
How to Draw Using Frontal Perspective
Have you ever felt that your backgrounds lacked depth? Frontal perspective, also called one-point perspective, is undoubtedly the answer. It is one of the foundations of realistic drawing, and once you understand the principle, everything becomes much simpler.
The origins of perspective
The great masters of the past made it their mission to create depth in the spaces inhabited by their characters. Gradually, several of them contributed to conceptualizing what is, in broad terms, an illusion based on a point of convergence toward which all objects seem to move, reducing their size as they move away.
It was ultimately Leon Battista Alberti who formalized this phenomenon in his treatise on painting, definitively integrating this principle into the rules of composition.
The three fundamental elements
To be able to draw in frontal perspective, you will need to take three fundamental elements into account.
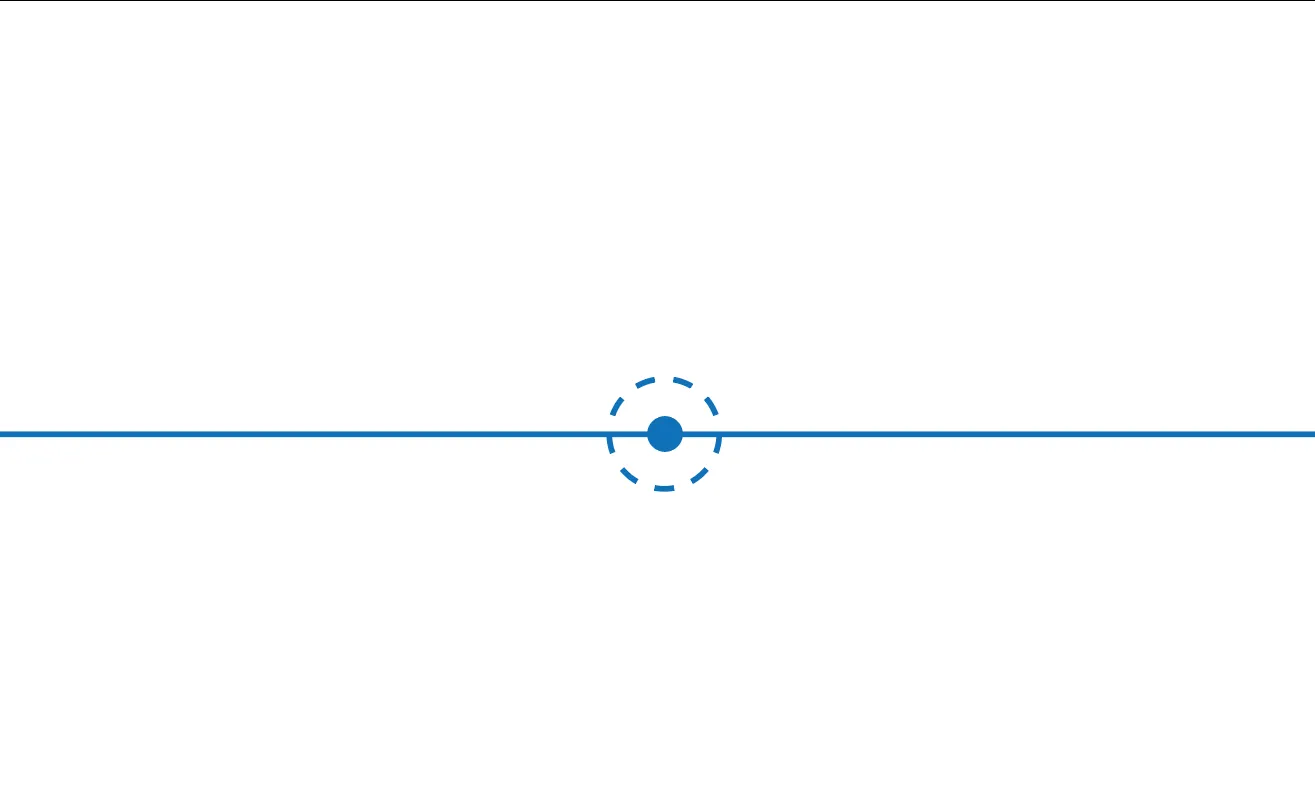
The horizon line
This is an imaginary line located at eye level. It represents the relationship between the real horizon and our point of view. This means that everything above this line will correspond to what is above our head, while the opposite applies to everything below it.

The vanishing point
In frontal perspective, a single vanishing point is used: a central point placed on the horizon line, which serves as a reference for projecting all the objects in the composition.
Orthogonal lines
These are guide lines that start from the vanishing point and project in all directions. They make it possible to define the variation in size of the objects and their location in three-dimensional space.
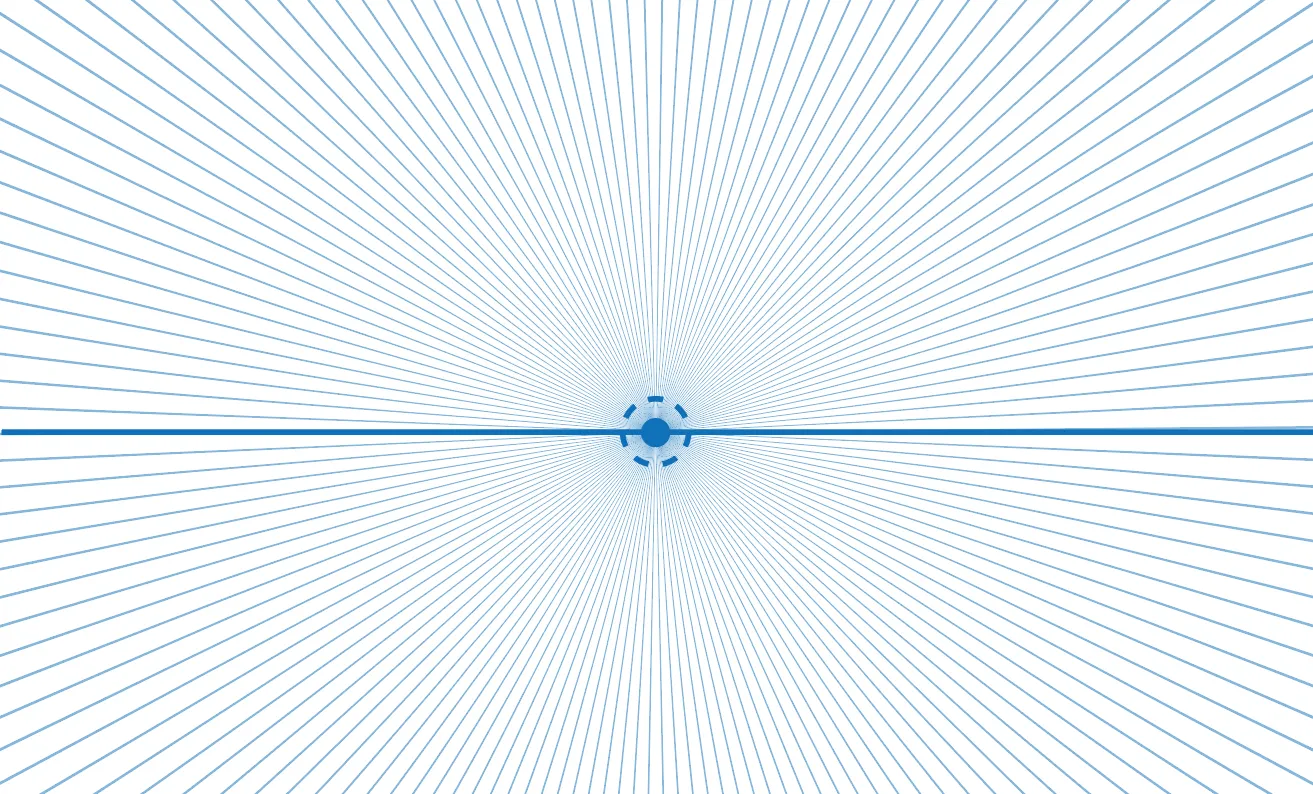
Construct your projection guide
Start by drawing the horizon line at the height that seems most appropriate, in the middle of the sheet – this is a good starting point. Then, place the vanishing point on this line, preferably in the center, although its location can be adjusted. Finally, draw lots of straight lines in all directions from this point.
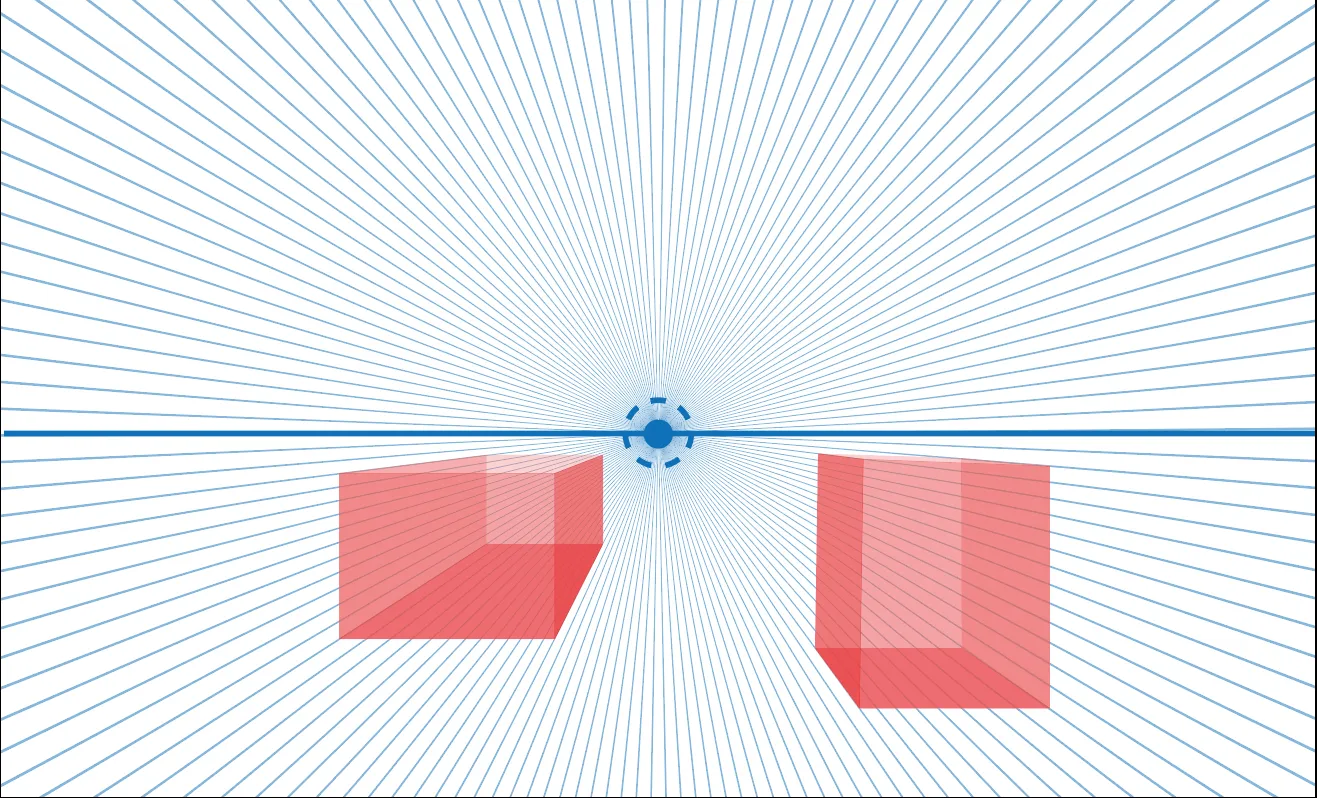
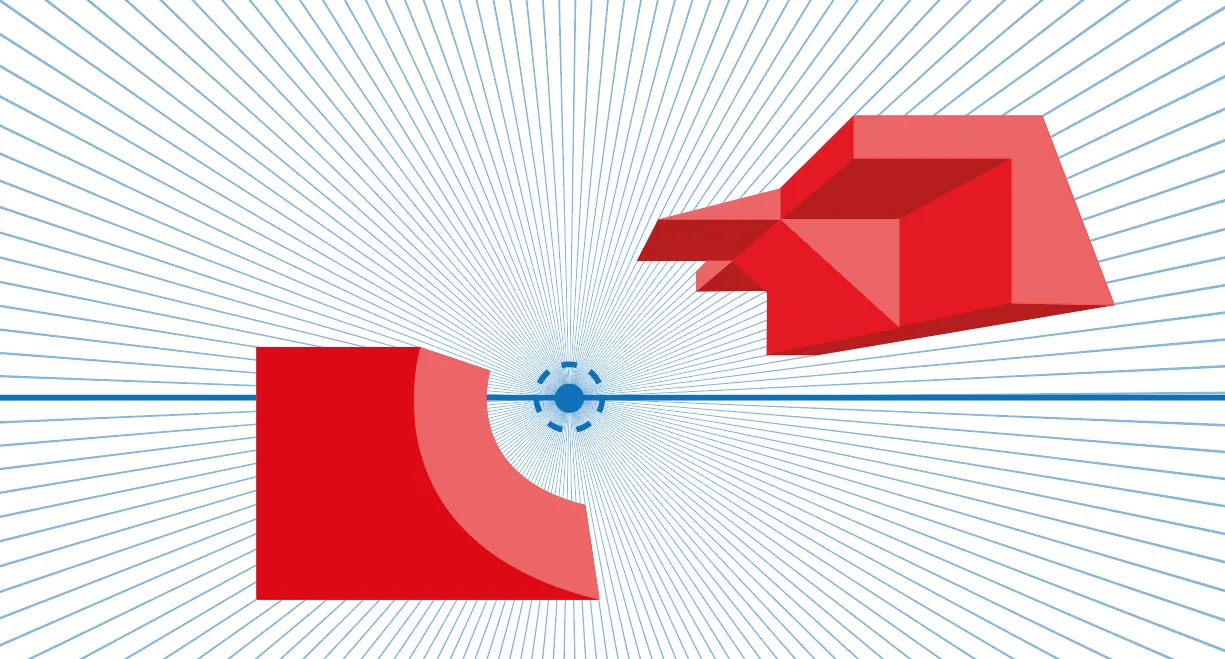
Once this guide is in place, you can draw all sorts of forms. A cube, for example, will have its dimensions distorted as it is projected towards the vanishing point: this is exactly the desired effect.
Four exercises to practice
The concept may seem abstract at first. Here are some practical exercises to help you gradually understand it.
Draw various forms
Start with the simple cube you saw earlier, then create others with different sizes and proportions, distributed throughout the imaginary space. Next, add more complex shapes with curves, diagonals, or voids.
Draw a series of objects that get further away
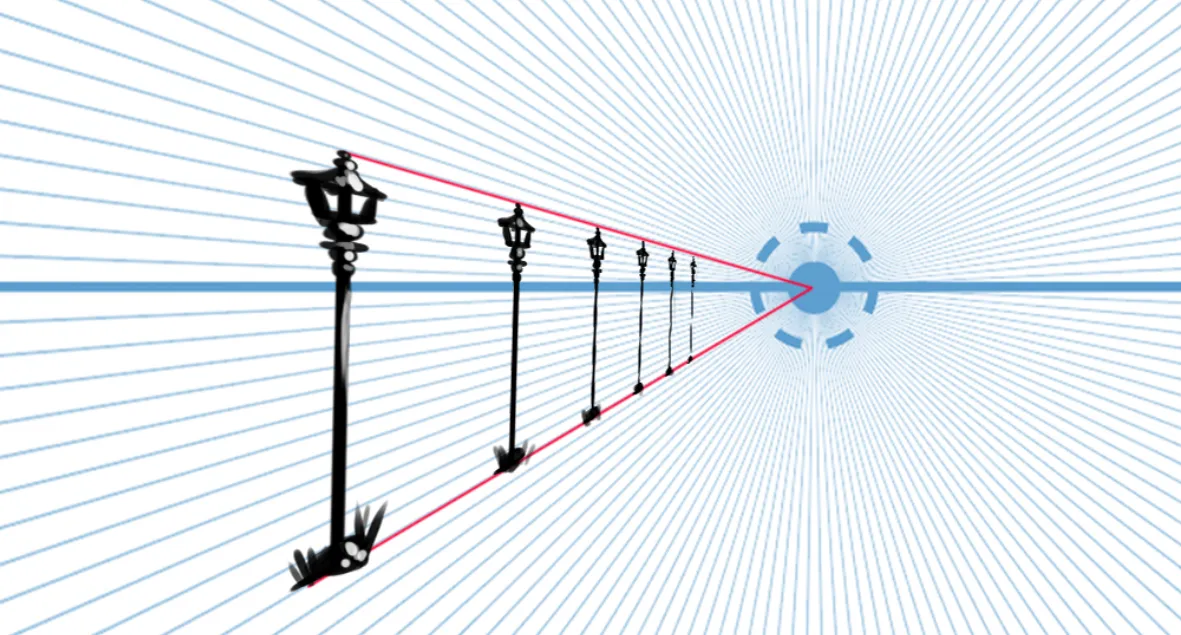
Choose a simple element, such as a tree or a post, and place several of them in a row, one behind the other. Project a line from the vertical ends of the first object to guide the scale of the others: this will give you a consistent reduction as they get further away.
Draw characters in different locations
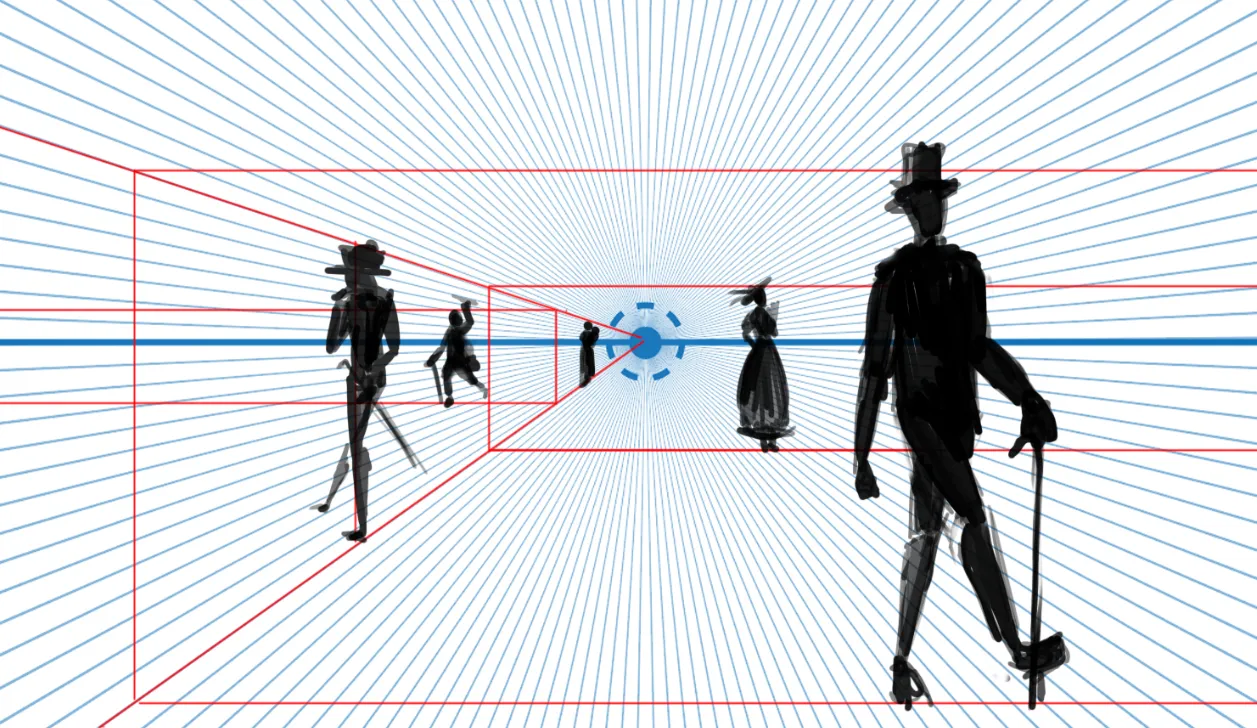
This is a similar exercise. Draw a character in a free-form pose, then use the guide lines to identify scale variations and add horizontals to move it across the width of the composition.
Draw a building
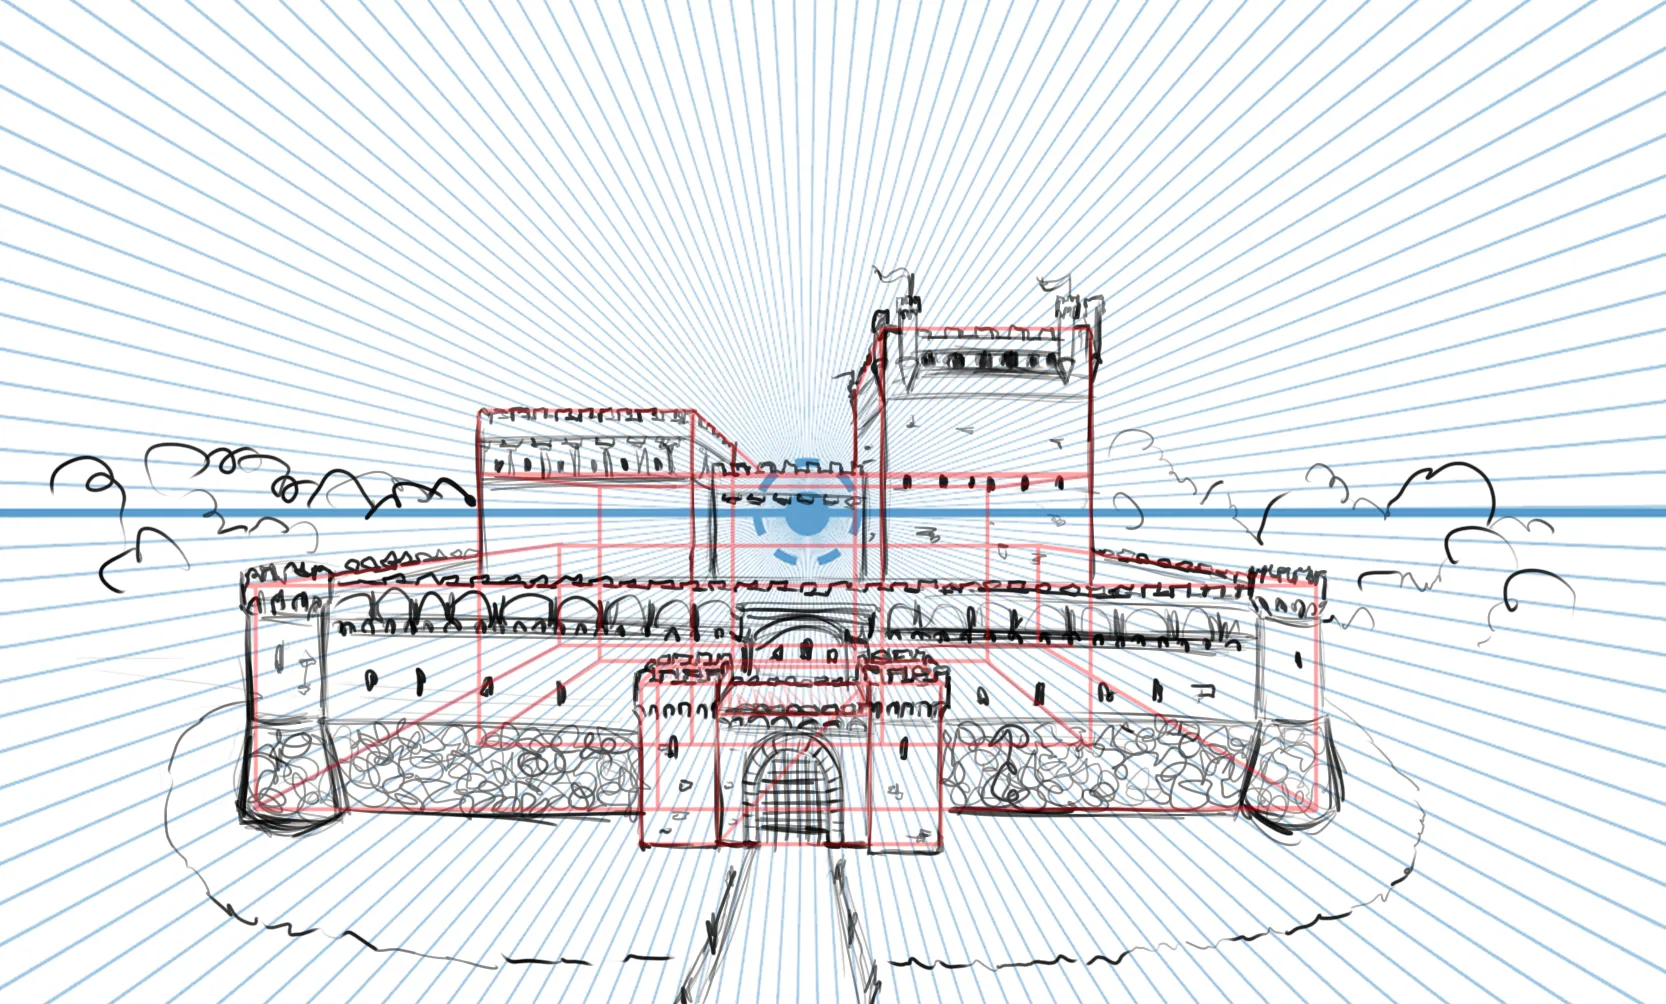
To develop further, try constructing a castle. First, define the main forms using simple shapes (cubes, cylinders), then add textures such as bricks or windows. And if you want to go all in, add a few silhouettes of guards along the walls.
This concludes this article on frontal perspective, also called one-point perspective. We have looked at the fundamental principles of the concept, as well as several practical exercises to learn how to use it. But keep in mind that the door remains open to imagination: these exercises are just a starting point.
Above all, remember that no matter how many elements are in your scene, everything always starts from the same vanishing point. From there, it is only a matter of drawing the correct lines to place the objects and manage the distances. I therefore encourage you to do these activities at home to fully master the technique and begin to integrate it naturally into your compositions.
Discussion
No comments yet.