How to Create a Line Drawing
There are several drawing techniques, but the most common and generally the first that beginners learn without even knowing it is line drawing. In this article, we will look at what line drawing entails, what techniques are related to this practice and how to improve.
WHAT IS LINE DRAWING?
As its name suggests, line drawing is a drawing made up of... lines. The goal is to represent our subjects with different types of lines, whether for their outlines, their volumes, or internal shapes. It is a type of drawing commonly found in the world of comic books, manga, or comics, but also for more graphic representations such as posters or tattoos.
DRAWING IN LINES STEP BY STEP
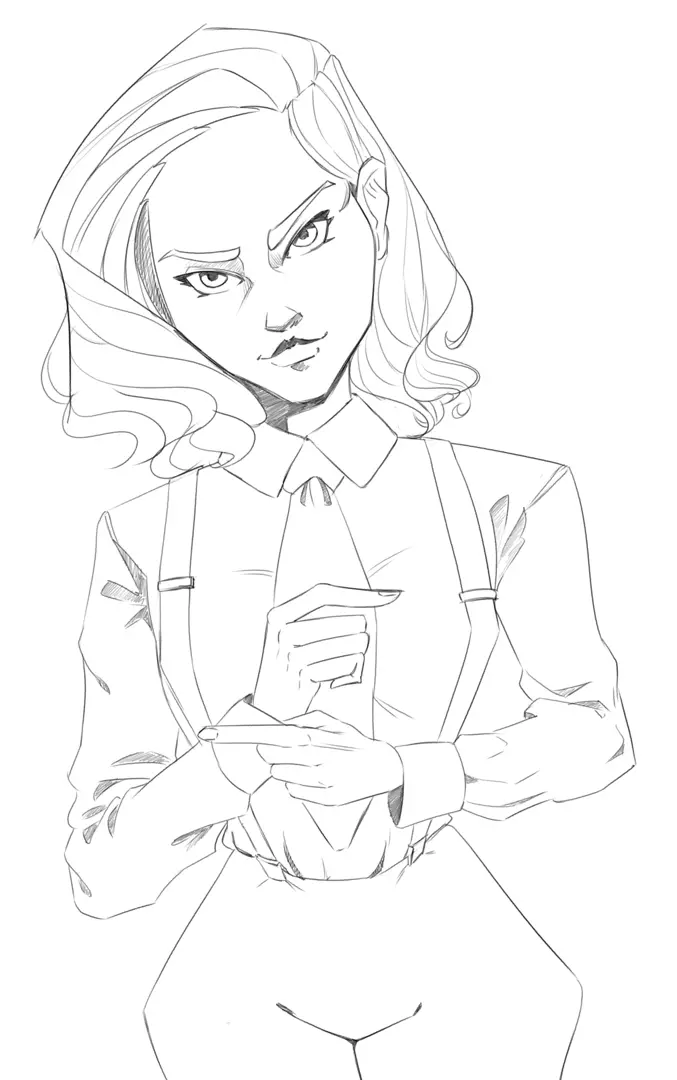
Like any drawing, we will start with a sketch. We will then clean up our line drawing on top of it. In digital, you can do your cleanup on a new layer. In traditional, you just need to ink directly over your sketch and erase it at the end. This is the inking step.
FULL AND FLUID
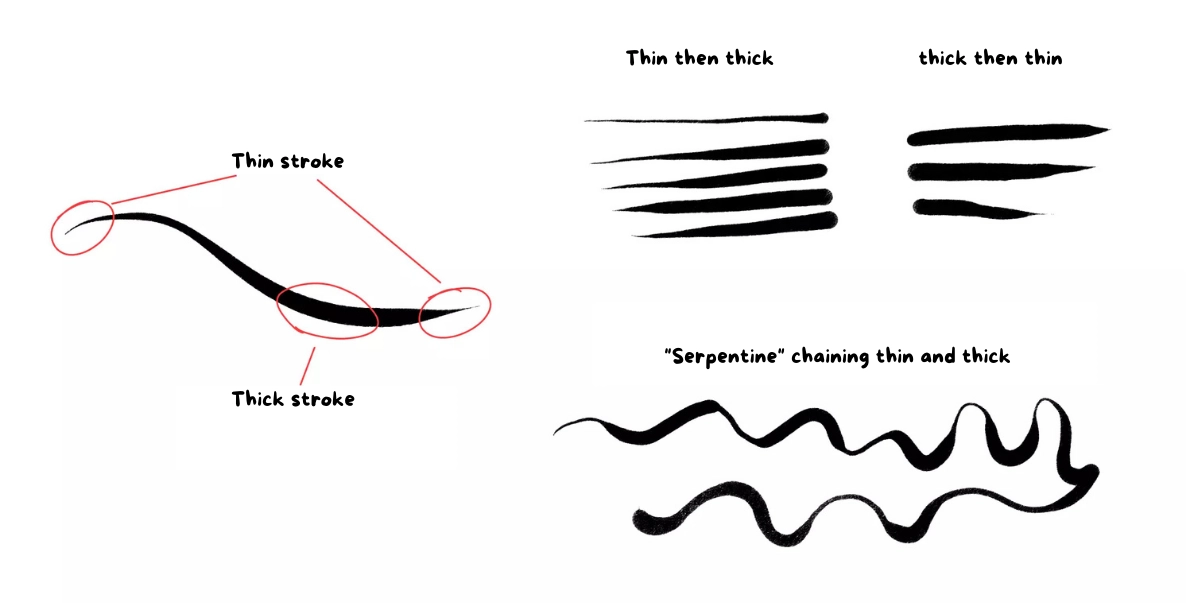
In line drawing, it is essential to vary the thickness of the lines. It is this that will give substance to the drawing. Thicker lines are called descending lines and thinner lines are called ascending lines.
If you are using a pen or a brush, you can easily alternate between thick and thin strokes depending on the pressure applied to the tool. With a calibrated felt-tip pen, it is necessary to use different pens with thicker or thinner tips, or to go over the lines to thicken them. This also works digitally with pressure-sensitive brushes.
Practice making thick and thin strokes by trying to vary the type of curves as in the following example:
THE HIERARCHY OF LINES
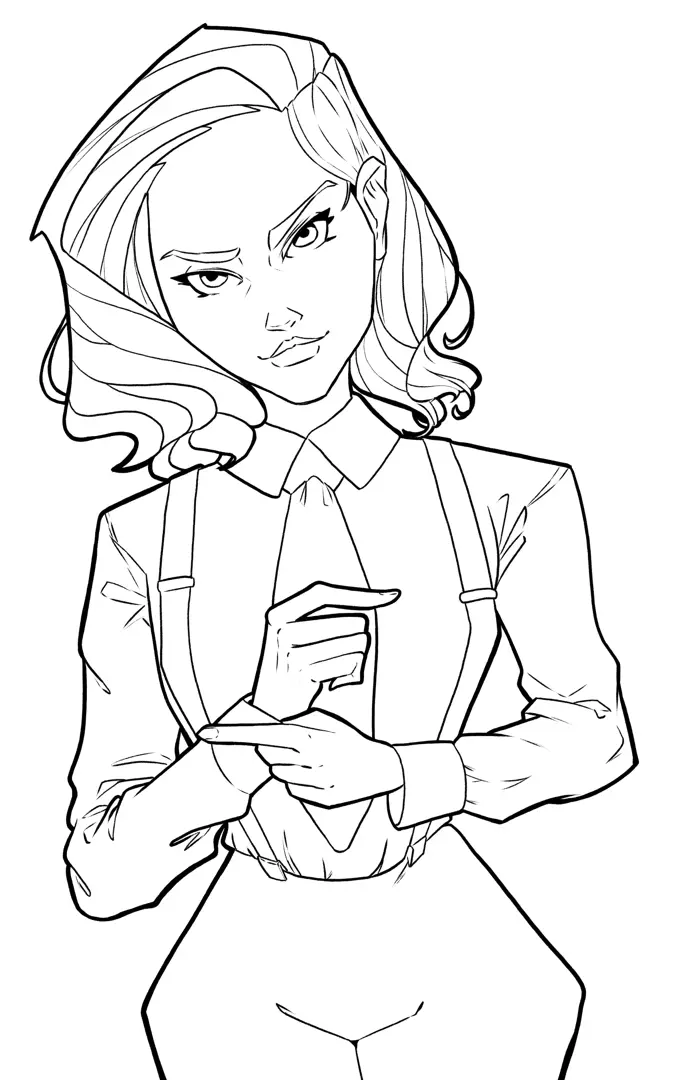
Now that you know how to vary line thickness, it is important to know which thickness to use depending on what you are inking in order to give your drawing good legibility. This is what is known as the line hierarchy.
The goal here is to reserve our thickest strokes for the general shapes, and the thinnest for details. The simplest hierarchy to use is as follows:
● Thicker lines: Silhouette of our subjects
● Average lines: Overall Shapes
● Fine lines: details
● Finest lines: Patterns, textures, hatching.
Of course, it is necessary to make thick and thin strokes for each category. It is the thickness of the thick strokes that will be decisive.
HOW TO GIVE VOLUME TO YOUR LINE DRAWING?
Since it's not possible to use gradients in line drawing, you will need to use hatching to create the illusion of volume in your subjects. Be careful, the hatching must be drawn in one of the two directions of your surfaces.
Let's take the example of our three basic volumes: the cube, the cylinder, and the sphere. When you want to hatch the surfaces of these volumes, your hatching should follow their directions. In the case of flat surfaces like those of the cube, your hatching will be parallel to the sides of the surfaces. For curved surfaces like the side of the cylinder or the sphere, your hatching will follow the curvatures.
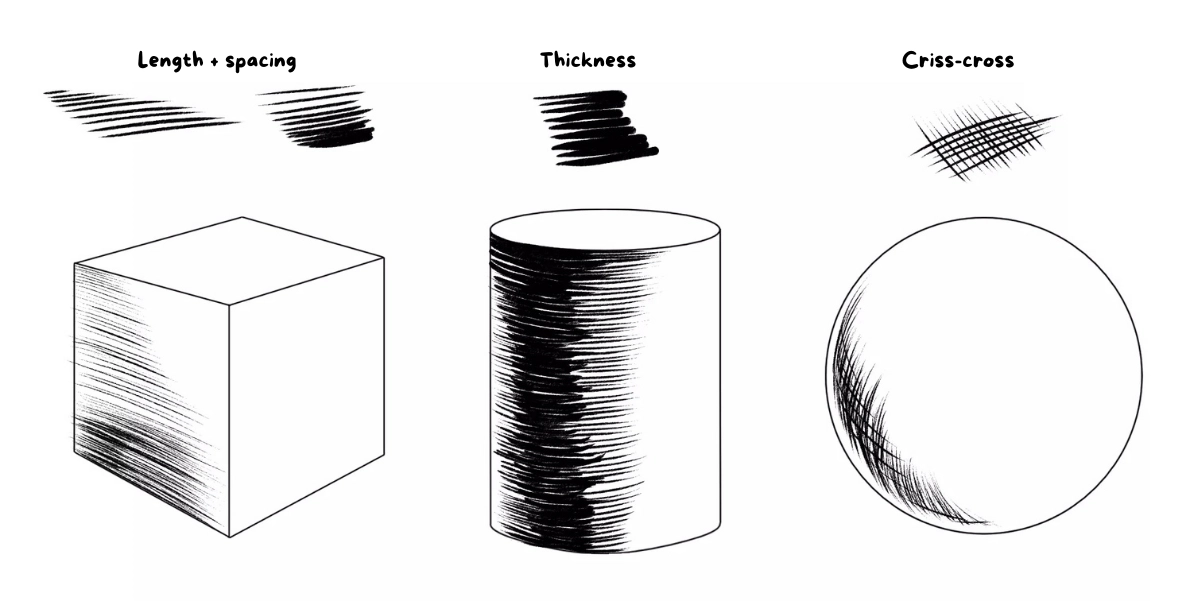
If your hatching does not follow the directions of your surfaces, your volumes will not be understood correctly.
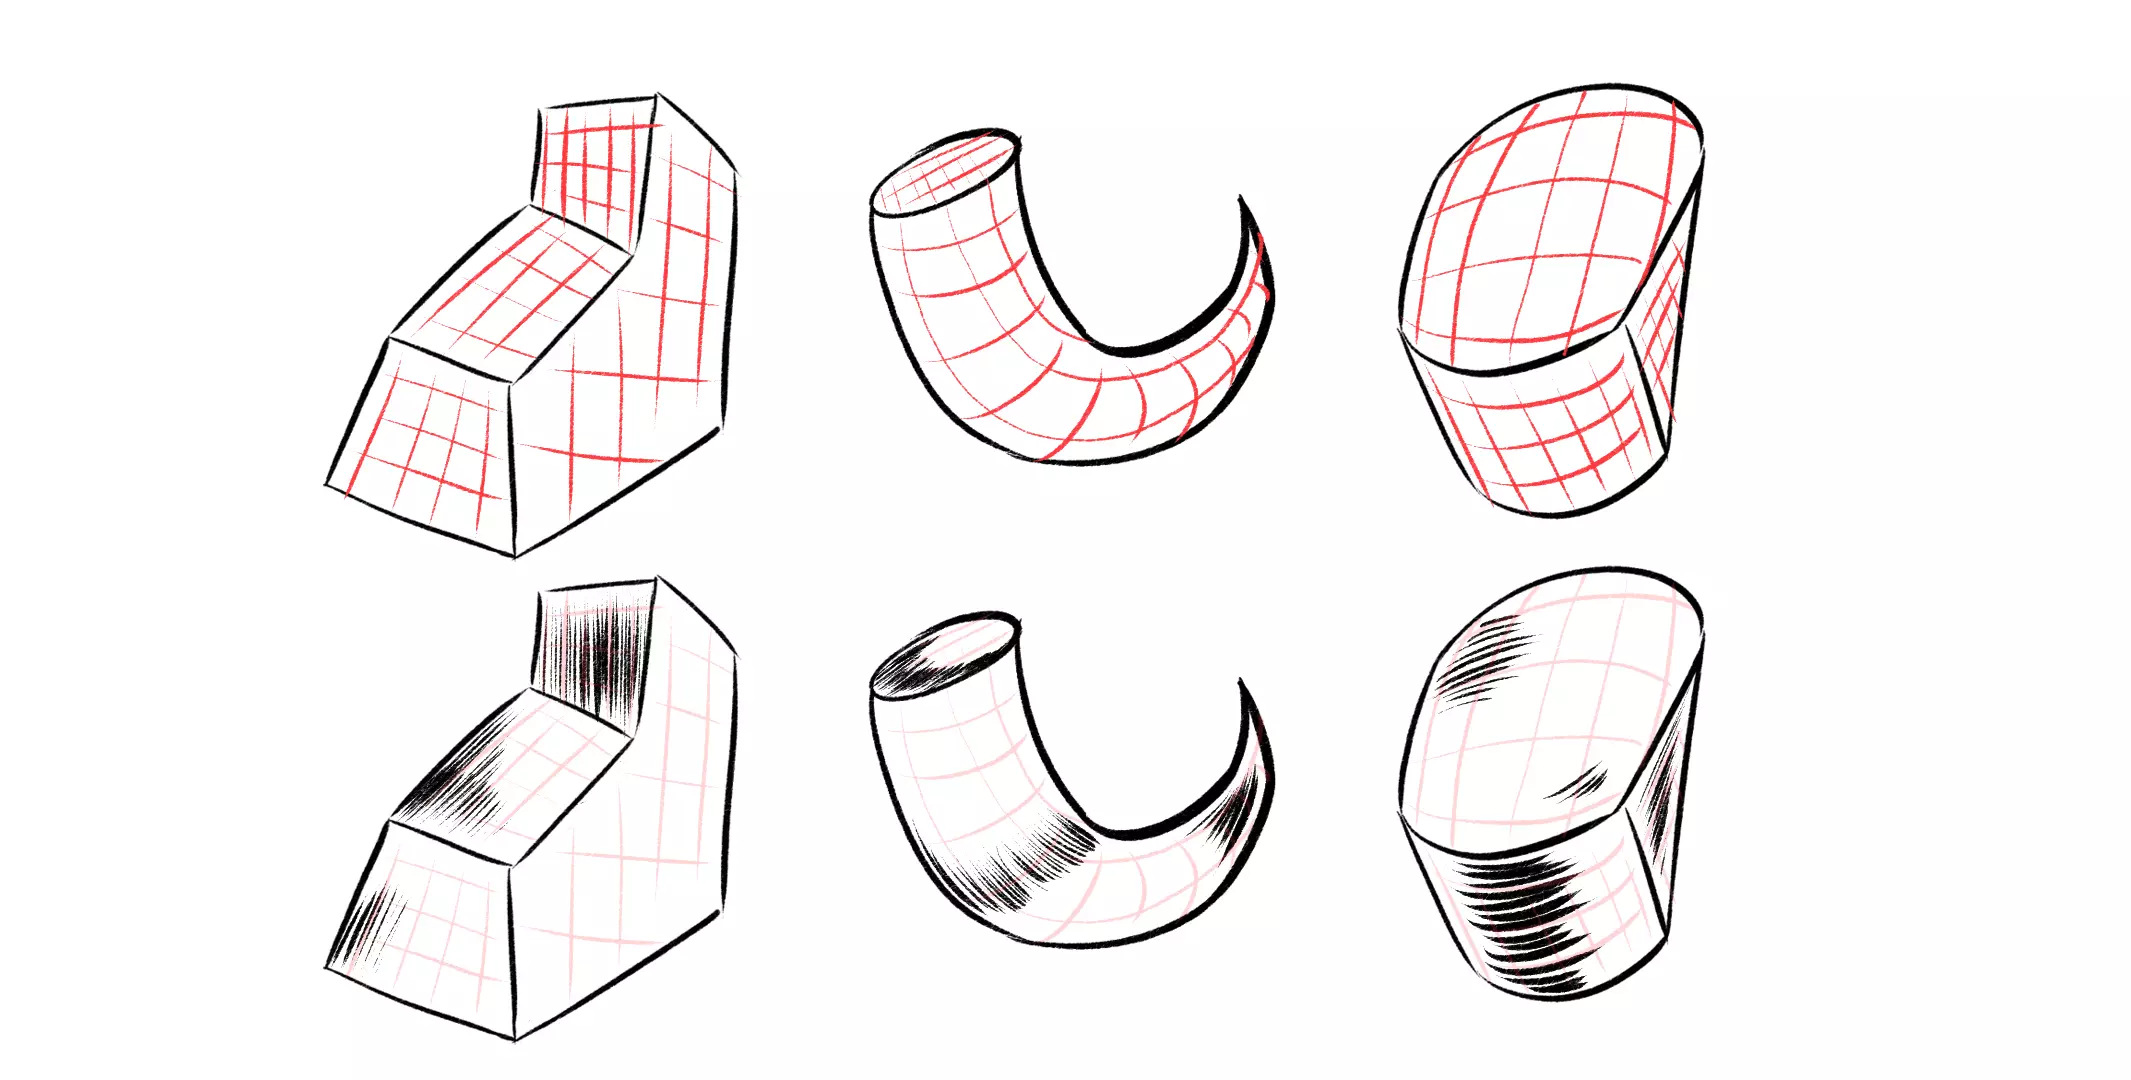
For more complex volumes, do not hesitate to sketch out a grid on your surfaces in draft form.
Alright, now that you know how to correctly hatches correctly, you can vary their spacing, thickness, or length to give the illusion of a stronger or weaker shadow.
Finally, if you want to make your shadows more intense or play with texture, you can cross your hatching. The second set of hatches is therefore done in the second direction of your surface.

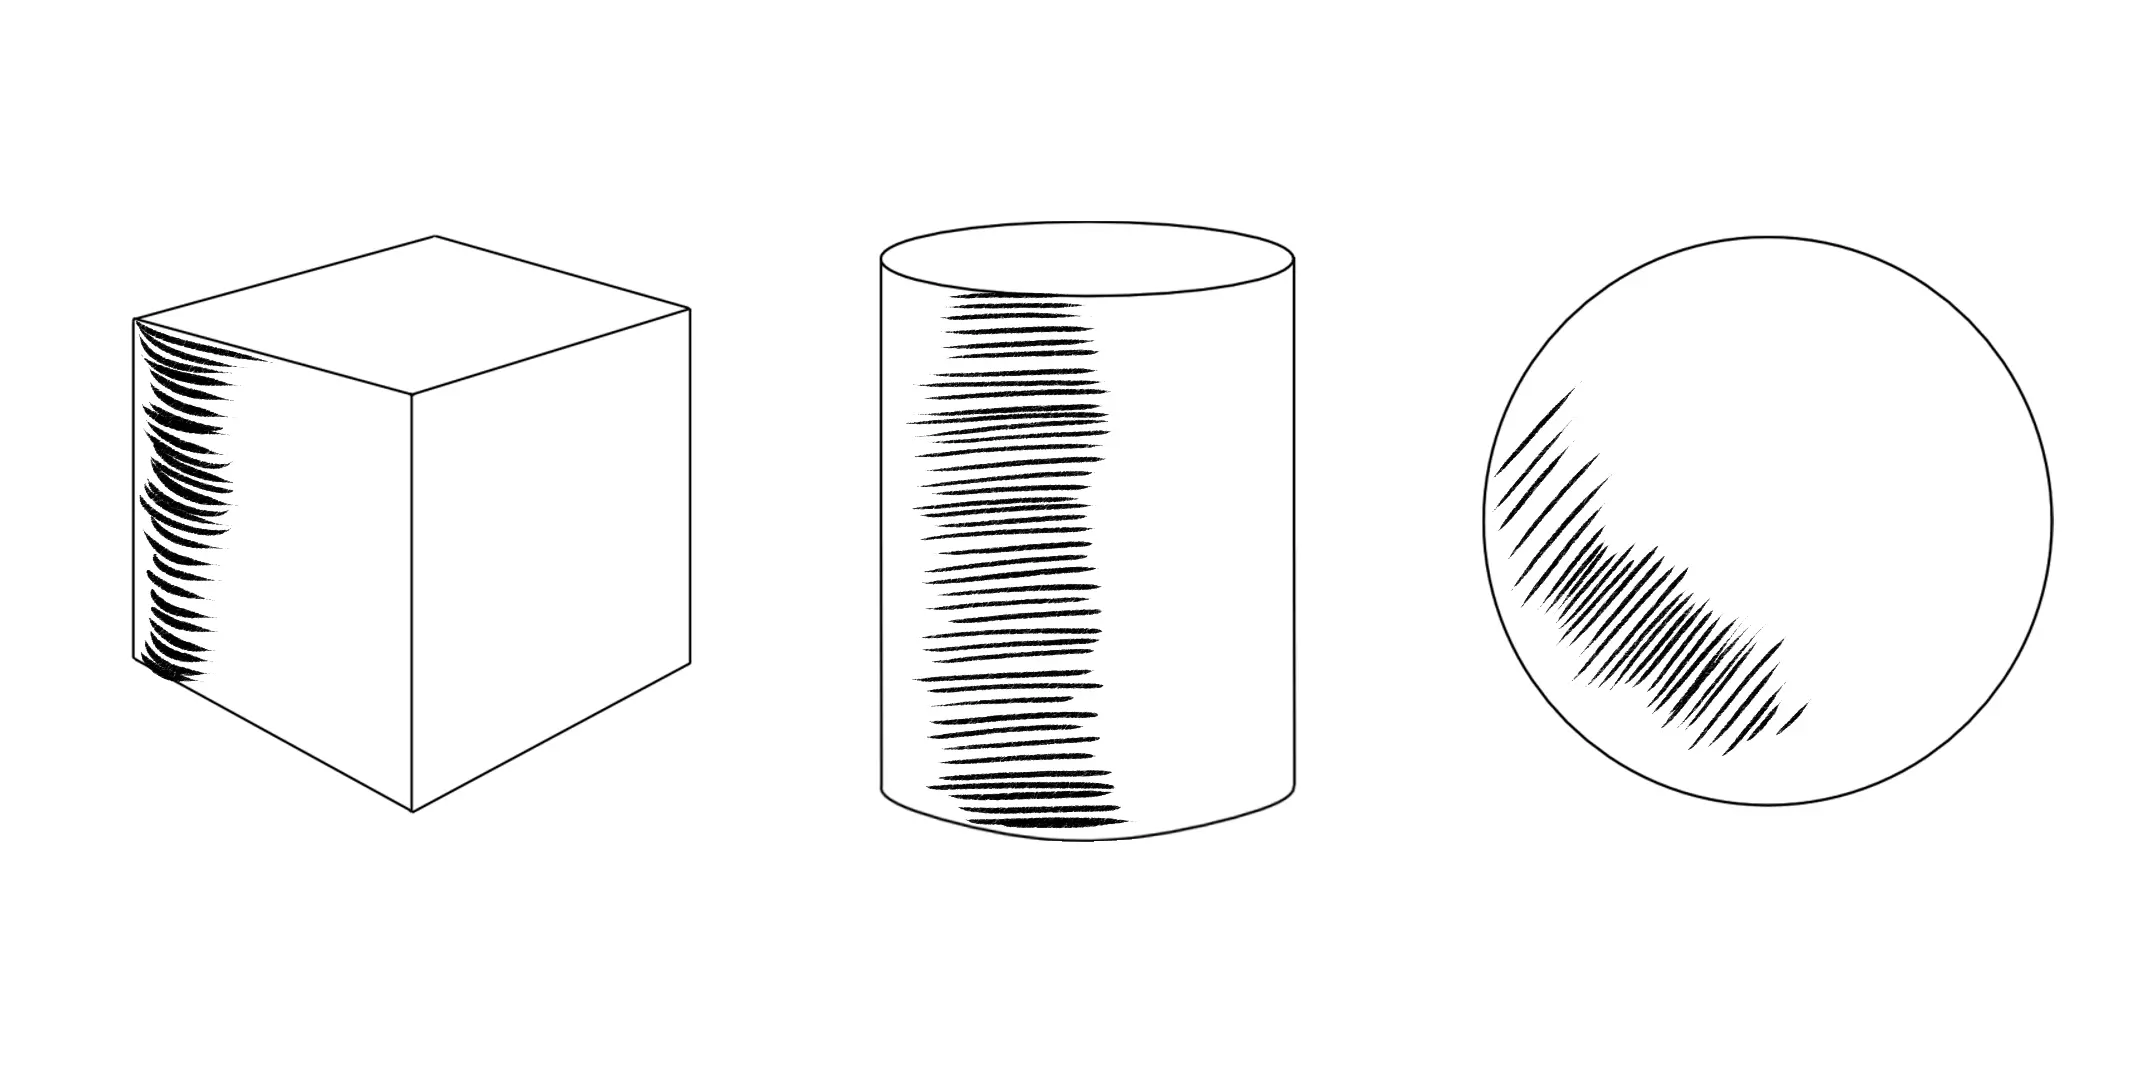
You have the theory of hatching, now practice! Go back to the previous drawing and try applying hatching to mark shadows. Feel free to represent the directions of the surfaces to be shaded using grids.
Congratulations, you now know how to make a line drawing!
GO FURTHER
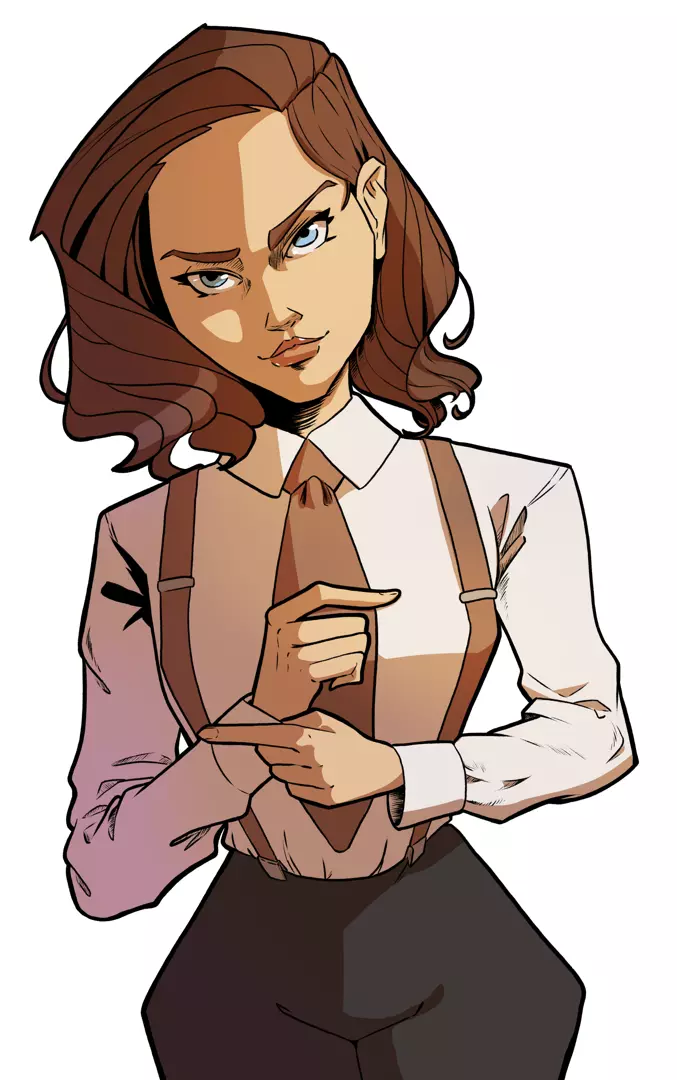
Your drawing is finished but you feel something is missing? Then do not hesitate to fill in the blanks. To do this, you can give your drawing more depth with solid blacks or more life with solid colours. This will give it a very cartoonish feel! If you are more into manga, why not try using screen tones? There are many possibilities, have fun!

Discussion
No comments yet.