Observational Drawing
Observational drawing is the foundation of drawing. It's what you do all the time without realizing it. So, in this article, we will look at some tips to help you do it well.
WHAT IS AN OBSERVATIONAL DRAWING?
Observational drawing involves drawing reality, what one sees, without interpreting or imagining it. When you do life drawing, you are doing observational drawing. When you copy an object that is in front of you, it is observational drawing.
The same is true if you go out into the street and draw what you see. It's also the best method to learn how to draw.
You have different ways of doing observational drawing:
You draw an object or a person in motion, and therefore you capture only the main outlines of your model.
You have an object or a person in front of you, but you sketch it in a very limited time (usually a few seconds to 5 minutes).
You have an object or a person fixed in front of you and you draw it, taking your time to draw with precise proportions and details.
I've already written an article on life modeling. If you want to know how to draw from a live model, I invite you to go check it out!
In this article, we are going to draw a still life, more specifically, a fruit basket. We'll draw it in detail, with colors, shadows and highlights, and try to give it texture.
TAKING MEASUREMENTS FOR DRAWING
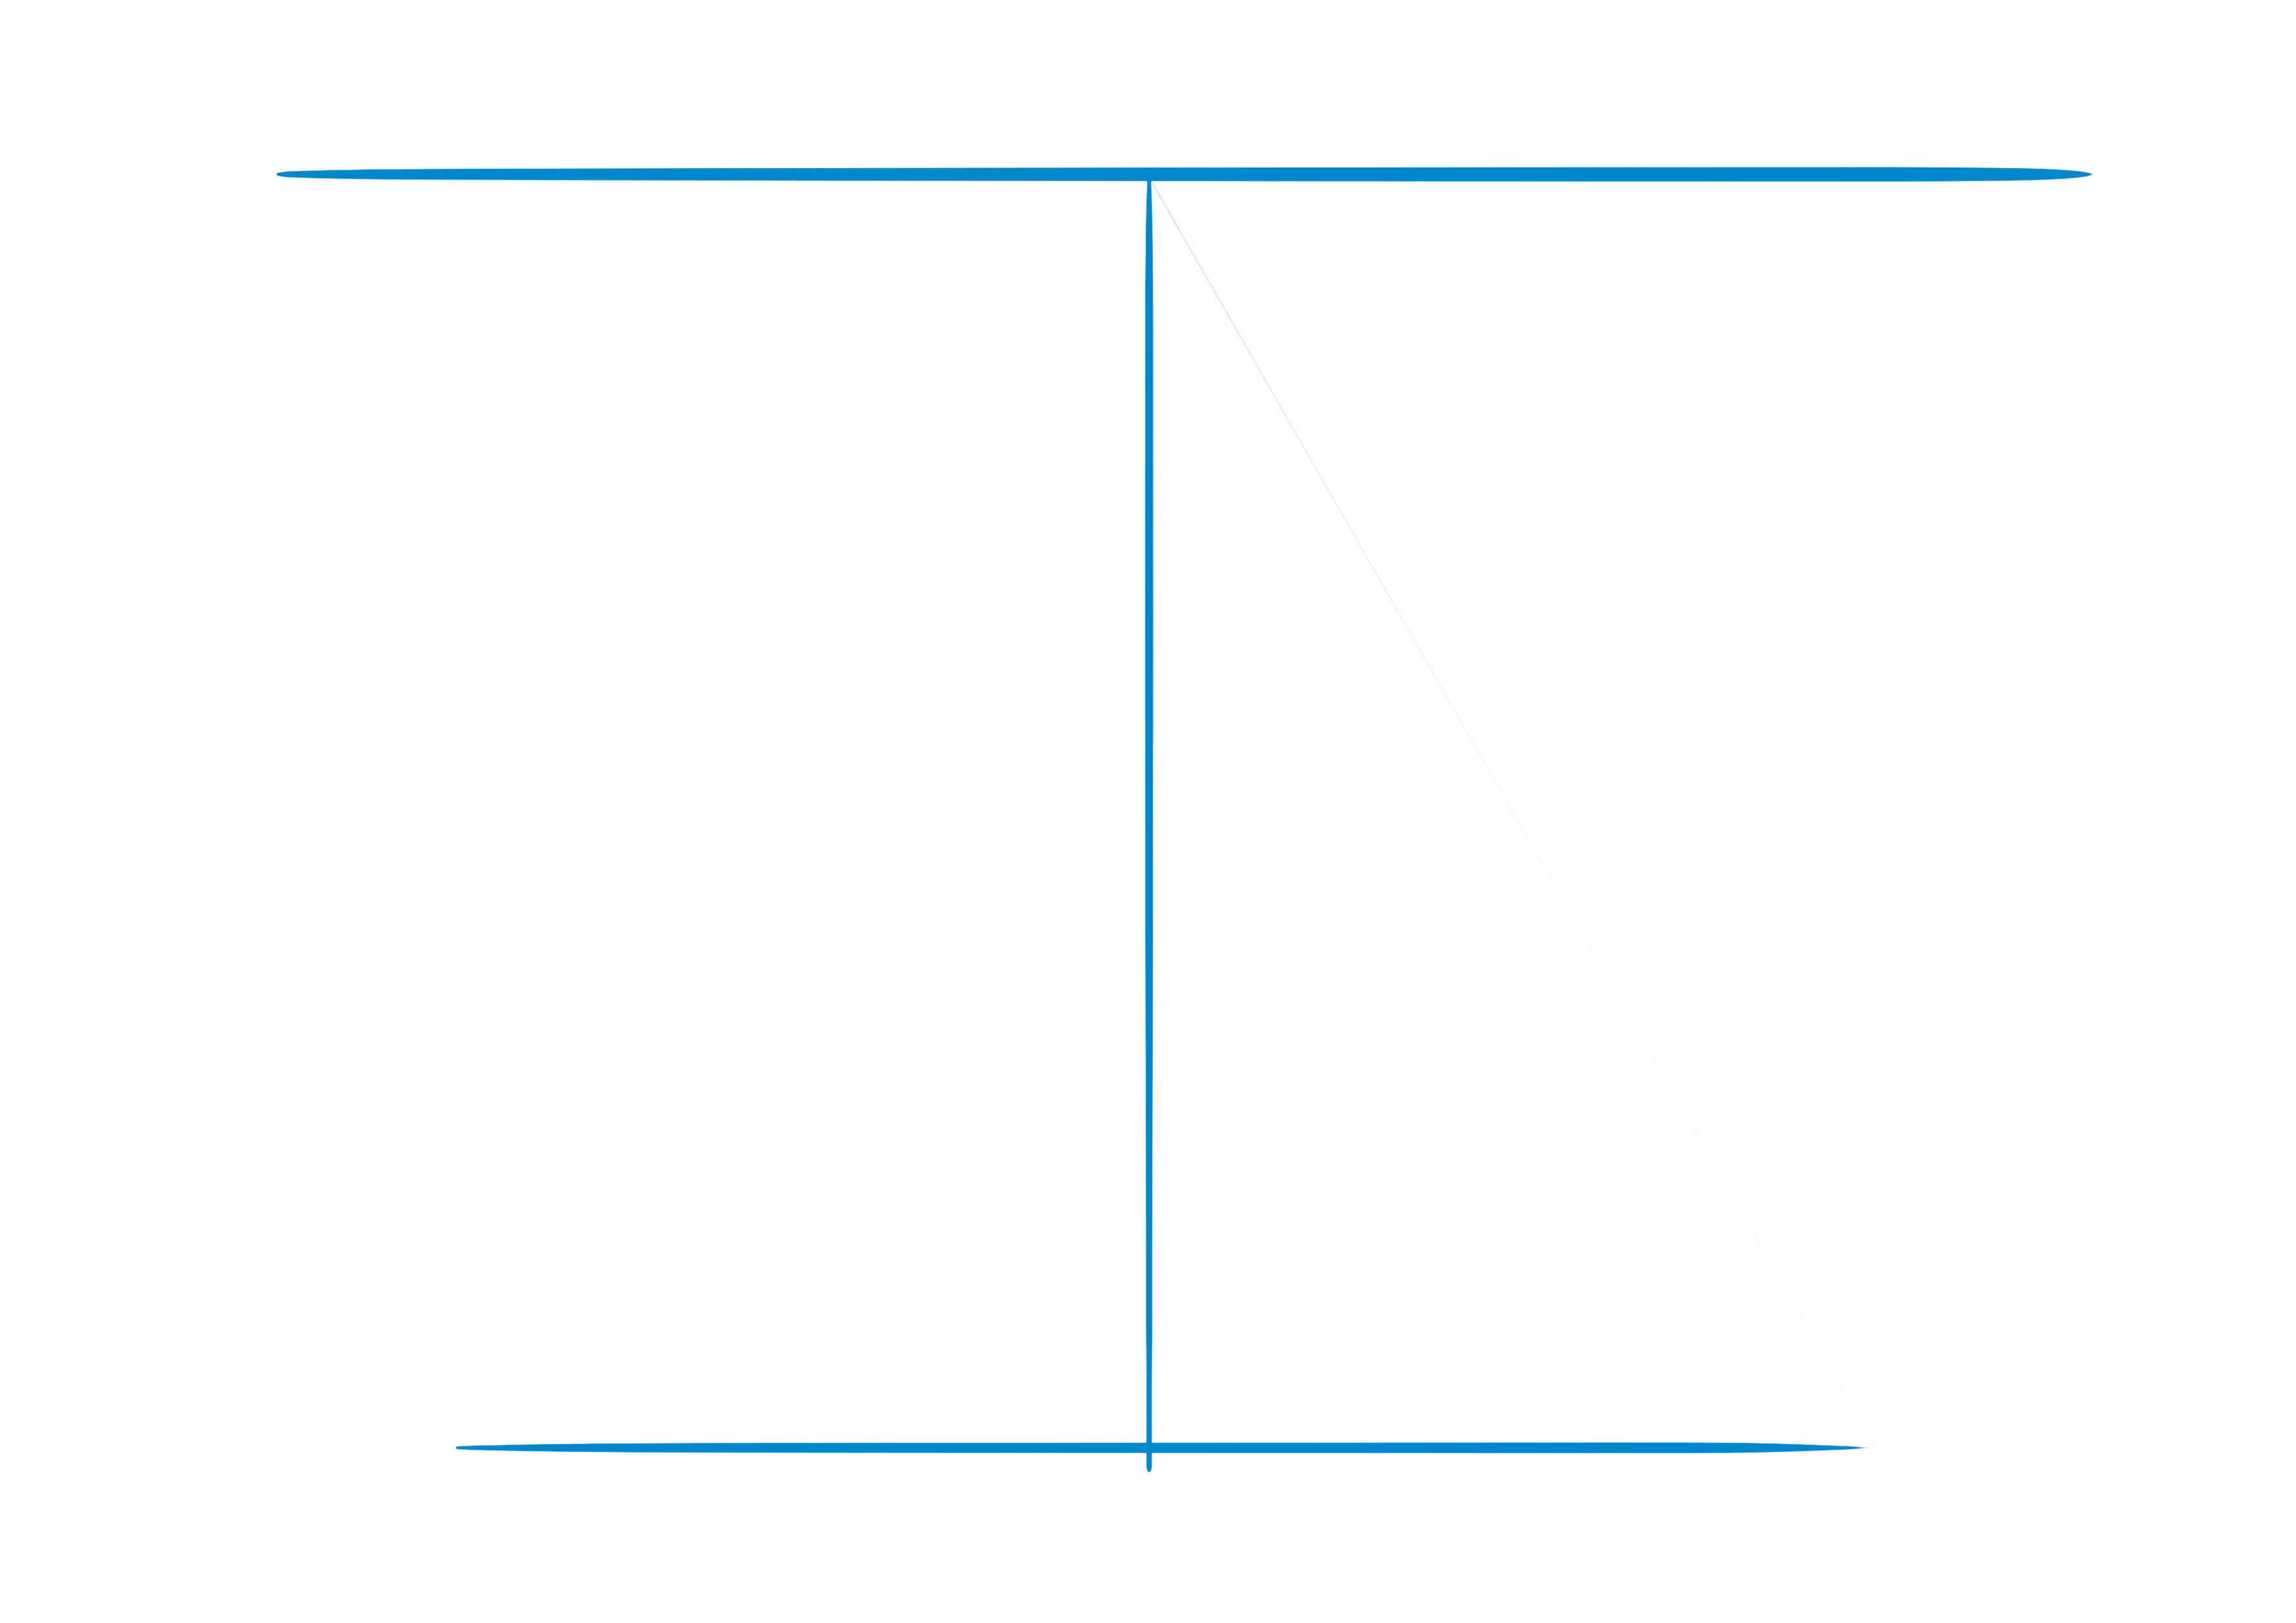
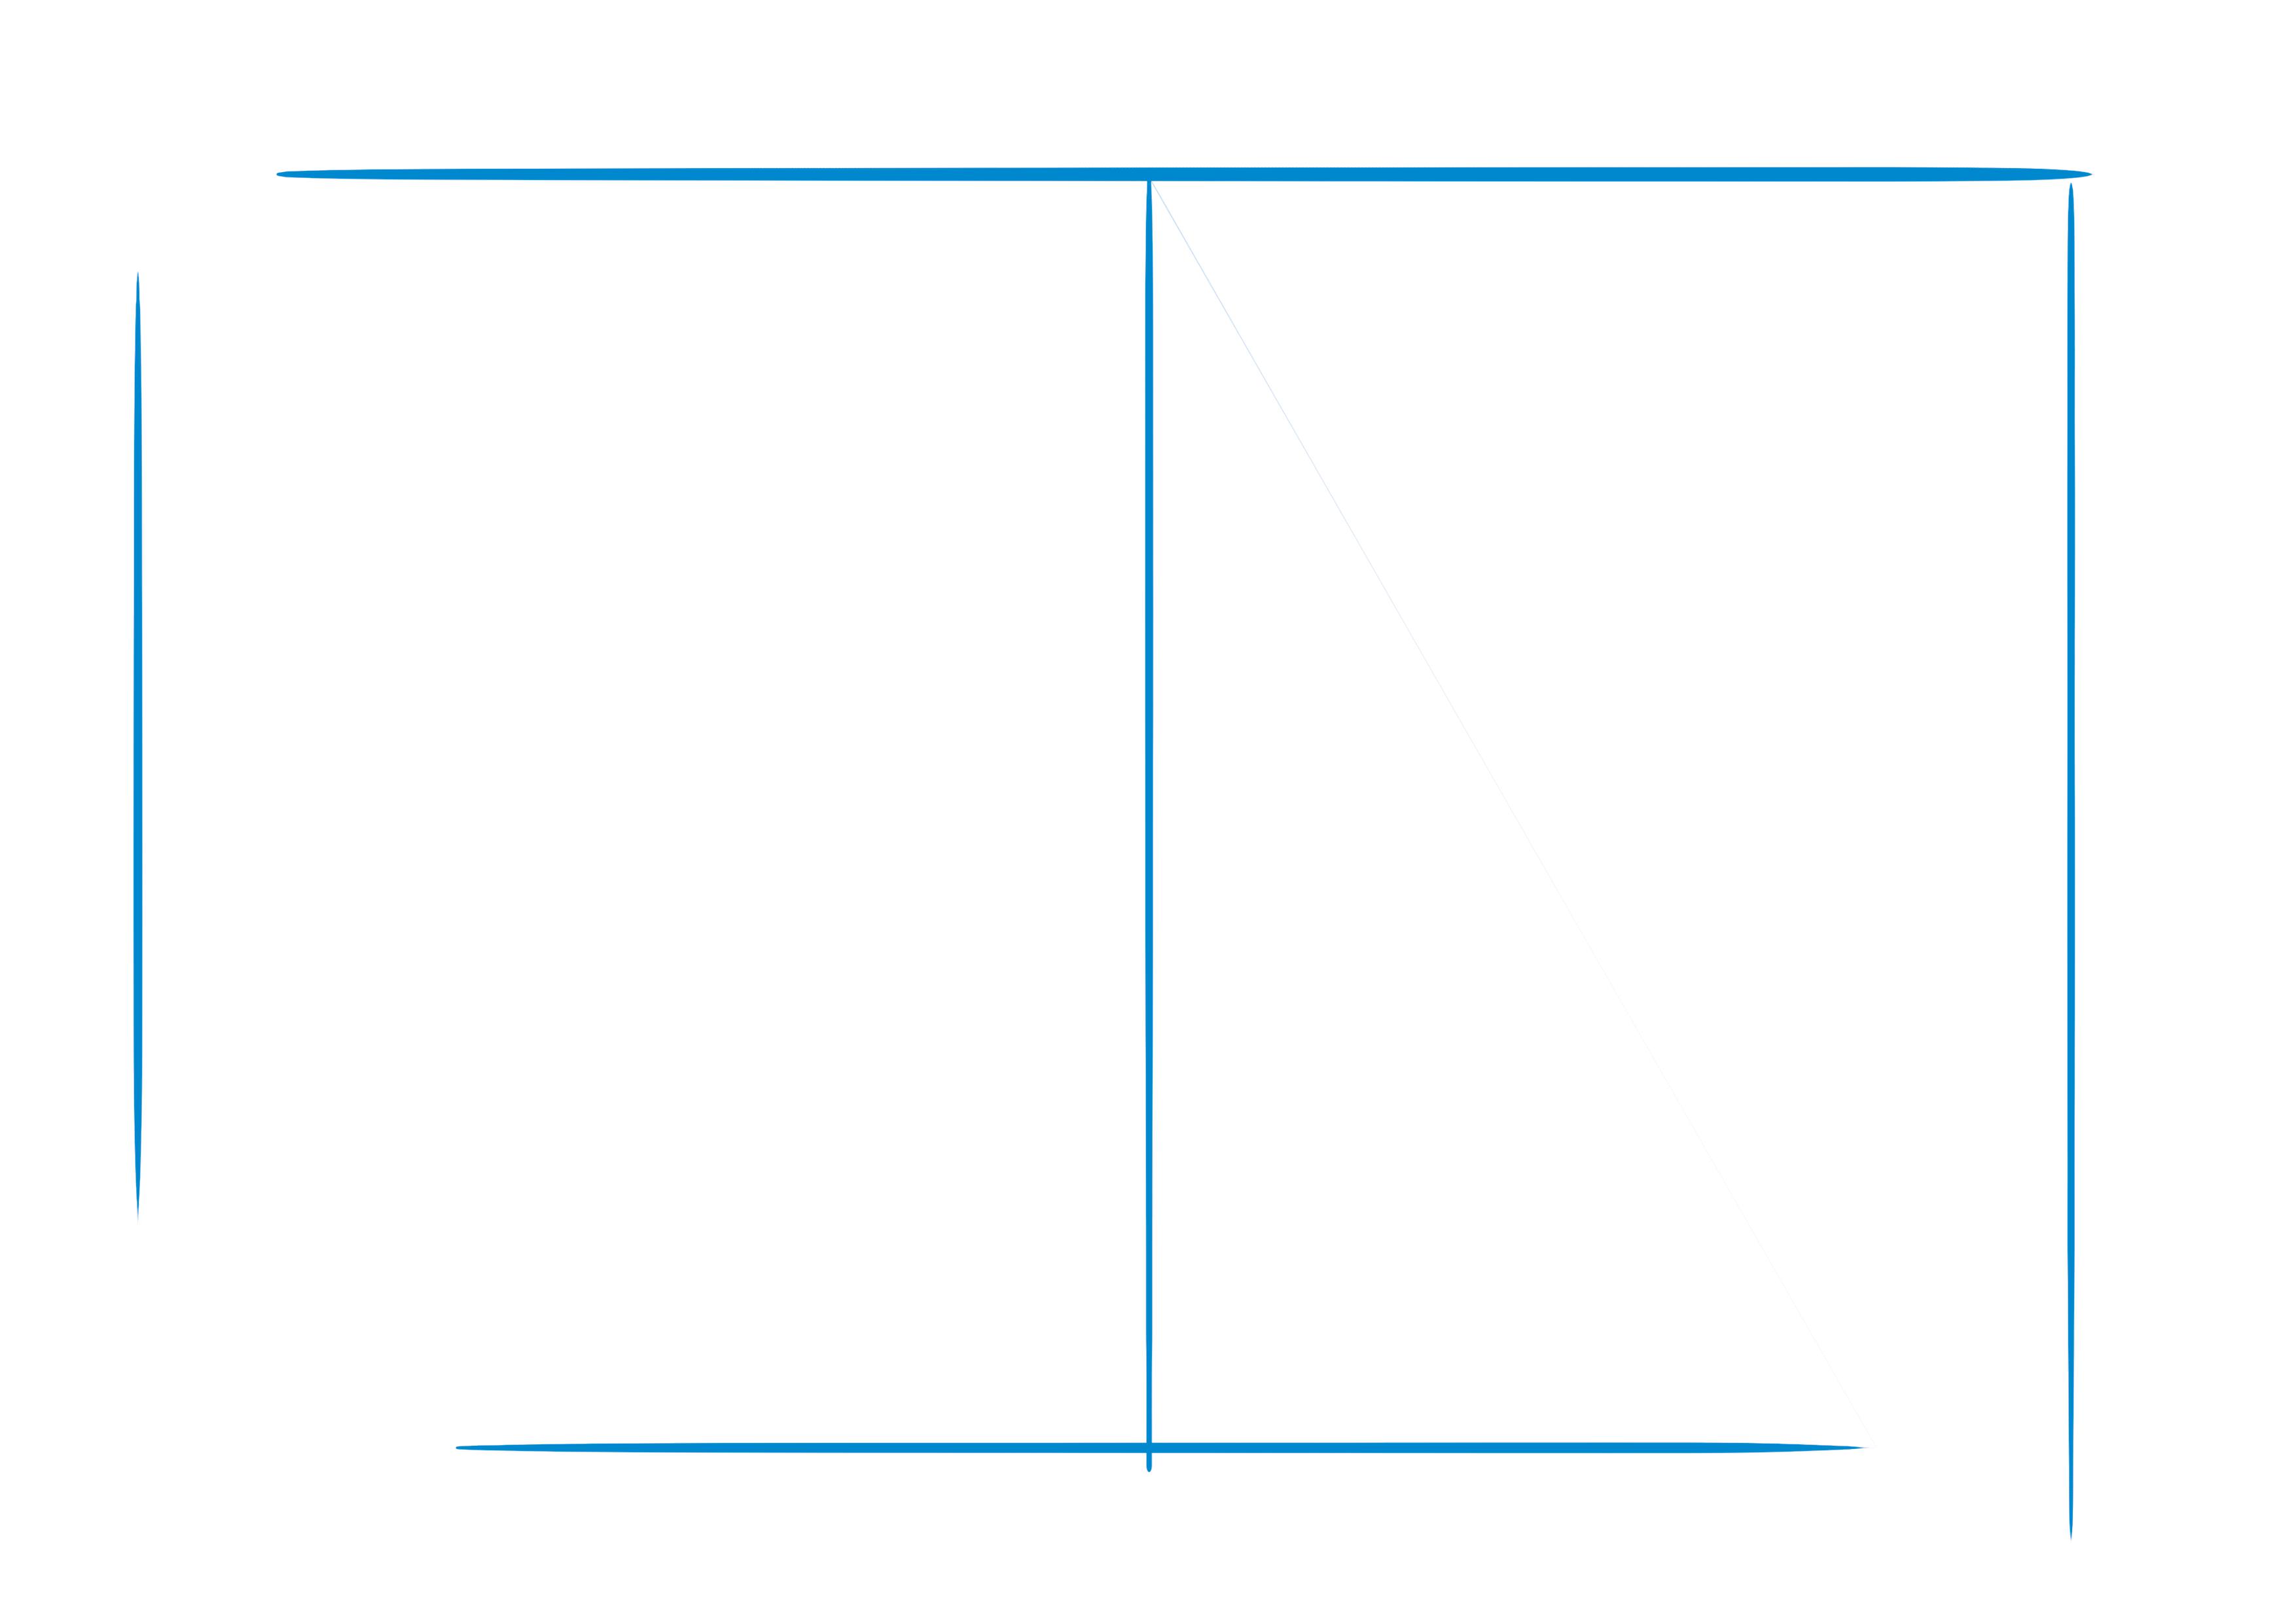
Before starting, it is important to know how to take measurements with what you have, which is a pencil.
If you have read my article on life modeling, you already know how to take measurements; for others, here's a quick reminder:
Position yourself facing the subject, arm fully extended and one eye closed.
Align the tip of the pencil with the highest point of your model and move your thumb down the pencil until it aligns with the lowest point of the model (or if the size is too large, take an essential point as a reference point).
Your first measurement will serve as a base.
By turning your pencil 90°, you can take horizontal measurements in the same way.
Then, choose how to record your measurements on your sheet:
Either transfer them directly onto your sheet, to draw at the scale you see, but generally, the drawing will be too small.
Or adapt the basic measurement to the size of your sheet by multiplying it by the appropriate number (x1.5, x2, x3, etc.).
Now we can start!
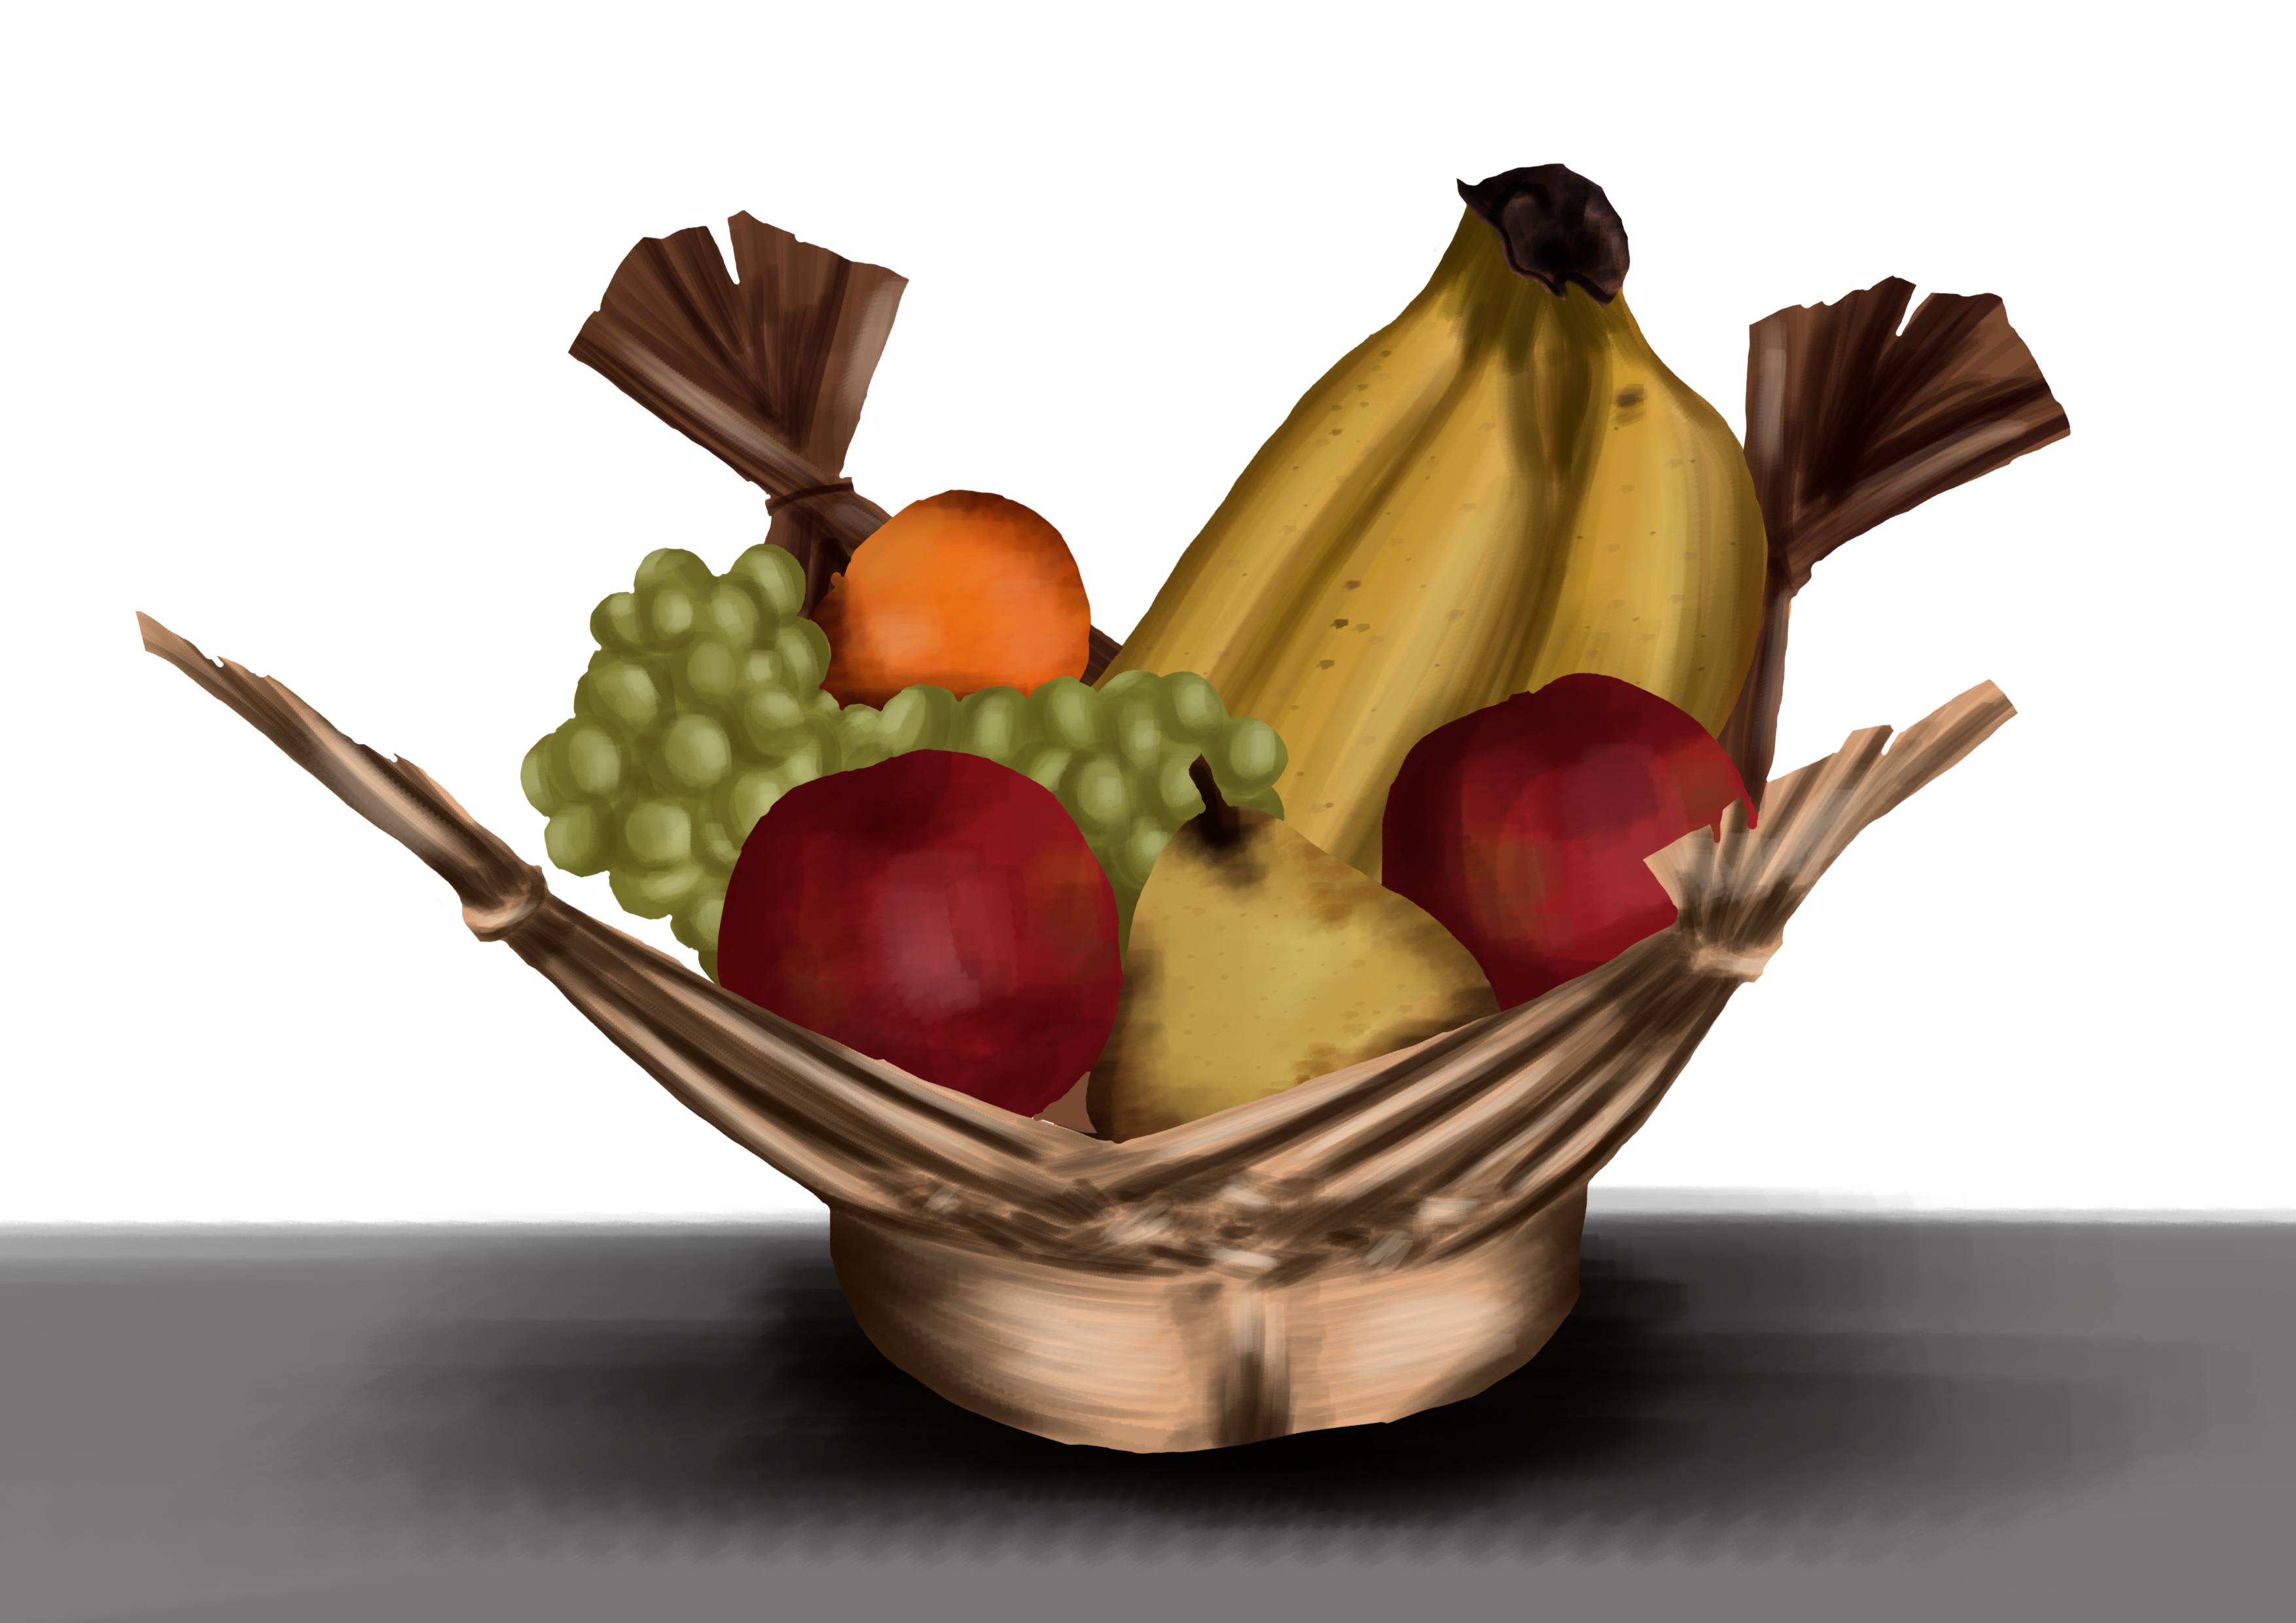
CLASSIC OBSERVATIONAL DRAWING: THE FRUIT BASKET
It would be ideal to have your model actually in front of you, but for the purposes of the article, I will use a photo.
I have therefore chosen this fruit basket.
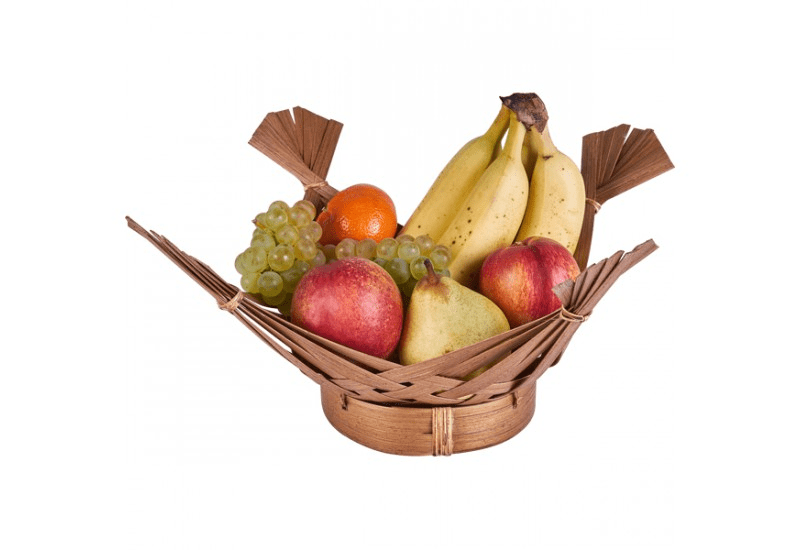
This is a model that is as classic as it gets. The only touch of originality comes from the shape of the basket.
It's a timeless subject in art school because fruits all have different shapes and textures, which allows for practice in multiple genres with just one subject.
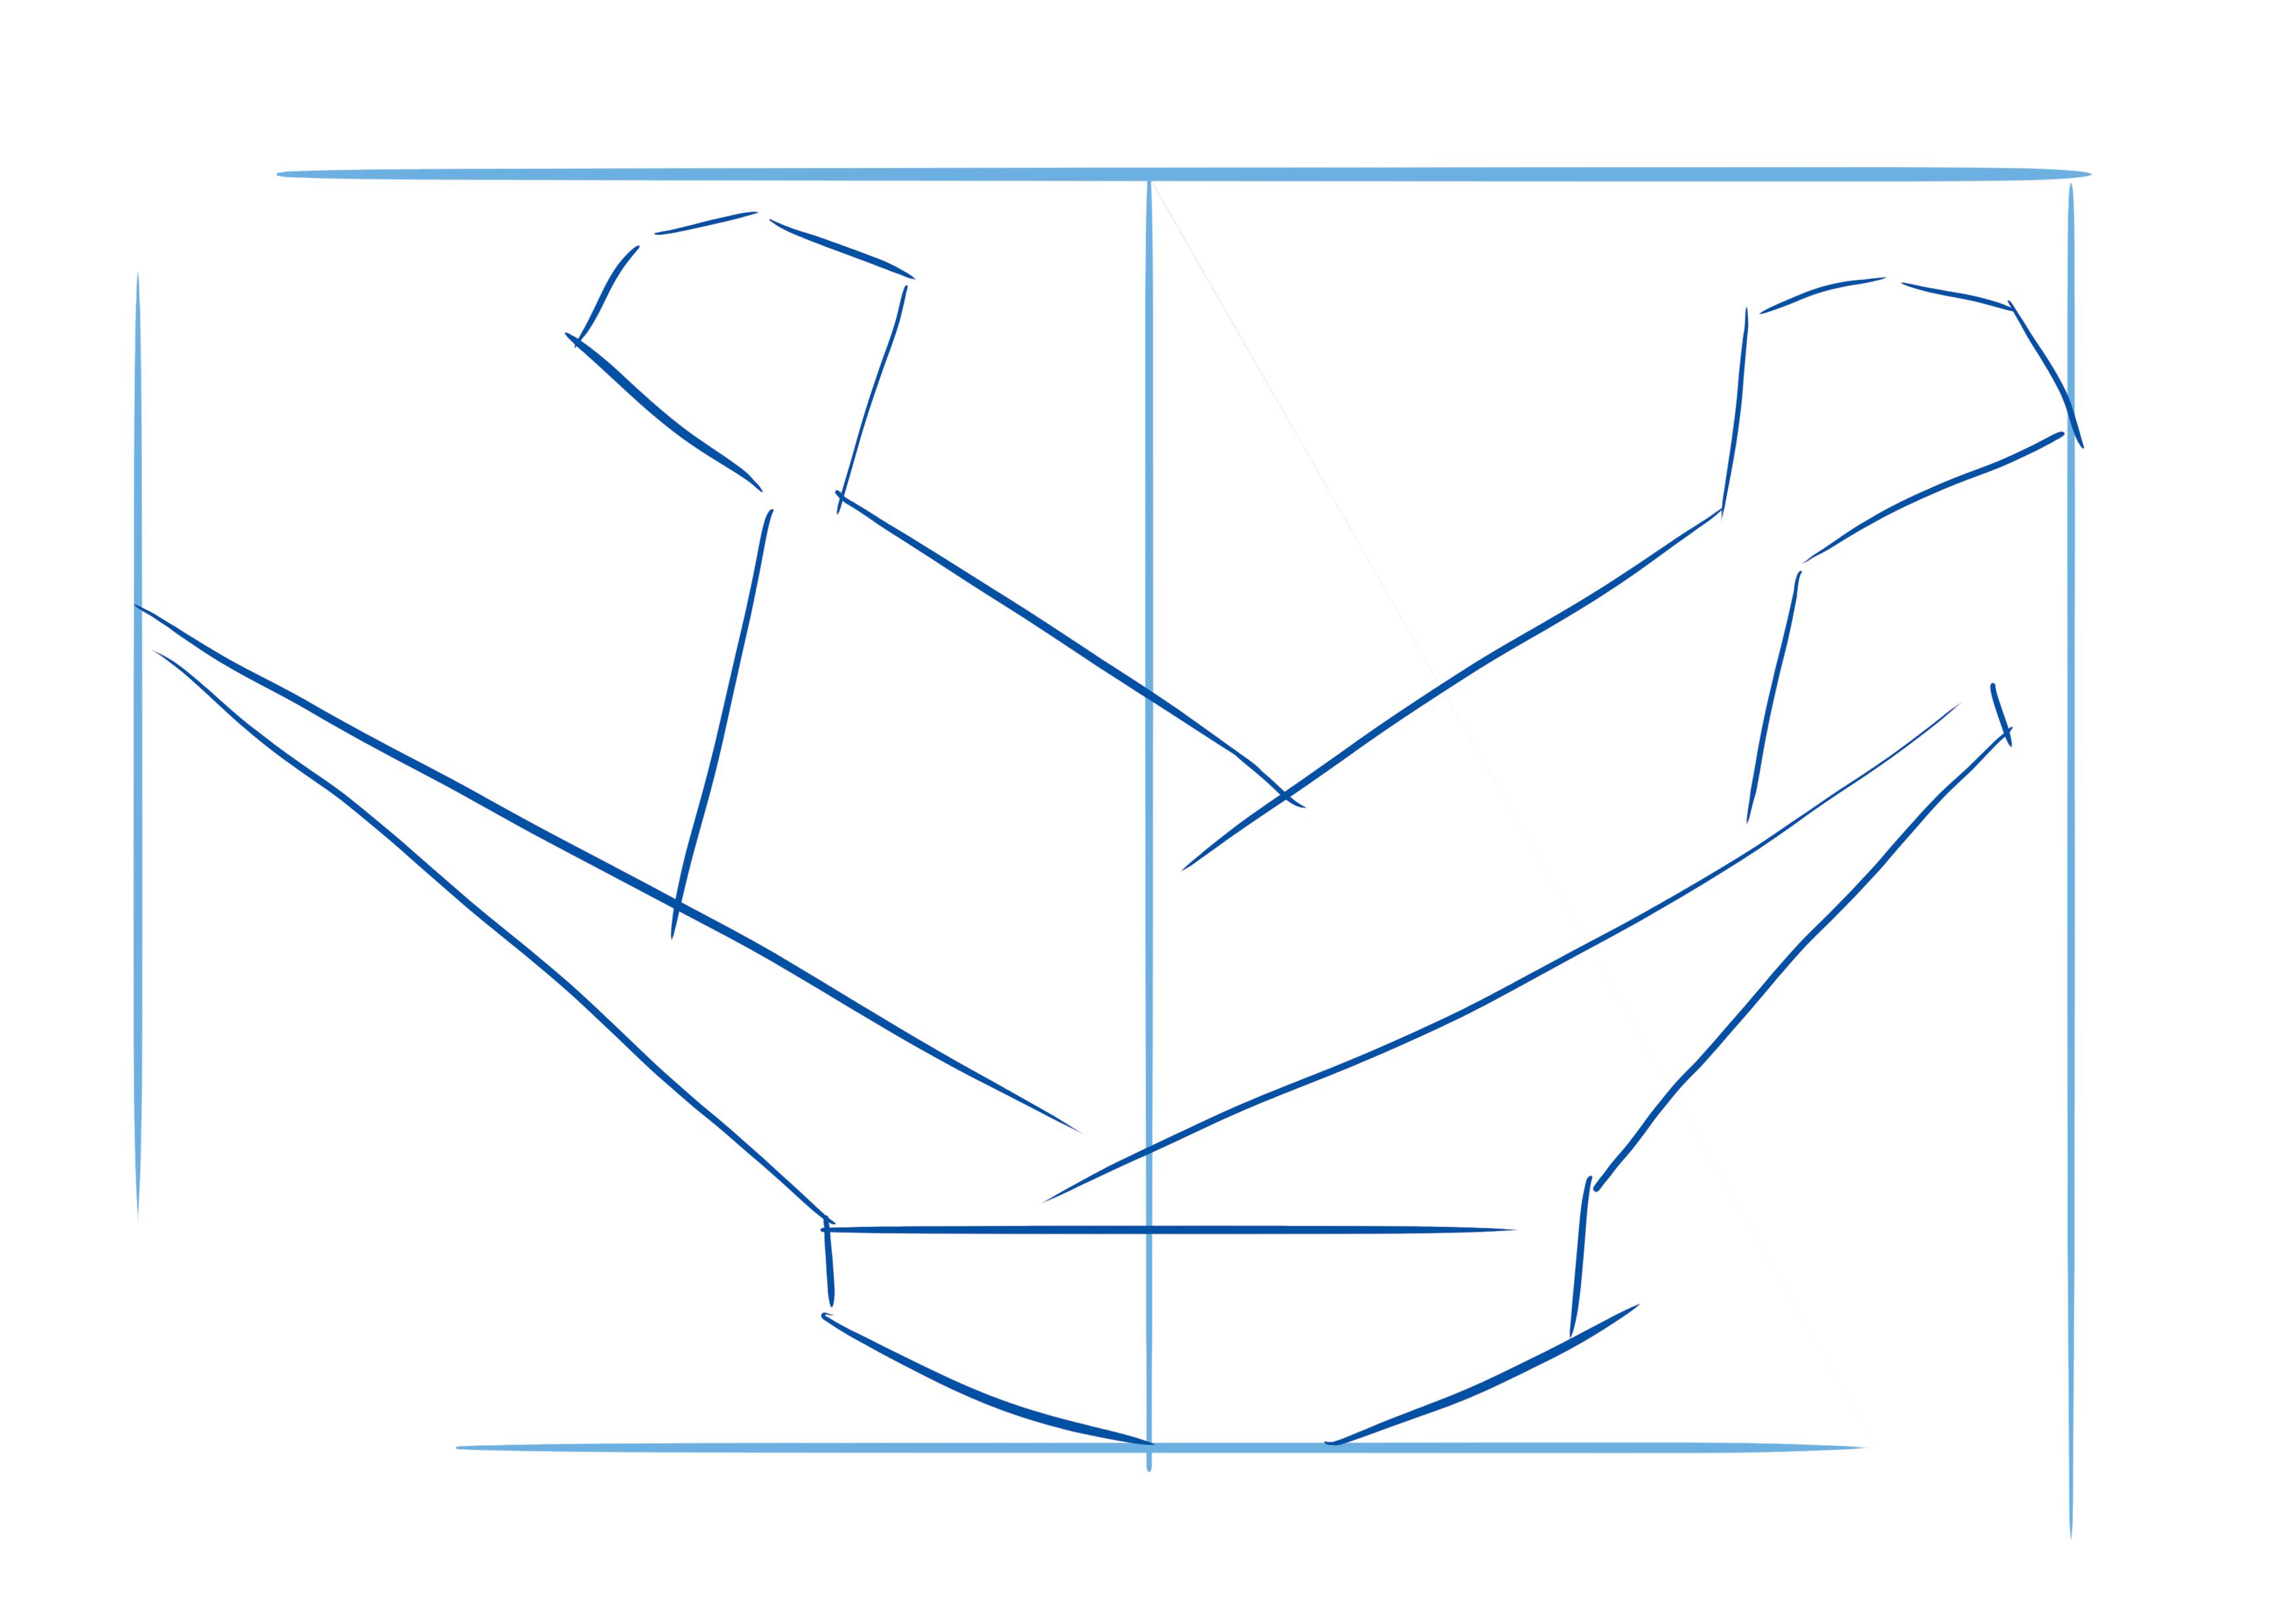
So I start by placing reference points by measuring my subject and transferring the measurements onto my paper.
I start with the height markers...
Then I do the same thing horizontally to get the width.
Now, I have the overall size of my subject.
I place the basket first, as it is the piece that supports the entire subject and it is also the largest object.
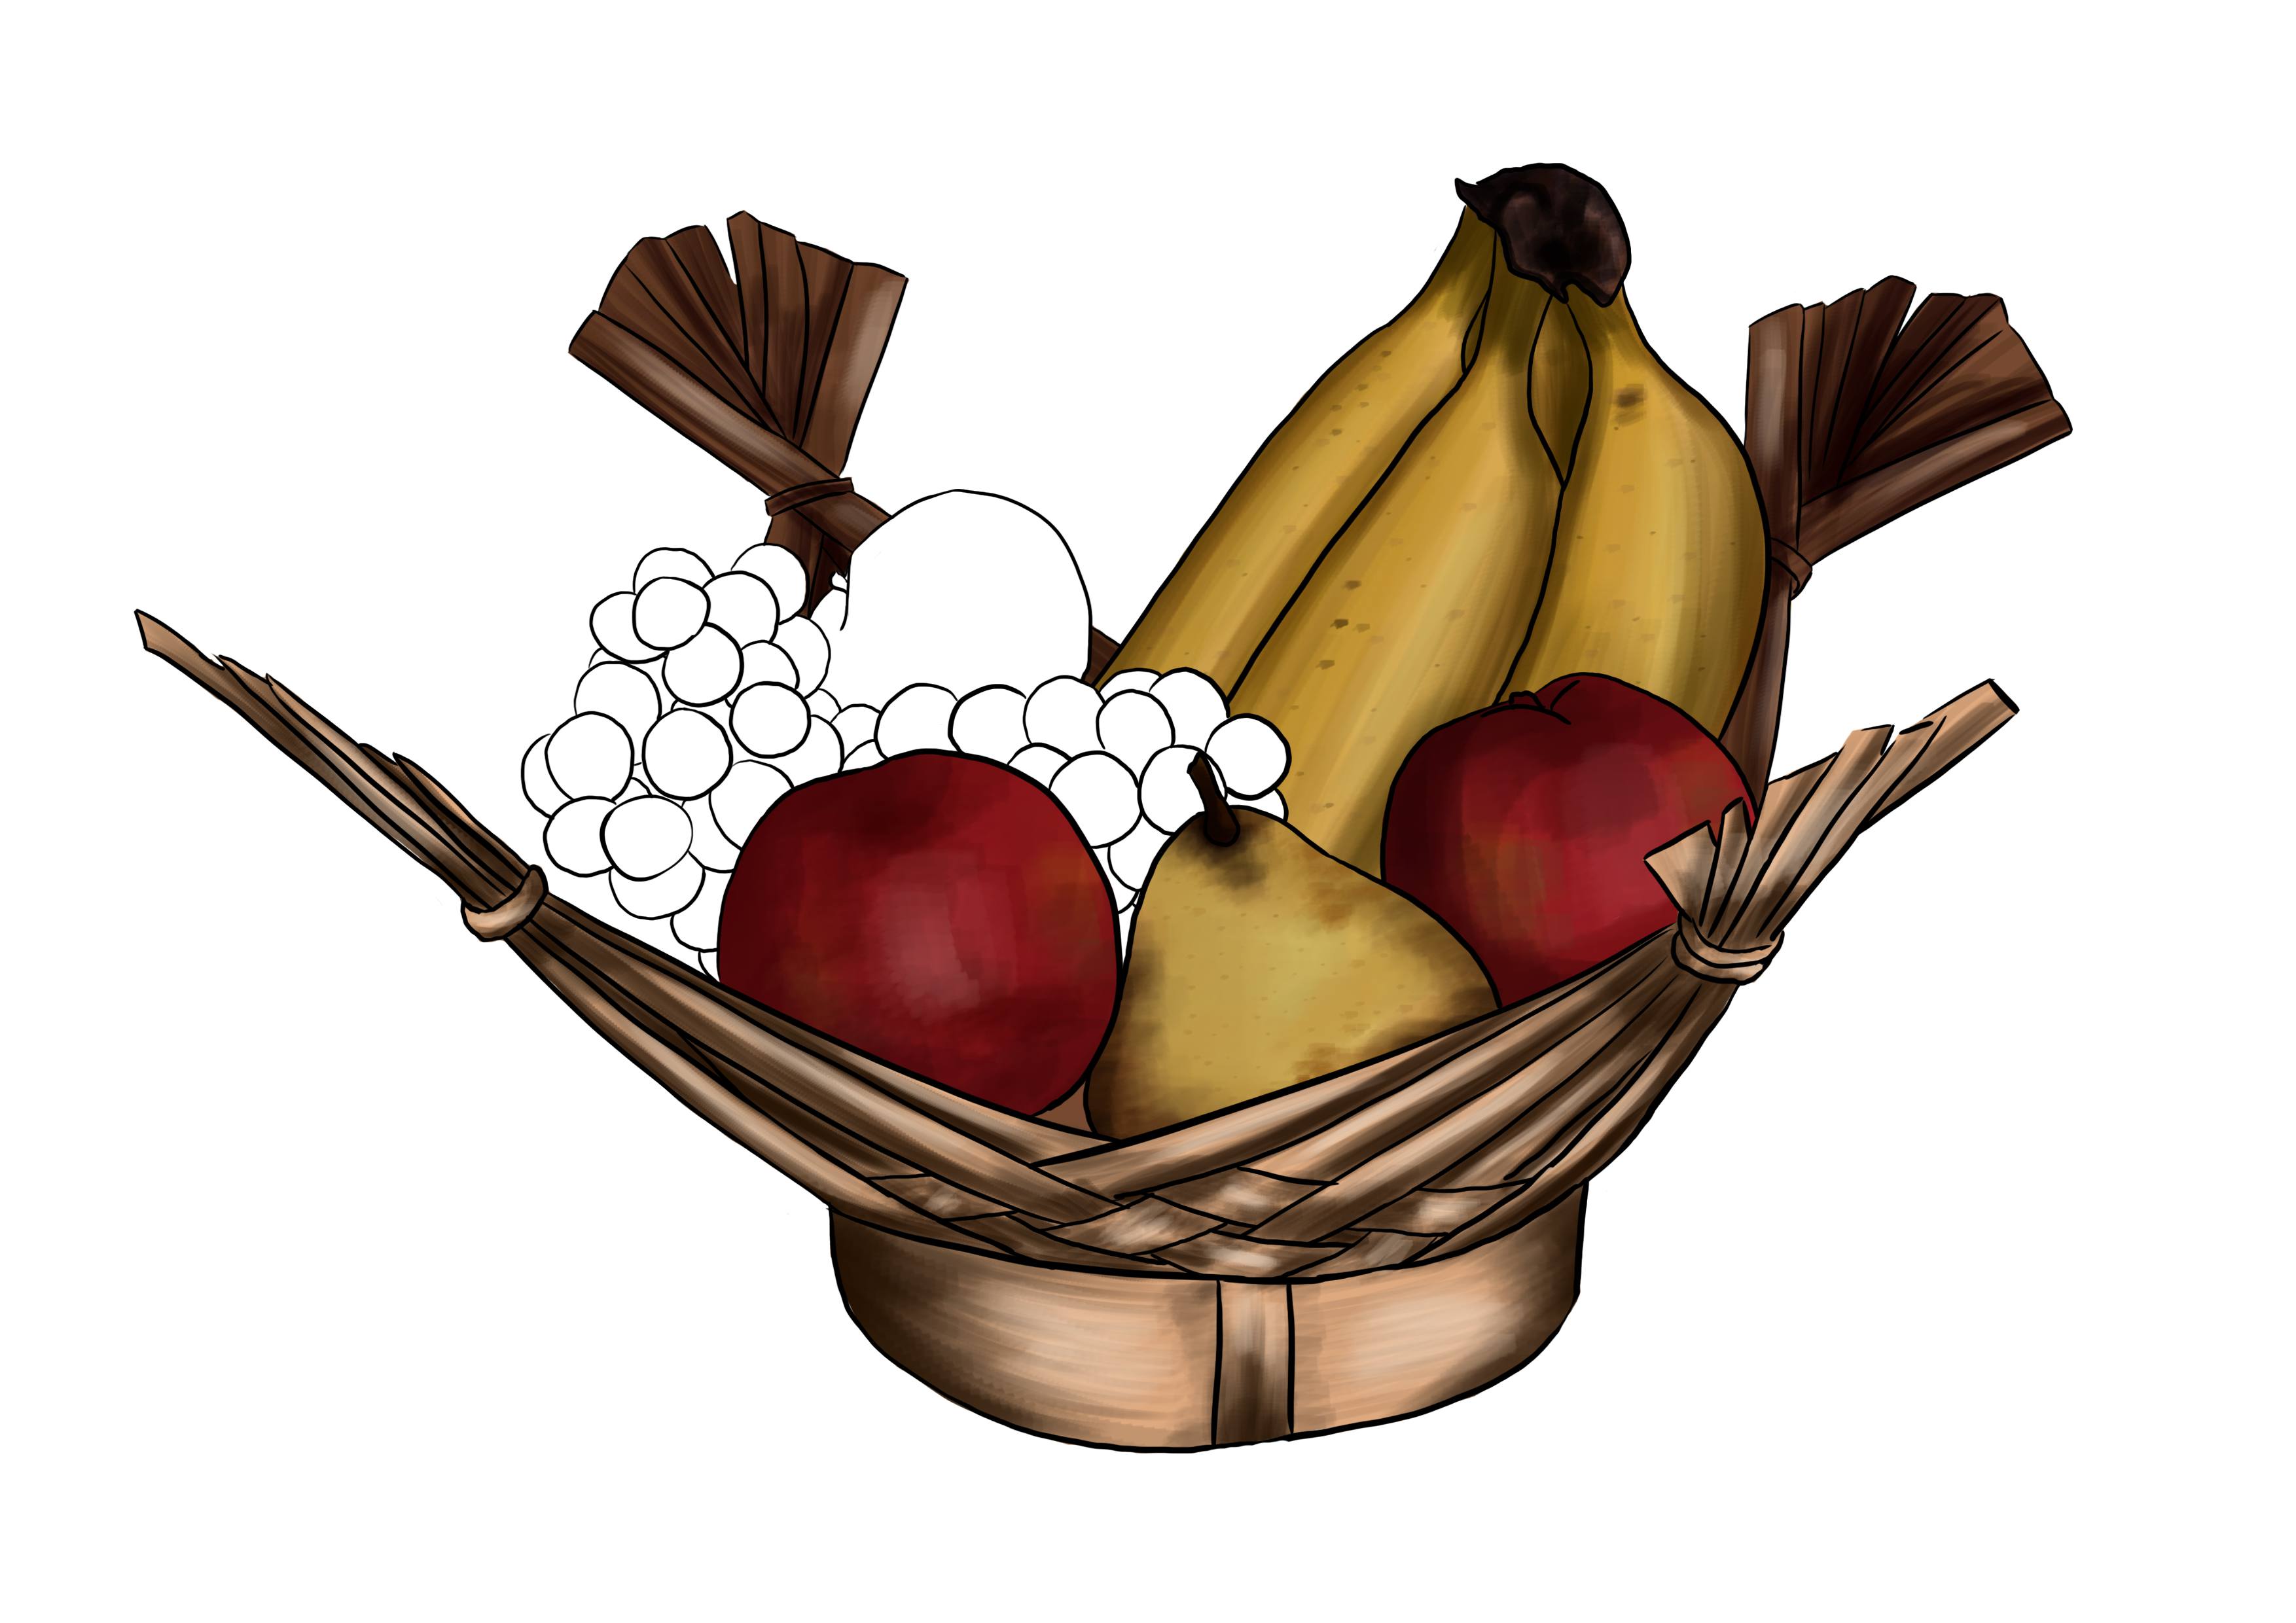
Then, I roughly place my fruits, drawing only the shapes, without any detail.
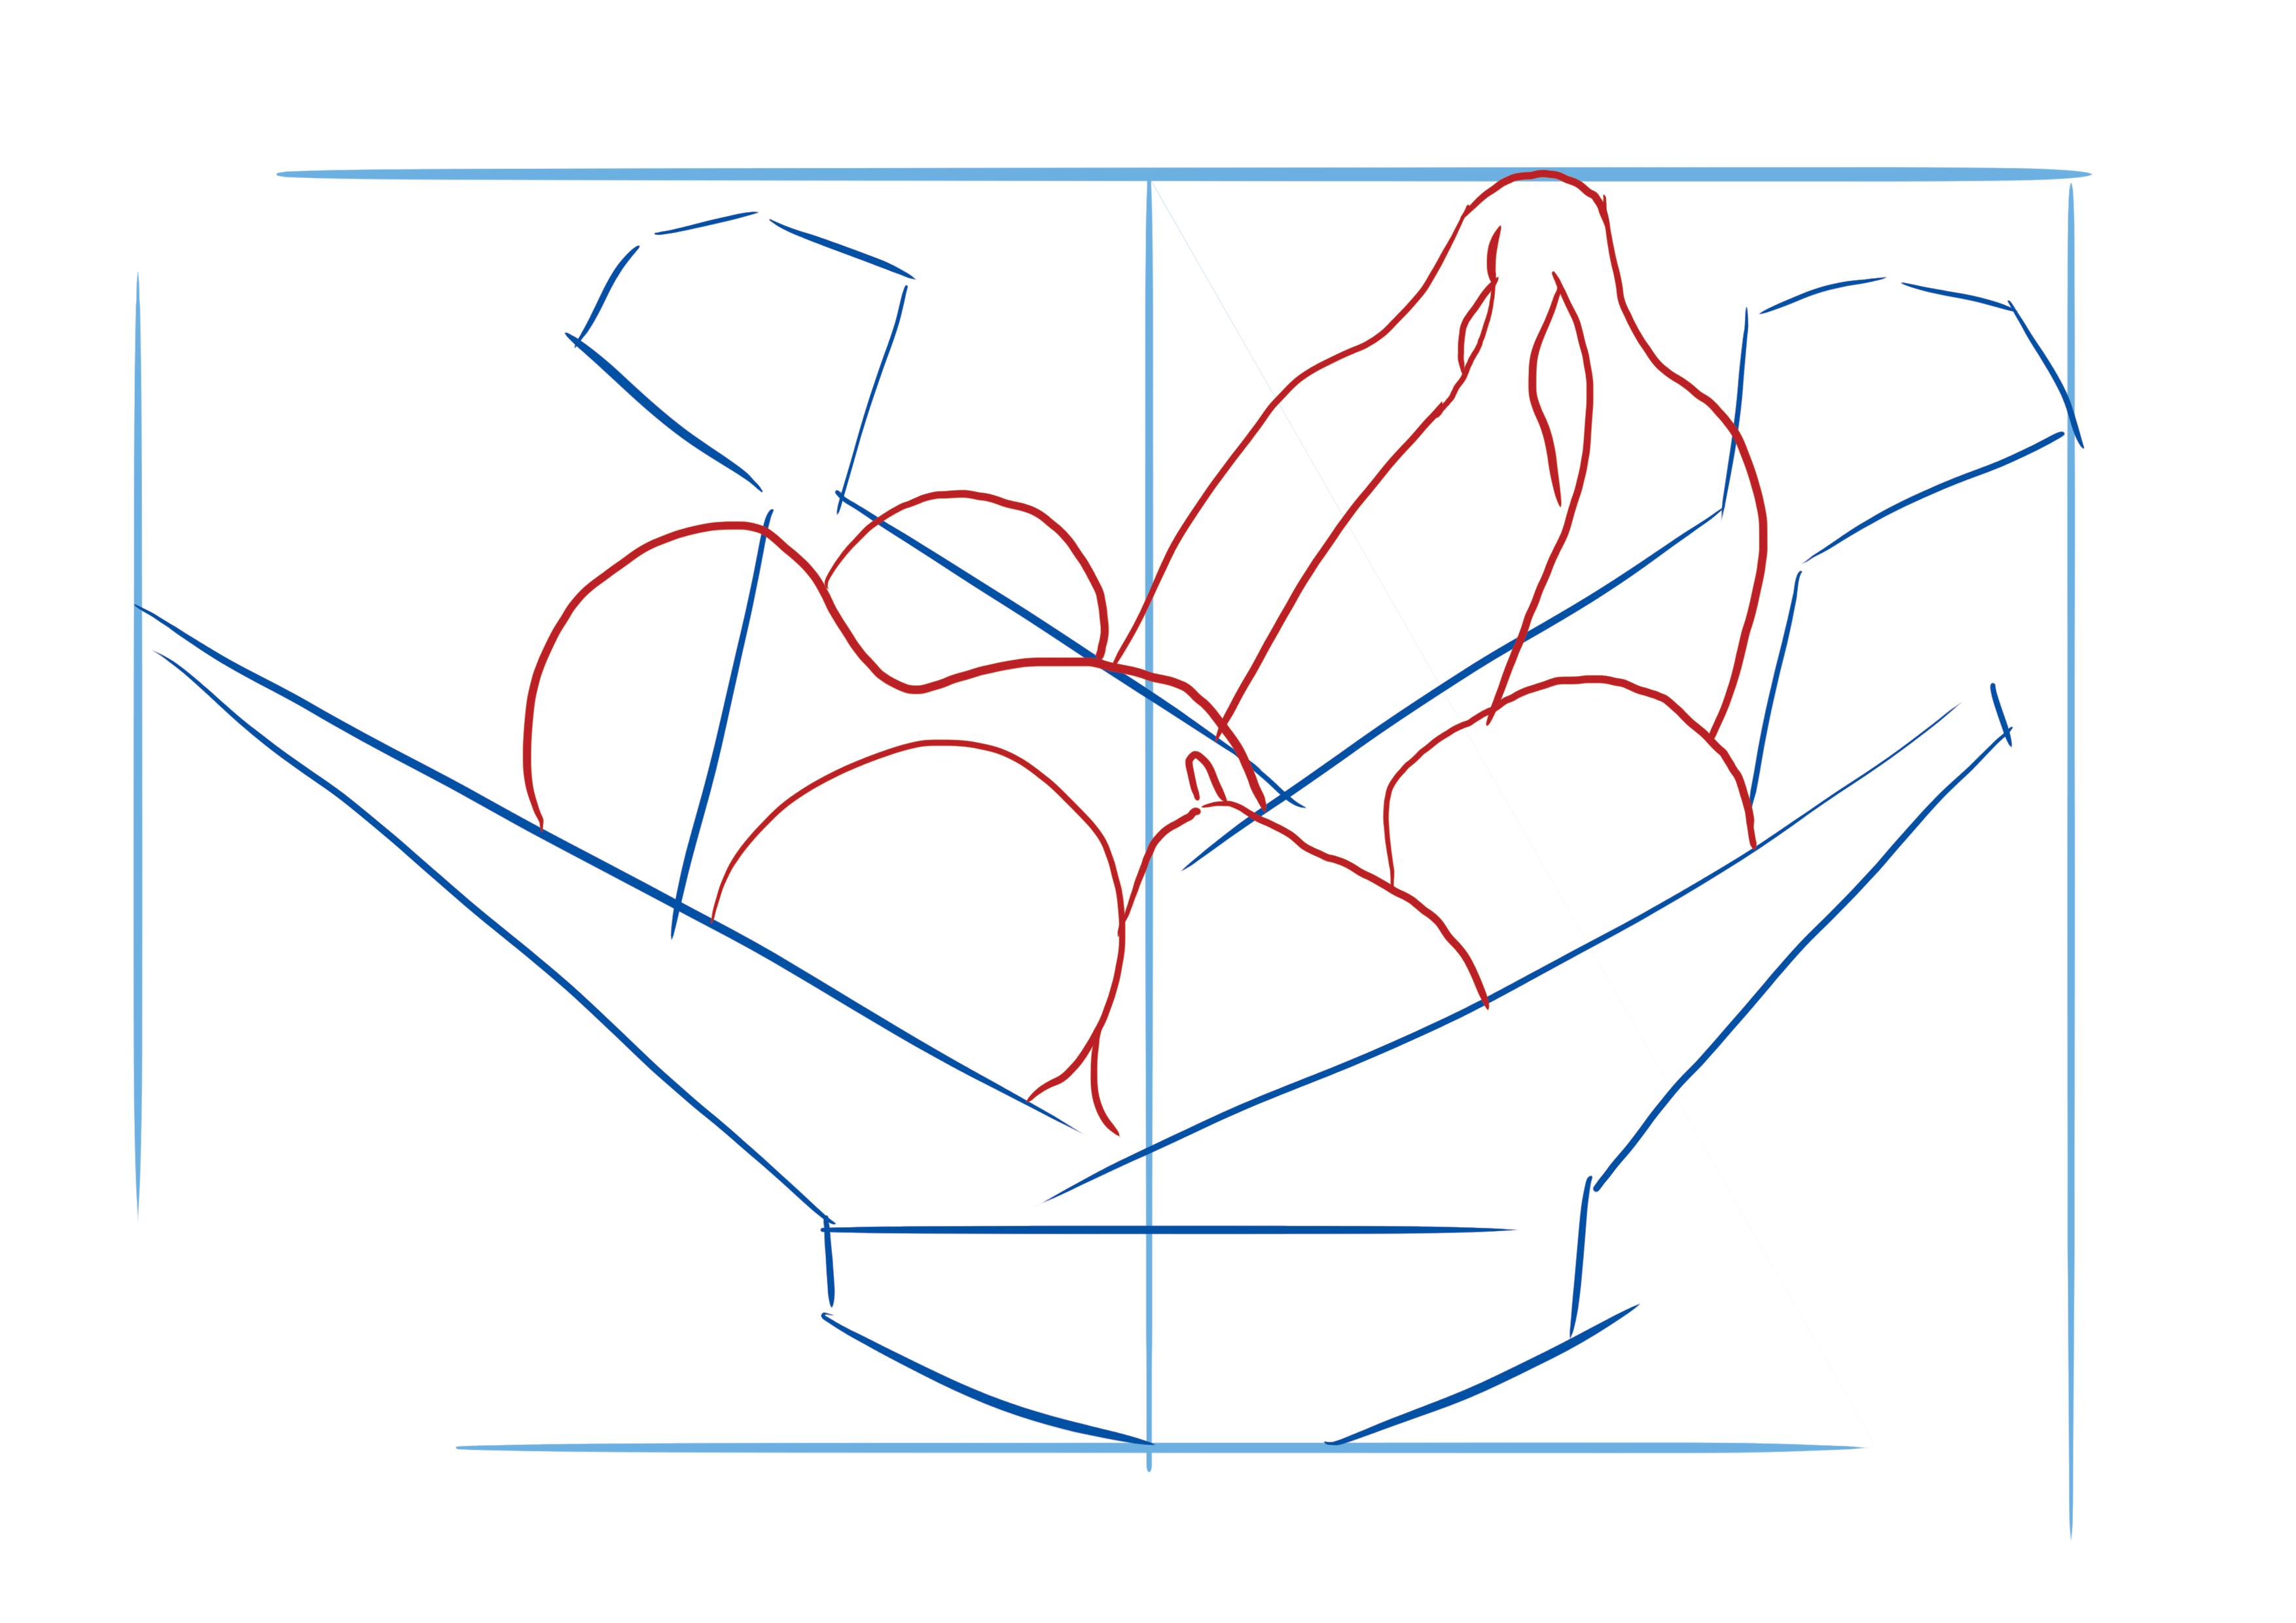
Once I am sure of myself and my references, I start to add in the details.
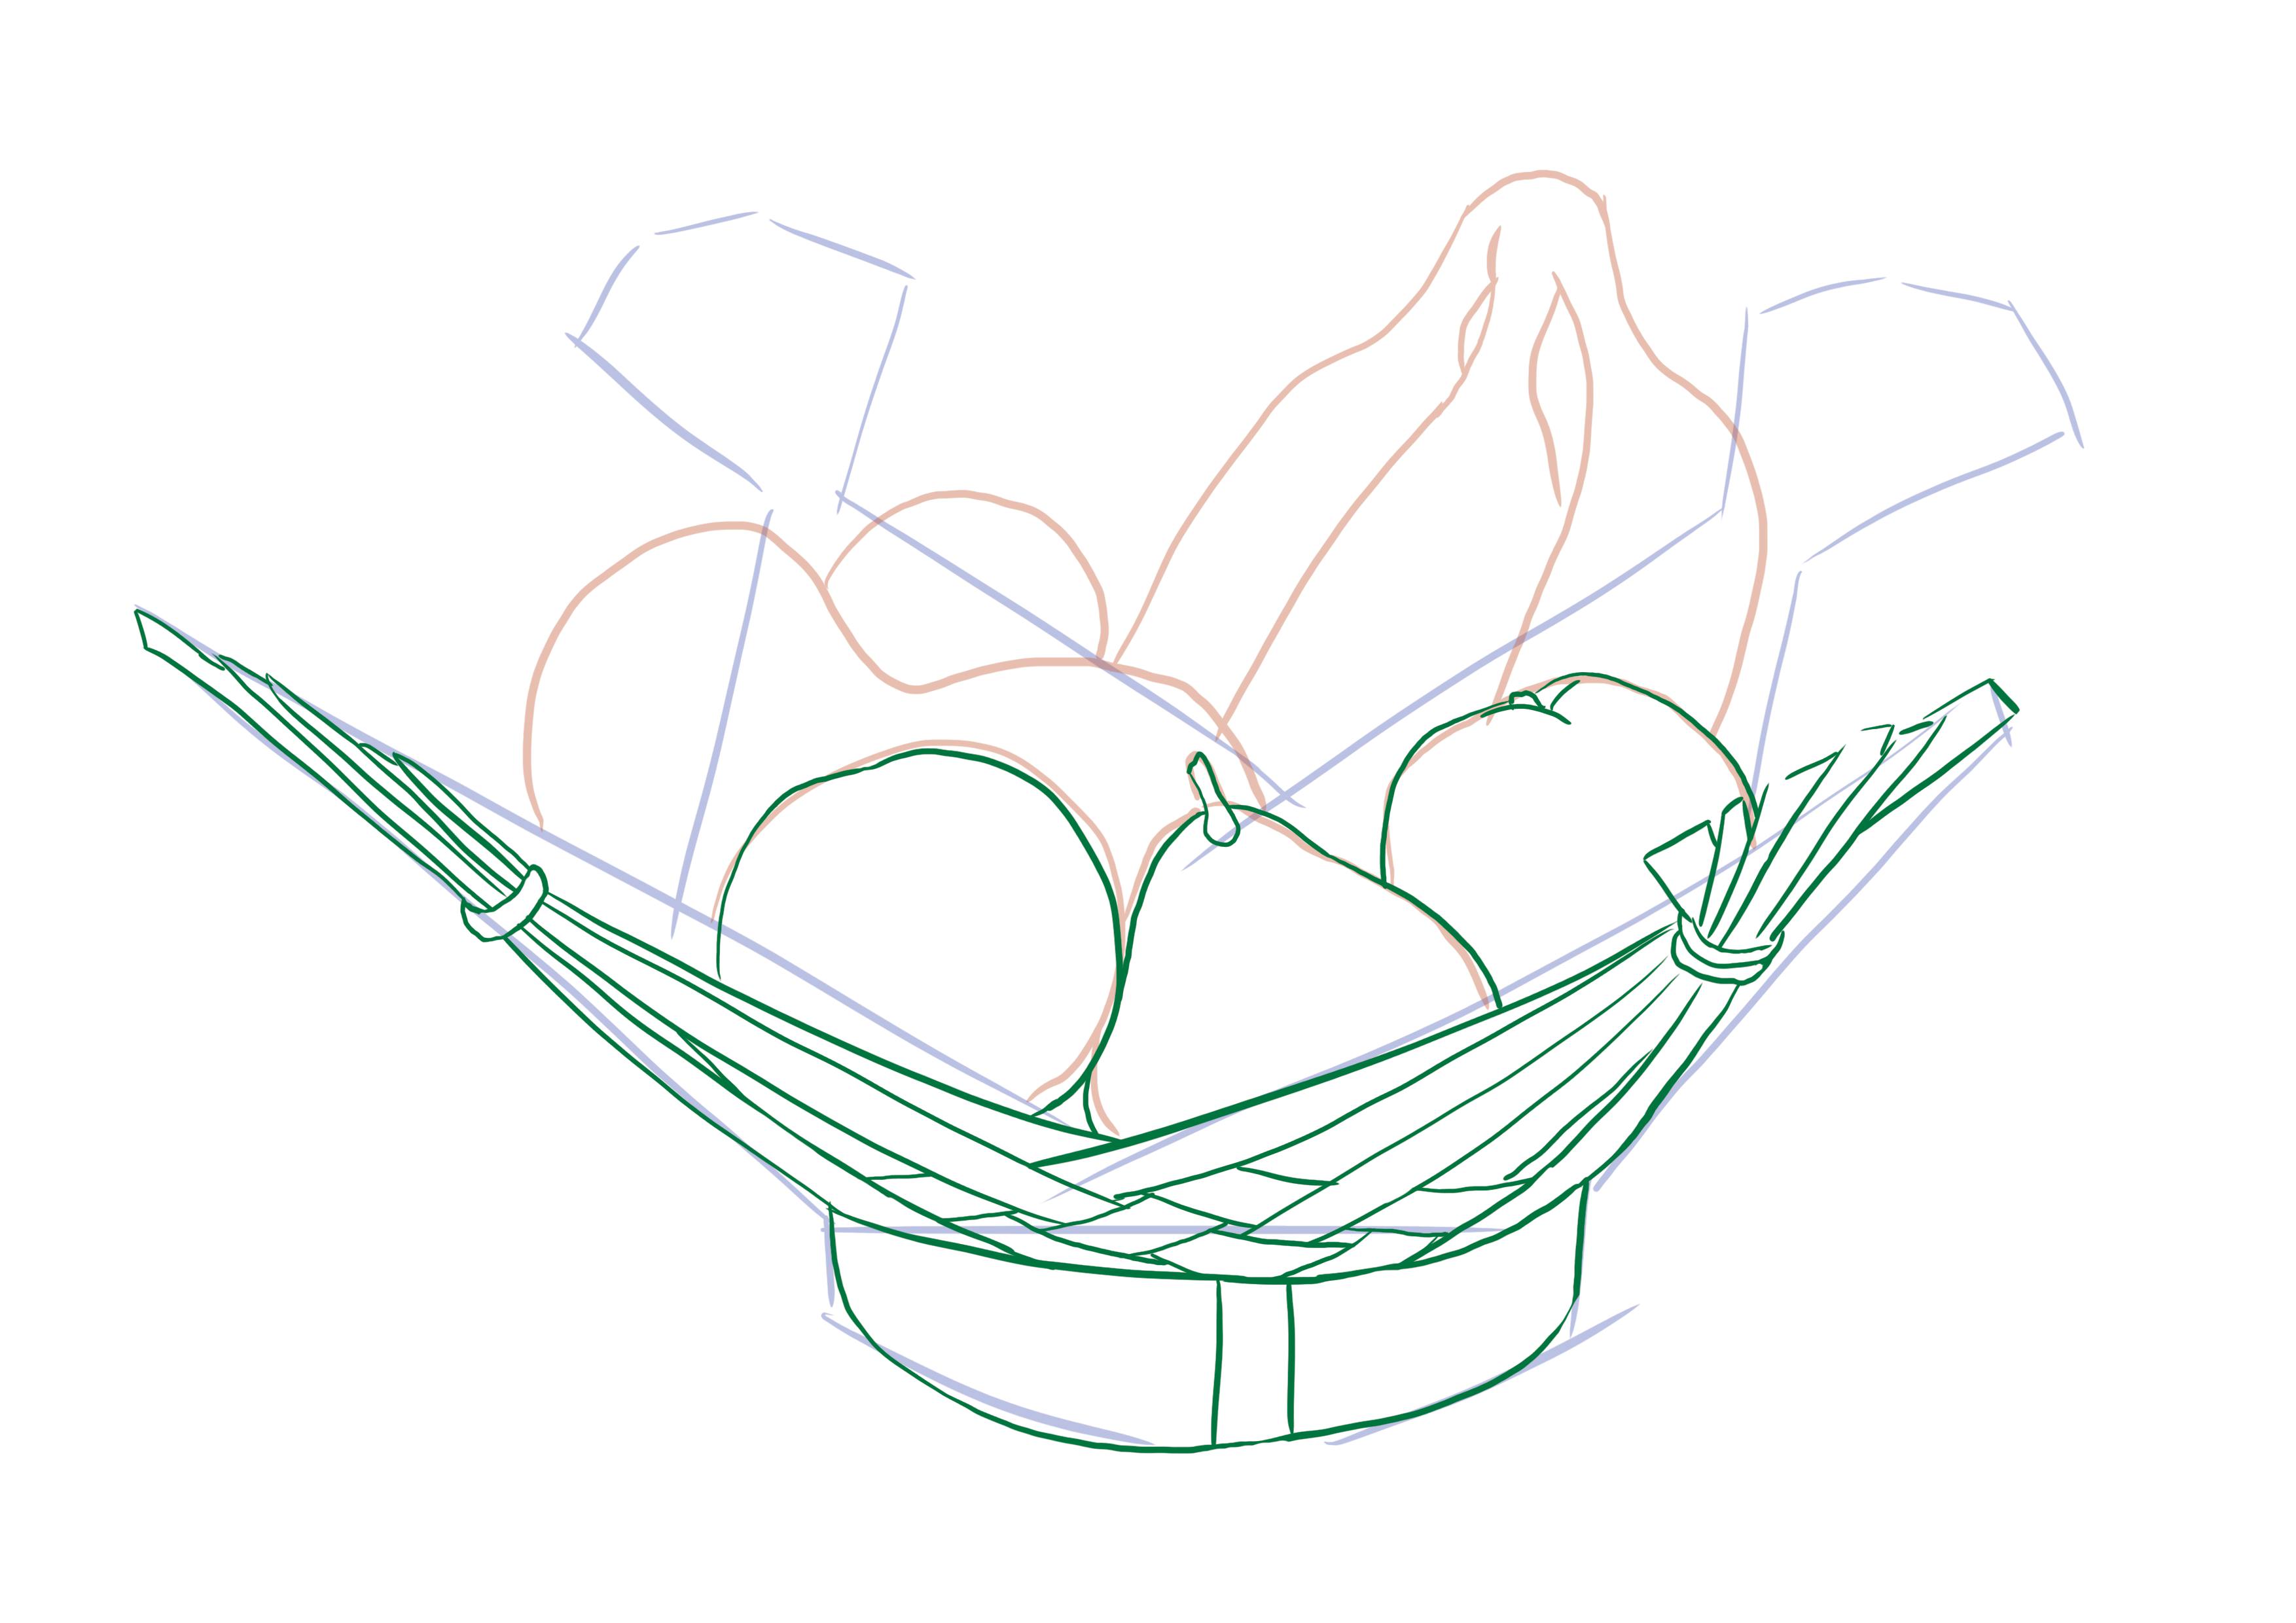
So, I start by drawing the basket.
Then I continue with the foreground fruits, namely two apples and a pear.
I'm adding the bananas...
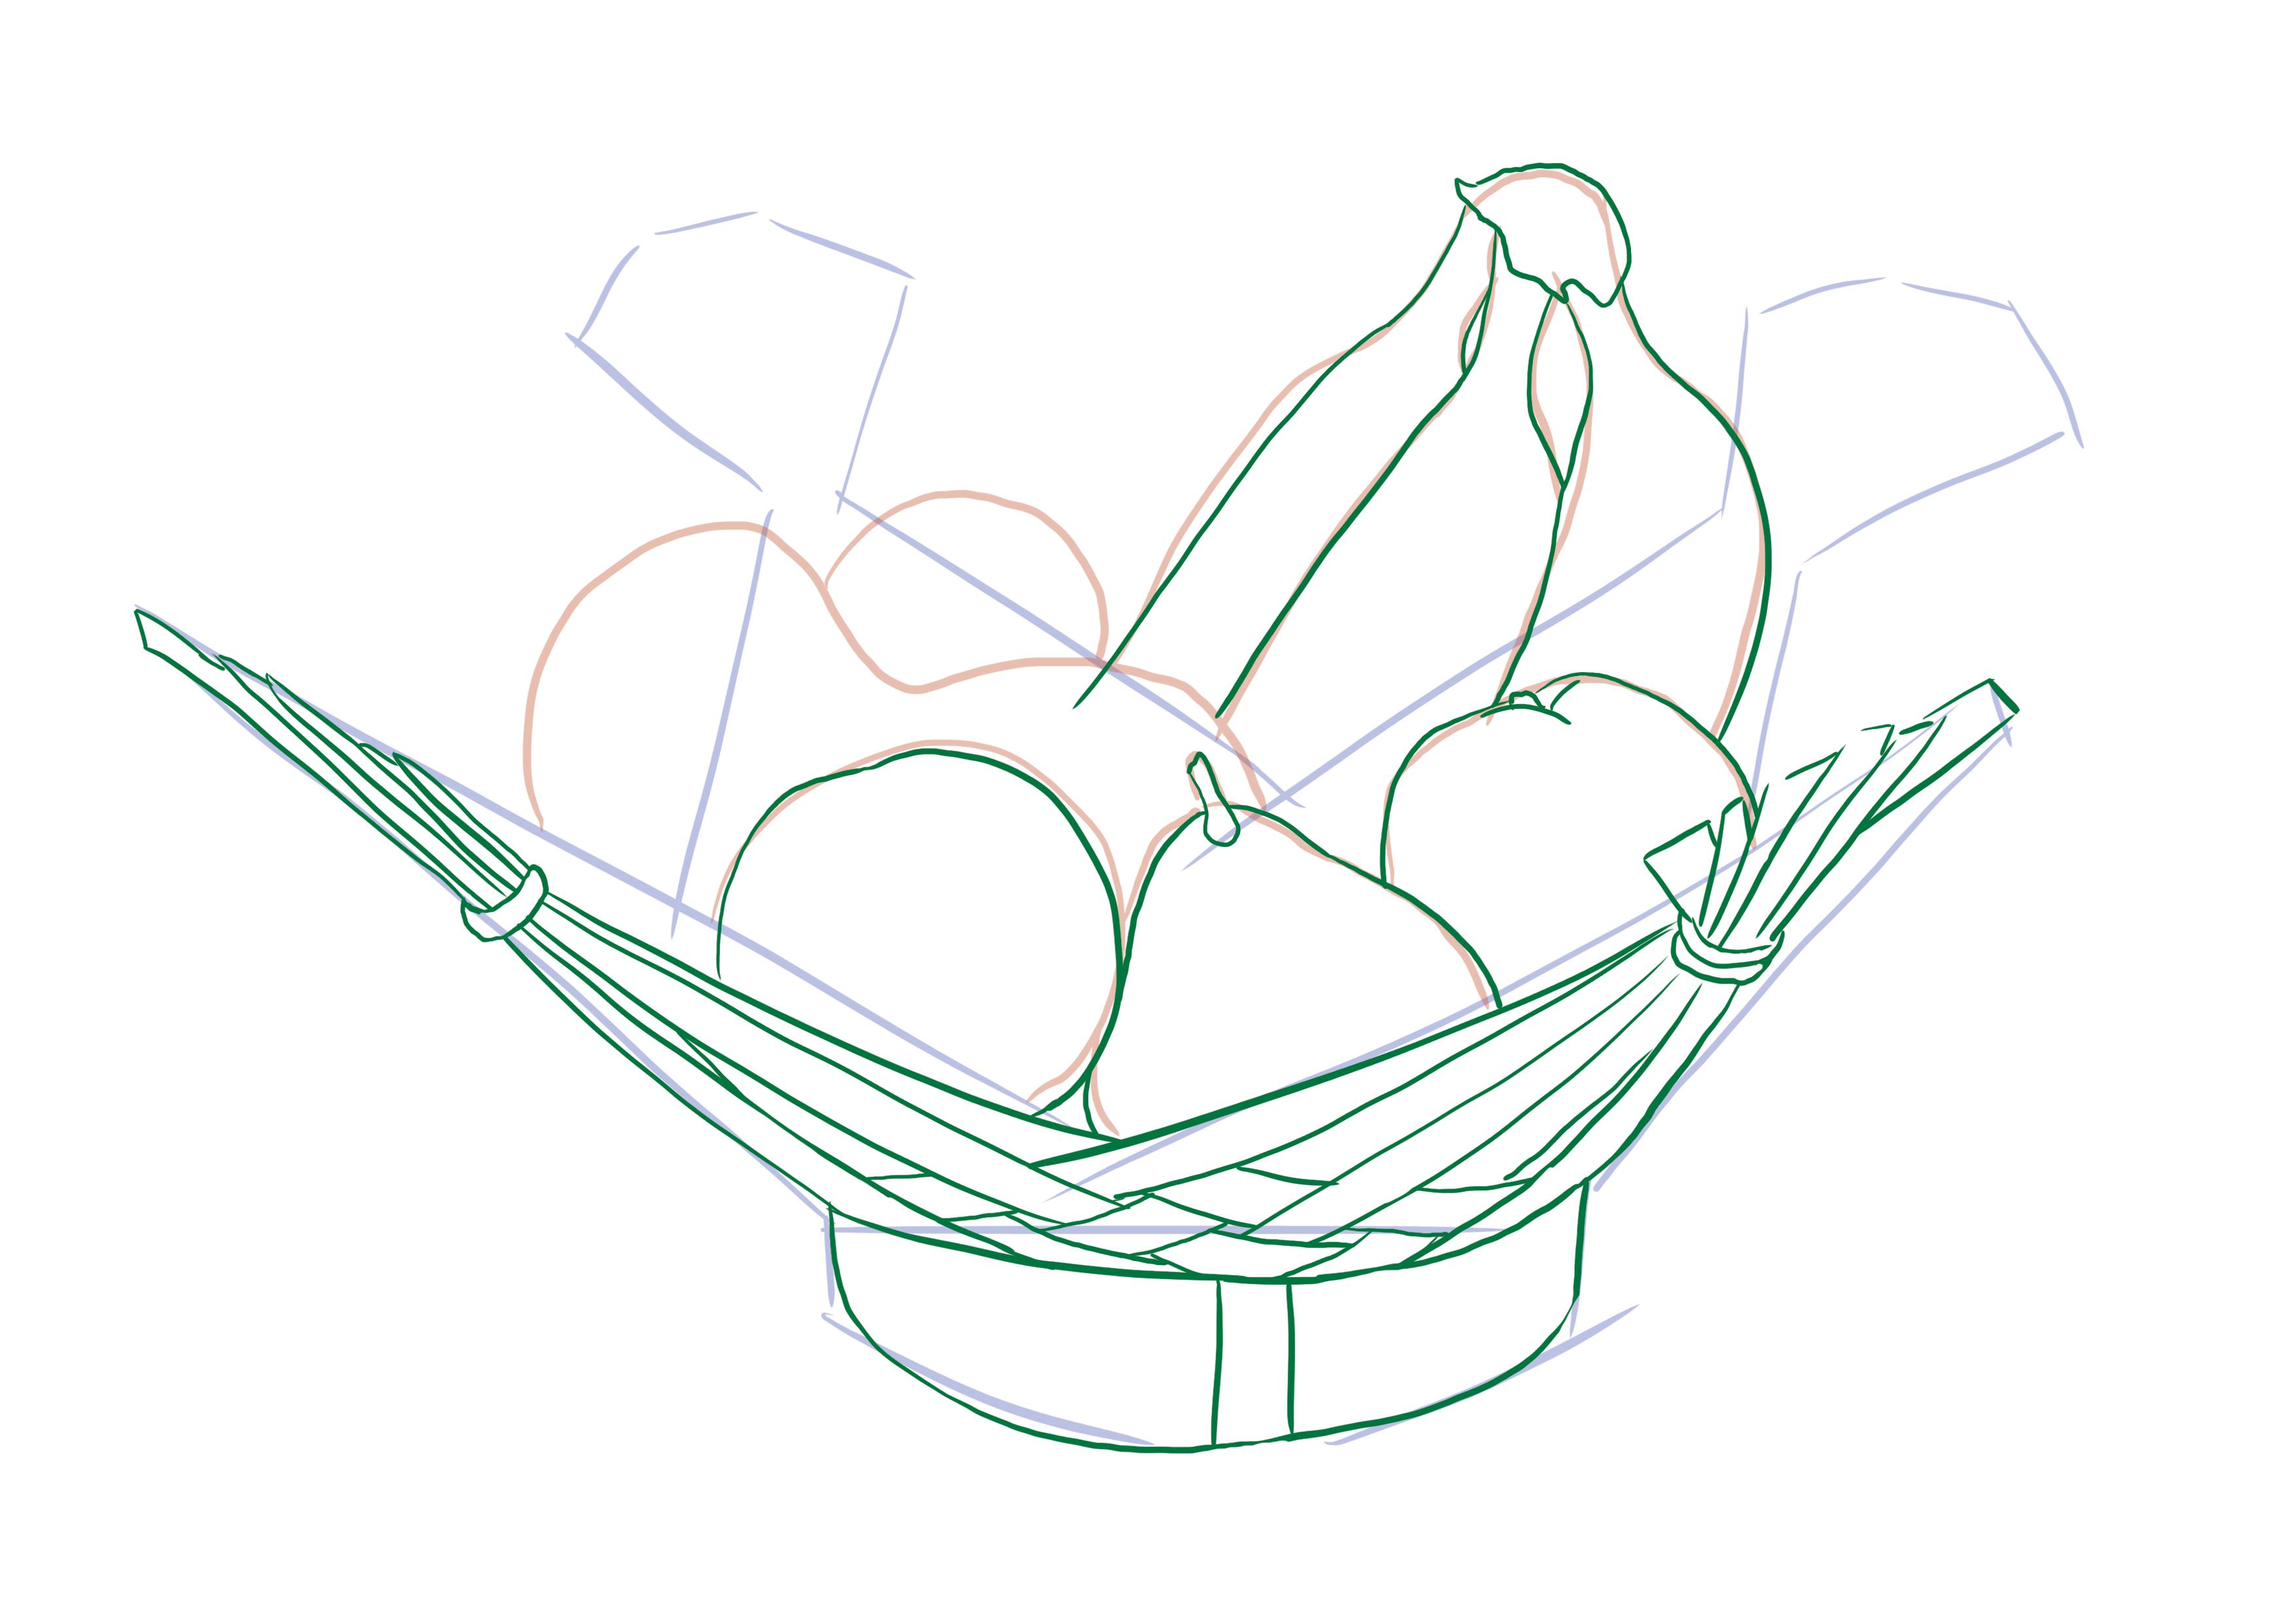
Then the grapes and finally the orange!

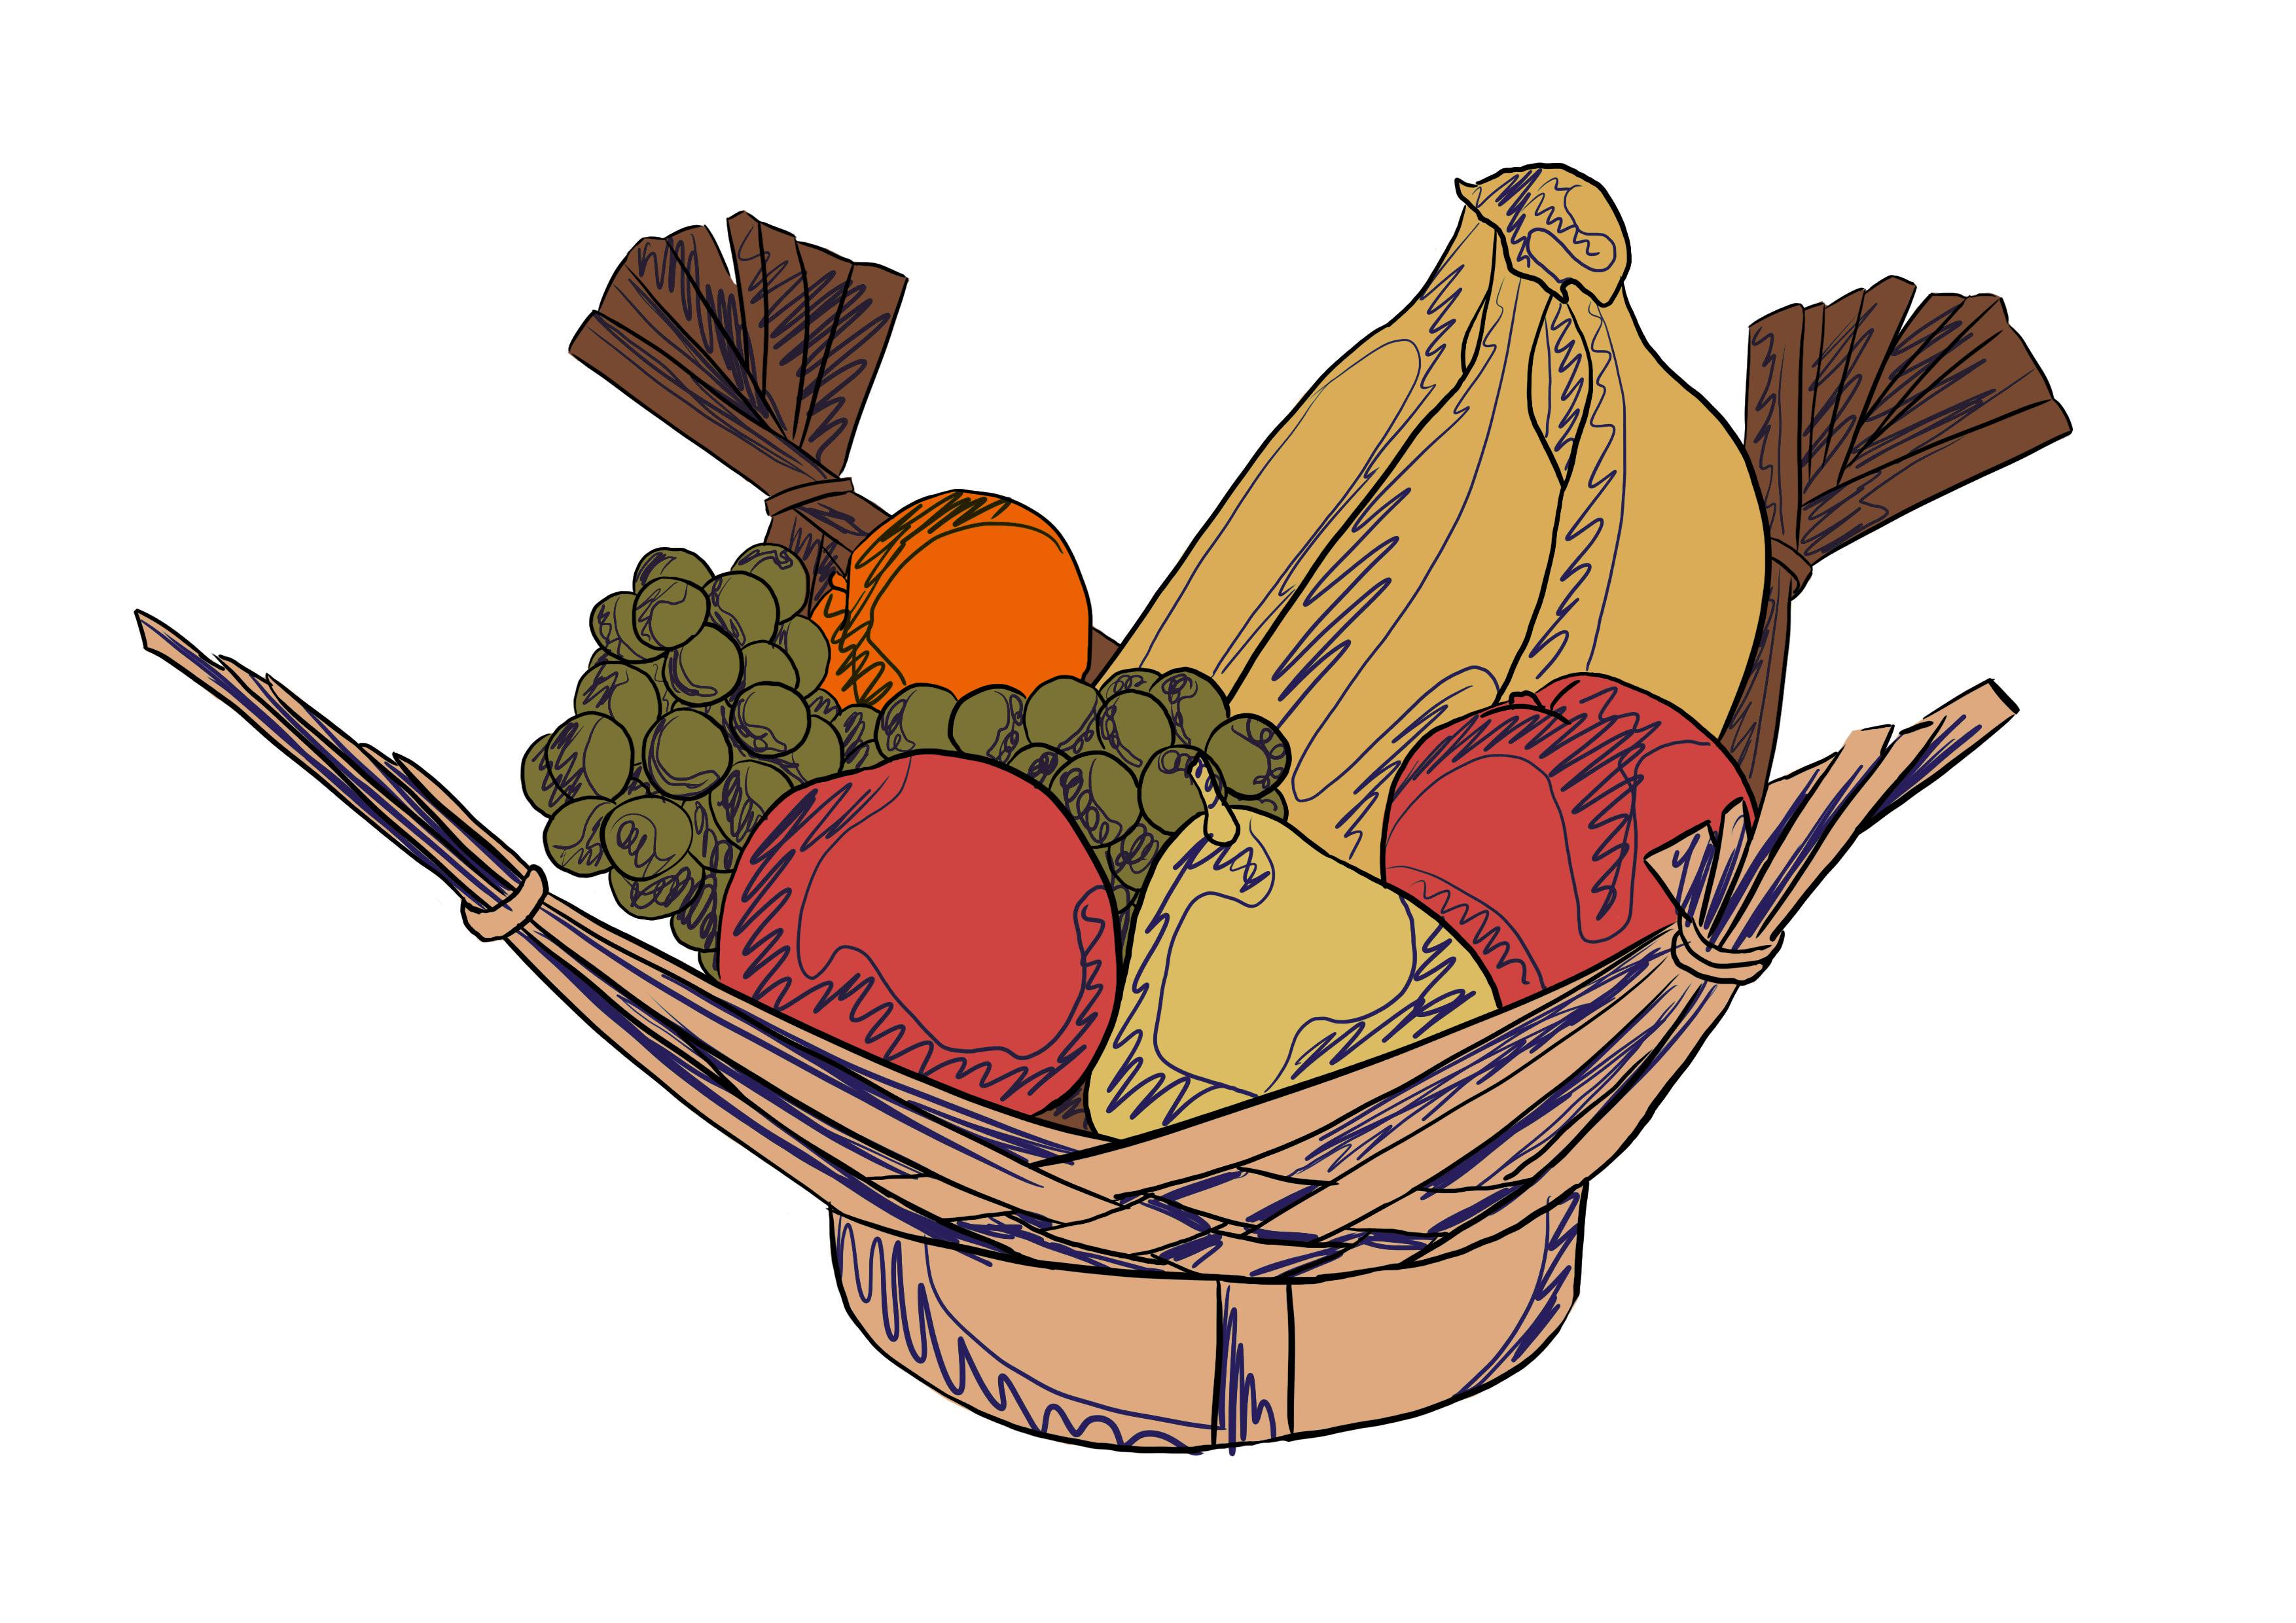
I'm finishing with the background of the basket.
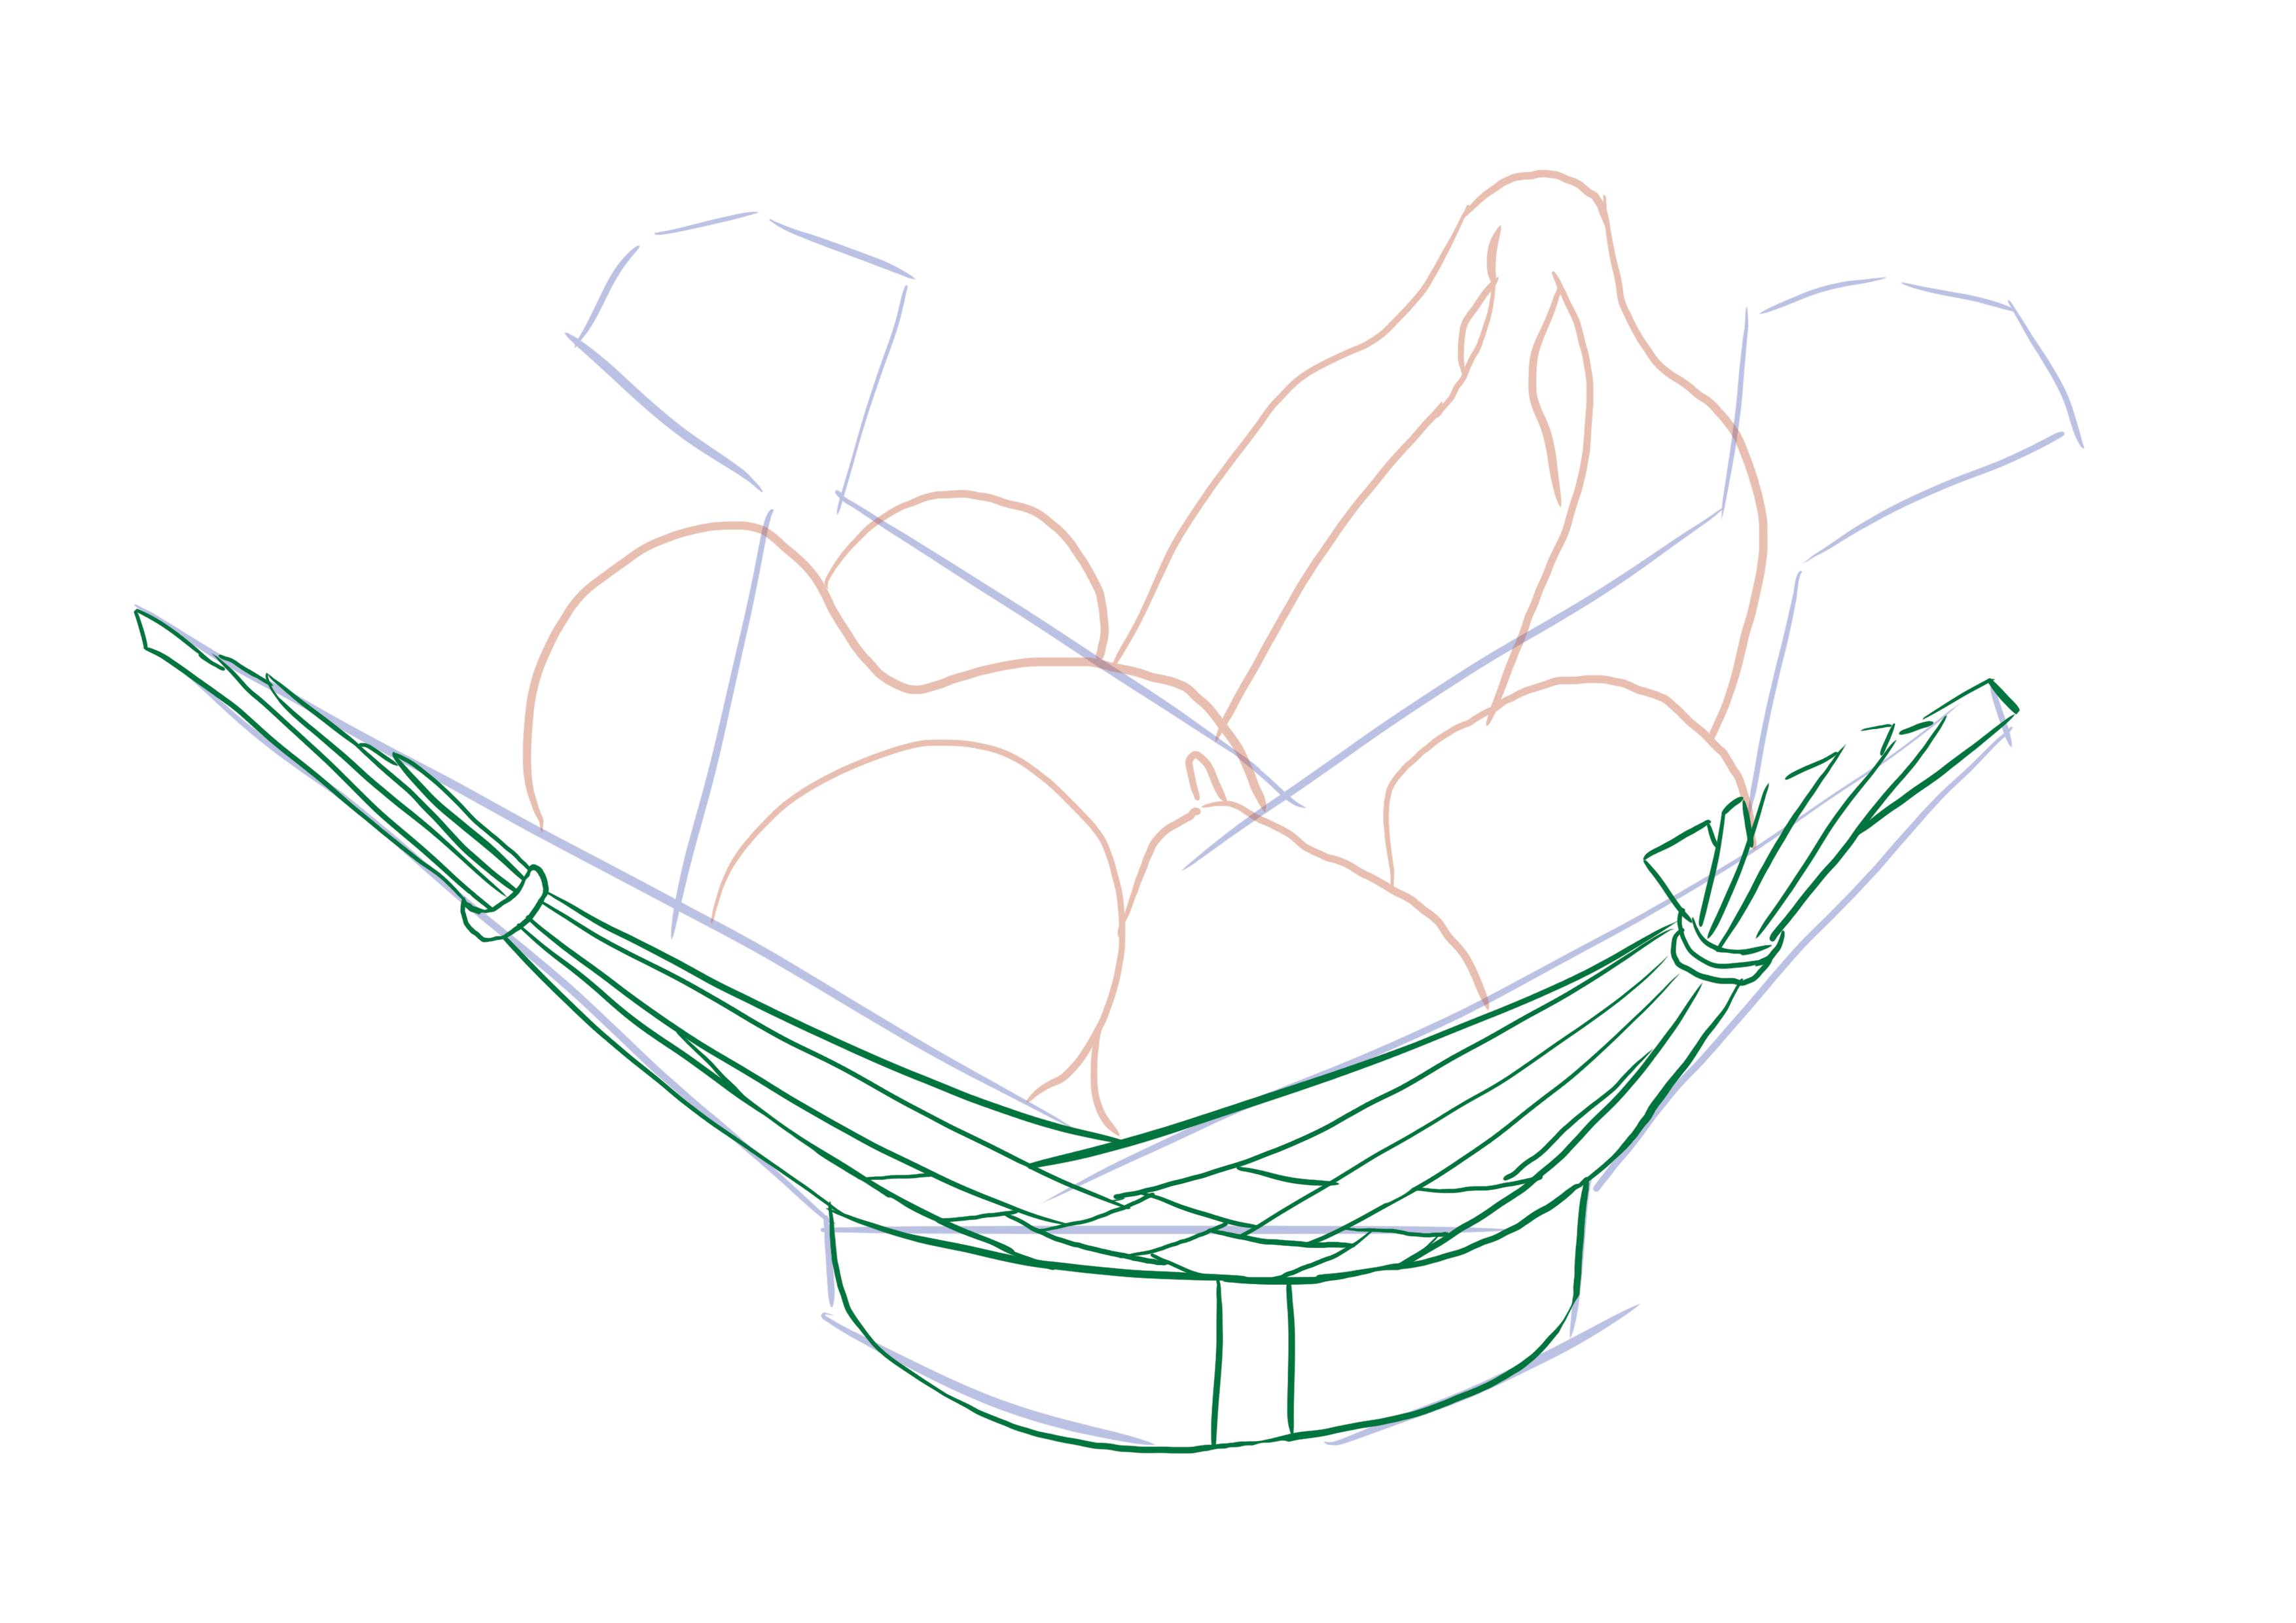
So far, nothing is too complicated. We've drawn the shapes with just a bit more precision.
And yet you have done the most difficult part of observational drawing!
Indeed, the most complicated aspect of this practice is achieving perfect proportions and creating an almost exact, if not identical, copy of the model.
The rest is just a bonus!
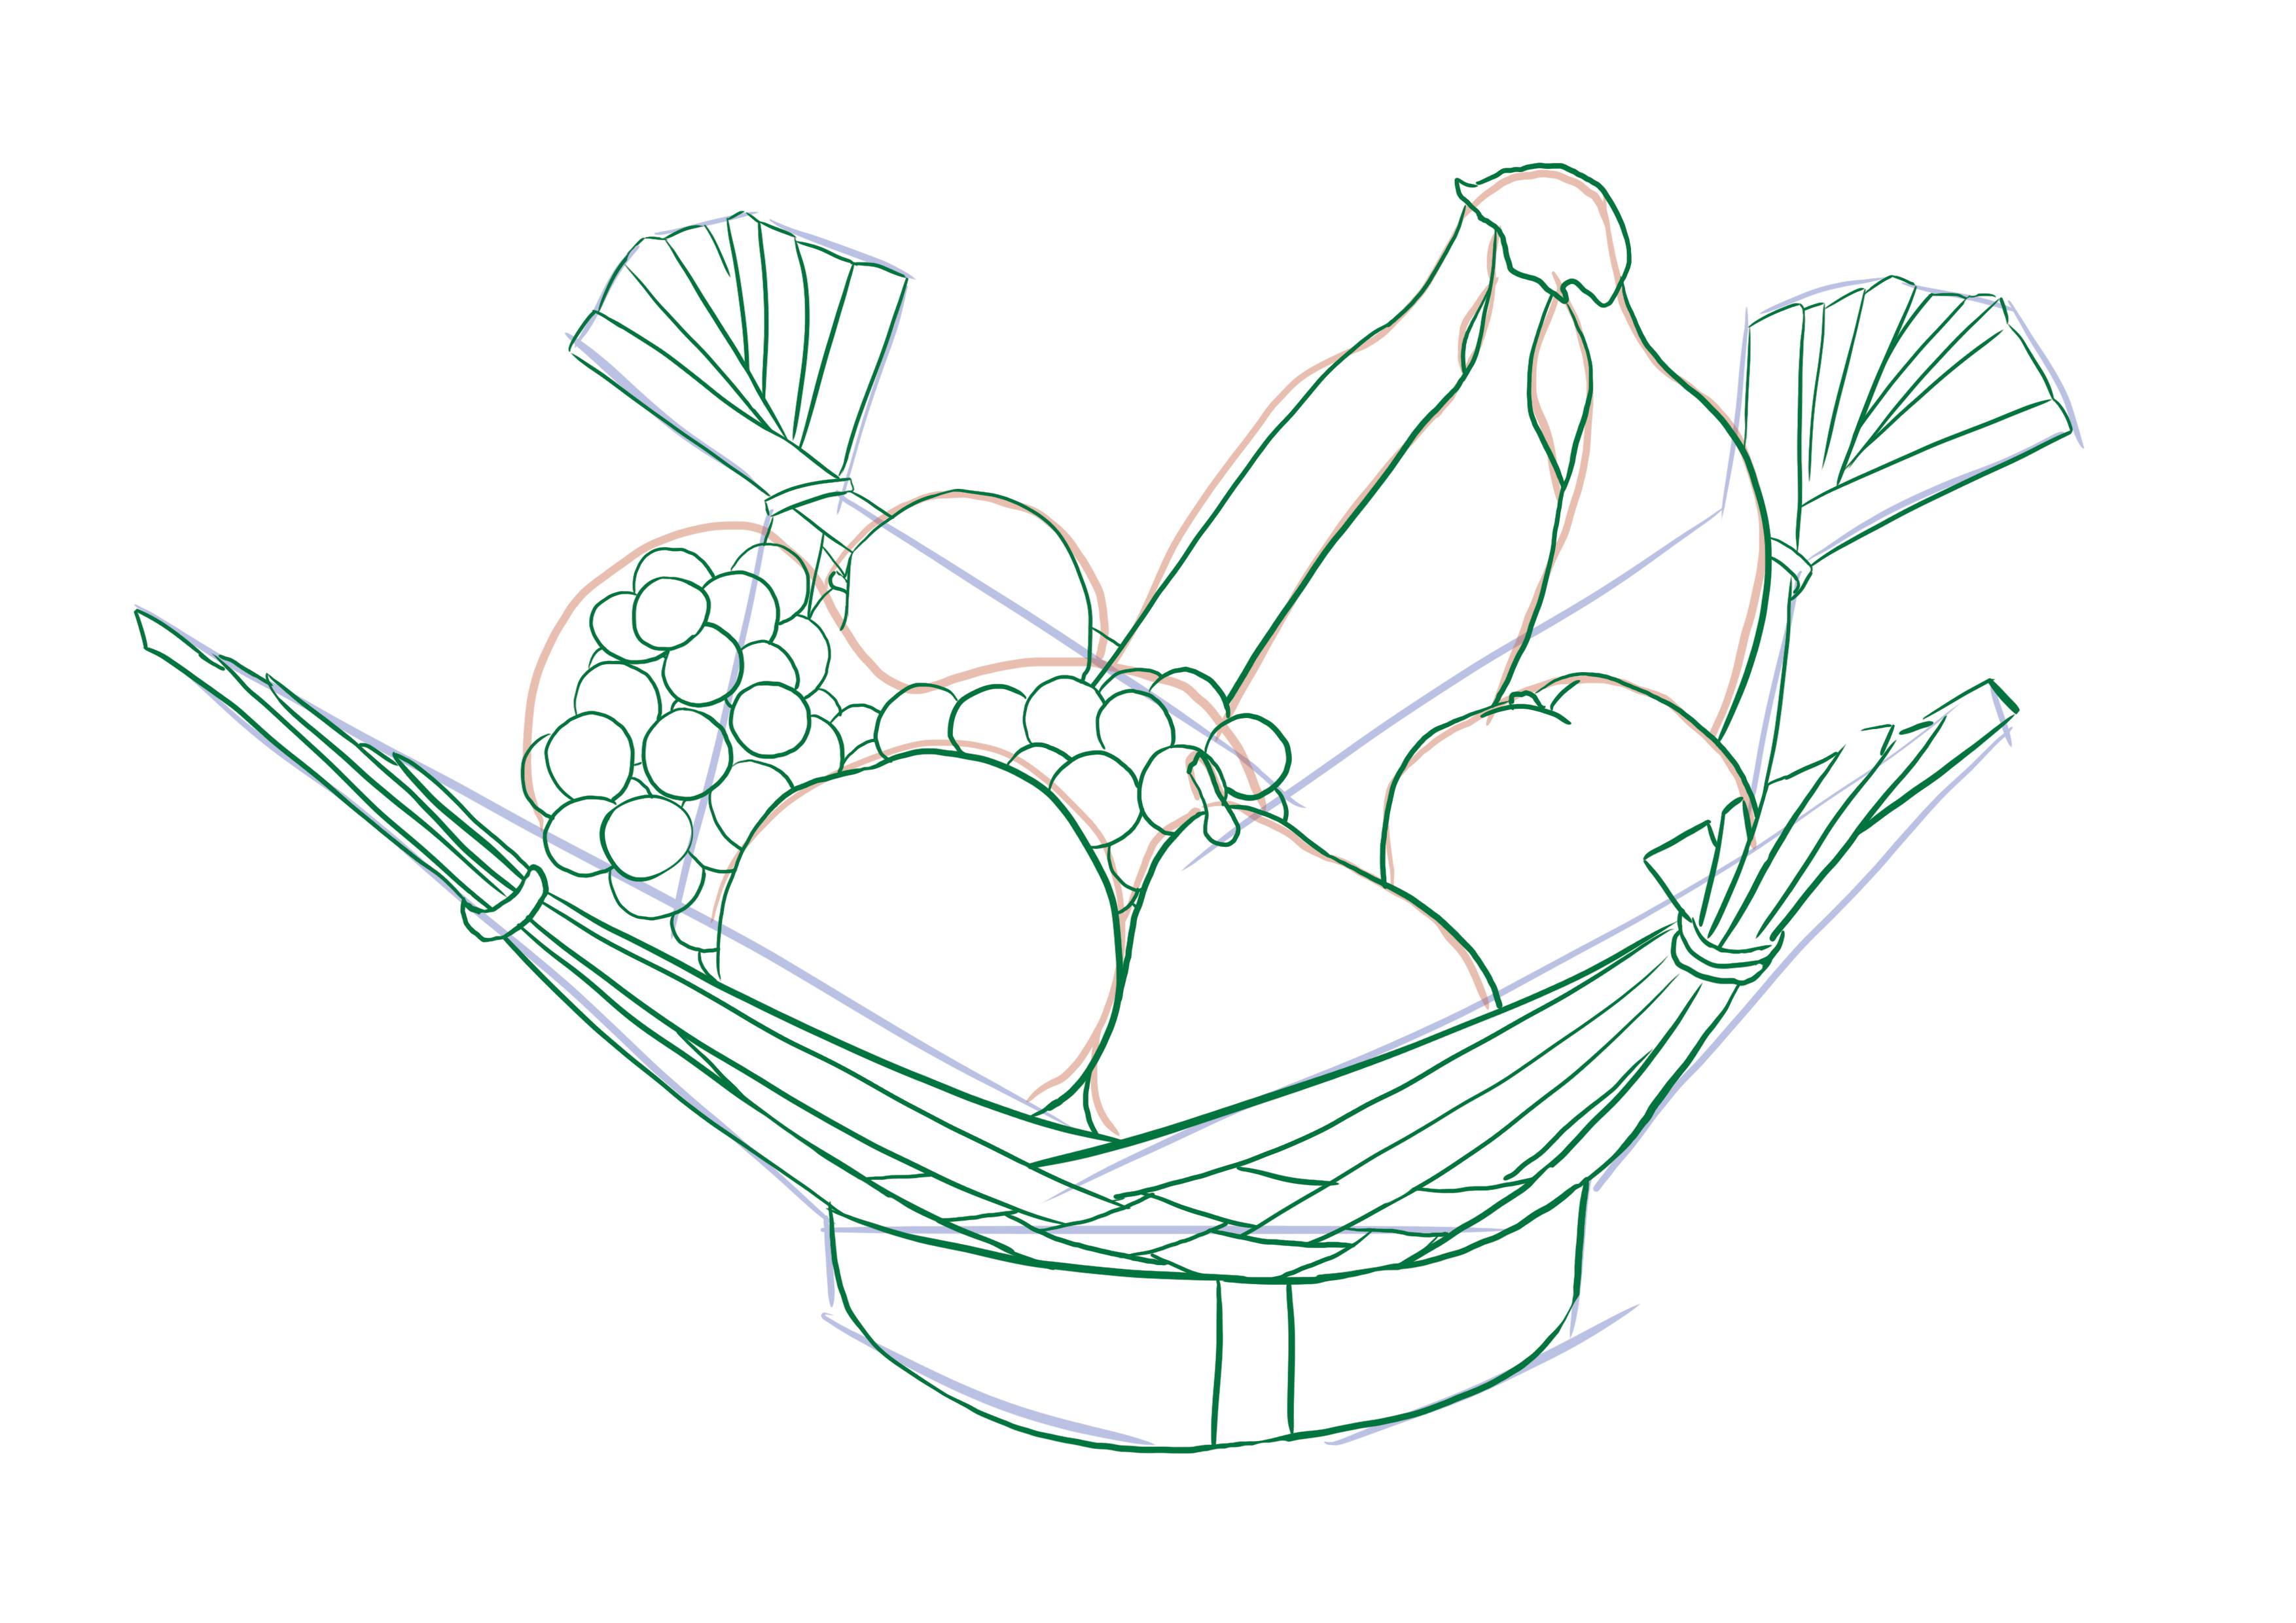
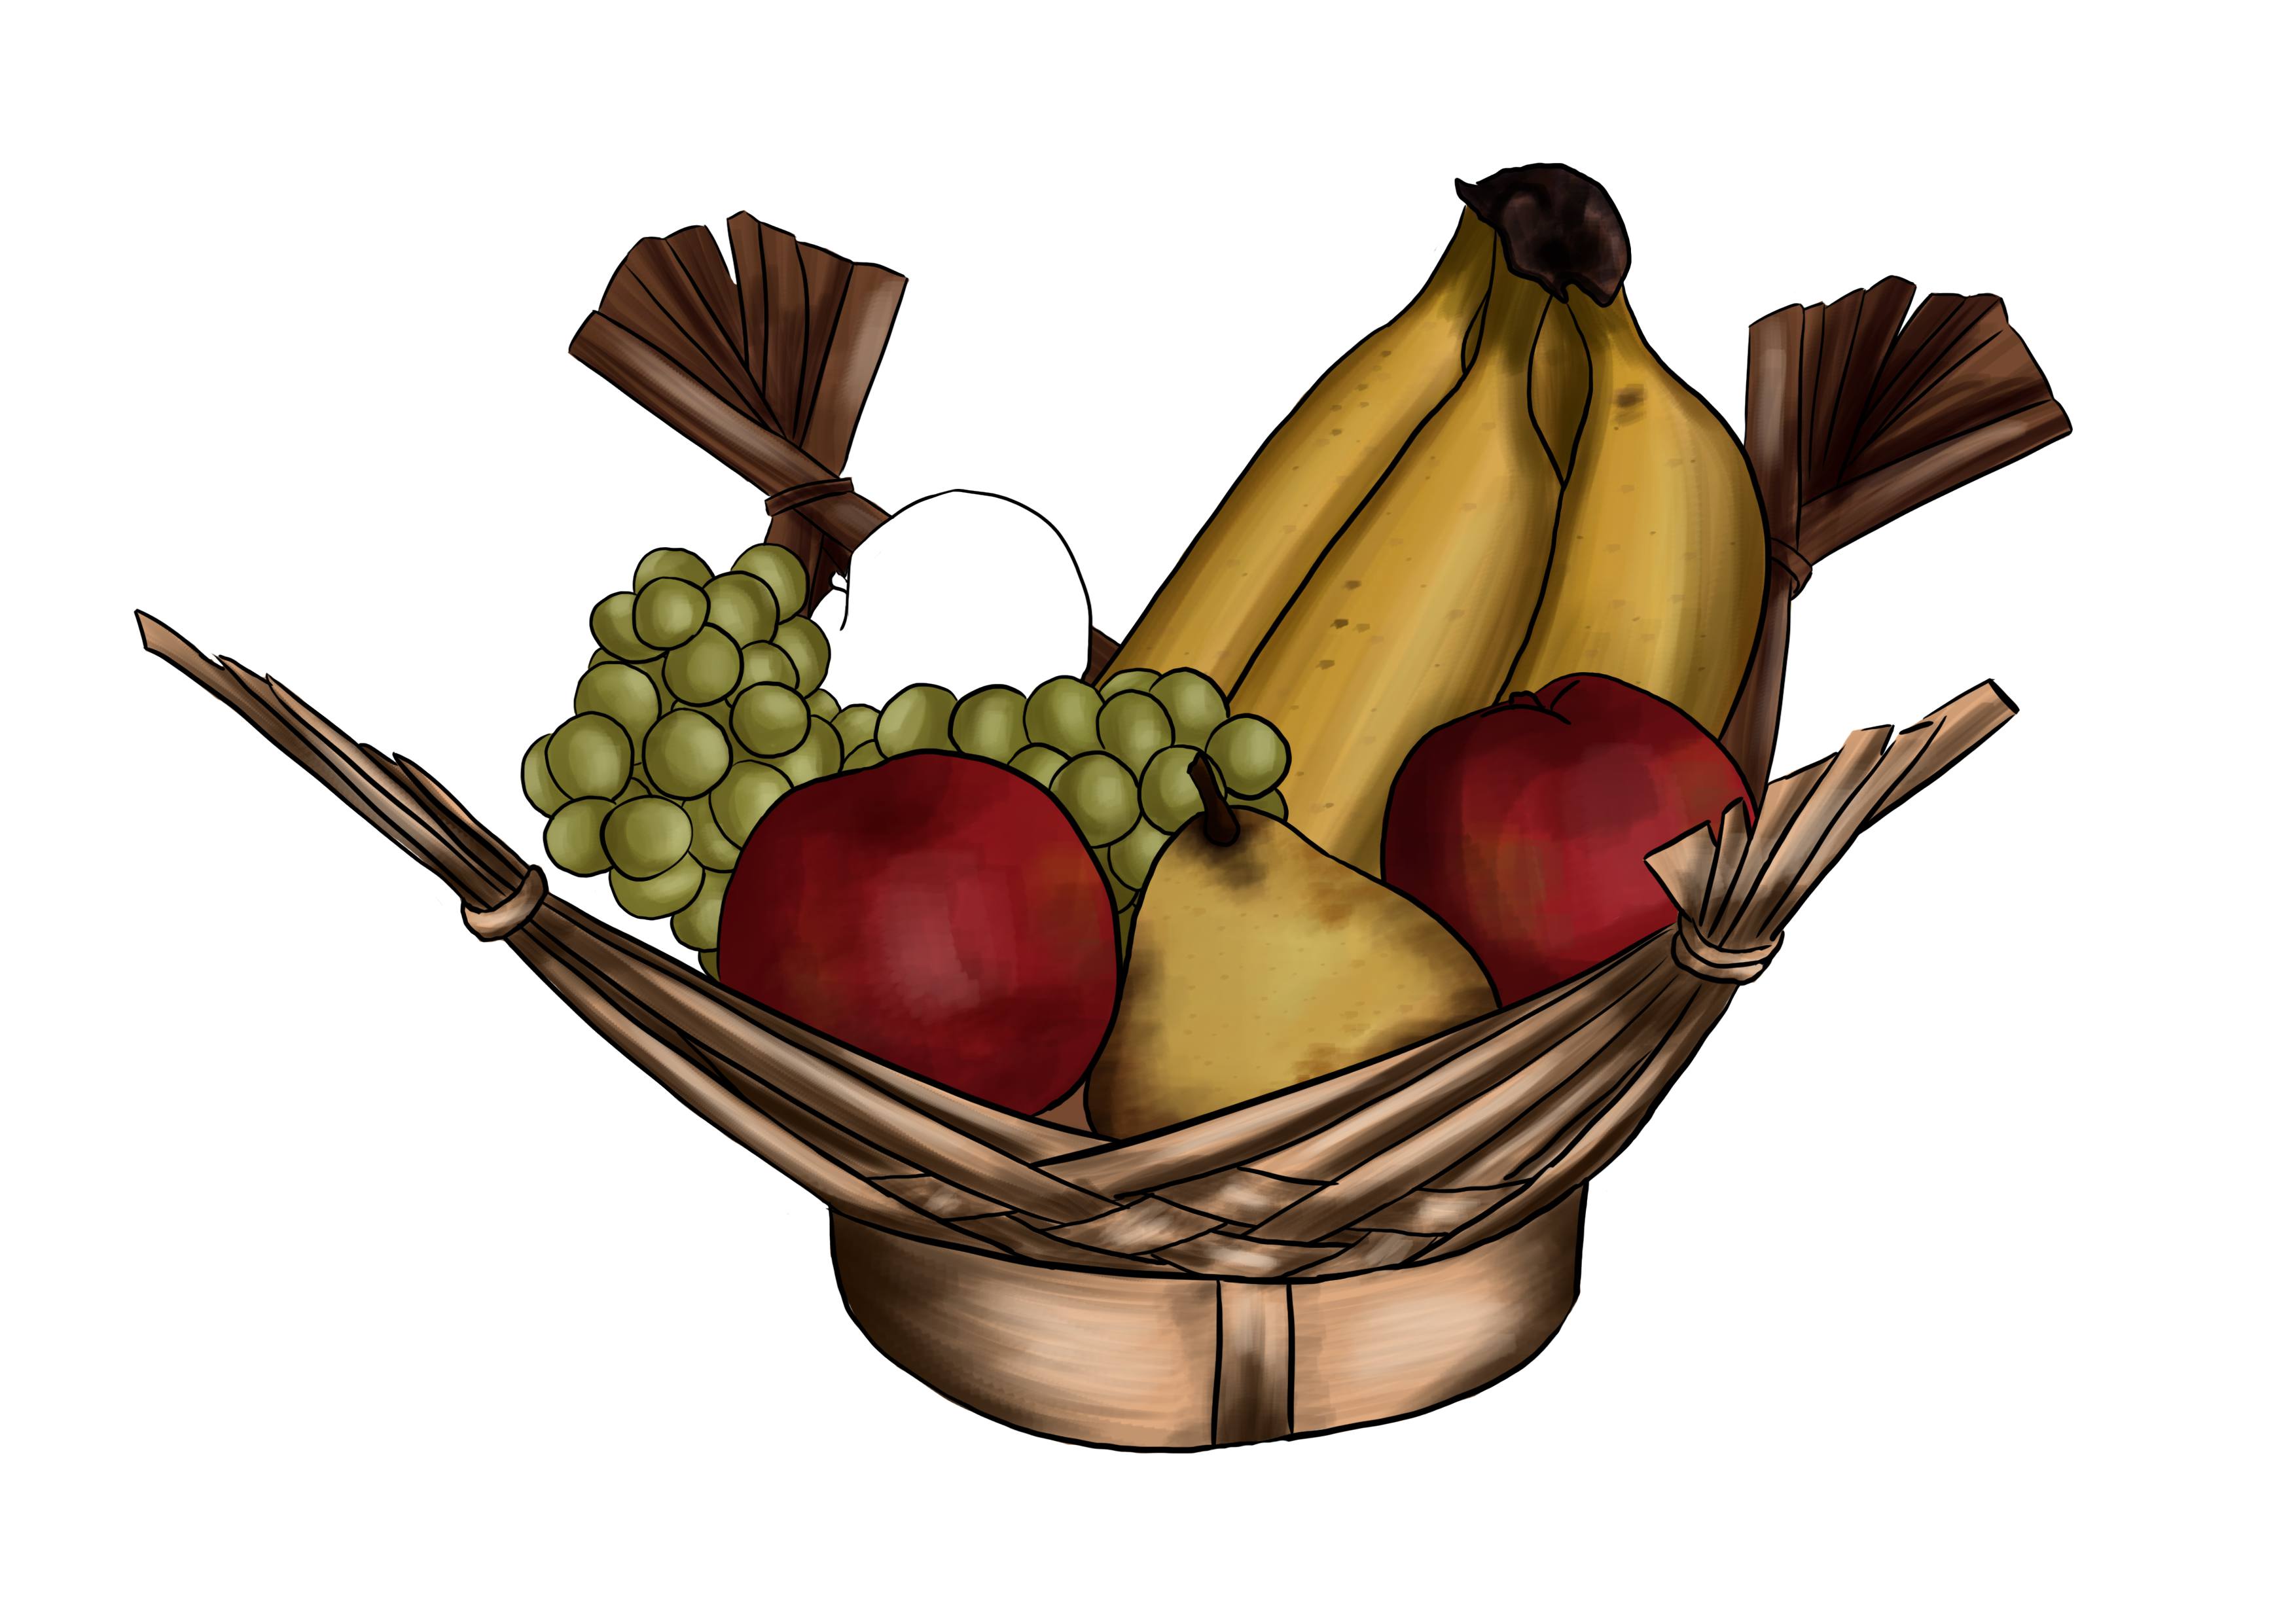
I'm going over my drawing with a clean line.
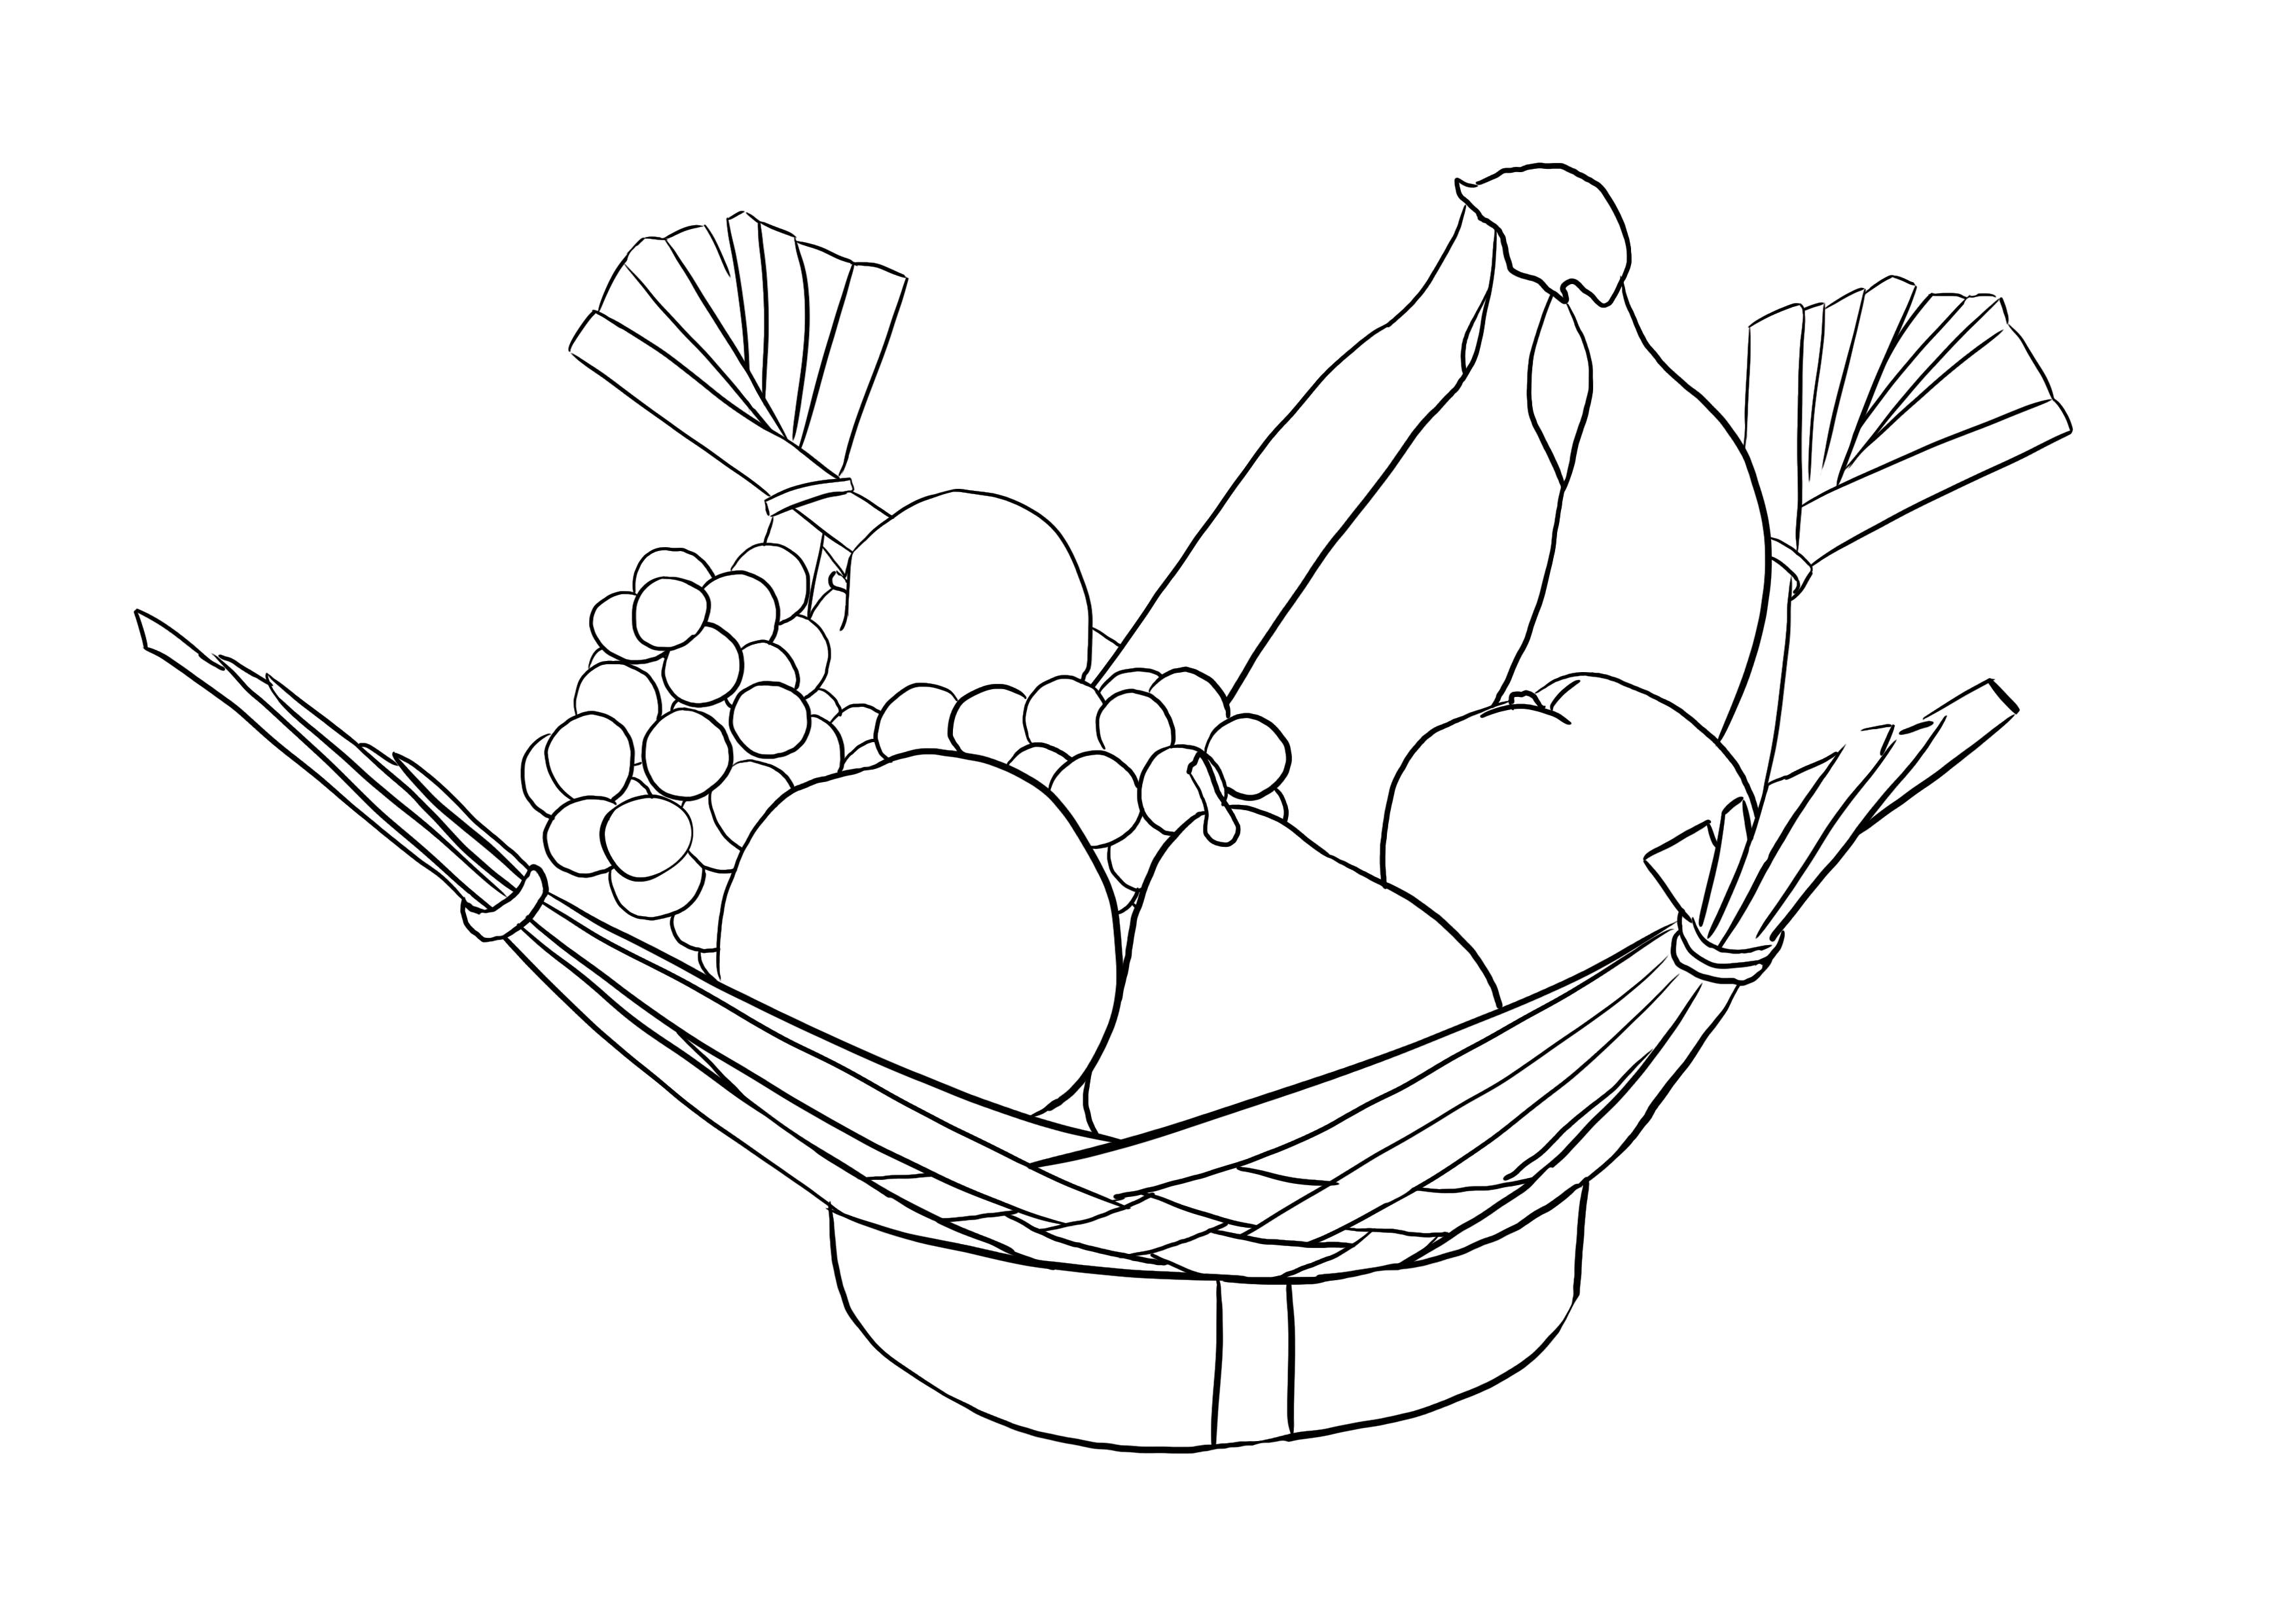
ADDING DETAILS AND COLORS TO THE OBSERVATION DRAWING
We will now proceed with coloring.
You will start by applying the base colors to your drawing.
Generally, the base color is simply the average shade: neither the darkest nor the lightest.
Then I will define where the most important shadows are.
To do this, look at your subject by blinking.
The areas of shadow and light will stand out, and those that you see are the ones that actually exist and that you must reproduce in your drawing.
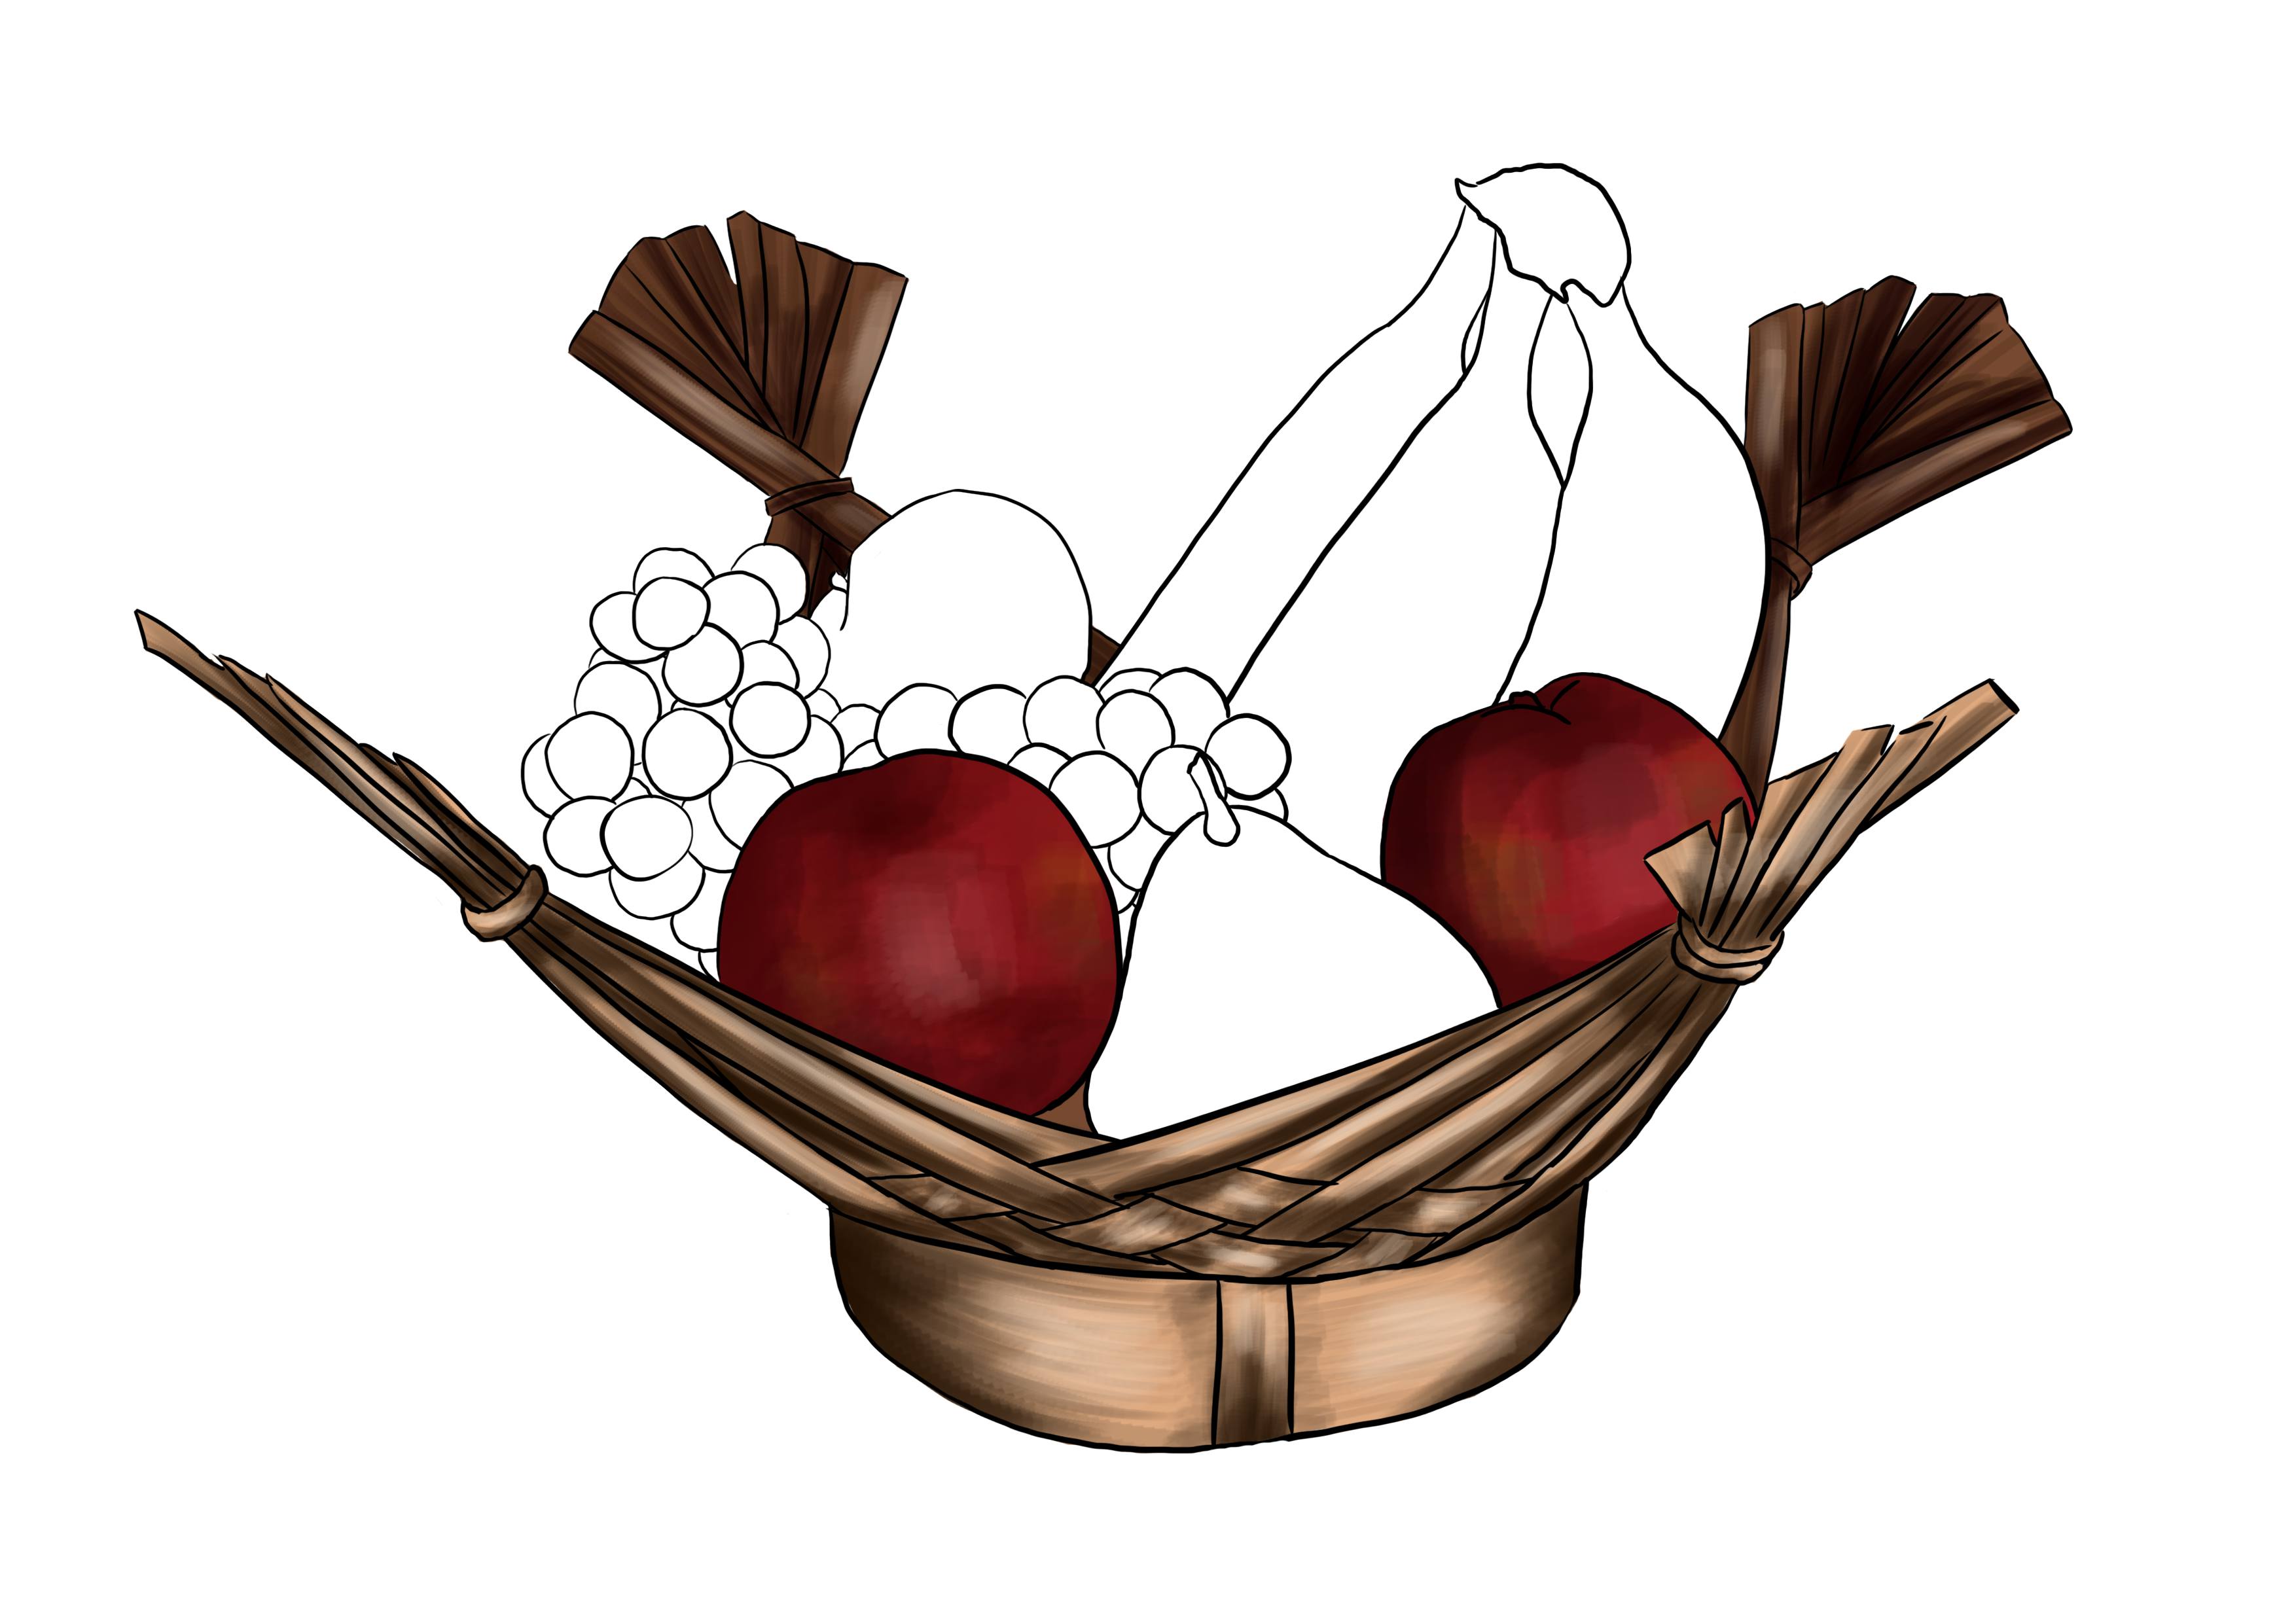
I start by adding the shadows/highlights to the basket.
Now I can add the apples.
I am careful not to blur my blocks of color. If I blur and mix them, it will create something very smooth, almost plastic-like, and so, the desired texture will not be there.
By letting your pencil/brush strokes show (or whatever tool you're using for coloring), it will add texture and therefore give your drawing life.
I do the same thing with the pear.
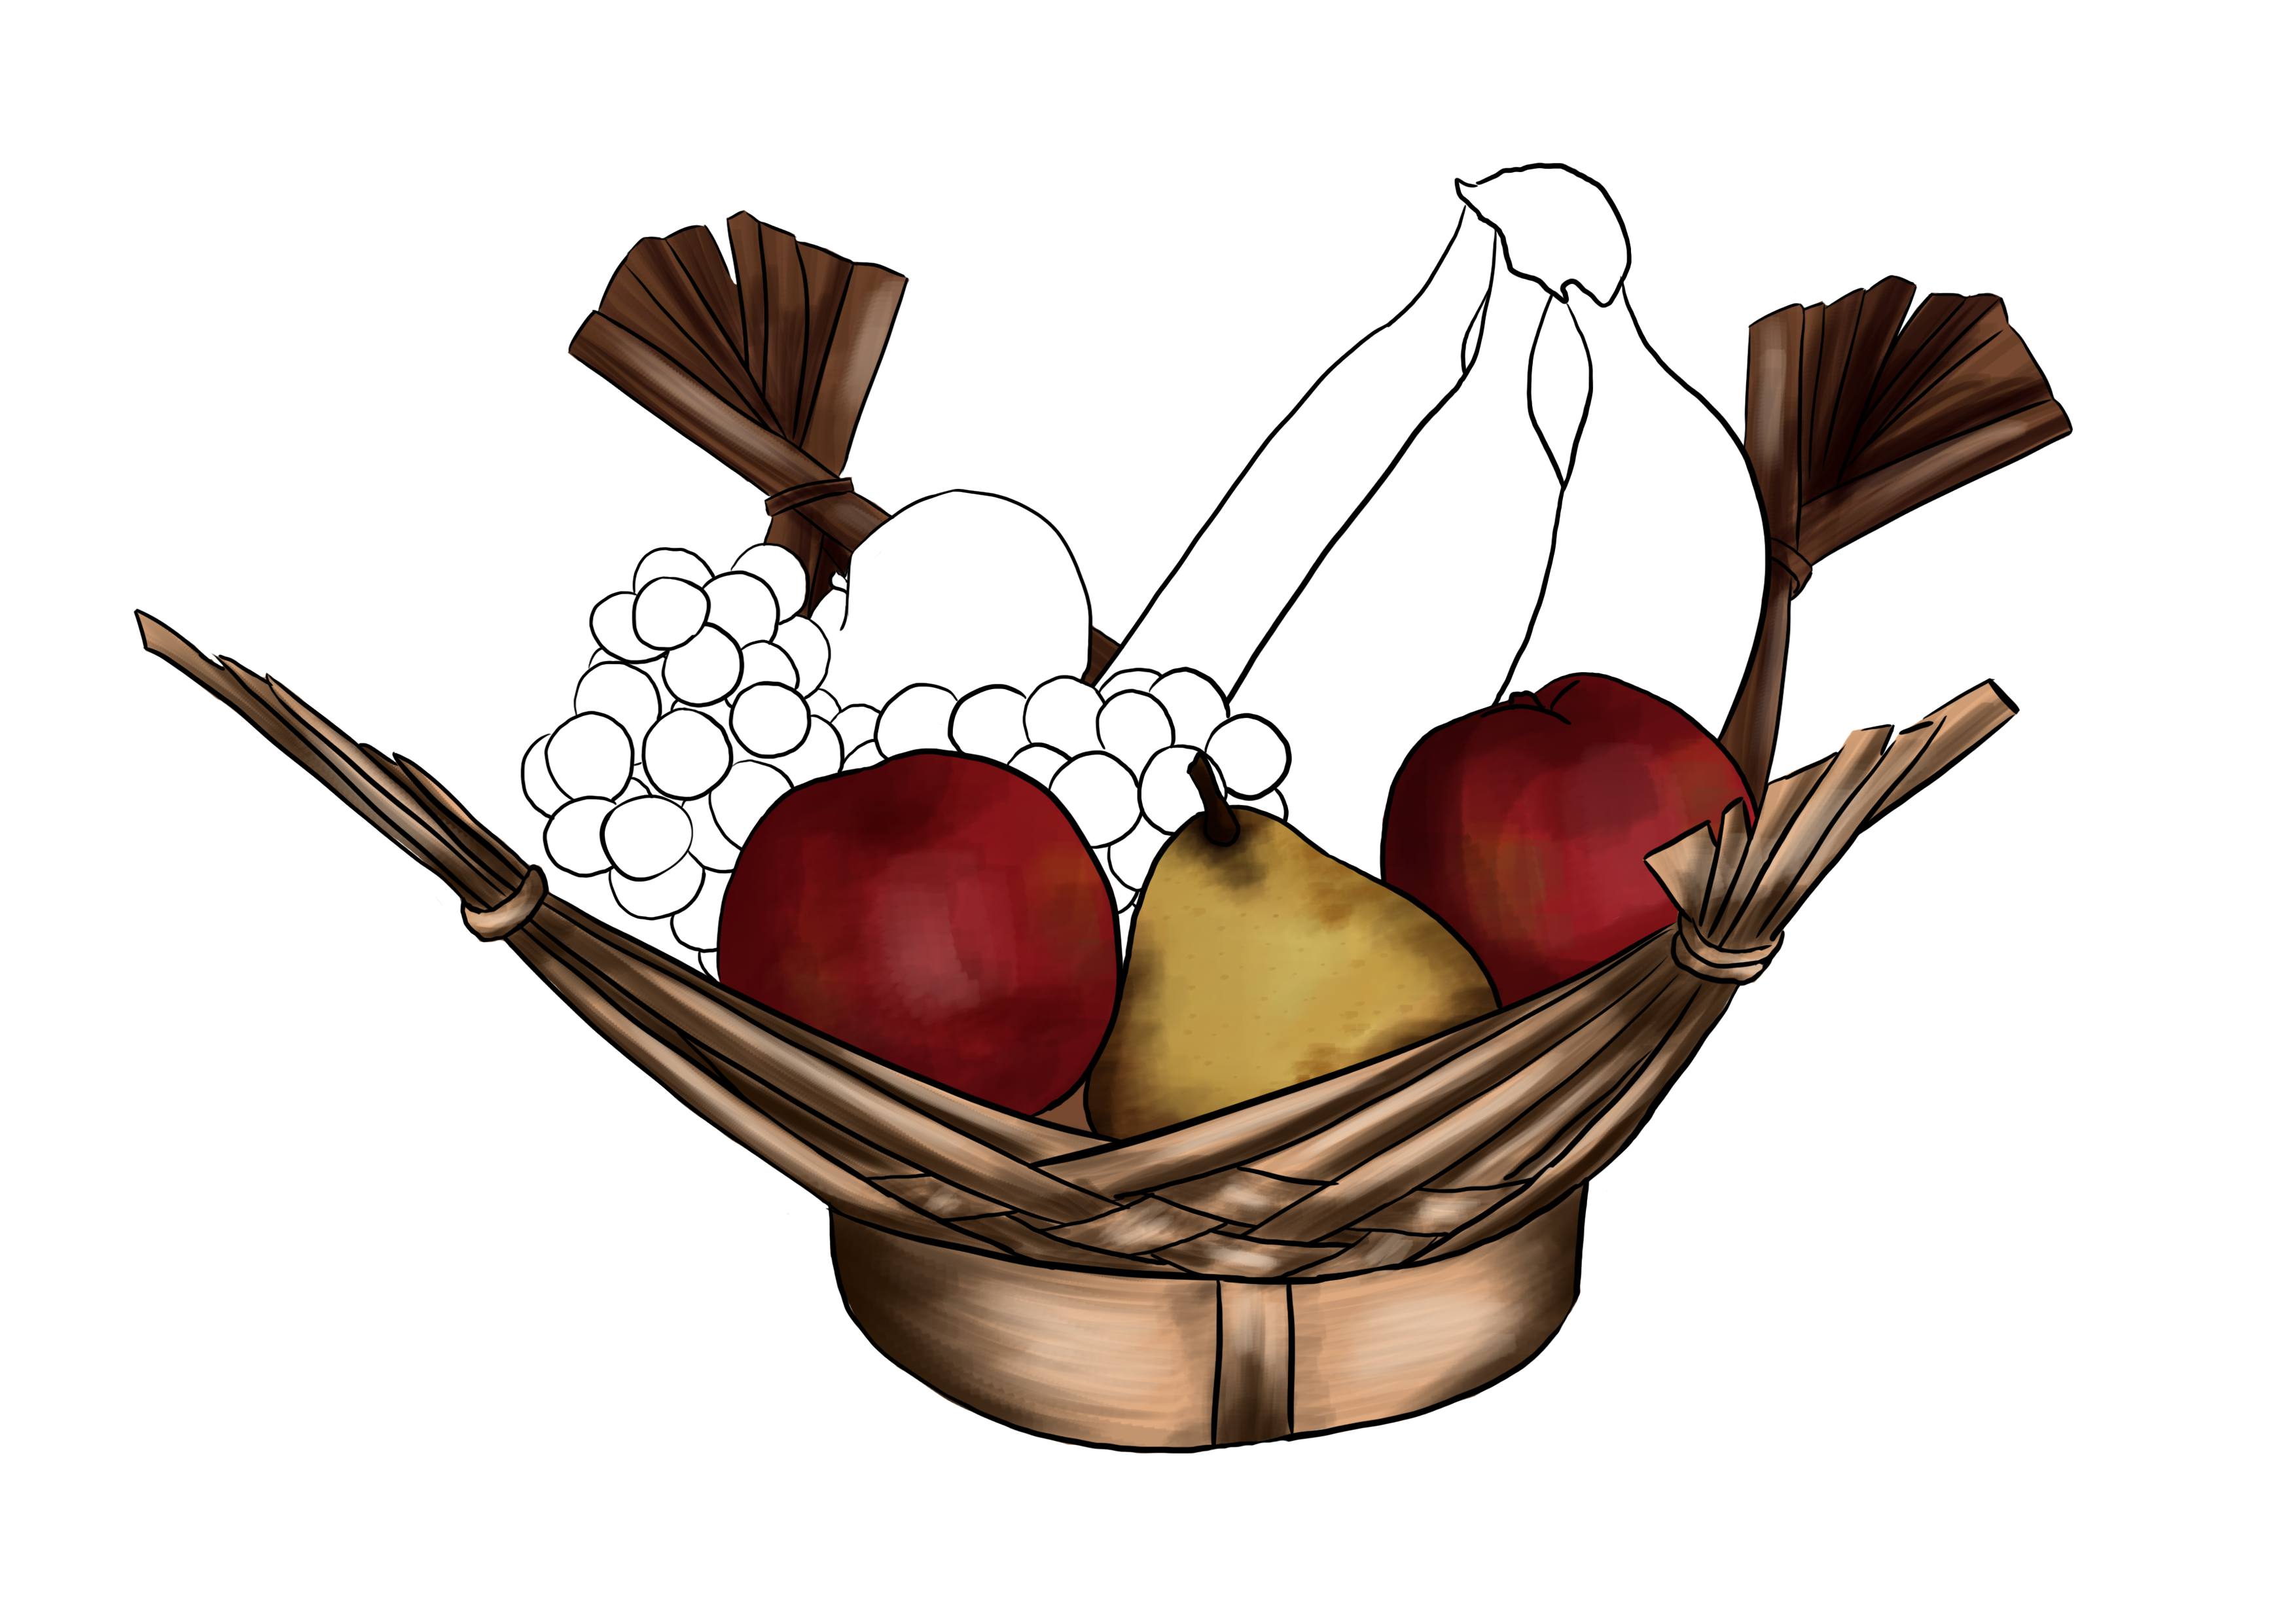
I continue with the bananas, making sure to add some small brown spots, because perfectly yellow bananas are only seen in cartoons.
Now I'm moving on to grapes.
Grapes are generally quite transparent when viewed up close. To achieve this transparency effect from a distance, I use a strong light that's slightly yellowish-white (because pure white light doesn't exist). This reflection will give the impression of a very fine texture.
I finish with the orange by accentuating the strokes of my tool to give an impression of roughness.
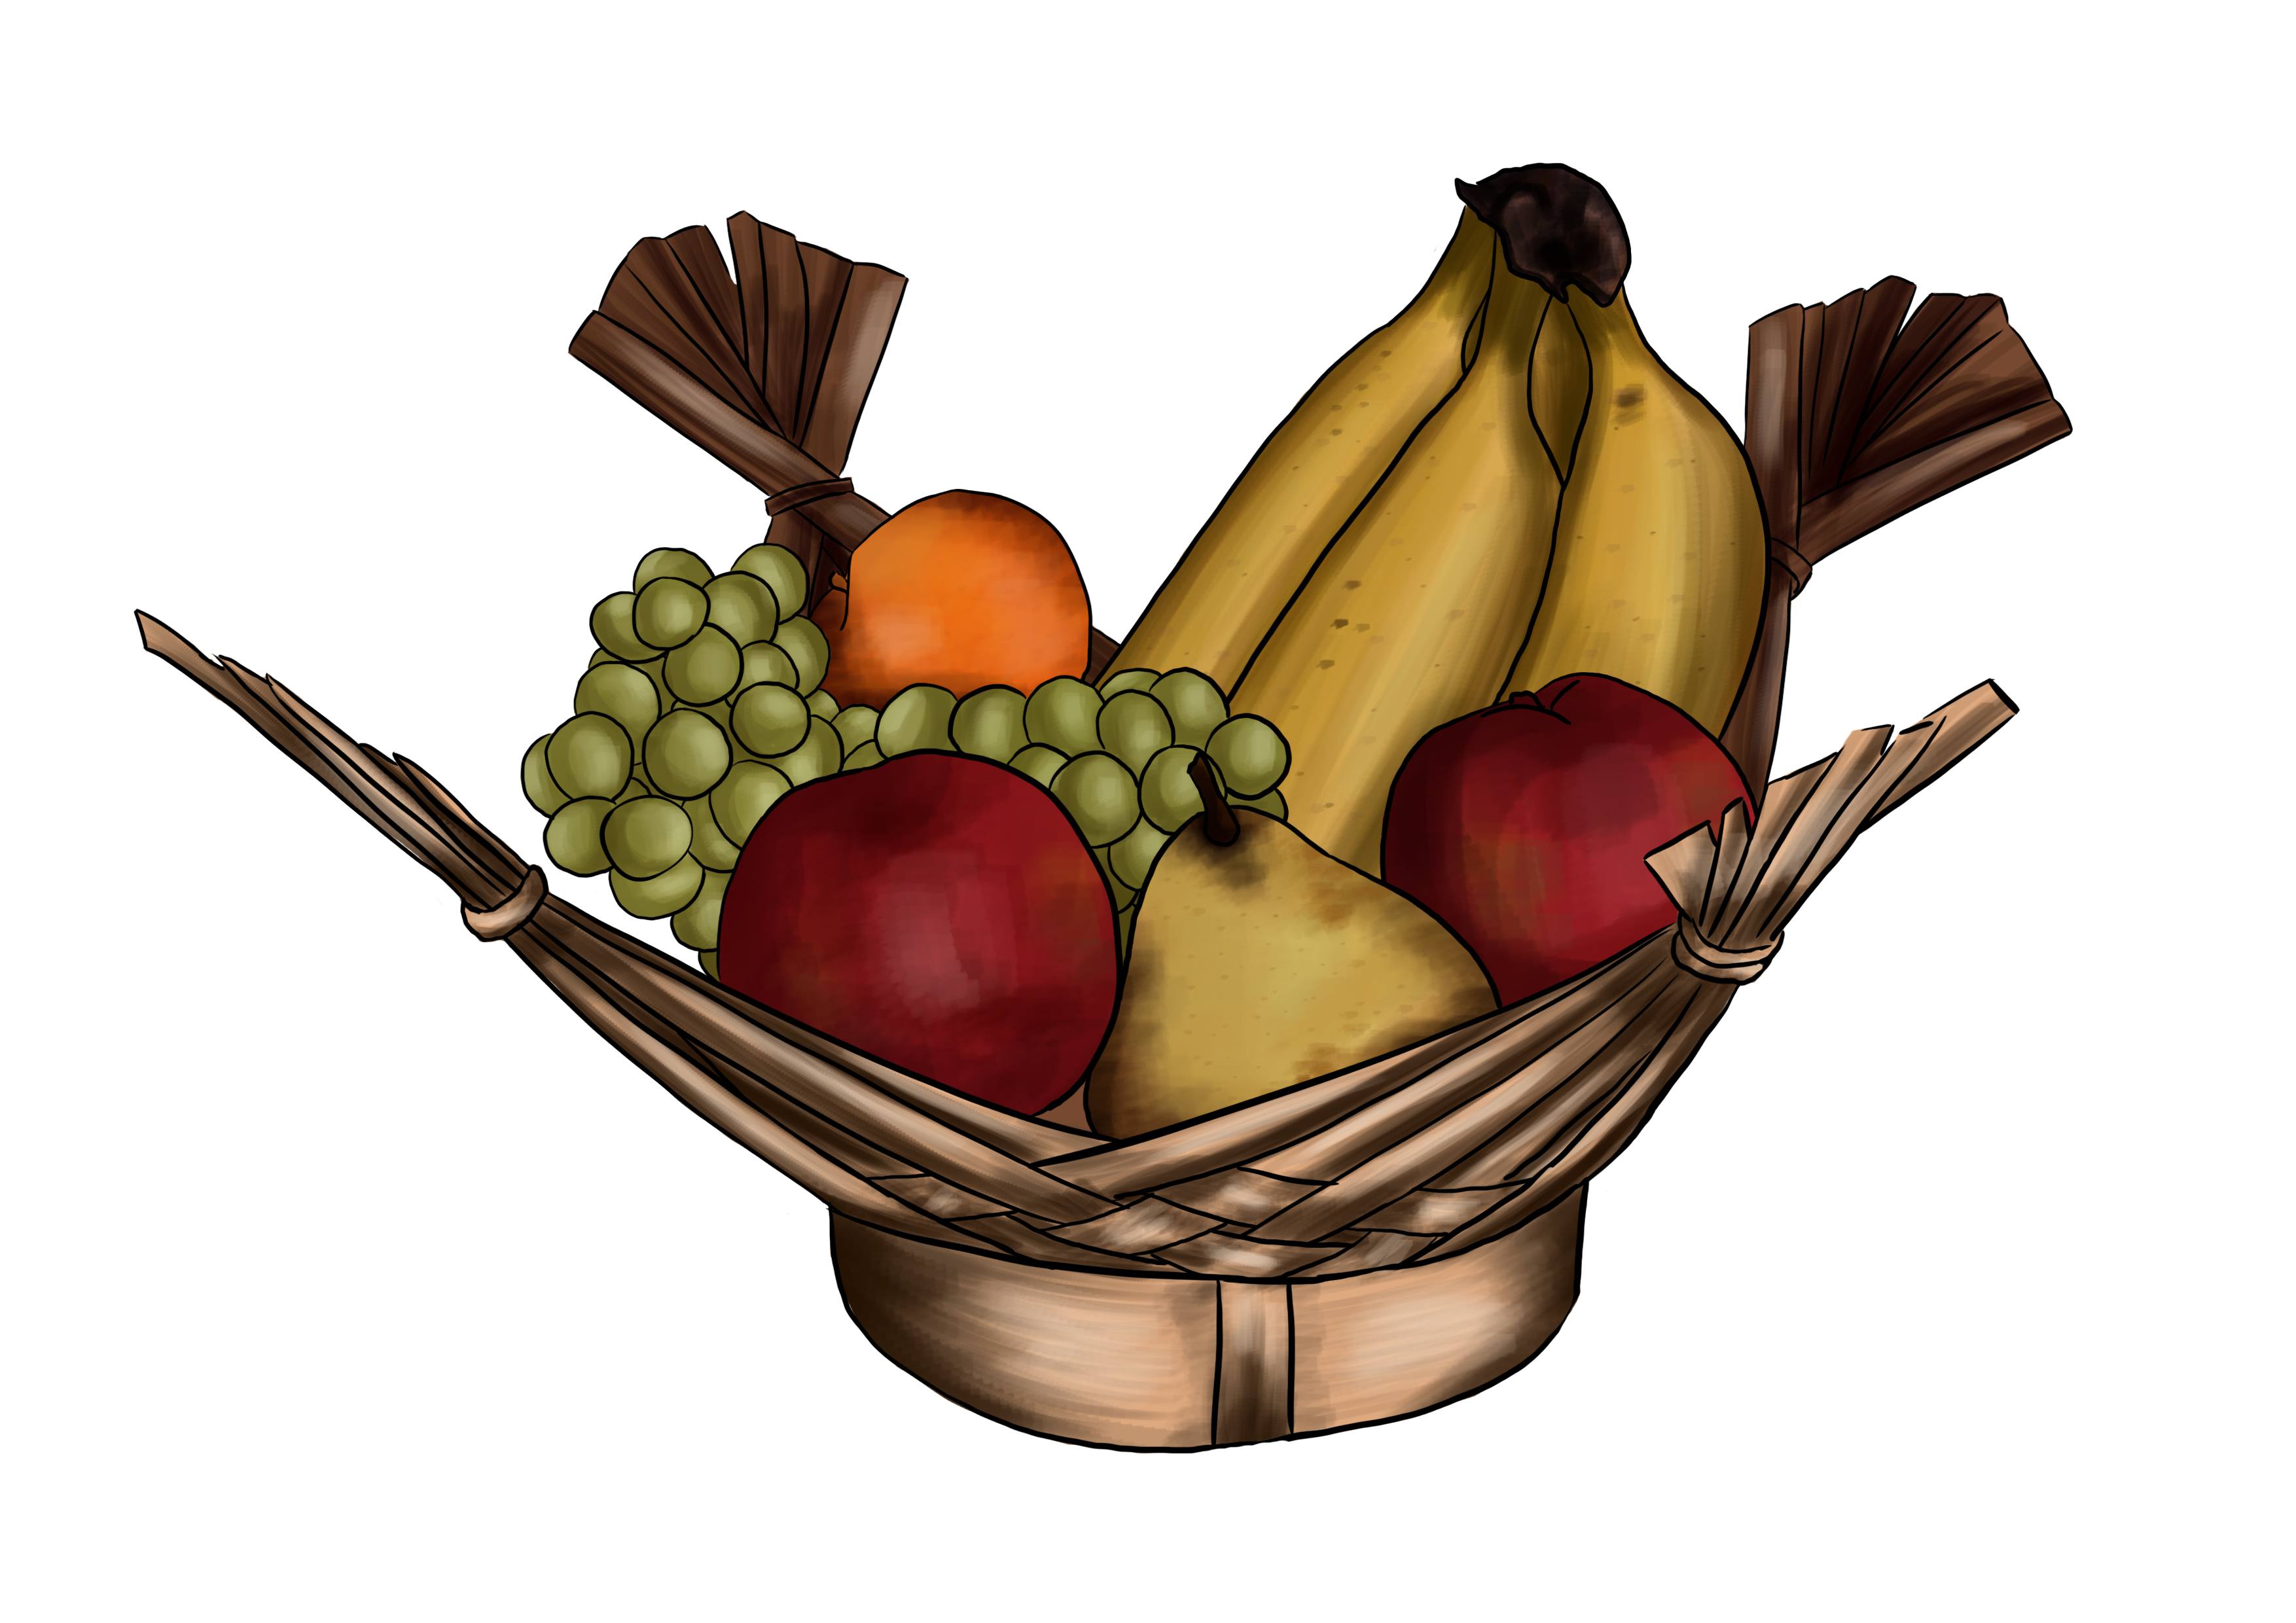
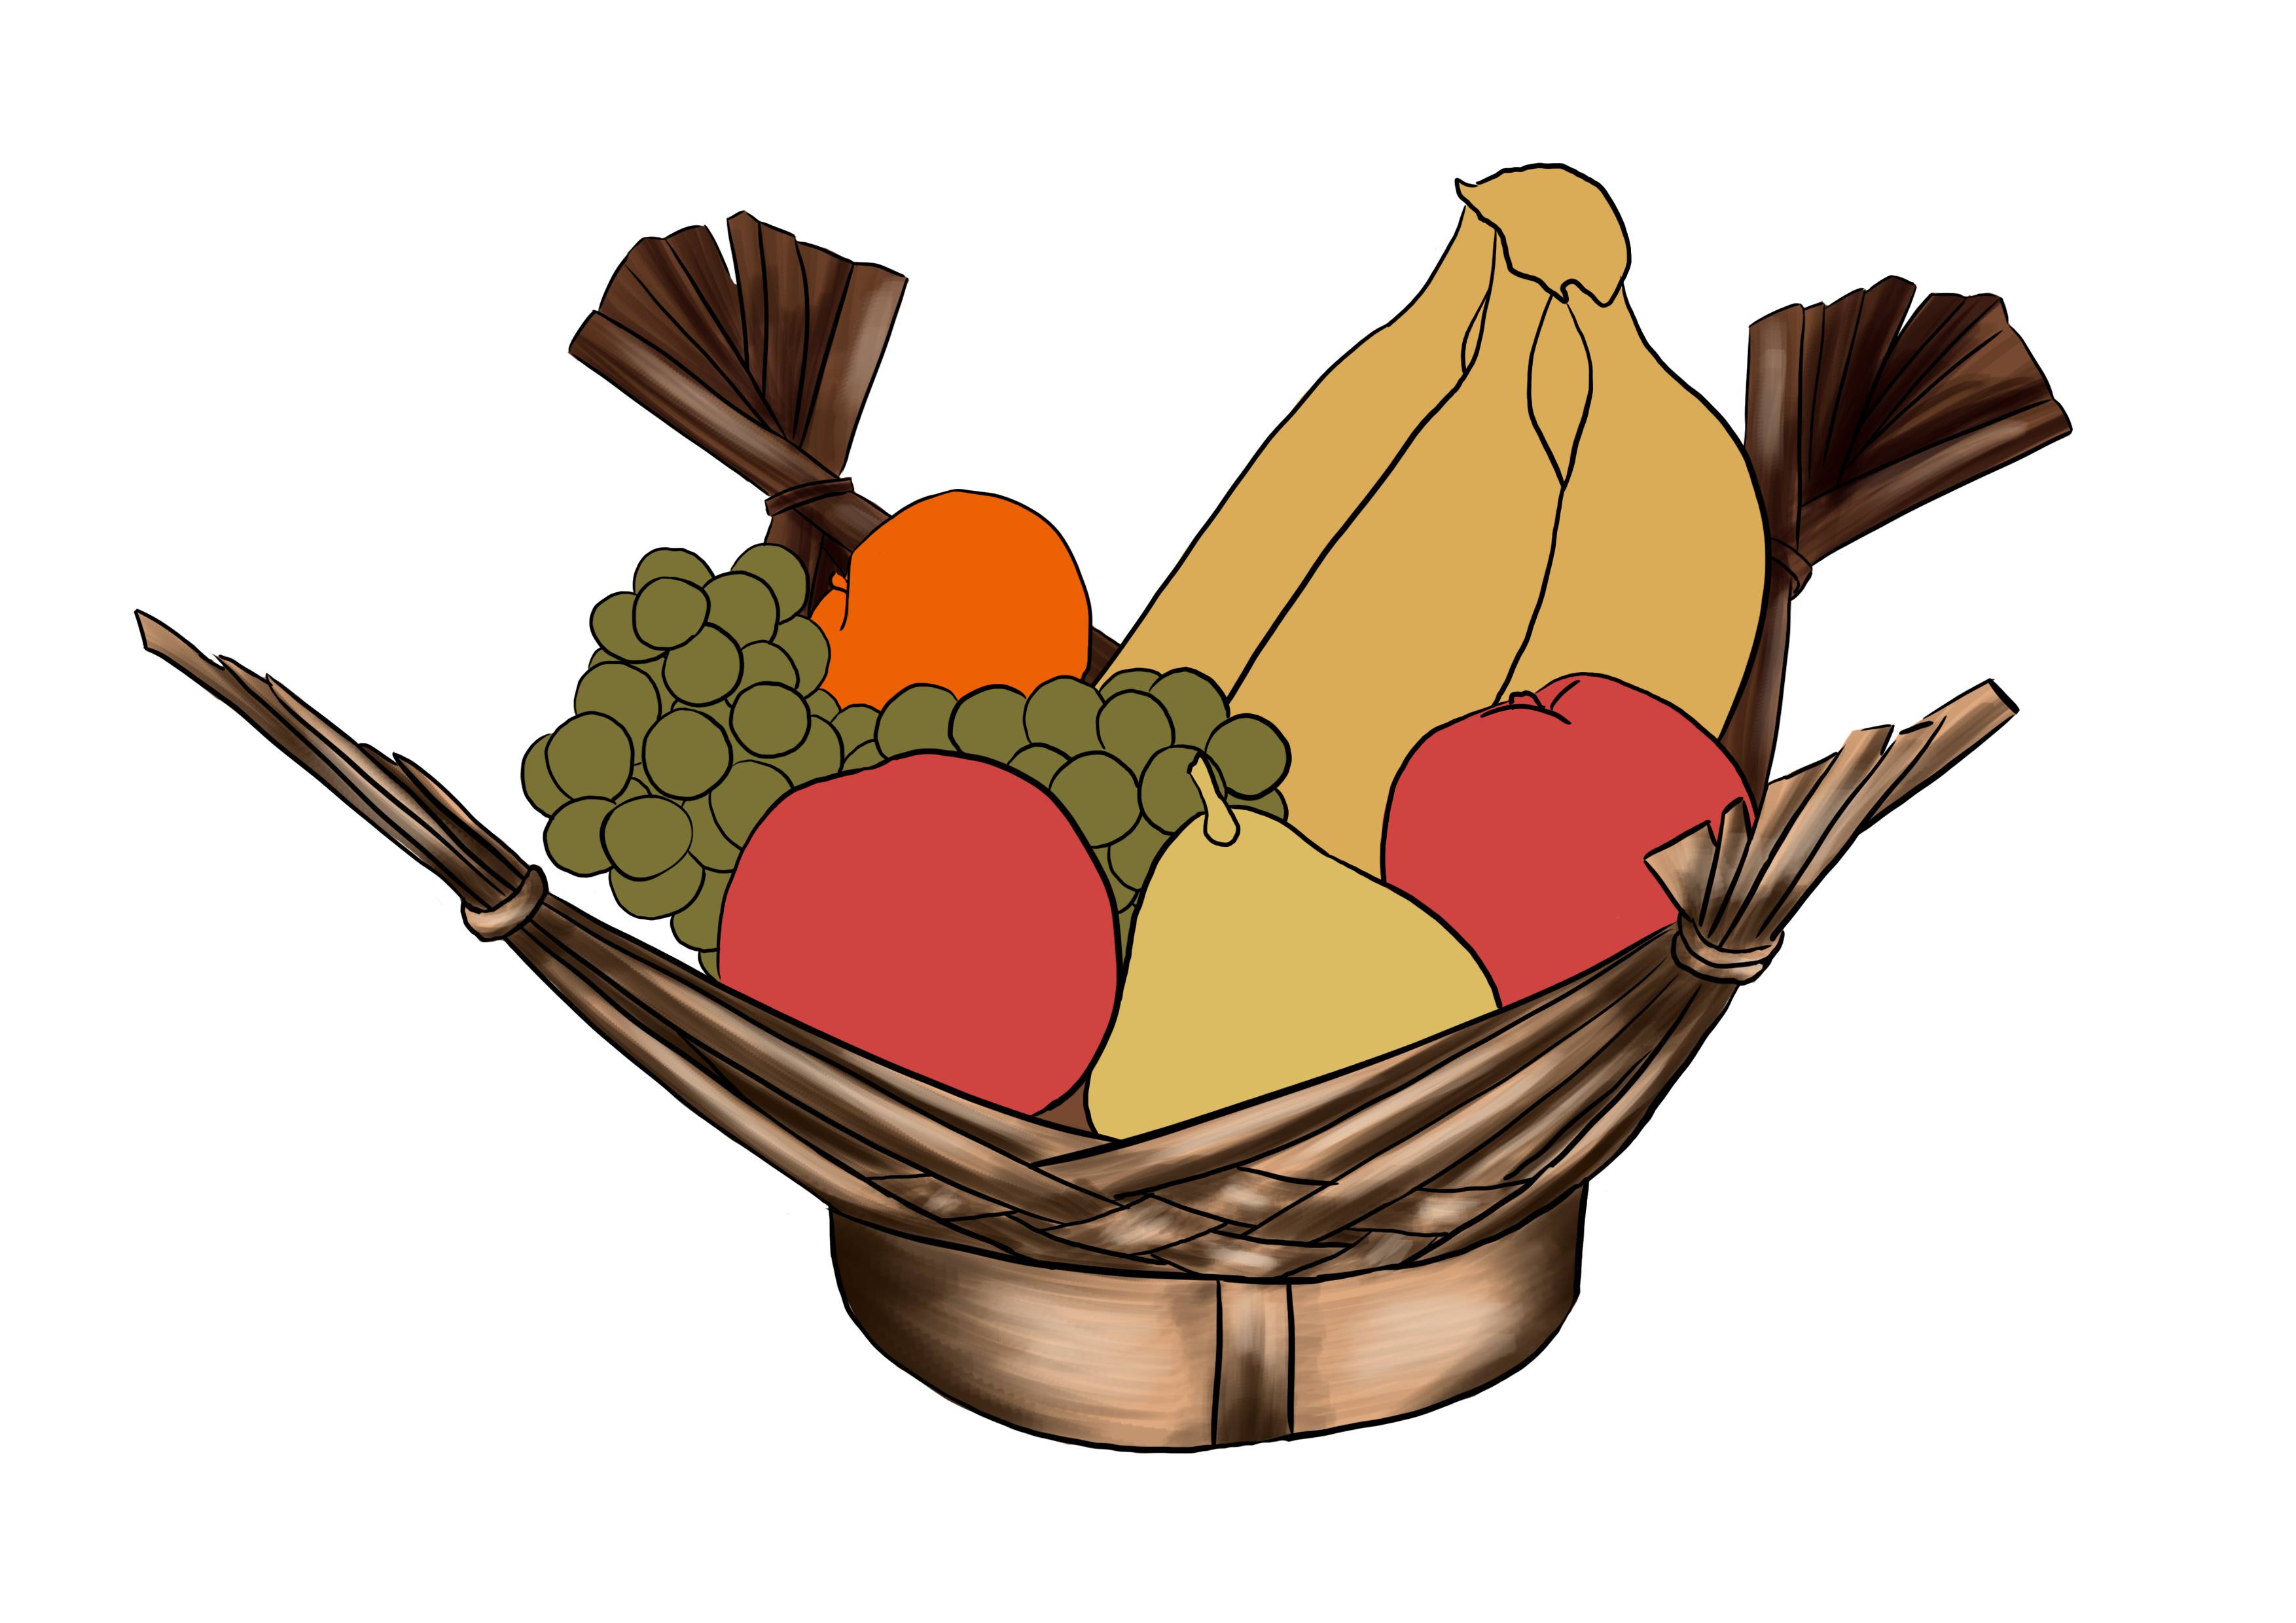
The basket, in itself, is finished.
There, we worked on each element separately because we had the time, but if you need to draw quickly, like for a competition for example, you need to work on the whole drawing step by step.
Do not add shadows and highlights for each element at once.
Apply colors to the entire drawing, add the shadows for the entire drawing, and then the highlights for the entire drawing.
Work on your subject as a whole, and not as separate elements.
Like this, even if you don't have time to finish your drawing, you can submit a harmonious image and that's what matters most!
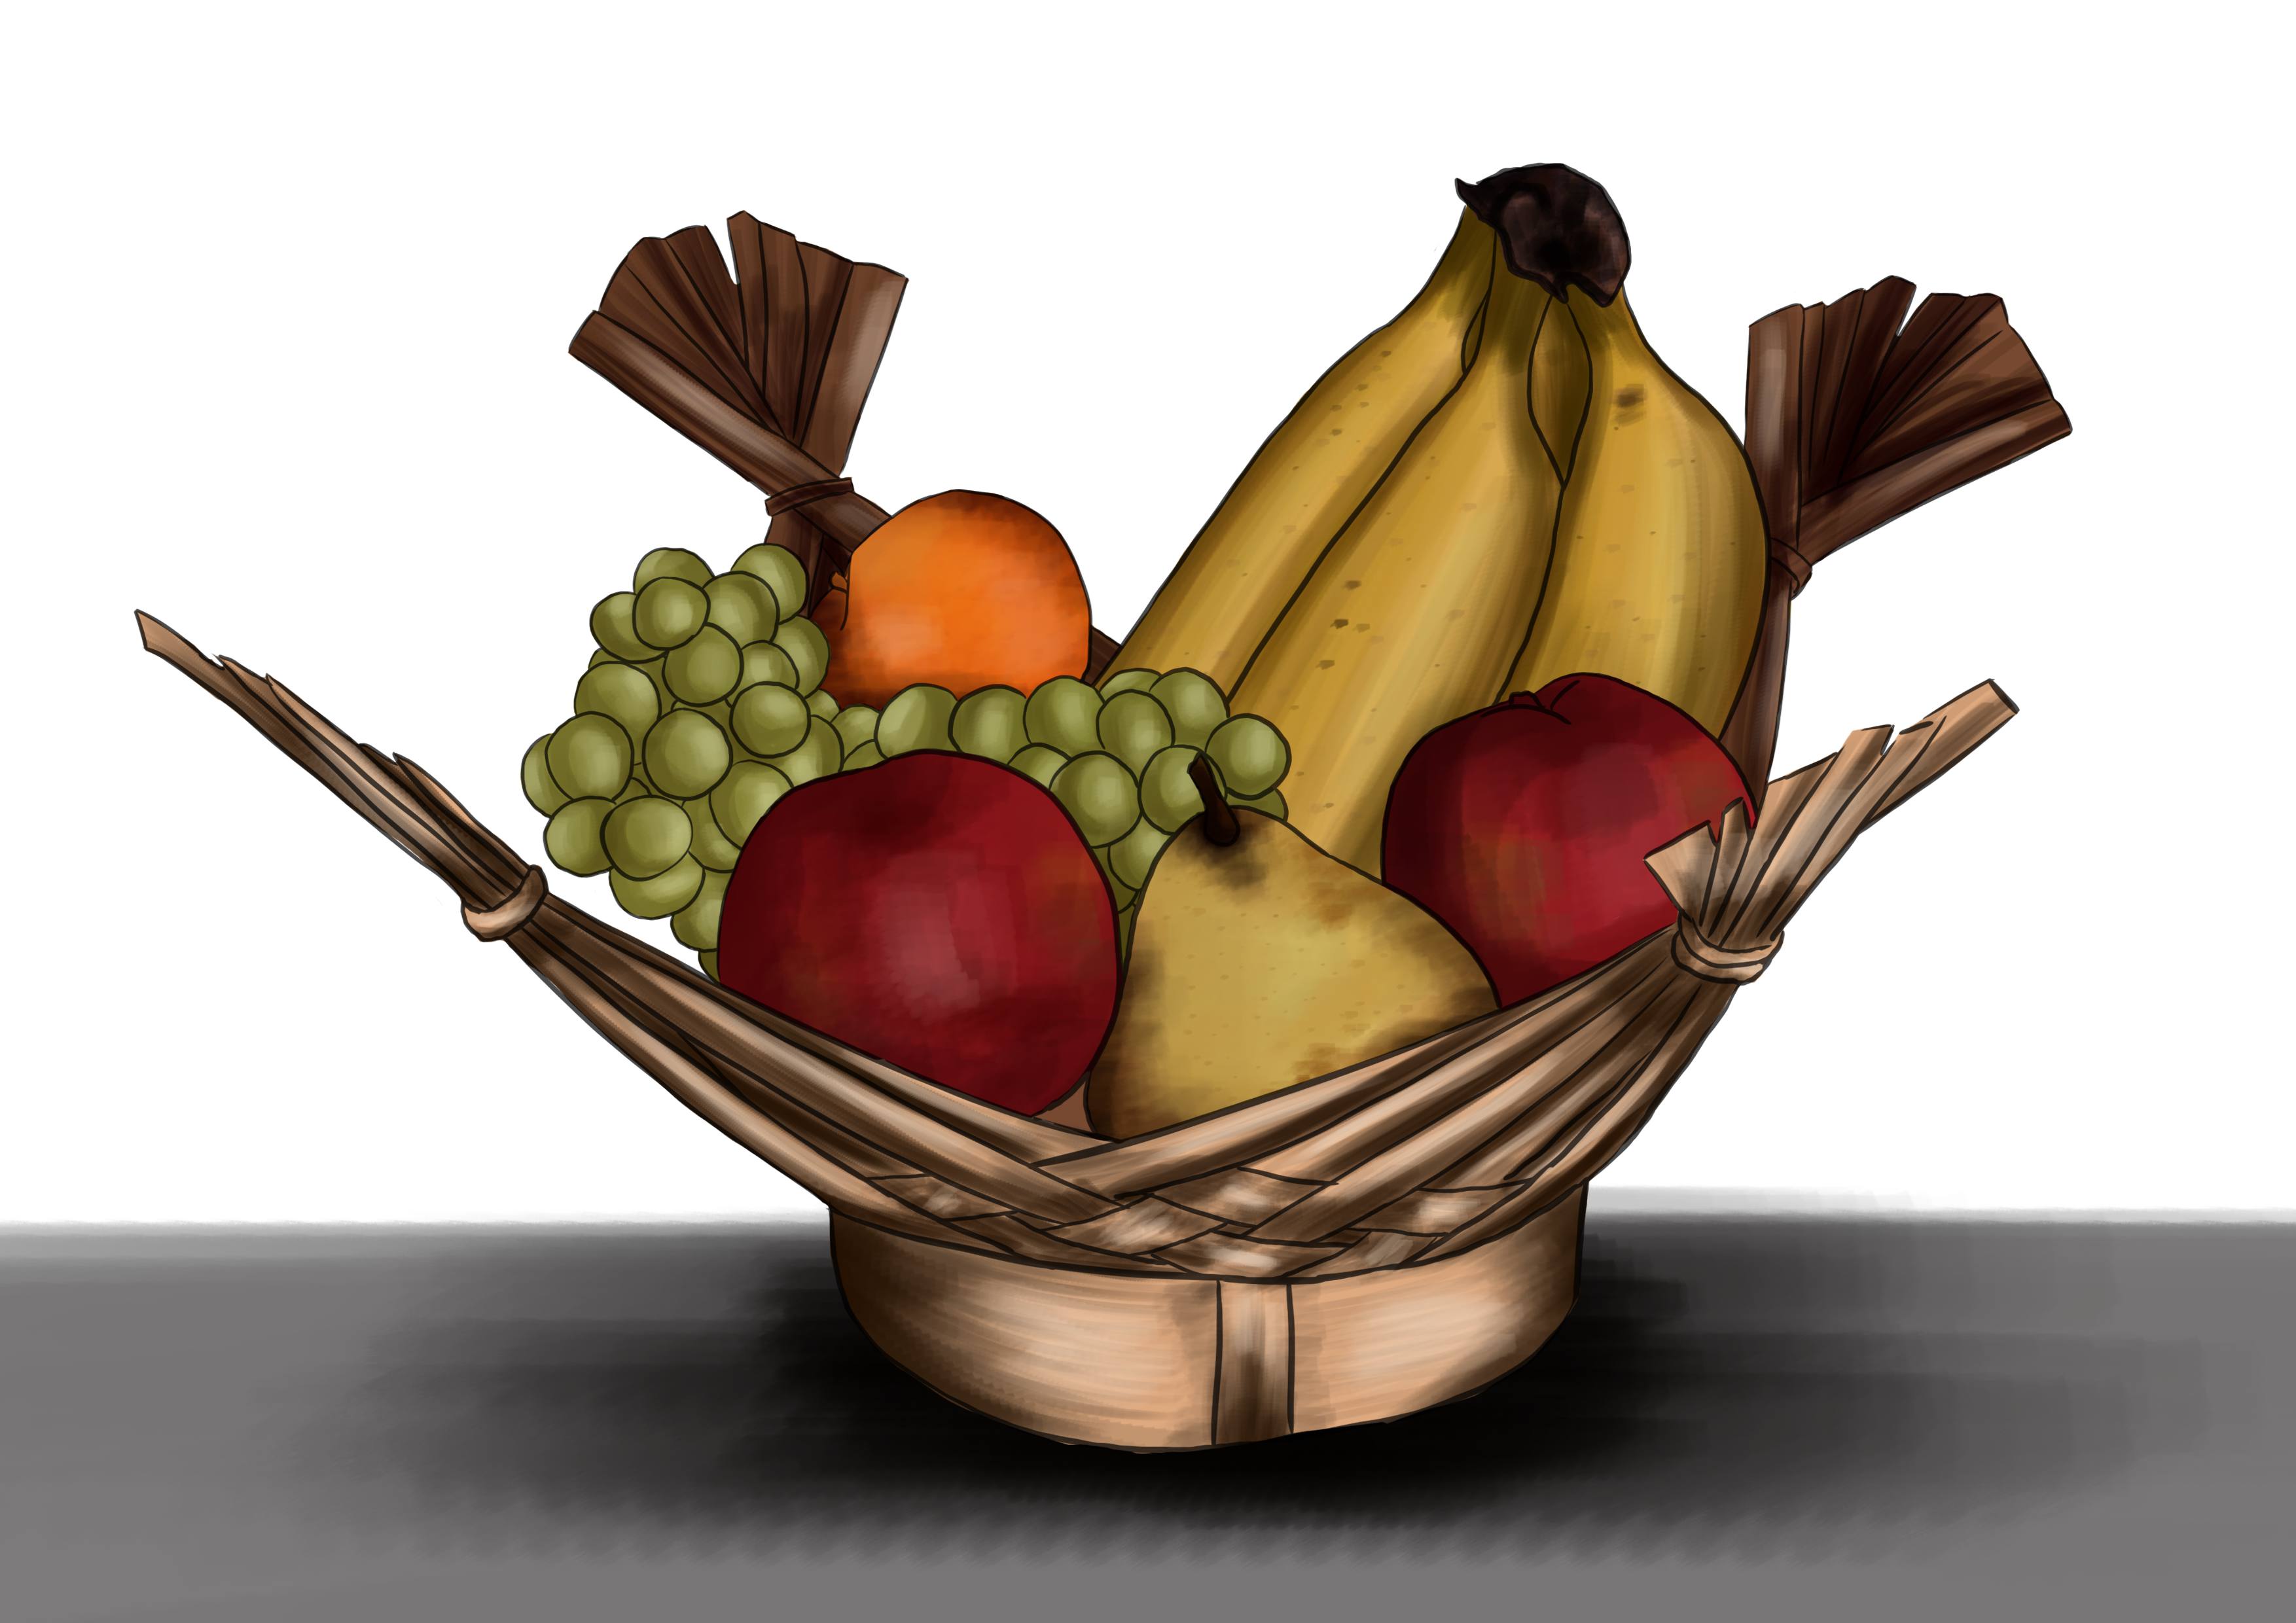
Finally, your drawing is successful if your line work is not necessary. A successful drawing must be understandable no matter how it is presented.
If you are on a computer, it's easier to do, so if you are working with a tablet, do the test regularly.

While you're drawing, remove the line work from time to time and see what it looks like. If people can understand your drawing, it means you've succeeded, if not, it still needs work ;)
CONCLUSION
Here we are, our article on observational drawing is coming to an end. I hope you enjoyed it and, most importantly, that it helped you understand the value of observation in drawing! Take the time to practice as often as needed, on as many models as you want.
Try imposing time constraints on yourself in order to target your shortcomings, understand what works or not. In short, observe! :)
Illustrator and writer: Coralie
Discussion
This will be my second tutorial! 😊
For now, I haven't finished yet, but I'm really stuck on step 5, where I need to draw the front of the basket in detail...😞