How to Create Cubism Artwork
Hello everyone, today we're going to explore a painting style that breaks the rules and opens the door to creativity: Cubism.
Born at the beginning of the 20th century with Picasso and Braque, this artistic movement consists of representing a subject from multiple angles at the same time, simplifying it into geometric shapes. Don't worry if this seems complex: I will show you step by step how to create your own Cubist artwork.
What is Cubism?
As discussed in the introduction, Cubism is an artistic movement that emerged in the early 20th century, notably with Picasso and Braque. As we have already seen in the introduction, it seeks to represent reality differently, without trying to imitate it.
Cubist artists simplify forms by breaking them down into geometric shapes (cubes, cones, cylinders) to better understand and illustrate the structure of objects. Their goal is to suggest a new way of seeing, by presenting multiple viewpoints at once rather than just a single static image.
Cubism is not only interested in form, but also in movement and time. By combining different perspectives in the same image, artists try to show the evolution of a subject, as if multiple moments were superimposed. This exploration, influenced by photography and the scientific discoveries of the time, brings life to the artwork while making it more abstract and thoughtful.
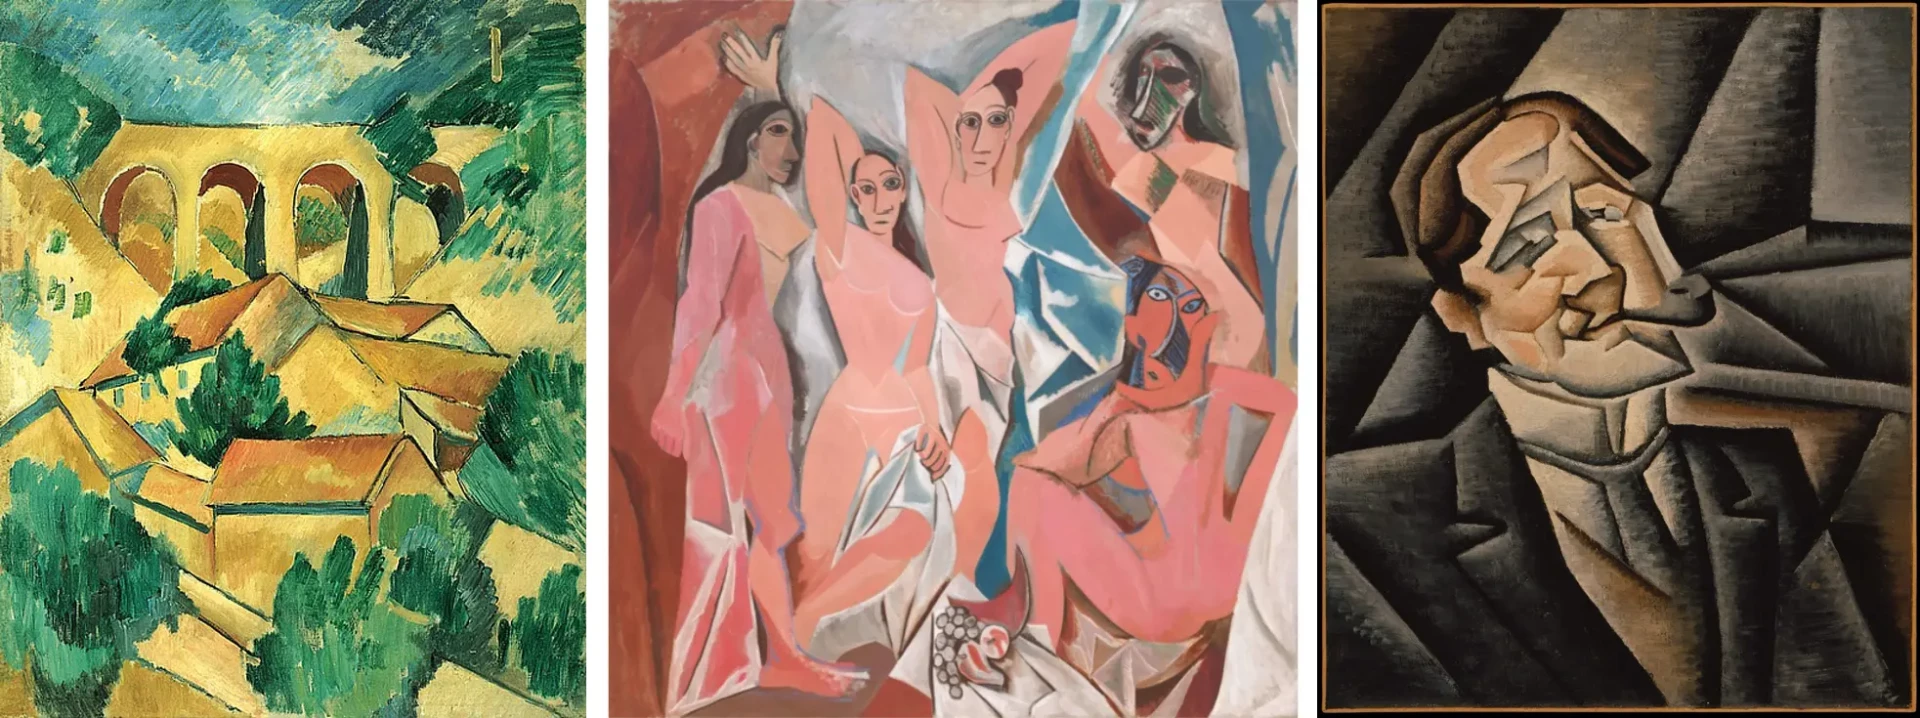
From left to right:
The Viaduct at L'Estaque – Braque (1908)
The Young Ladies of Avignon – Picasso (1907)
Juan Legua – Juan Gris (1915)
Cubism is mainly distinguished into two trends:
Analytical Cubism is the first phase of the movement, developed by Picasso and Braque between 1908 and 1912. During this period, the artists sought to analyze reality by breaking it down into simple geometric shapes: cubes, cones, cylinders... Objects and faces are fragmented into facets, as if they were being observed from several angles at the same time. The colors are deliberately subdued and limited (grays, browns, ochres) to focus on the structure and composition rather than the visual effect.
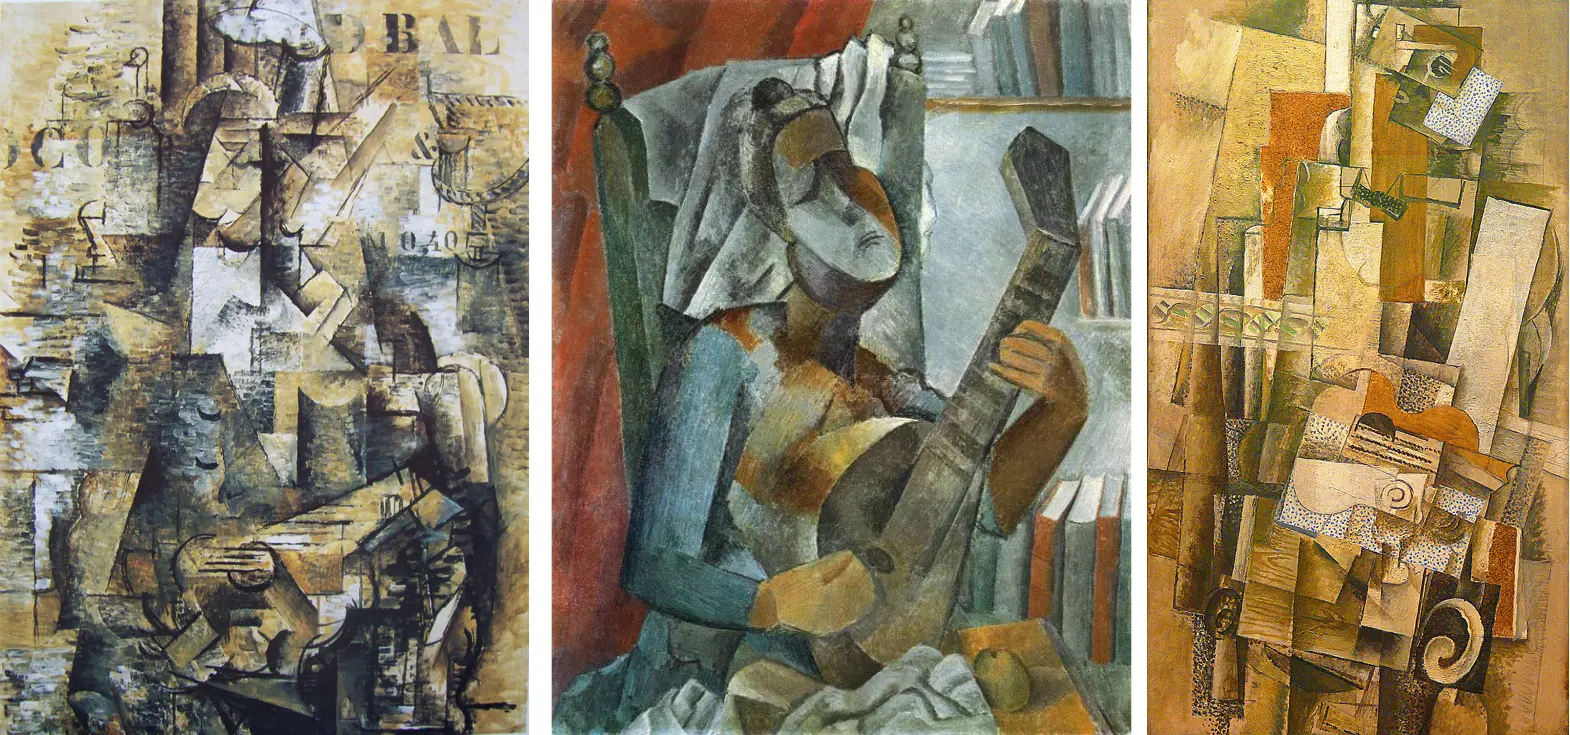
From left to right:
The Portuguese – Georges Braque (1911)
Girl with Mandolin - Pablo Picasso (1910)
Man with a Guitar – Georges Braque (1911)
Synthetic Cubism, emerging around 1912, counteracts this approach. Artists simplify forms and reintroduce more vivid and expressive color. They also use collages (newspaper, wallpaper, textures) to enrich their works and mix techniques. The aim is no longer to analyze reality but to reconstruct it in a creative and symbolic manner, giving more freedom to the composition.
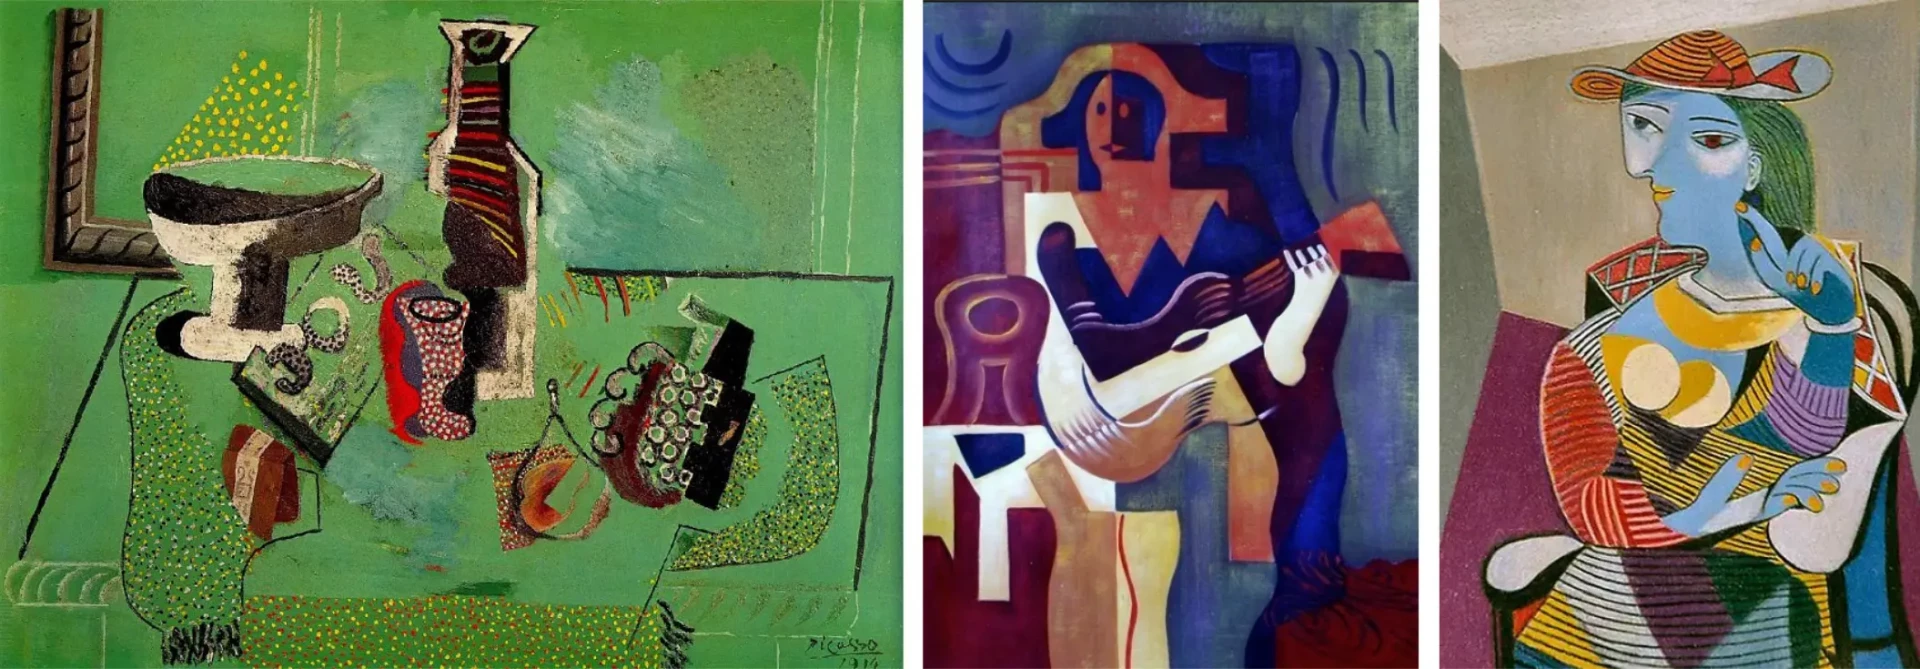
From left to right:
Fruit Bowl, Bottle and Glass – Pablo Picasso (1914)
Harlequin with a Guitar – Juan Gris (1919)
Seated Woman - Pablo Picasso (1913)
Mediums and techniques
Cubist artists used a wide variety of mediums, often mixing several techniques to enrich their works. The most common were oil painting on canvas, ideal for working with flat color planes and geometric shapes.
Many, like Picasso and Braque, also explored charcoal, pencil, and India ink for their preparatory drawings, which highlighted the structure and construction of the subject. From 1912, the Cubists also introduced collages: cut papers, newspapers, wallpapers, or pieces of fabric glued onto the canvas, enabling the combination of drawing and texture.
Some used gouache or pastel for their matte effects and softer tone transitions. In summary, Cubism pushed the boundaries of traditional mediums by mixing them to better serve its central idea: to decompose and reconstruct reality. Feel free to experiment by yourself and choose the medium or mediums that you like the most.
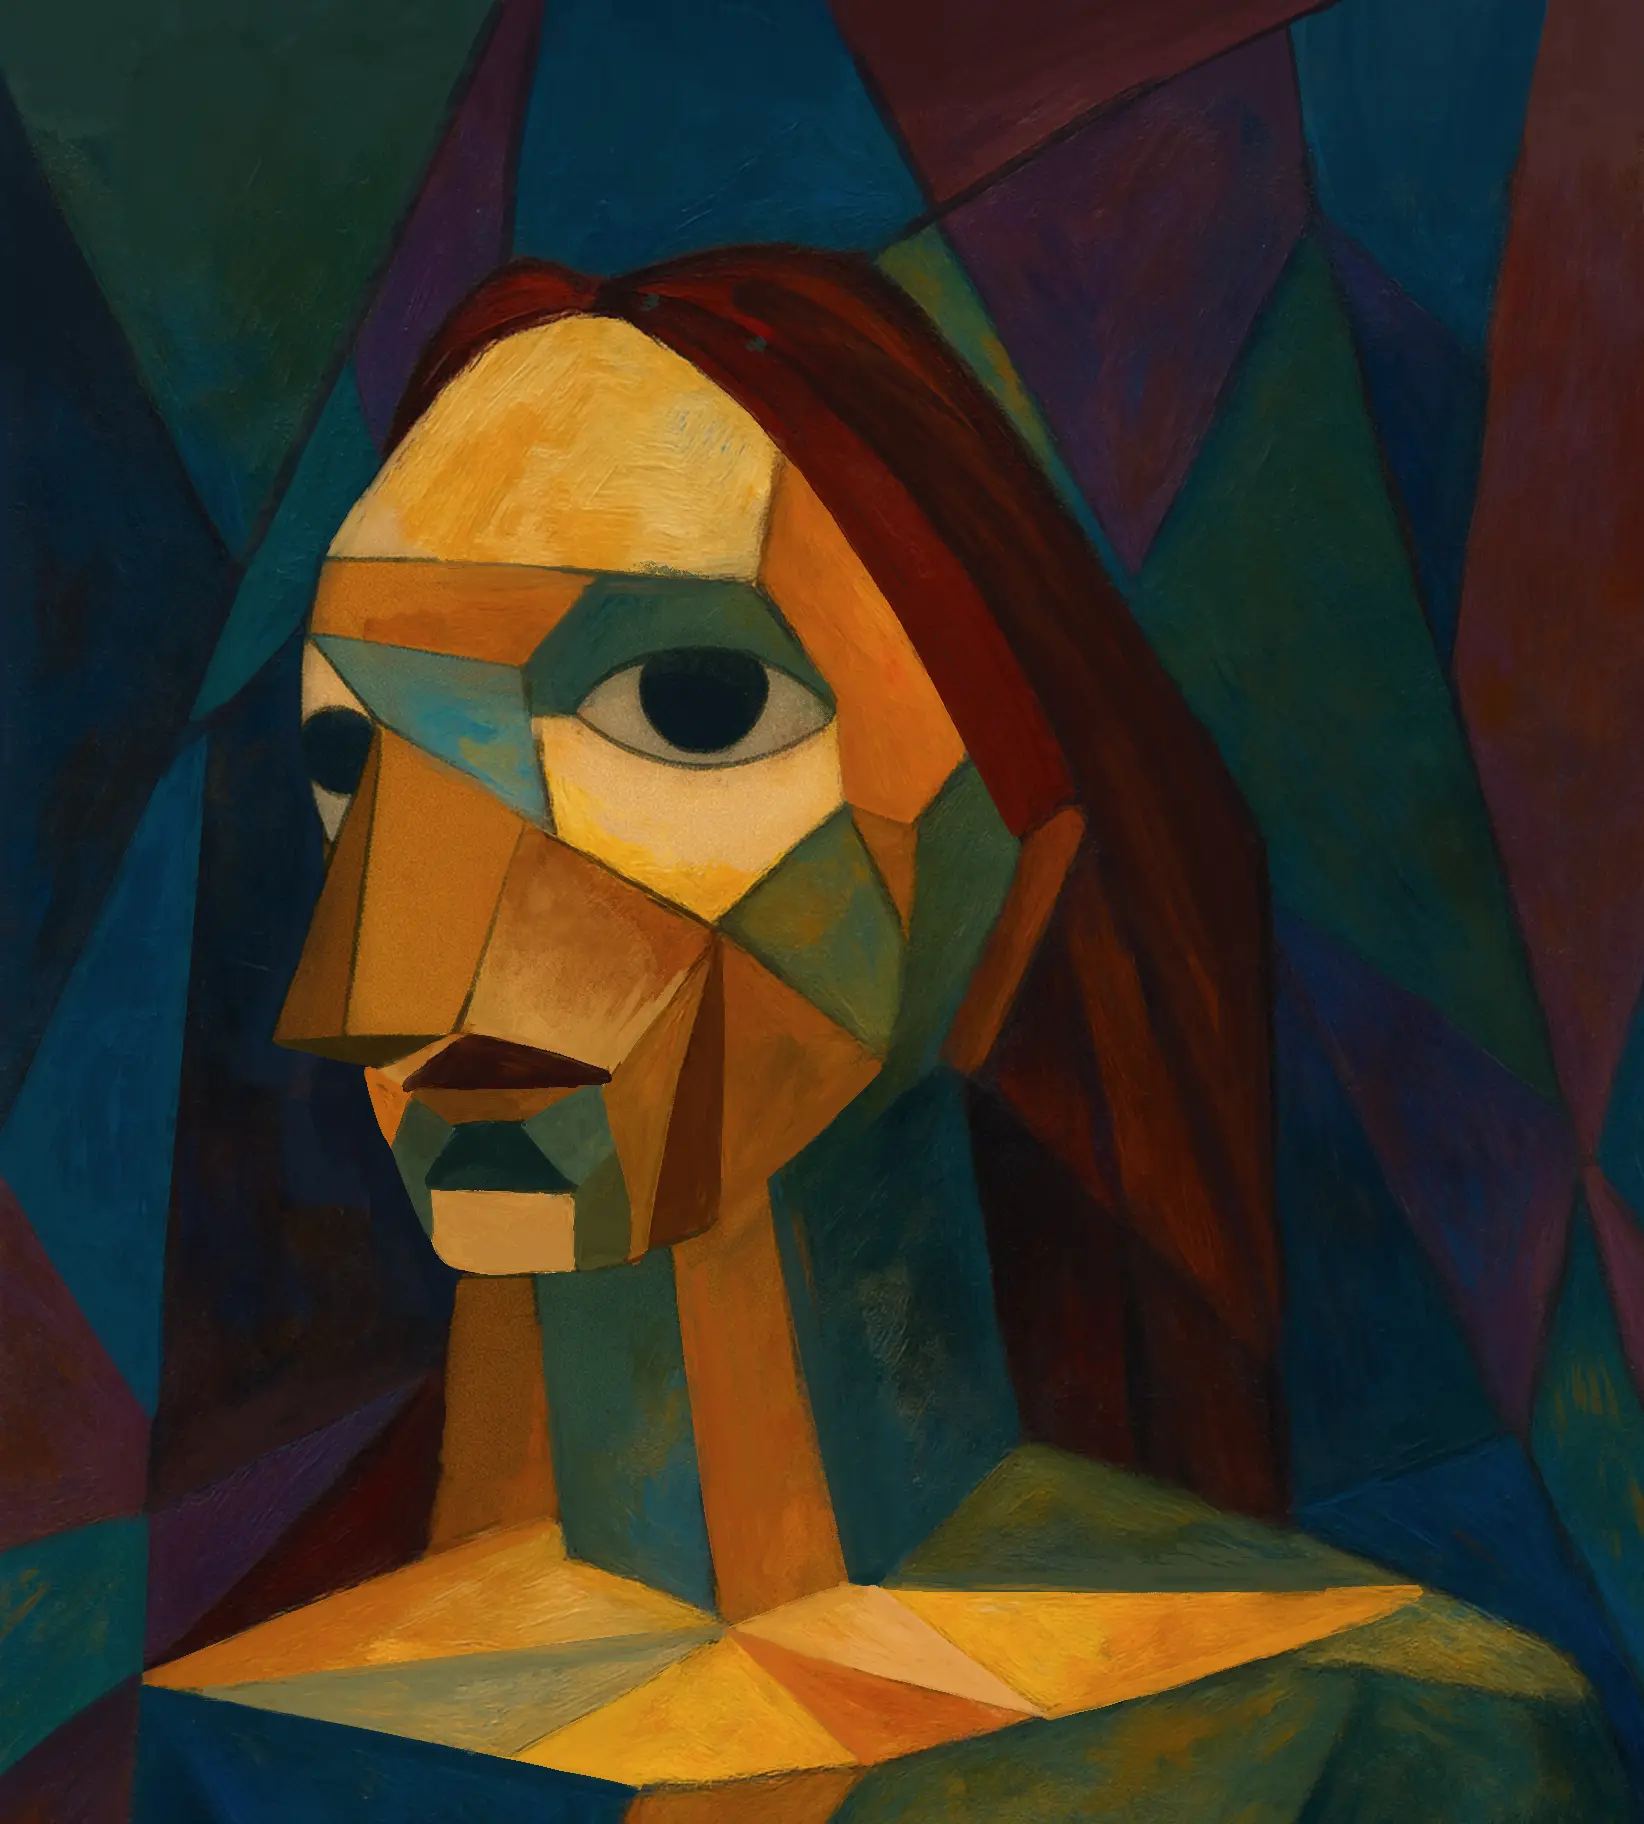
Creating a Cubist painting step by step
Let's now move on to practice and explore a way to create portraits in the Cubist style, step by step.
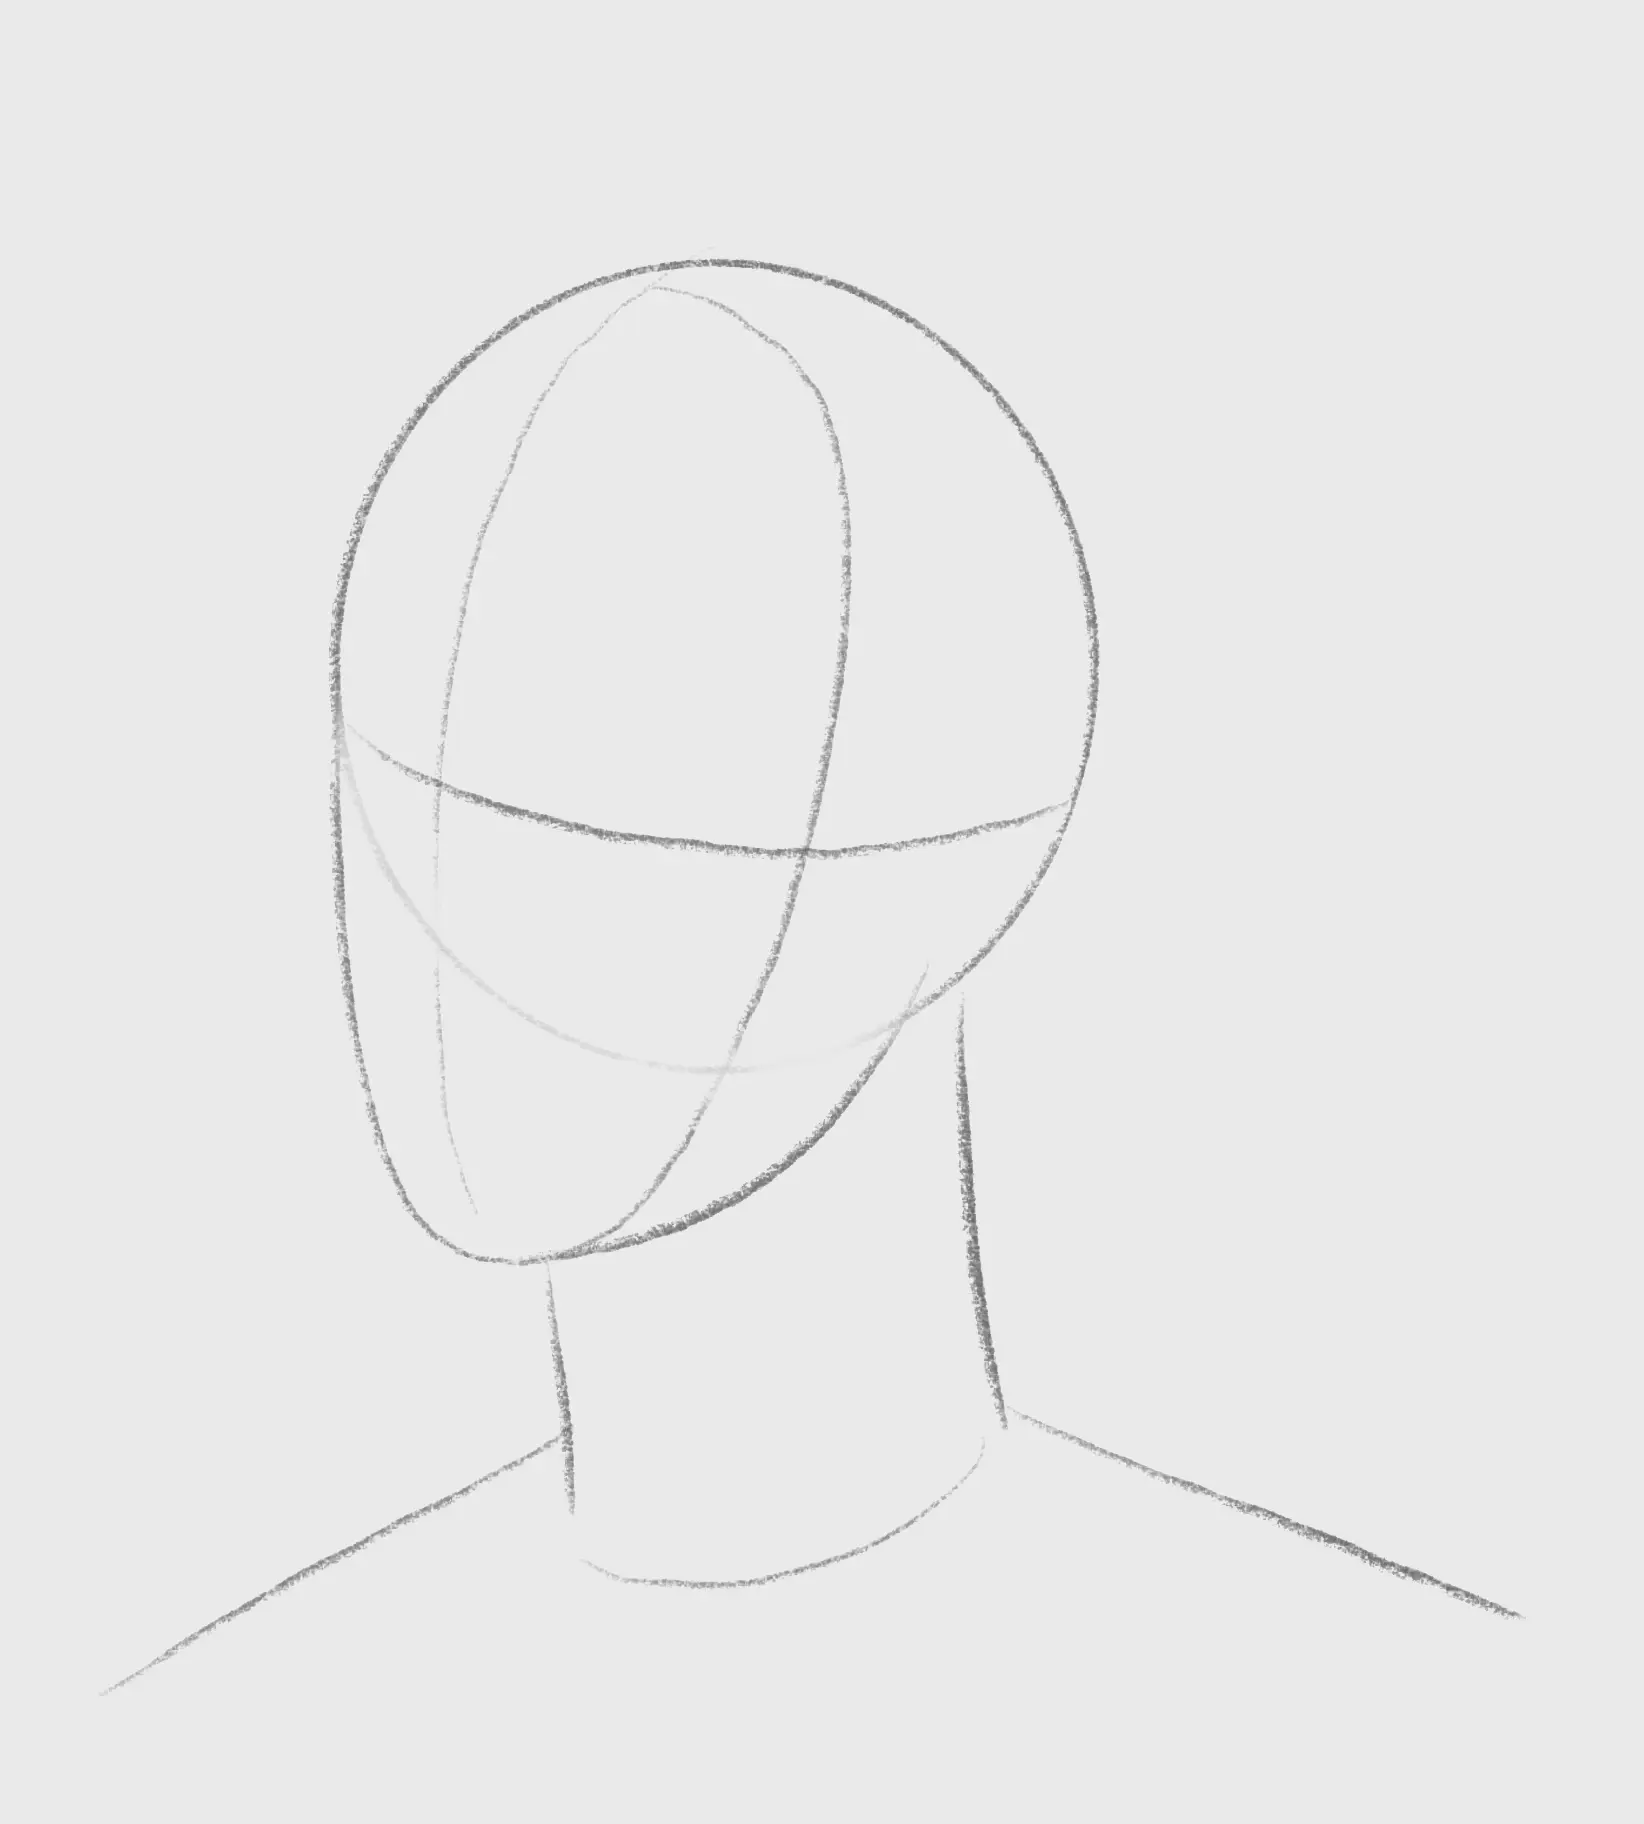
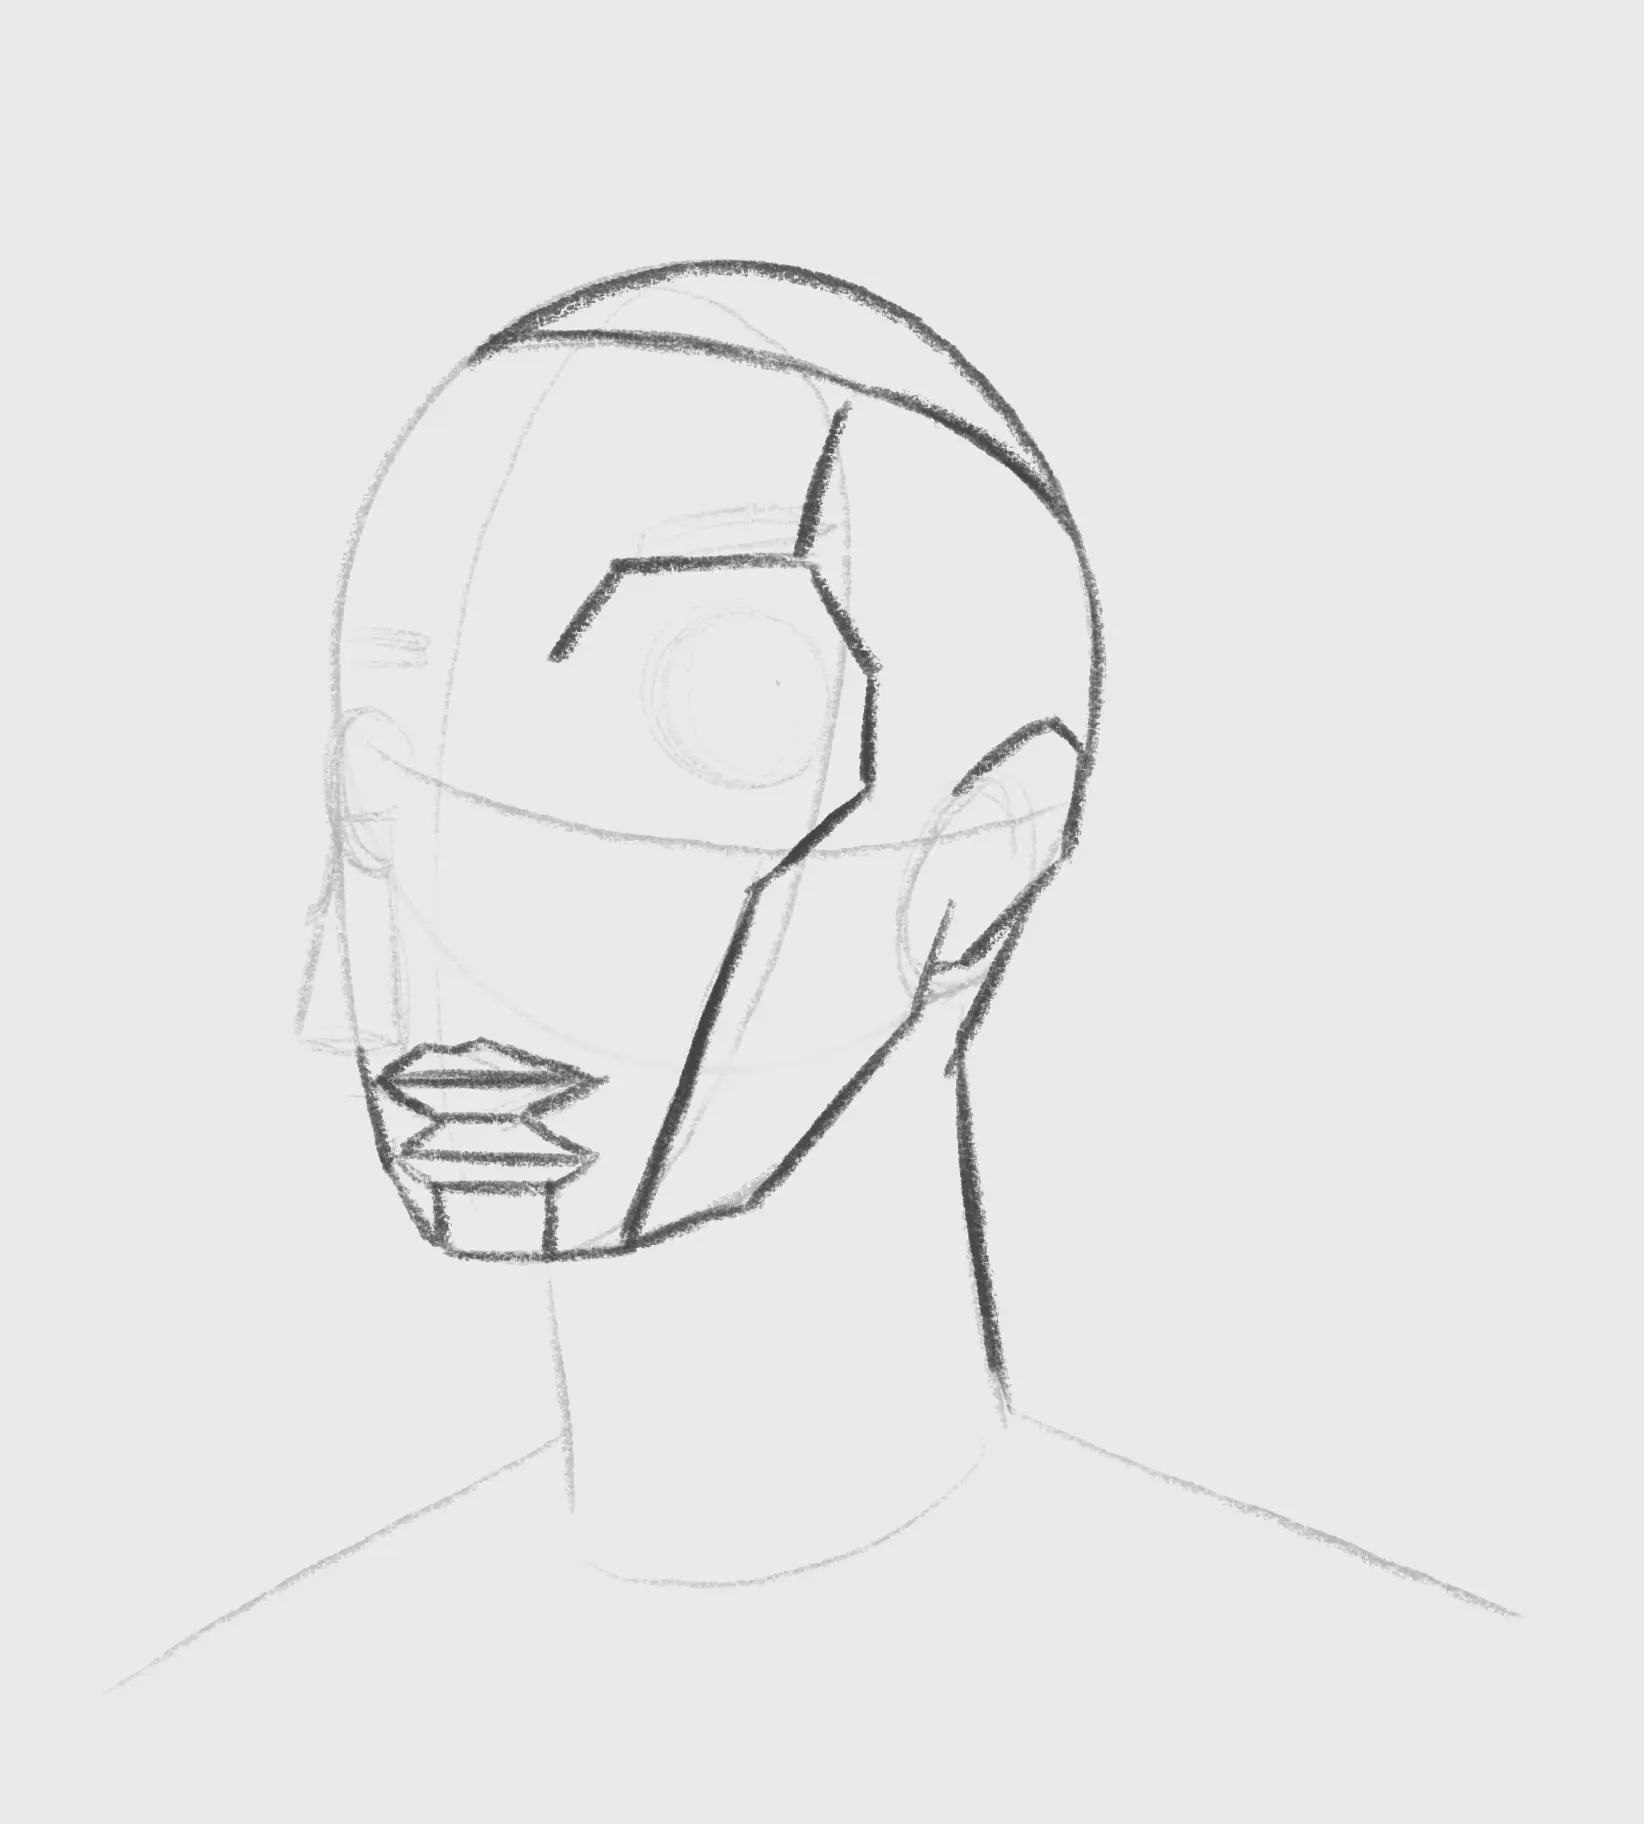
1. We start by drawing fairly standard marker shapes, which will serve as our base.
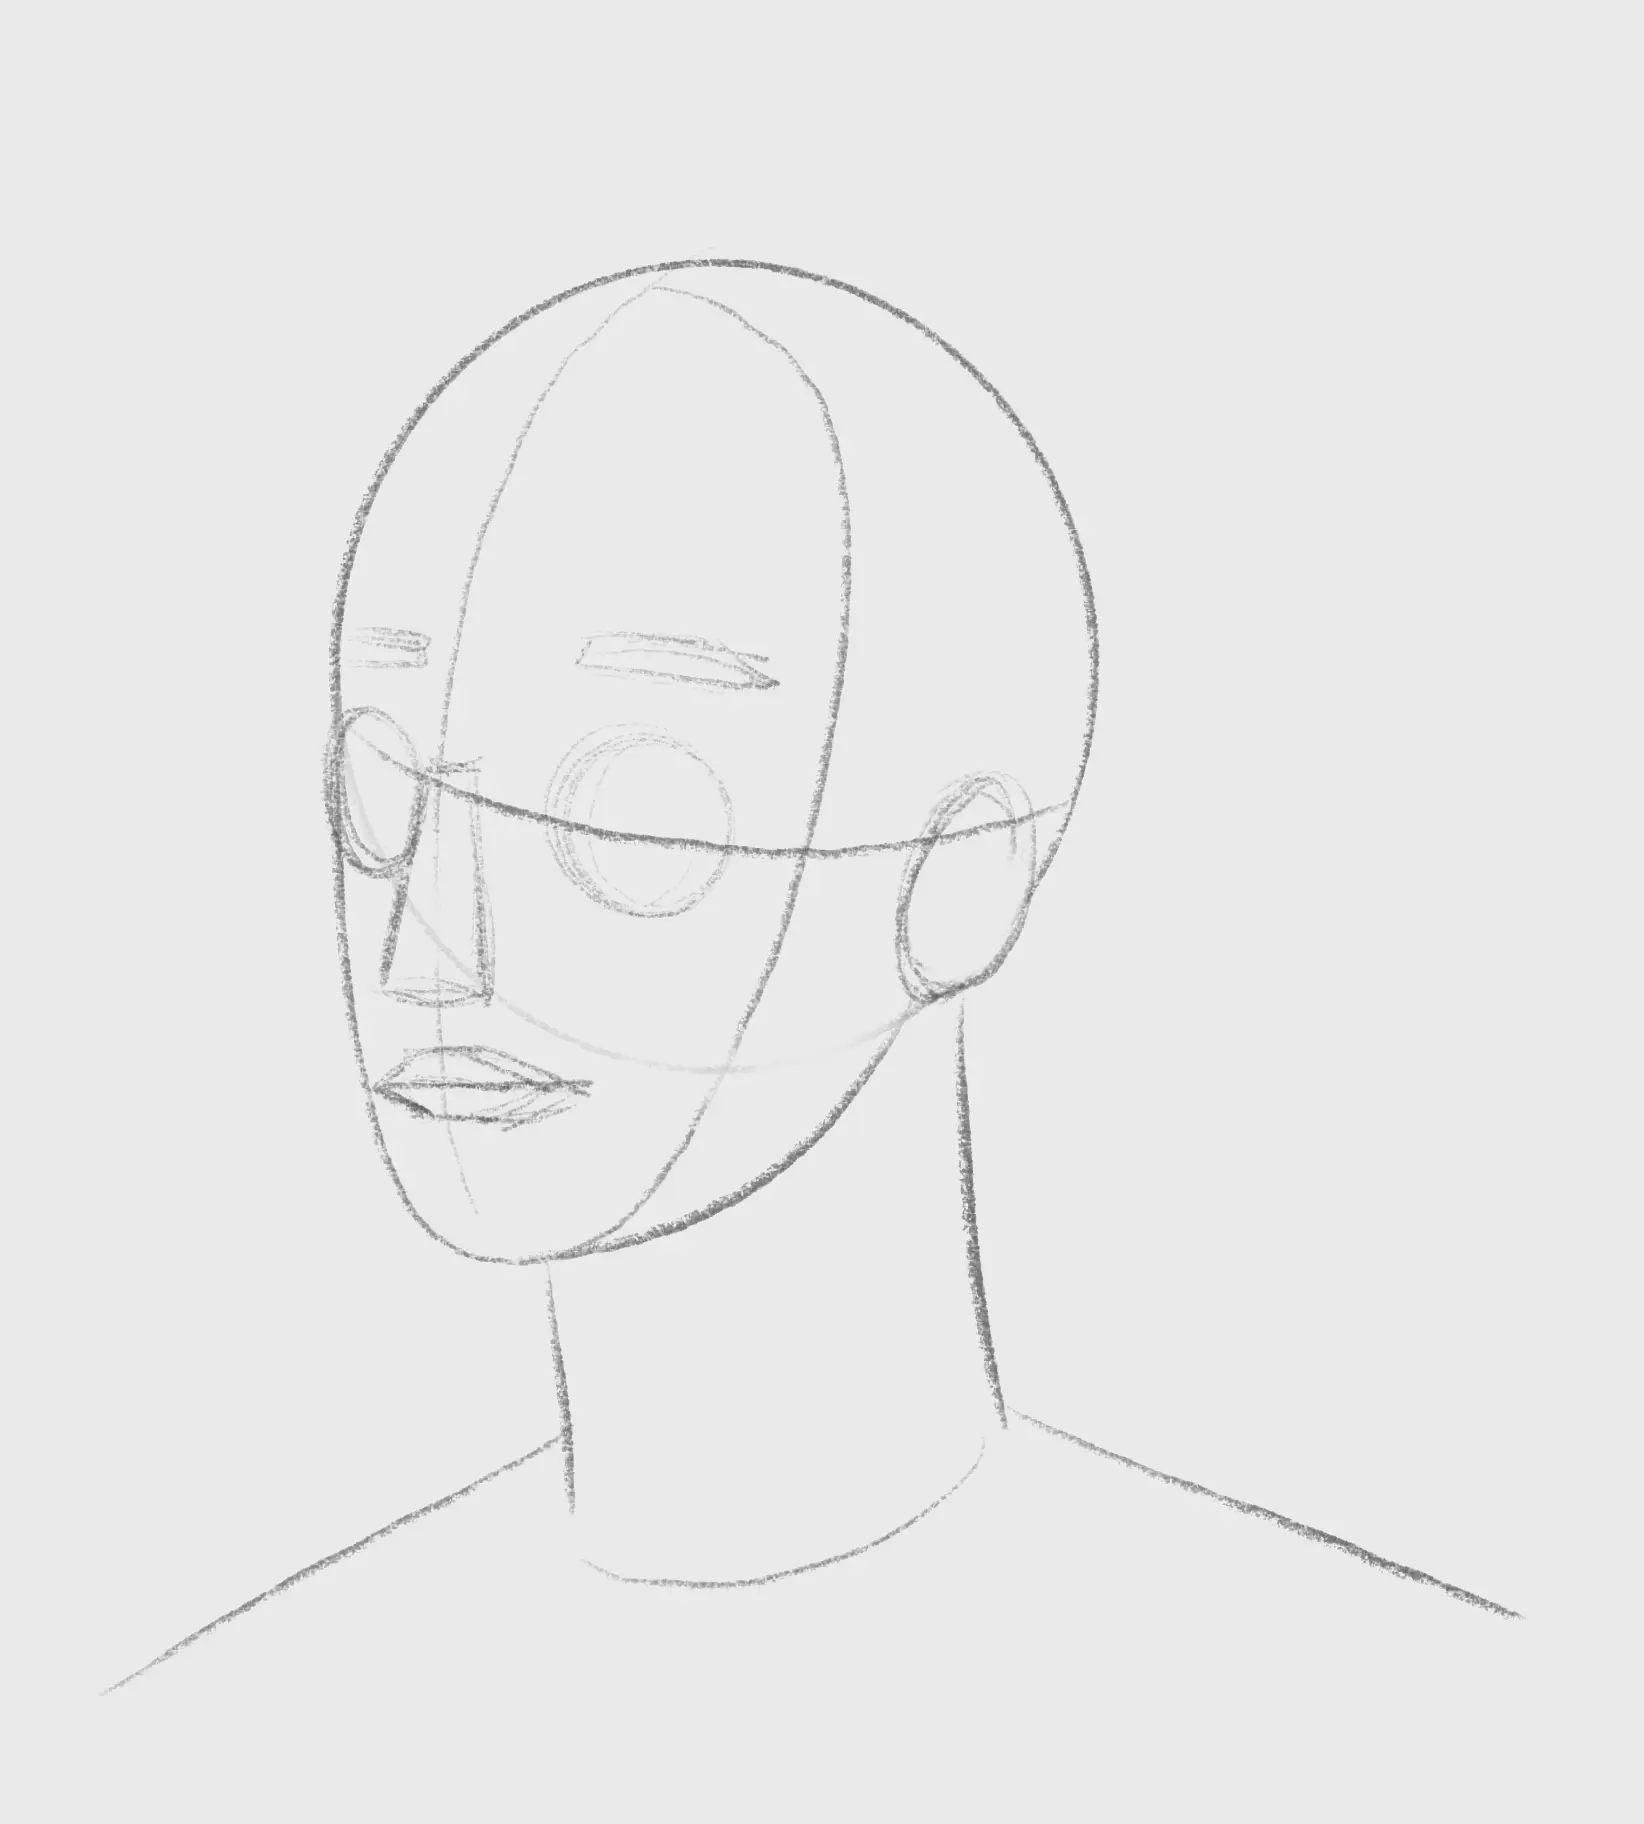
2. Next, we position the traditional locations of the eyes, nose, mouth, and ears.
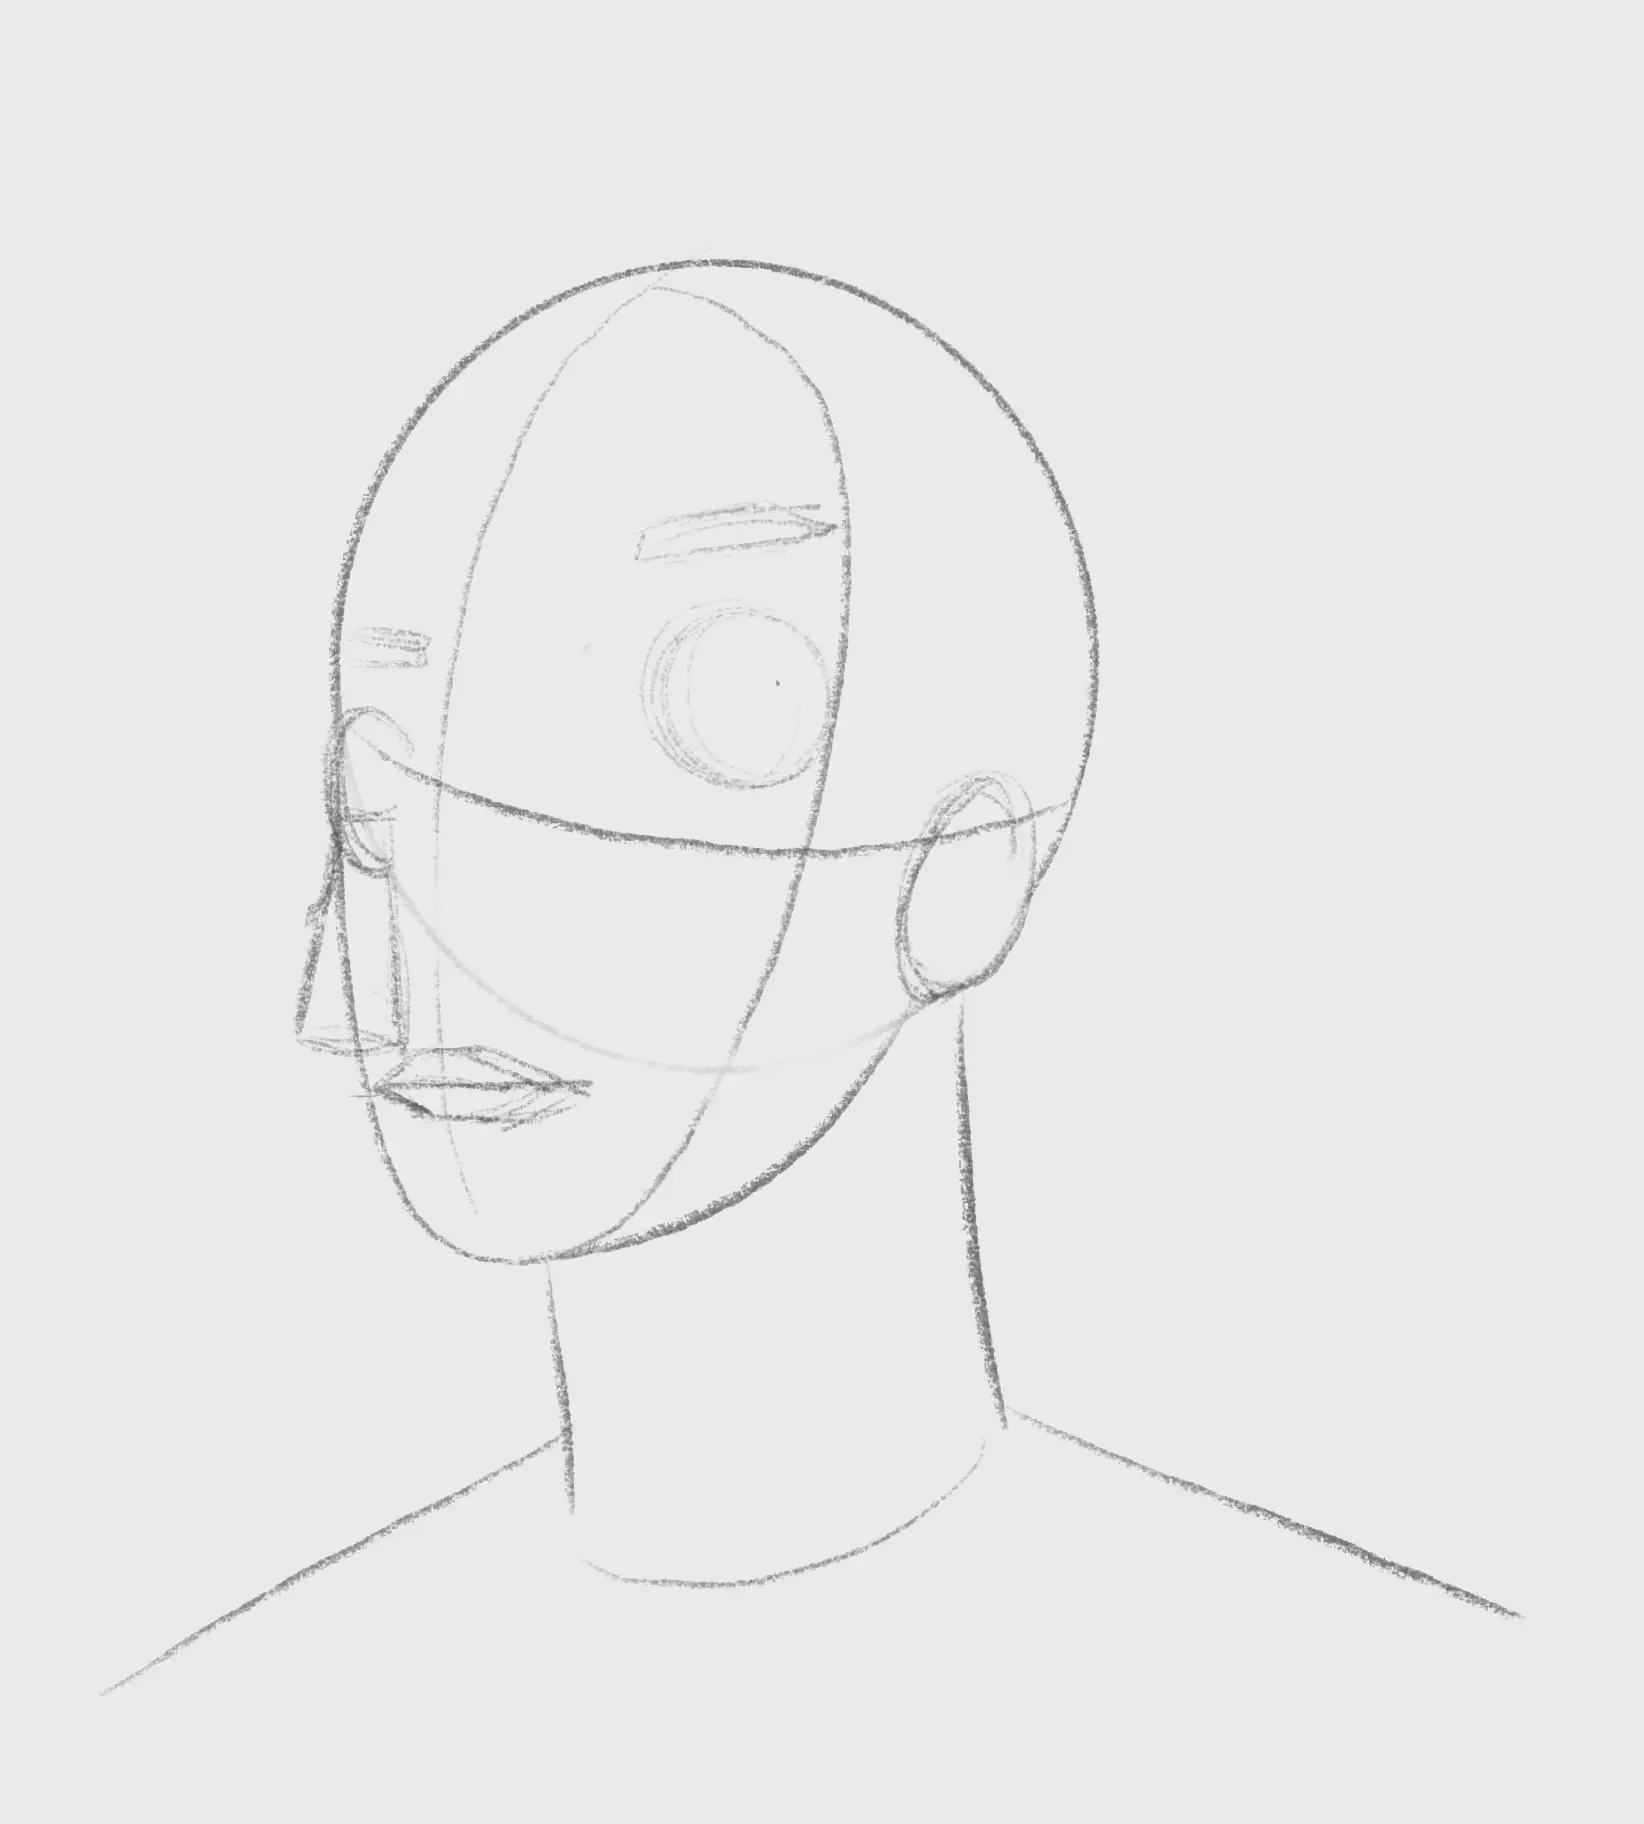
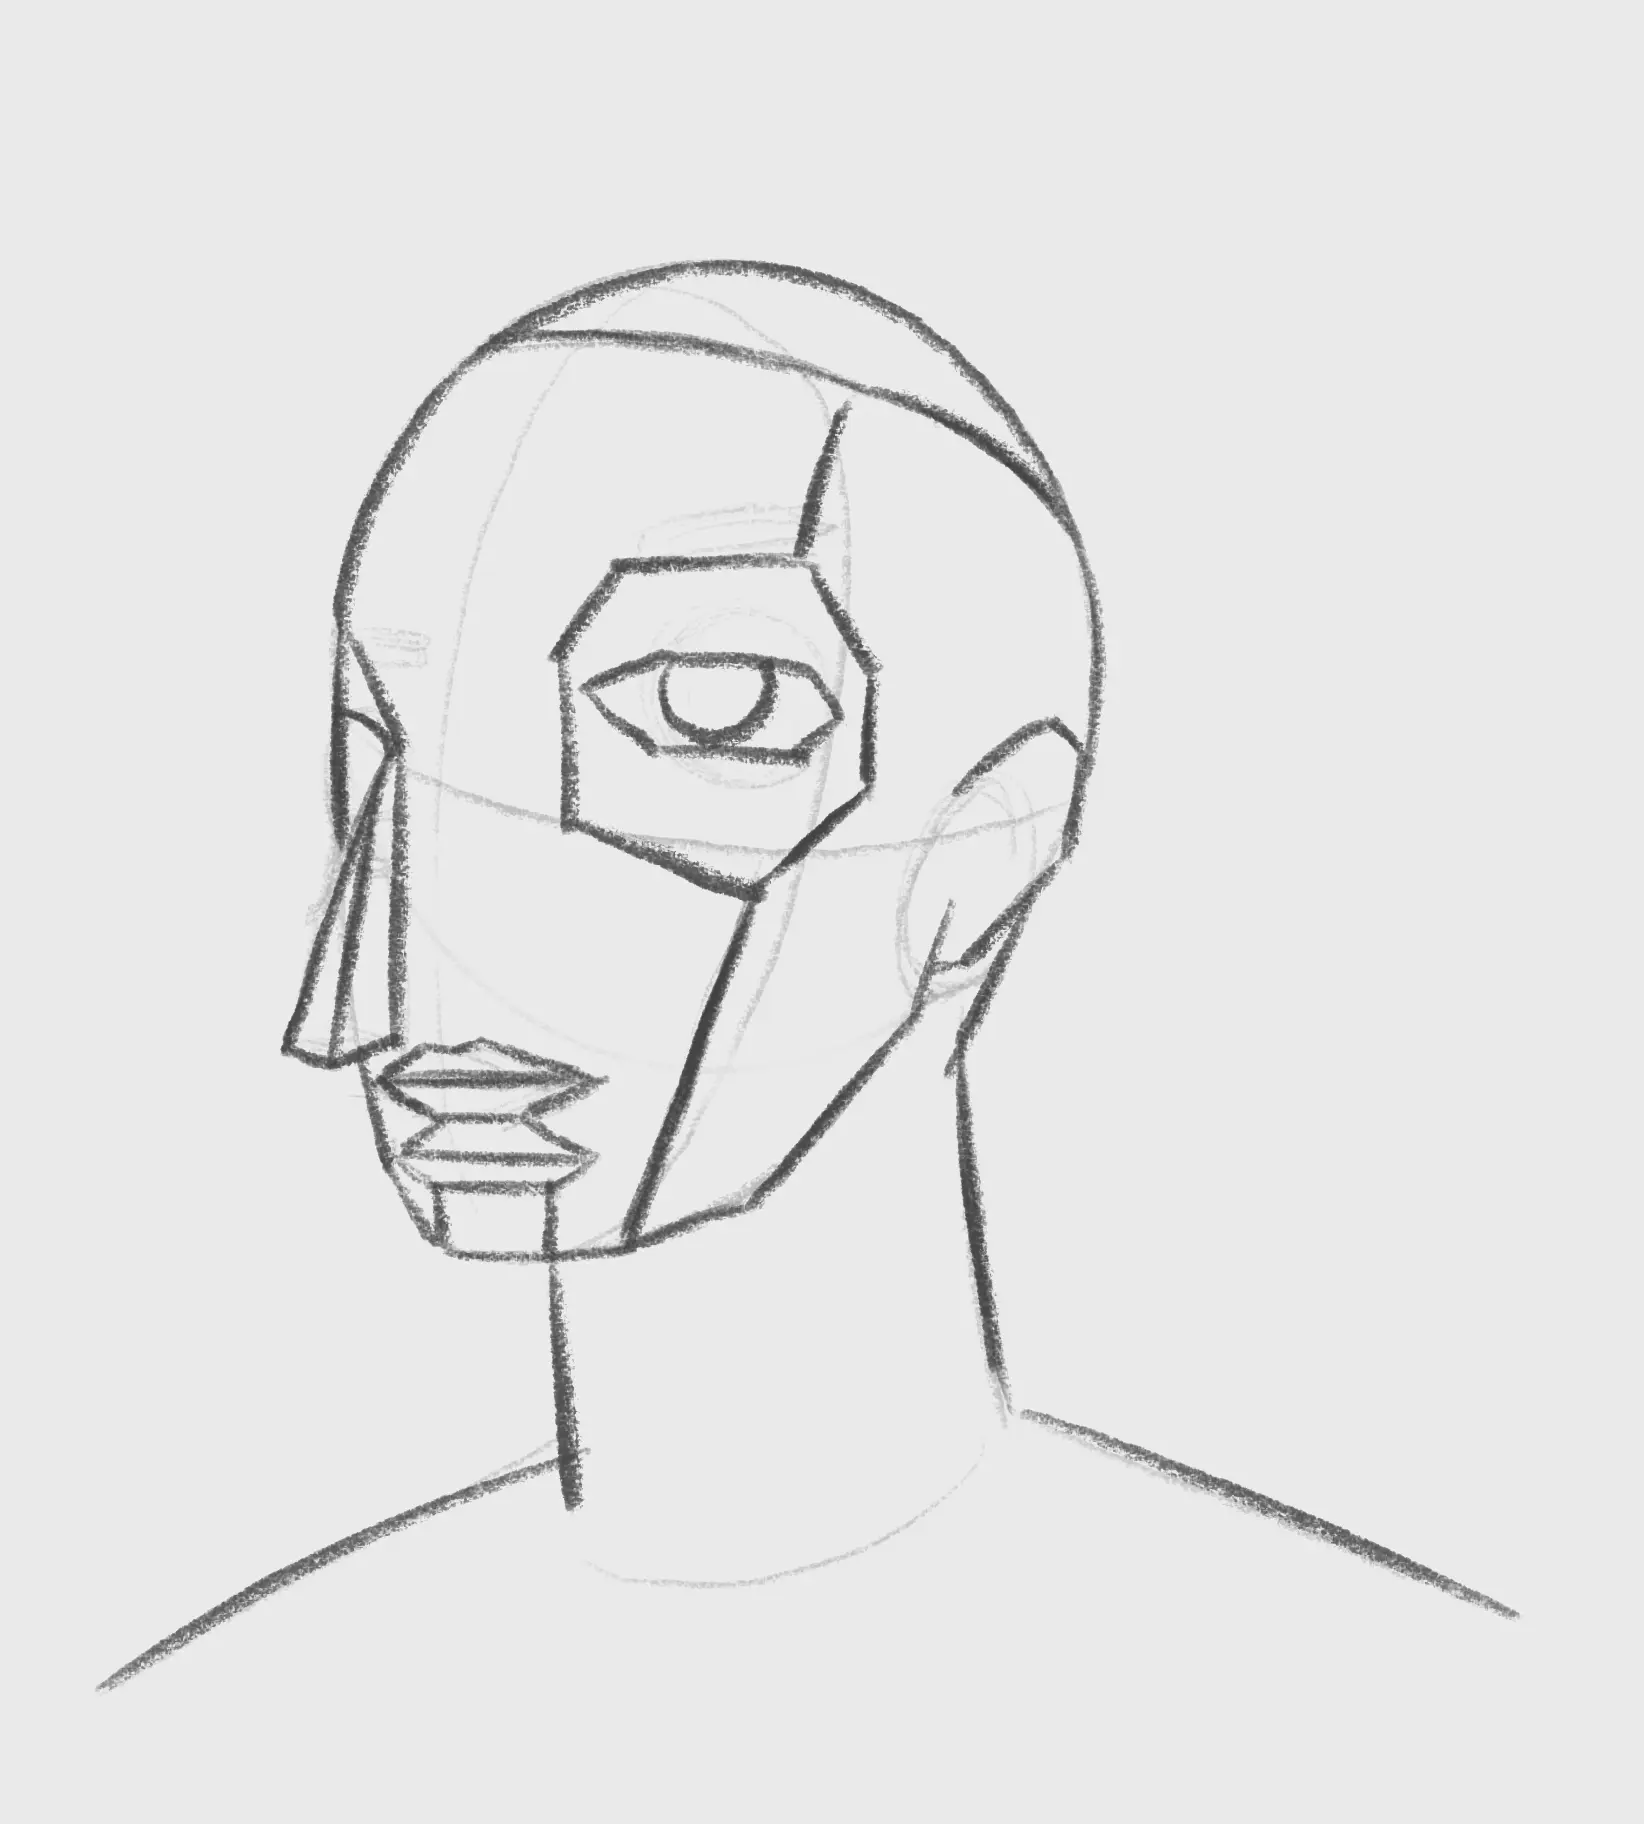
3. We then move the different elements to modify their perception. For example, the nose is shifted to the left to suggest a profile view, while the right eye is moved up and placed more to the right to evoke a frontal view. It is by linking these different angles that we create the Cubist style.
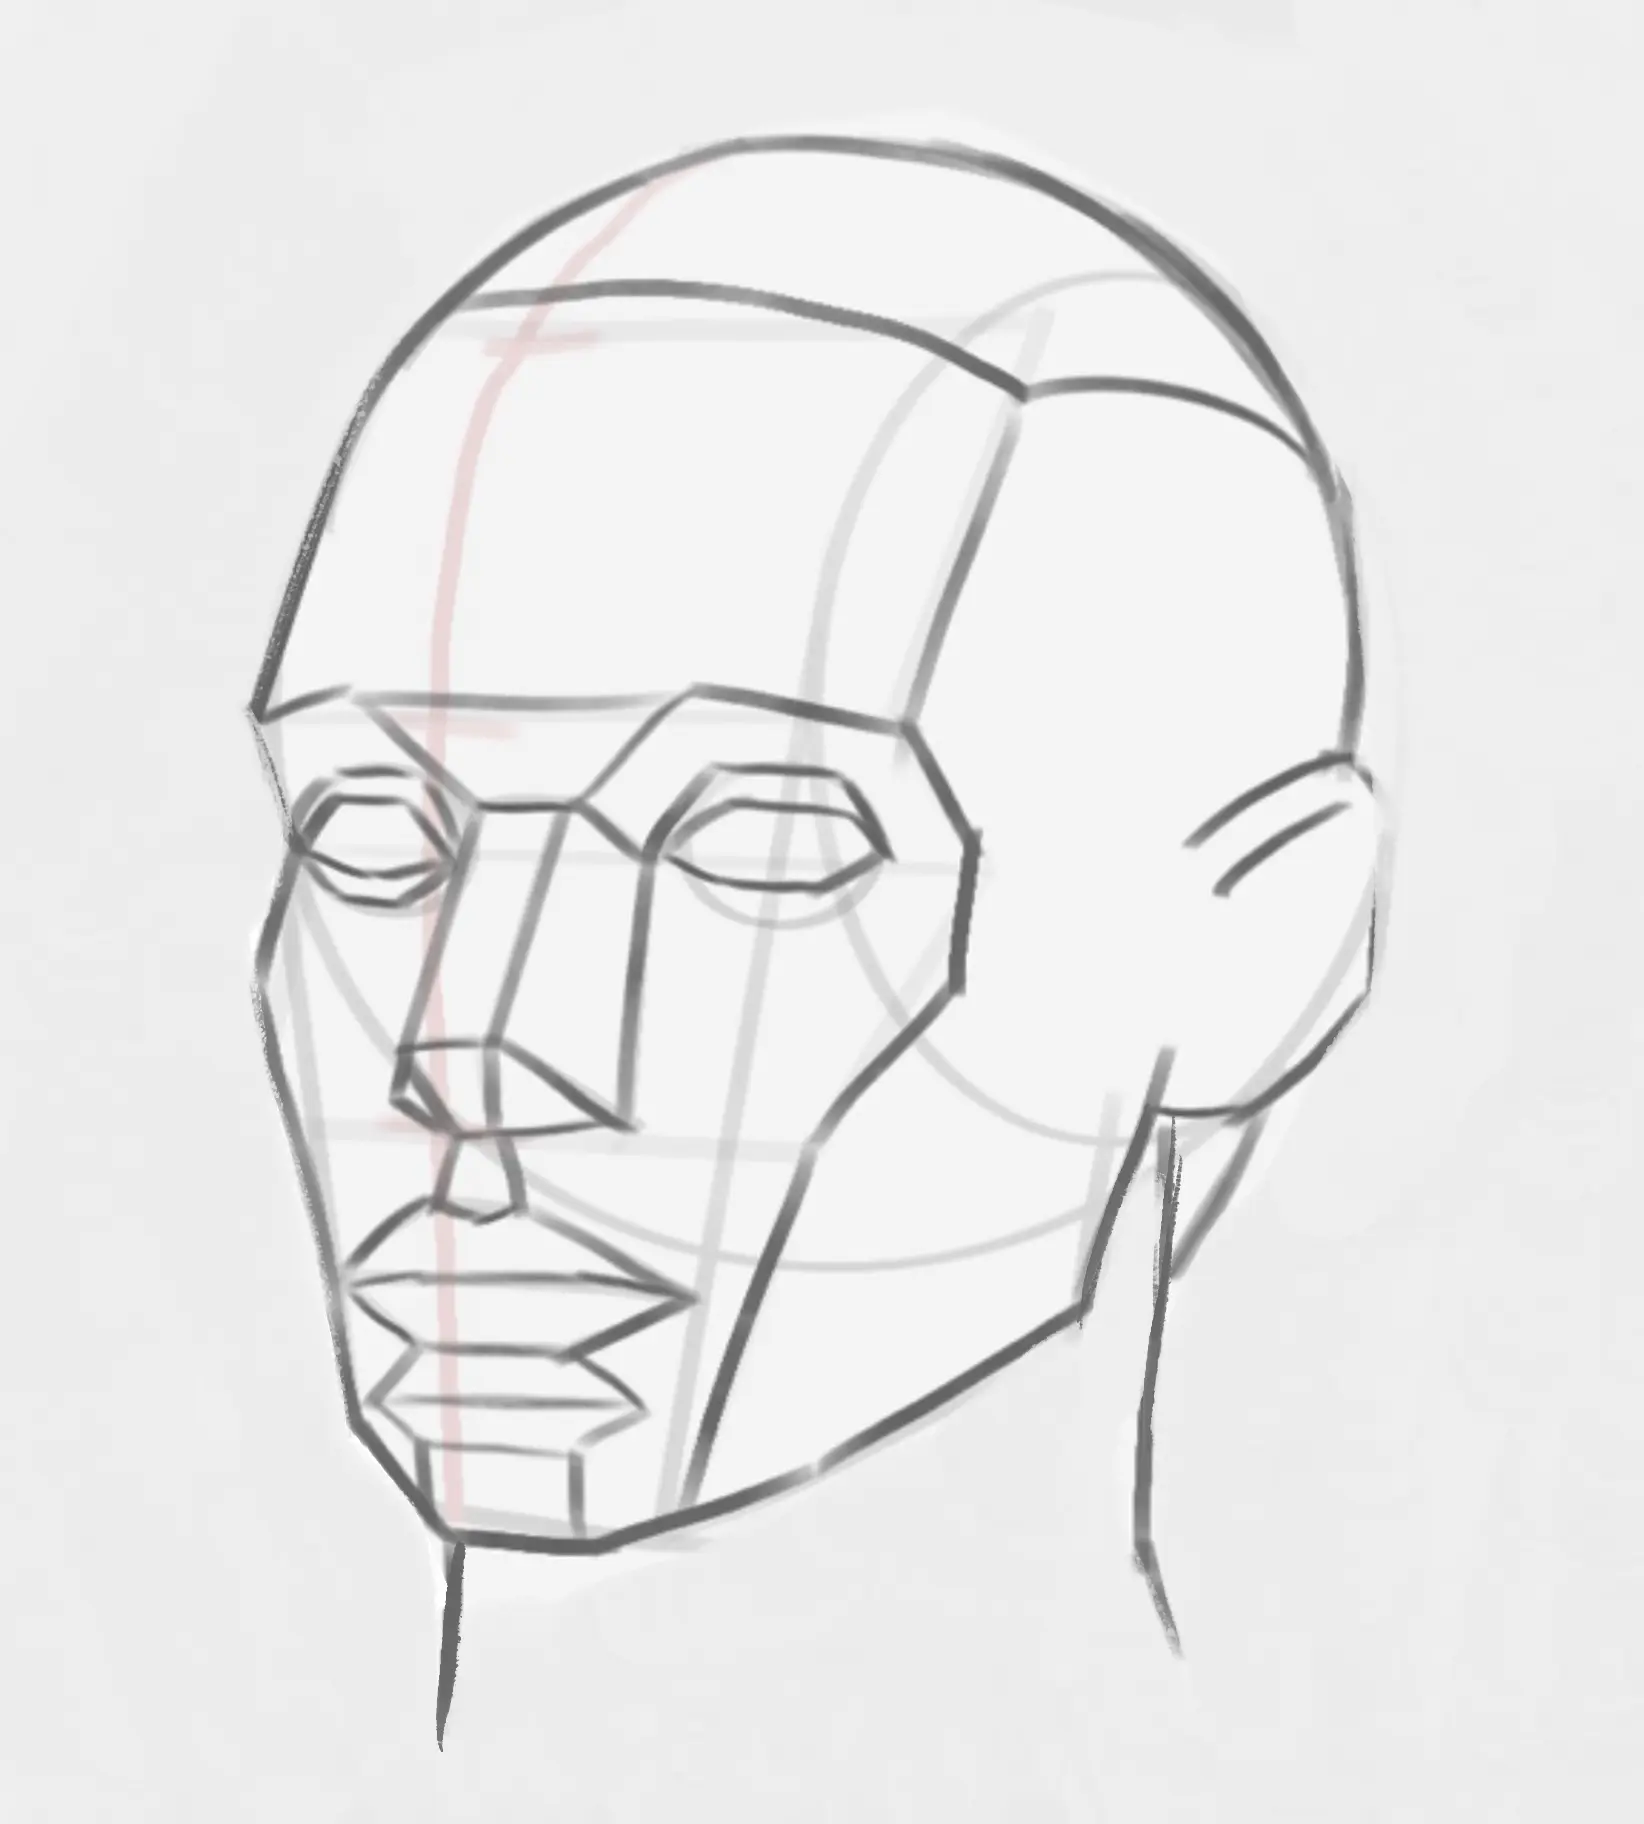
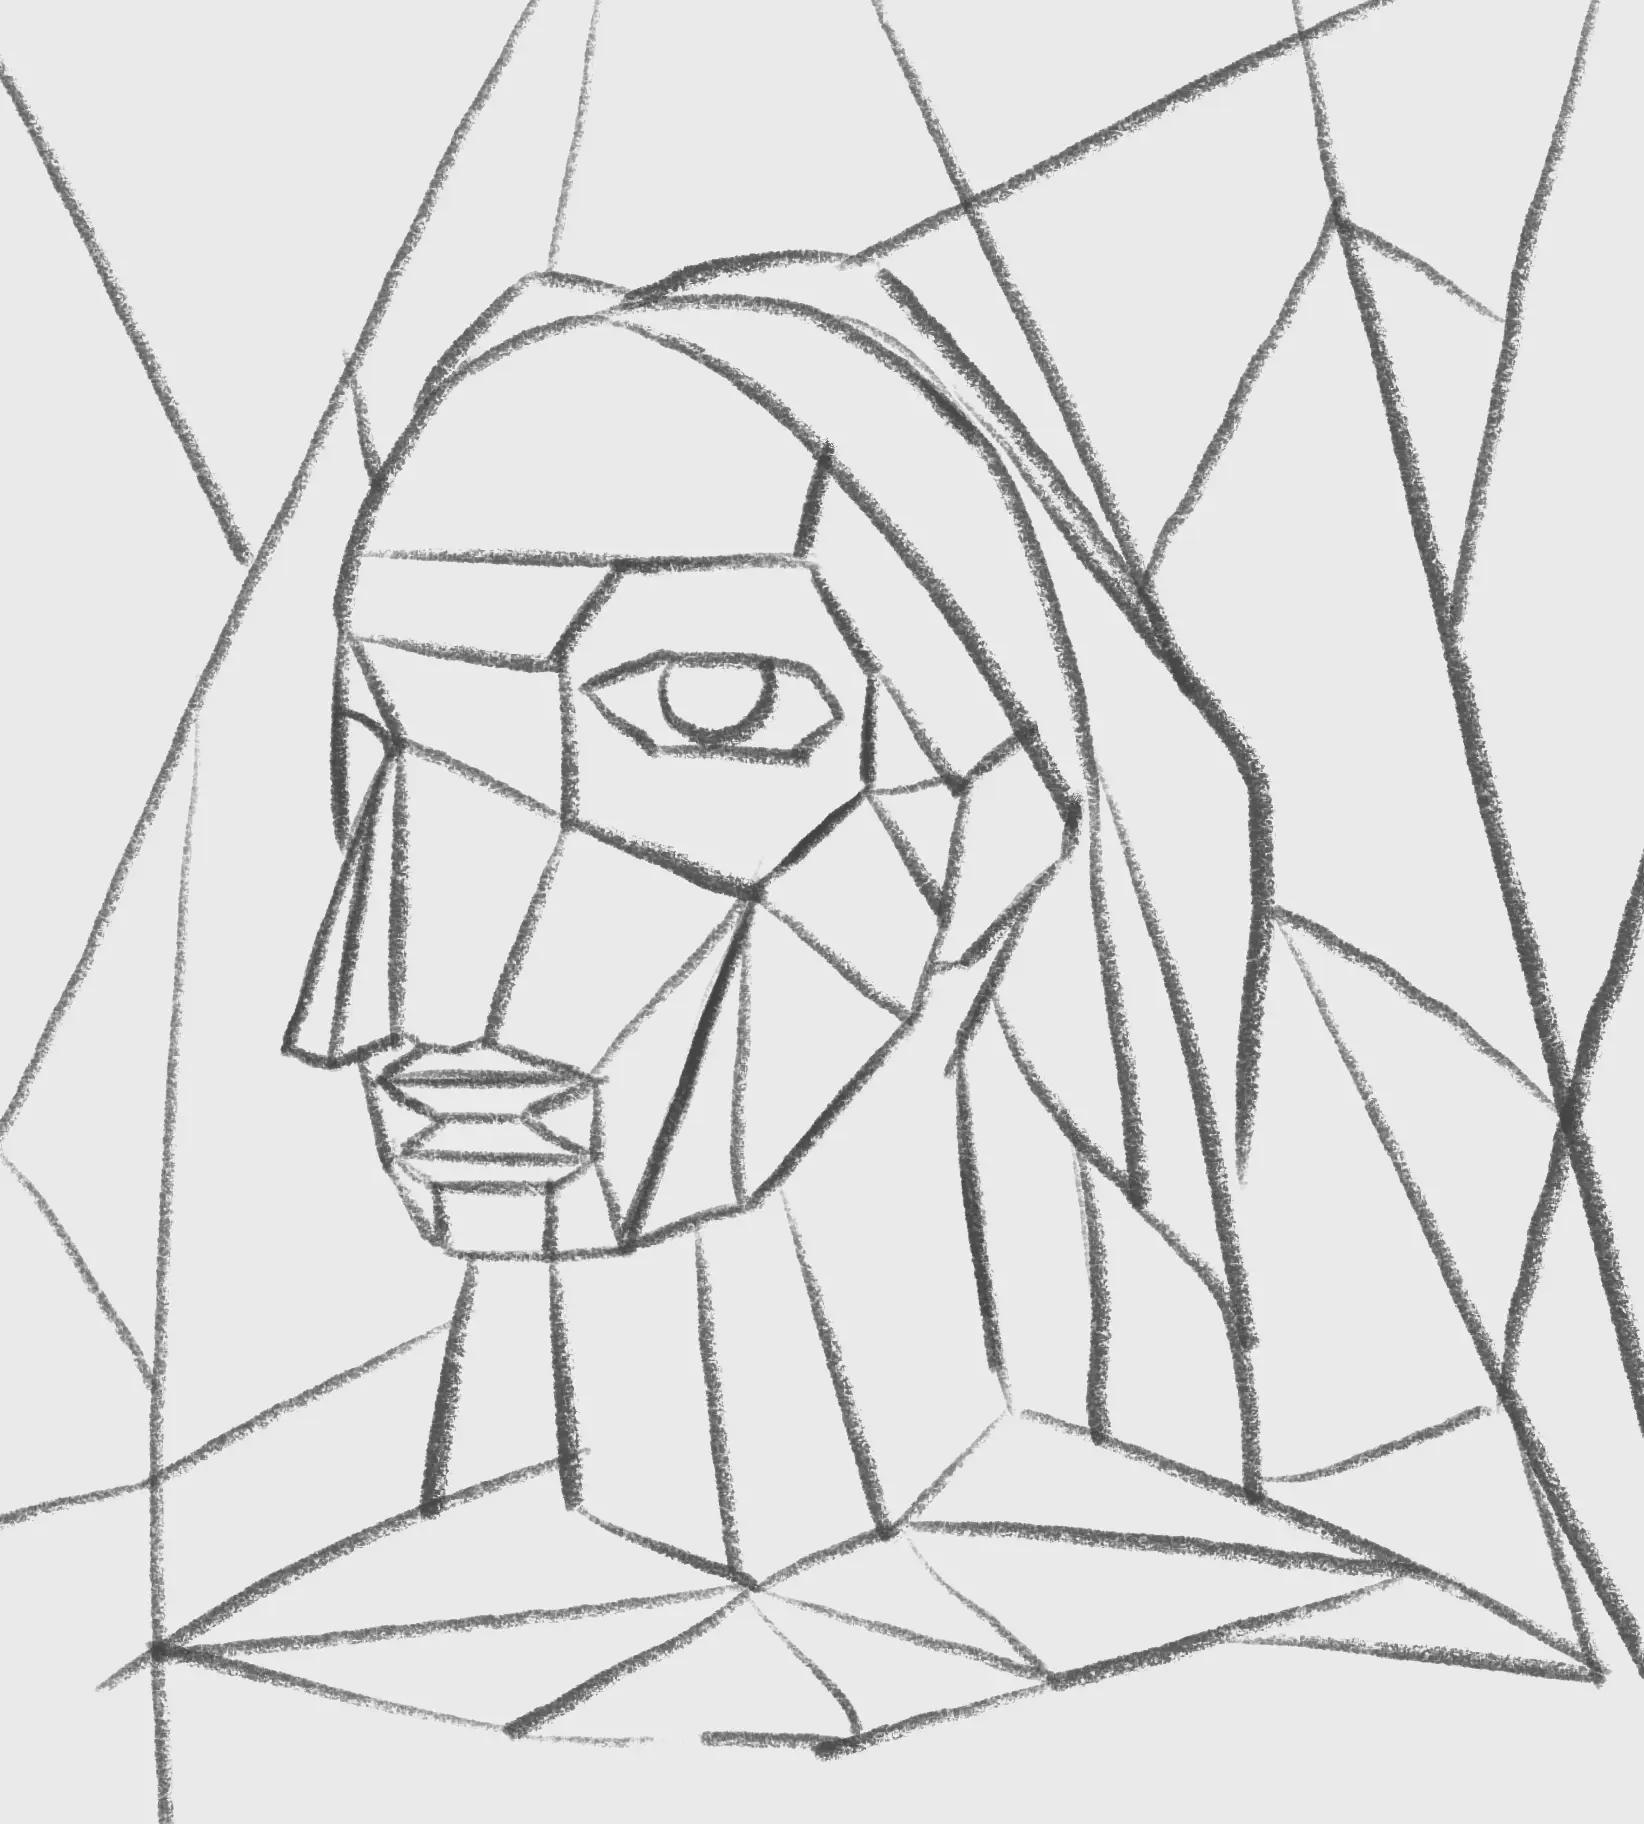
4. At this stage, it's important to keep in mind the decomposition of the facial planes.
5. We can start breaking down our sketch into the different planes of the face by using the Asaro head.
6. After defining the planes on the "front" view part, we can move on to the "profile" view section.
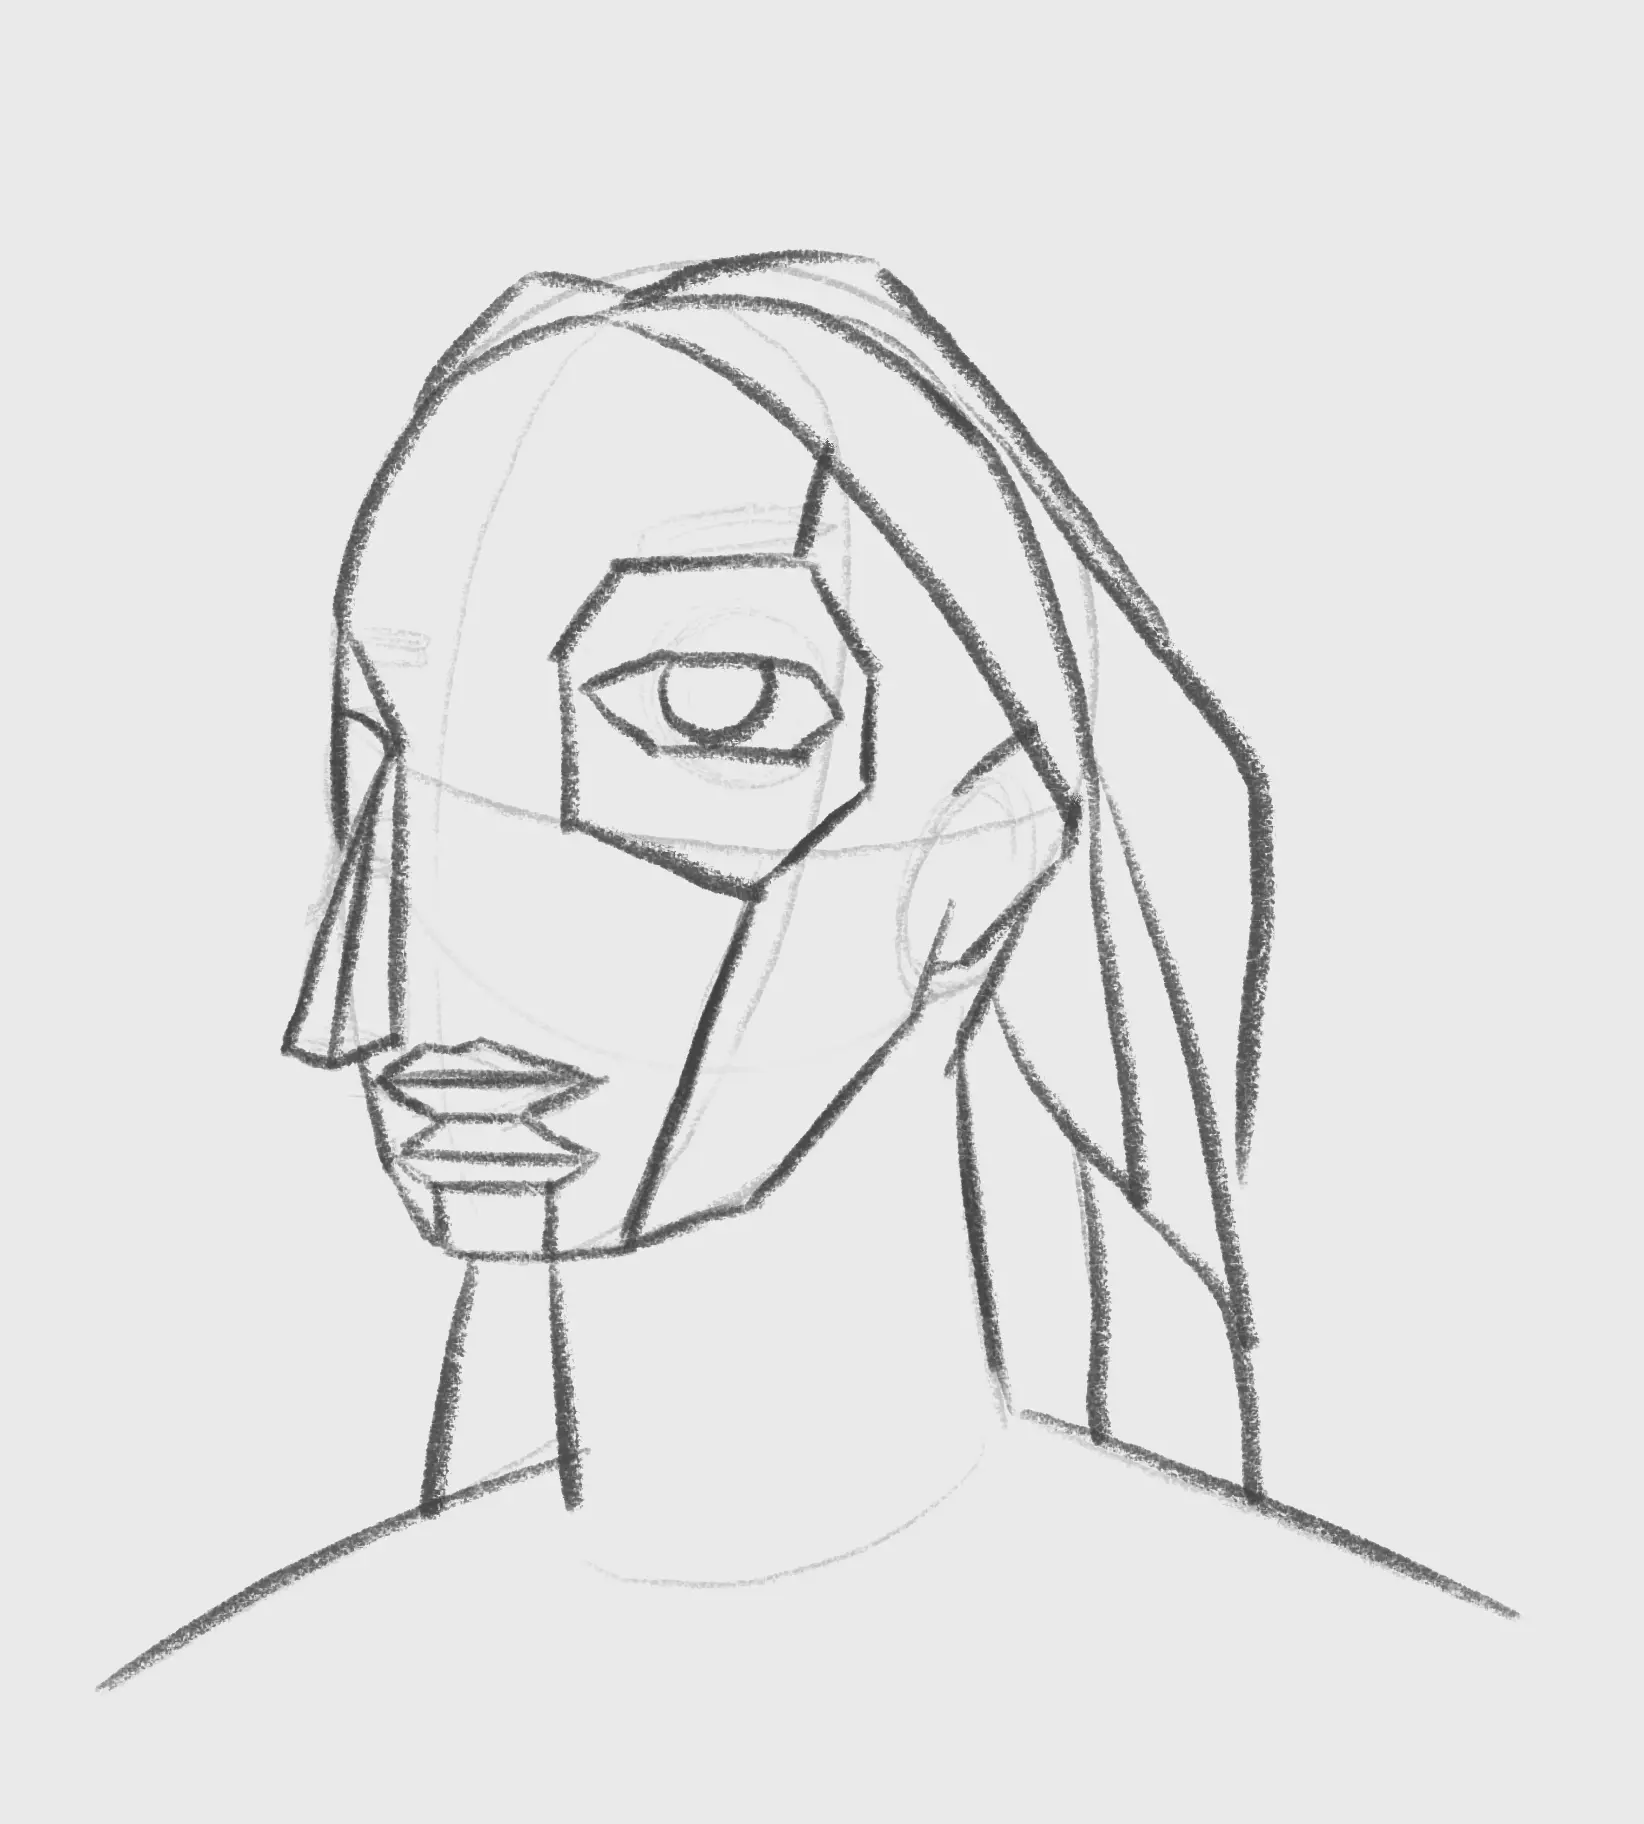
7. We can add synthetic shapes to suggest hair.
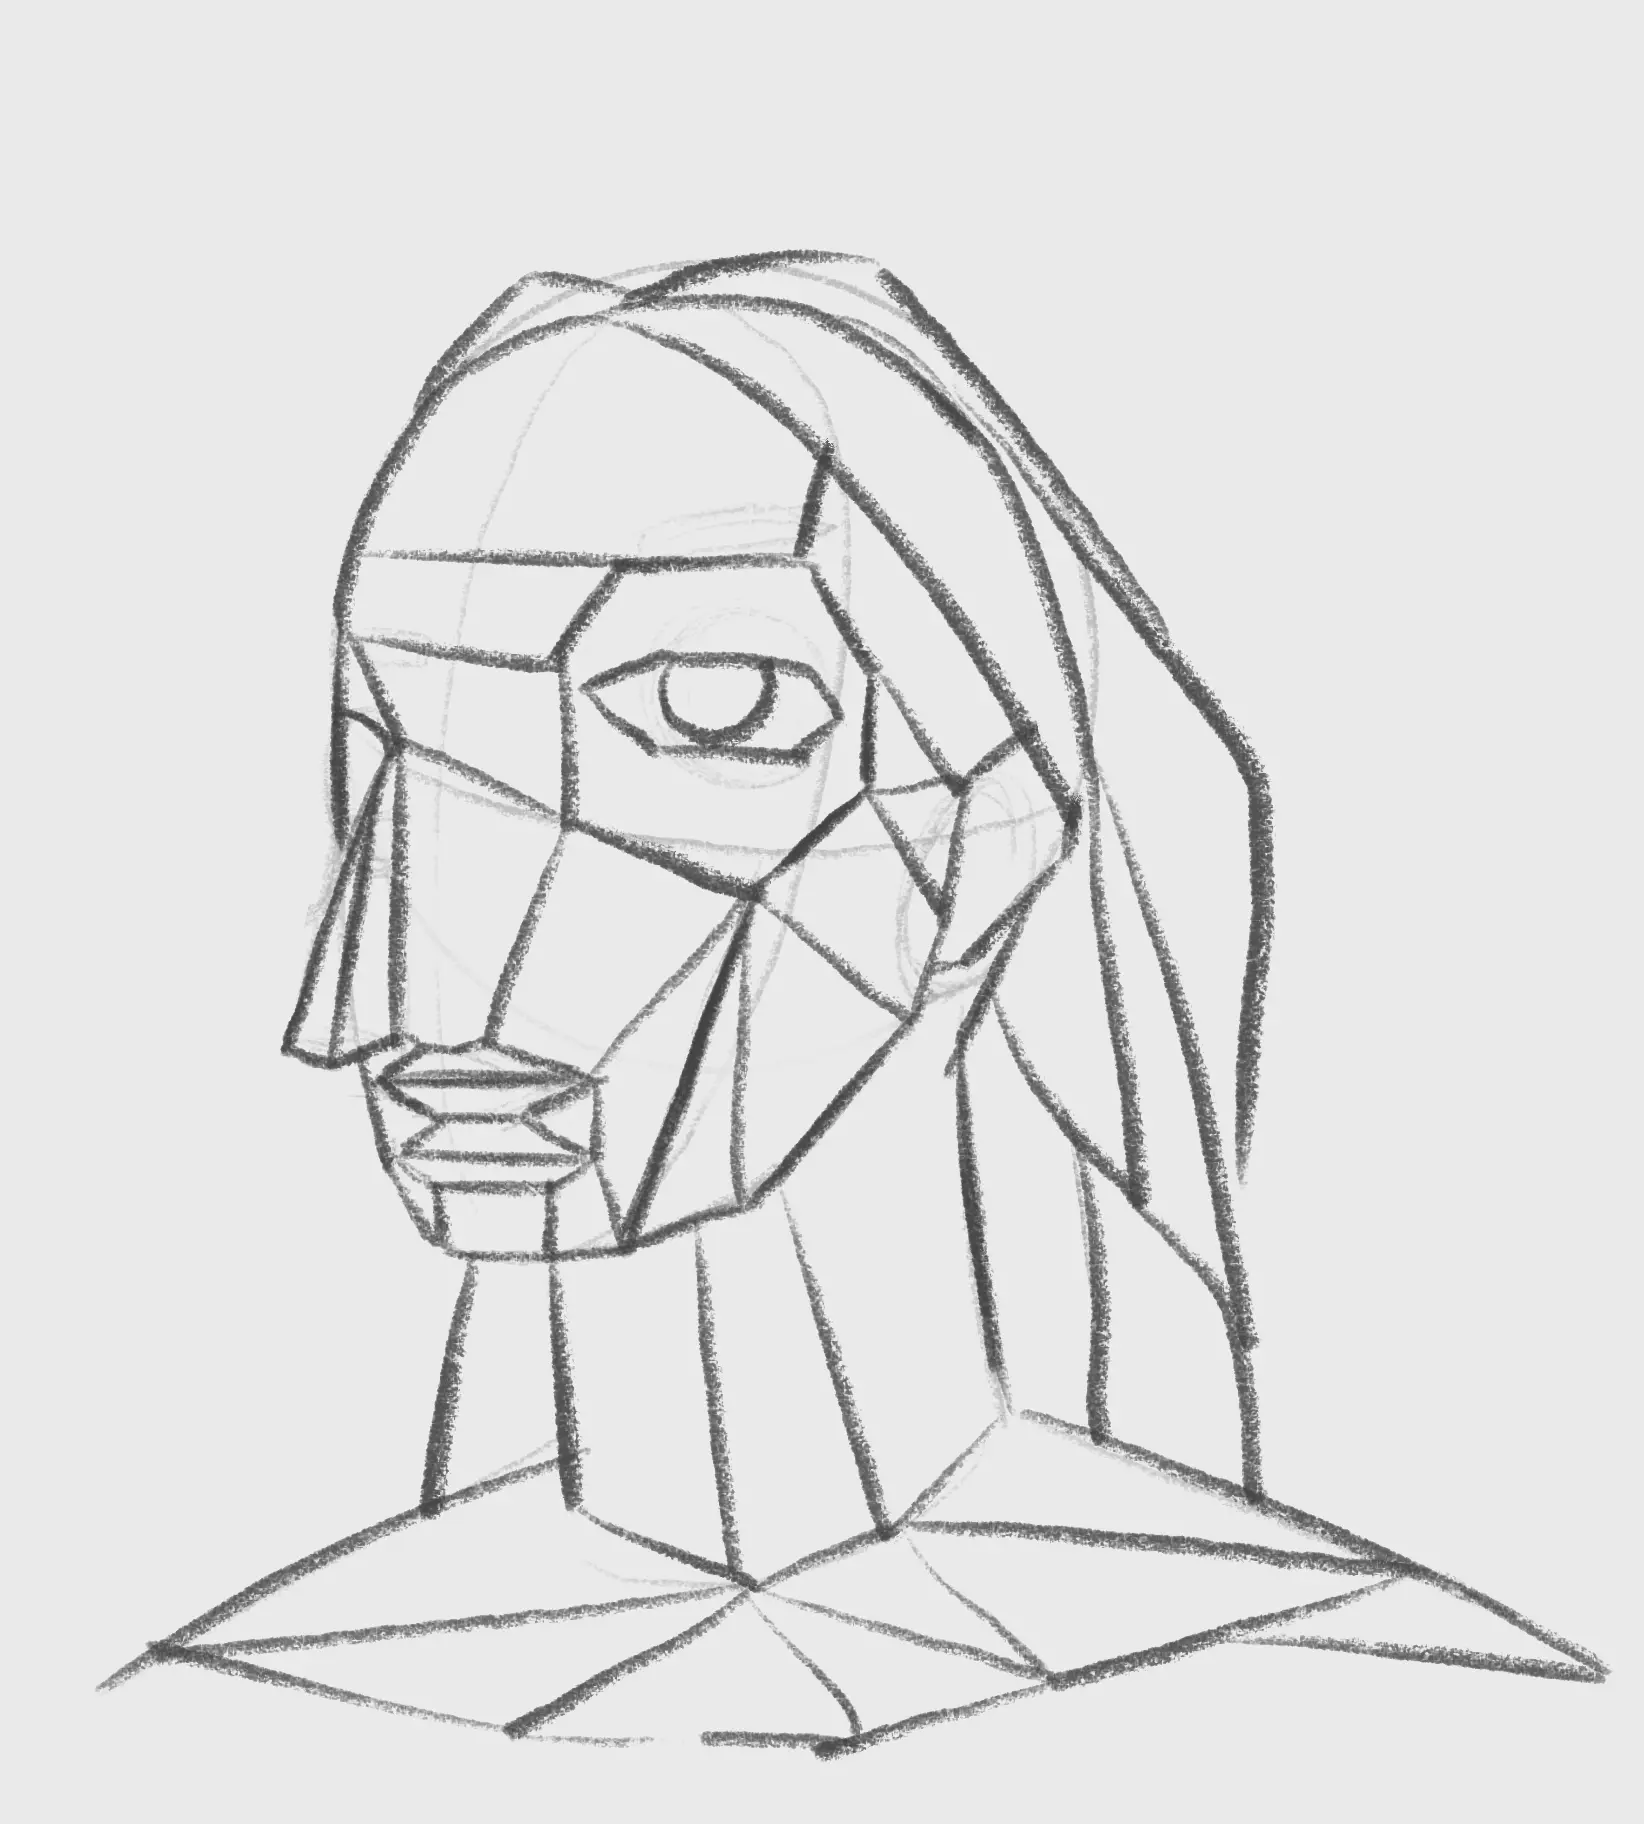
8. Next, we subdivide all the parts of the face by linking them to the already created face.
Adding color to the painting
9. When subdividing the background, the most commonly used shapes are often triangular forms.
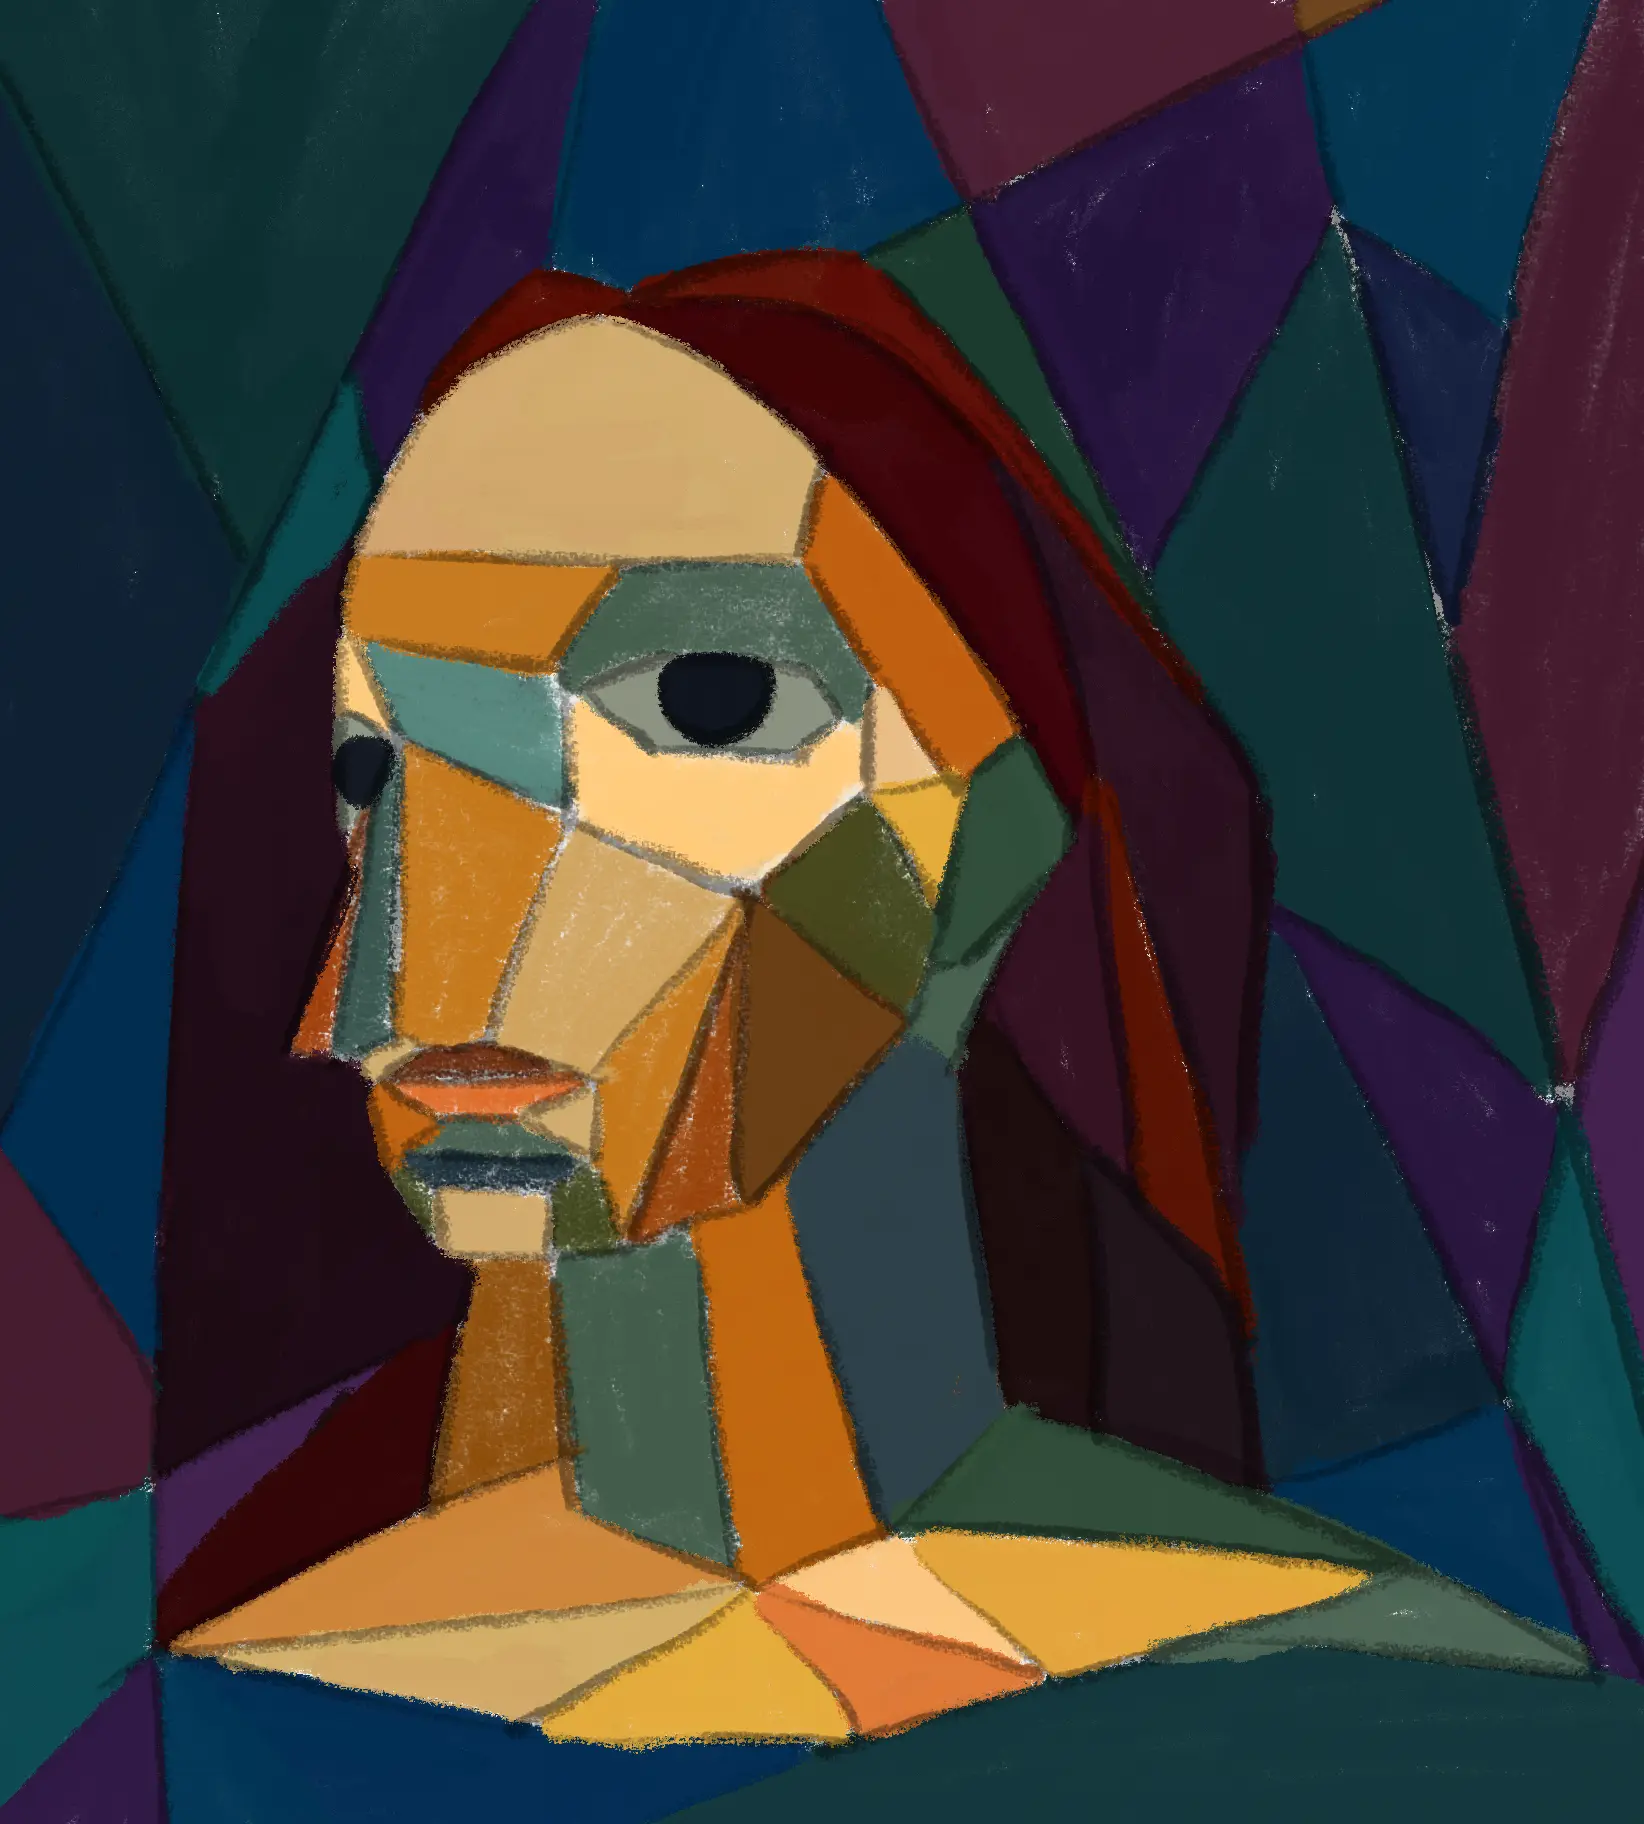
10. It’s time to apply some color, you can choose to draw inspiration from colorful atmospheres, either with an analytic style or a synthetic style, whichever you prefer. I personally will use varied but low-saturation colors. I’m still trying to use colors that separate the background from the face.

To finish, we just make the painting cleaner by clearly marking the boundaries. You can leave visible brush strokes, spots... the Cubism style is not smooth, it's up to you to observe and experiment.
Cubism is primarily a way of playing with reality. Forget about faithfully representing: here, anything goes as long as the shapes and colors create harmony. The more you dare to break the rules, the more character your artwork will have. So, get your pencils out and have fun reinventing the world in the style of Picasso!
Discussion
Oh what a great and comprehensive article, it's actually a perfect mini course in my opinion as it combines the history of this art and shows in a very educational way the exact approach to execute a cubist drawing. Thank you very much. I really love it!