How to Draw an Albatross
Today, we’re heading out to the open sea to draw an albatross. With its immense wingspan and elegant silhouette, this bird is a fascinating subject to observe and sketch. Follow me step by step to understand its structure and learn how to draw it easily.
Characteristics of the albatross
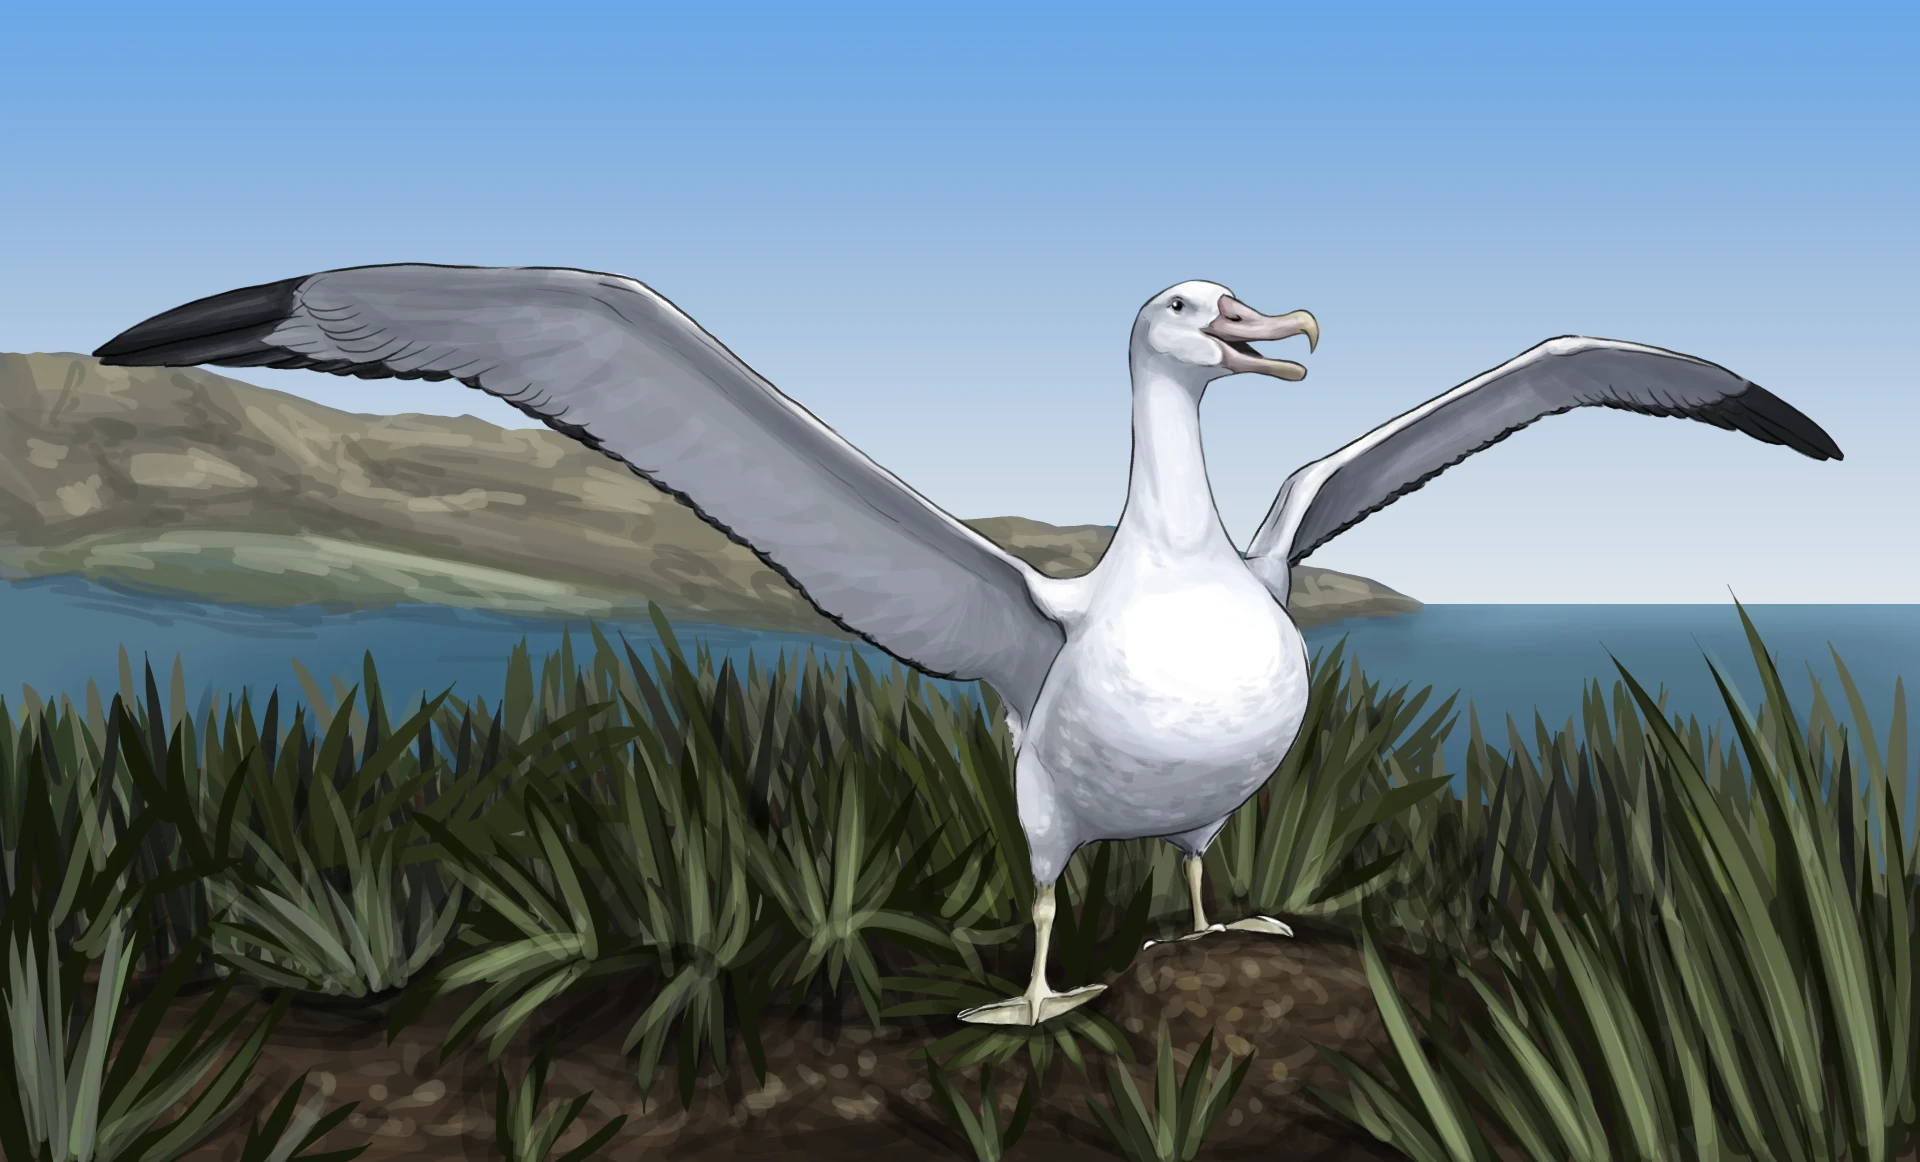
Albatrosses are large birds characterized by their immense wings, with a wingspan that puts them among the largest winged animals. They live on rocky coasts and cliffs.
Regarding their anatomical characteristics, in addition to noting the size of their wings, each of which can reach twice the length of their body, we can also mention their piercing gaze, their slightly elongated beak with a hooked tip adapted for fishing, their flattened feet like those of ducks, as well as a small body whose musculature is concentrated in the chest and shoulders.
Not to be confused with the seagull
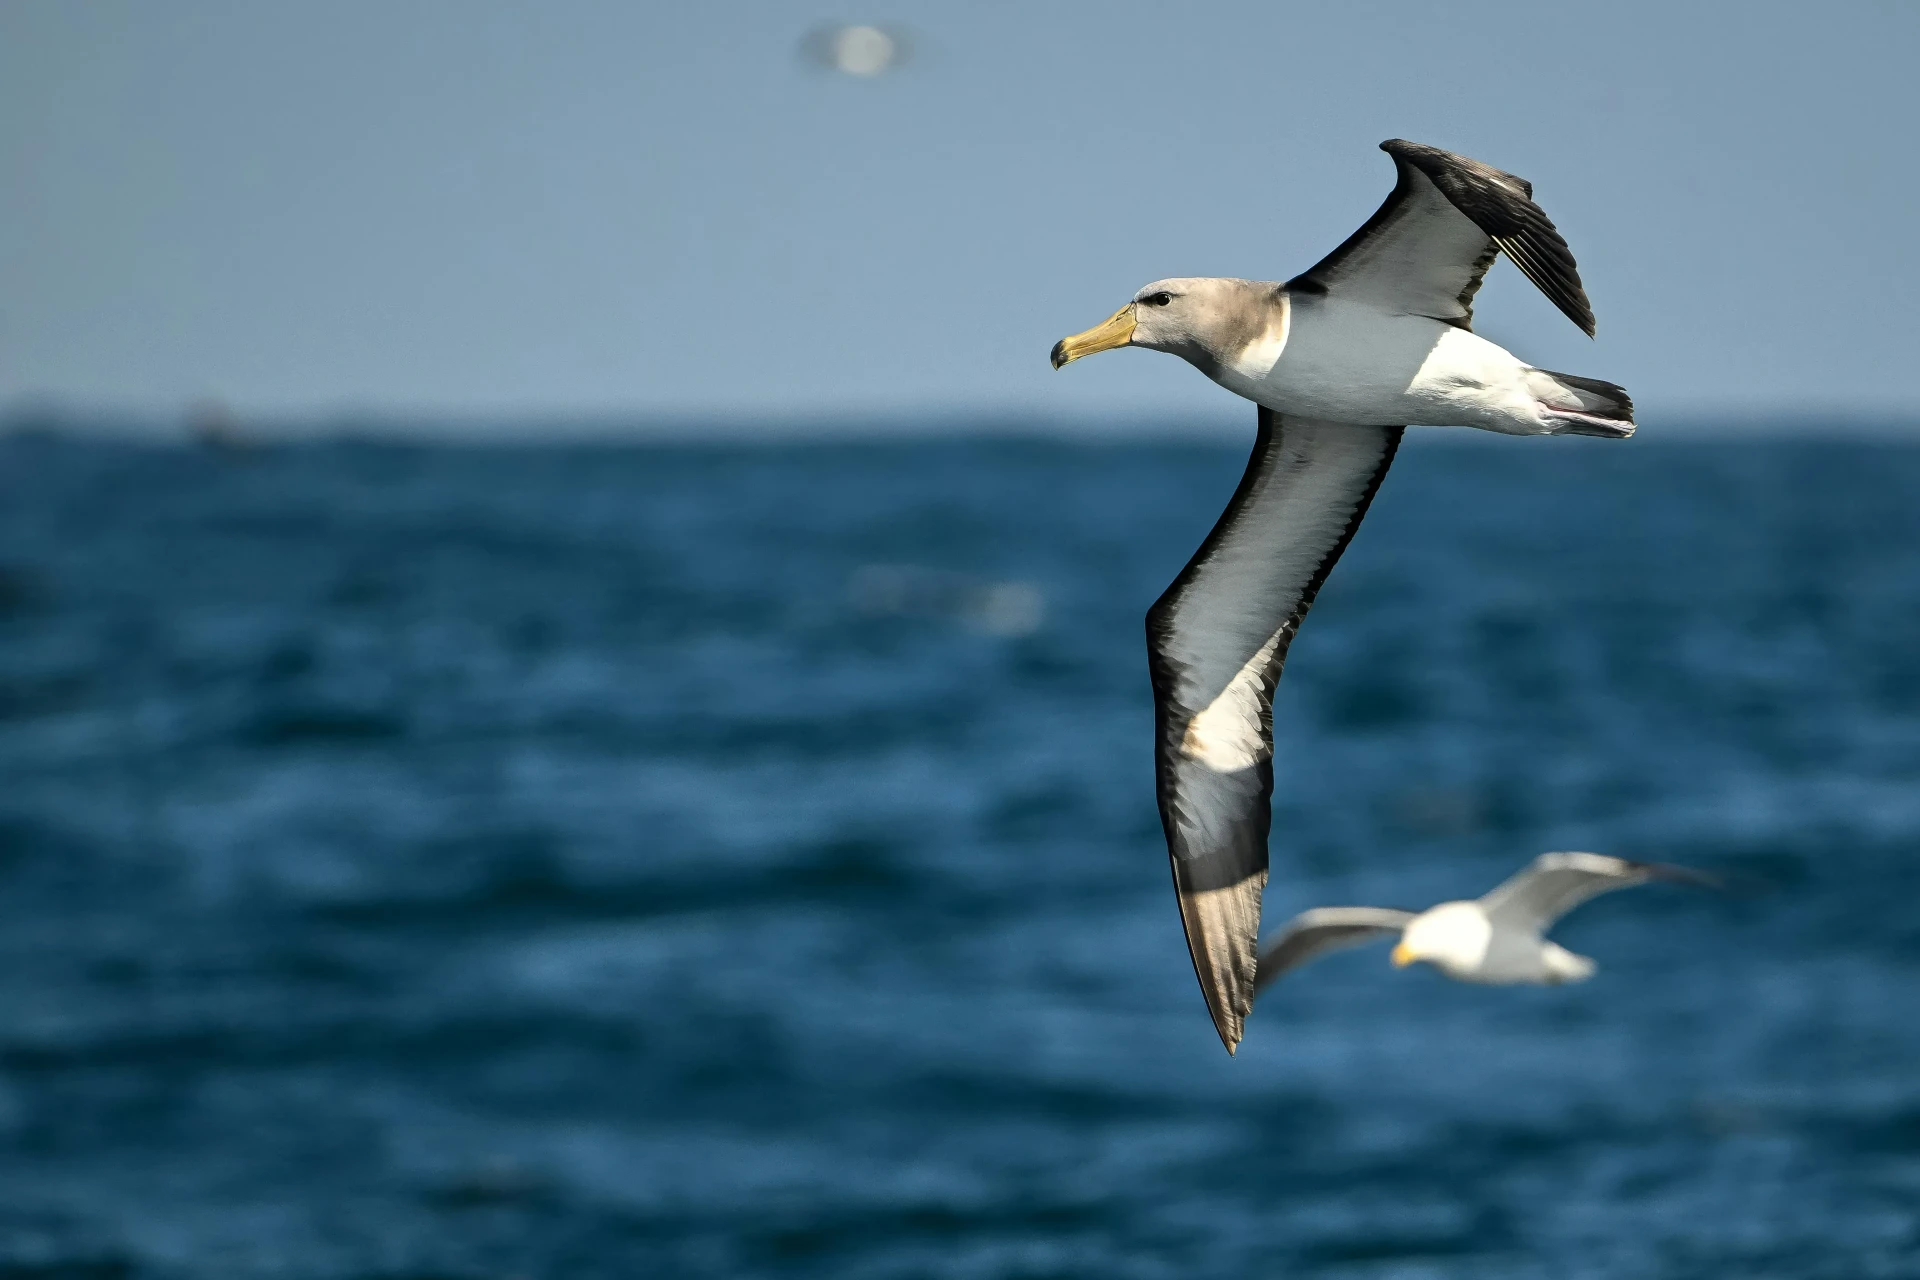
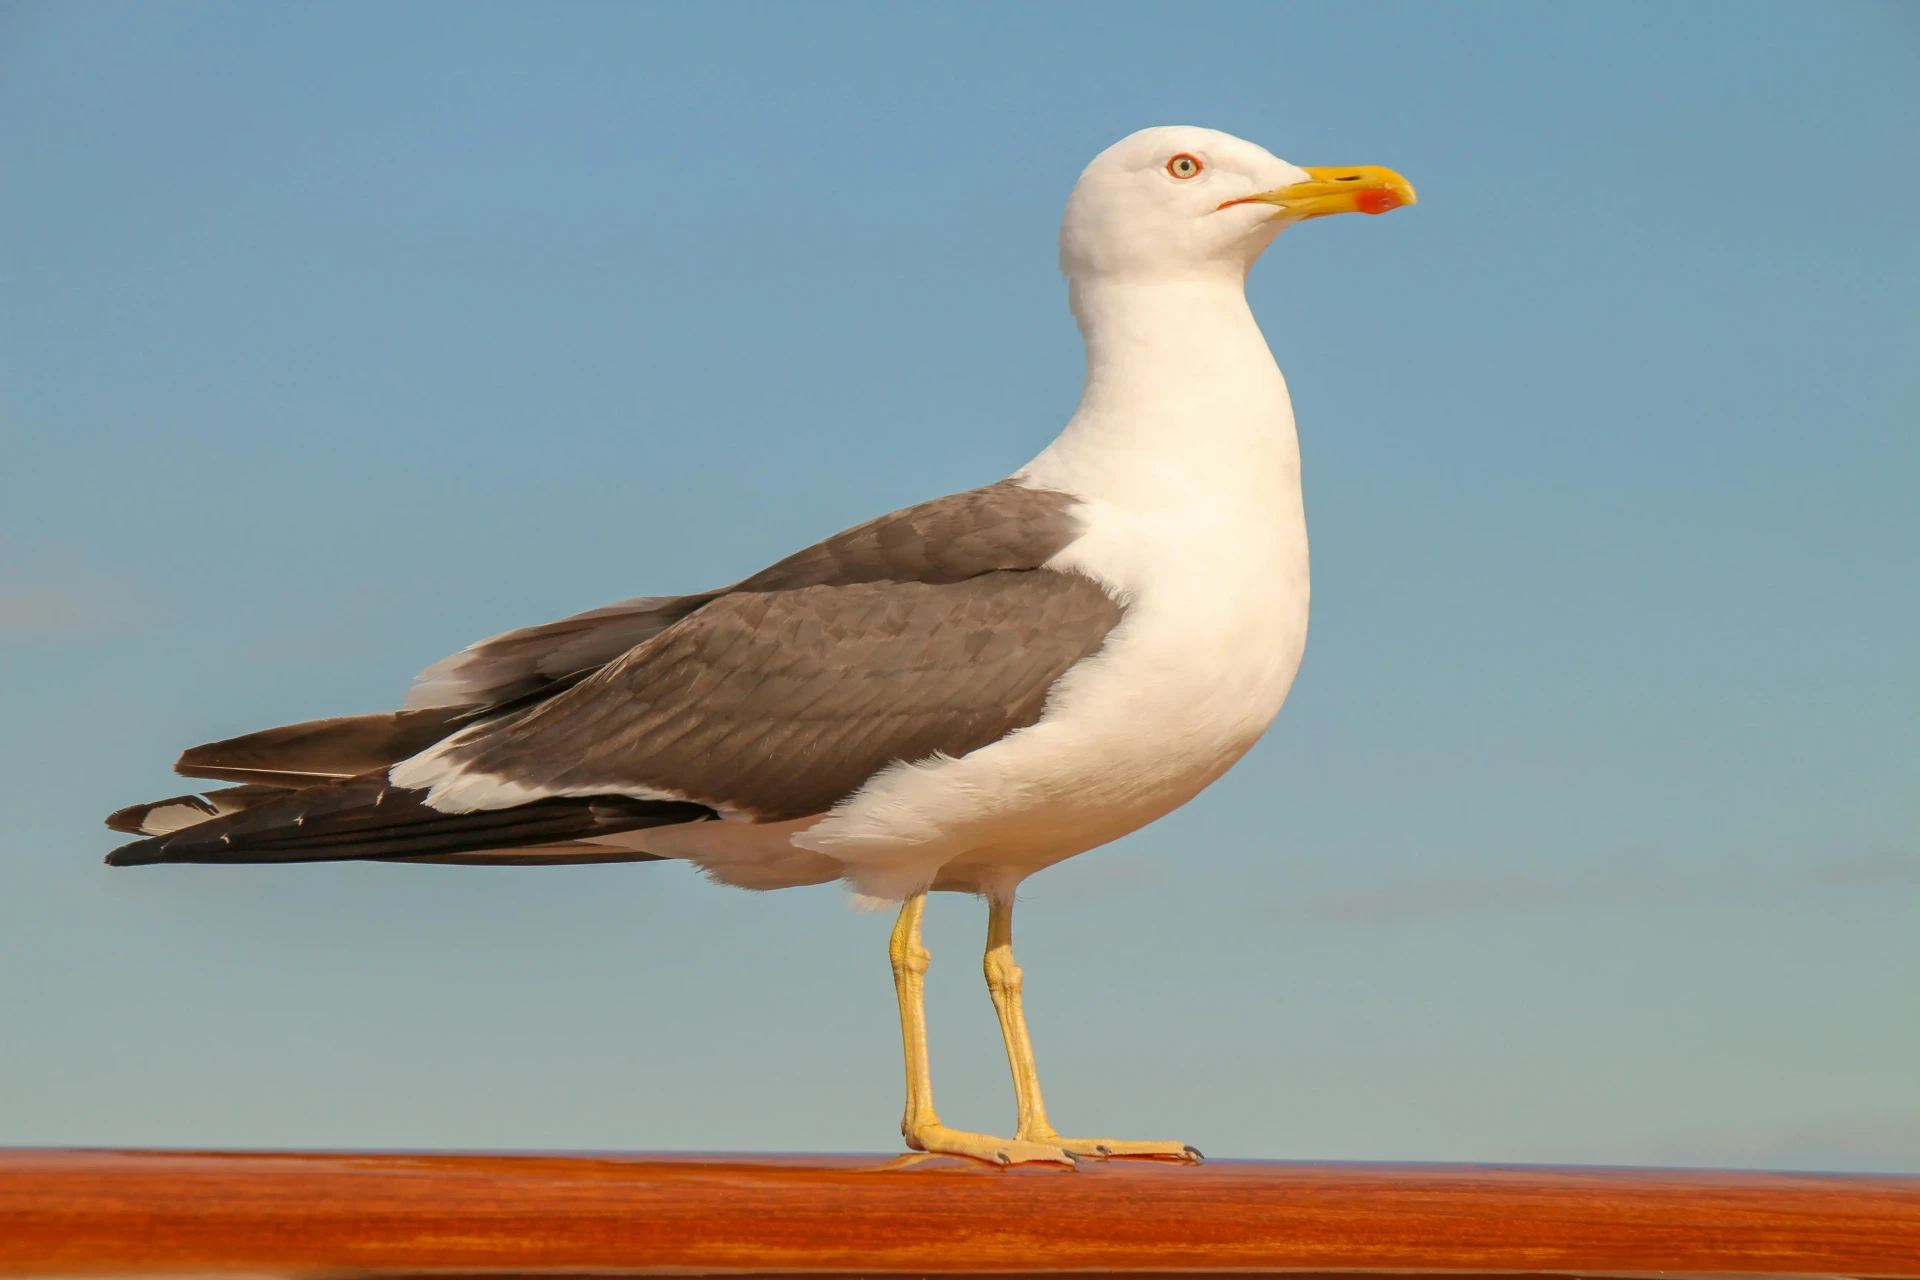
Even though these birds may seem similar, they can be identified by their size. The difference in scale is comparable to that between a pigeon and an eagle: seagulls are much smaller and have shorter wings. They also have yellow beaks and legs, unlike the paler tones of albatrosses.
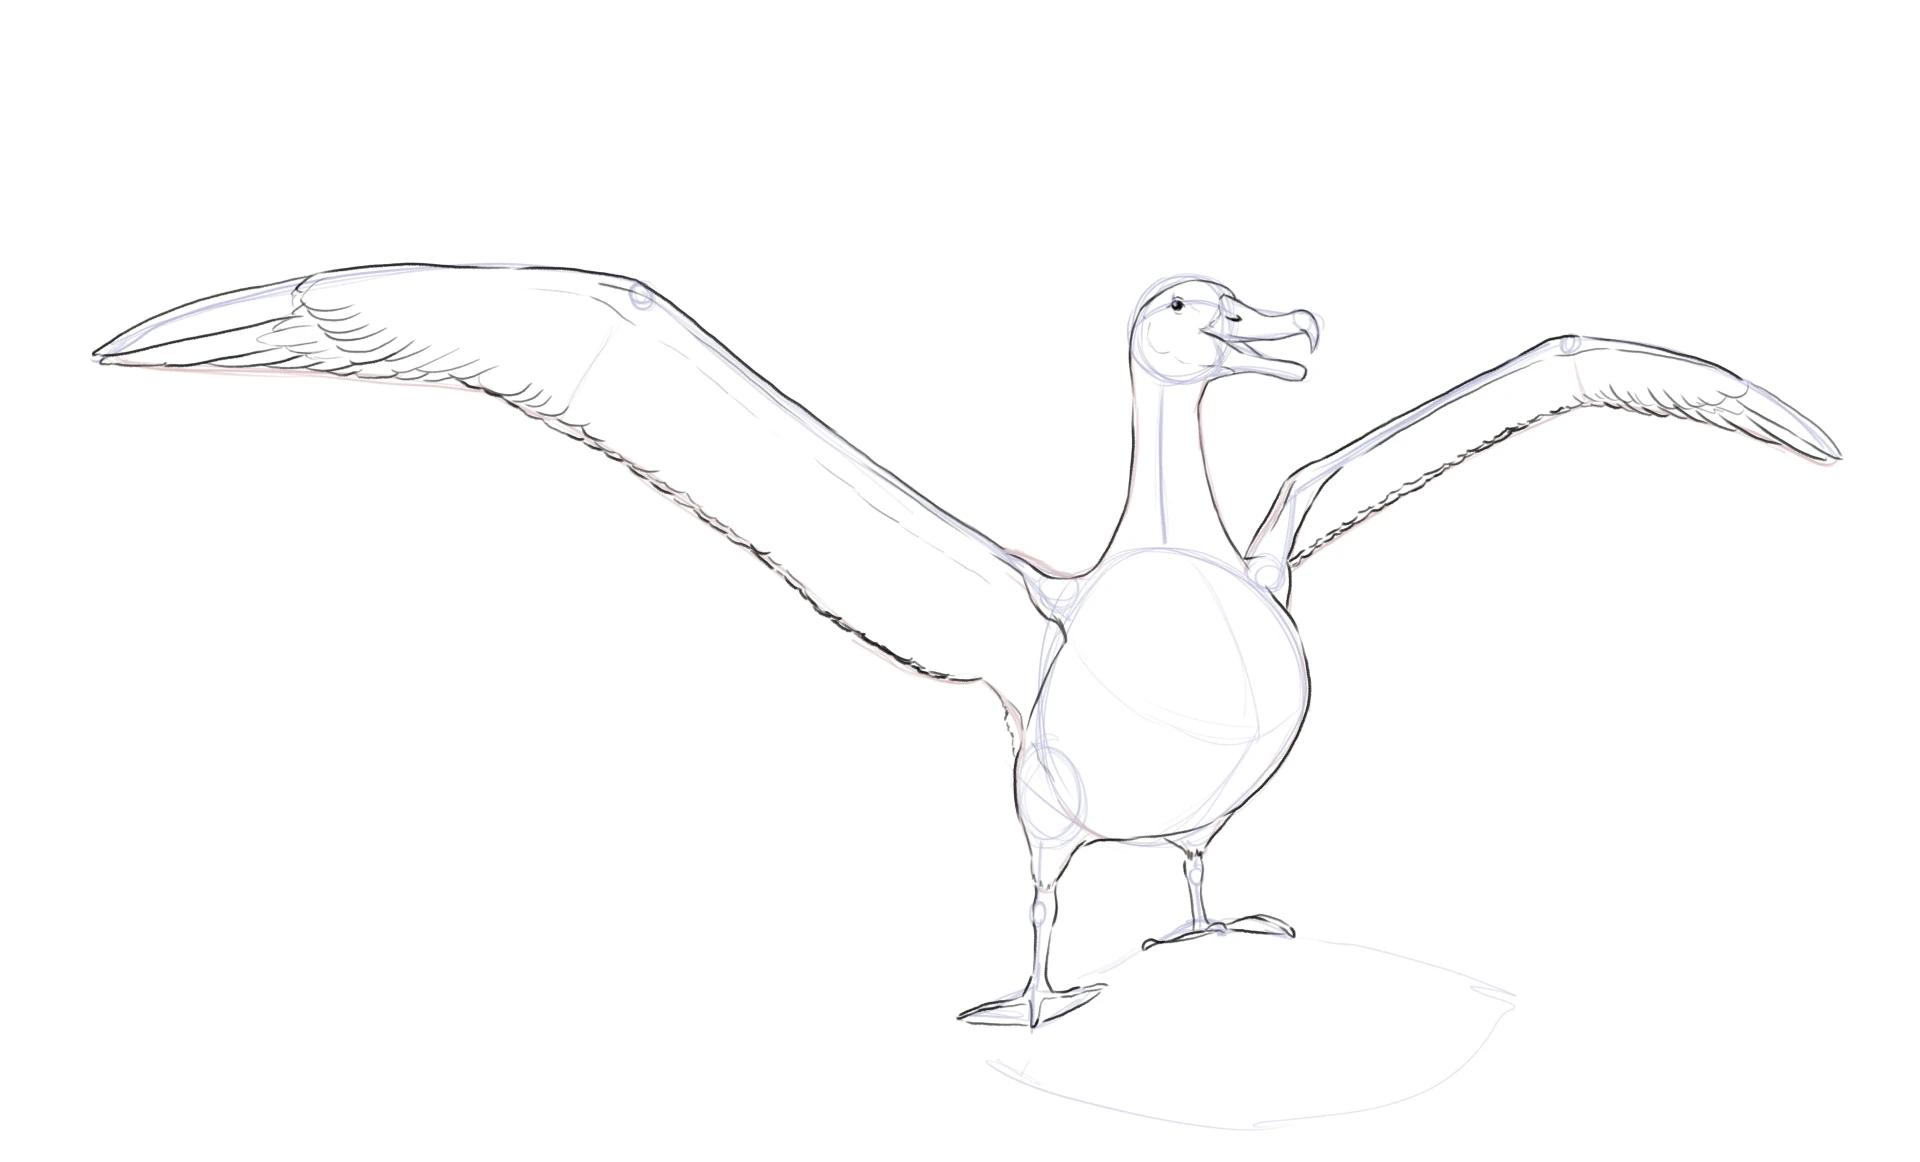
How to draw an albatross step by step
To begin, we will draw two circles that will help us identify the head and torso. One will be much larger than the other. Consider a proportion of about 6 to 1, placing the smaller circle much higher up.

Connect them with a straight line to form the elongated neck. Draw small circles on the upper and lower parts of the torso for the shoulders and thighs, with a slight incline to create a three-quarter pose.
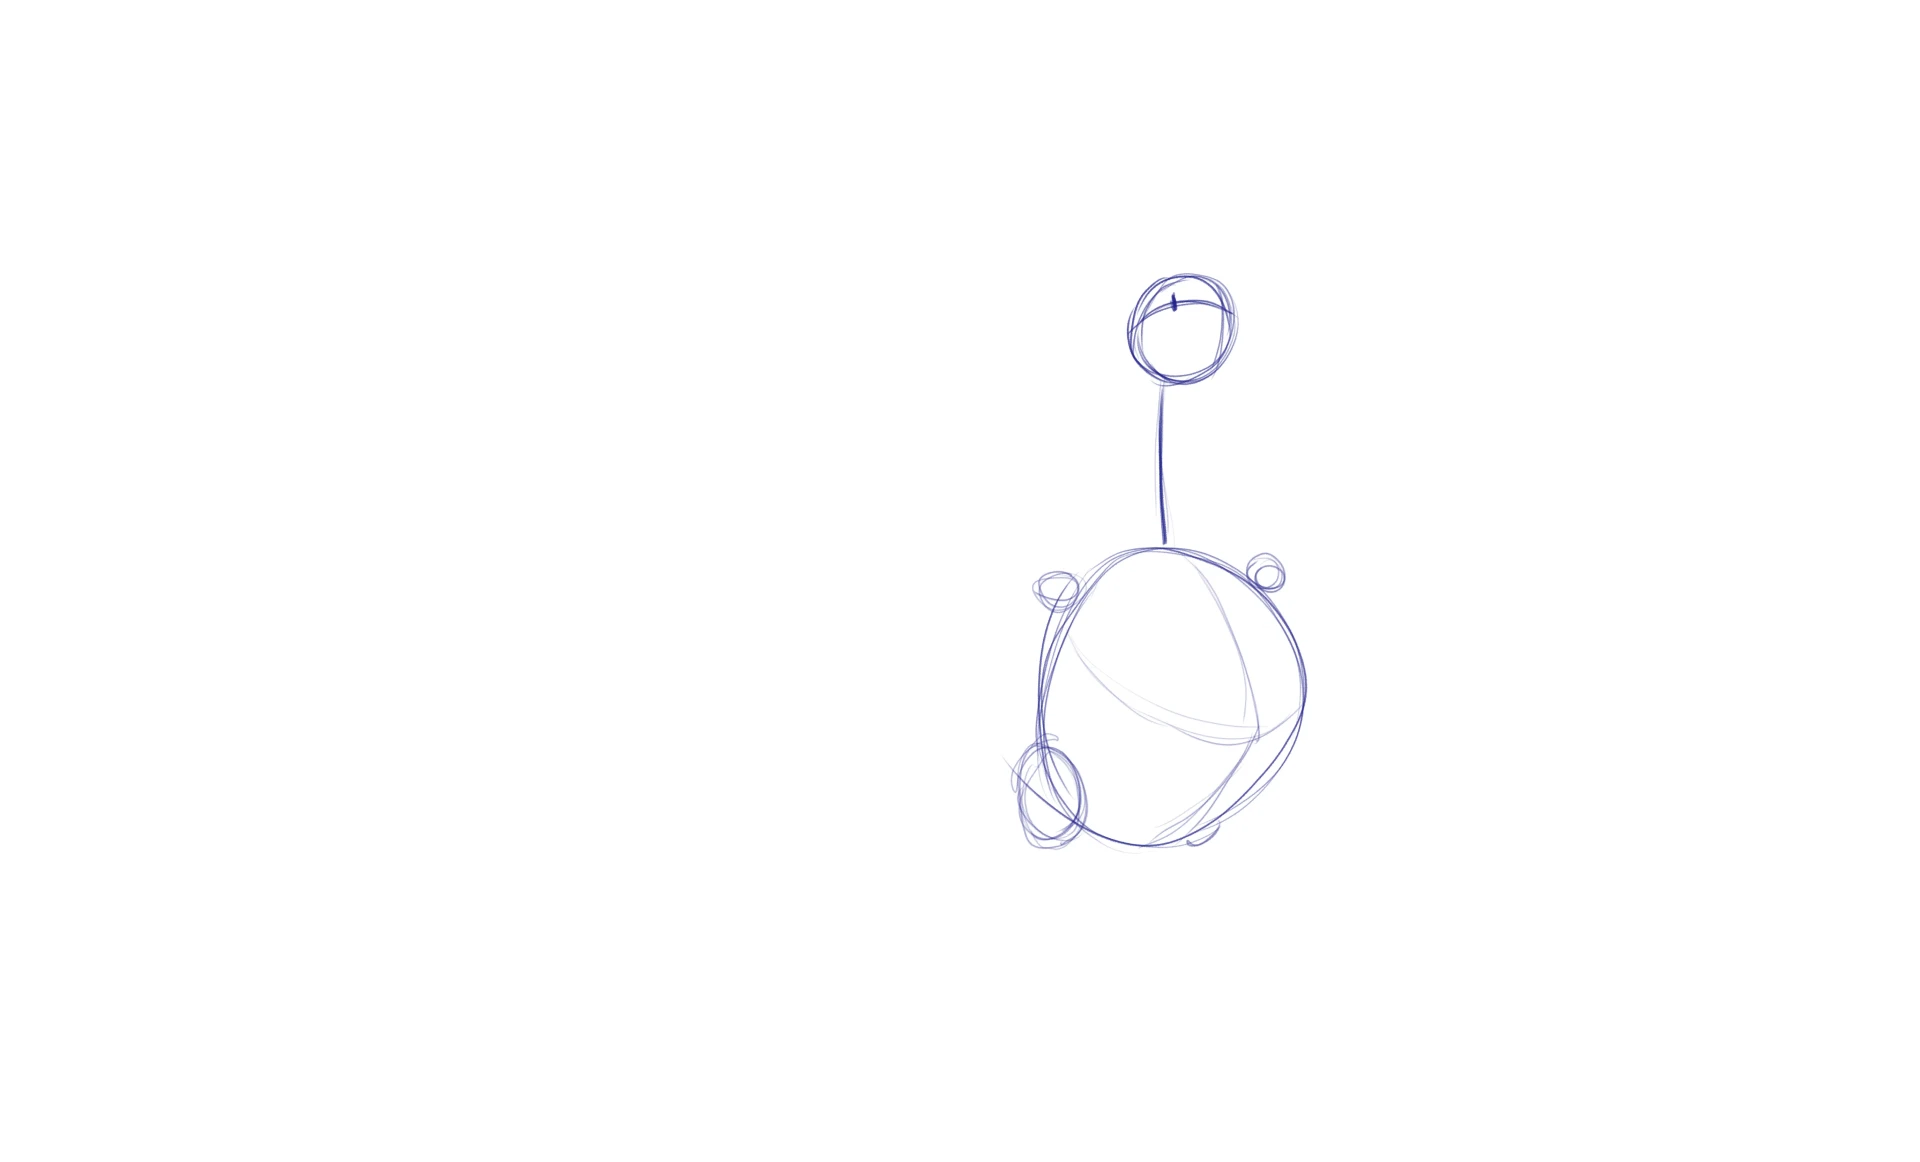
To complete the basic structure, draw the beak and the limbs. The beak starts with a width almost equal to that of the head, then gradually narrows to take on a curved shape, ending in a hook. For the wings, draw two large lines that meet at an elbow; one will be longer than the other, depending on the chosen perspective.
The feet, on the other hand, are two short limbs that end in a triangular flat shape.
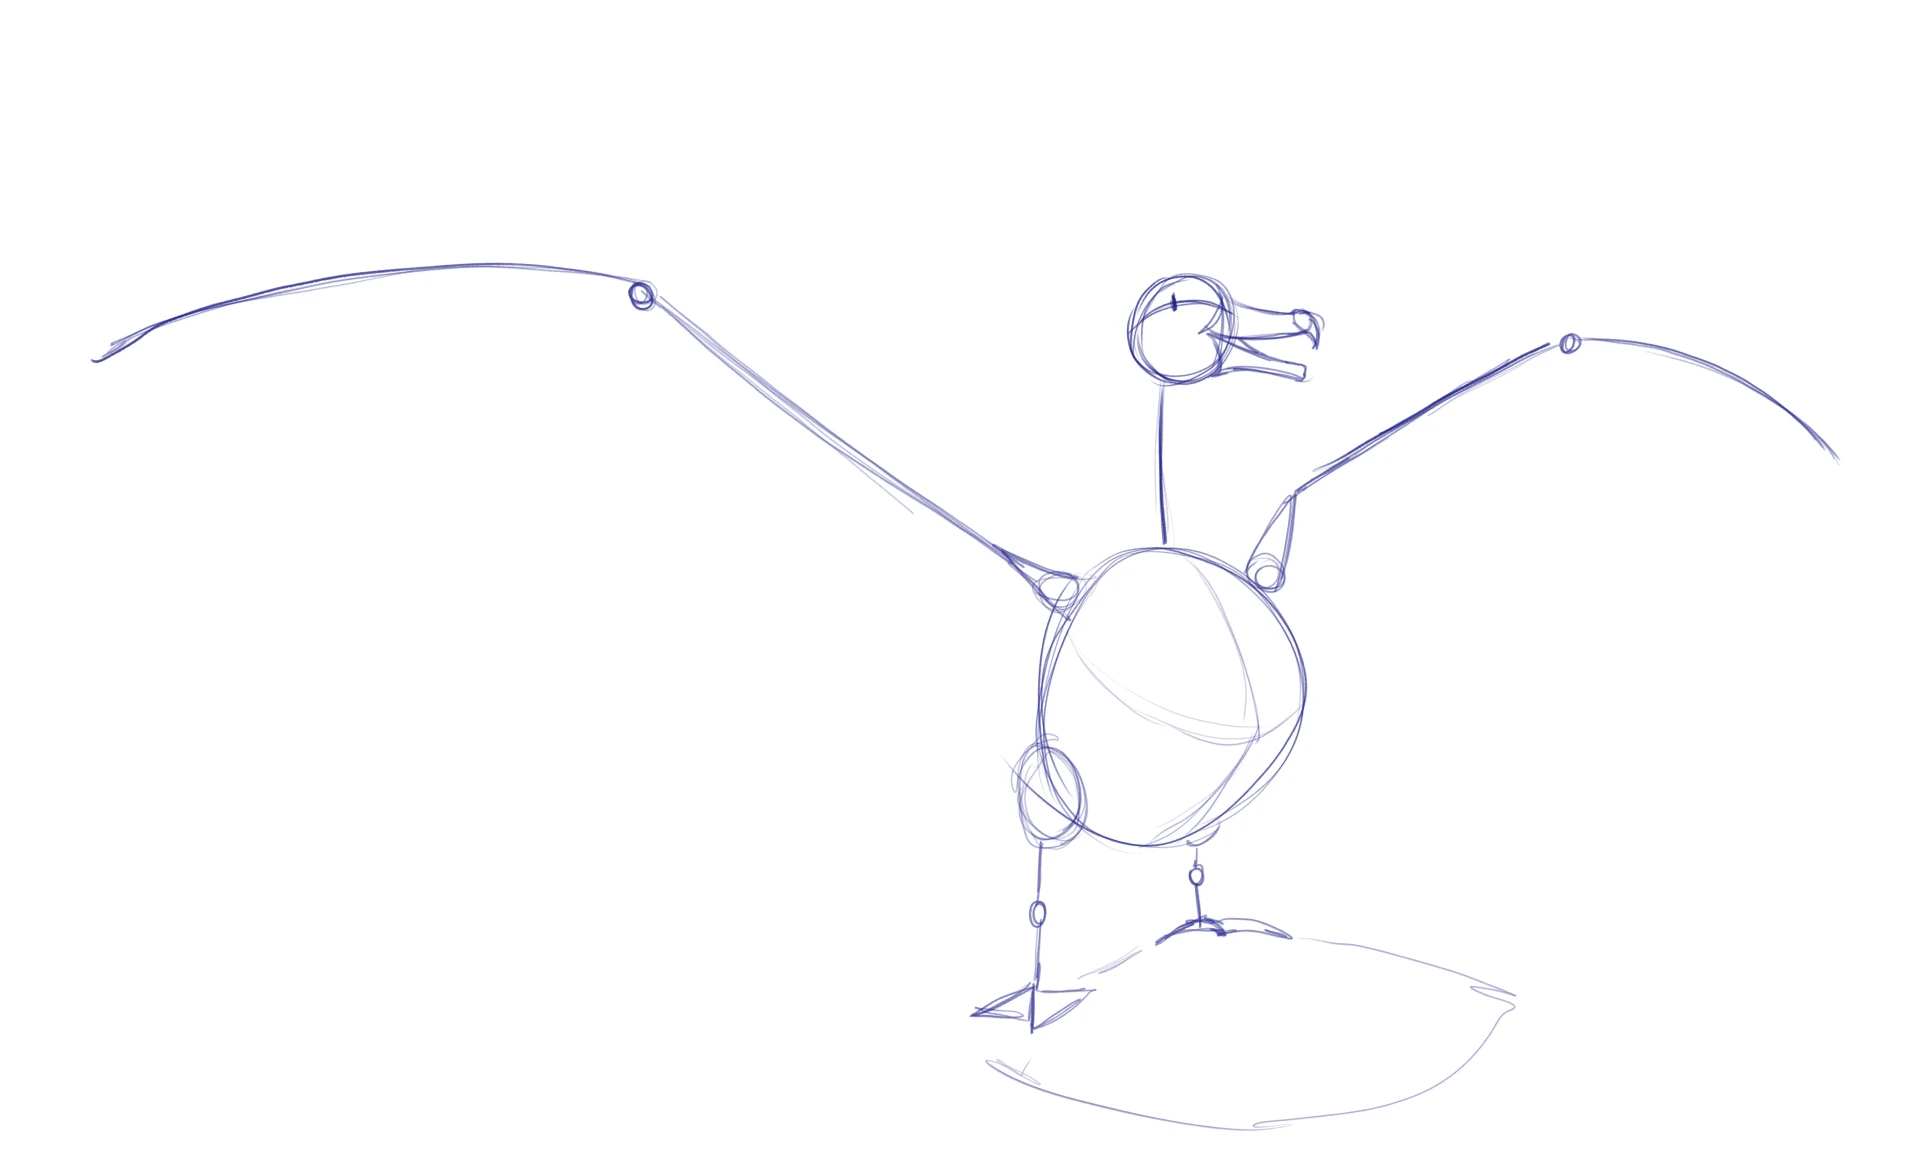
This construction diagram will help you distribute your lines well: note the neck, which becomes thinner towards the top, the thin wings, and the powerful chest – these are essential guide points for the next steps.
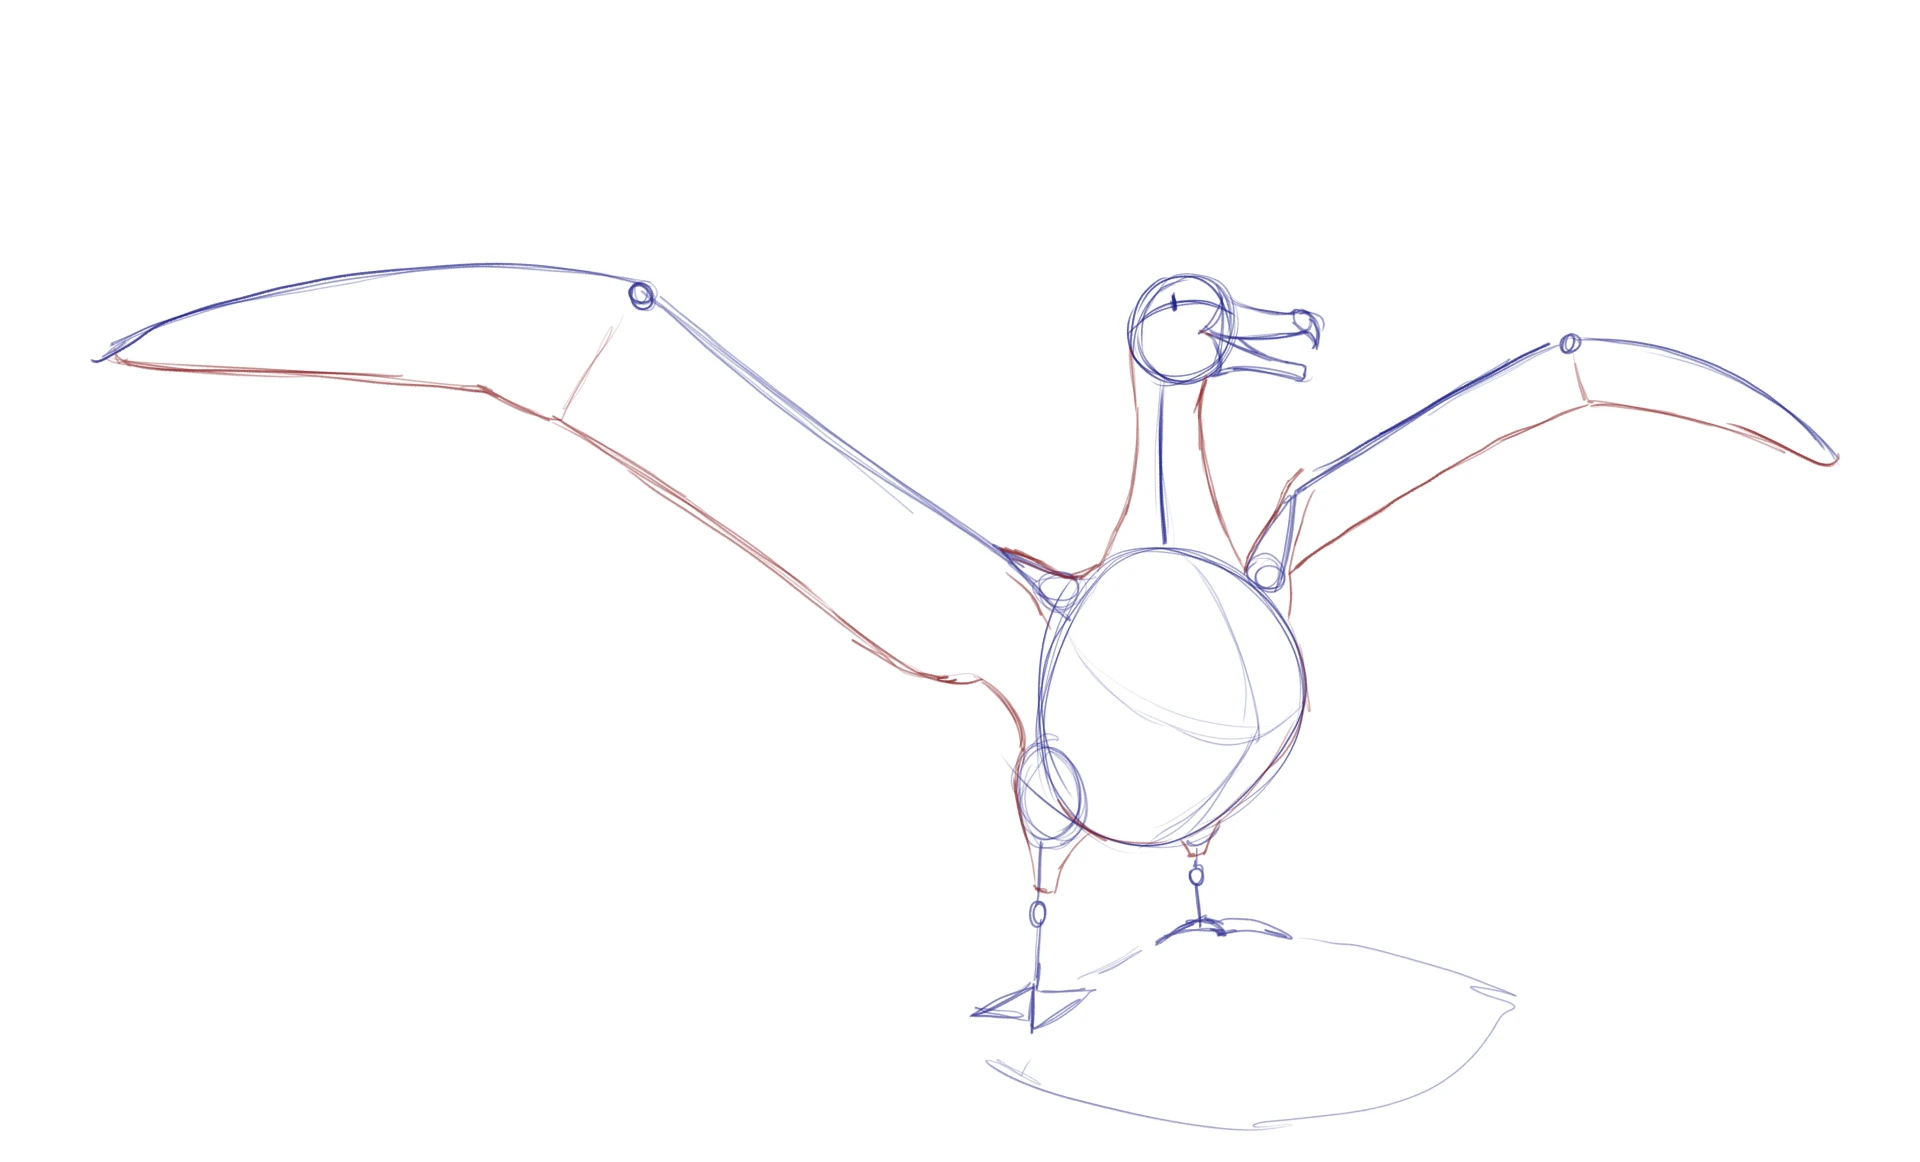
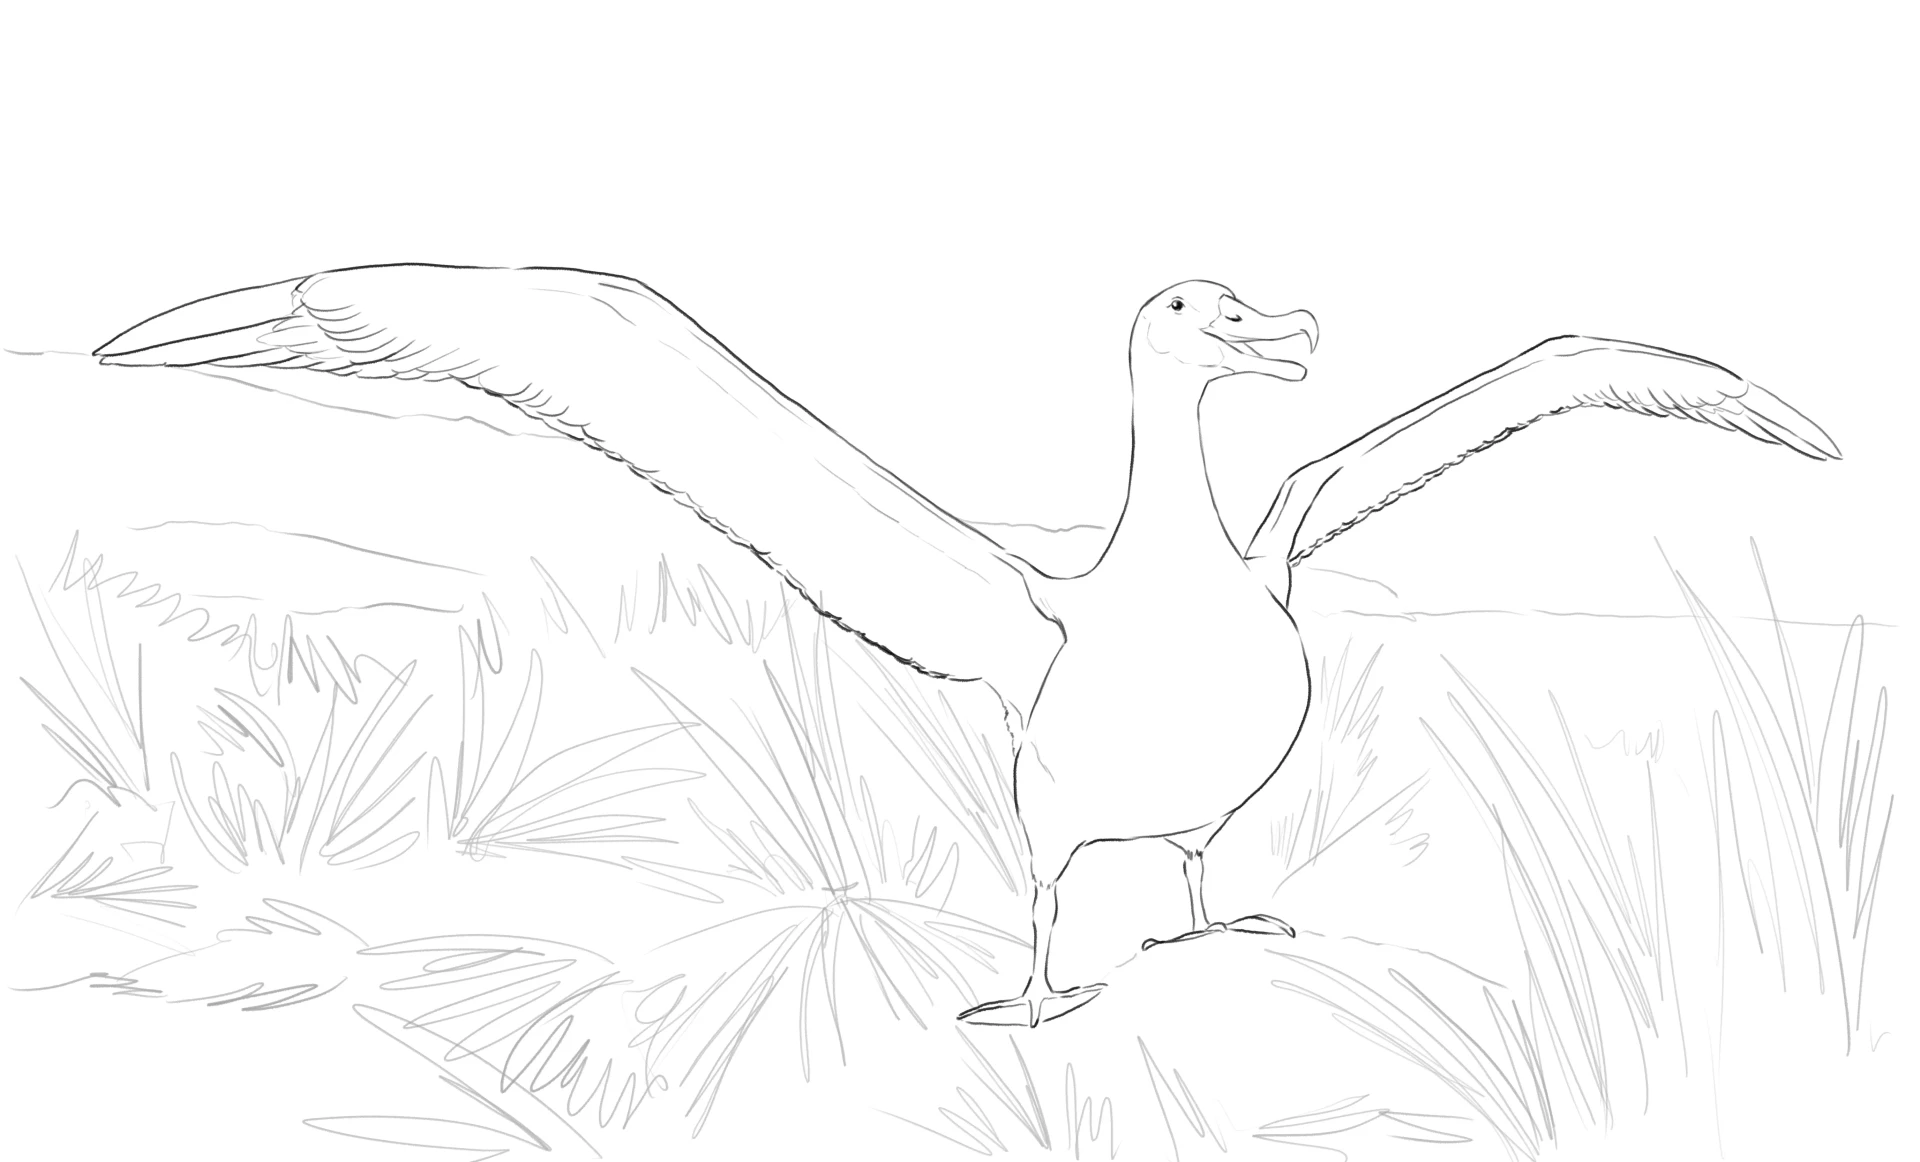
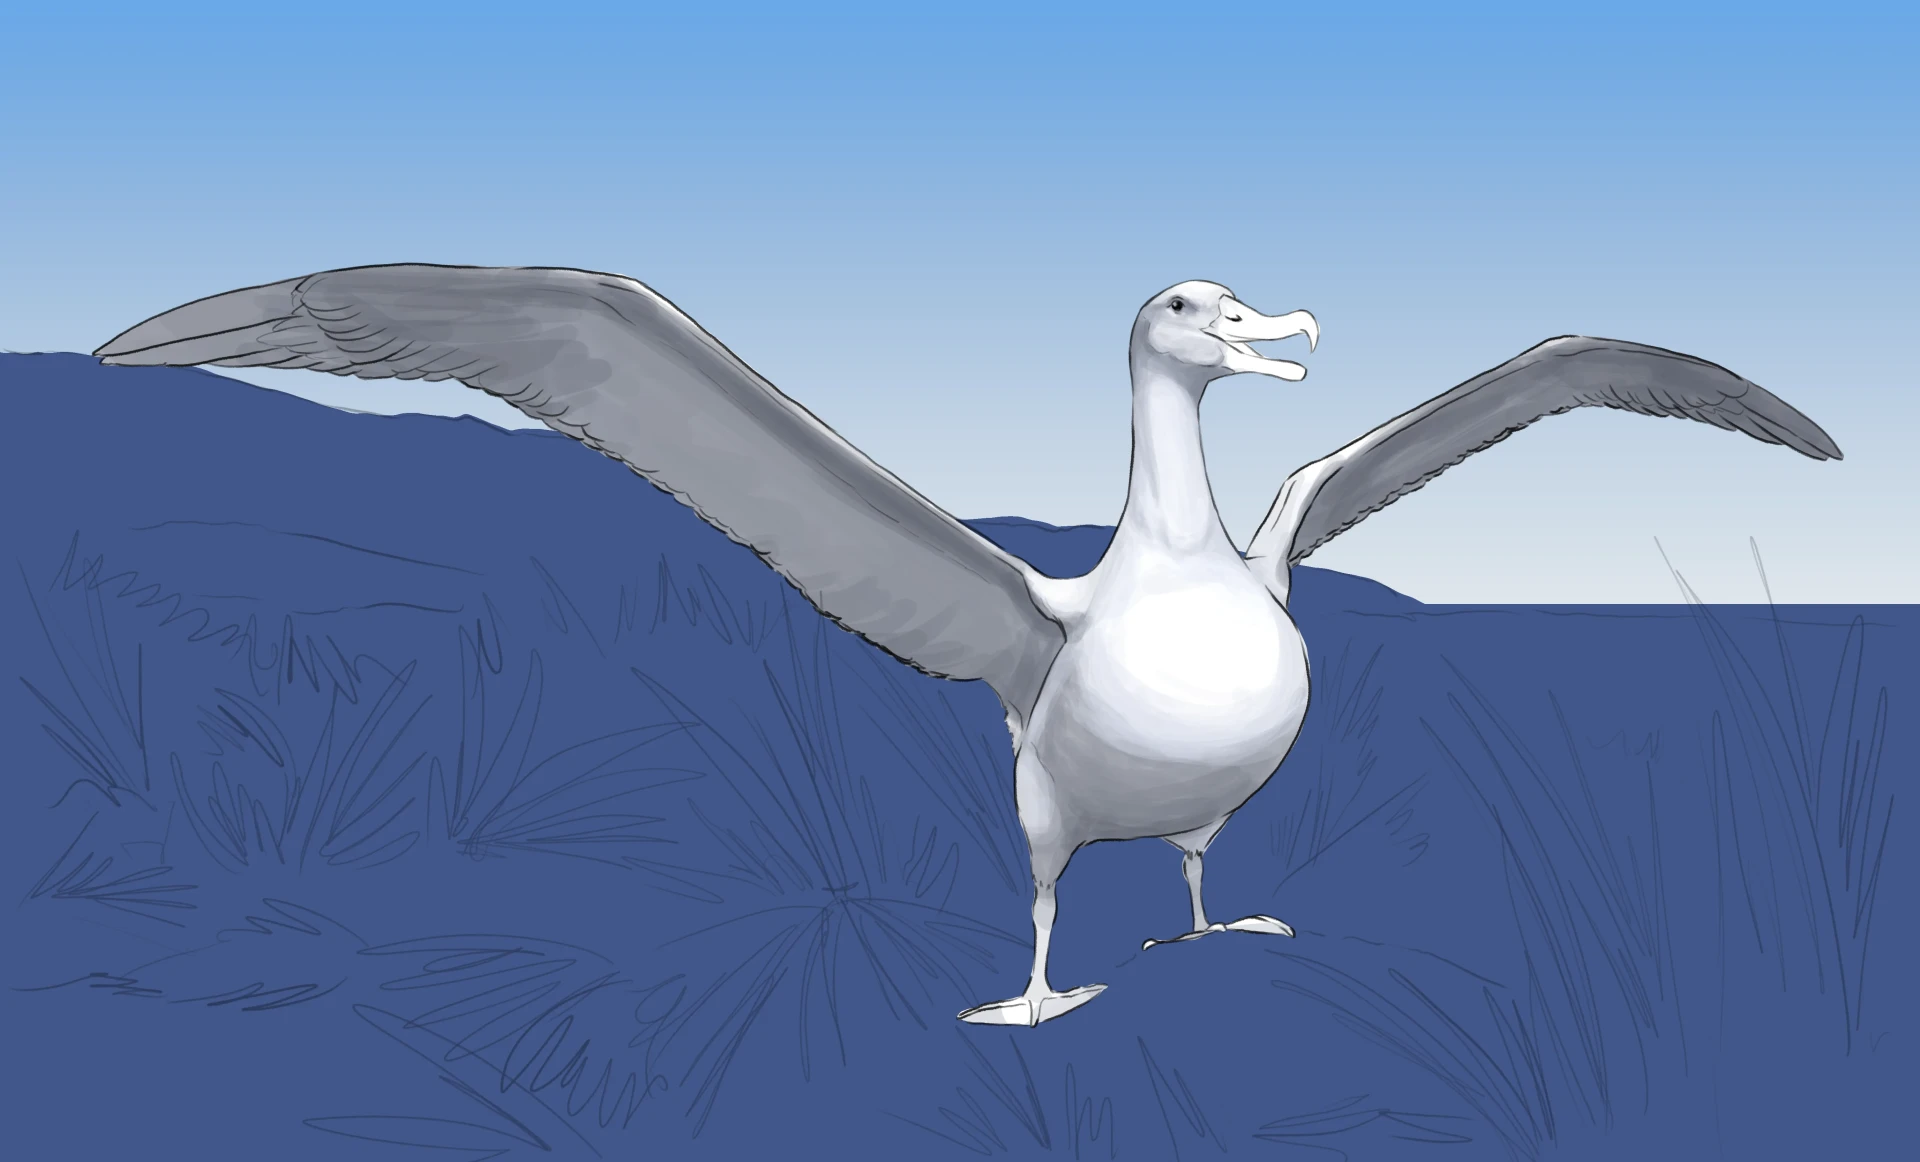
Draw the albatross’s head
Make the sketch fainter without completely erasing it to maintain a visible base for construction. Work on the final line with precision and delicacy – a well-sharpened point or an ink tool will do the trick.
Start by drawing the head: refine the beak with a few extra curves for a more organic look. The feathers completely cover the face up to the edge of the beak; draw their outlines with fine, curved lines.
Sketch the eyes, then use a few light lines to suggest the volumes of the face, around the eye and at the level of the jaw. Finish by reinforcing the outline on the entire head and neck.
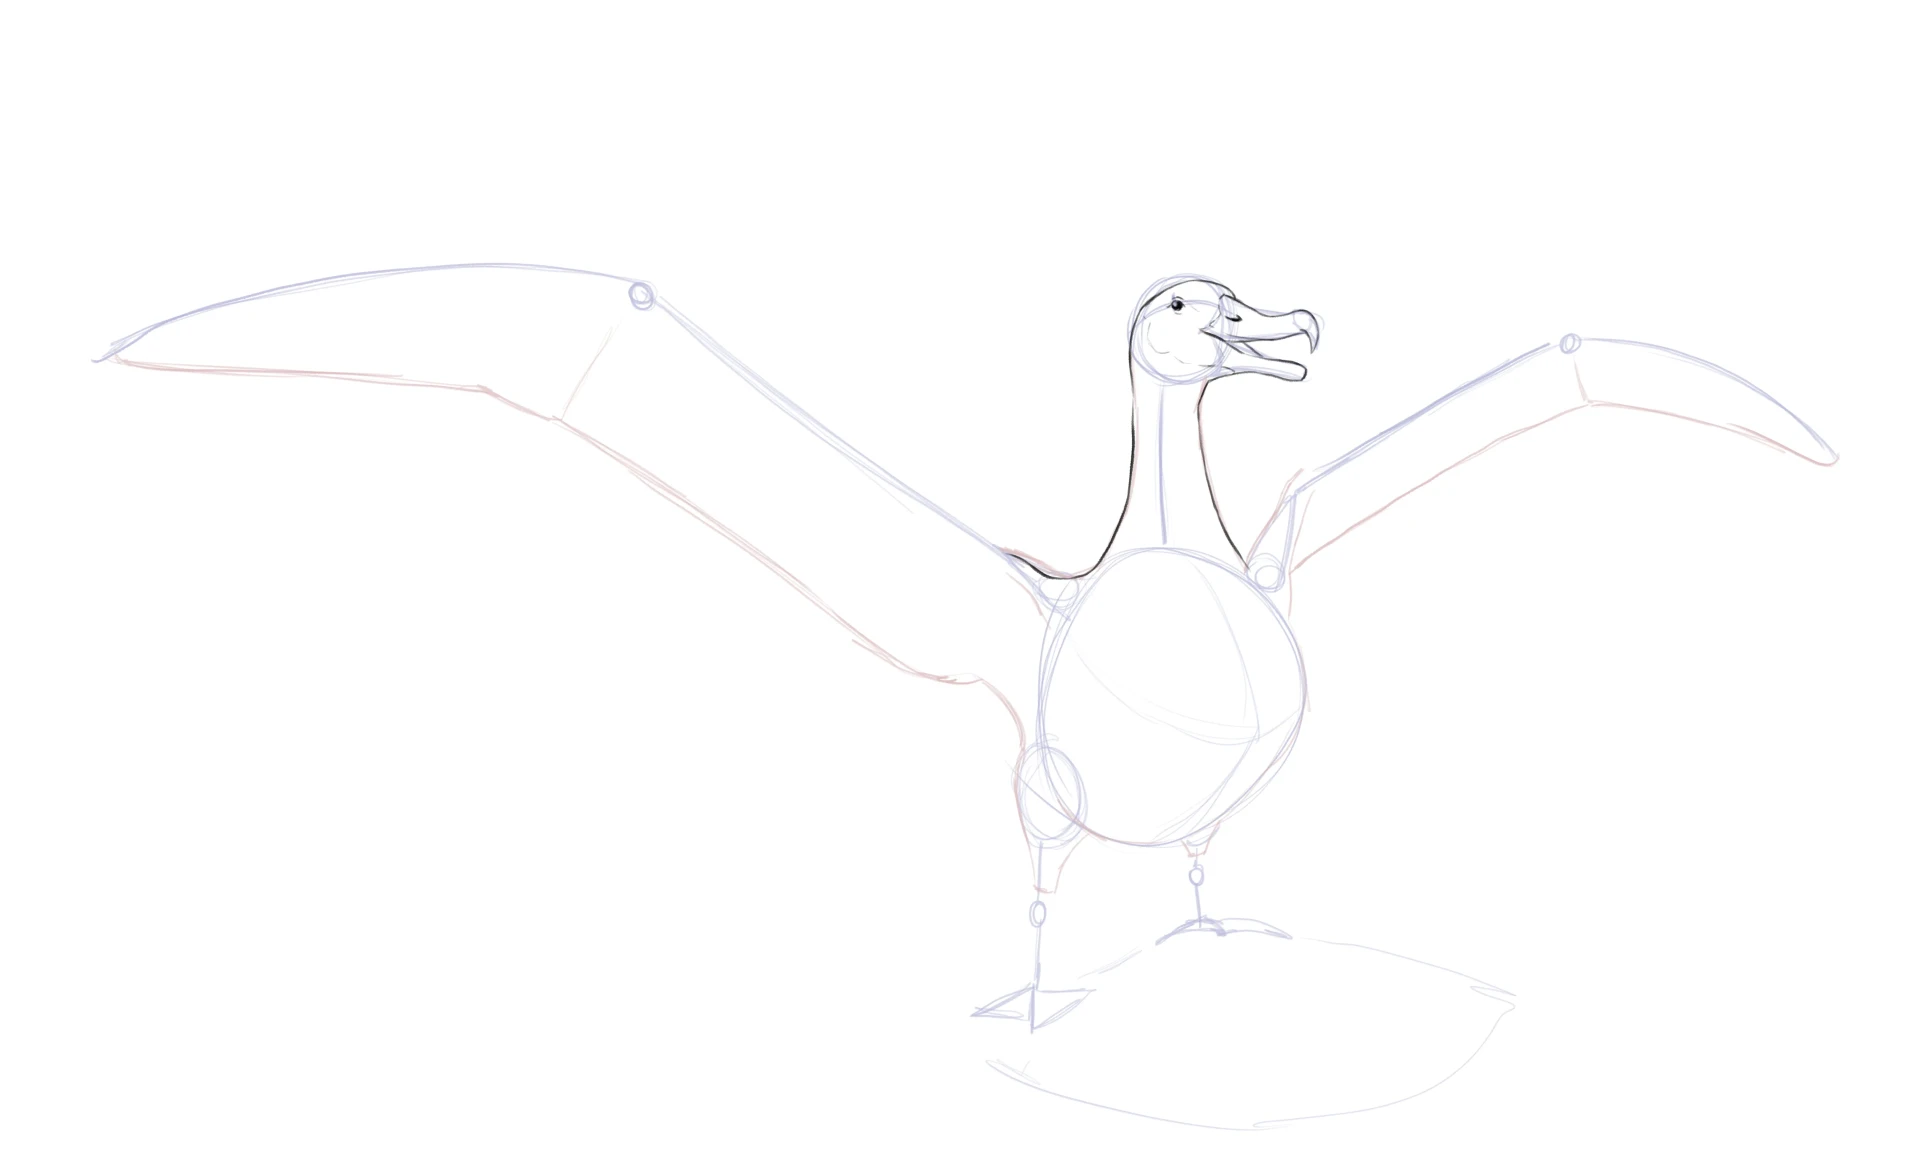
Next, move on to the wings. The albatross’s plumage is much simpler to depict than that of other birds: its feathers are thin, almost like sheets of paper, and do not create a very noticeable texture at this distance. A few feathers drawn on the lower contour of the wing will suffice.
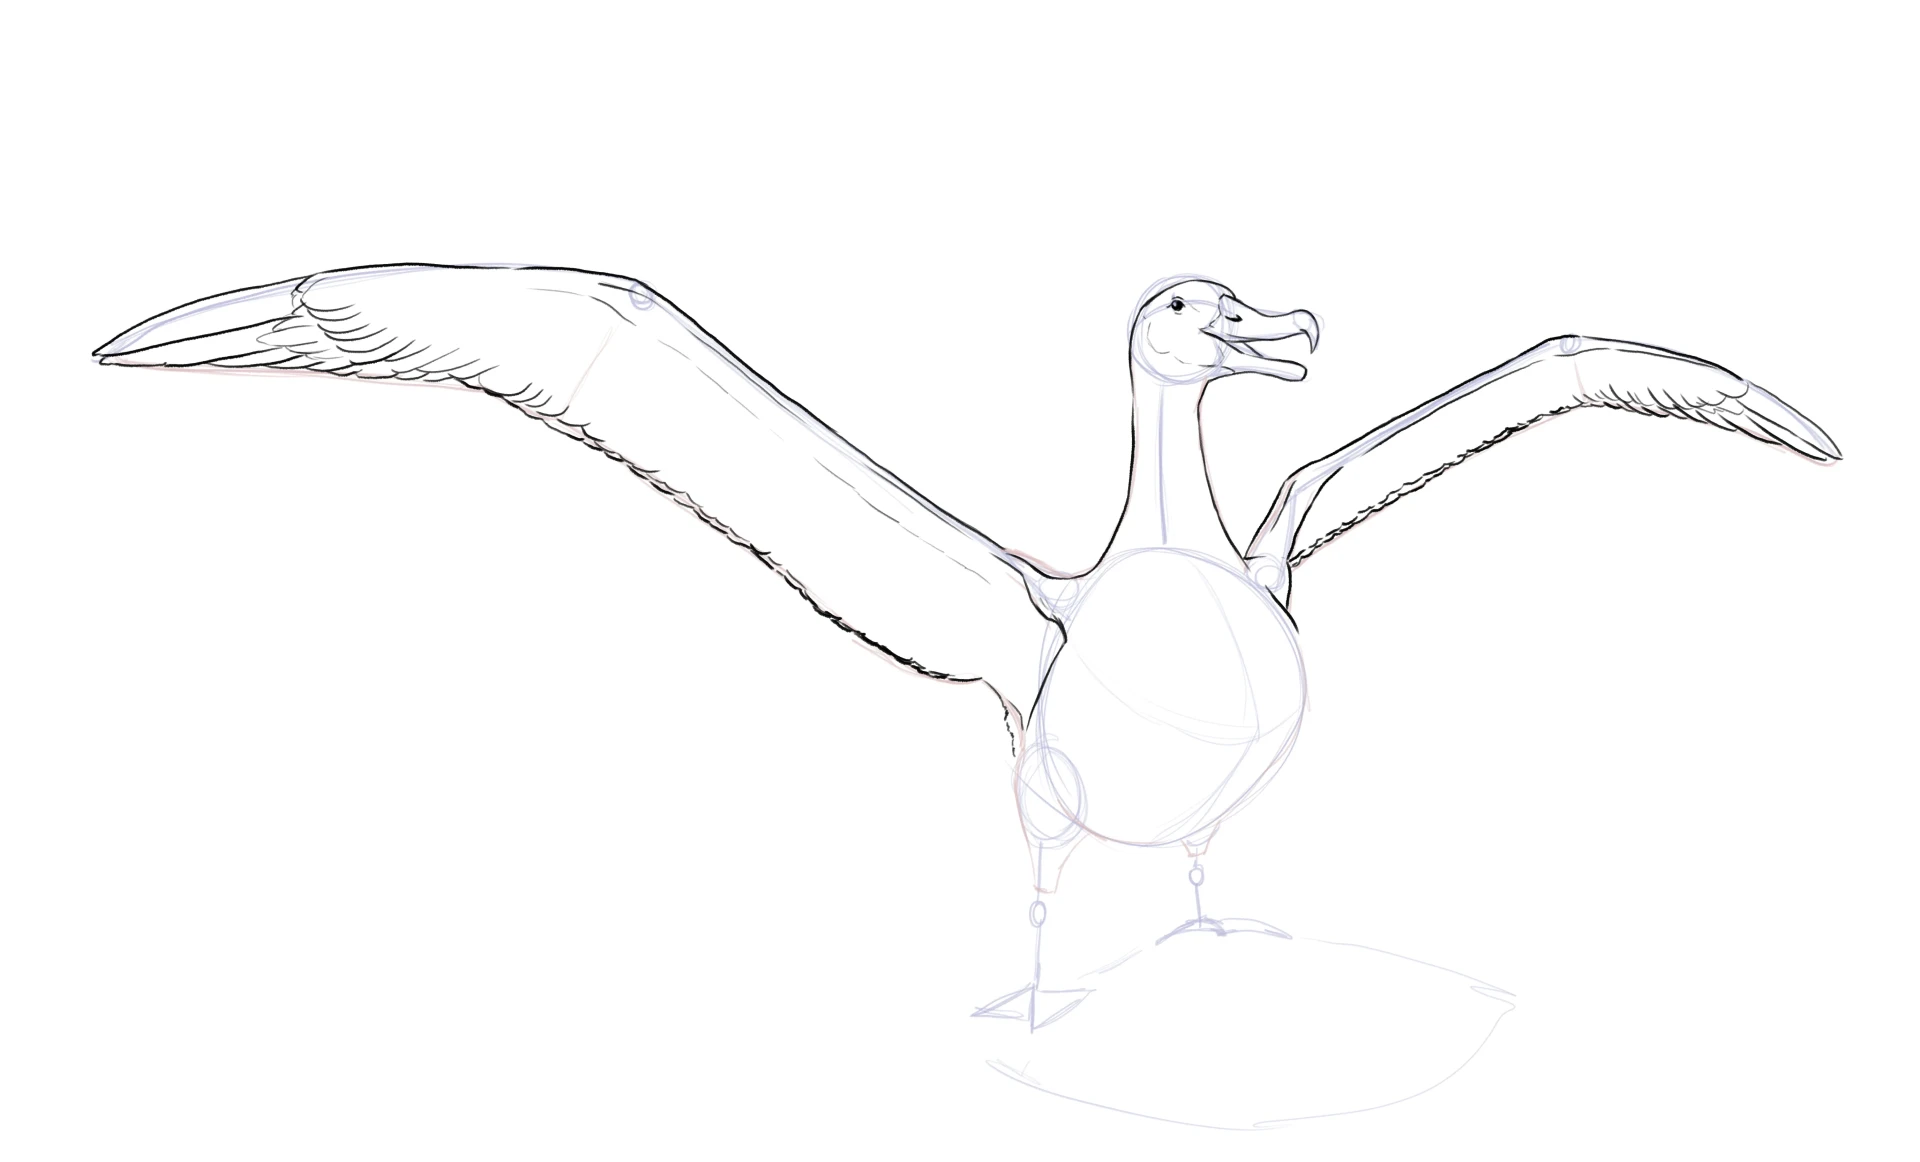
Draw the outline of the breast without texture, then go down to the thighs, using an intermittent line to suggest the end of the plumage. Finish with the rounded knees and the three-toed feet connected by a membrane, a characteristic detail of seabirds.
At this stage, sketch out a simple setting: the sea on the horizon, the silhouette of an island in the distance, and in the foreground, tall grasses on cliffs, the natural habitat of the albatross.
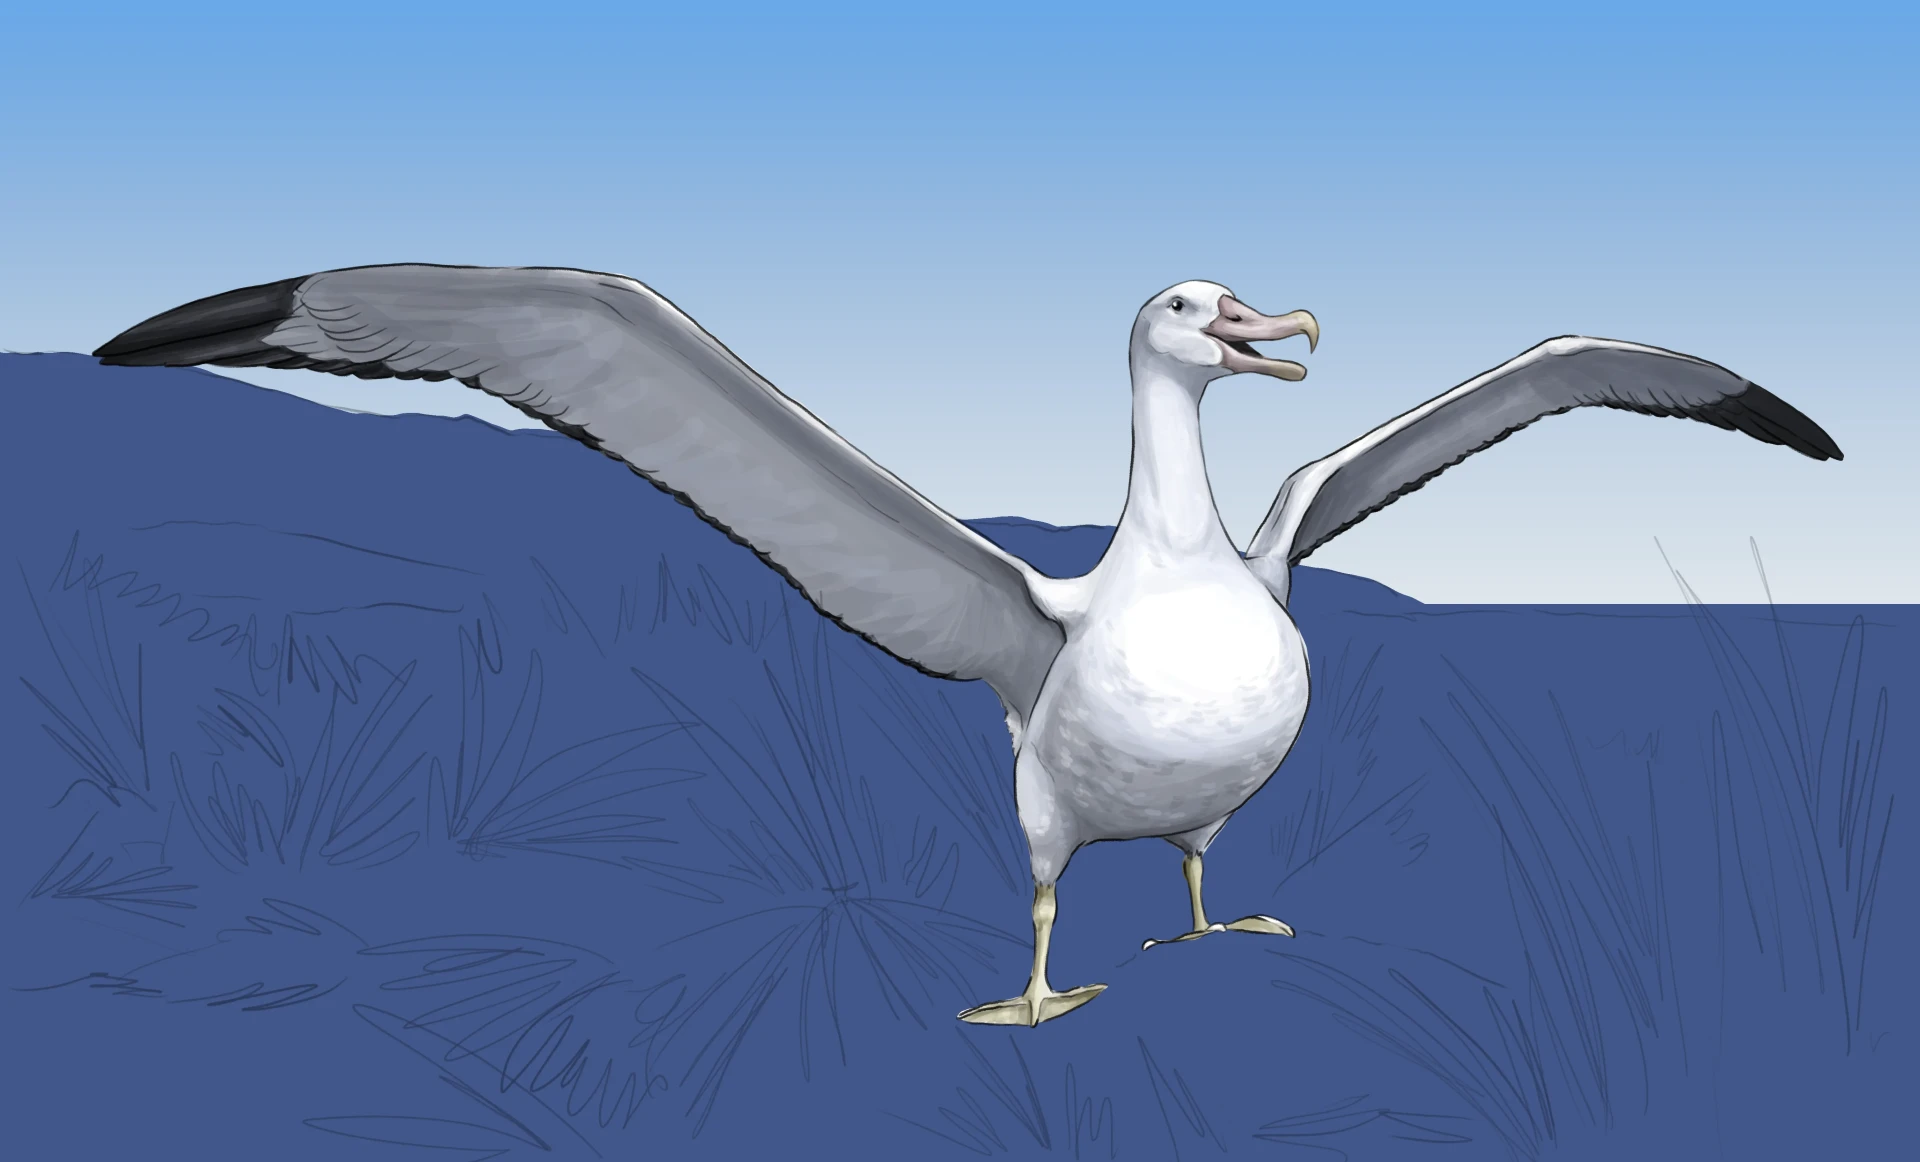
Add color to the drawing
First, cover the sky with a blue gradient that fades towards the horizon, where it meets the sea. A crucial point: carefully preserve the silhouette of the albatross; it is white, and even the slightest trace of color would be immediately visible on its plumage.
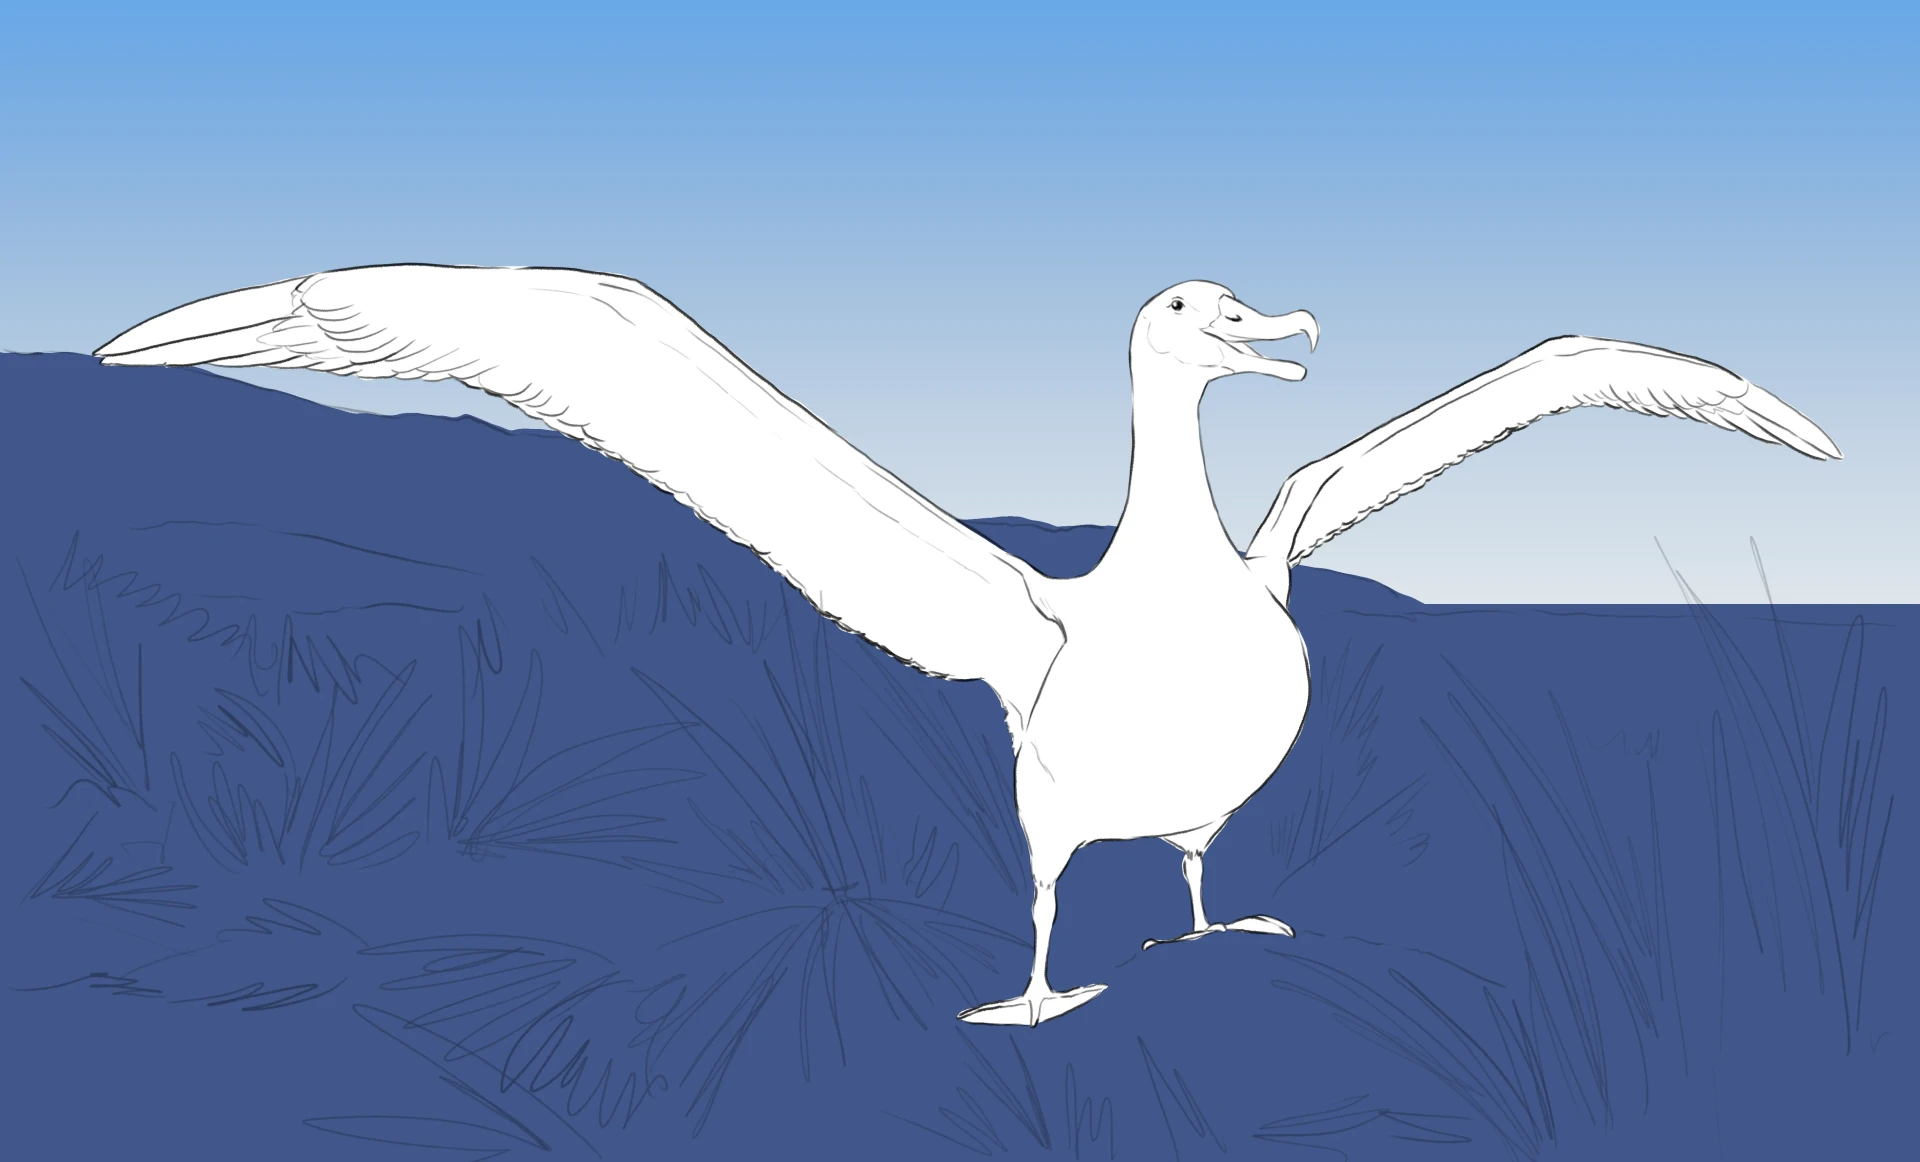
Start creating depth by identifying the main shadow areas. Carefully observe the model before applying anything. The dark values are concentrated under the wings and on the belly, hidden under the chest directly exposed to the light.
Avoid pure gray: instead, work with a very muted blue, obtained by lightening your lightest blue with white, then neutralizing it with a touch of orange.
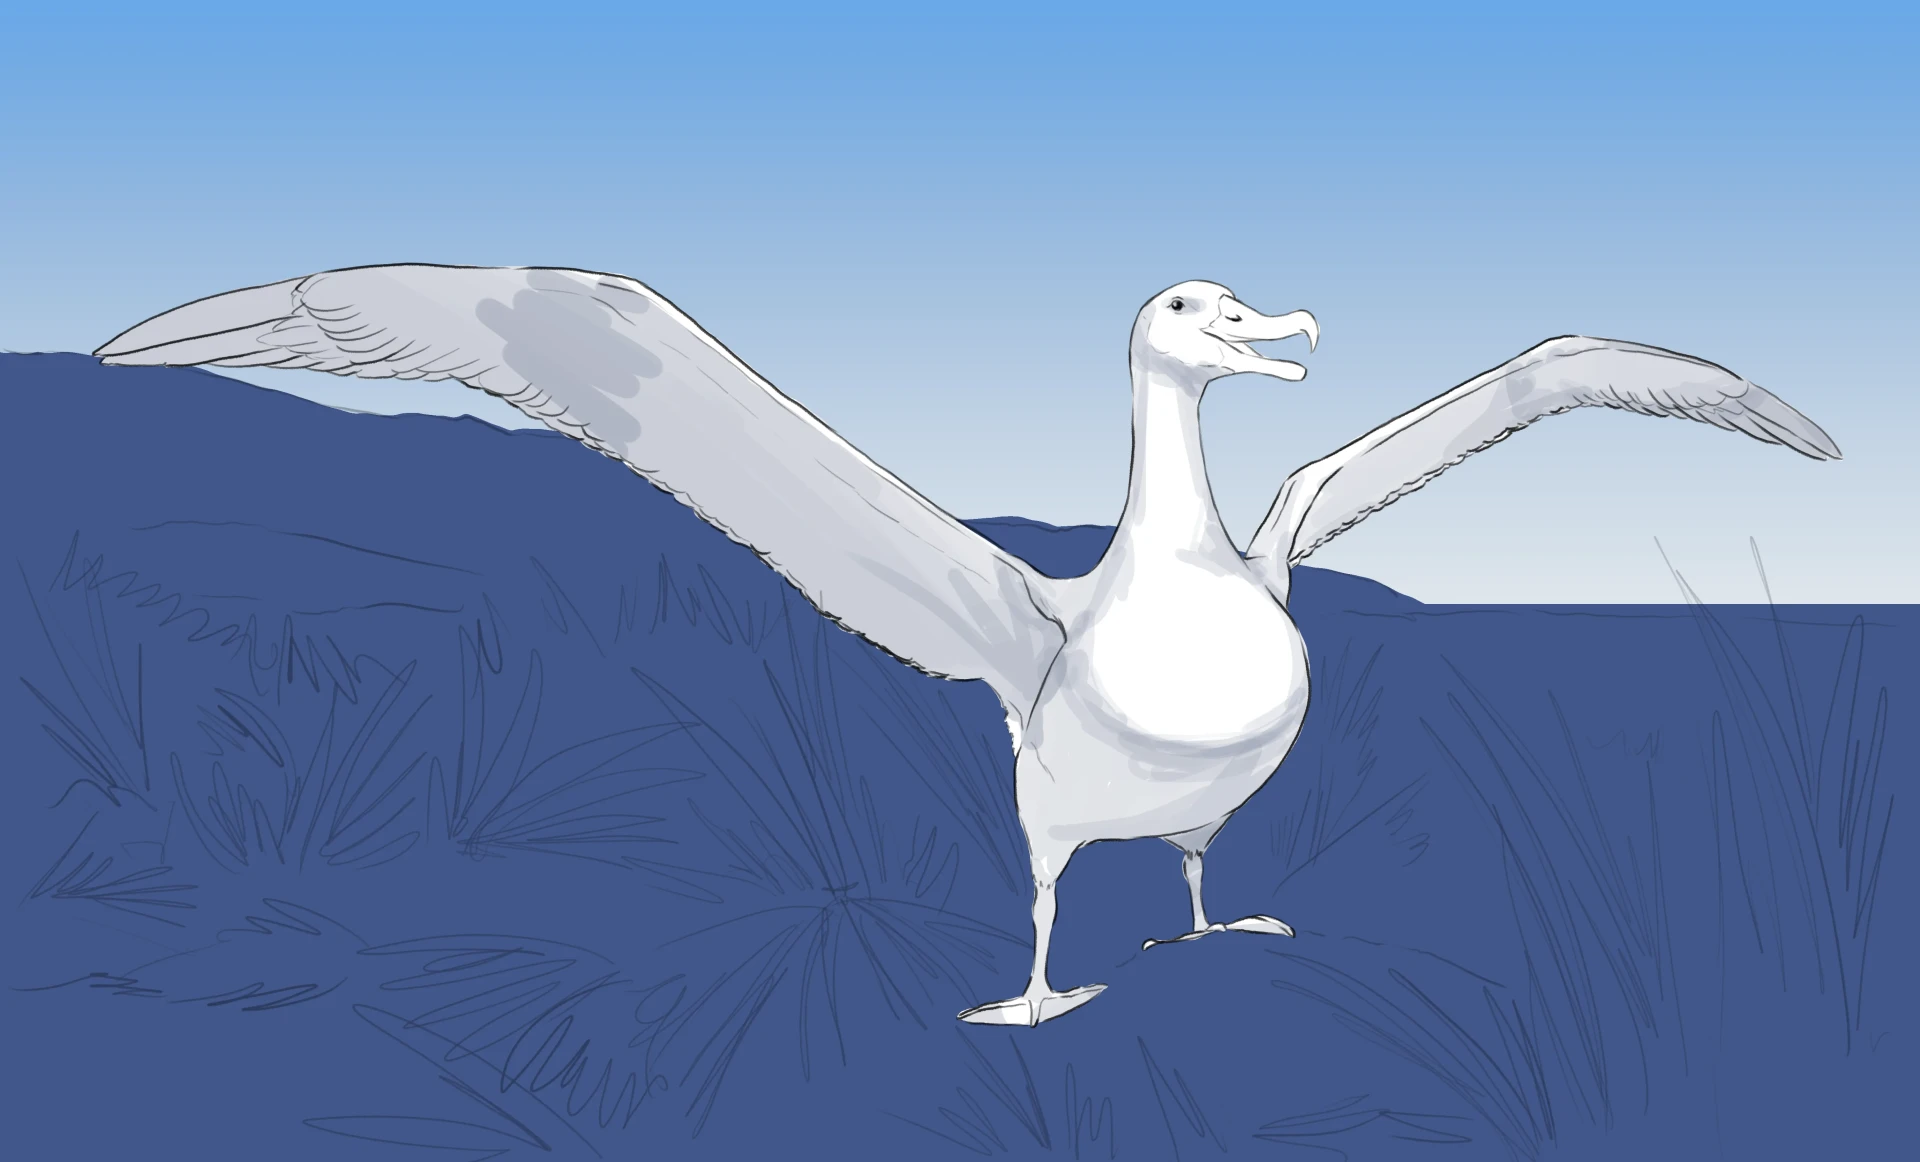
Gradually refine the main forms by layering increasingly darker tones in the contact areas, the joins of the wings and torso, and the head and neck. Observe the model at each stage to adjust your values.
Next, apply the texture of the plumage with small horizontal curved strokes, playing with light and dark values, distributed in an almost random manner on the belly. The resulting effect evokes soft, padded plumage.

Finish by coloring the beak, legs, and wing feathers. For the pinkish beak, use the same approach as for the plumage: a lot of white and a touch of green or aquamarine. Then, increase the proportion of green to create the dark tones and add volume. For the yellow legs, neutralize with a hint of violet.
Finalize your drawing
If you want to color the background, stick to muted tones to evoke the cold and windy atmosphere of the coast. There is no need to overdo the details in the background. For the grass in the foreground, long strokes in different shades of green are enough to recreate this wild irregular effect.

Our drawing is now finished. The albatross is a bird that merits our attention; its gliding silhouette is a real pleasure to draw once you have mastered its structure.
Don’t forget that at each step, the key is to identify the nuances in each color so that it blends naturally with the overall design. I hope you enjoyed this tutorial!
Discussion
I really like this tutorial on L'Albatros ð and I thank the author, Bryam, for providing the steps to follow in order to successfully complete the drawing. It’s practical, and his advice is very interesting (I live in a city with many seagulls – so, when drawing, it’s important not to confuse the two birds!).
It’s wonderful that you liked it!