
How to Draw an Angel
Angels occupy a special place in our collective imagination. Many people like to think that their loved ones are watching over them from heaven. Others believe that an angel protects them from danger every day.
In this article, we will examine these beings of light that support the faith of millions of believers around the world: their artistic representation, the elements that have shaped their image over the centuries, and, of course, how to draw them step by step.
The representation of angels in art
Angels are celestial beings present in the three Abrahamic religions, but it is in Christian art that their representation has undergone the most significant changes.
The Middle Ages
Medieval works show us strange creatures, sometimes disturbing ones, and this is actually a faithful representation of the descriptions in the Old Testament, where angels did not resemble the human form as we know it today.
Gothic and Renaissance
The humanist revolution completely transformed this image. Angels took on a human appearance, dressed in magnificent garments and endowed with colorful and vibrant wings, while still retaining something of their supernatural dimension.
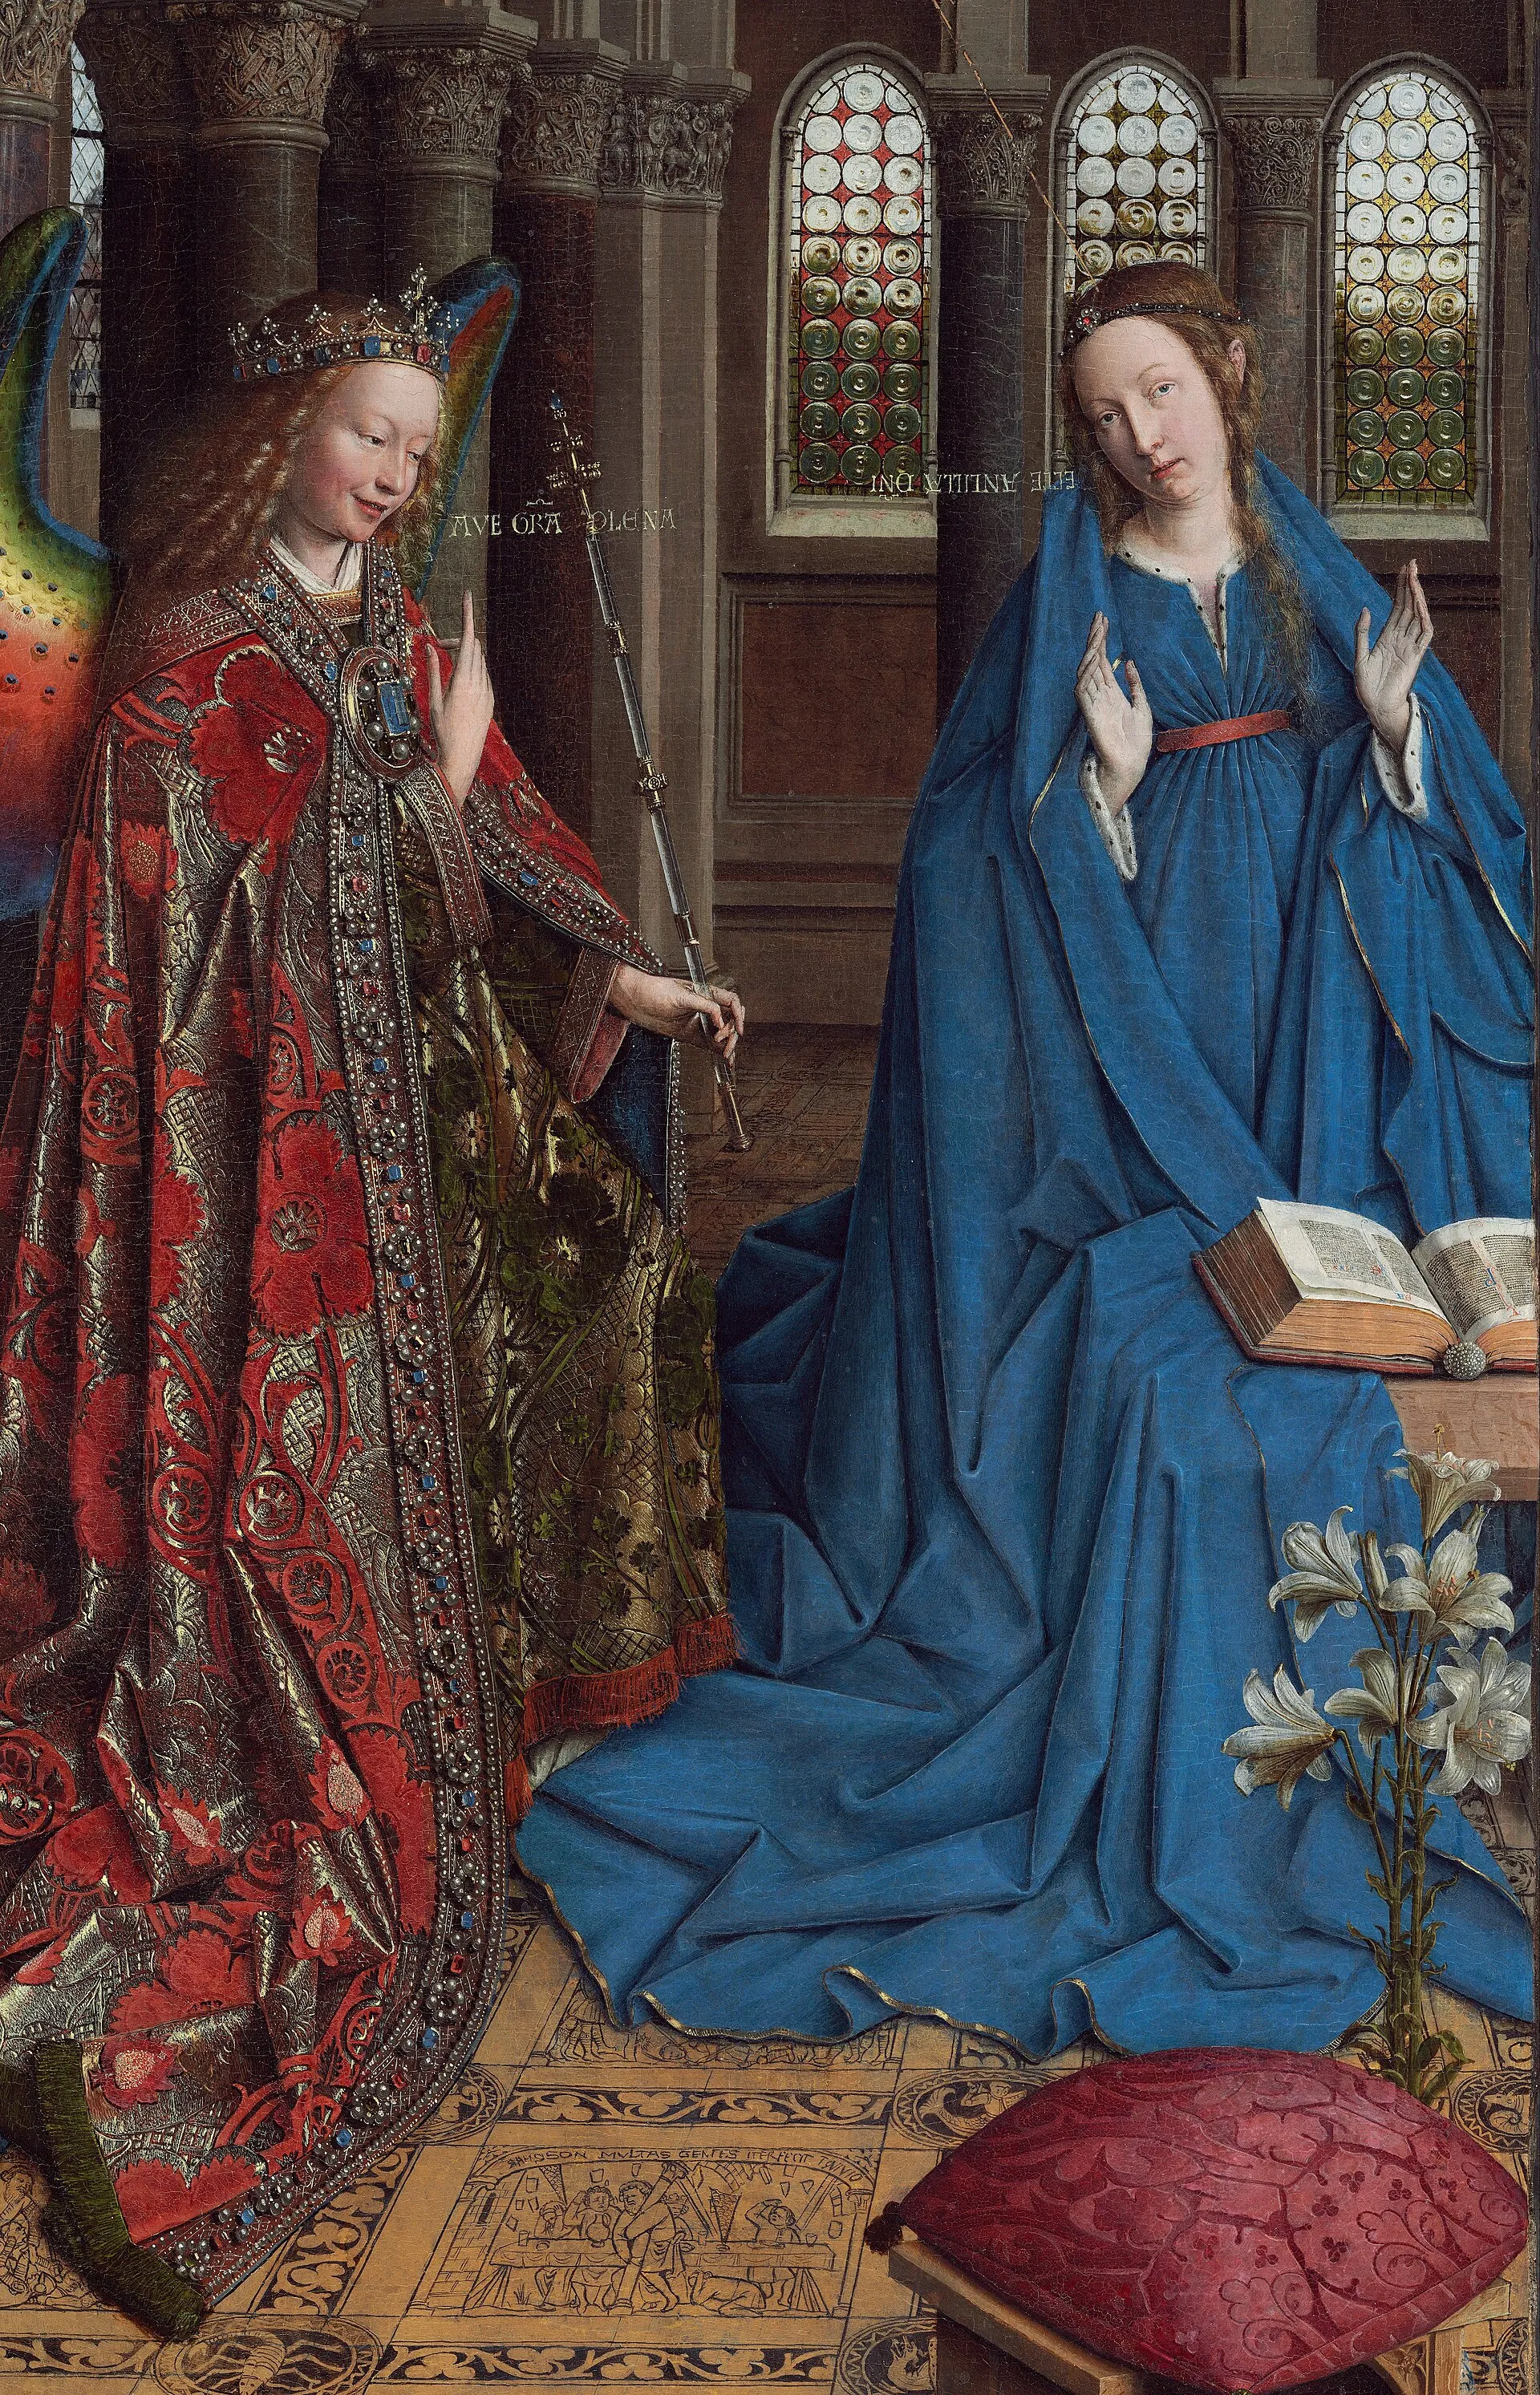
The Annunciation (1434-1436), Jan van Eyck
Baroque
It was during this period that cherubs appeared: small, chubby children with curly hair and no clothes, who flitted around the Virgin Mary and the saints, playing instruments or being playful.
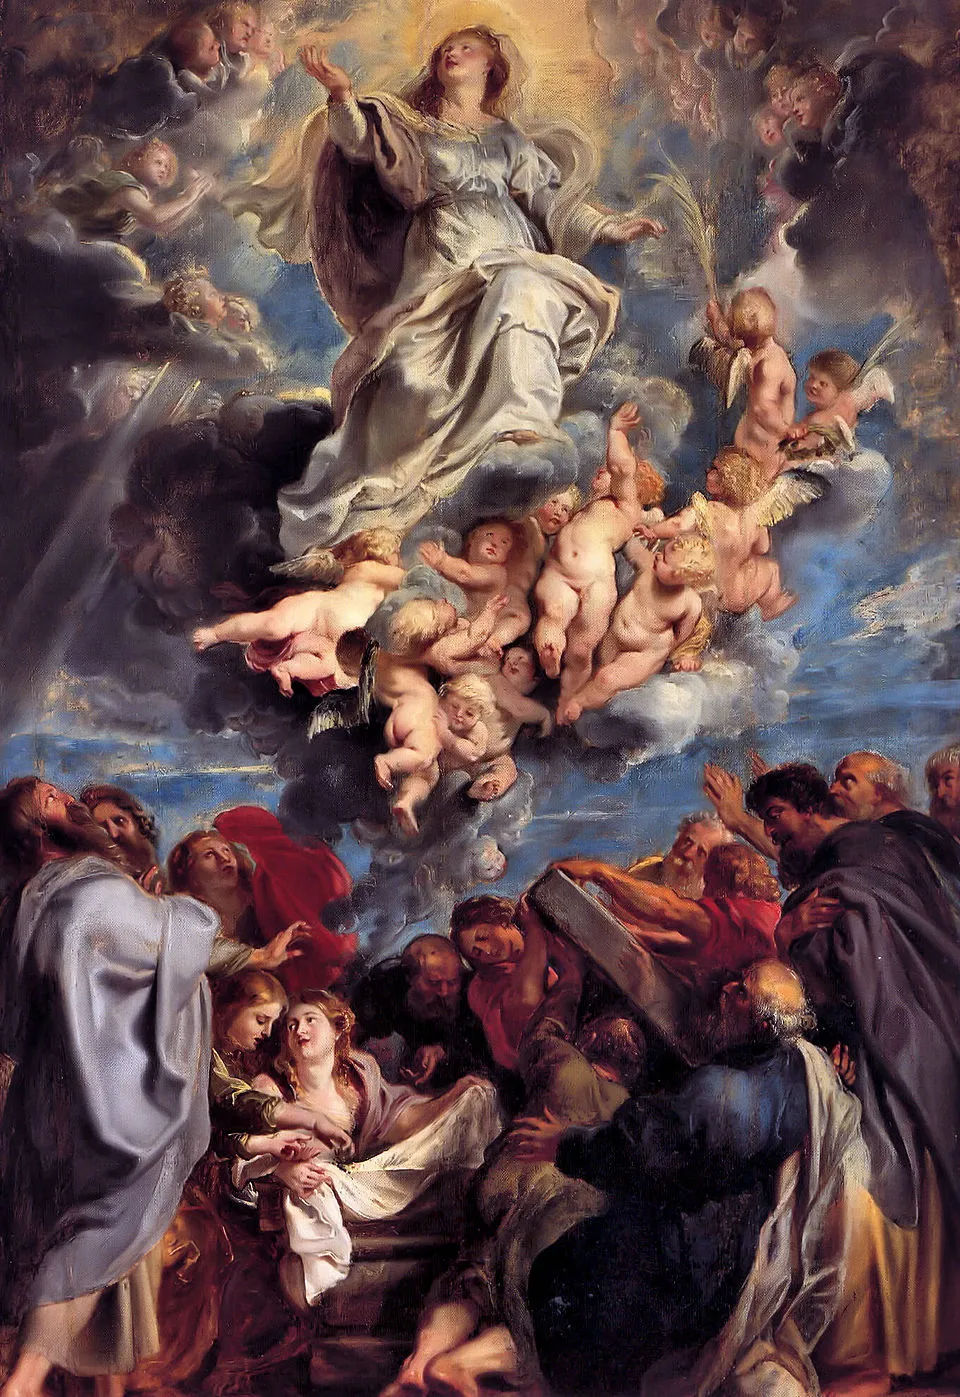
The Assumption of the Virgin (1611-1612), Peter Paul Rubens
Neoclassicism
The rediscovery of antiquity and white marble imposed a new aesthetic. White became the symbol of the divine, purity, and status. Wings, clothing – everything abandoned color in favor of immaculate whiteness.
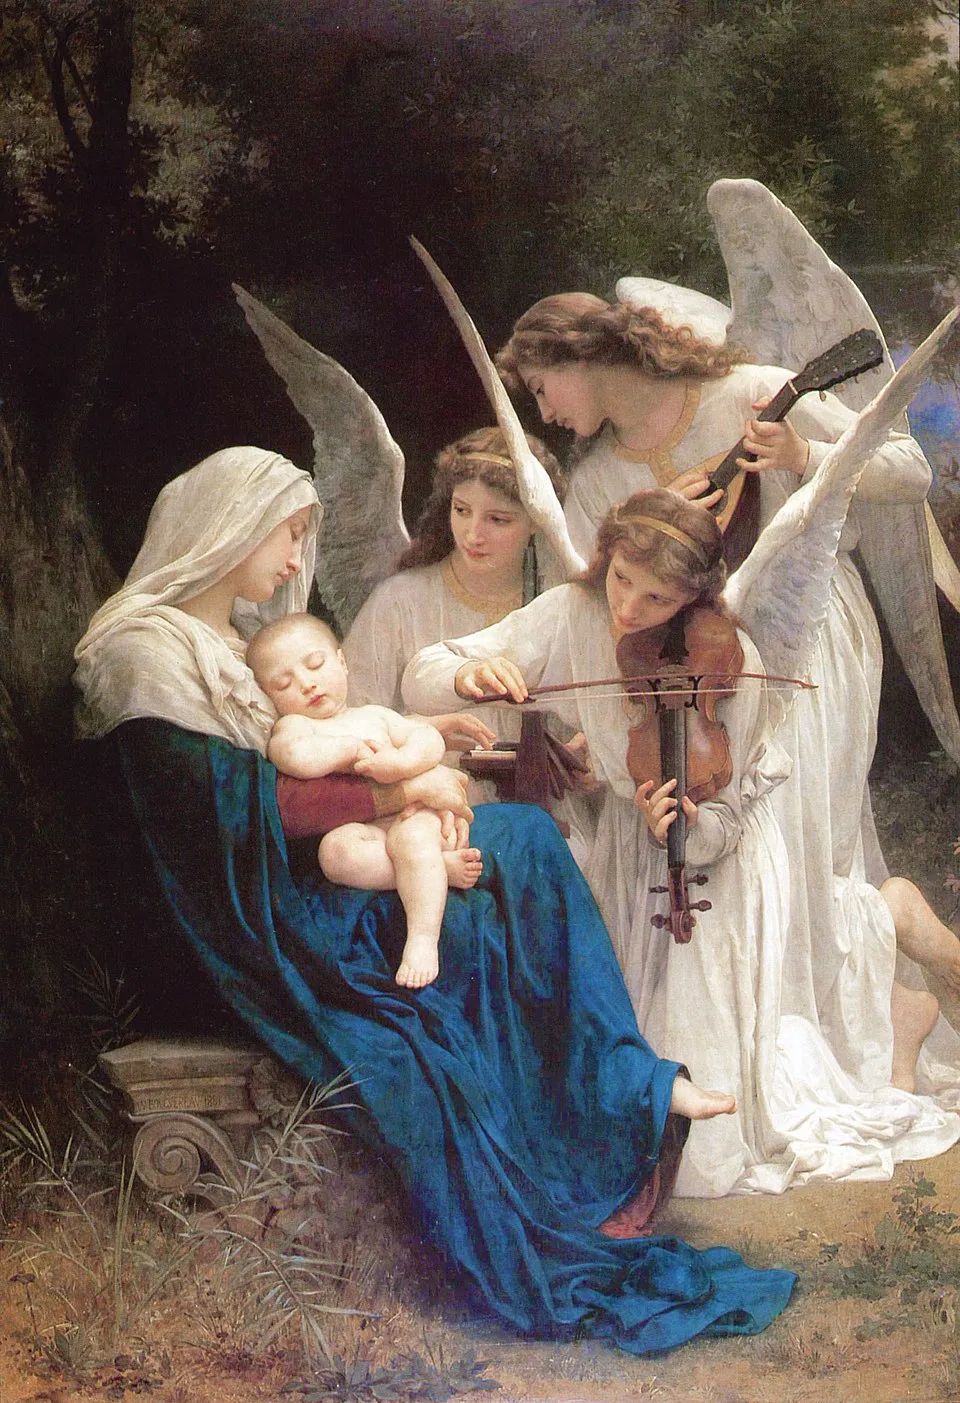
The Song of Angels (1881), William-Adolphe Bouguereau
The essential elements of an angelic representation
Before delving in, here are the characteristics that most often appear in depictions of angels: a young and serene appearance, a pair of wings whose size reflects their rank, a white tunic with gold embroidery, musical instruments such as the harp or trumpet, a sword for some, and of course a luminous halo above their head.
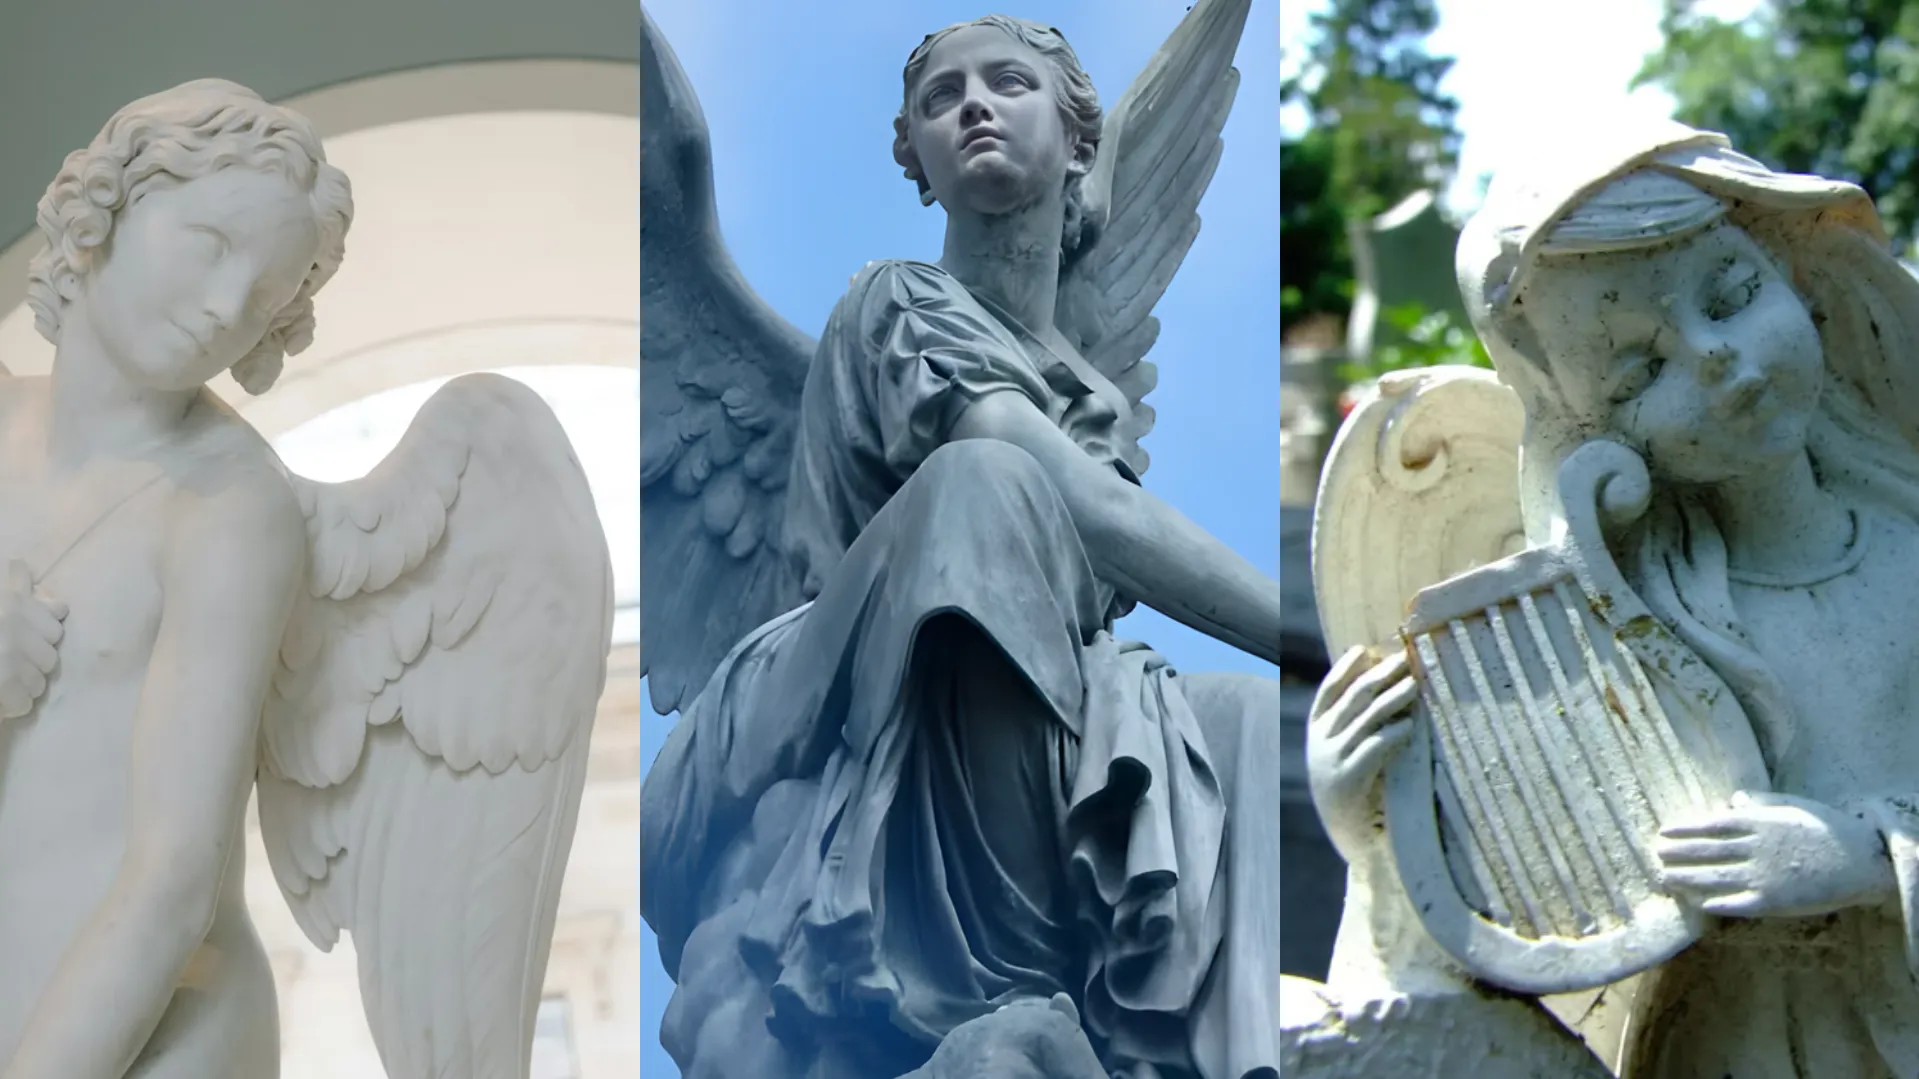
How to draw an angel step by step
We begin with a human figure, seeking an elegant and serene pose that reflects the nature of these beings.
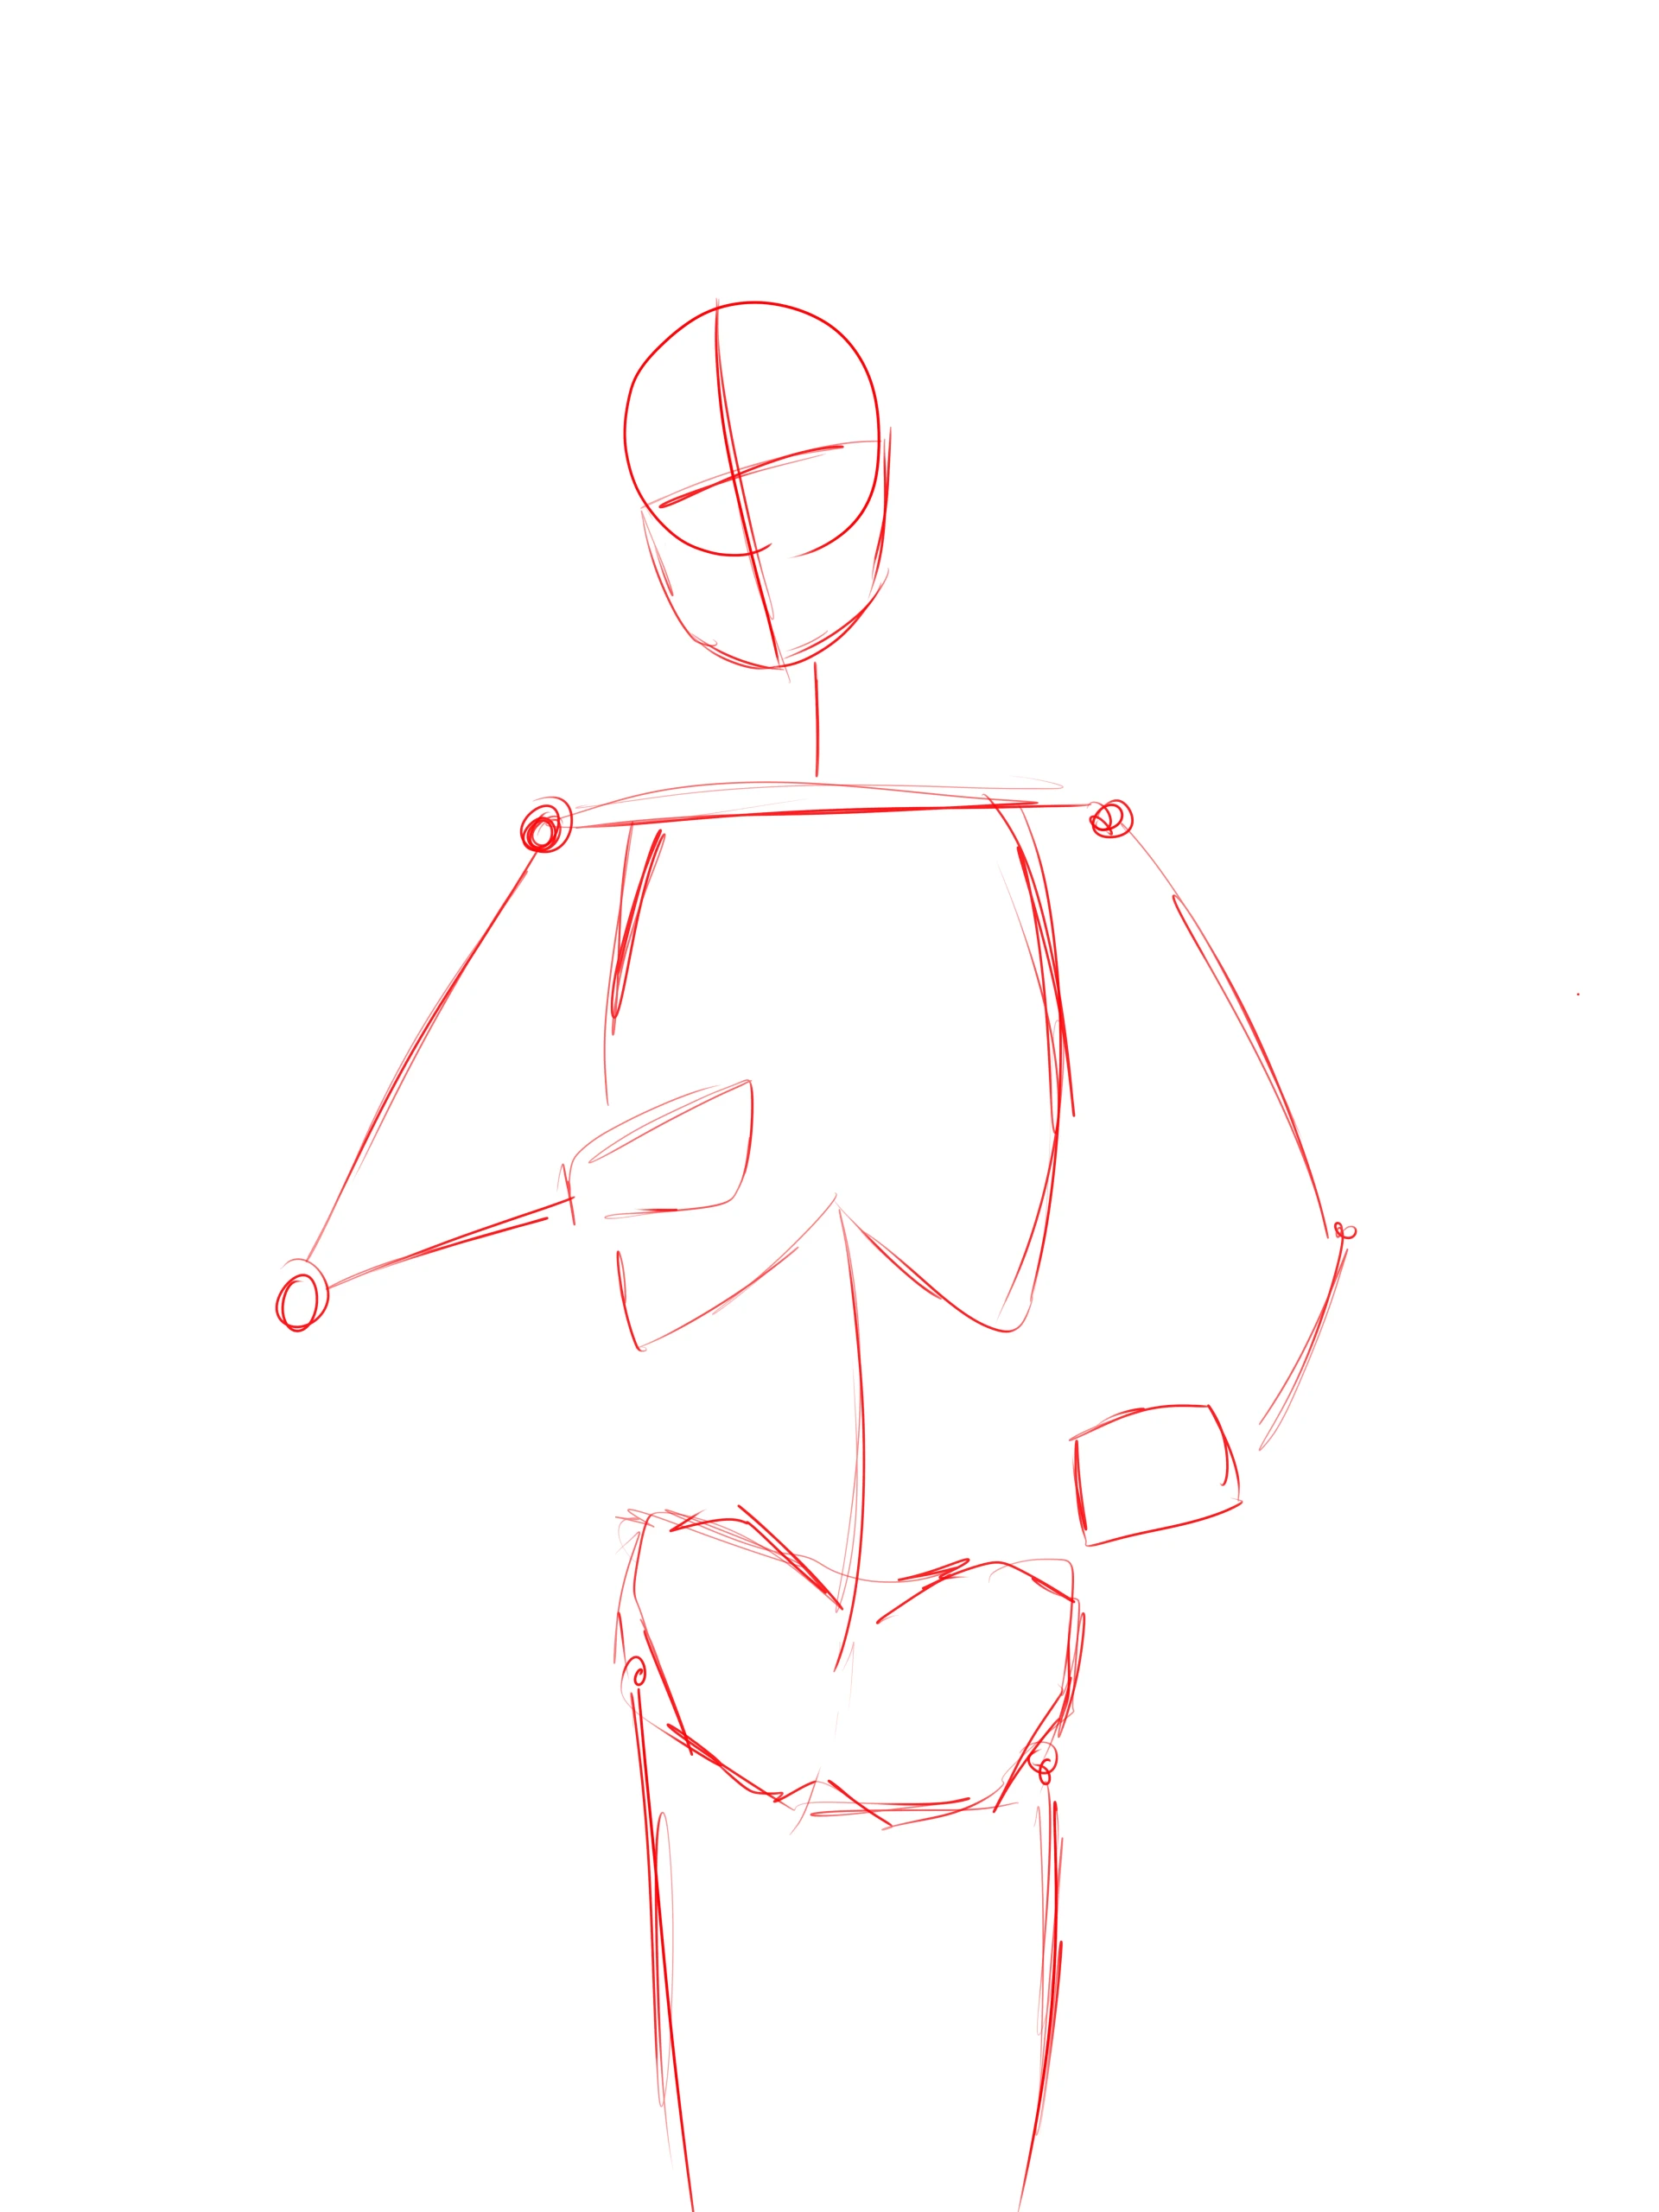
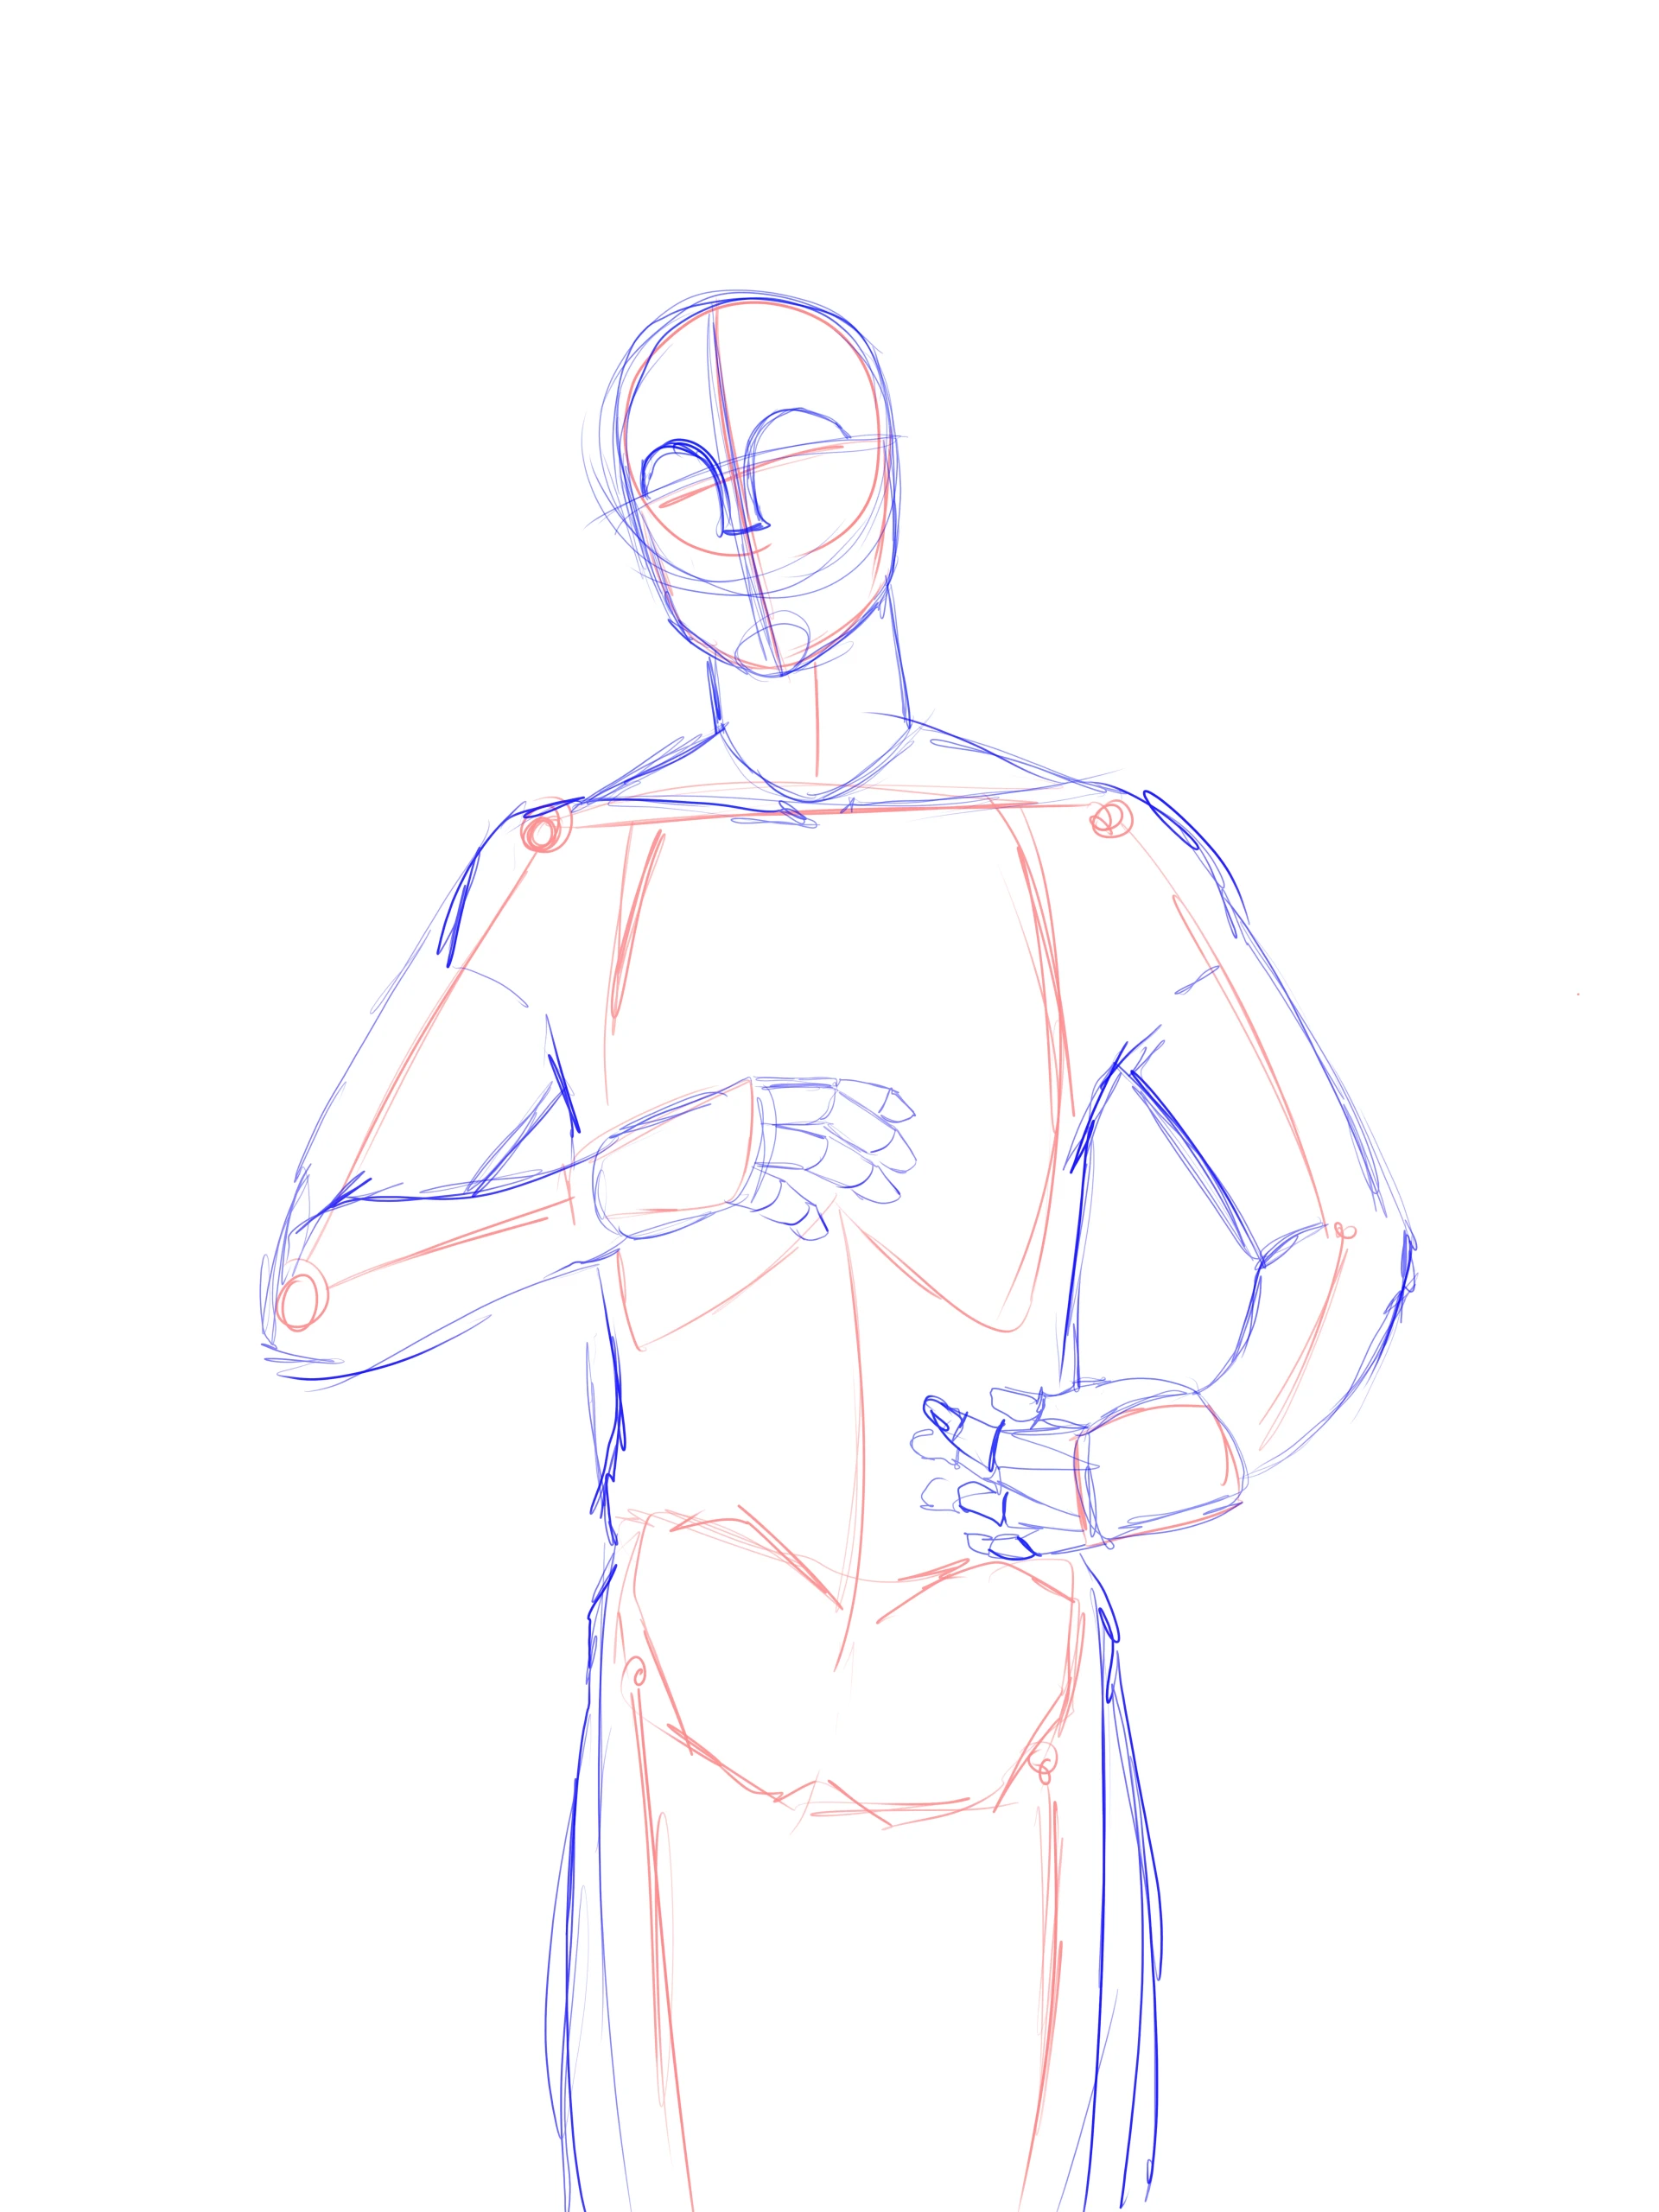
A volume sketch can help visualize the musculature and proportions before moving on to the drawing.
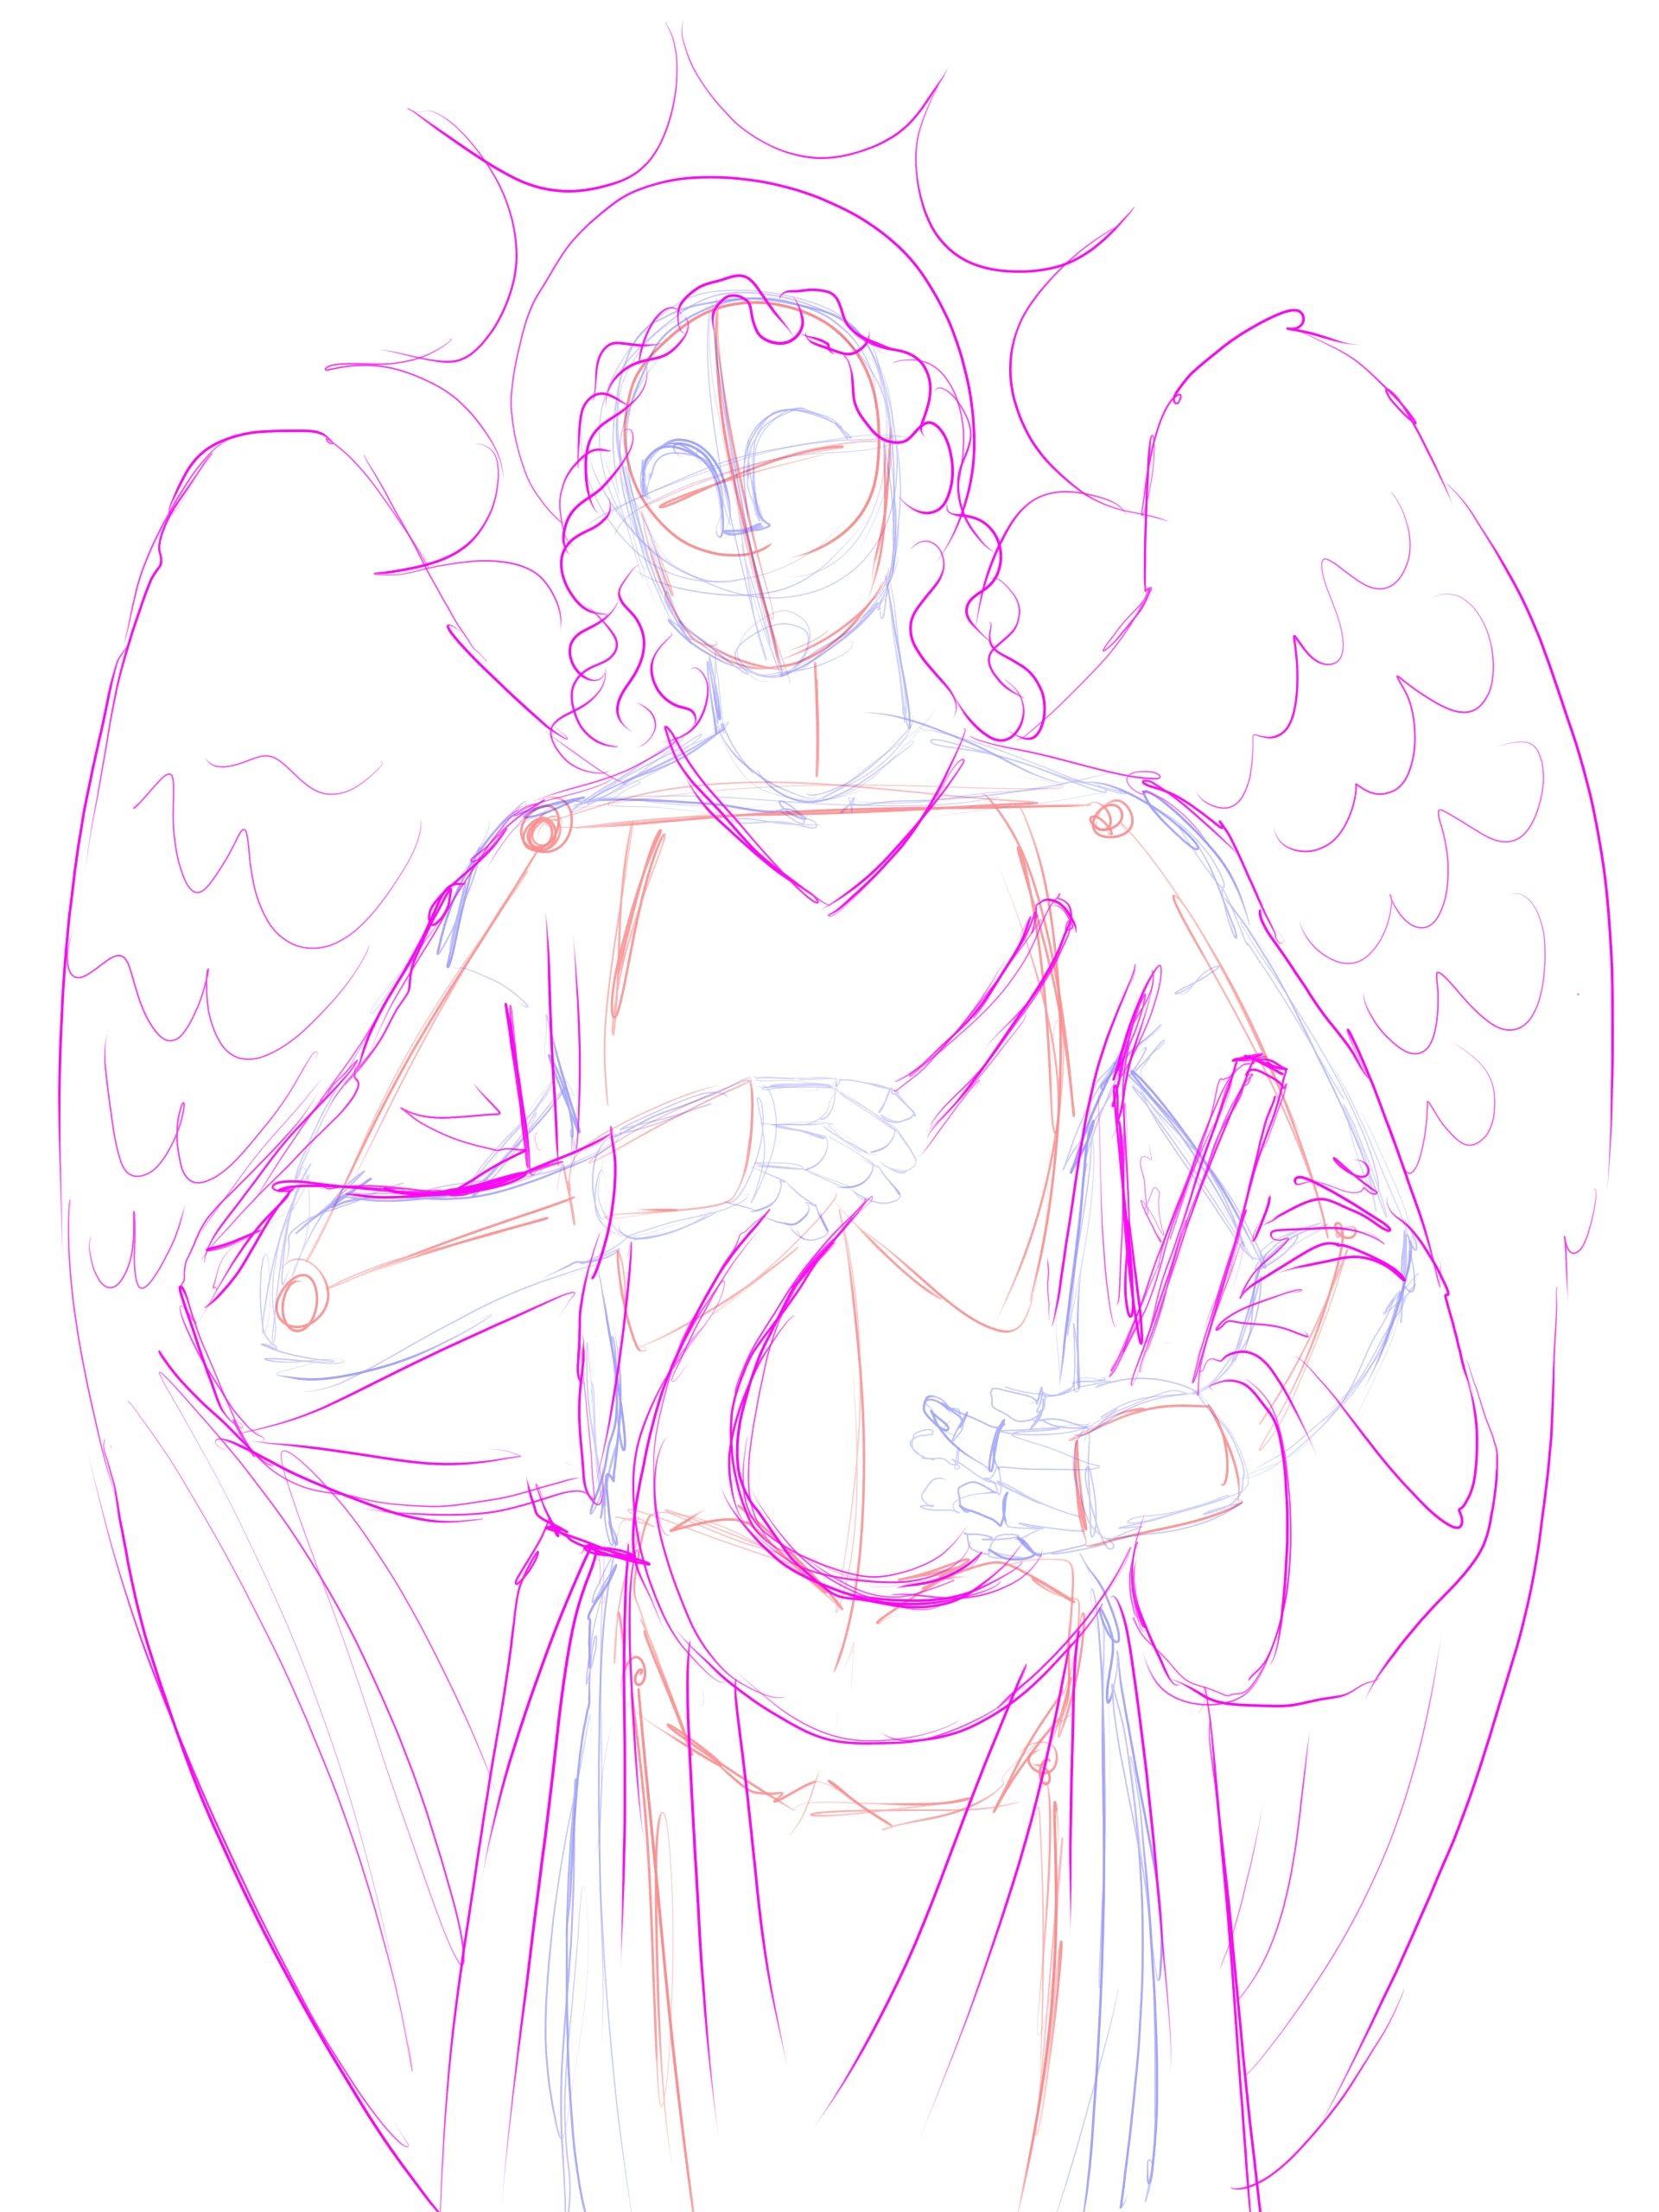
Using the base sketch, we position the characteristic elements: large wings at rest, a harp in its hands, a halo, and the white tunic. It is at this stage that the angel really begins to take shape.
Draw an angel’s face
On a new layer or sheet placed on top, the final lines are drawn. The idea is to reflect the angel’s noble character in each stroke.
The face should be beautiful and young, with large eyes, a well-defined nose and lips, and full cheeks.
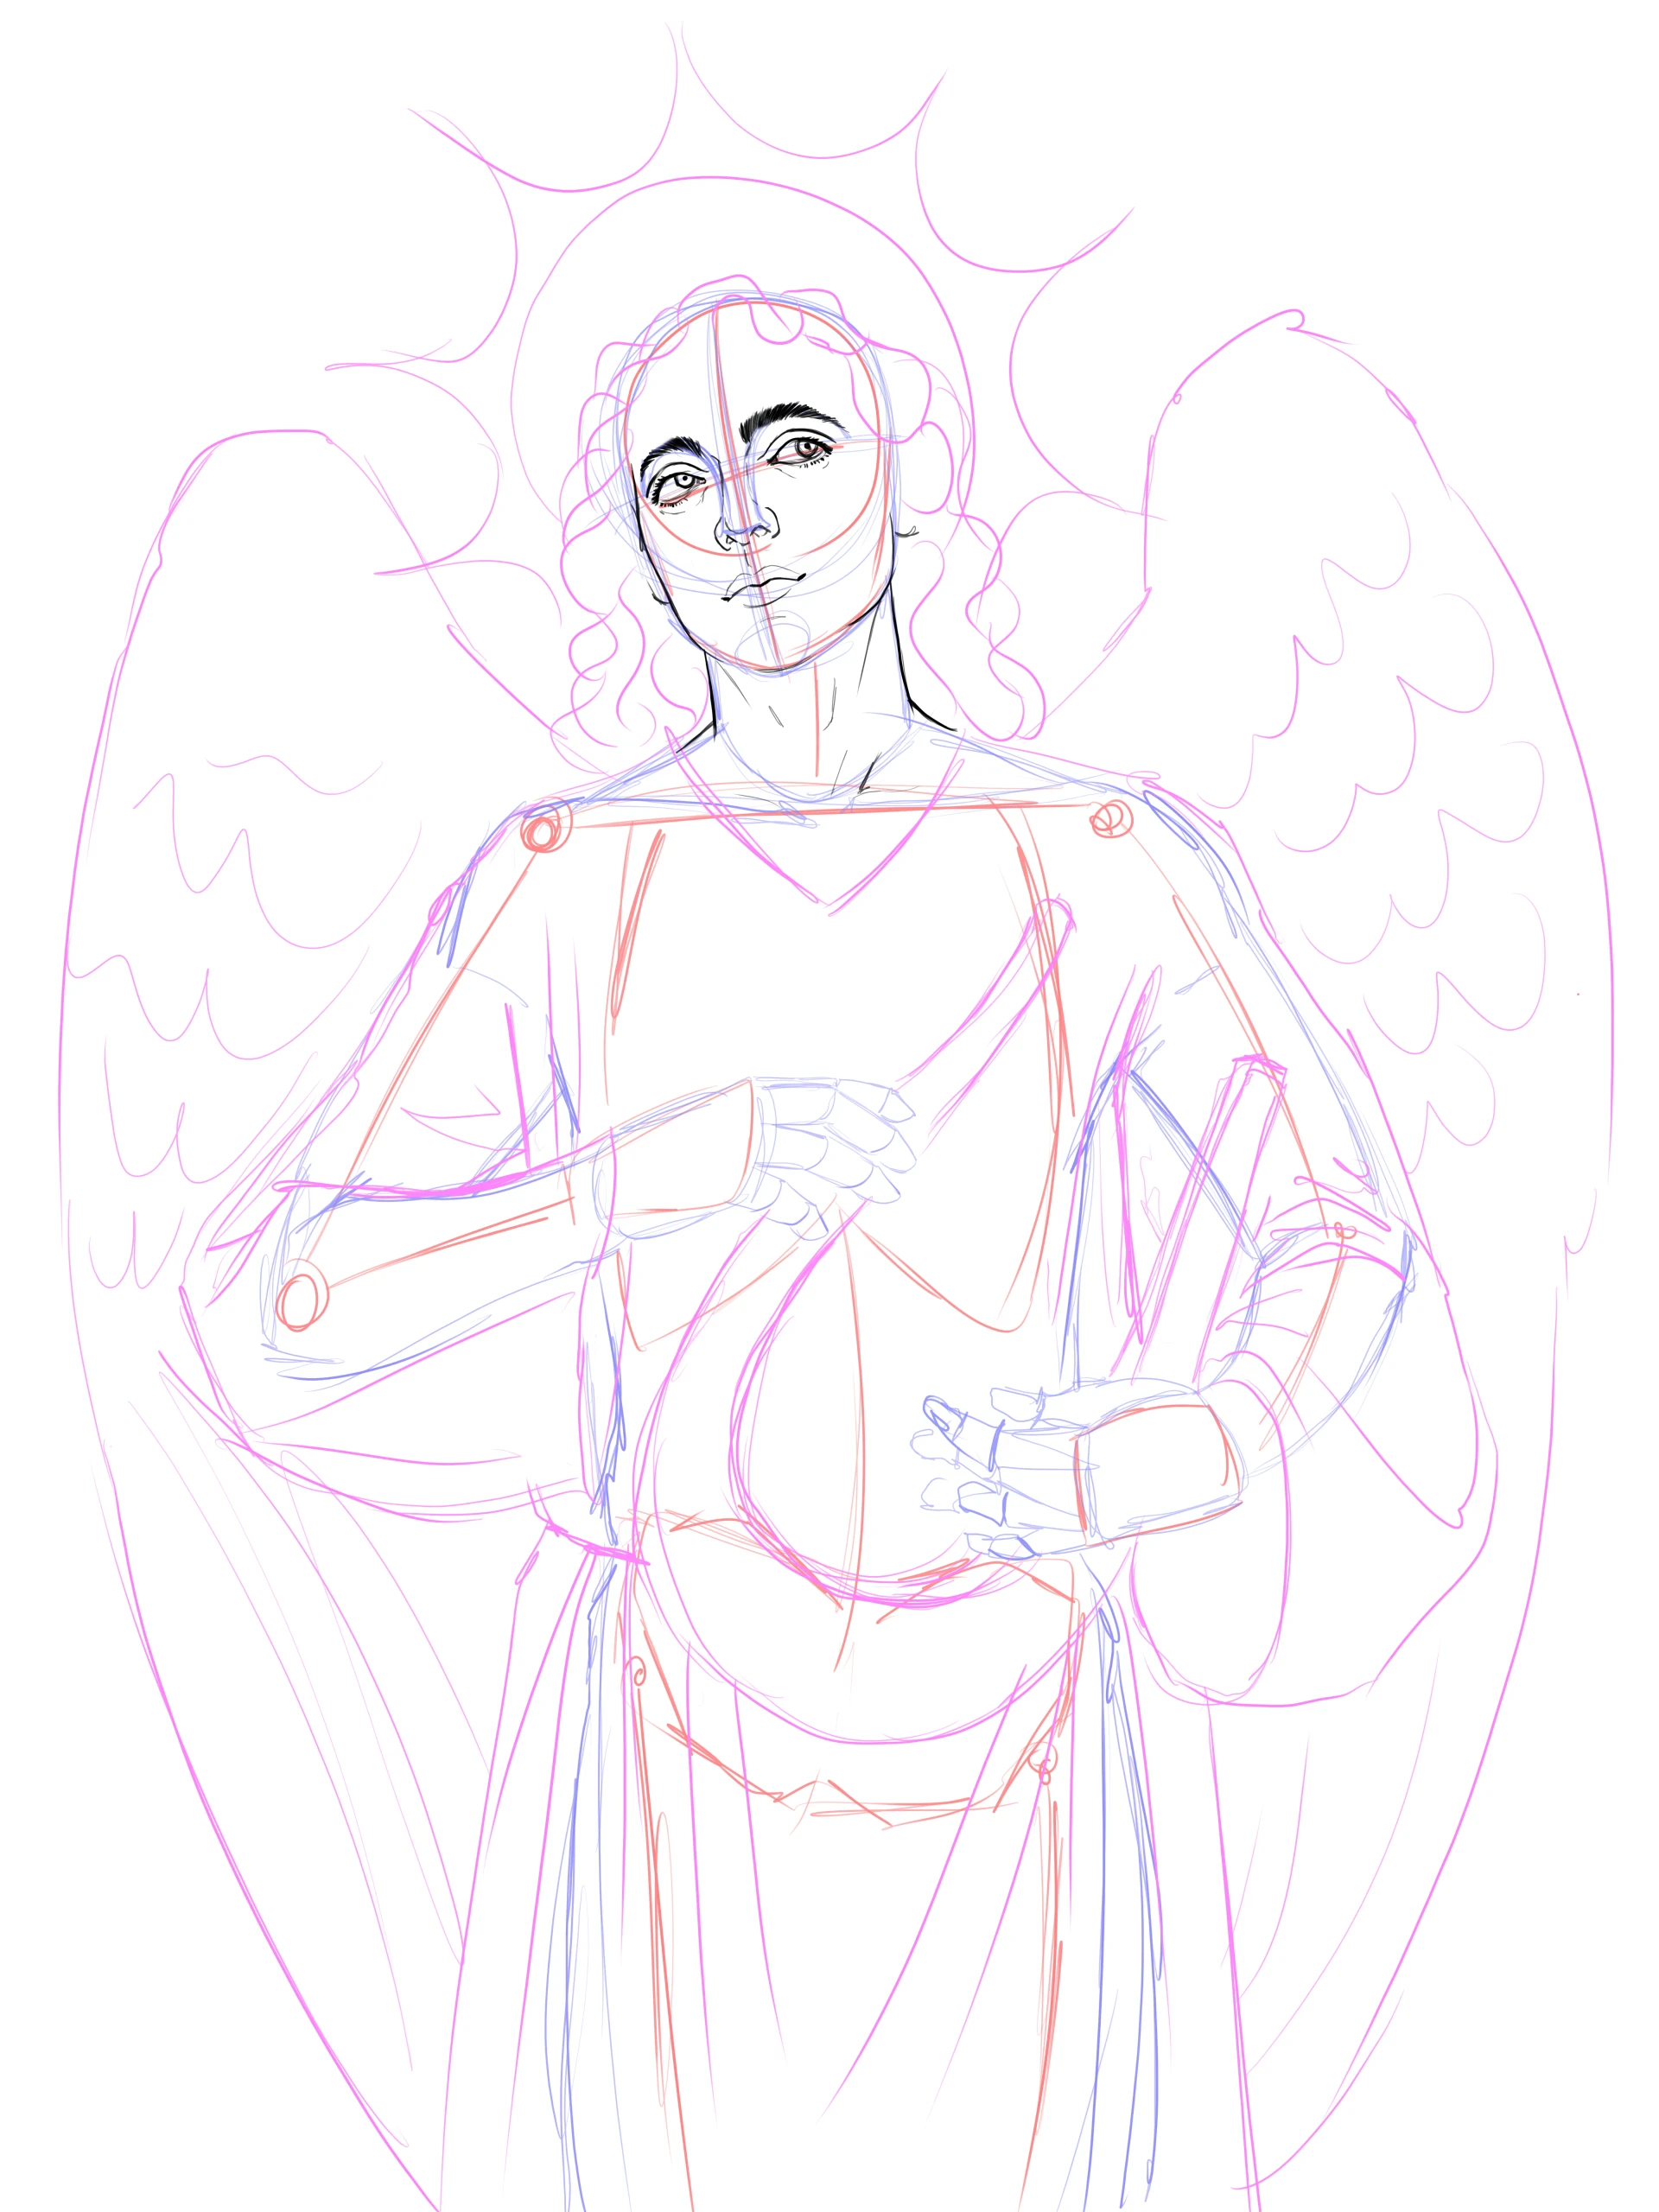
For hair, we are looking for natural and organic waves, with a soft and harmonious messiness.
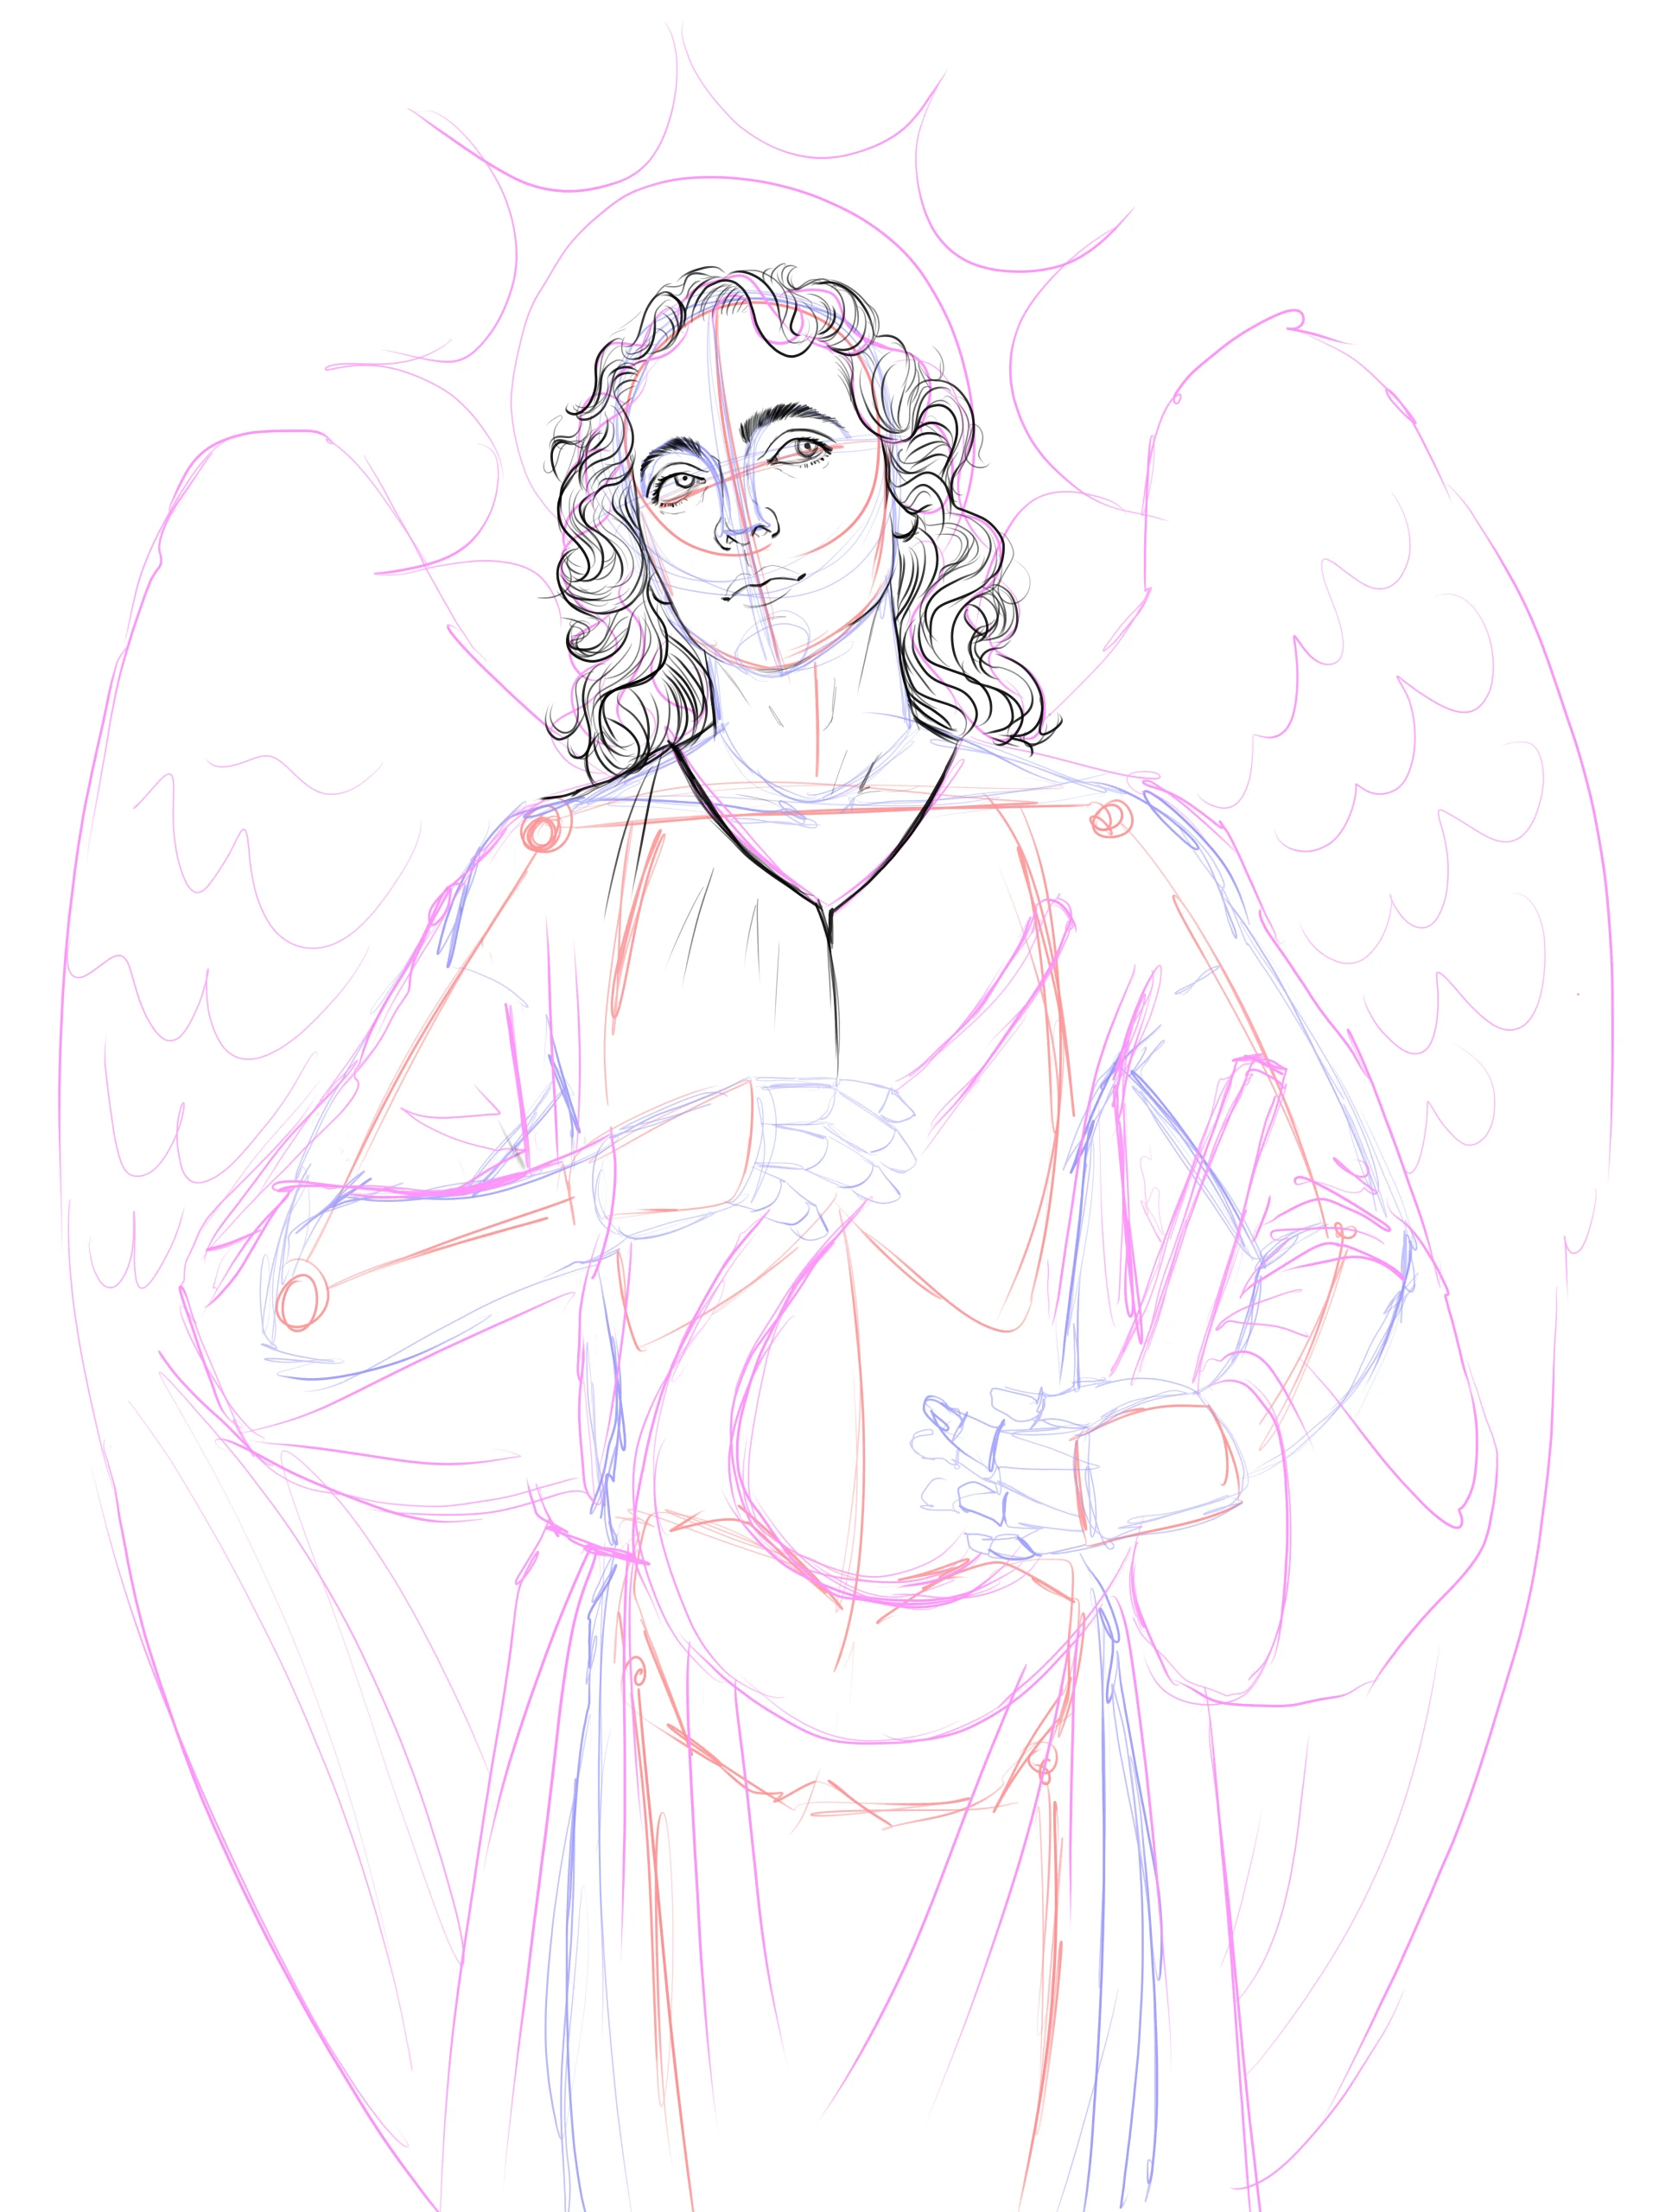
The tunic, being lightweight, requires special attention to stress points in order to create beautiful folds, a technique that is very common in classical art.
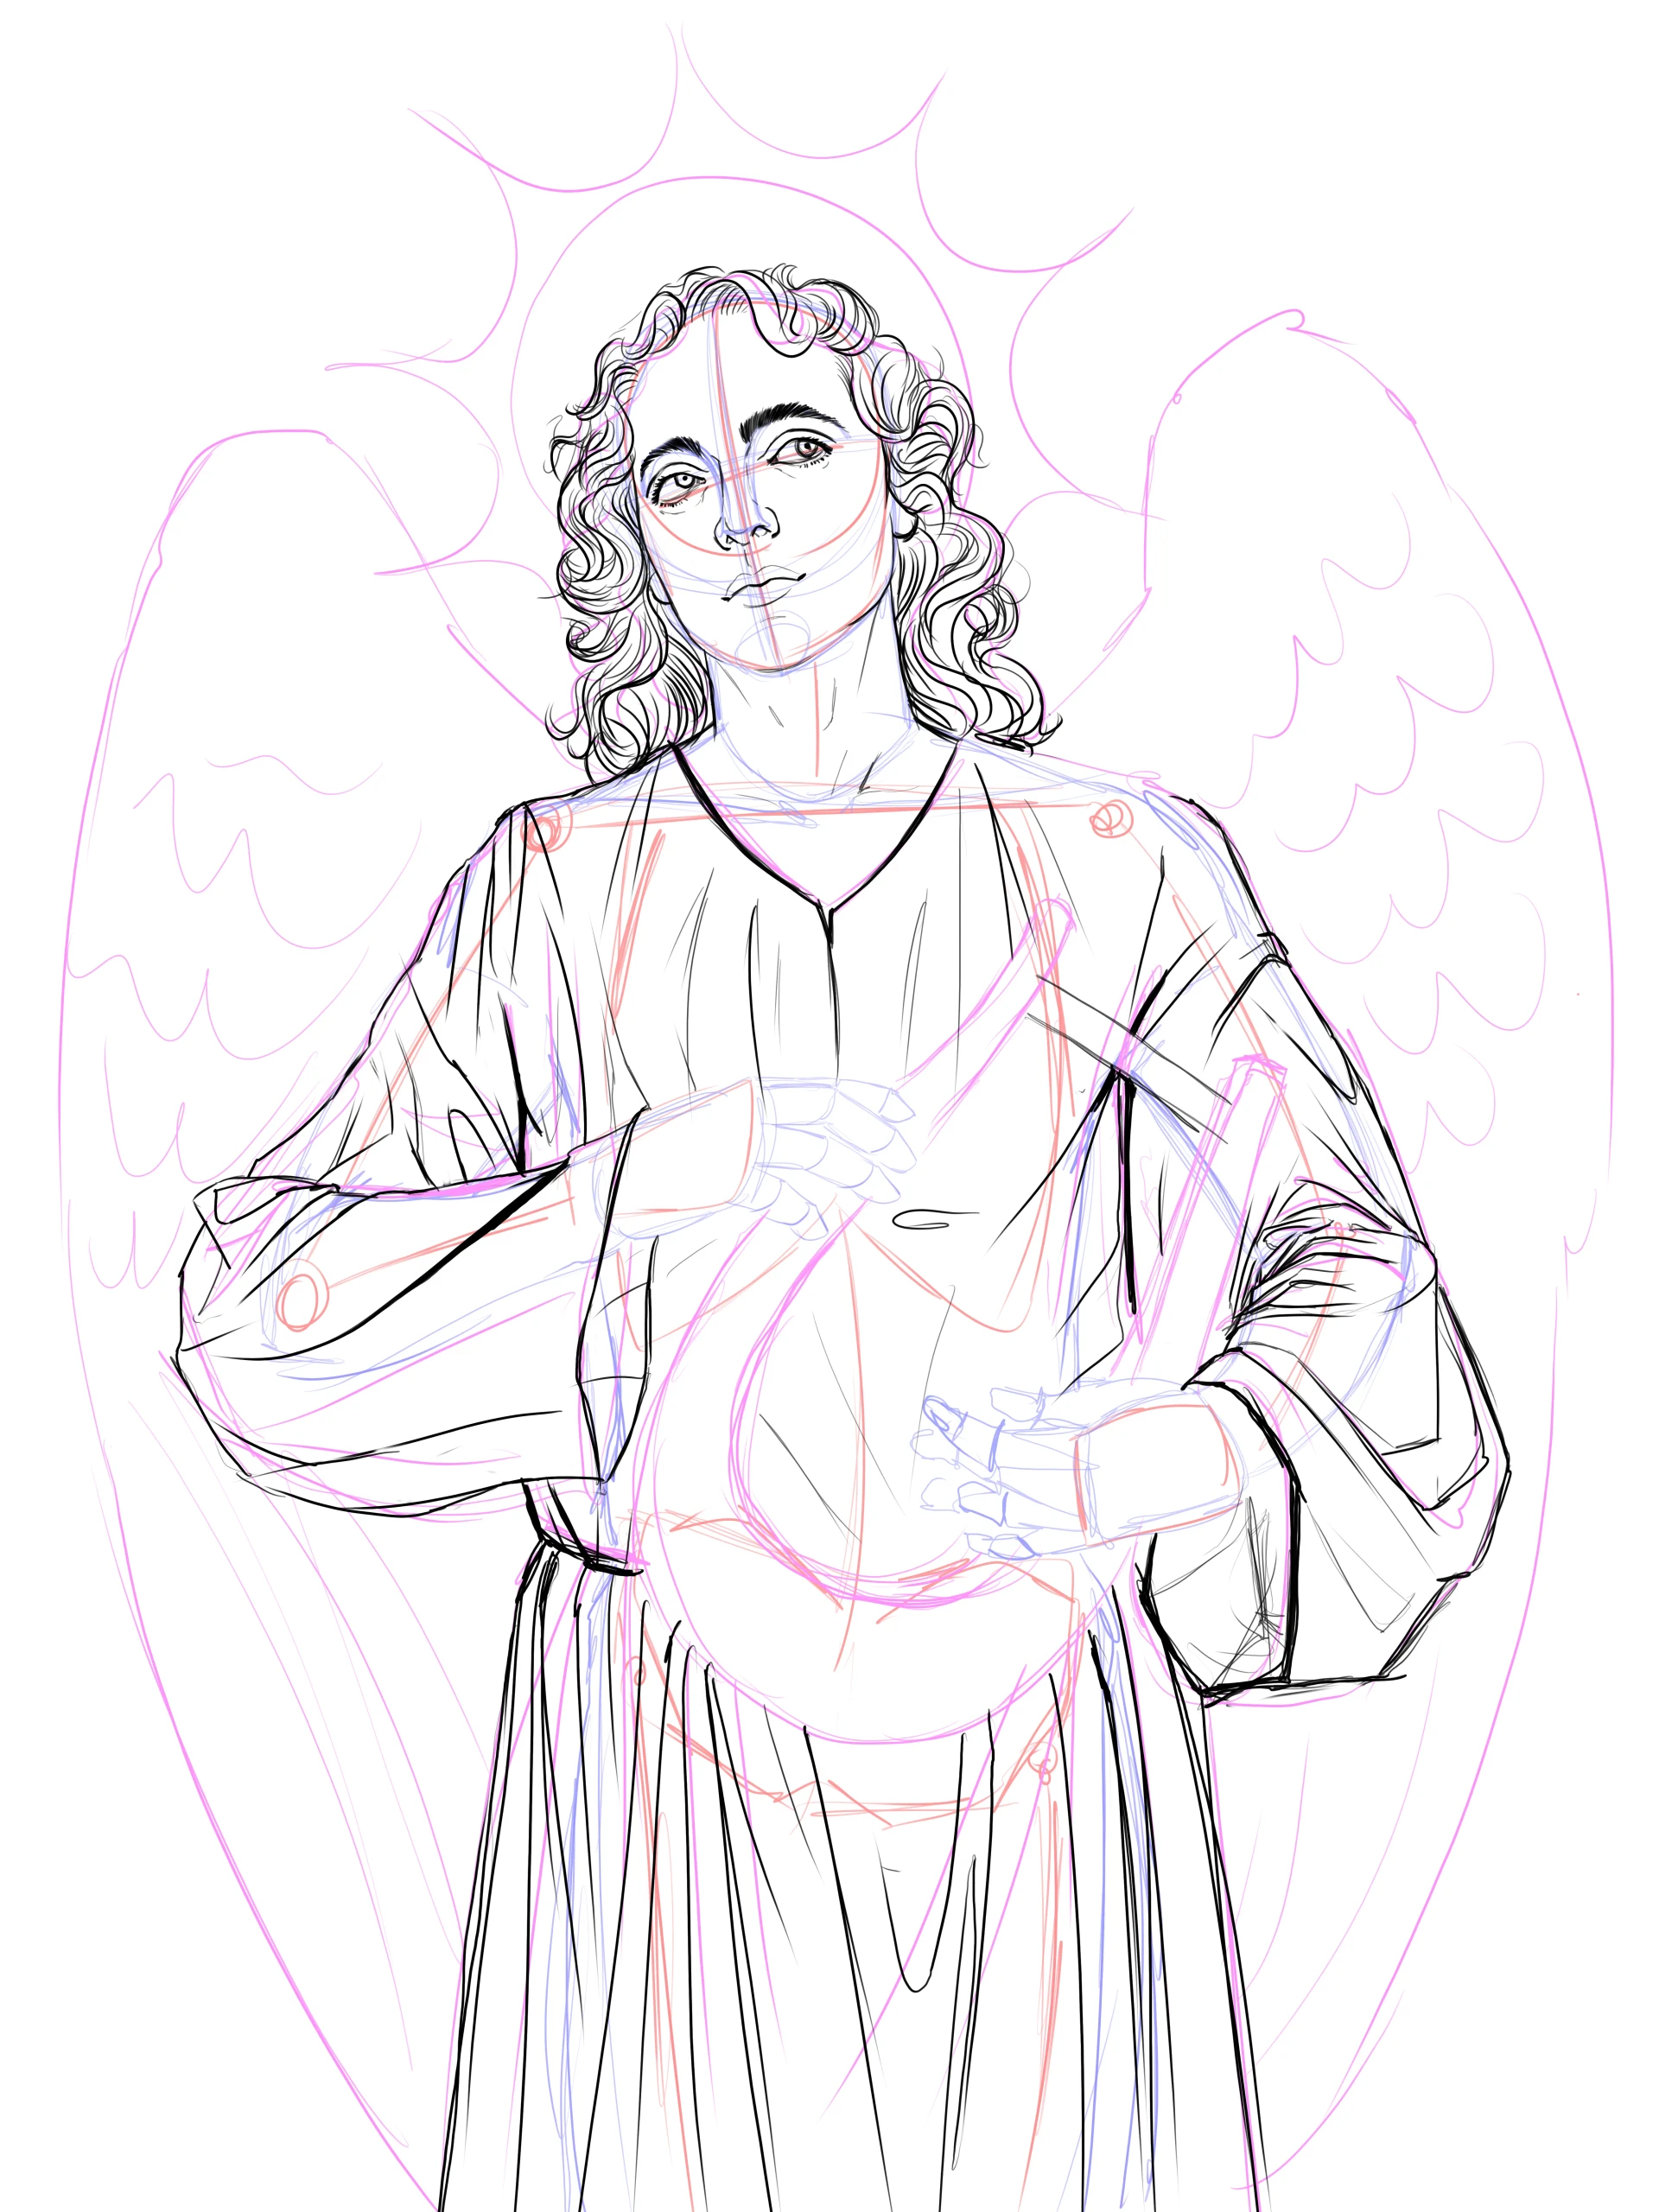
Now we will draw the hands playing the harp.
The hands are placed in a somewhat unusual position, as we seek to achieve some tension and flexion while maintaining a natural and realistic appearance.
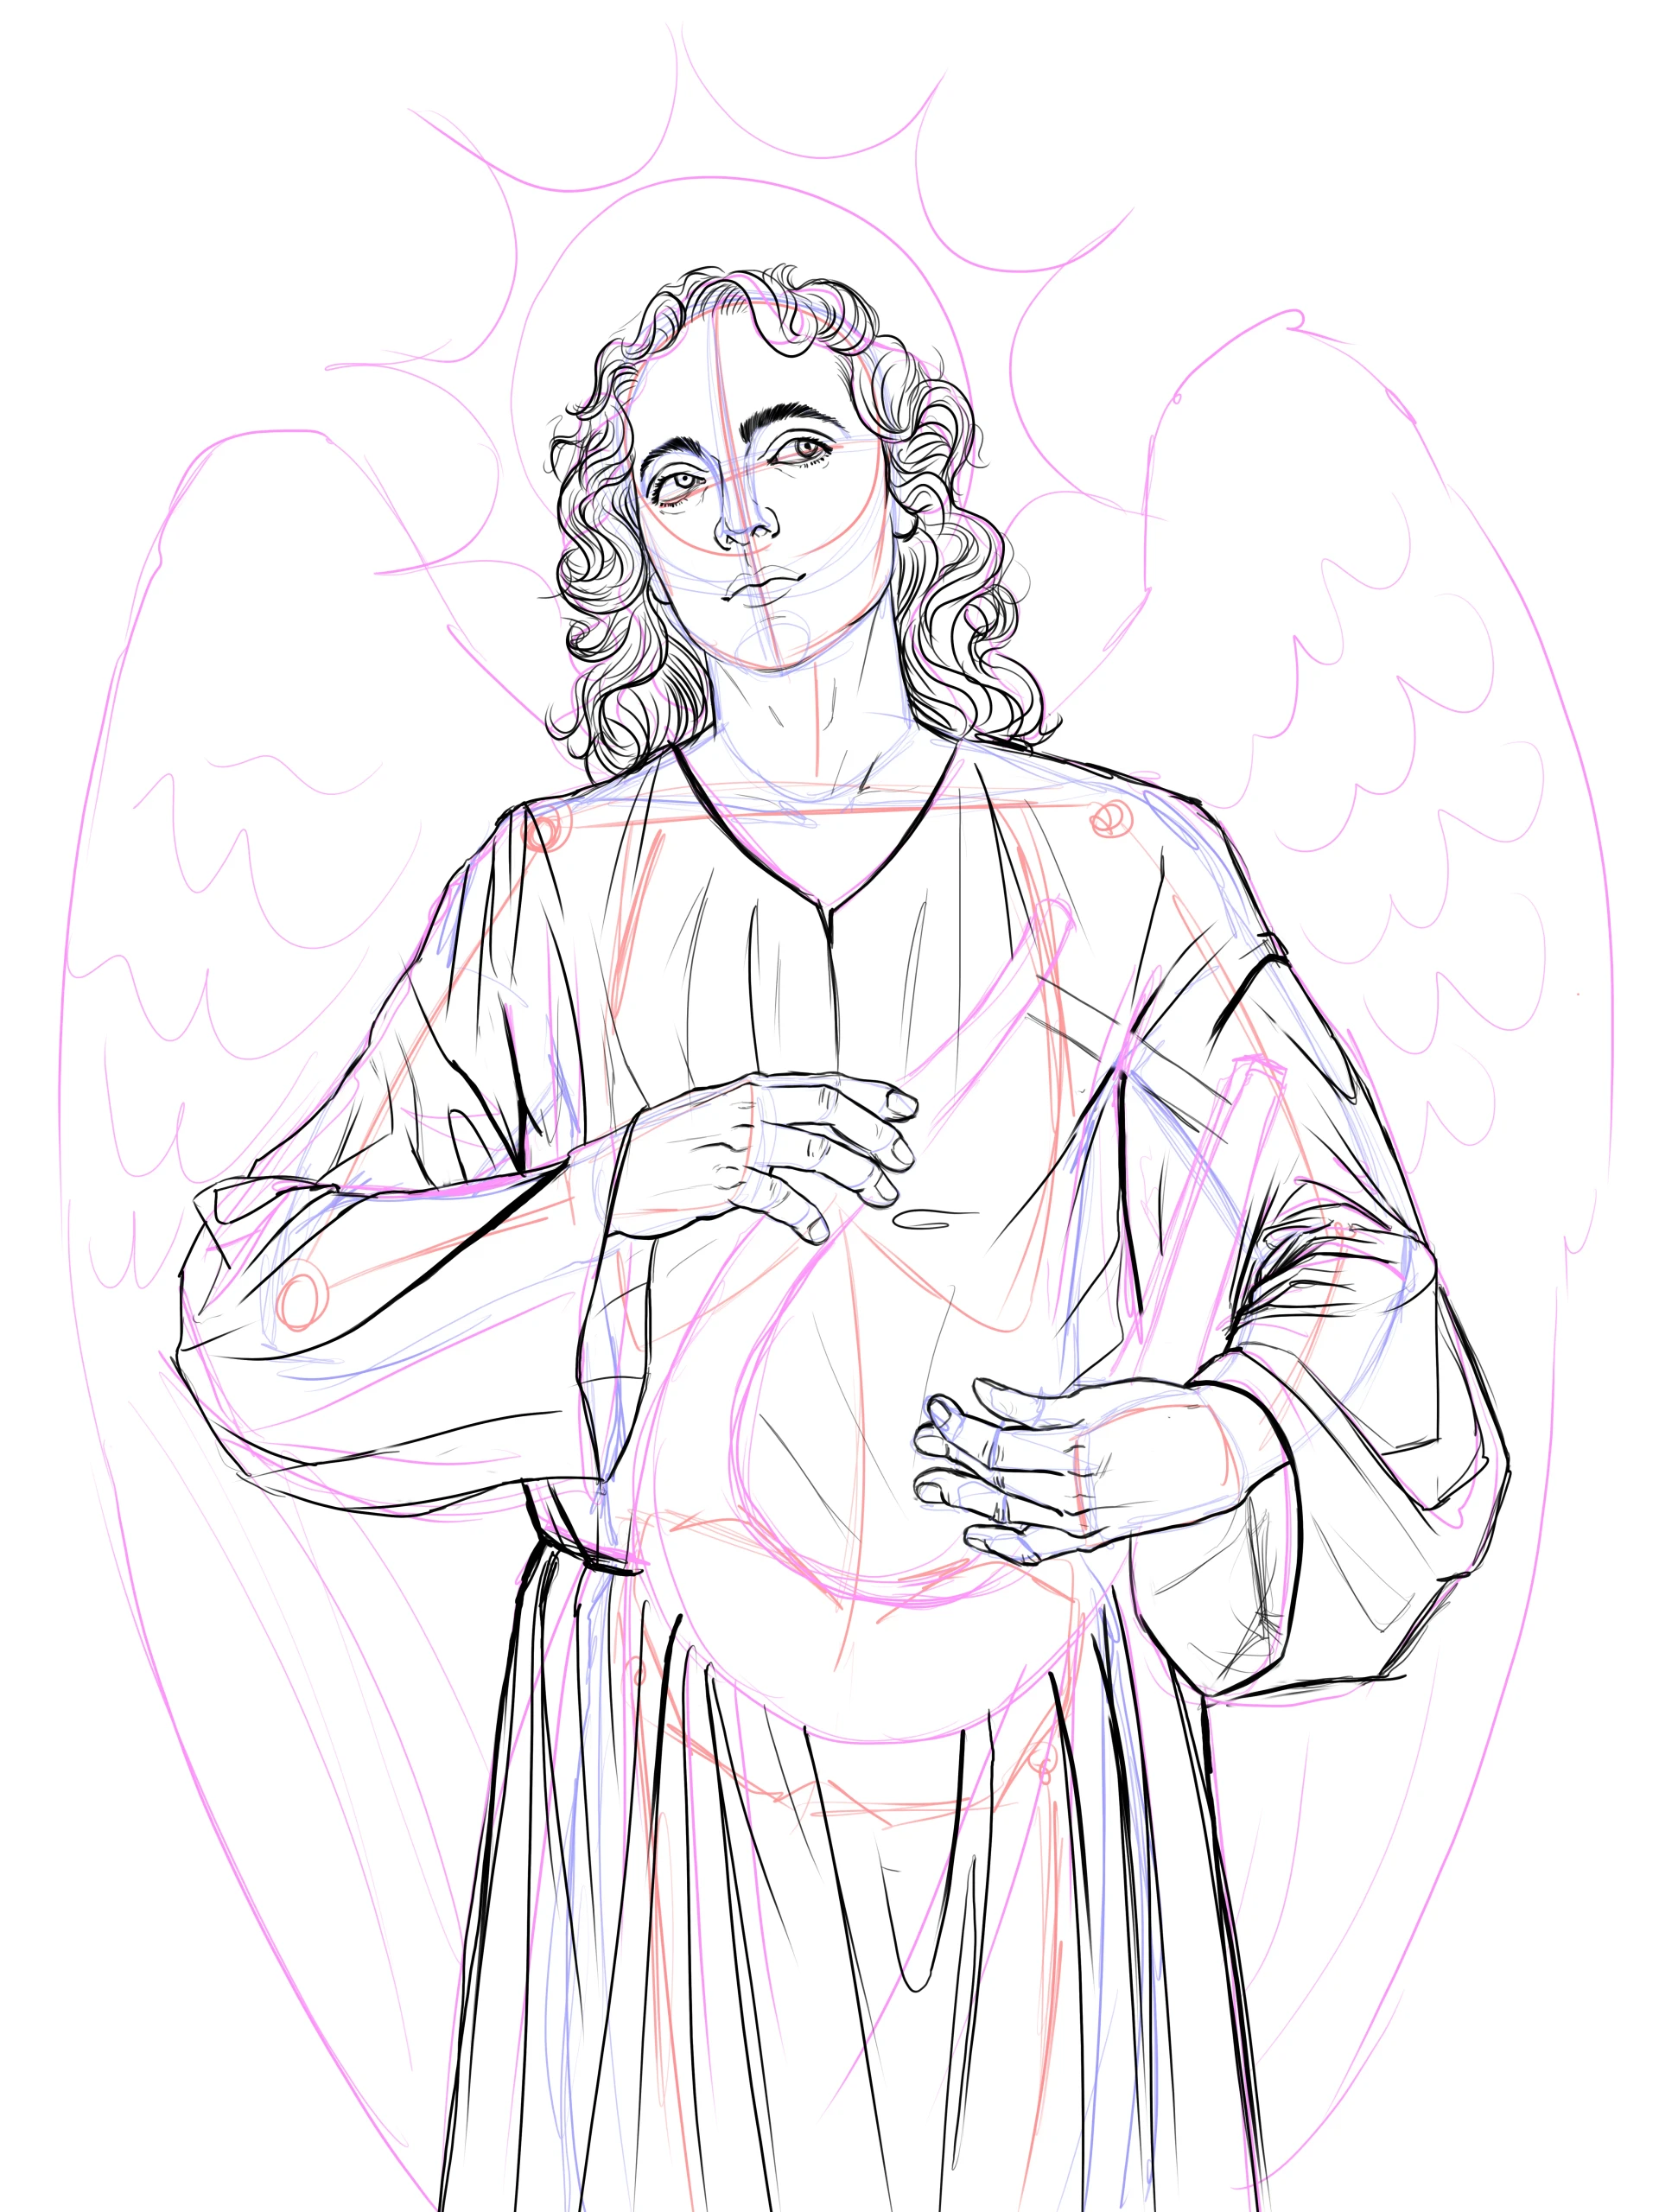
The hands we just drew interact with the harp. Use one to hold it by one of its edges and the other to pluck the strings, even though this position does not actually correspond to how one plays this instrument. It is primarily an aesthetic pose intended for representation.
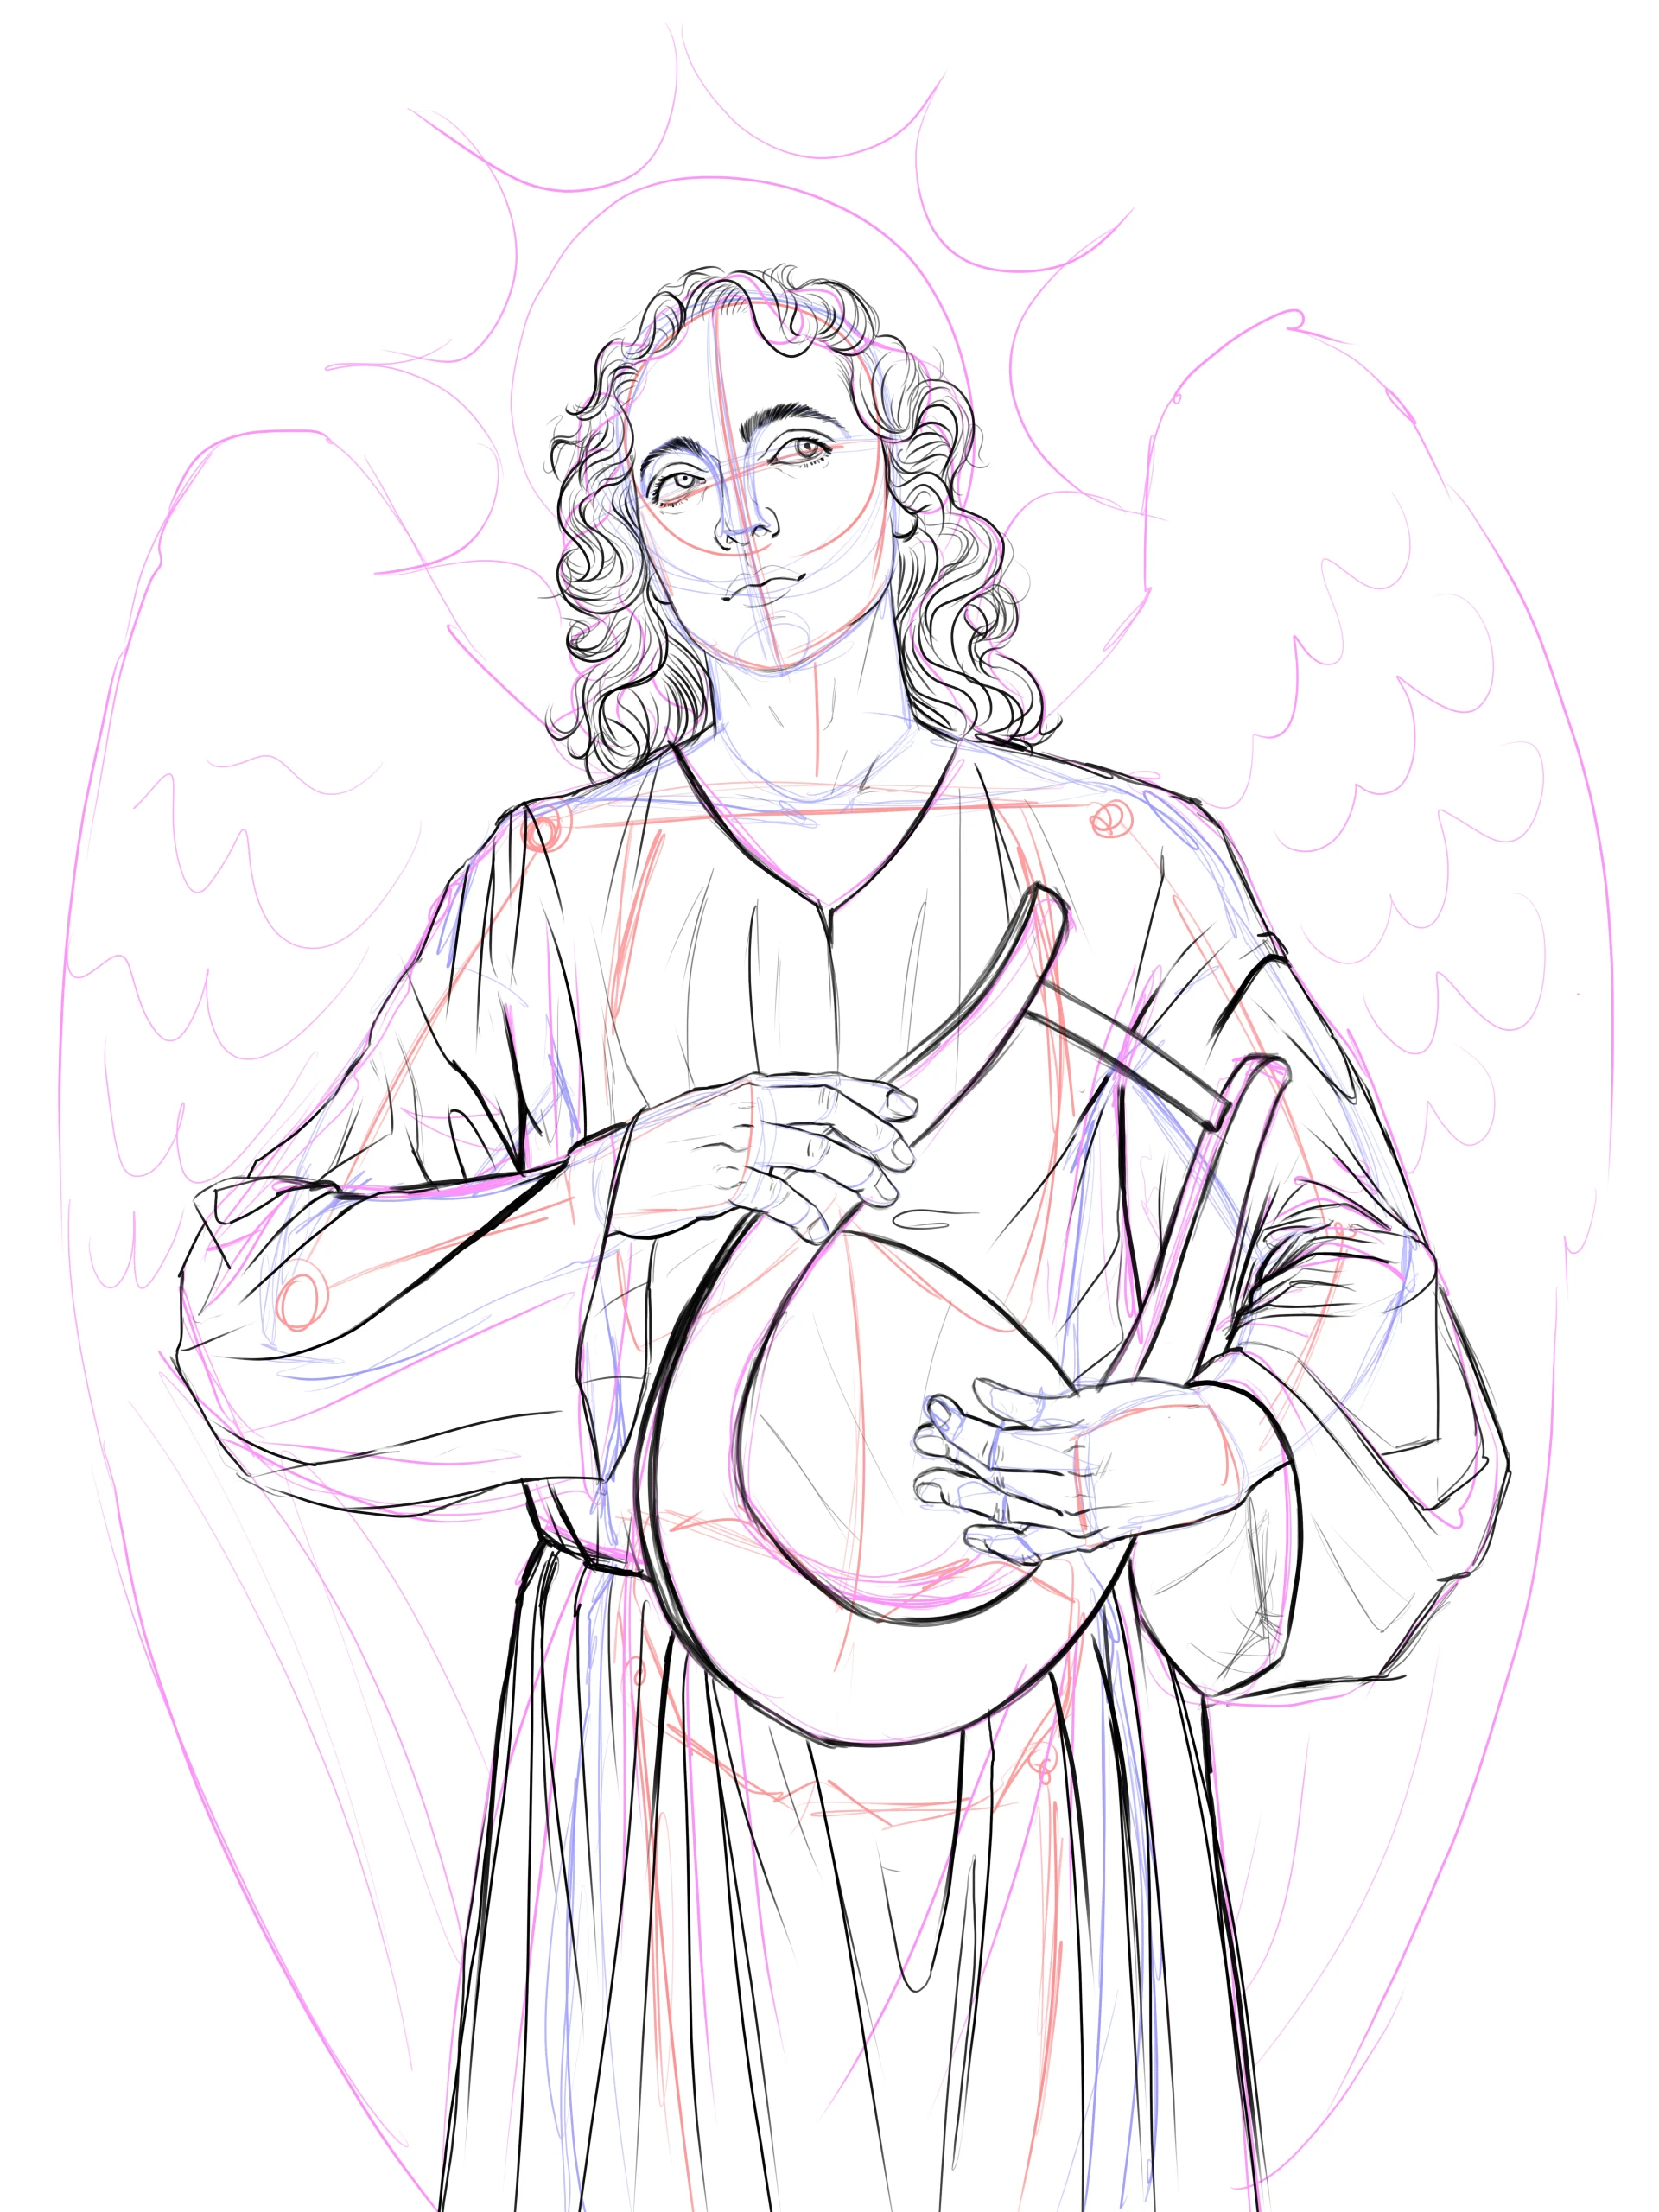
Now, let’s draw the wings, which are not very different from those of birds. Draw several layers of small feathers, covering the wings up to about elbow height. Then, add long large feathers that hide behind the character.
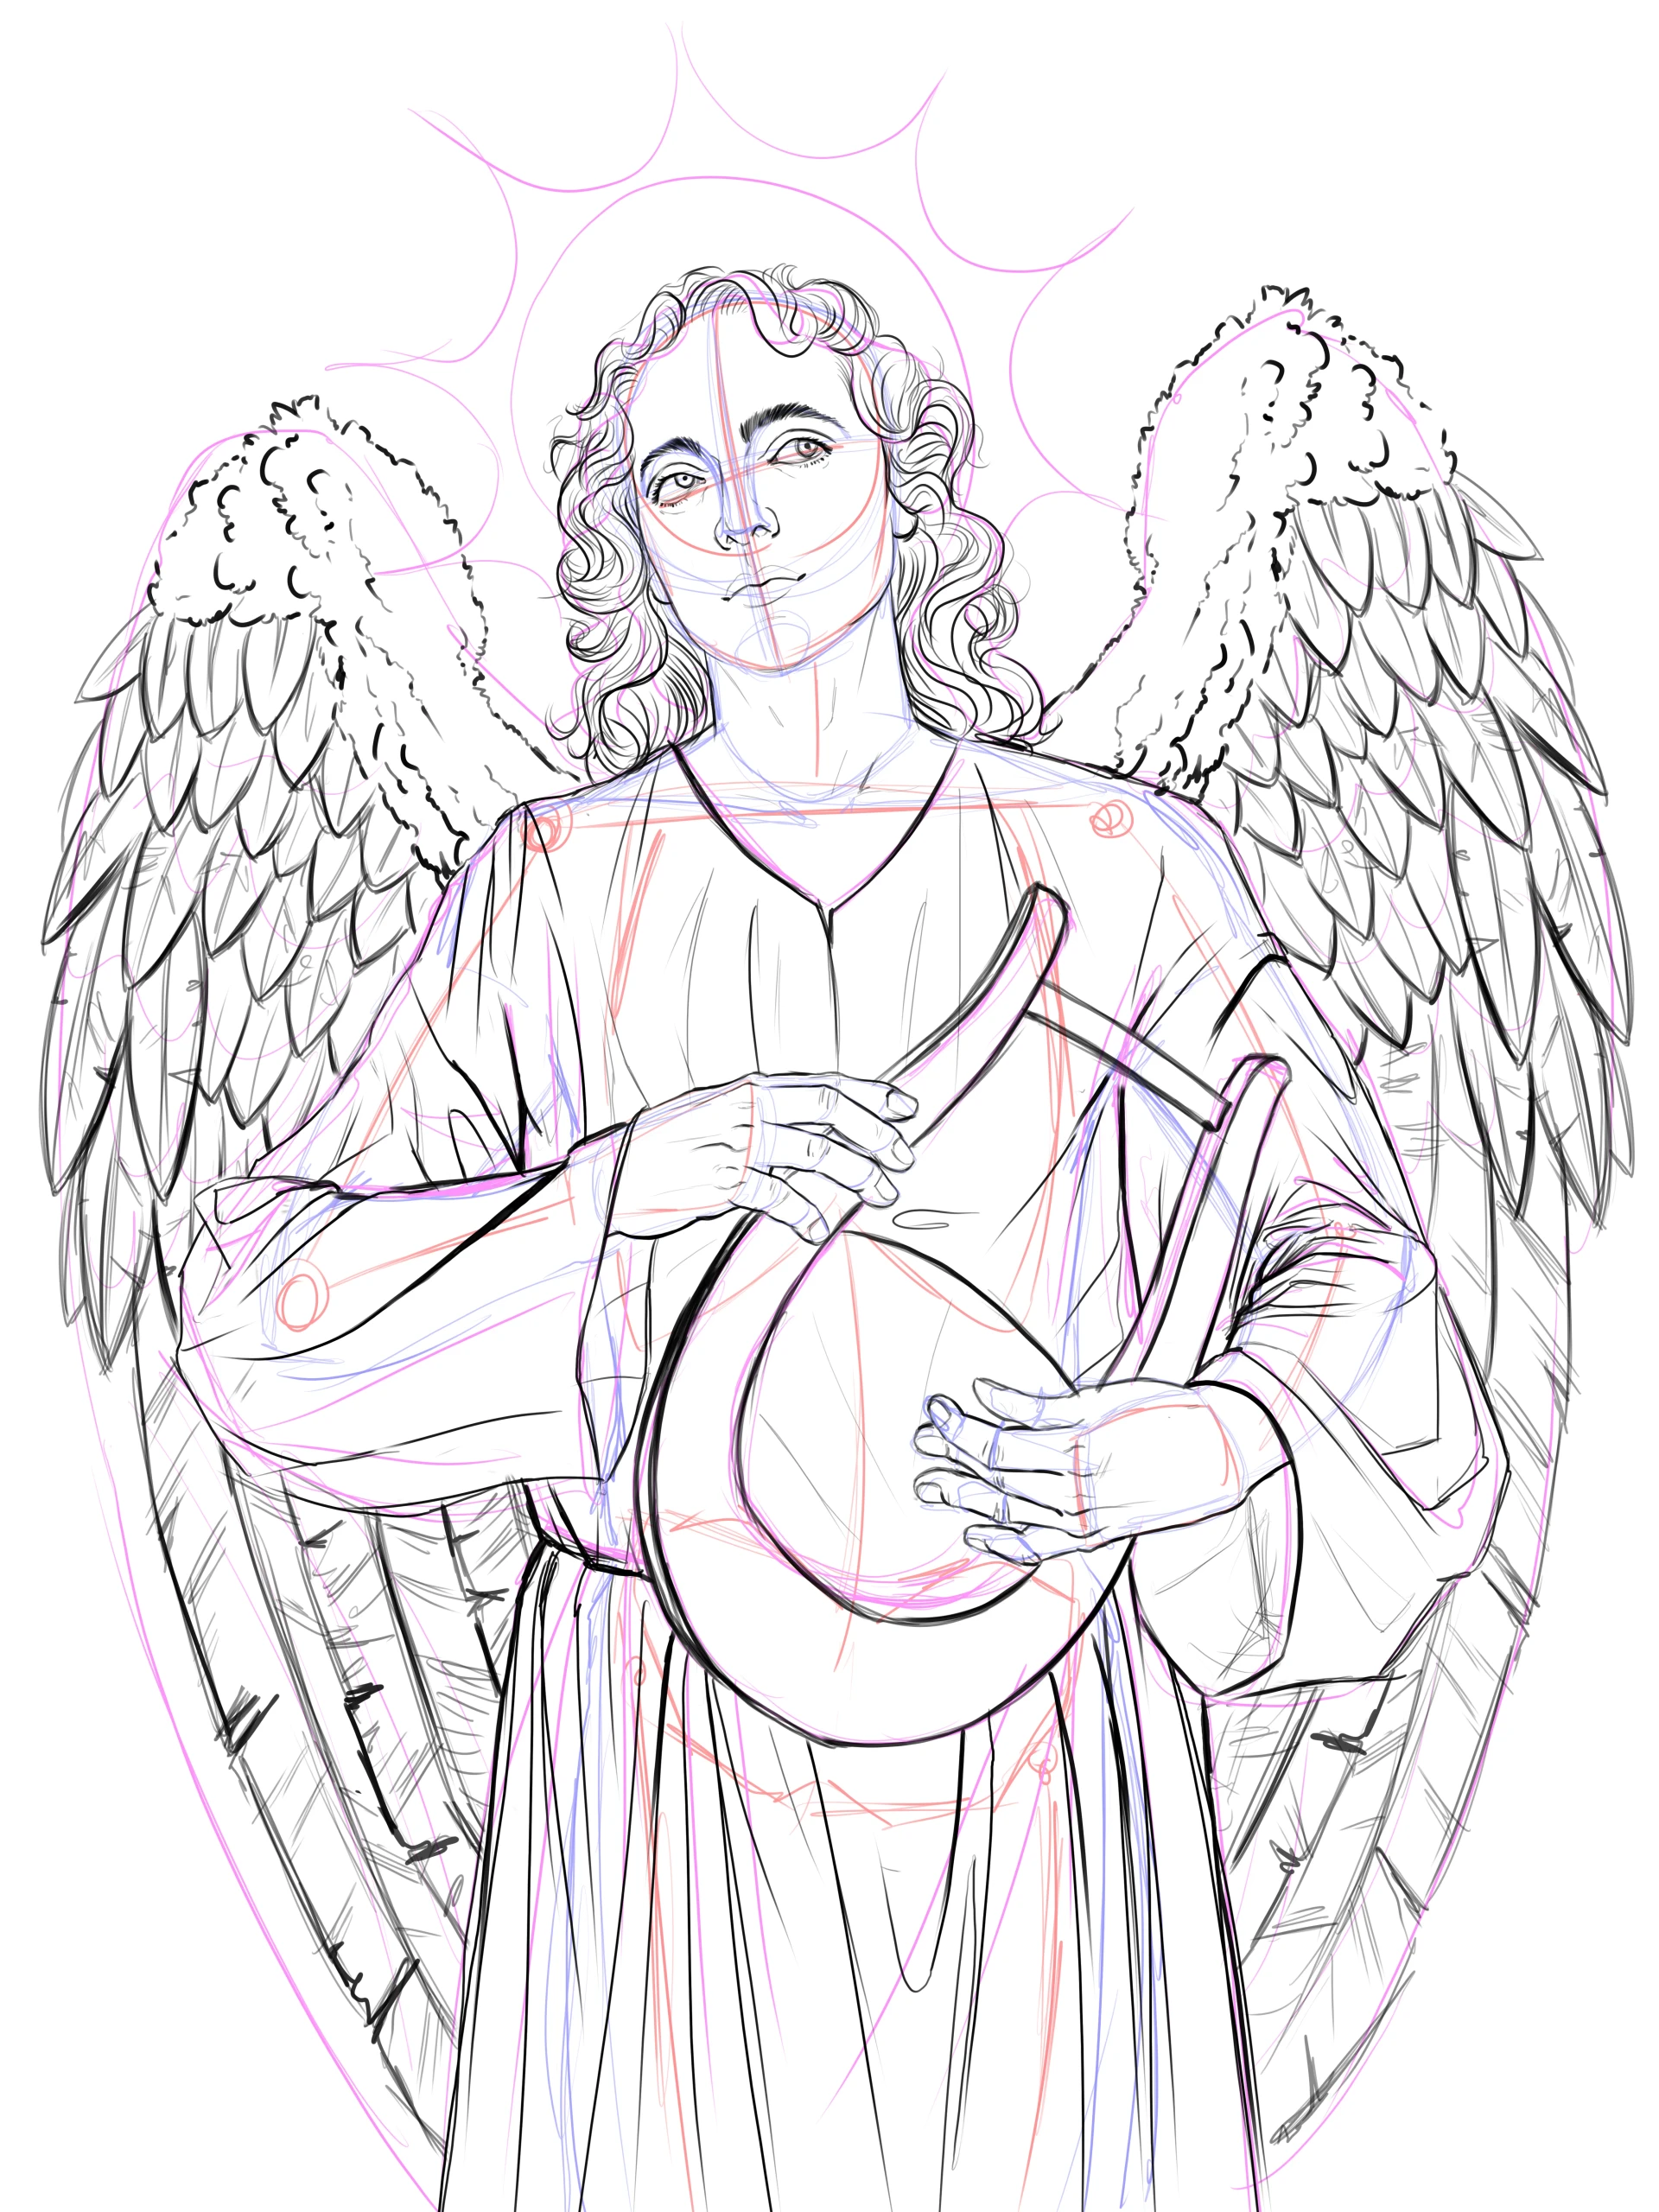
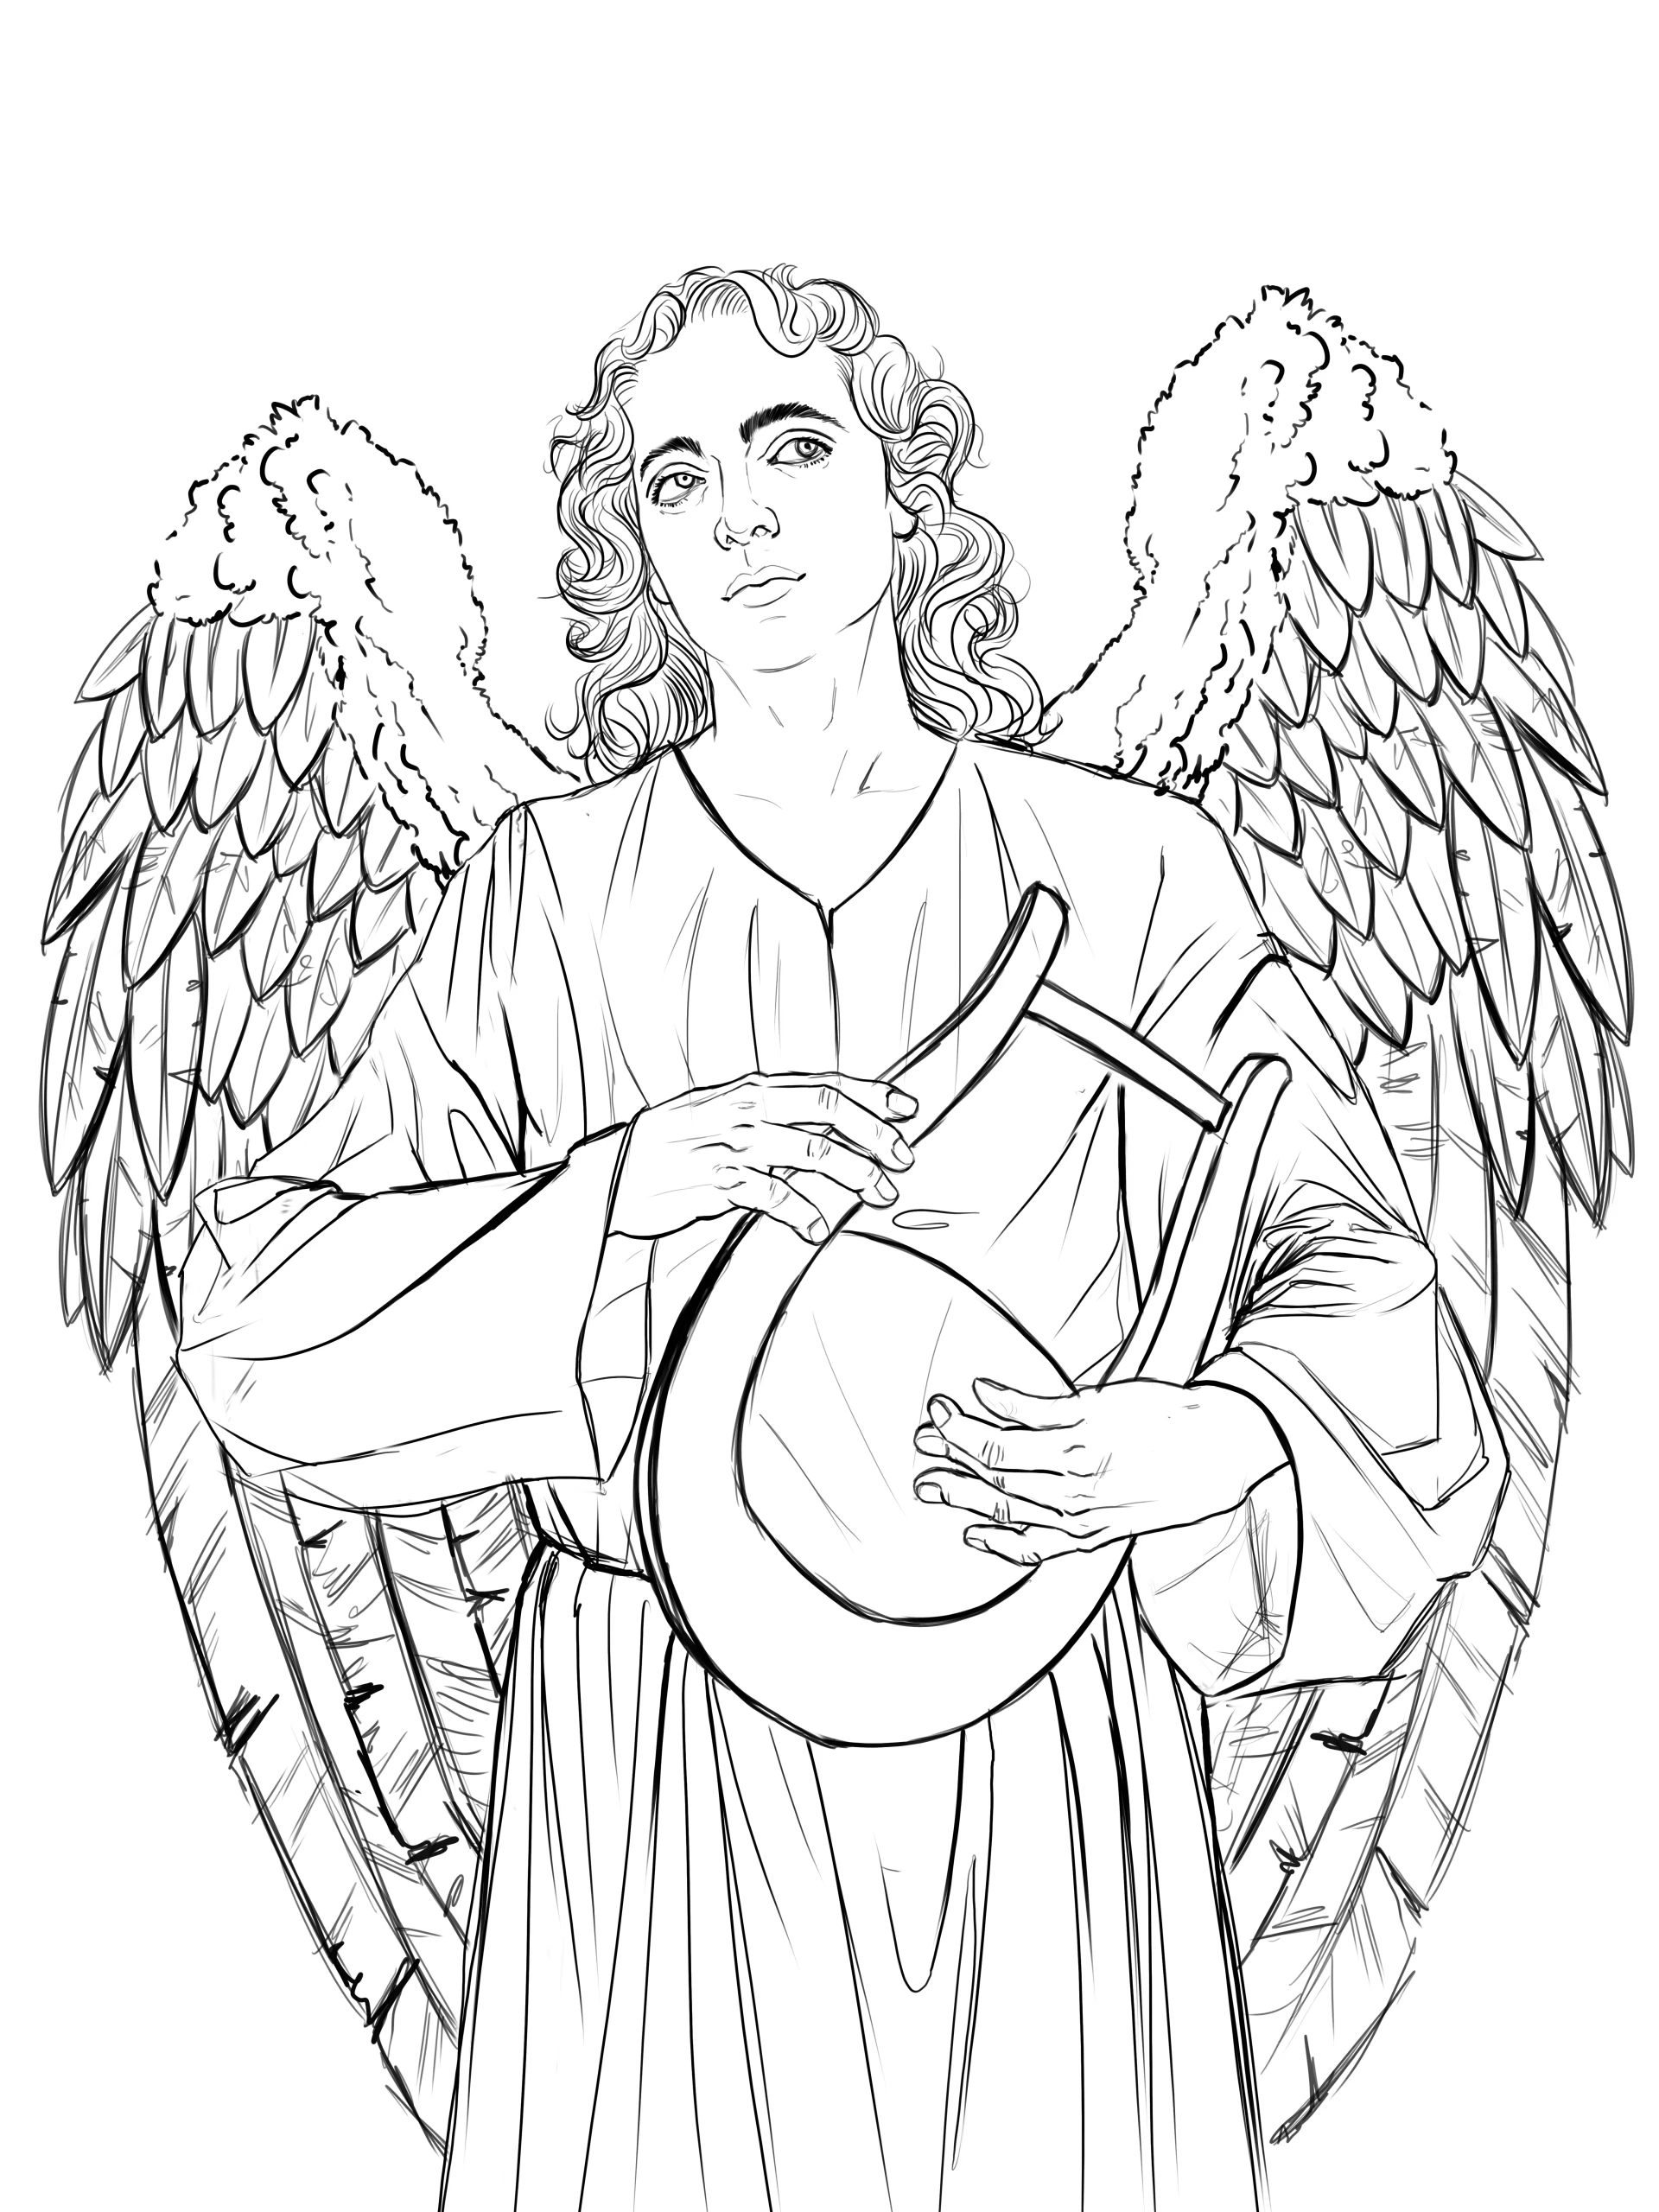
Erase the guide lines from the sketch to clean up our drawing, and take this opportunity to refine the details and correct the lines.
Add shadow and light
To begin drawing light and shadow, I recommend starting with an intermediate color base, using a gray for the subject and a slightly darker gray for the background. You can use the contrast to your advantage for elements of pure light, such as the halo.
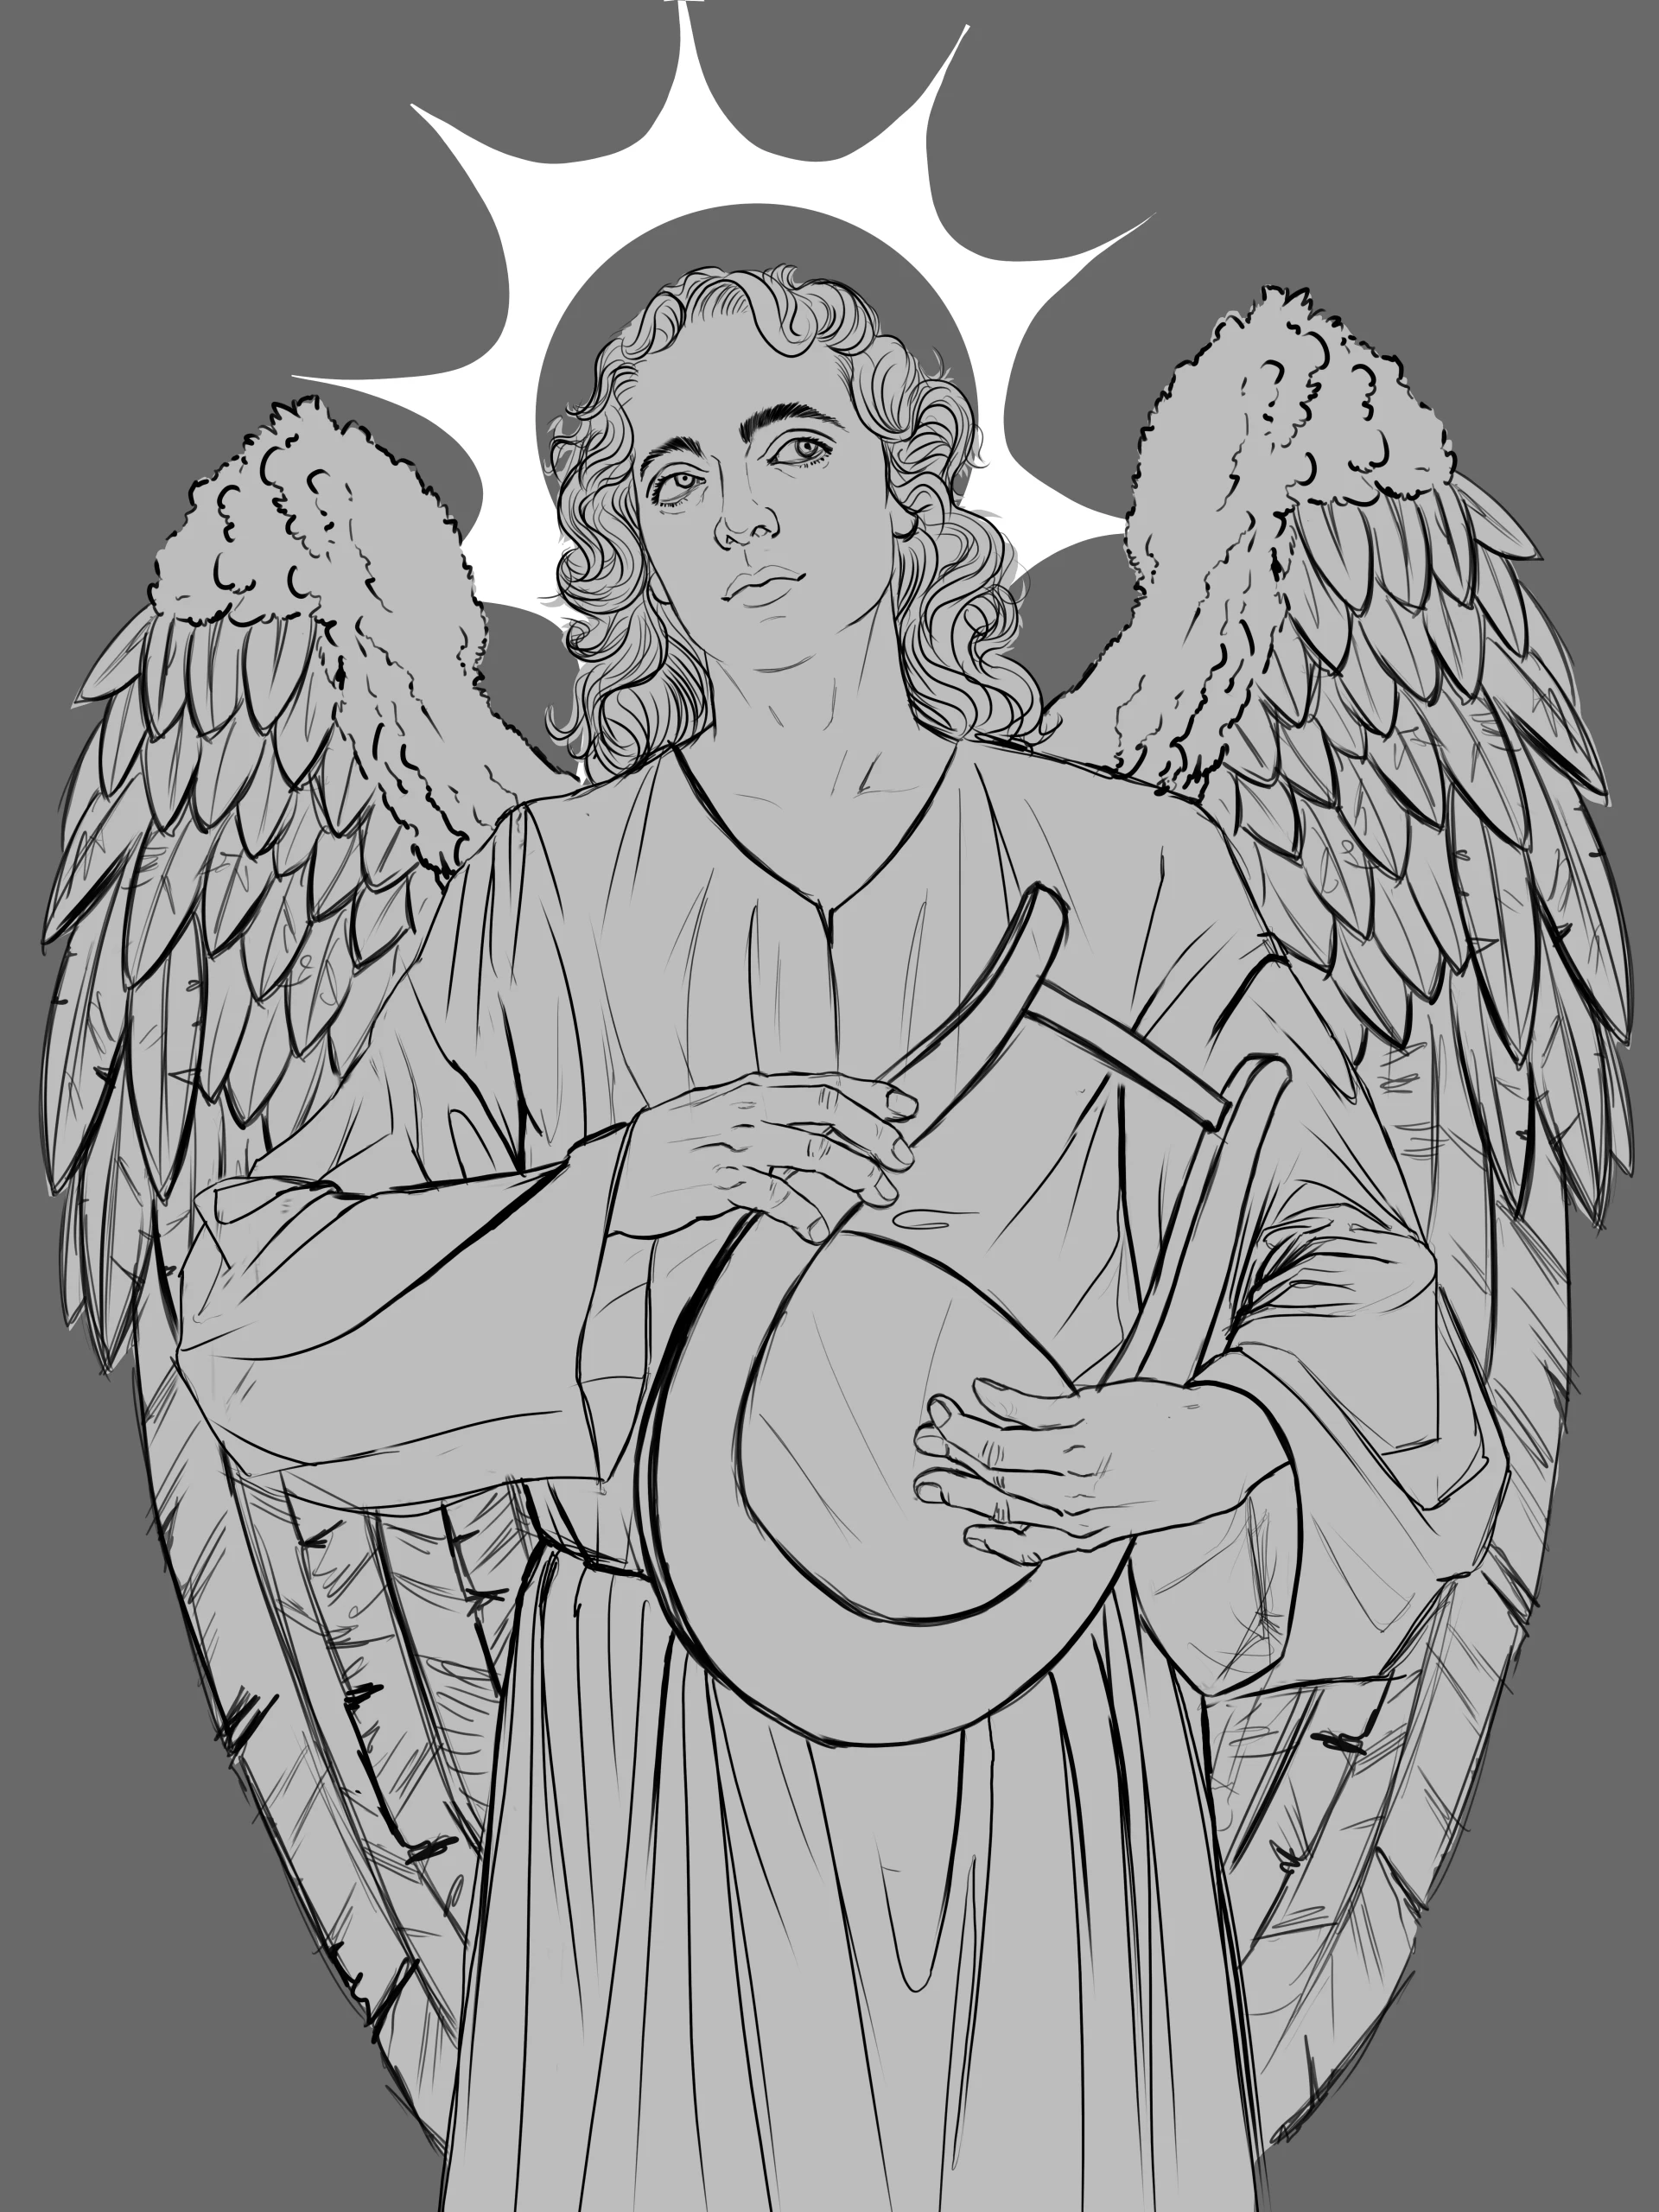
It is now important to define the light spots. To do this, I suggest adding a little bit of well-blended white in the areas that shine or reflect light, such as the halo and some areas in the corners of the background.
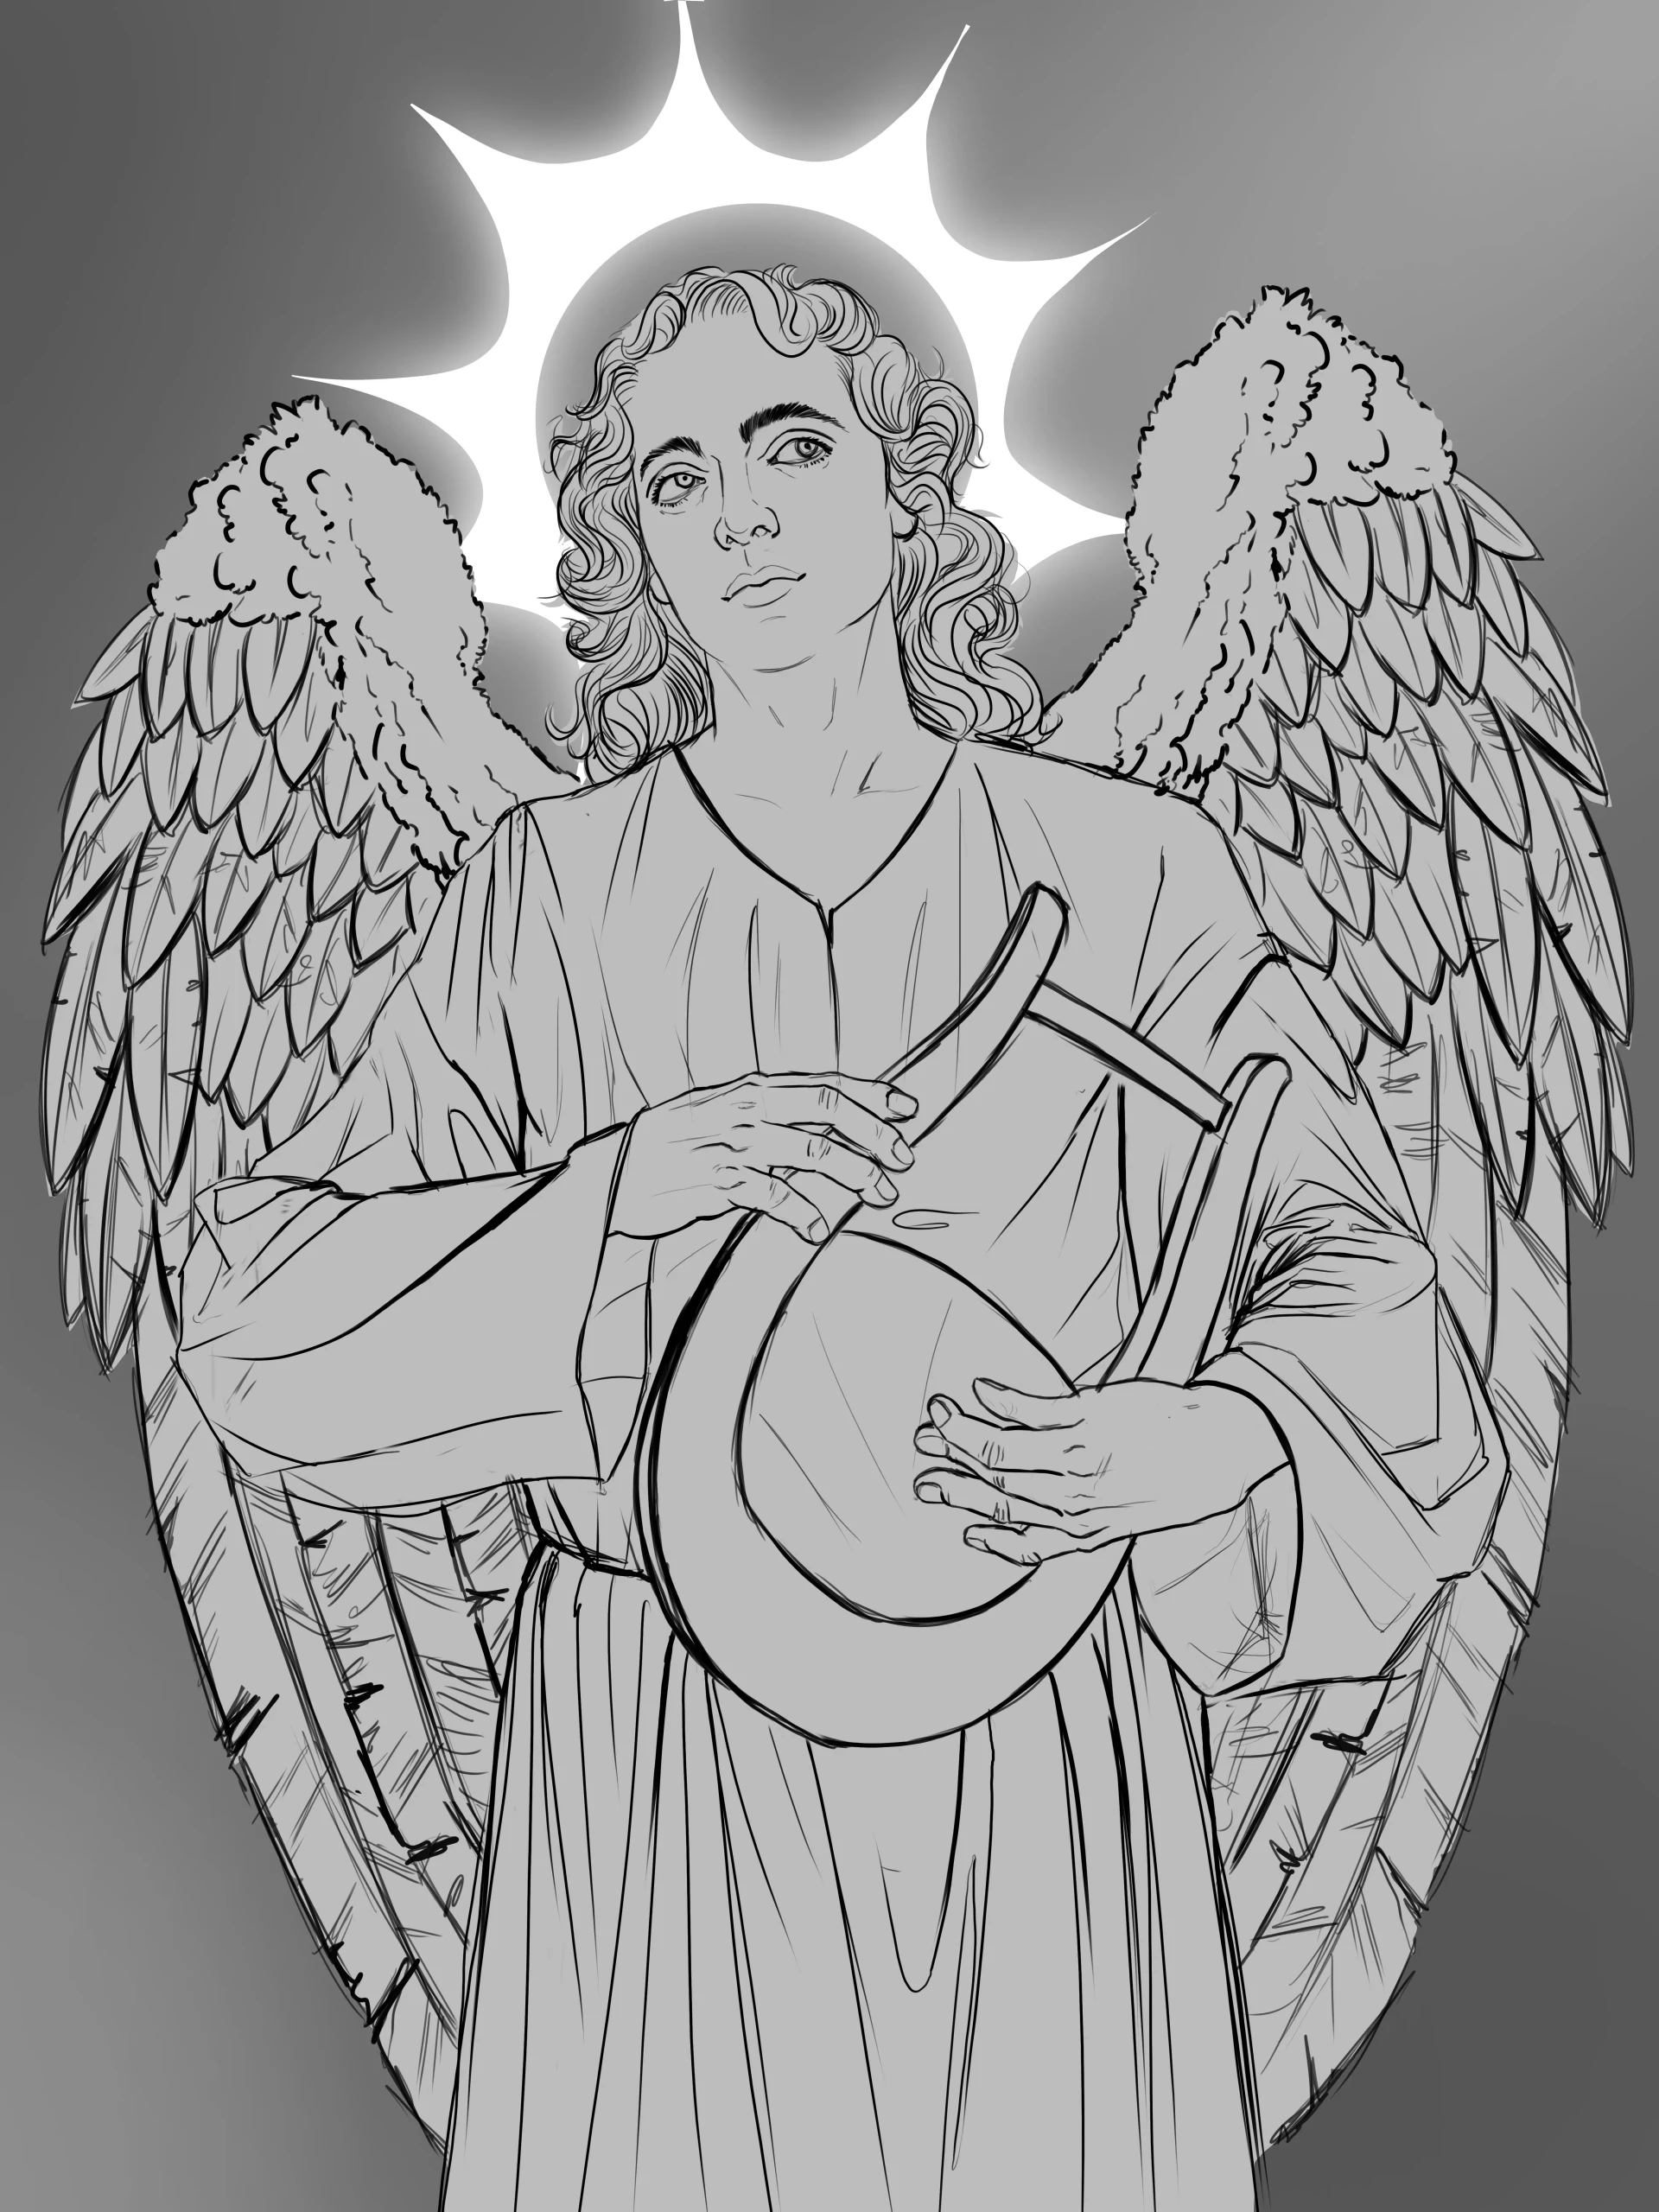
If you wish, you can create general shading over the entire drawing to identify the most exposed areas. Remember that we have a model in direct light, which requires more pronounced contrasts and light reflections everywhere.
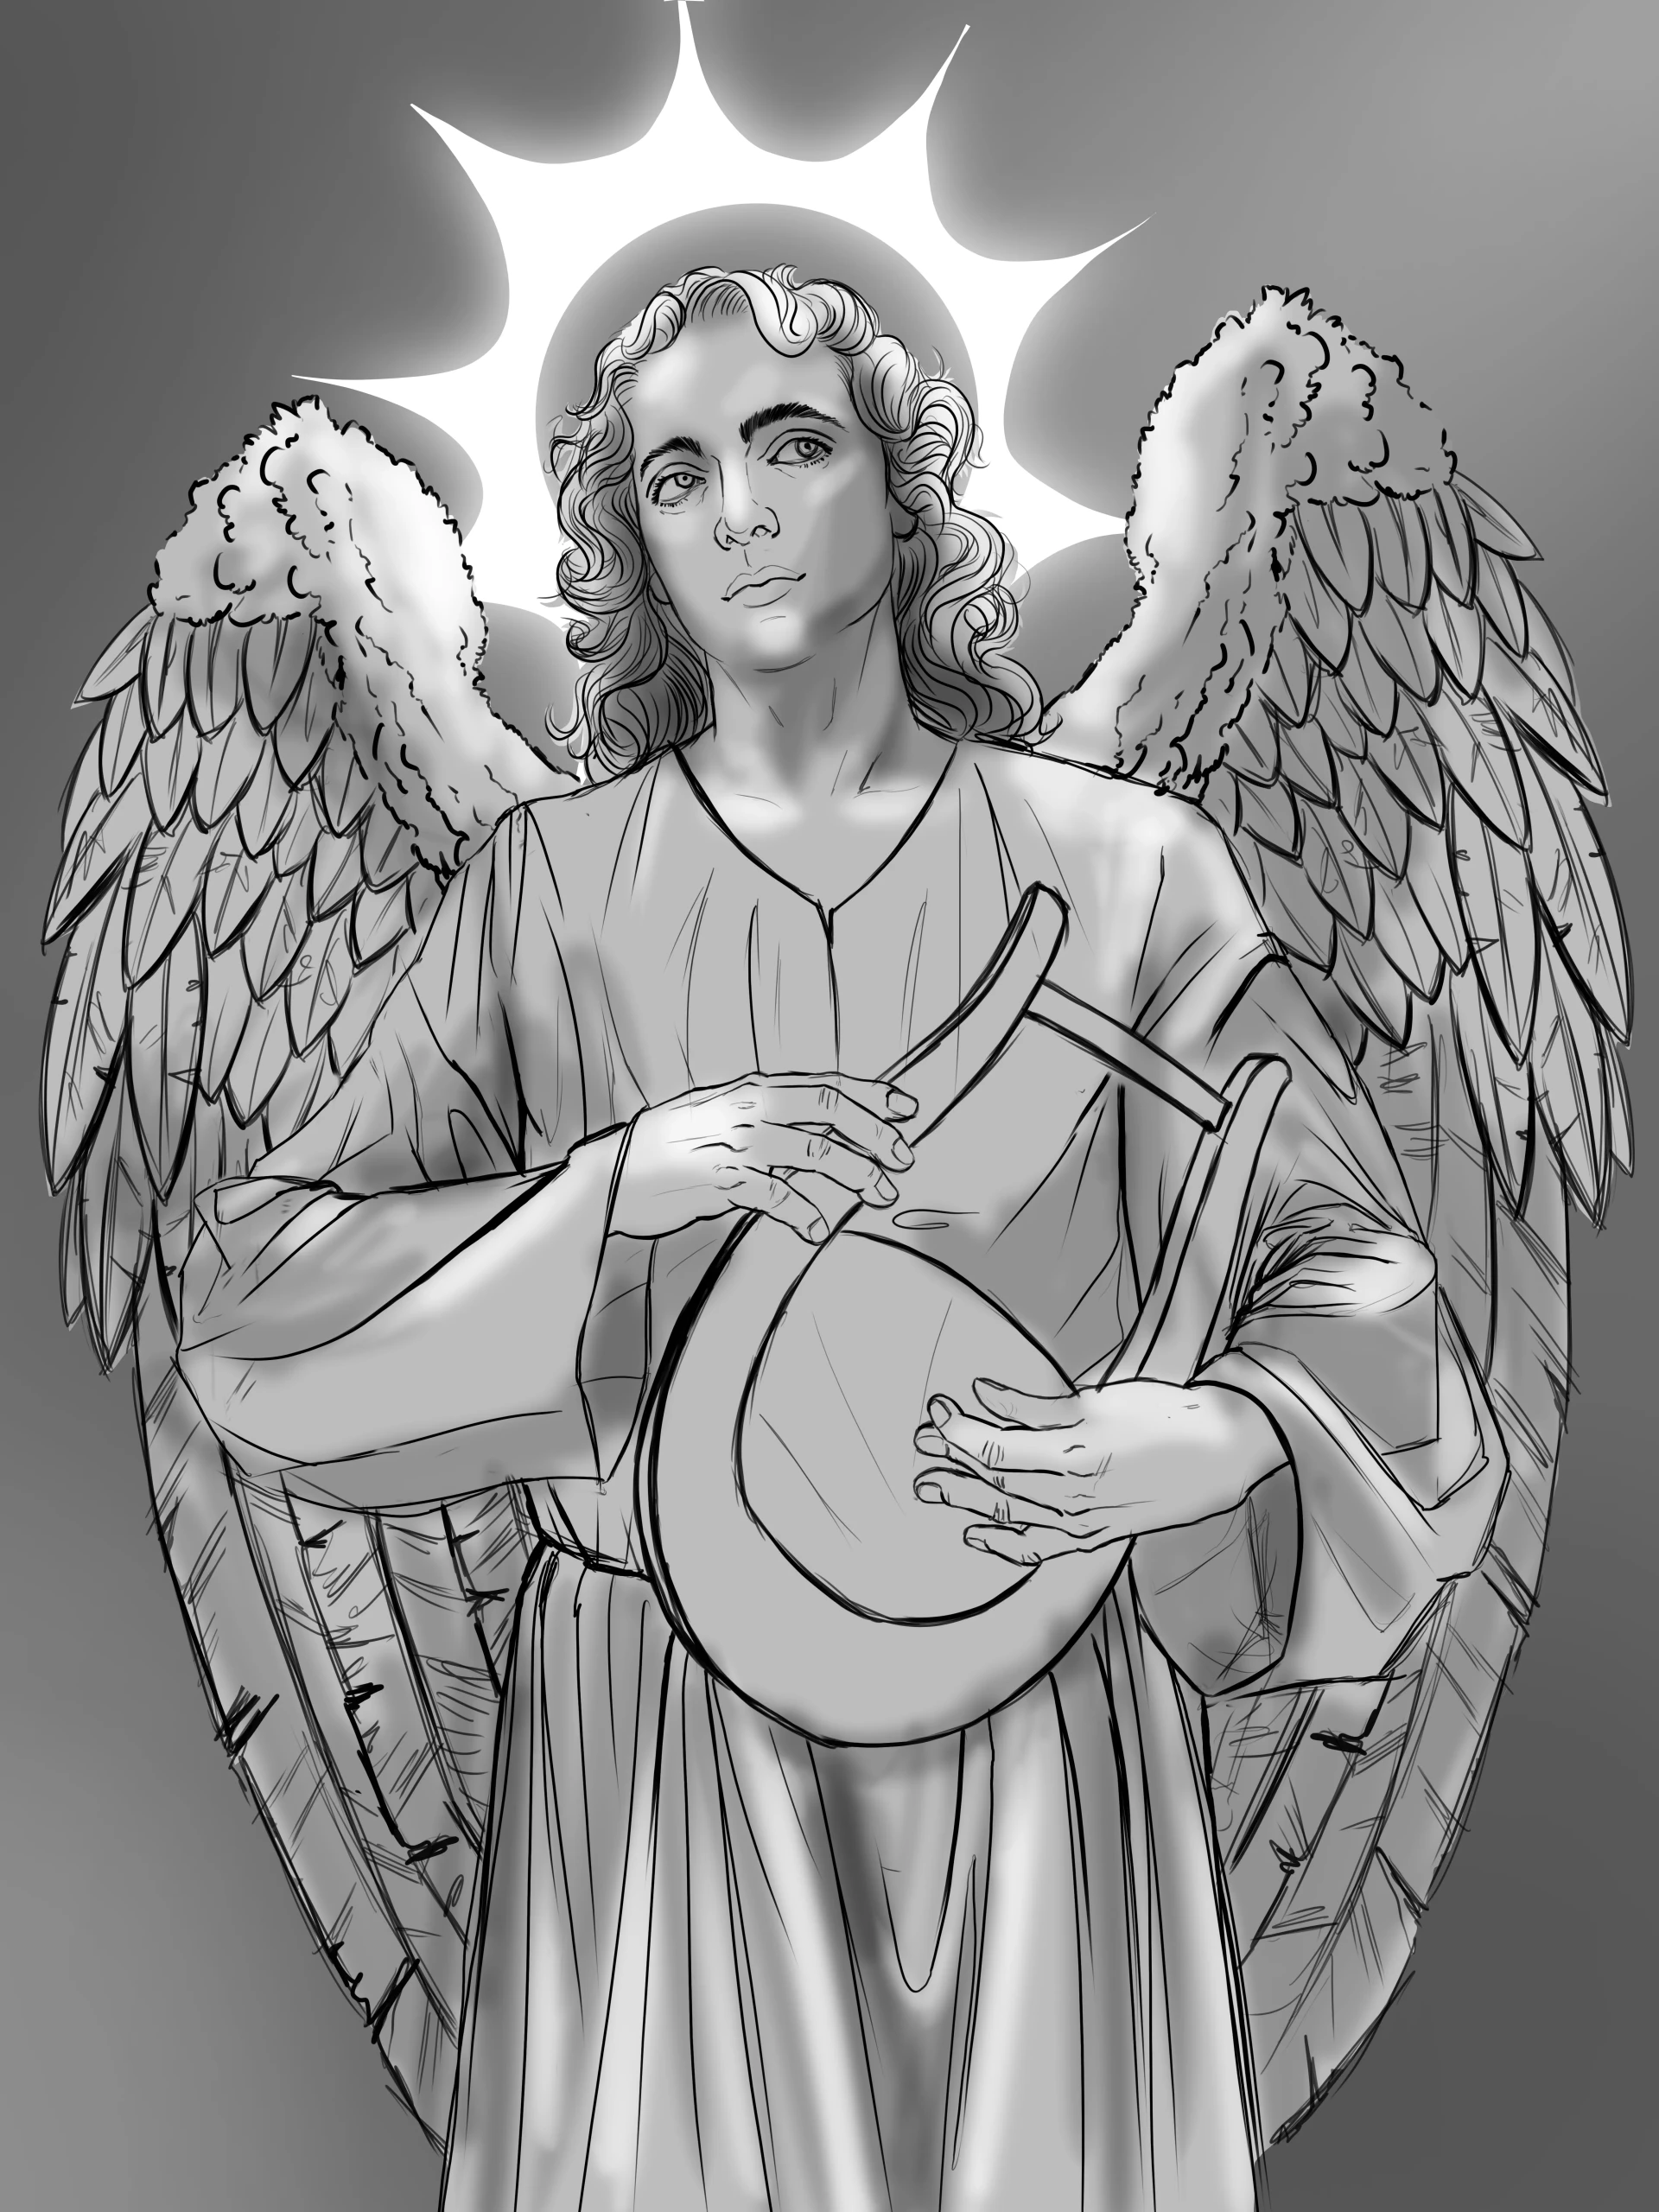
Add volume to the drawing
The face requires very soft shadows, with several highlights along the contours.
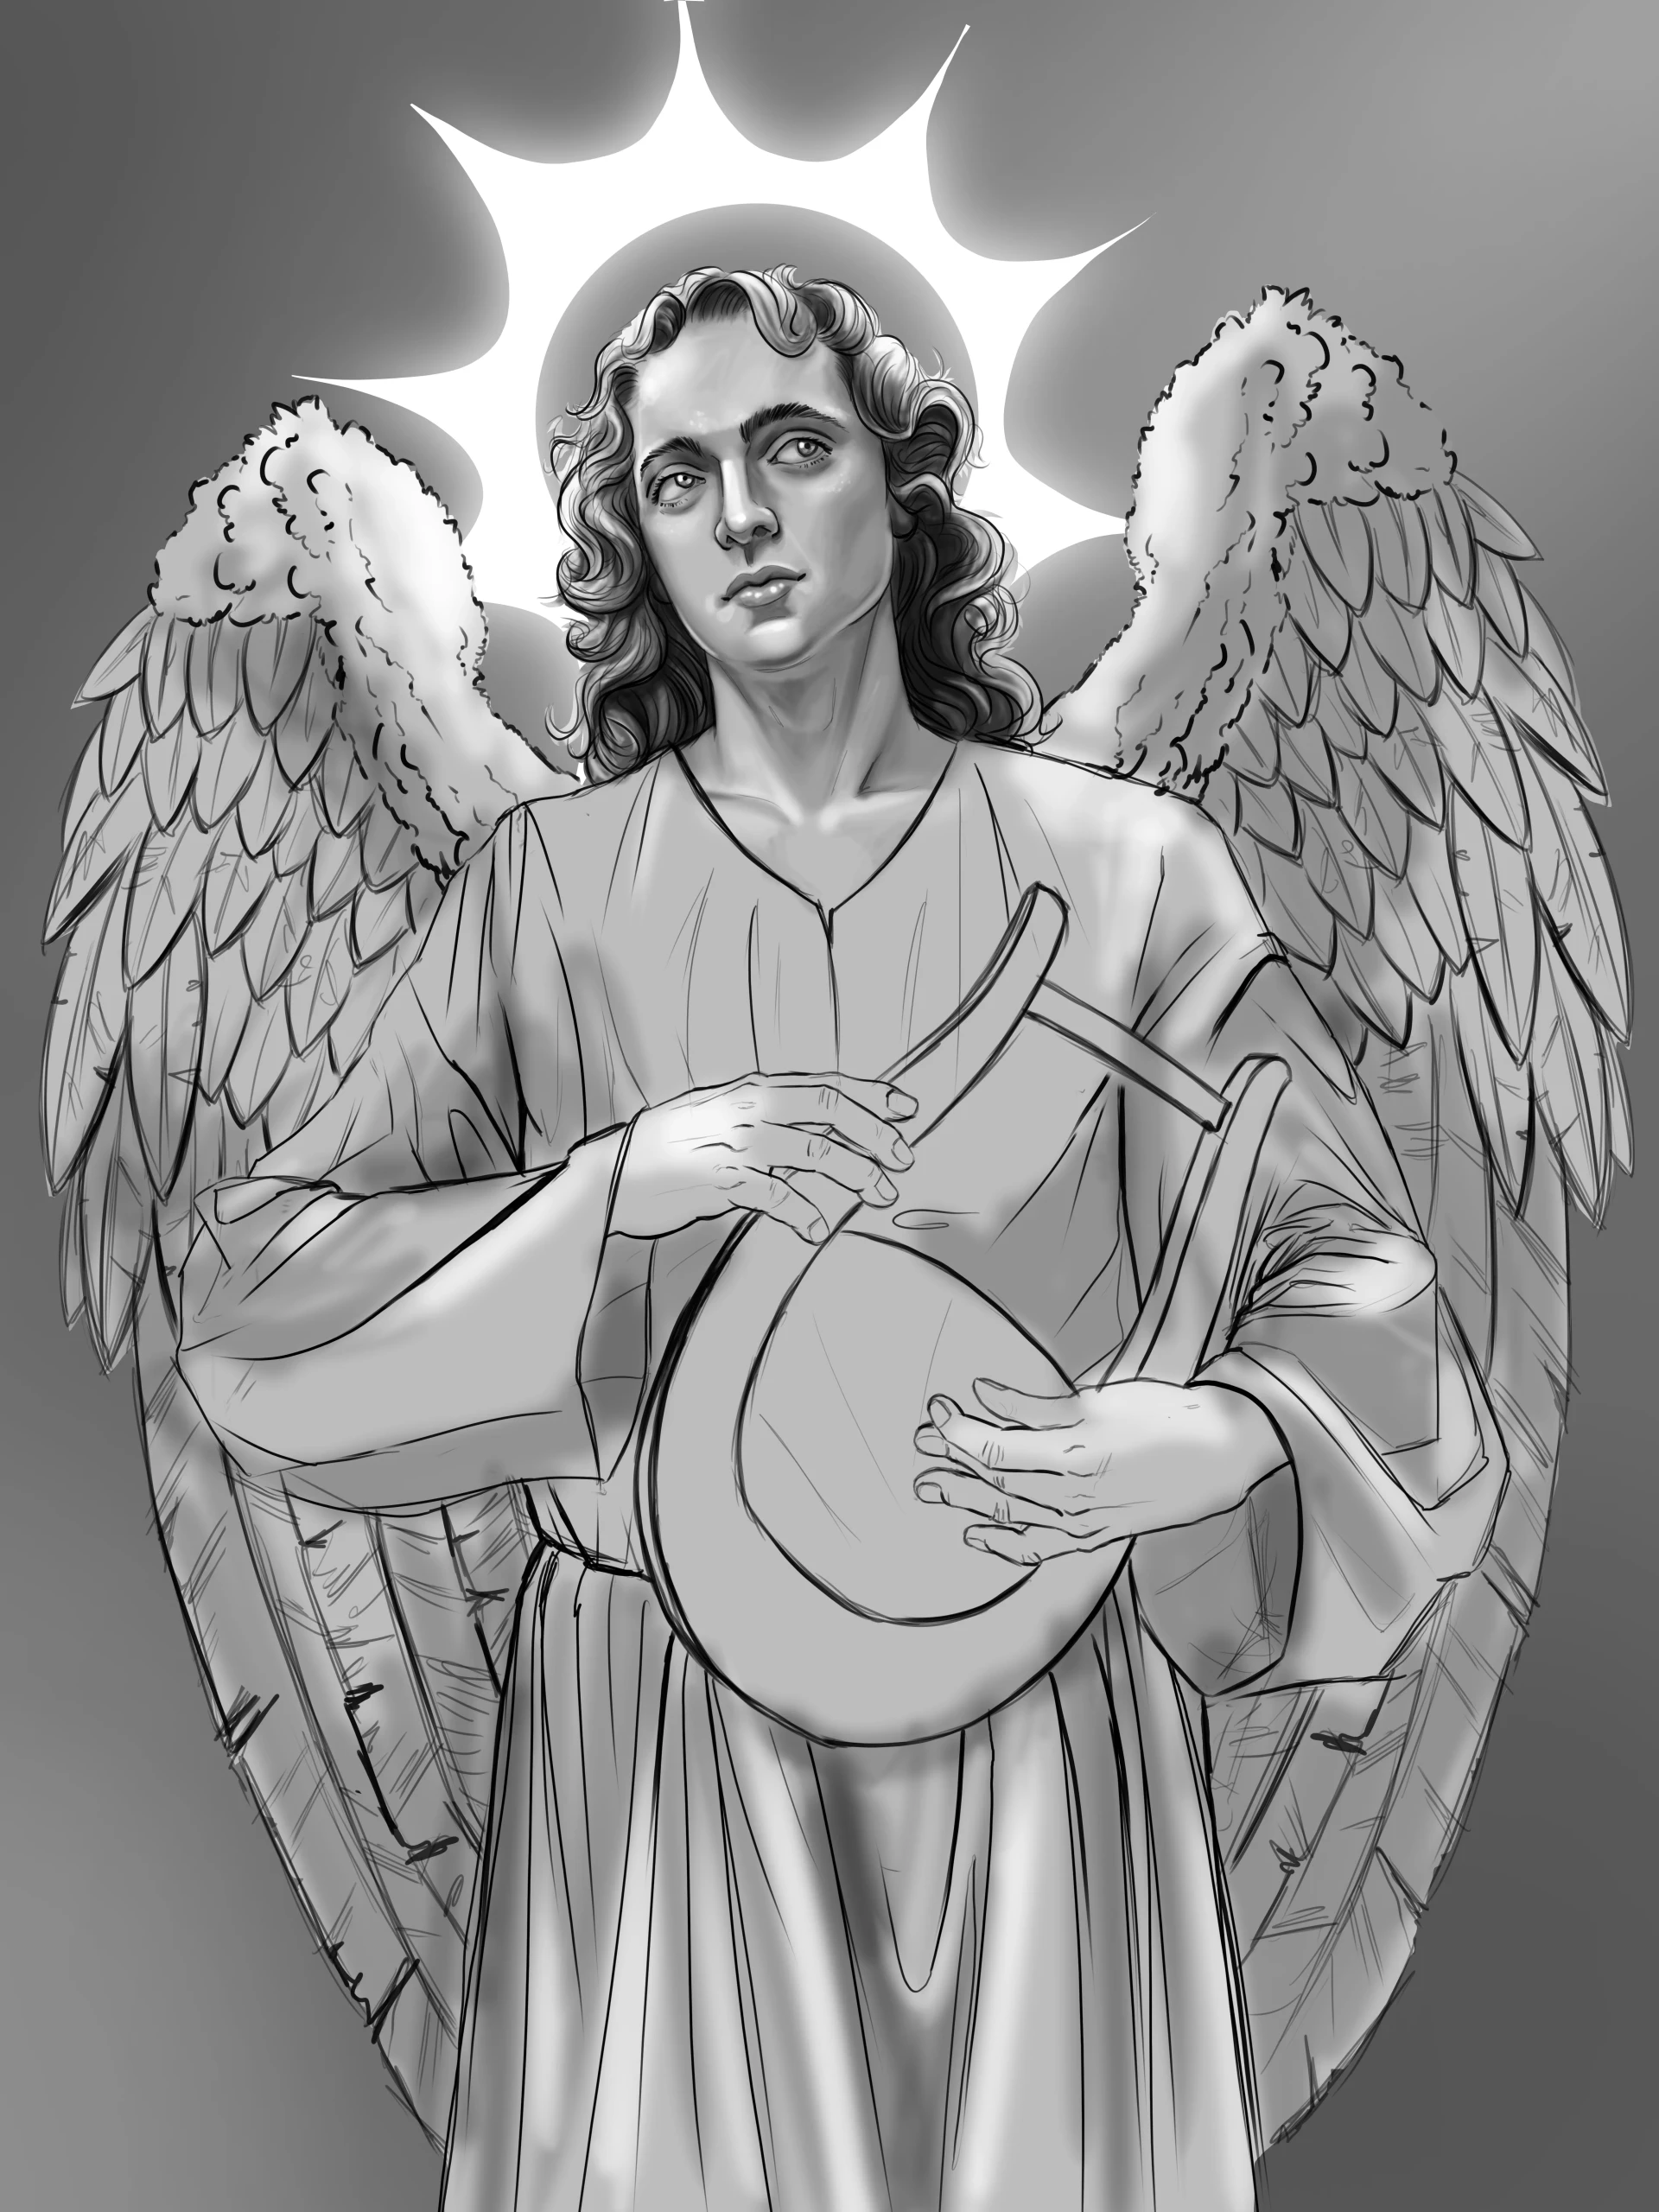
For the wings, the technique is simpler than it seems: a shadow on the inner part of each feather, a dark area near the body, and then white diagonal lines to create texture.
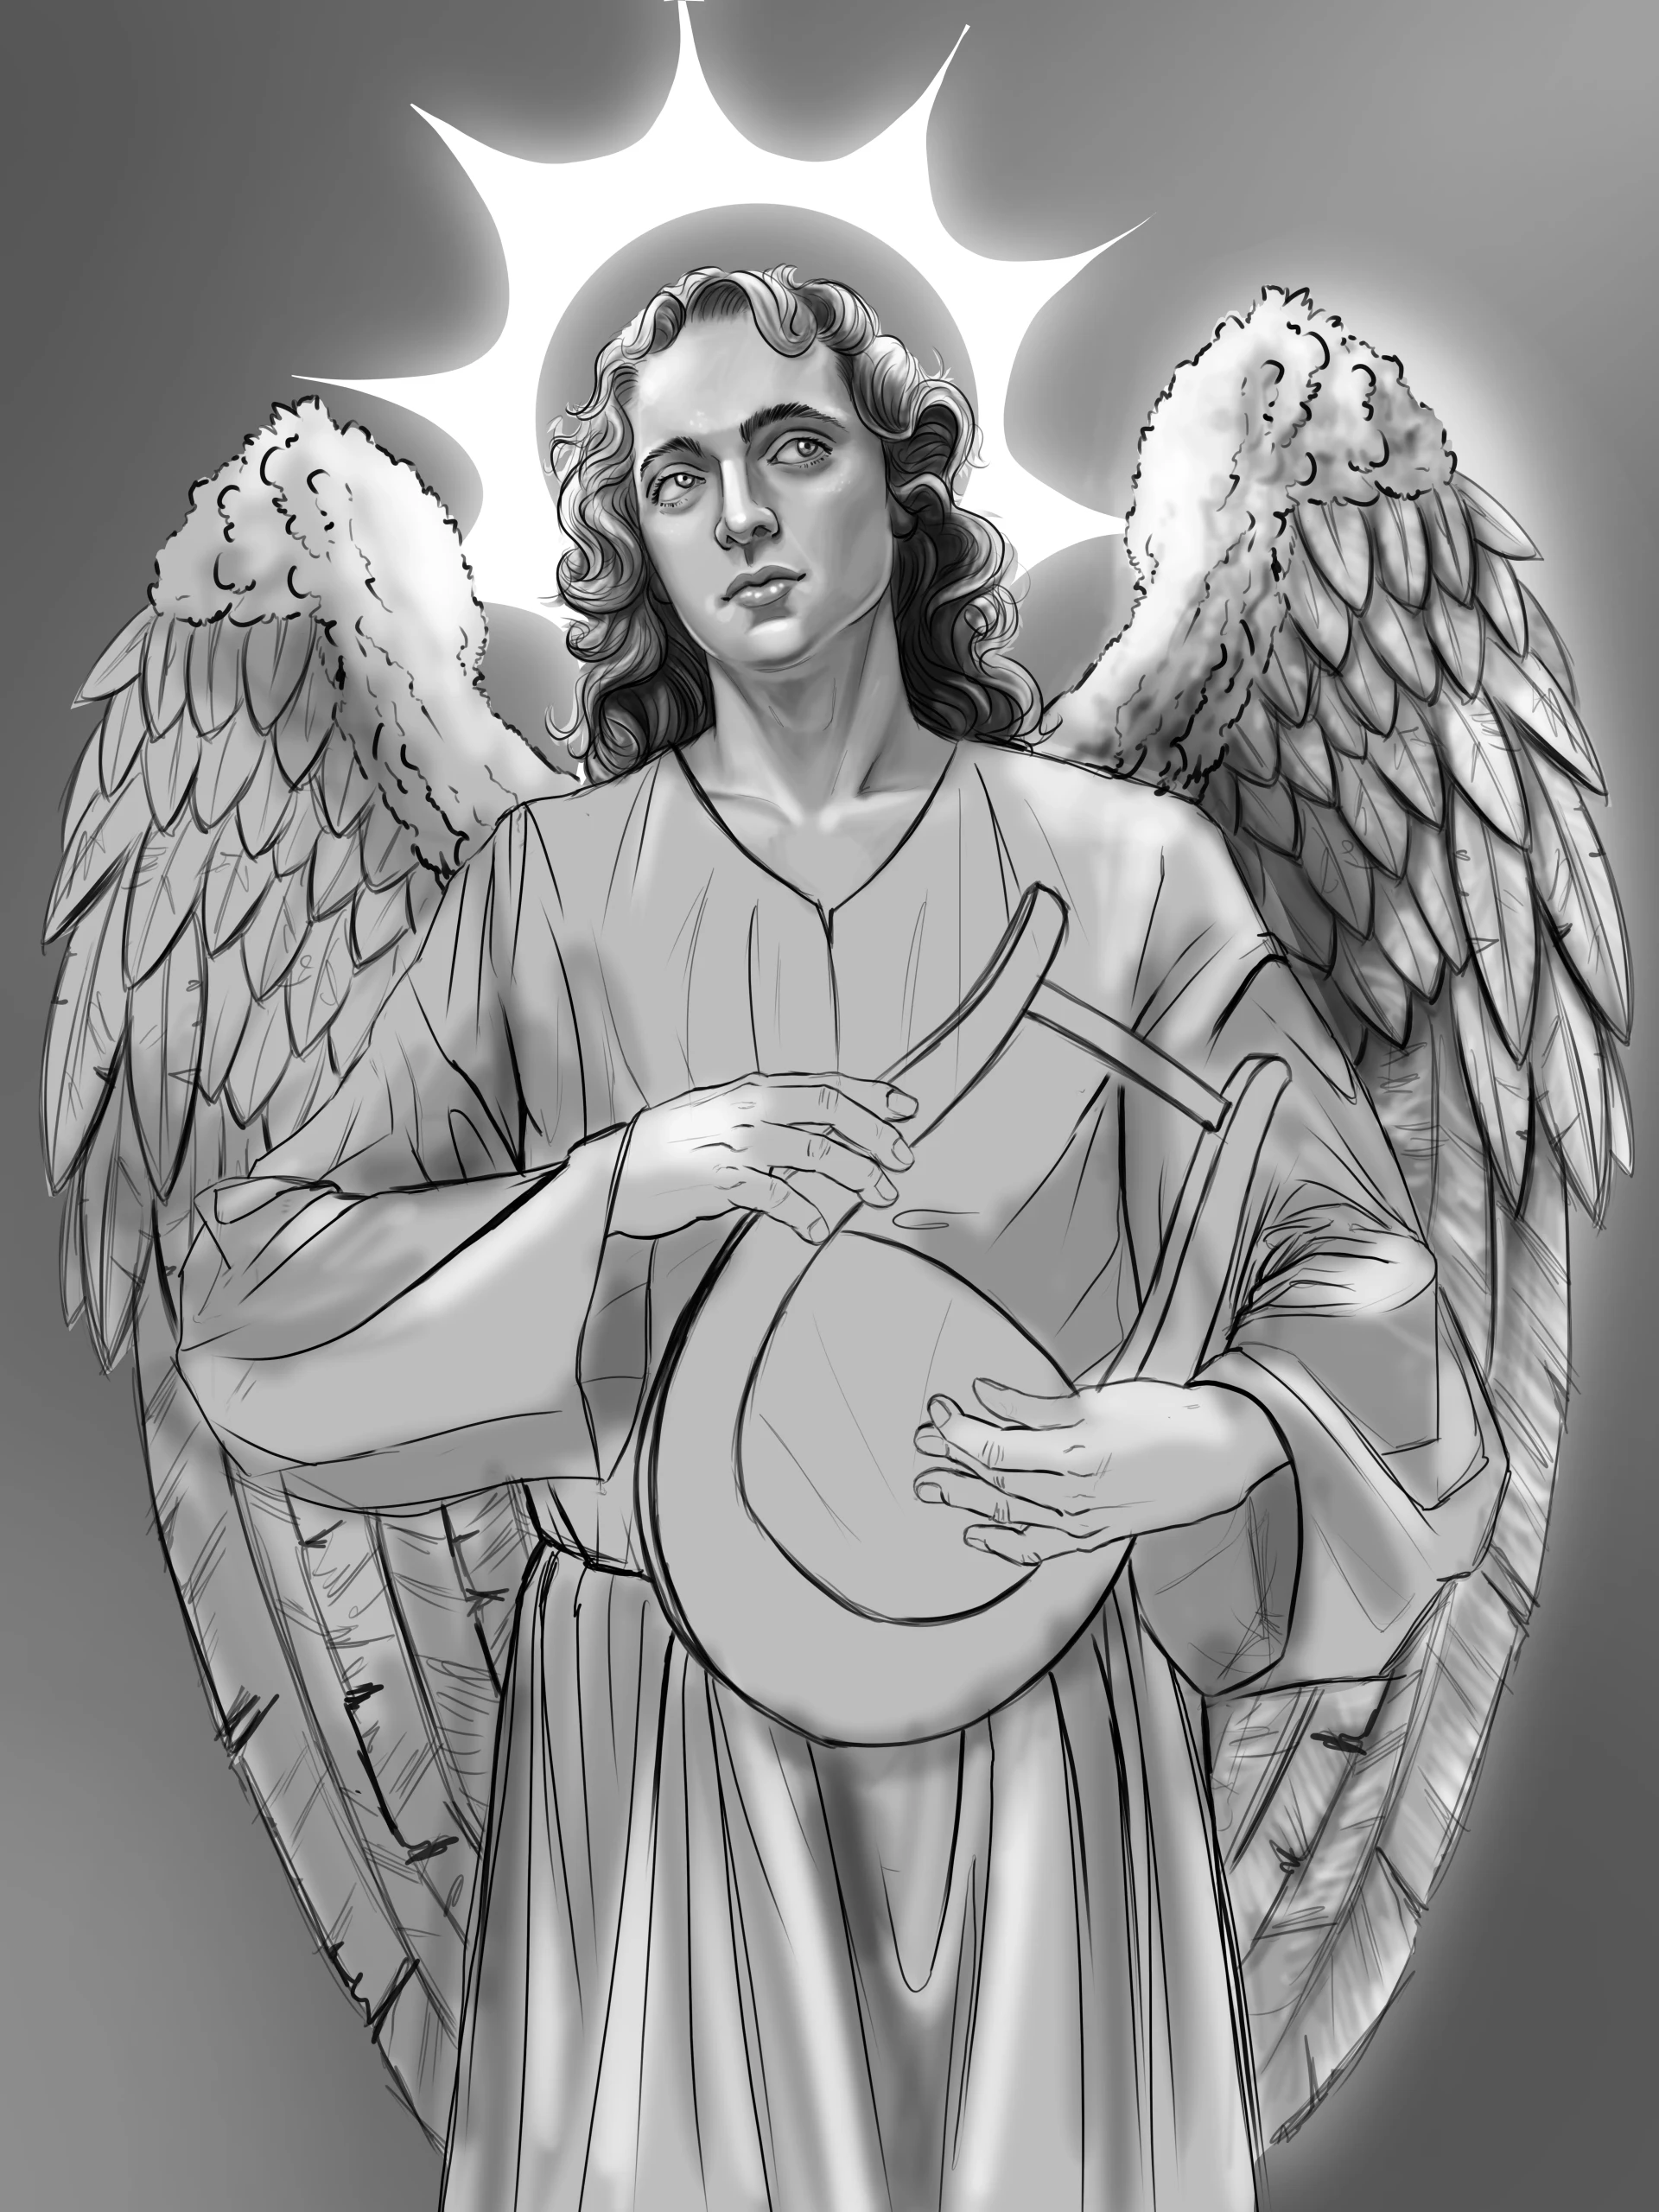
To give the instrument more volume, we will use a much darker tone. This will create a contrast that will bring balance and weight to the image. For the hands accompanying it, use the same values as those used for the face.
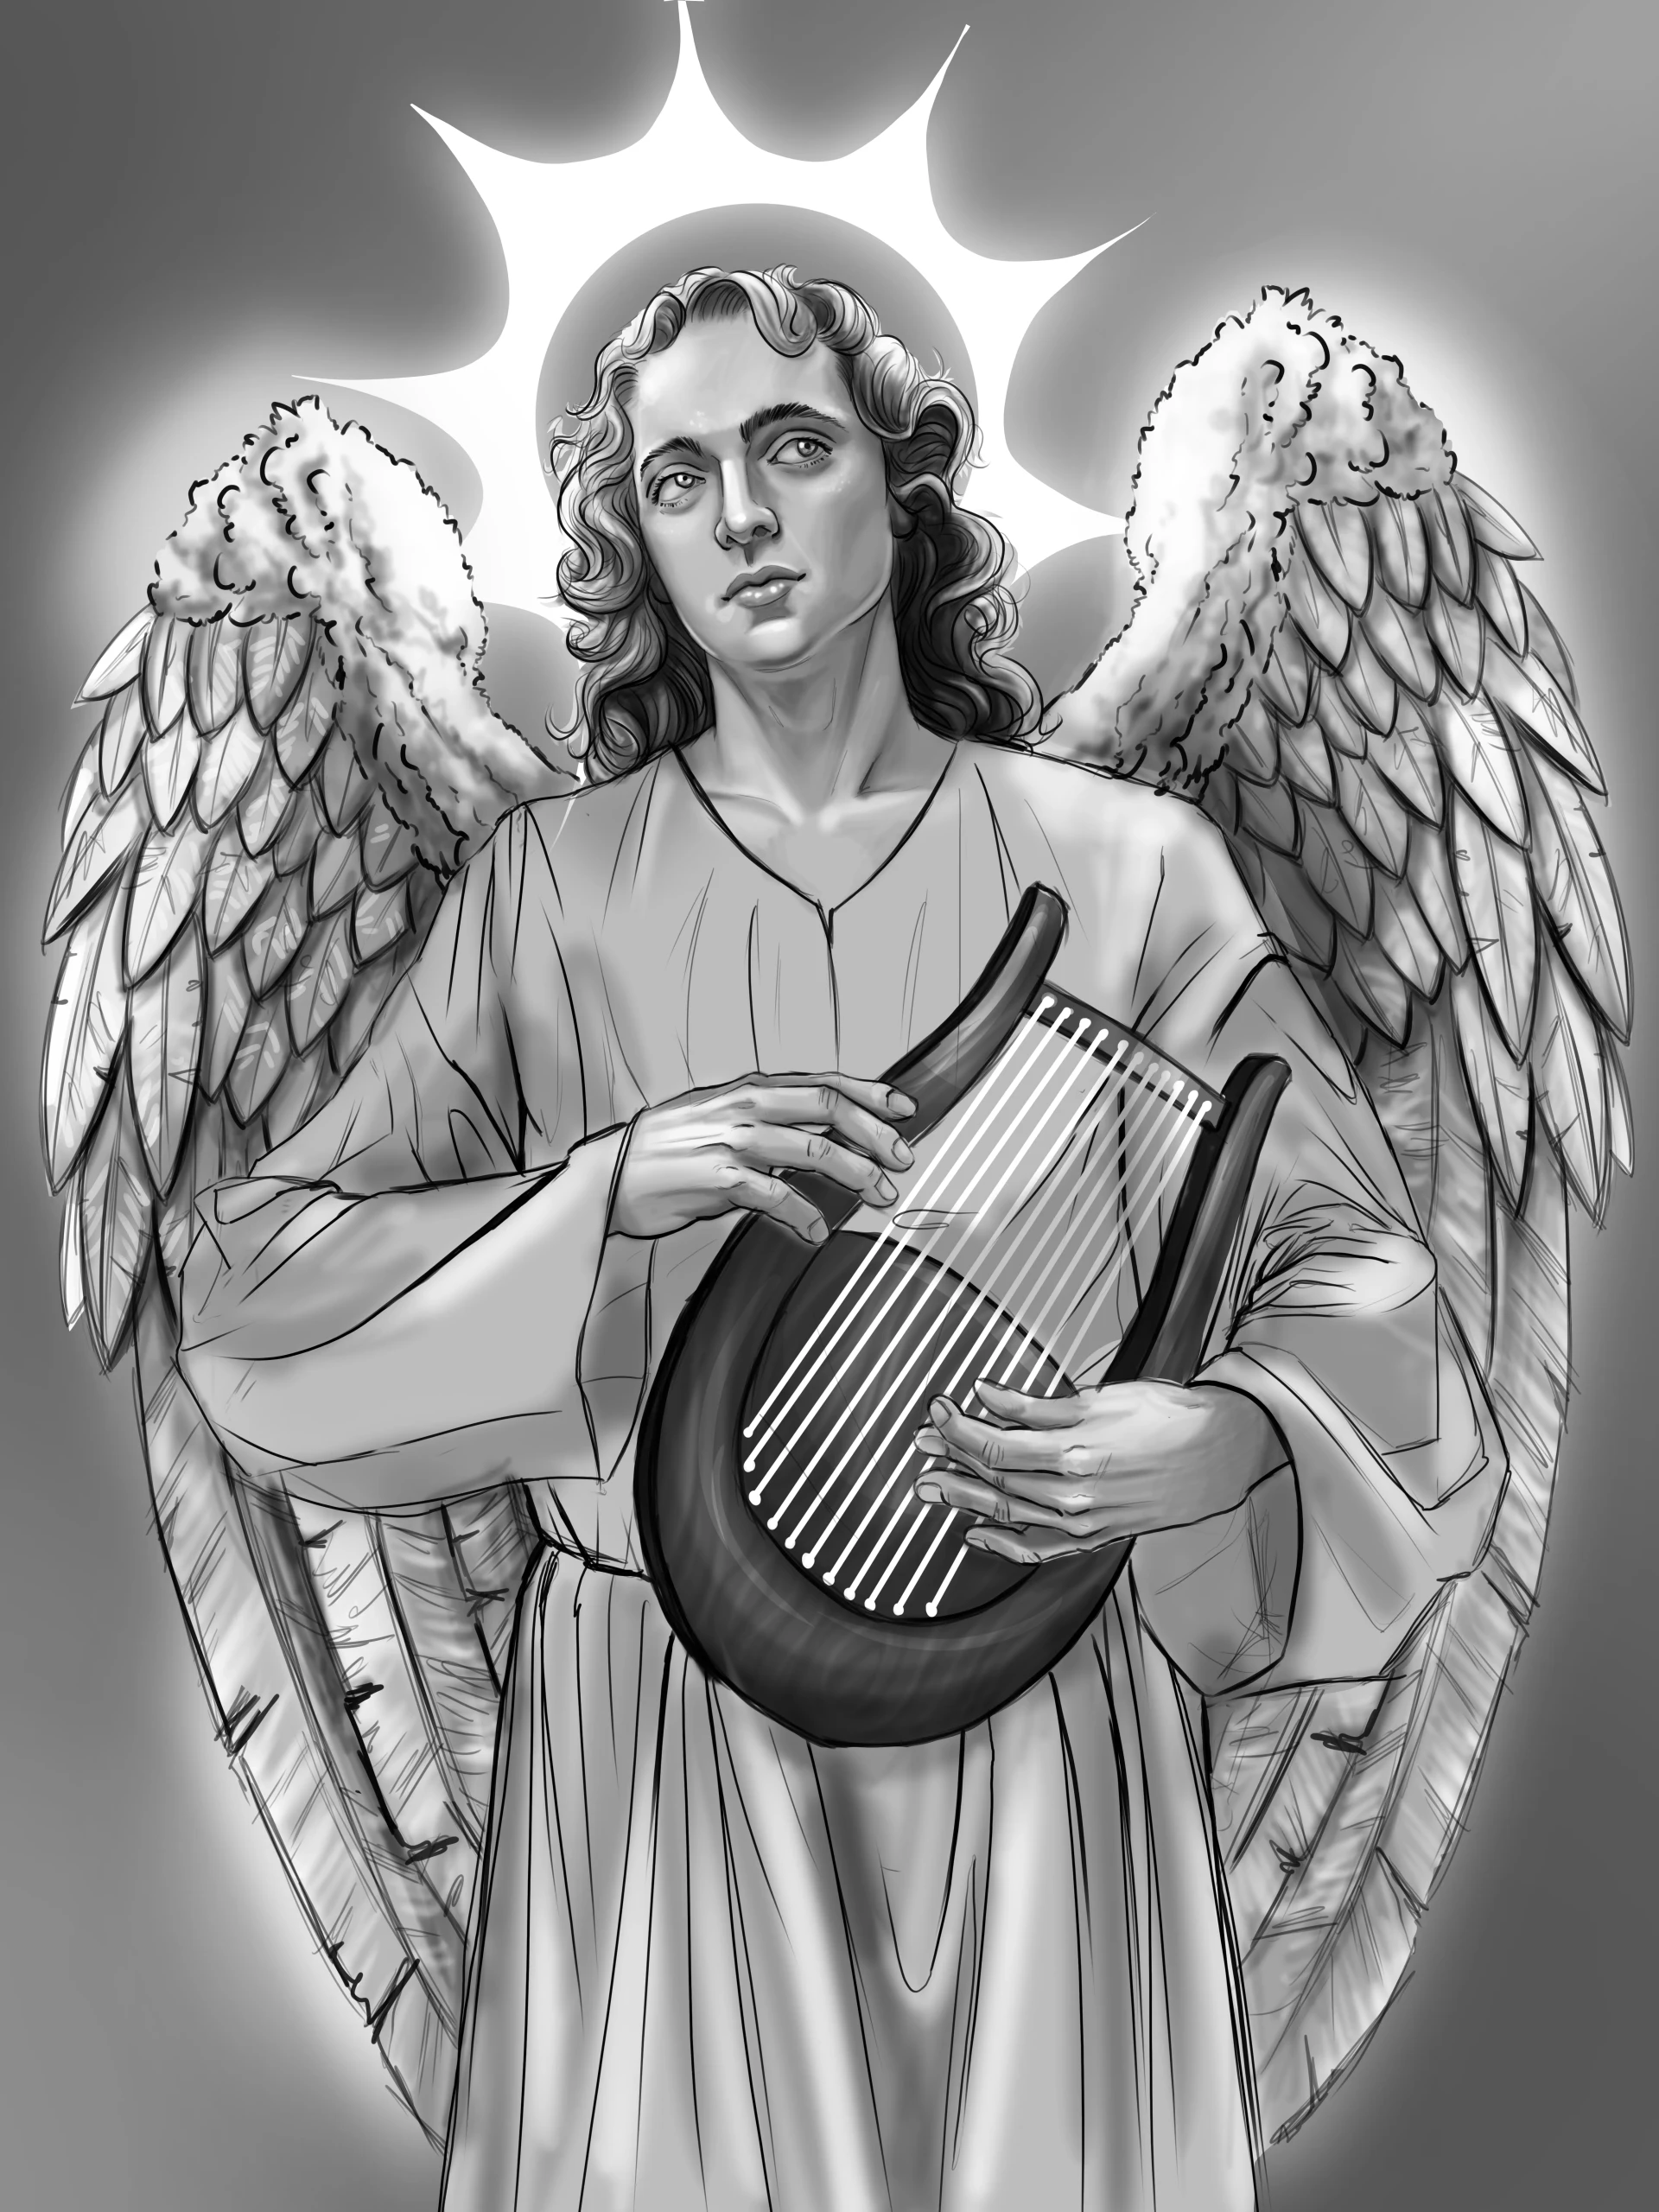
Finally, the time has come to shade the tunic. It can be easily shaped with a few gradients on each side of the folds, while preserving the light on the shoulders and the shadow under the arms.
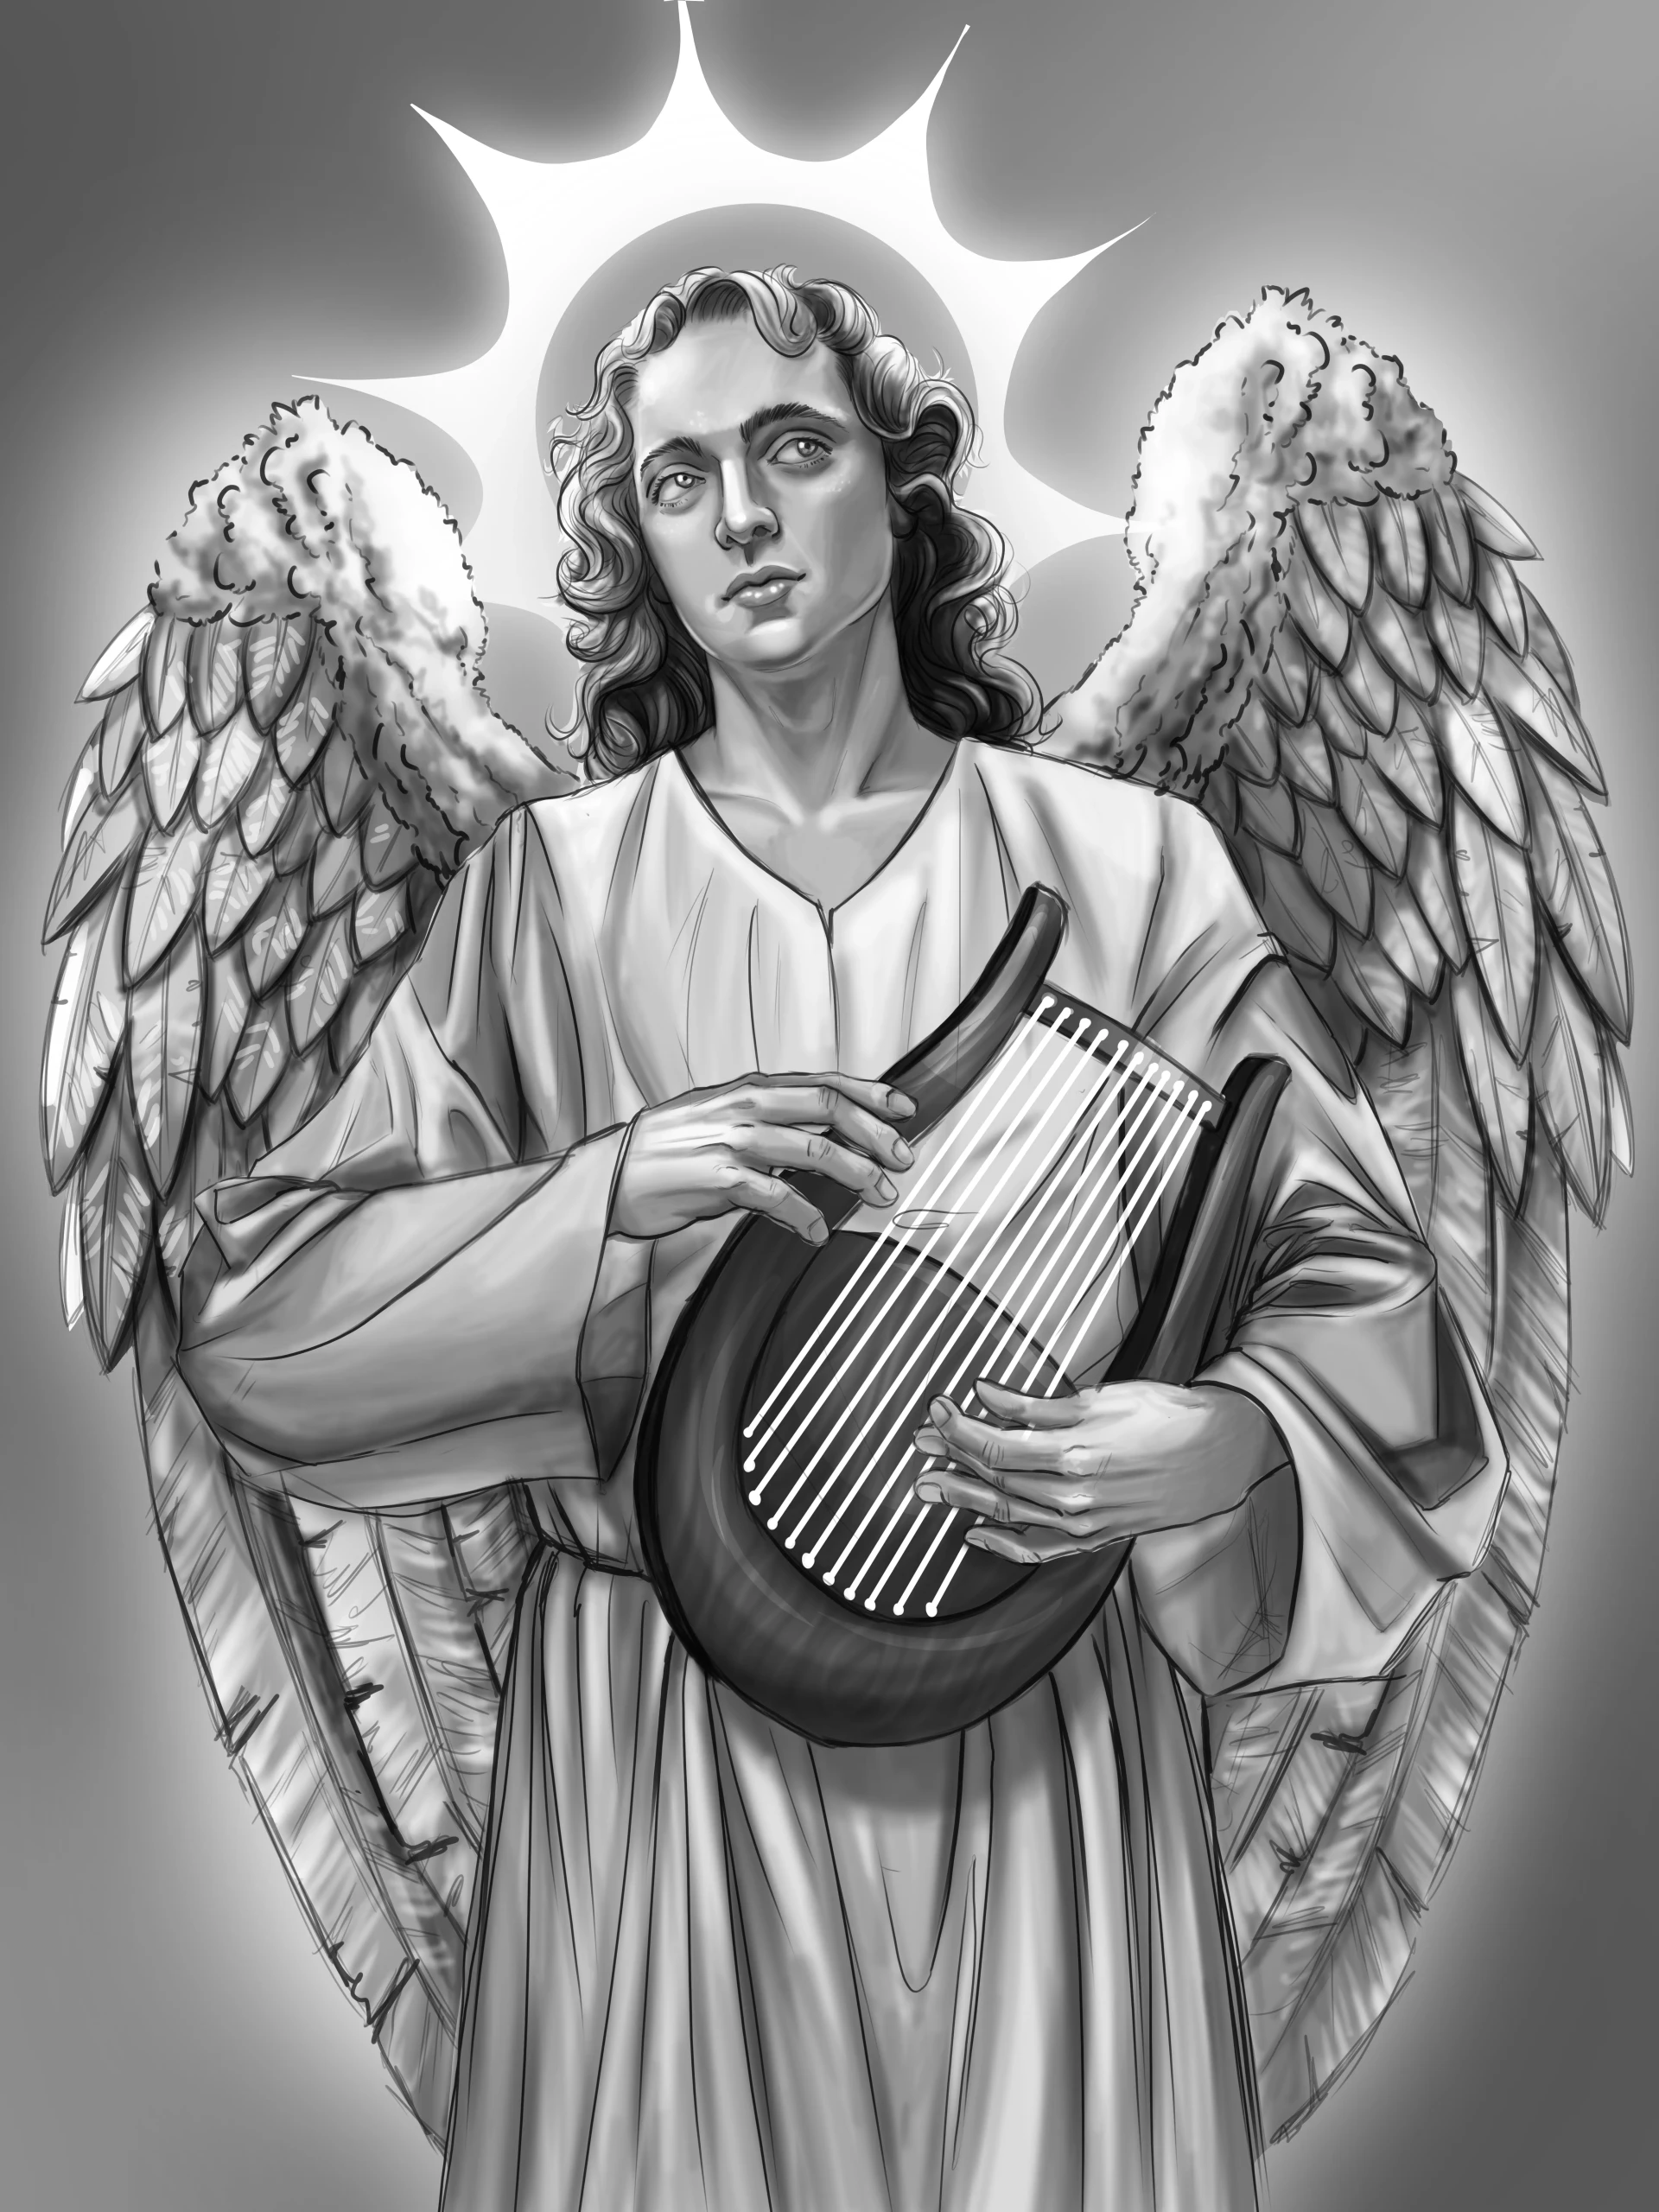
Finish the angel drawing
Finally, you can color the whole piece with reddish tones and some greens to create natural skin hues. An intense orange for the lips, pink on the cheeks and nose, gold for the hair and embroidery. And for the background, a light blue scattered with light clouds is naturally ideal.
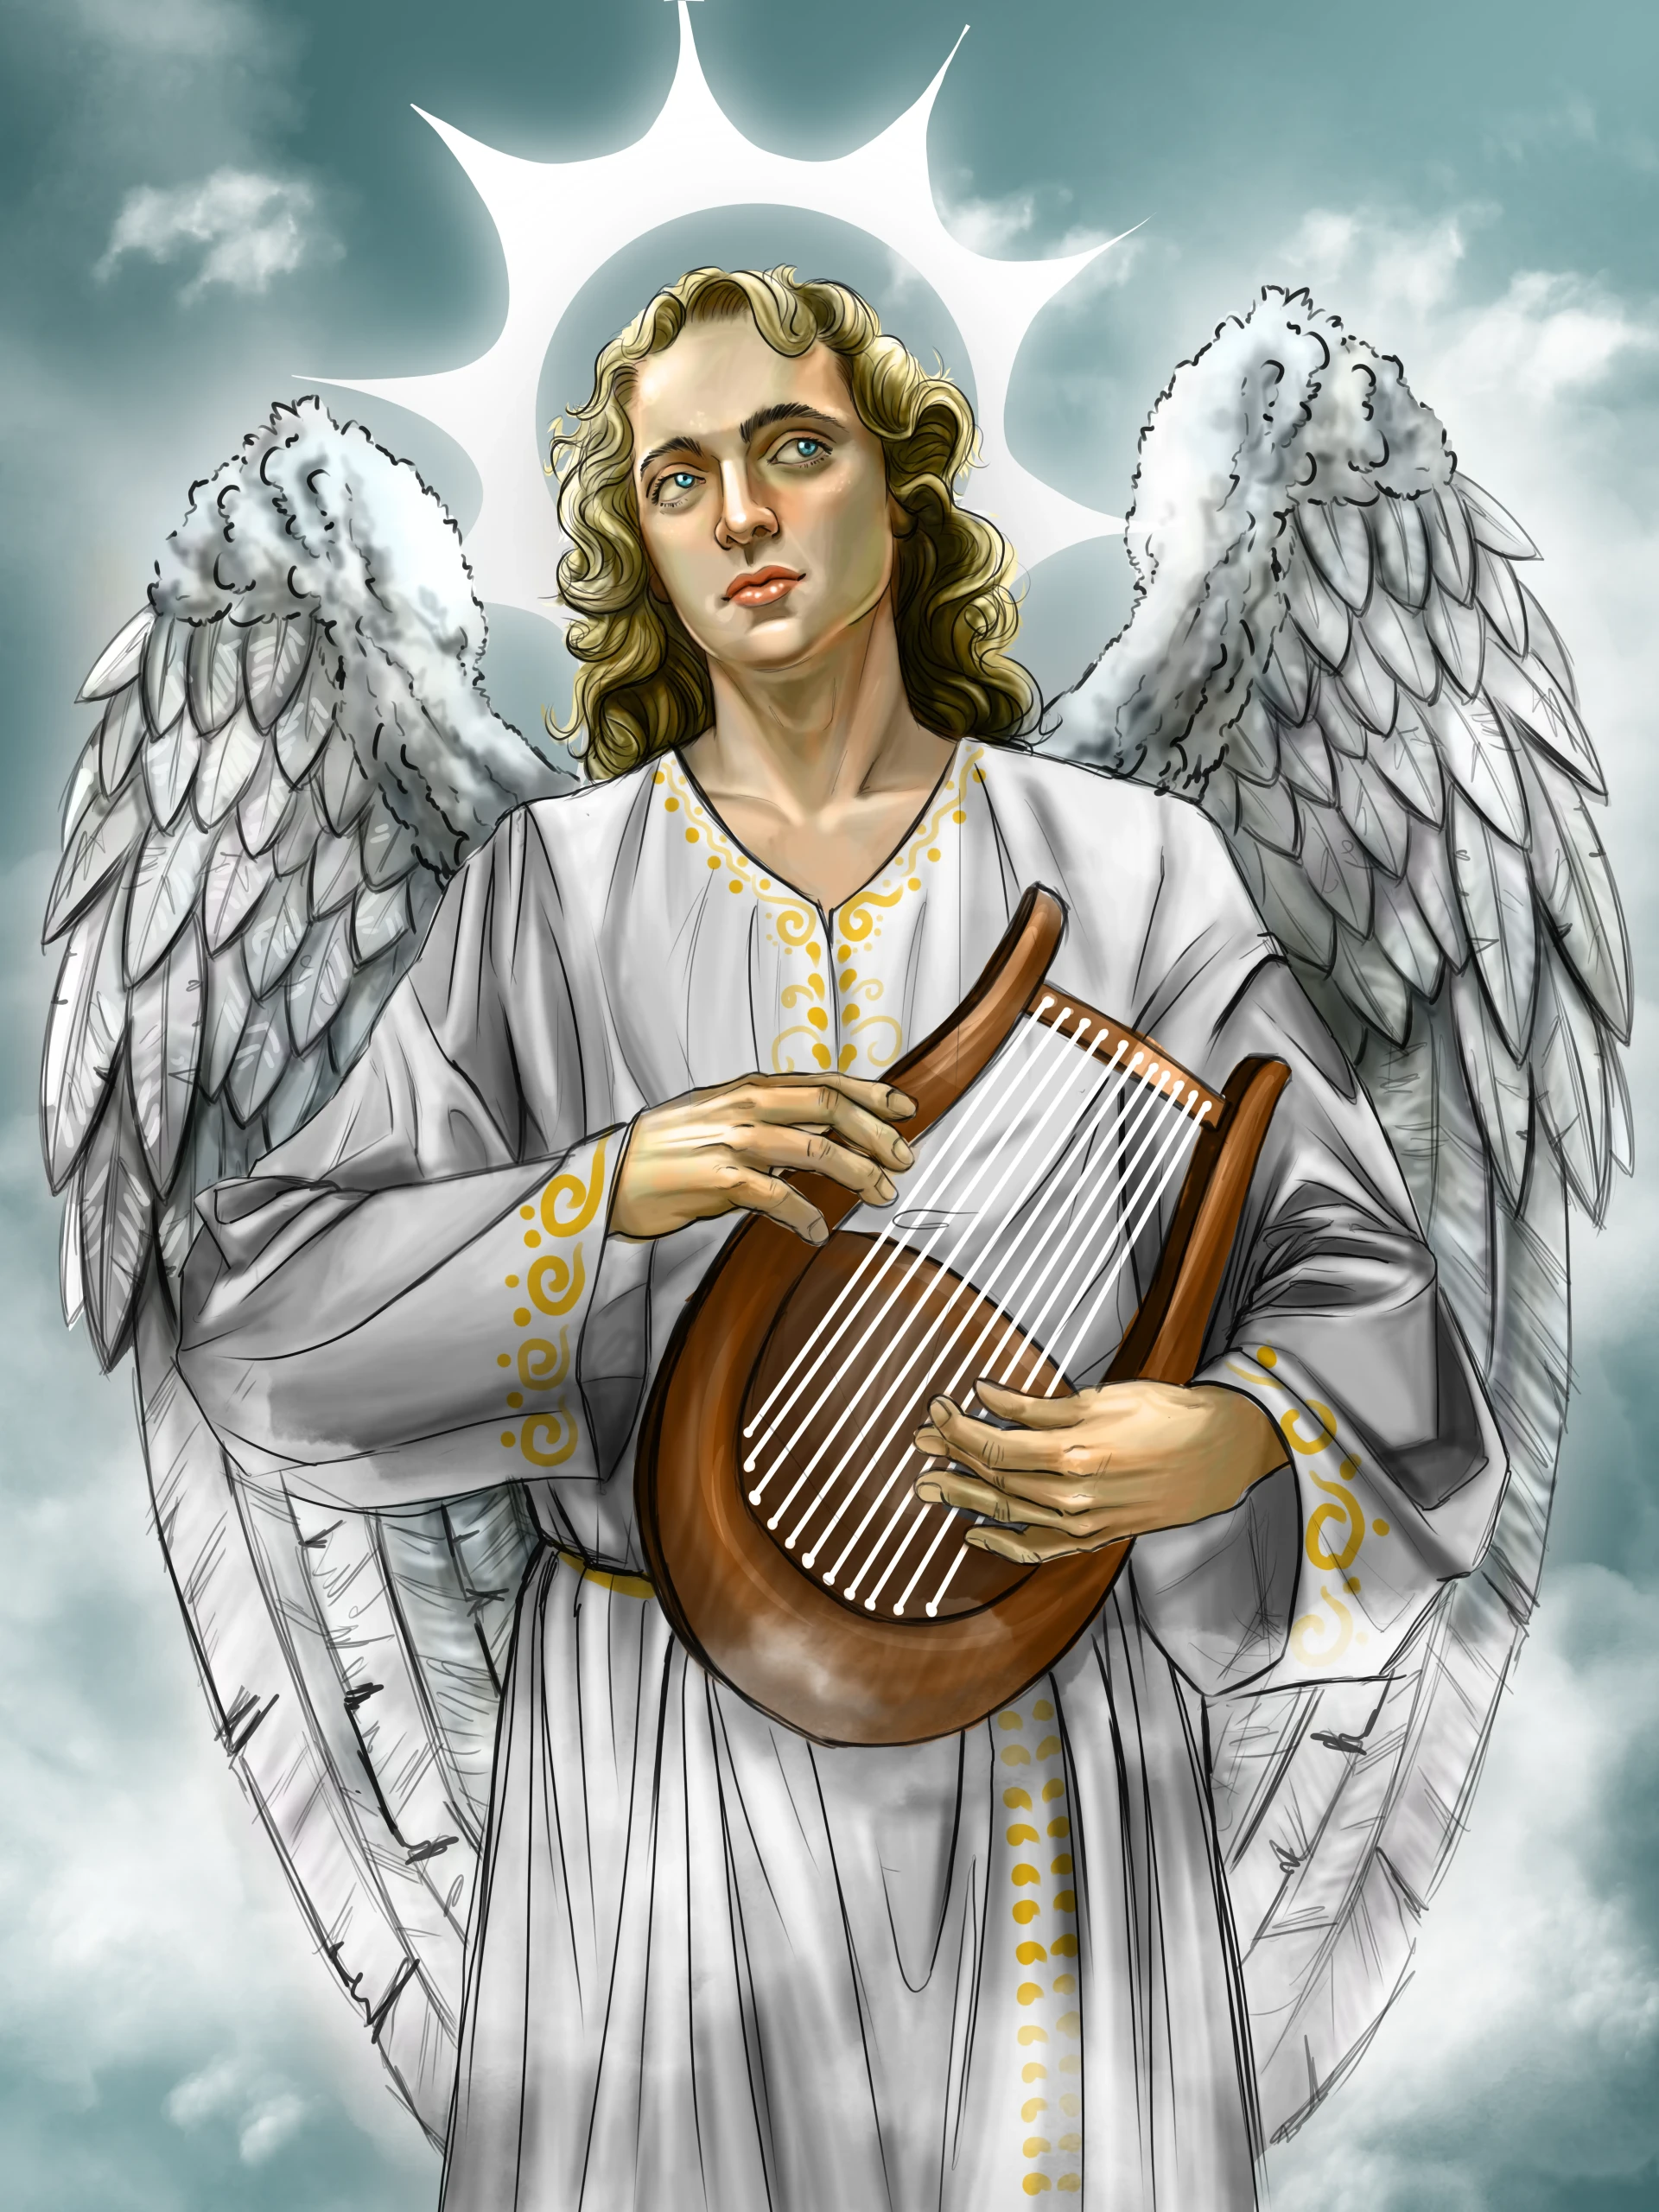
That’s our angel drawing finished; now it’s up to you to add as much detail as you like.
I hope this article has inspired you to create your own angelic representation!
Discussion
No comments yet.