Make a Caricature from a Photo

The caricature is a very particular category of portrait drawing. Although it generally follows the same rules as portrait drawing, it also has its own specific characteristics that you need to know to create a successful caricature. In this article, we are going to learn how to create a credible caricature from a photo.
Choosing the Right Model
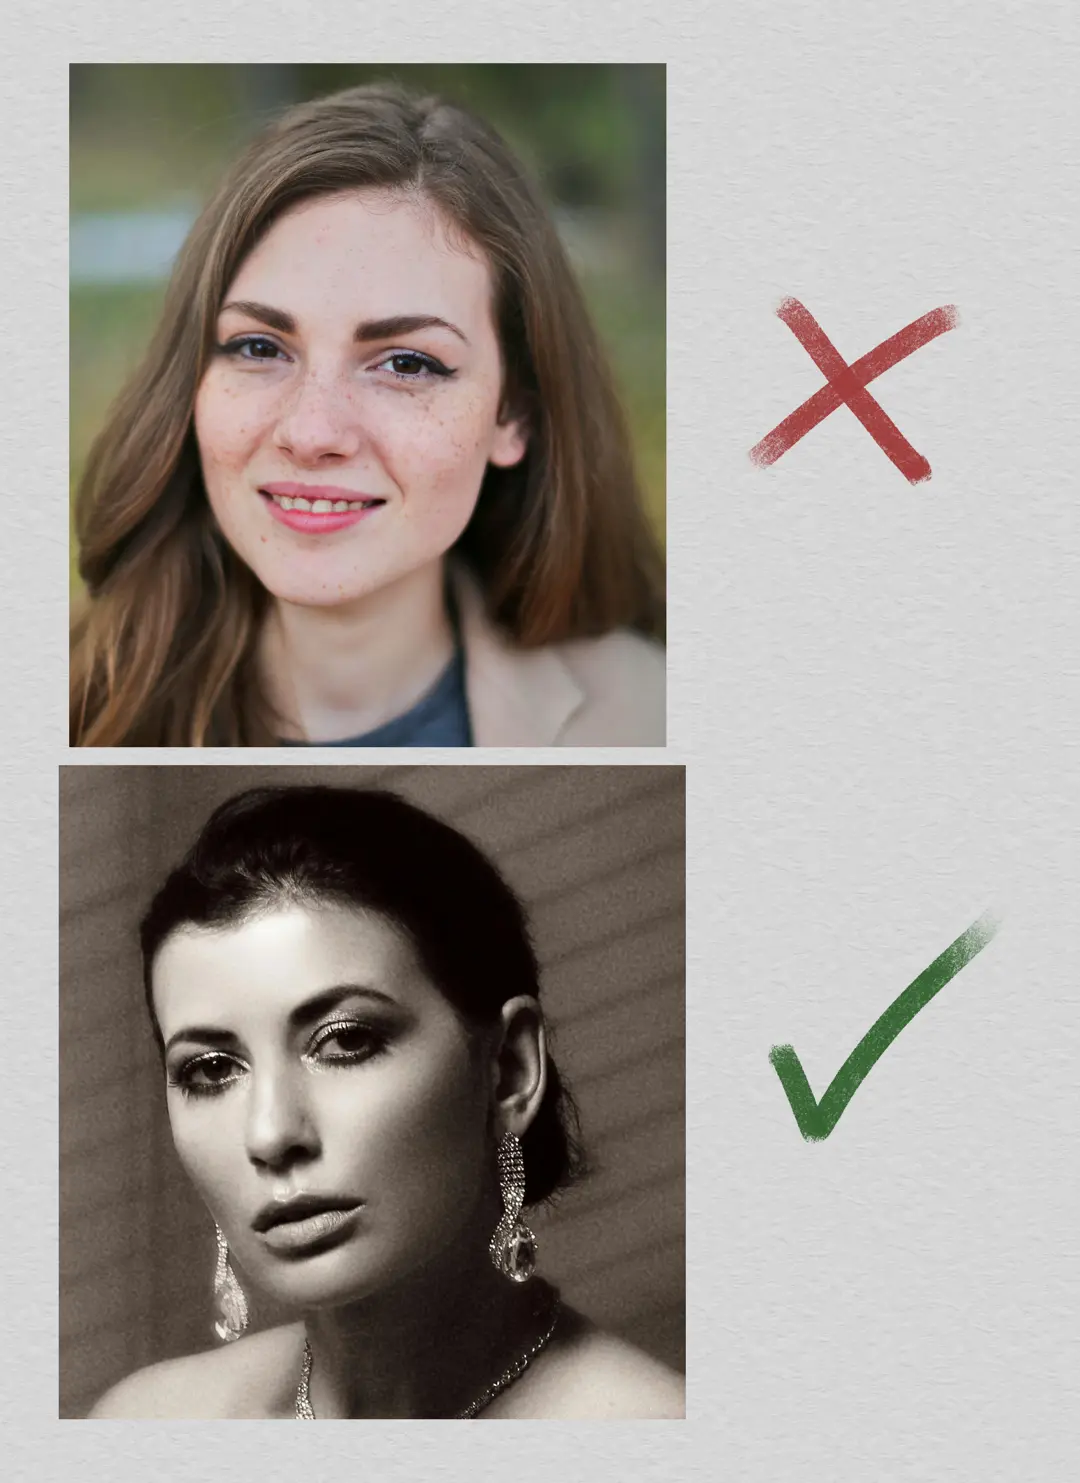
The first step to creating our caricature is to choose the right photo. Some faces are easier to caricature than others because they are more distinctive.
Try to initially choose a photo where certain facial features are more pronounced than others. It could be a person with a particularly long nose, very deep-set eyes, or very prominent cheekbones. If you are a beginner, avoid using faces that are too "balanced" and therefore more complex to exaggerate.
Like in portrait drawing, opt for photos where the lighting and the angle of the head give you a good understanding of the volumes. This will prevent you from having to invent details and will make it easier for you to understand the overall structure of the head.
Choose Facial Features to Exaggerate
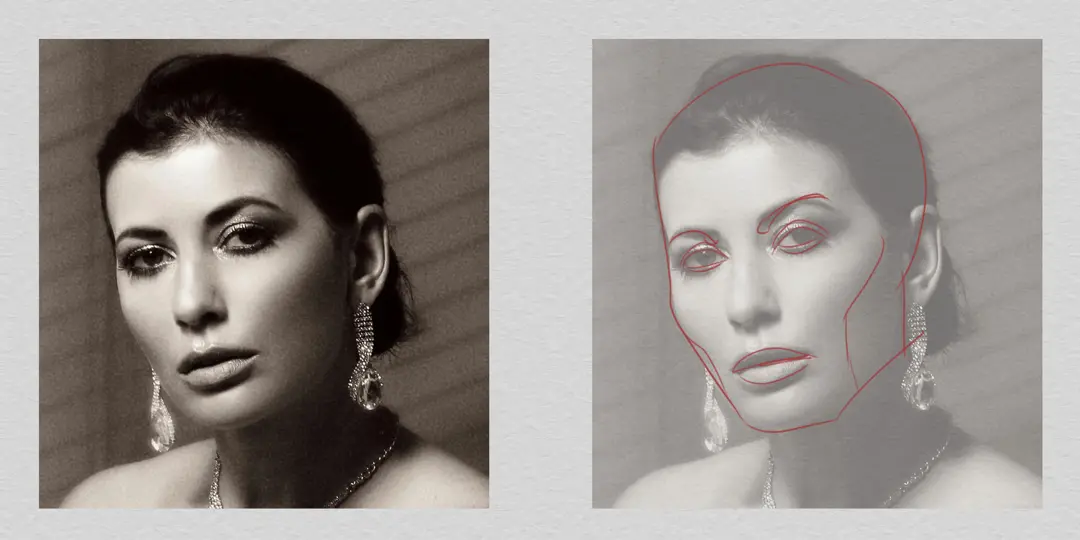
Once we've chosen our photo, we'll need to analyze our model. For the rest of the article, I've chosen this one:
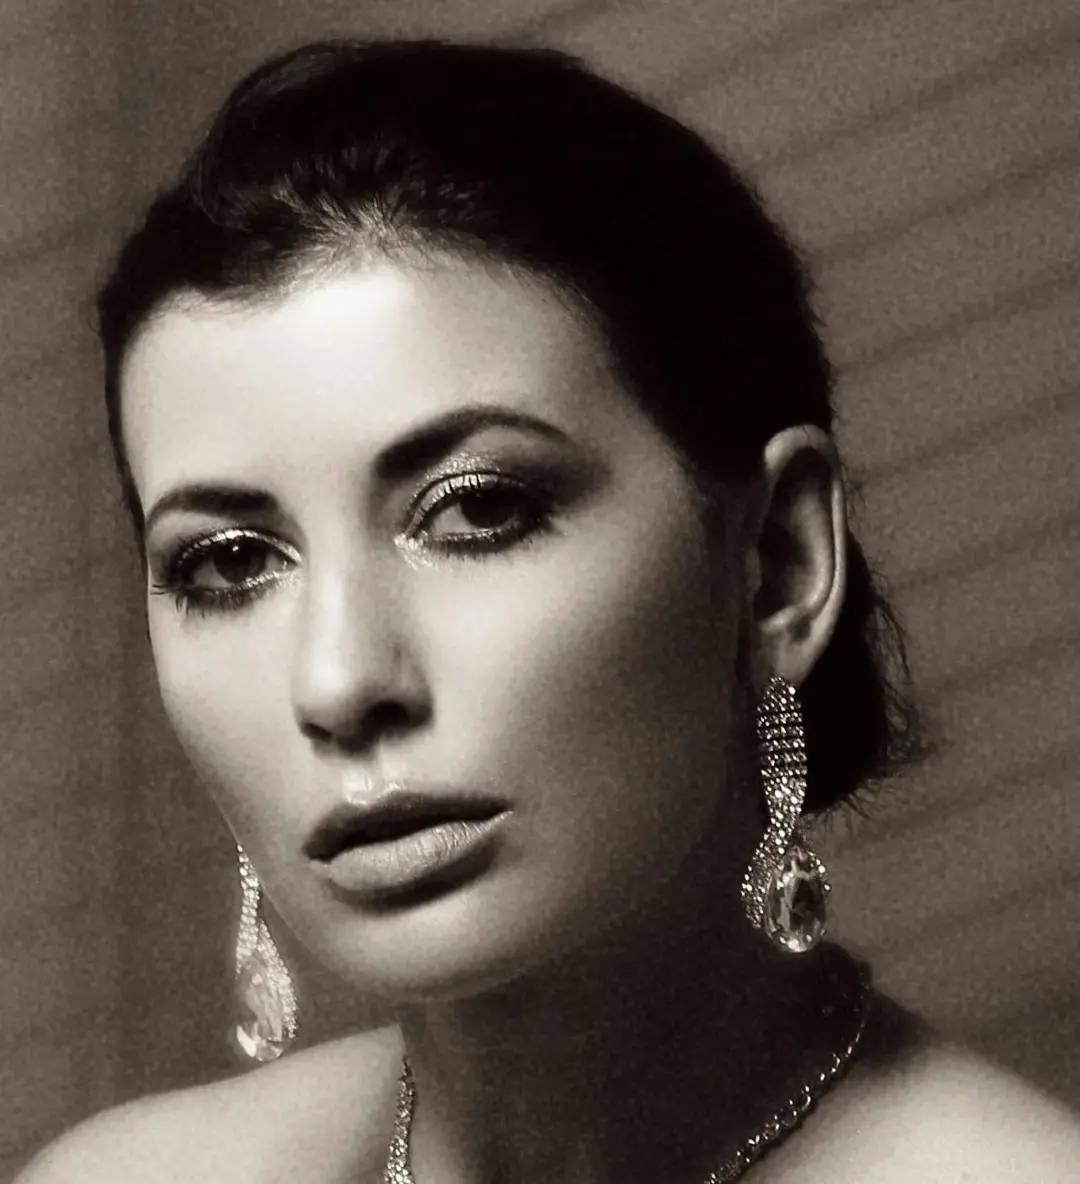
I start by identifying the pronounced facial details. Here, my model has very pronounced cheekbones, a wide and low mouth, and "comma" eyebrows (thick towards the inside of the face, thin towards the outside) that are close to her eyes.
Regarding the less pronounced but still present details, she has a relatively square jaw and slightly hollowed cheeks, as well as half-closed eyes and a somewhat triangular inner facial space.
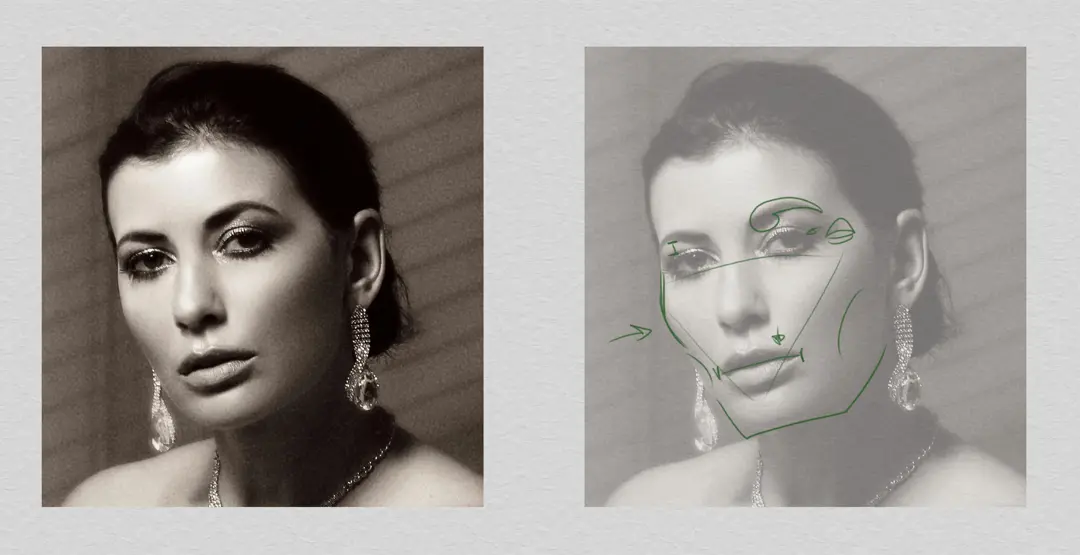
I can now choose which of these details to exaggerate. One of the important points for properly recognizing a face is the shape of the head. The square jaw, prominent cheekbones, and hollowed cheeks are therefore good features to exploit for my caricature.
The facial expression can be read from the eyebrows, eyes, and mouth, so it's interesting to choose some of these elements as well. Some features may be less expressive, like my model's nose, which remains quite classic. Therefore, I will not exaggerate it excessively.
Drawing our Caricature Step by Step
Now that our analysis is done, let's move on to creating our caricature! We will apply the same process as for a classic portrait, but we will need to pay special attention to shapes.
As caricatures are stylized, the shapes used for our deformations are of great importance for the overall understanding of our drawing. However, we must not neglect the structure of our face in order to be credible: our head, even deformed, must still remain a head!
Let's start with the head. The head is mainly divided into 4 areas: the face (1), the top of the skull (2), the side of the skull (3), and the side of the jaw (4). The silhouette of these 4 areas can vary, but they must all be present in our caricature, and, of course, all in the right places.
Here is how I chose to divide the different areas of my head on my caricature compared to the classical division:
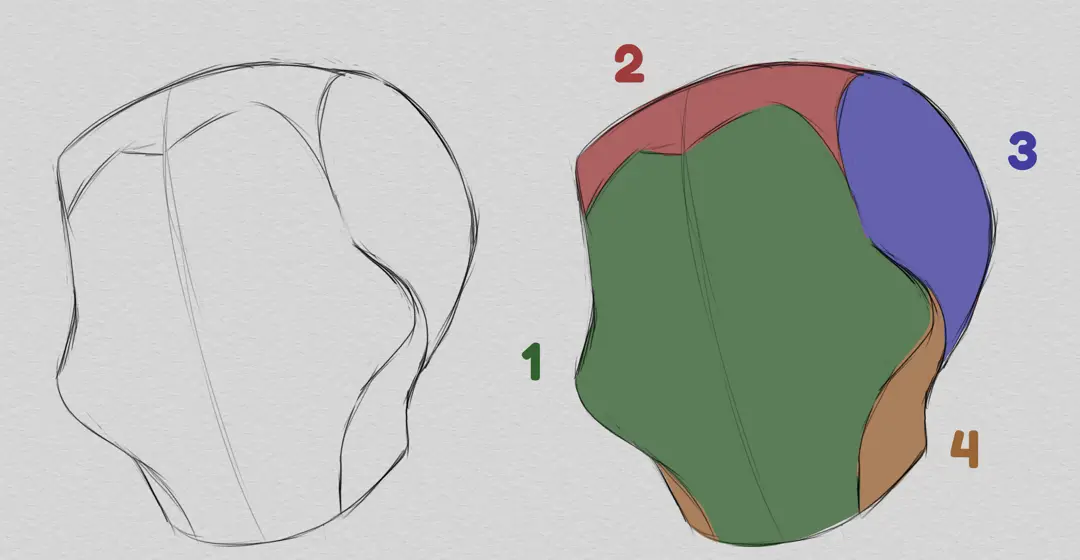
Note that the distinctive features of my caricature are already present: the square jaw and prominent cheekbones.
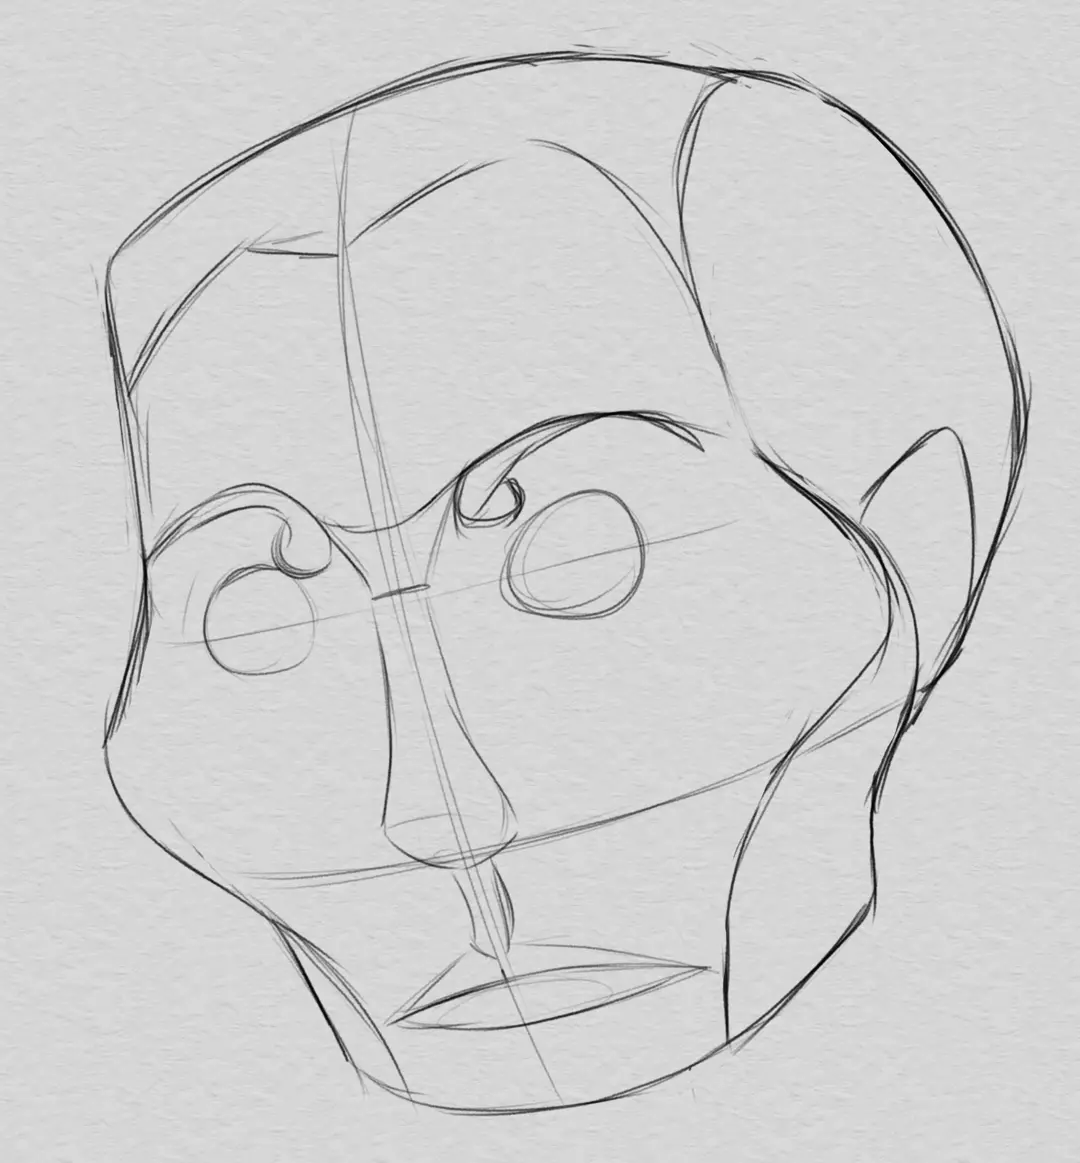
Next, I will place the main elements of the face: the mouth, ears, nose, eyes, and eyebrows. In order to keep my face believable despite the deformations, I will follow some rules:
The bottom of the nose aligns with the bottom of the ear
The nose and eyebrows are connected by the arches
The nose and mouth are connected by the philtrum (the small skin depression between the nostrils and the upper lip)
These few points allow me to maintain the logical placement of my details on the face of my caricature.
Adding Volumes to the Drawing
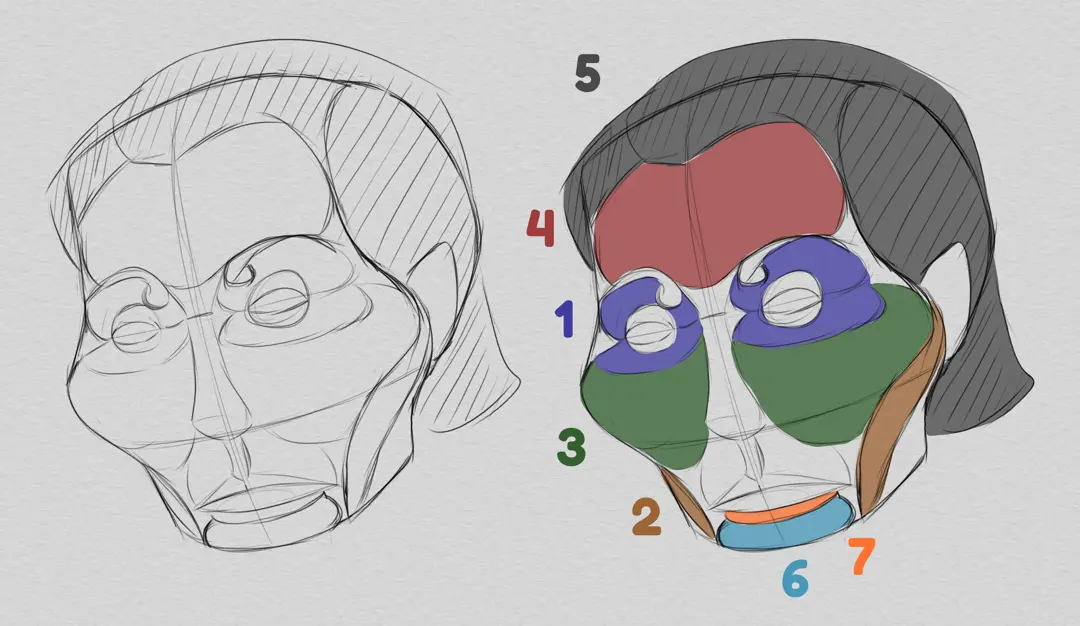
I will now continue with the delineation of the open volumes in my drawing, which are the eyelids, the eye sockets (1), the cheeks (2), the cheekbones (3), the forehead (4), the hair (5), and the chin (6). Here too, I can establish some rules to maintain a coherent structure:
The cheeks start from the corners of the cheekbones, pass through the corners of the mouth, and end on the sides of the chin for the hollow part, and follow along the jaw for the rounded part.
The chin is separated from the mouth by the chin dimple (7).
The forehead takes root at the arches, at the edges of the eyebrows.
The cheeks occupy the space between the side of the head and the nose.
The eye sockets occupy the space between the nose, eyebrows, cheekbones, and sides of the head.
The roots of the hair are located in the upper skull area and the sides of the skull. The hair can be simplified to match the style of your caricature.
Most of my construction is done. I can now go back to my list of interesting details established during my analysis and start to represent them, keeping exaggeration in mind.
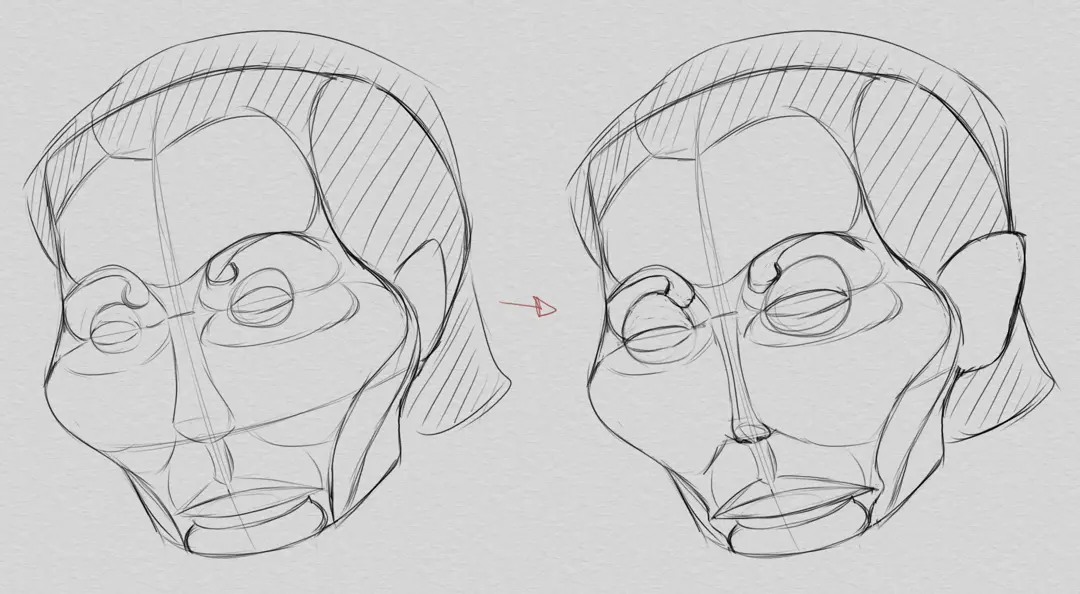
For example, for my eyebrows, I will further emphasize the difference in size between the thin part and the thick part. Since the eyes are important for understanding expression, I will enlarge them. This will give me more space to mark their half-closed expression.
Conversely, since the nose is not of major importance here, I can reduce its size. I will also pay more attention to the silhouette: here, I see that the ear touches it, so I will take the opportunity to give it more prominence in my caricature.
Cleaning Up Your Drawing
The construction of the caricature is complete! I can now move on to the cleanup step: rendering. You have quite a bit of freedom with this one, and can proceed however you like: keep a sketchy look, paint your caricature, leave it in a clear line style, etc. I still advise that you at least render your volumes if you want to maintain a 3D representation of your caricature.
For my part, I really like the sketched look for a caricature, so I'm going to opt for that one. As for the rendering of volumes, I apply the same principle as for a classic portrait, so feel free to check out our articles on portraiture if you want to delve further into the details for that part.
Our caricature is finished! Try using different models (men, women, young, old, etc.) to test other forms of exaggeration!
Written and illustrated by Louis Grieves.