How to Draw Charcoal Portraits
Hello everyone,
Today, we are going to work on a realistic charcoal portrait. It is a very interesting exercise to learn how to manage contrasts, line drawing, and the basics of black and white drawing.
I'm going to take you through this step-by-step guide, accompanied by some tips, to create a charcoal portrait easily and enjoyably.
Required materials

Before we begin, let's talk about the materials. The main element, of course, is a stick of charcoal.
A charcoal pencil can also do the job quite well.
You might be wondering: what is the difference between the two?
A stick of charcoal allows for very deep blacks, while a charcoal pencil gives a slightly softer result, which can facilitate some transitions in a portrait.
In addition to the pencil, you will need an eraser and suitable paper. I recommend a medium-sized paper that is large enough to work freely and make broad gestures without feeling cramped.
What does a charcoal portrait look like?
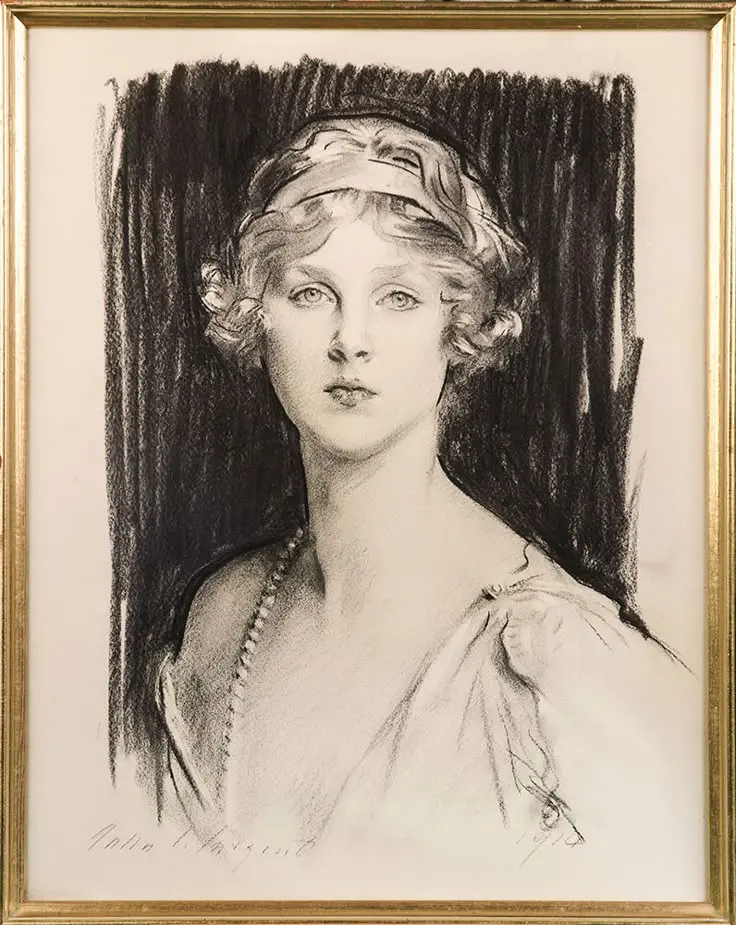
John Singer Sargent
As can be seen in this example, charcoal portraits often feature very stark contrasts.
When working with this technique, we generally talk about "light values" and "dark values" to designate the different levels of light and shadow present in the drawing.
It is precisely by playing with these contrasts, and working on the shadow areas, that we will be able to give volume and three-dimensionality to our portrait.
Some points to keep in mind
When using charcoal, it is essential to be careful of the small splinters or dust that fall from the pencil, as they can easily stain the paper and alter your drawing.
Another important point: your hands get dirty quickly because of the powder and charcoal residues, which can also cause unintended marks on the paper. Therefore, it is best to work cleanly and carefully, keeping a cloth or a protective sheet handy.
Finally, don't worry too much about the final result. What matters most is enjoying the drawing process!
Drawing a charcoal portrait of a man from a model
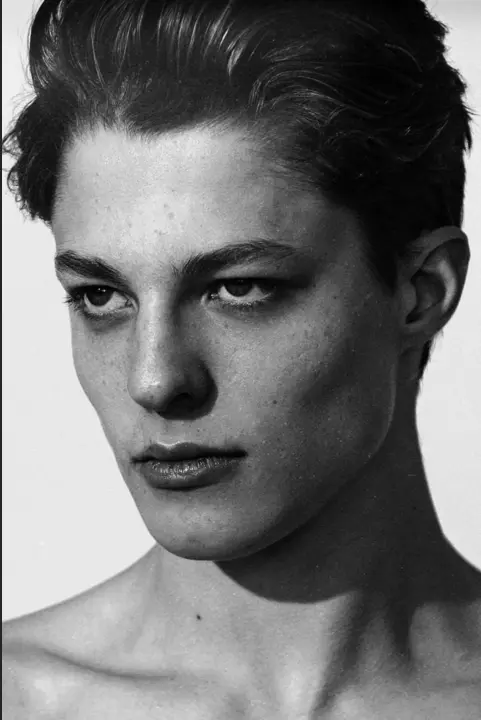
The first step to creating a portrait is to choose a good reference. This can be a photo of yourself, a loved one, or even a famous person!
To better understand and work with contrasts, it is recommended to opt for a black and white image.
Try to select a photo with well-balanced values, neither too dark nor too bright. A little tip: squint slightly. If you can still clearly make out the silhouette, it’s a good reference image.
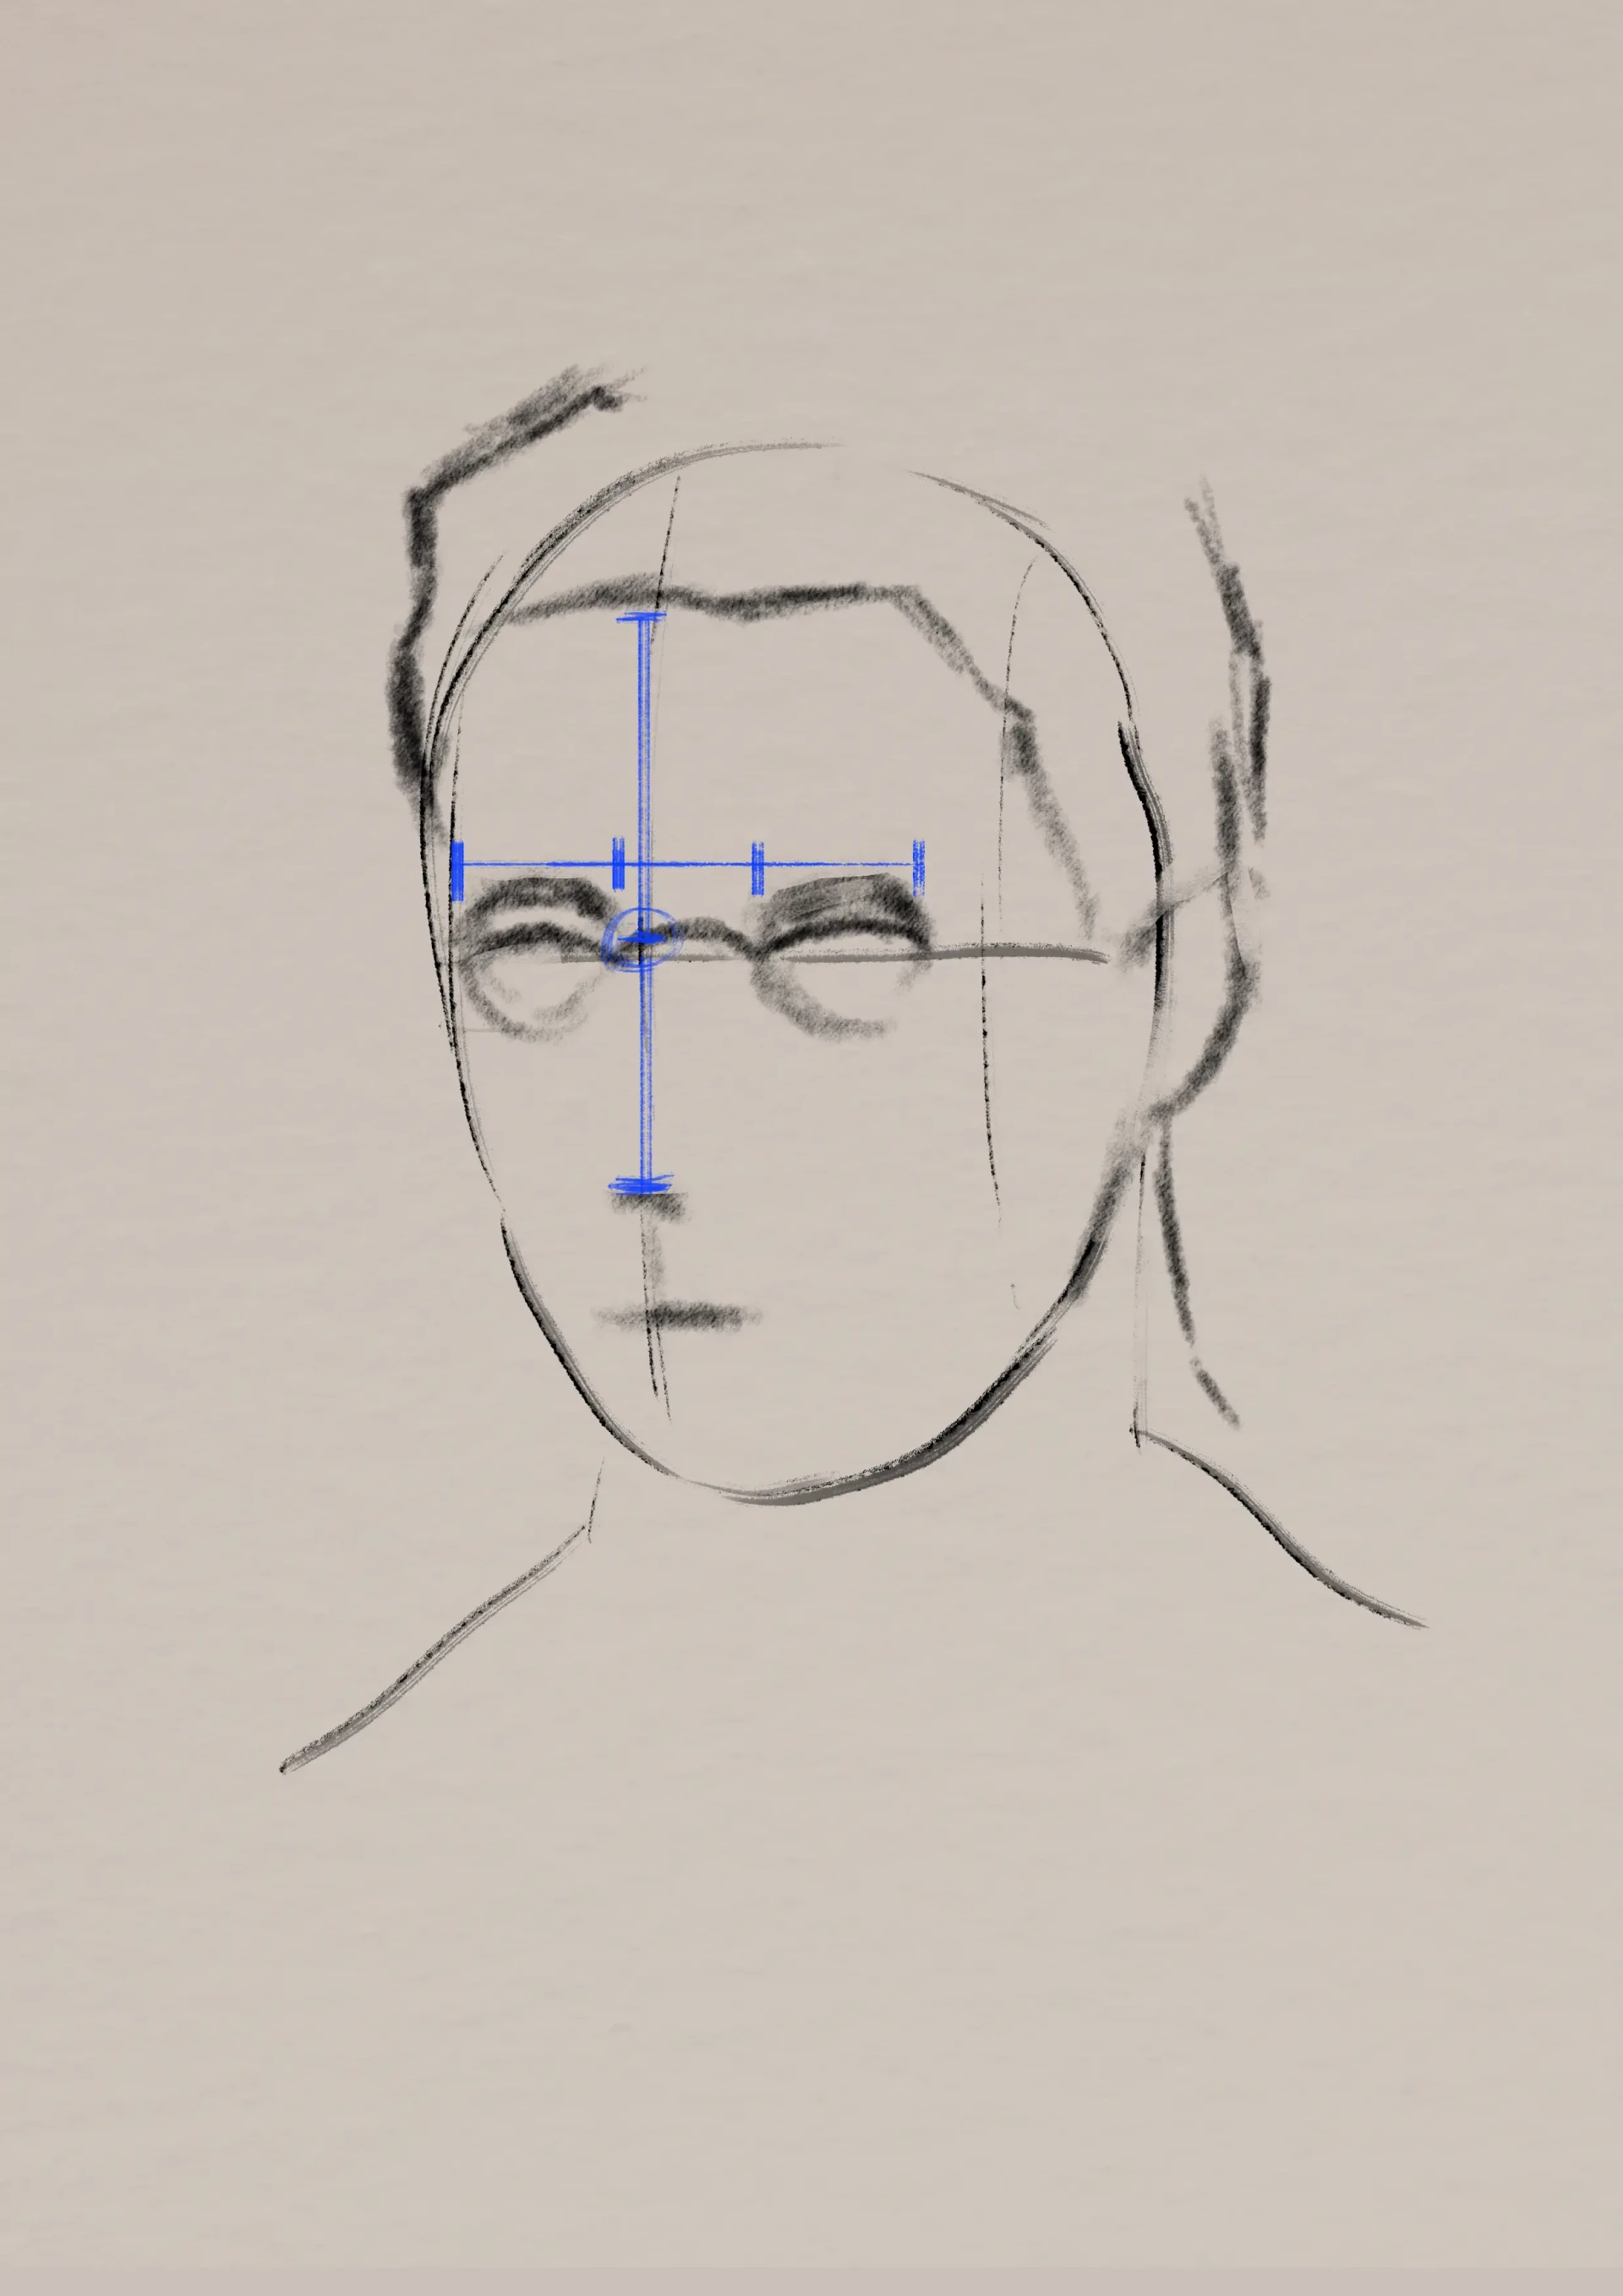
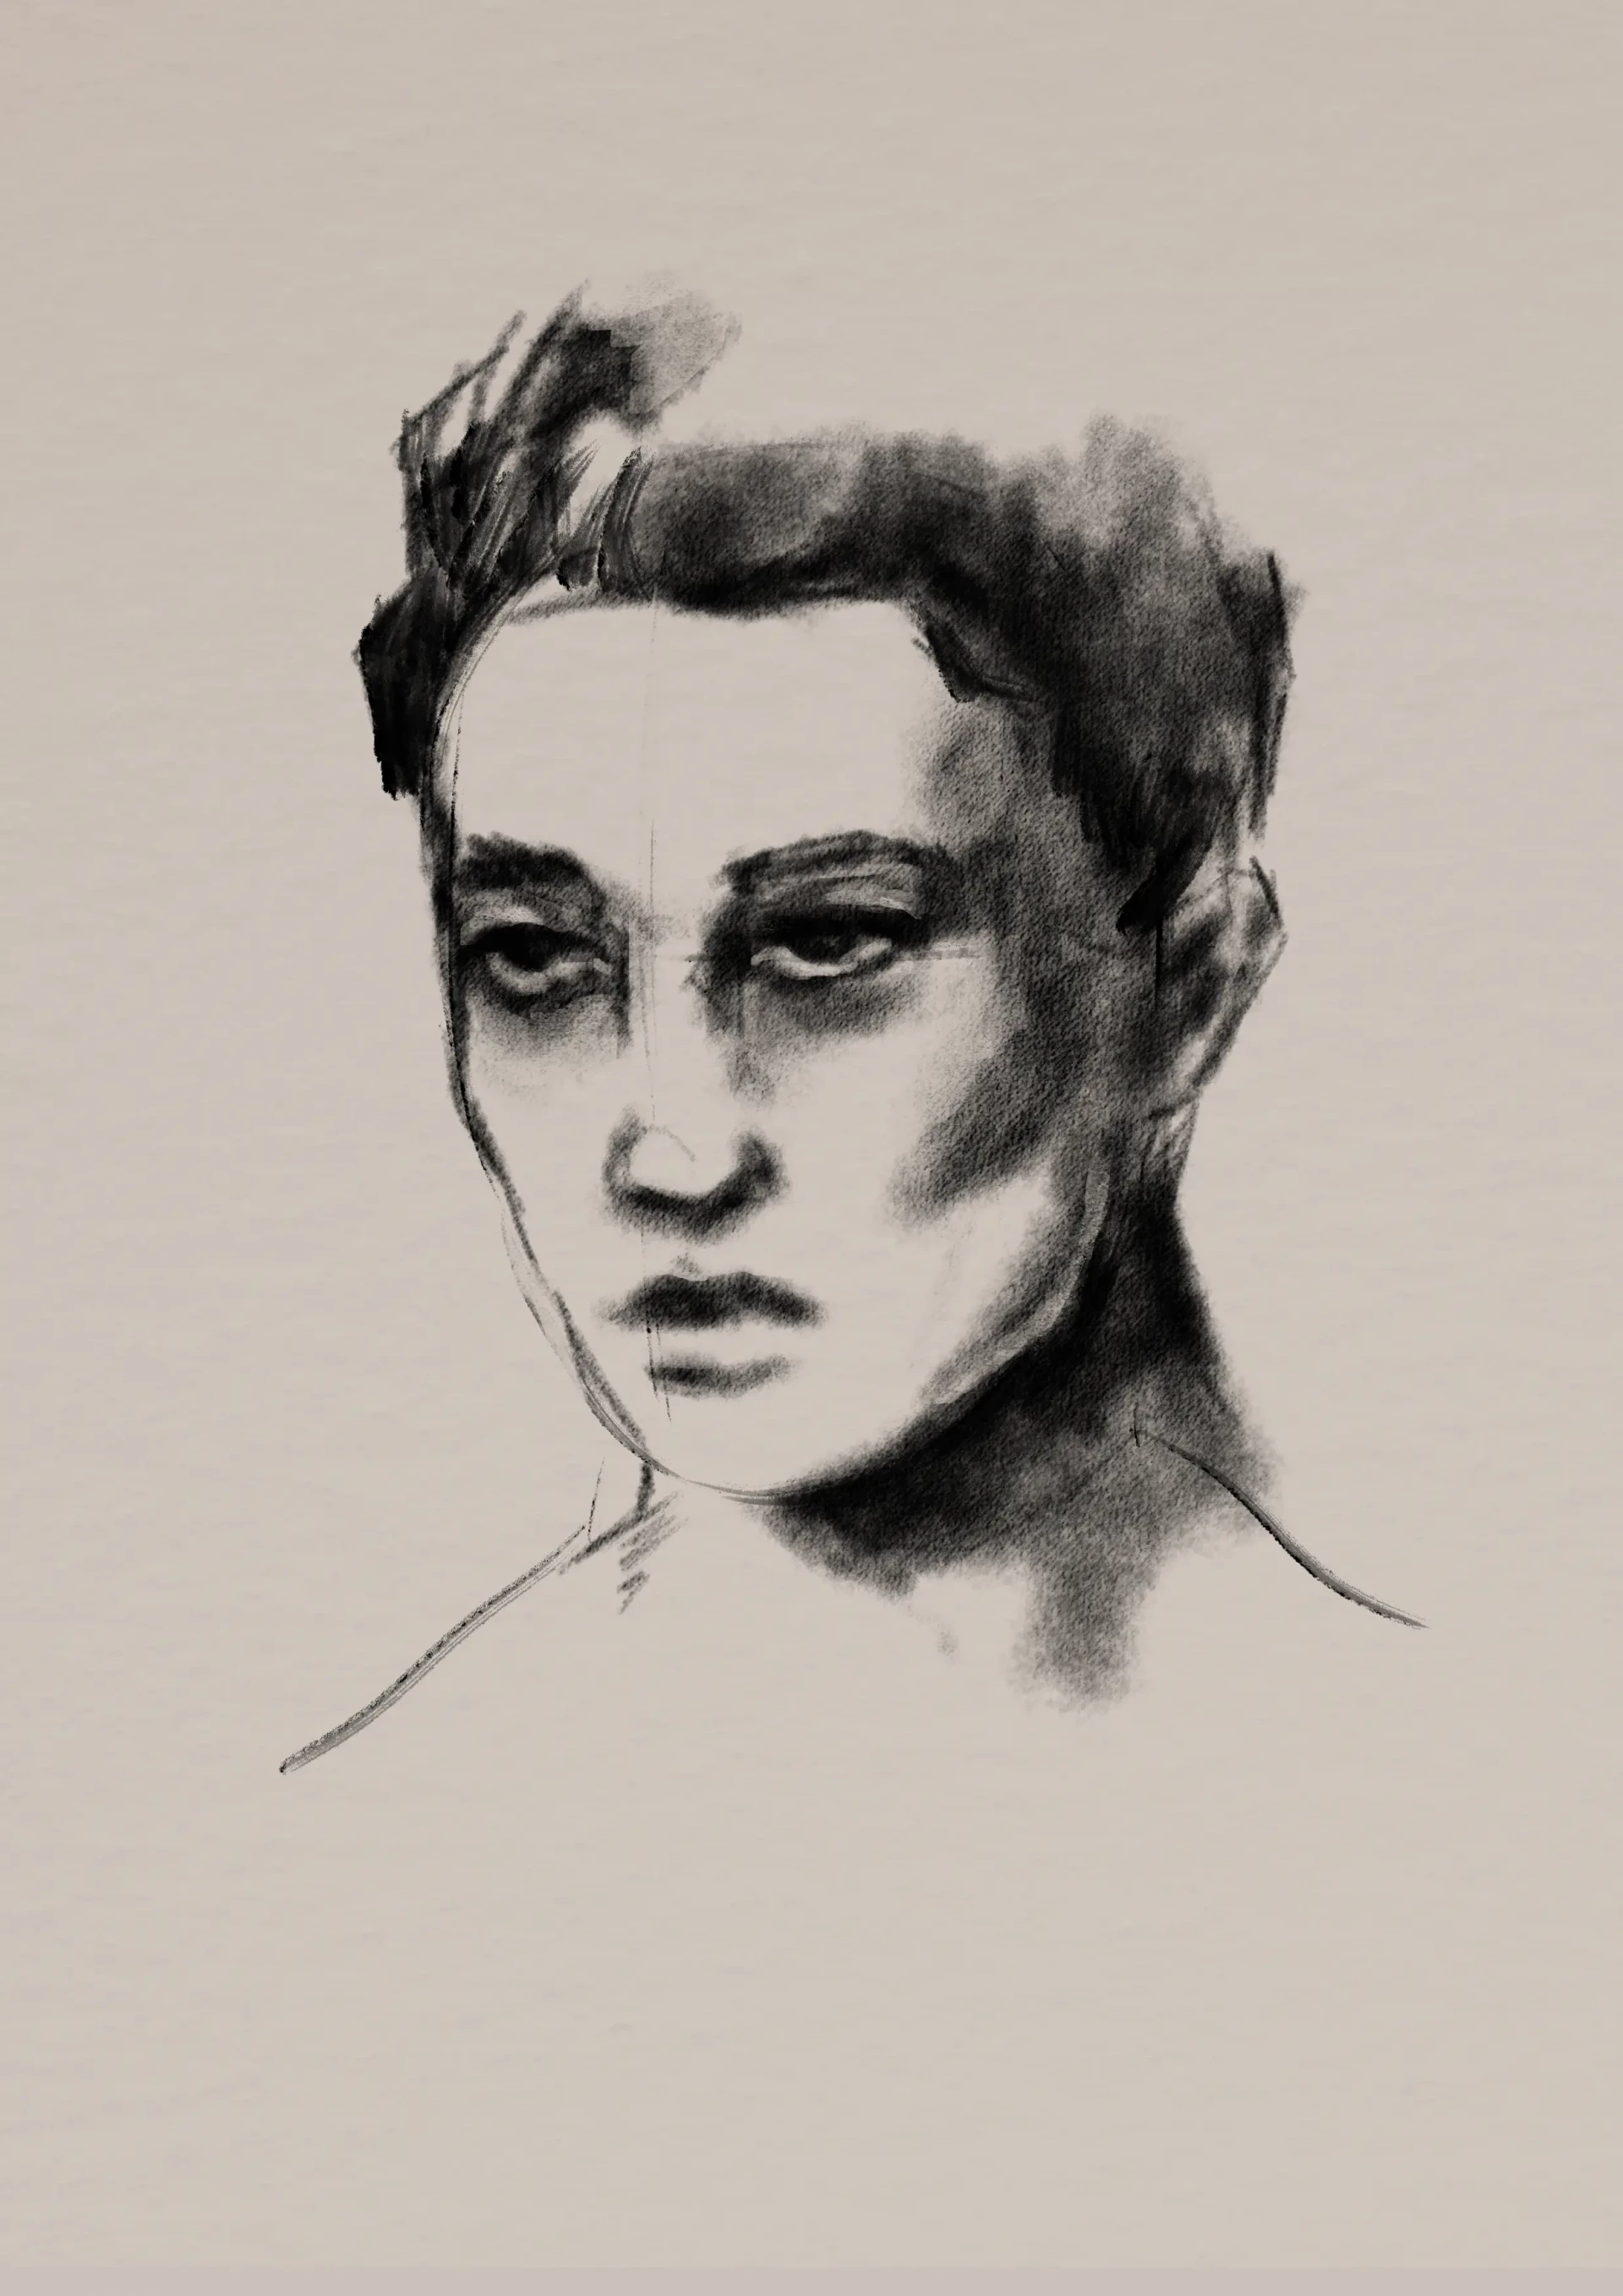
For this exercise, I chose a picture of a model. Since it’s a face, the first thing to do is to draw an oval, then divide it to place guidelines at the level of the eyes, as well as on the sides to indicate the position of the corners of the mouth.
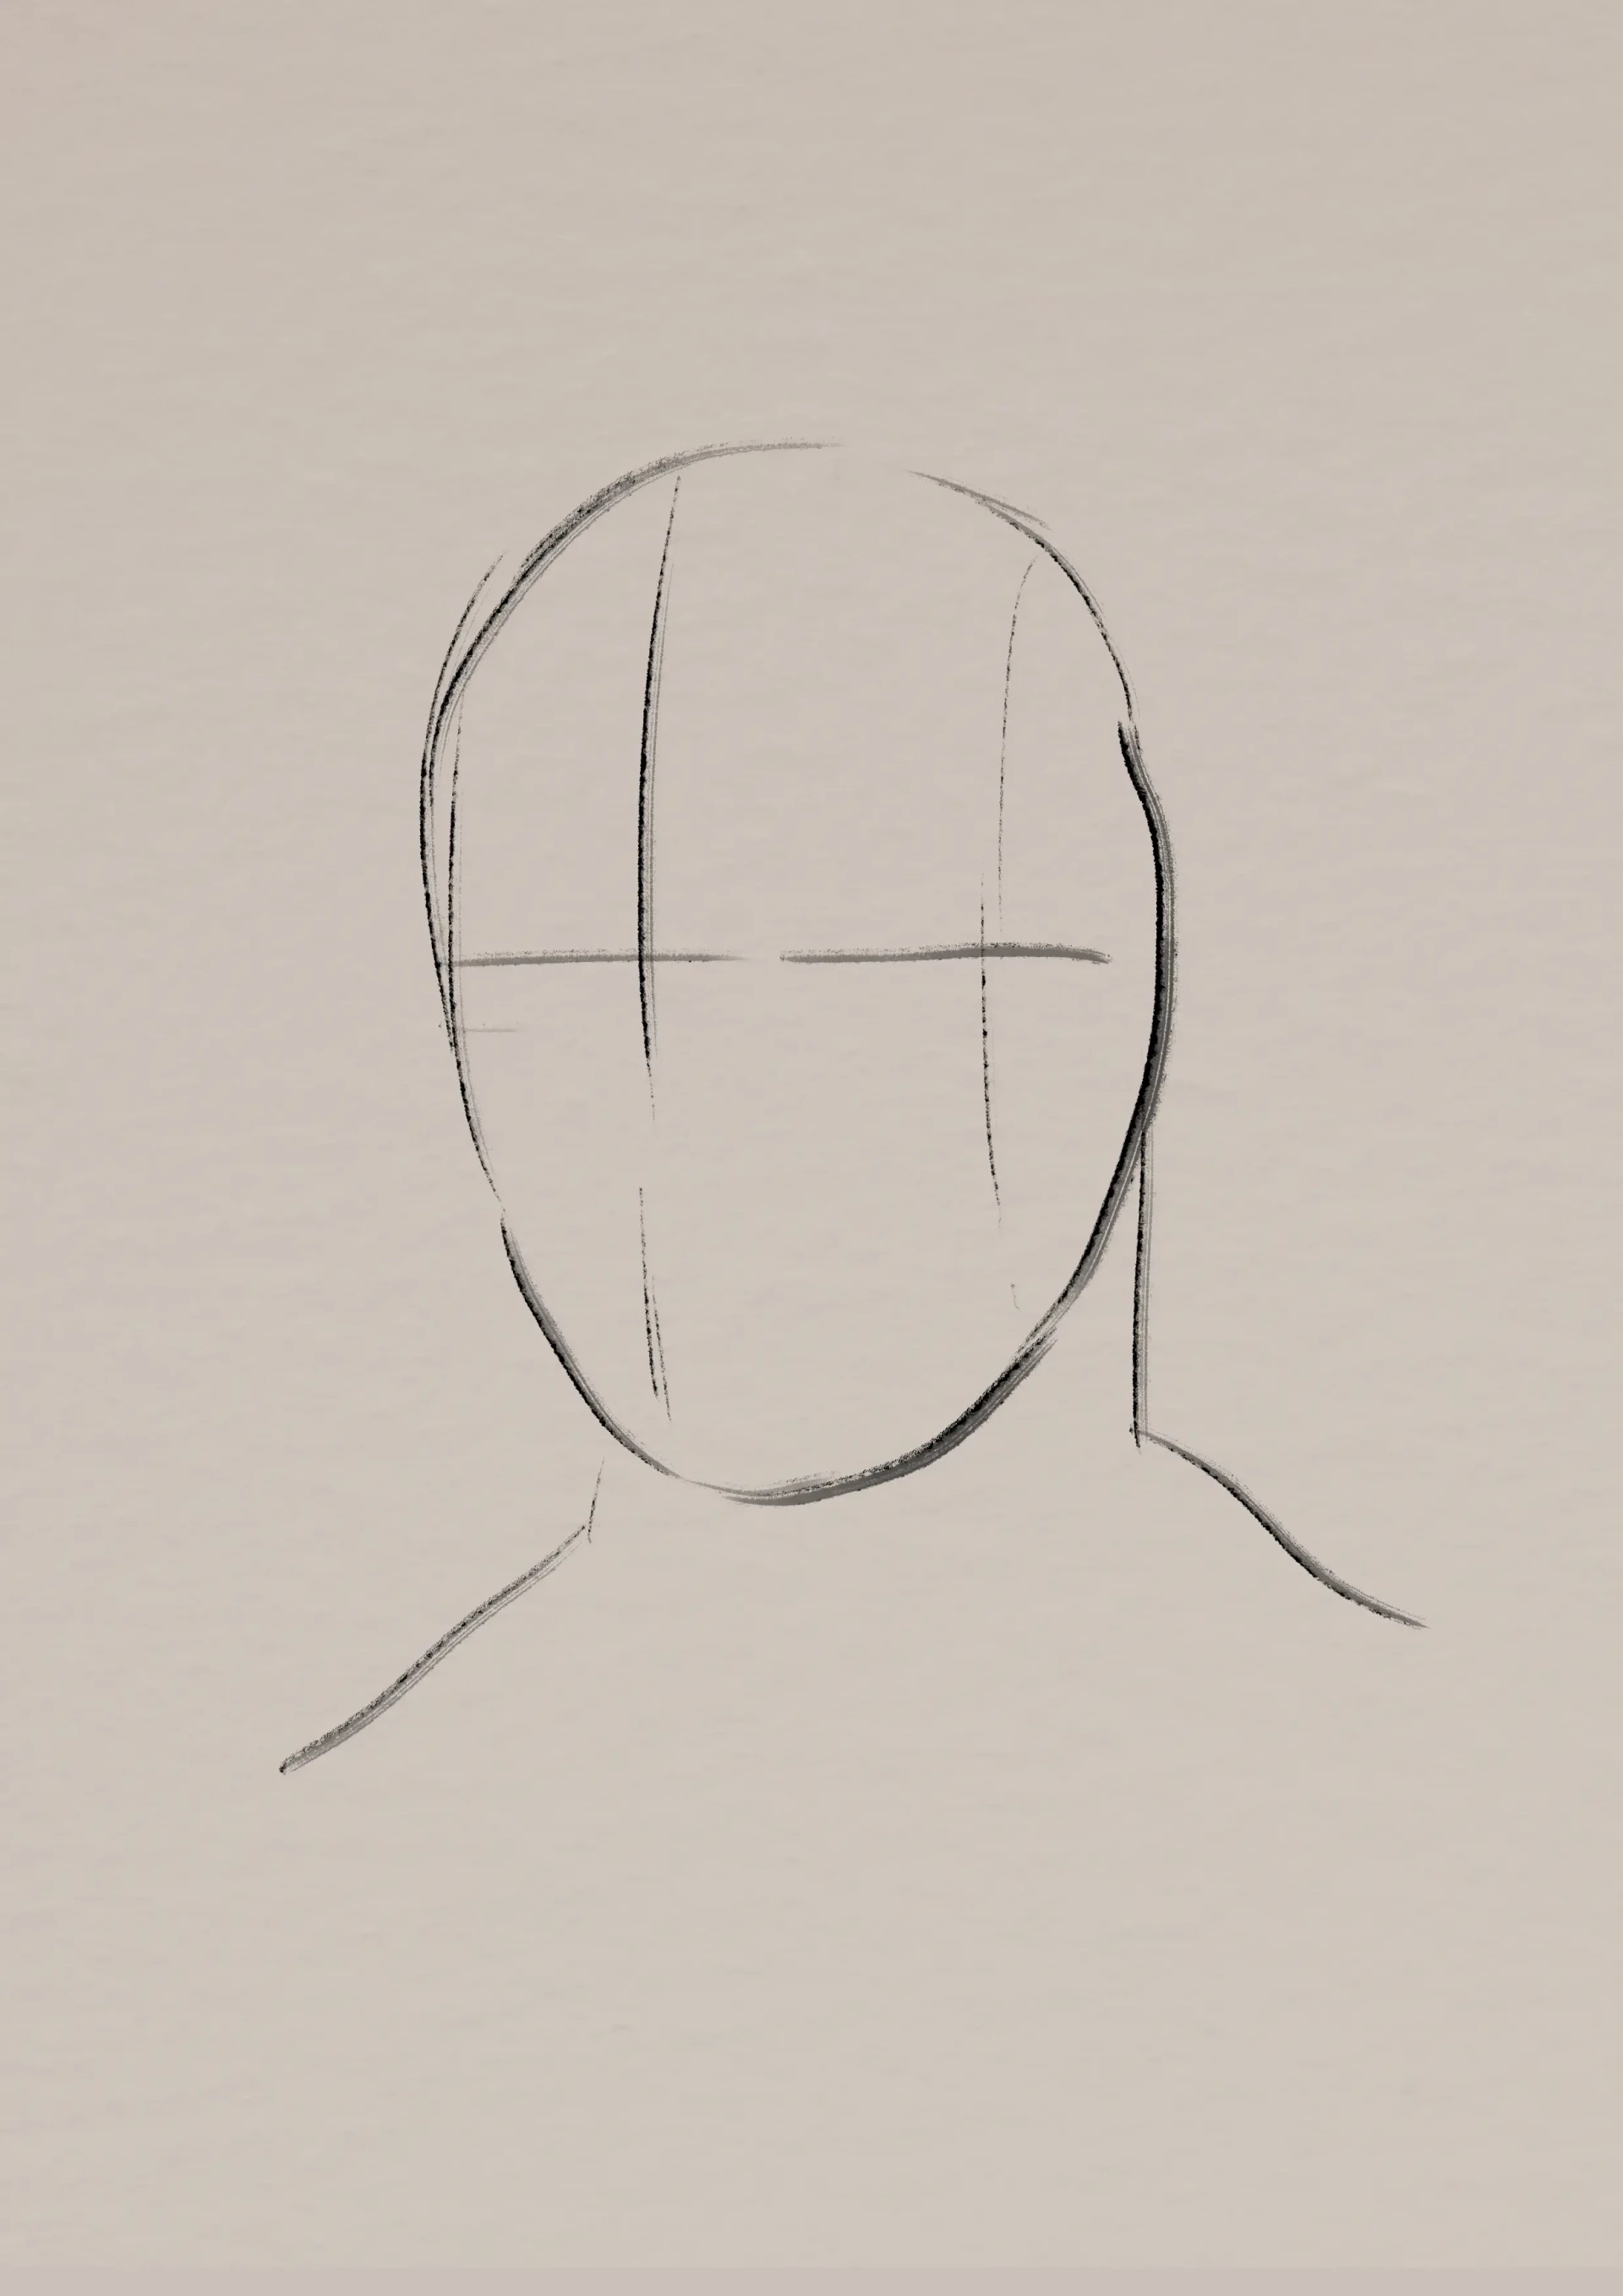
The next step is to refine the facial features, keeping in mind some proportion guidelines.
For example, the distance between the eyes usually corresponds to the width of an eye. Similarly, the distance from the tip of the nose to the start of the forehead is often equivalent to the height of the forehead.
This type of relationship between the different parts of the face (and of the body in general) can be very useful for creating a balanced portrait.
But beware: these reference points are only a guide, not an absolute rule. Each face is unique, and it's precisely these small differences that make a portrait alive and expressive.
We continue by progressively adding the details of the face.
When drawing these elements, it is important not to think in terms of isolated "nose," "eyes," or "ear," but rather to approach the drawing as a whole, as a play of lines, shapes, and values.
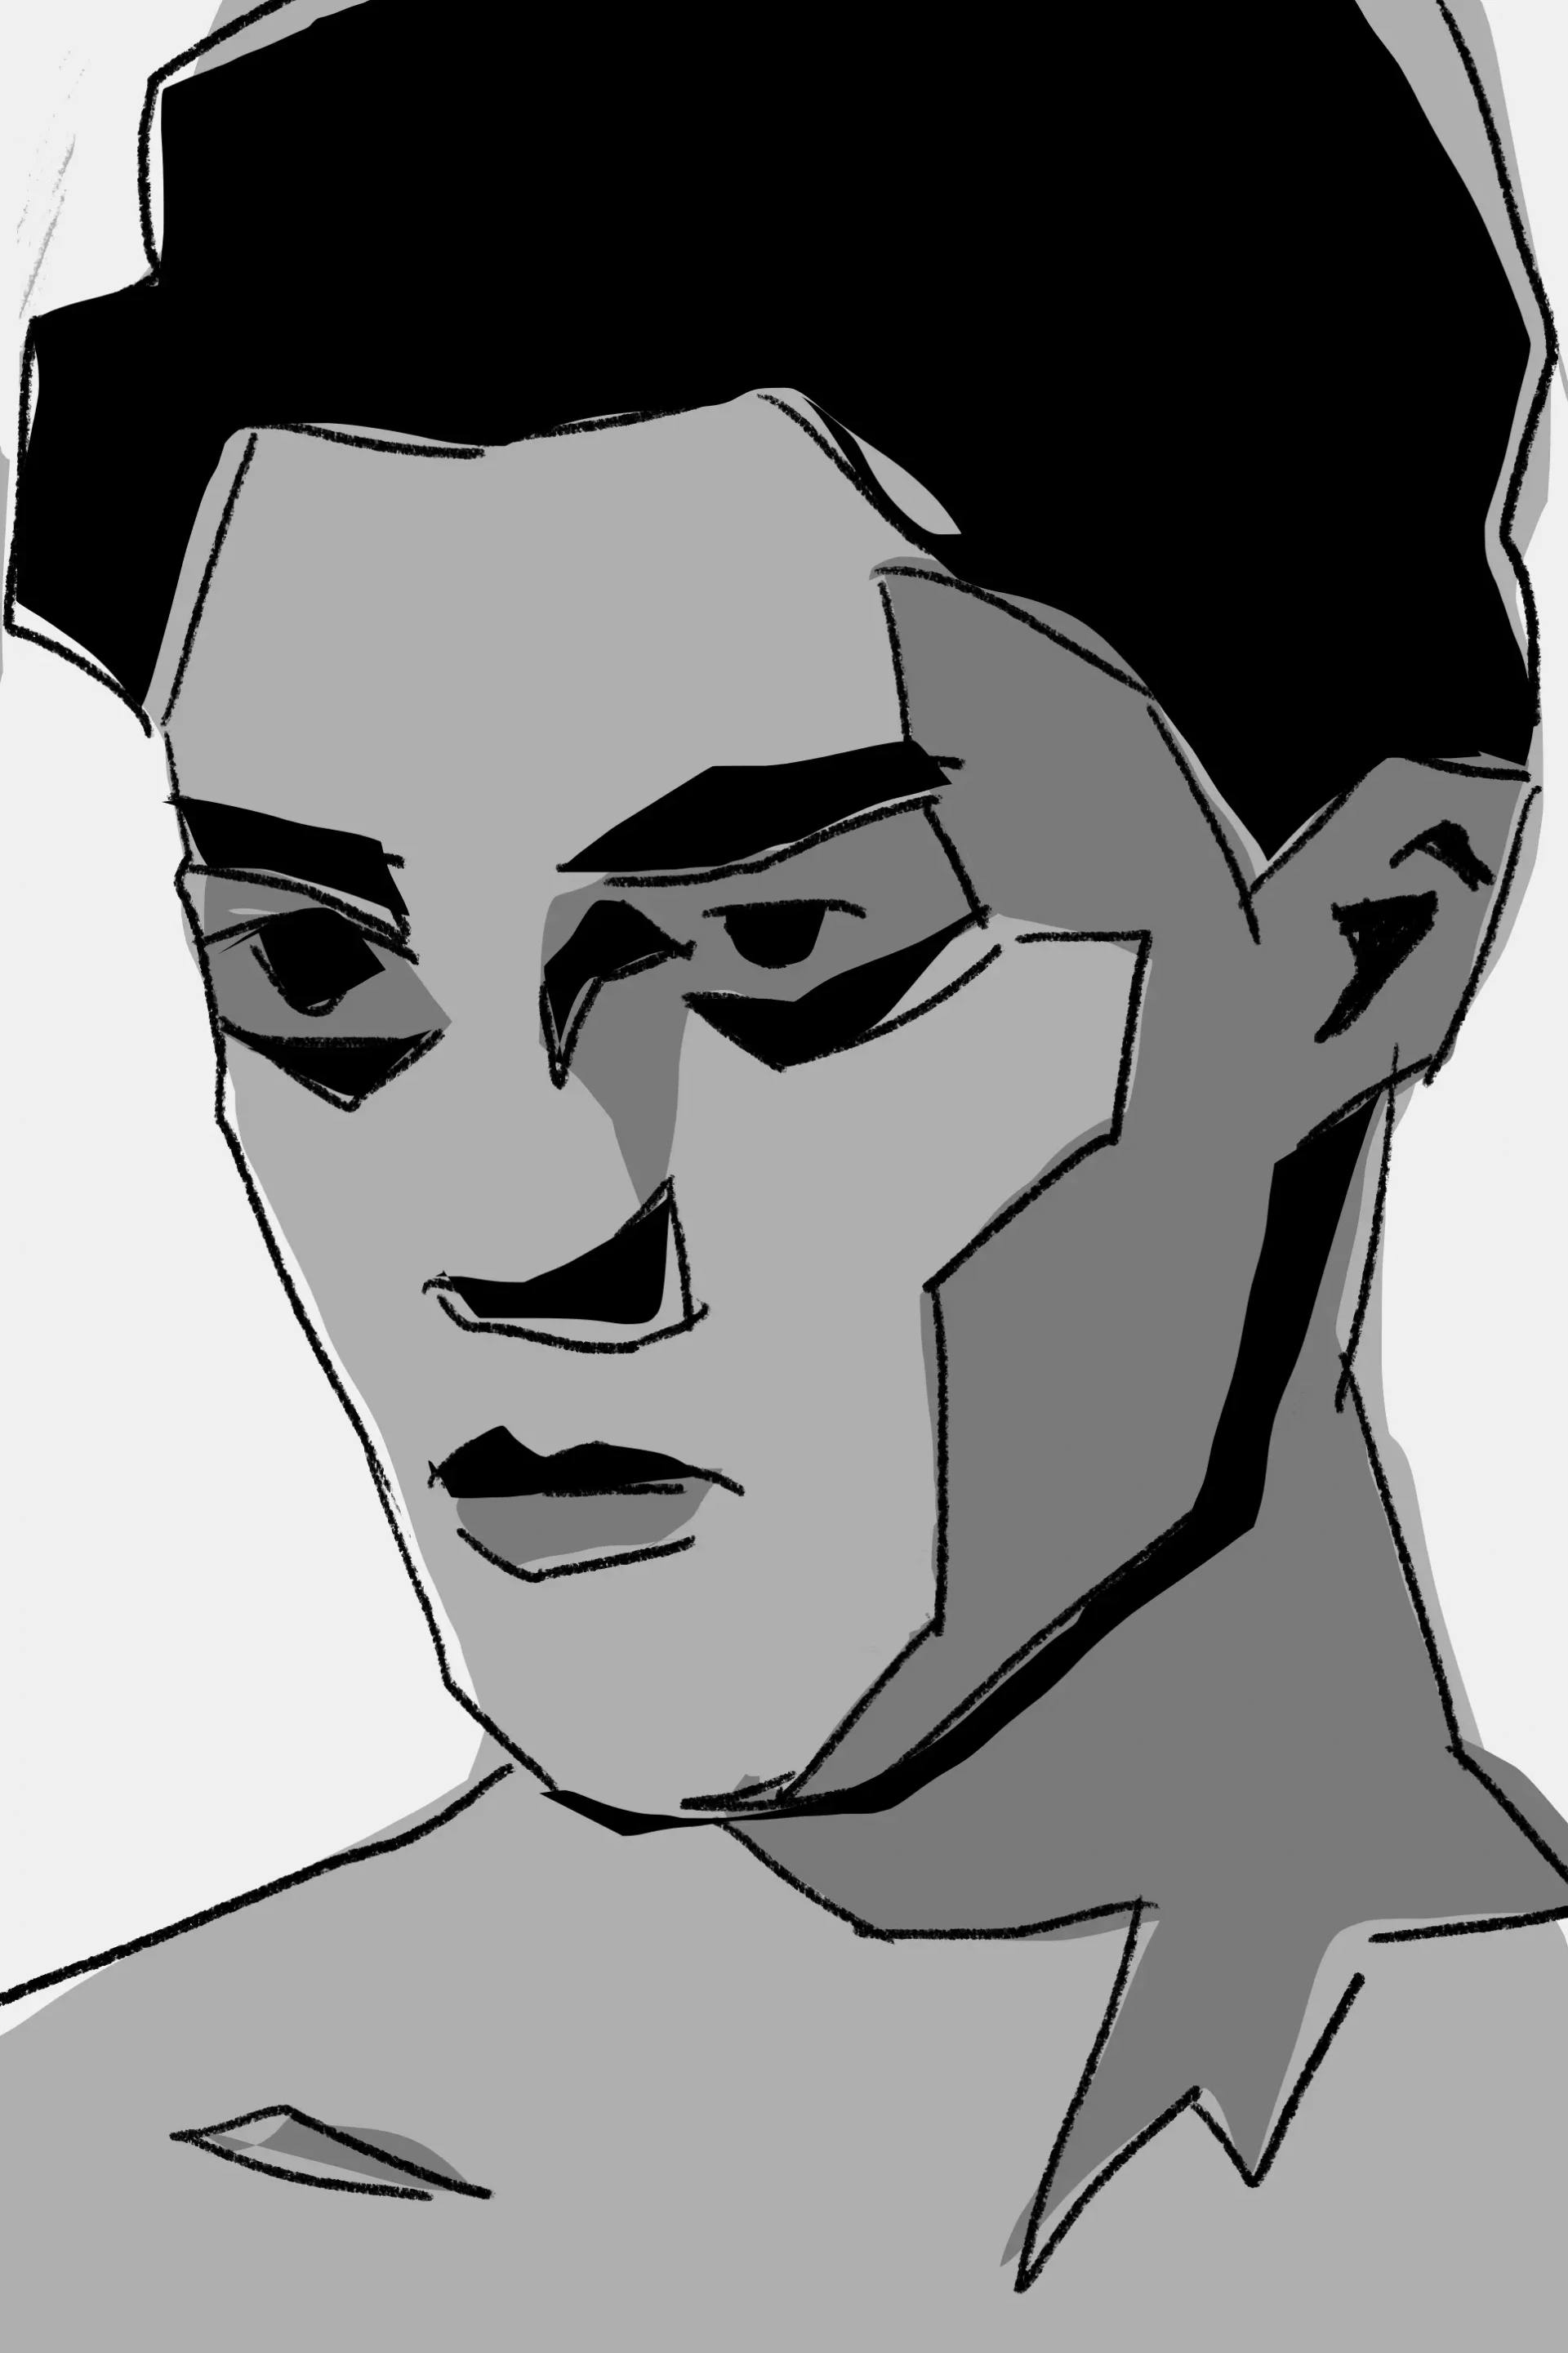
Once part of the portrait is sufficiently advanced, we can begin to observe the variations in values (shadows and lights) in our drawing. The idea is to simplify the face into blocks or geometric shapes to better understand its structure.
With this approach, you will be able to identify the darkest areas and the lightest areas, as well as the intermediate values. To achieve this, you should often proceed by abstraction: it is no longer about drawing a face, but rather shapes of light and shadow.
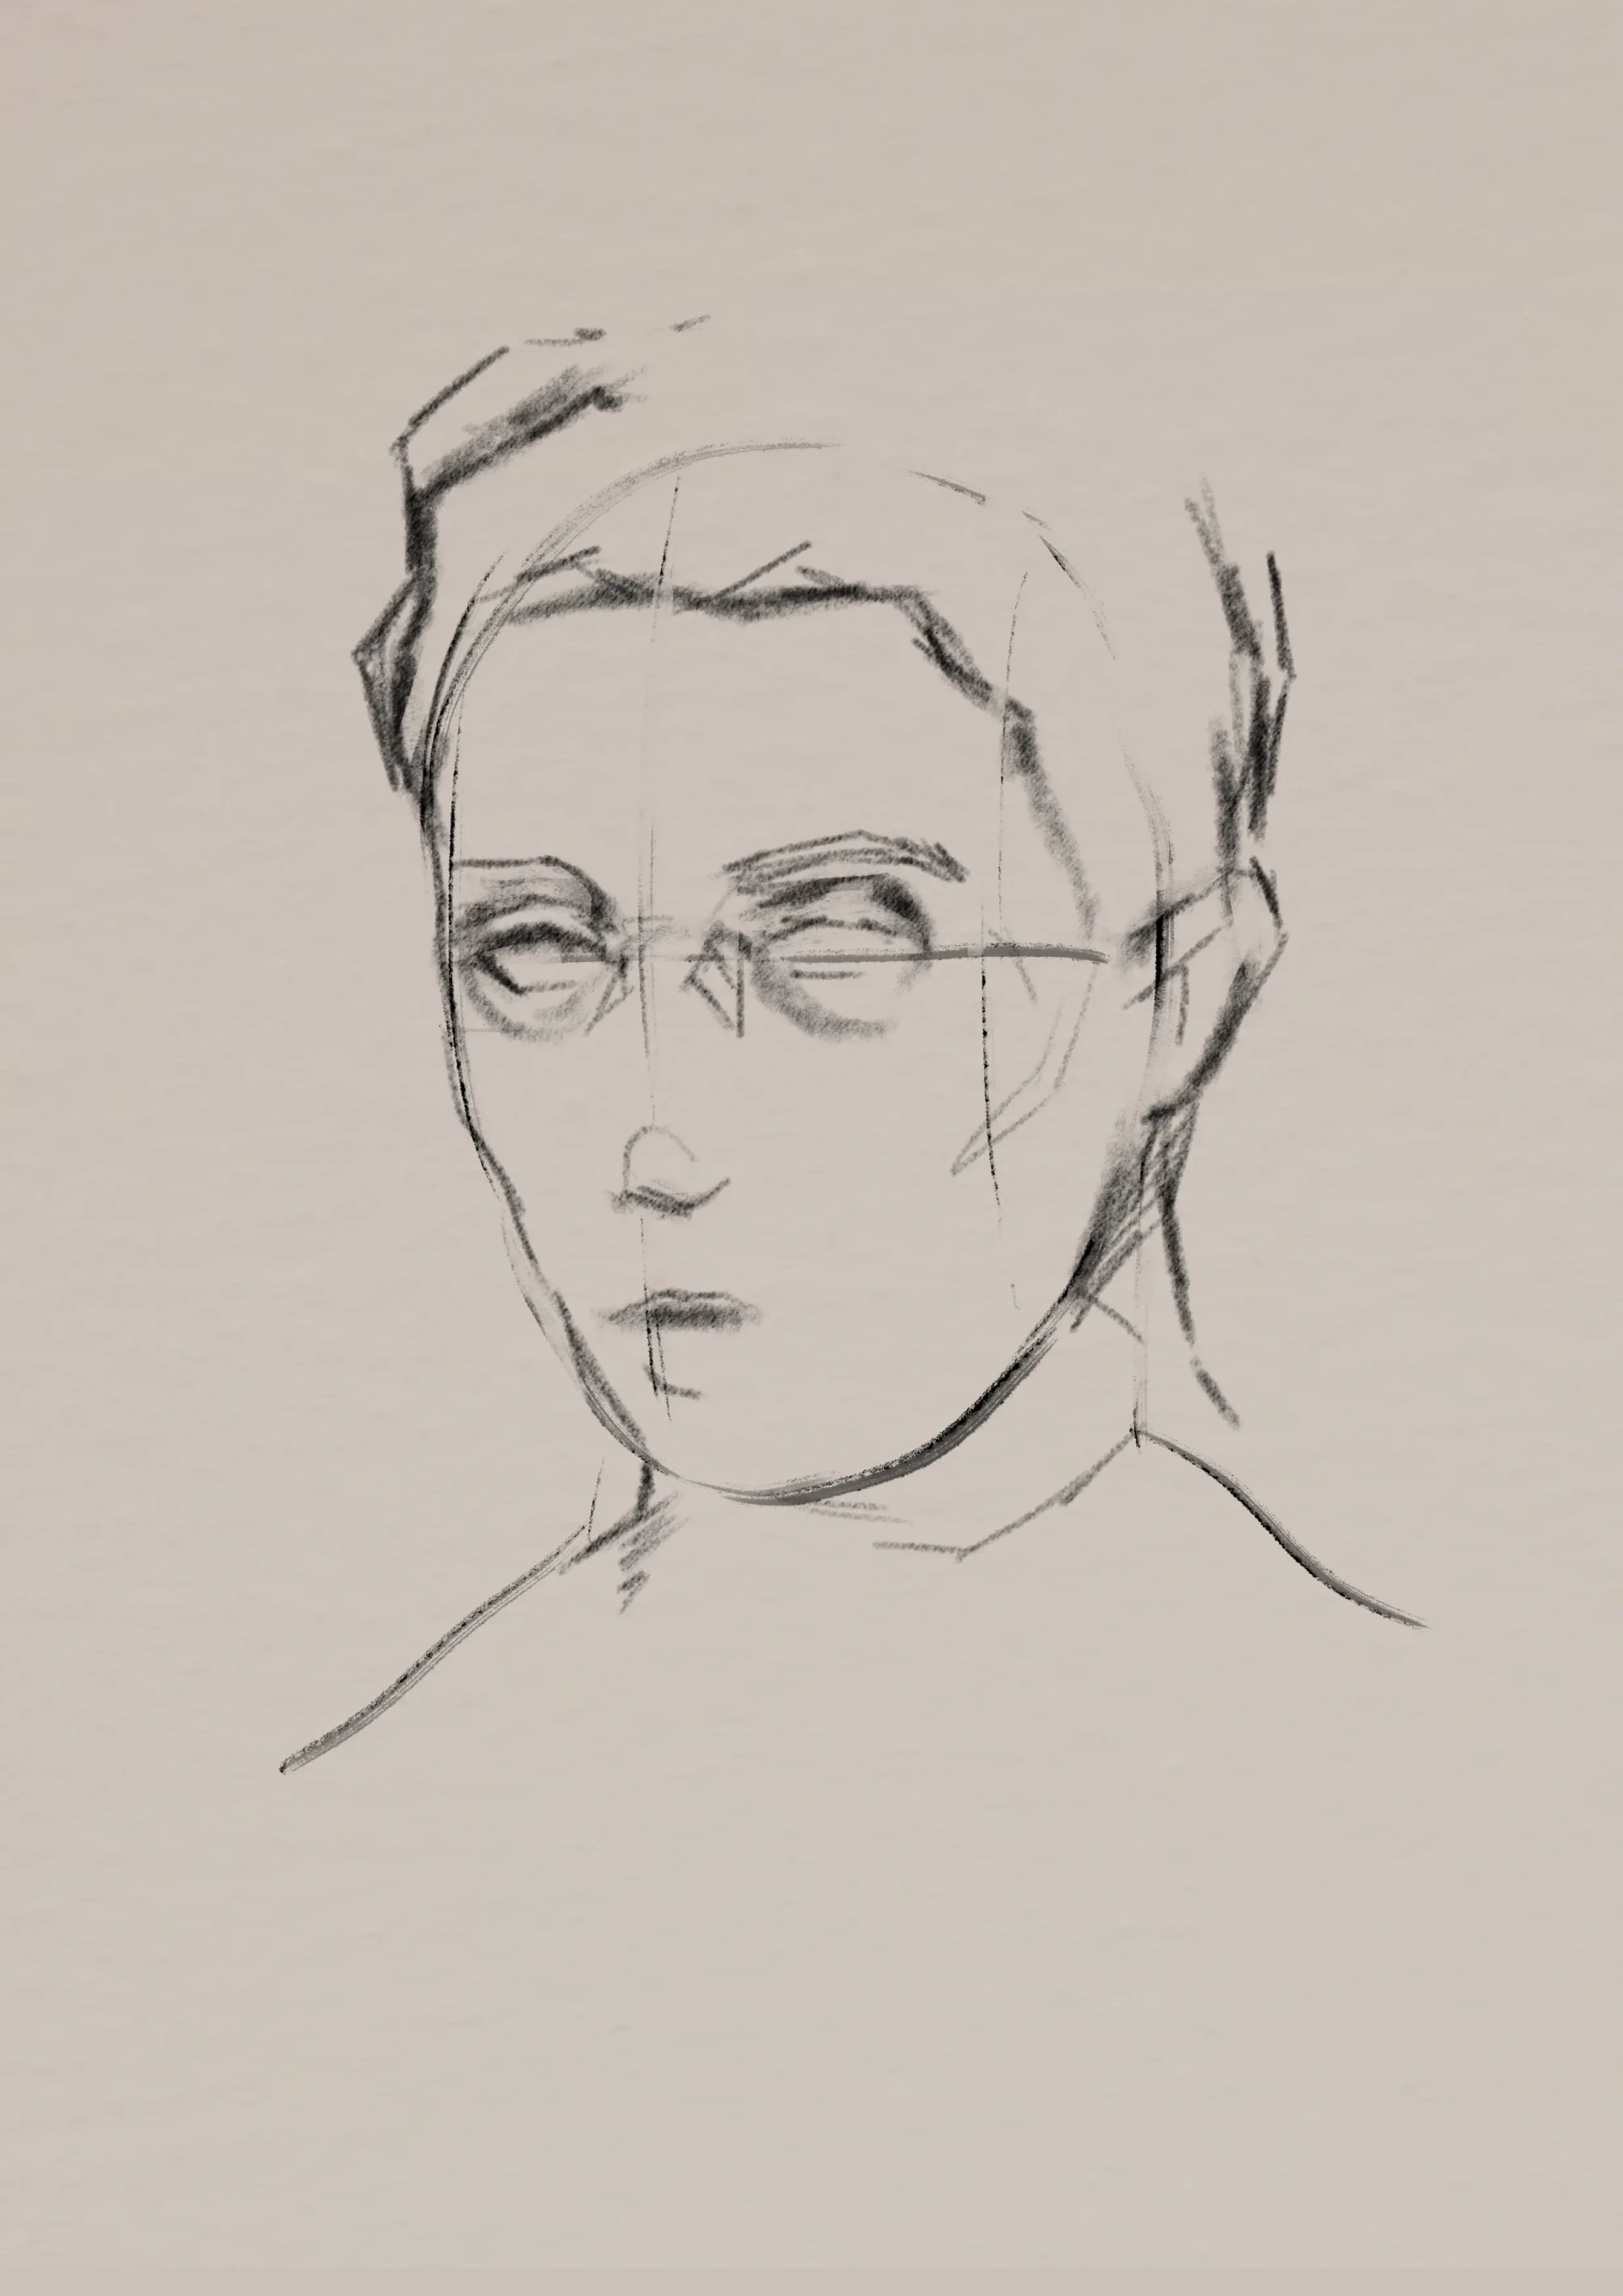
All this information is already present in your reference. Your role is to carefully observe it, identify the contrasts, and then transcribe it into your drawing.
If, at first, the portrait doesn't resemble your model, don't panic! It’s completely normal.
Do not hesitate to use angular lines initially: this can enhance the expression and give your sketch more character.
Once the areas of light are identified and the different parts of the face well defined, you can start filling in your portrait.
For this, it is often useful to slightly tilt your charcoal pencil: this allows you to cover a larger surface and achieve a softer stroke.
Try working generously, without leaving too many empty spaces. That being said, it's better to keep it light than to add too much depth from the start, as it will always be easier to deepen the shadows later than soften them.
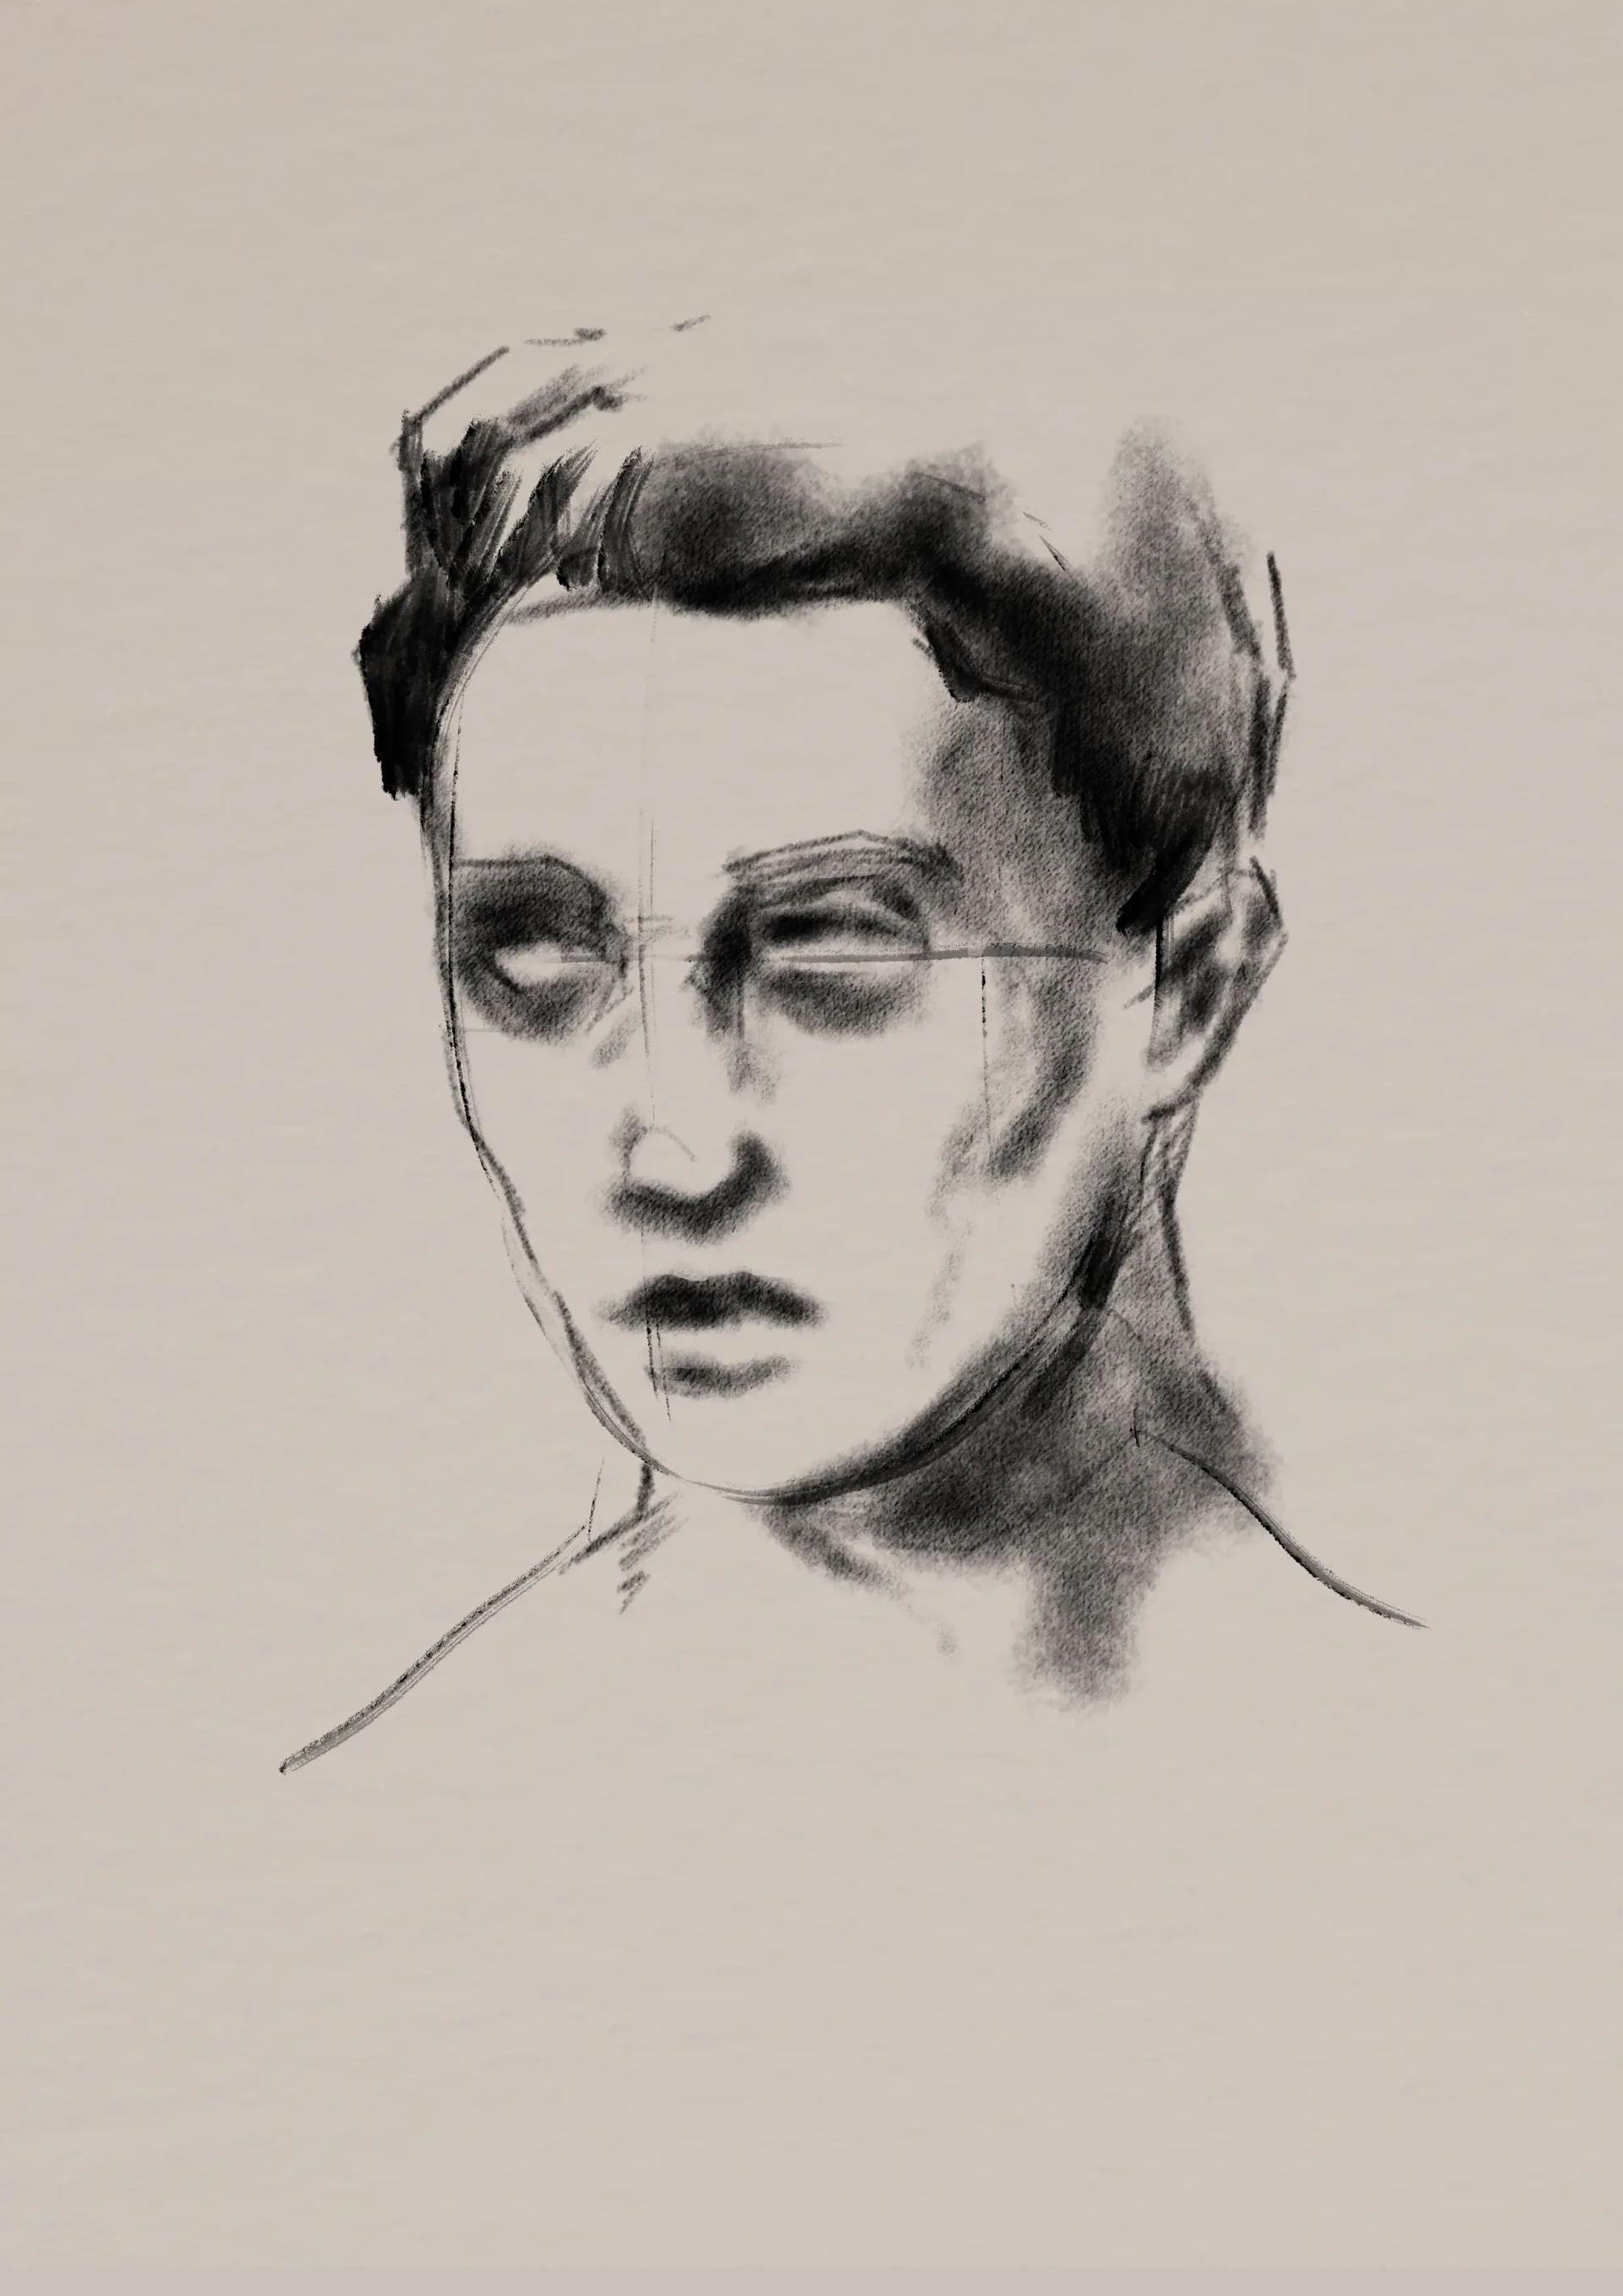
Don't worry if you accidentally go over some lines, we can easily correct this with the eraser.
The idea, for now, is to continue building the portrait by clearly defining the different areas. We can then refine the drawing by gradually adding details.

Next, we add more details around the eyes, always keeping in mind the three main values: the darkest, the lightest, and a mid-tone.
In order to work on these details with greater precision, you can hold your charcoal more vertically: this allows for a finer and more distinct line, which is ideal for delicate areas.
Don't forget to draw the tear ducts as this small detail adds a lot of realism and life to your portrait.
One of the main challenges of drawing with charcoal is preserving the light and neutral areas. By darkening some parts too much, it is easy to encroach on other areas of the portrait and lose clarity.
To achieve neutral values, you can draw very light lines and then gently blend them with your finger. This tip works well for certain specific areas, but be careful not to overuse it: if you blend too many surfaces, your drawing will appear blurred and the contrast, which is crucial in a charcoal portrait, may disappear.
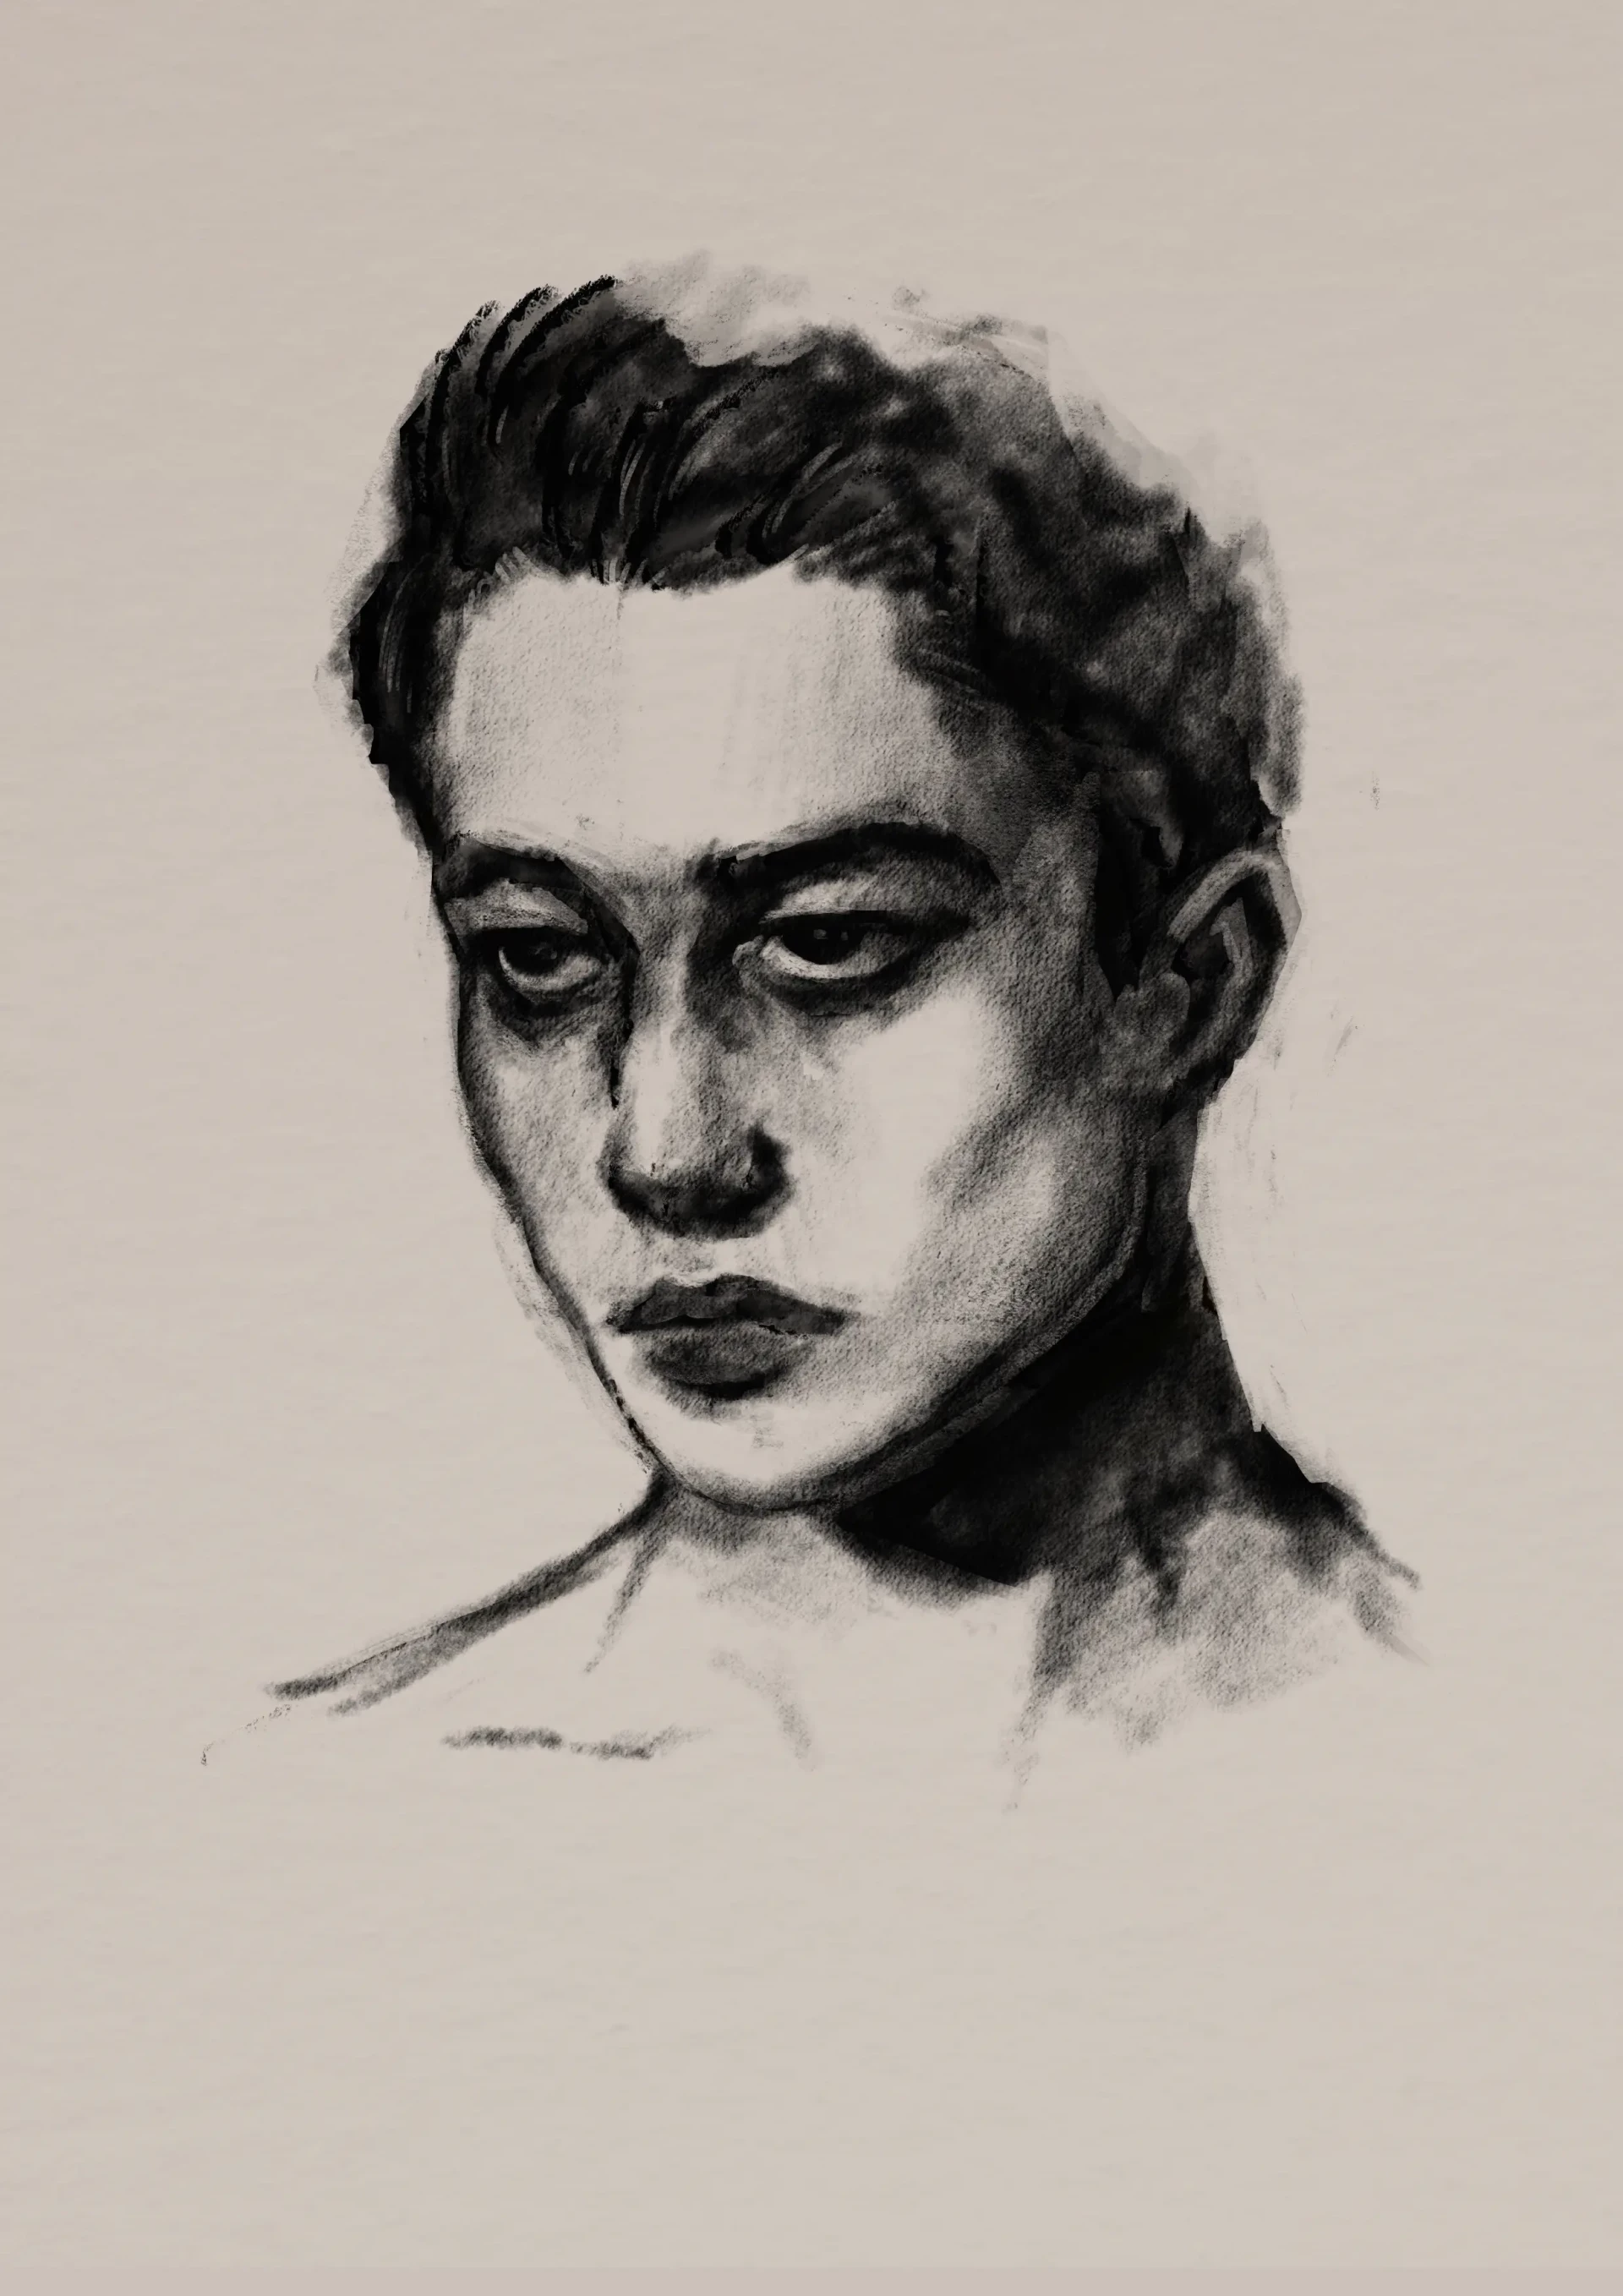
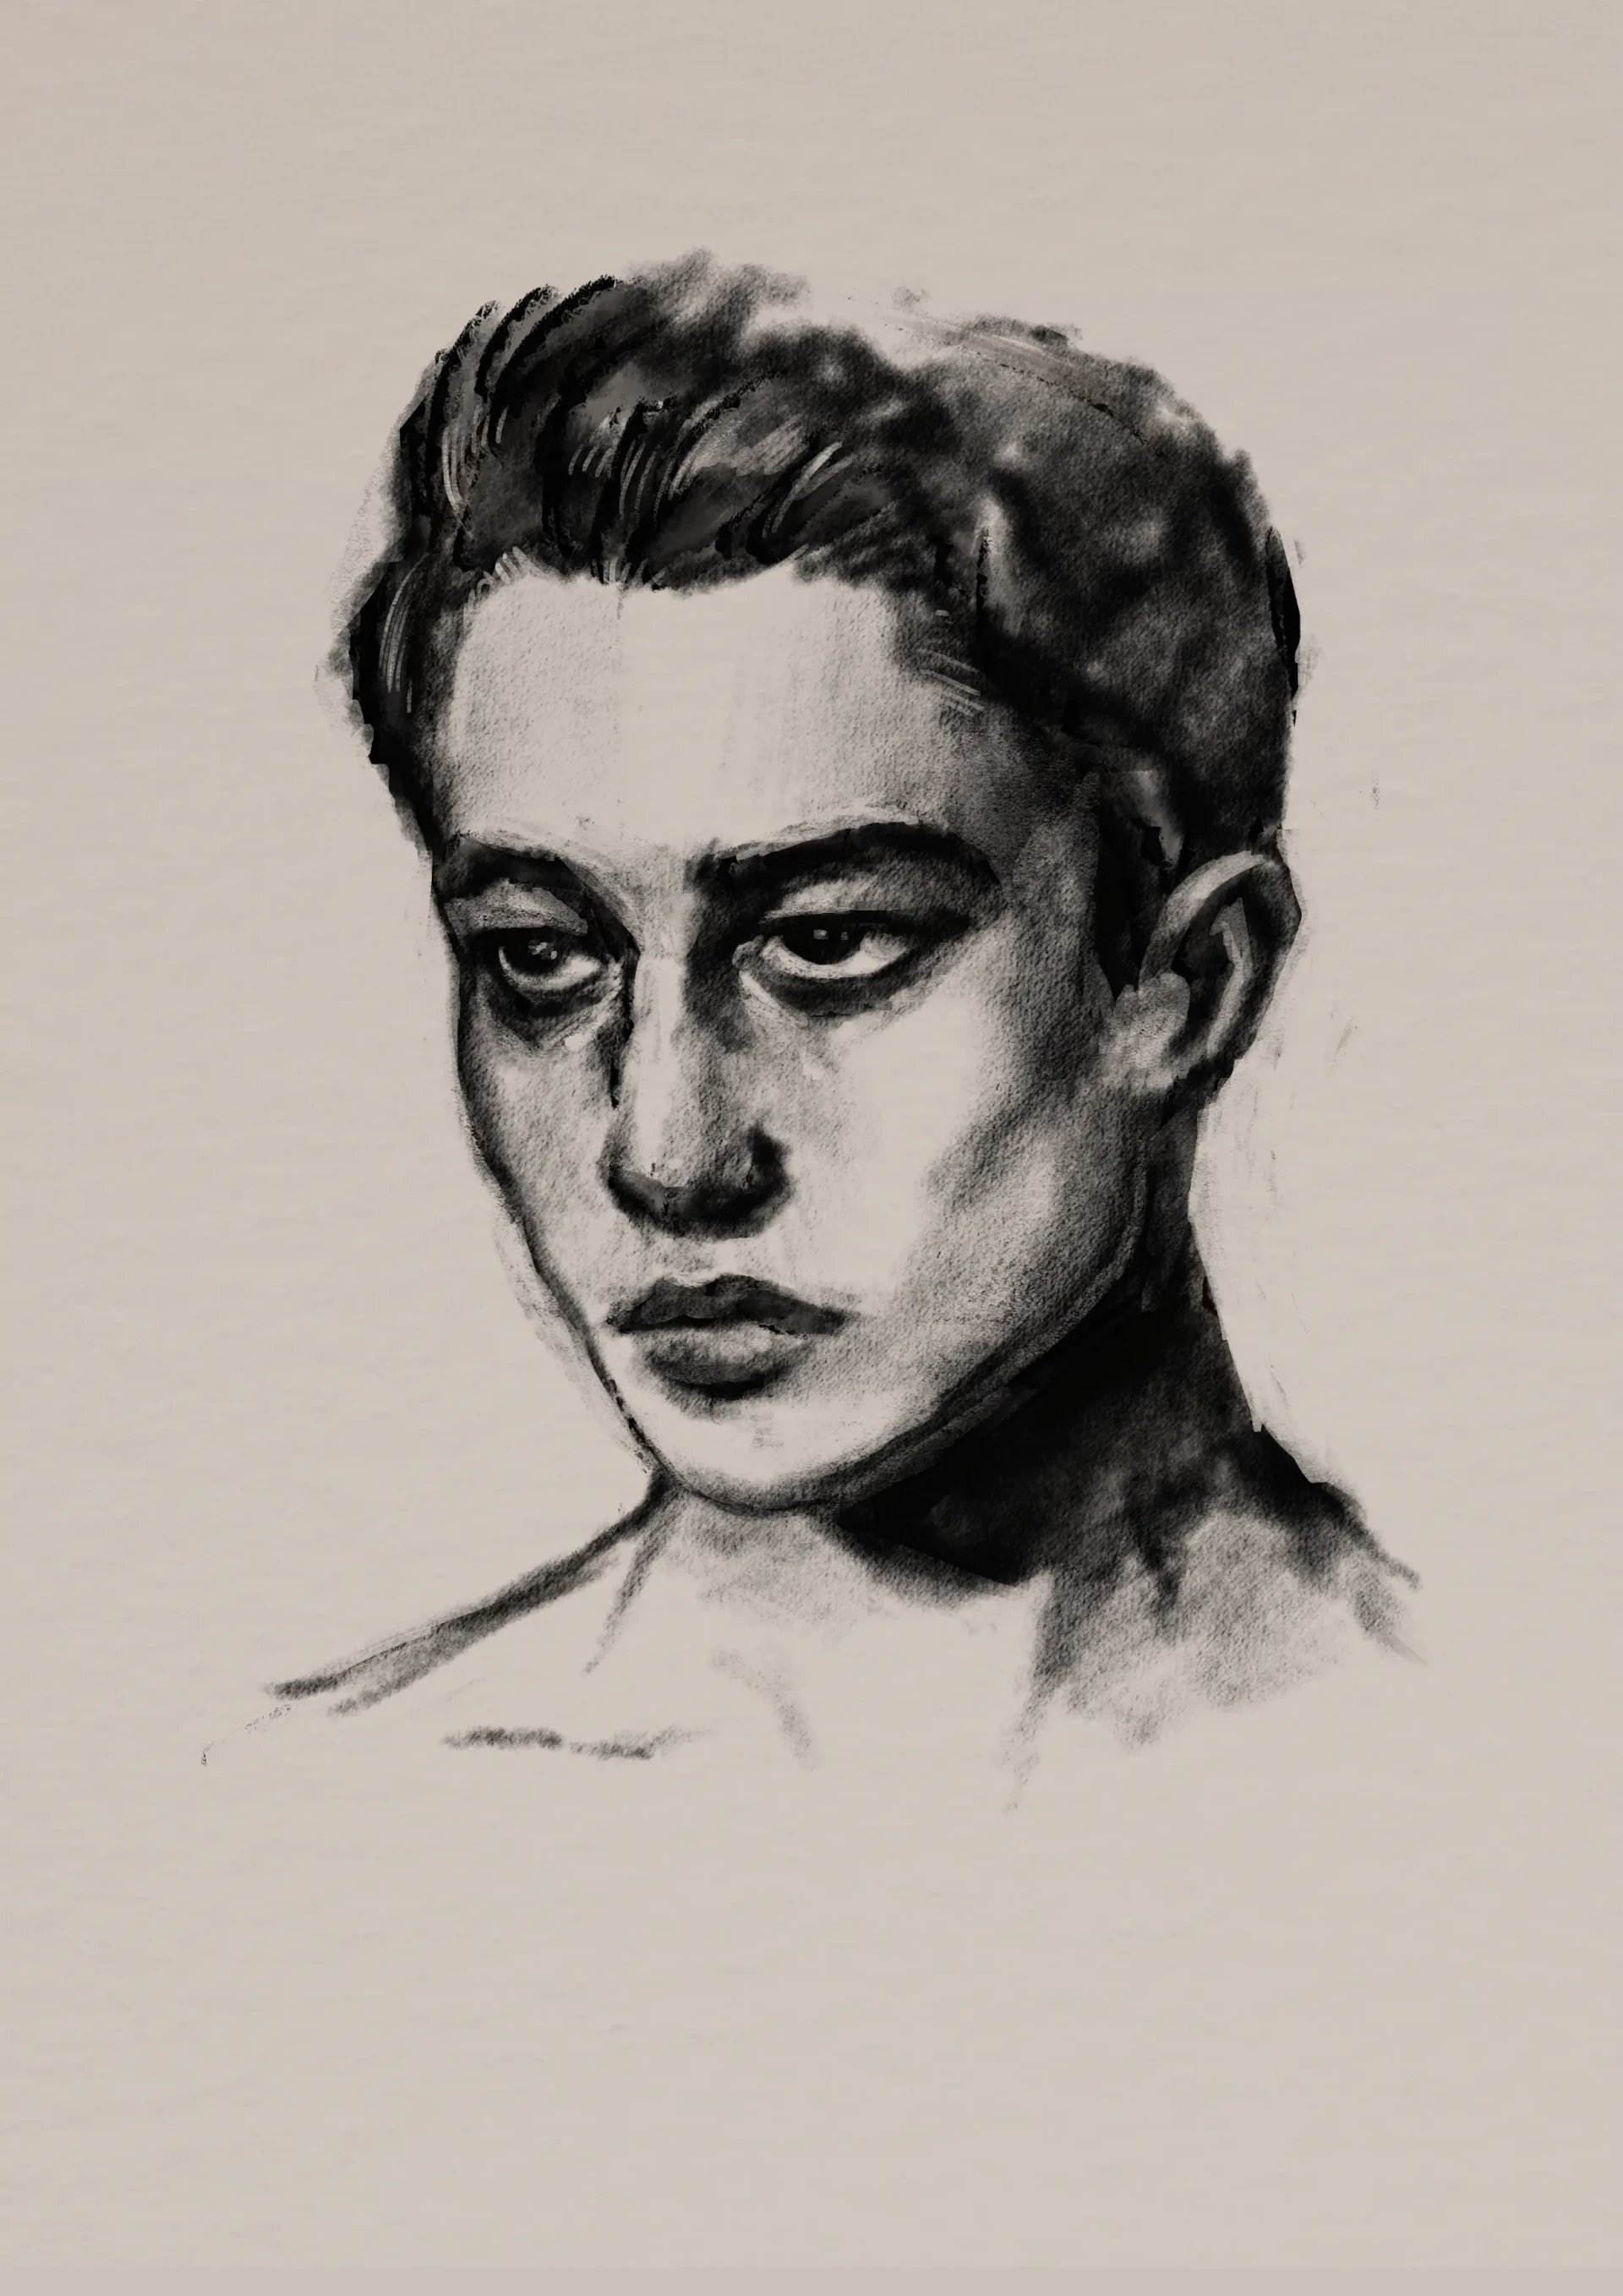
Once the bright areas are well defined, your drawing should gradually come to life.
And if the result still doesn't seem convincing to you, don't stress: patience is essential in this type of exercise. Sometimes, a single stroke can transform the entire drawing.
Finalize your portrait by adding highlights and reflections
We are now going to bring out the areas of light. For this, use your eraser to draw small strokes and erase certain key areas: the tear duct, reflections in the eyes, the lips, or the tip of the nose.
If you have a white pencil, you can also use it to enhance these bright areas and accentuate the contrasts.

Finally, you can compare your drawing to your reference and see if any adjustments need to be made.
Keep in mind that charcoal tends to leave marks, even once the drawing is finished. It is therefore important to handle your sheet with care.
If you have the opportunity, I recommend applying a thin layer of fixative to protect your work and preserve the values you have created.
And there you have it, our charcoal portrait is now complete! I hope you enjoyed this article :)
Discussion
No comments yet.