How to Draw a Cliff
When we think of the sea, we often imagine a sunny beach, although this is not the only thing we can find in nature. Sometimes, it's surprising to see waves crashing forcefully against tall rocky cliffs, capped with a thin layer of grass.
Hello again! Today, we are going to draw a cliff: a perfect opportunity to depict the water of the sea in contrast with the calm of the land.

Draw a cliff step by step
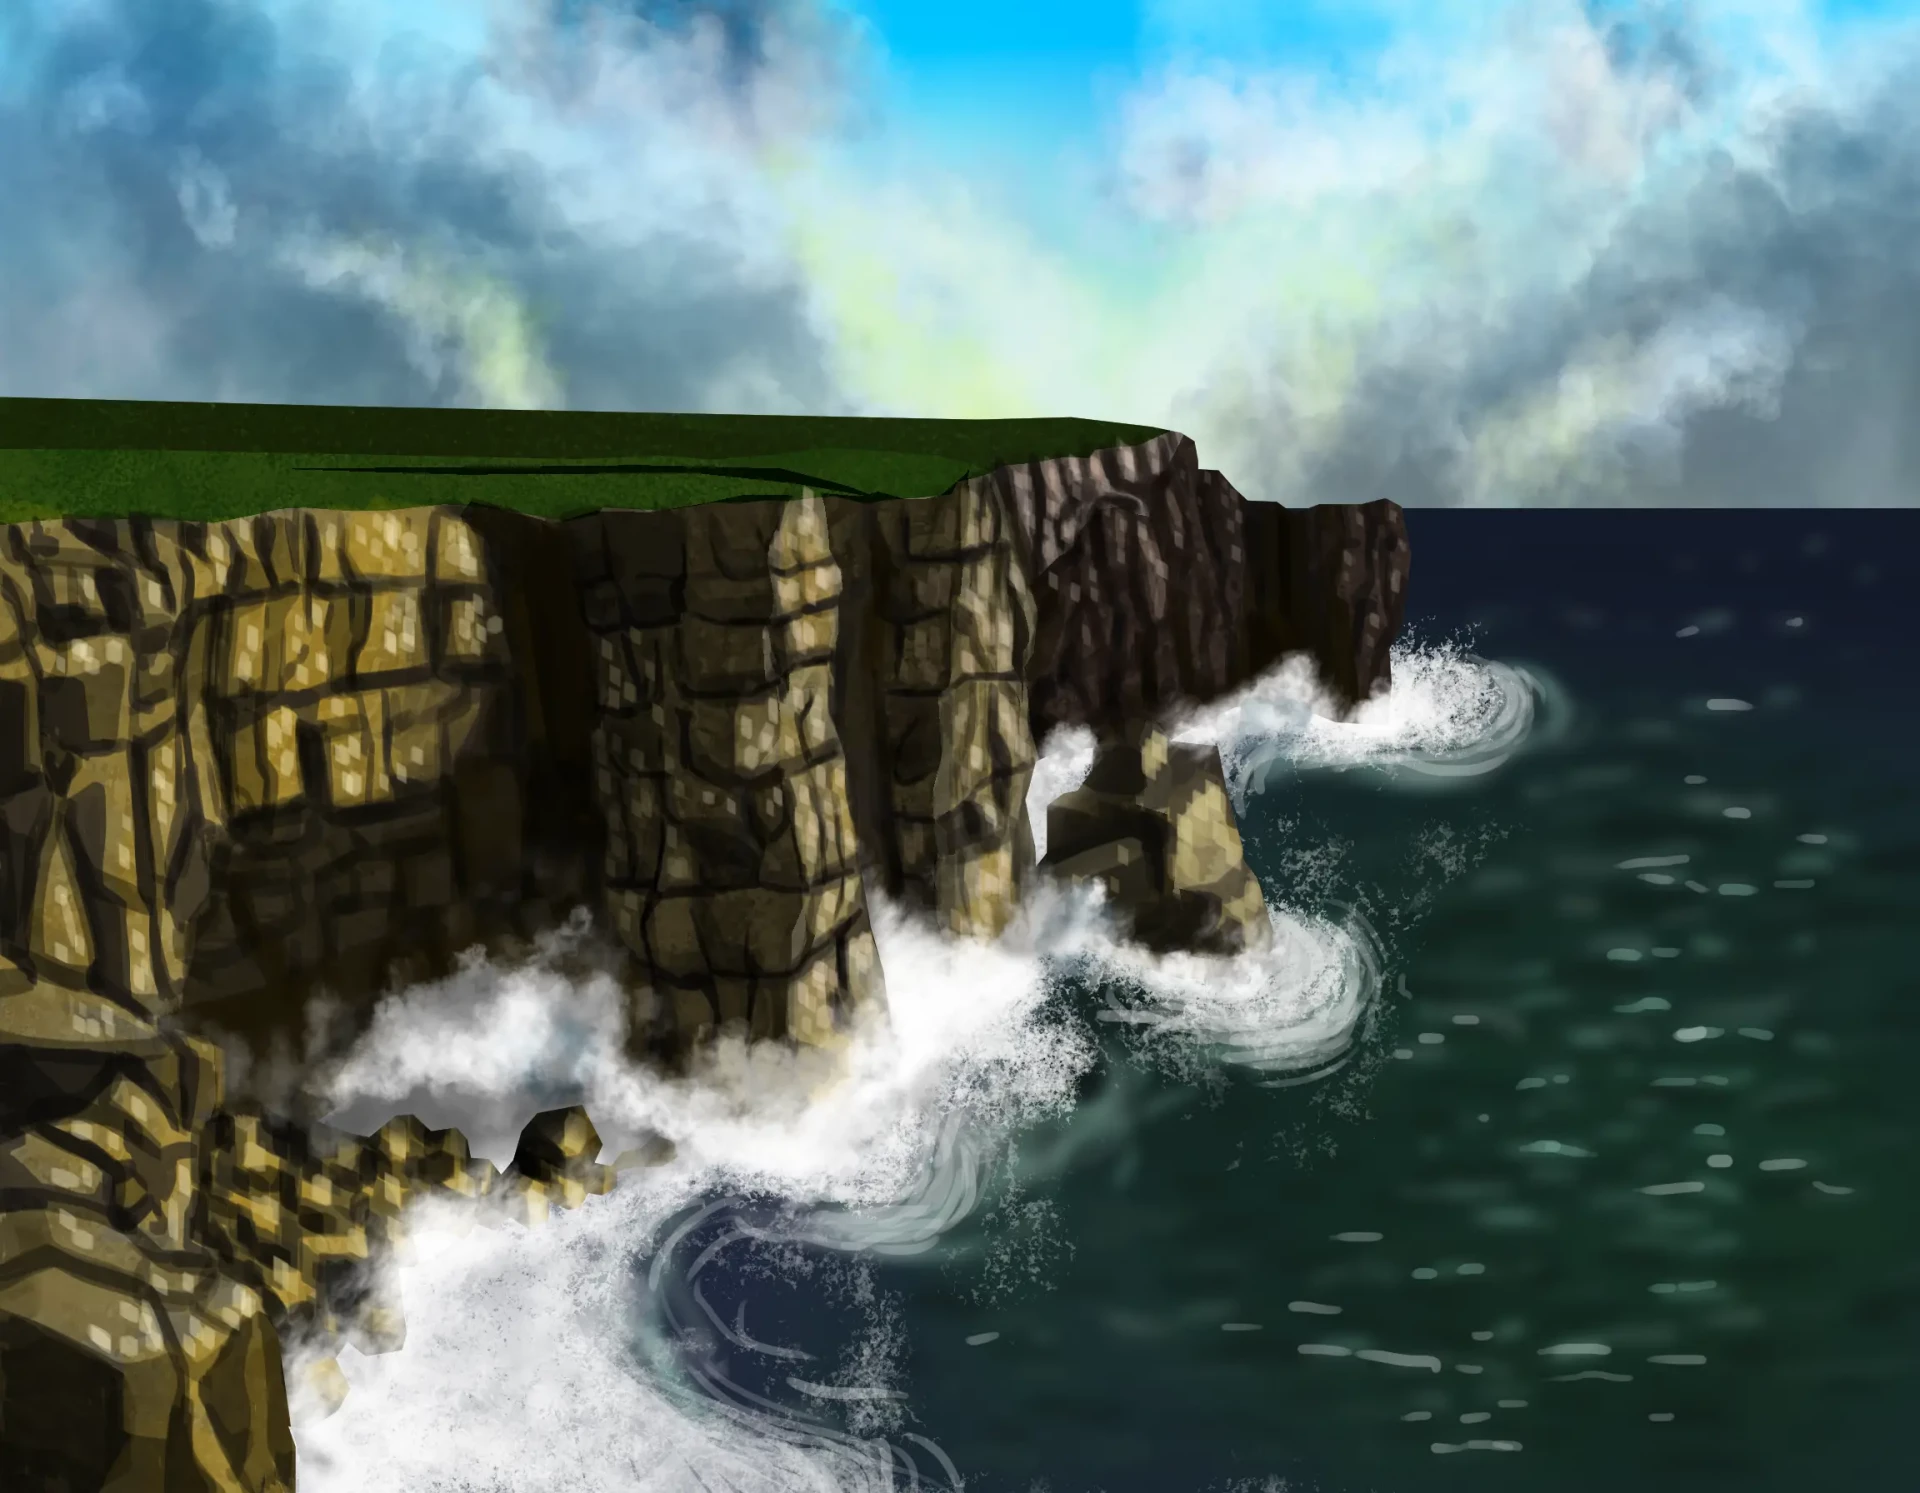
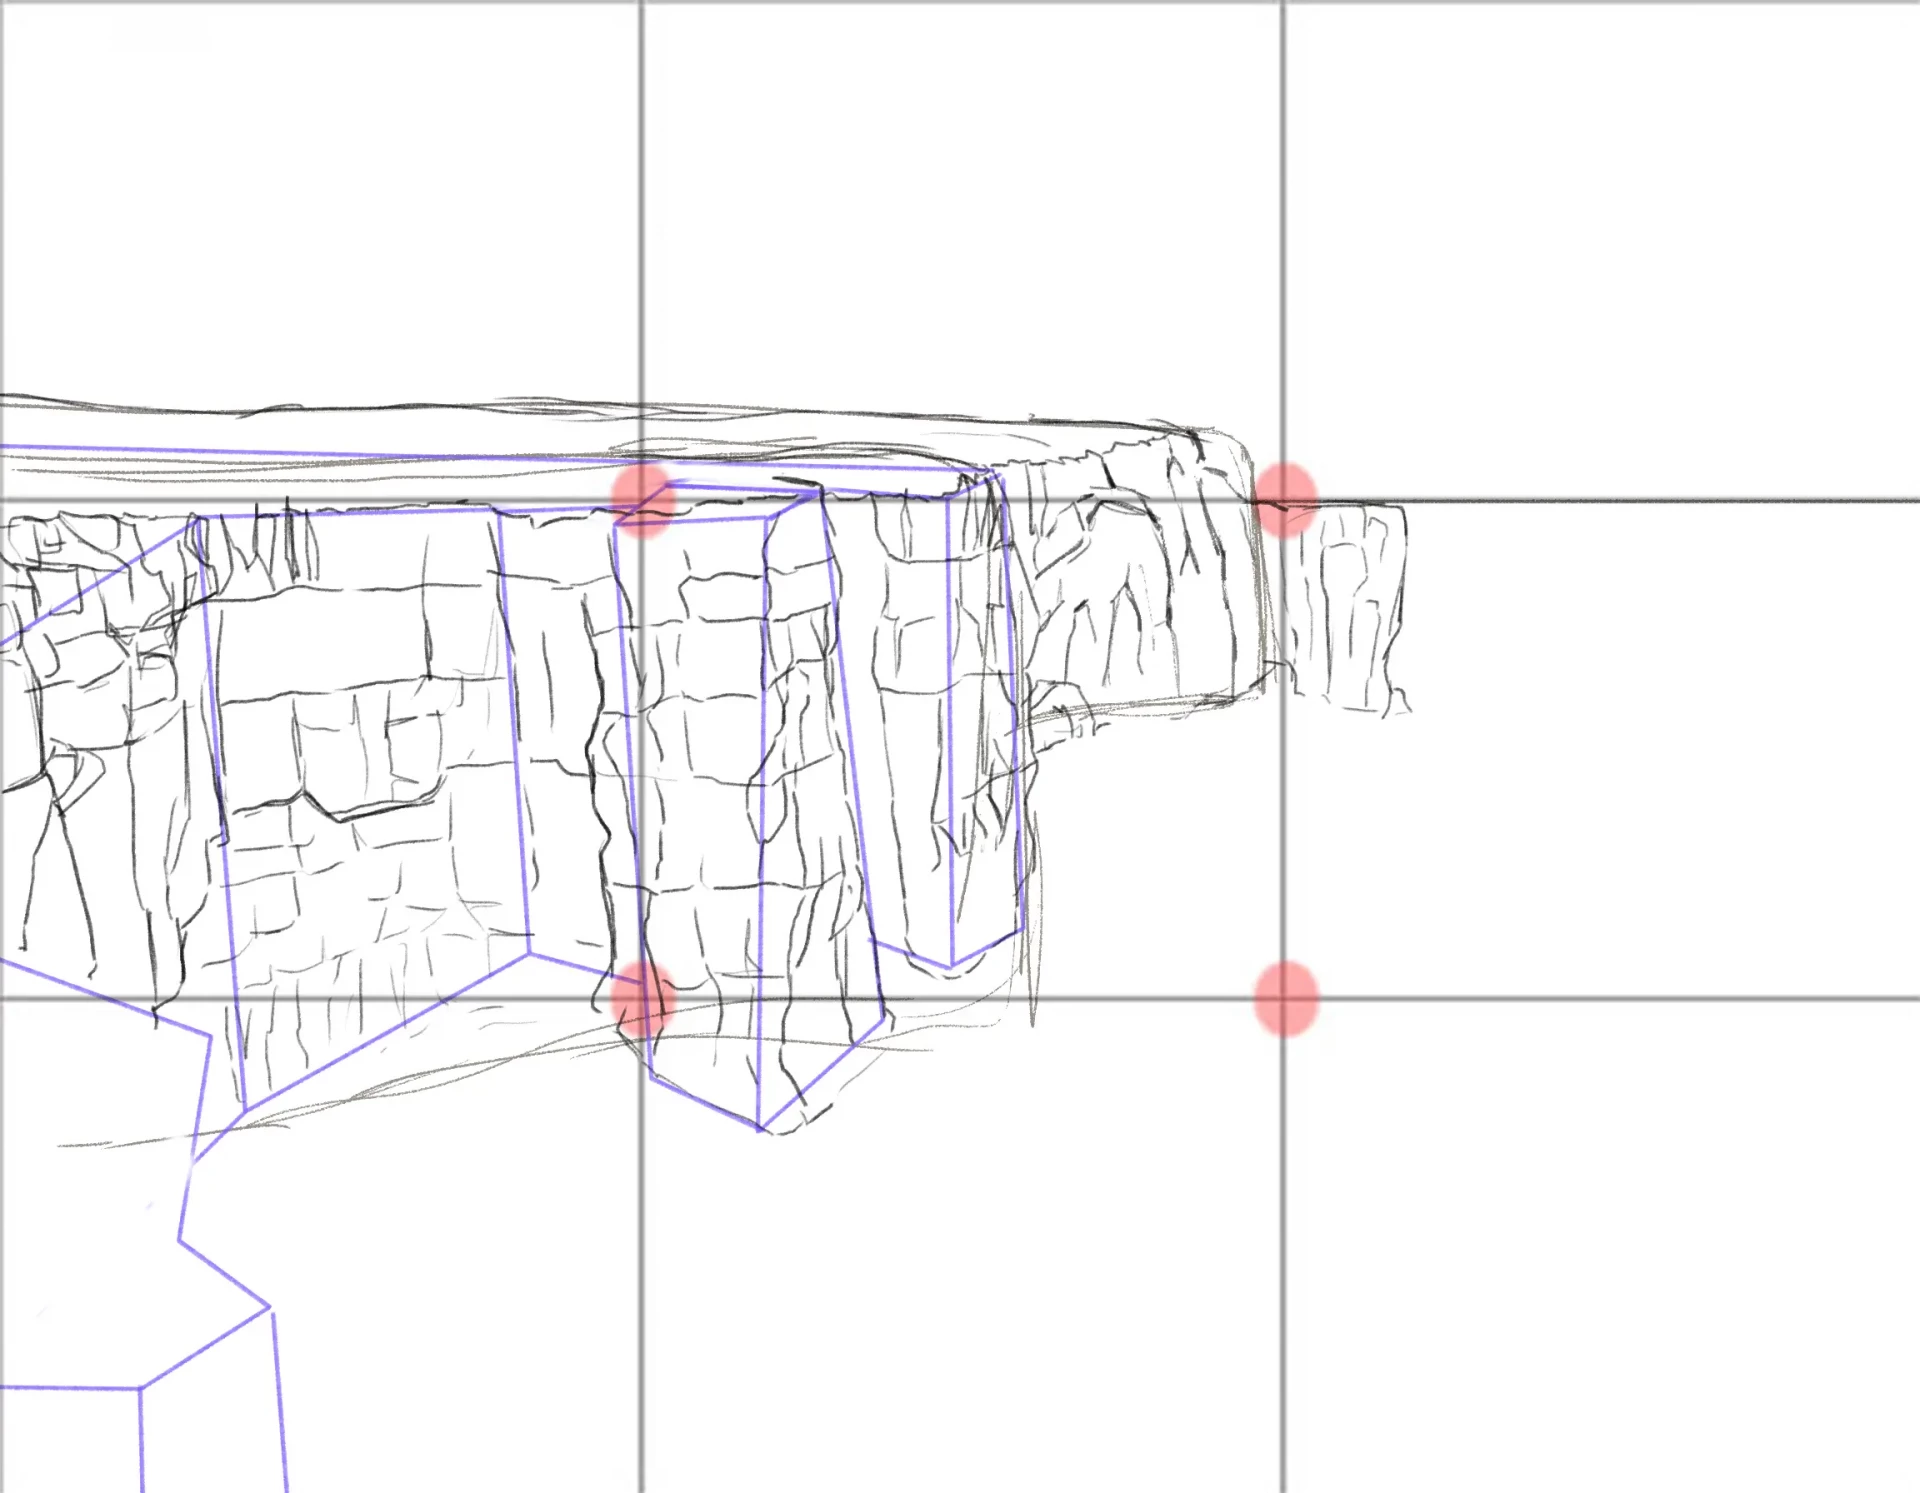
We will begin, as always, with our reliable rule of thirds, which will guide us in placing our main shapes while considering two principles. The first, the horizon line should be positioned on one of the horizontal lines, depending on the importance we want to give to the sky. The second, to capture attention, we will place elements on one of the red points.
By following these instructions, we will draw two large shapes starting from the point of interest and covering a part of the surface located below the upper strip.
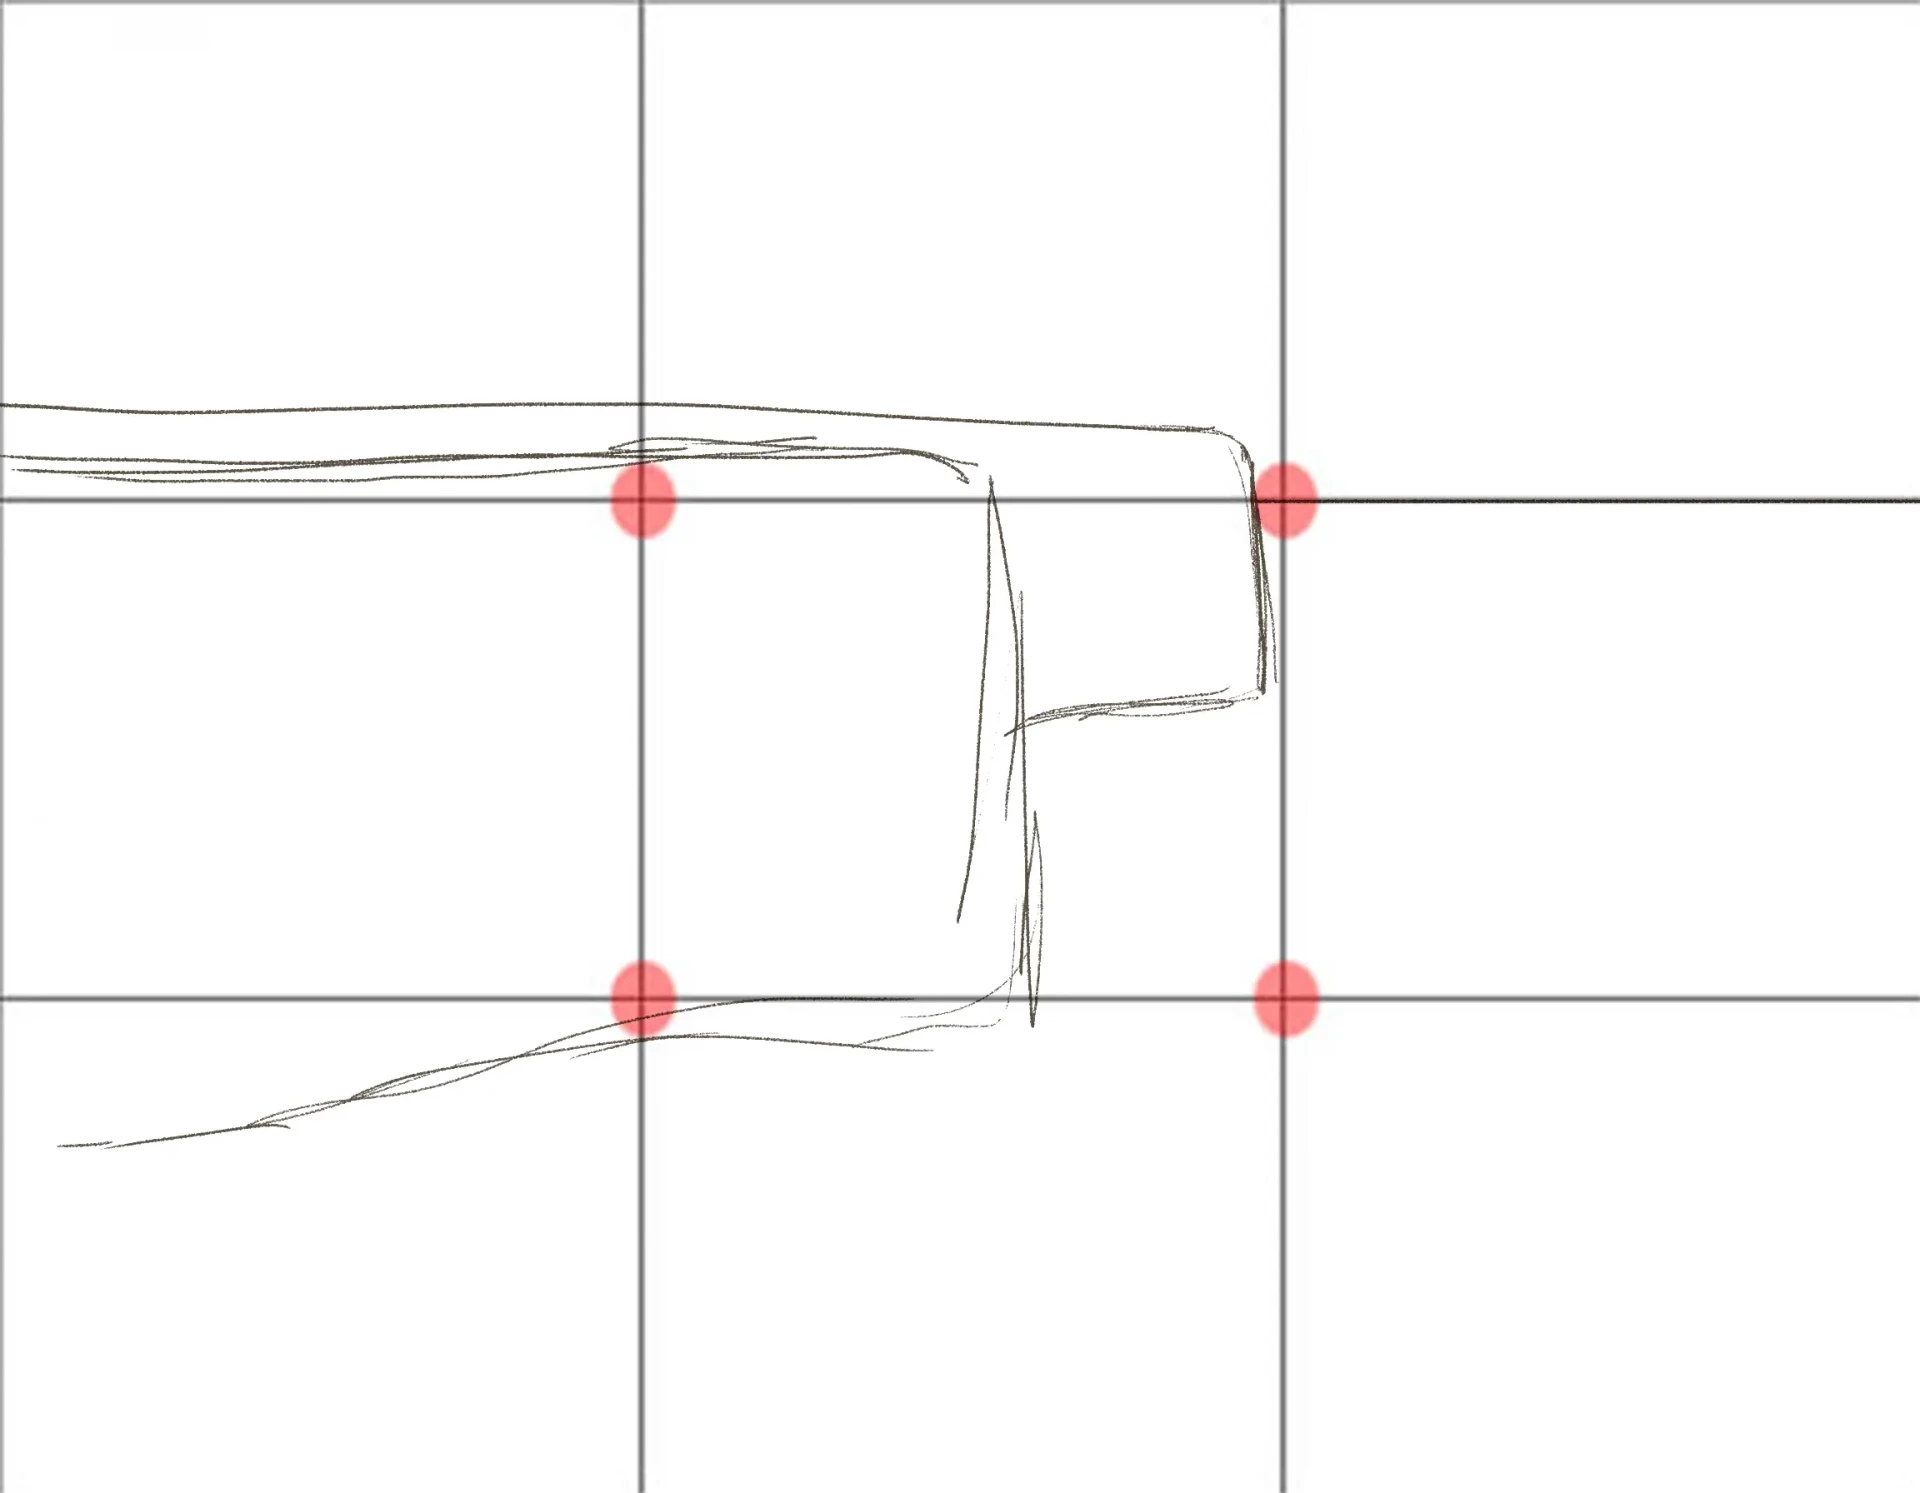
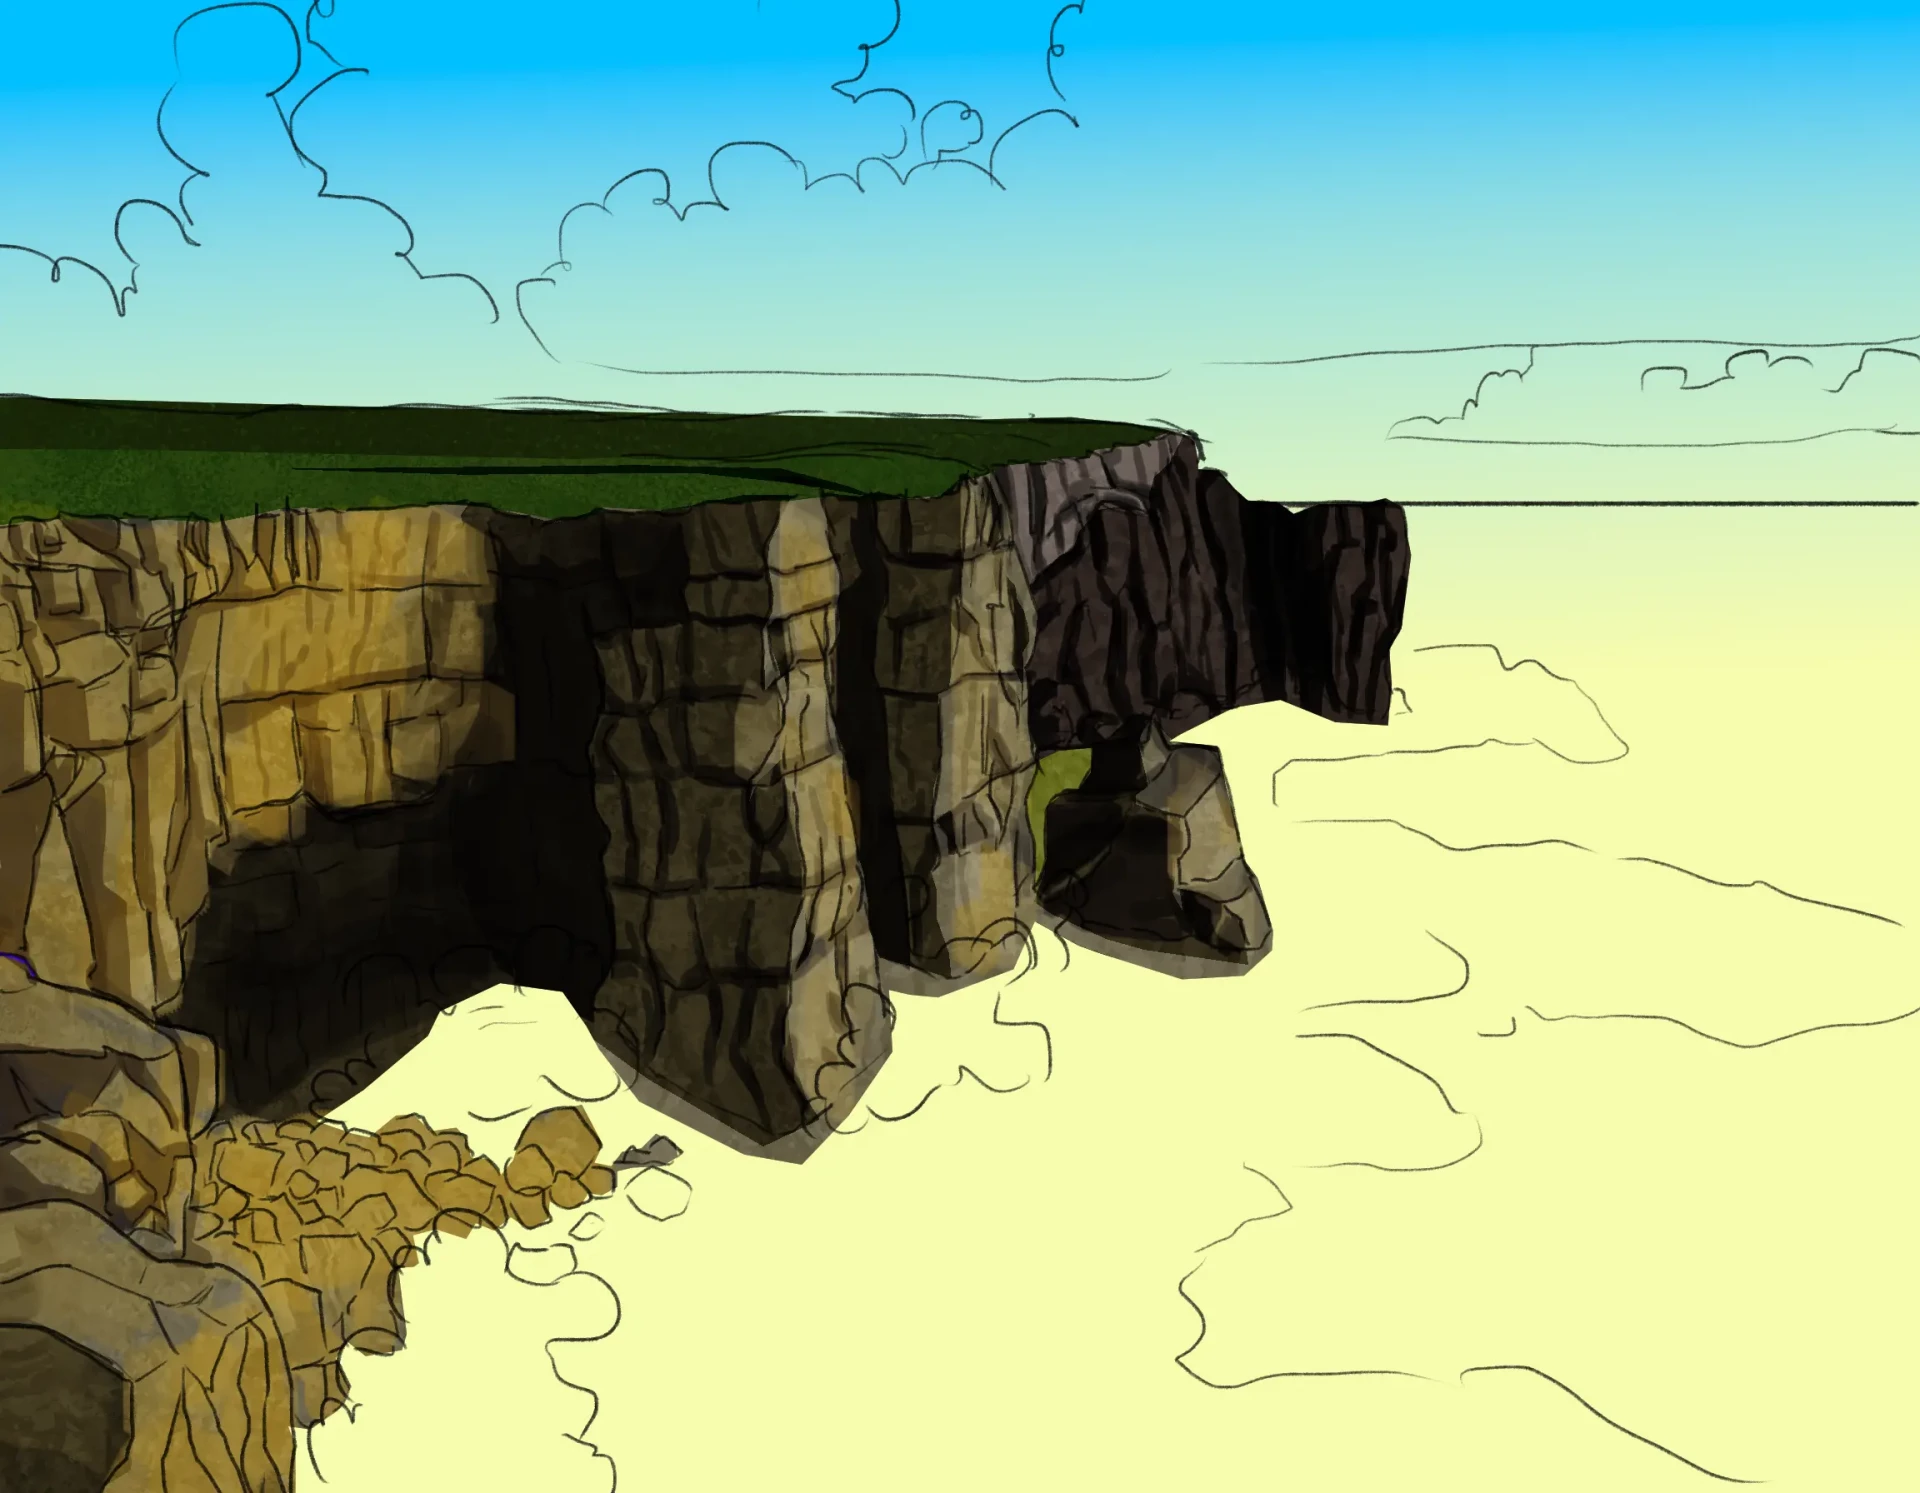
Here, we will understand that there are two planes: in the background, we will sketch a distant cliff, which we will define with broken and irregular, yet firm lines.
The second cliff is much closer to the viewer, and our intention is that it does not appear flat; on the contrary, we want it to have a dynamic appearance and interesting shapes. To achieve this, we will rely on geometry to structure the blocks on which we will execute the sketch.
Draw a sketch of a cliff
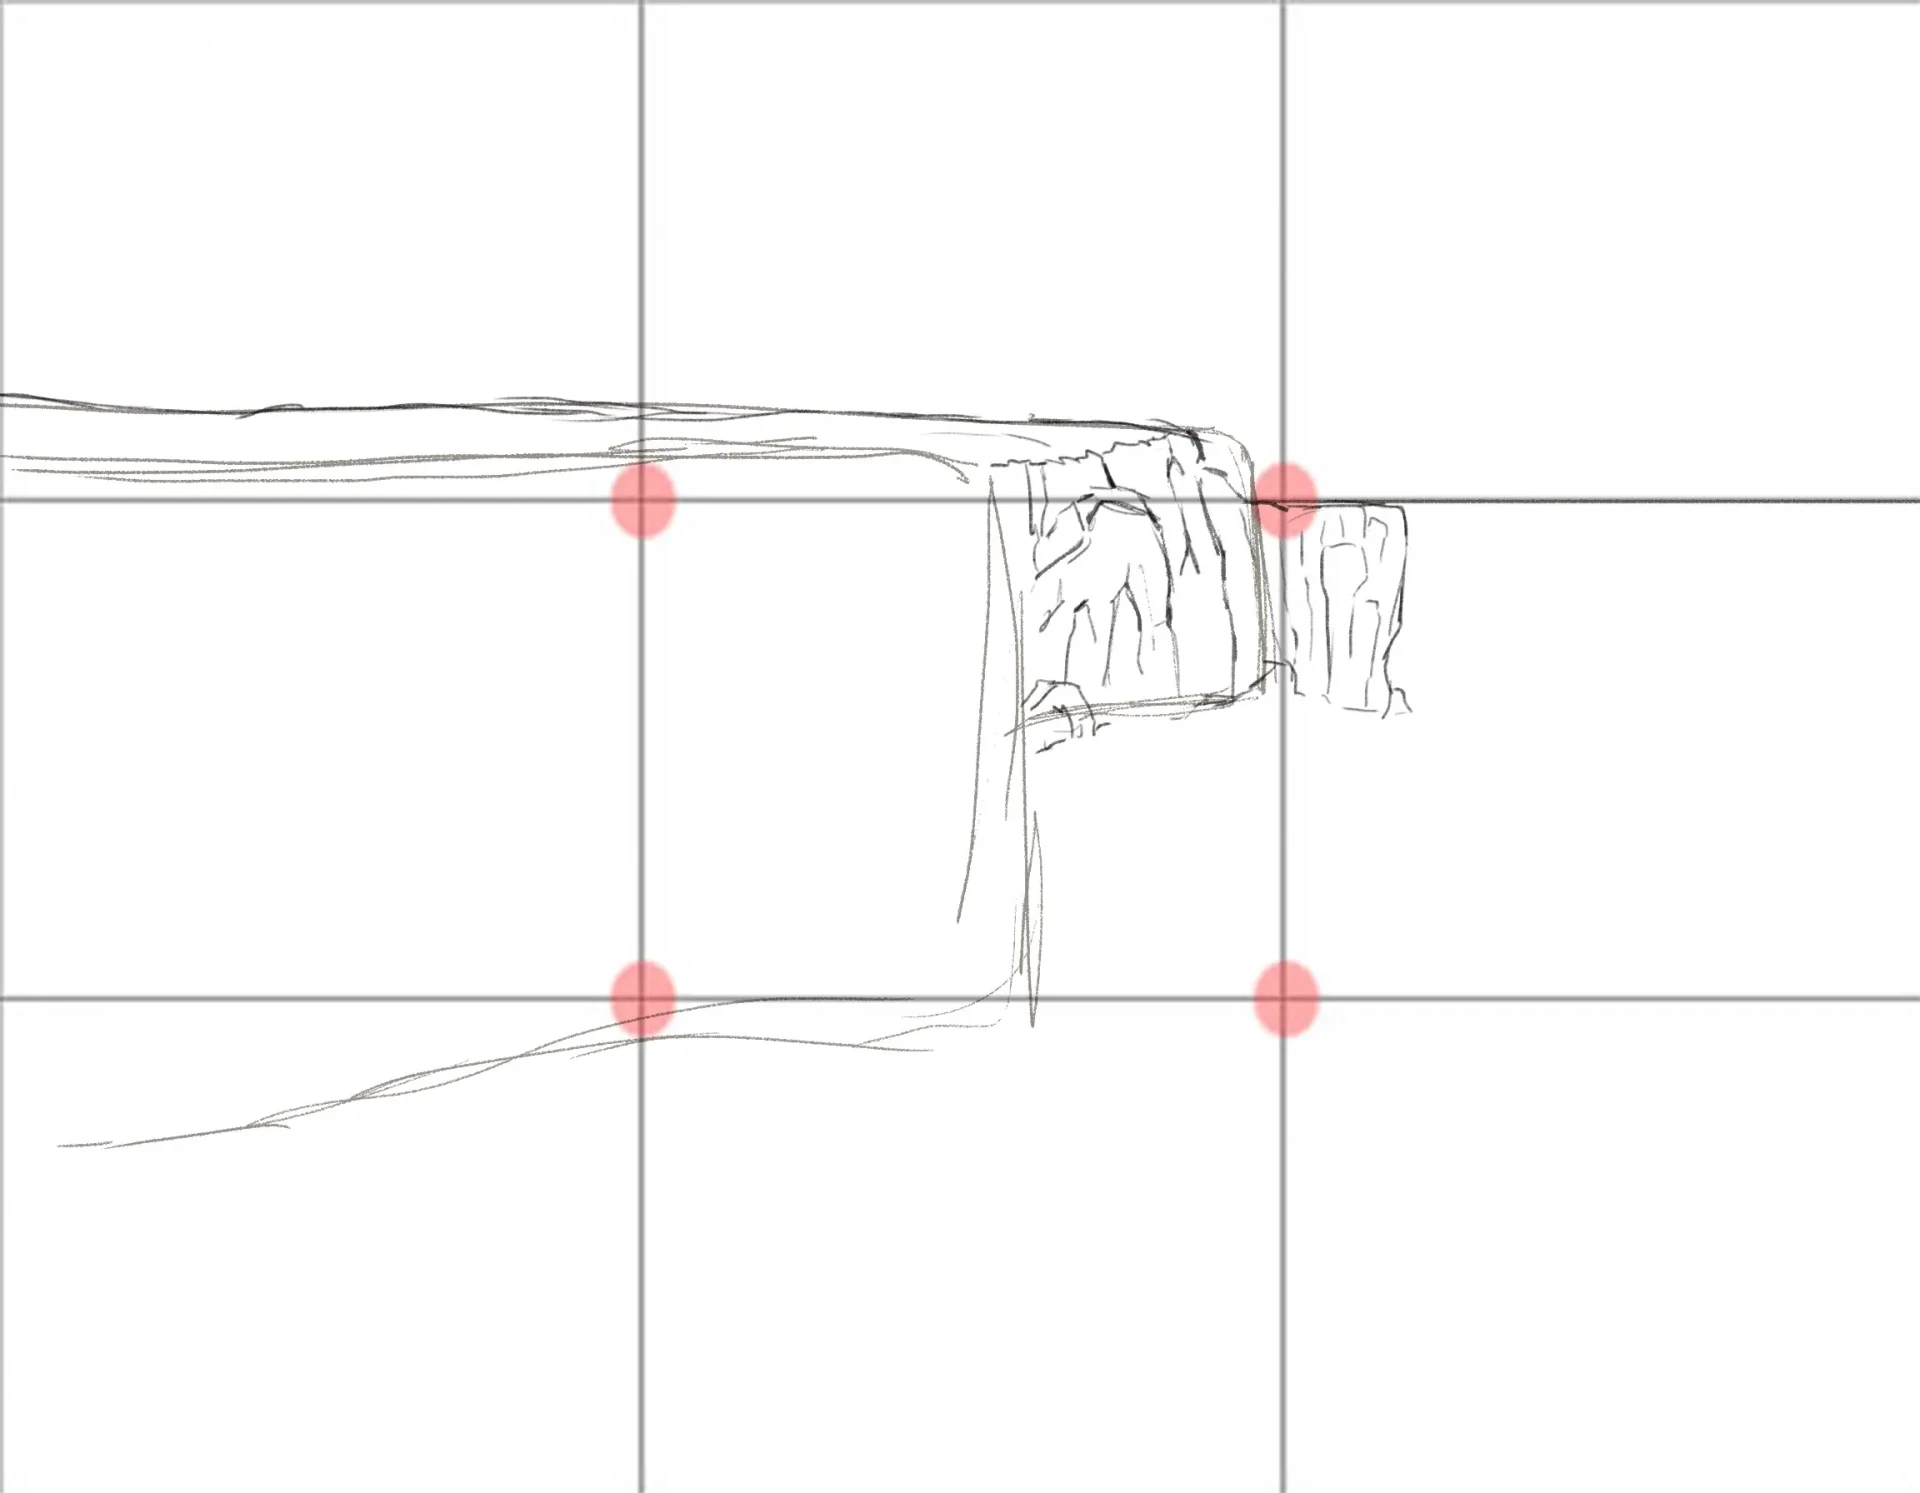
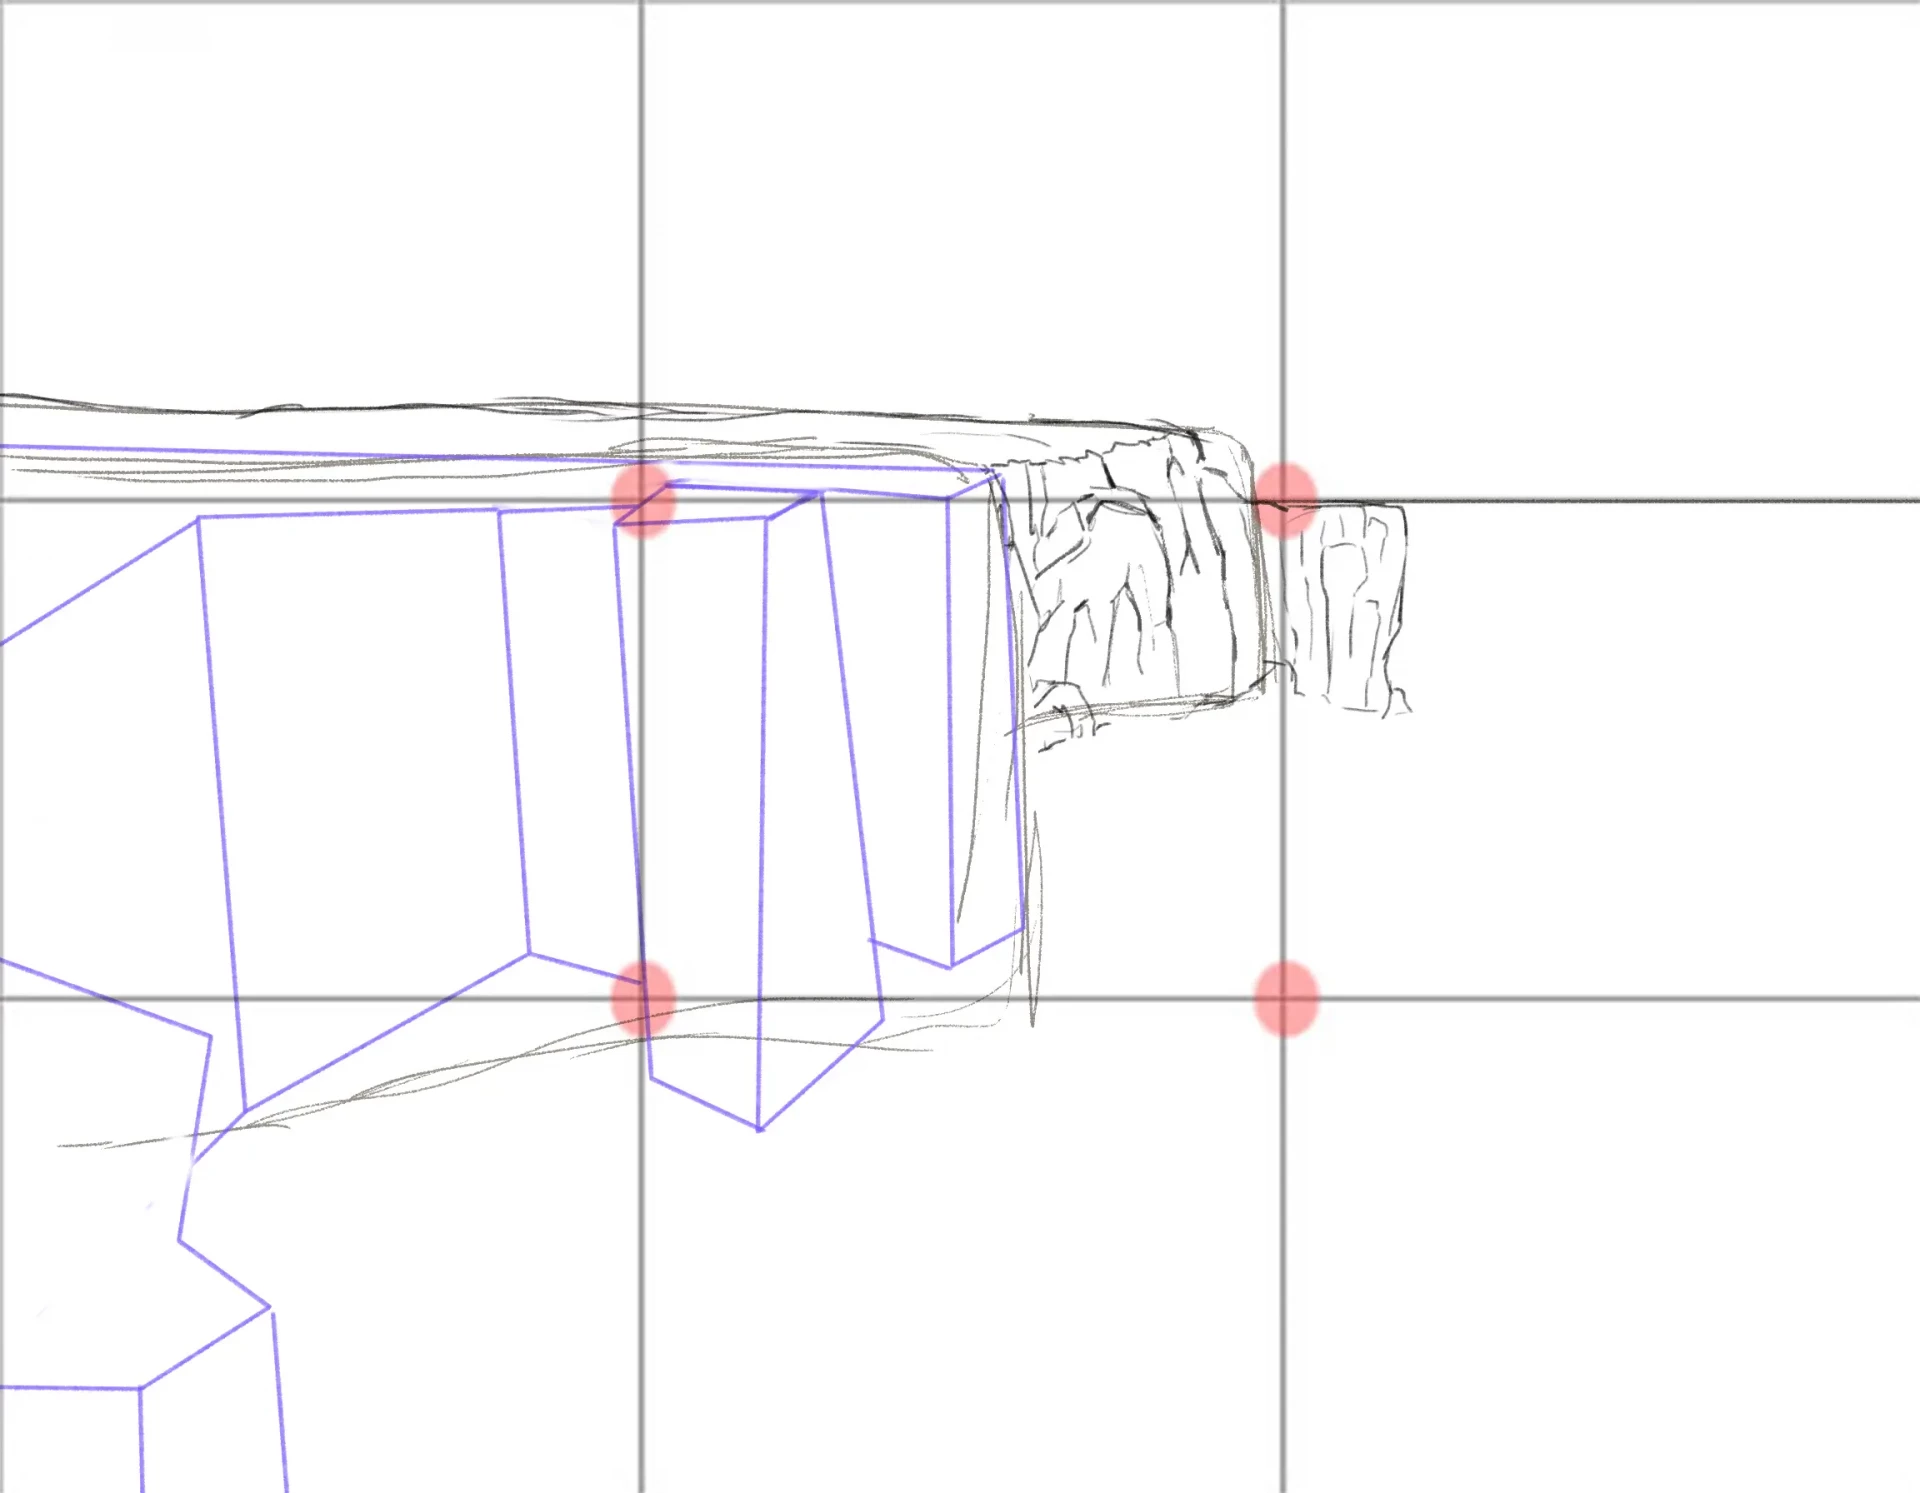
For the cliff in the foreground: start with geometric shapes (blocks) to emphasize its form and volume. Divide it into "levels" as if the cliff had stacked layers.
Add complementary elements: rocks of different sizes protruding from the water, uneven terrain, and of course the waves hitting the rocks.
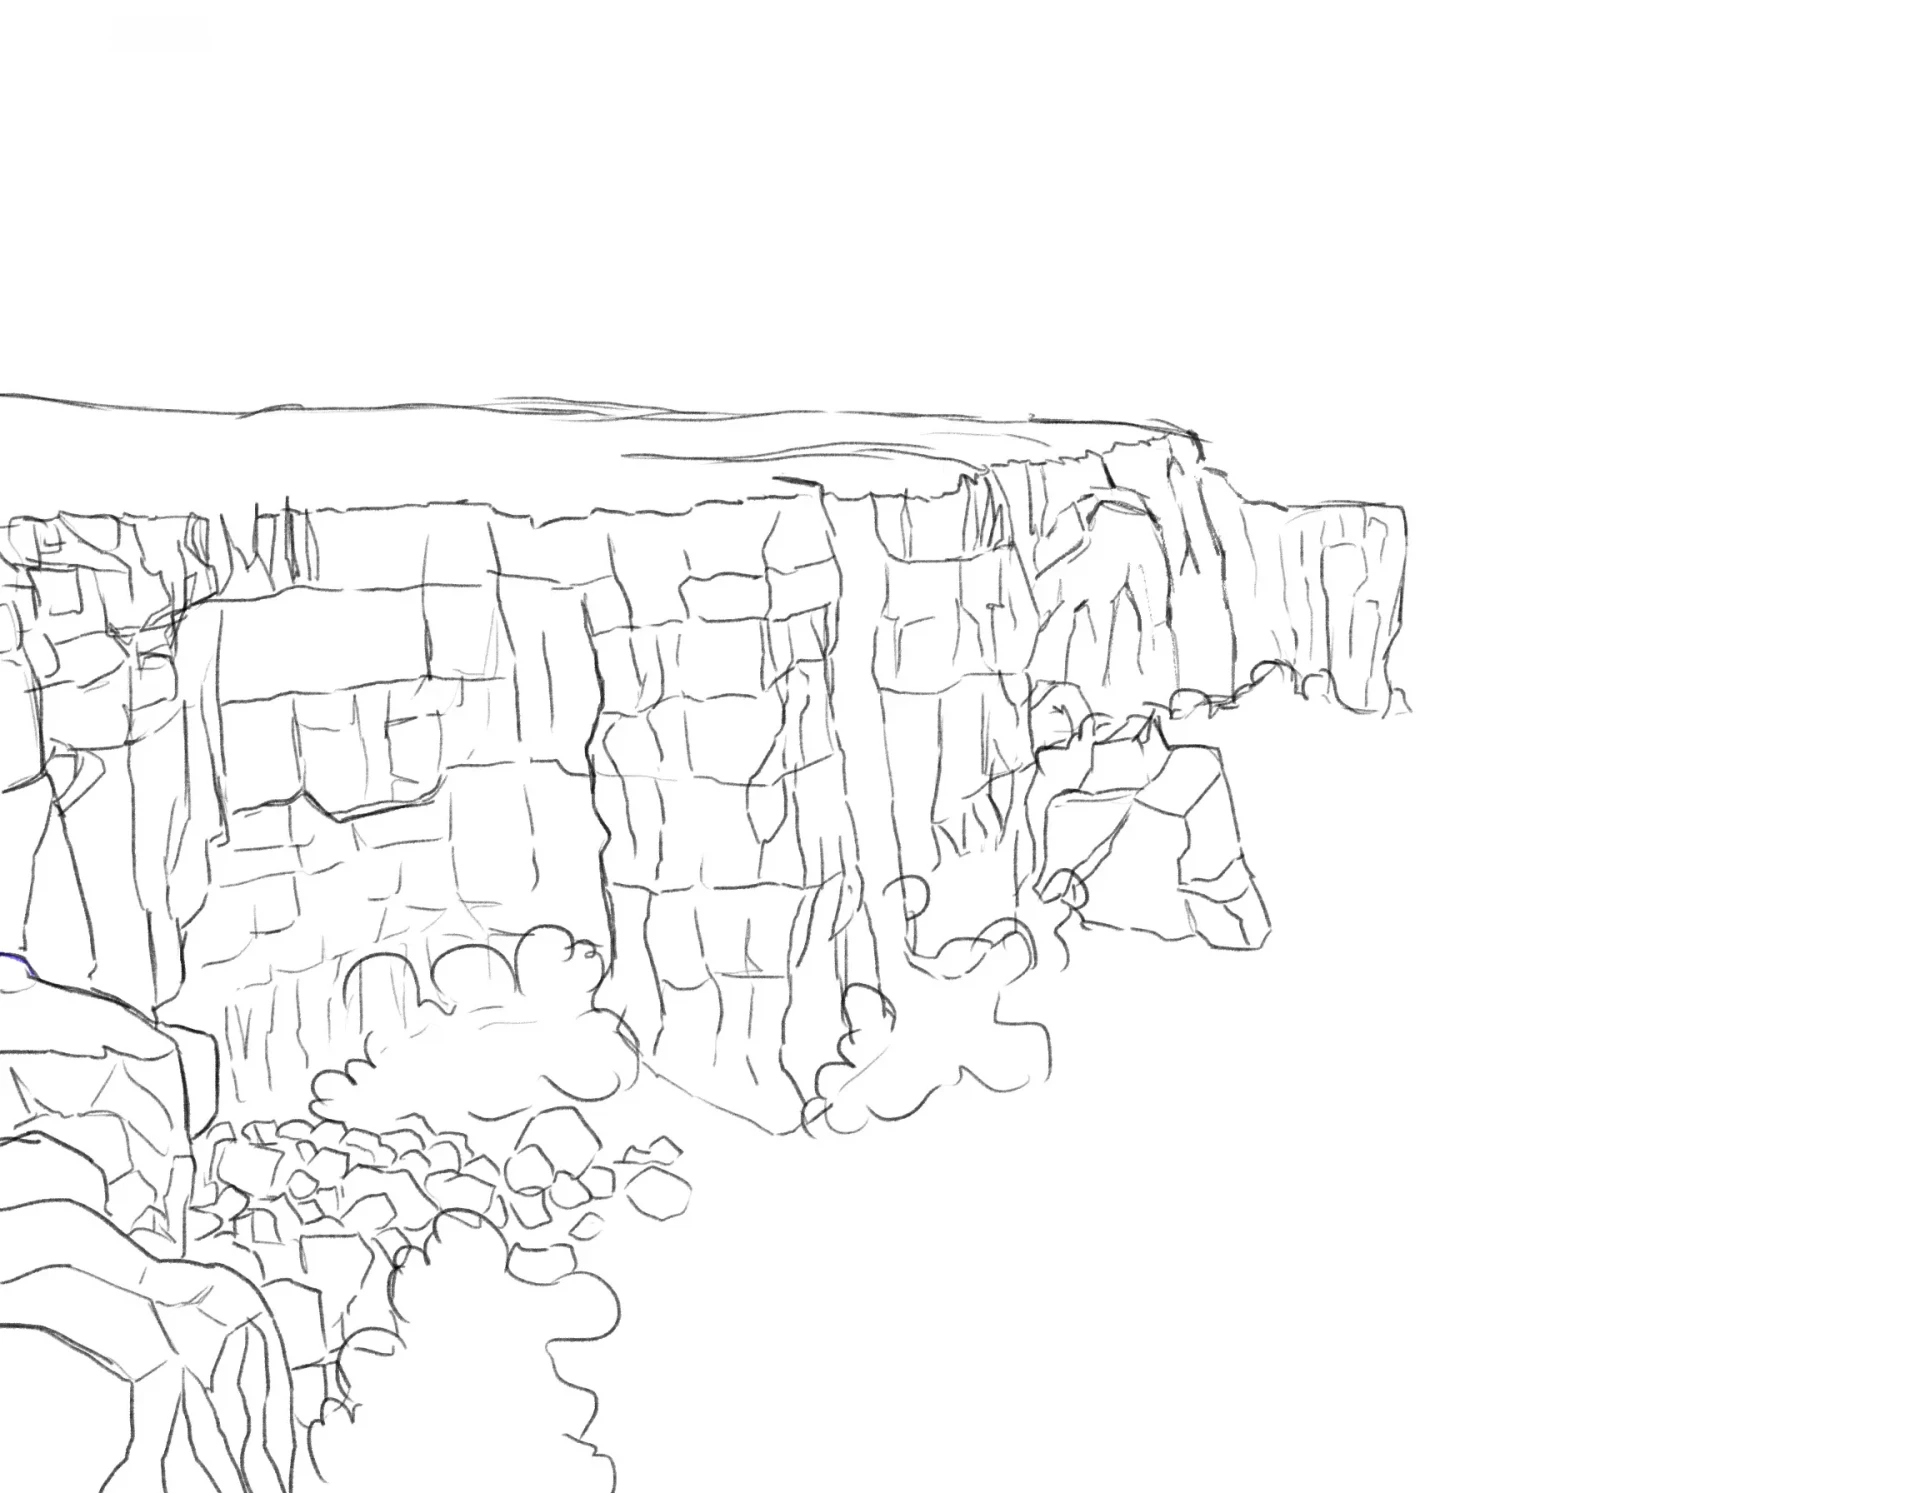
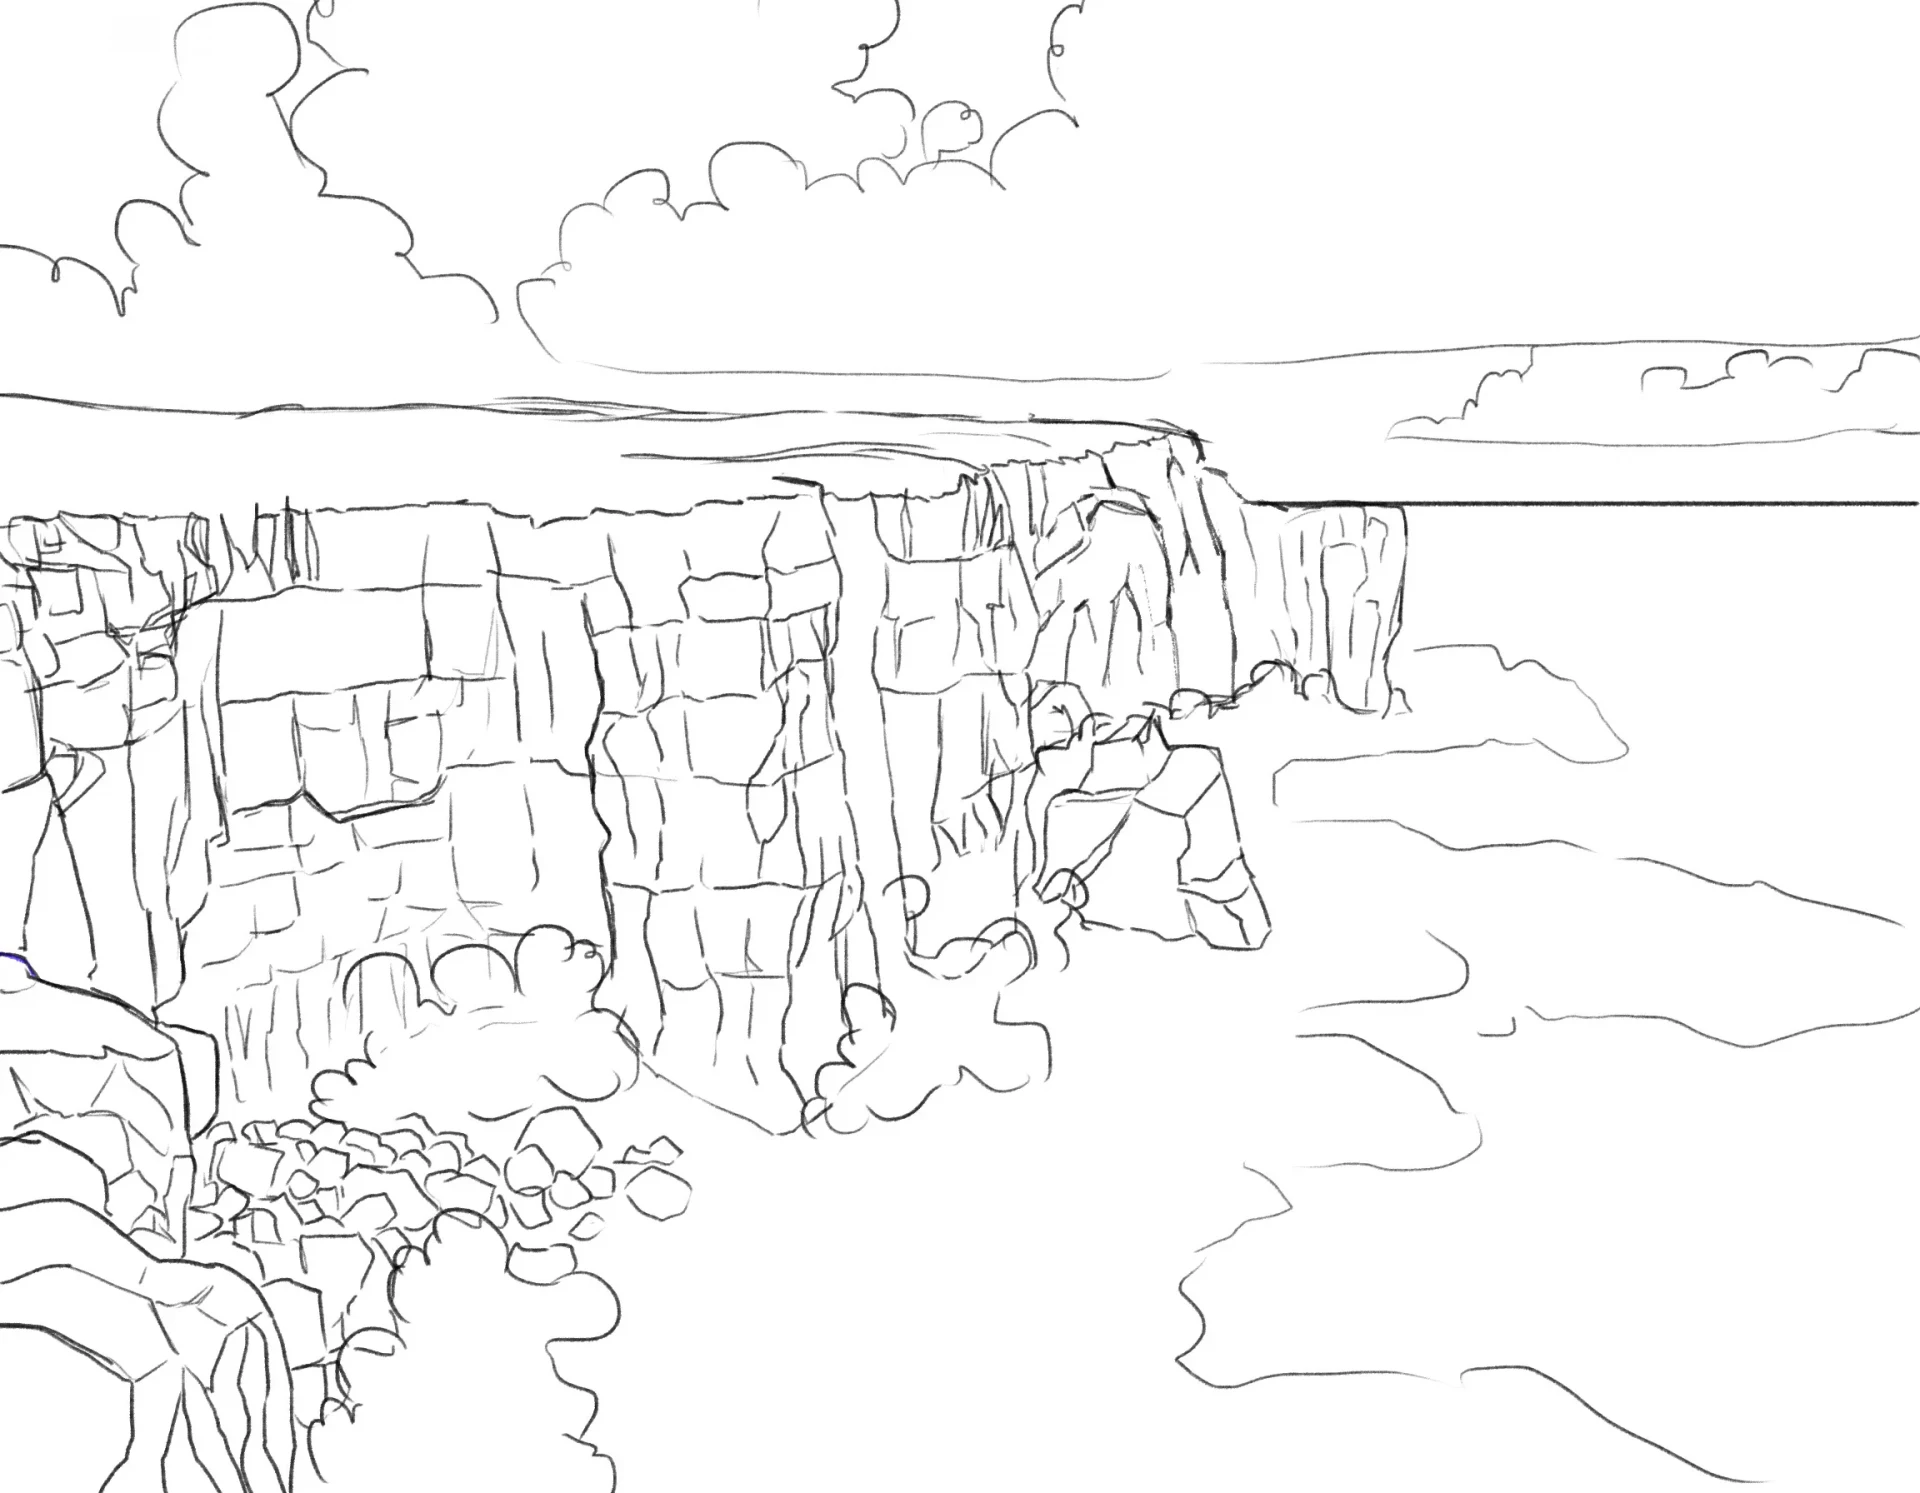
Draw the horizon line: remember that the sea looks flat when viewed from afar, so avoid adding undulations there. Add heavy, abundant clouds: the atmosphere is ripe for a storm.
Add color to the drawing
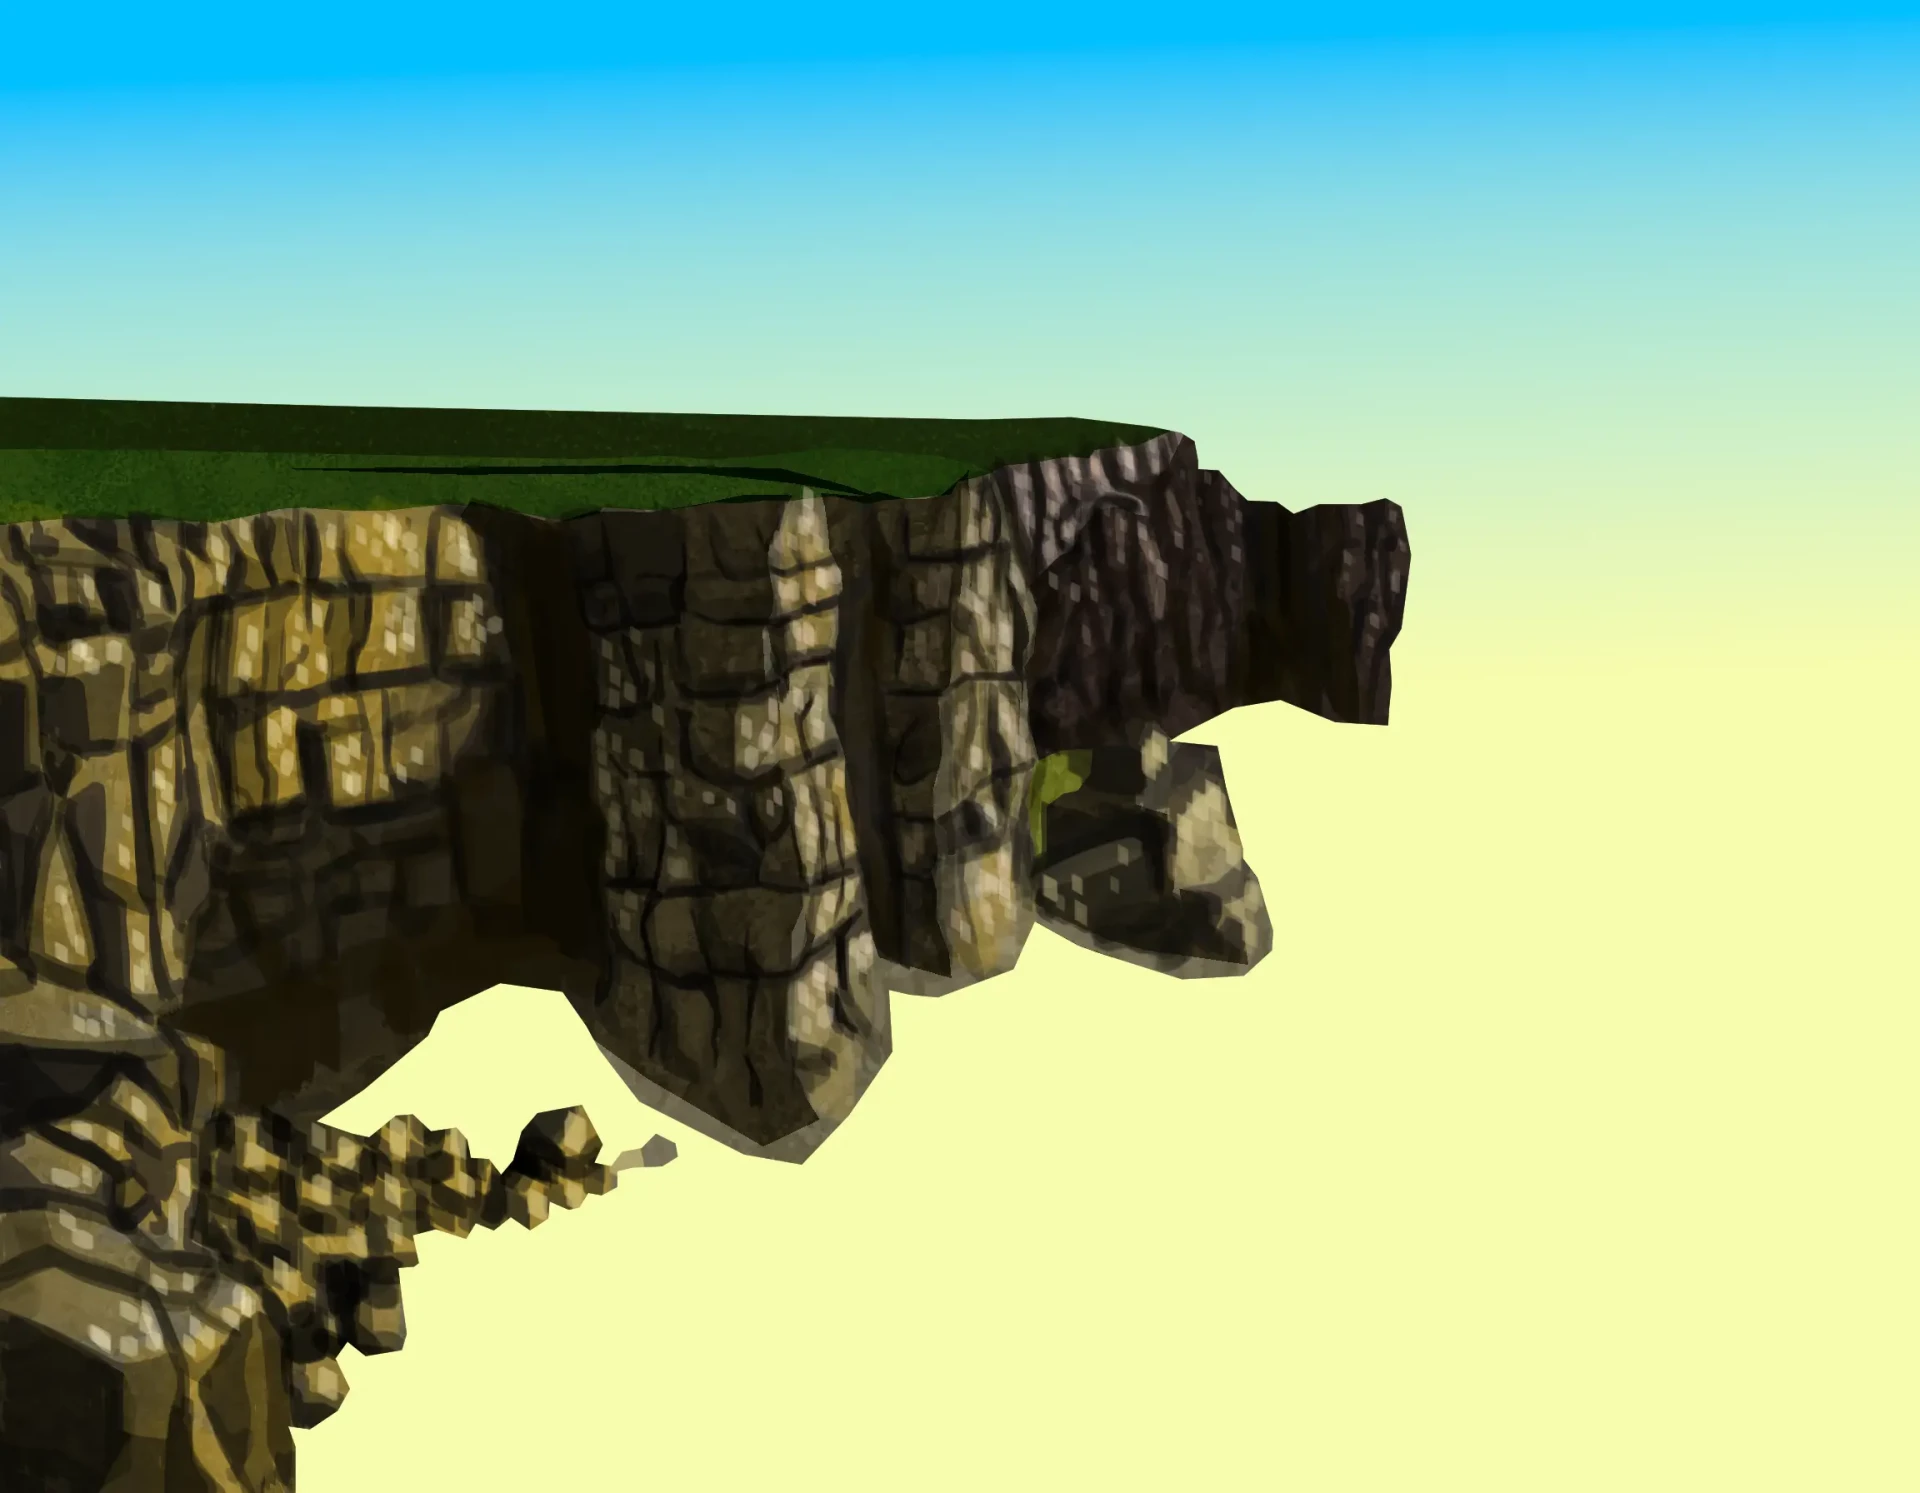
The sky will always be our starting point, as it is very important to get rid of the white, which can sometimes inhibit us. For this landscape, we will create a gradient from blue to yellow, although this may vary; you will understand later why we made this choice.
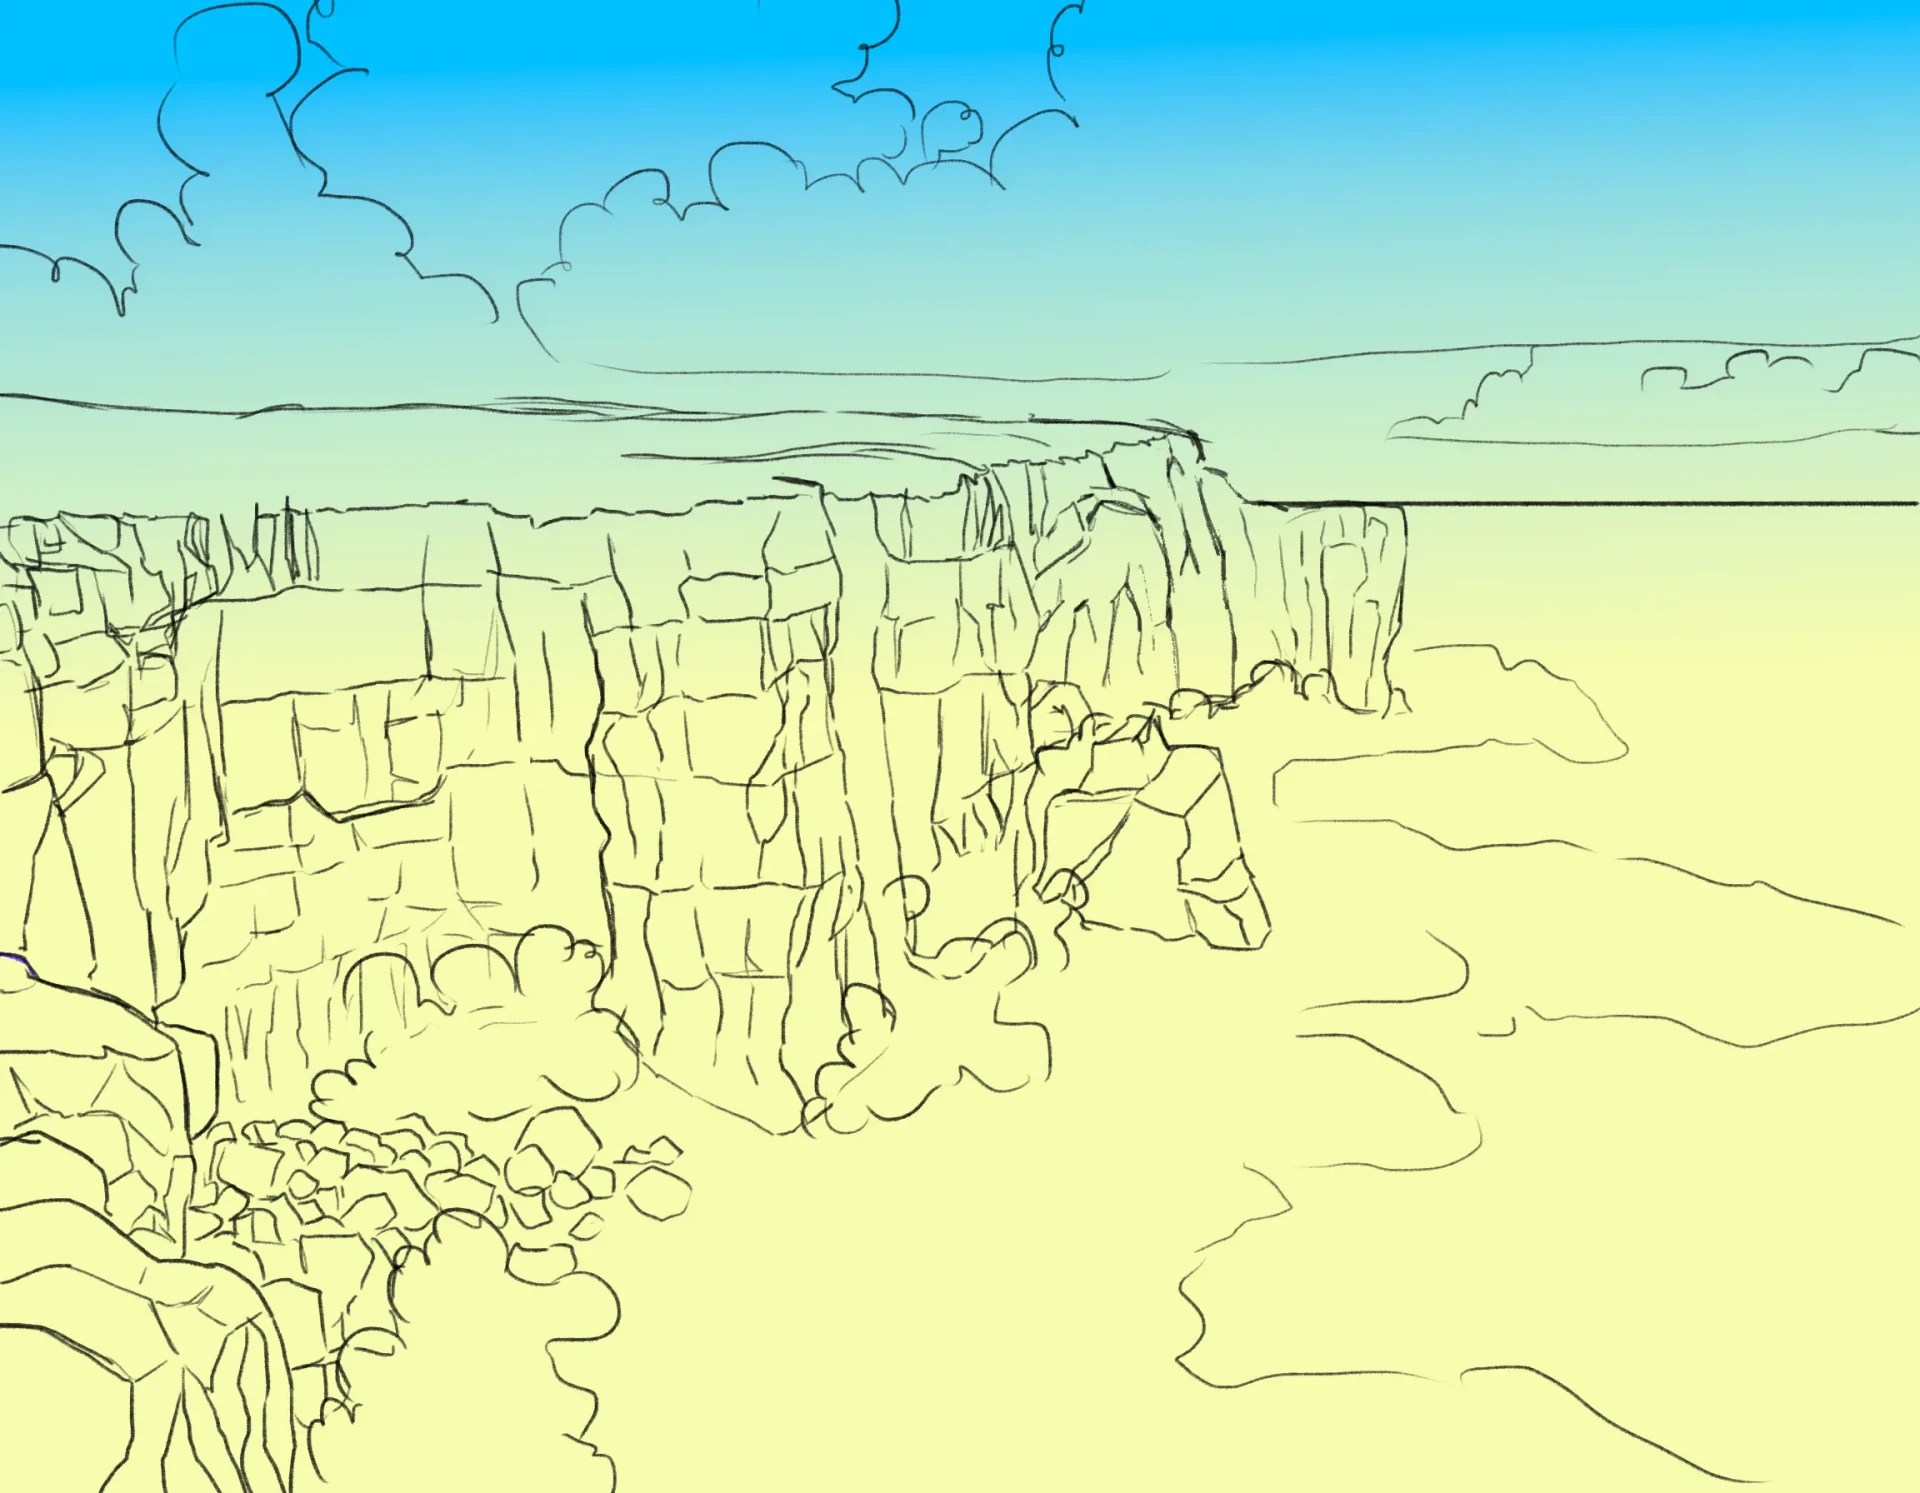
The first step for our rock formation involves assigning the base colors: a lightly saturated ochre hue will be suitable for the foreground, the one we drew using blocks, while for the most distant cliff, we will use a darker tone.
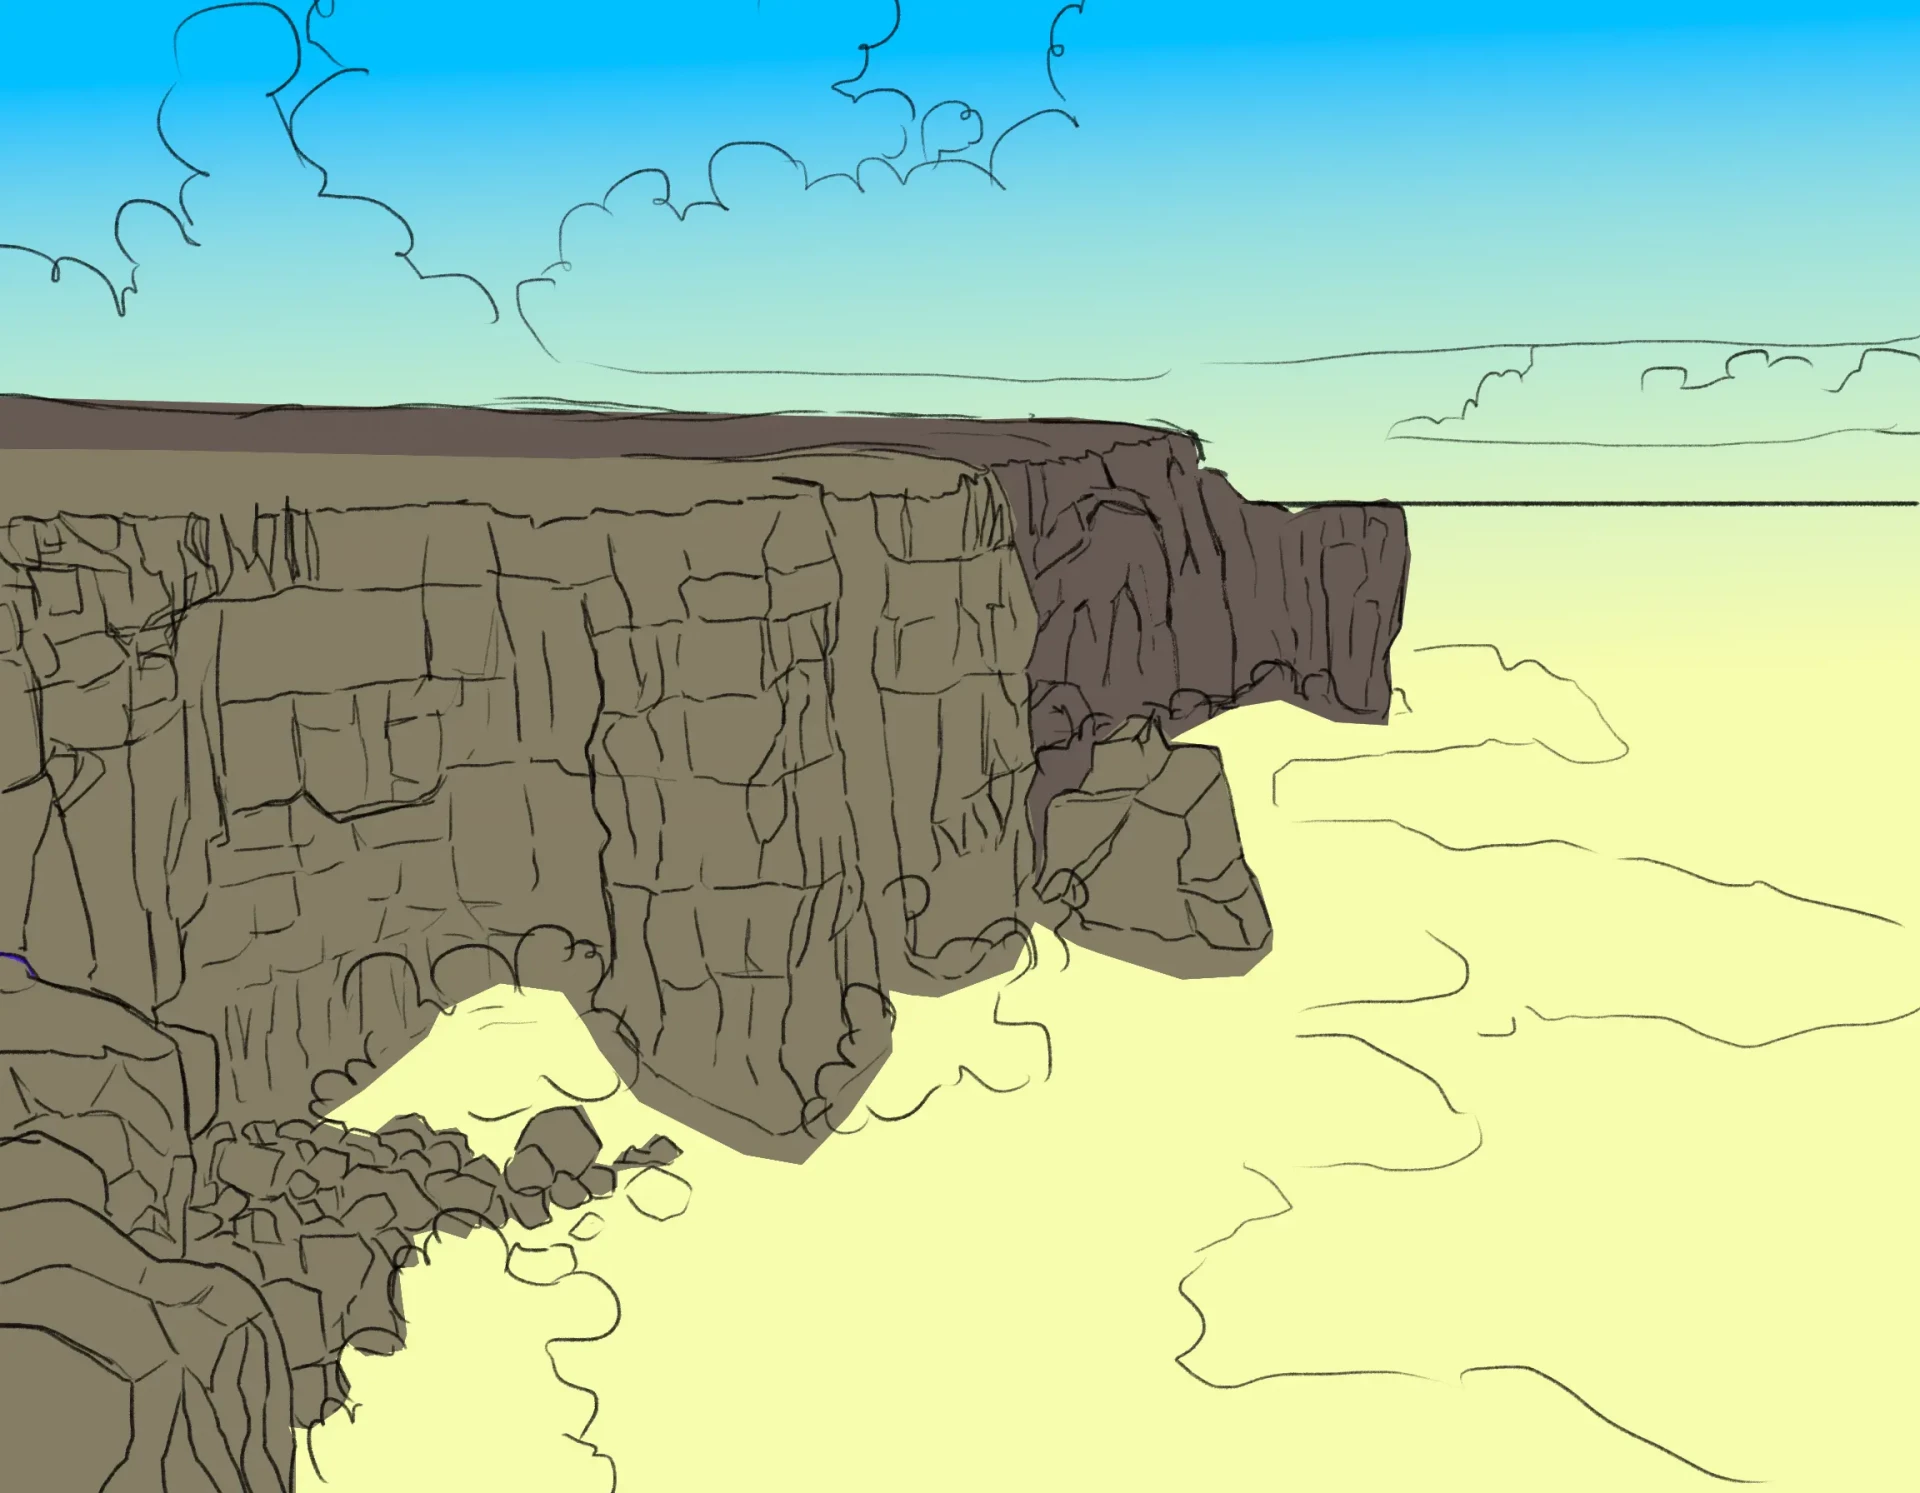
Apply base colors: a lightly saturated ochre for the foreground, a darker tone for the distant cliff. Identify areas of shadow: as light comes from an angle (often behind clouds here), locate where the rock is less illuminated.

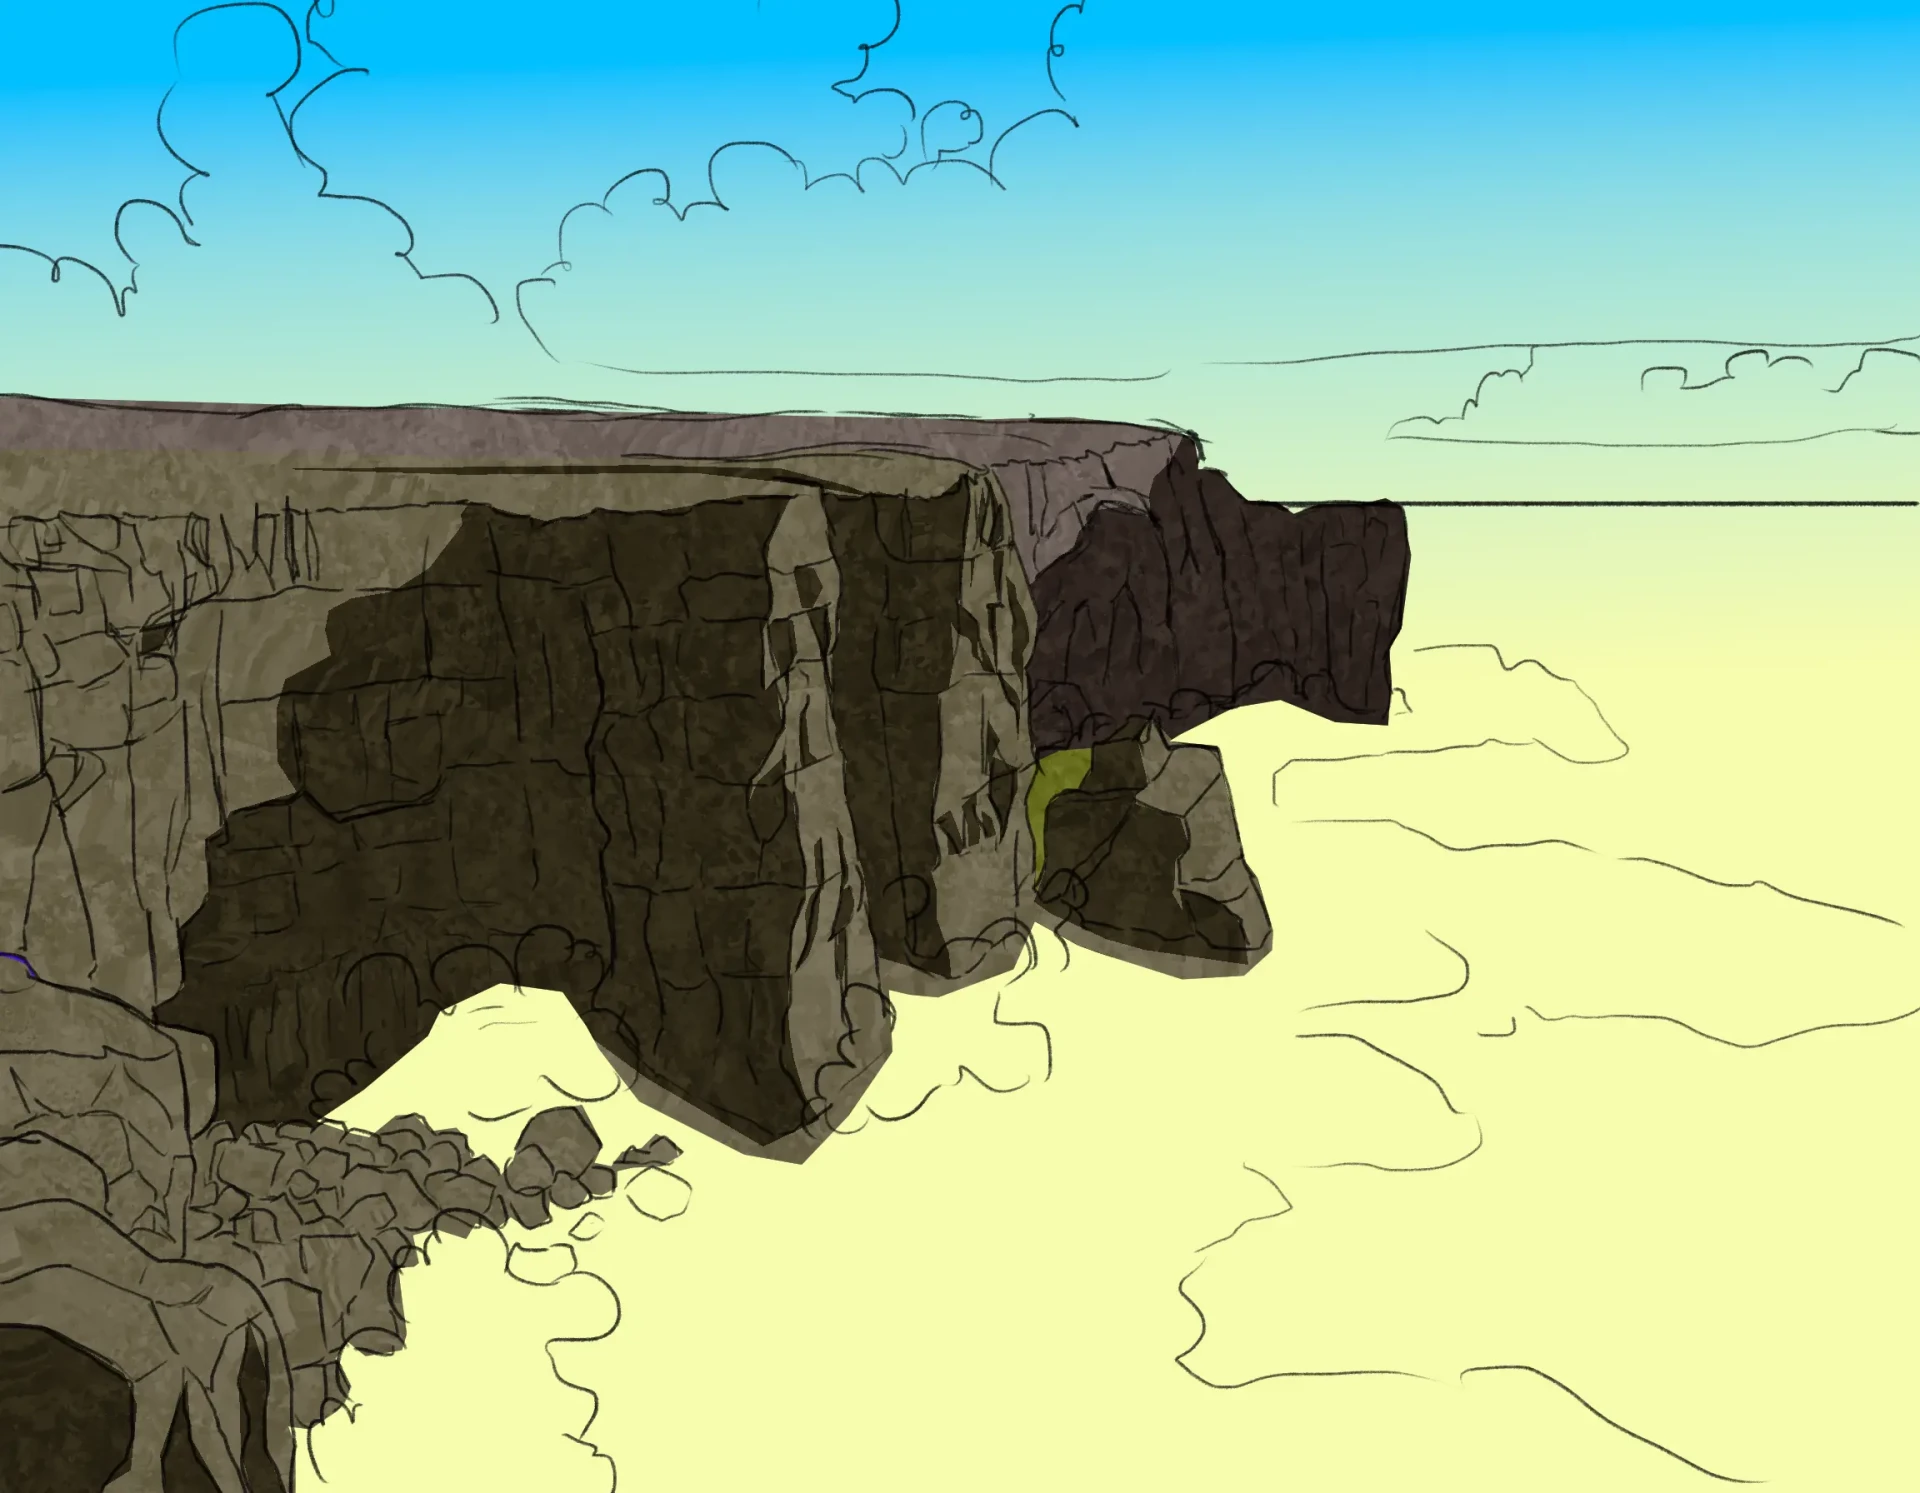
Add texture
Add texture: using a suitable brush, evenly cover the surface.
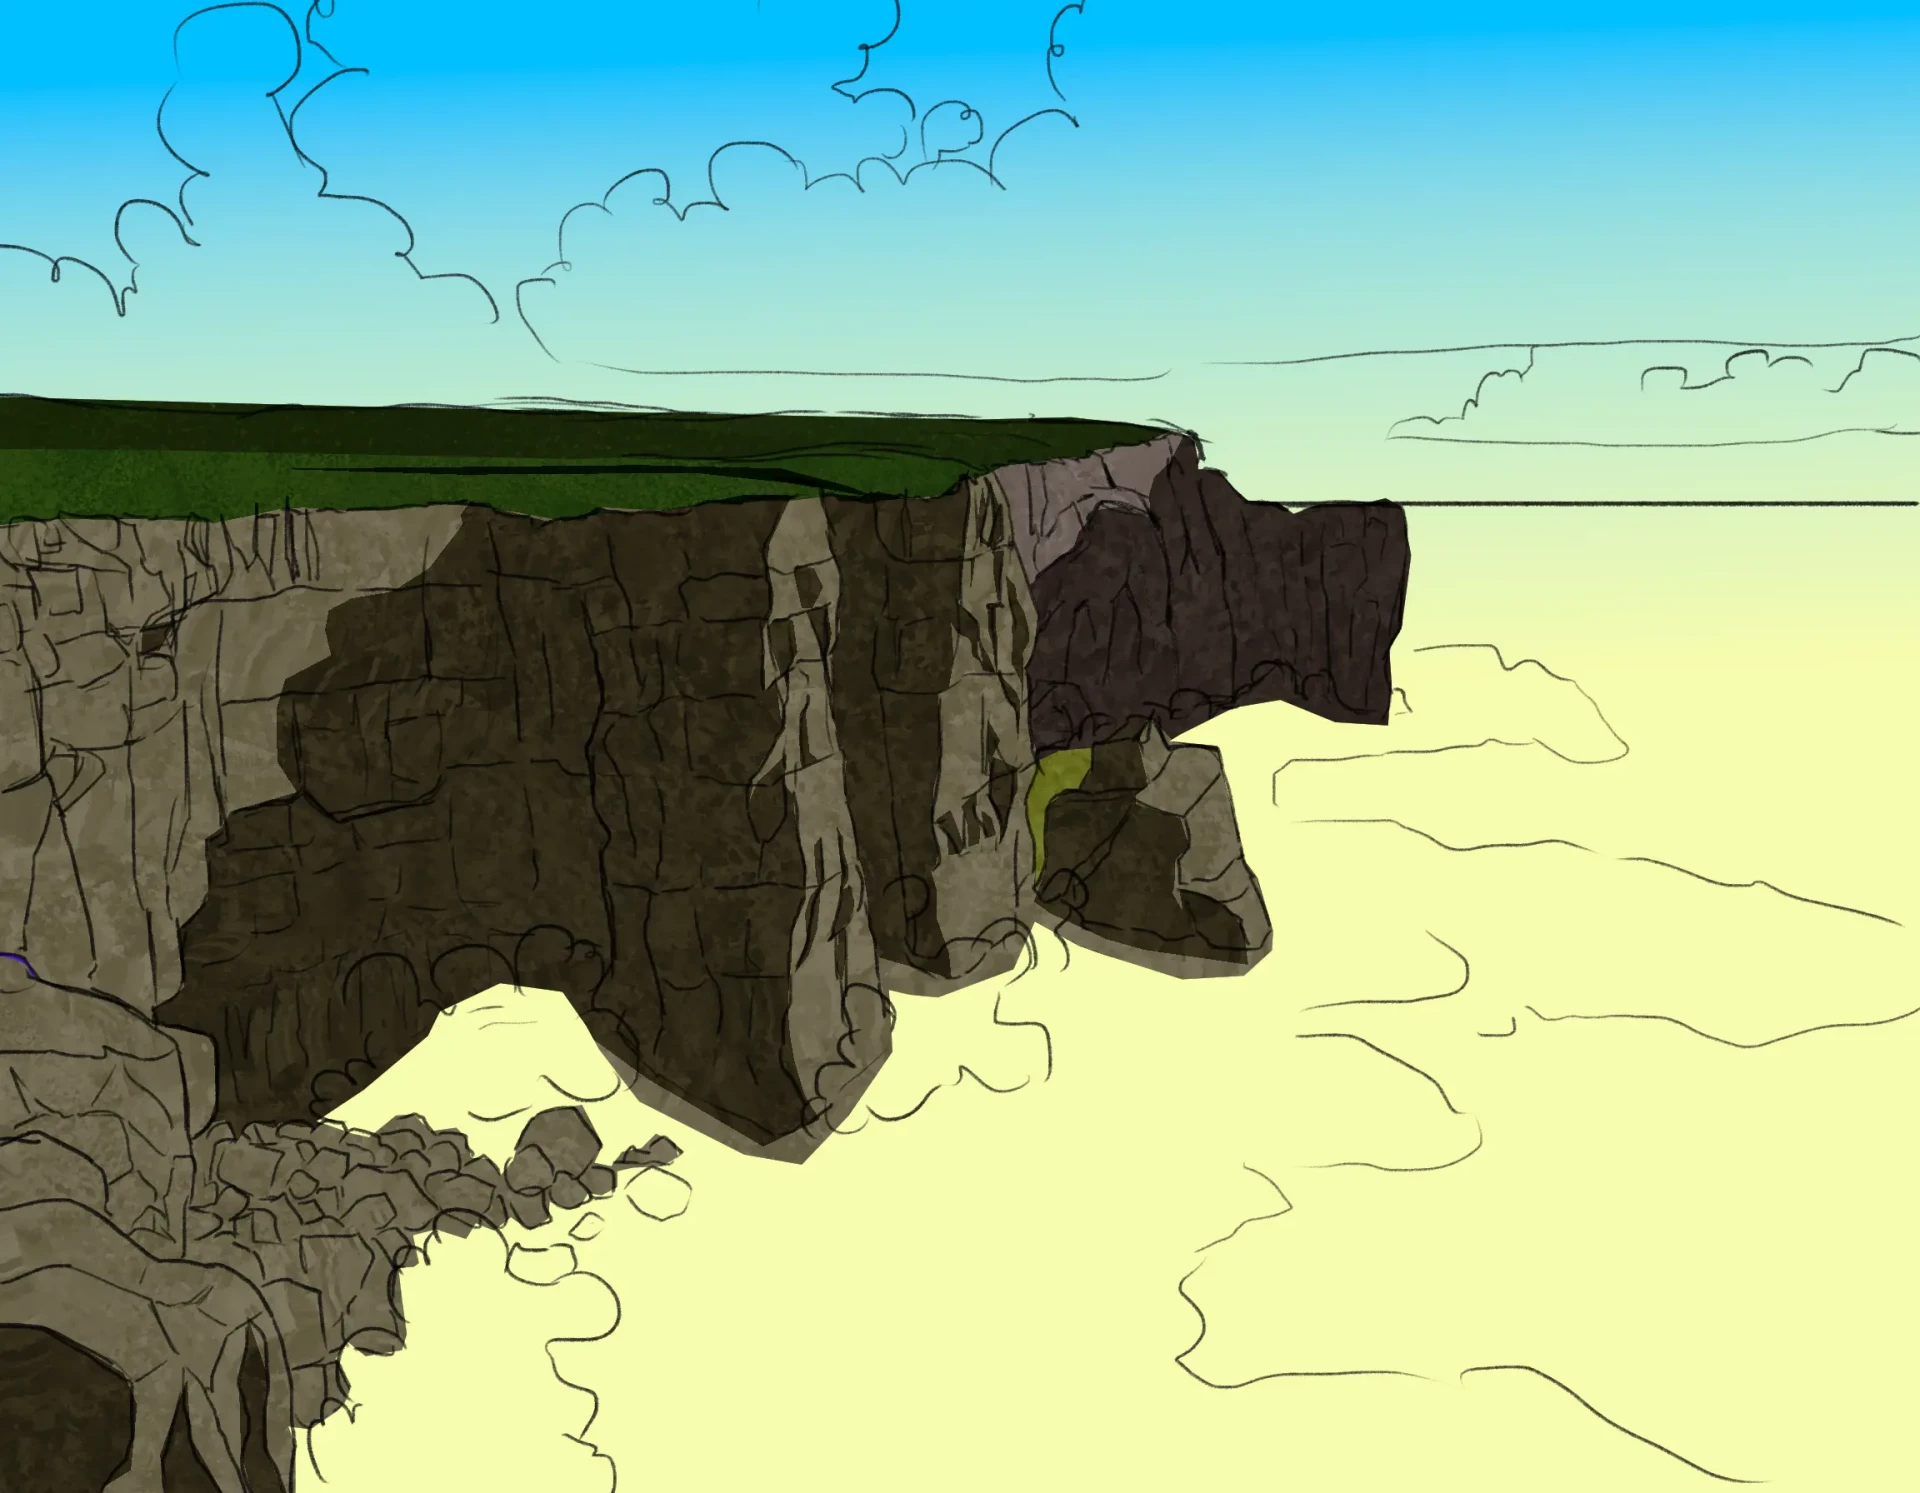
Now, we will follow the same process for an additional detail: color the grass on the upper part and add an appropriate texture, making sure to keep it very simple. There is no need to be too meticulous, as this is an element observed from a distance.
Outline the cracks/fractures in the rock: draw very dark irregular lines where the rock splits.
We will finish the uniform colors by adding soft and transparent spots in golden or light ochre tones. This will bring more life and light to certain areas of the painting.
Finally, use variations in tones and shades to add depth. Let yourself be guided by the shapes and, in each block, apply shadows with straight or firm contours. As an additional detail, lighten some blocks with a lighter and more saturated version of their base colors.
Draw the sea below
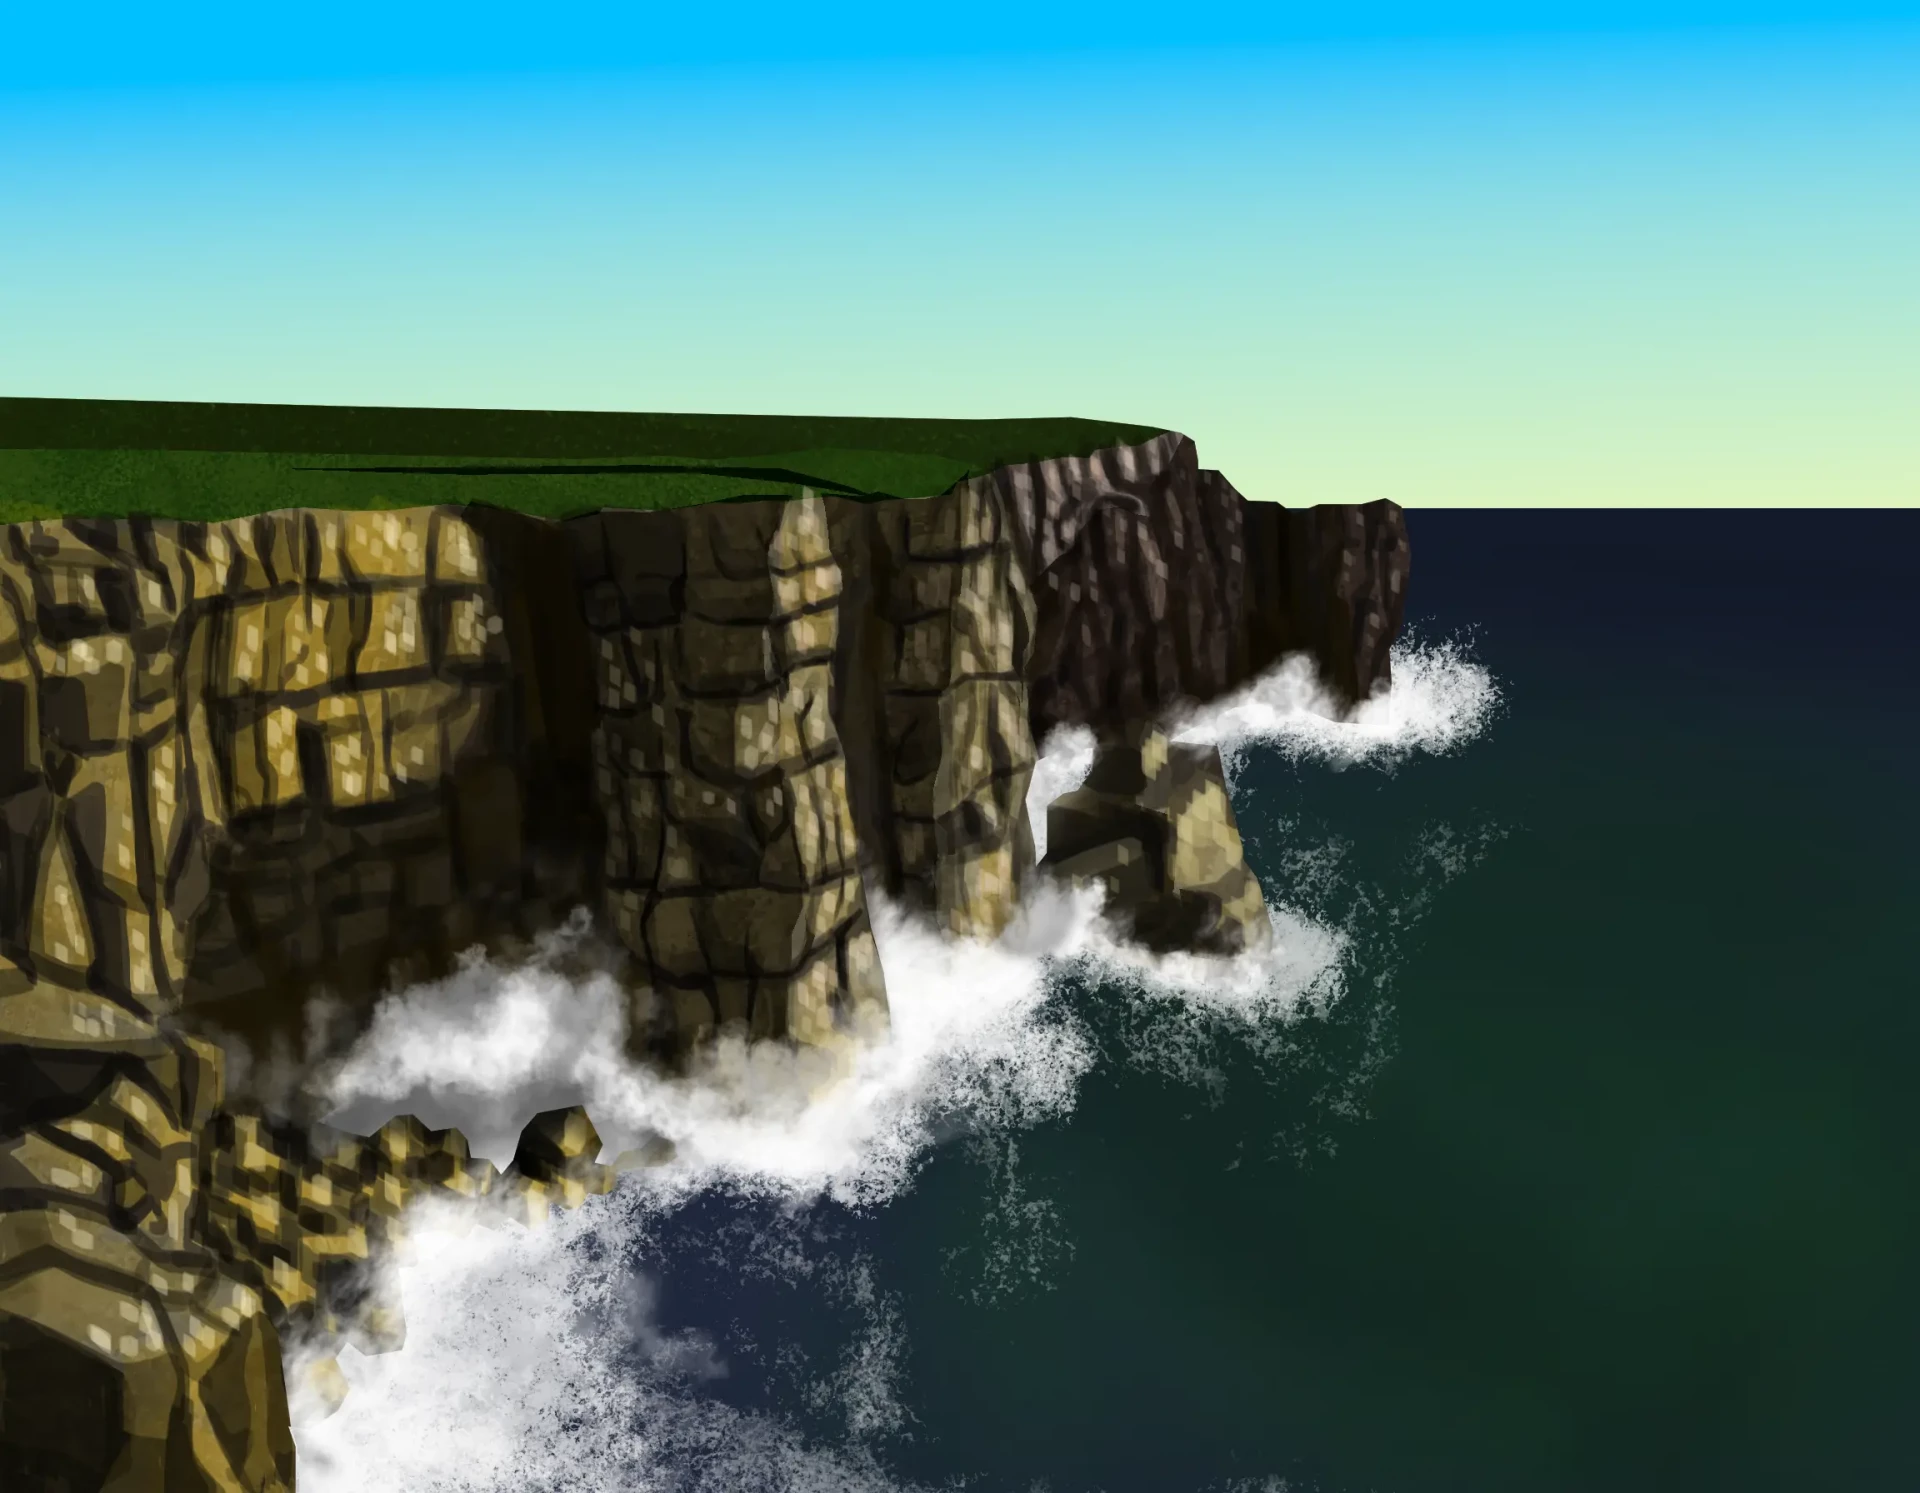
Paint the sea with its deep and tumultuous waters. We'll start by applying a base coat in Prussian blue, indigo, or, more commonly, in a dark shade, then we'll add light touches of green and black.
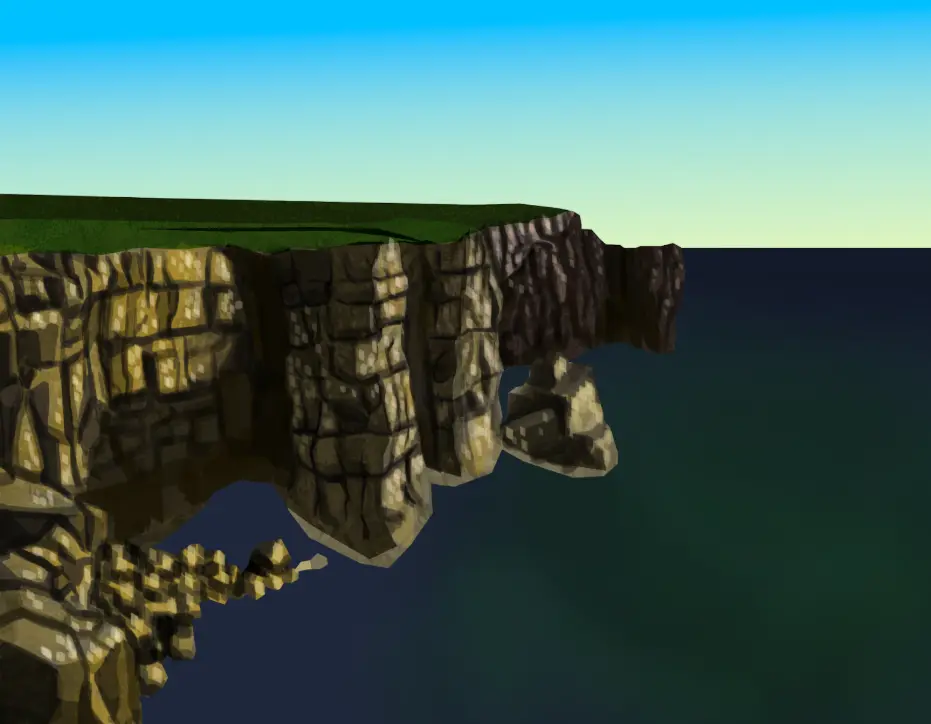
The point where the sea comes into contact with the rock is simply brutal: the shock of the waves is wild and hypnotic, and in the heart of all this turmoil, the water produces a kind of foam. Therefore, apply scattered touches to create a layer on the surface of the sea.
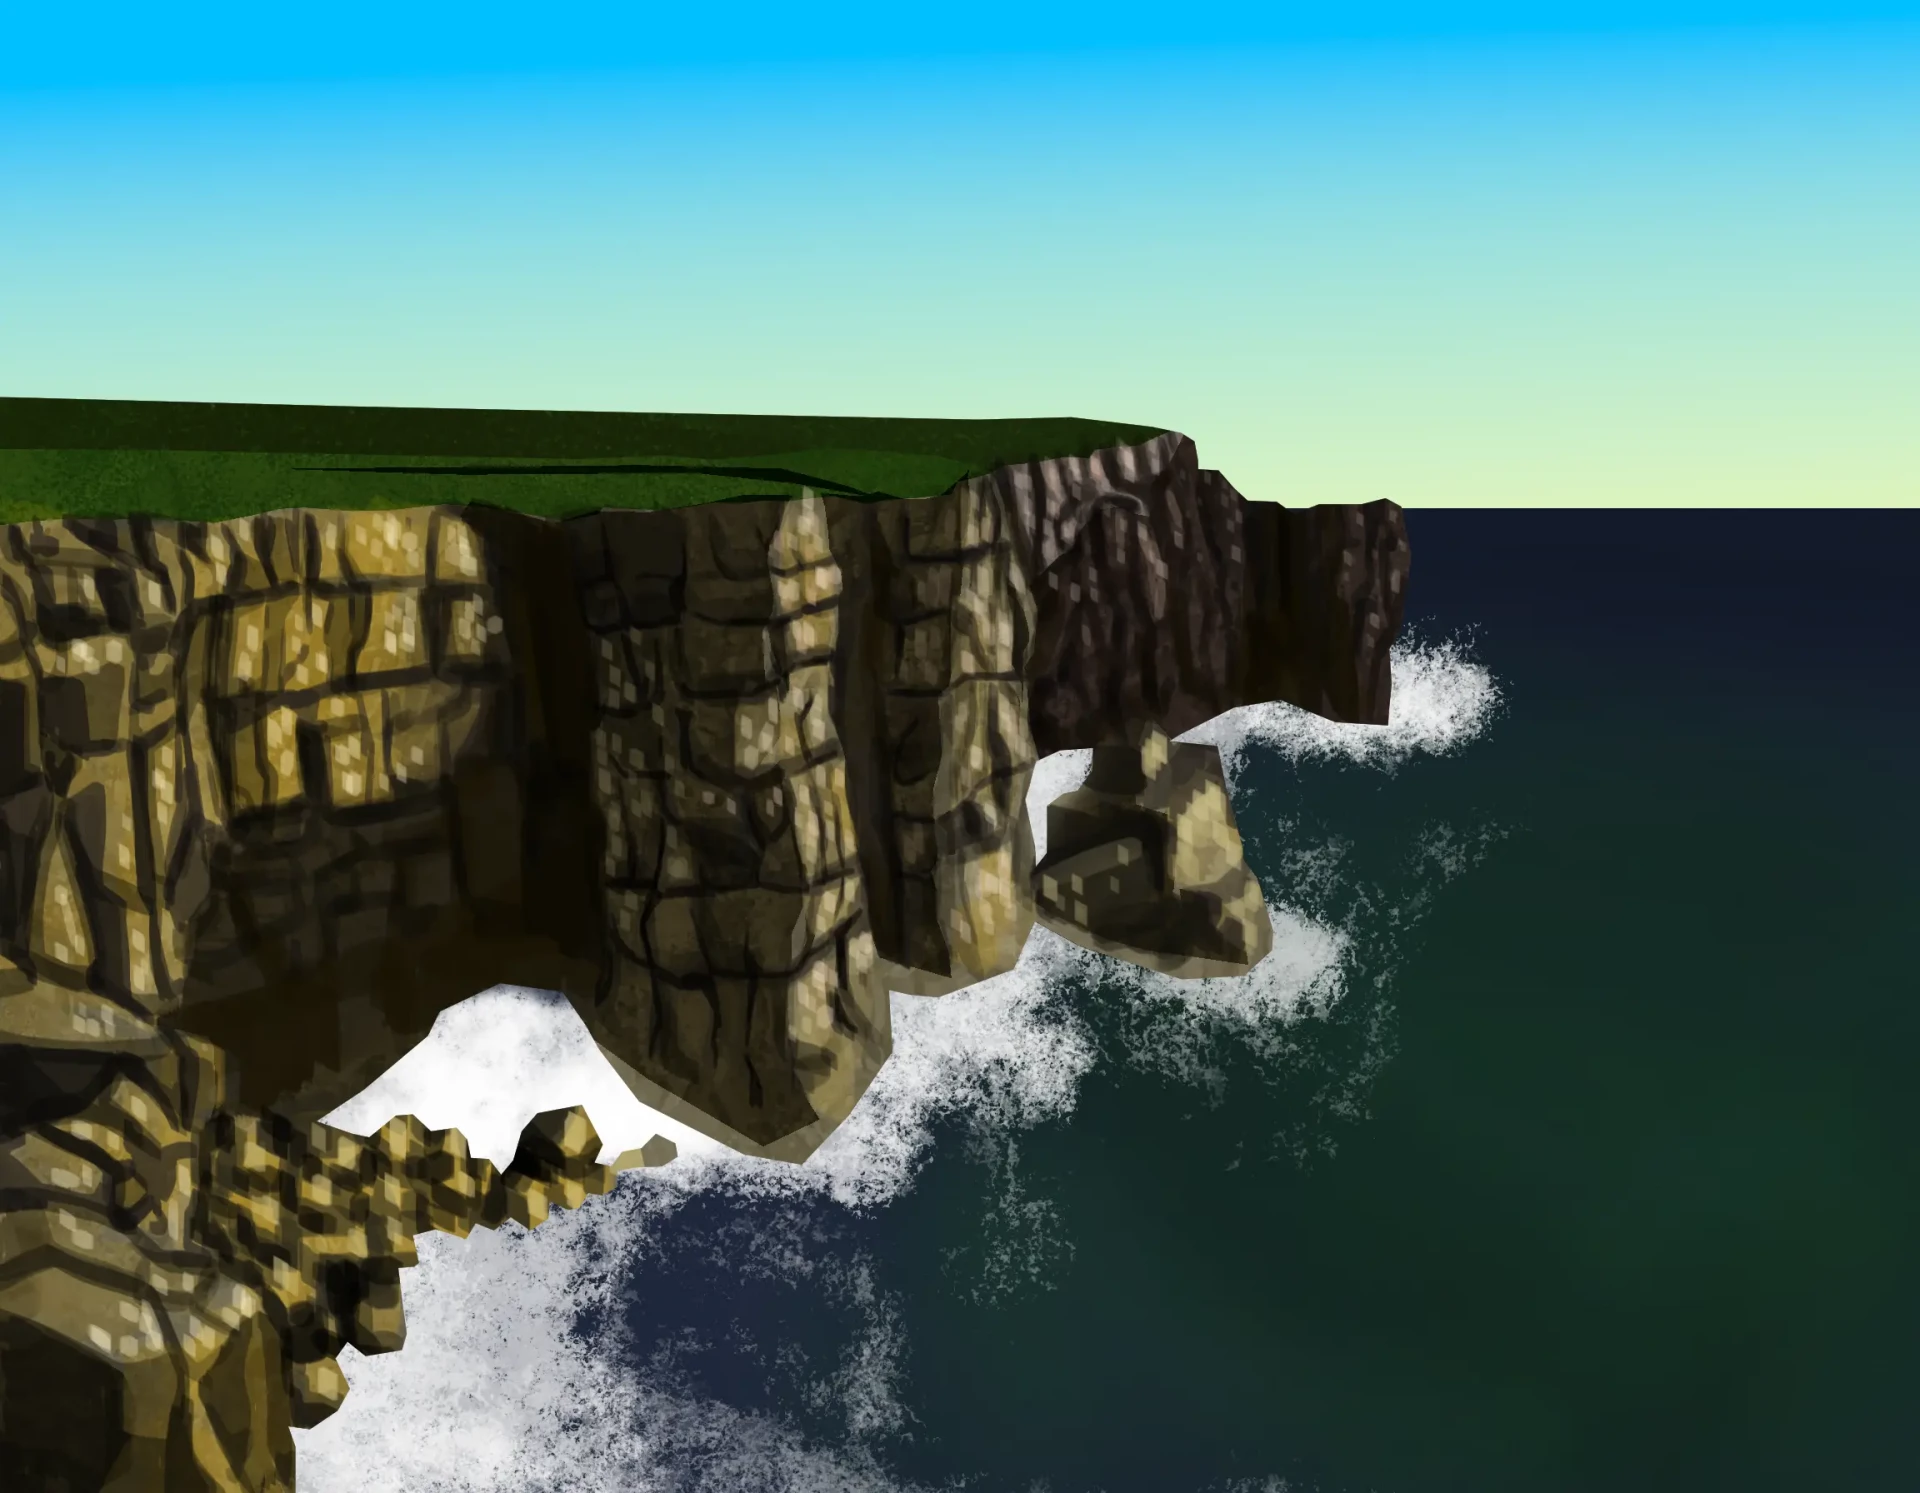
We will now draw the waves breaking directly against the rock. Let's draw clouds of spray rising from the sea surface, but be careful not to make them too high. It is important to respect the shapes of the rocks and allow the contours or planes to stand out, without them being covered by waves that would be out of place.
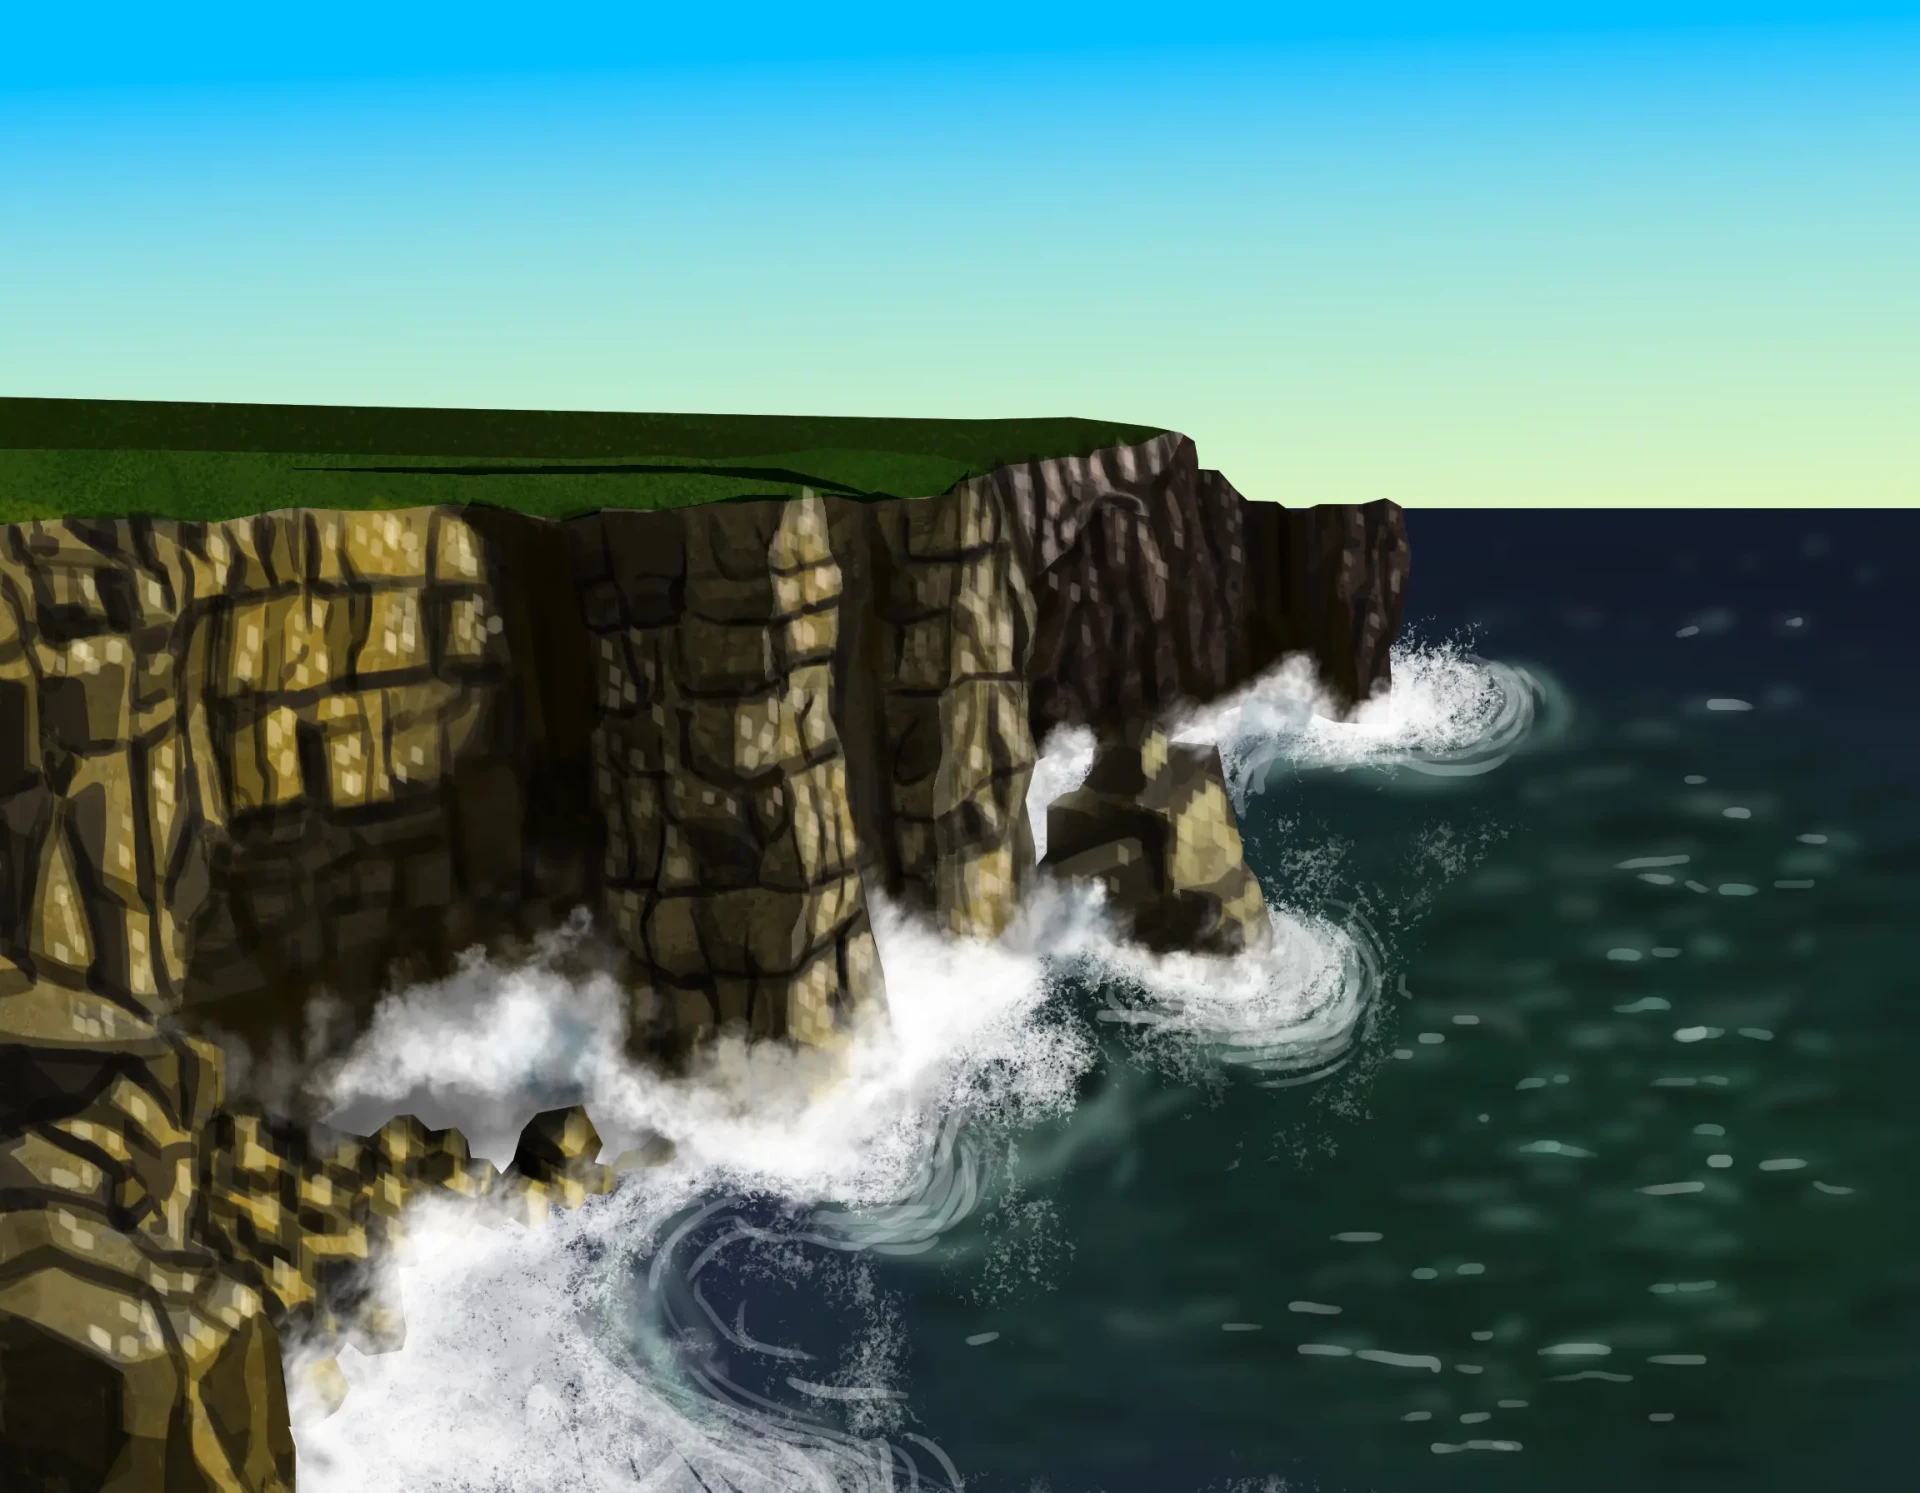
The texture of the sea is very complex: it is full of contrasts, reflections, and translucent areas. I will explain to you how to make a simplified version.
Make many short strokes with darker colors, tonal variations, and, of course, highlights, which we will then blend to integrate them into the base color. Emphasize some reflections and add ripples using lines of translucent white.
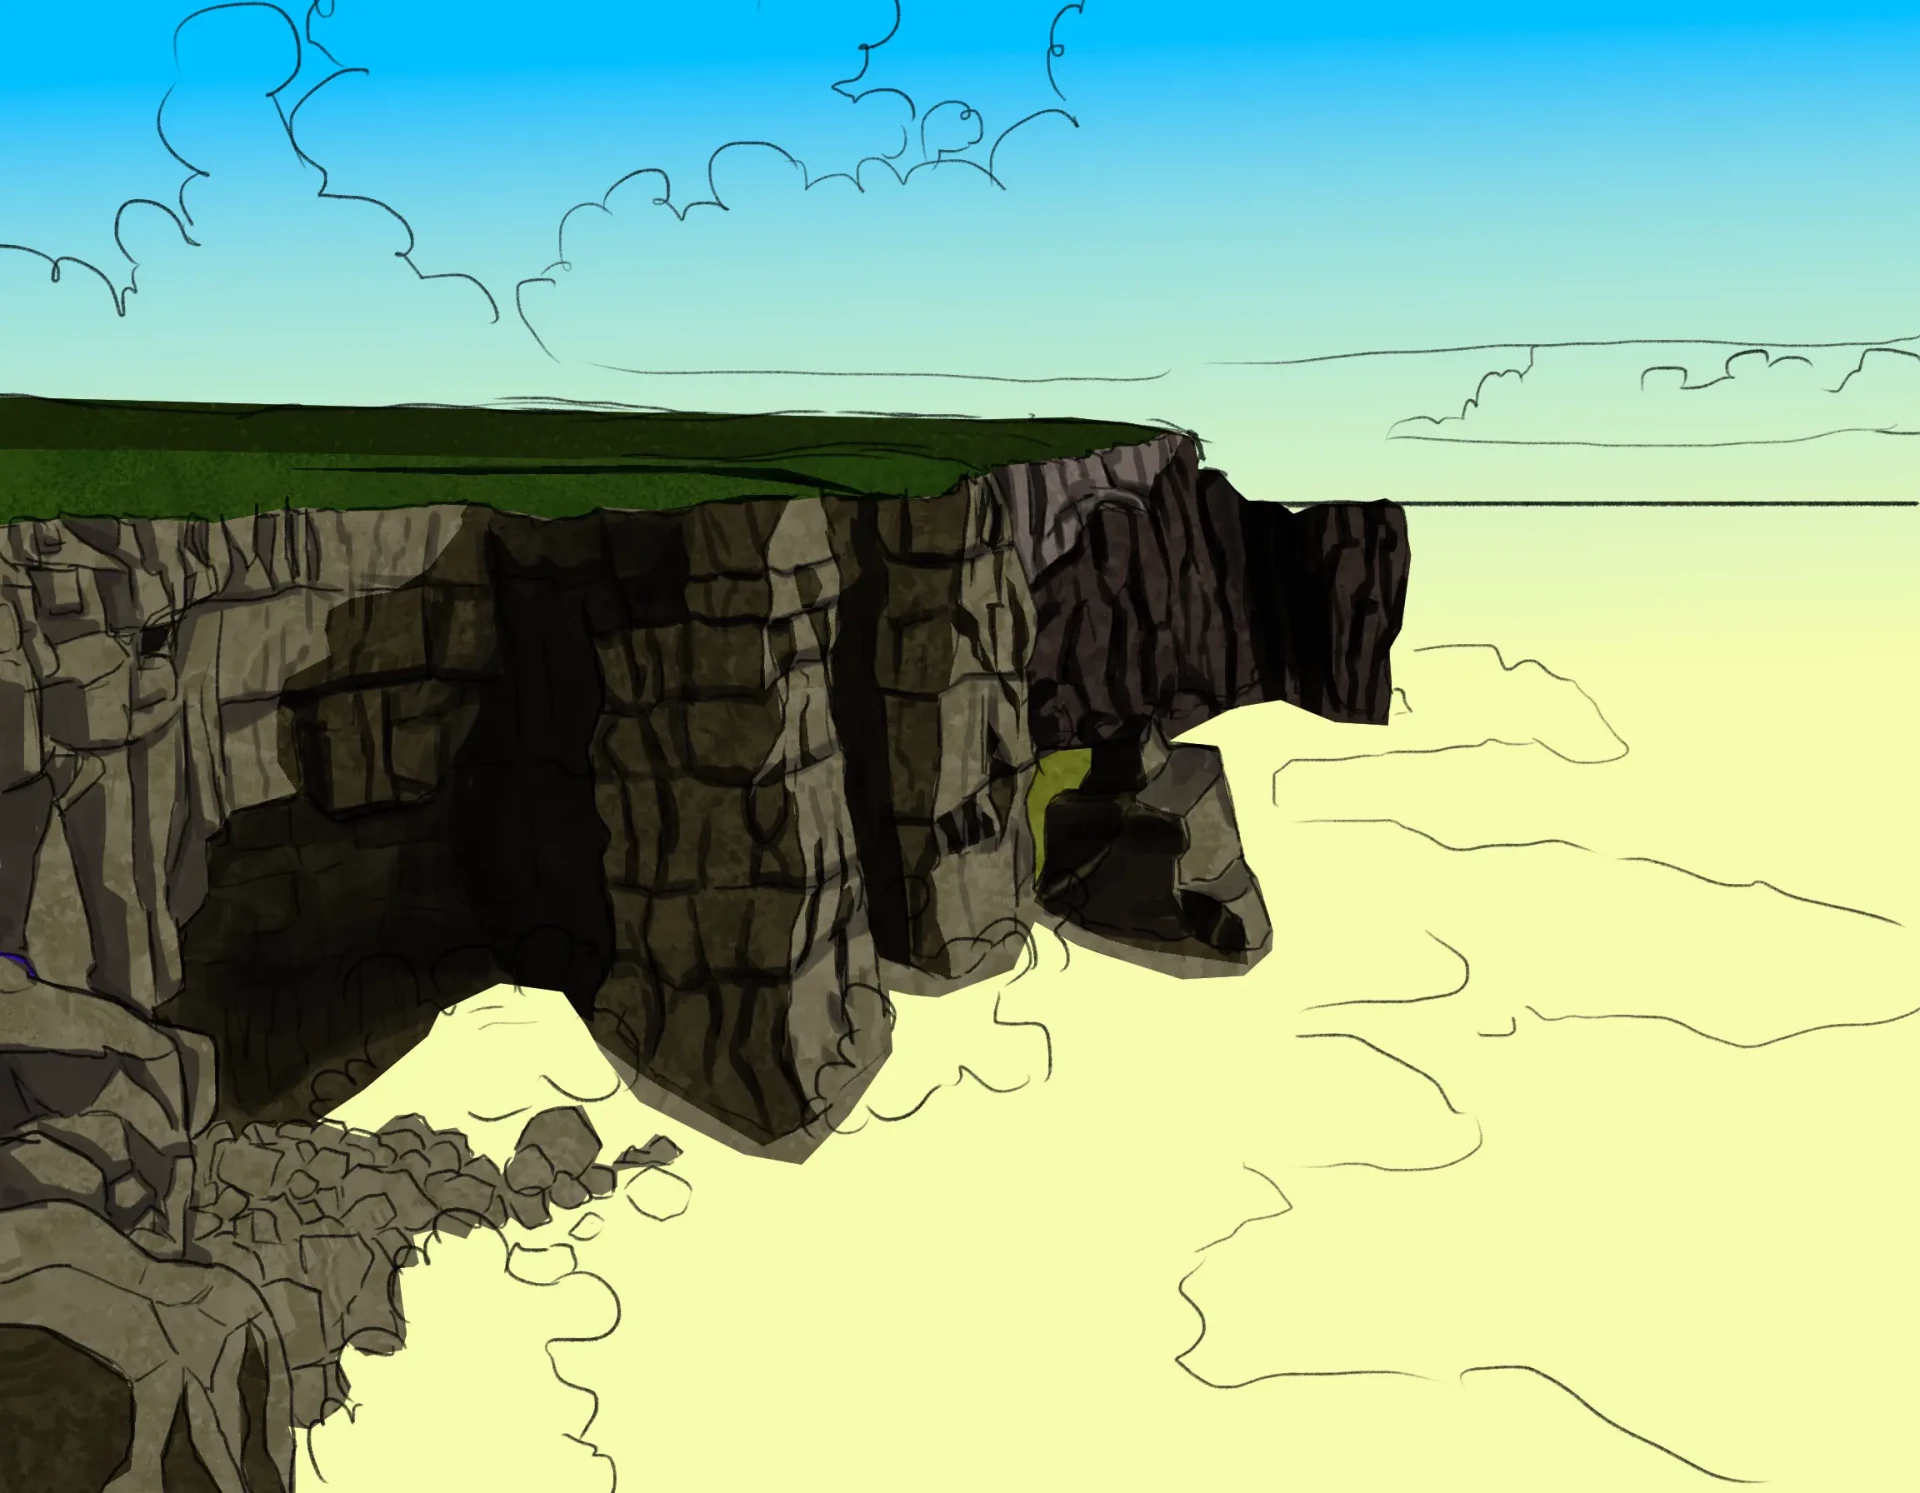
Finalize the painting
Finally, draw the clouds. Although often done earlier on, you can save them for the end here so that they reflect the already established mood.

And here is the result of this tutorial, which I hope will be useful to you!
I encourage you to put the tips discussed into practice: remember that you can use geometric shapes to organize the elements and follow a simple method, divided into base colors, main shadows, intermediate tones, and volume.
And don't forget that clouds are not just decorative, but they are an essential part of the landscape's atmosphere.
Discussion
Amazing! Being methodical while enjoying the result of each step: that's at least what I understood and appreciated in this tutorial by Bryam. Many thanks to the whole Dessindigo team. ❤️
Great, thank you so much for sharing. I'm struggling quite a bit with the topic of cliffs, which doesn't seem very complicated, though. I'll put that in place 🙏😂
👍 Really great, simple and detailed explanation. The result is stunning!!
Thank you very much for this tutorial. The steps are well explained. It’s clear and concise. Ah ah the rule of three, I don’t use it often because I paint landscapes by feel. I will need to use it more.
As I paint in watercolor, I adapted the steps, for example for the light colors of the rock which I had to anticipate before by not applying dark everywhere, the foam by preserving the paper after the drawing, and the sky which I worked on wet so I did the clouds at the beginning. I didn't have any difficulty making these adaptations to the steps, I just read them before I started.
Interesting. Thank you. Worth a try!
Interesting. Thank you. To try!