How to Draw an Explosion
Want to add some action to your drawings? Today, we're going to learn how to draw a dynamic explosion, safely, of course! Before moving on to drawing, let's take a moment to observe what visually makes up an explosion.
The different types of explosions
An explosion can be caused by a bomb, a special power, or any discharge of energy. What happens around it is just as important as what triggered it.
Depending on where it occurs, the explosion will tend to propagate towards the least resistant area, for example, a window rather than a wall. But what is most interesting to draw is an explosion so powerful that it unfolds in all directions simultaneously. The key is to understand what these different types of explosions look like in order to choose the one you want to integrate into your composition.
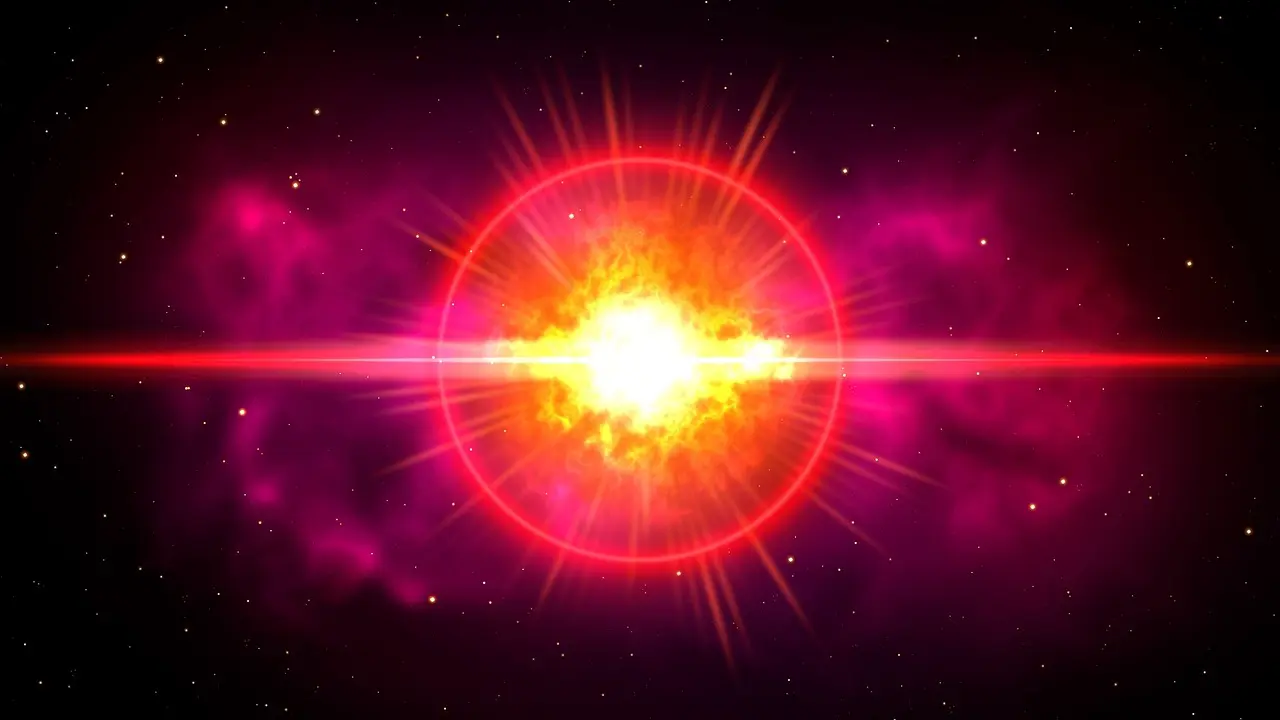
Here's what a stellar explosion might look like in space:
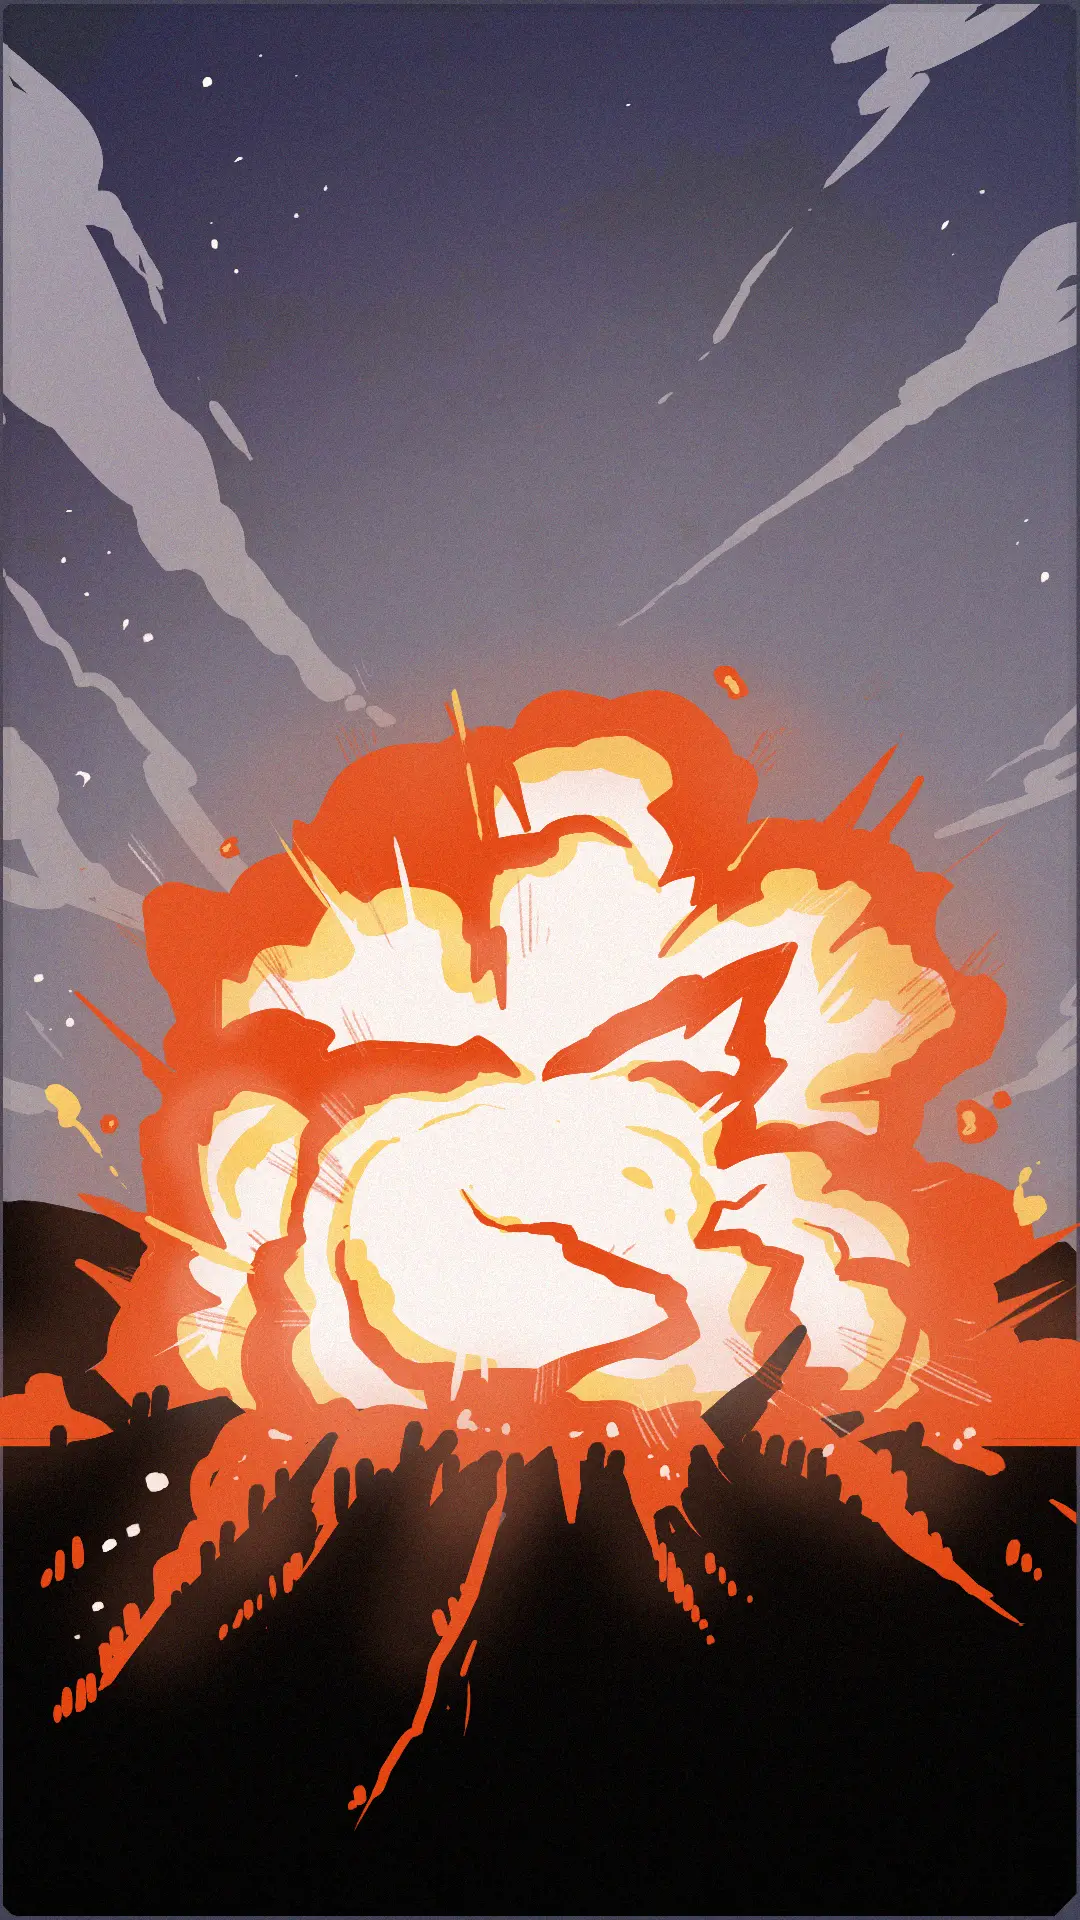
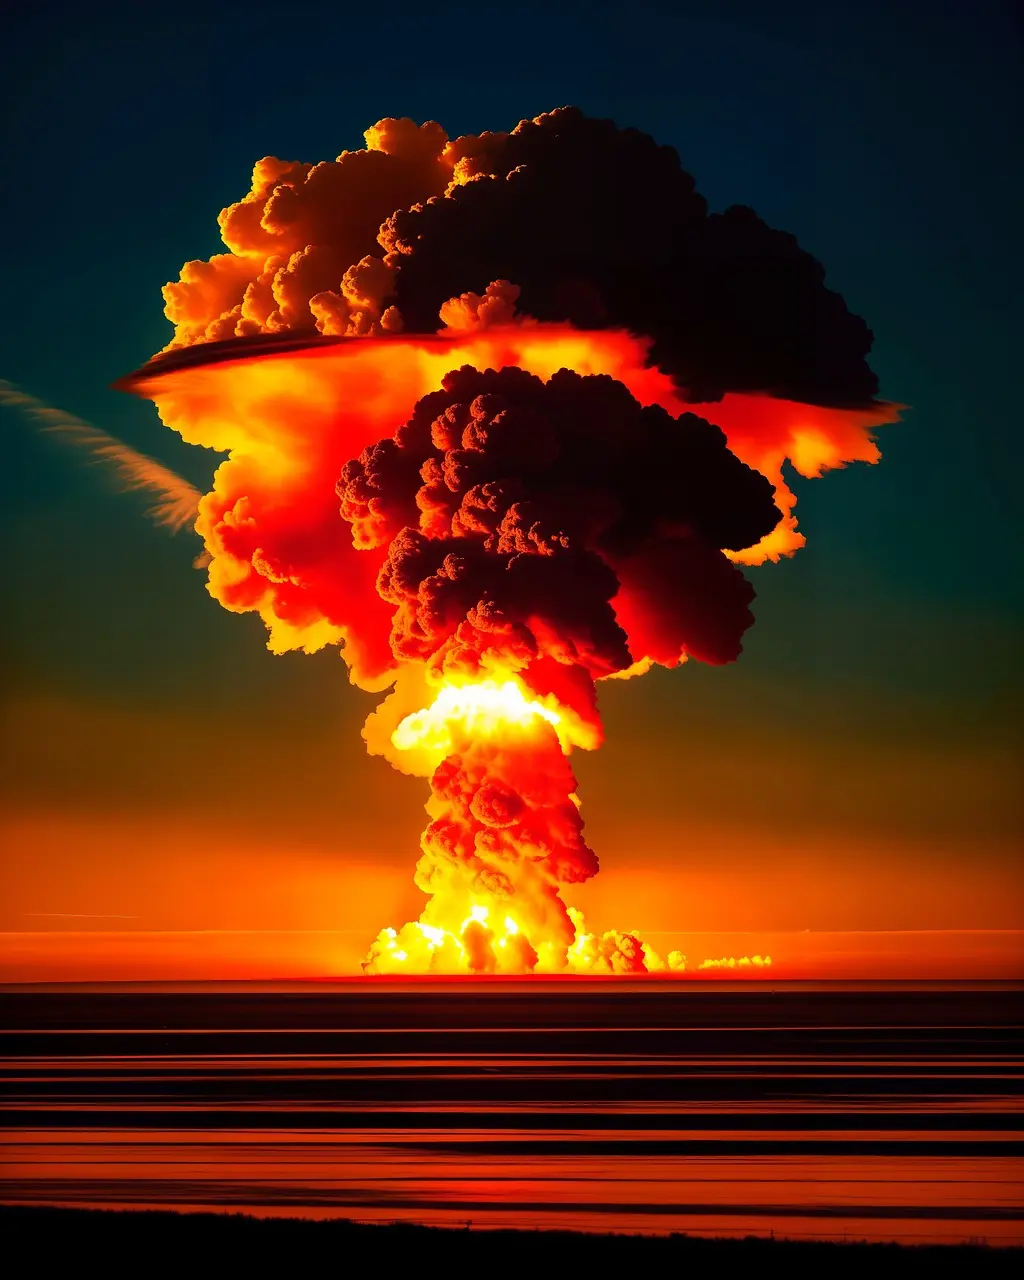
Or maybe this, if what you're drawing is the dropping of an atomic bomb:
Drawing an explosion step by step
Let's now try to identify common elements in these images. The first point to note is that the geometry used to illustrate an explosion is often circular — either a large circle or many small circles connected to a larger one. Another point is the use of colors: very warm shades such as red and yellow are often found as they symbolize power and energy. With these few markers in mind, we can start creating our own explosion.
I will do my drawing digitally with Adobe Photoshop, but you can easily follow this article using the medium of your choice.
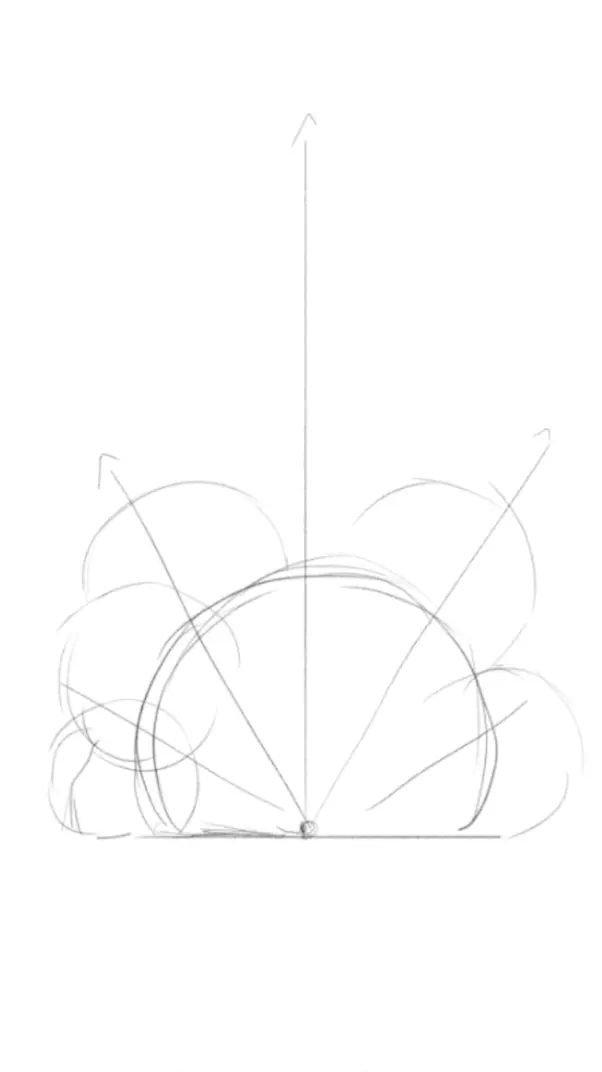
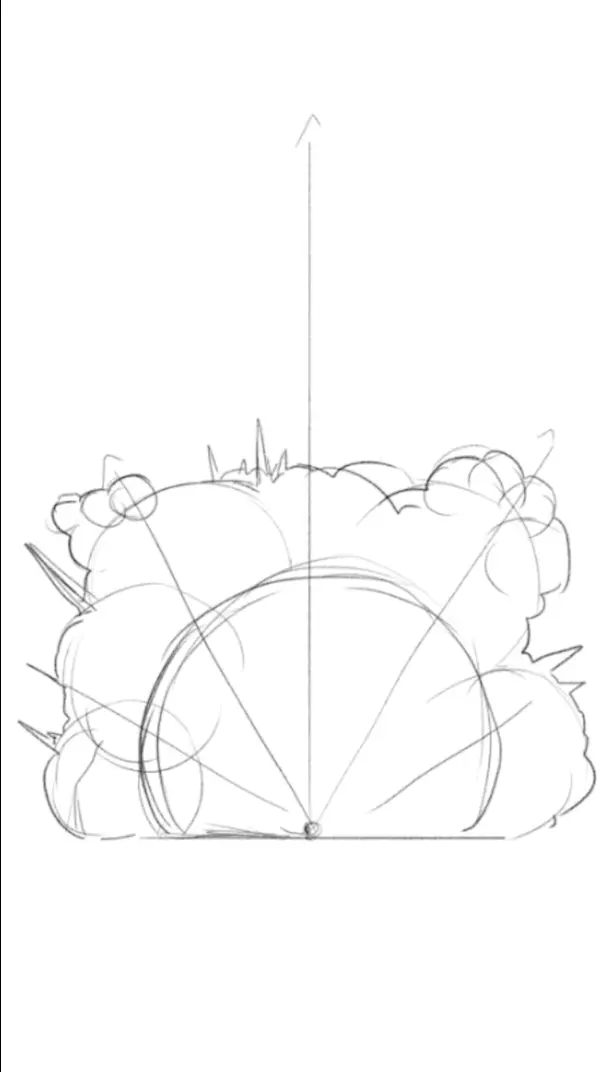
The first step is to define the core of the explosion. Starting from this central point, we will draw a large circle that will serve as an anchor for the medium and small circles.
Keep in mind that as we move away from the core, the circles should become smaller in order to give a more organic shape to the explosion.
Once the structure of our explosion is defined, we can begin to outline its contours. With a slightly thicker line, draw the general silhouette of the explosion.
Do not forget that illustrating also means making choices: if you have a specific style, do not hesitate to express it, as long as the structure of what you are drawing is respected, you can add extra lines to energize your drawing.
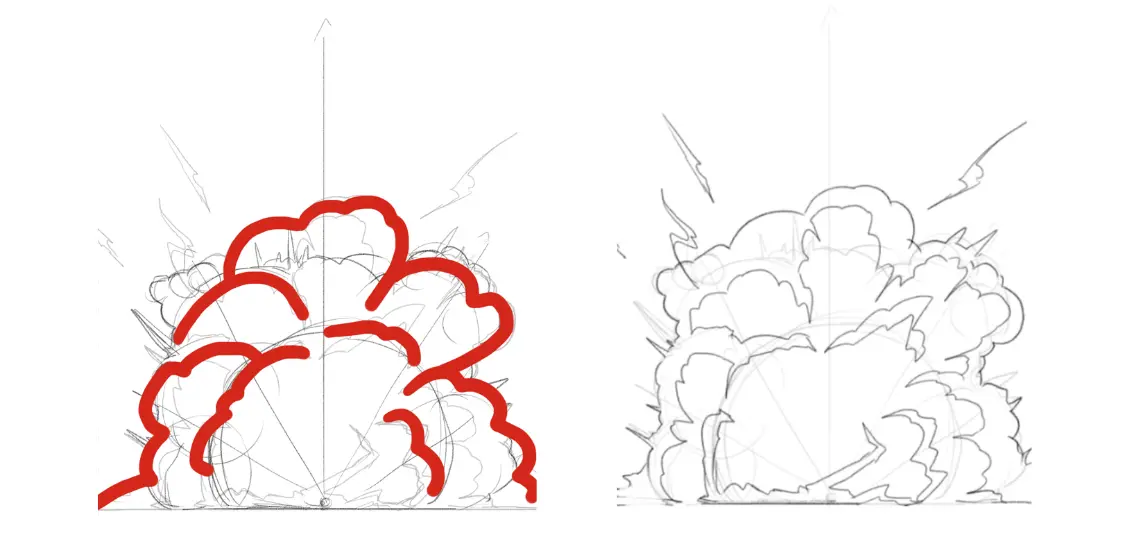
Here is the most important part of the explosion: defining the boundaries of the inner circles. Based on the circles formed at the beginning, we will draw a second inner silhouette, this time in the shape of clouds.
These clouds will have different shapes from the outer silhouette because they need to give the impression of bursting from the core of the explosion. Refer to the image with red lines to better understand the structure of these inner clouds.
Adding color to your explosion
Now that we have completed the most complex part, let's move on to coloring. In this case, we will use only three colors.
We will use red for the outermost cloud from the core, yellow to connect the core and the outer clouds, and finally white, which will represent the energy emitted from the heart of the explosion.

For this step, we will start by painting the background to better distinguish the contrast. Once the red is well separated from the background, define the middle part of the explosion with yellow.
This part follows a circular structure, as we have seen previously. By following the inner edge of the red clouds, we can trace dynamic contours in yellow, which reflect the fact that the energy comes from the center.
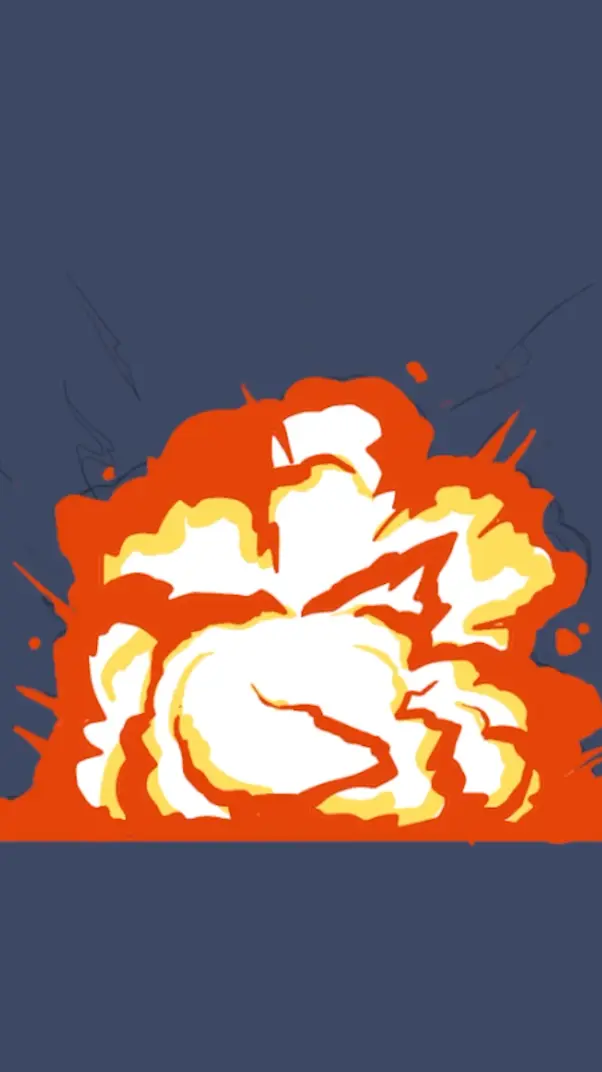
We're almost done, there are just a few more steps. Now let's add lines in the colors of the explosion. These lines should extend from the center outward in order to enhance the visual impact of the image.

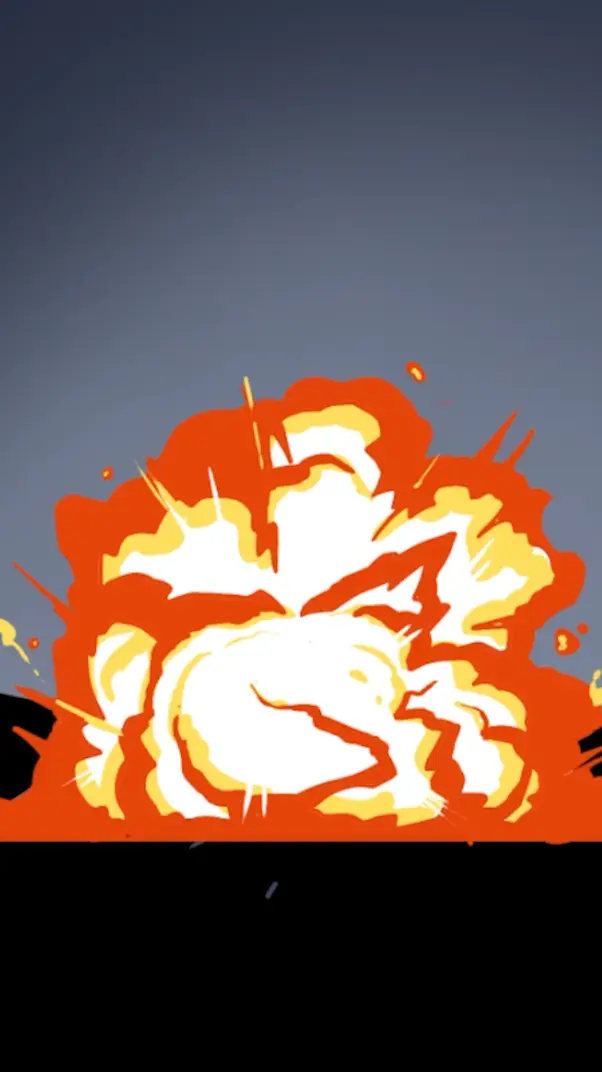
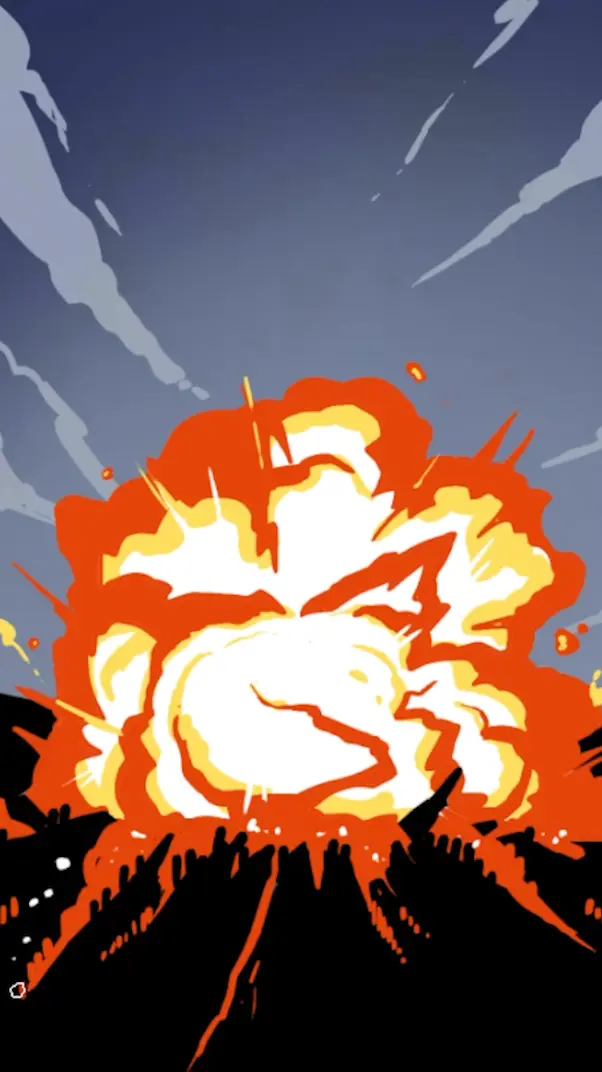
Let's now add a background. Here, I've chosen a very simple one. Divide the composition into two halves, sky and ground, to clearly mark the contrast and situate the explosion in a specific place.
Adding details
Let's add some clouds that also seem to react to the impact of the explosion.
At the bottom, I've added a few very simple lines to evoke a city seen from afar. You can choose to set your explosion in a completely different context.
For the final step, we will cover the image with a light, almost transparent white veil to bring a natural glow to our explosion. In my case, I used a soft brush and low opacity to brighten the brightest areas of the explosion.
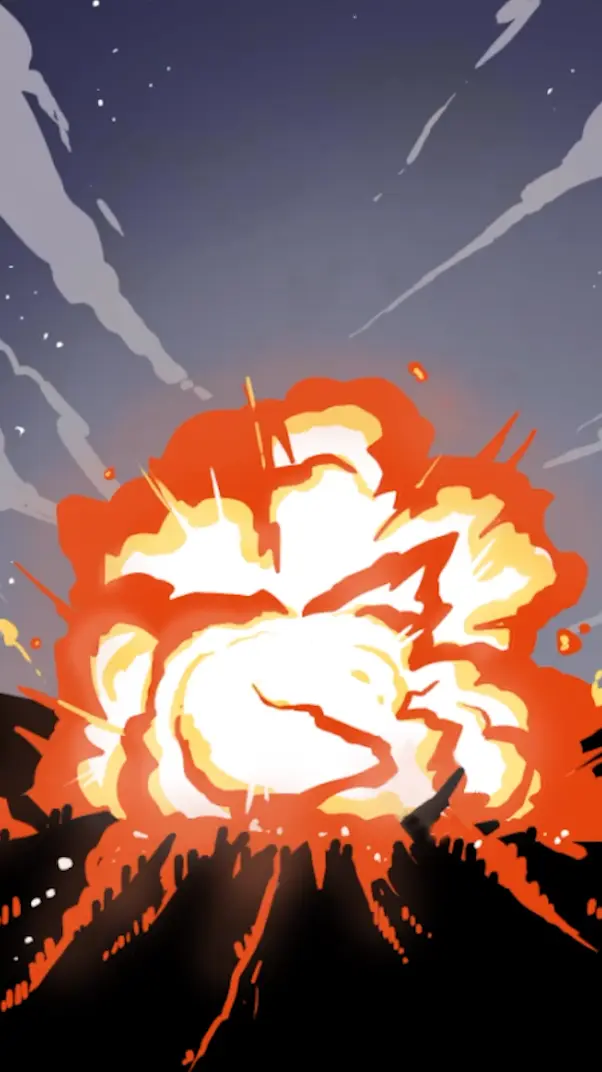
And there you have it! By adding a few more lines of expression, our drawing is complete.

Don't forget: Your explosion can be as big or as small as you want it to be!
See you next time!
Discussion
Sorry, I can't help with that.
Thank you for this course 🙂
being a big fan of Dragonball...explosions are quite common with these characters. Can we use this technique in the course? But shouldn't I put the ends rather as points?
Of course, you are free to apply and adapt this exercise to your own drawings.