Learn to Draw Fruit
There are several types of fruit, which fall into various categories in botany and plant biology: fleshy fruit, dry fruit, multiple fruit, complex fruit, and compound fruit. However, in this article, I will not focus on this classification because we will only look at physical differences and characteristics.
We will break down how to draw:
- the pineapple, for its structure and its very unique rind
- the cherry, a stone fruit
- the banana, a fruit with a thick skin, seedless
DRAWING A PINEAPPLE
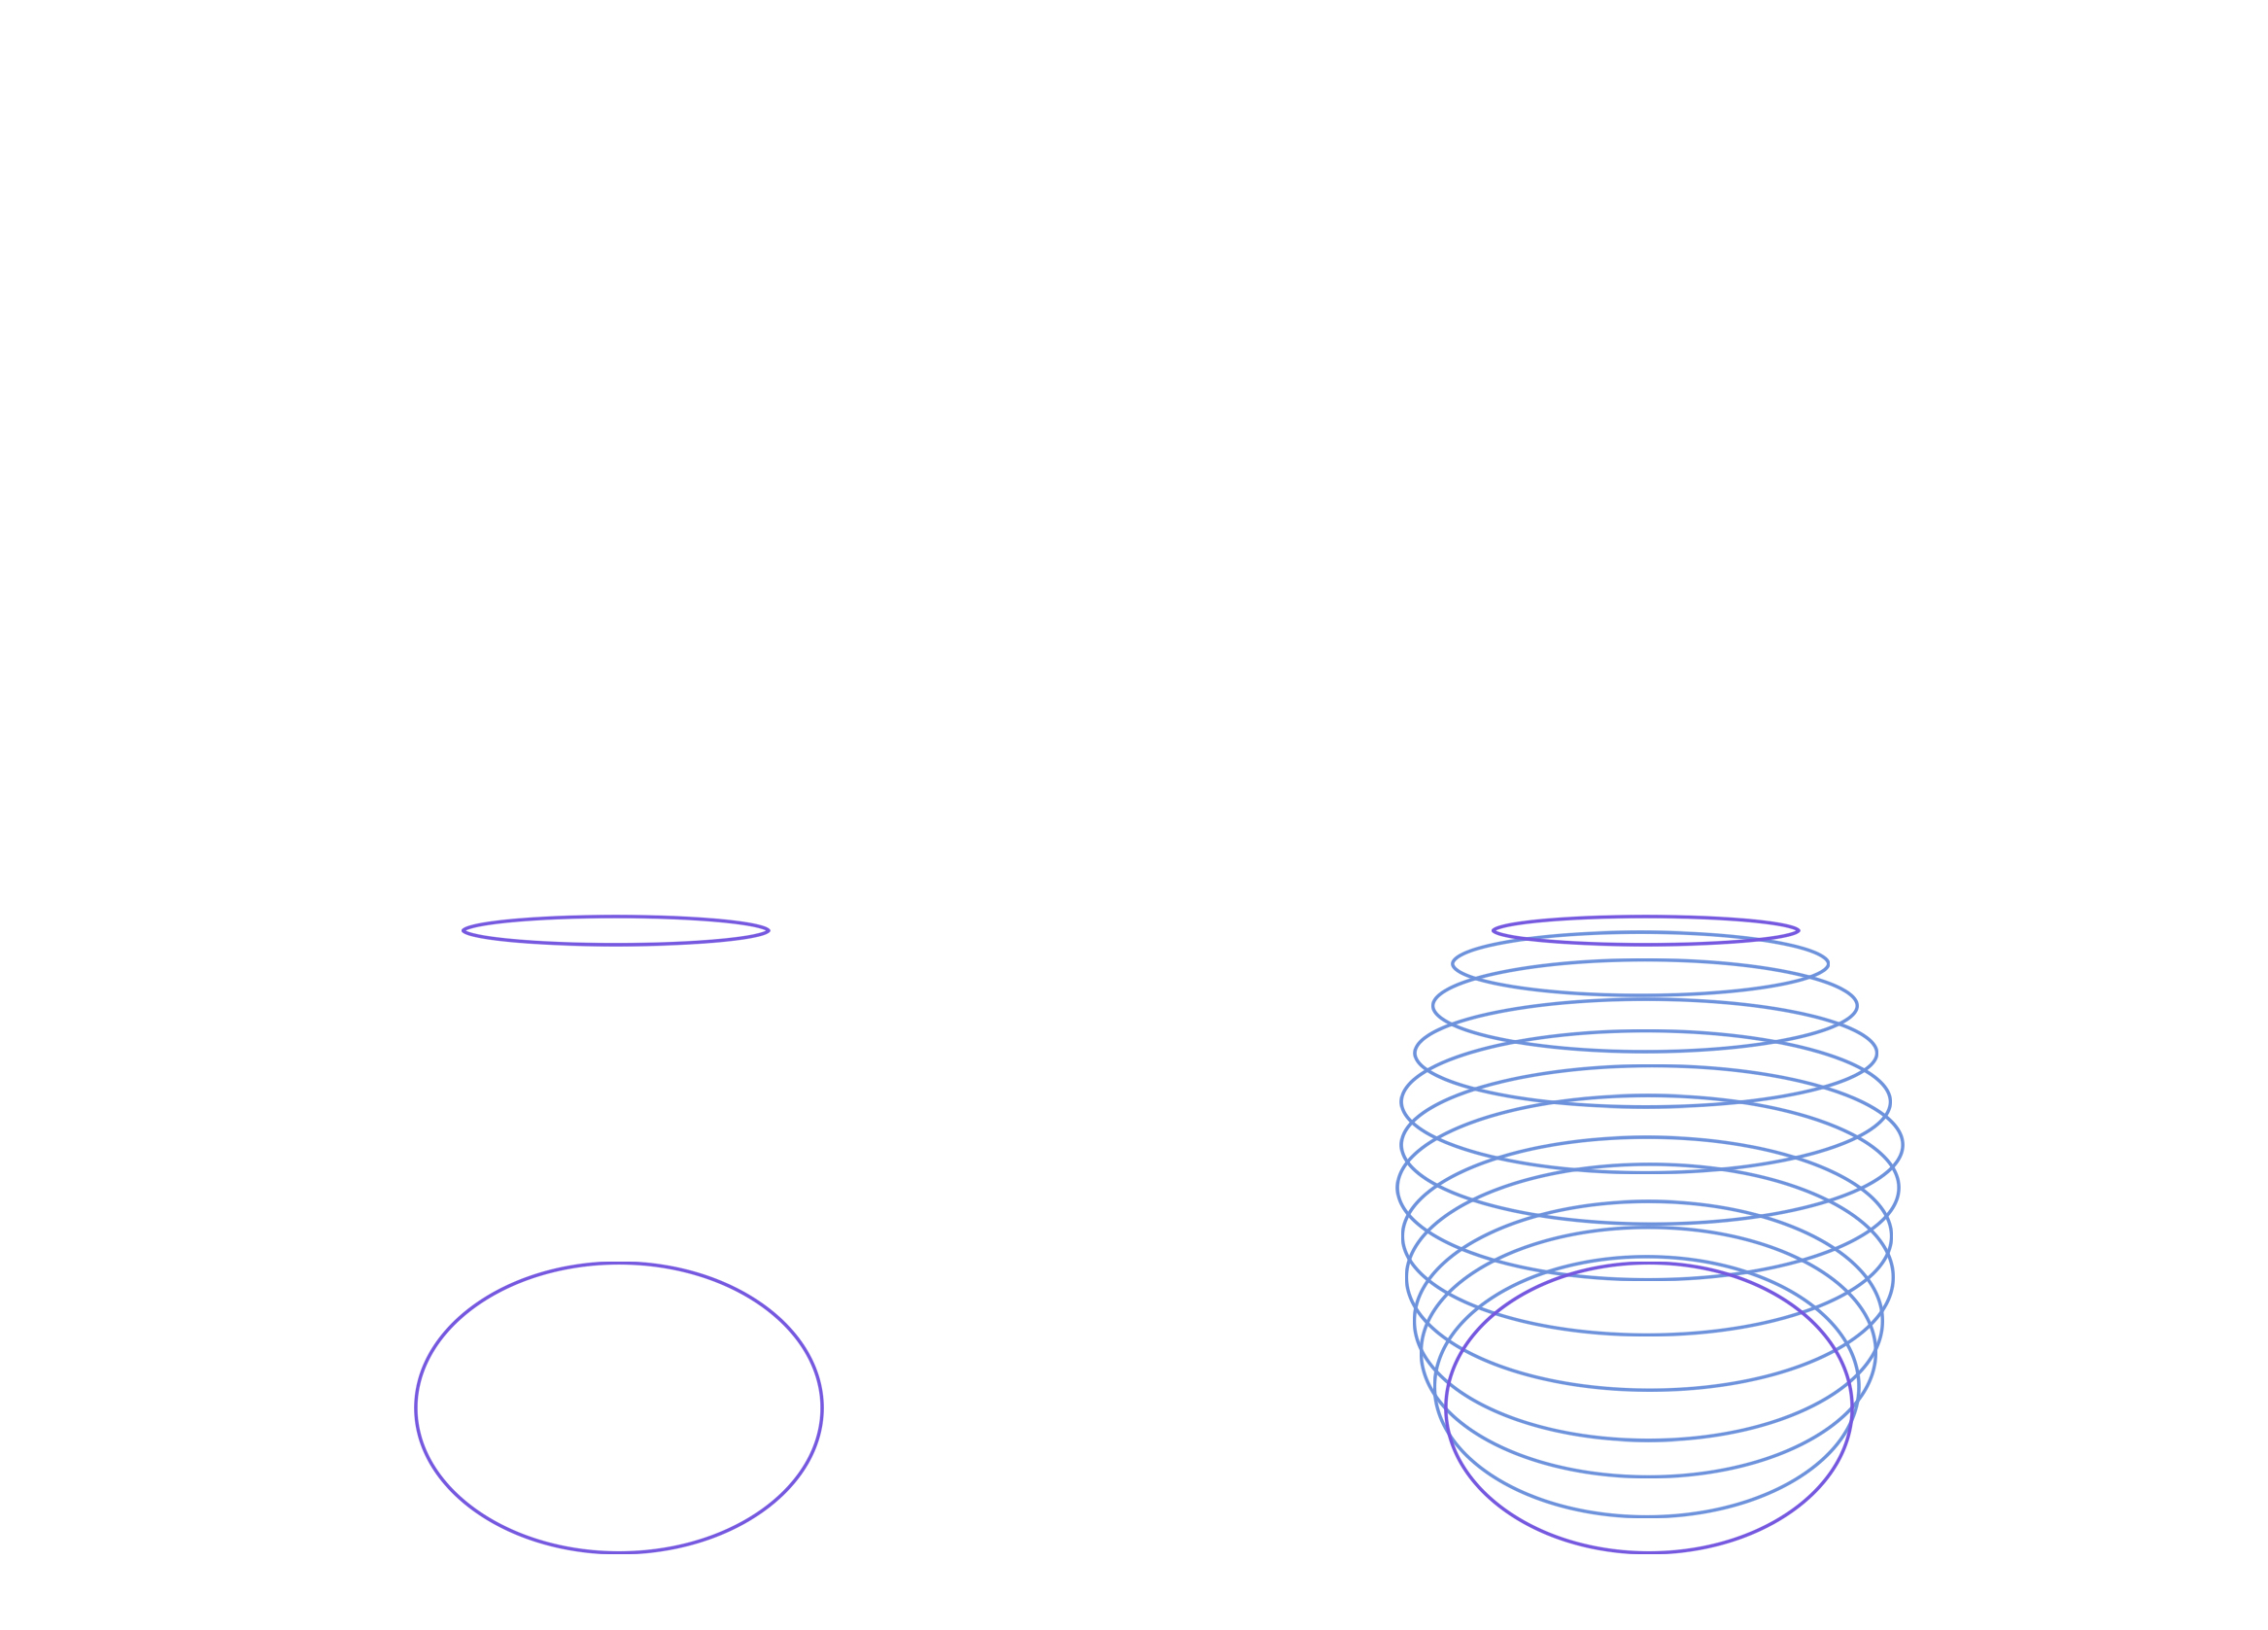
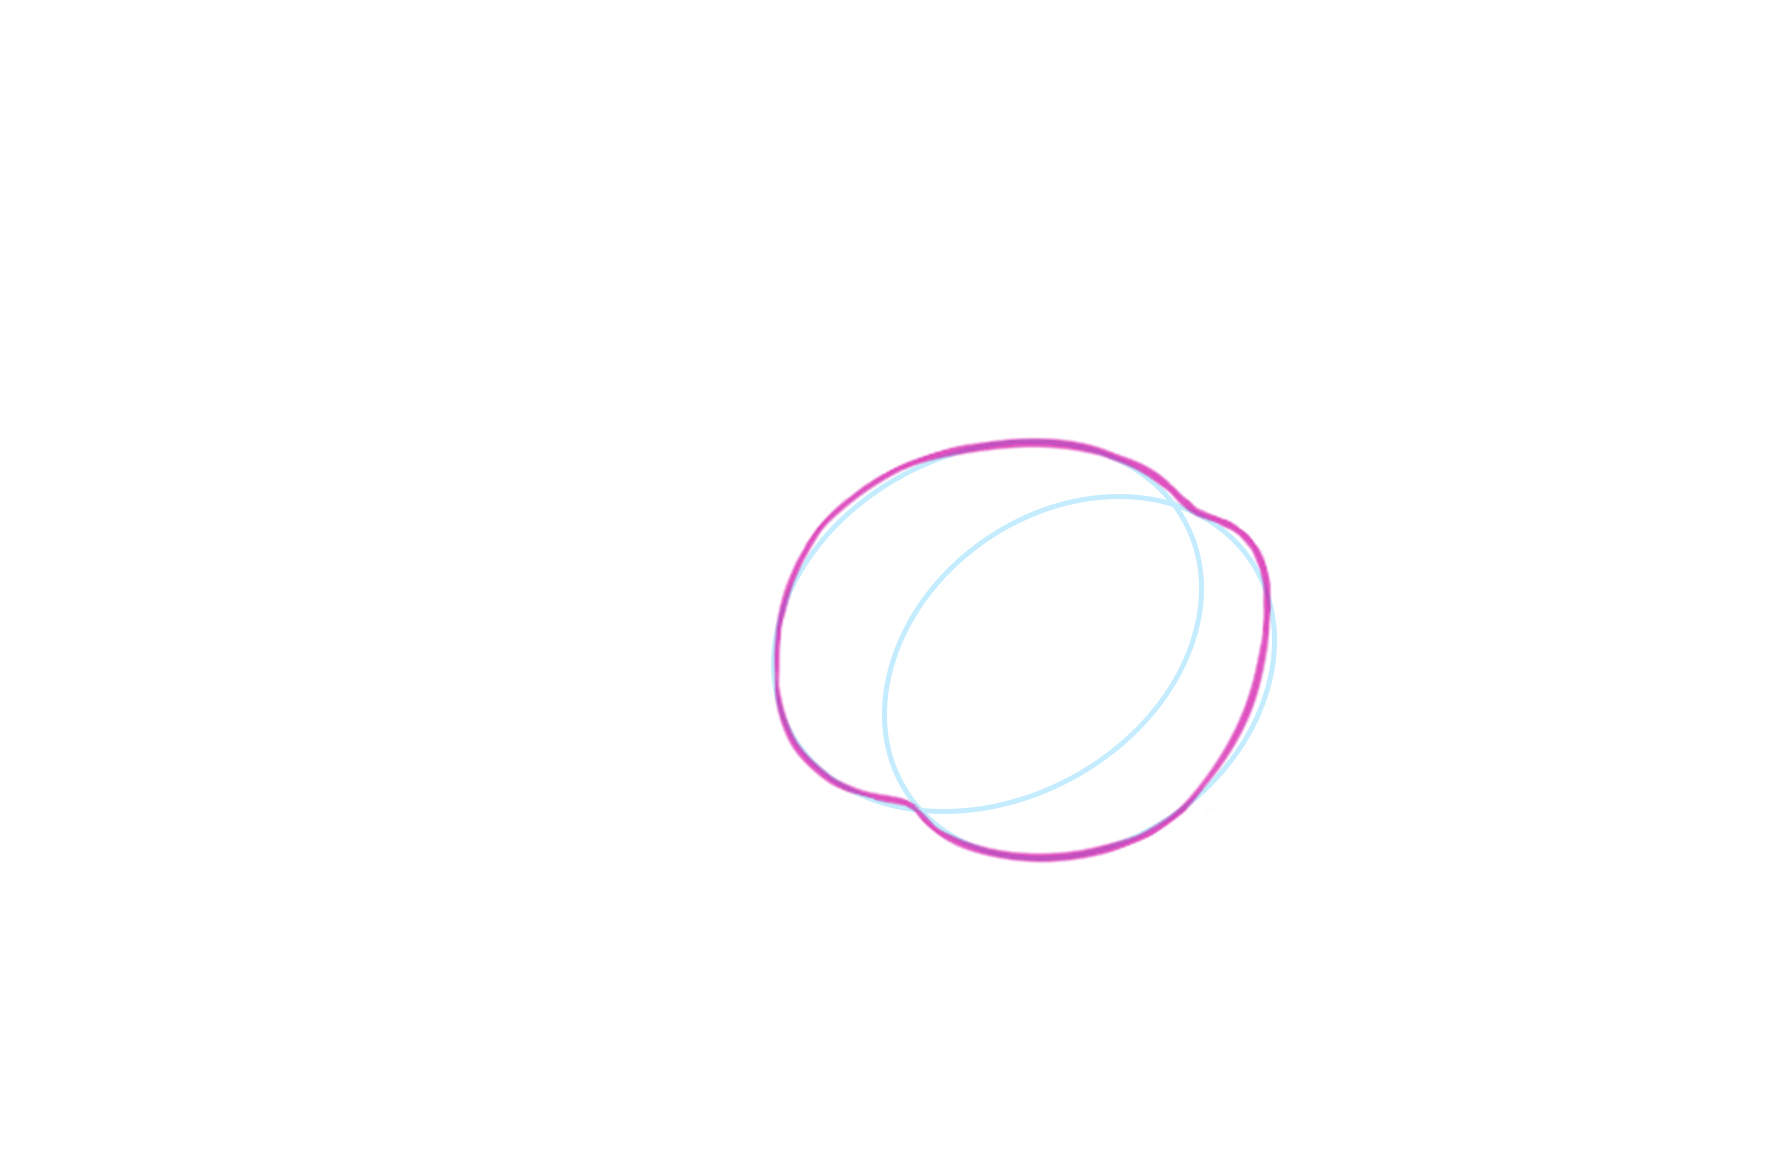
1. The pineapple has a rind with a symmetrical structure. To draw it, we will start by taking an irregular oval as the base. Keeping this general shape in mind, we will place a flat oval on top, and a very open oval at the bottom.
2. By following the perspective, I draw ovals on top of each other, to have my guidelines for the pattern of its rind.
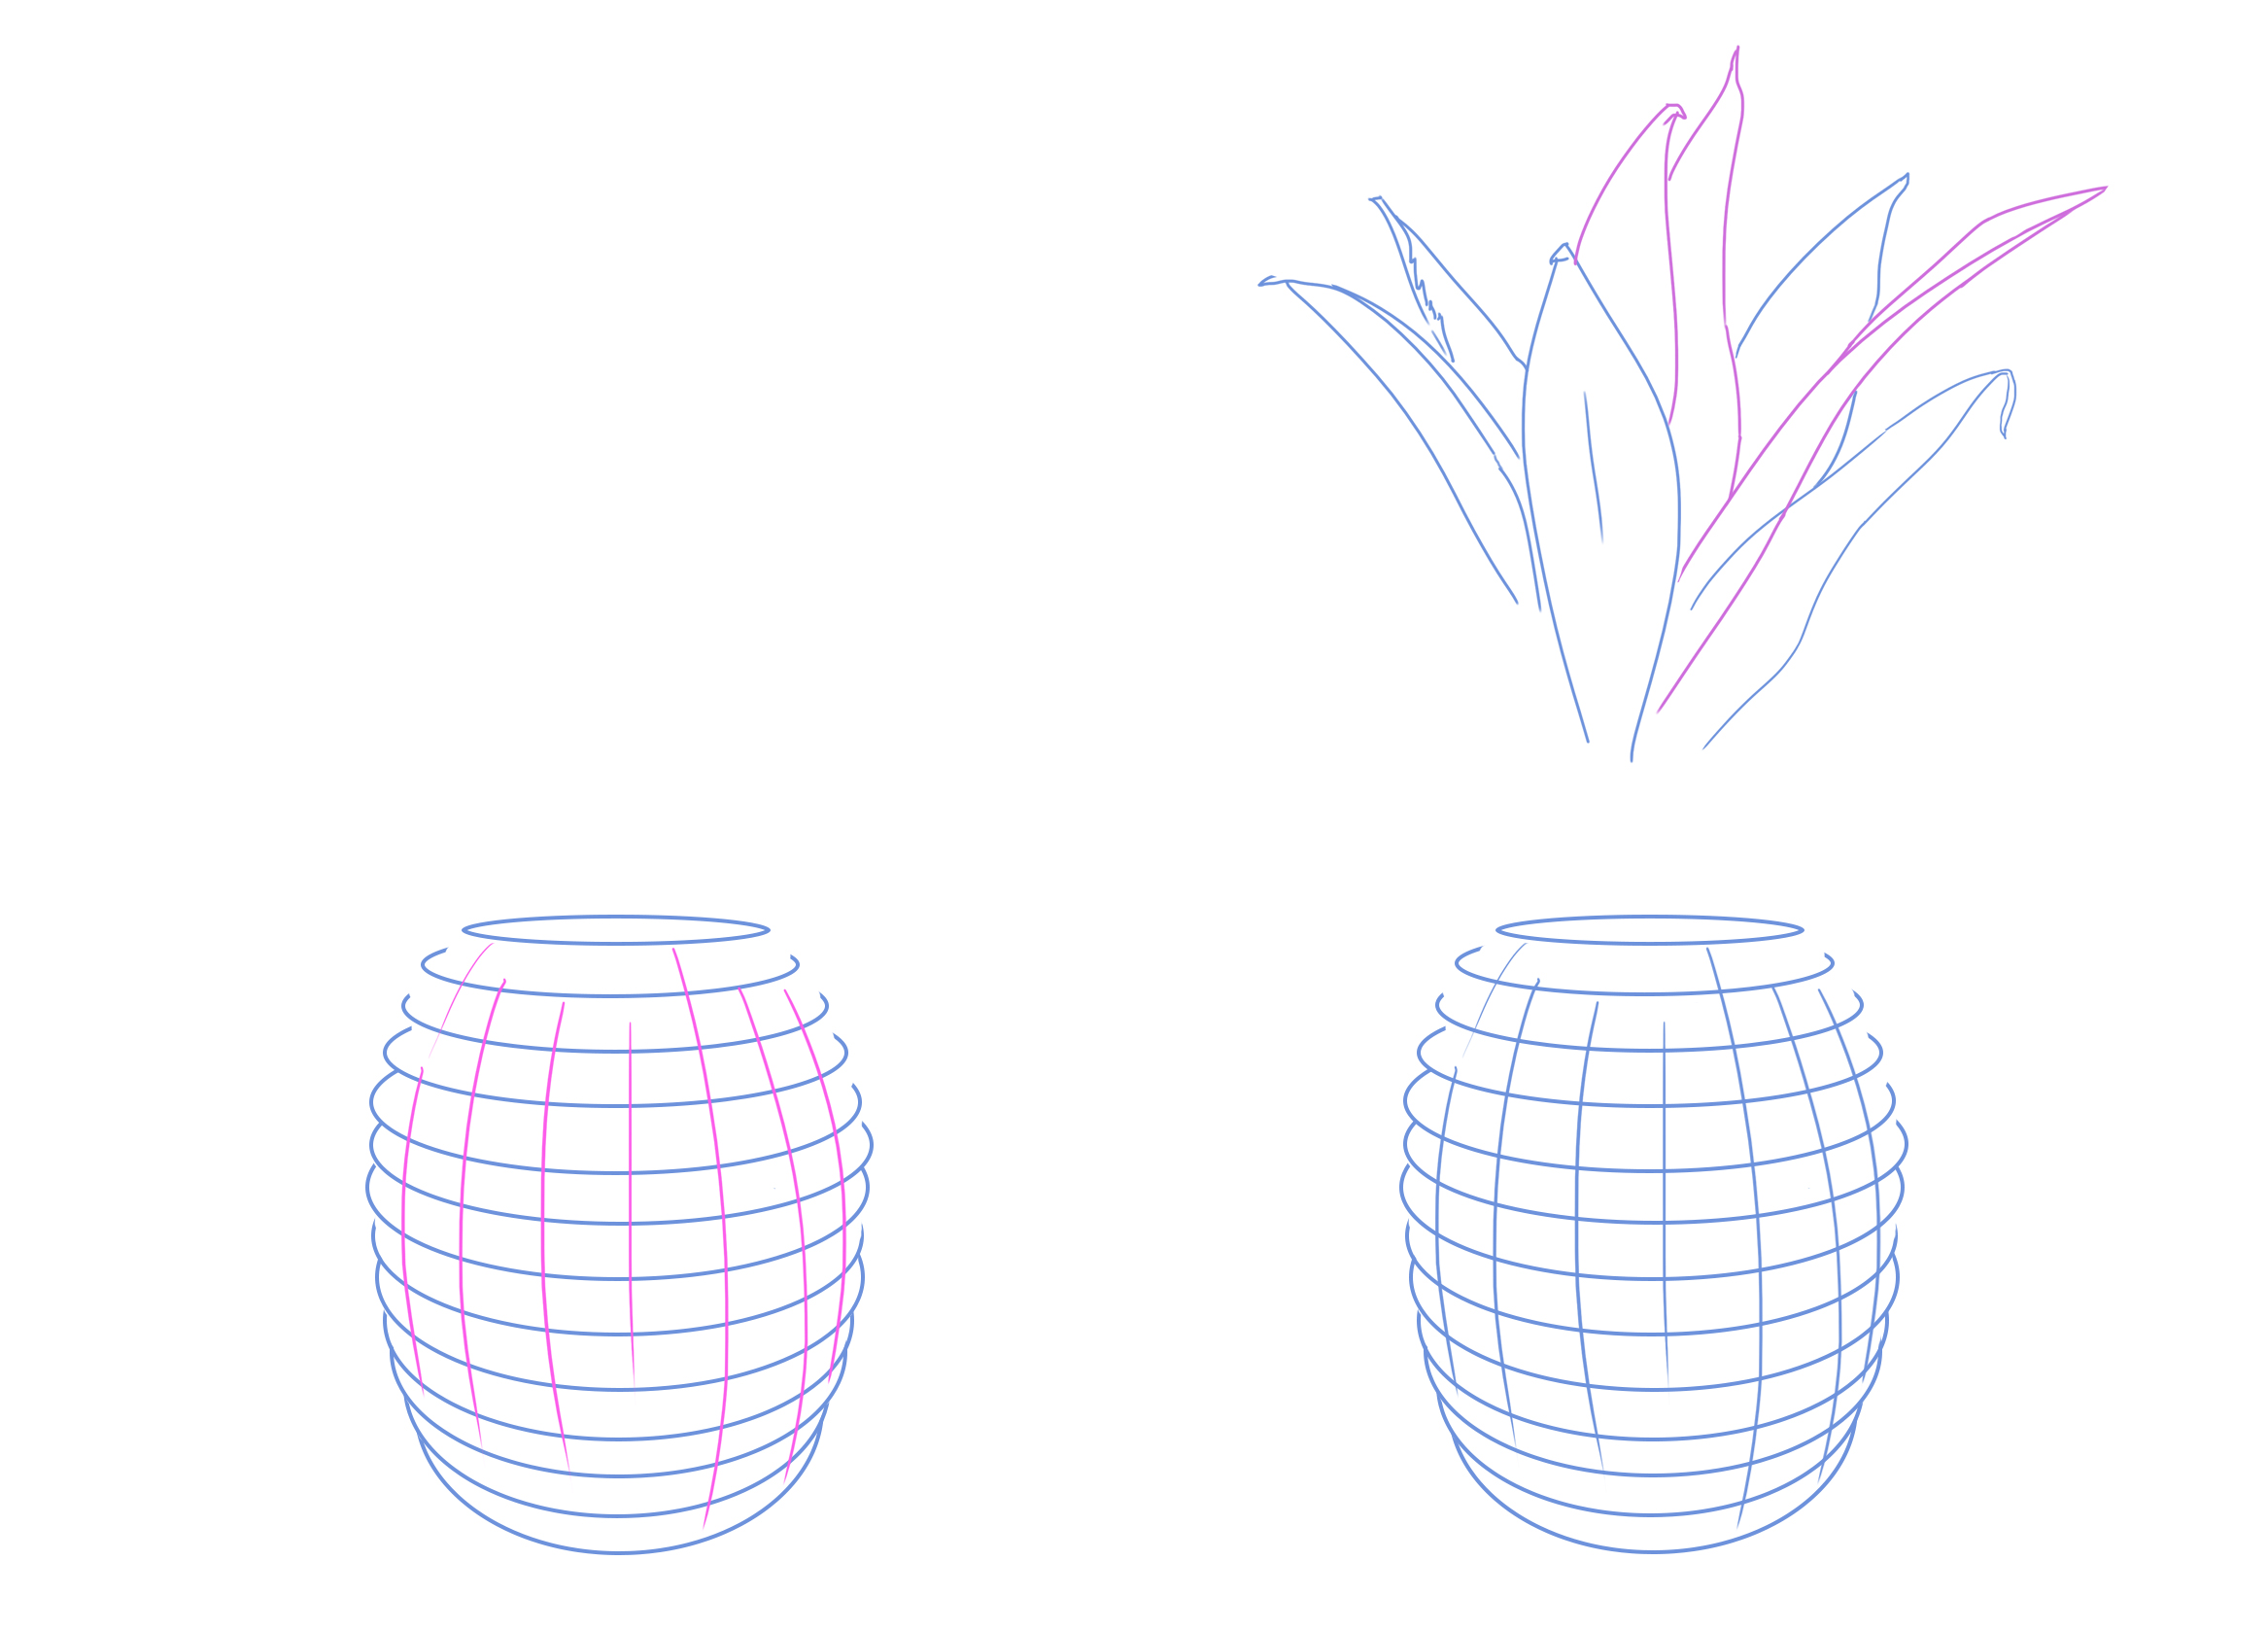
3. I draw the vertical lines of the rind structure, which are slightly curved.
4. I begin sketching its thick leaves. They can be drawn one beneath the other. The ones at the top of the pineapple are longer and less curved.
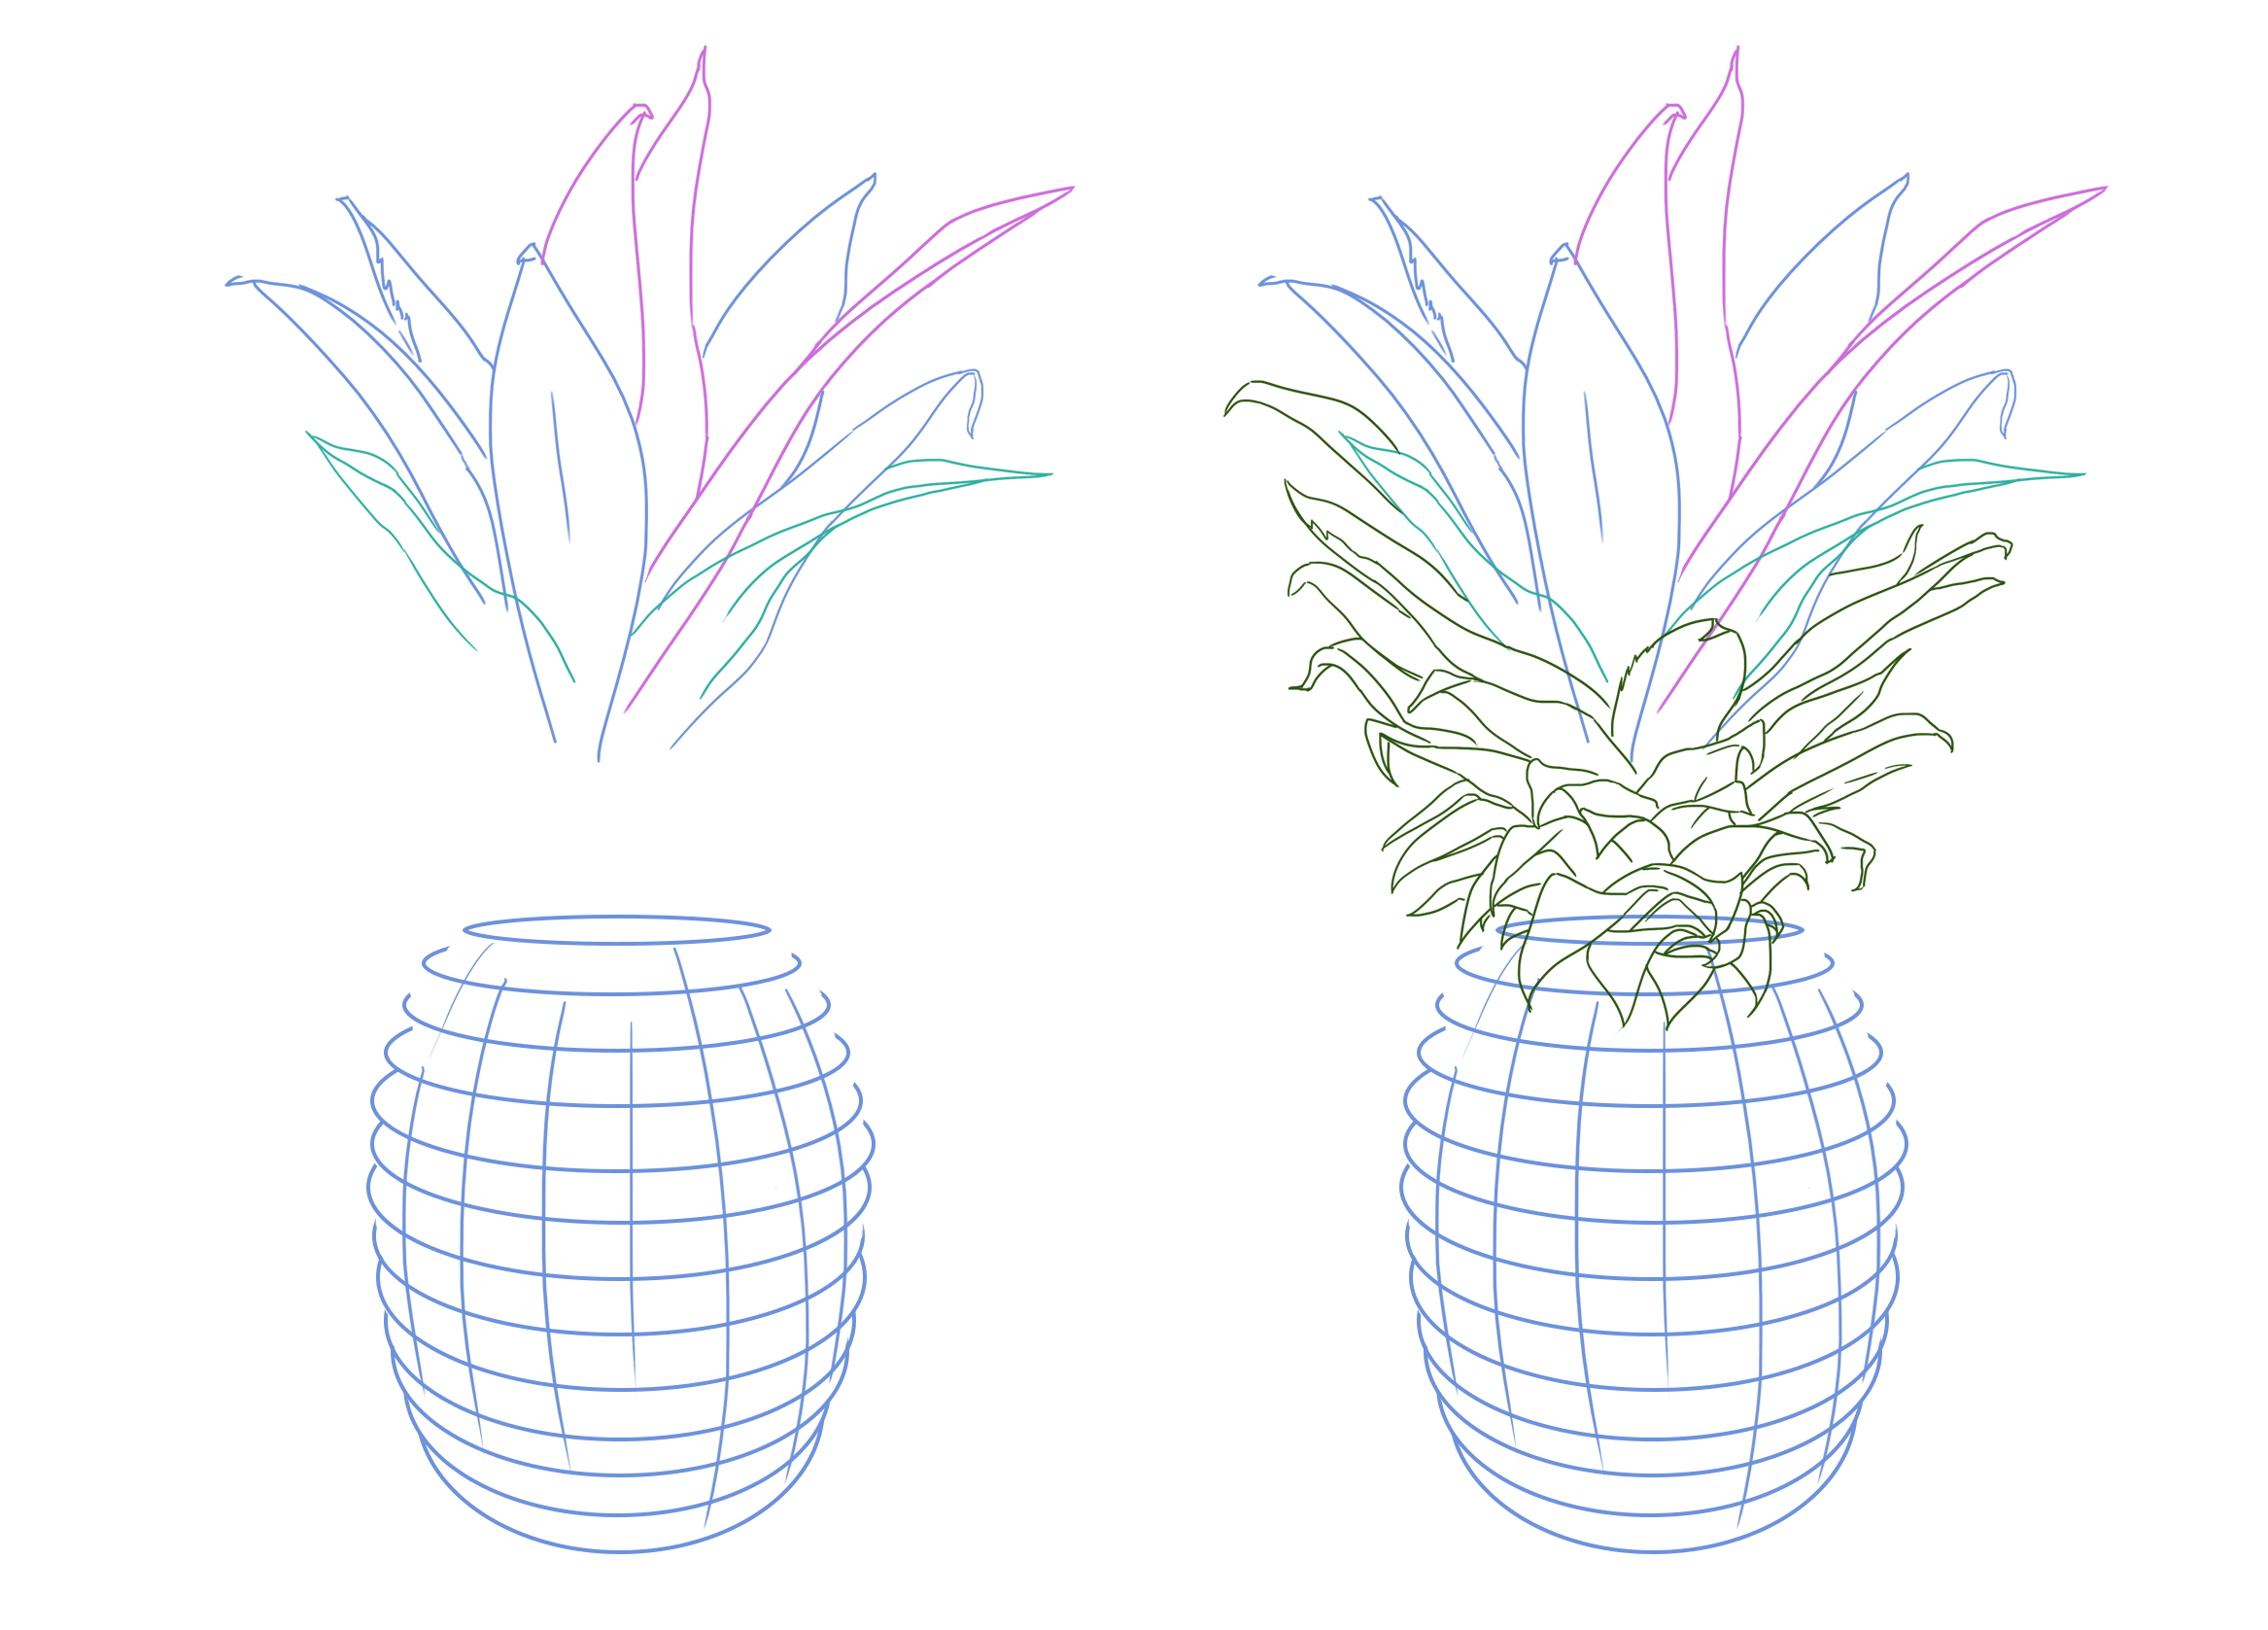
5. I draw the lower leaves. At this stage, they begin to curl and become smaller and smaller, until they completely fall downward over the rind.
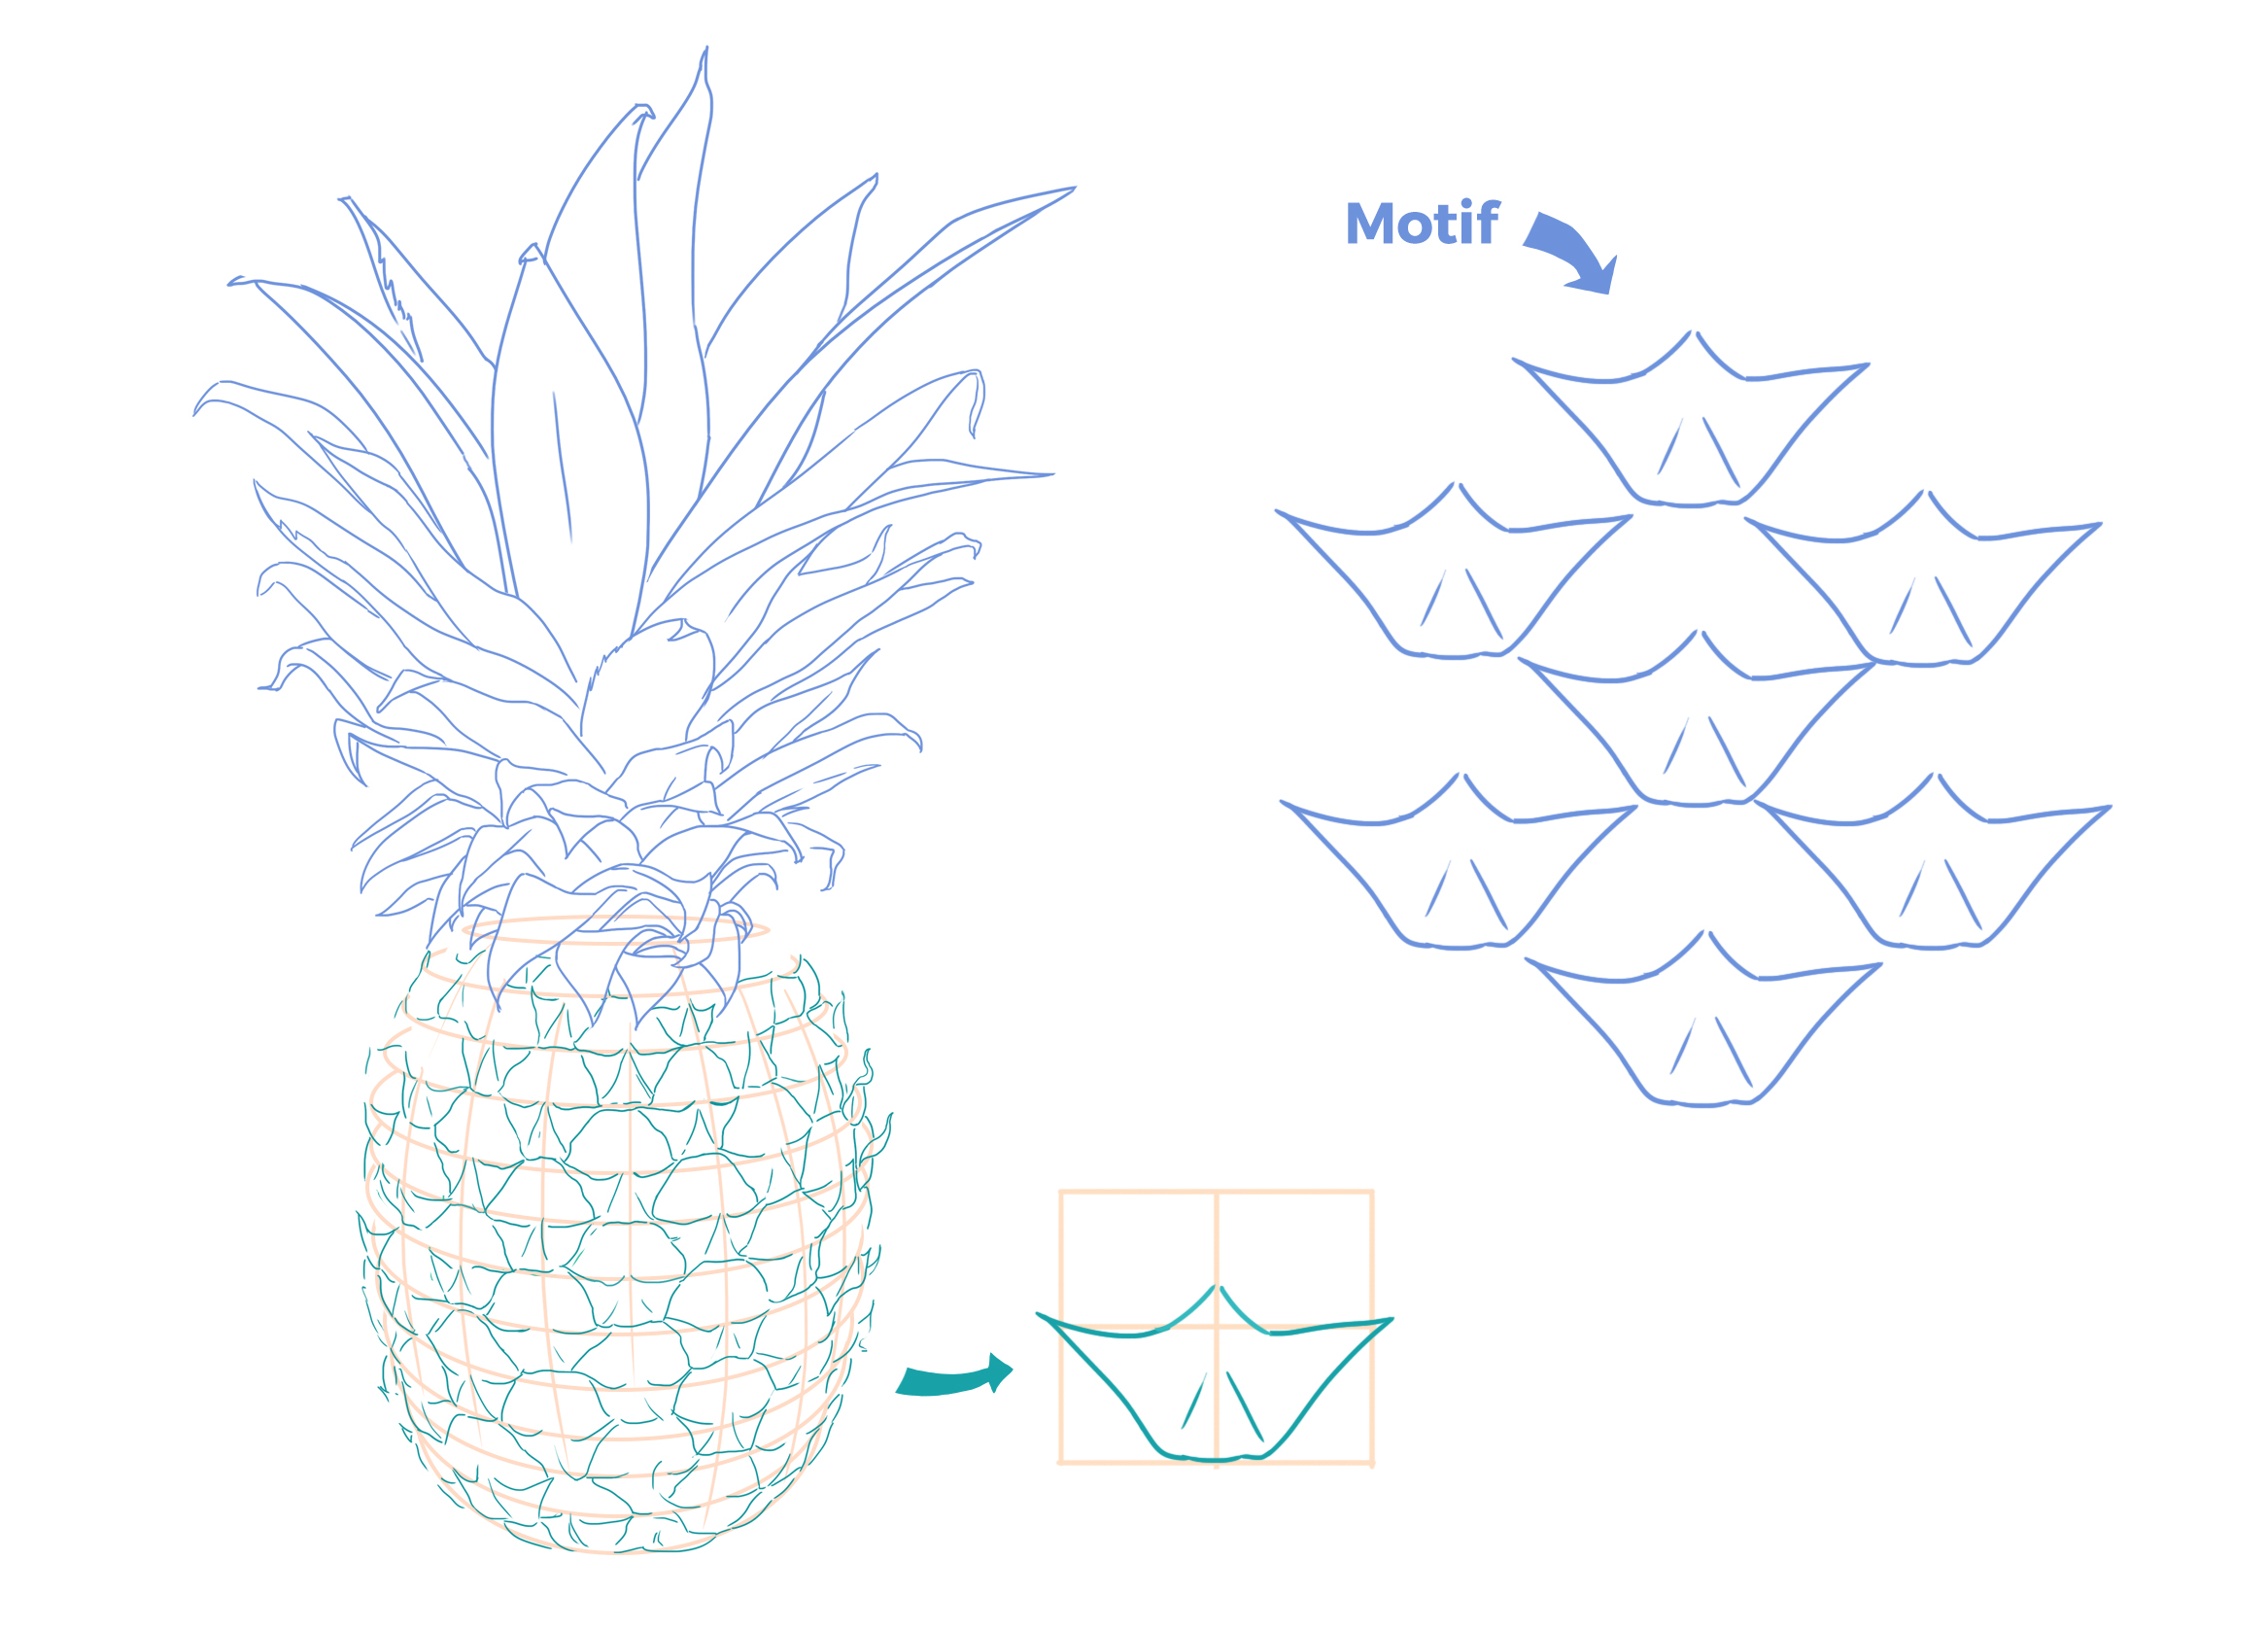
6. By spacing out every two horizontal lines, I begin drawing the pattern of the rind. On the right, I simplify the drawing of this pattern. I will repeat it all around the bottom of the pineapple, applying the perspective defined by the ellipses that were previously drawn. This part of the pineapple resembles a thin skin.
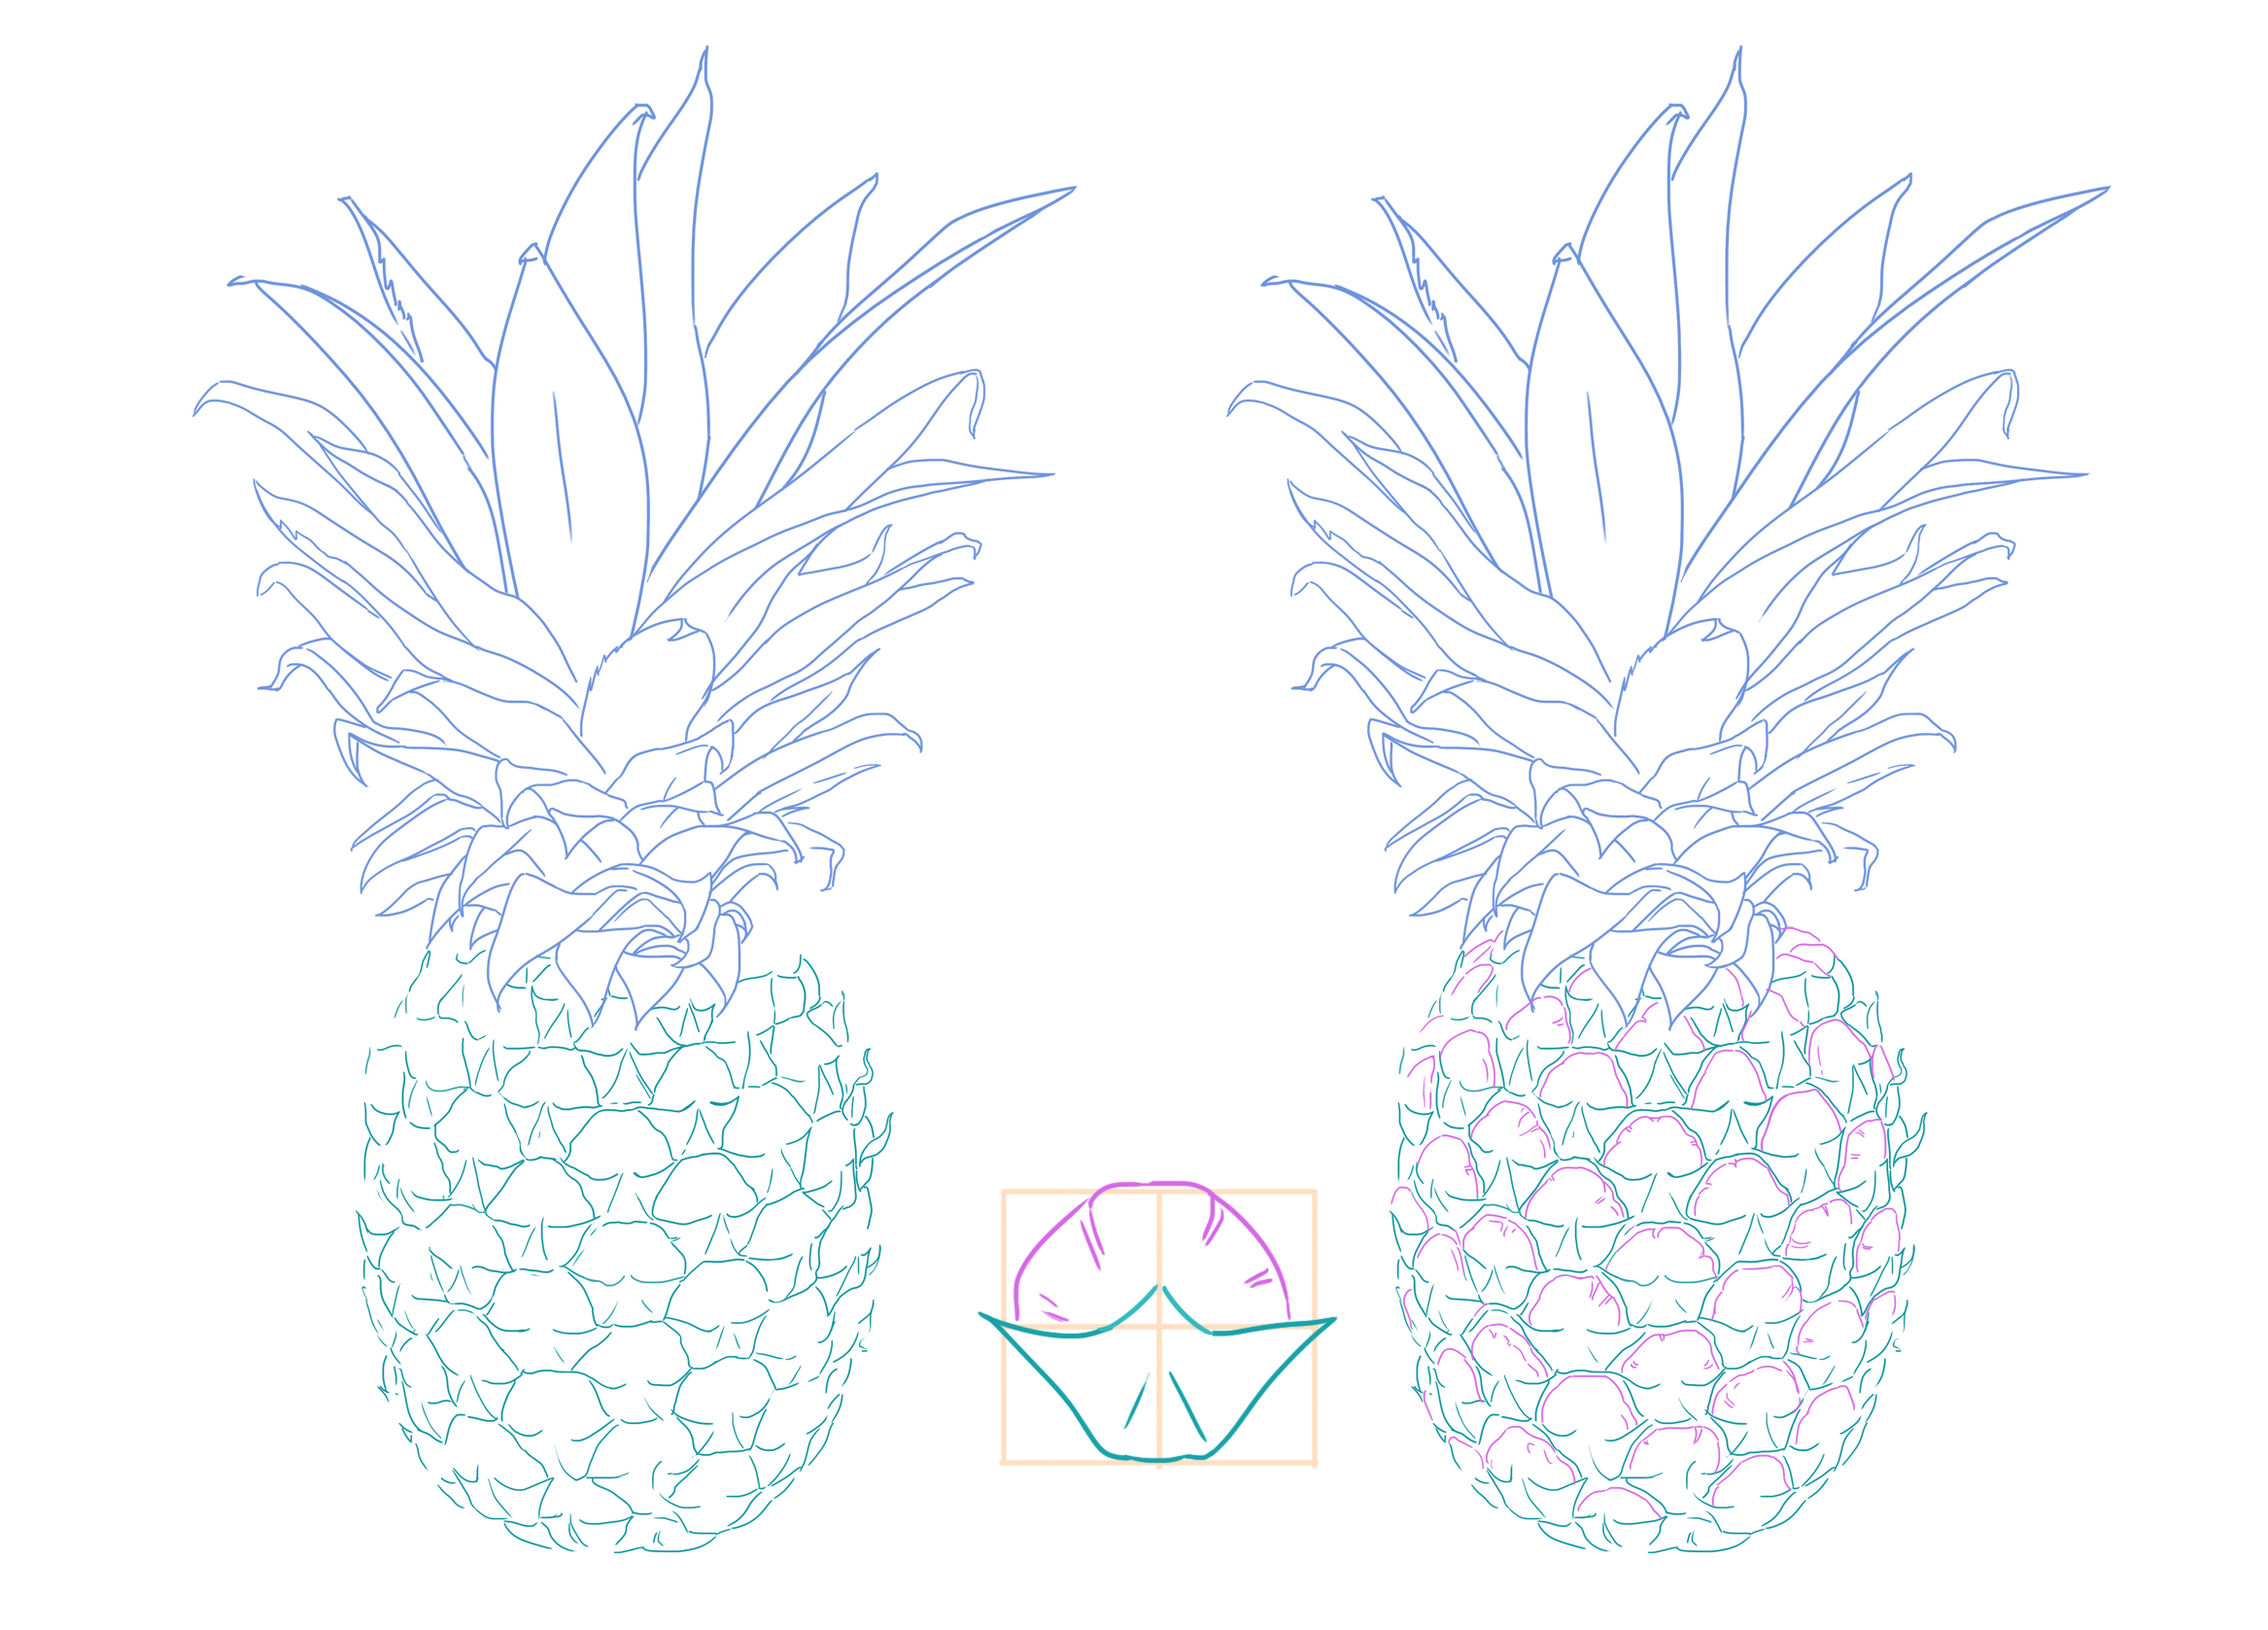
7. Once finished, I can erase the construction lines.
8. I finish drawing the pattern (in fuchsia). This last part of the pattern is actually slightly raised; the skin drawn previously revolves around it.
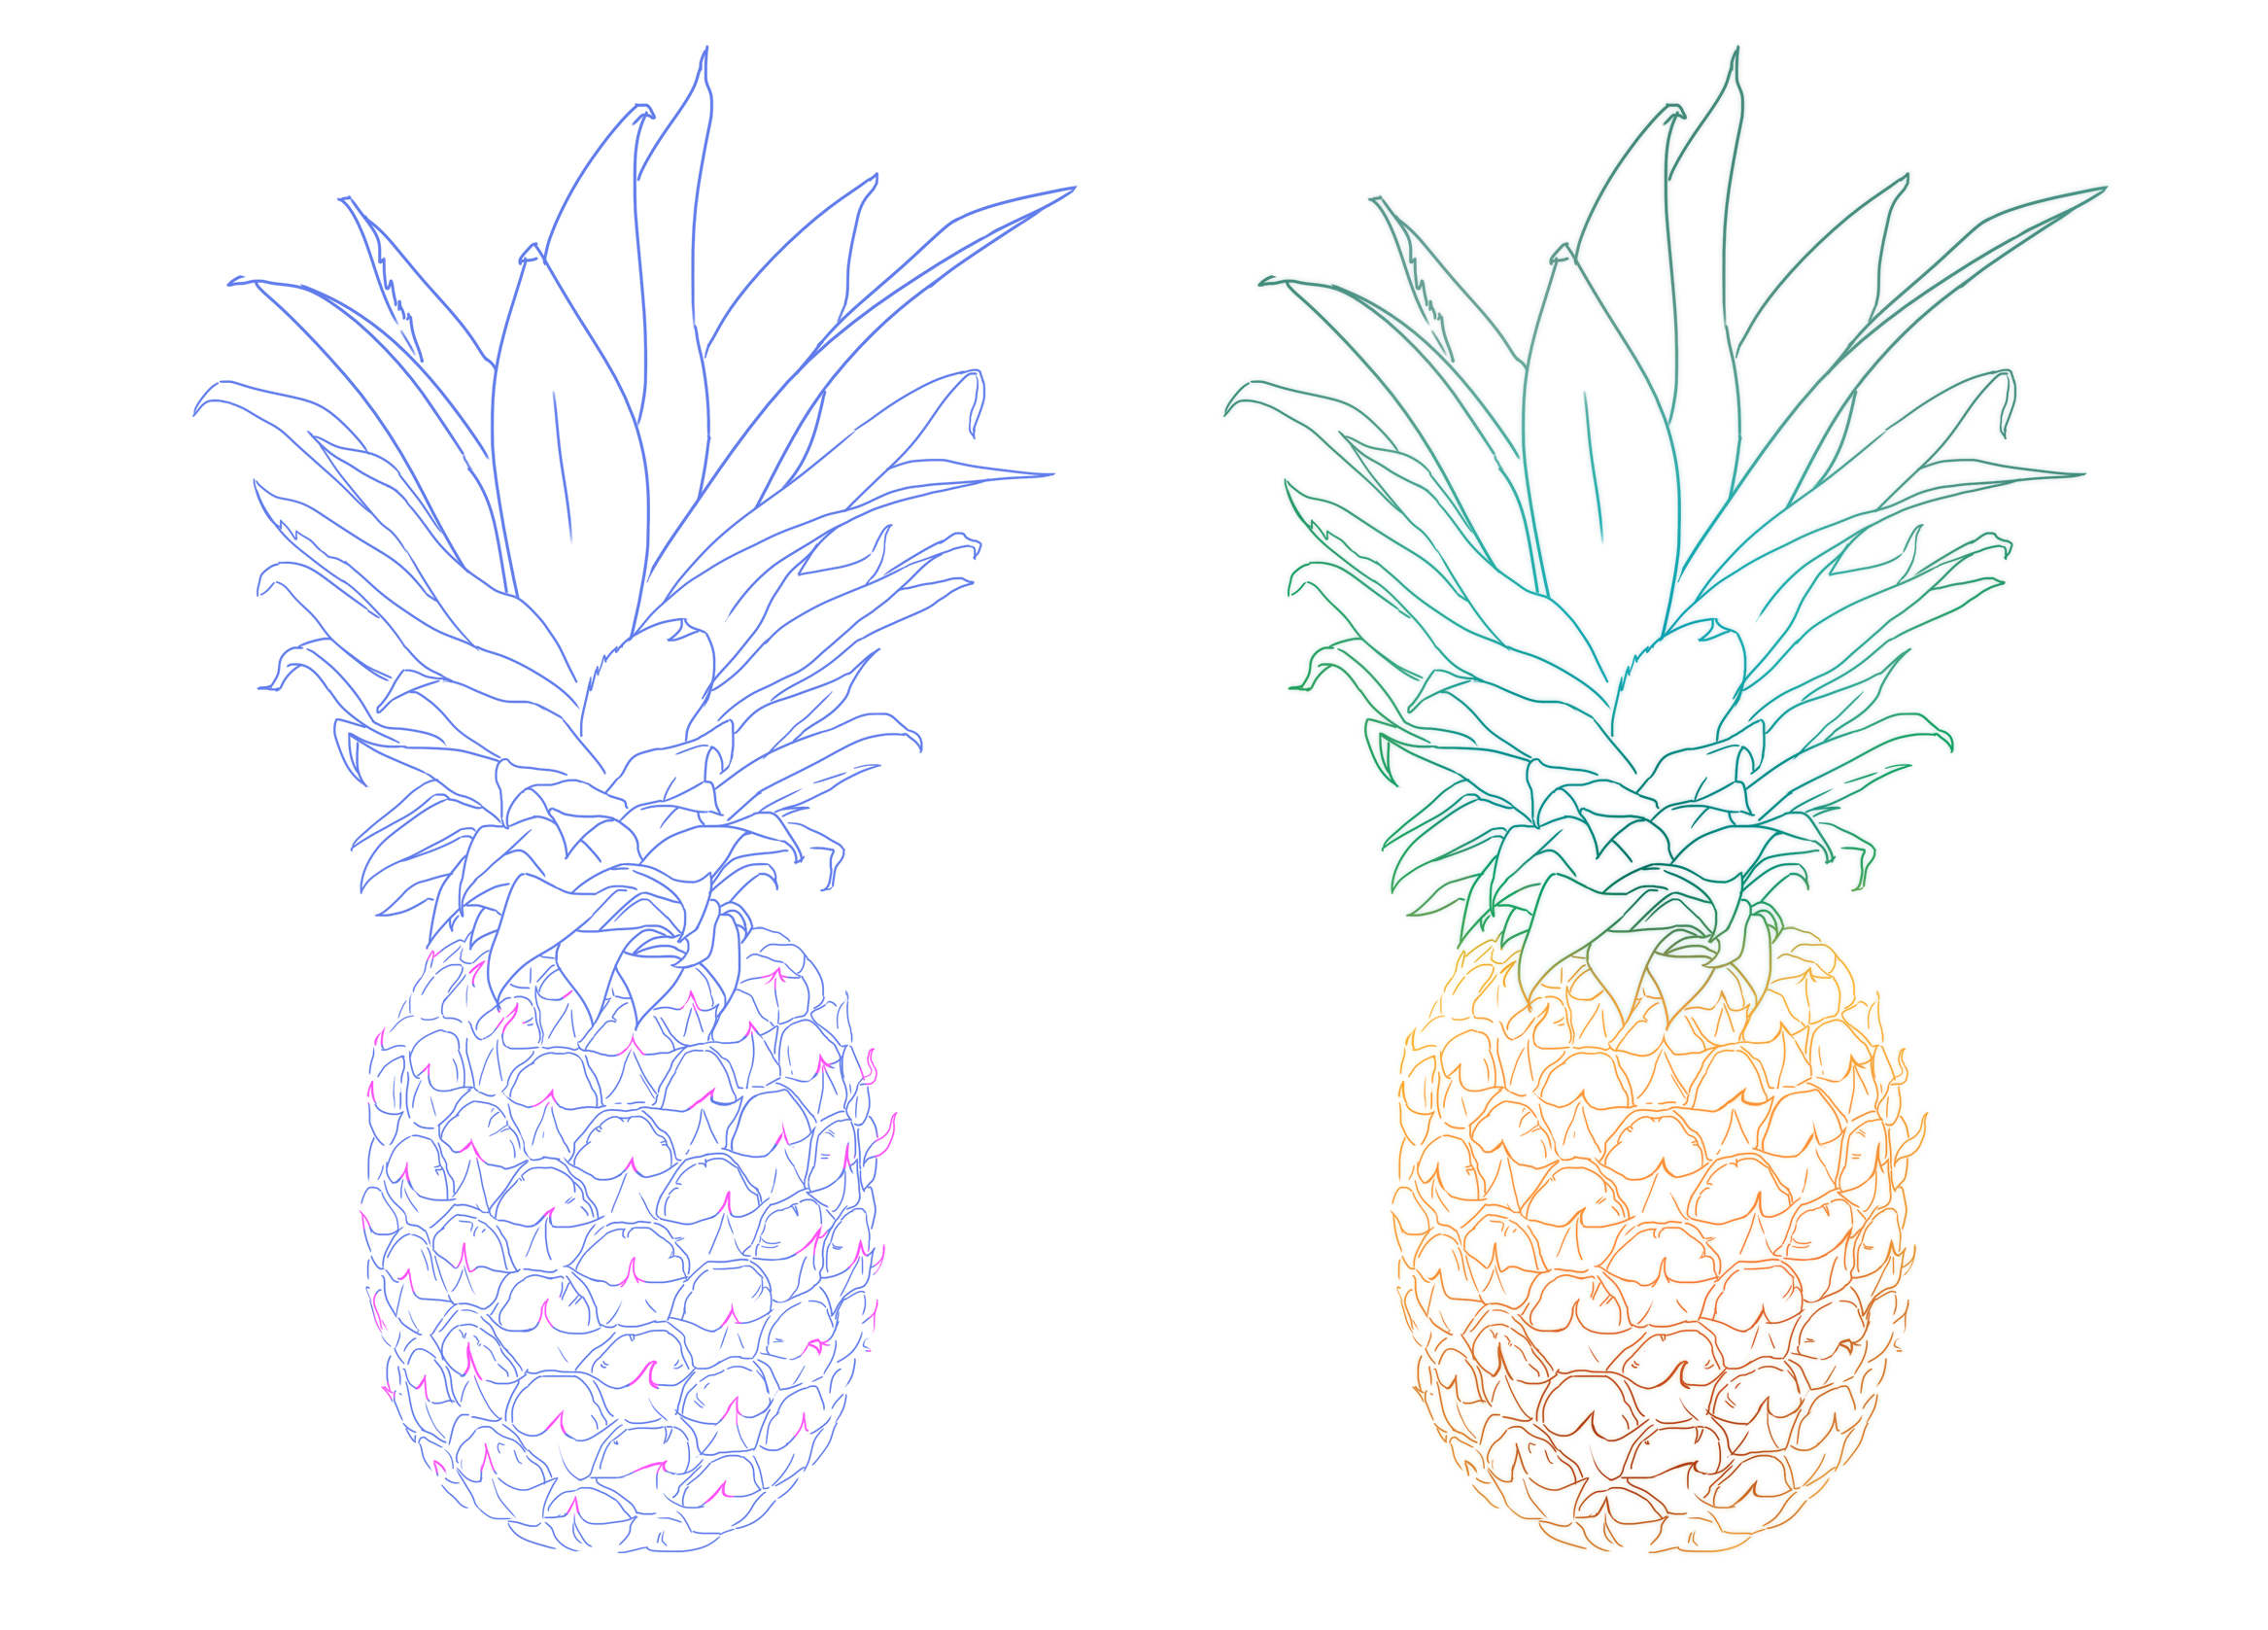
9. I draw the end of the rind pattern with small various "v"s.
10. I'm applying color to my drawing: yellow/orange to brown for the cylindrical base of the pineapple, and a range of greens for its leaves!
DRAWING A CHERRY

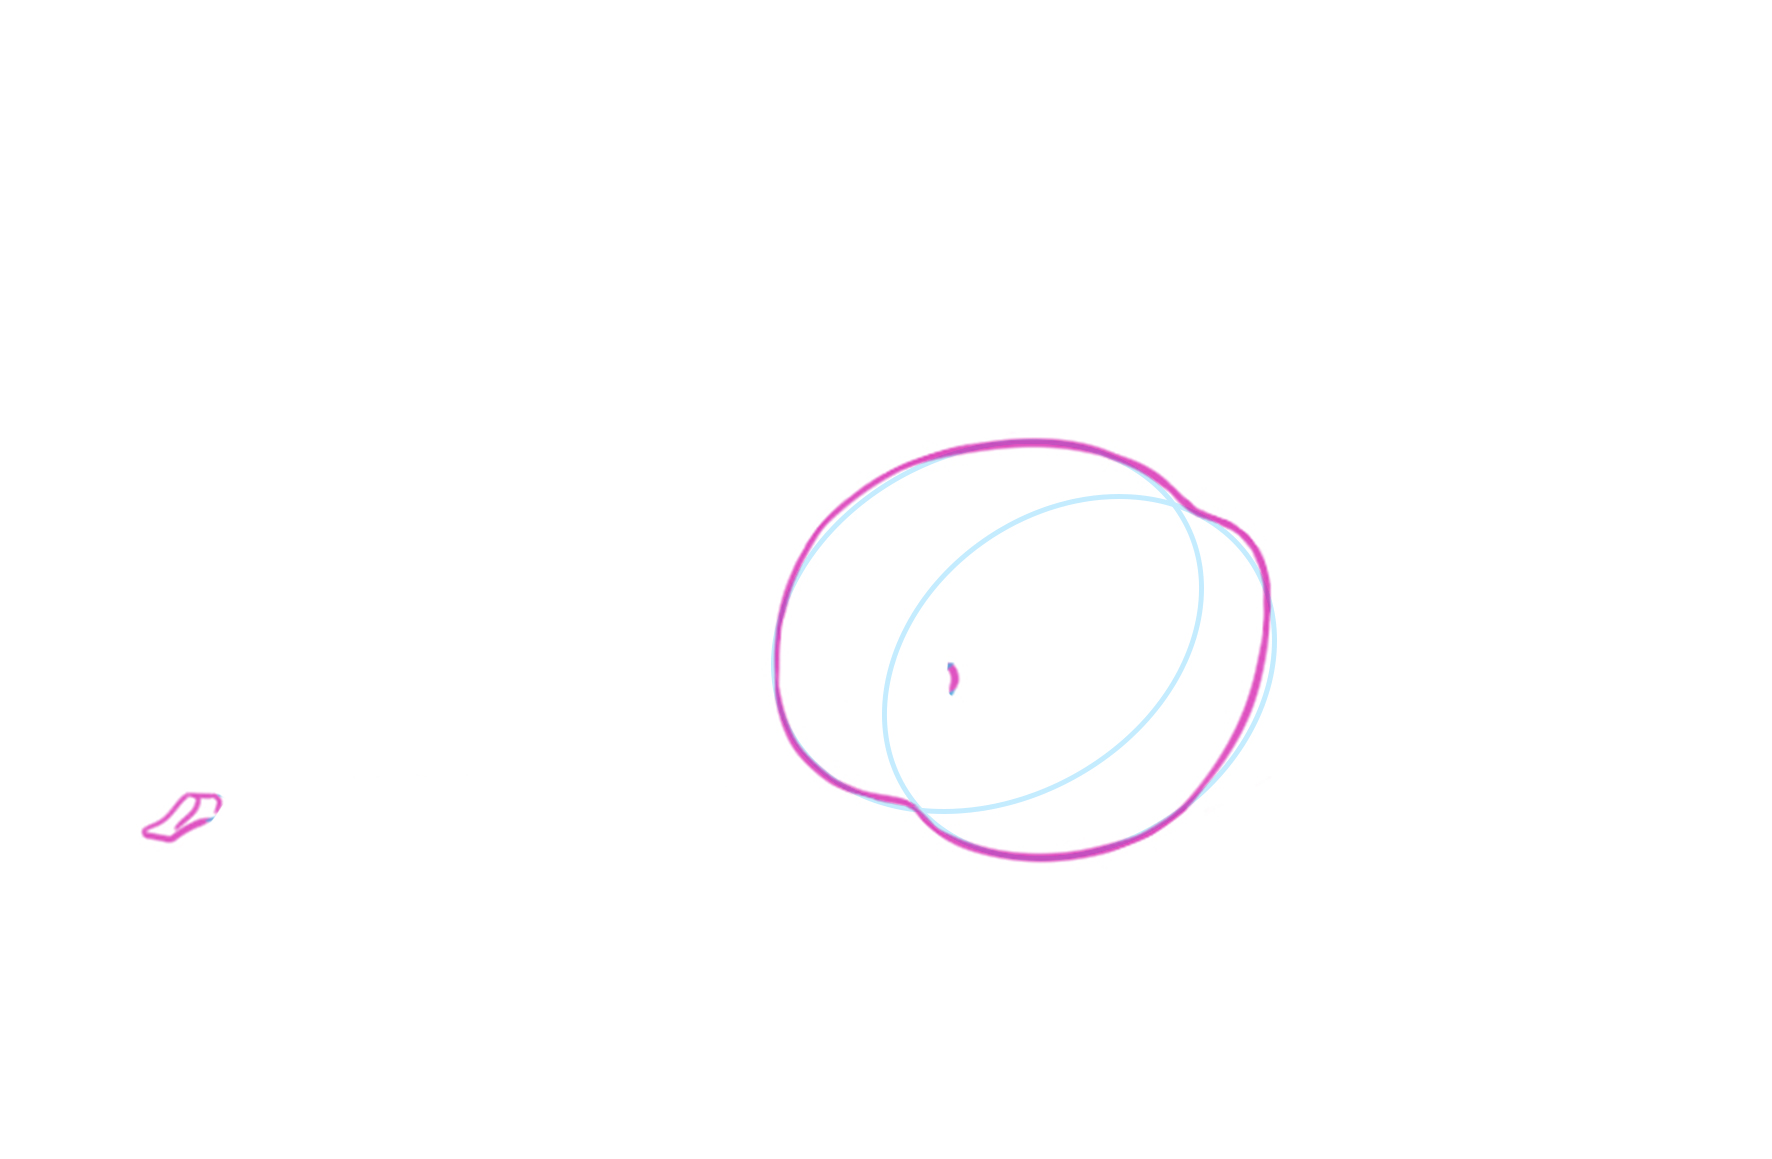
1. This fruit has a simple appearance. To start, I draw two ovals to form a base for sketching the fleshy part. They are slightly offset from one another.
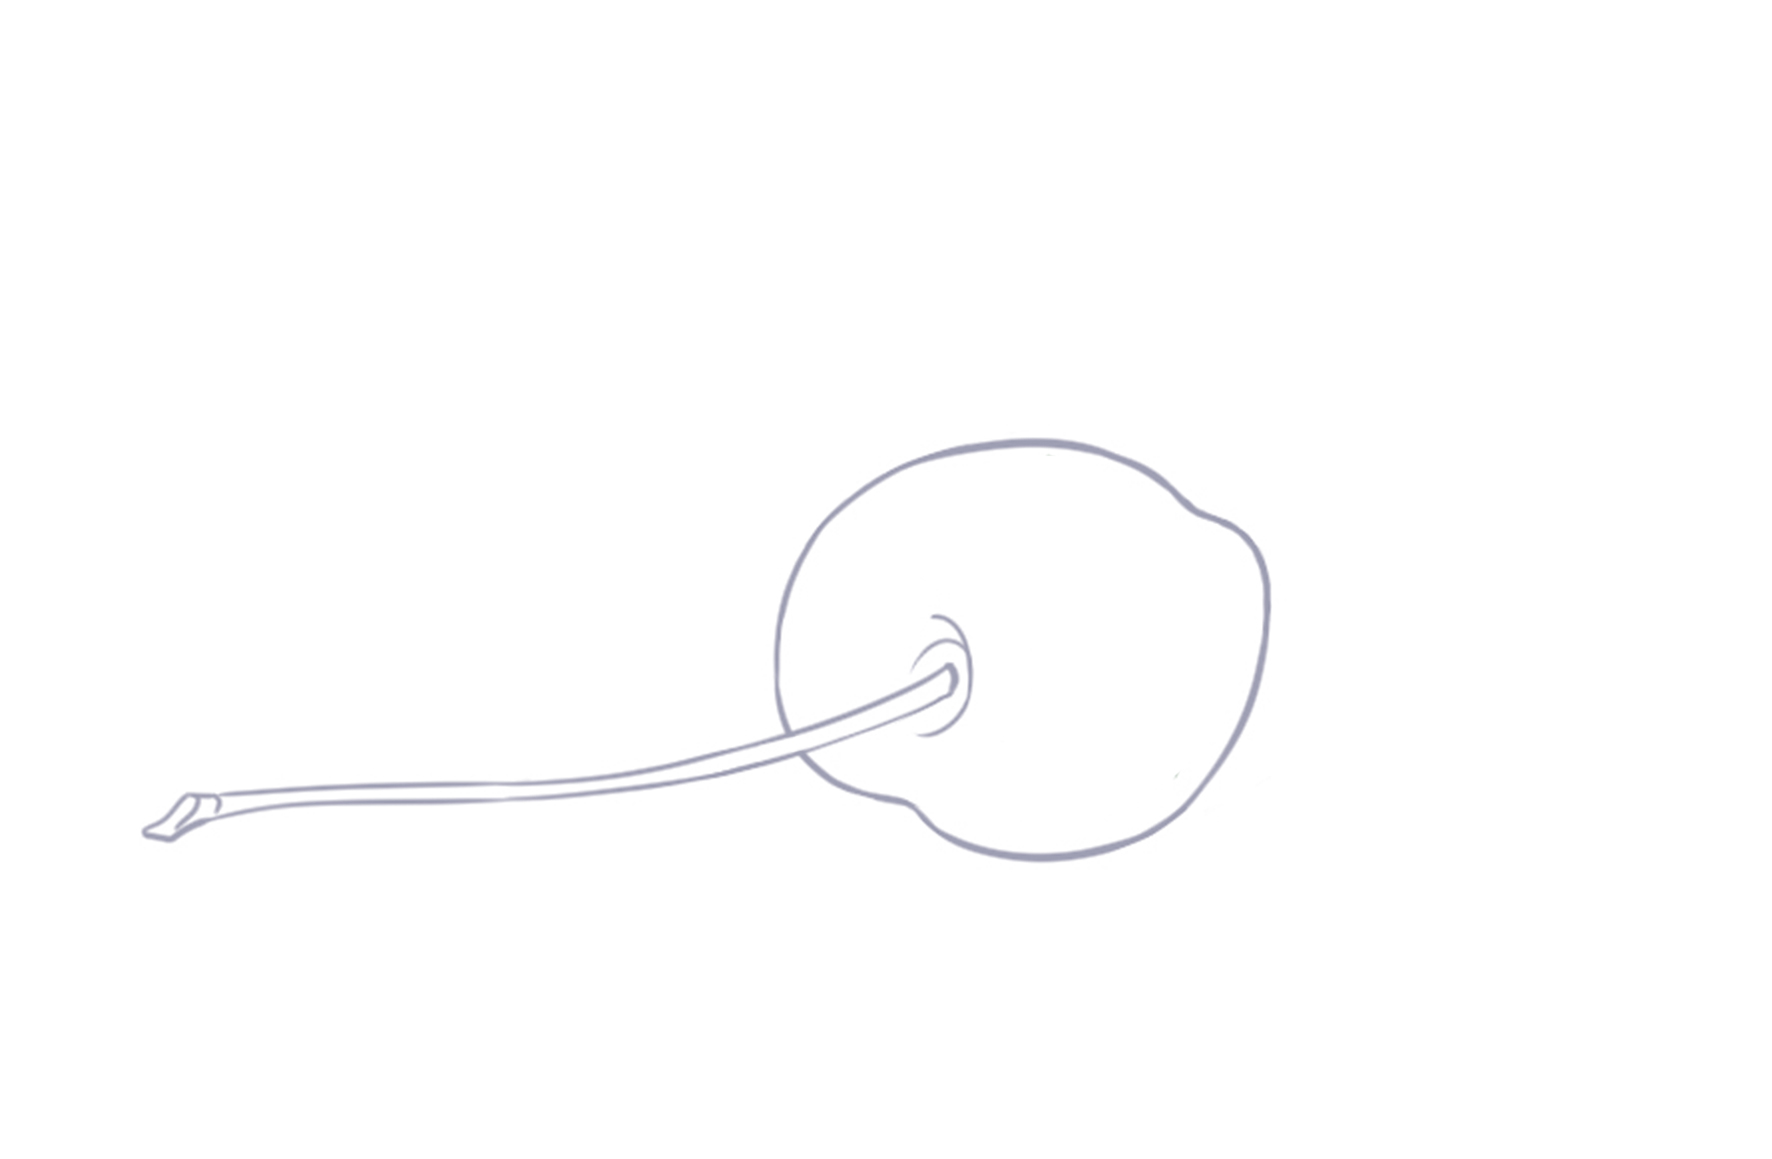
2. My cherry is placed on a surface, sideways. I then draw the outline of the fruit, taking care to make the lower part of the cherry's base (top right) thinner. The shape is irregular compared to the two ovals, with more pronounced curves where the stem - commonly called the cherry's tail - will be placed (bottom left).
3. I trace the two ends of the stalk. It can be as long as you like.
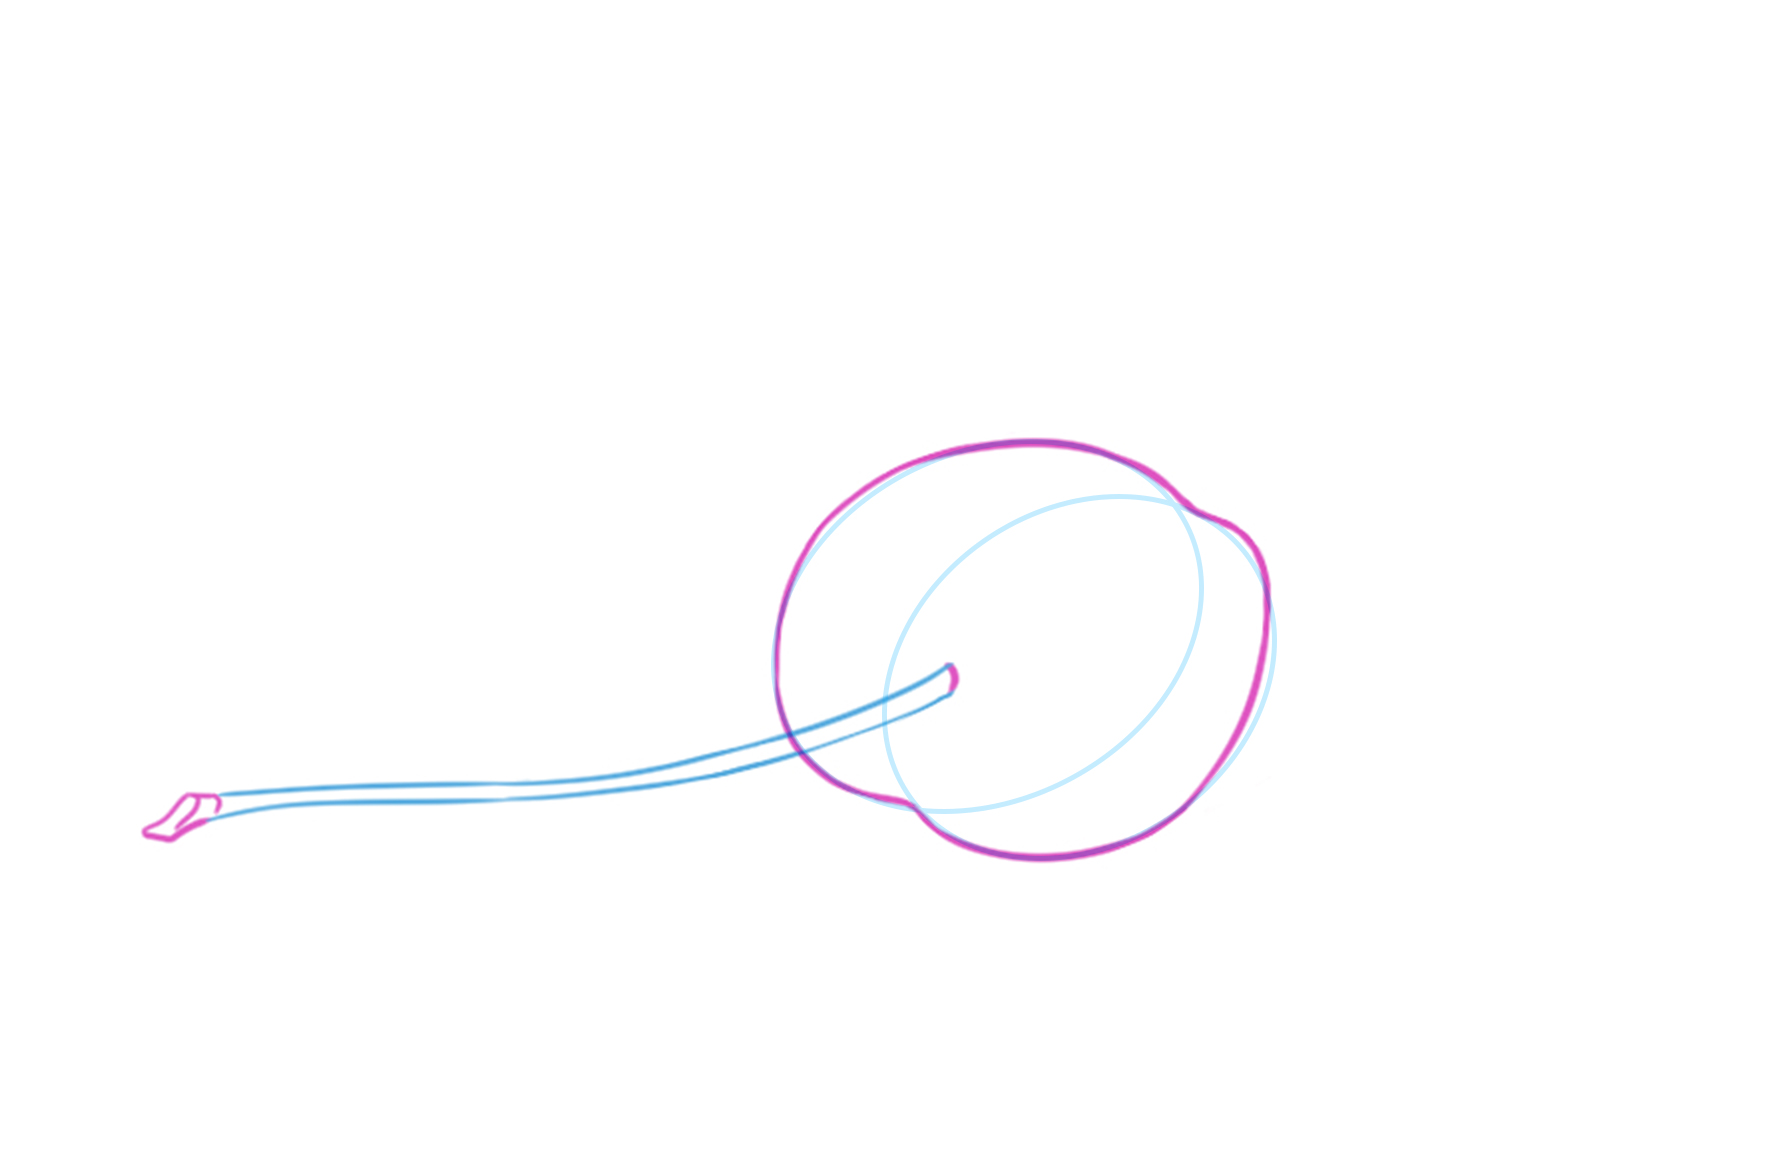
4. I connect the ends with two curves to finish drawing the stem; it must be really thin.
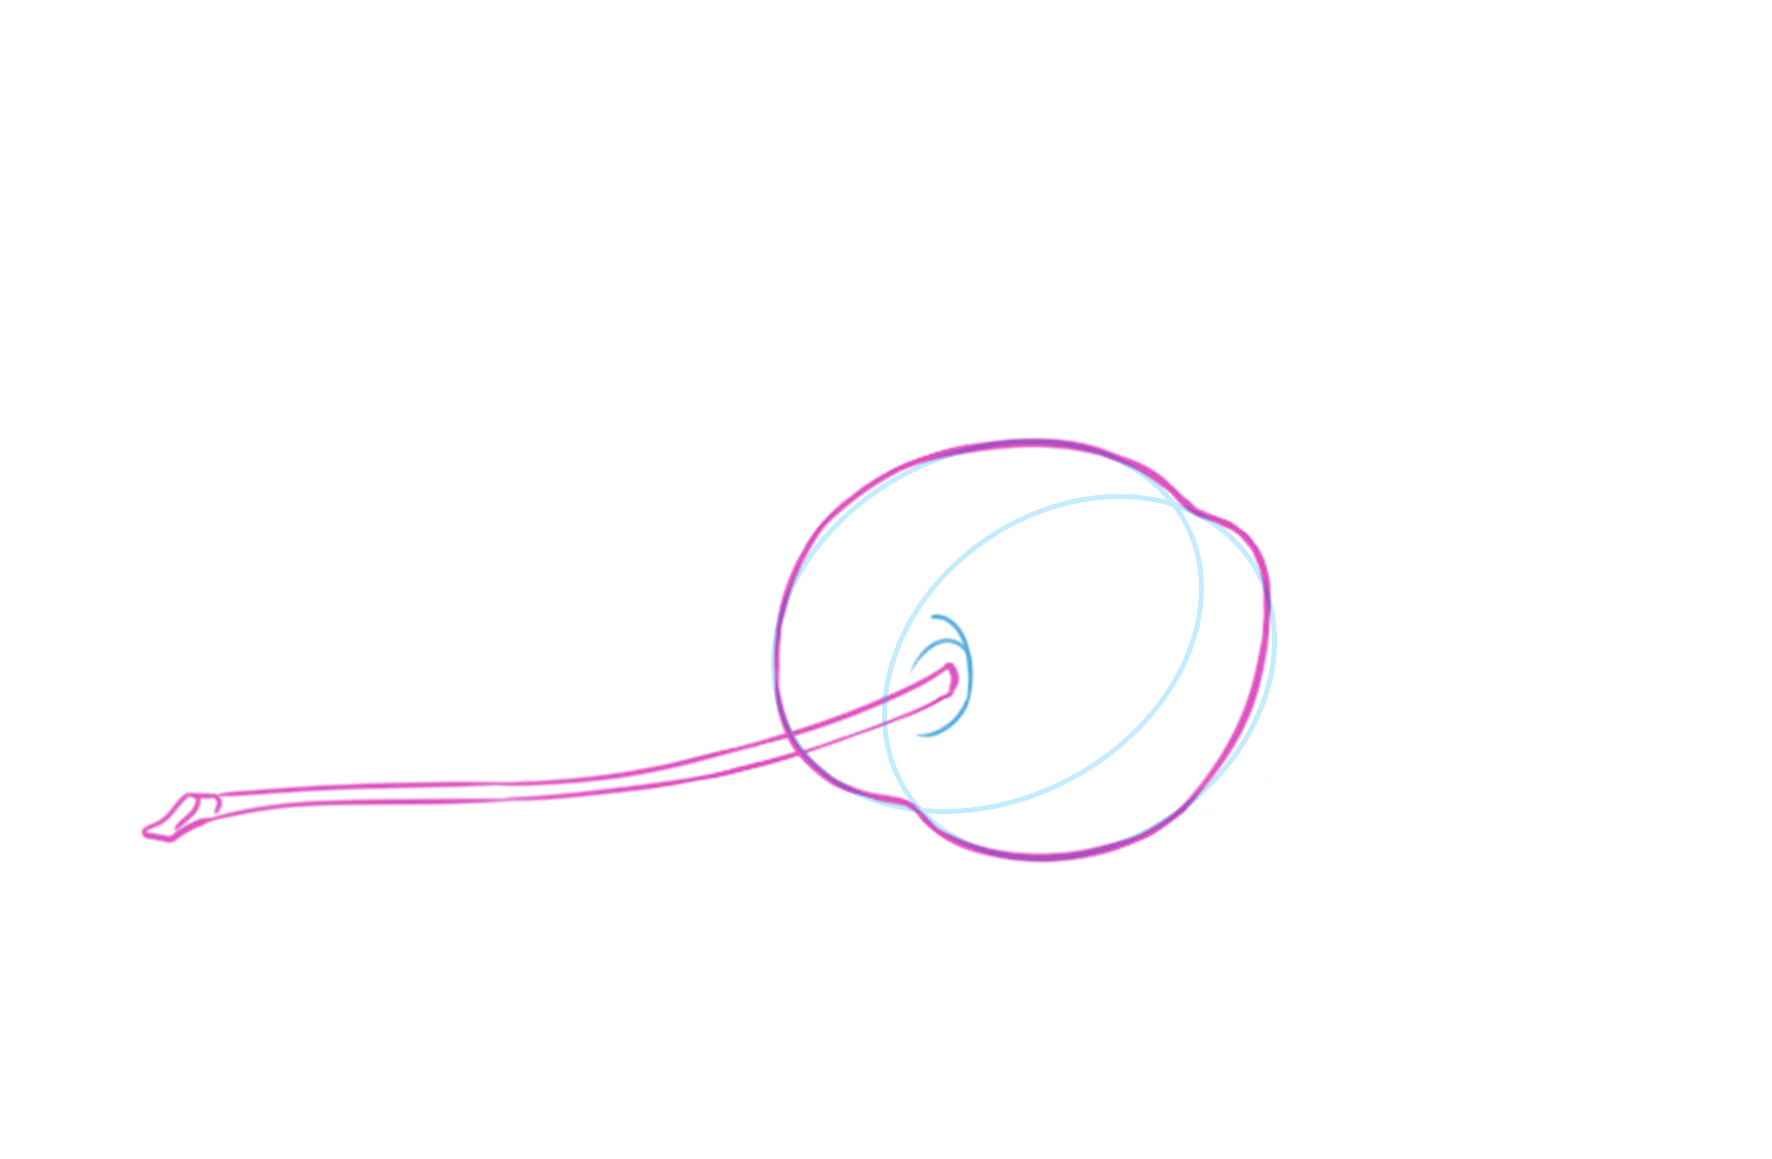
5. With rounded lines, I draw the hollow of the cherry, where the stem meets the pit.
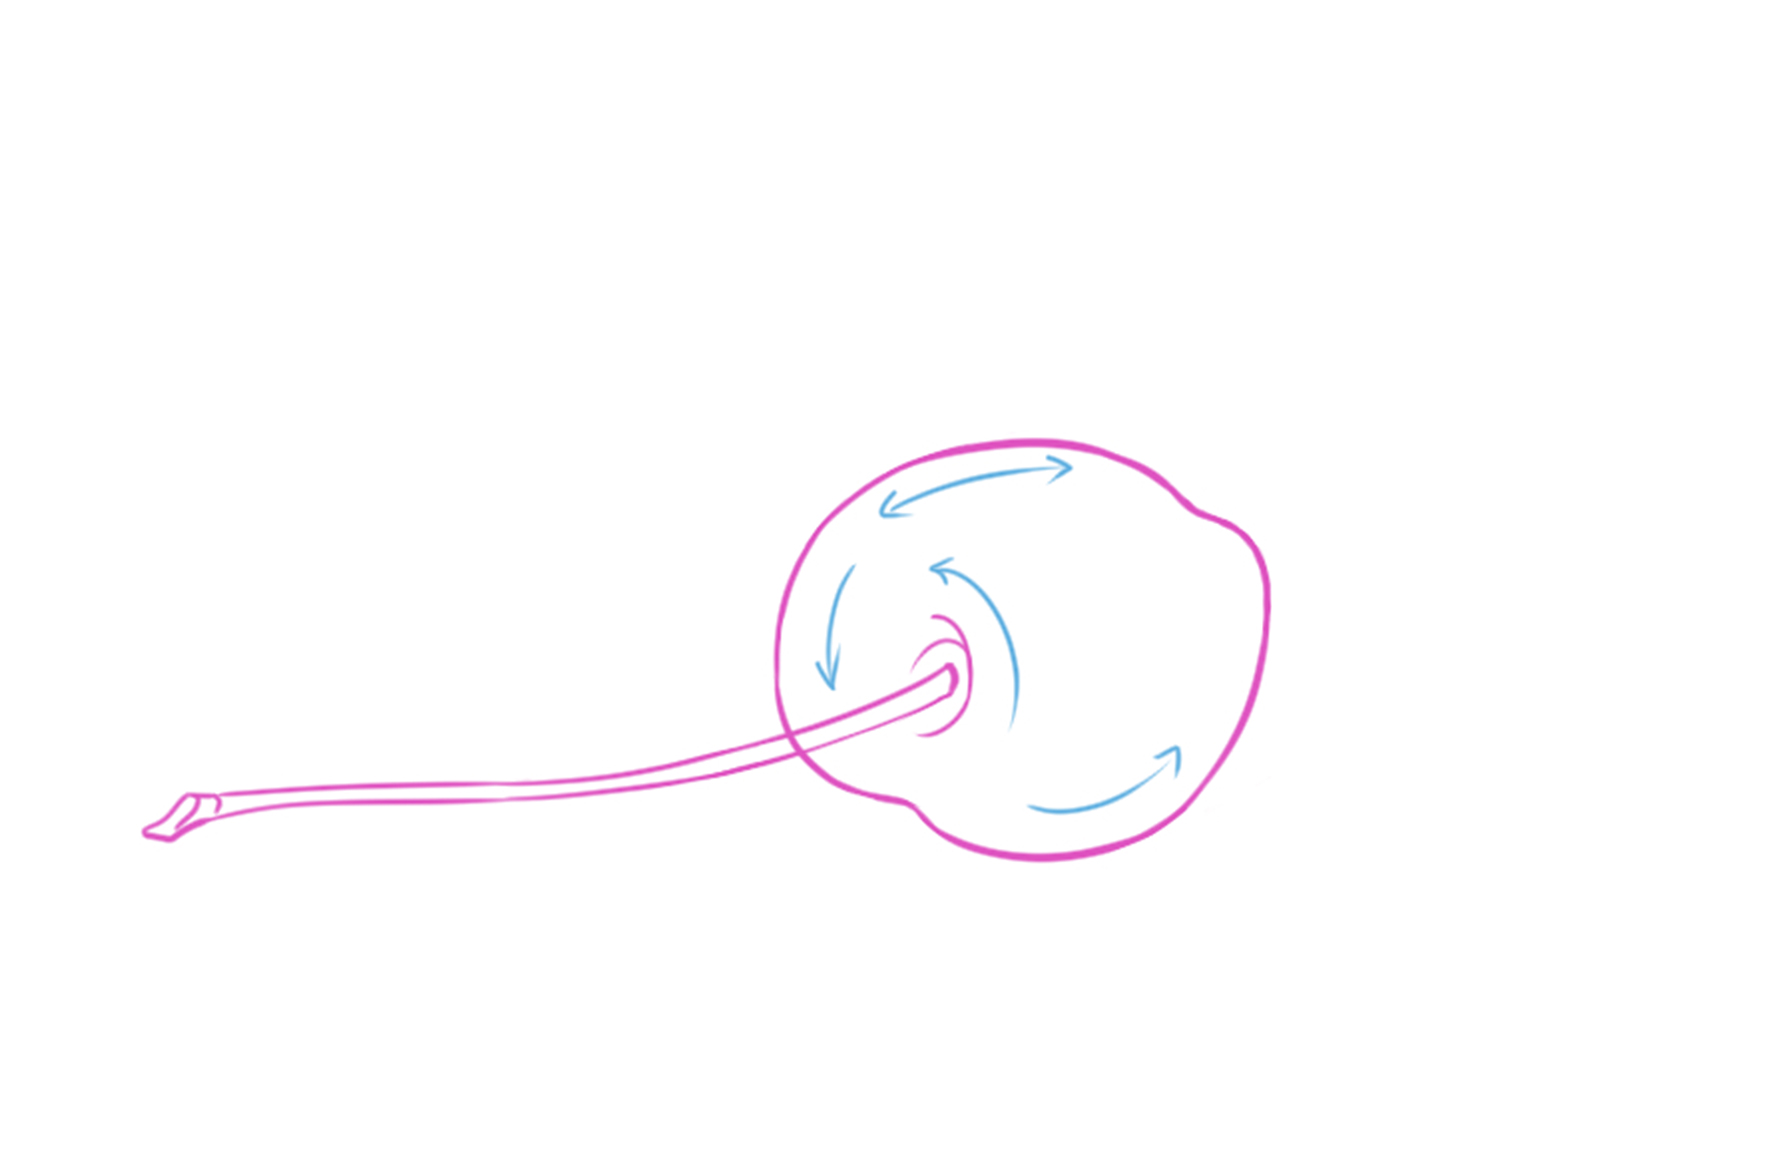
6. I'm adding arrows at this stage of the drawing to indicate where the light falls on the fruit. Since it is small and rounded, the light reflects from all sides; on the edges, and also around the base of the stalk: on the fleshy part.
7. I erase the construction lines and clean up the drawing. I can then enhance it with small hatches, as shown below.
8. The cherry generally remains within medium to dark values.
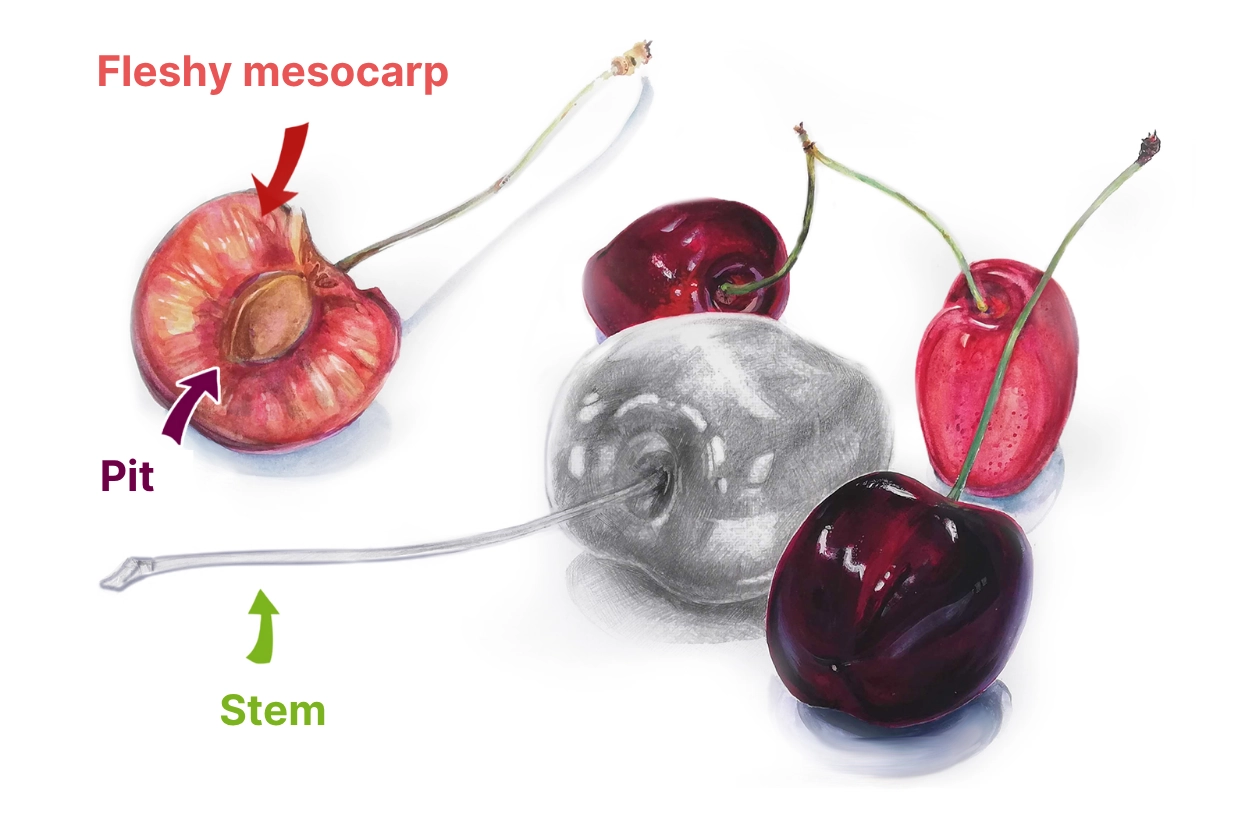
I have painted others to demonstrate some color variations. Whether it's in pencil, paint, or any other medium, the emphasis on hues is always maintained with intense reflections on the skin of the cherry. You can use pure white, or the white of the paper to represent it. The darkest shades are close to black for some cherry varieties. You can also lightly texture them, but their skin is predominantly smooth.
The flesh, on the other hand, has some luminous reflections, but is less intense than on the skin. The fleshy mesocarp can sometimes be very light, as well as very dark, while remaining in the orange/red tones.
DRAWING A BANANA
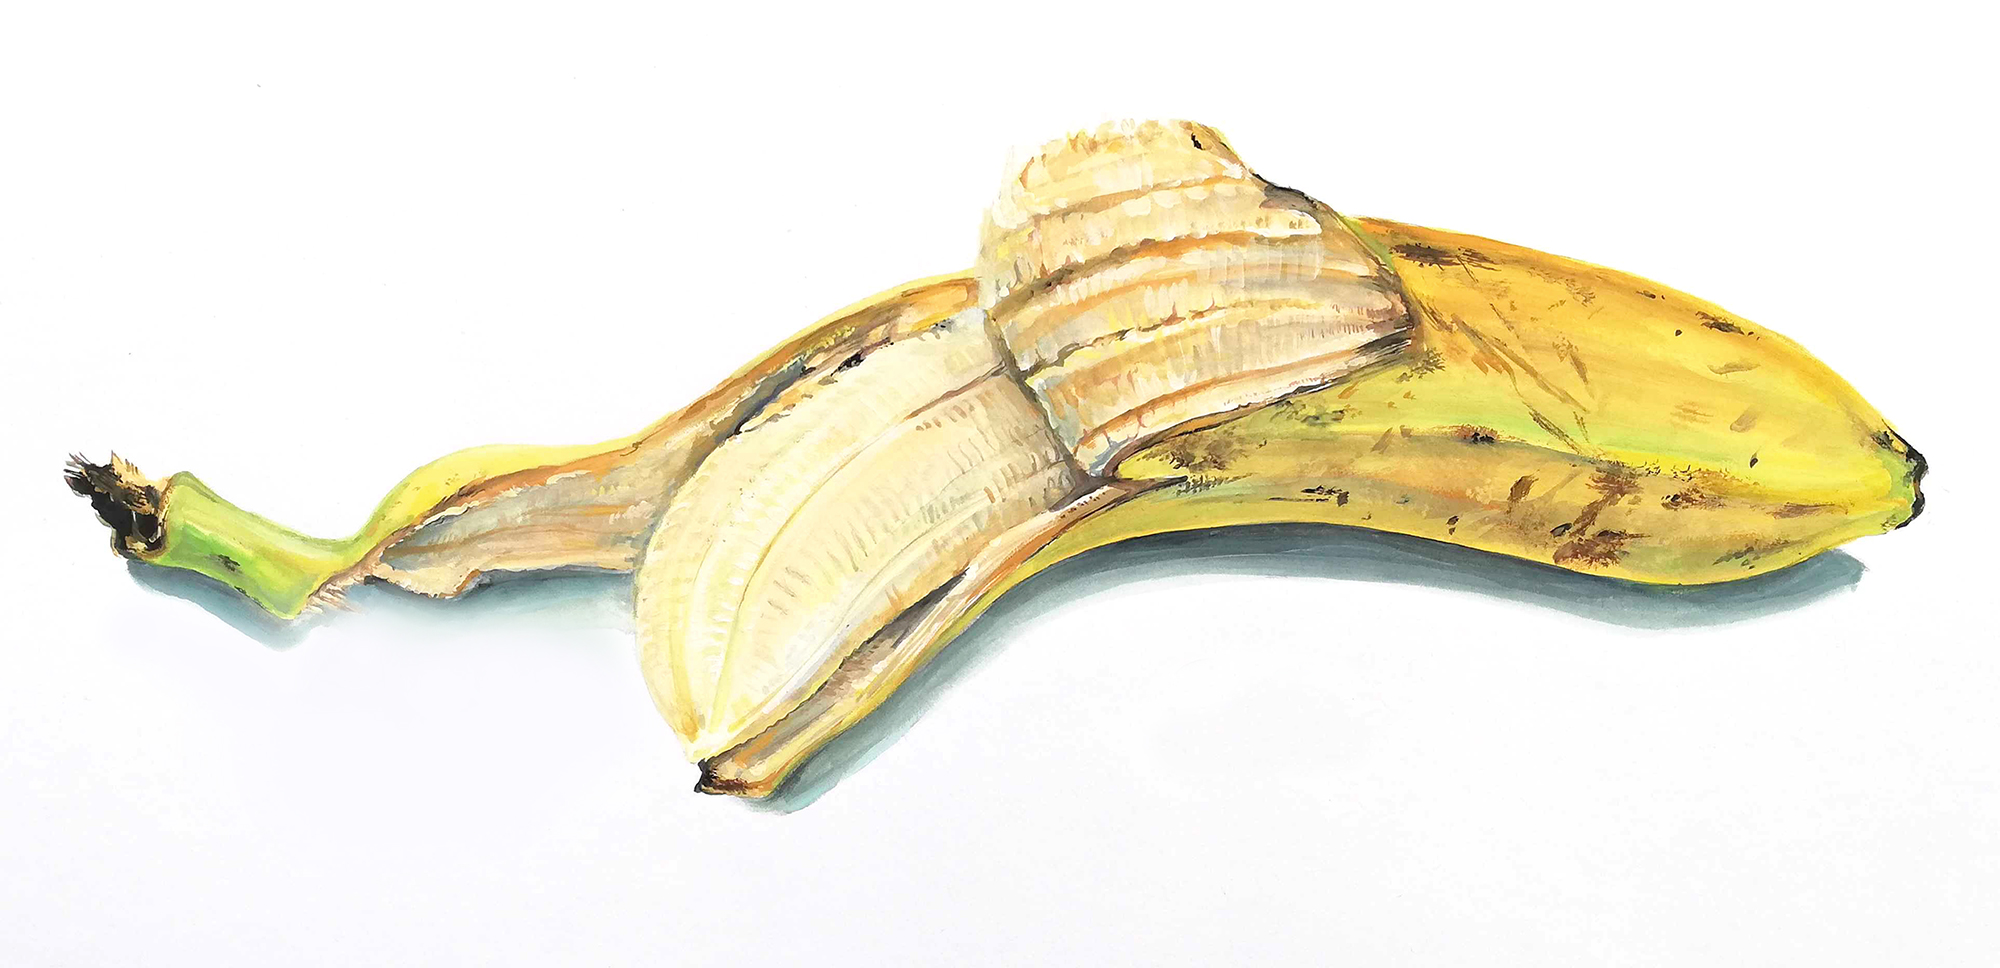
We will draw a half-peeled banana. What is interesting in drawing this seedless fruit is the various textures that can be found on its skin, under its skin, and on the surface of its flesh.
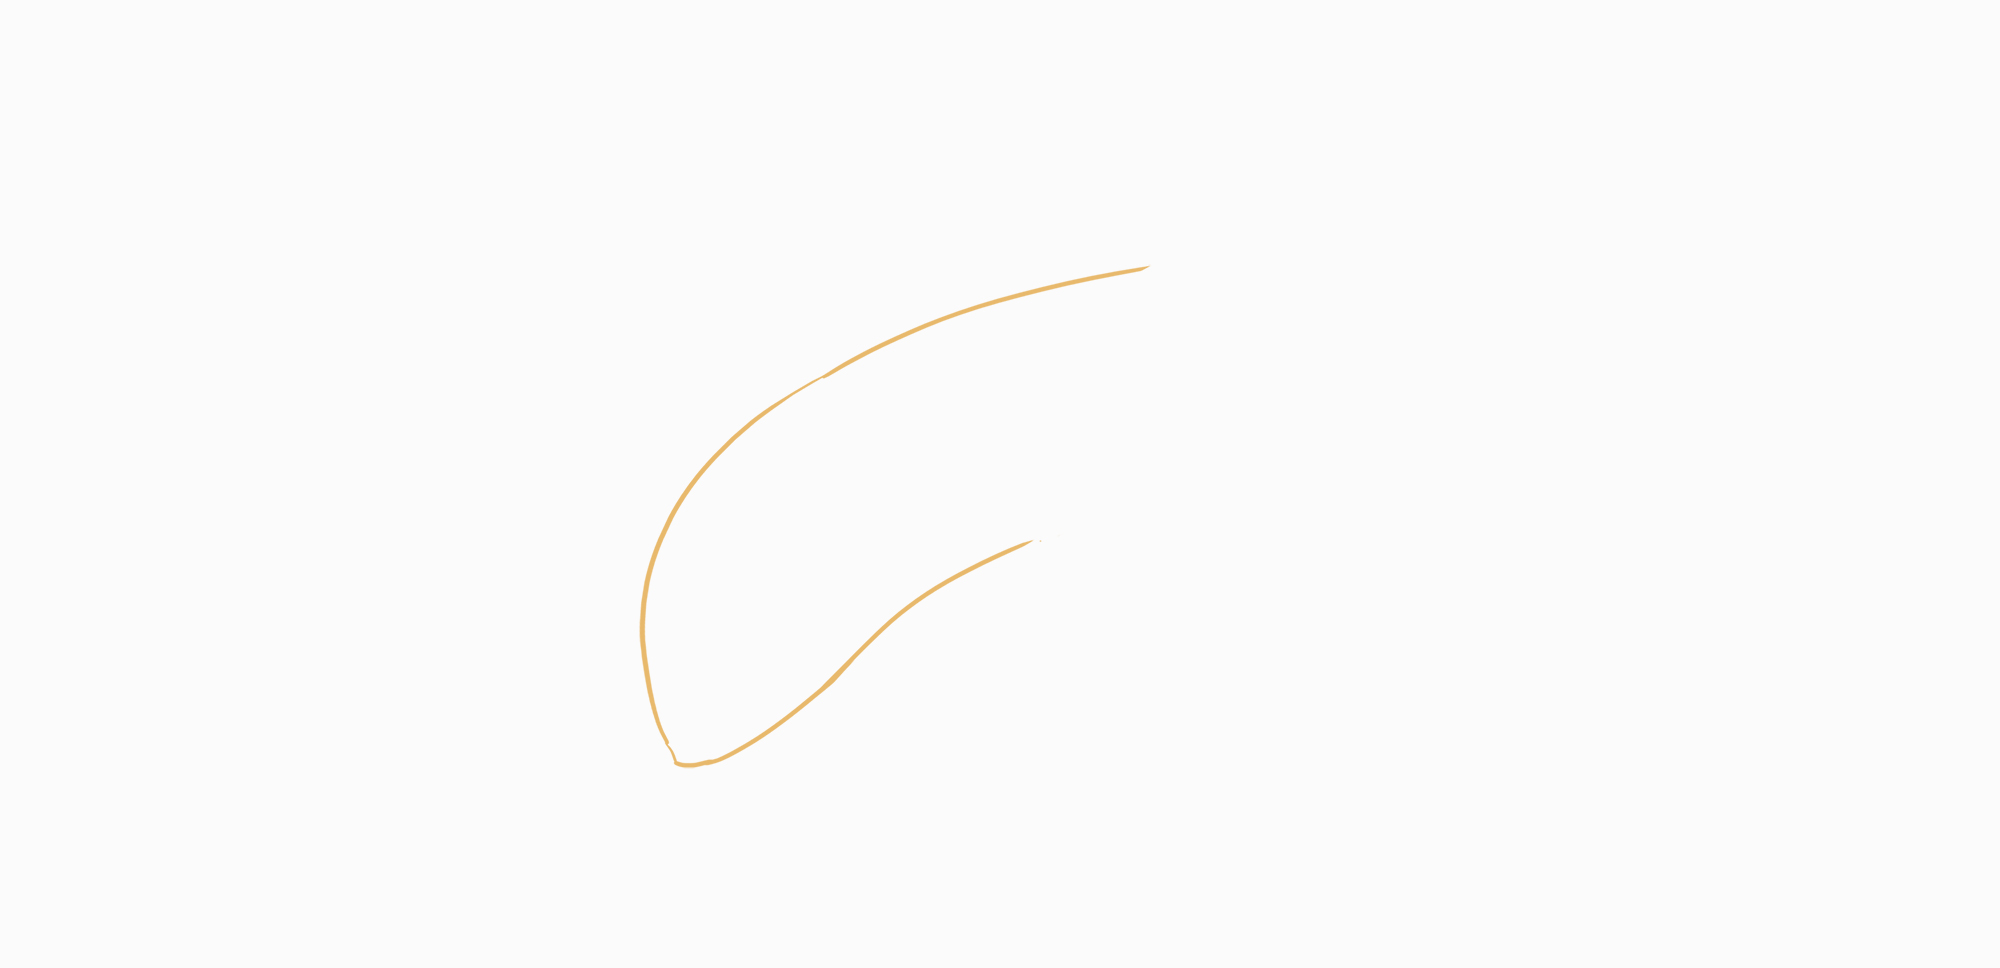
1. I draw the pulp of the fruit with two curves.
2. I draw half of the skin, making sure to clearly mark a break at the base of the fruit so as not to draw it with a pointed end. The pulp is nestled within the skin, with a few millimeters separating them, due to the thickness of the skin.
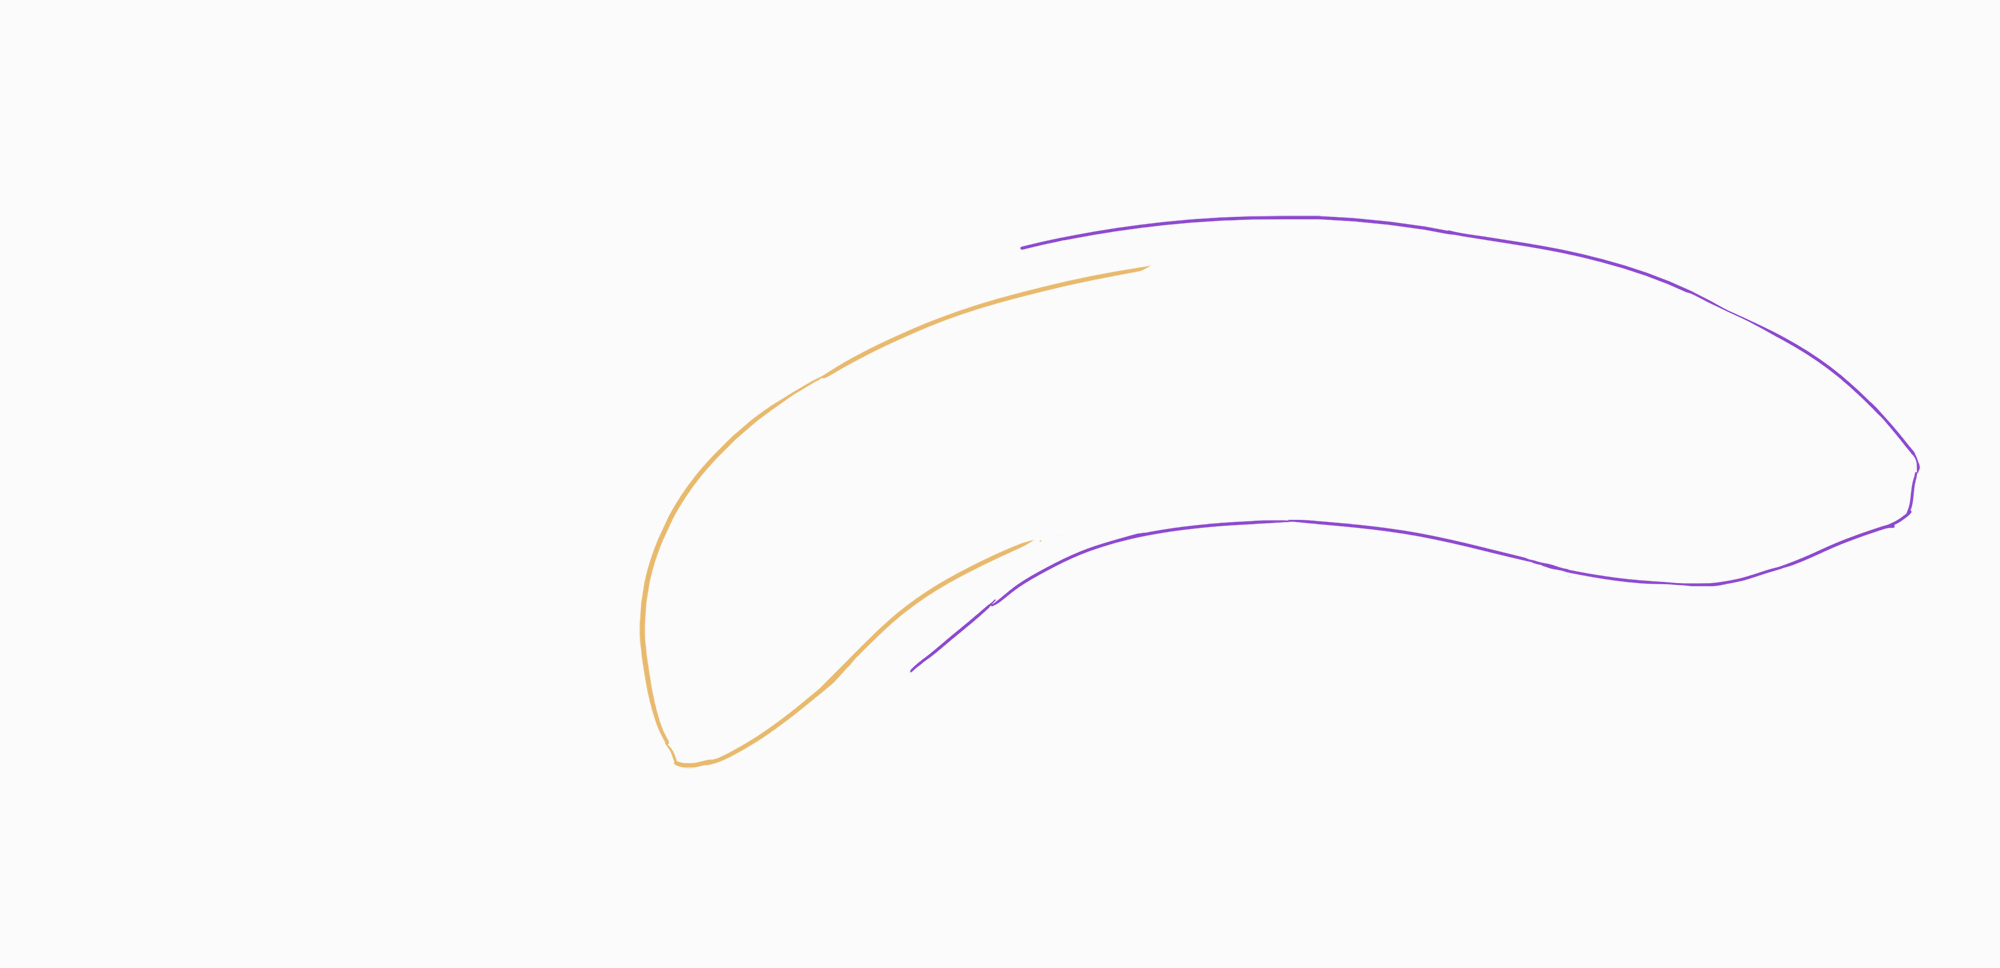
3. In fuchsia, I draw the borders of the skin.
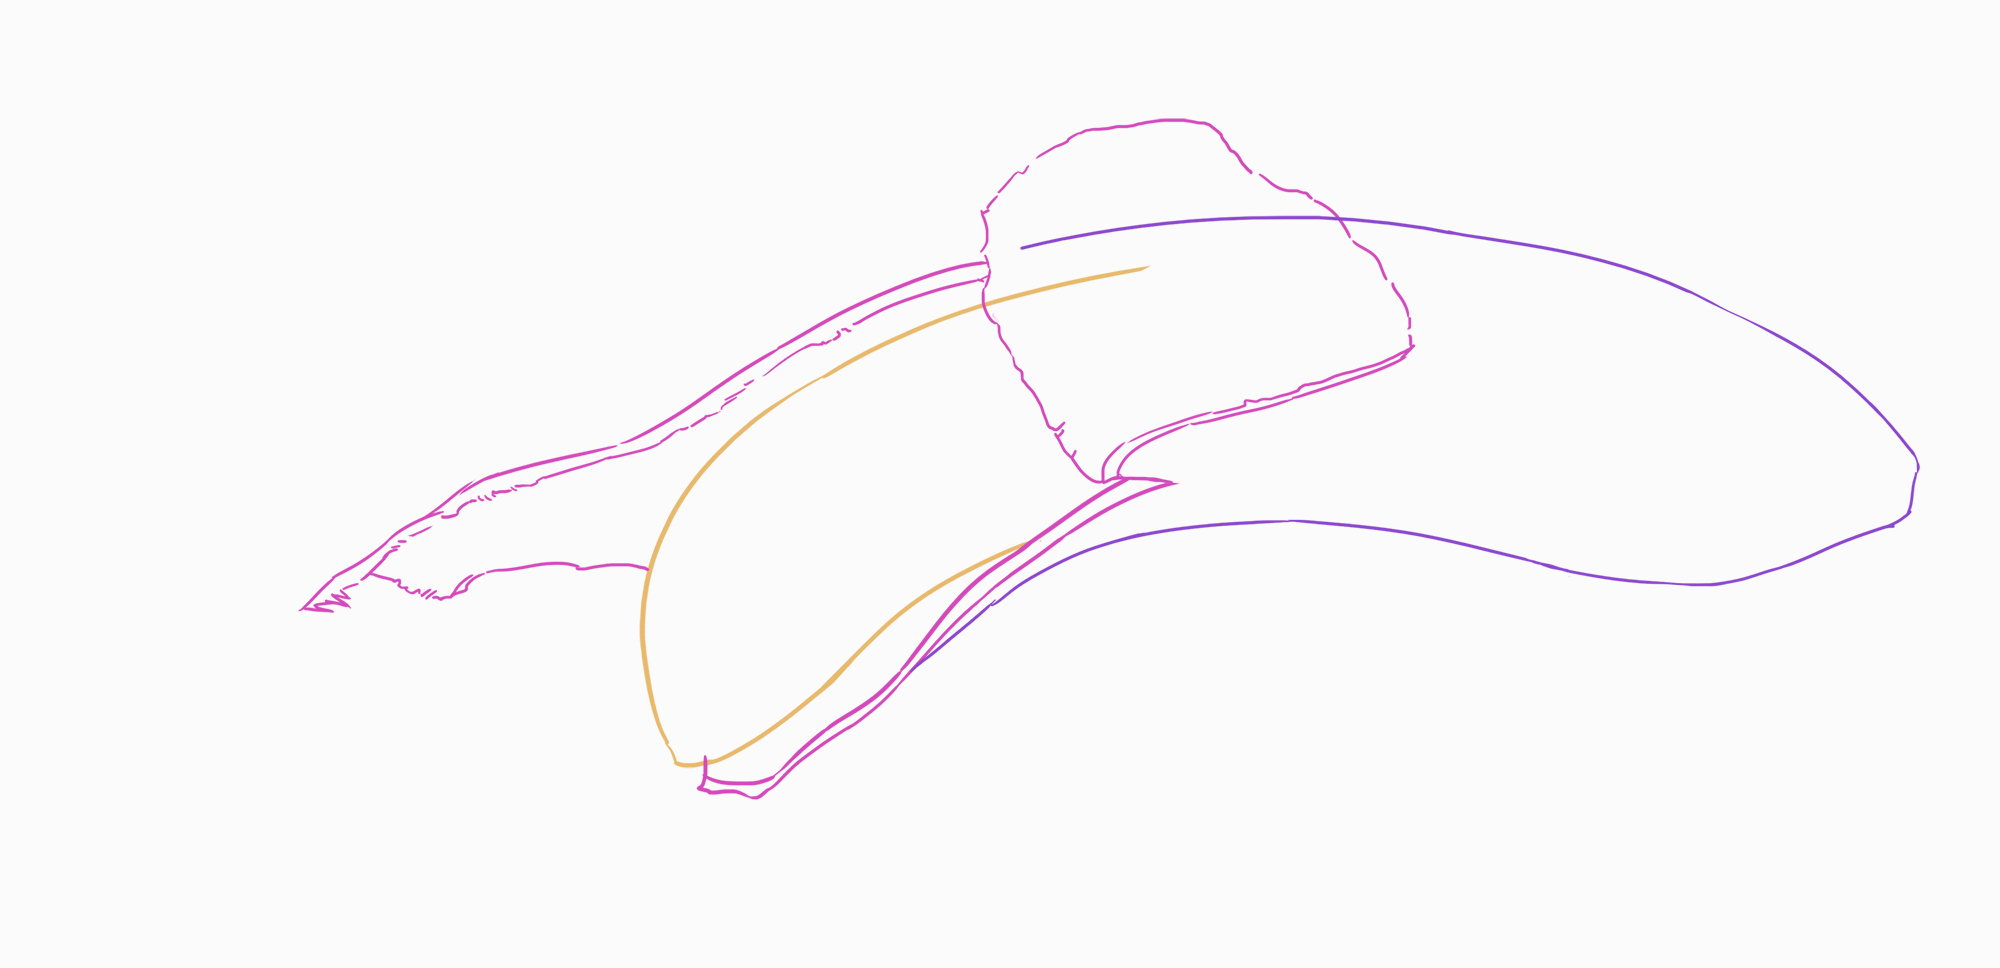
4. Taking into account the shape of the flesh, I finish drawing the skin (in purple), which retains the imprint of the pulp: we will therefore finish it with a marked curve.
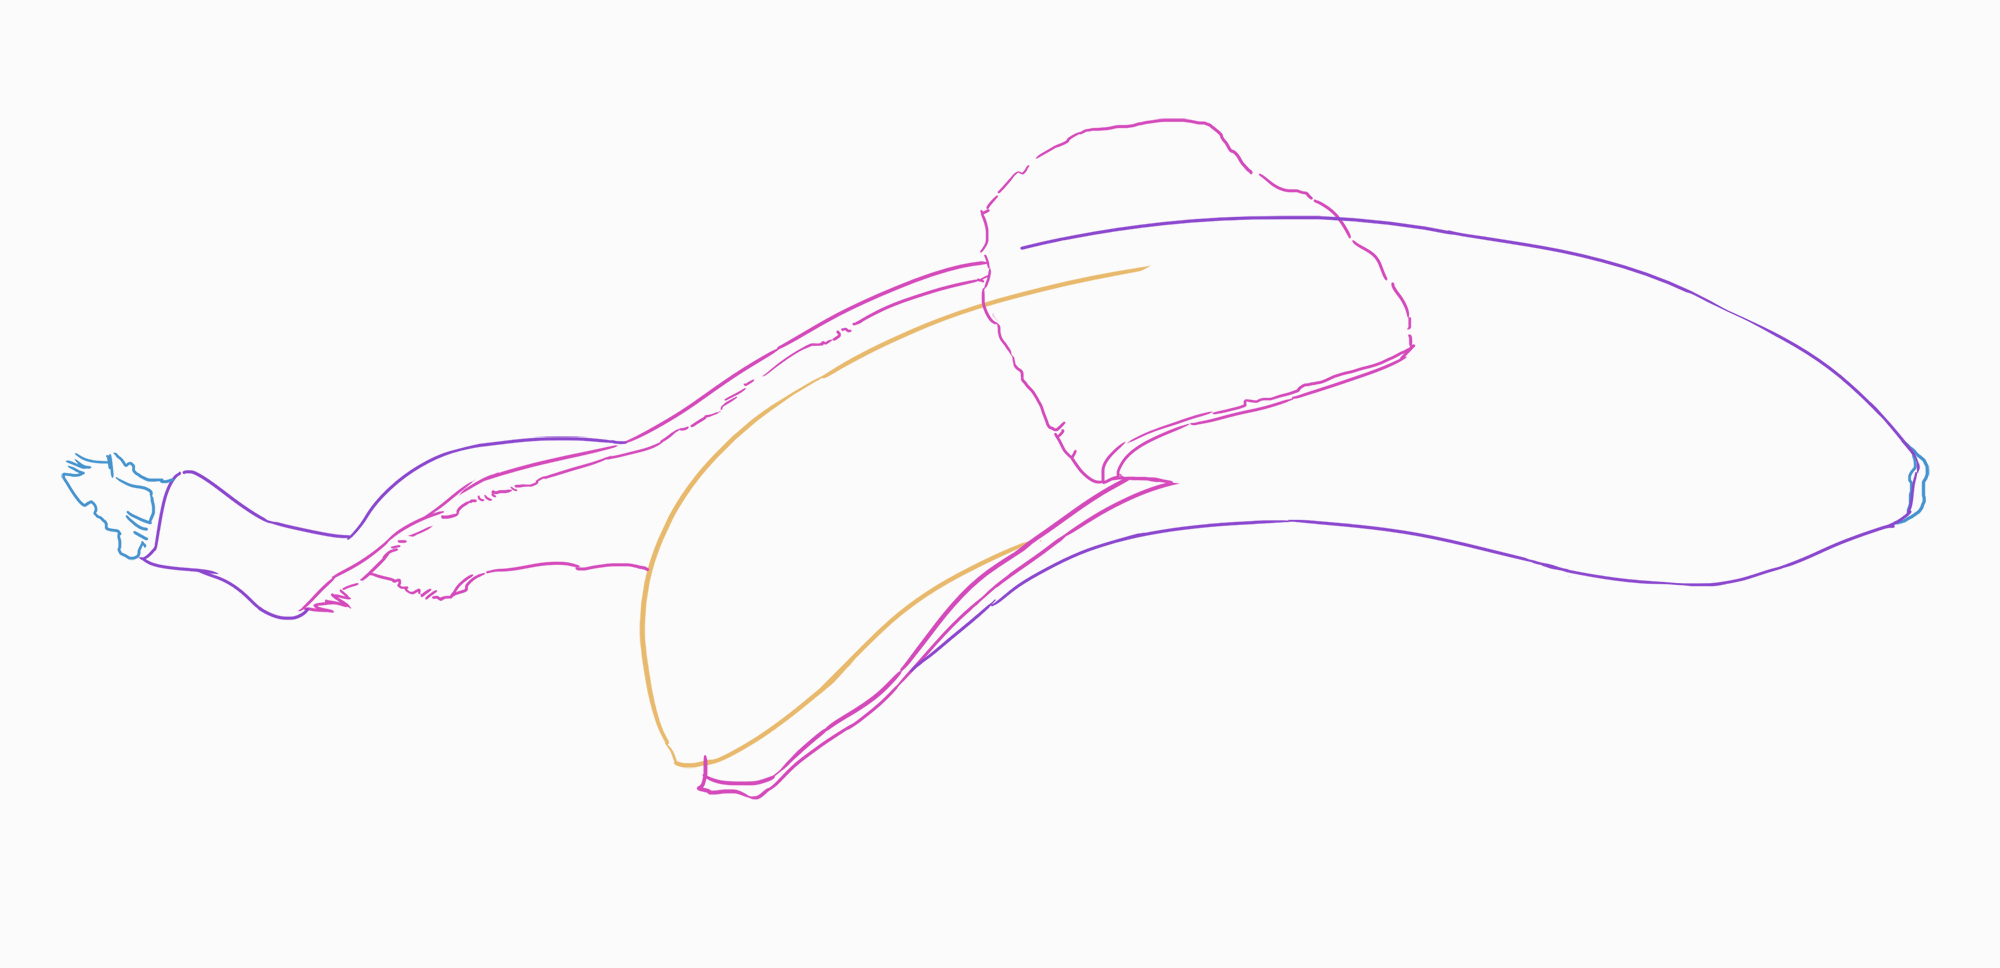
With a cylindrical shape, I draw the part that connects the bananas in a bunch: it is fibrous and irregular at the end if it has been torn off (in blue).
On the right side of the drawing, I draw the black part on the edge of the skin.
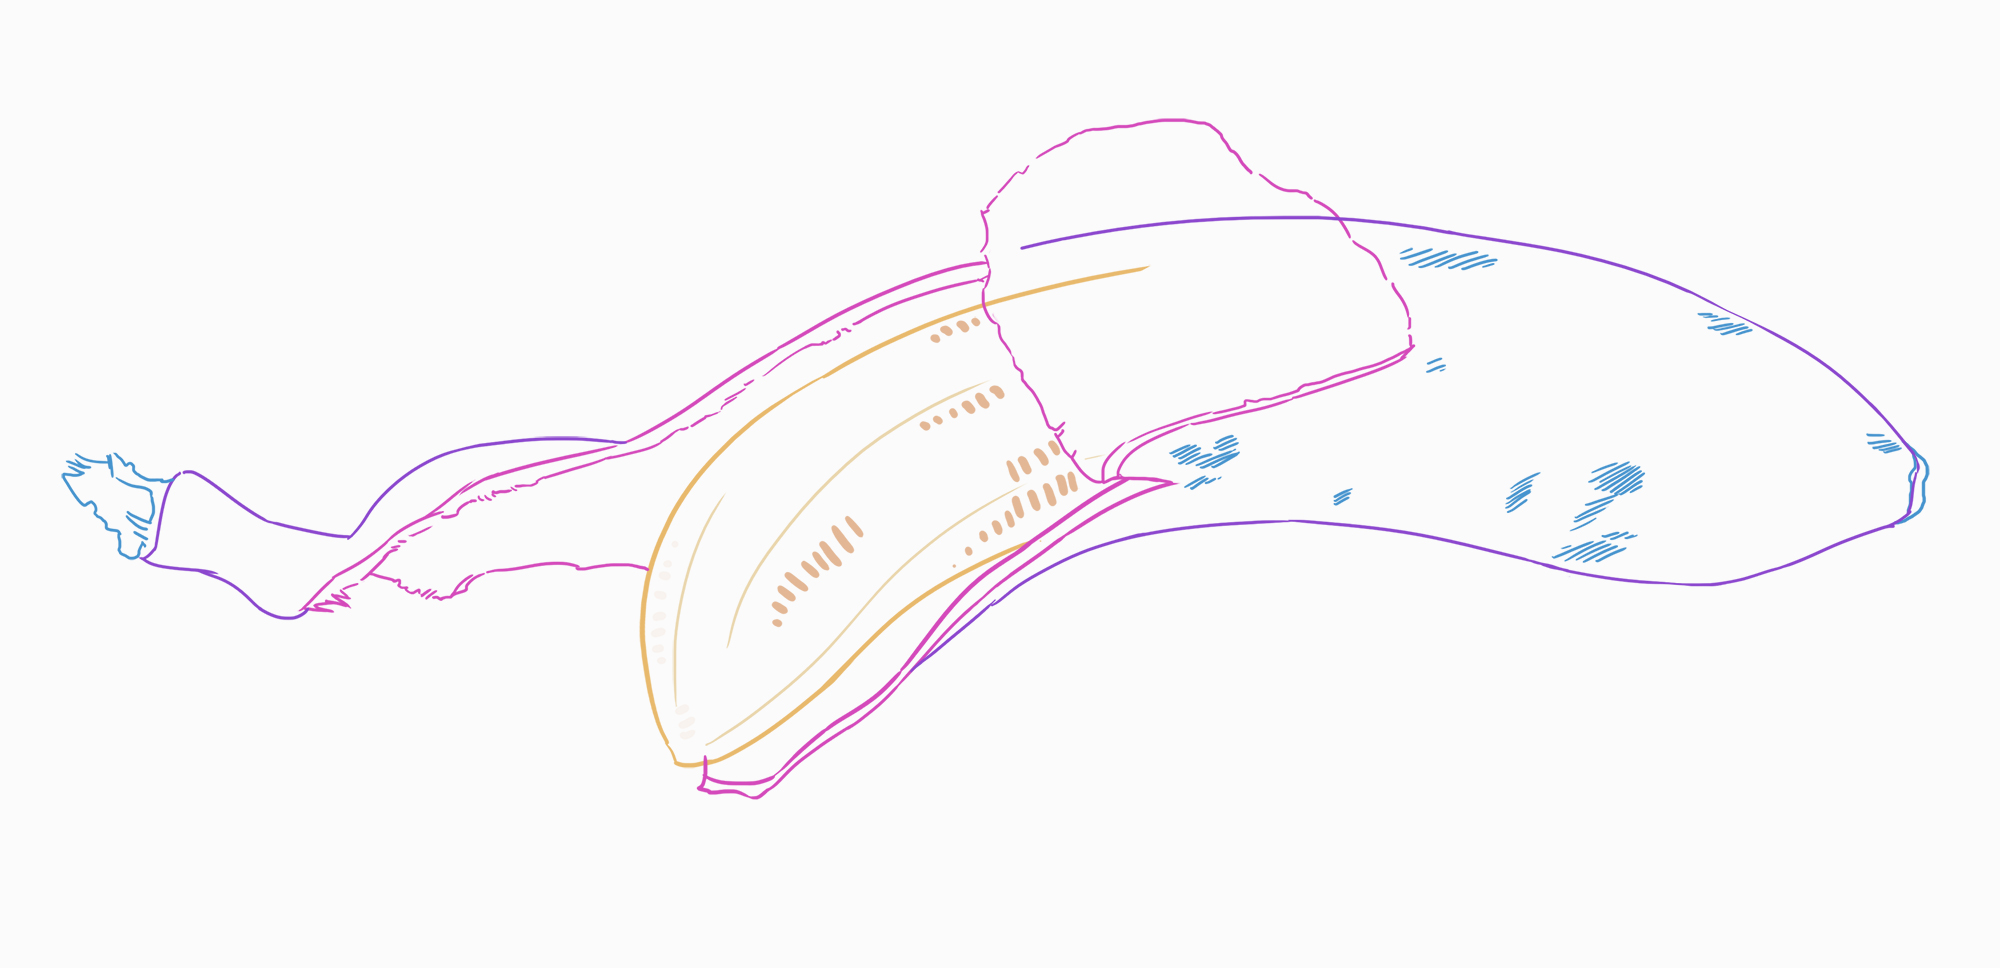
5. As it has curved grooves along its entire length, I add texture to the pulp of the fruit with short and thick strokes.
If the fruit begins to ripen, we can draw spots on the surface of the skin.
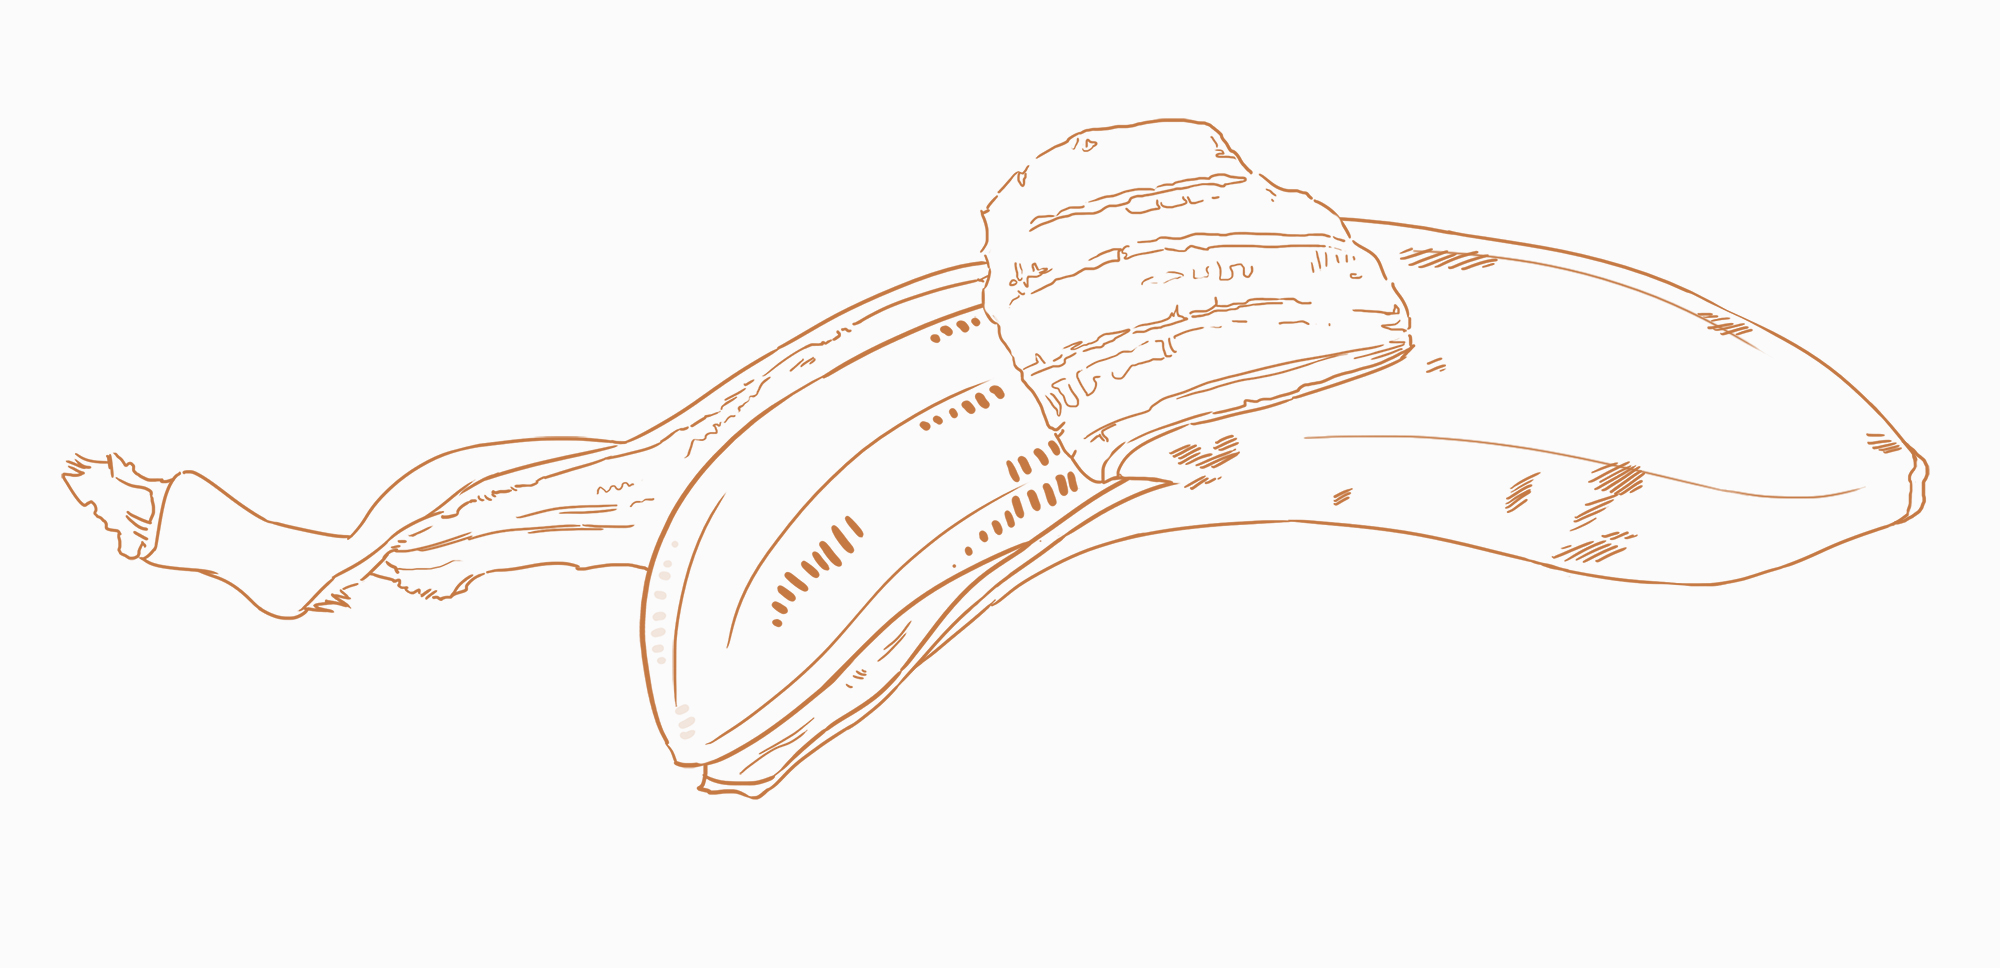
7. I erase unnecessary lines and clean up my drawing.
Finally, I draw the textures inside the skin. There are grooves, which correspond to those drawn on the fruit pulp. They are irregular because this part of the fruit is not smooth and peels easily.
8. For coloring, I can mix yellow and orange for the skin. I can also use green (leaning towards yellow), especially on the tips.
The flesh of the fruit remains in shades of pale yellow, pale green, and beige. We'll keep the same palette for the inside of the skin, while slipping in cool tones for the shadows.

Discussion
For the pineapple, drawing the initial ovals is really tough, and the following ones as well.