How to Draw a Knot?
Hello everyone! Today, I'm back with a rather light article where we'll see how to draw a knot. You'll see that with a very simple technique, you can easily draw very different knots, but always successfully!
Get your pencils, paper or tablet ready, and most importantly, your creativity! Let's go!
Why are some knots successful and others not?
Before you continue reading, I'm going to ask you to take a few seconds to look at these two knots. Try to understand why one works better than the other. Little hint: it's not the quality of the line itself that makes the difference.
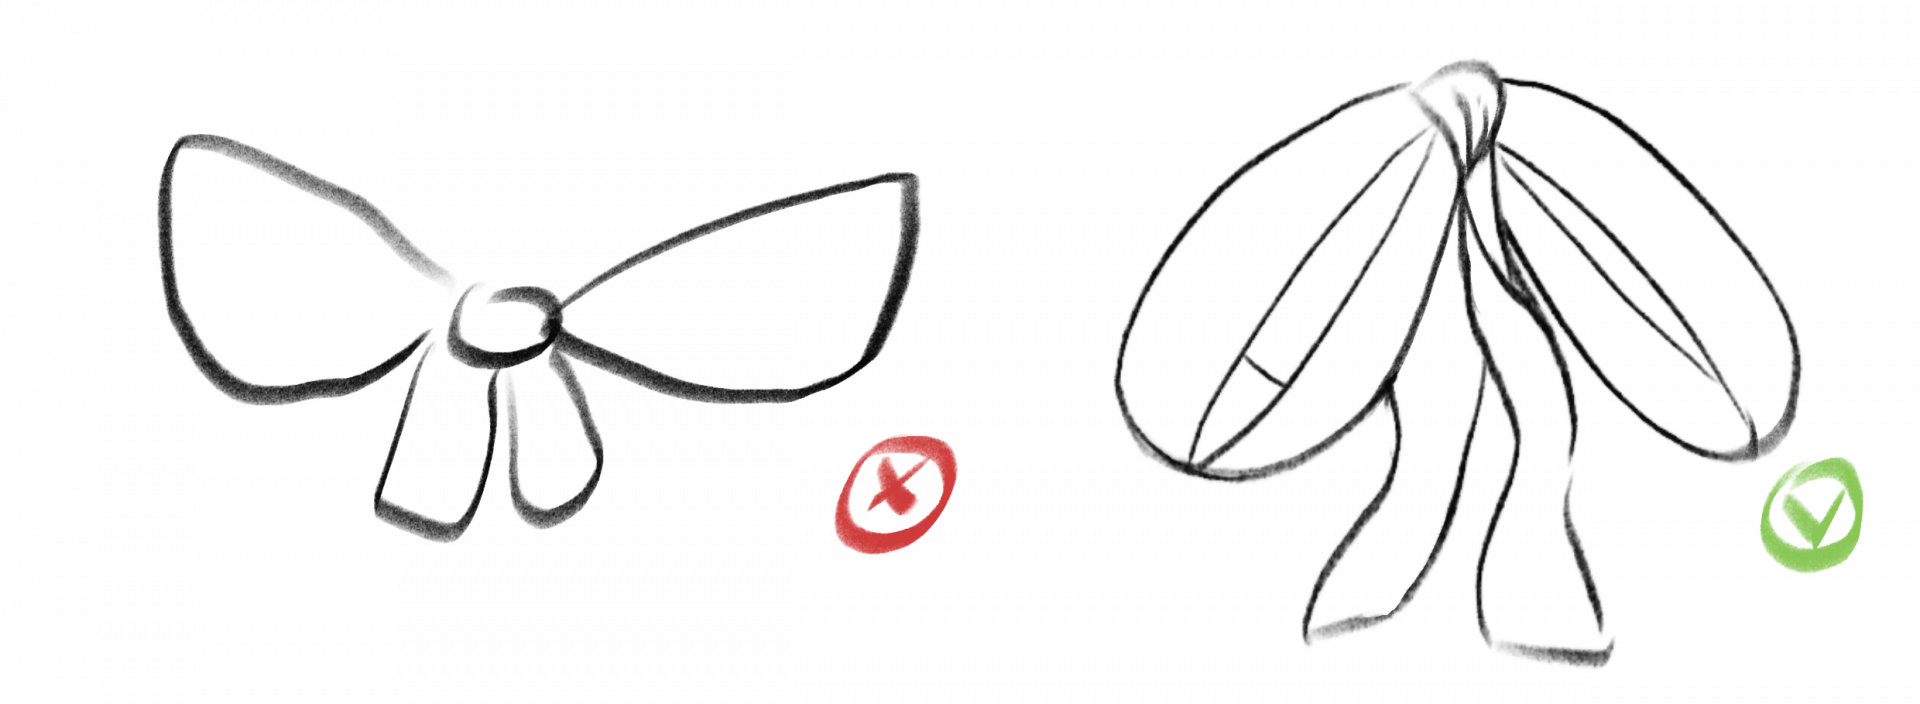
Well… enough suspense, I imagine you have understood: if the knot of law works so well, it's because we feel the material. How? Simply by reproducing the weight of it on the fall of the knot, and especially by playing with the different planes of the fabric. Let's look at it in detail:

In the photo on the right, you have the classic example of a knot. One important detail to note: it is not seen from the front. Often, the front view tends to flatten everything, which is also true for knots. If you want to draw them, I always recommend preferring a slightly angled view. You can also try a deceptive front view (we'll get to that shortly).
Another important point, we clearly observe the different movements of the fabric as it goes over and then under.
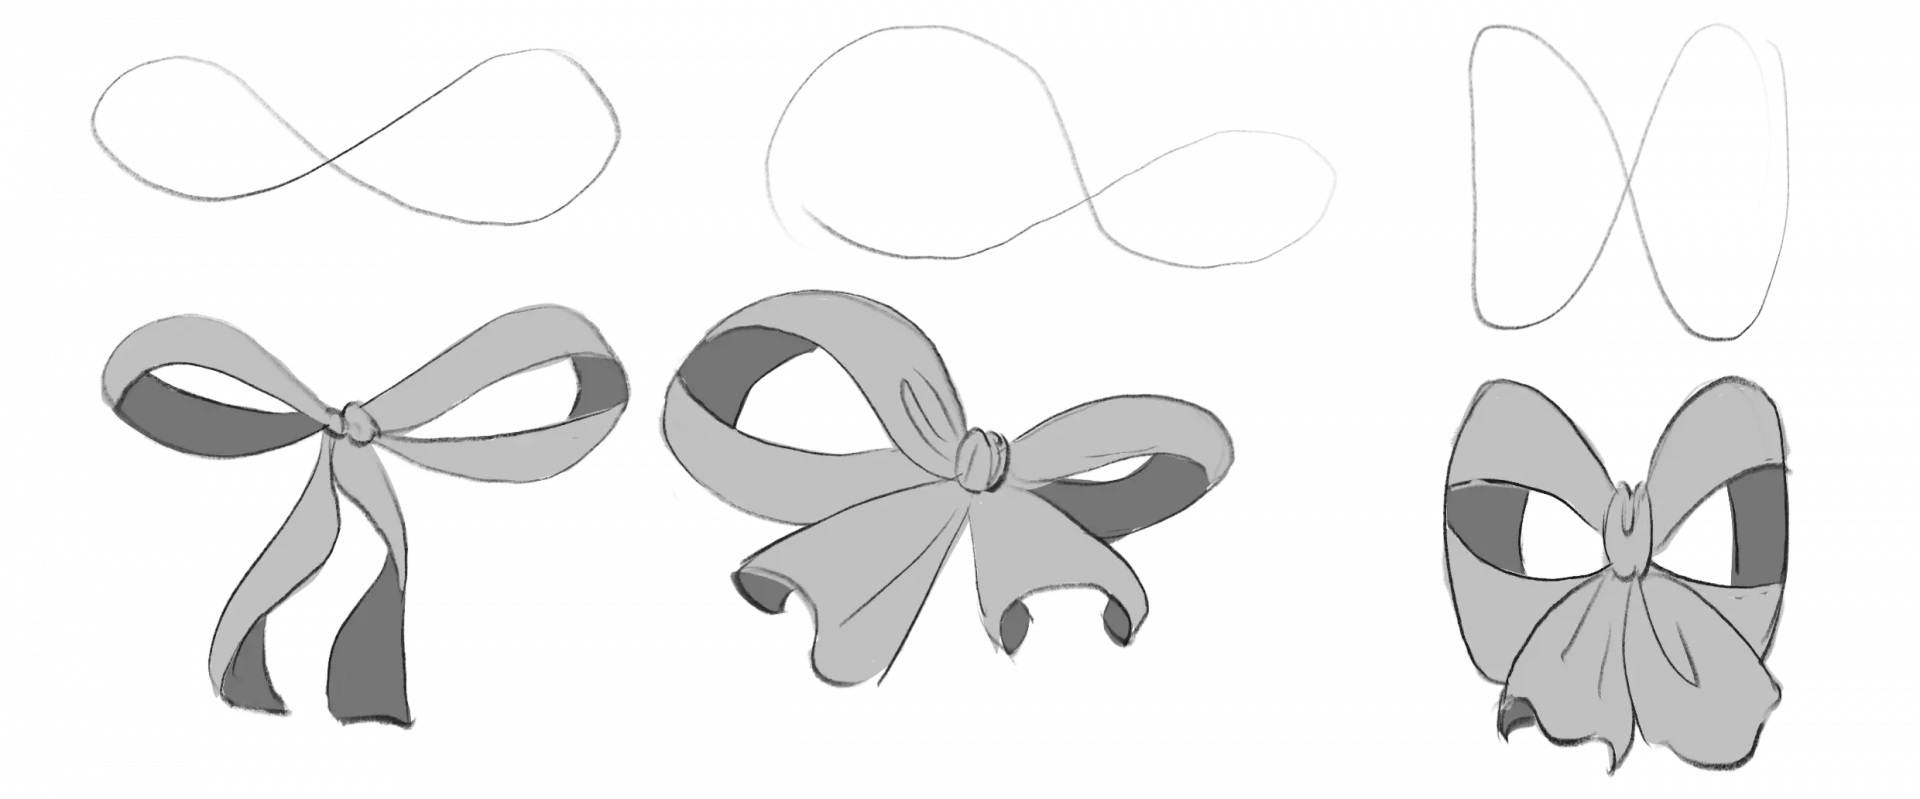
To illustrate this, let's take the example of a two-tone ribbon, with the front in red and the back in green. If we were to redraw the reference knot with this fabric, we would clearly see that a knot alternates between these different faces, and that it is precisely this that gives it volume.
Draw a knot in front view
We are going to learn how to draw a knot from a frontal view, but with a little trick: we will deliberately show some folds or parts of the fabric that, in a true perfectly frontal view, would be hidden. This technique, which I call "deceptive frontal view," helps to better understand the structure of the knot and prevents the drawing from appearing too flat or confusing. It’s a simple and effective way to give volume and relief to your knot, while still being easy to draw.

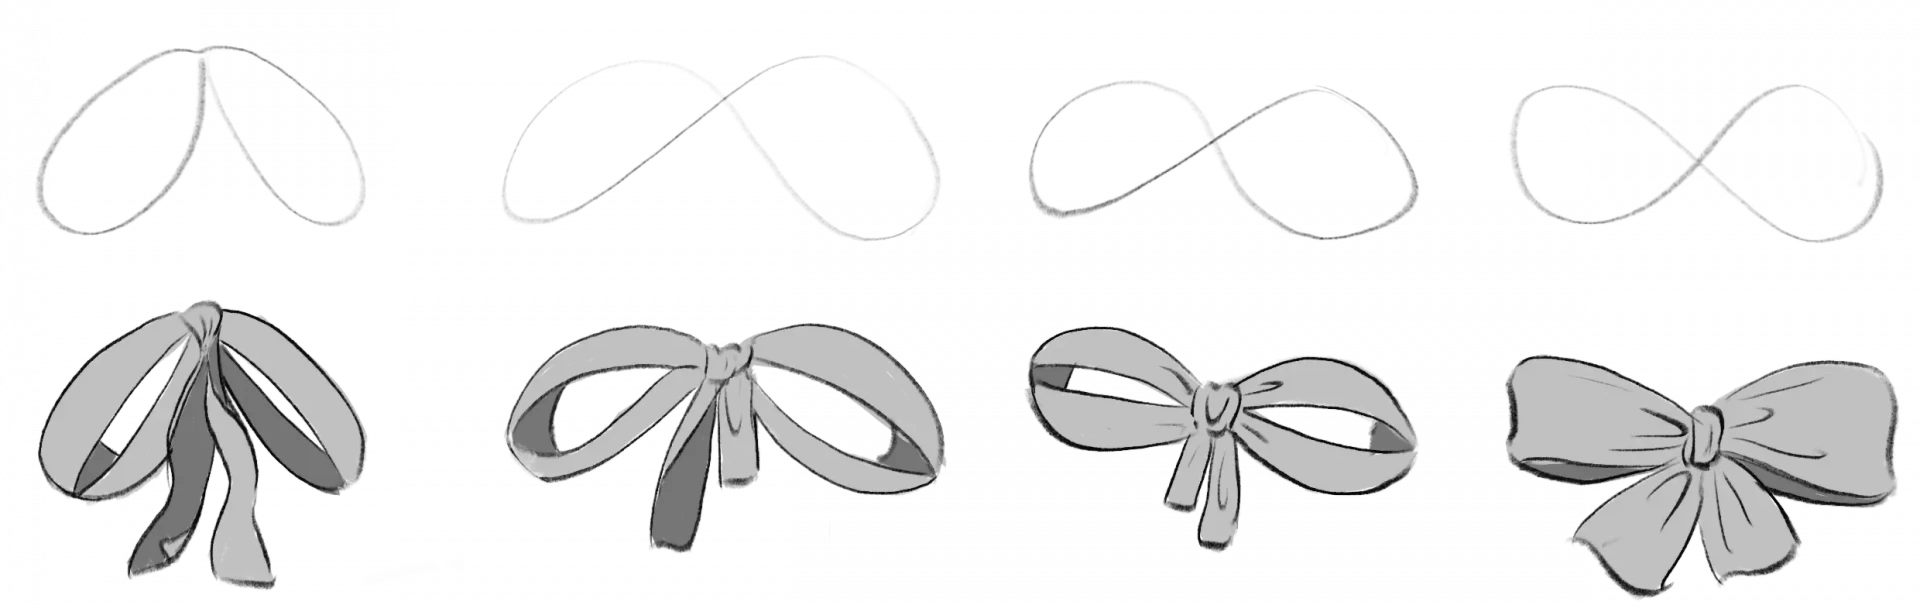
1. Start by drawing a figure-eight shape (like an infinity symbol). This will serve as a guide for the loops of the knot.
2. Next, draw a shape for the central loop. You can make it any size you wish, but I recommend keeping it proportionate to the two sides, in order to maintain good visual consistency.
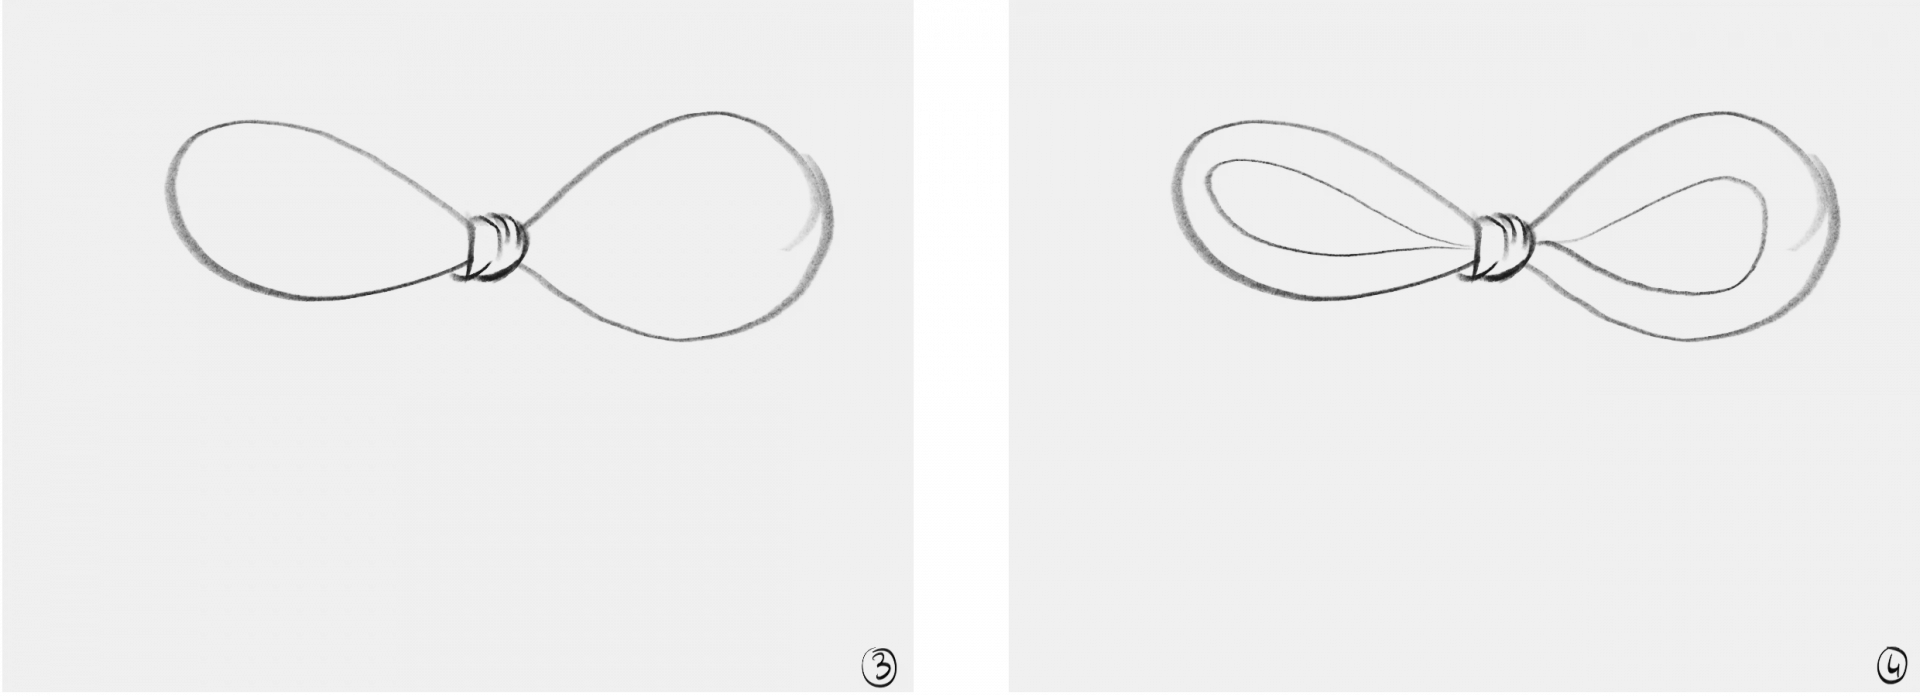
3. Next, folds are added inside the central shape to give realism to the fabric.
4. Then, we add thickness to the ribbon by drawing a similar but smaller shape inside the first one.
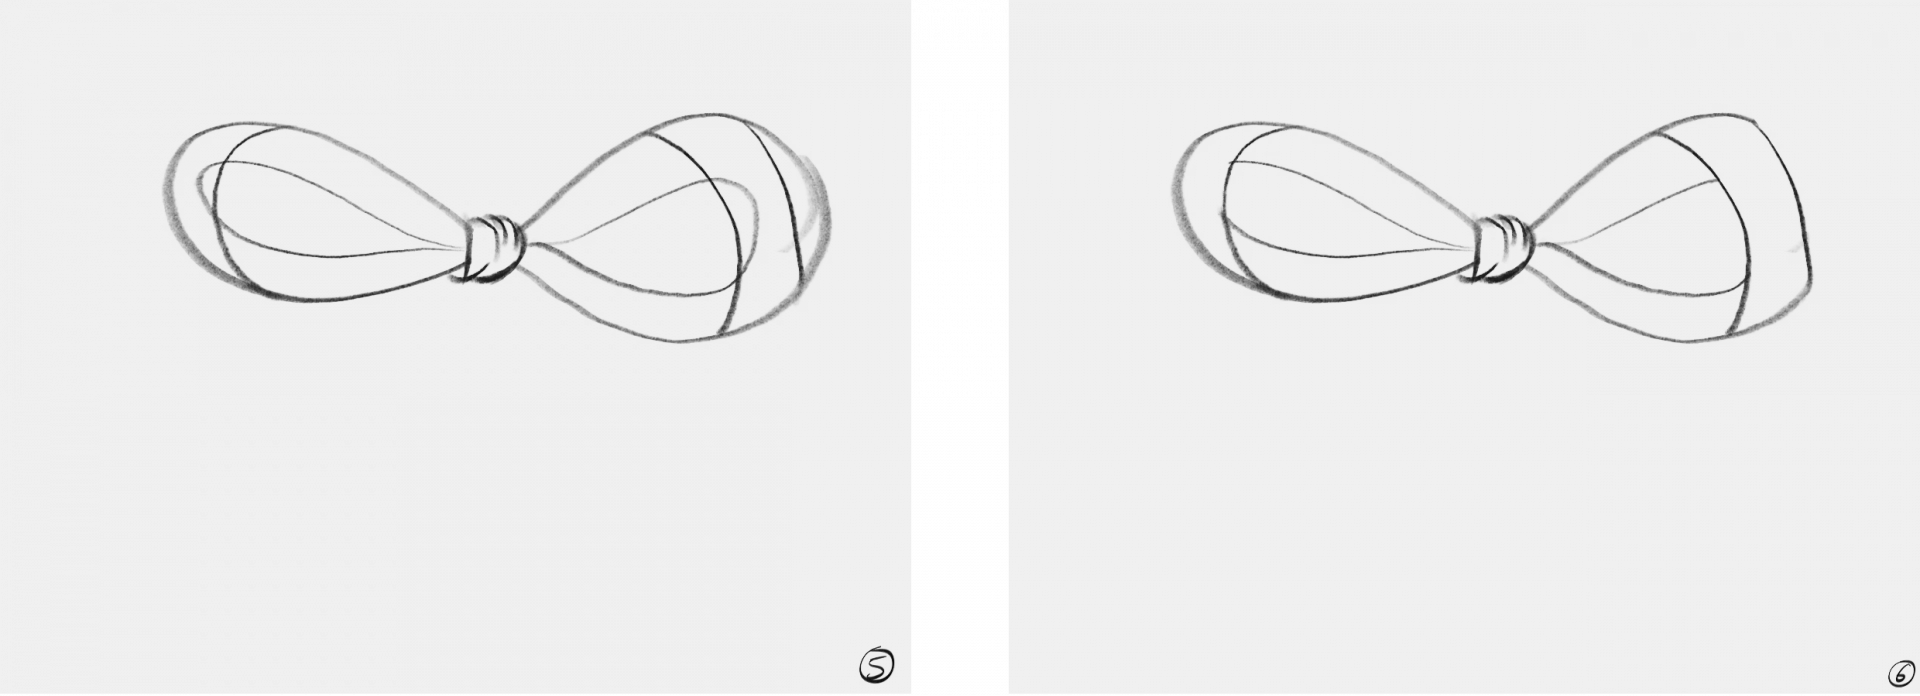
To create this play between the front and the back, the ends of the two loops are truncated.
We can then erase the unnecessary lines to make the drawing cleaner.
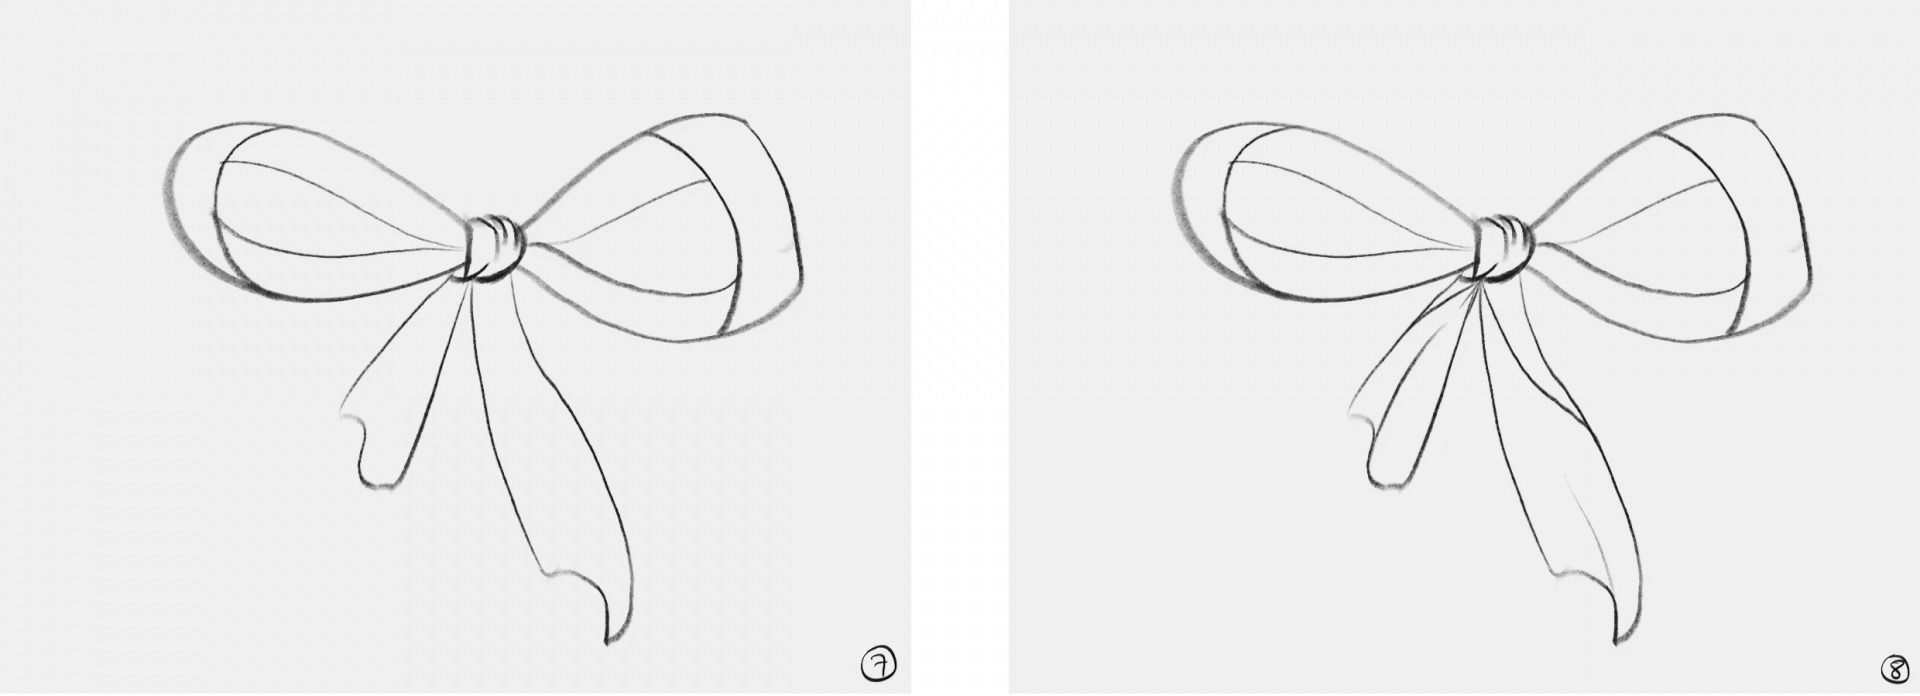
7. You can add ribbons that hang from the ends. I recommend drawing them slightly wider at the end to show that they are tightly tied at the knot. You can also give them wavy shapes to create movement.
8. Next, we add a few folds to finalize the bow and give it more realism.
Vary the knots
Once the method we just looked at is well understood, you can draw any knot. For this, I highly recommend having fun with the initial figure-eight shape. You can also vary the thickness of the ribbons by increasing or decreasing the gap between the two inner shapes.
Tip: if you want to create a ribbon like the one we saw referenced above, you will need to draw your figure eight in perspective.
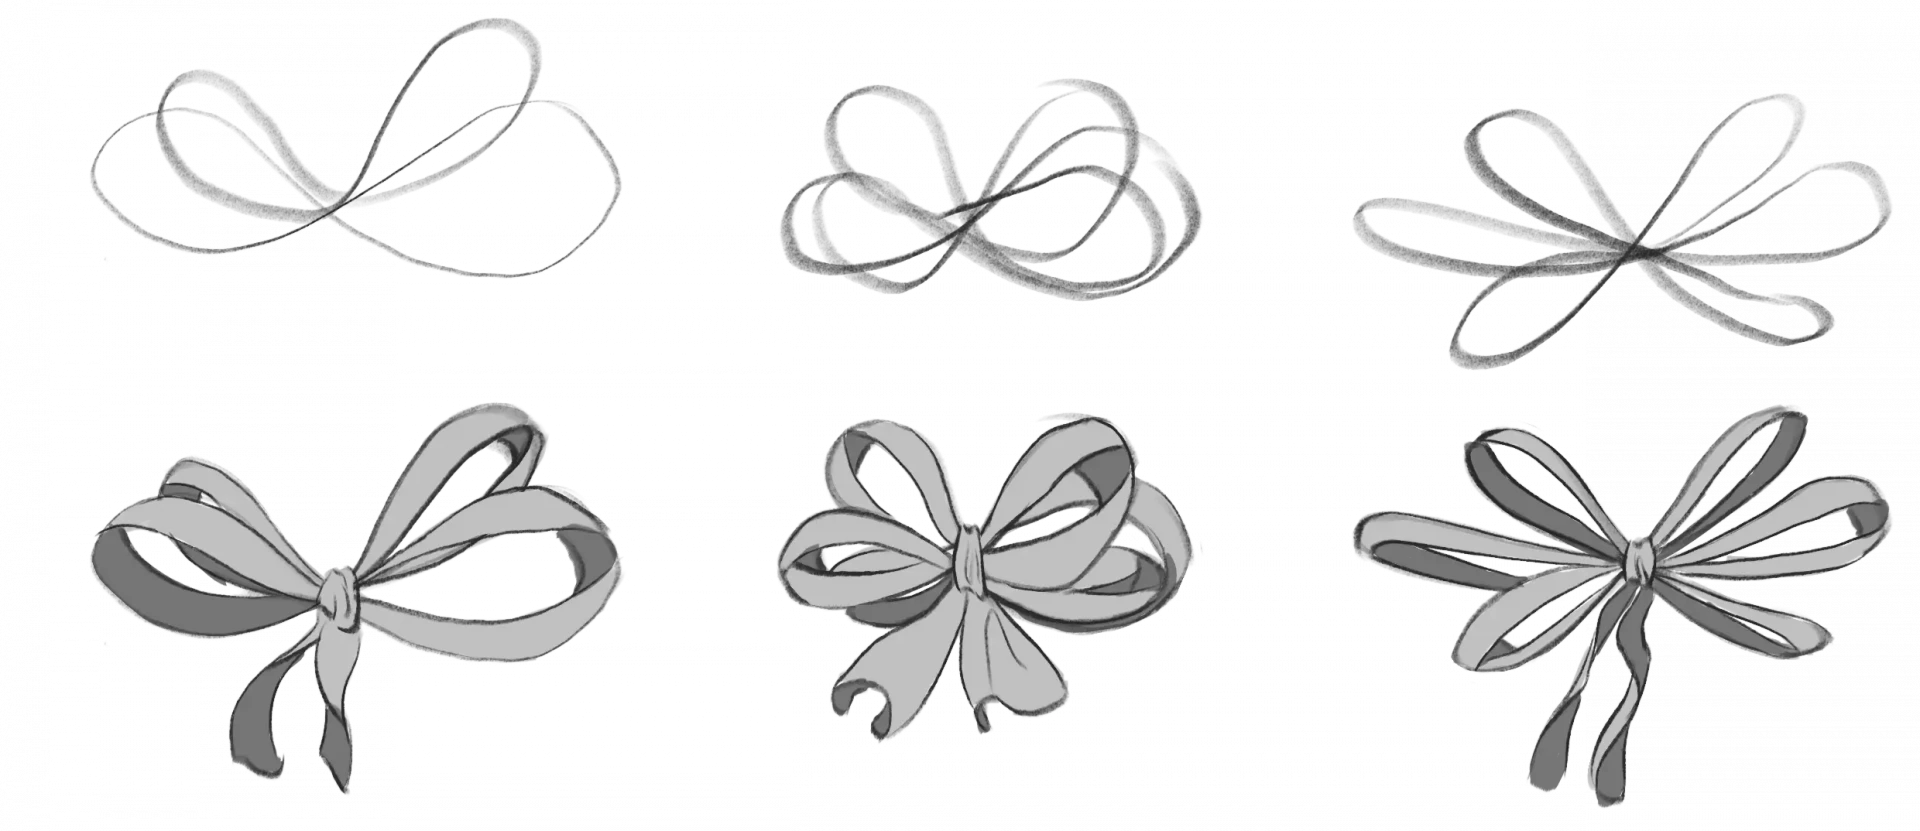
To add more variation, you can also alternate the shapes of the loops between the inside and the outside.
By following this technique, you can also create drawings of knots with multiple loops. To do this, simply draw several figure eights, making sure that their centers are roughly in the same place to maintain good consistency.
Finally, if you want to vary the impression of the material, you need to play on the hanging aspect. The more flexible and fluid a material is, the more naturally the knot will hang. Conversely, the stiffer it is, the more upright the knot will be (like bow ties, for example). To do this, simply ensure that the loops of the starting eight are more or less hanging.
You see, by following this simple method, drawing knots becomes a breeze! Feel free to have fun testing all sorts! I hope you enjoyed this article! 😊
Writer and Illustrator: Chloé Pouteau