How to Draw a Lake Surrounded by Mountains
Drawing a lake surrounded by mountains is both an inspiring and enriching exercise. This type of scene can be approached in various ways: at sunrise, under a stormy sky, or on a winter's day.
This natural setting allows work on several essential elements: perspective, mass, reflection, texture, and lighting ambiance. It is this diversity that makes the subject interesting.
In this step-by-step tutorial, we will go through how to draw a lake surrounded by mountains.

Get inspired and observe mountain lakes
Before even picking up your pencil, it is essential to carefully observe these landscapes. Whether you are using photos, memories from hikes, or drawing from life, take the time to analyze the following elements:
• General composition: the lake is often located at the bottom of the image, surrounded by peaks that create a natural frame.
• Vanishing lines: the mountains recede into the background, creating a depth effect.
• Reflections: a calm lake often reflects mountains, the sky, or vegetation, with varying intensities.
• Textures: smooth for water, rocky for mountains, blurry for forests in the background.
• Atmosphere: morning mist, golden light, stormy sky... Each choice brings a different emotion to your drawing.

Preparing your drawing: choosing the viewpoint
Before starting to draw, ask yourself a few questions:
• What is the point of view? High angle, low angle, eye level view?
• Where is the horizon? Generally, it is placed in the upper or middle third for a landscape view.
• Do you want to represent a calm or choppy lake? The style will change according to the level of detail and contrast.
Make a quick sketch with an HB pencil to define your frame (rectangular, panoramic, etc.) and outline the major masses (mountain lines, lake surface, location of trees or rocks). This will help you achieve a more precise and refined drawing.
Drawing a lake surrounded by mountains step by step
Here is a simple step-by-step method for drawing a lake surrounded by mountains.
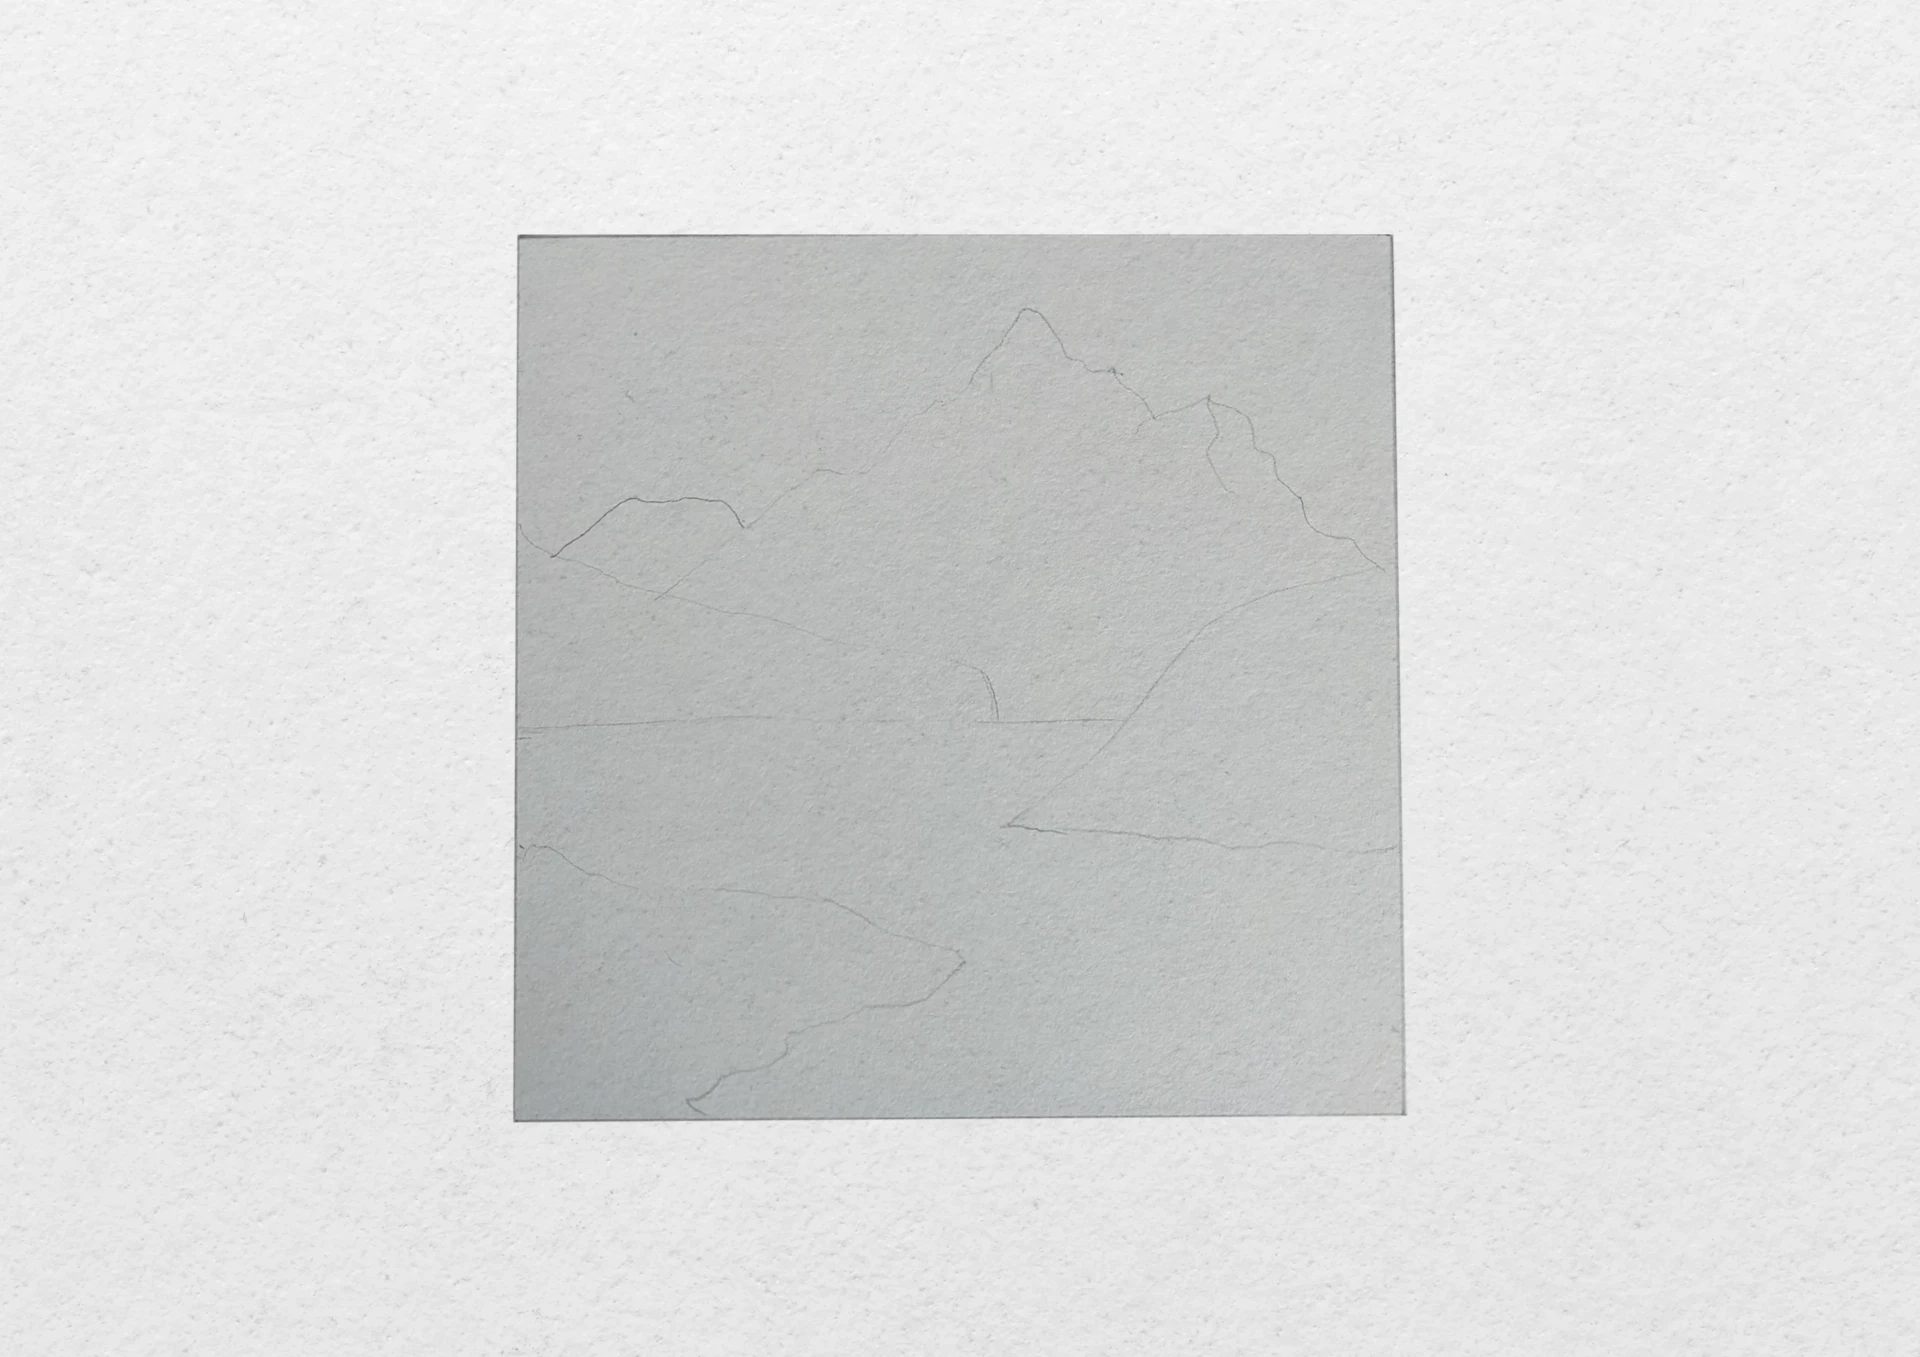
Draw a square with a side of 12 cm. For a complex subject like this, it might be helpful to add a frame on your sheet: this will help you better position the elements later.

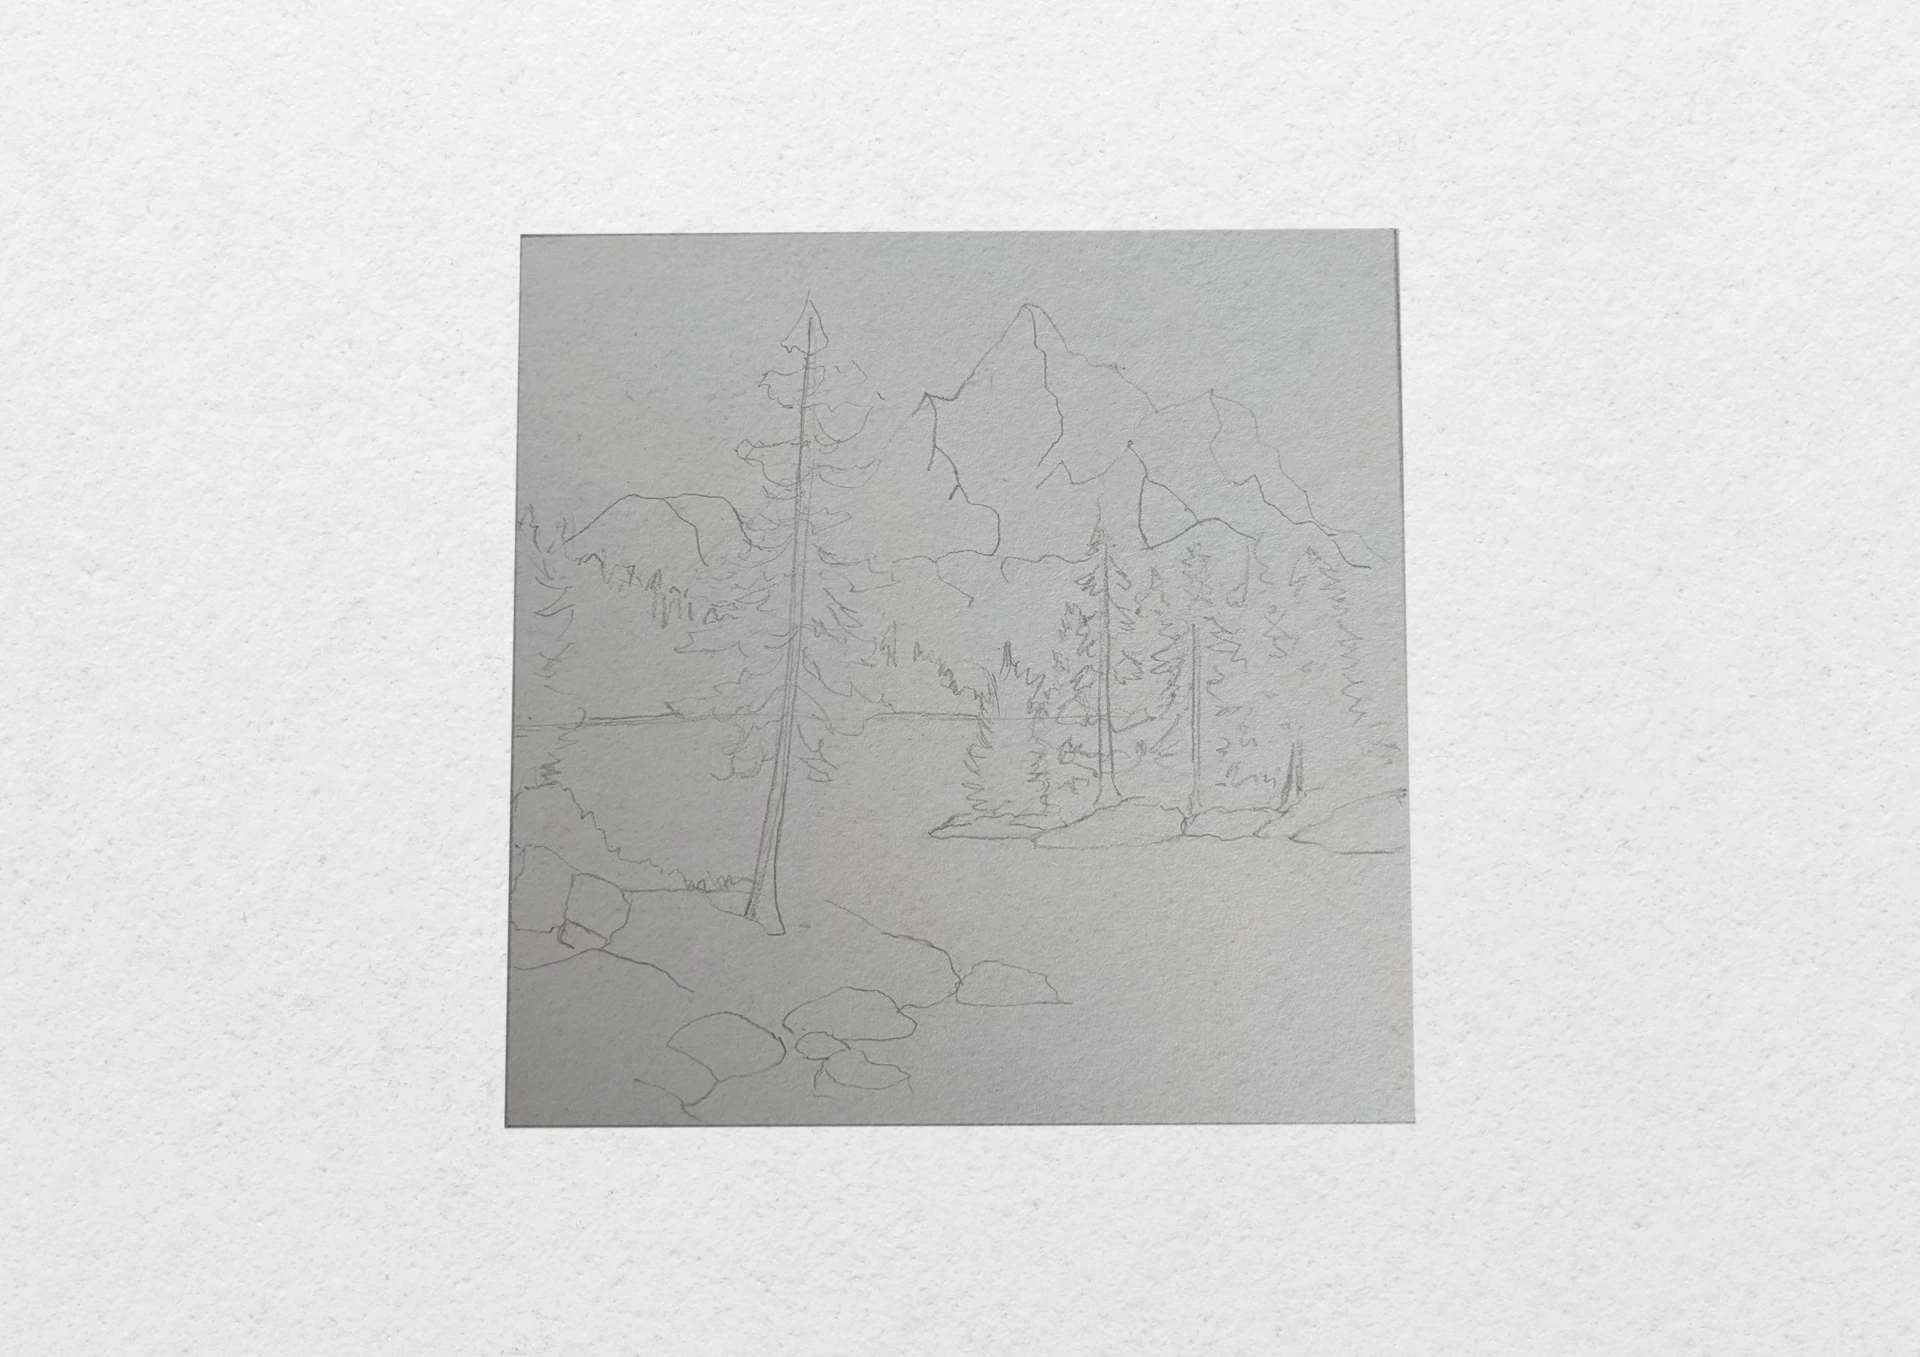
With an HB pencil, place the horizon line and the major masses: two triangular shapes on the sides, and, in the background, the outline of the mountain. Subsequently, respect the perspective (larger in the foreground, smaller in the background). In just a few strokes, your space begins to take shape.
Add foreground elements: rocks, some relief, and a few trees. For now, do not linger on the details or on shadow and light.
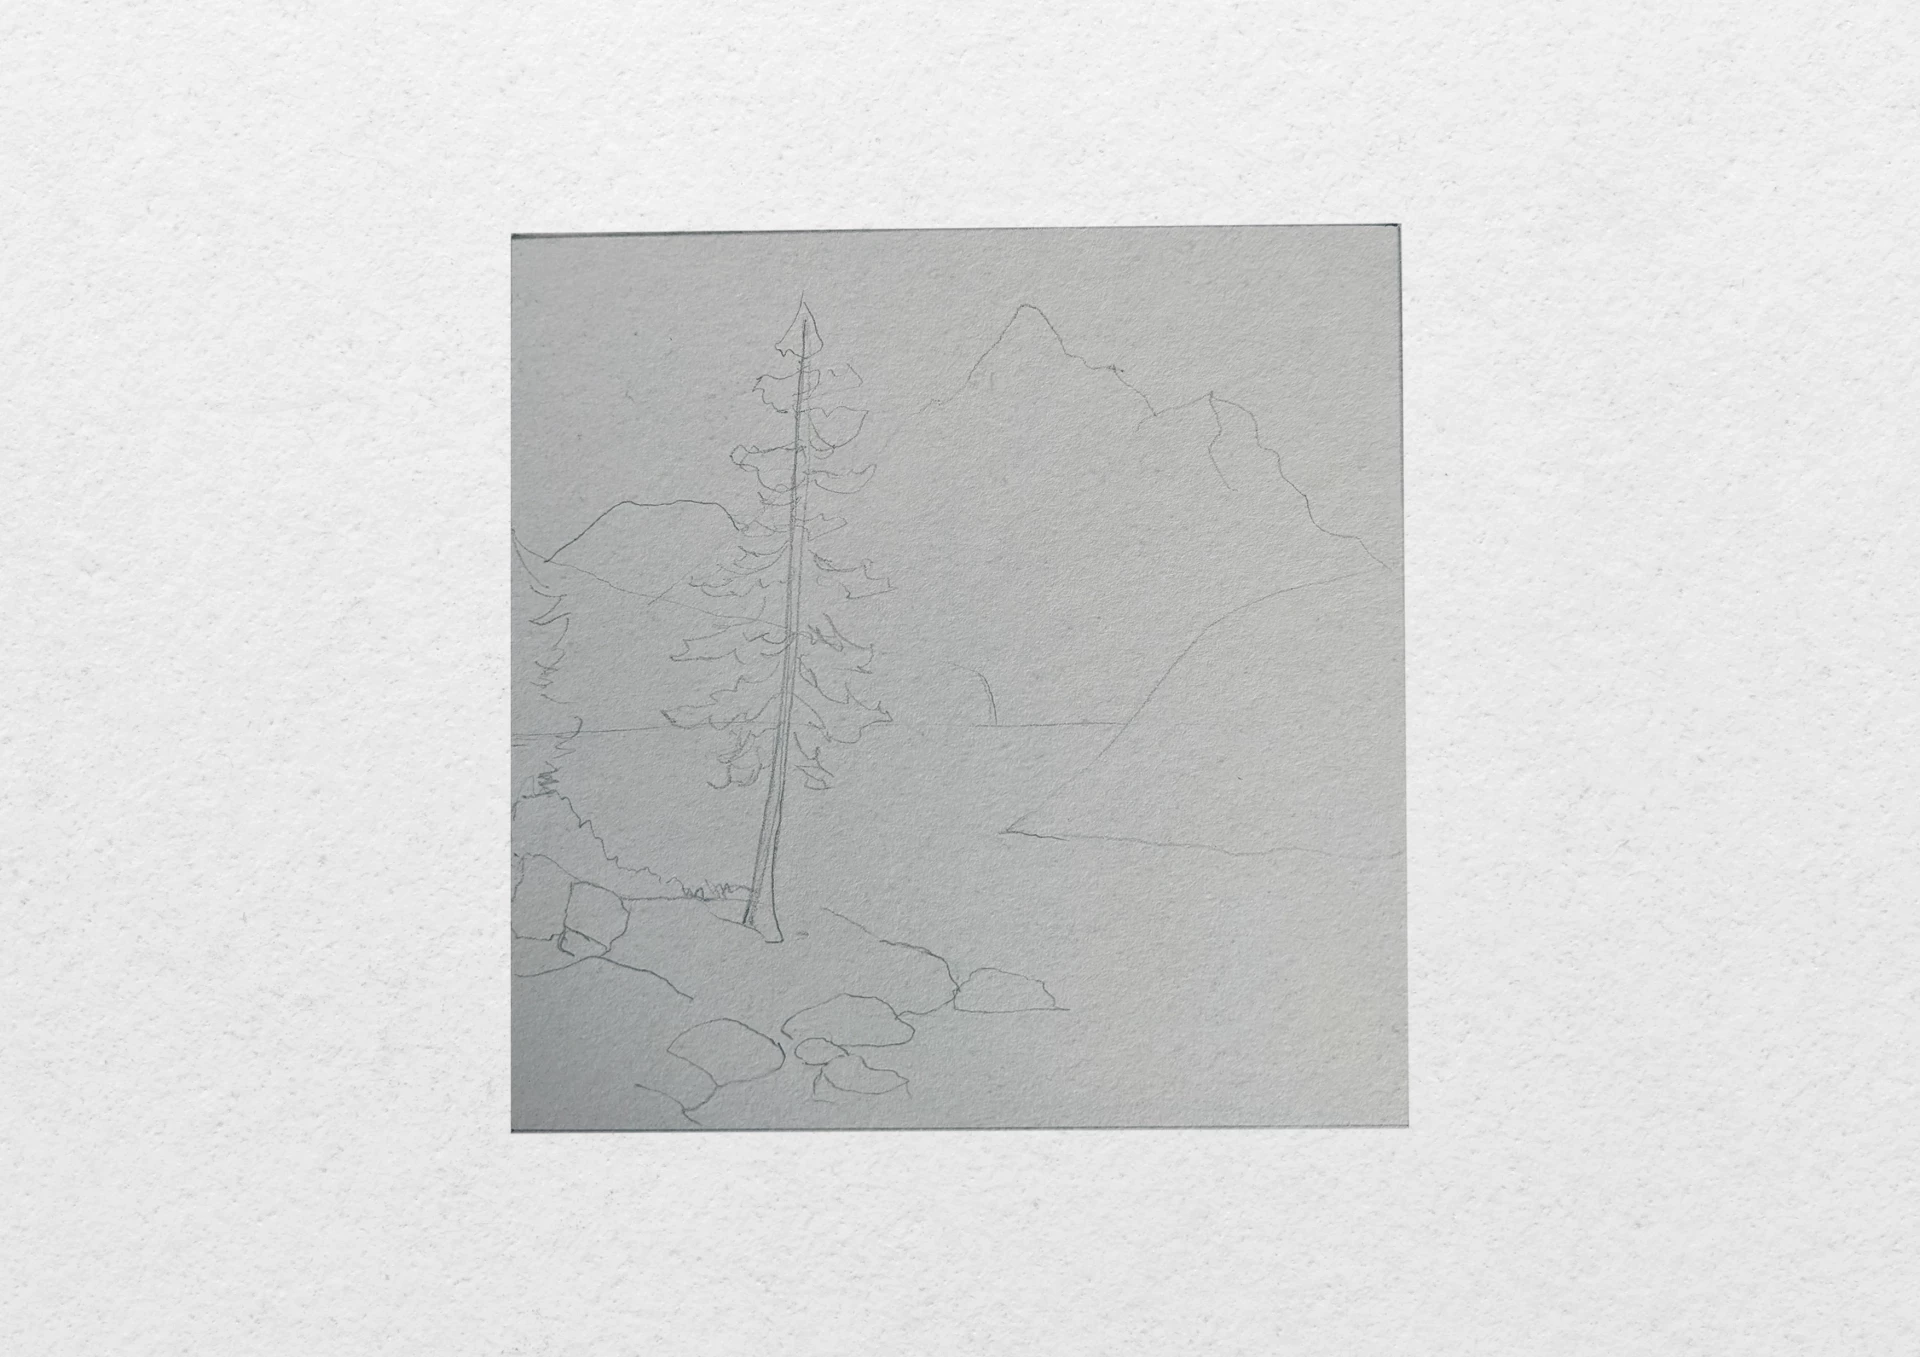
Continue drawing the background without too much detail, simply suggesting the masses. Then, in the background, draw a few lines to suggest the contours of the mountains.
Add shadows and highlights to the drawing
Begin to gradually address the areas of shadows and lights using a 2B pencil. Lightly shade the foreground elements: the trees, rocks, and terrain. Vary the orientation of your hatching (slanted, vertical, horizontal) to add rhythm and dynamics to your drawing.

Continue this shading work on the background, still in a gradual manner. It's easier to intensify an area than to erase an excess of shadow.
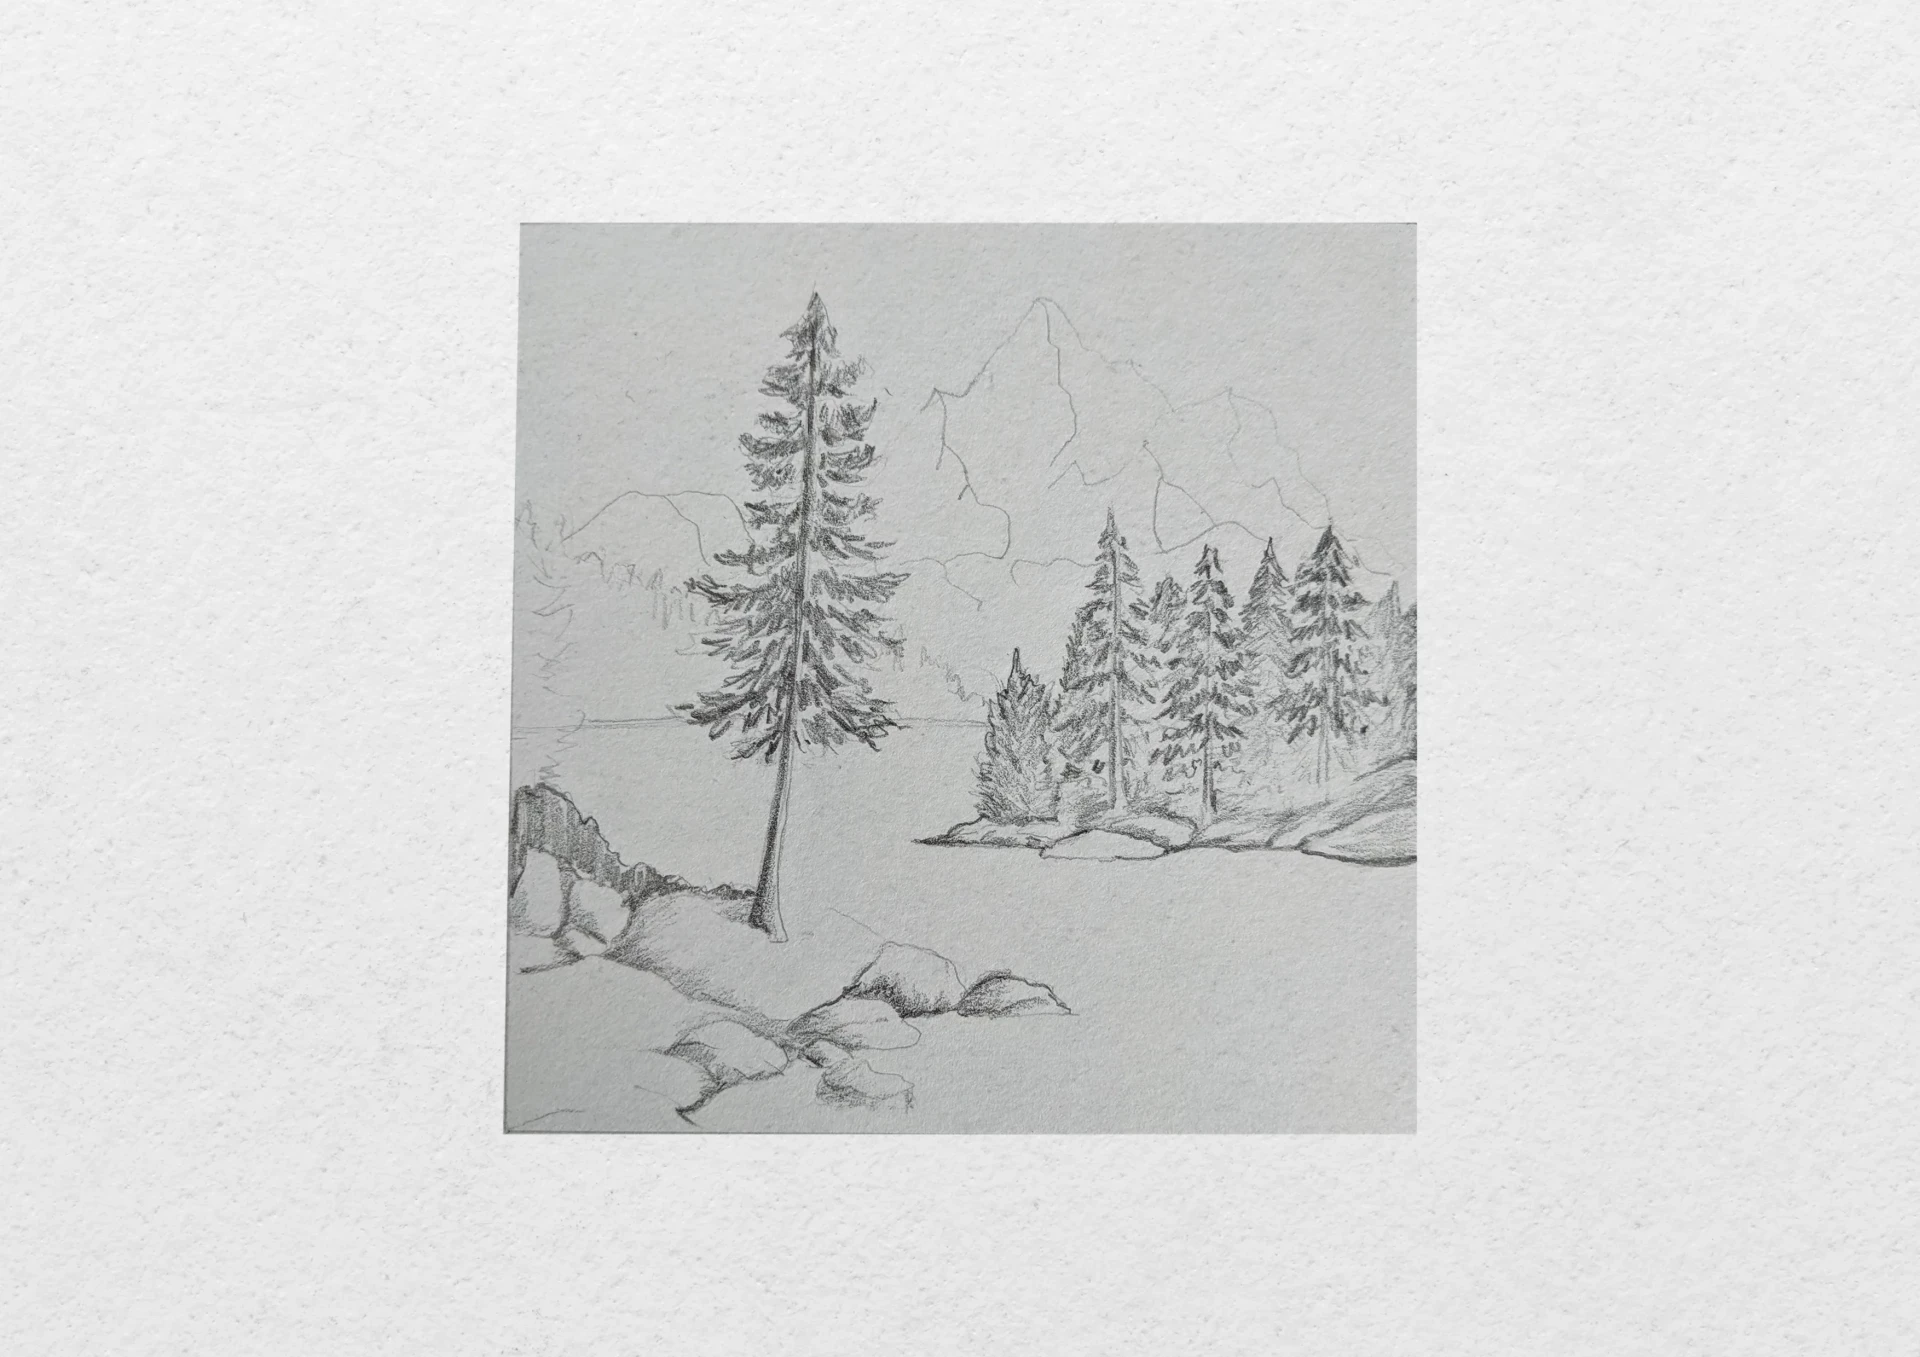
Complete your drawing by working on the background, always with a light touch. Use vertical hatching to enhance the relief and depth.
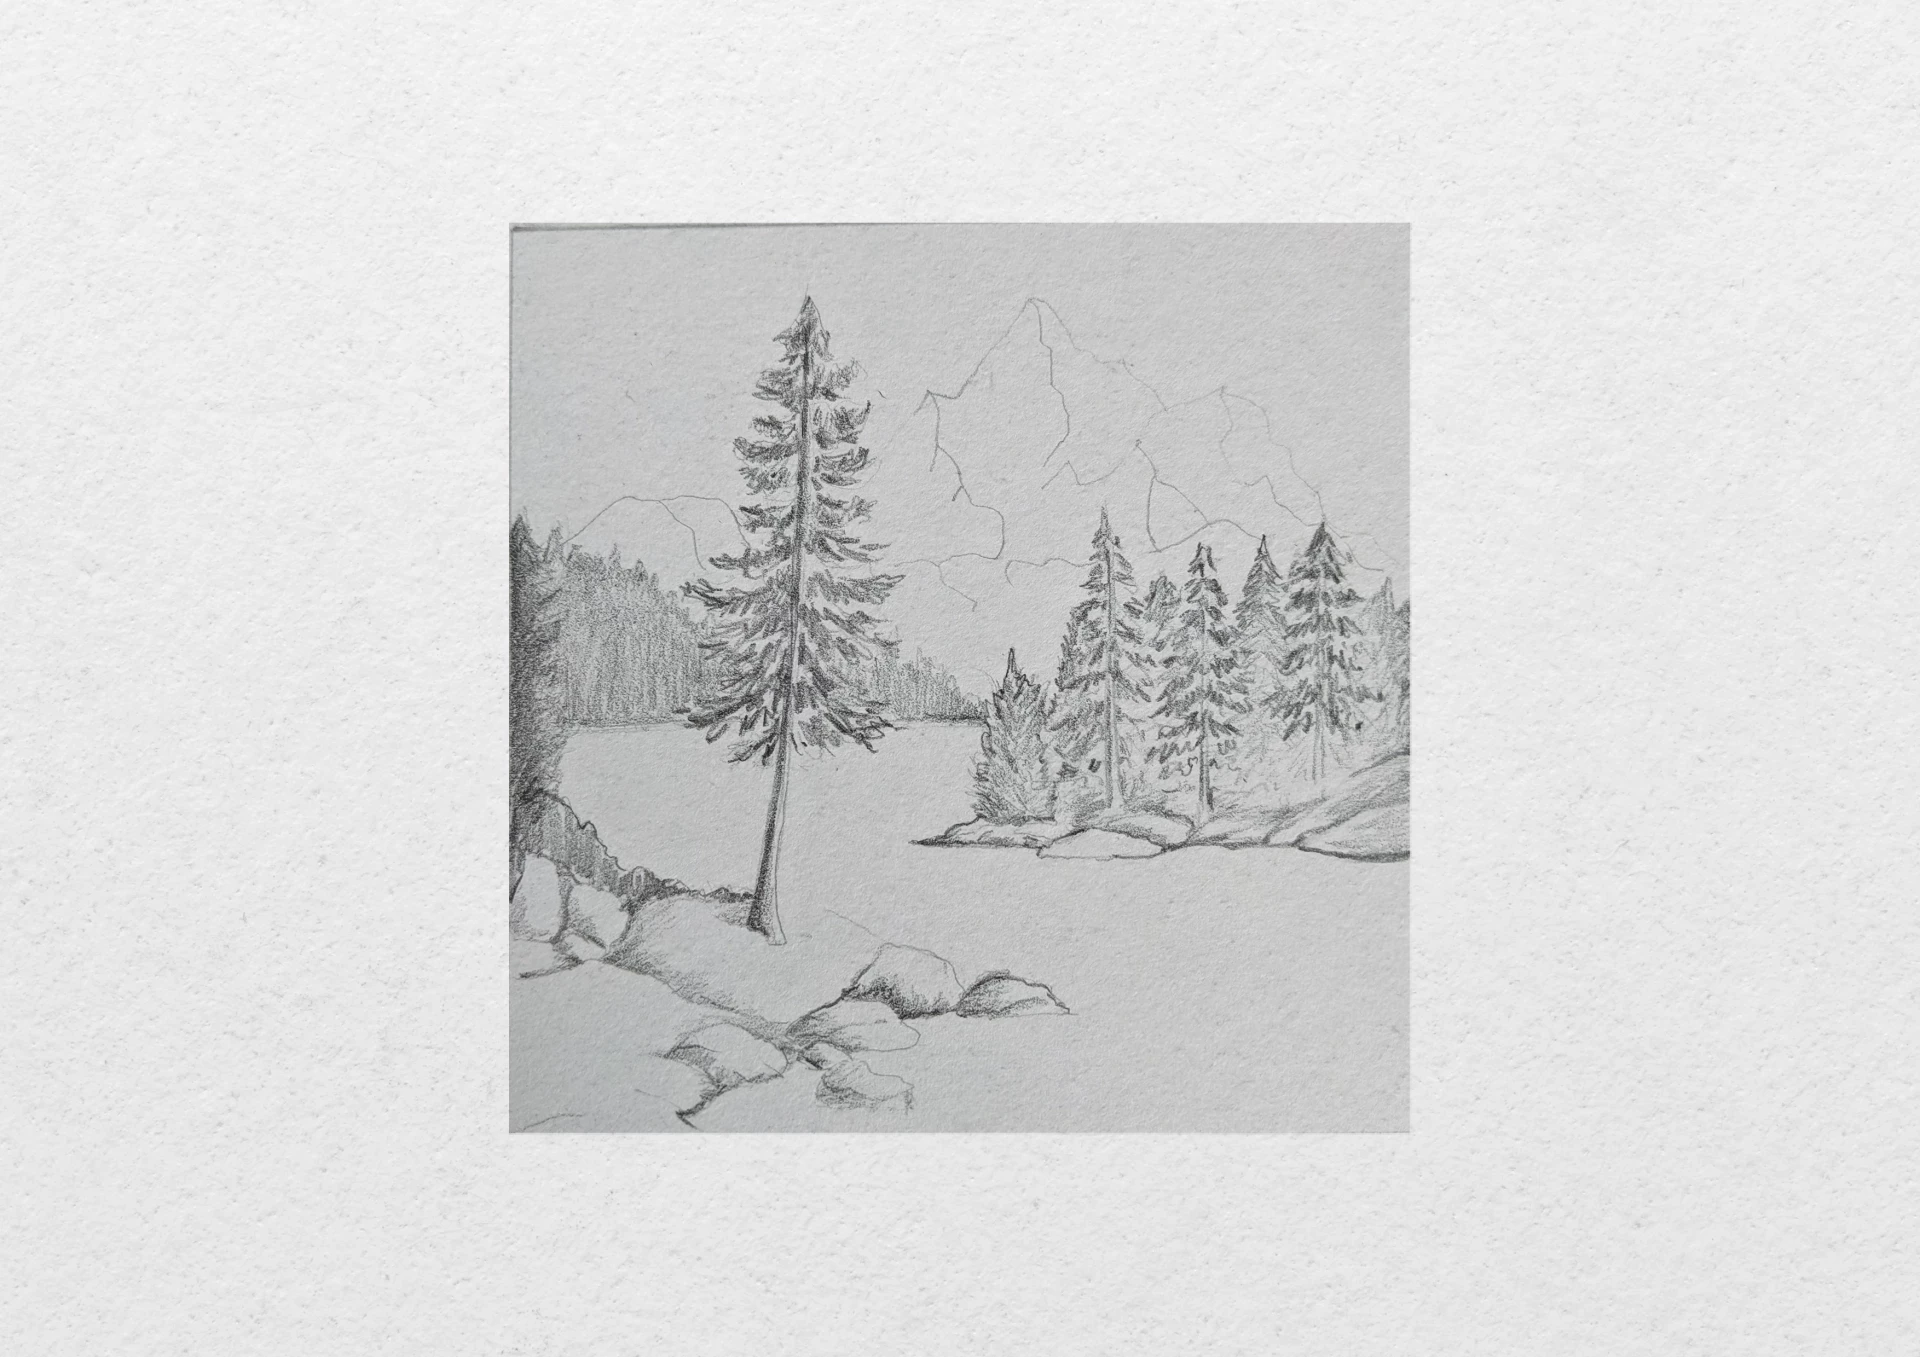
Now draw the shadows and lights of the mountains in the background. Be sure to keep some areas white to accentuate the contrasts and let your drawing breathe.
Add reflections of trees and mountains in the lake for more realism. To do this, use horizontal hatching on the right side and vertical on the left side. This will enhance the texture of the water.
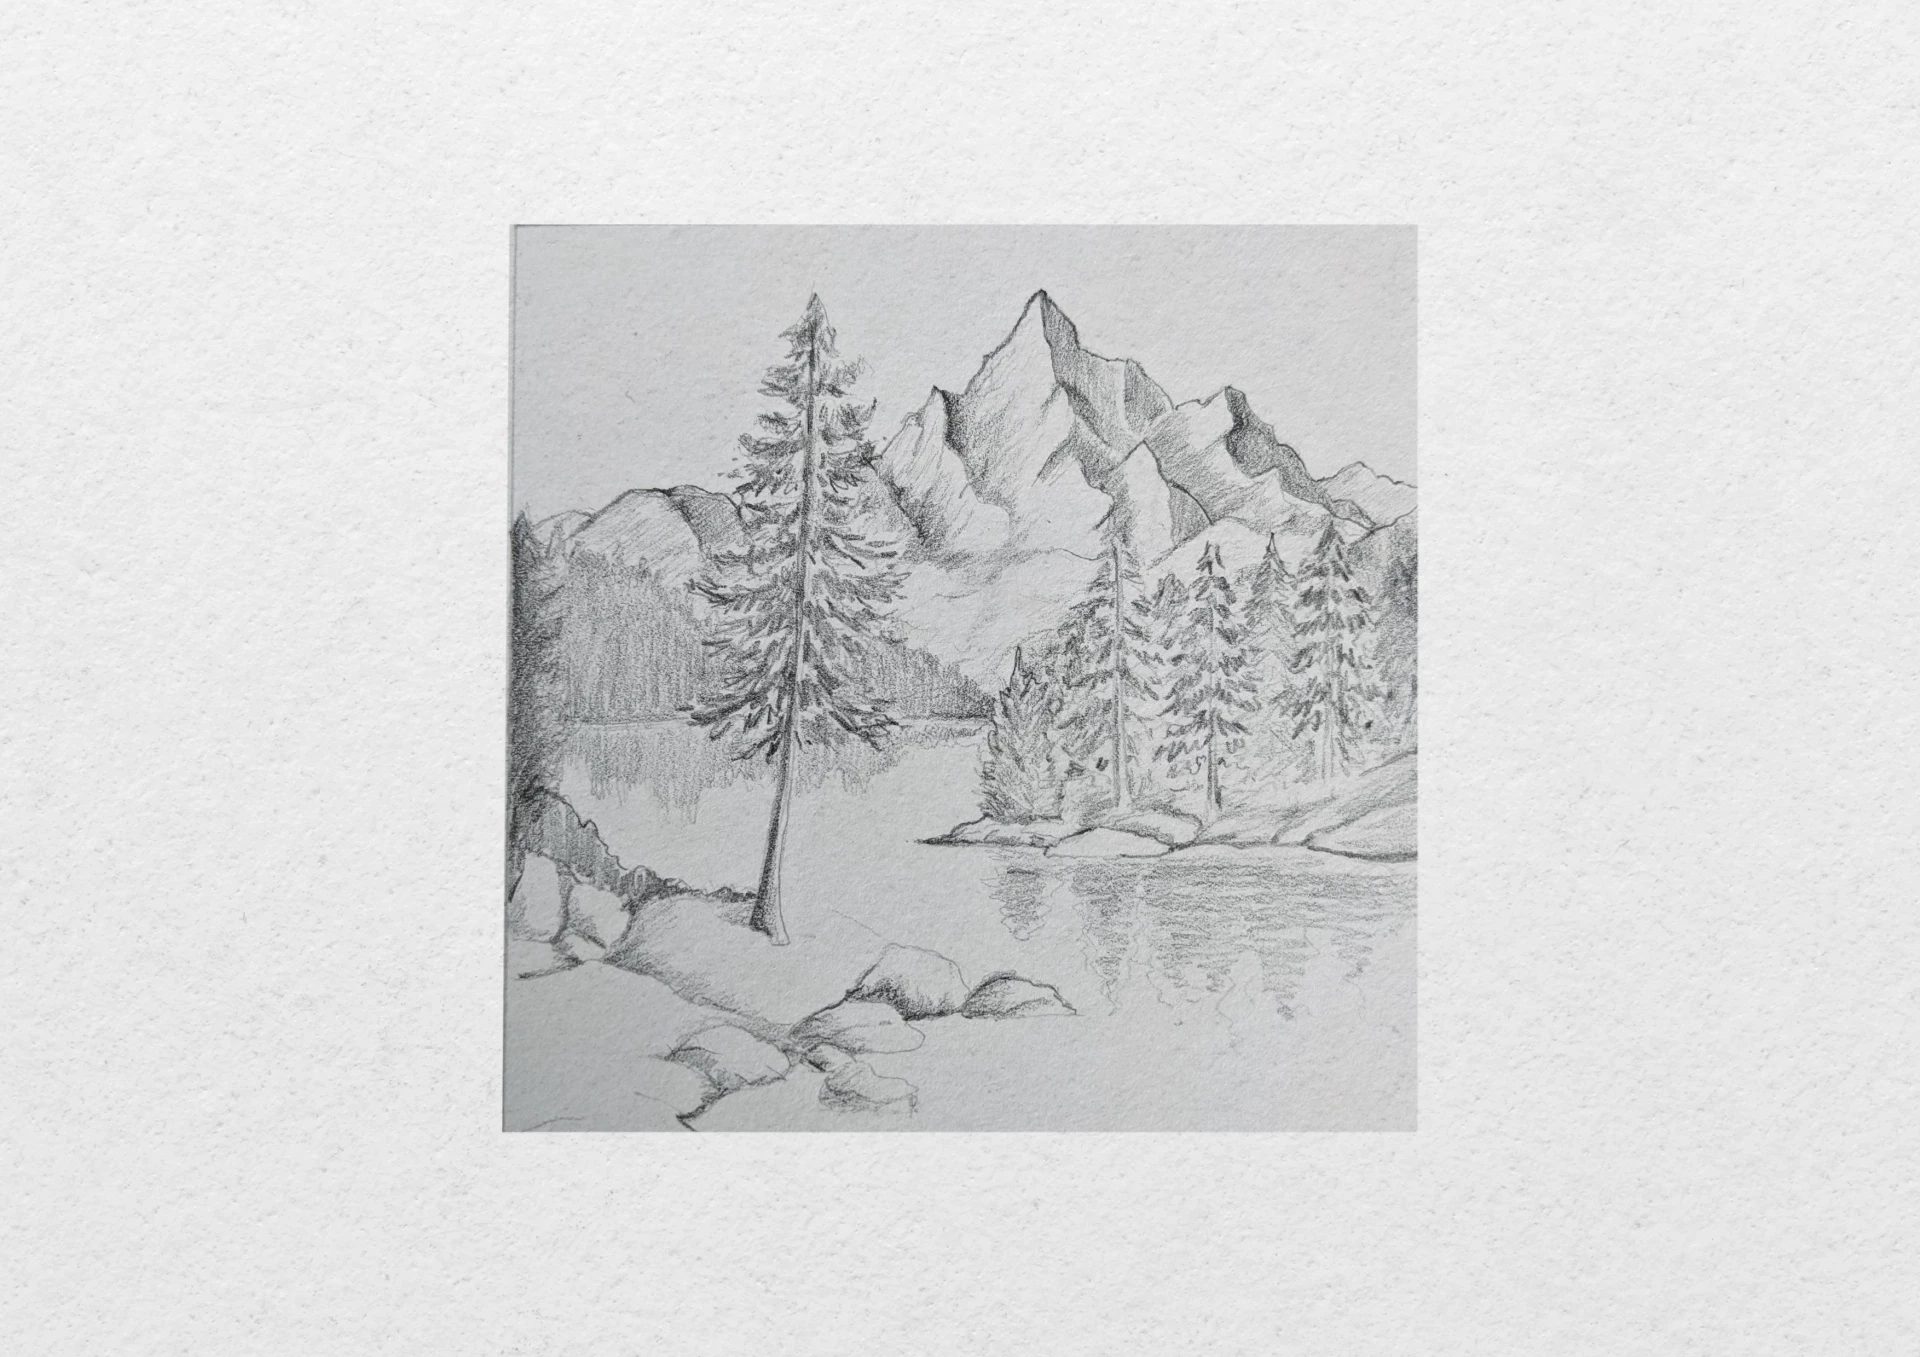
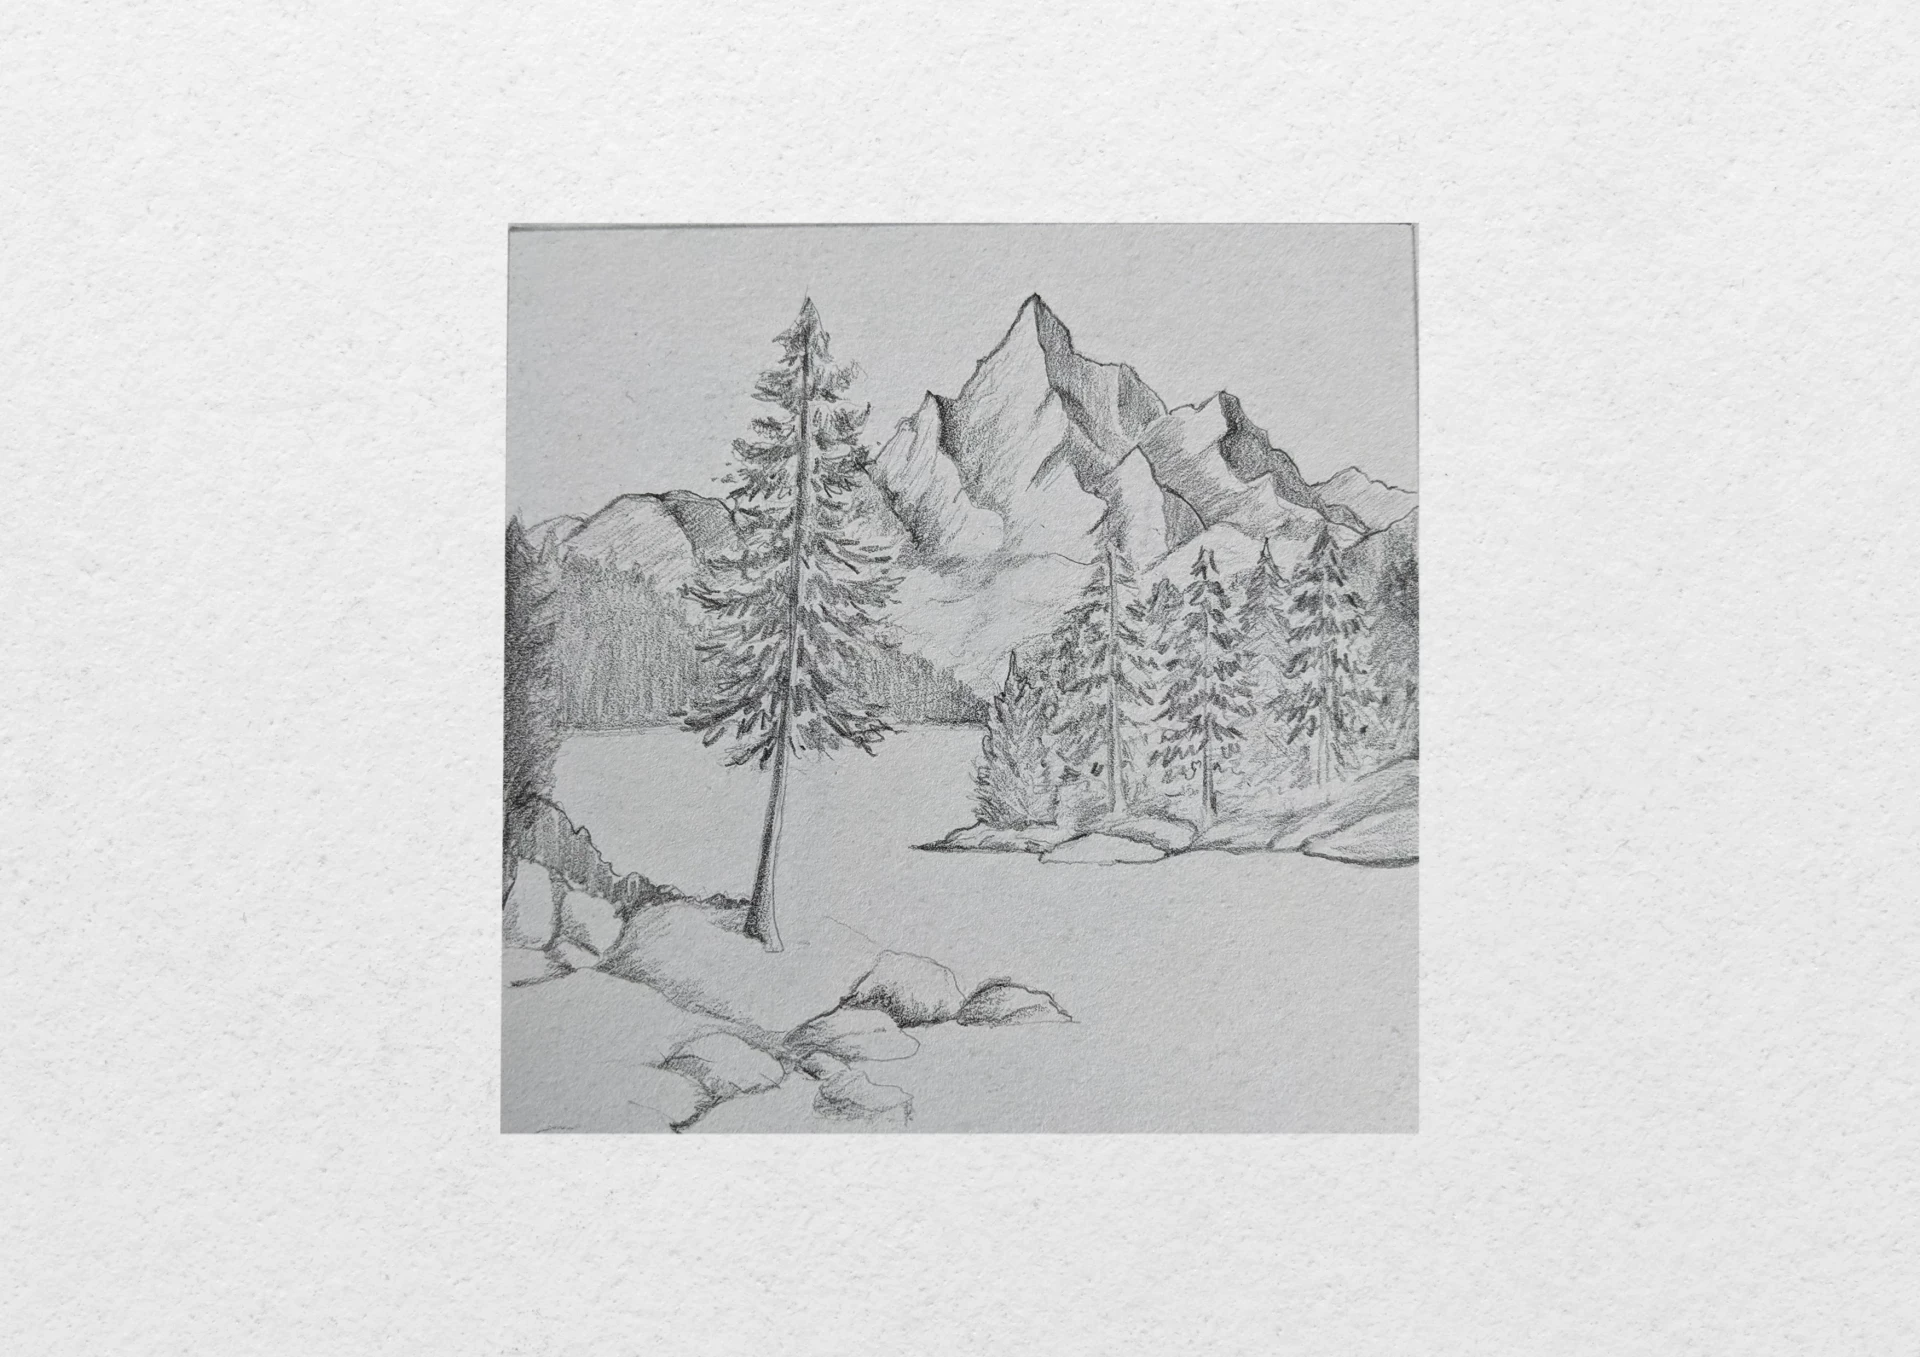
Finally, enhance some contours or shadows to accentuate the depth effect. Ideally, reinforce the foreground by adding some details and dark areas. This is the principle of atmospheric perspective: the further away you get, the more the contrasts fade.
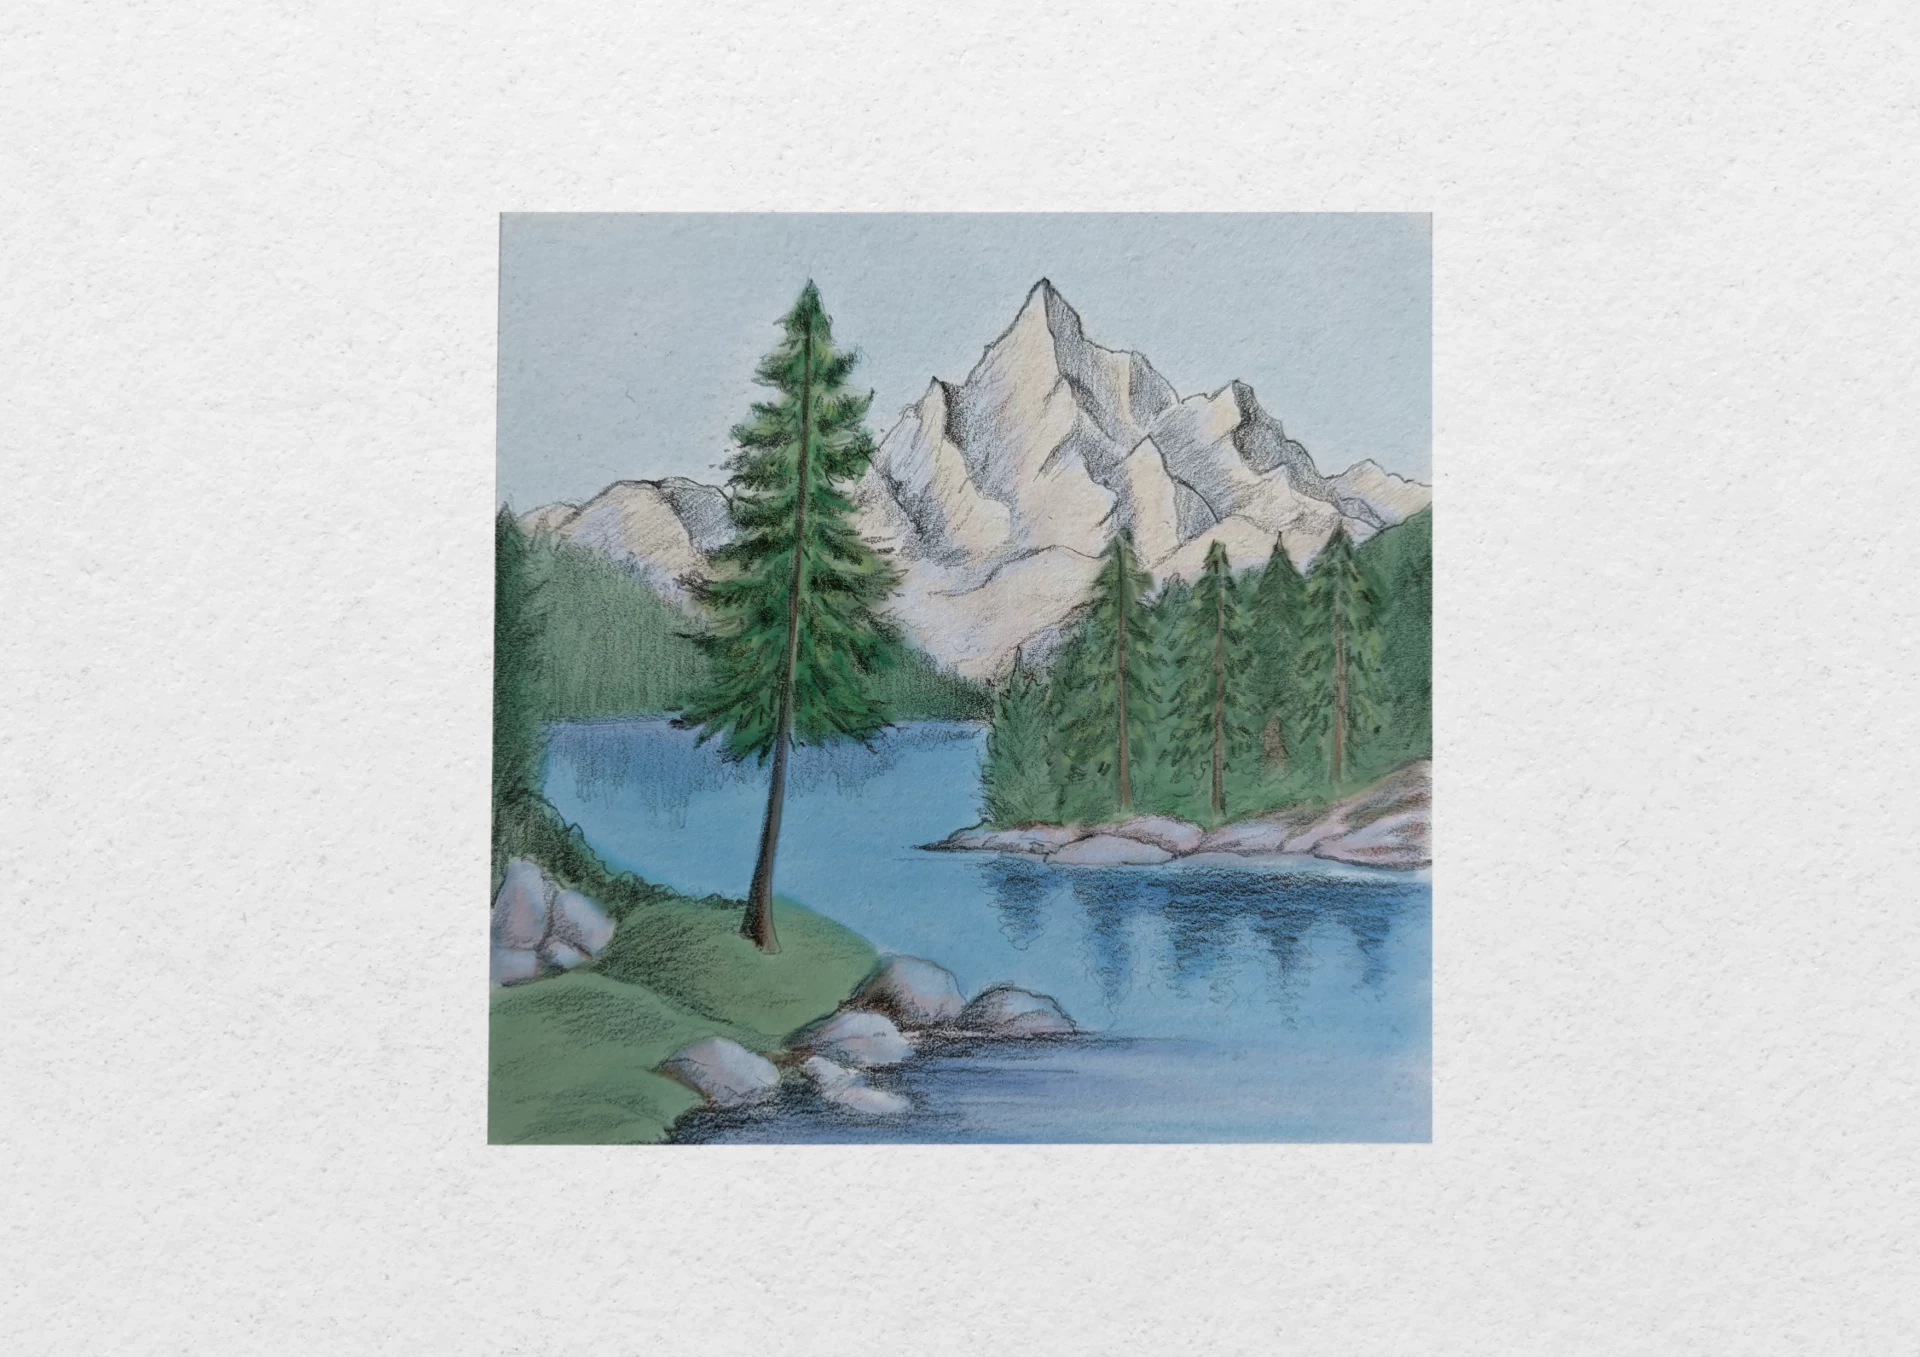
If you wish, you can add color using colored pencils or digitally. Proceed gradually so as not to cover your shadows.
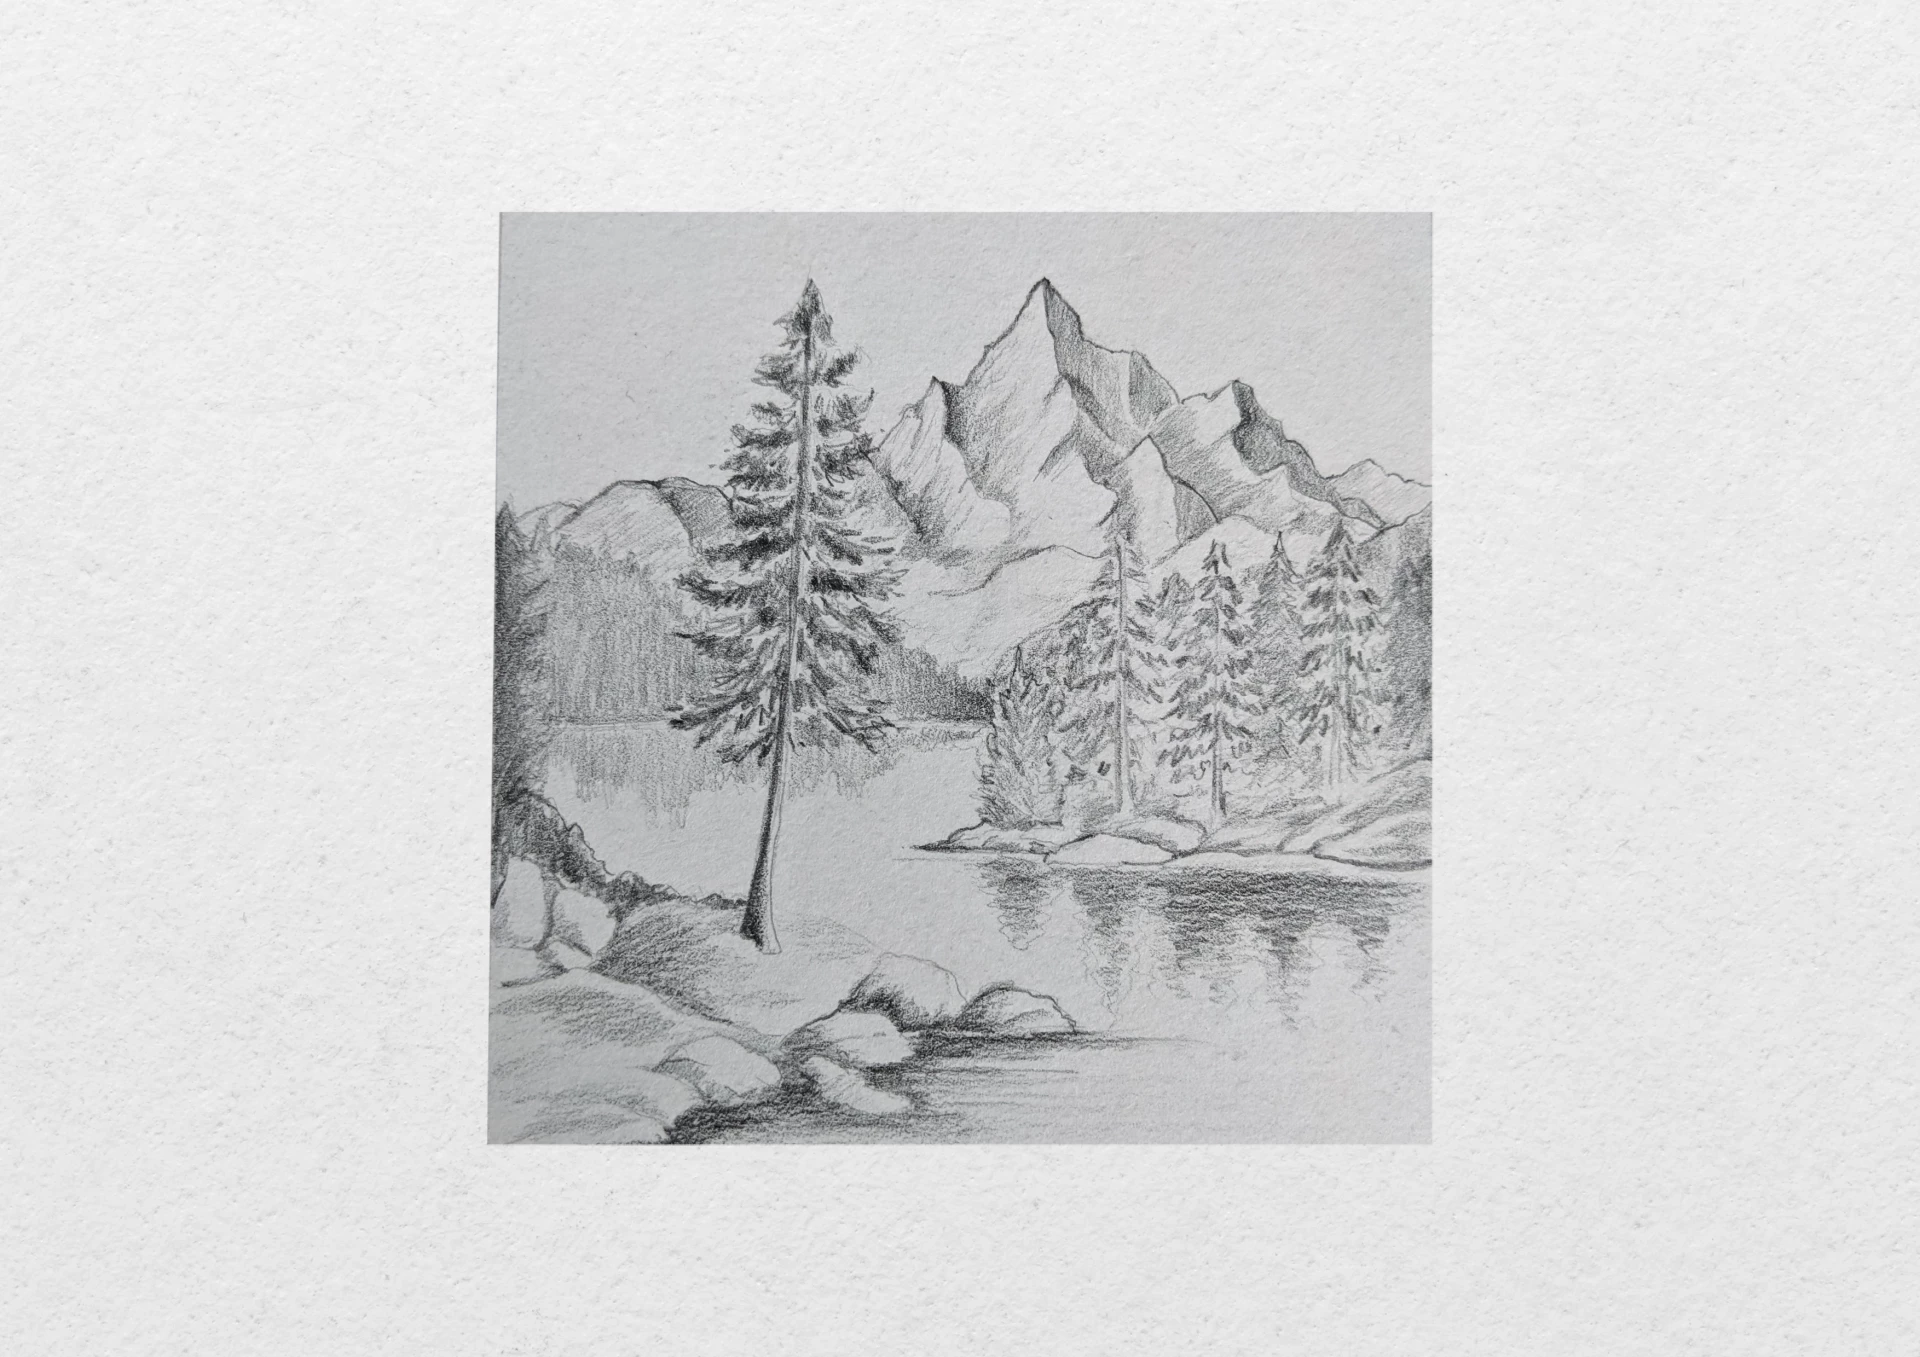
Here it is, your drawing of a lake surrounded by mountains is finished!

Some tips to bring more life to your landscape
• Vary the shapes of the mountains: avoid repetition or overly perfect symmetry.
• Create an atmosphere: a cloudy sky, morning mist, or sunbeams between the peaks add emotion to your scene.
• Add a narrative element: a bird, a boat on the lake, a walker on a path... This will make your drawing more alive.
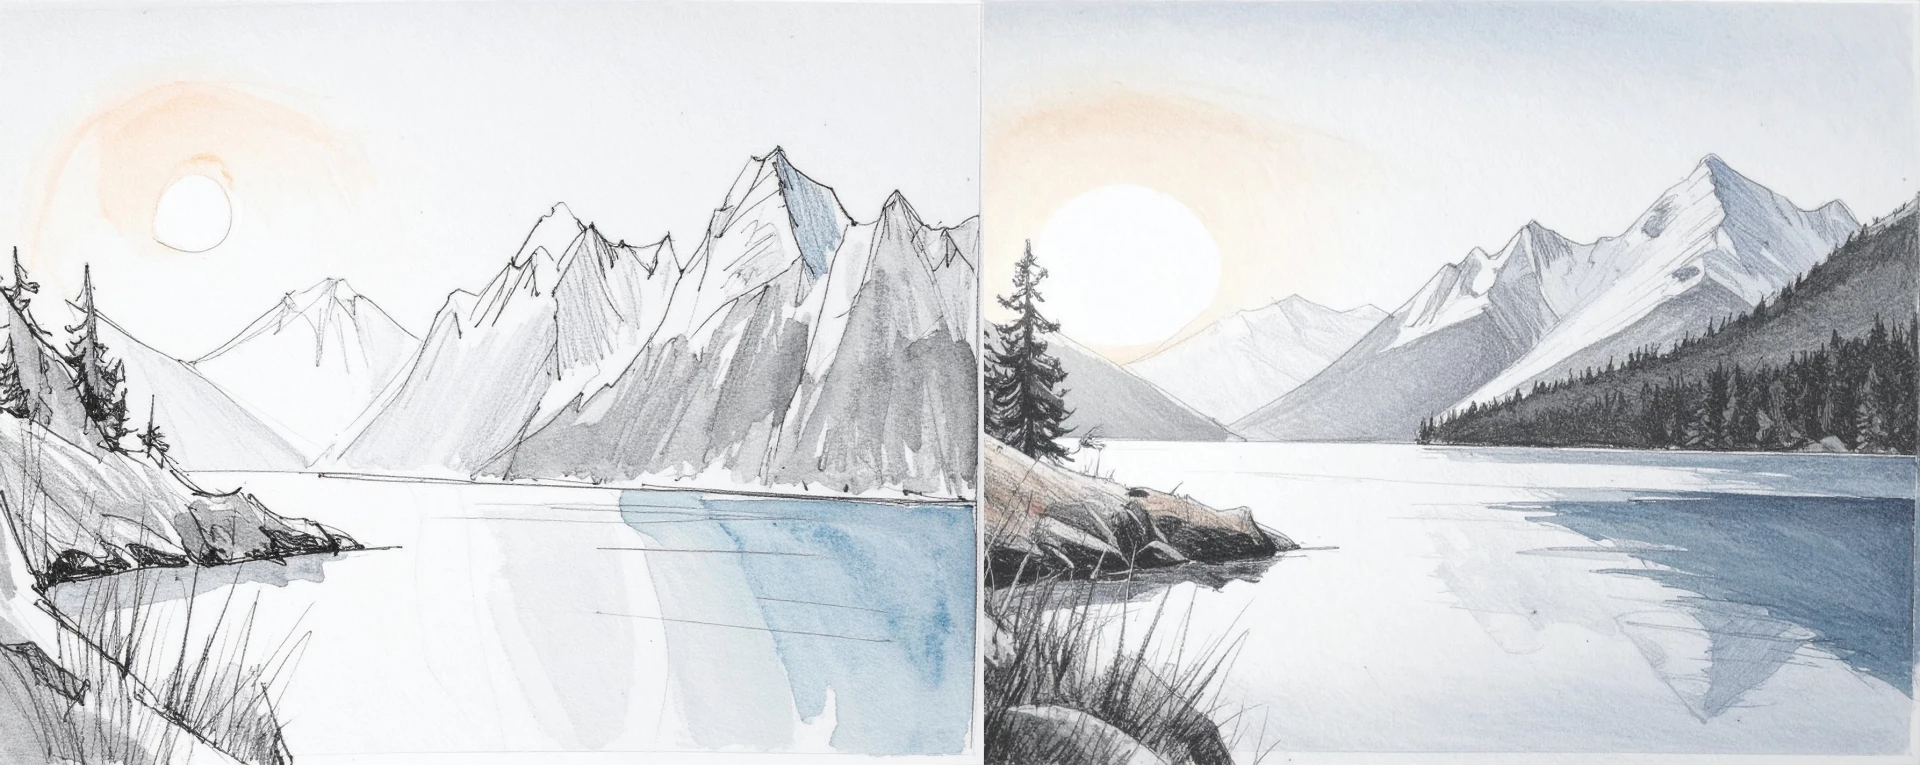
Once comfortable with the first version, you can experiment:
• A lake seen from above, from a summit.
• A view at dusk, with colorful reflections and elongated shadows.
• A winter scene, with snow on the peaks and a frozen lake.
• A highly contrasted black and white graphical interpretation.
Drawing a lake surrounded by mountains is much more than just a technical exercise: it is a way to encourage the gaze to embrace calmness and contemplation. It is also excellent practice for experimenting with composition, contrast, and mass.
Take the time to observe, test different viewpoints, play with light and textures. And above all, enjoy yourself! Each landscape you draw is a story you are telling.
Discussion
No comments yet.