How to Draw a Landscape in Perspective
Perspective is a fundamental concept in drawing because it enables easy and accurate representation of 3D objects. In this article, we will put the concept of perspective into practice in order to draw a landscape.
The basics of perspective
For the rest of this article, it is necessary to have some basics in vanishing point perspective. If you're not sure what vanishing point perspective is, don't panic! We have some very good articles on it that you can consult. You can also continue reading this article without it; some reminders will be made along the way so not to leave beginners behind, but it is highly recommended to know how to construct boxes in perspective before starting.
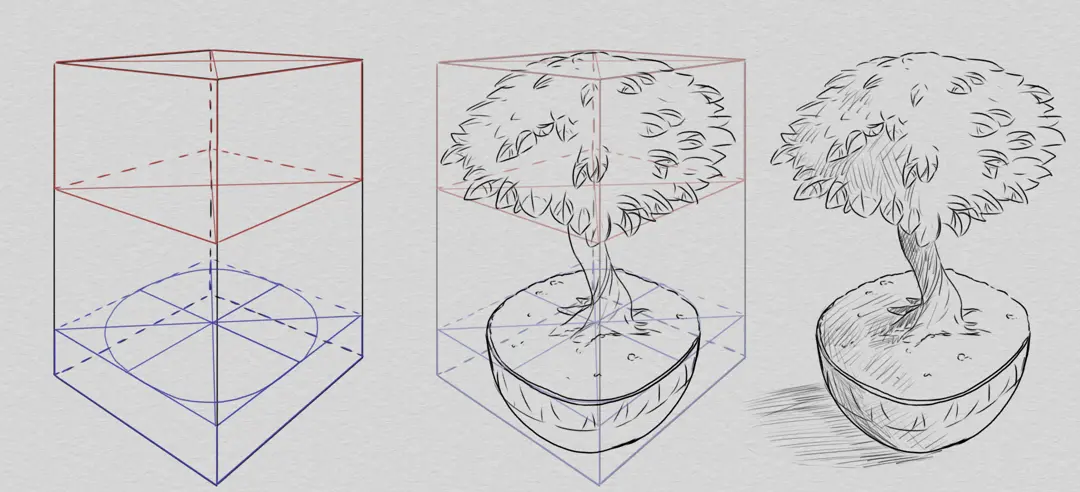
To draw our landscape, we are going to need an important concept: bounding boxes. In perspective, the term "bounding box" refers to a cuboid that contains our subject. It's a very useful tool because it's very simple to draw inside a box, and even easier to place a box in perspective! The bounding box thus enables us to bridge the gap between drawing in perspective and freehand drawing.
The other fundamental tools we will need are the horizon line (red) and the frame (blue). The first defines the eye level of our observer, and the second the orientation of their gaze. Thus, it is possible to have a horizon line out of the frame!
Composition of our landscape
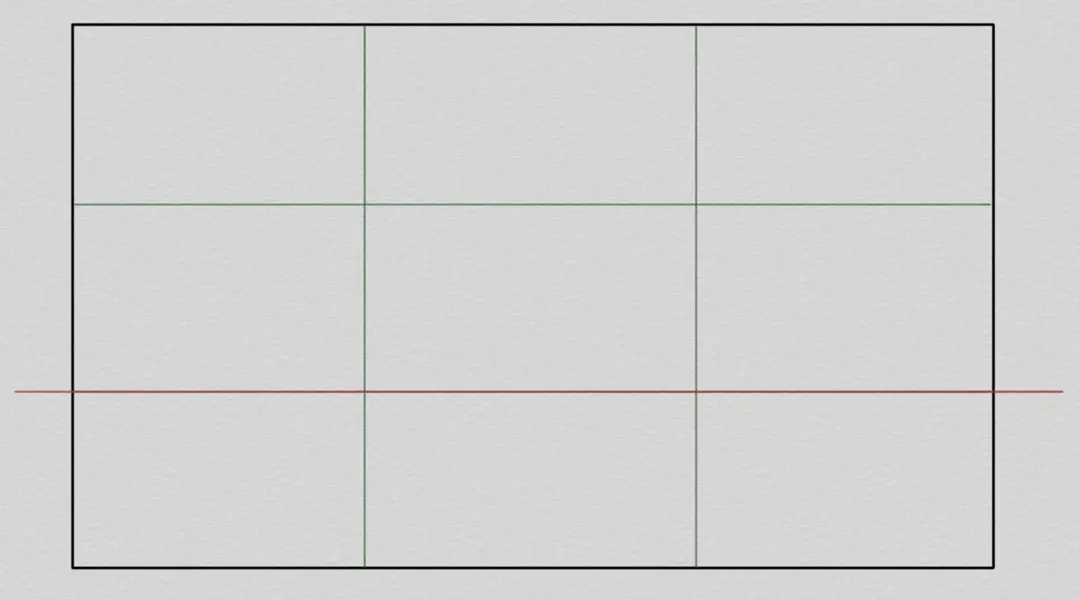
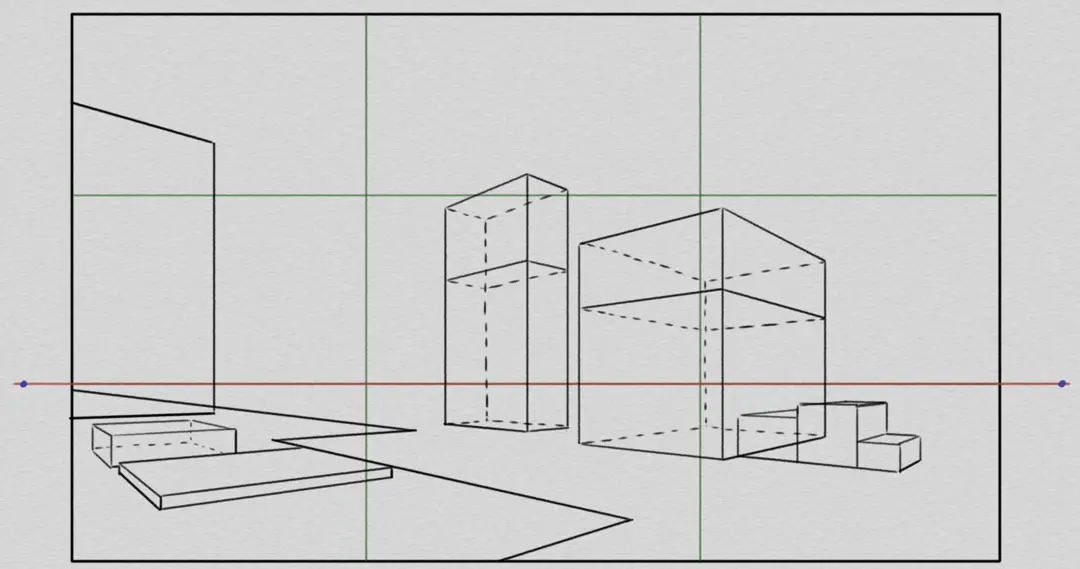
To begin drawing our landscape, we will first define a frame and follow a composition rule. I'm going with a classic frame, in a landscape format, and a horizon line passing through my frame. Regarding the composition rule, the simplest one to use for a landscape is the rule of thirds: I evenly divide my frame into thirds both lengthwise and widthwise.
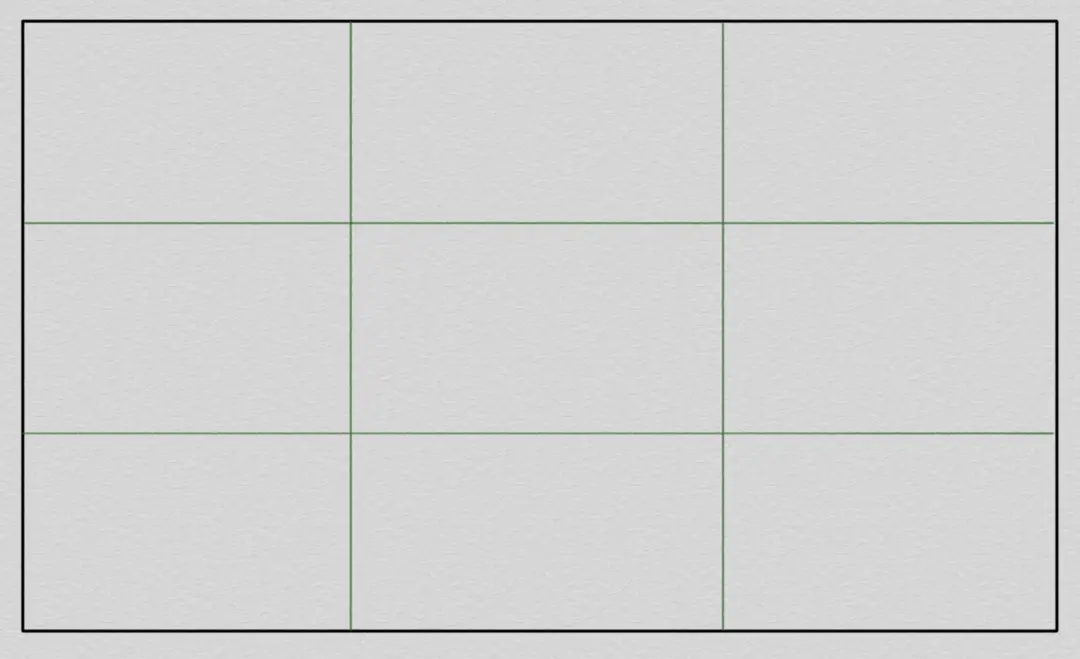
The simplest thing here is to place my horizon line on one of the horizontal thirds. Since I want to really see the sky in my composition, I will place my horizon line on the lower third.
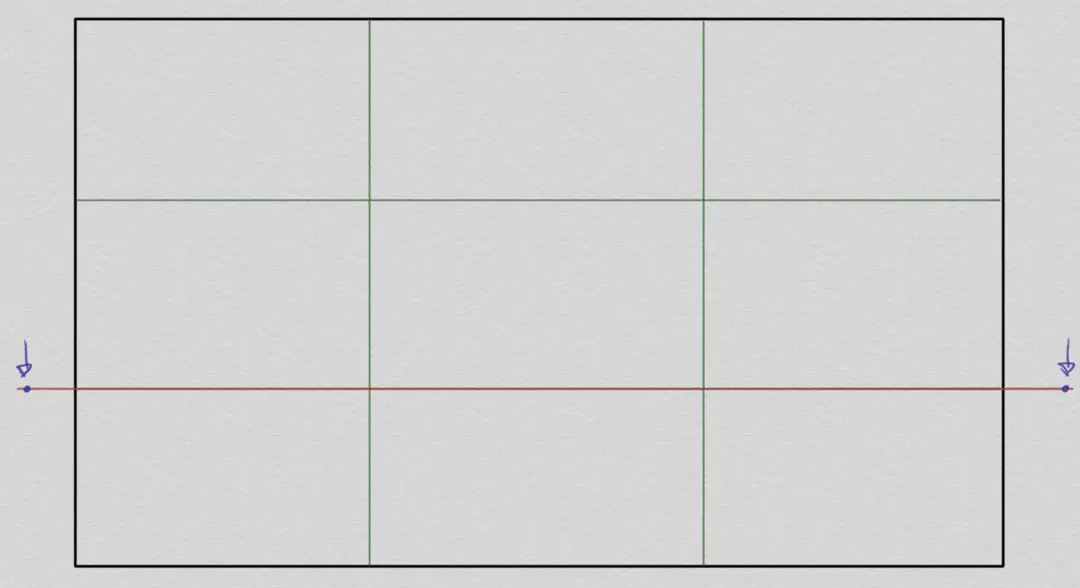
I then go on to place my vanishing points. I opt for a composition with two vanishing points (blue), which is quite natural for a landscape. I set my vanishing points slightly outside my sheet to cover the entirety of my scene.
I now have all the prerequisites to start placing elements in my landscape.
Drawing a landscape in perspective step by step
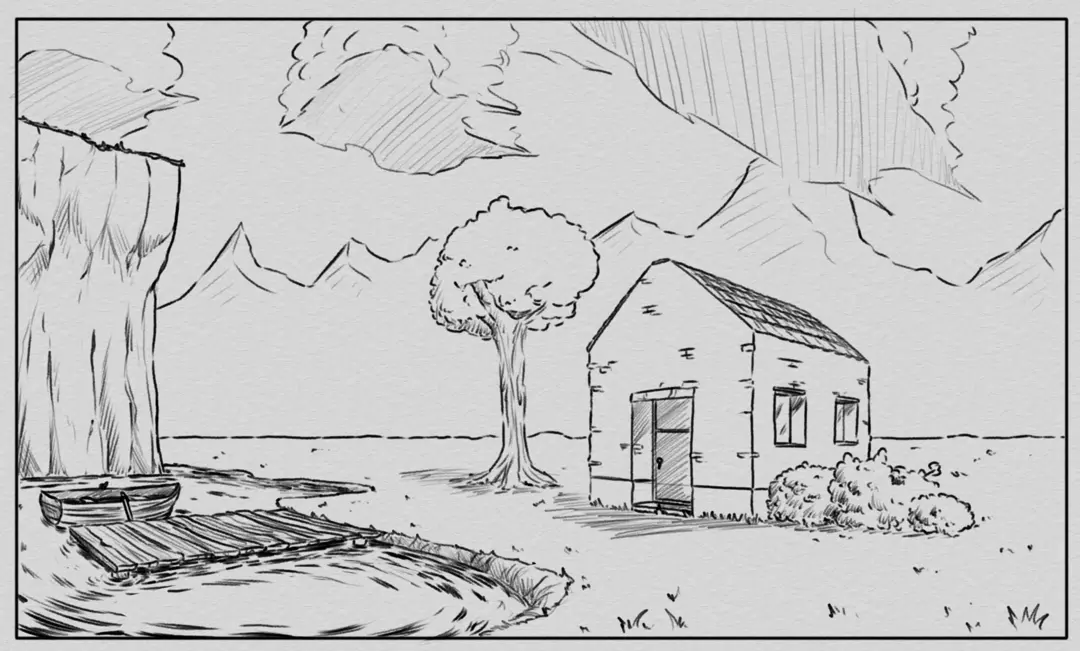
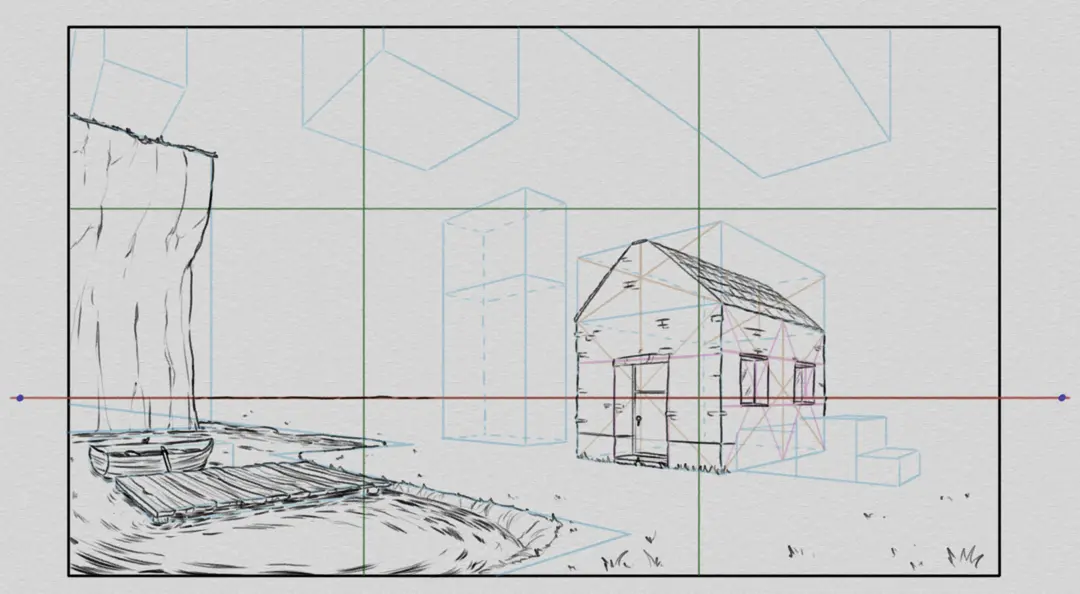
I can start to put the large blocks of my landscape into my composition. I've decided to depict a rather classic mountain lake scene, with a house, a dock, a boat, and some natural elements like trees, clouds, bushes, and a cliff.
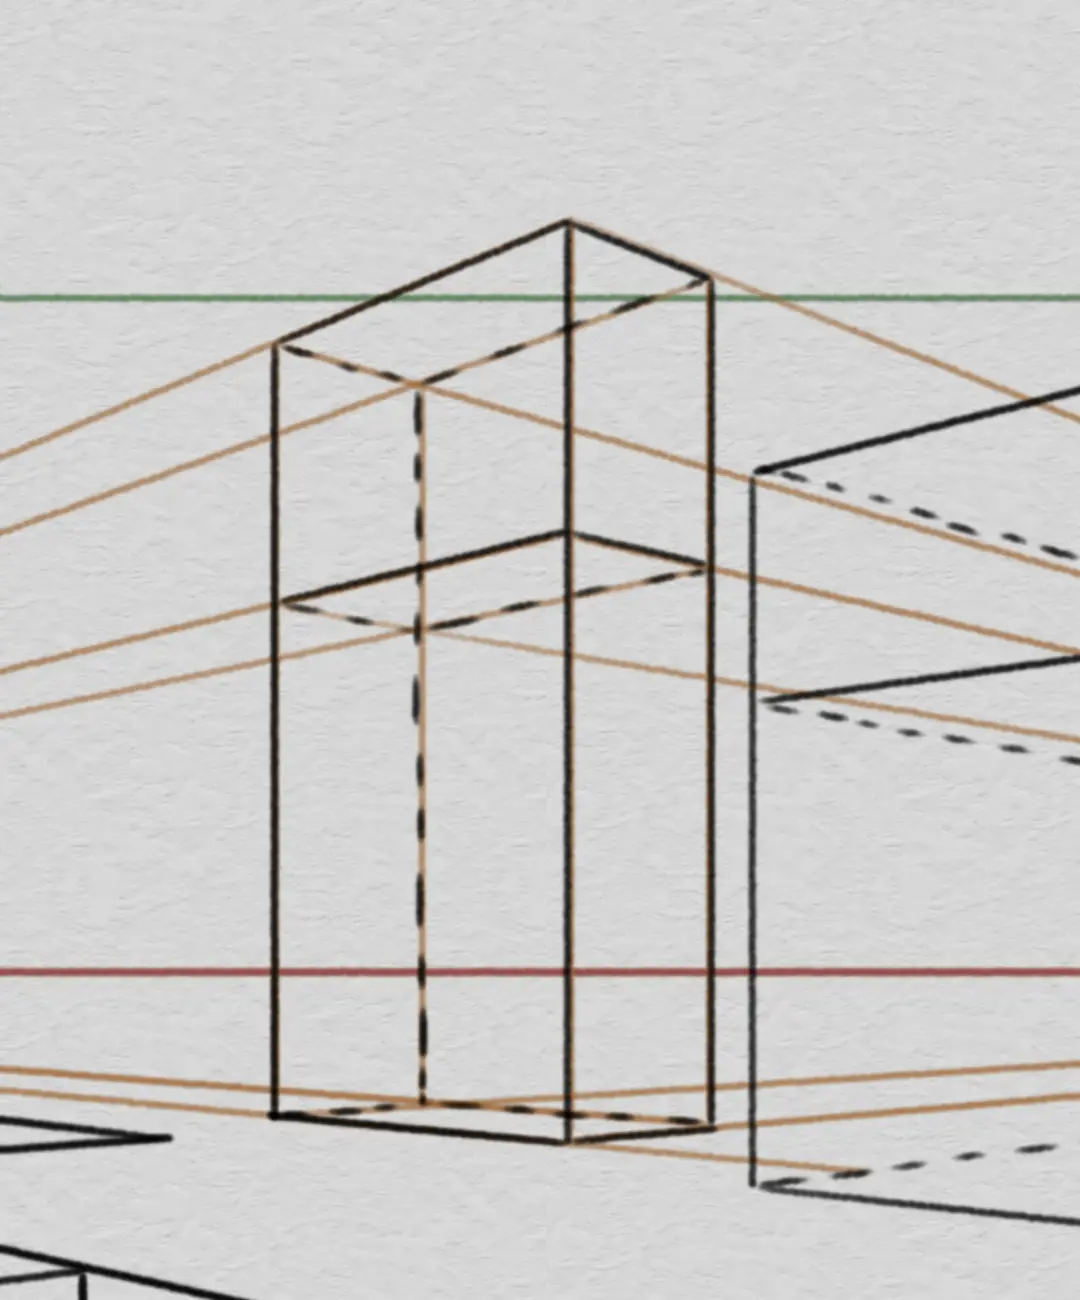
I start by placing my main element: the house. To do this, I draw a box with two vanishing points on the right third of my composition. I also divide my box in two to separate the body of the house from the roof.
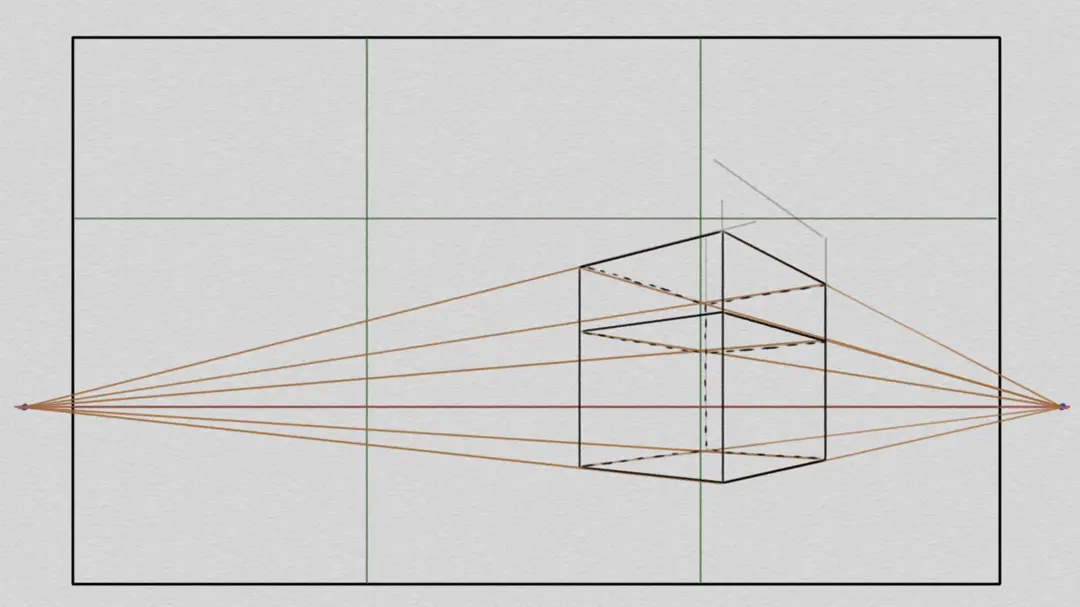
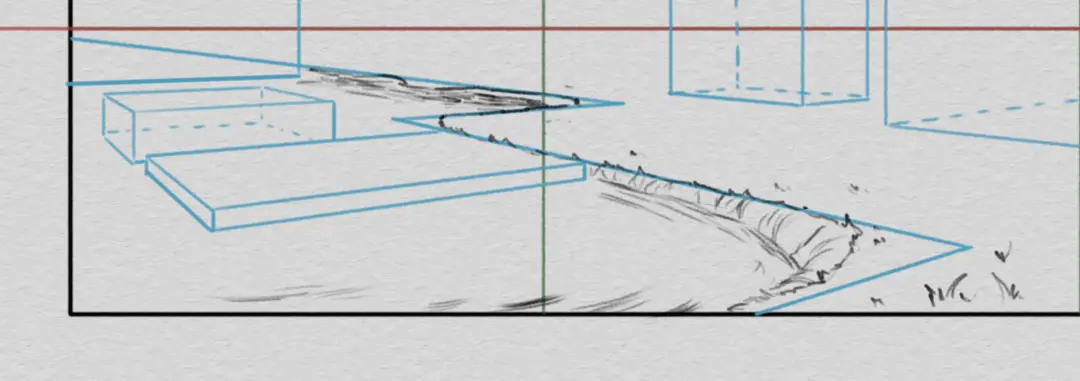
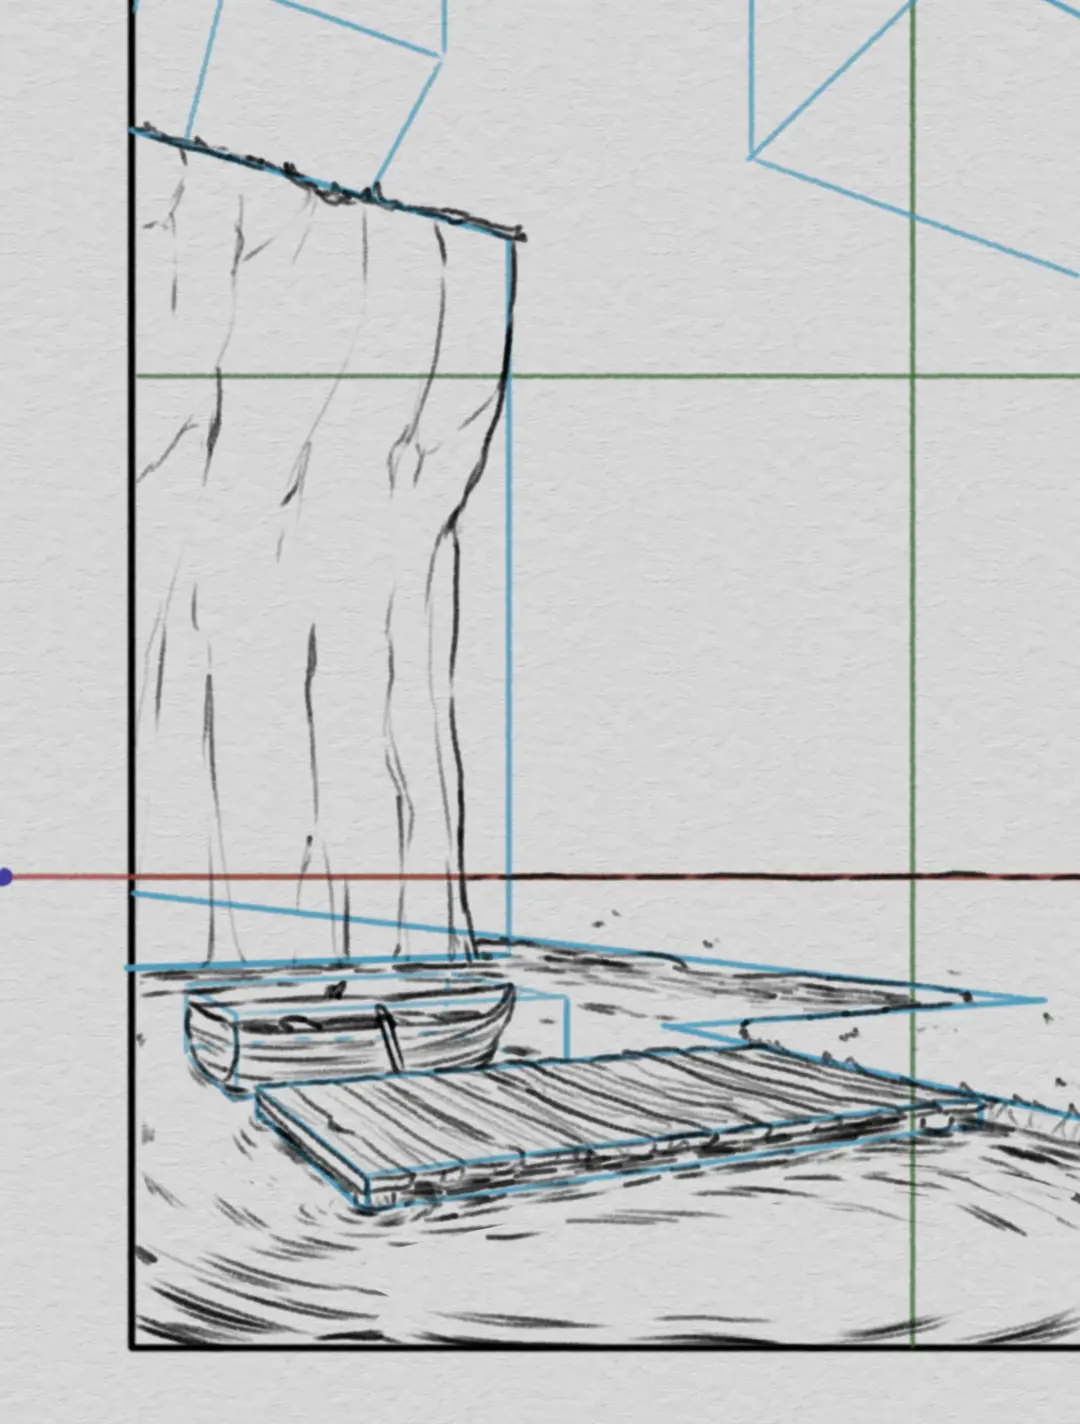
My house is on the lakeside, so I will then look to create the bounding box around it. Since the lake is a "flat" object, I will only need a flat surface. To place my surface in front of my house, I extend one of the edges of the house's box and intersect it with a vanishing line coming from the opposite vanishing point. Hence, I obtain a first boundary line for the shore facing my house.
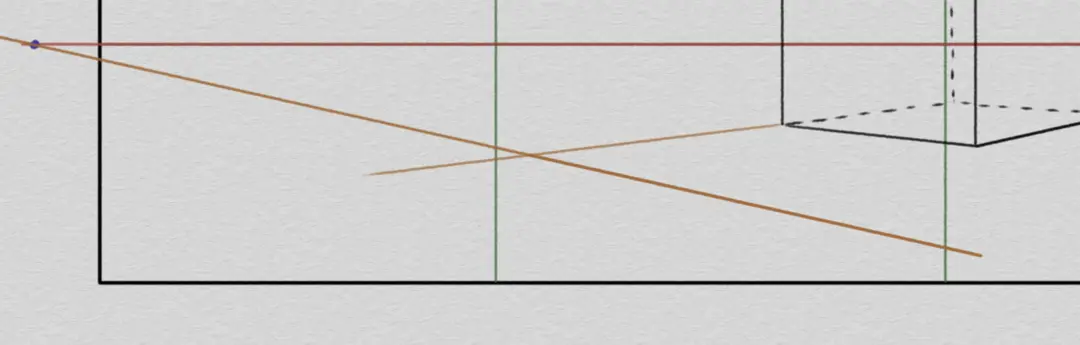
In the same way, I obtain a second part of the shore of my lake by cutting the first with a vanishing line coming from the second vanishing point.

And so on, I can begin to shape the shore of my lake.

The pontoon joins onto my first shore. I mark a width on it and draw two vanishing lines passing through these new marks to make the base of my pontoon.

I close the base of my pontoon with a vanishing line coming from the second vanishing point.
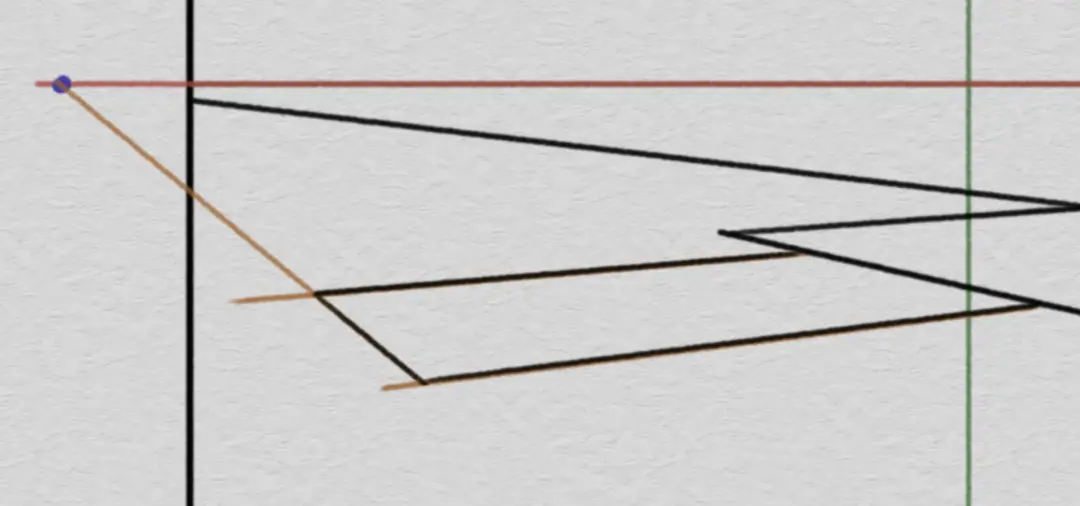
Finally, I add some depth to my pontoon by drawing its bounding box from this base, towards the bottom of my scene.

To sketch the pontoon, I placed it onto a surface. I can proceed in the same way to design the box of my cliff, but this time making it protrude from the surface of the lake. Finally, since the cliff crosses through the horizon line, only one face of it will be visible.

Using my first boxes to build the next ones means I can ensure that all my objects are on the same ground. If I want to add a tree near my house, I can proceed in the same way. I place a marker on the side of my house, I draw a vanishing line passing through it…
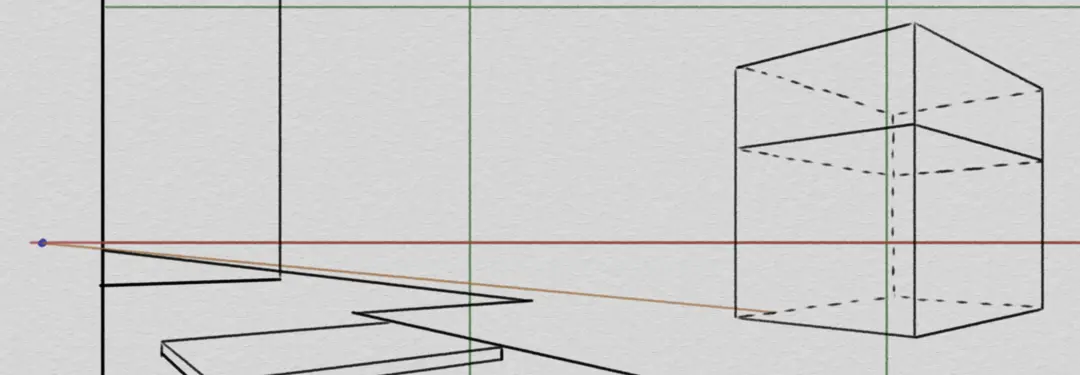
… Then I choose a point on my line, and build a bounding box from that point.
I use the same method for the boxes around my bushes (on the ground) and for my boat (on the lake).
Some elements do not touch the ground and can be at variable heights. This is the case for clouds, for which I traditionally draw boxes with two vanishing points above the horizon line.
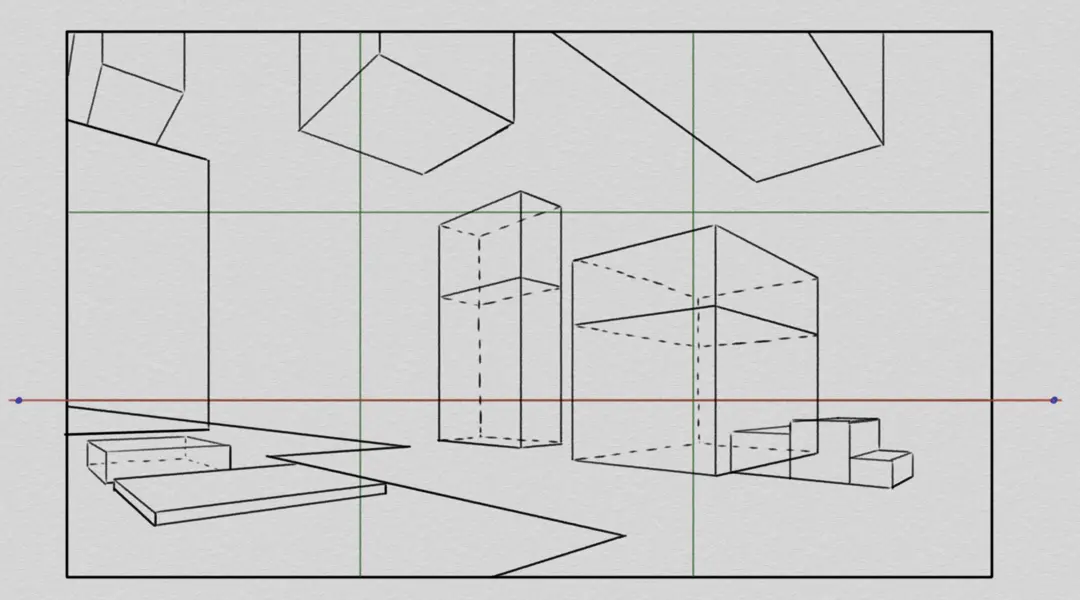
Finally, some elements will be too far away to be perceived in volume. This will be the case for the mountains, which I will place in the background of my composition, in the form of silhouettes, in the next step.
Drawing the landscape
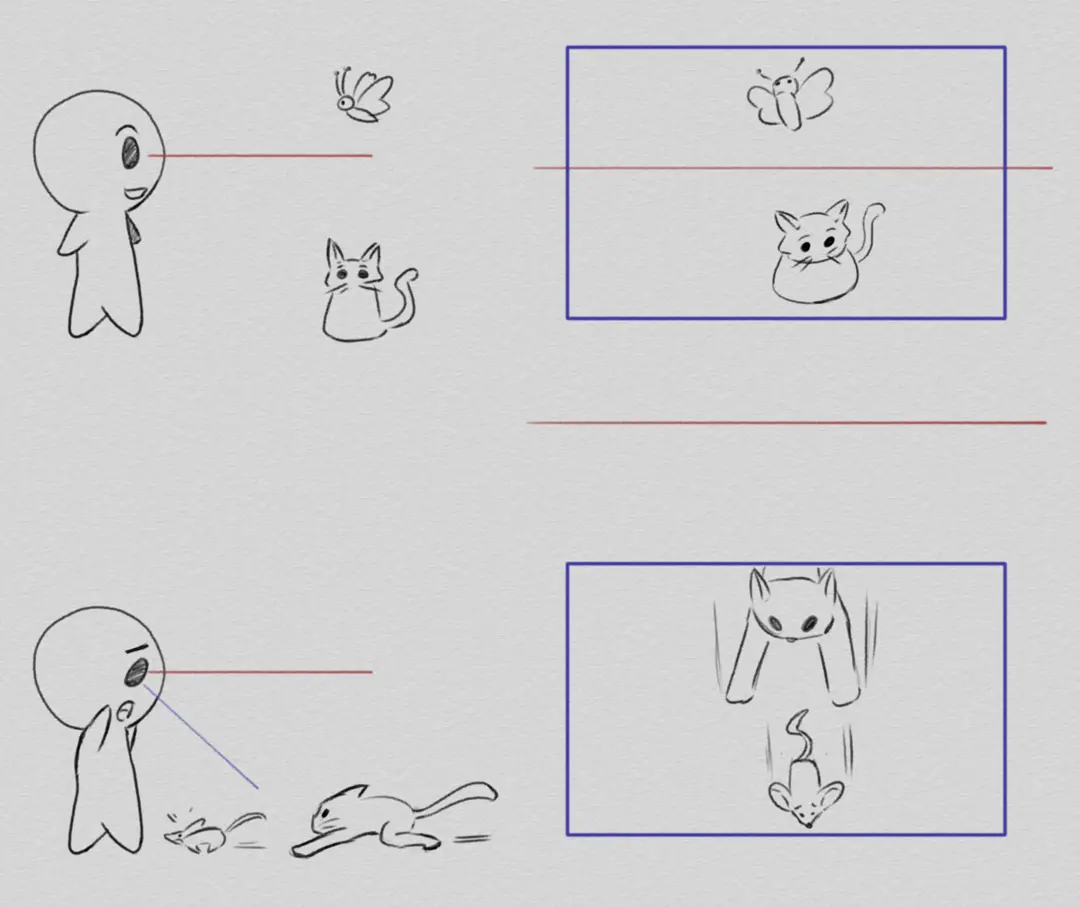
All my boxes are placed! I can start drawing the different elements. My bounding boxes give me the general volume of each element and how they are perceived: if they are below the horizon line, we should see the top of these. If they are above the horizon line, then the underside of these elements is visible. Lastly, if they cross the horizon line, we will see neither the top nor the bottom.
The simplest way is to start by drawing the objects in the foreground and gradually delve deeper into our scene. So, I start with the lake and pontoon. For the lake, I first redefine the shape of the shore. Even though I want a lake with two distinct shores, I don’t want a rectangular lake! I soften the angle of the lake’s box and add a bit of irregularity along the shores. For now, I’m not detailing the water particularly; I’m waiting first to have the elements on my lake.
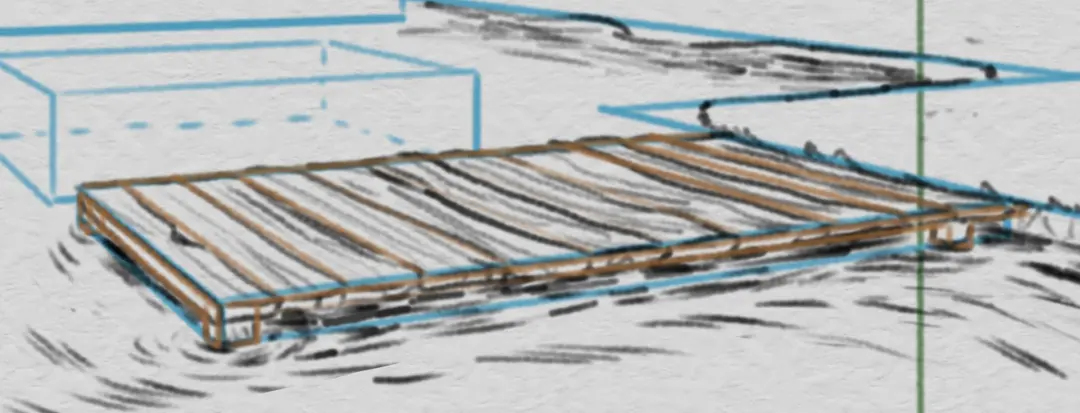
For the pontoon, I just scored the top of my box with vanishing lines to be able to easily draw wooden slats later on. I can also place markers on either side of the pontoon to add posts that sink into the water.
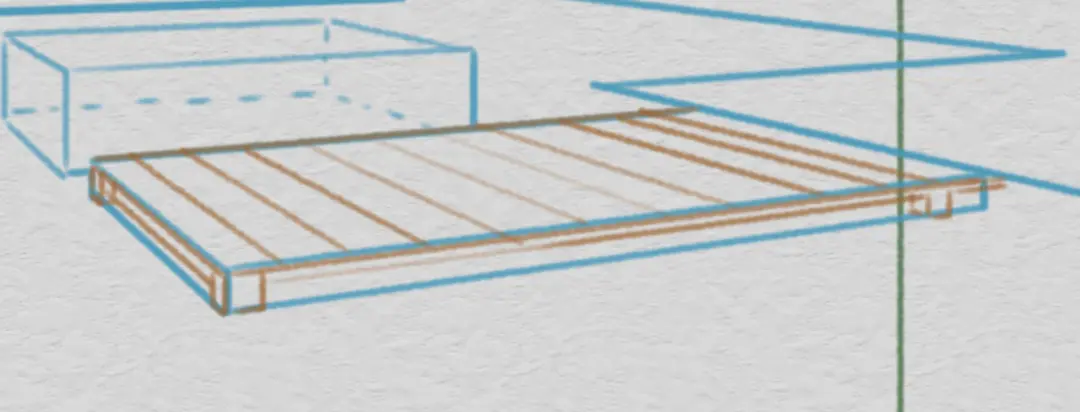
Once I have placed my detail markers, I can finish the pontoon.
I can then construct the boat using the same process as for the pontoon, and the cliff in the same way as for the lake.
For the house, I am adding some additional guides to position the details: I cut the faces of the box along diagonals to find their centers, which will help me position the roof and center the door. I place horizontal guides to find the top of the door and to align the windows, and again diagonals to center them.
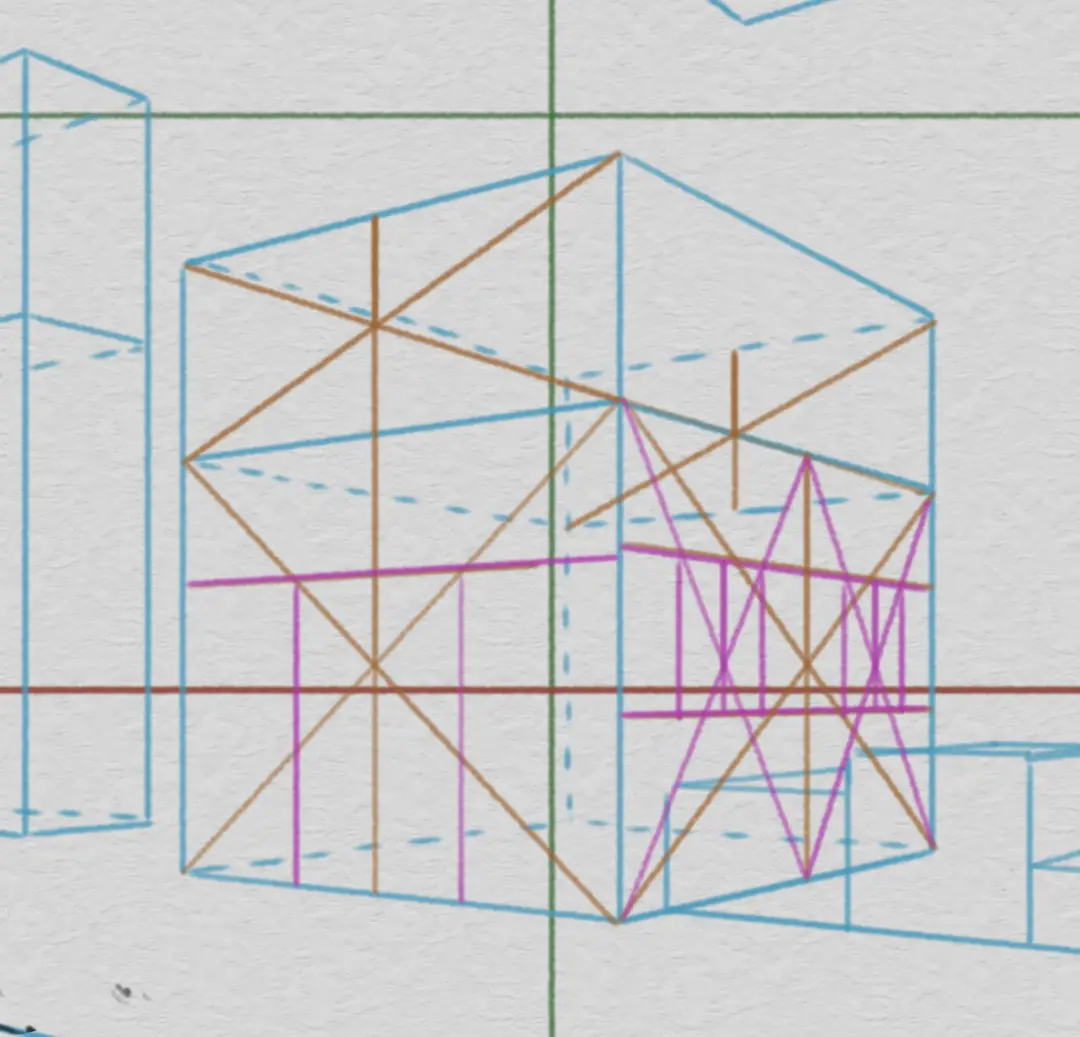
Once these reference points are placed, I finish the house, leaving space for the bushes.
Finally, for more natural objects like clouds, trees, or bushes, I freely draw the shapes by hand keeping in mind the orientation rules: the clouds are above the horizon line, so we see their underside, the bushes are below the horizon line so we see their top, and so forth. Regarding the mountains, I place them at the very end because they are defined by their silhouette on the horizon.
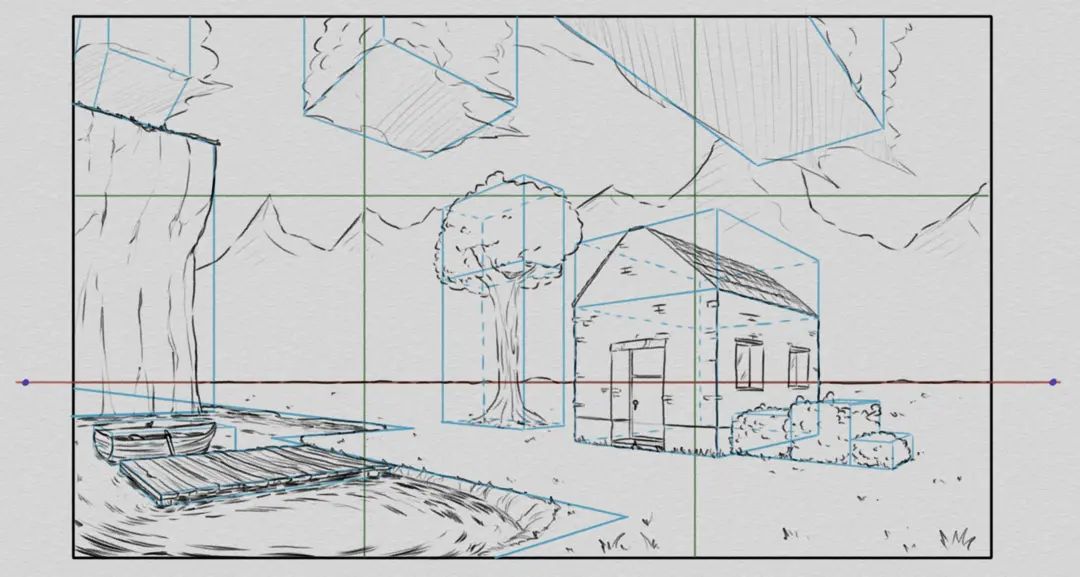
My landscape is now finished! It's always possible to develop it further, but I’m satisfied with this sketched version. Now, it’s your turn to try creating other types of landscapes in perspective!

Written and illustrated by Louis Grieves.
Discussion
AH the perspective I think it scares everyone, but the tutorial is well designed, for beginners the lines on the house might be a bit scary, nice