How to Draw a Landscape in Red Chalk
Red chalk, traditionally called sanguine, is a material that offers a new approach to drawing. It provides a range of values and contrasts that are different from graphite, while sharing many similarities with it. It is a closely related medium, but one which produces equally rich and unique results.
Hello again and welcome to this article. We are going to explore this material, widely used in the teaching of academic drawing and other creative fields, and use it to create a landscape this time.
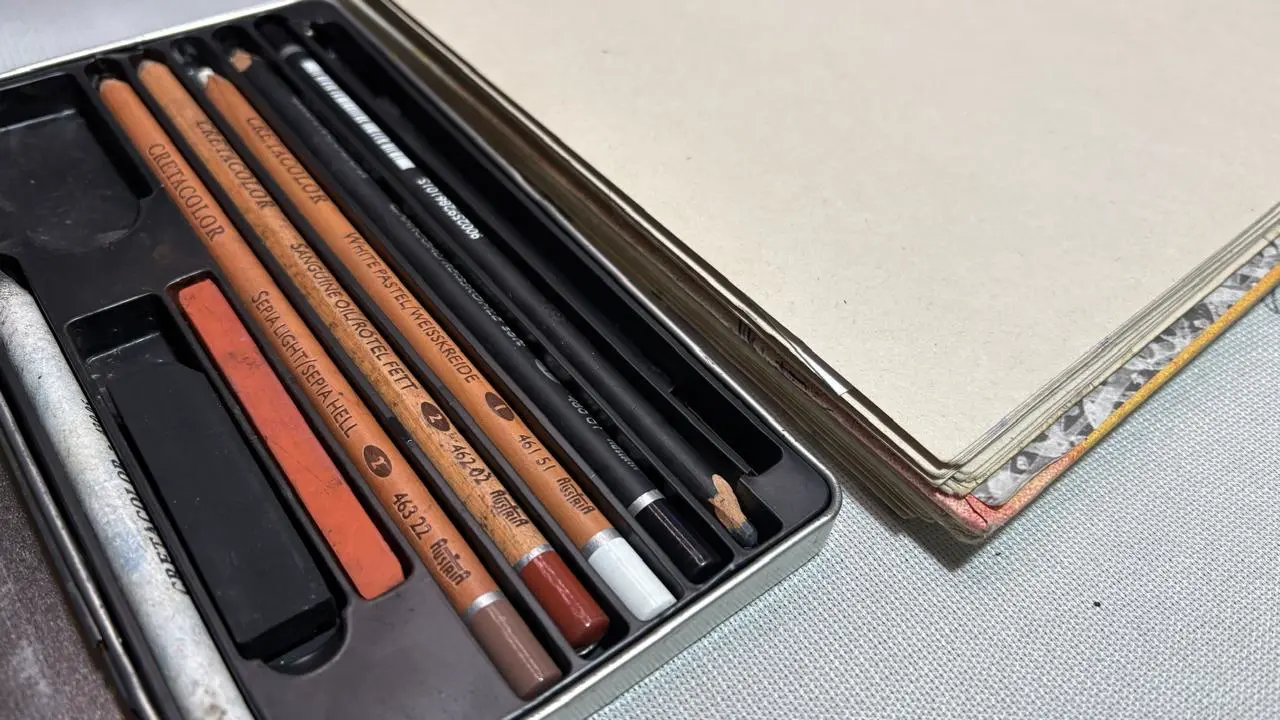
Equipment for drawing with red chalk
Red chalk is very similar to graphite, both in its texture and composition. It is a chalk or pencil with an ochre or coppery hue, obtained from iron oxide.
It is often used in academic teaching for making sketches and studies of anatomy. Numerous examples can be found in the sketchbooks of Leonardo da Vinci and other great masters.
The elements of a basic landscape
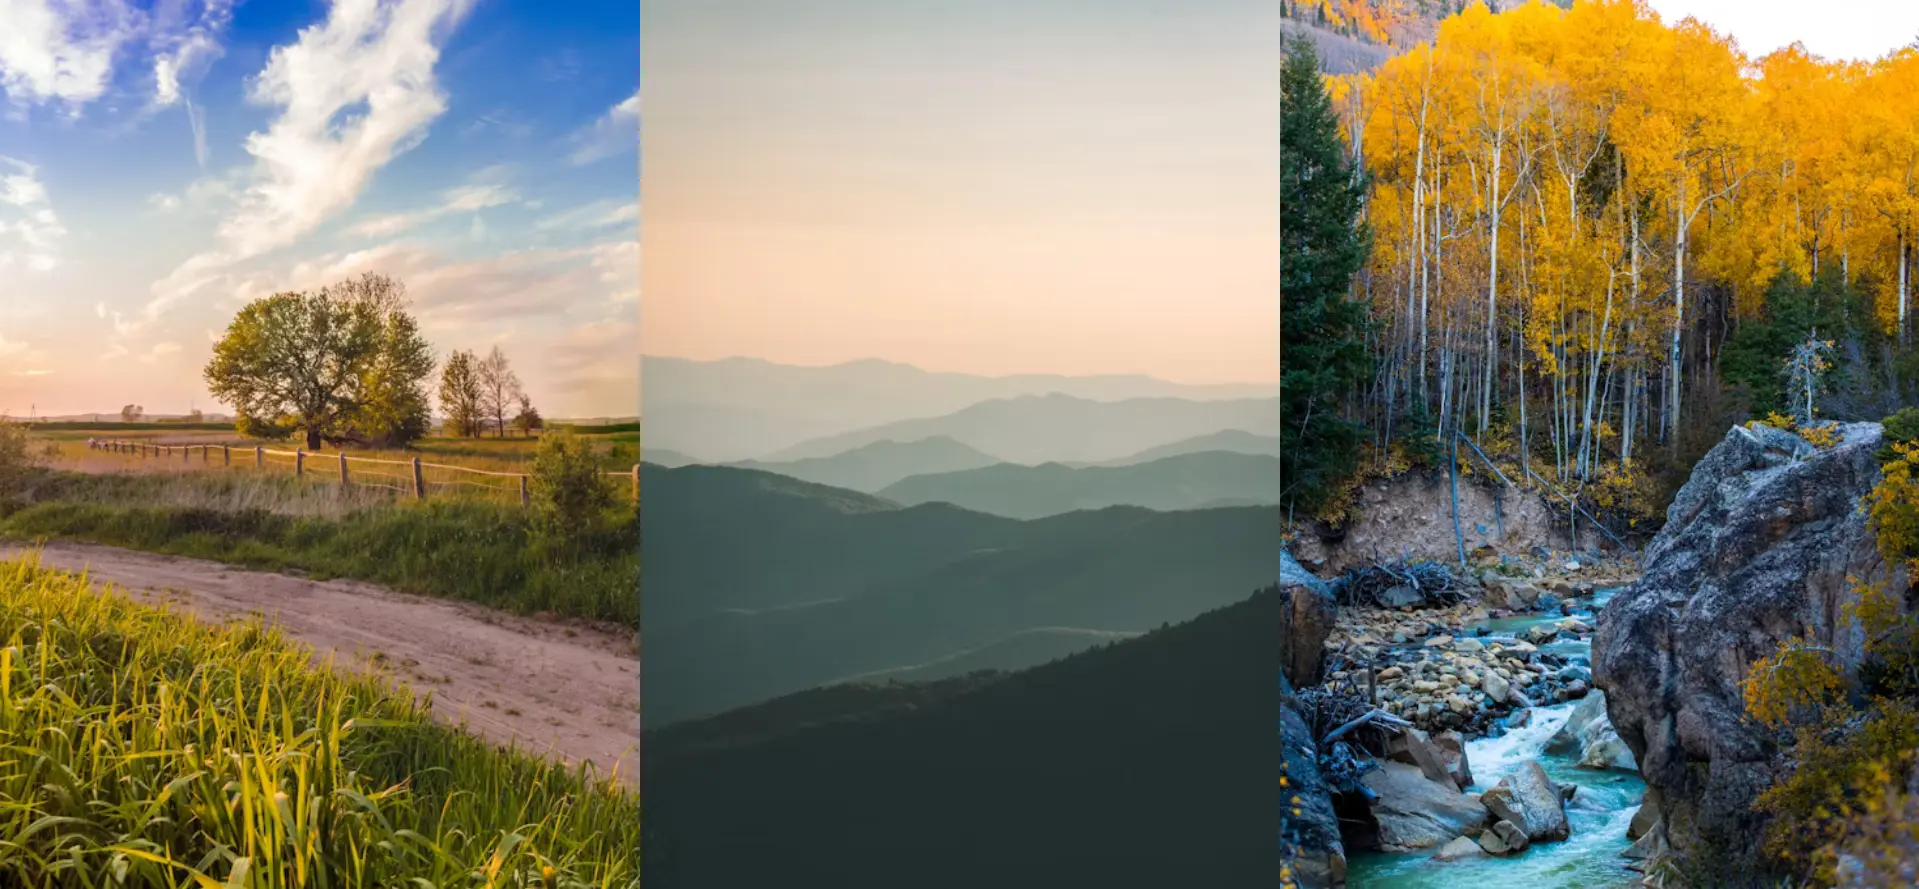
Before you start drawing, I recommend looking for some references to choose your landscape. Here is a selection of ideas to guide you in this process:
To build a landscape, it is important to use multiple depth planes. This enables you to distinguish between elements that are close and those that are far away, by varying their size and level of detail.
It is also wise to choose a main element, such as a tree or rural building, which will serve as the focal point of your composition.
Finally, consider incorporating complementary elements: different types of grasses, shrubs or flowers, as well as rocks, paths or hills.
How to draw a landscape in sanguine step by step
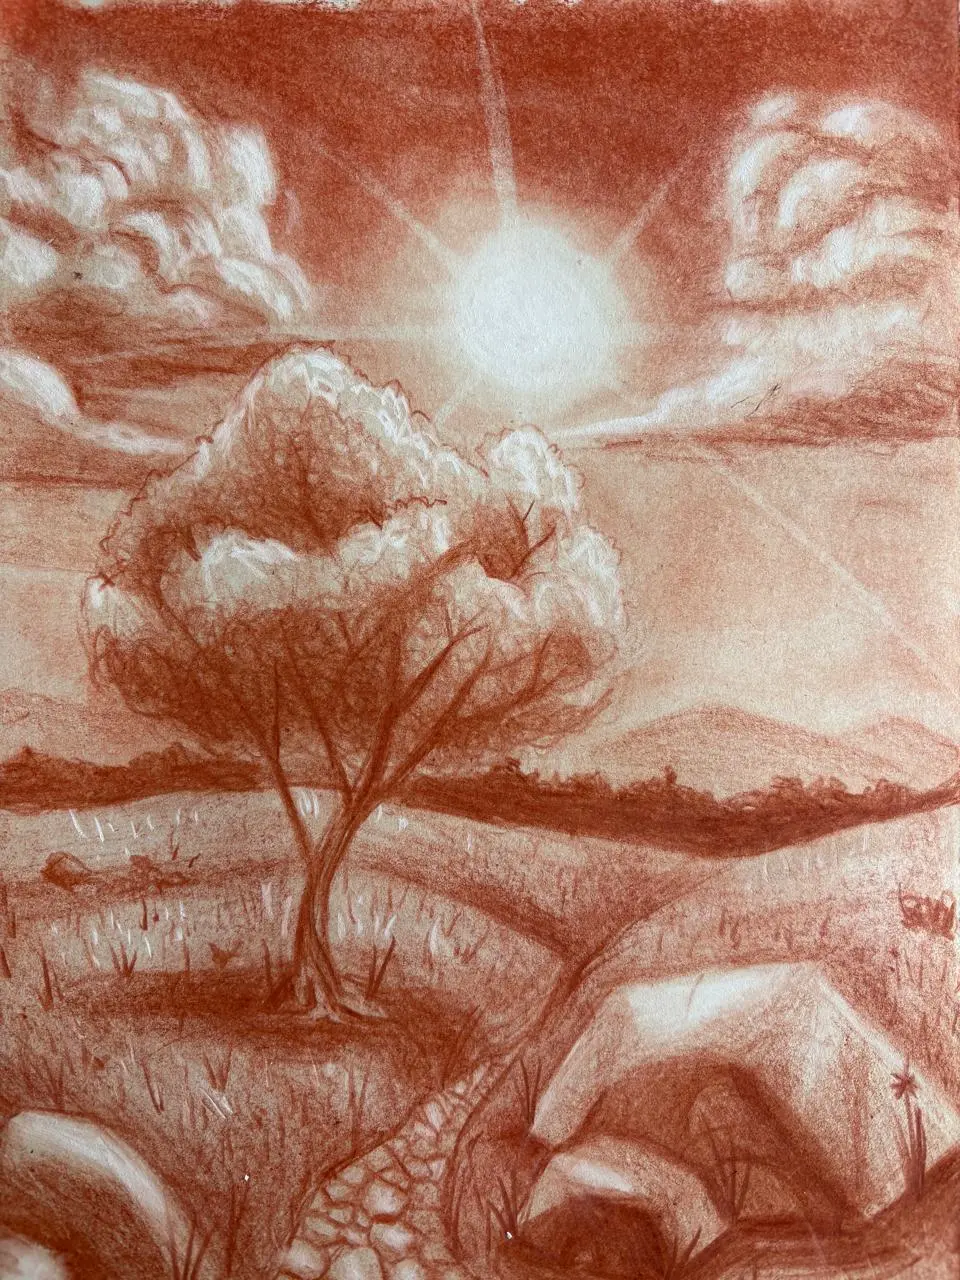
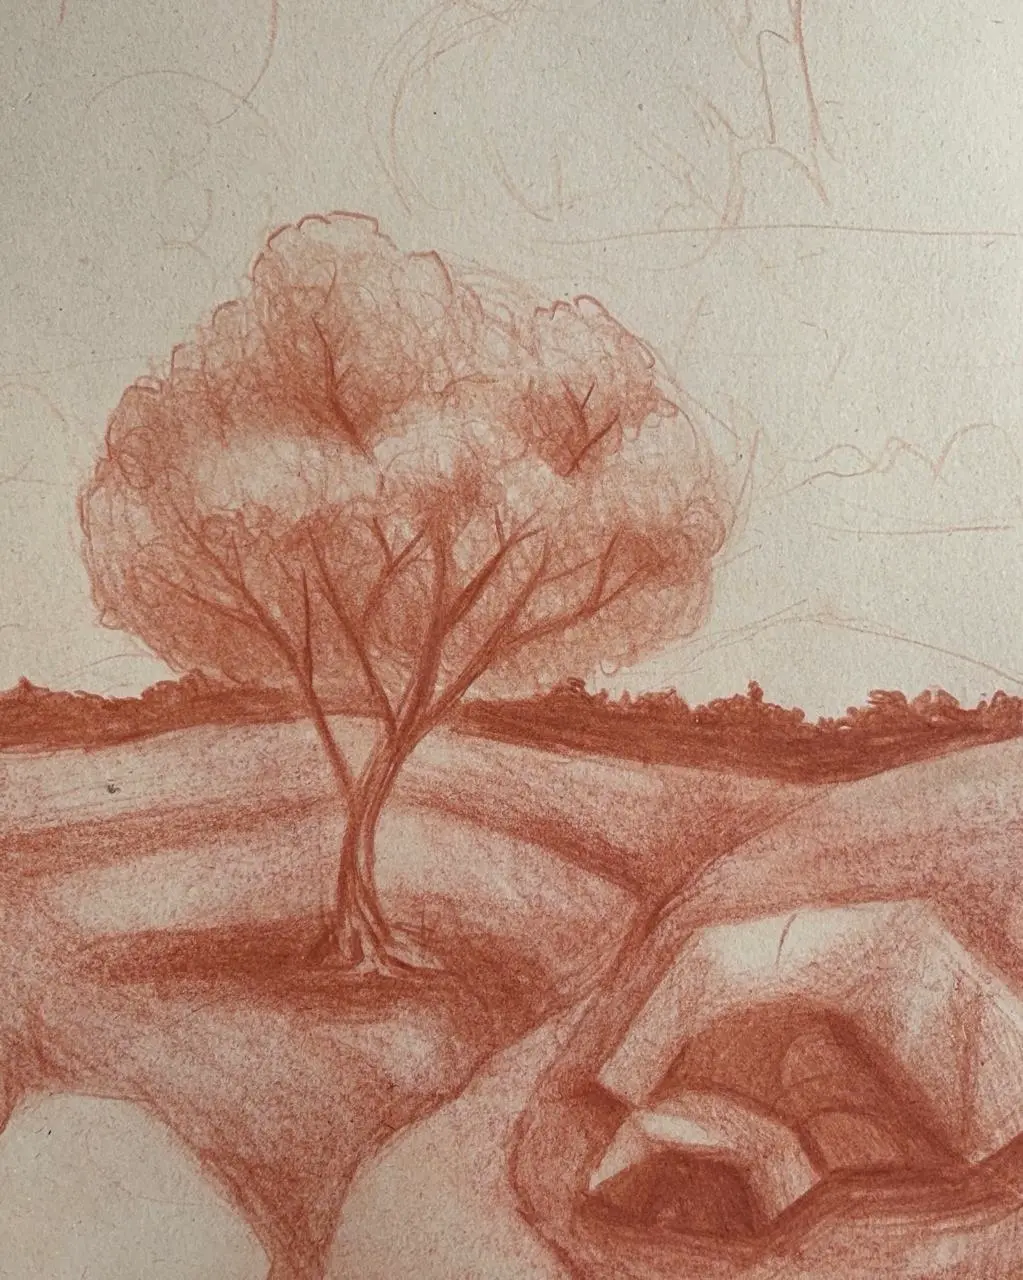
Our main element will be a tree placed slightly to one side, with the horizon line beneath its foliage. In the background, a forest will decorate the scene, along with some vaguely sketched mountains. In the foreground, we will place some rocks and a path.
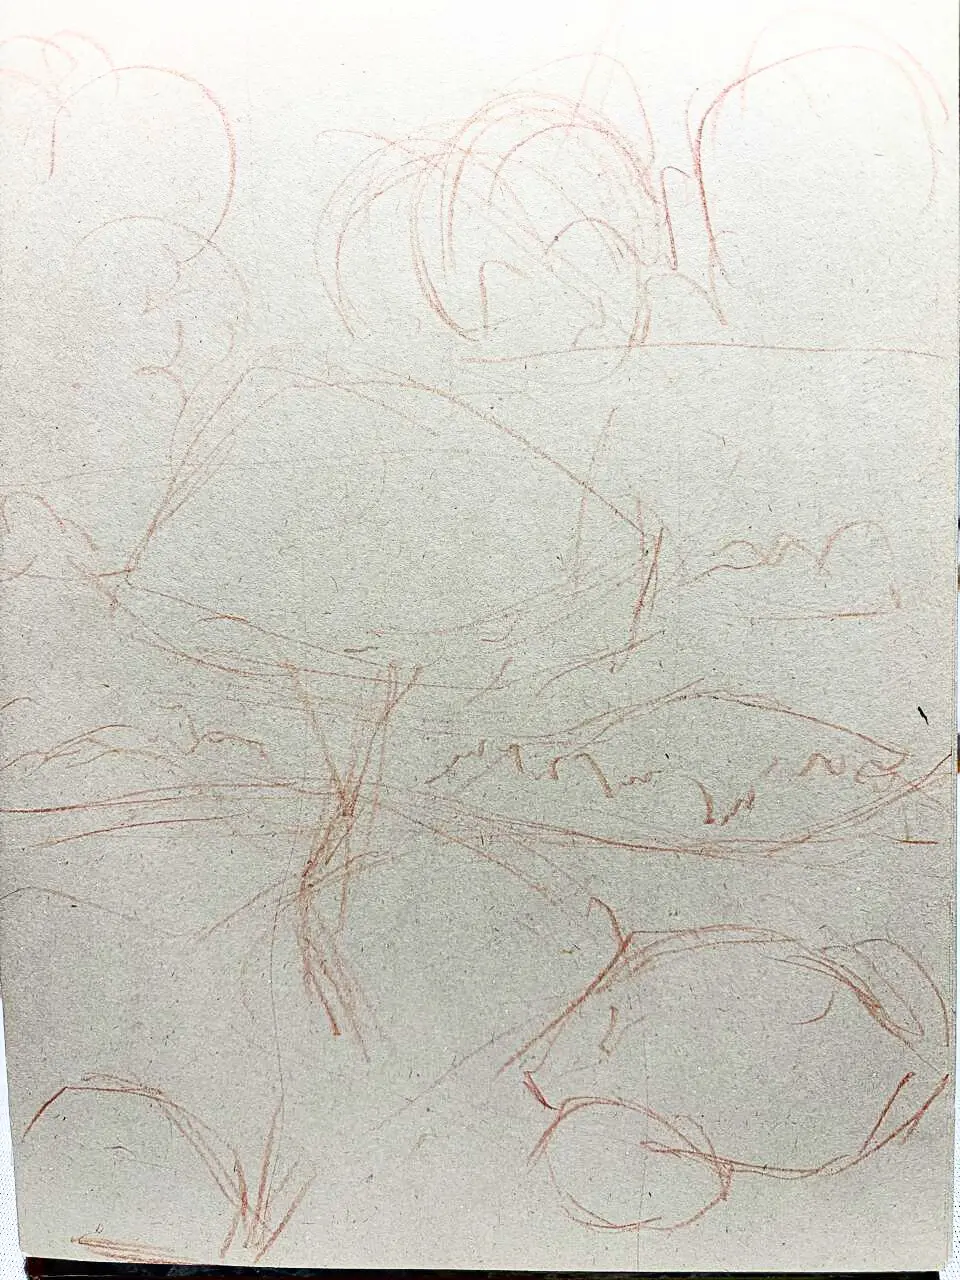
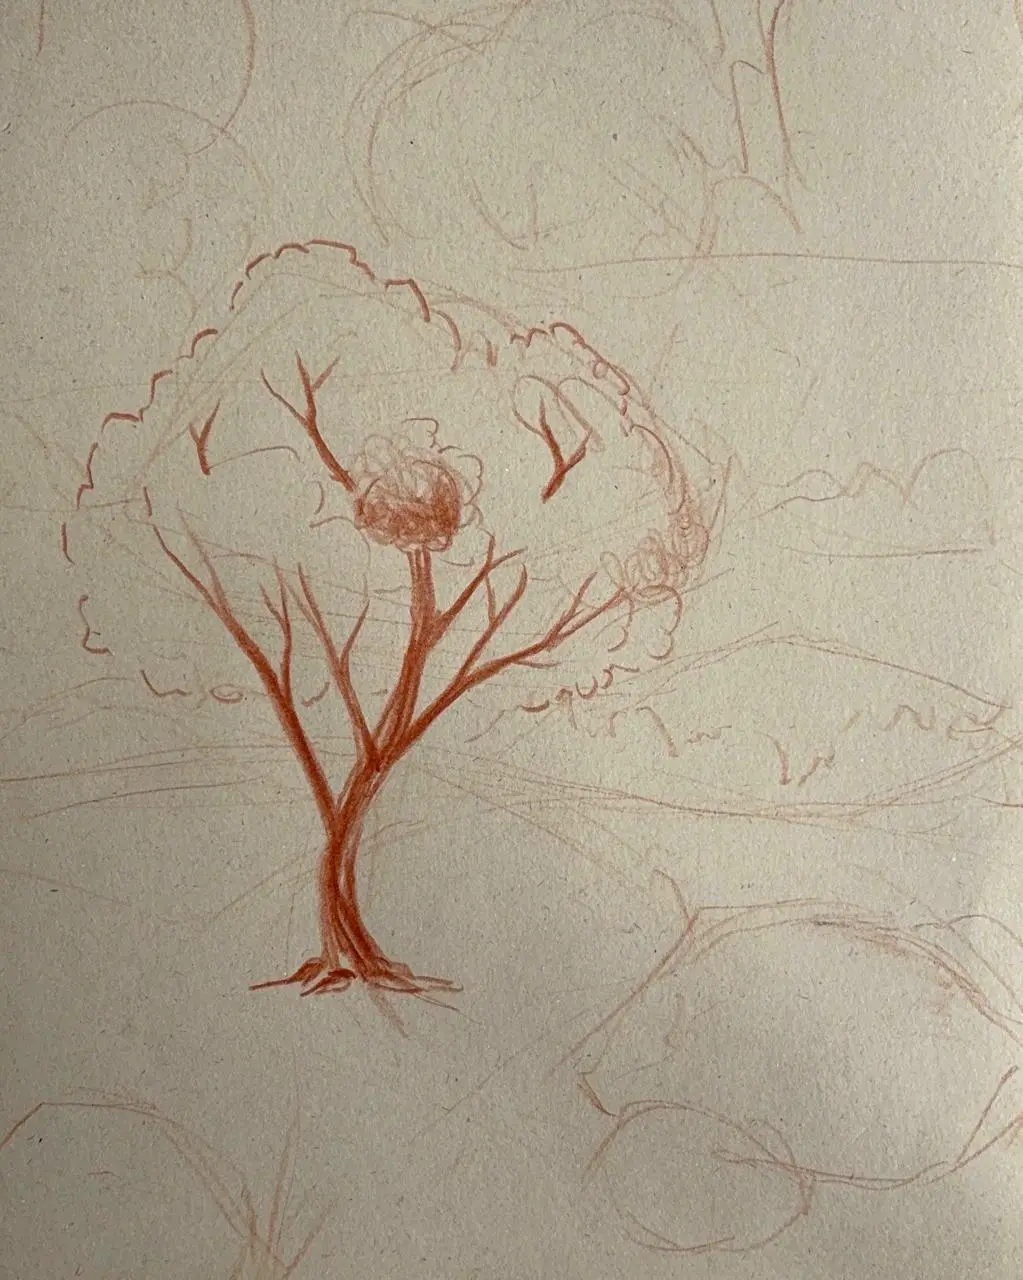
Let's start with the main element, the tree. Use the pencil to draw the trunk and branches with bold lines, leaving some white spaces to create the texture of wood. We do this to achieve the contrast that our drawing will need later.
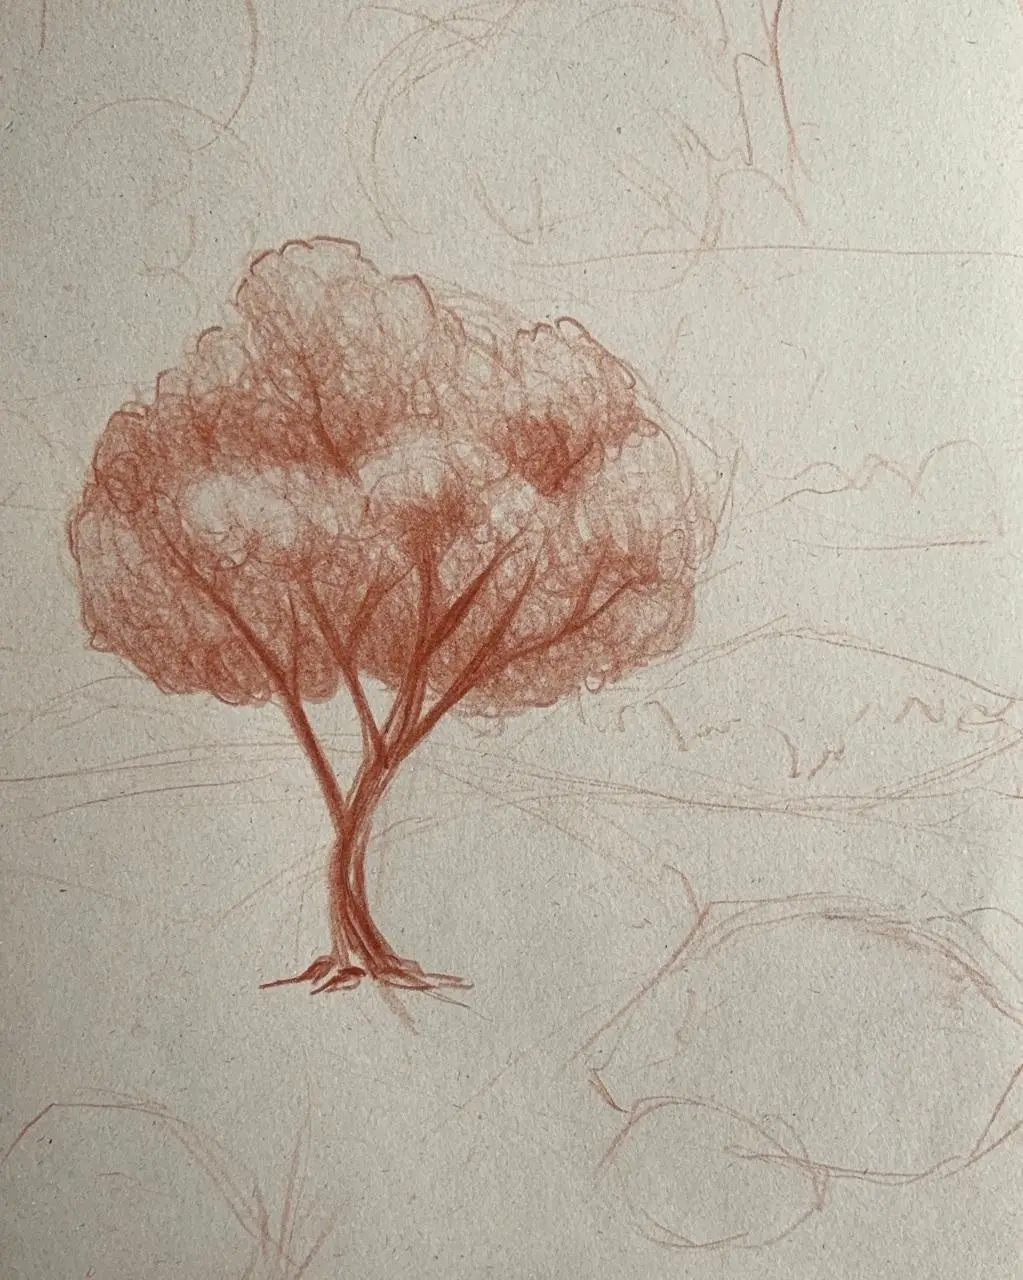
Now draw the foliage of the tree. To do this, use circular strokes that overlap in the darker areas and create dynamic gradients, thereby giving the natural effect of the leaves.
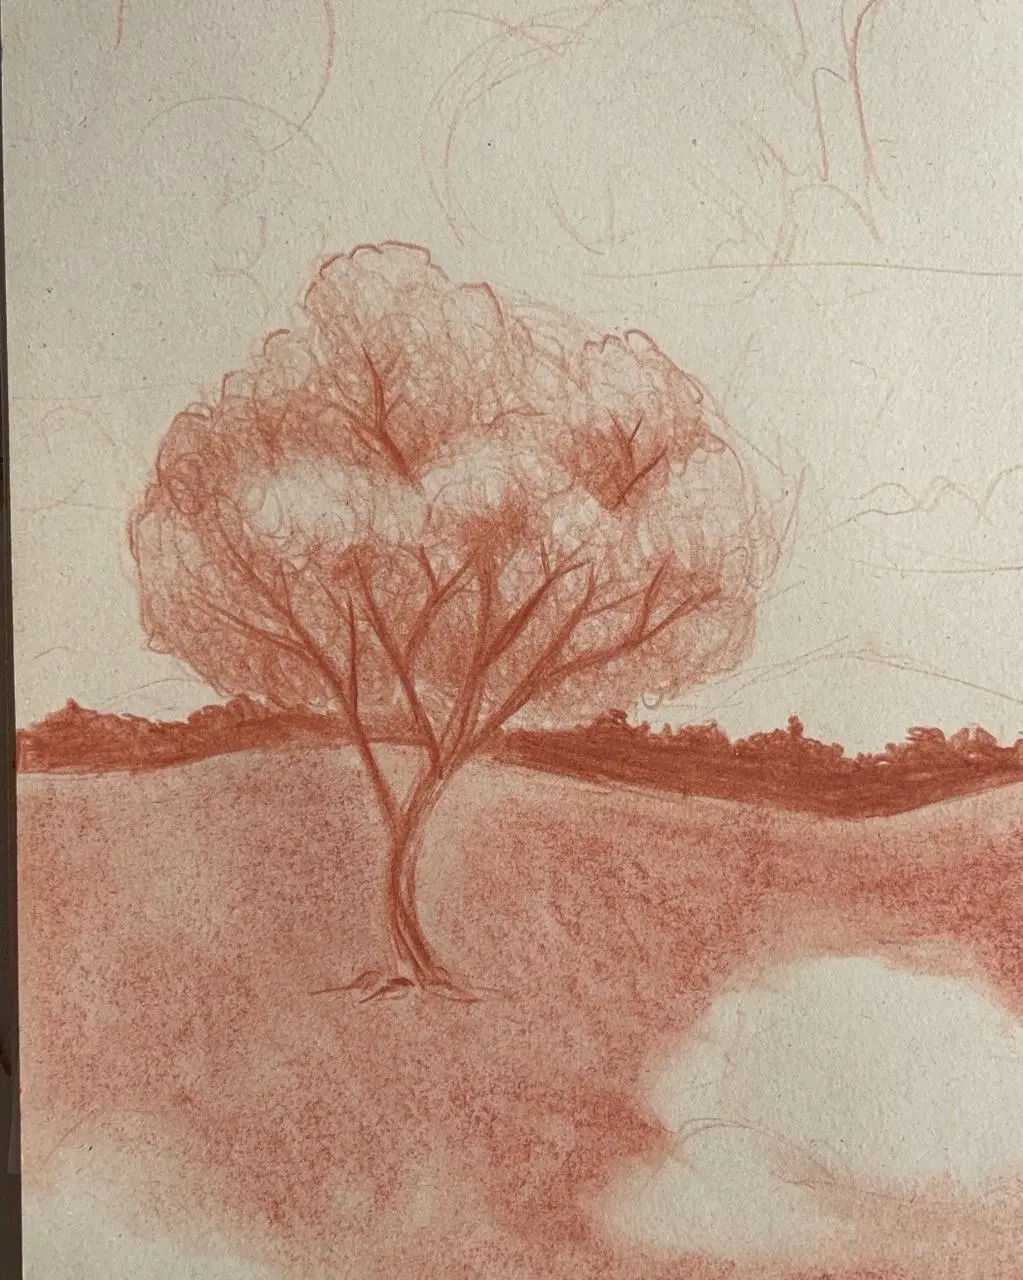
Then draw the woods on the horizon using the darkest shade, creating distant silhouettes that separate the sky and the earth. For the ground, apply a relatively uniform layer of a medium tone. You can use a blending stump or your own fingers to spread and blend the pigment.
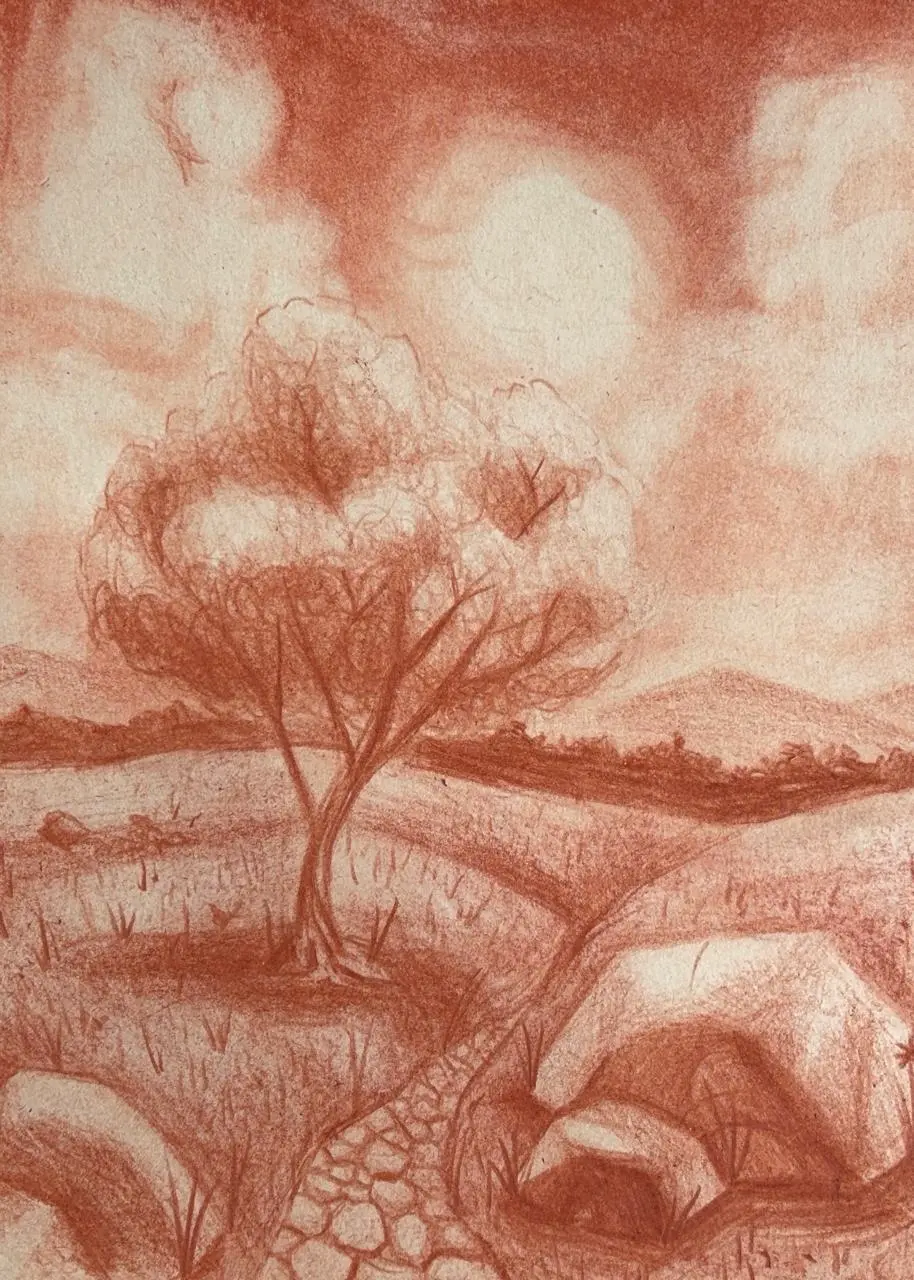
Then use the pencil to add volume to some reliefs, creating small hills dotted irregularly across the ground. Try to vary the shapes, sizes, and locations.
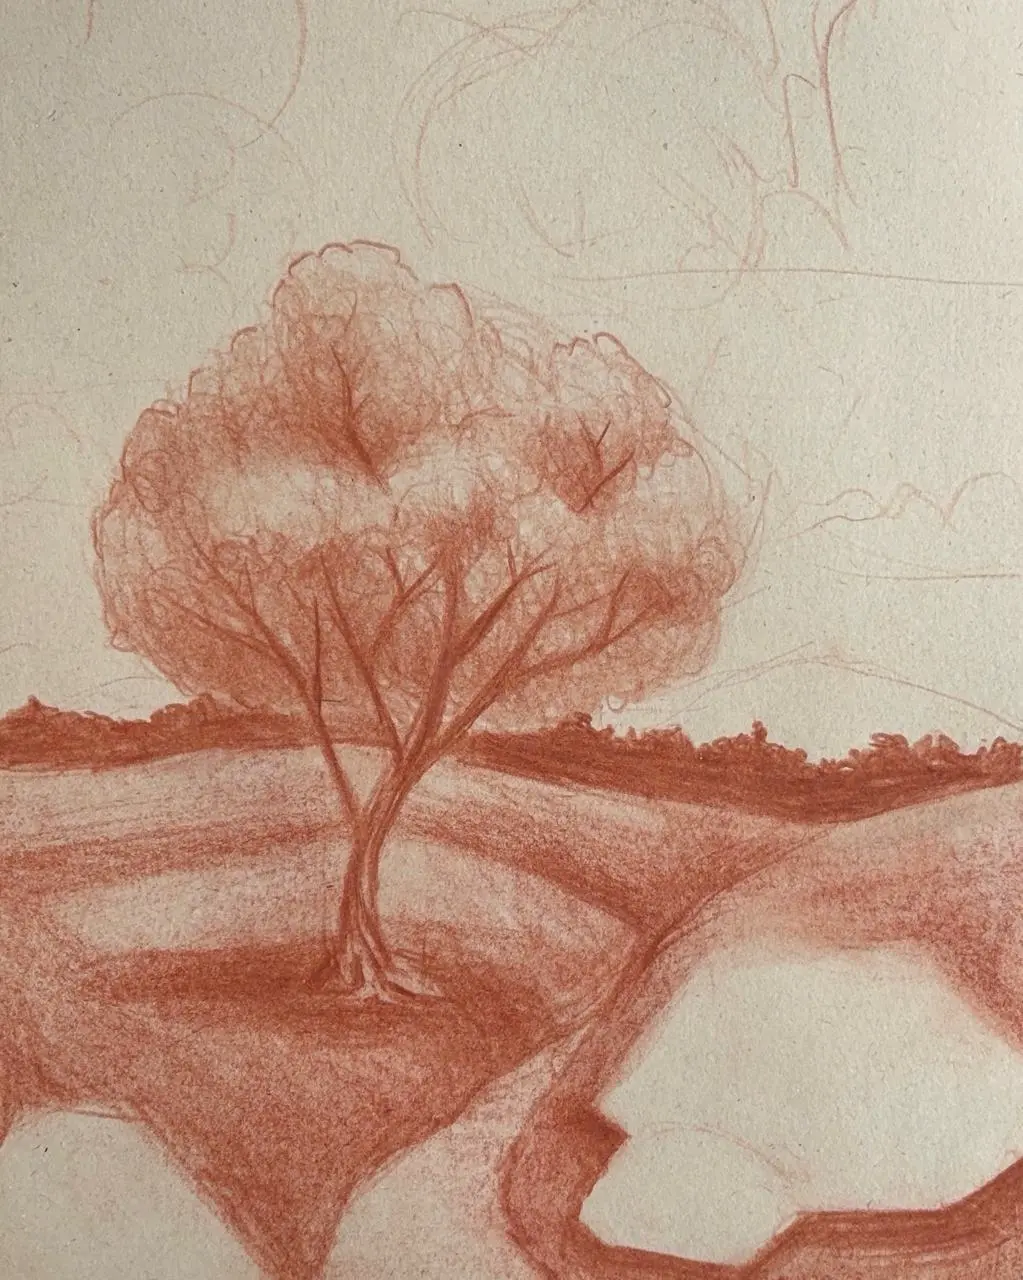
For the next step, create soft gradients to give volume to the rocks. This time, create much sharper and more pronounced contrasts, making shadows that are almost completely dark, and light areas that are almost or completely white.
To finish this first part, use your sharpened pencil to draw small blades of grass across the plain, using quick wrist movements. This will give you the characteristic shape.

Add the sky
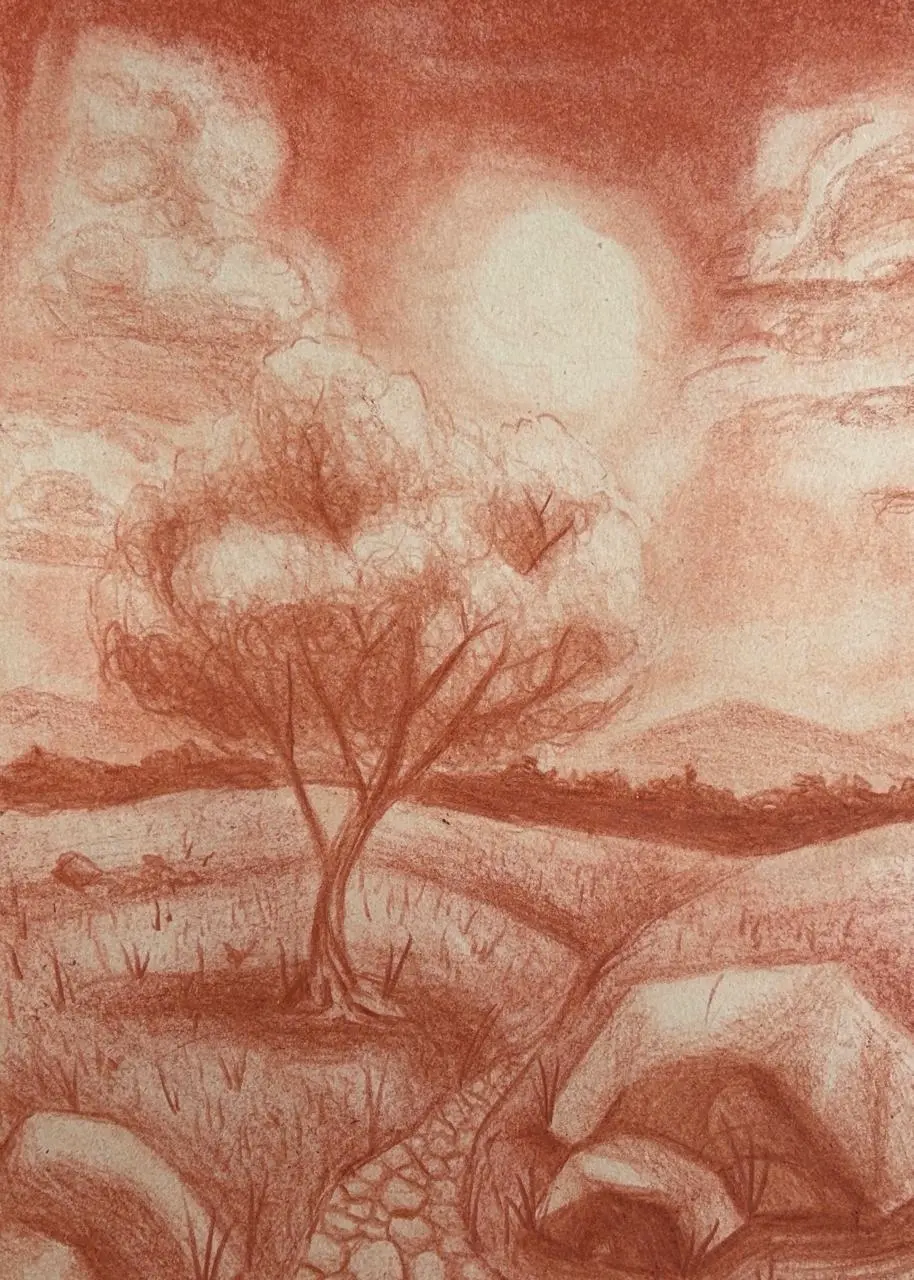
For the base of the sky, create a gradient from top to bottom. The darkest tones will be at the top, leaving a kind of twilight in the lower area, until reaching the lightest area which is almost in contact with the mountains, which will be lightly covered with a thin layer of color.
Note: to preserve the light of the clouds and sun, avoid applying pigment in these areas so you can achieve almost white tones without extra effort.
For the clouds, we will use both pigment and an eraser. Use the eraser to define the shape of the clouds, while applying soft sanguine strokes to darken and add volume. At the end, you will just need to blend carefully.
Use the eraser to create sunlight. Remove the pigment residues inside the sun to define a circle surrounded by a delicately graded halo. If you wish, you can add some rays in all directions to create more drama.
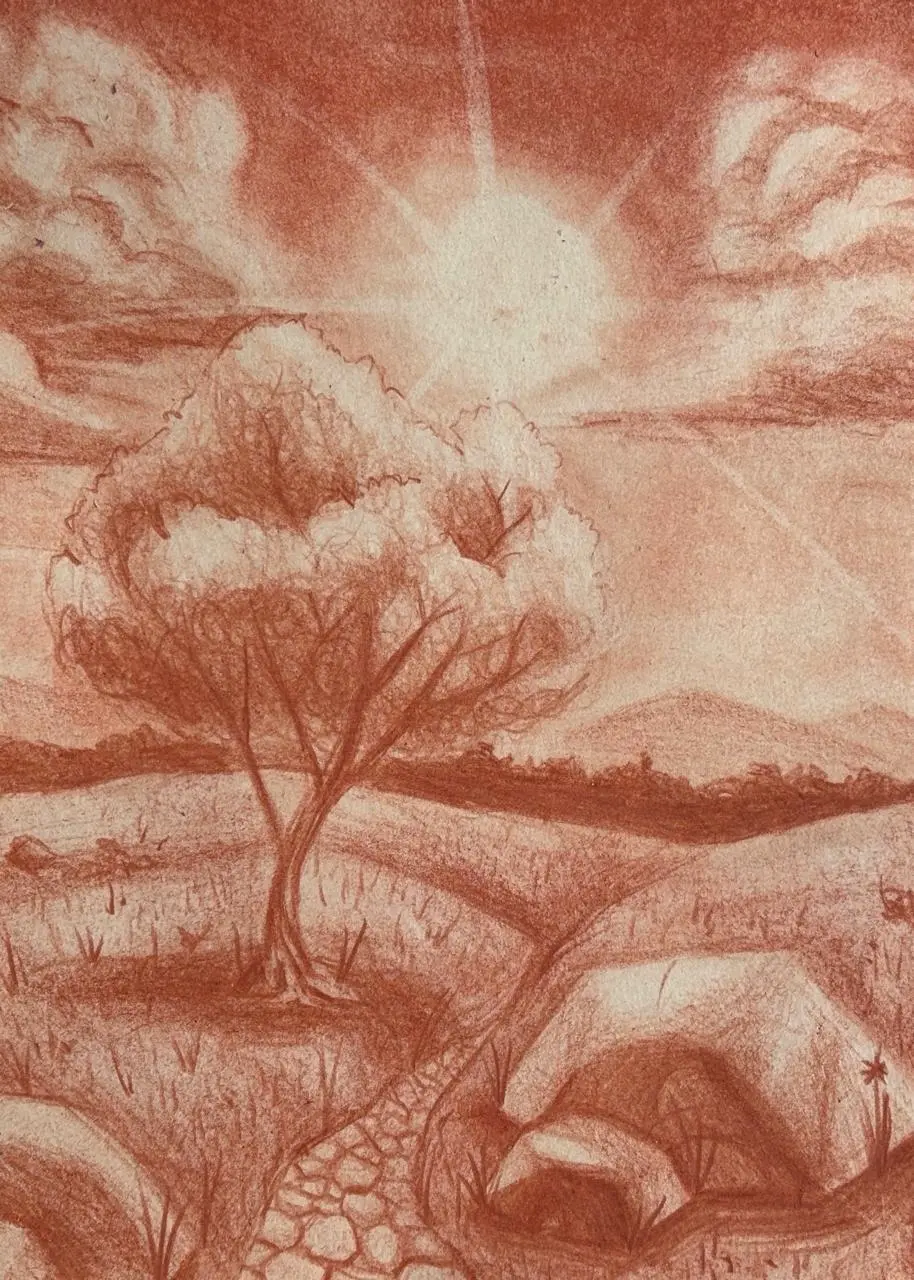
To finish, use white to add and accentuate the light areas. This will greatly increase the feeling of contrast. Brighten the sun as the main element and add reflections on surfaces that are directly exposed, such as the top of the tree and the rocks.

I hope this tutorial has helped you better understand the construction of a landscape in red chalk, how to master this material to vary textures and effects, as well as the use of tools like the eraser and the stump to reveal the full expressive richness of sanguine.
Writer: Bryam
Discussion
Hey BryamNopia.
Thank you very much for the article on landscapes in red chalk.
I really like this material.
I would like to create (when I feel comfortable with the tool) a black and white comic book. I wonder if there are any comics or novels in this style?
Wow!
What an original idea! As far as I know, what comes closest to it might be Japanese manga, which usually use black ink or digital drawing.