How to Draw Metal
Hello everyone,
Today, I suggest we focus on drawing a particular material: metal. With its many reflections, it can sometimes seem daunting to draw, but through this article, you will see that drawing metal is not as difficult as it might seem.
Get your gear ready and let's get started!
Types of metals

When drawing metal, it is essential to fully understand the differences between its three main textures: smooth/brushed, polished, and rusty. Each one brings a unique look that completely changes the way light behaves, and therefore how it should be represented.
Smooth or brushed metal
Smooth or brushed metal has a slightly satin surface, often with small streaks or a slight grain. This type of metal reflects light diffusely, resulting in a softer appearance without overly harsh reflections. In drawing, we often work with subtle gradients and extended shadows to show this almost tactile texture.
Polished metal
Polished metal is ultra-reflective, almost like a mirror. Its surface is so smooth that it captures and clearly returns the shapes and lights around it. To draw it, you need to think about accentuating the contrasts with very bright areas and sharp reflections, sometimes even distorted, which give this impression of intense brightness.
Rusty metal
Finally, rusty metal is the complete opposite: its surface is irregular, often granular, with complex textures and warm colors leaning towards brown, orange, or red. It captures less light, which is diffused randomly. In drawing, we often play with rough textures, spots, and worn areas to convey this aged and damaged aspect.
Drawing smooth/brushed metal
Let's start with the simplest, but also the most classic: smooth/brushed metal. We will see this on a cylinder, but it's exactly the same regardless of the surface. If you have any doubts, as always, I advise you to find references.
1. We start by laying down a simple base. Here, as I work digitally, it will be a medium gray. If you are working with other mediums like marker or pencil, always start with the lightest part.
2. I just added a dark stripe lengthwise, and another lighter one.
3. For more depth, I make lighter lines on the base.
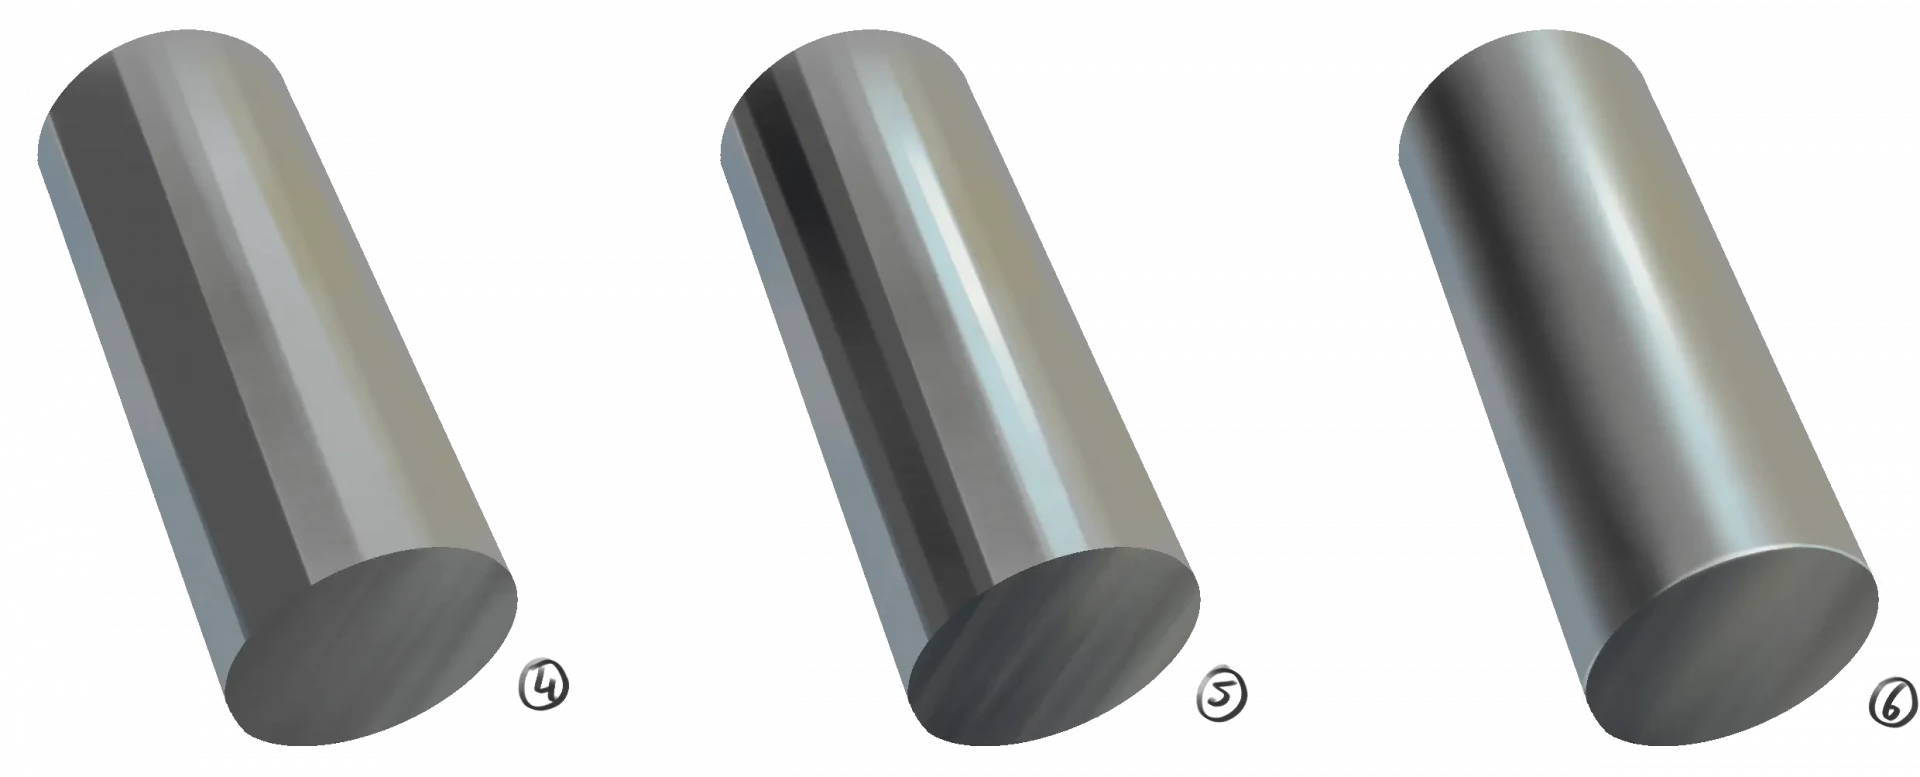
4. Metal is never 100% neutral gray, so it needs some nuances added, usually colors from the environment in which it is found. Here, we'll go with blue and a brown/green.
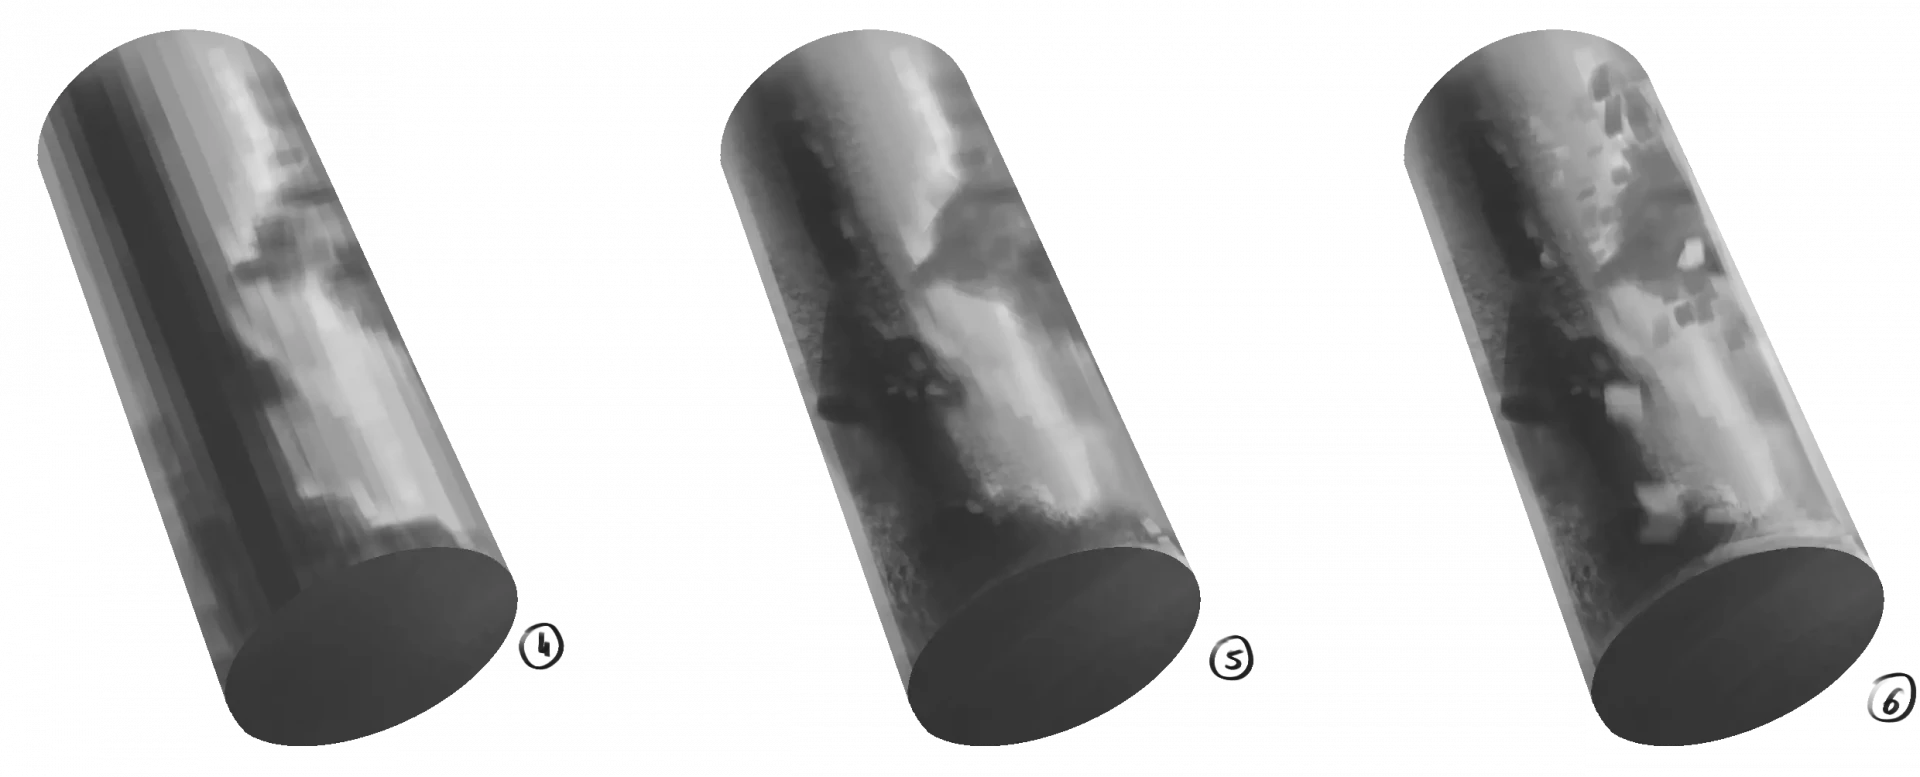
5. Then, we enhance the contrast by adding a new darker line and two lighter lines. If you want to create a very reflective or slightly faceted metal, you can stop here.
6. If you want a metal that is a bit more brushed or reflects slightly less, you can blur the colors together. I like to add a small finish with a white line at the different intersections or edges, this enhances the shiny appearance.
Polished metal drawing
Polished metal reflects the entire environment, so I advise you to choose a reference photo or at least have the entire environment already drawn before you create it, this will make your life easier. Here is the reference I chose here:


1. I start by reproducing the environment on the object. Here, since it's a cylinder, it will be slightly curved.
2. I then darken both sides of the cylinder.
3. Then, I add a line for the reflection in the center.
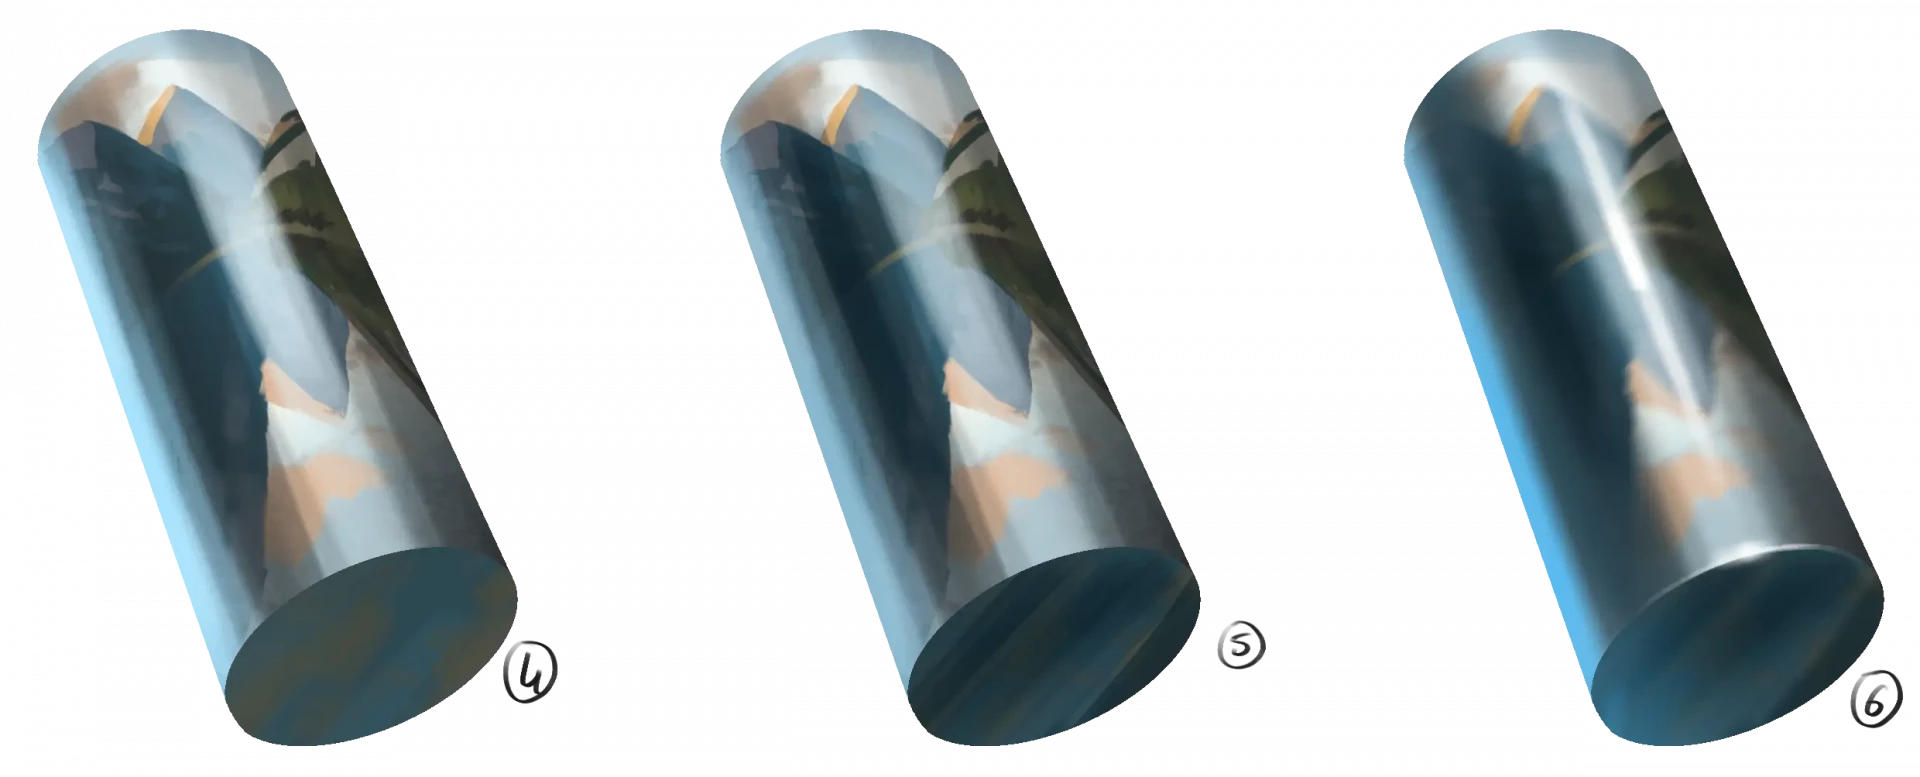
4. As before, the polished metal also reflects the general light of the environment. Here, we therefore add a blue reflection on the side.
5. I'm going to slightly intensify the shadow on the tube and the bottom.
6. You can choose to stop at the previous step or to blur the elements together slightly more, as shown here.
How to draw rusty metal
Let's now move on to the last type of metal: rusty metal. As it's essentially the natural evolution of smooth metal, you will see that the first three steps are the same.
1. I start by drawing the volume and adding the basic dark and light lines.
2. I add a few more details.
3. I continue to add detail. The idea is that the gradients from dark to light are smooth enough, but not too much either.
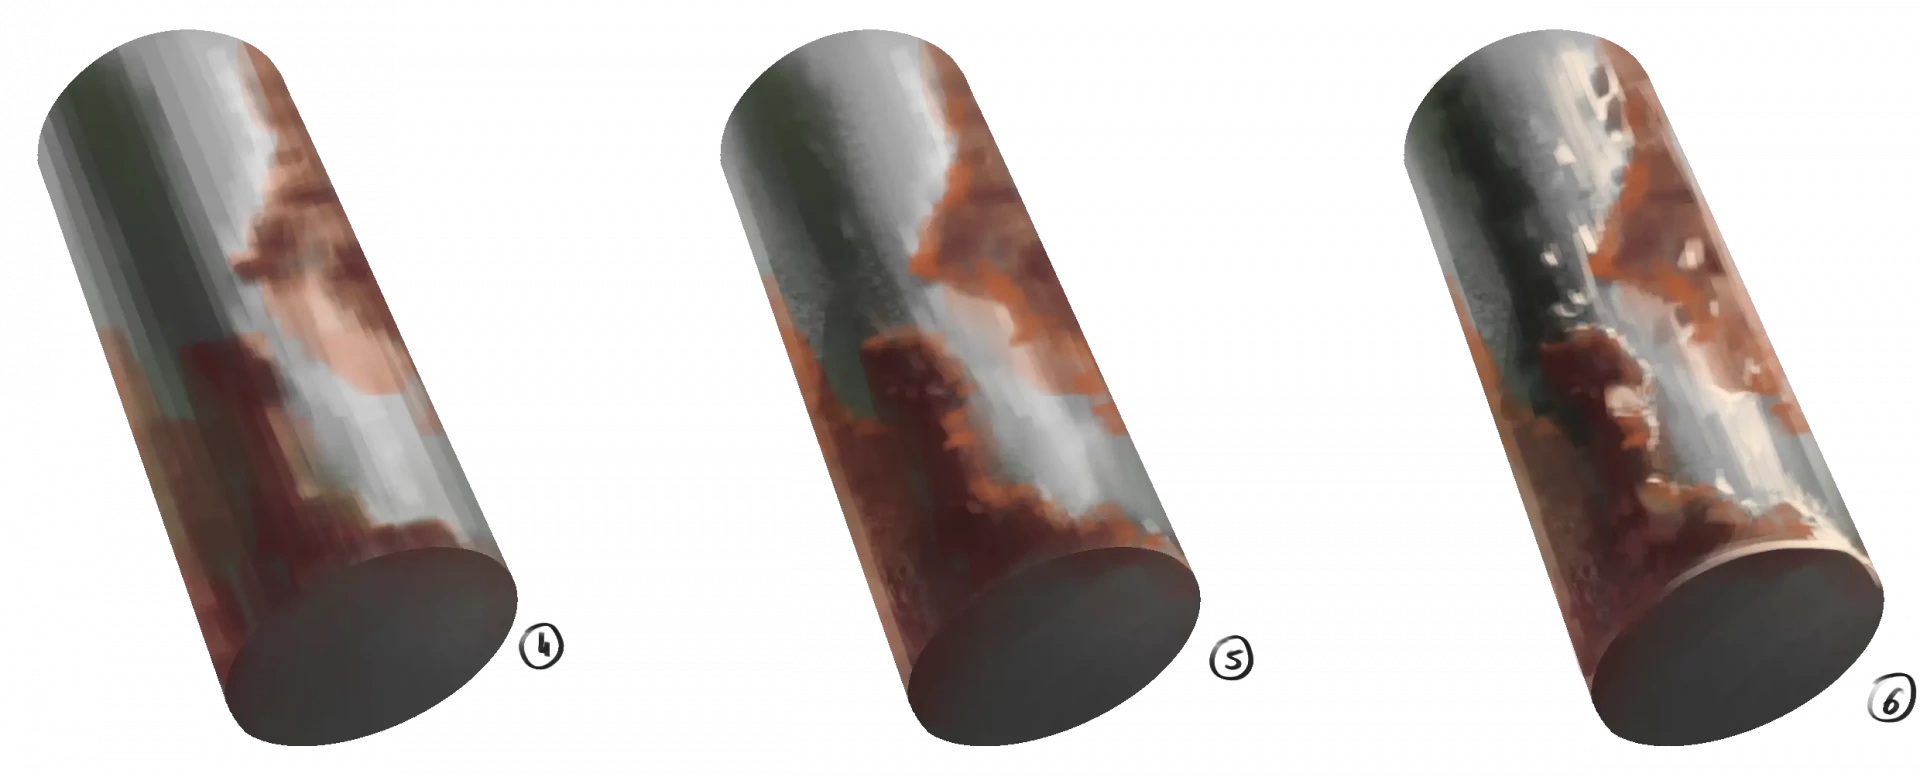
4. It's time to add some color! I start with a rust color (surprising!), which I apply in spots. Then I come in with a burgundy to intensify certain areas inside.
5. The rustic aspect creates a lot of texture, so I suggest accentuating this texture by creating randomly placed spots of various sizes. I strengthen each color to make it very clear.
6. Finally, if you want to make a metal slightly shiny, you can add highlights. I place them on the line usually used for light and on the edges of the rusty areas to show that they are slightly raised.
How to represent the volume of metal
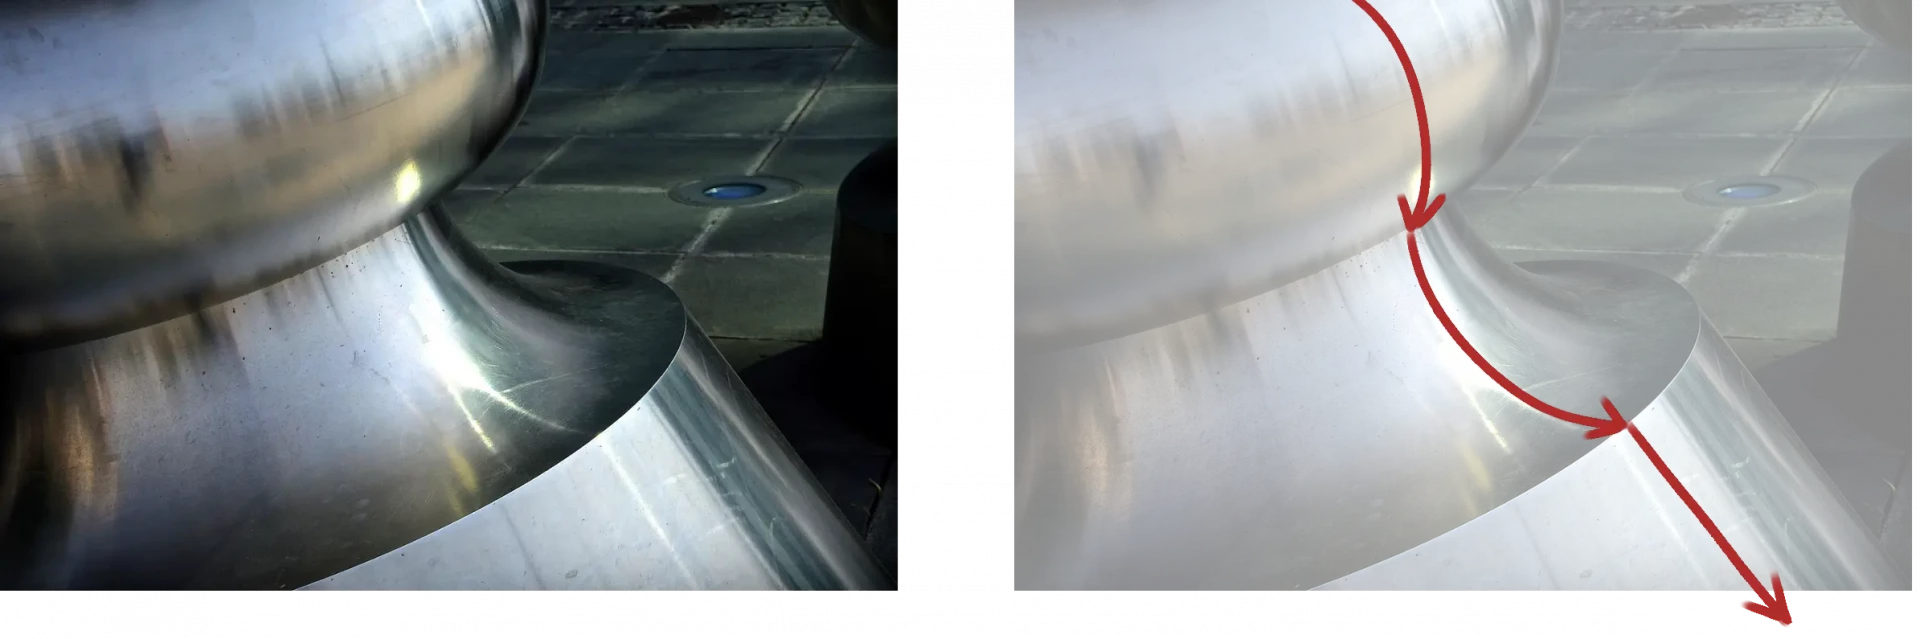
Now that you know the basics of drawing metal, let's look at how to represent it in different volumes. As you can see in the example below, depending on the shape of the object and its curvature, the metal lines take on different curves.
Here, if I had wanted to draw it, the top volume would have been curved inward, the middle volume curved outward, and the bottom volume would have been smooth.
Studying and understanding how volumes work is essential for drawing materials, but in the case of metal, this is even more true.
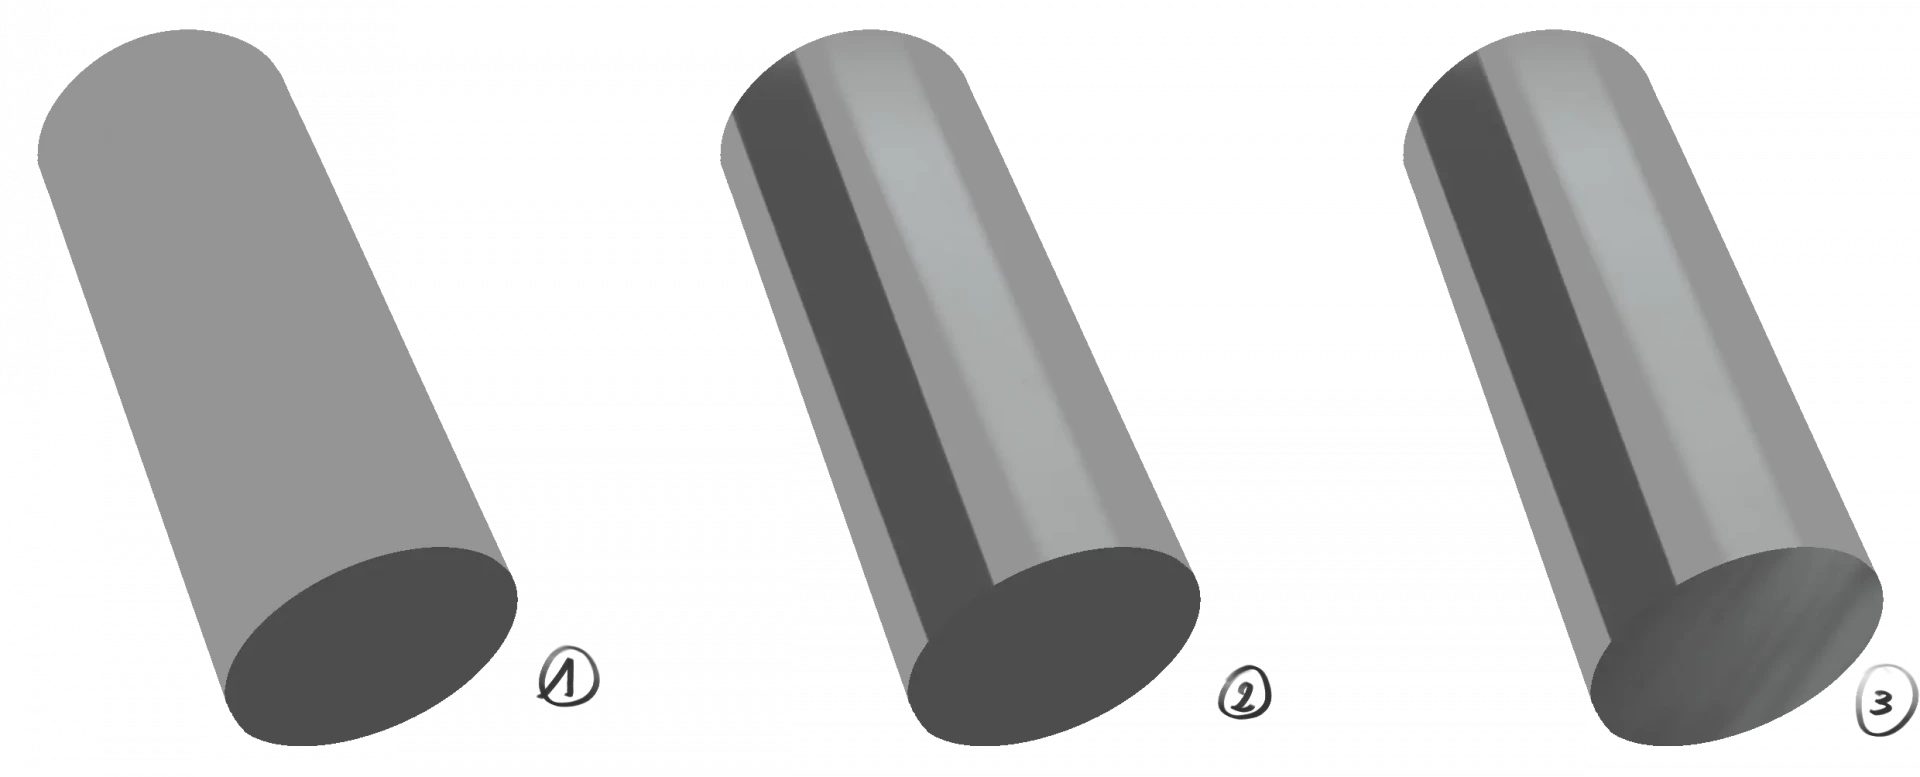
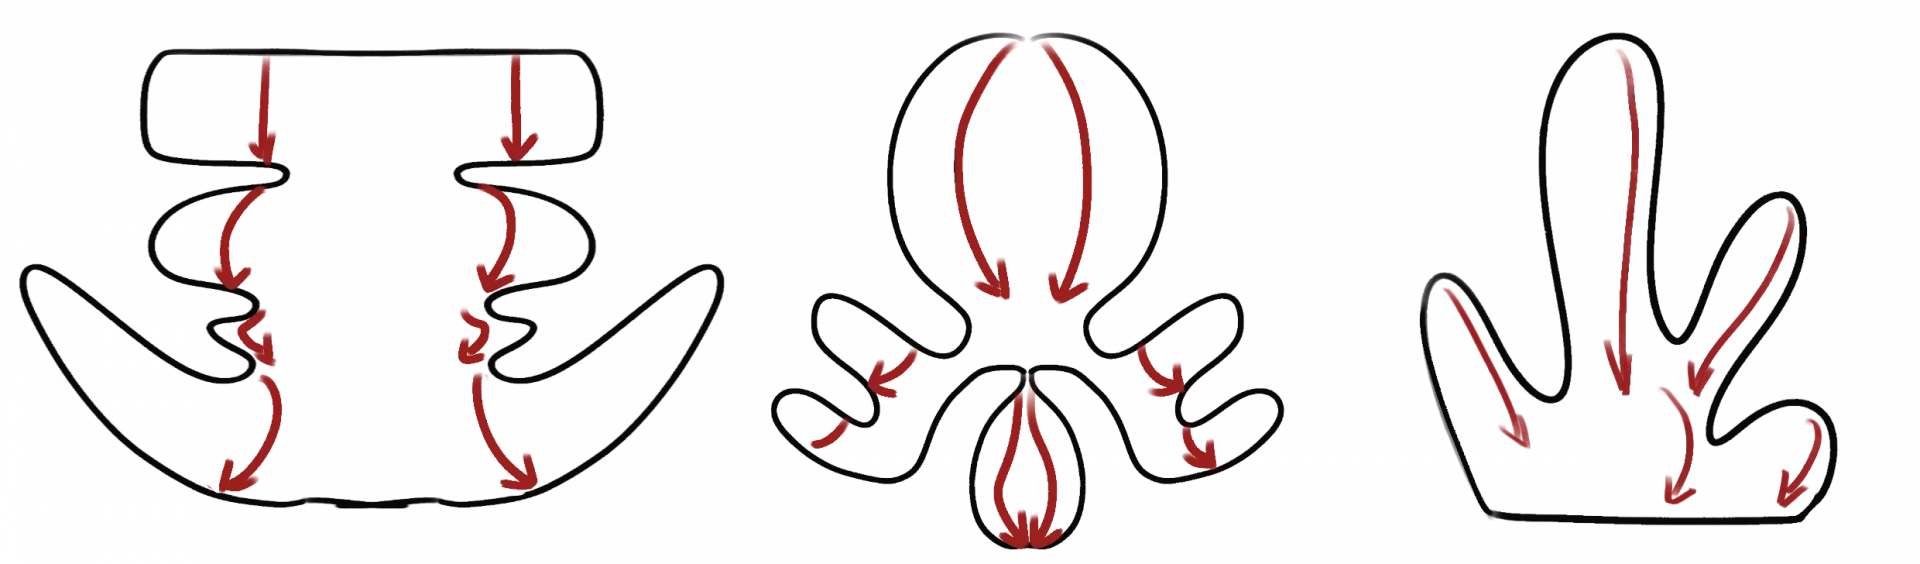
So I suggest you practice with the following three shapes. Imagine them as 3D objects, then consider in which direction you would draw the metal lines. The answer is right below, so don't scroll down too fast!
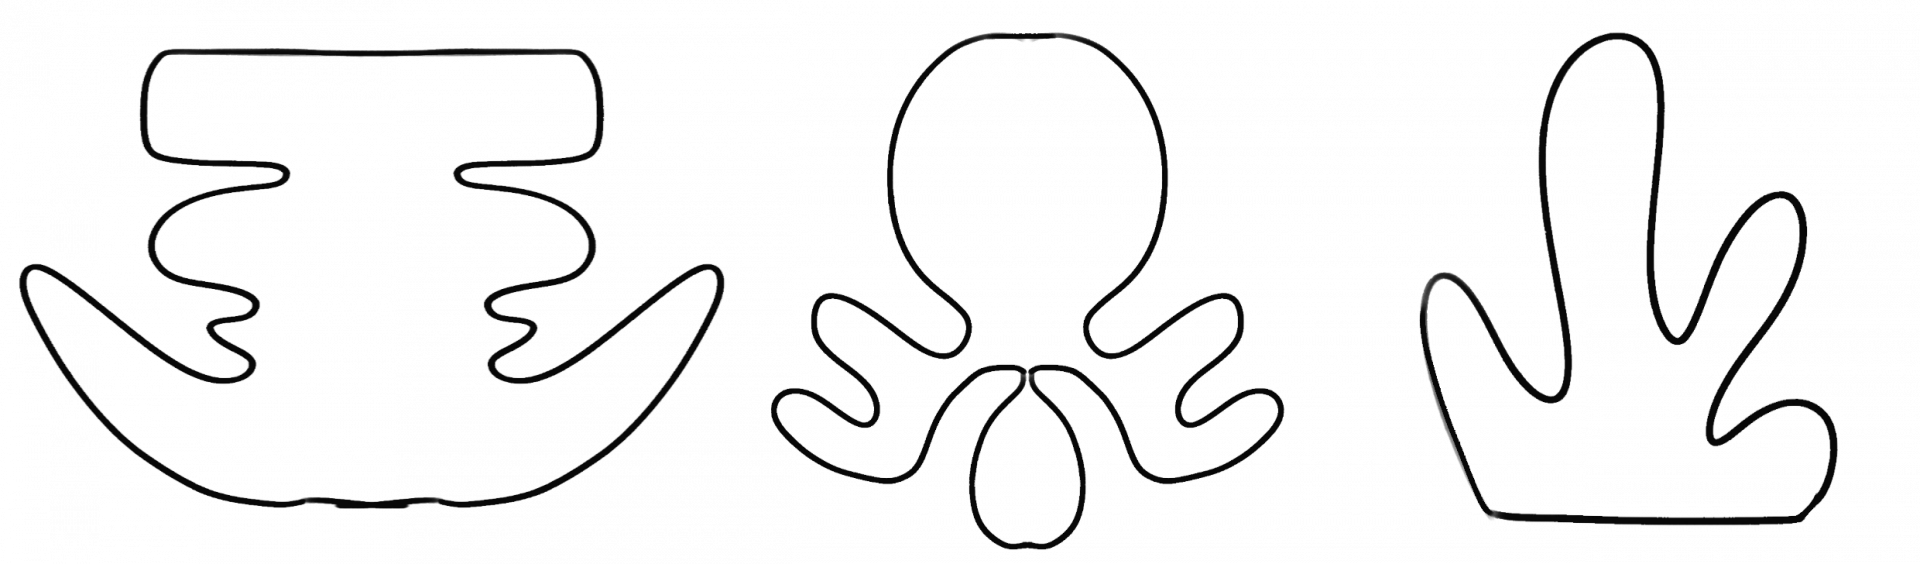
You might have guessed it already: metal lines (reflections or streaks) generally follow the length or main direction of the shape. However, often even on a horizontal shape, these lines remain vertical to give that classic effect of polished or brushed metal.
For example:
- On a vertical cylinder, the lines naturally follow the vertical.
- On a horizontal cylinder, even though the shape is horizontal, the lines on the metal are often vertical, which creates that typical brushed metal look.
- On a curved shape, the lines follow the direction of the curvature (ascending or descending).
If we were to quickly give a metallic effect by drawing lines, here's what it would look like:

Different colors of metals
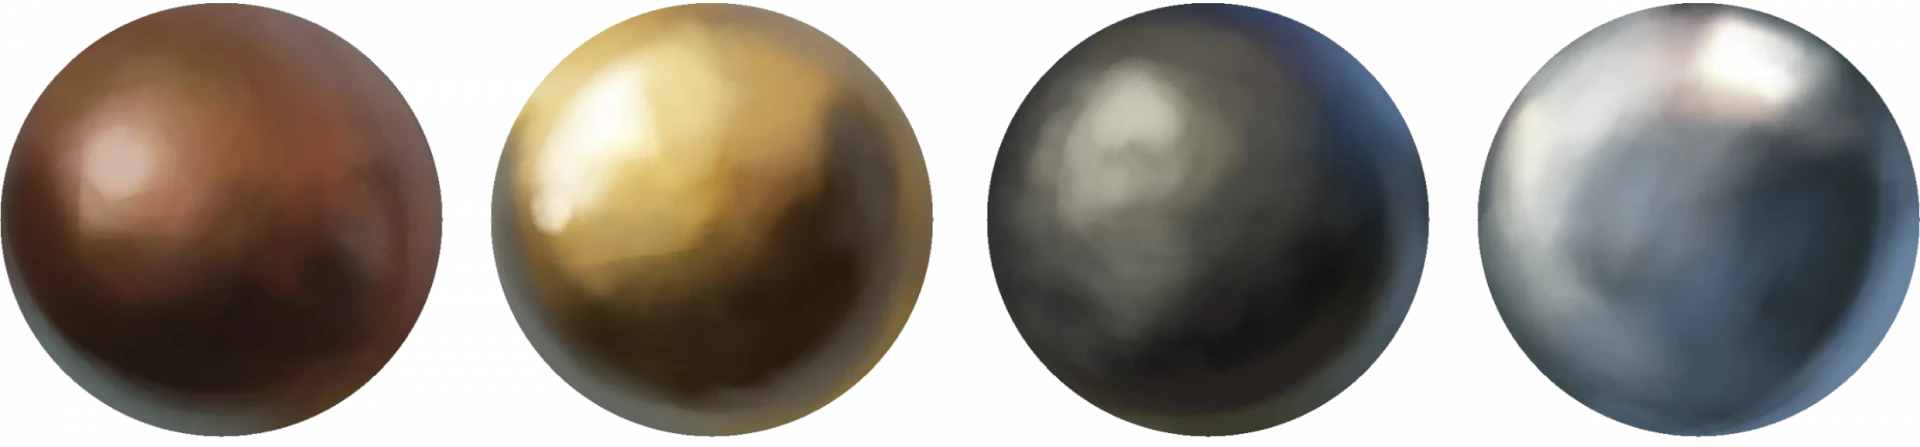
You surely know that there are many different types of metals, and this also affects their colors. Here are some examples of metals and their colors: copper, gold, iron, and silver.
If you want to represent a colored metal, always remember that it reflects its surroundings. Therefore, it is not simply a fixed color that is attributed to it.
Let's take the example of gold: it's not just a simple yellow metal. It displays numerous reflections, ranging from yellow to orange, and sometimes even shades of green or blue, in addition to reflecting its environment.
I recommend, if you are a beginner, that you choose references to observe all the color nuances specific to each type of metal.

This is the end of this article on how to draw metal.
As you can see, this is a field where very many possibilities exist. When you want to draw it, always think about the type of metal you want to represent, the general shape and form of the object, but also the finish of the metal (smooth/brushed, polished, rusty).
I hope you enjoyed this article! 😊
Discussion
No comments yet.