
How to Draw a Peacock
Elegant, proud and exotic: the peacock is one of the most spectacular birds there is. Throughout history, it has adorned the gardens of royal palaces across the Mediterranean and the Middle East, becoming a symbol of magnificence far beyond its natural habitat.
In this tutorial, we will learn how to draw it together, from the first lines of the sketch to coloring its characteristic plumage.
Symbolism of the peacock in art and mythology
First, let's look at this painting, which depicts one of the most famous scenes in universal literature: the Judgment of Paris. The young Trojan is positioned opposite three goddesses, whom the painter identifies by their attributes. On the left, an owl and a shield bearing the face of Medusa reveal the presence of Athena, goddess of wisdom. In the center, jewelry, flowers in the hair and a small winged Eros with golden arrows signify Aphrodite, goddess of love.
Finally, on the right, a woman in an elegant tunic is accompanied by a bird with plumage covered with hundreds of eyes: our protagonist of the day, companion of Hera, goddess of marriage and queen of the gods, whose vigilance never weakened.
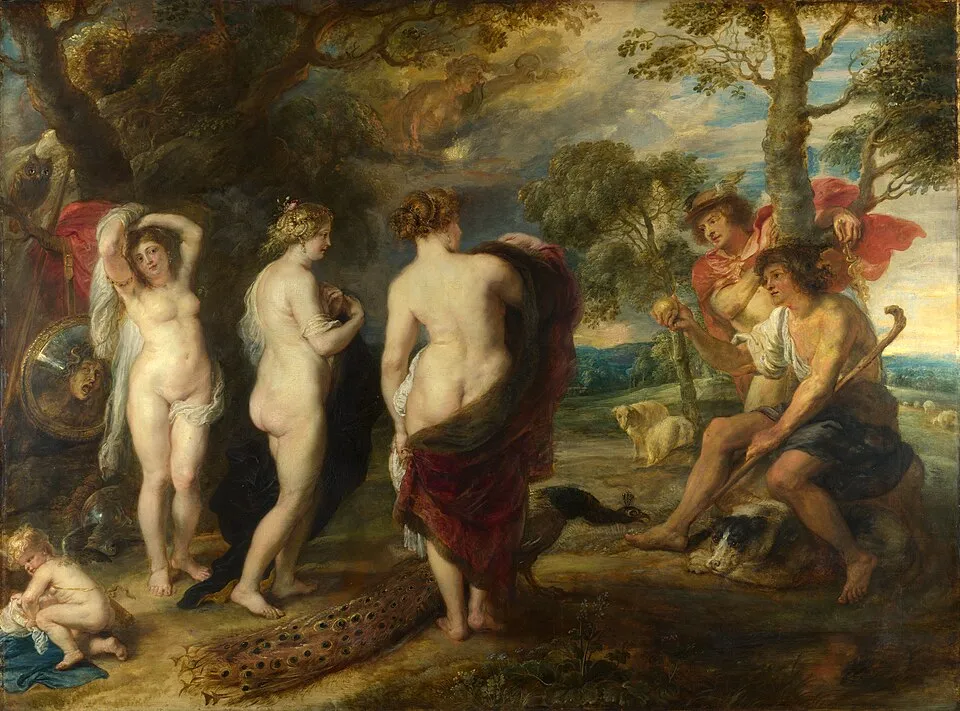
The Judgment of Paris (1632-35) Peter Paul Rubens
Anatomy of the peacock: what to observe before drawing
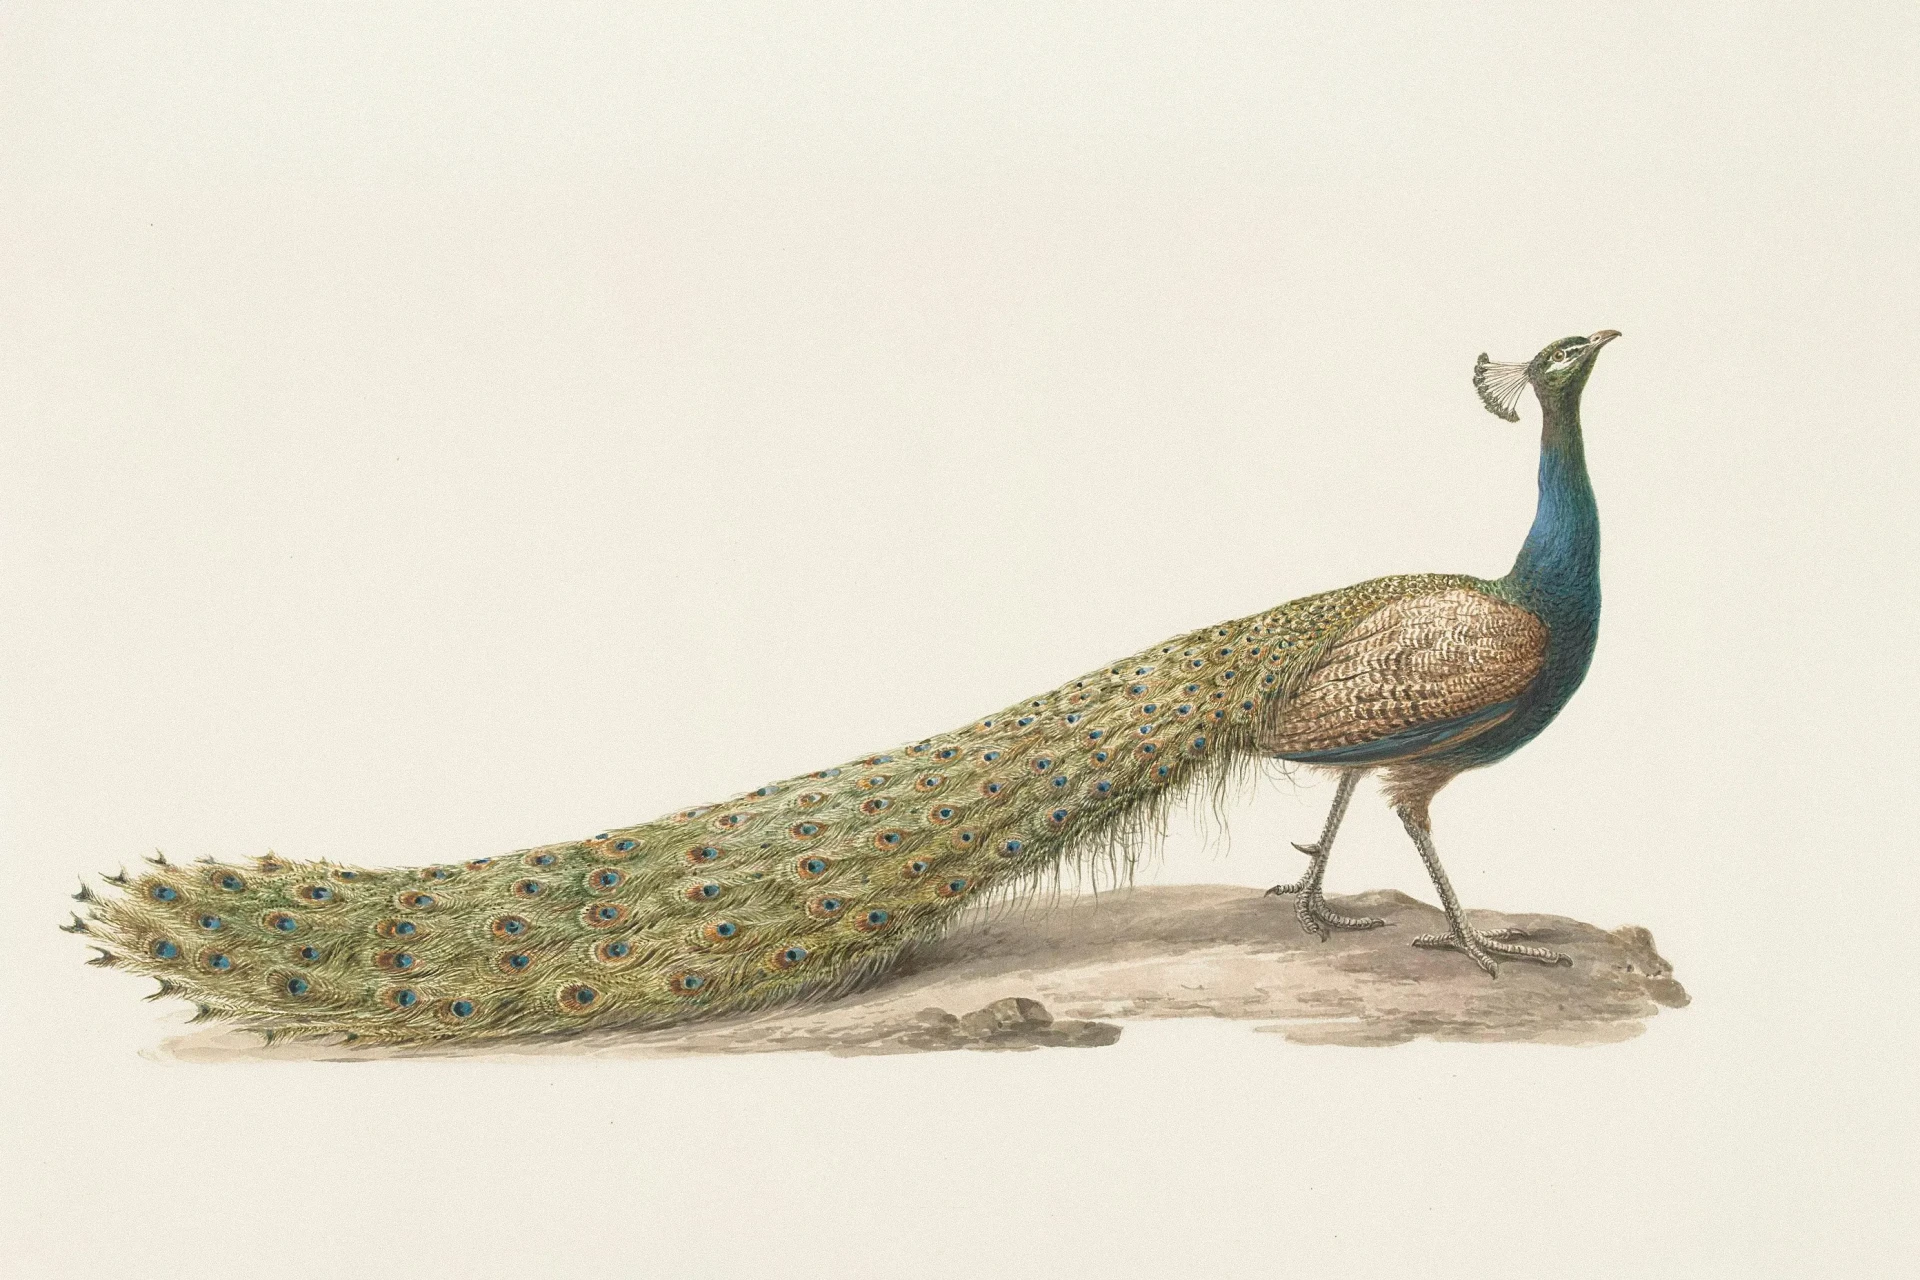
In the bird kingdom, males compete in ingenuity to seduce females, using melodious songs, acrobatic choreography, elaborate nests or flamboyant plumage. The peacock belongs to the latter category, and it excels at it.
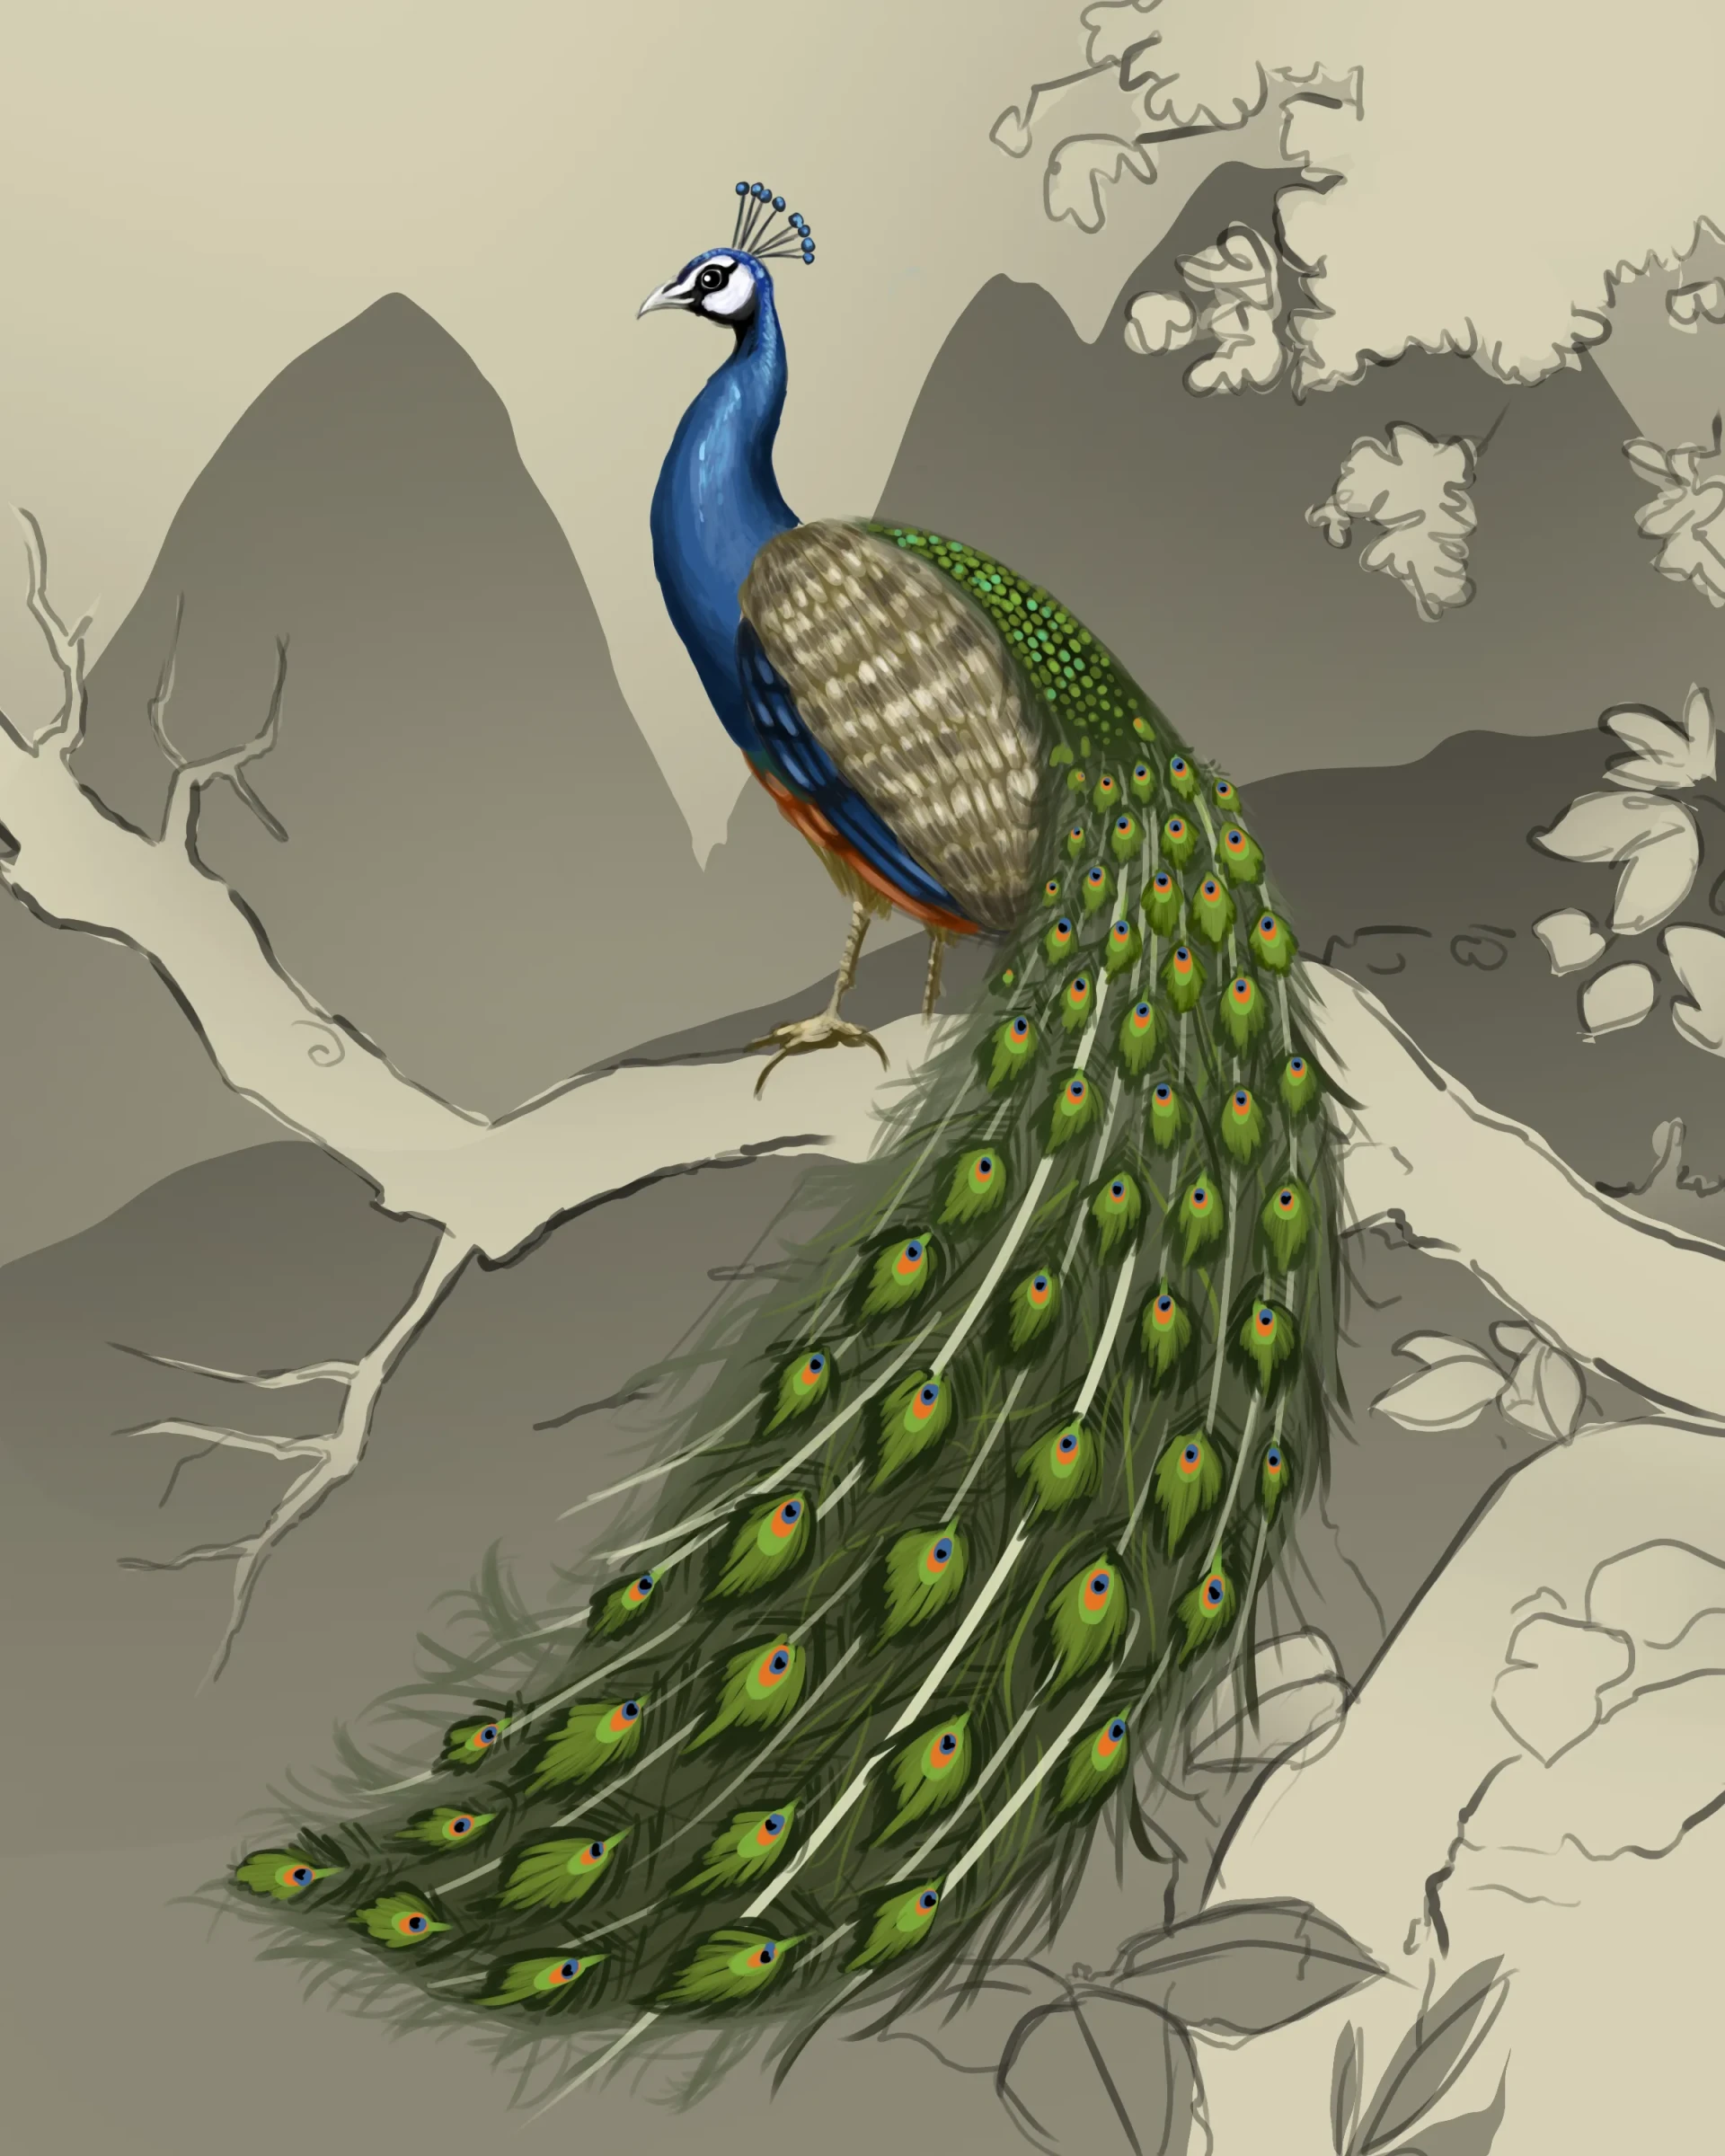
Its best-known characteristic is its train, the long feathers which emerge from the upper part of the back and which it spreads like a fan to catch the eye of females. But other details also deserve attention: a slender silhouette, plumage in blue and greenish tones, and its crown of small feathers which seem to float above its head.
The feather pattern in detail
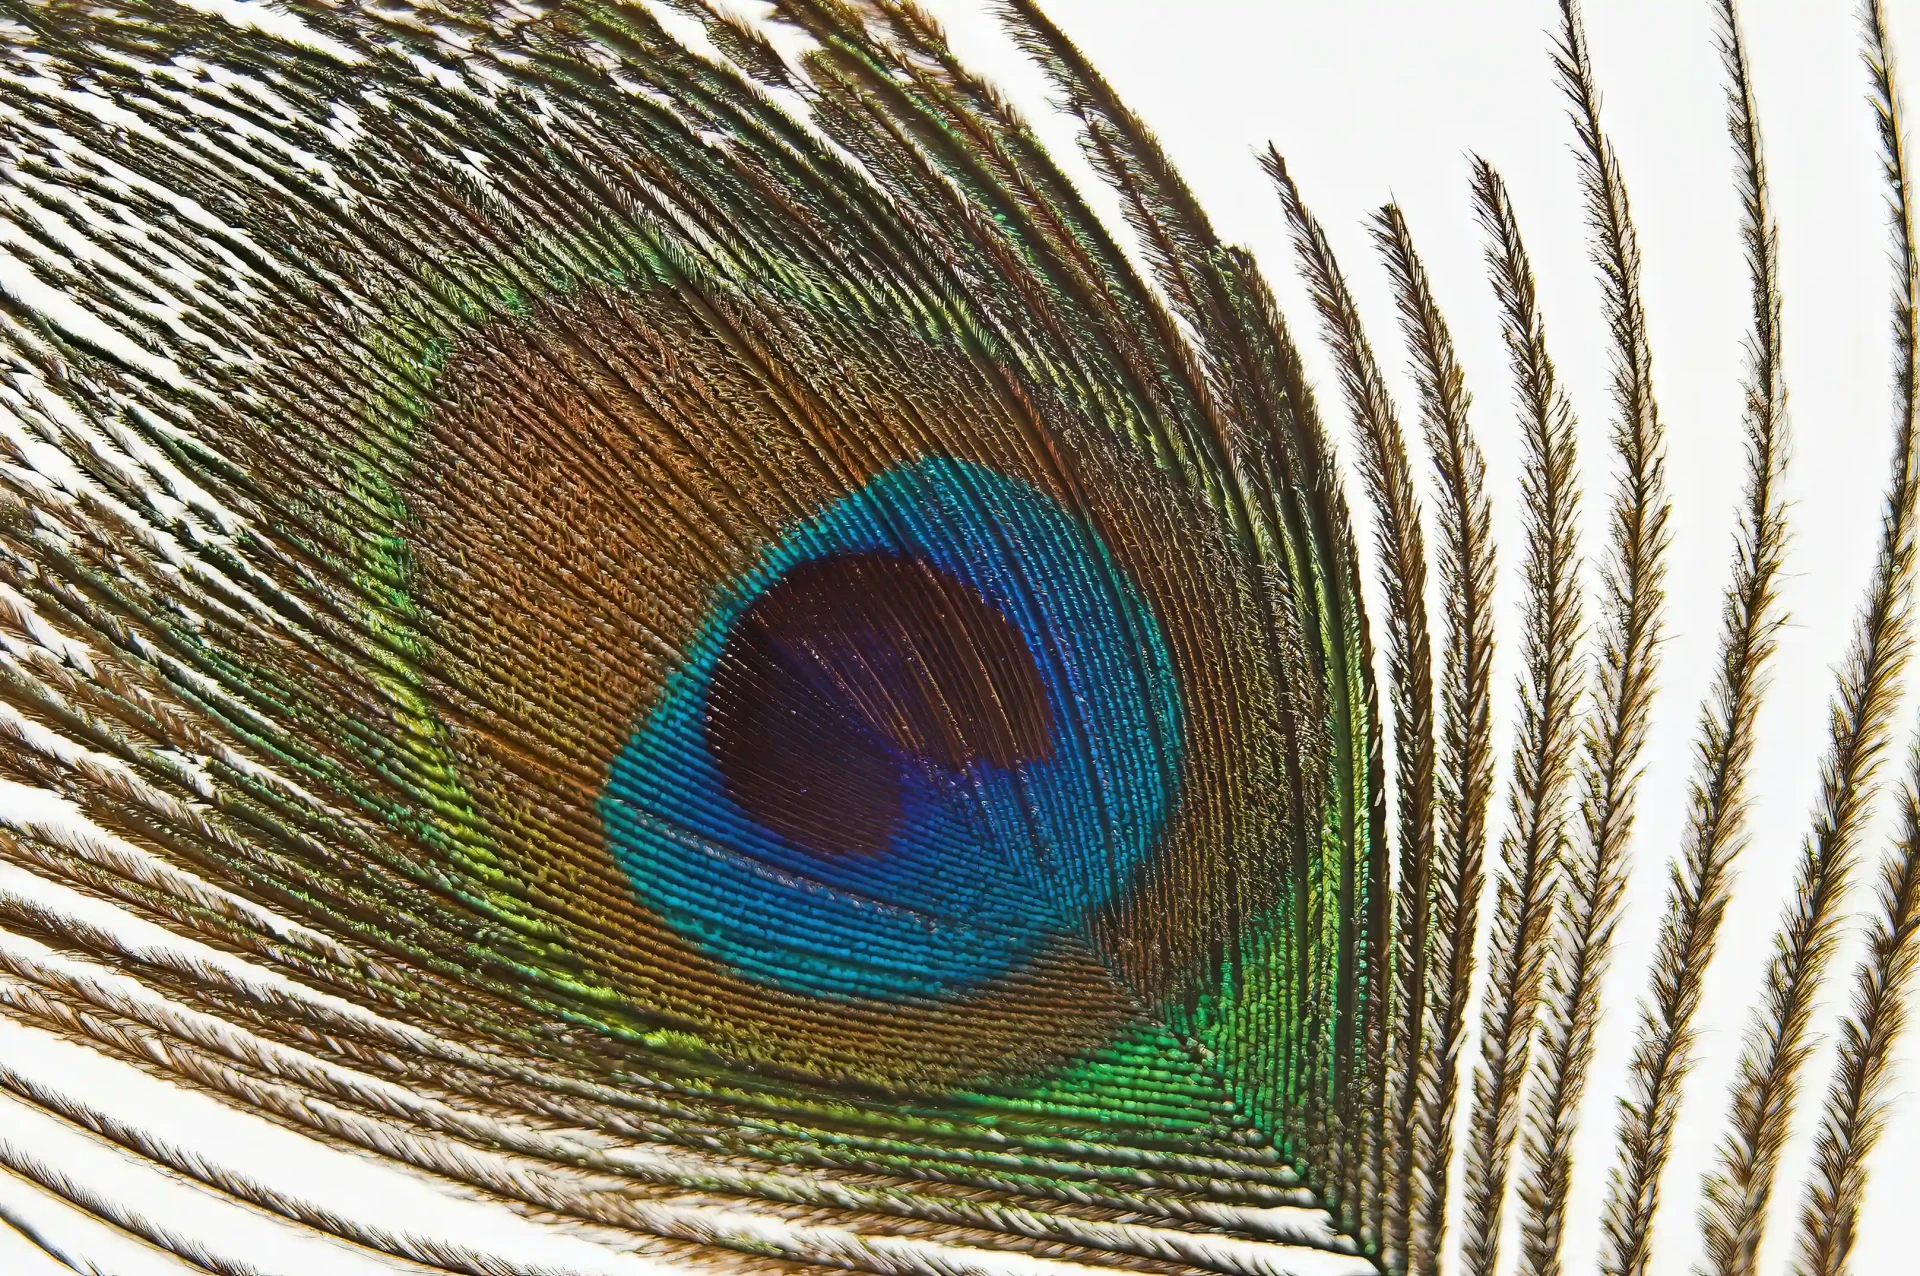
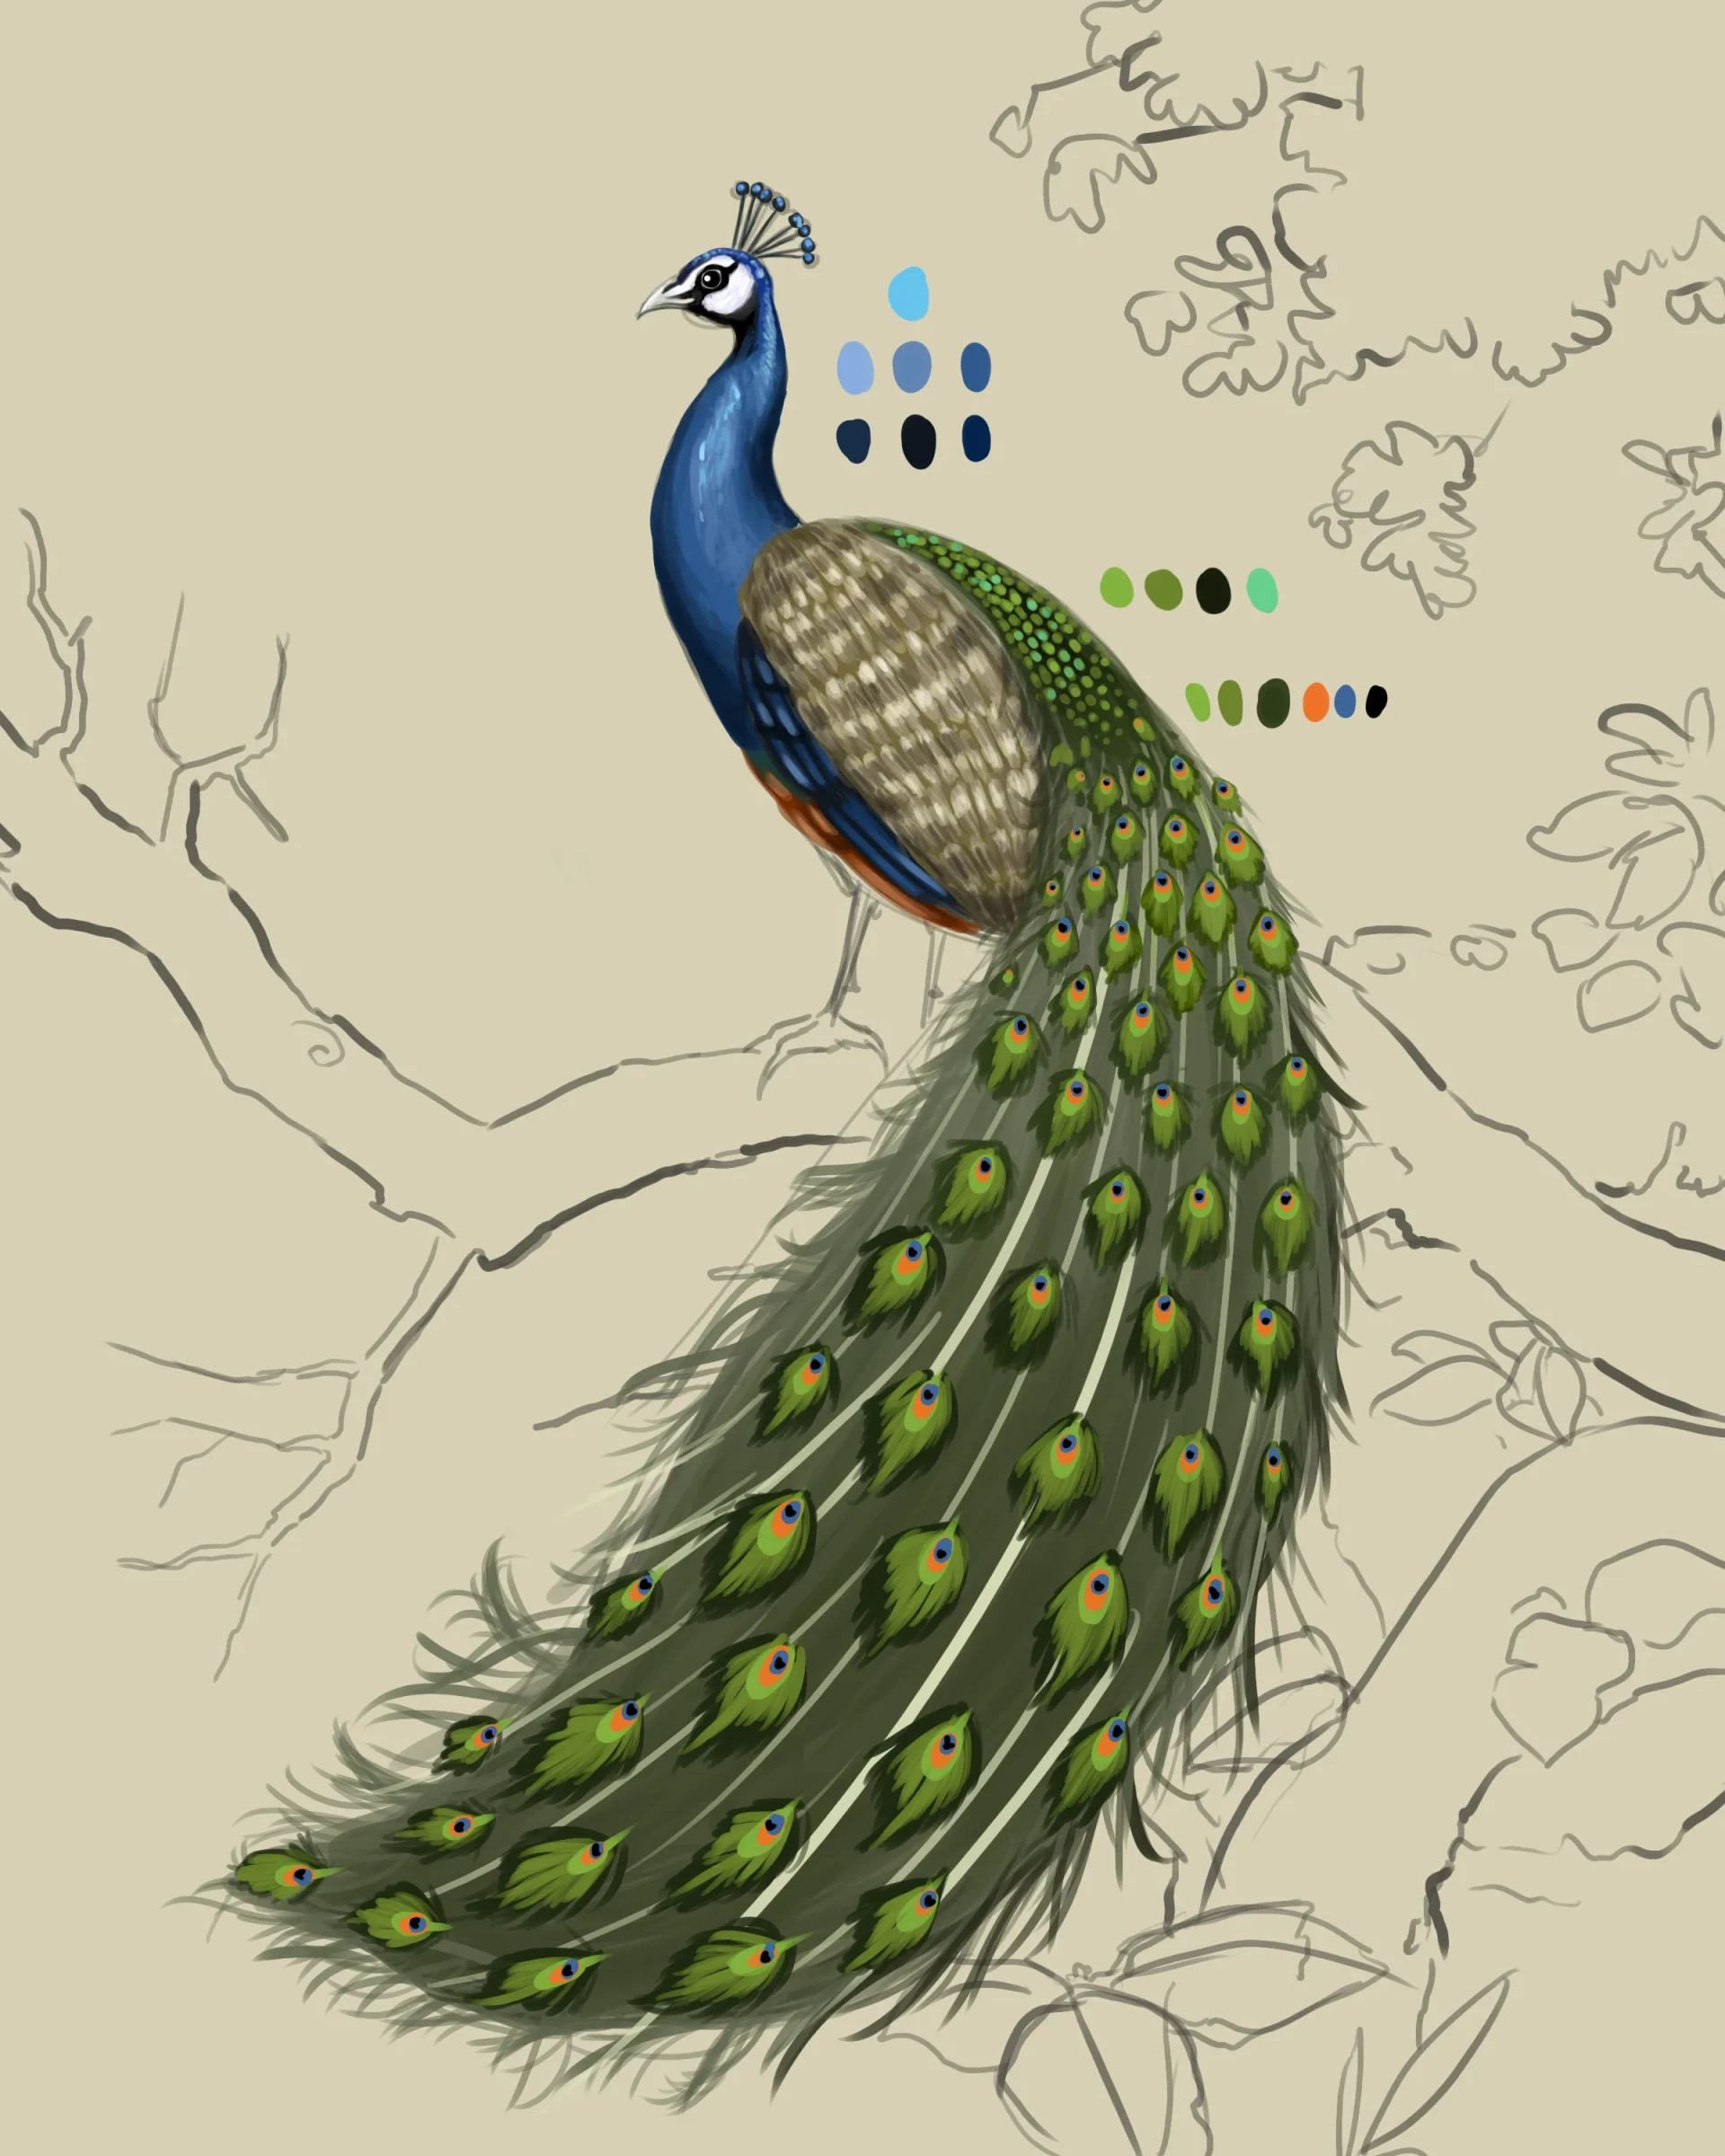
Let's take a closer look at what creates the magic of the plumage: the illusion of the eyes. Each large tail feather has a green, egg-shaped outline, with a lighter interior. In the center is a vibrant blue spot, similar to an iris, surrounding a deep black pupil. It is this pattern that must be carefully reproduced when adding color.
How to draw a peacock step by step
Let's start by dividing the page into two equal halves using a vertical guide line. This will help you manage the space better throughout the tutorial.
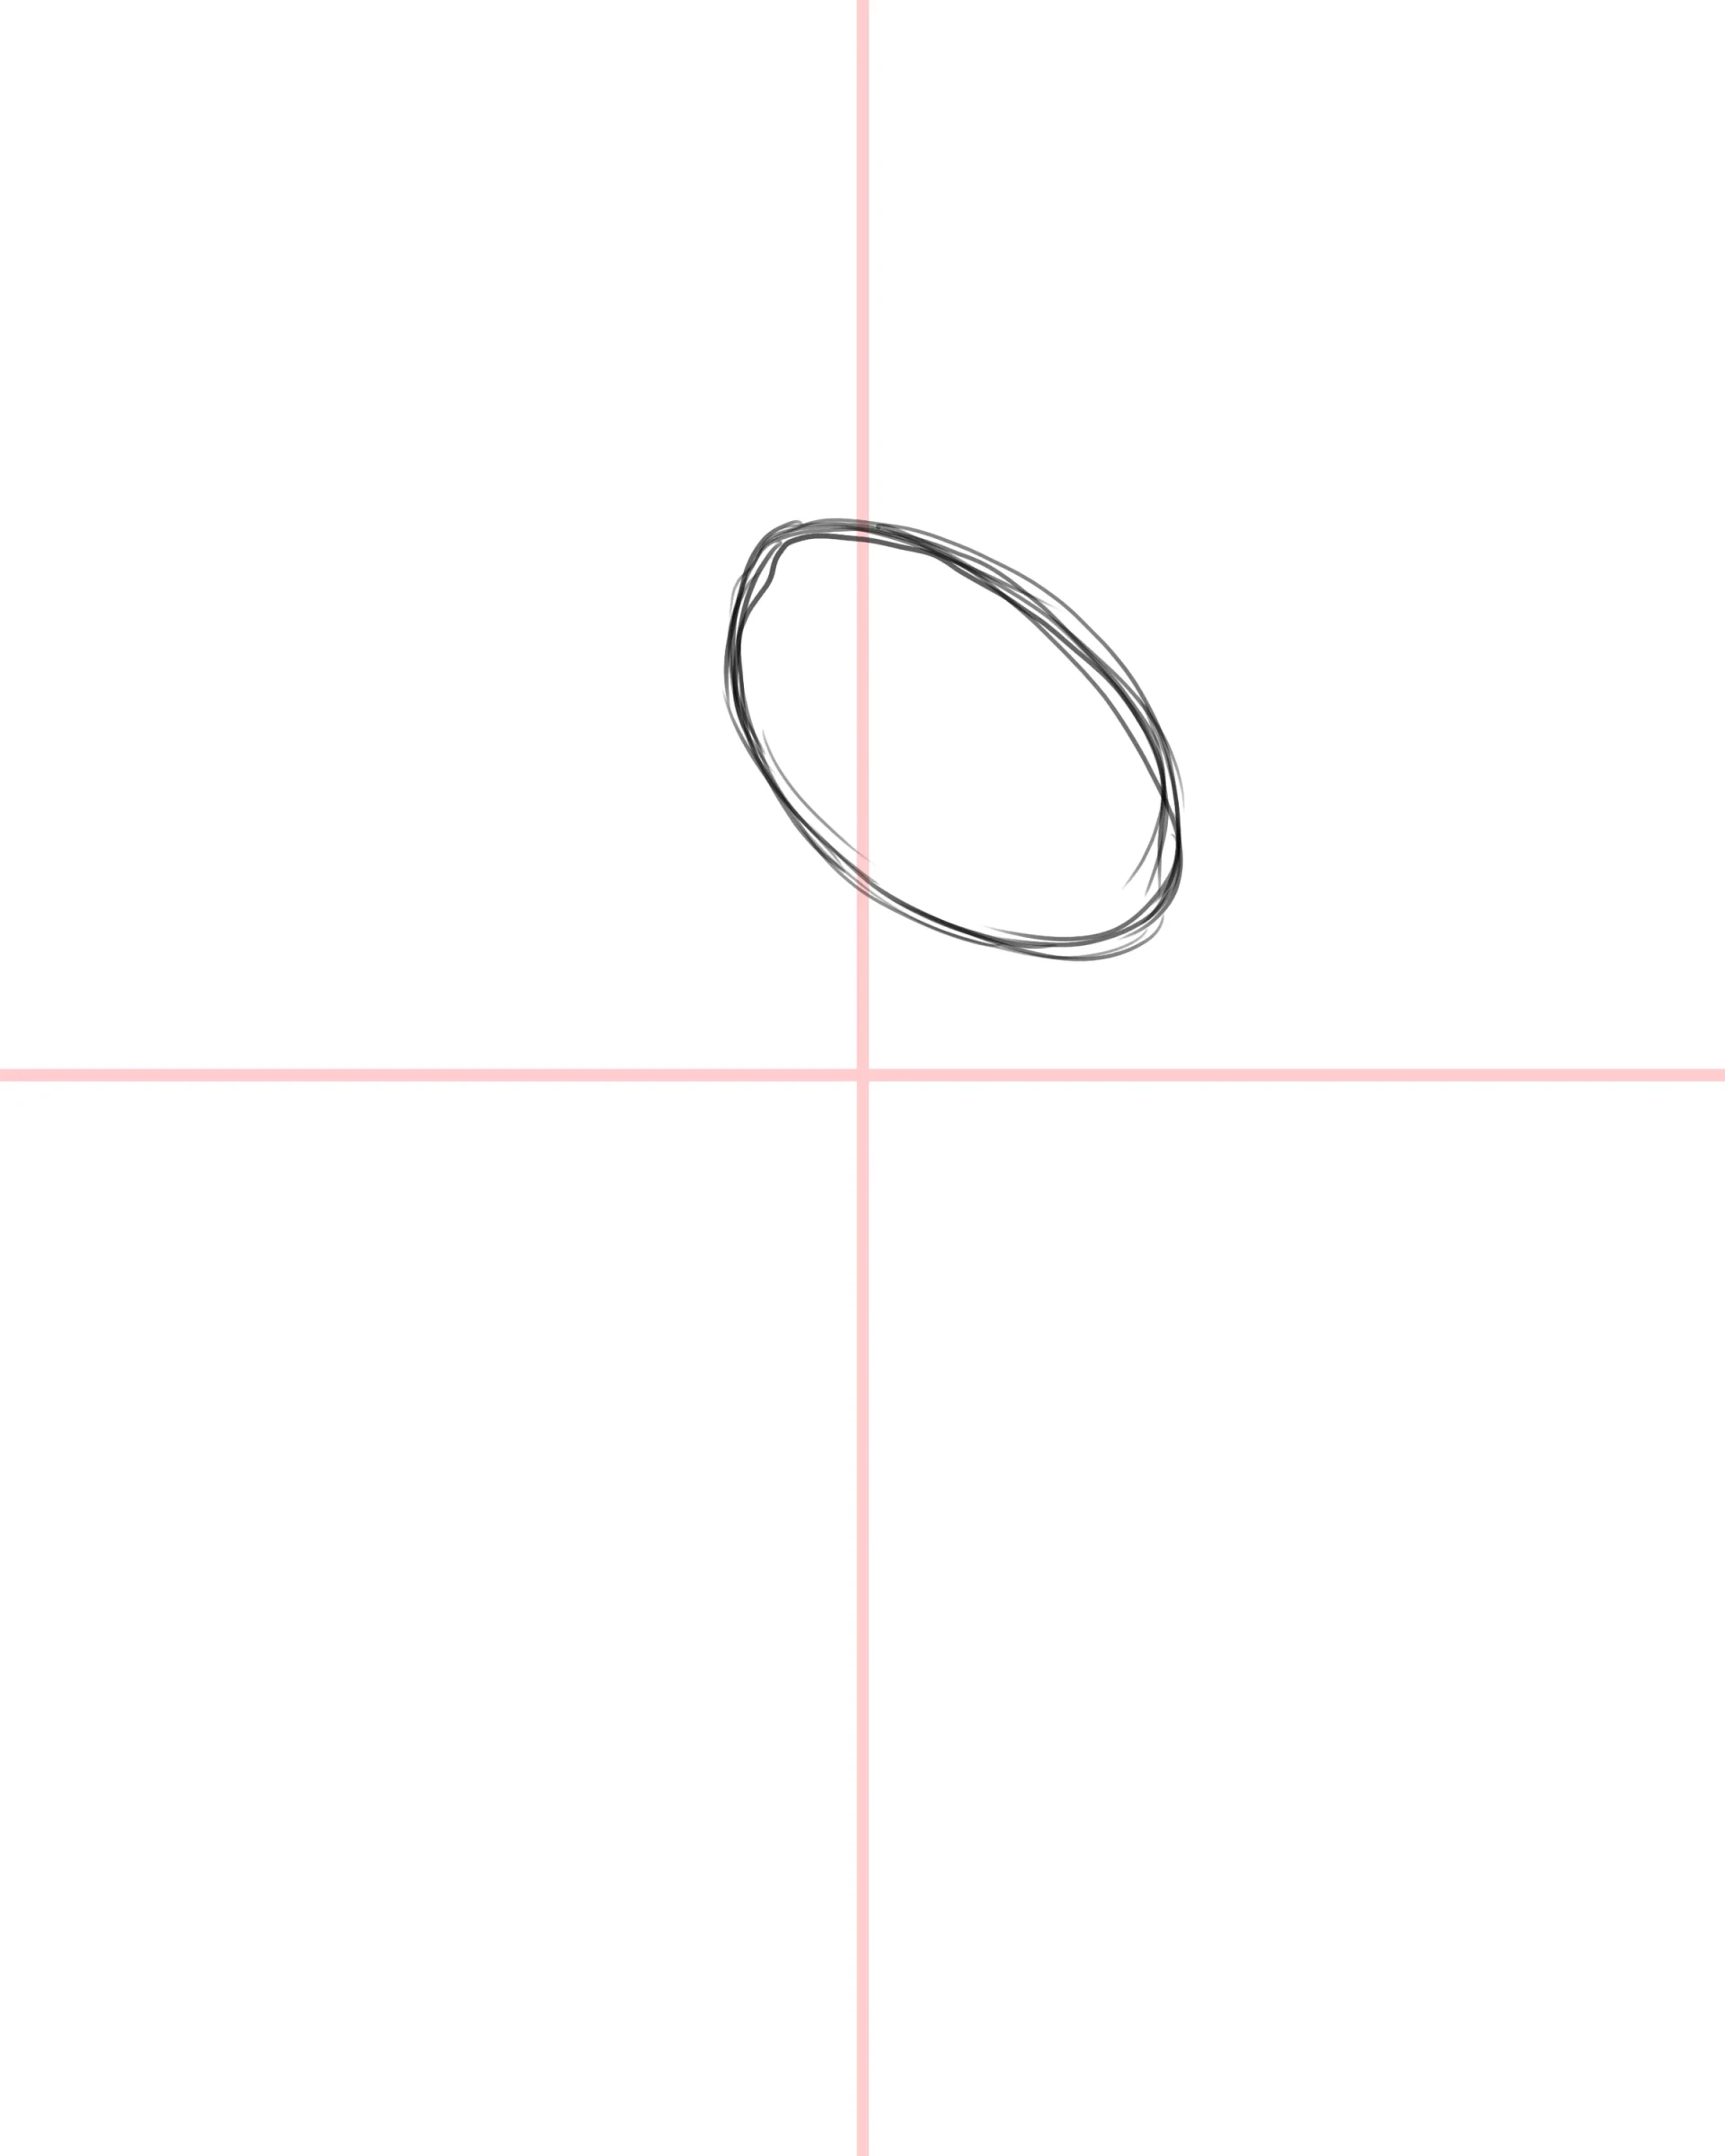
In the upper half, draw an elongated and slightly inclined oval, this will be the body of the peacock. The inclination suggests that he is raising his chest.
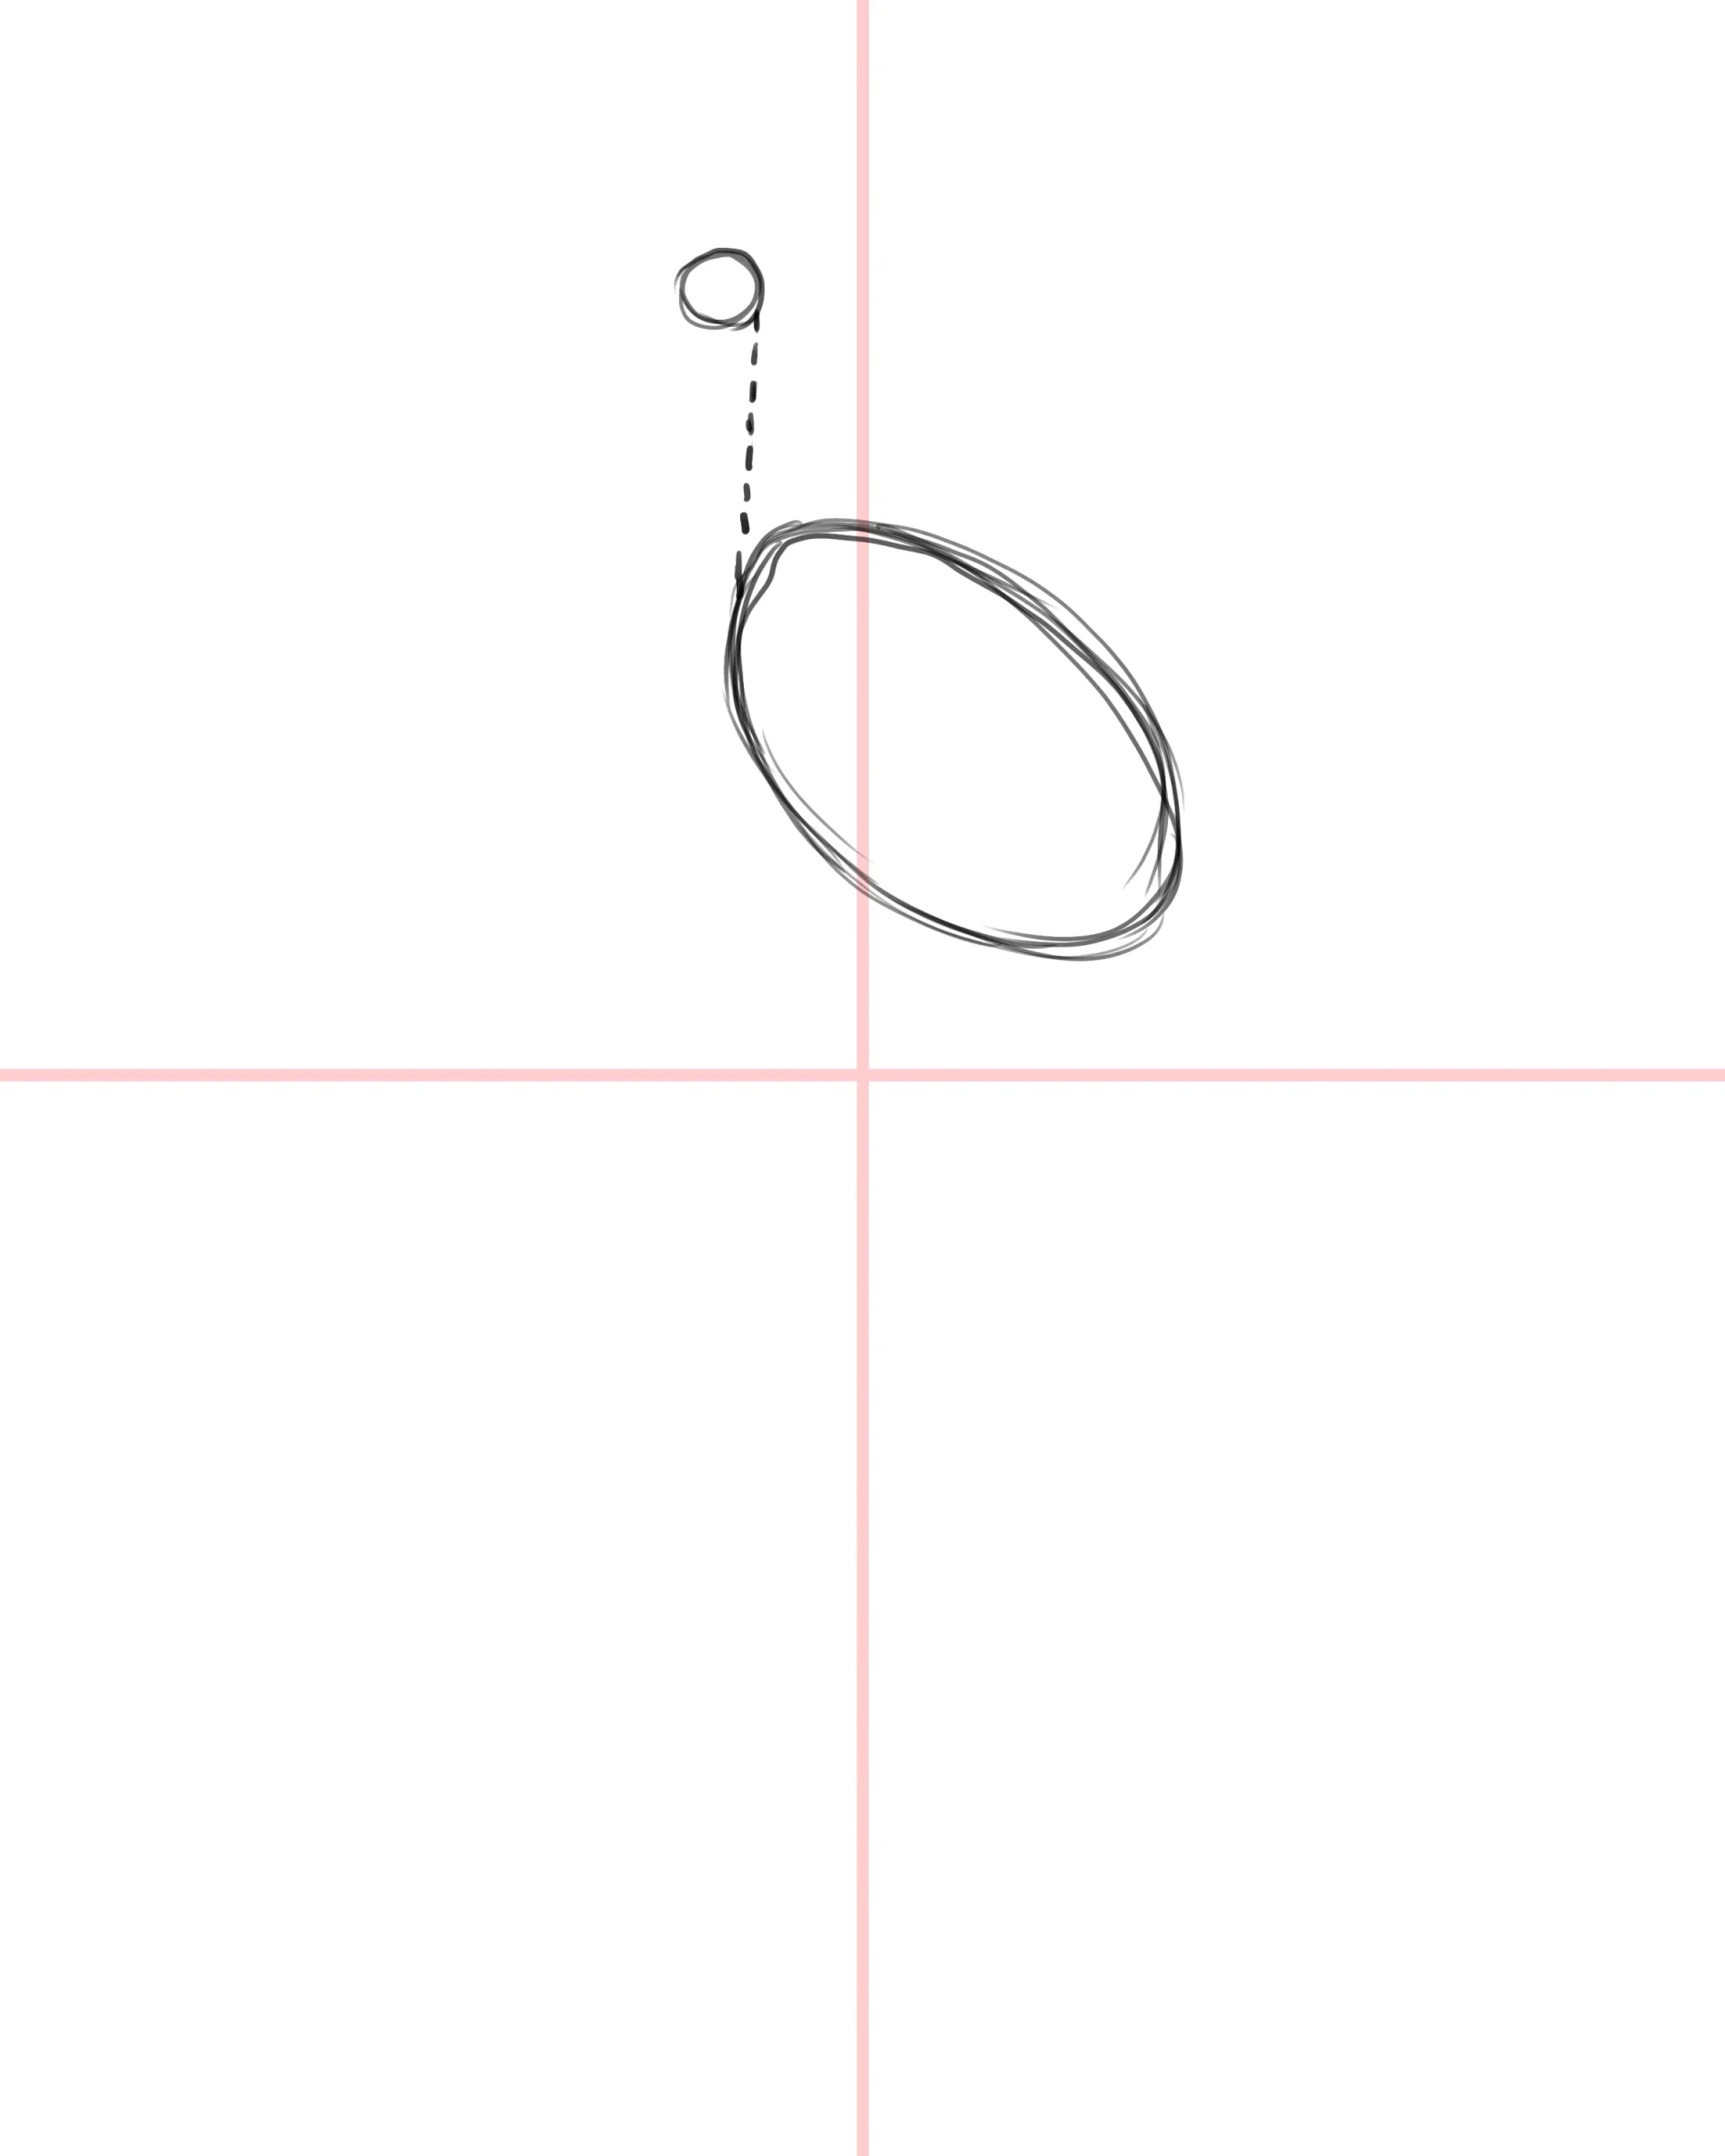
Then locate the upper part of the body and draw a small circle a few centimeters higher. The distance between the two will determine the length of the neck: adjust it according to the desired effect.
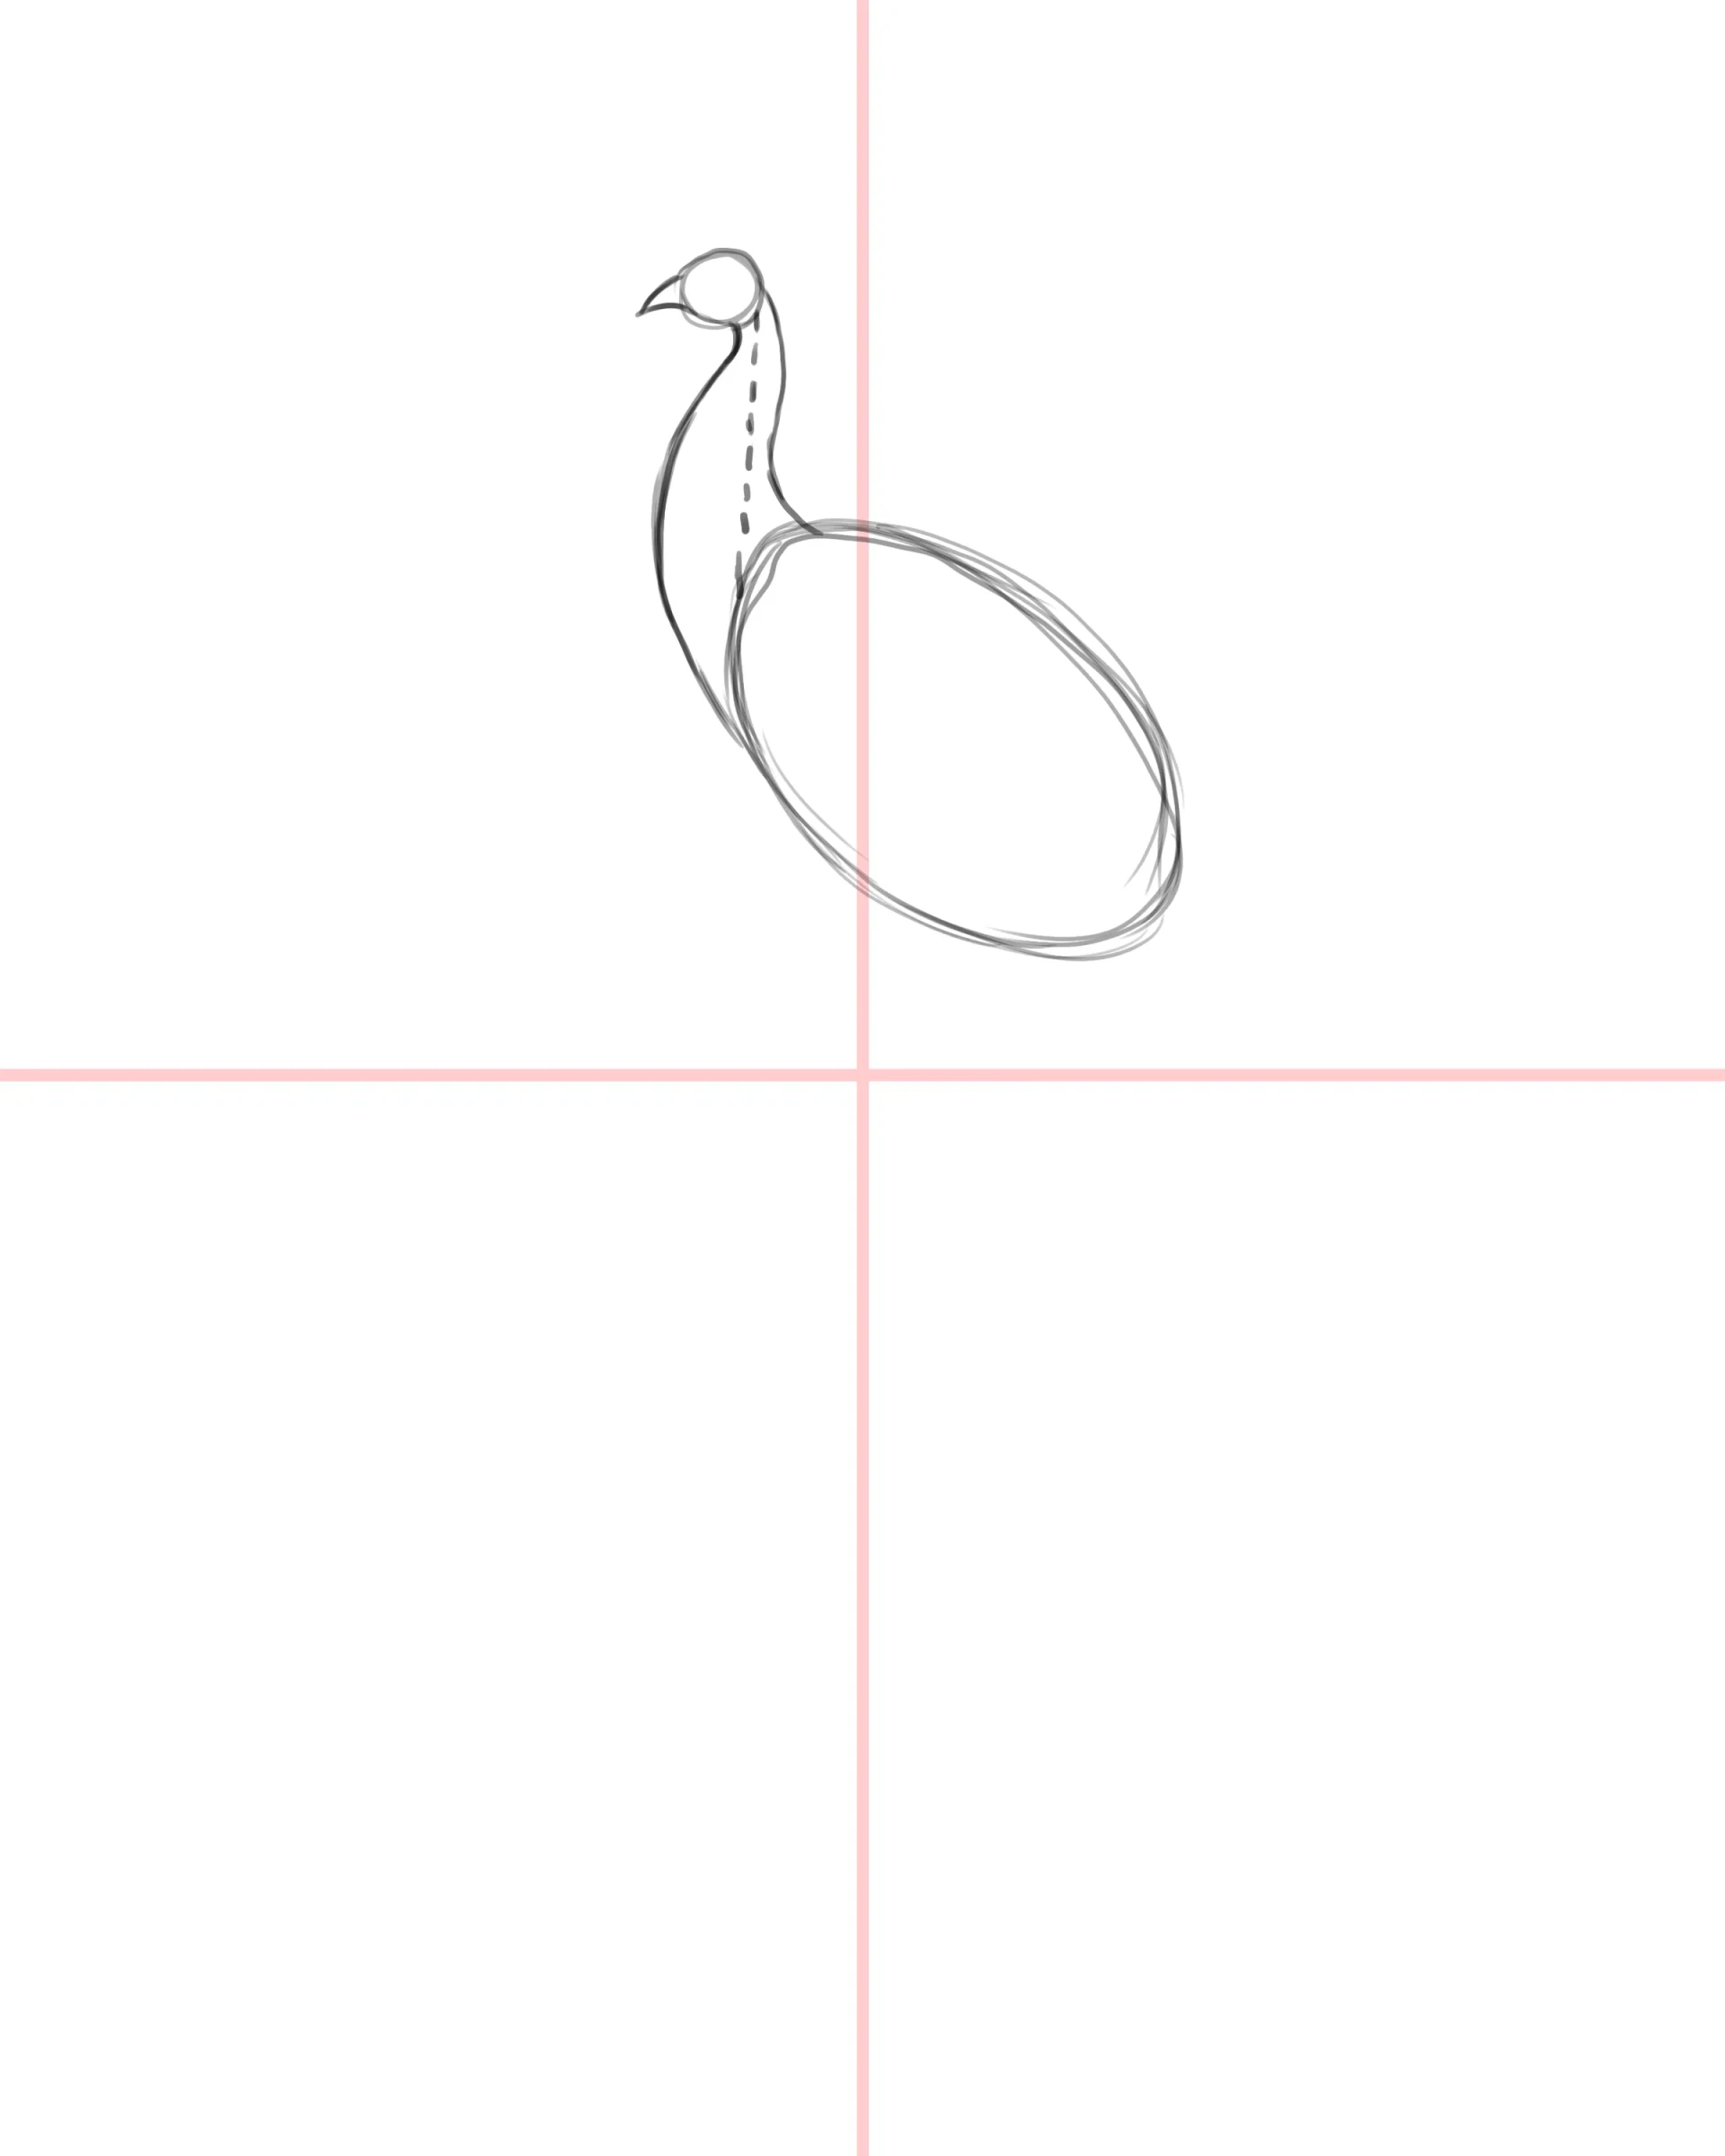
Taking this circle as a starting point, draw a curved neck which is thin at the base of the head, then gradually widens until it joins the body.
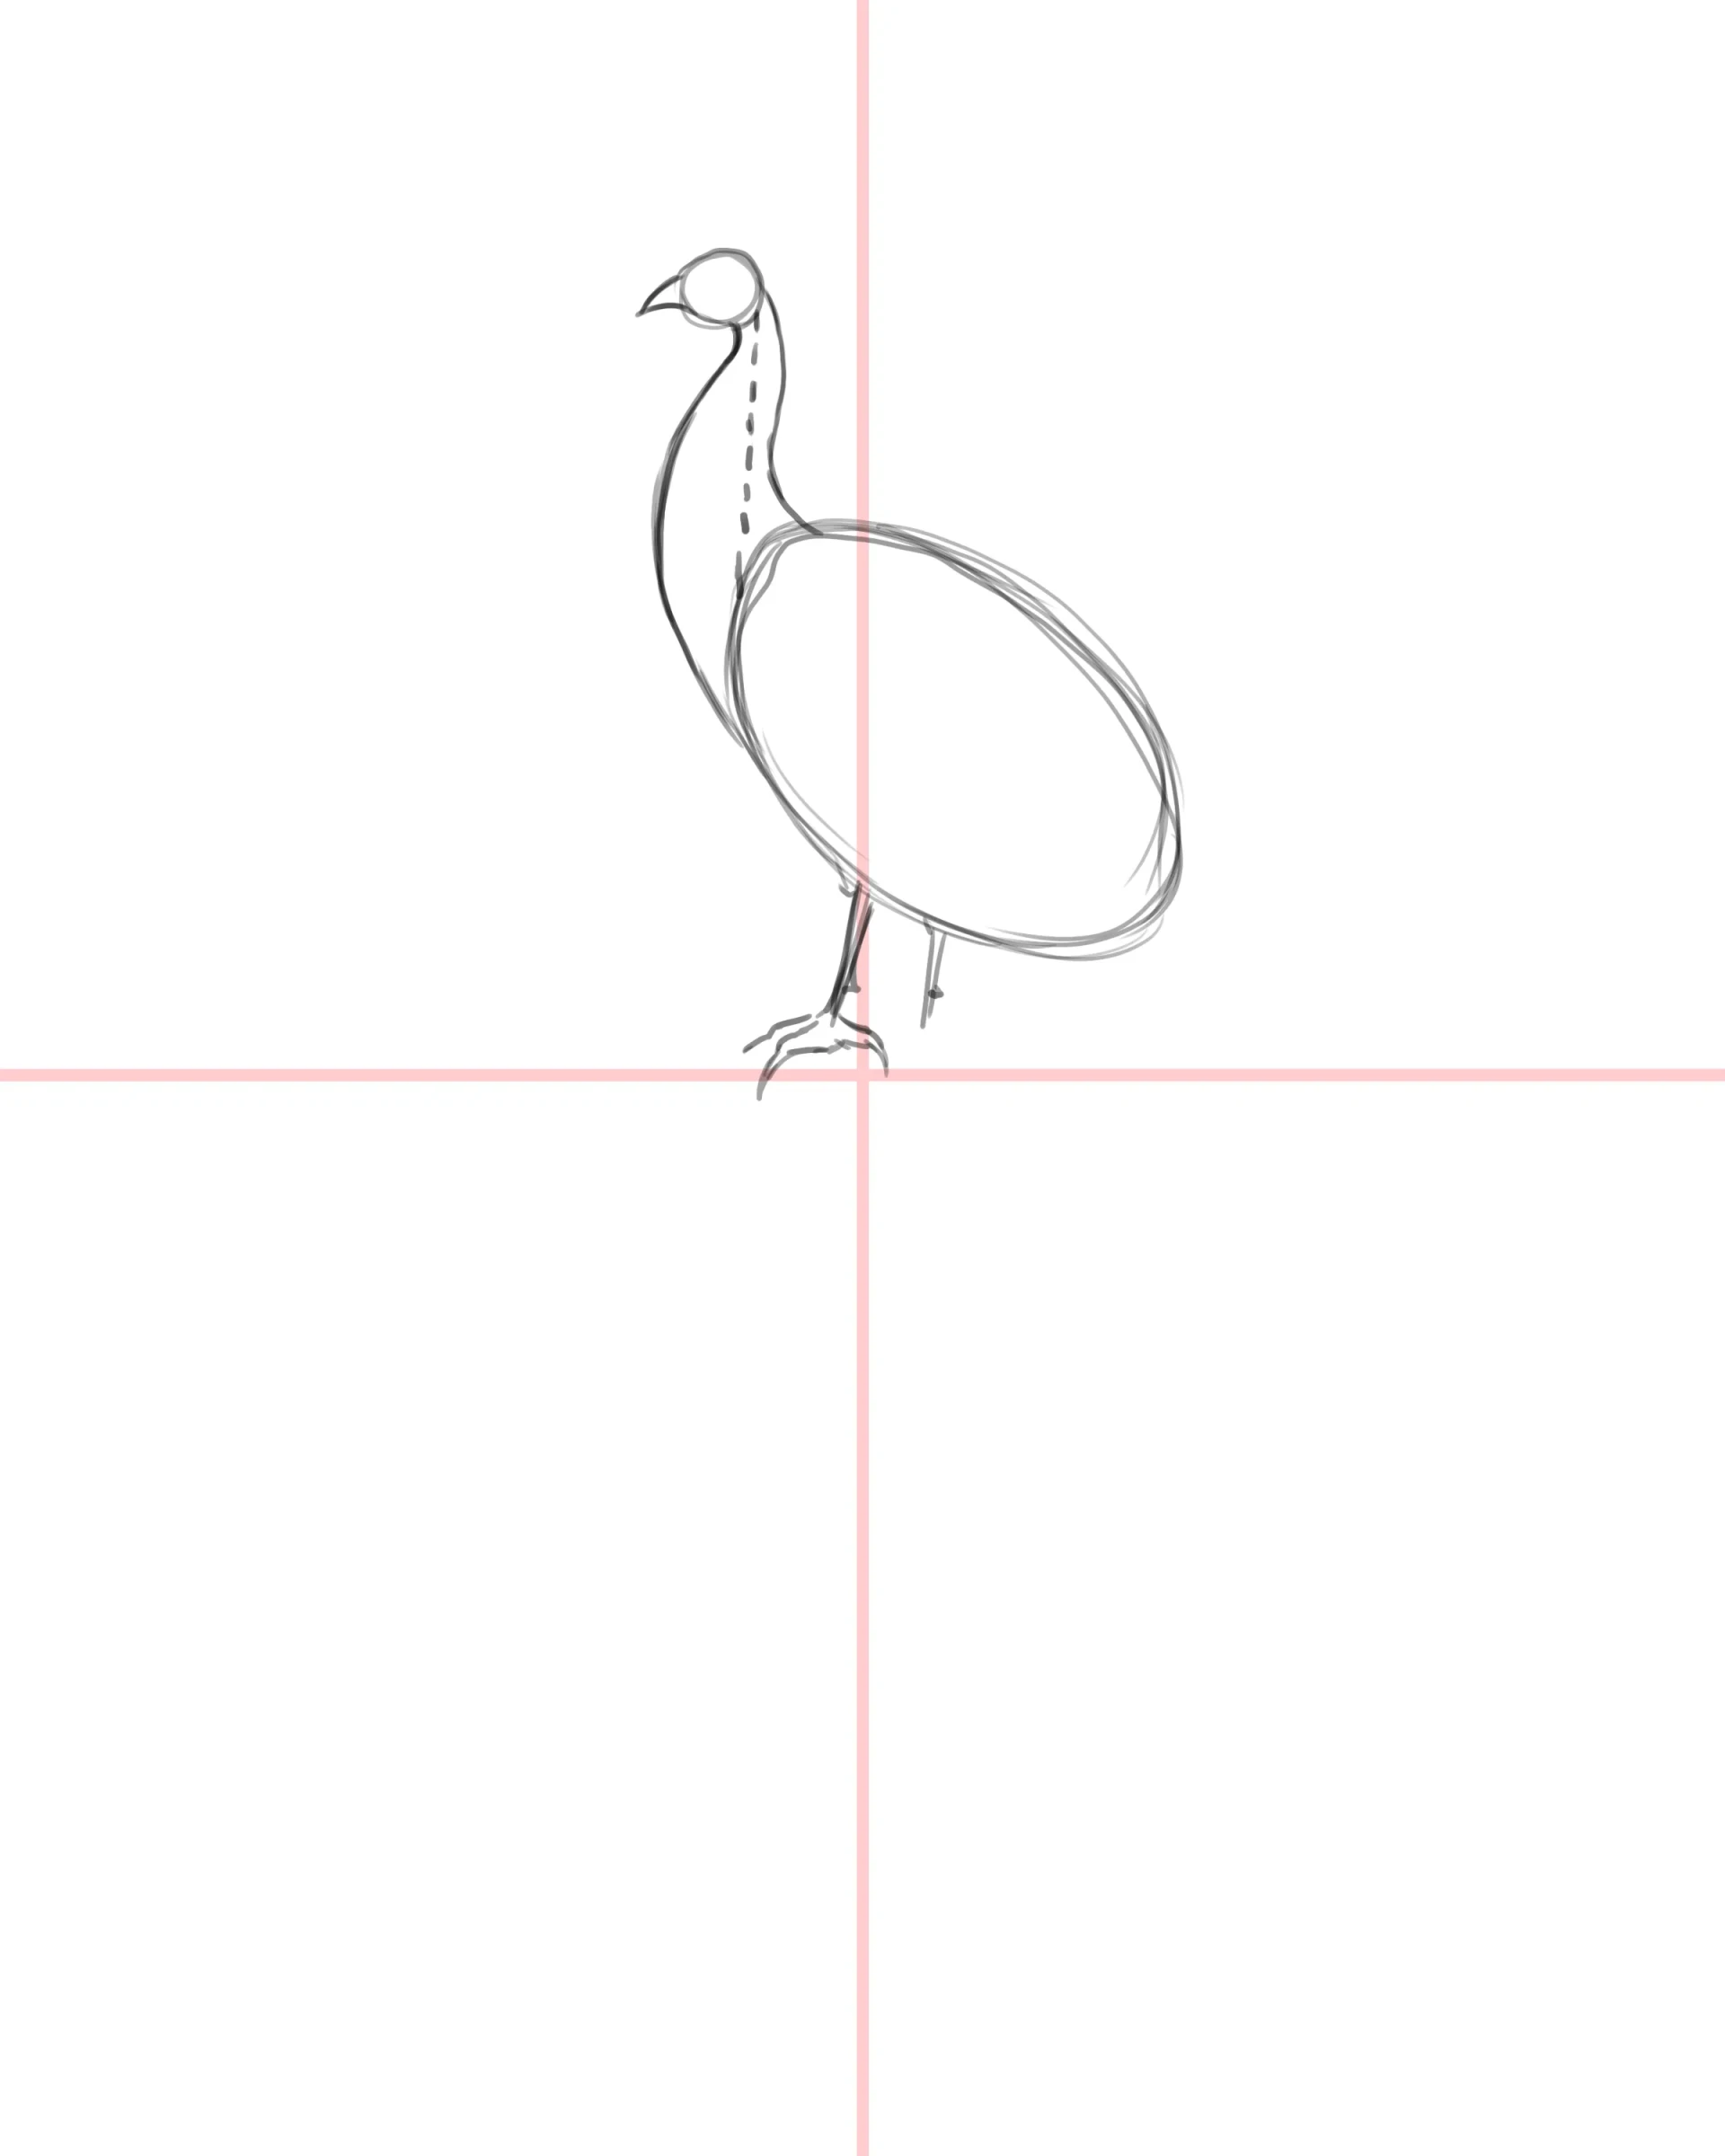
The silhouette begins to take shape. The bird's balance point is on the vertical guide line: this is where we can add the legs, which are thin and of moderate length.
Now comes the peacock's most distinctive element: the train. It does not start from the tail, but from the upper part of the back, an important detail not to be overlooked.
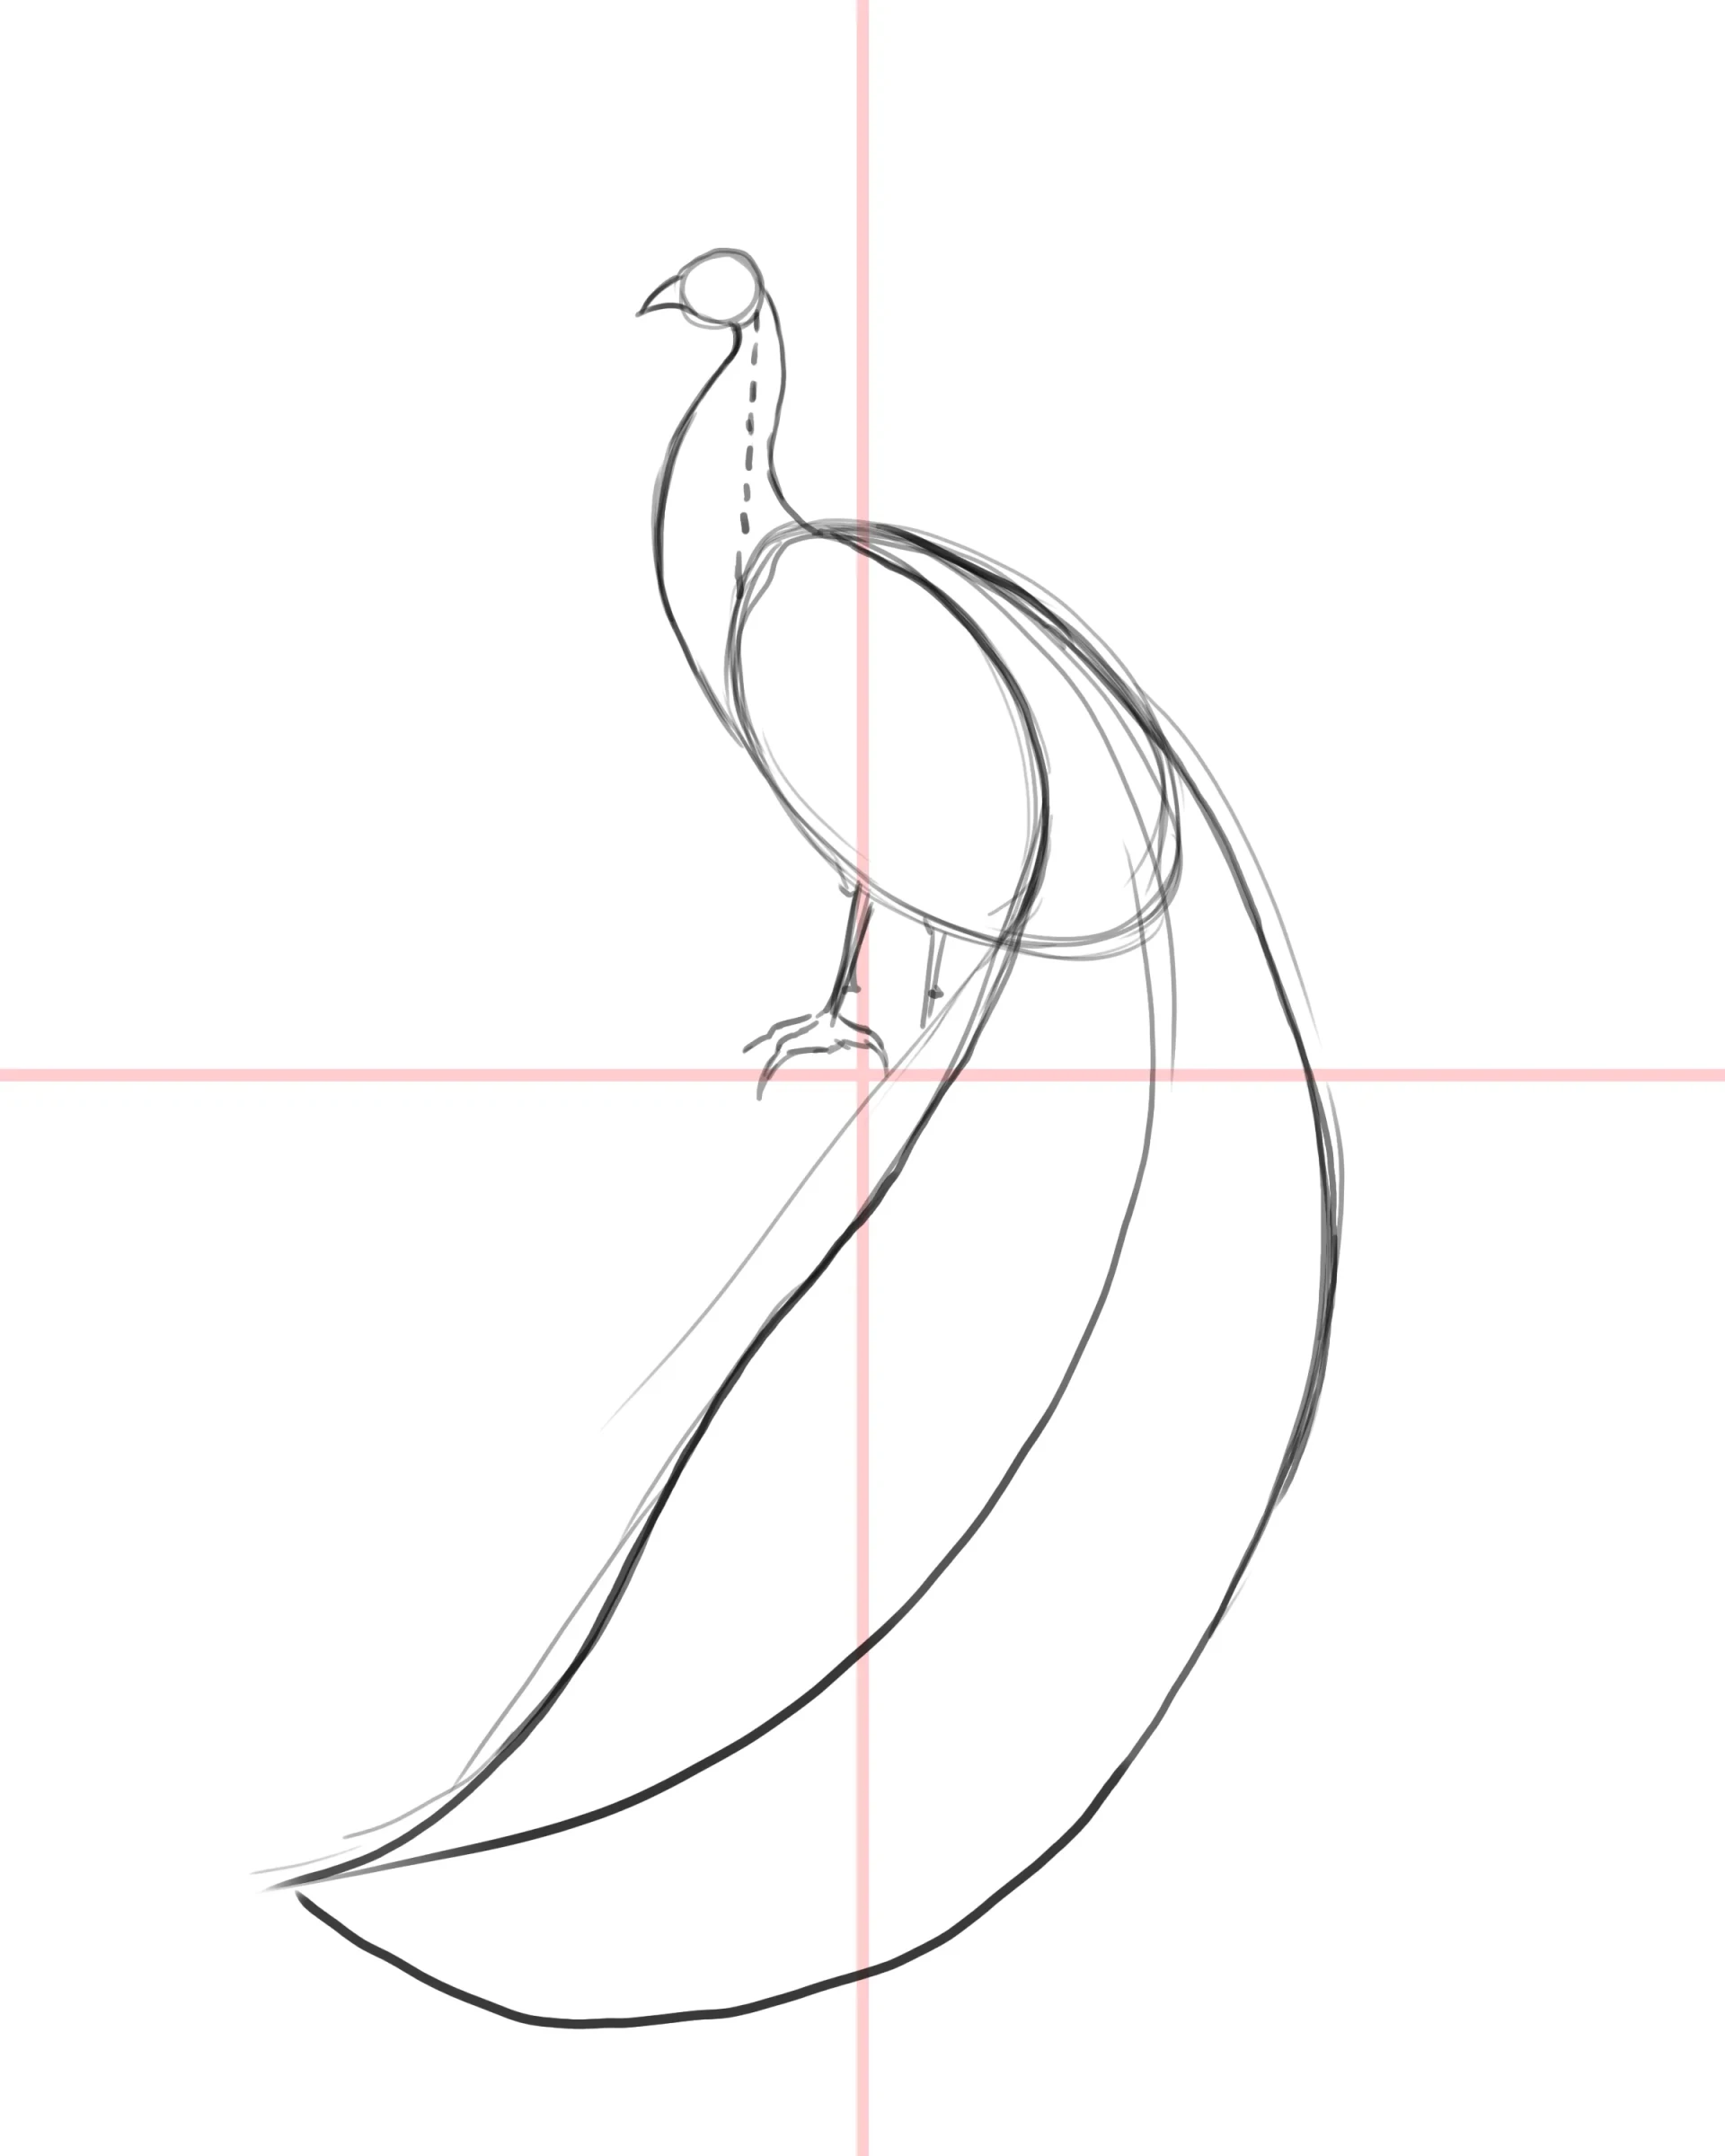
Along the line of the train, draw two curves inside the body to represent the first layer of wing feathers.
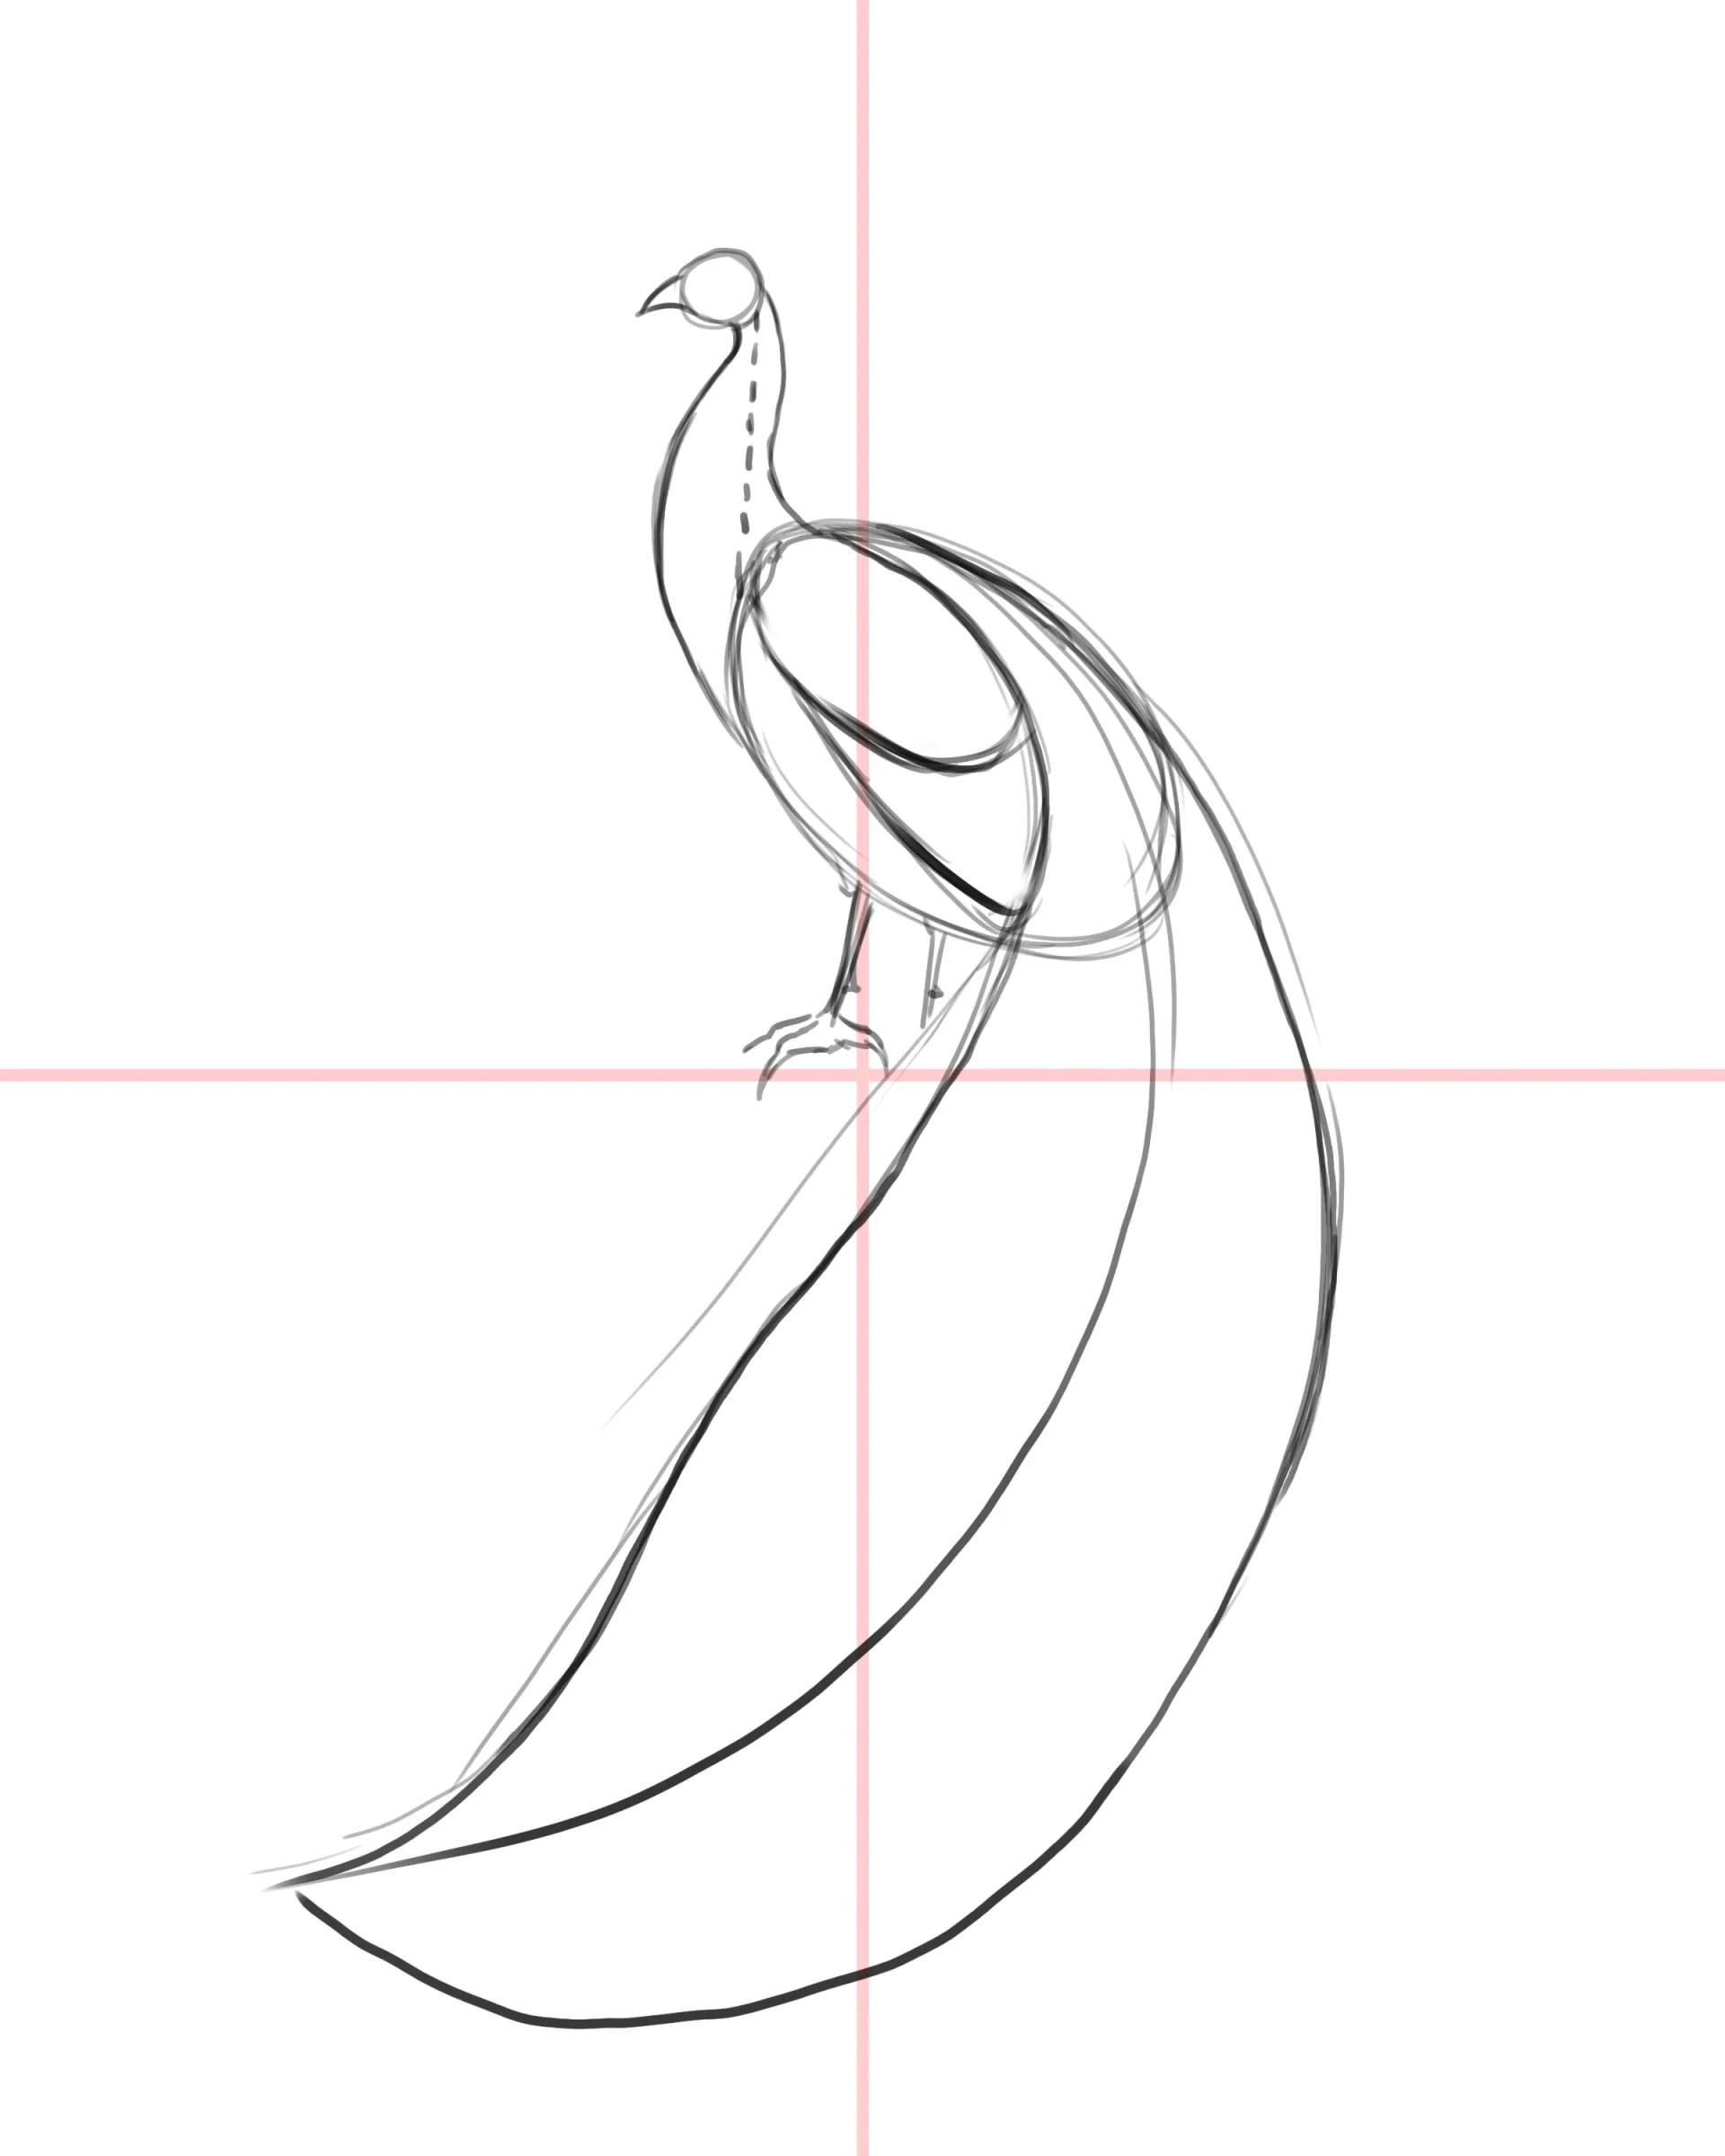
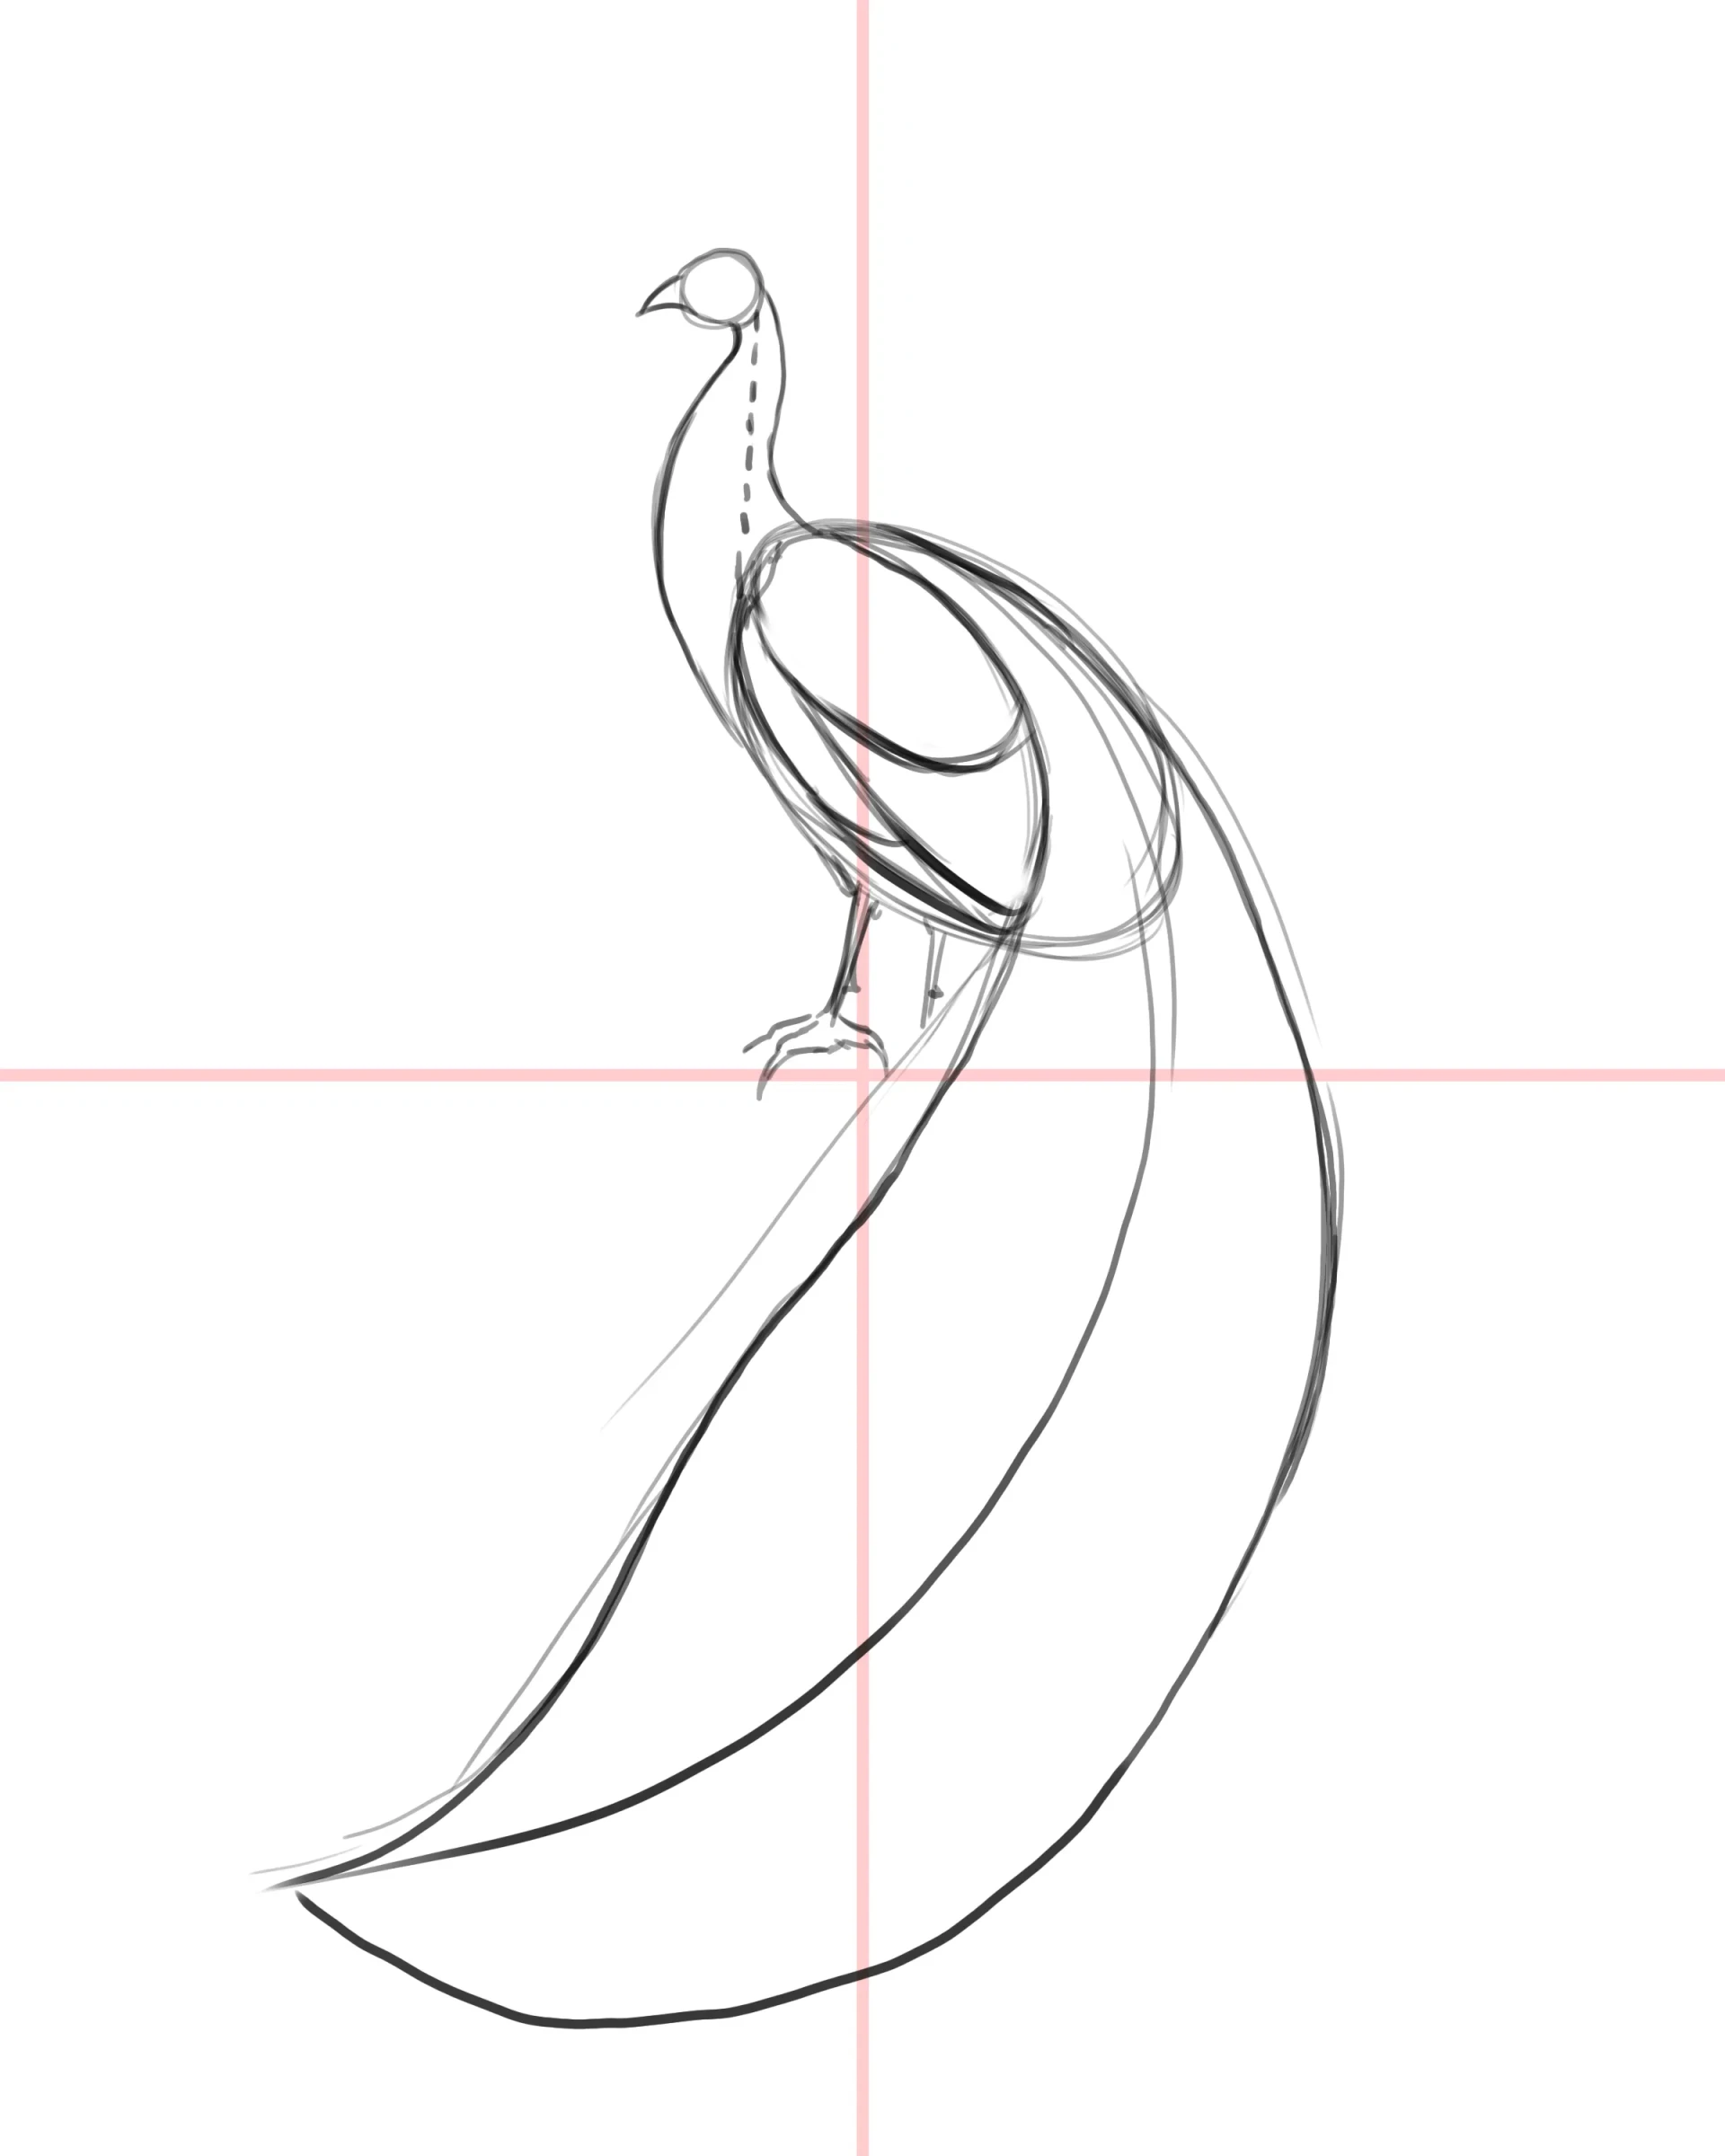
Add a new layer of feathers underneath, shown in blue, which supports the large train feathers as they unfold.
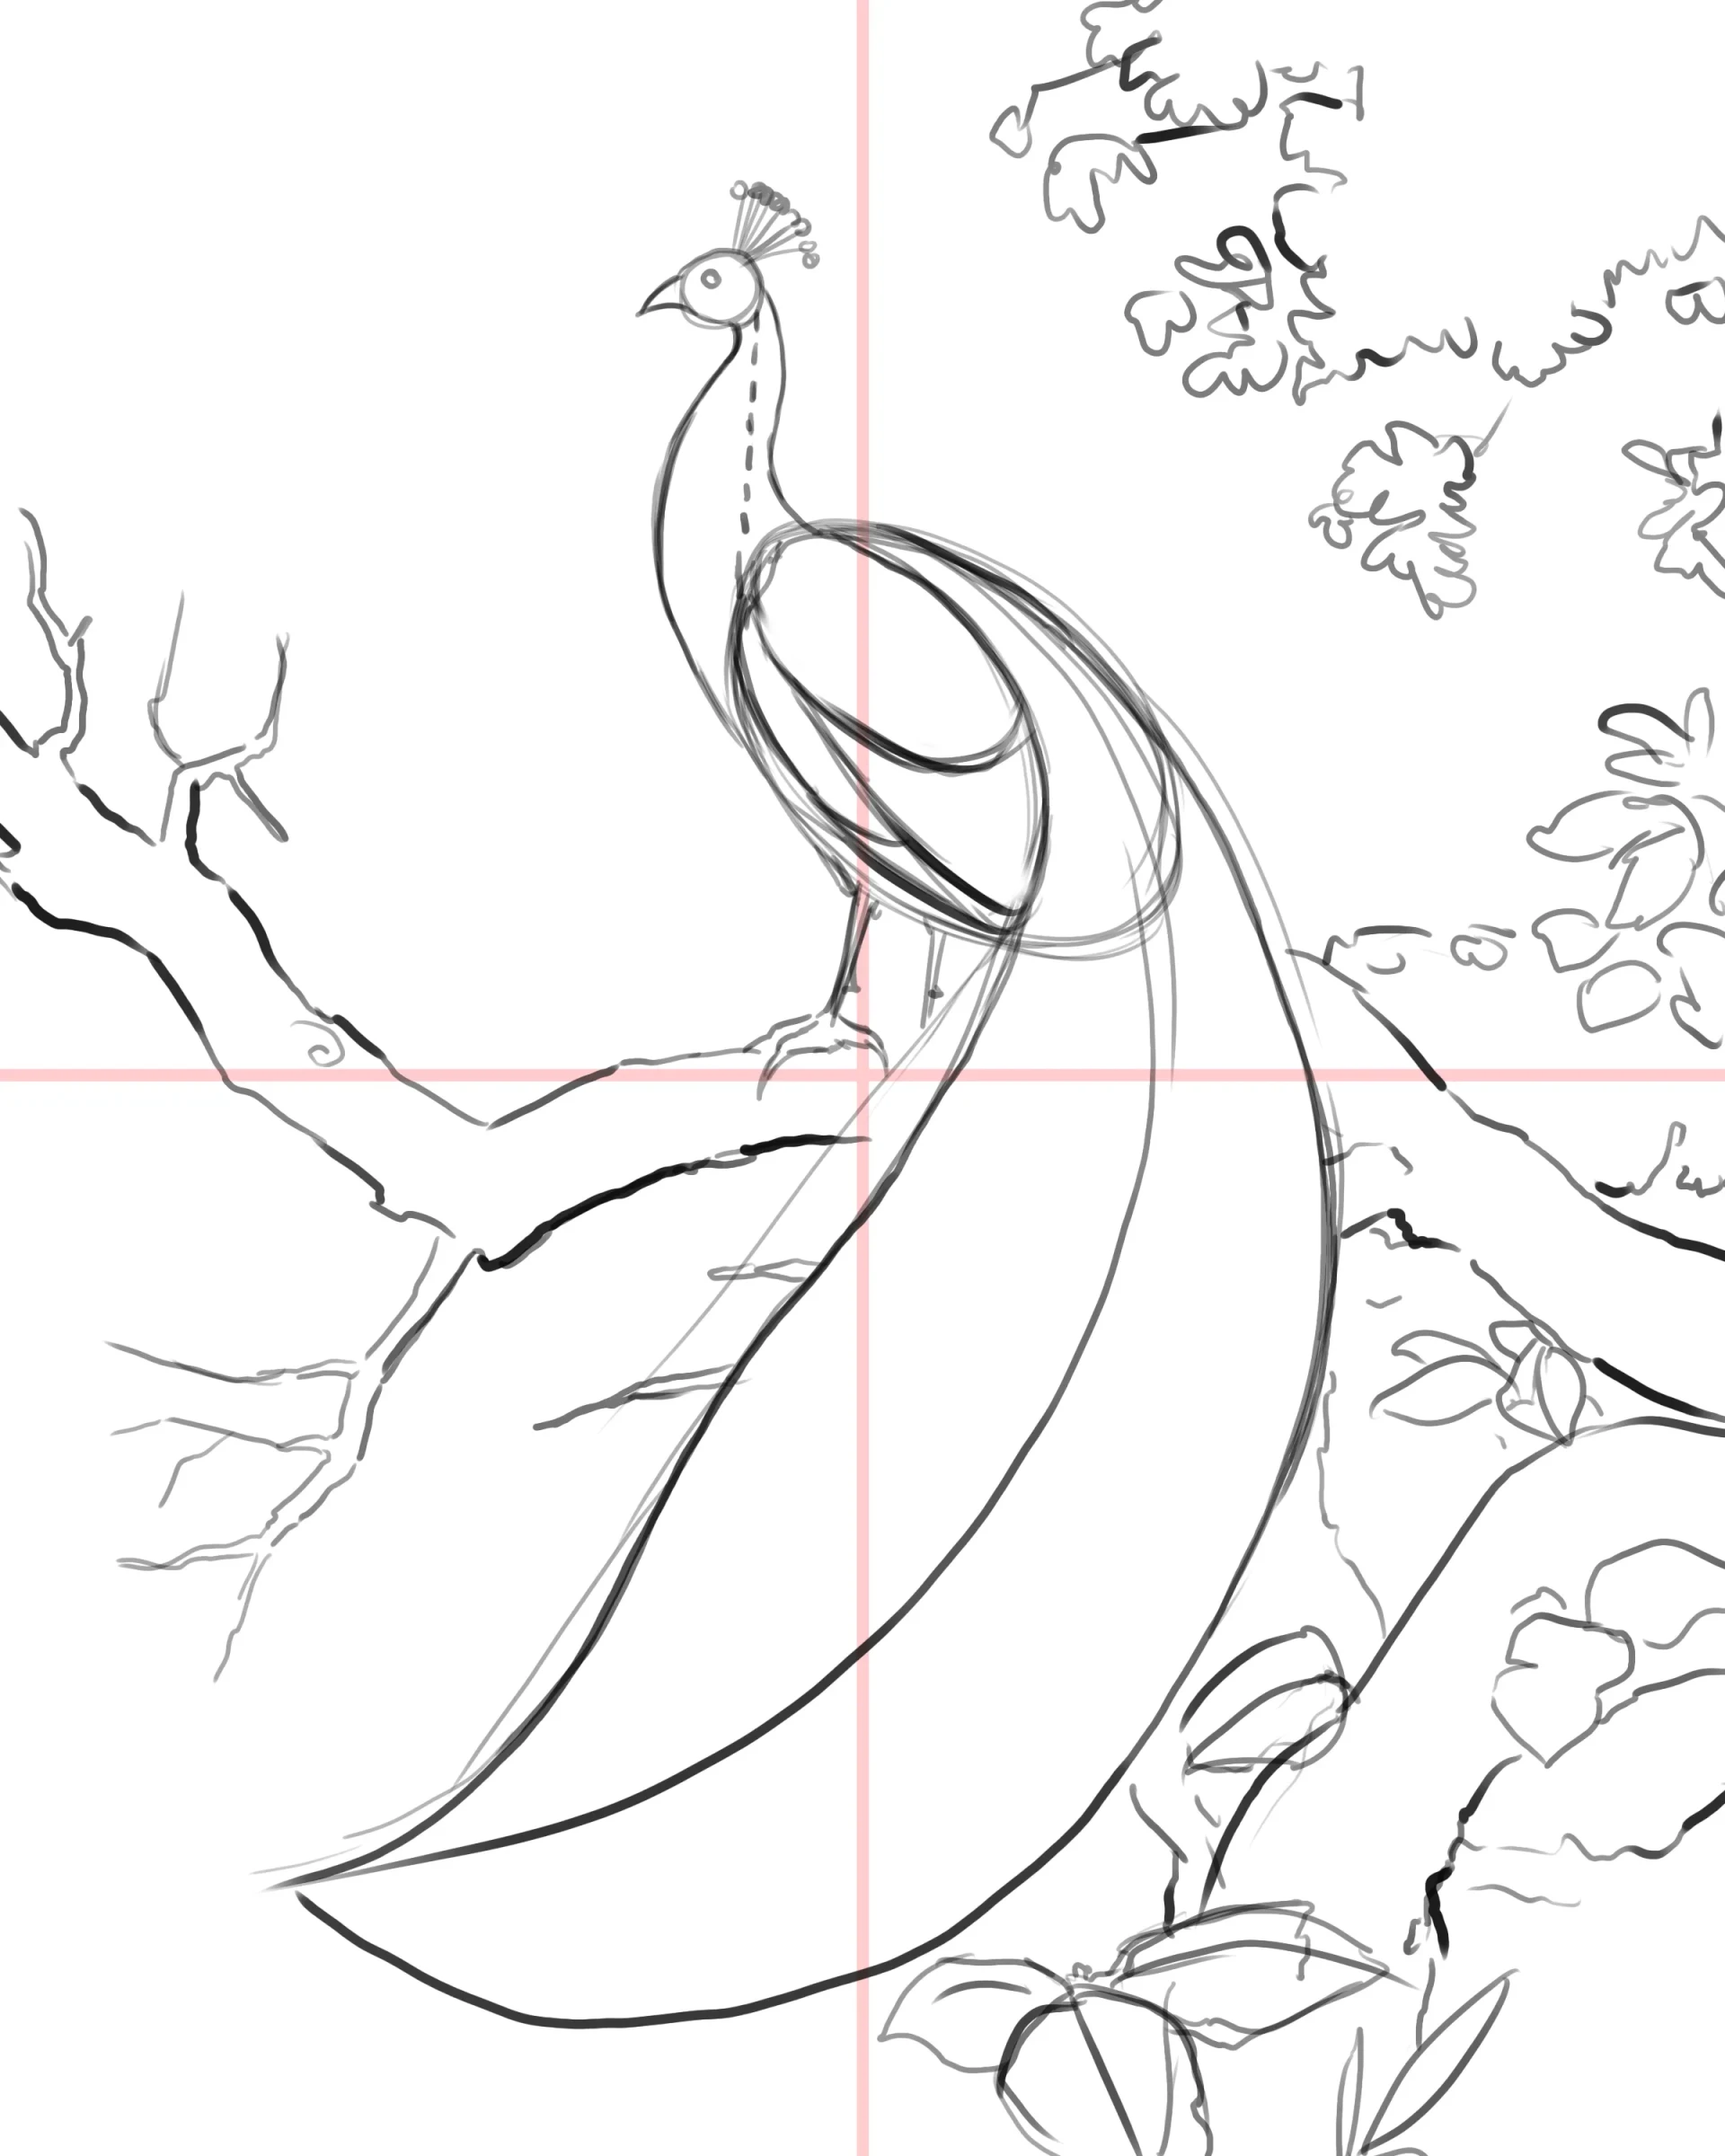
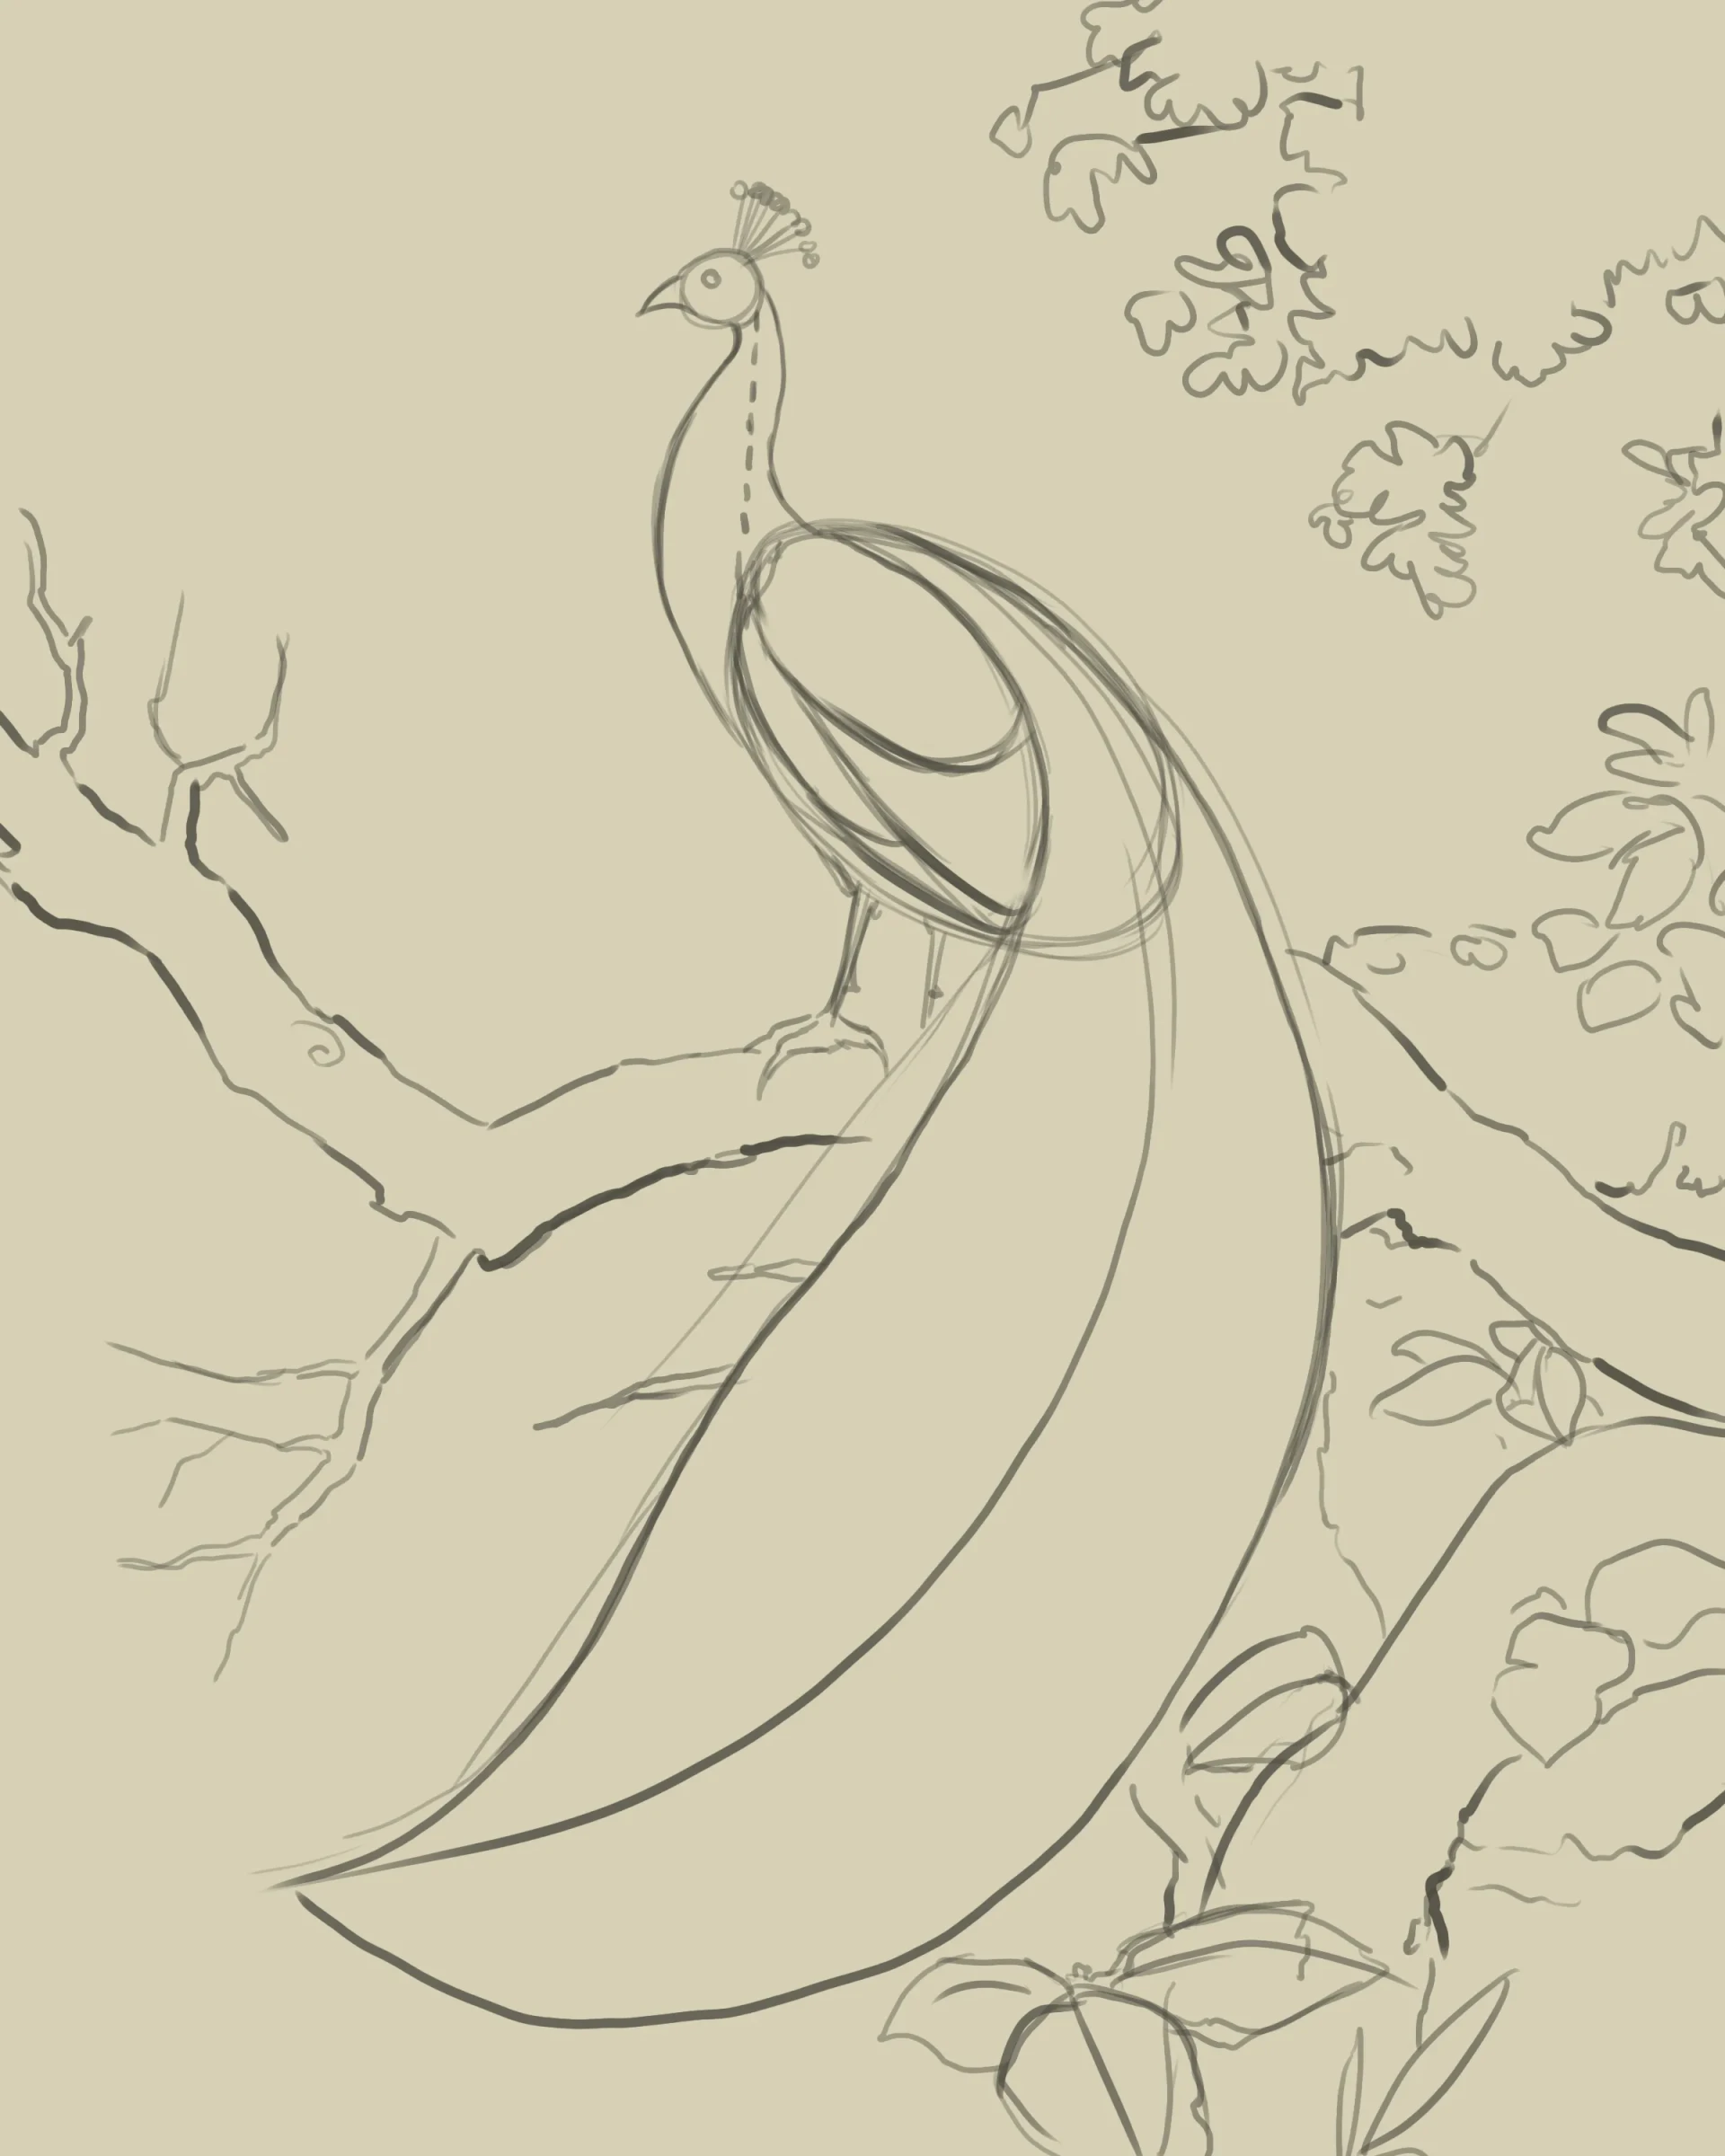
To finalize the sketch, add the crest of small feathers to the top of the head, and maybe a simple decoration to set the bird in its environment.
Add color to the drawing
Start by erasing or softening the guide lines, and adding a background color. For this tutorial, a warm earth tone was chosen: it creates a soft atmosphere and highlights the bright colors of the plumage.
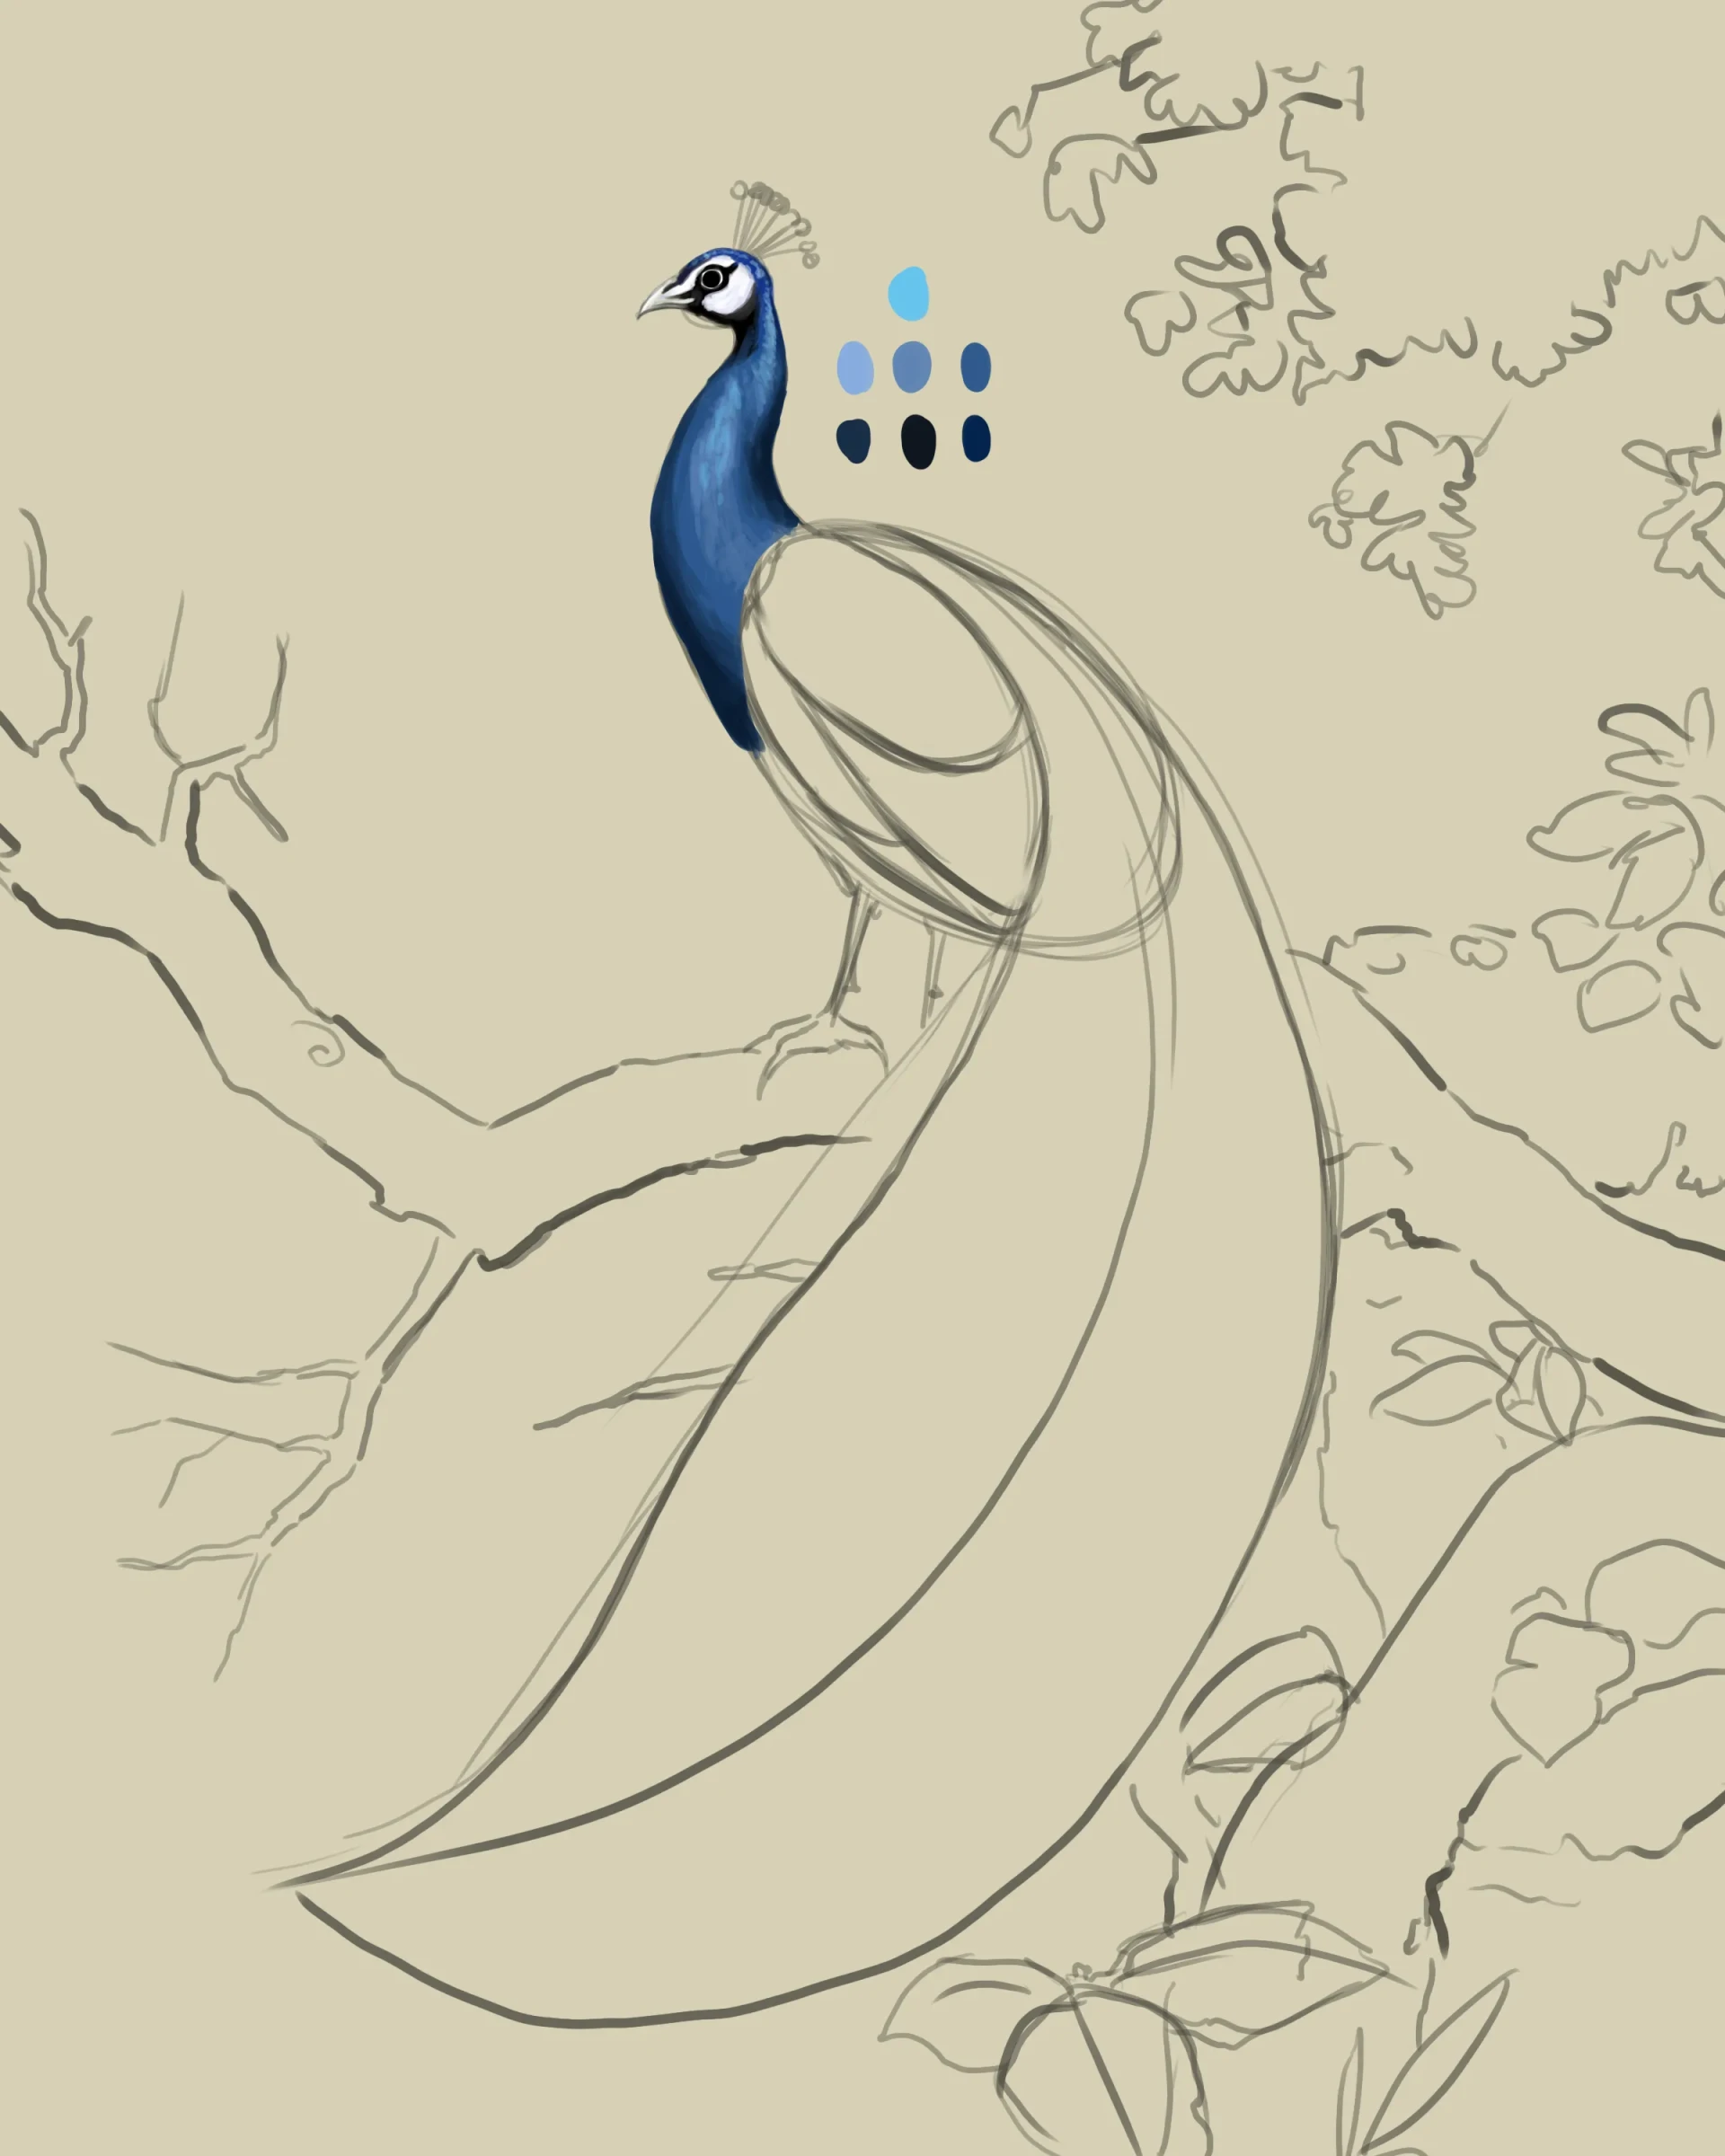
For the head and neck, work with a range of blues, from deep to most desaturated, adding touches of turquoise to add vibrancy.
Proceed in layers: start with a strong blue, darken the side areas with a duller tone, lighten the center with light tones, then finish with small strokes of turquoise blue in the light areas.
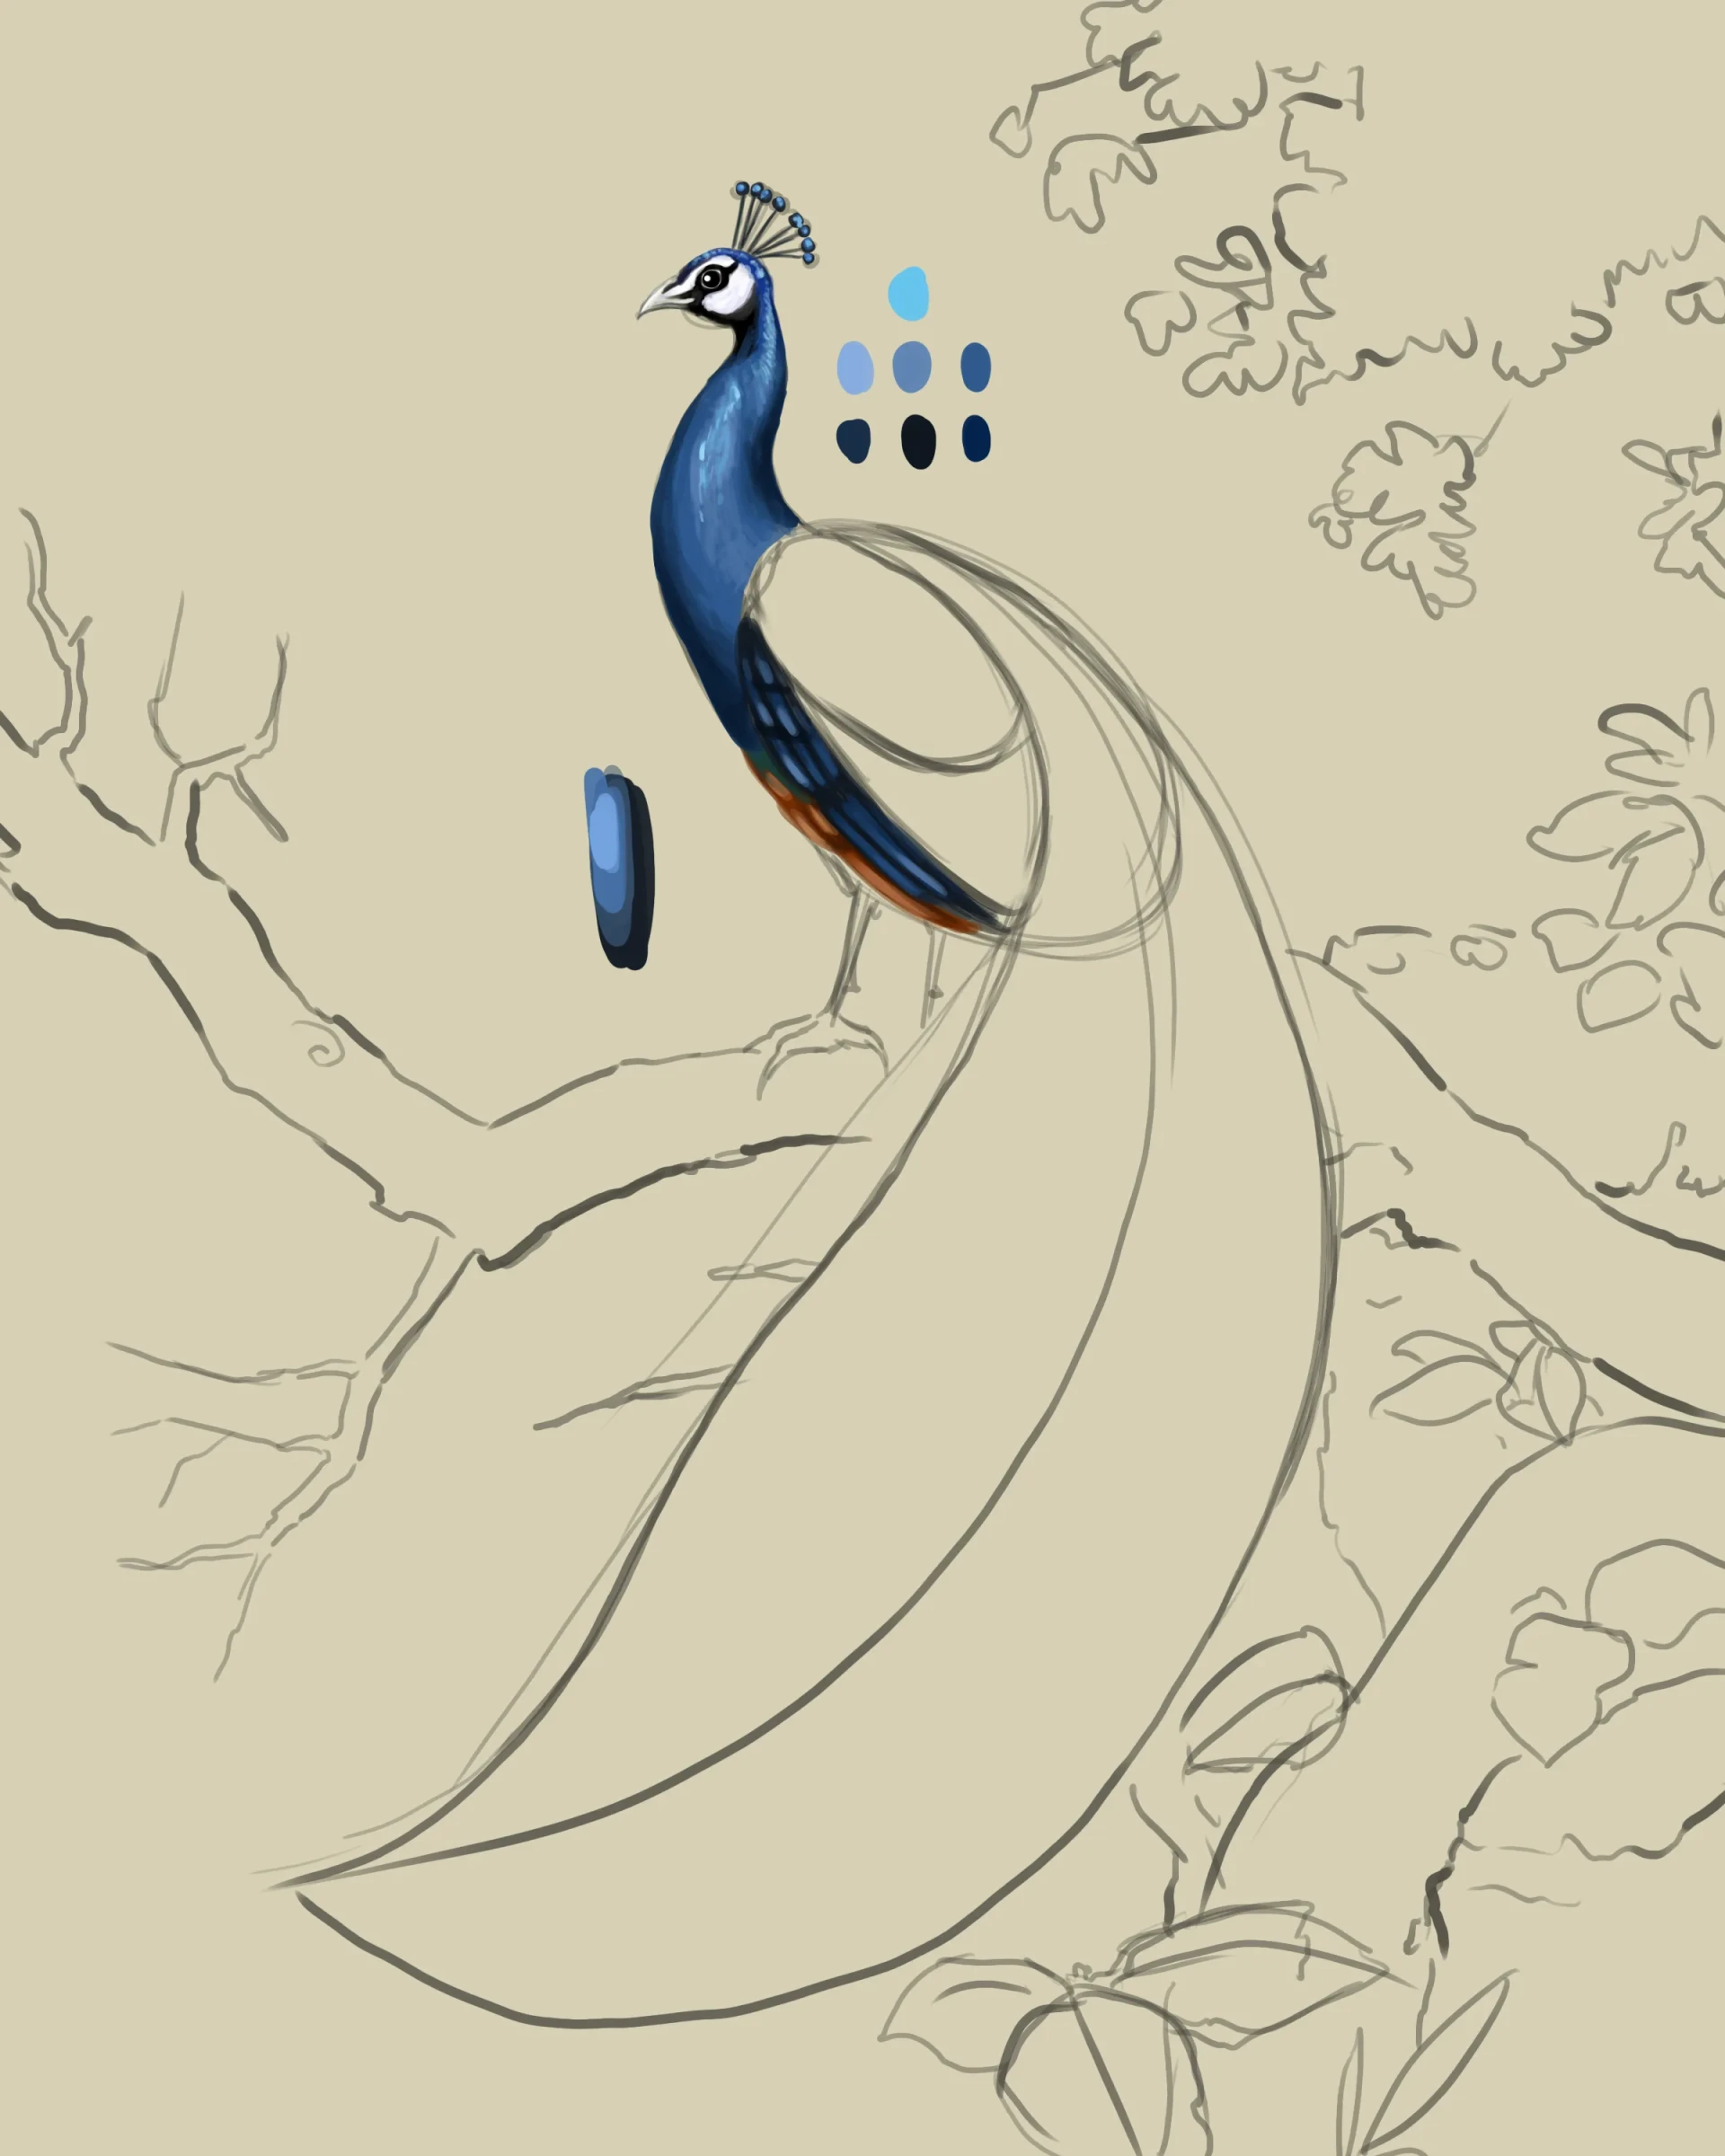
Repeat the same tones of blue for the lower feathers, but this time starting from the darkest tone and moving towards the light with long strokes that imitate the shape of the feather. Add a few touches of orange to provide contrast.
Now let's move on to the upper feathers. Here's how to do it:
- First add an even layer of dark ocher over the entire area.
- With a tone close to the background color, create regular spots that form a small repeating pattern.
- Then take a darker and duller tone, close to a dark, not very saturated brown to draw small rows of vertical lines.
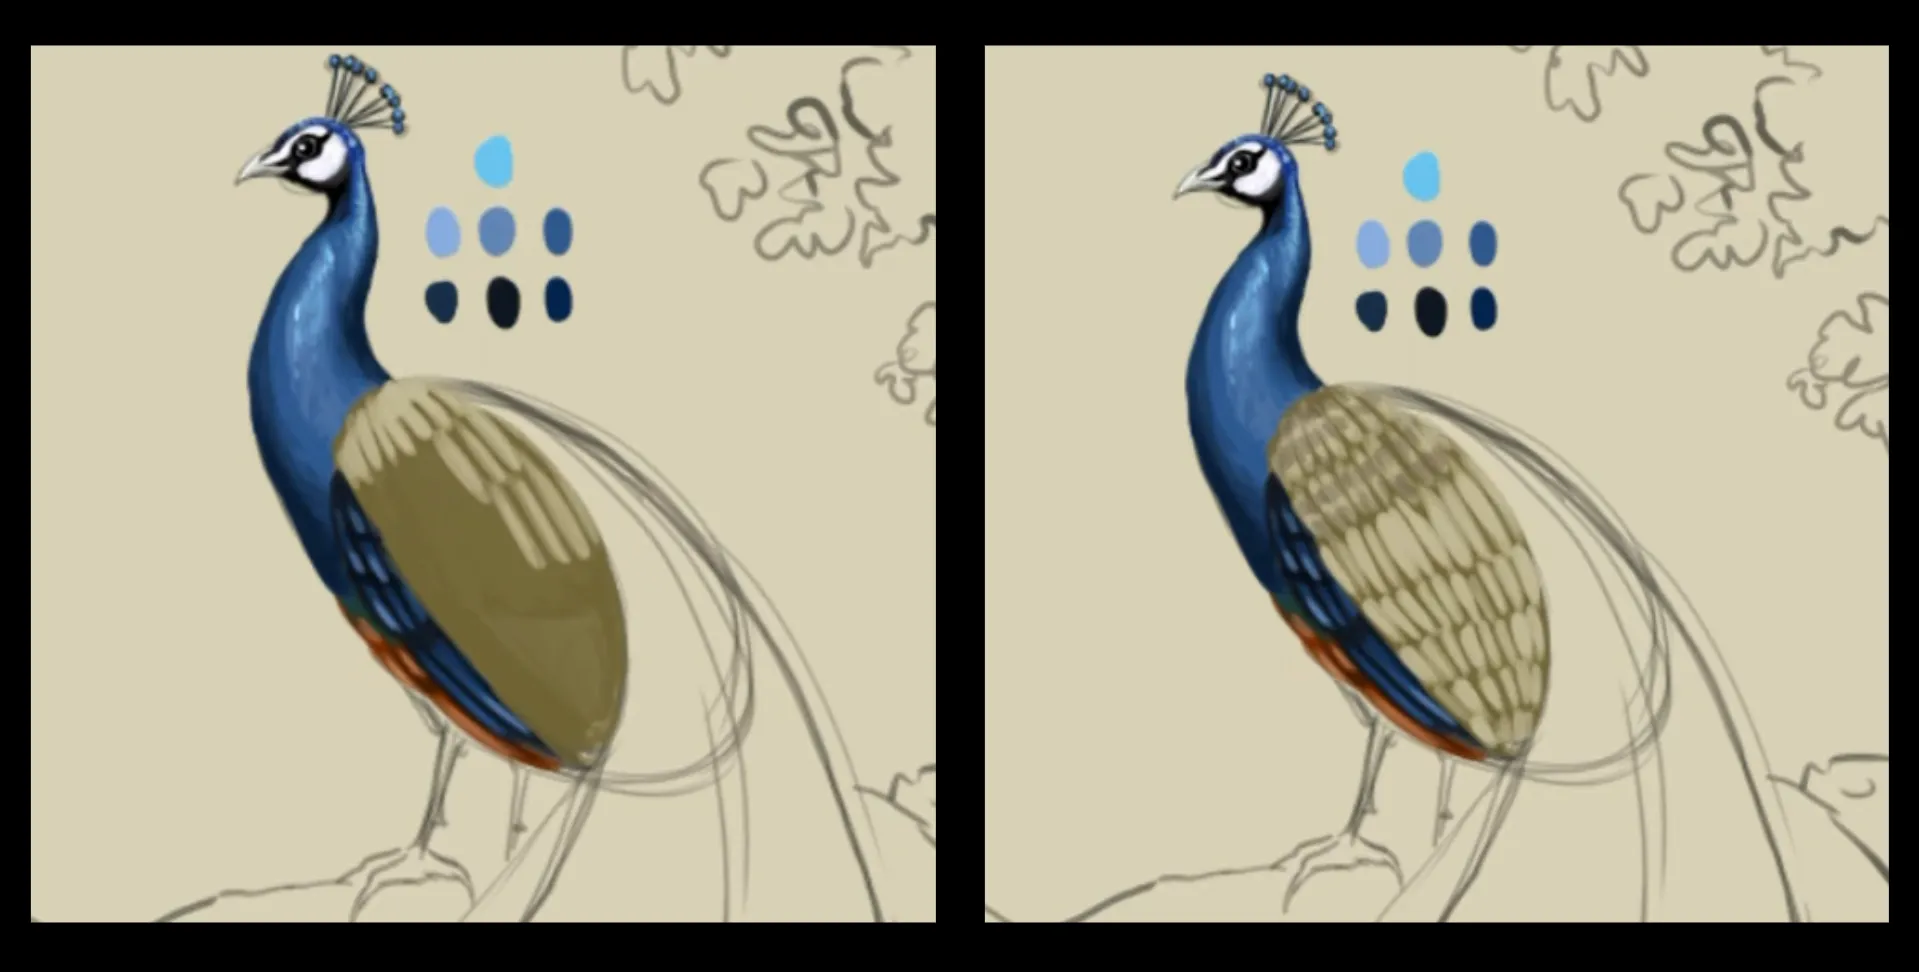
You can vary the tones slightly from one area to another: this brings dynamism to the texture and avoids an overly uniform result.
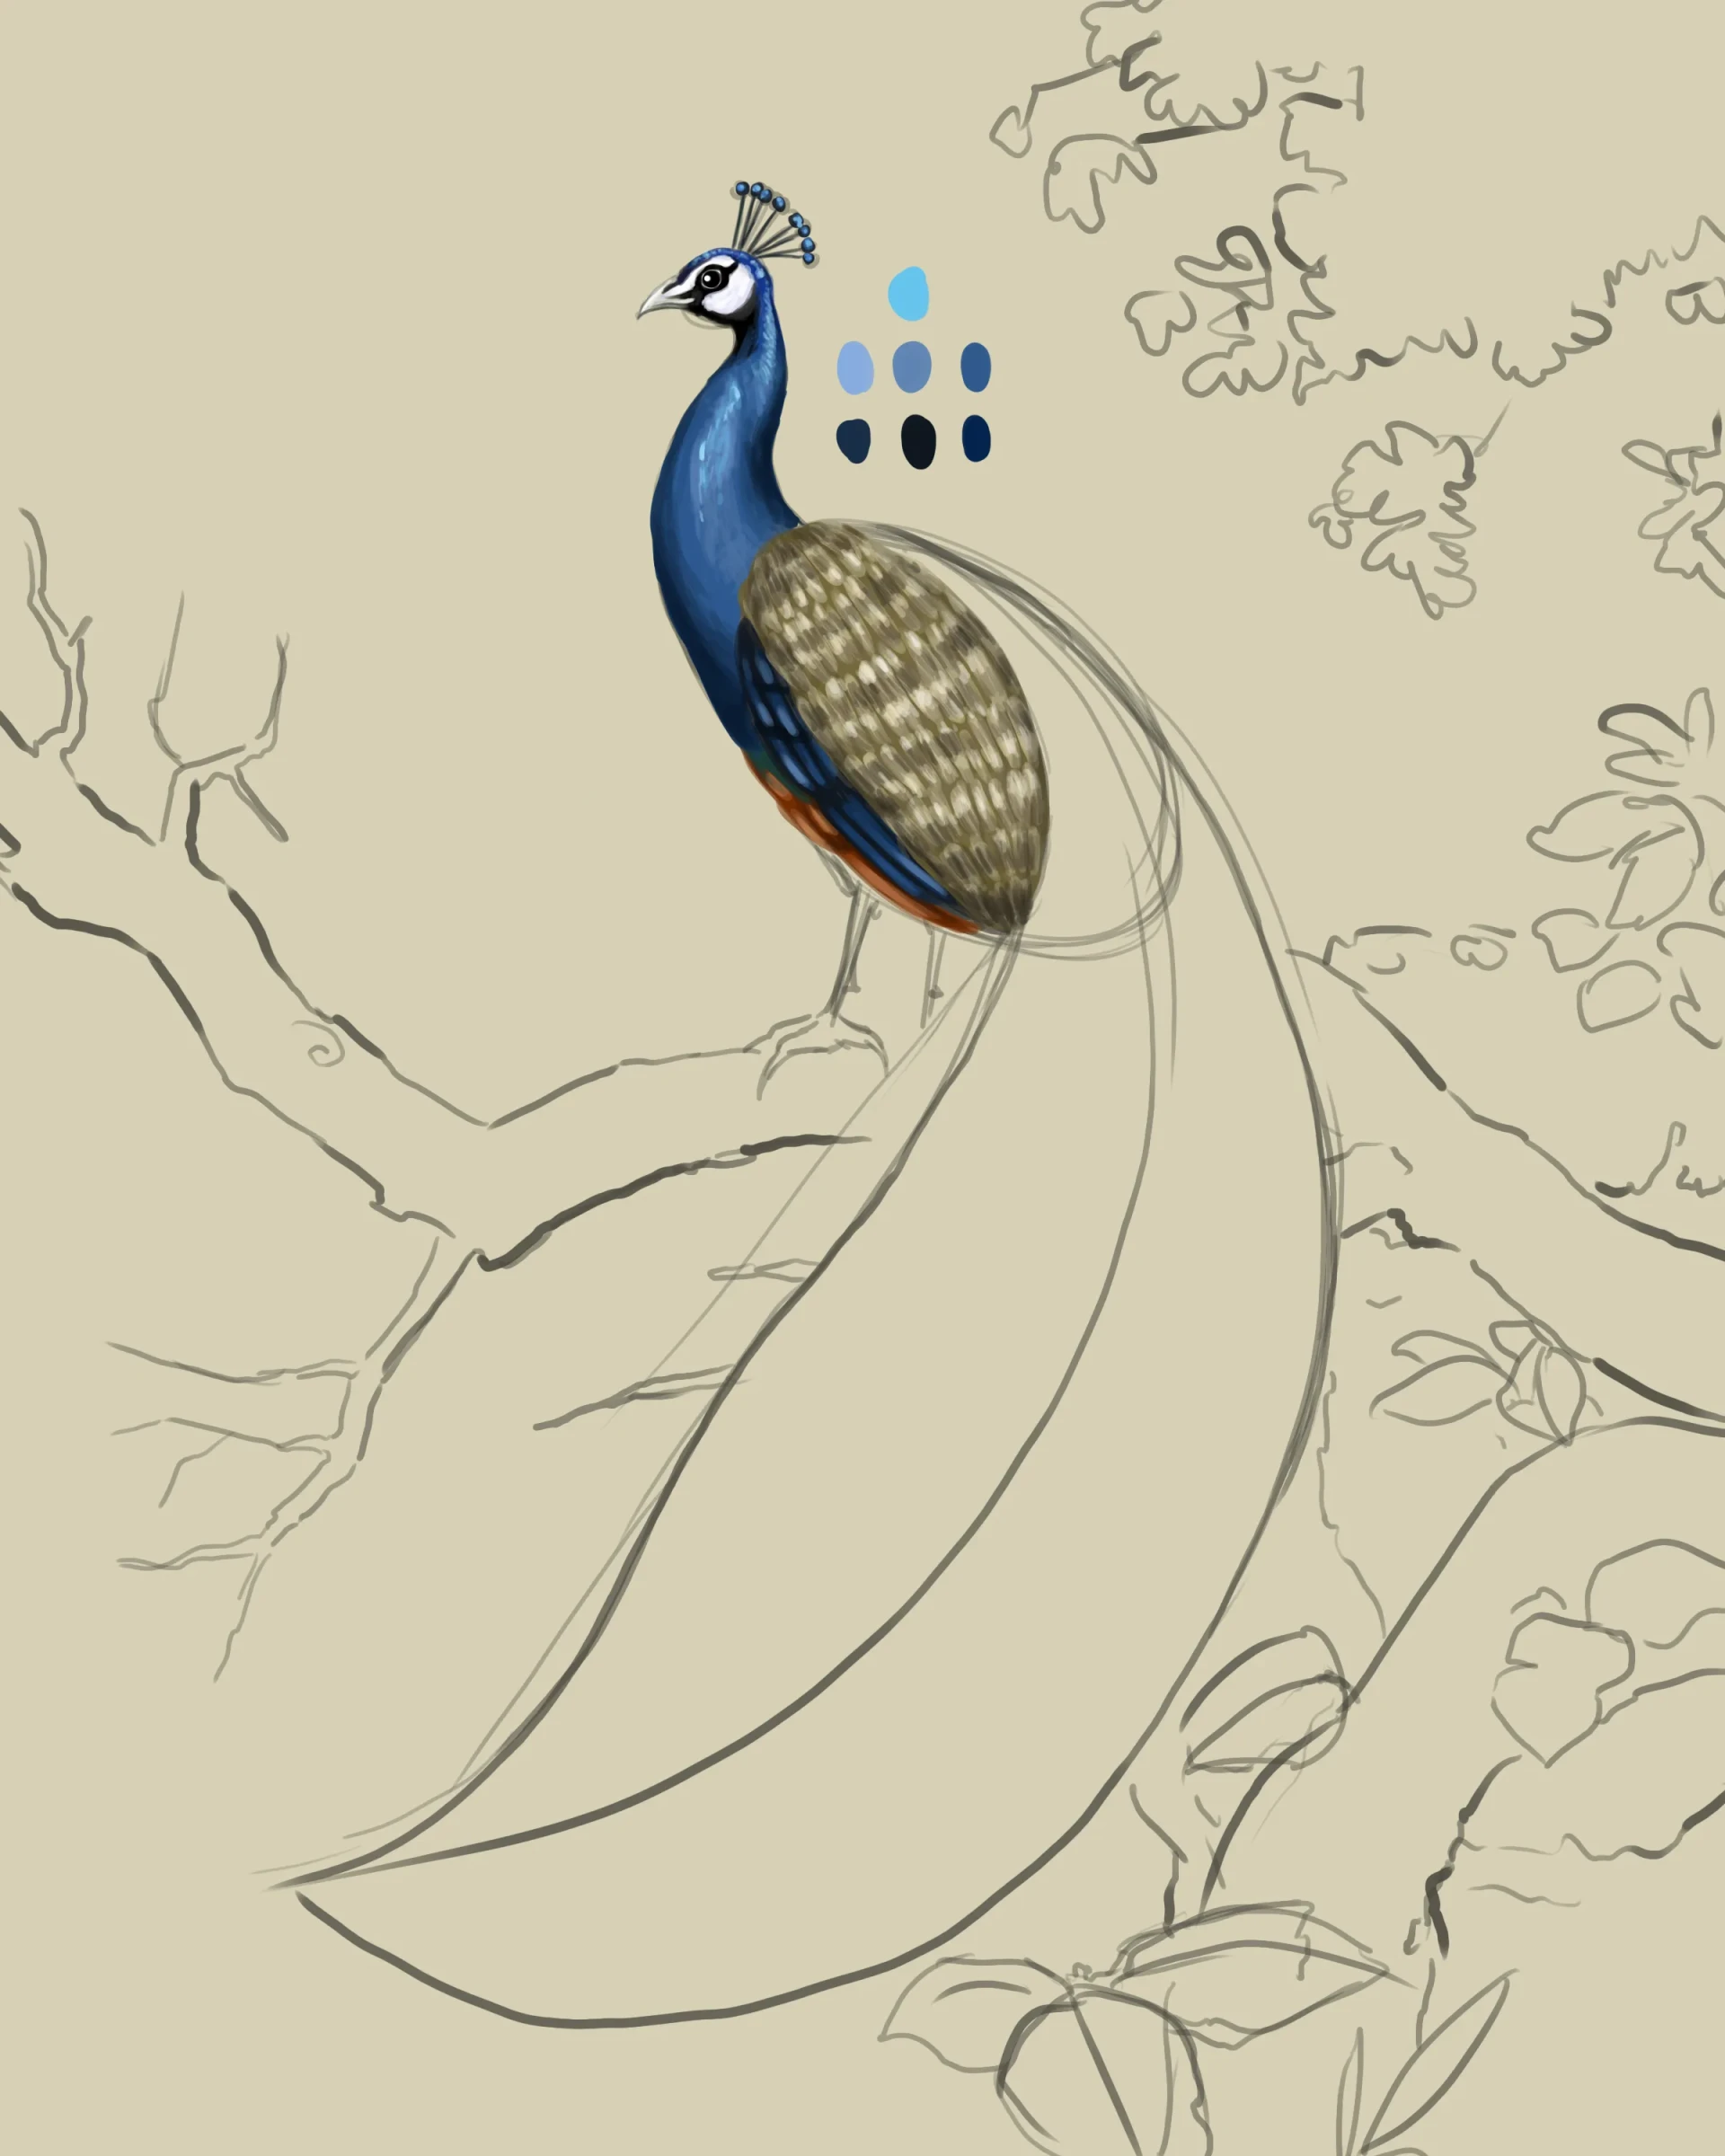
Color the tail of the peacock's feathers
Start by putting a layer of desaturated greens over the entire train. You can already begin working on the texture from this first step.
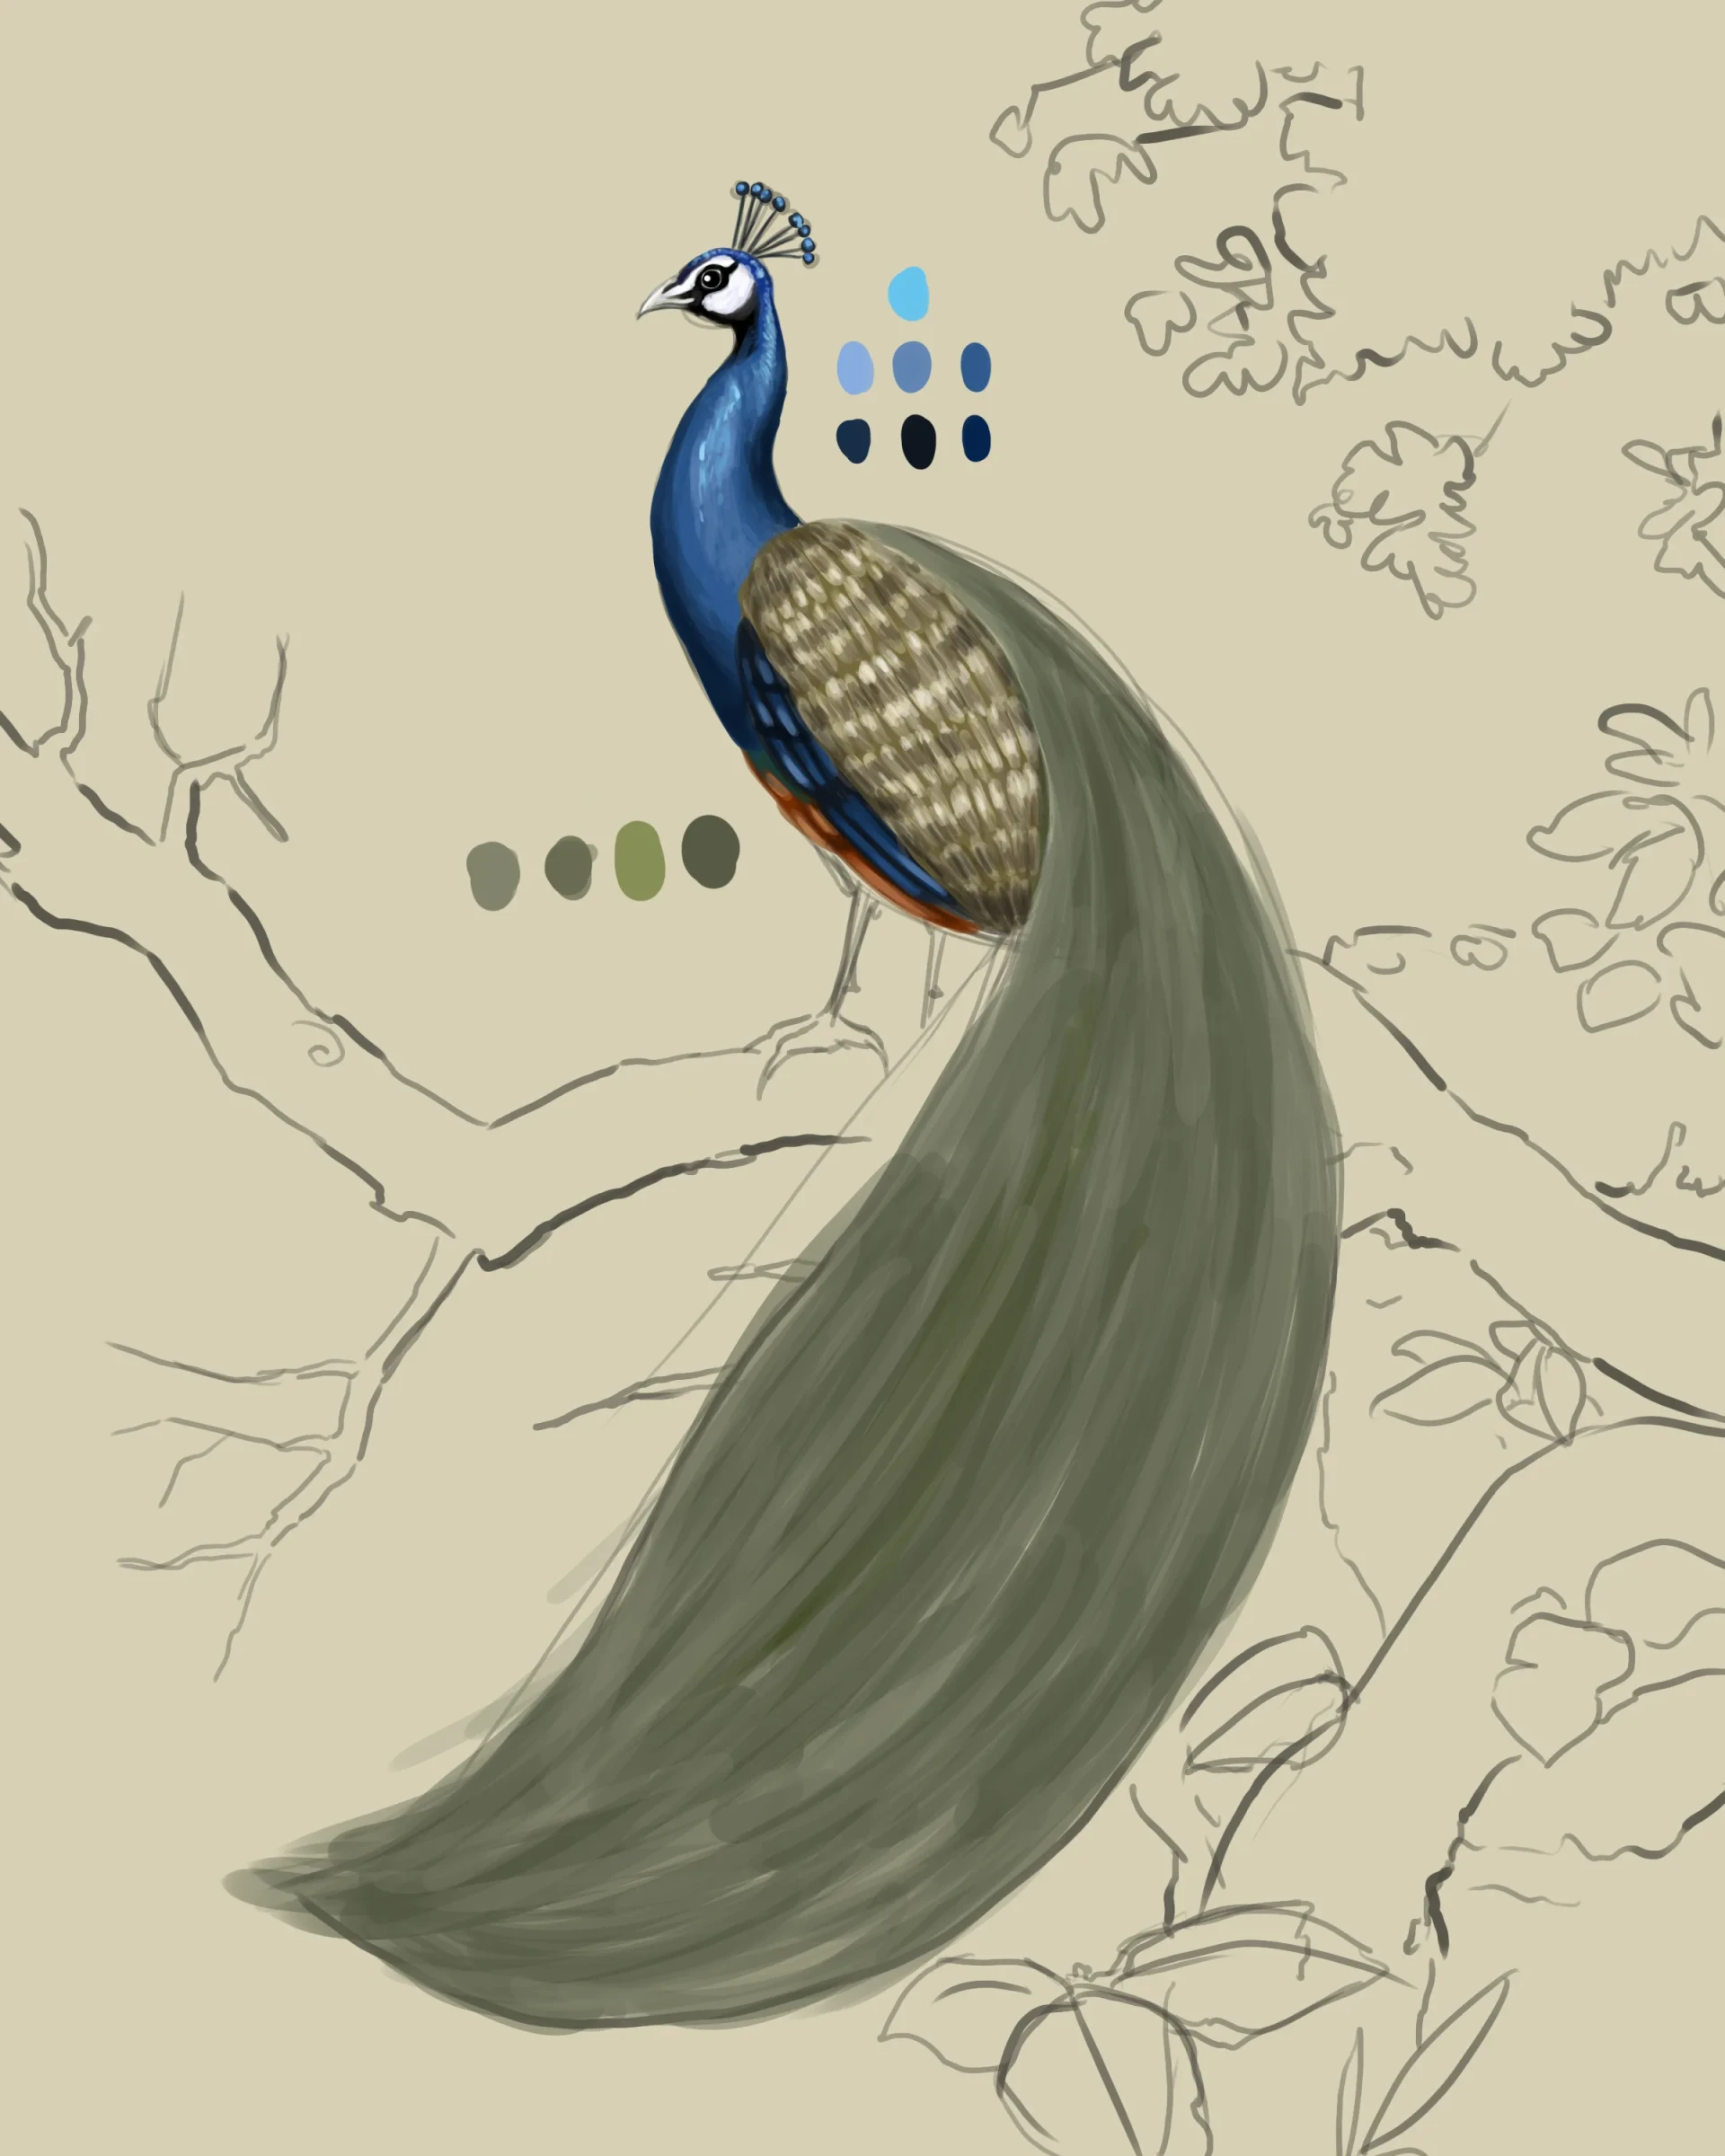
Then apply touches of bright green in the form of small dots on the upper part of the back, to obtain an effect similar to fish scales.
Draw strands in different shades of green along the entire train, gradually making them larger as you approach the end.
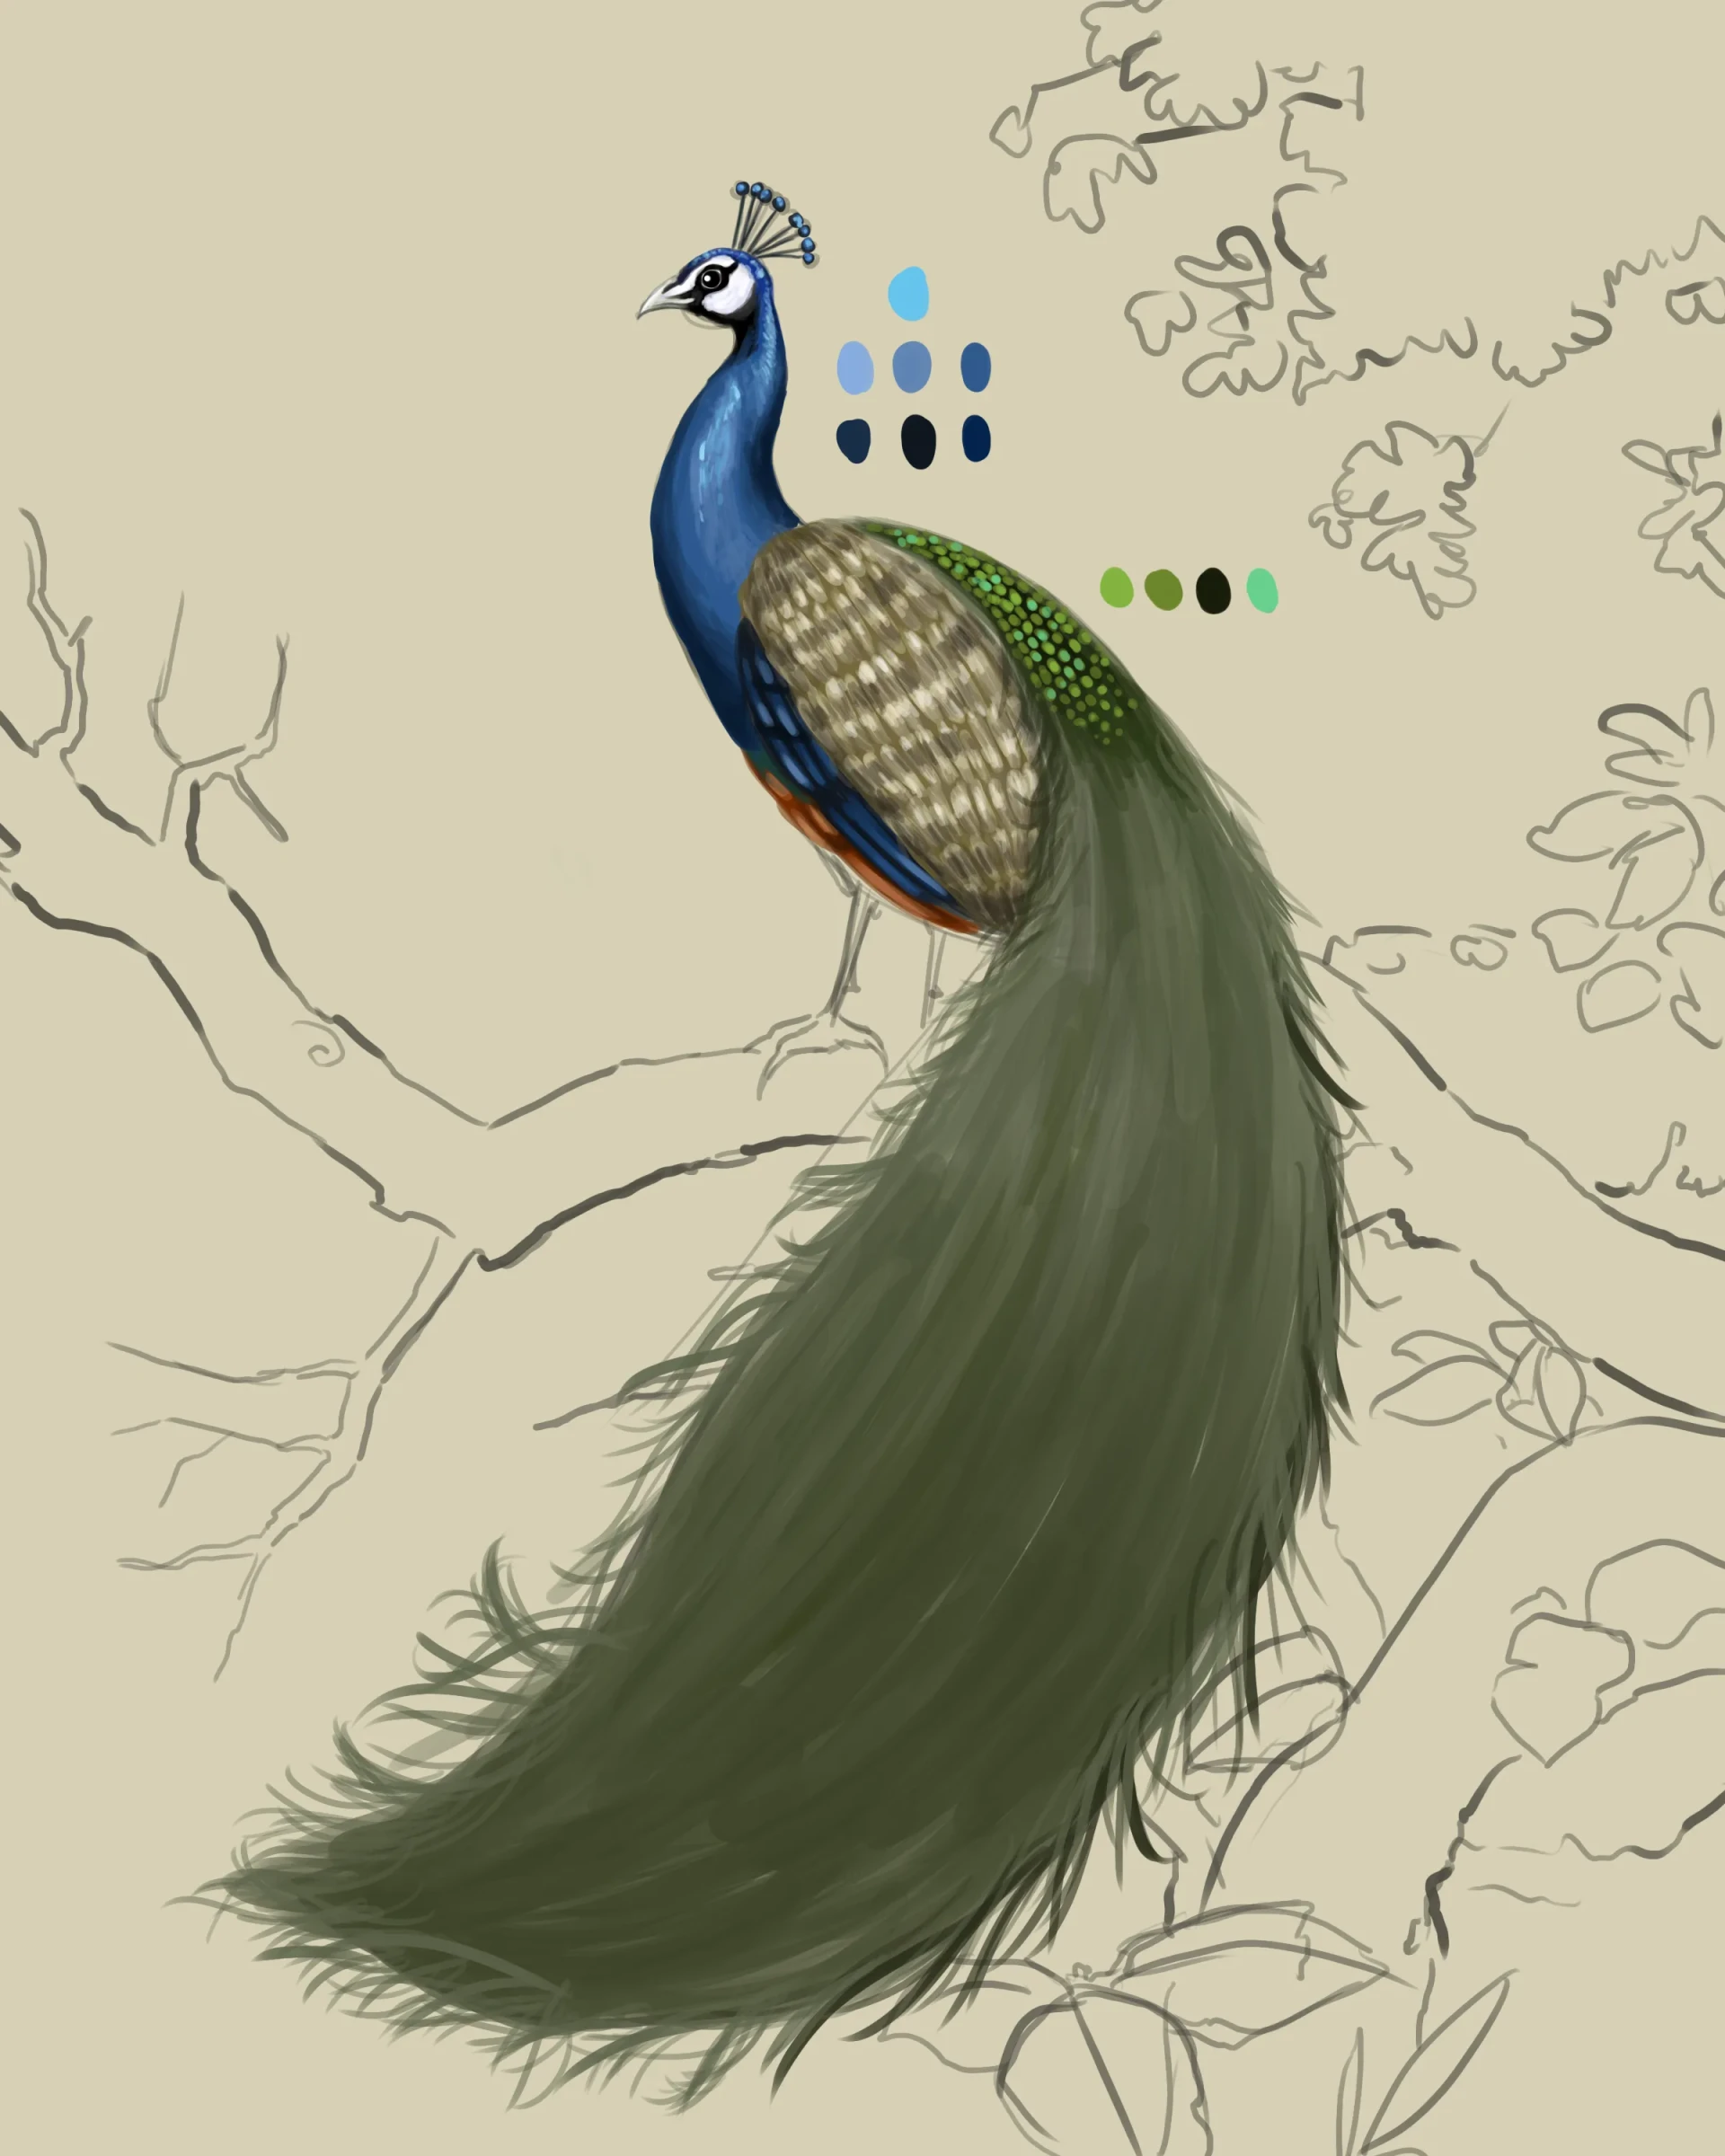
To give the train depth, finish with a few long lines in a very light tone, which slightly tail off.
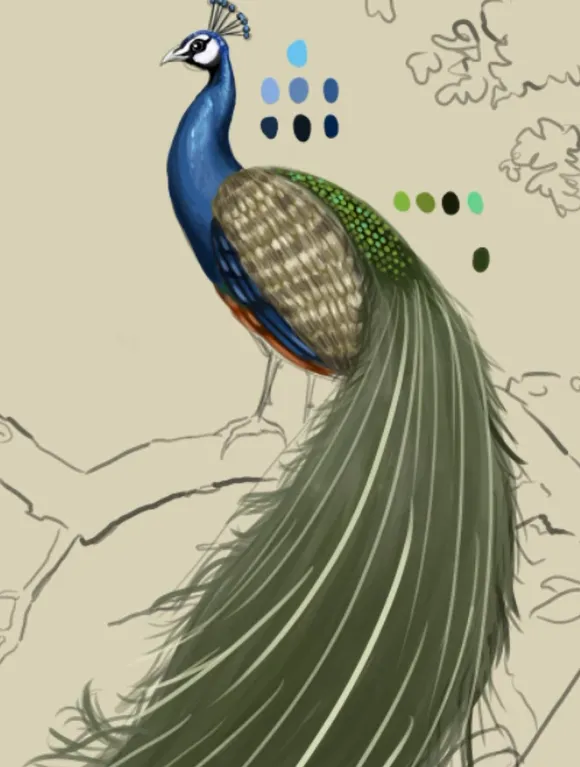
Add details to the drawing
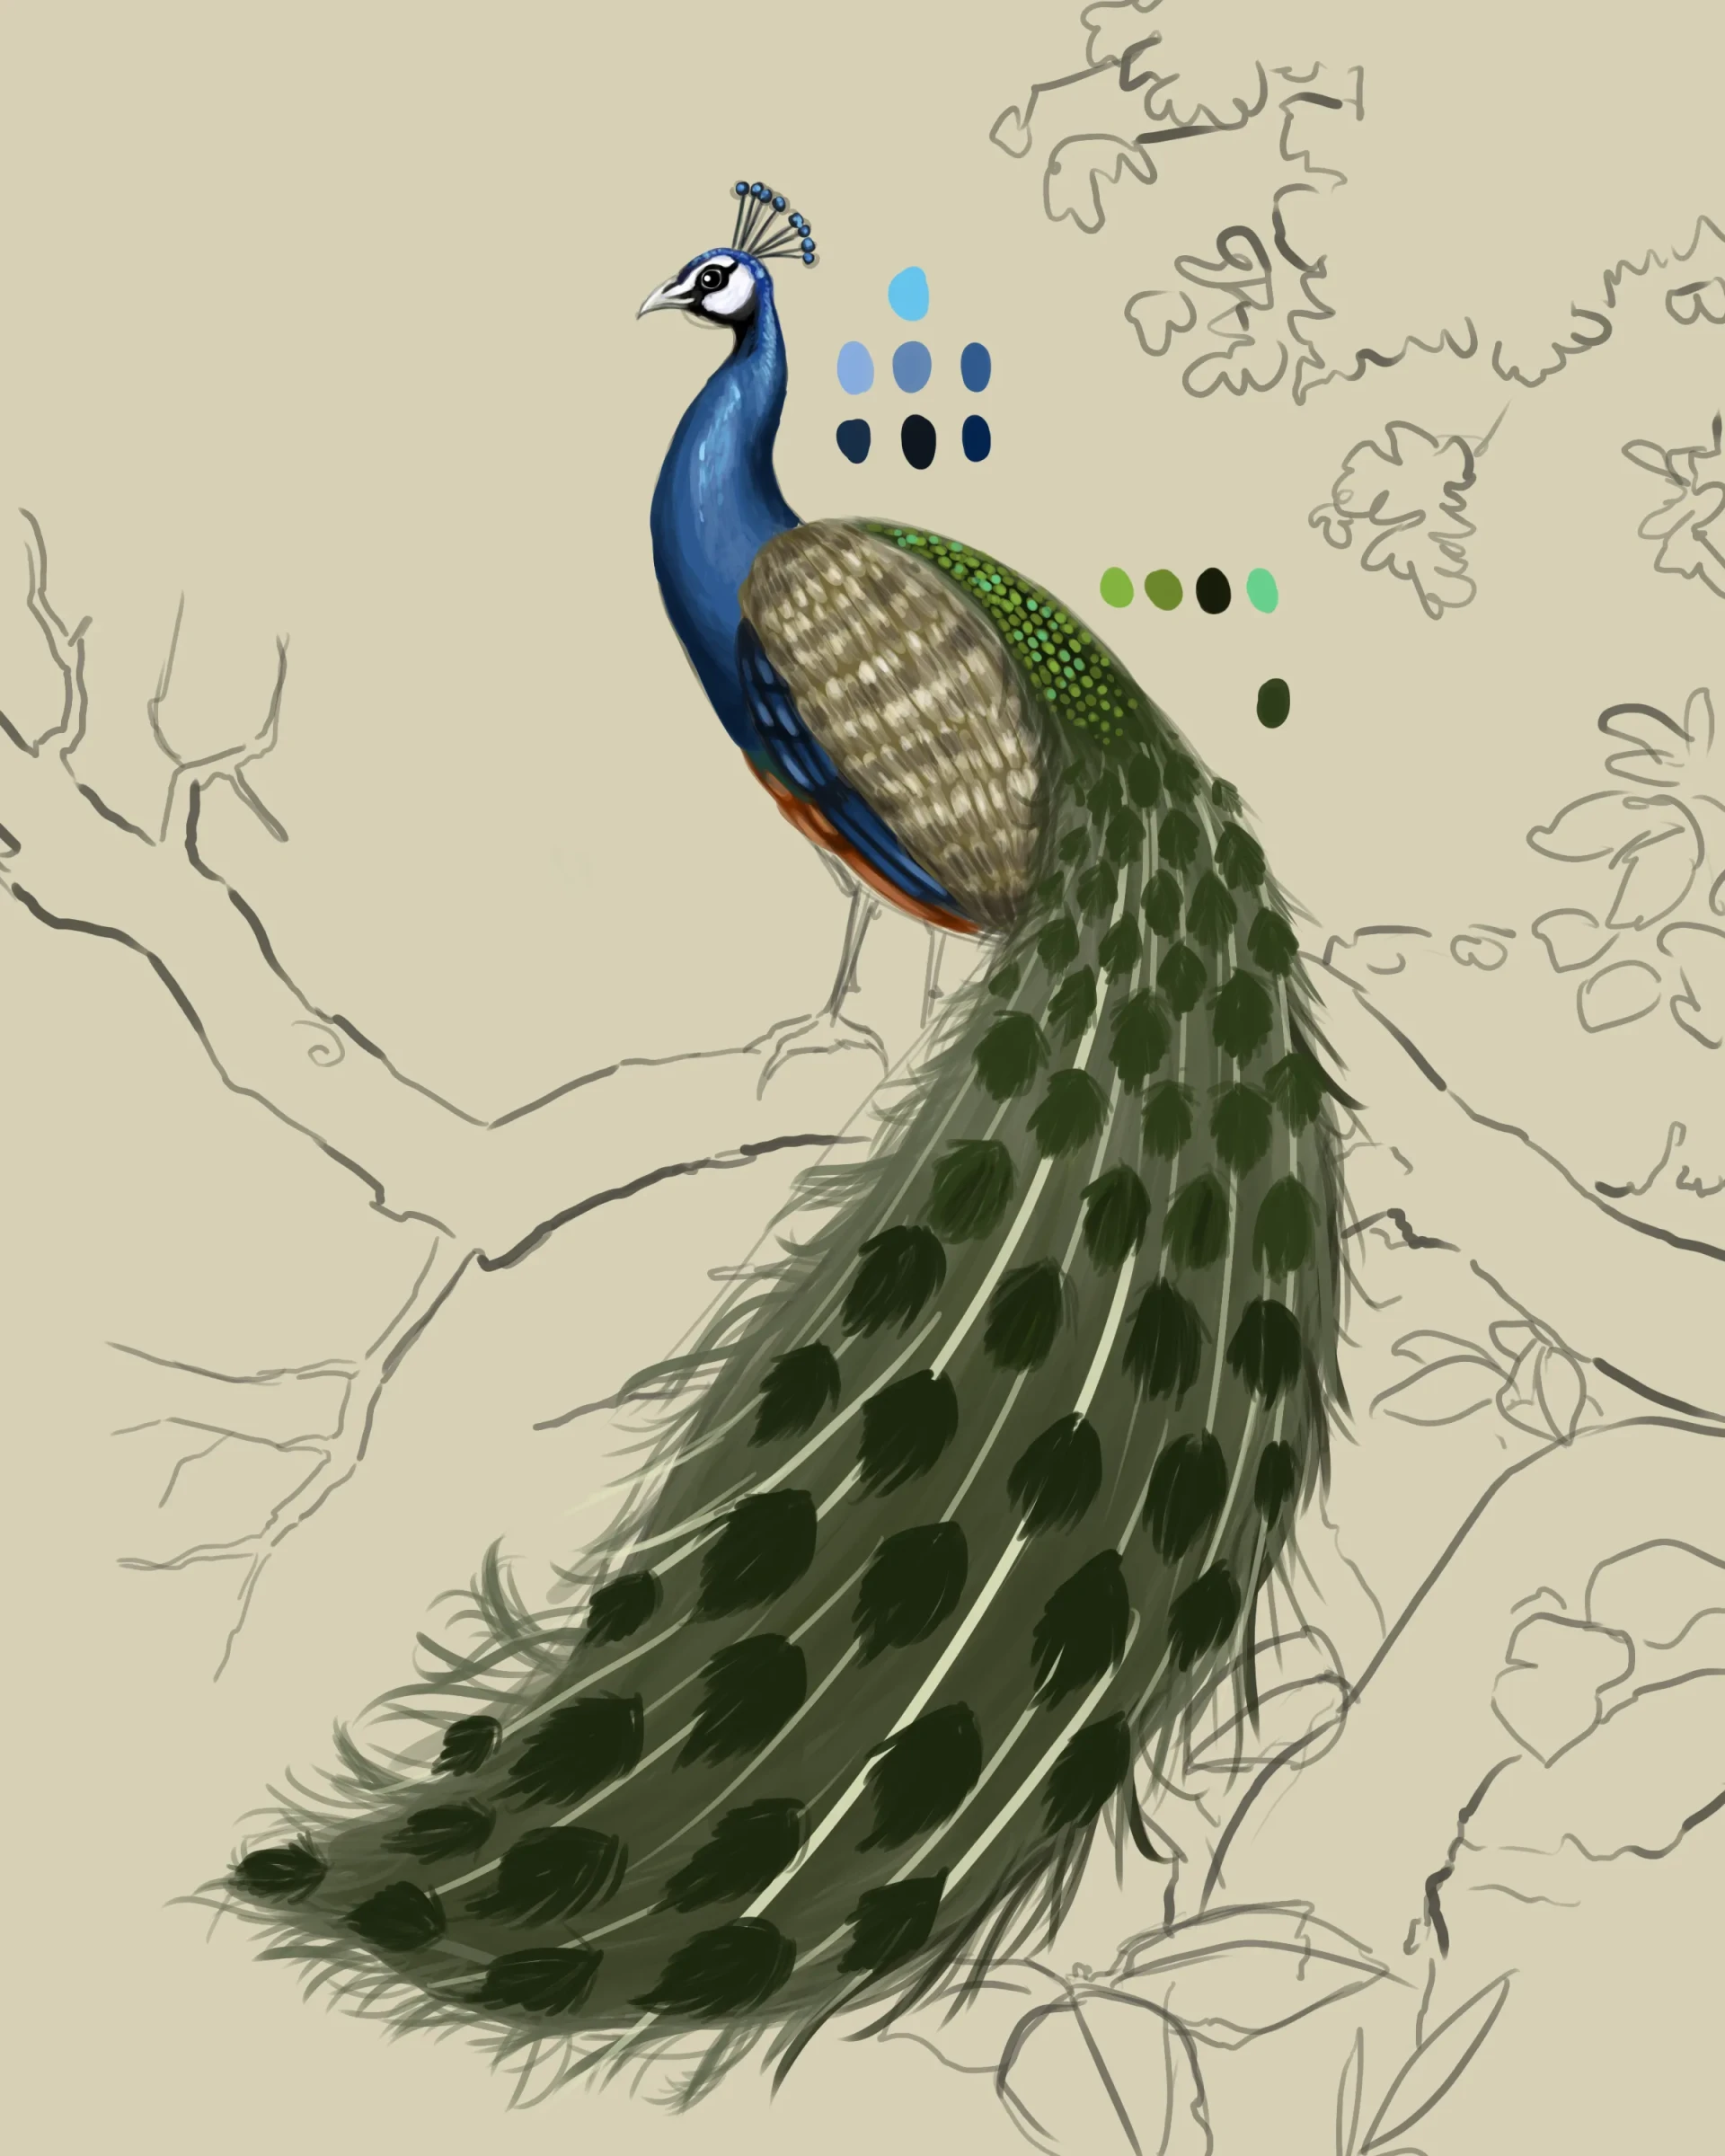
With a very dark green, draw inverted drop shapes distributed throughout the train, gradually enlarging them towards the end.
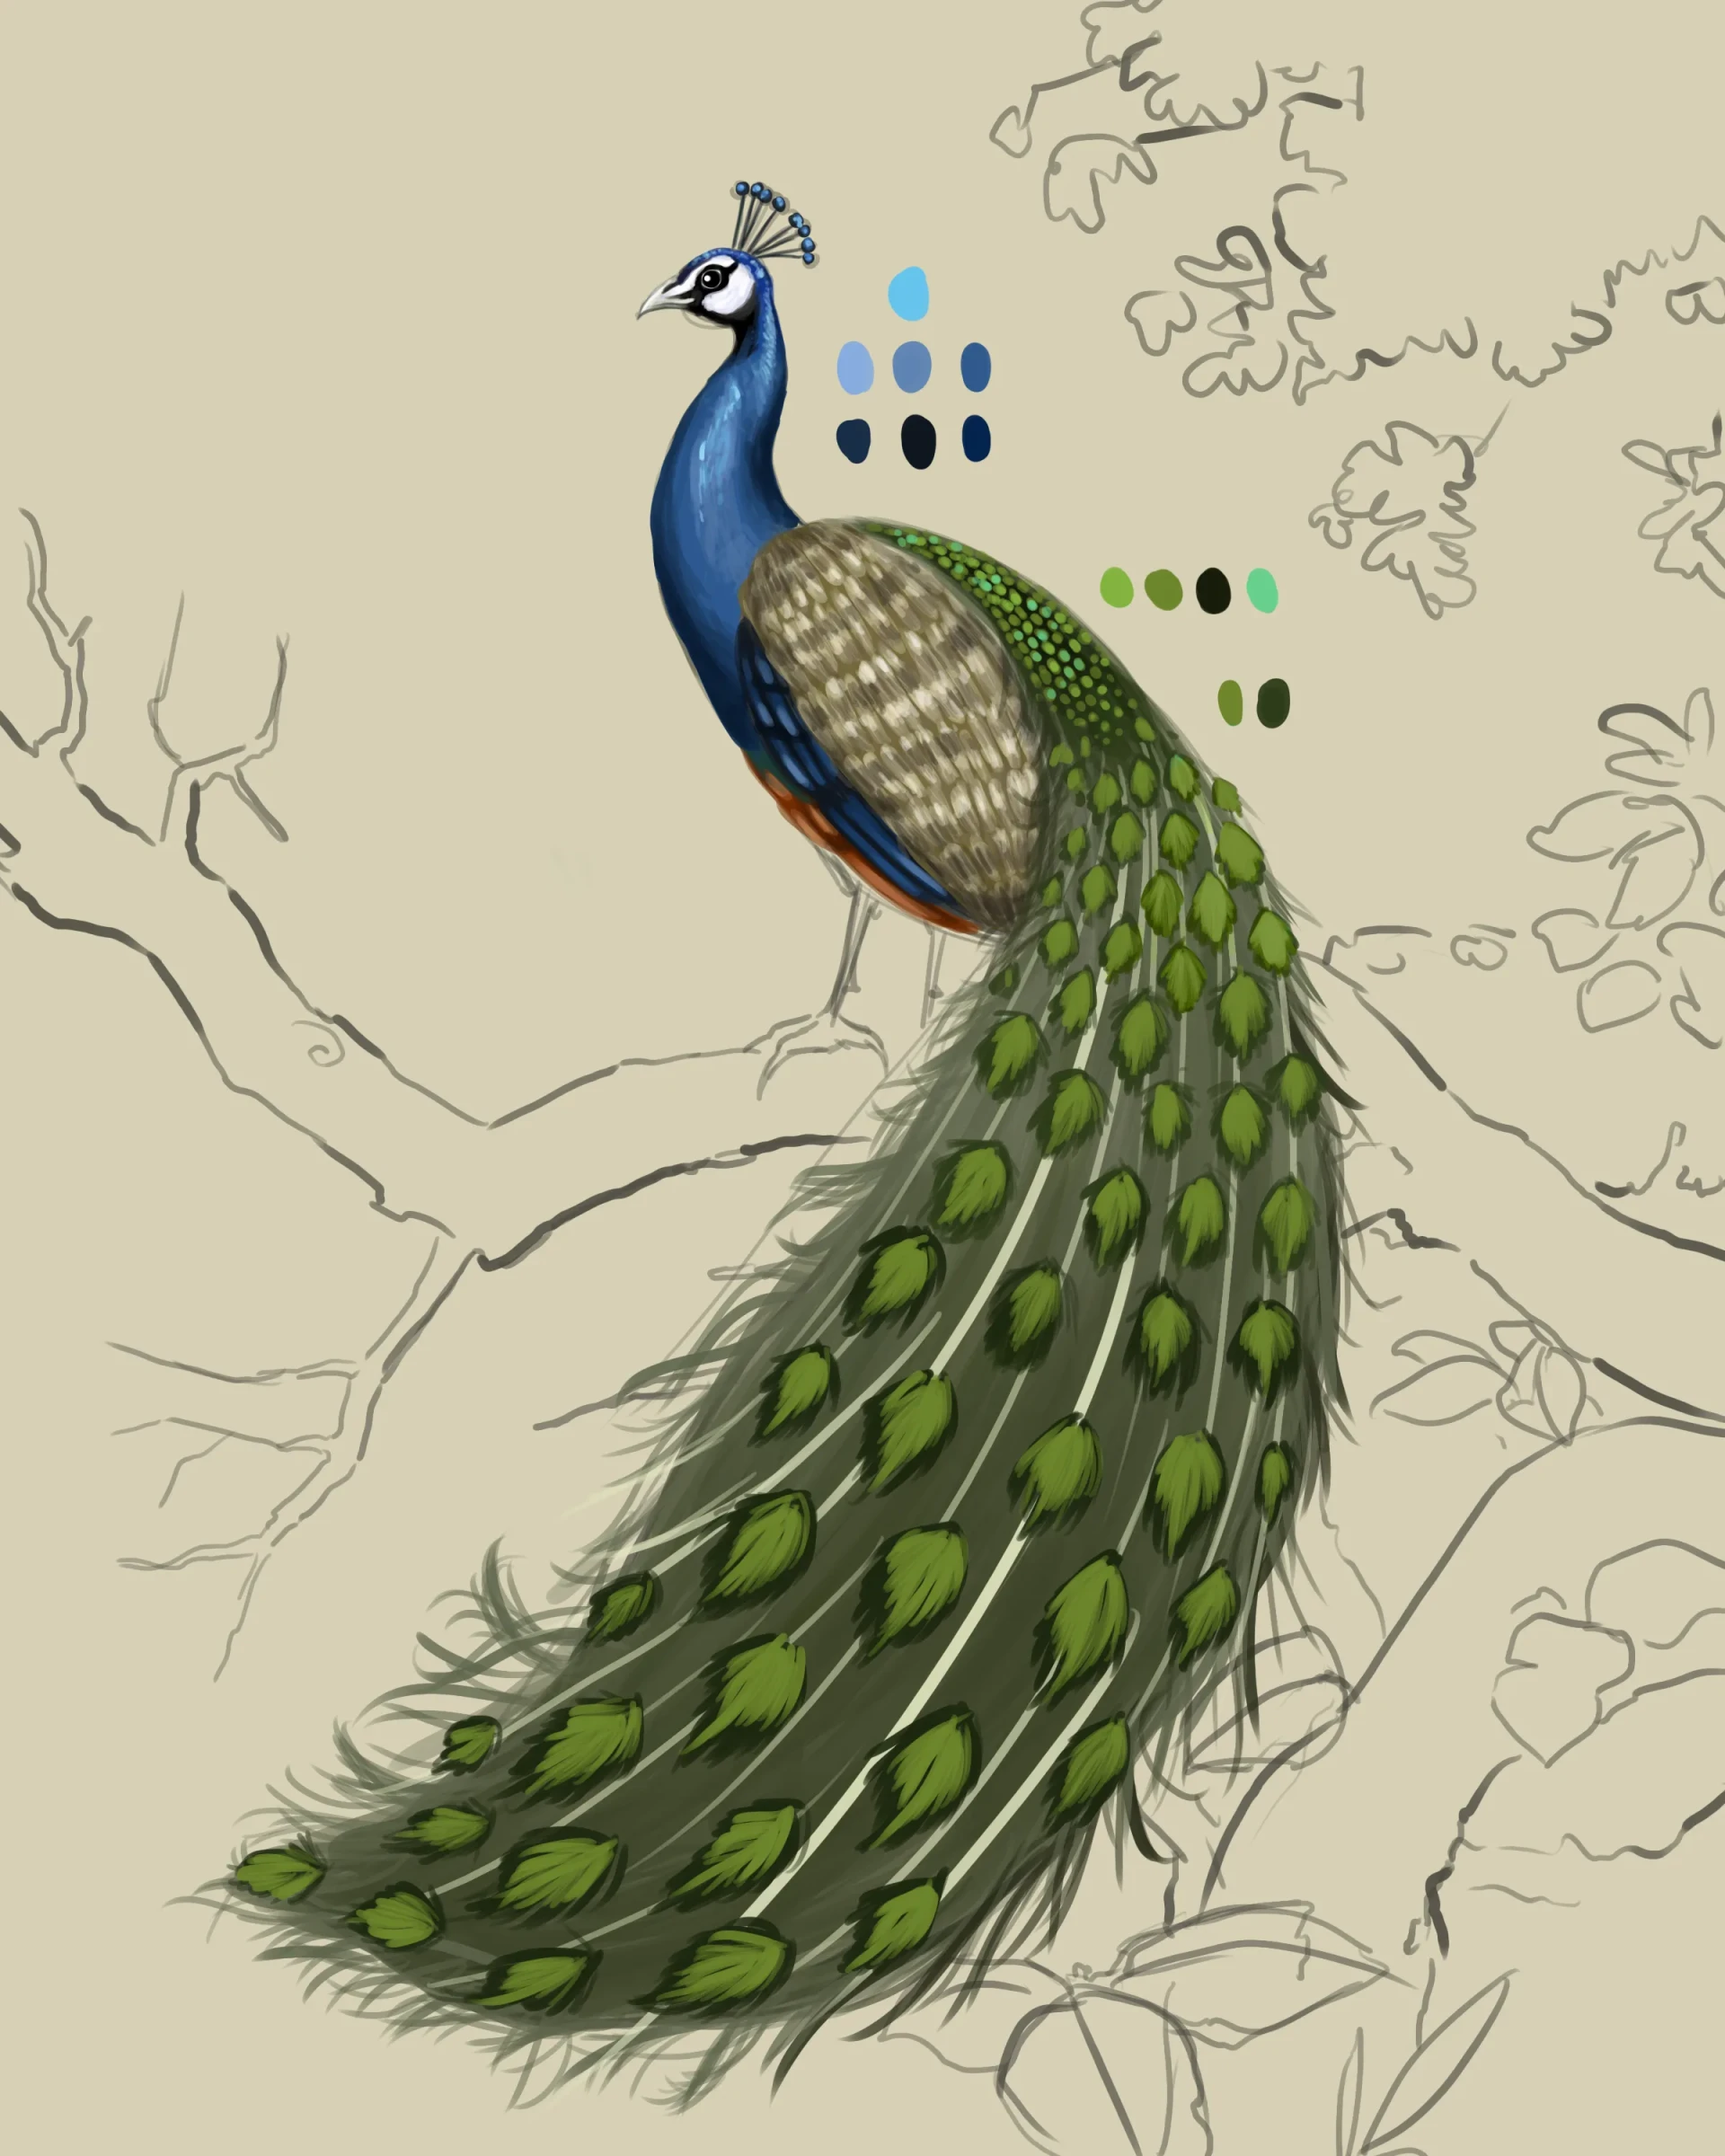
Inside each one, apply a spot of the same shape but slightly smaller, this time in intense and light green, to create a strong contrast.
It is within this second spot that the eye pattern observed at the start of the article takes place: an ocher egg-shaped splotch, a blue spot in the middle, and finally a small inverted heart shape at the very center.
To finish, erase the remains of the sketch, remove any color marks, then refine the light and shadow areas as desired.
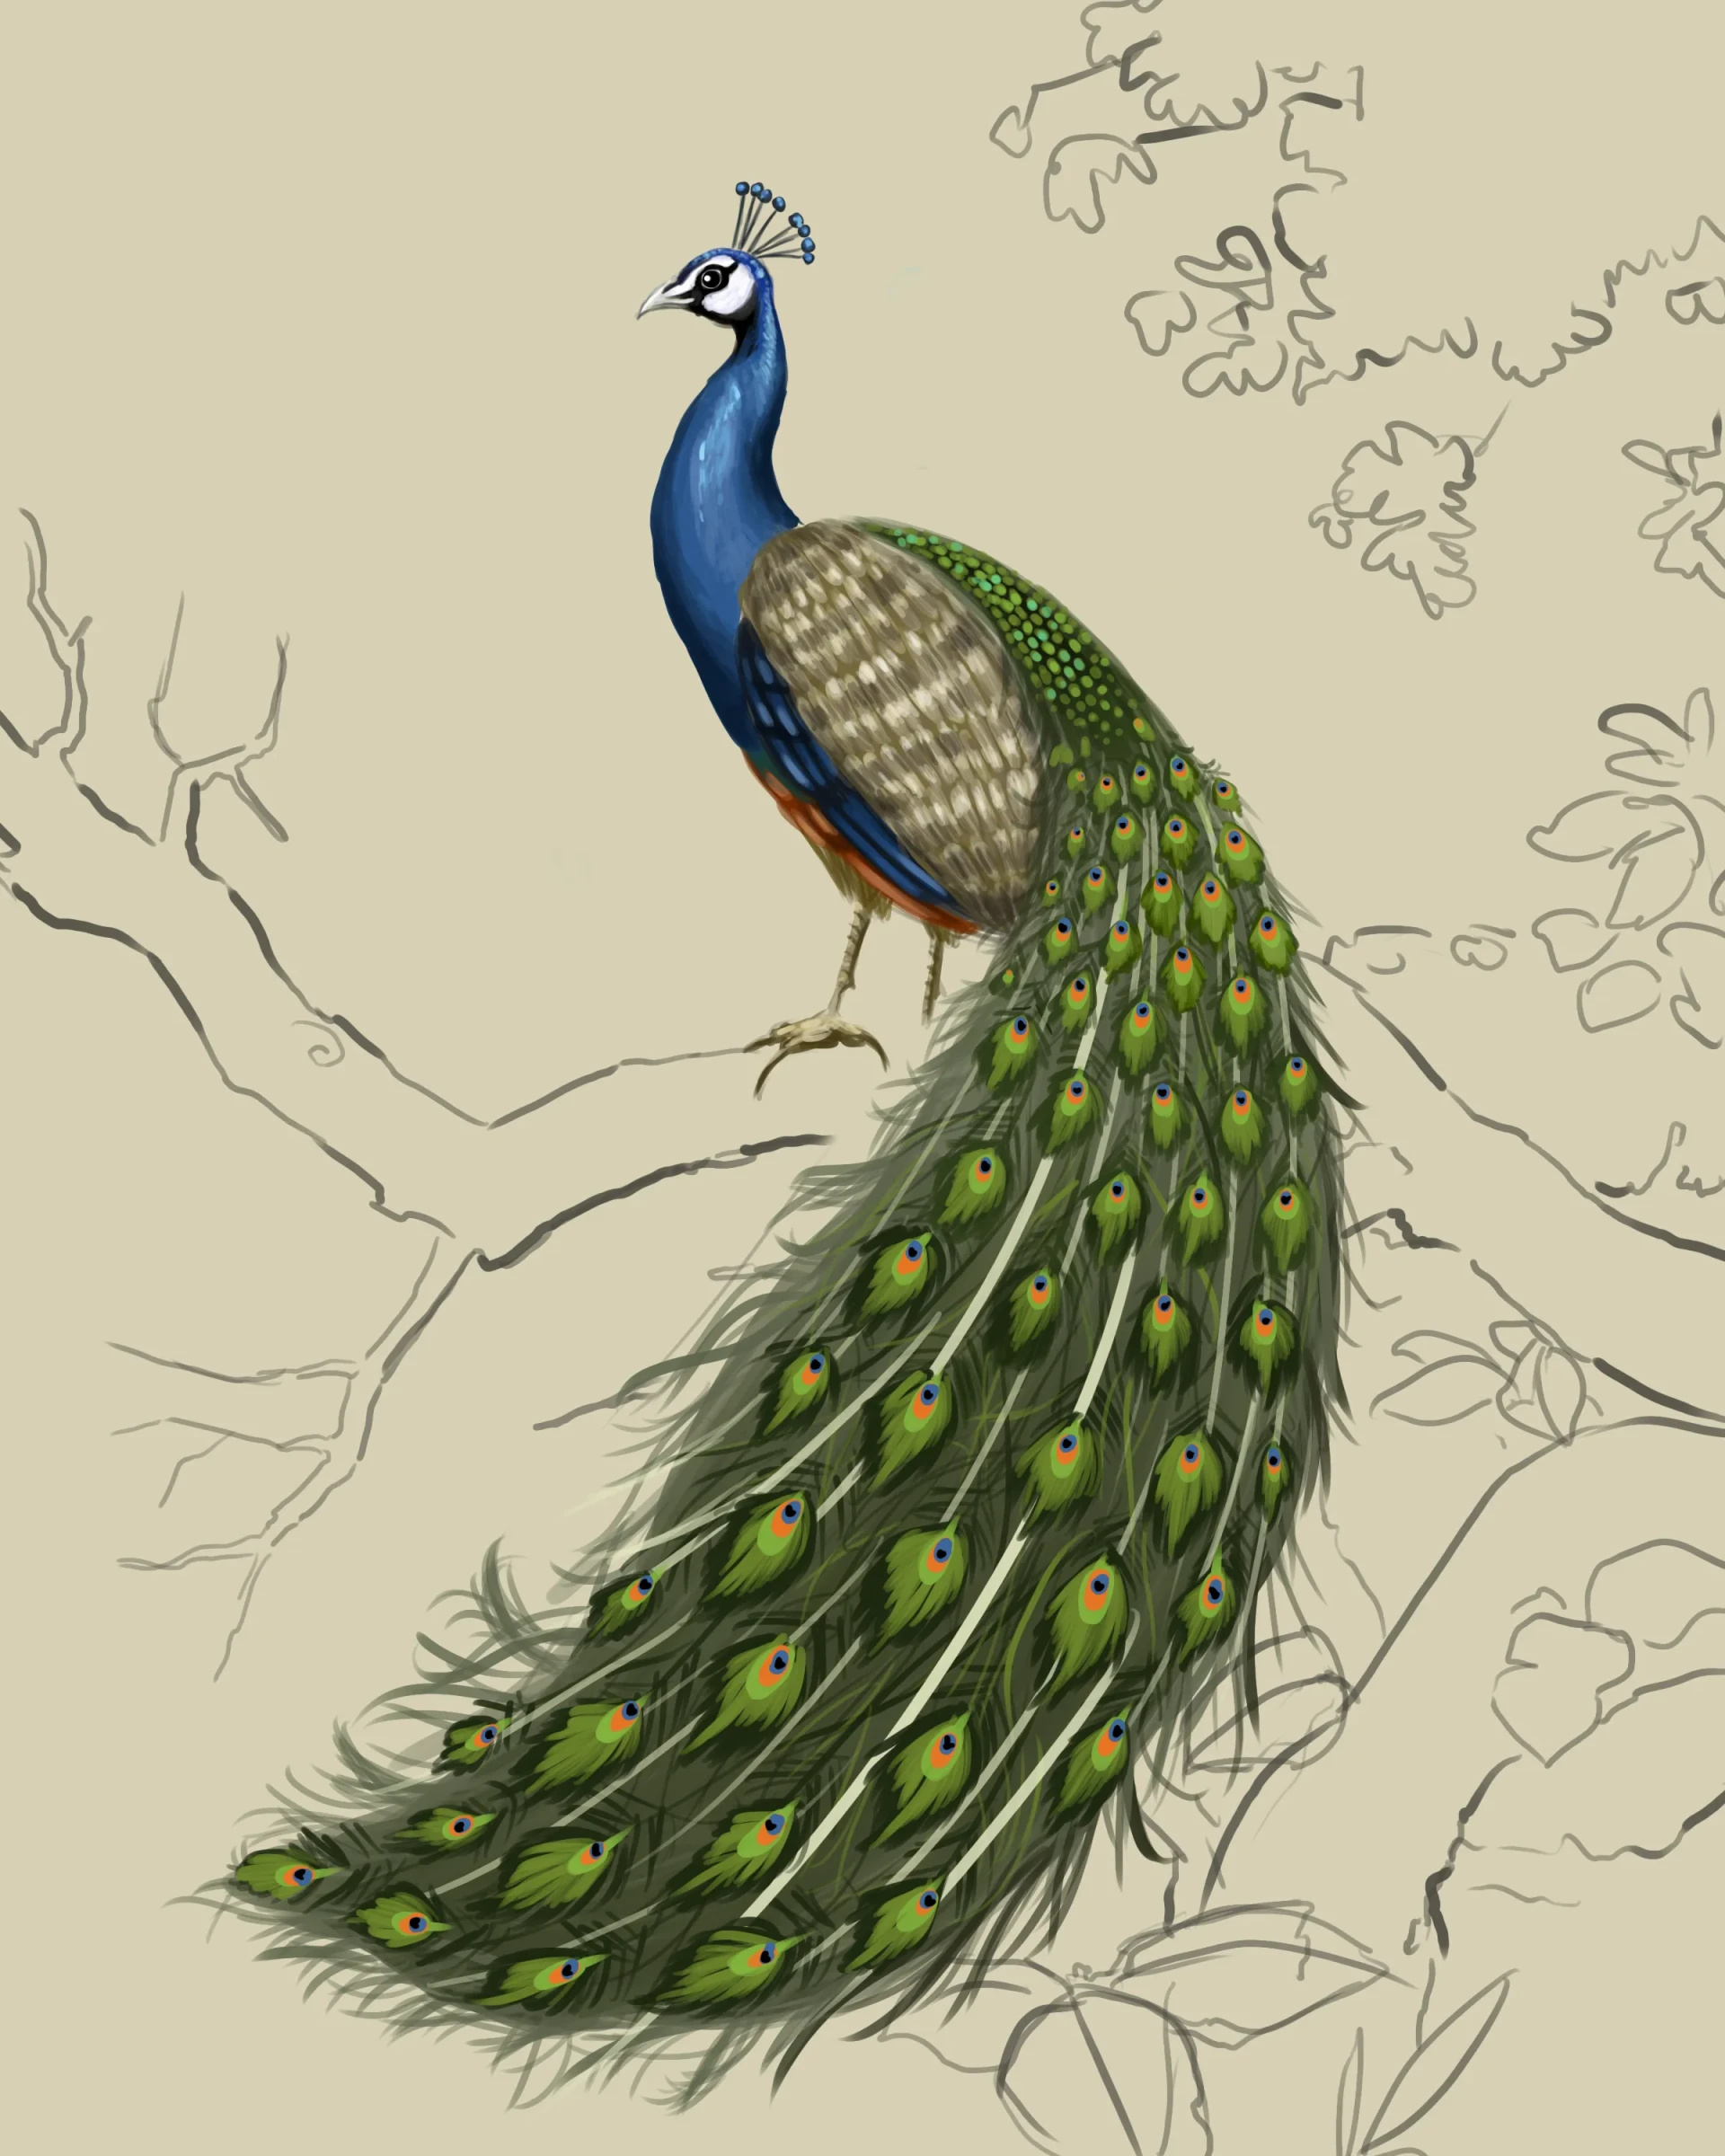
Drawing a peacock is a great exercise for working with shapes, textures and colors. Once your illustration is finished, don't hesitate to add a simple background to highlight your subject.
I hope this tutorial has helped you create your own drawing and will make you want to continue progressing.
Discussion
No comments yet.