Drawing a Portrait with Red Chalk
Hello everyone! Today, I invite you to dive into a timeless classic of drawing that has elegantly traversed the centuries: the red chalk portrait. Warm, expressive, and full of character, this technique has captivated numerous artists, from Renaissance masters to contemporary illustrators.
Prepare your red chalk and paper, let's go!
Why Choose Red Chalk for Portraits?
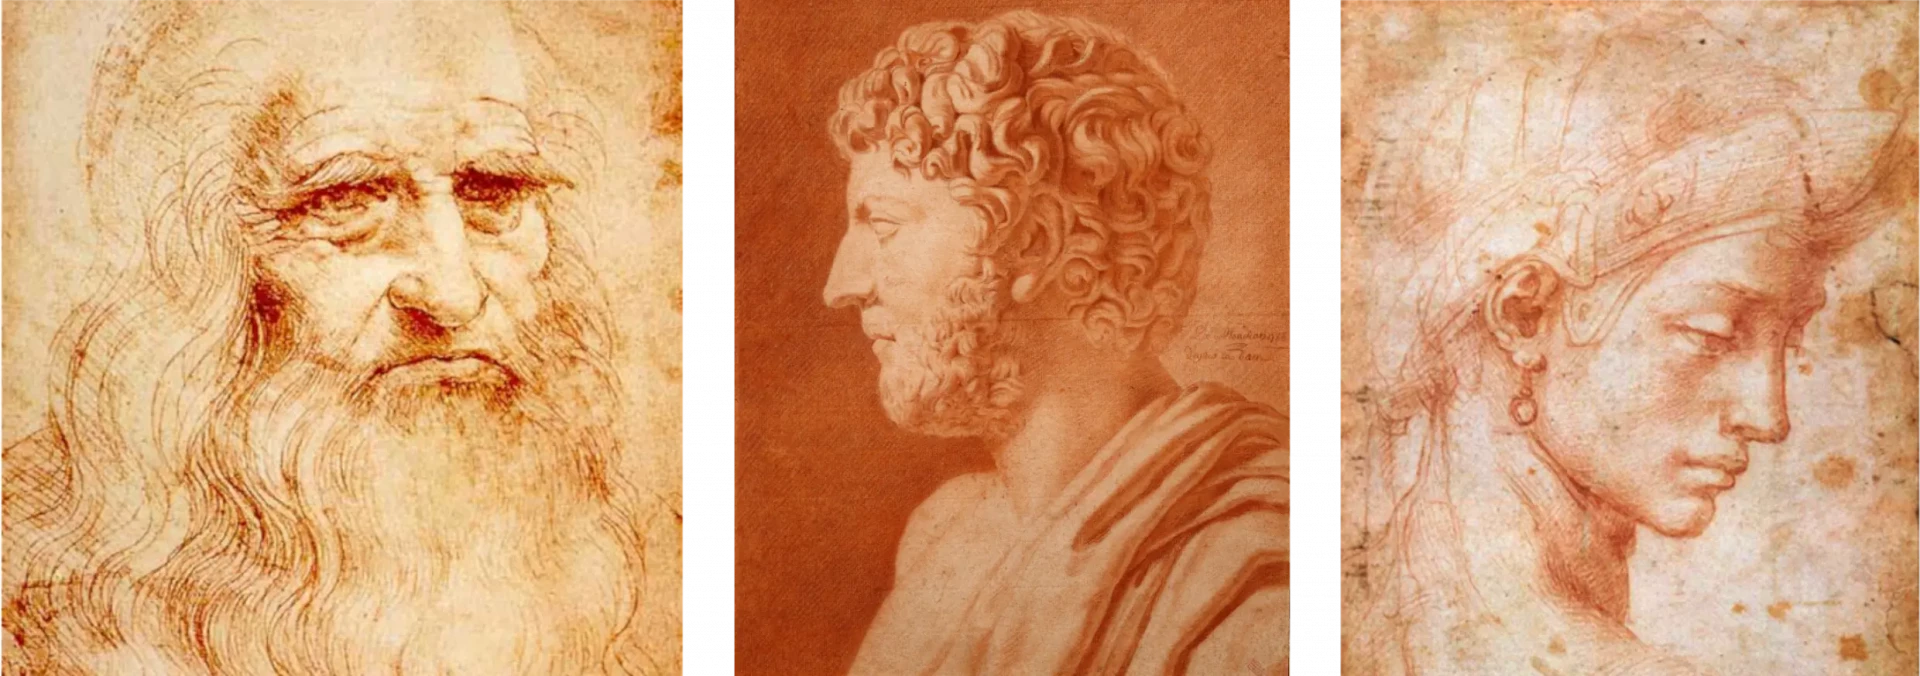
(from left to right: Da Vinci, Mademoiselle de Mondran, Michelangelo)
Red chalk has been particularly appreciated since the Renaissance, when it was often used to make preparatory sketches for major works. With its warm hues ranging from reddish-brown to terracotta, it adds a touch of life and warmth to drawings, making it ideal for depicting the human body. Its color is not unlike that of skin, which further enhances the impression of realism and gentleness.
Like graphite or charcoal, red chalk allows you to work both subtly and precisely. It can be used to lay down large, blended areas or, conversely, to define sharper details with fine cross-hatching. This mix of flexibility and expressive richness makes it a medium much appreciated by artists, especially for portraits, where each nuance is essential to convey emotion.
The Materials
In this course, I will not go into the precise details of all the materials or basic techniques related to sanguine. I invite you to read this article (link: starting with sanguine) if you want to learn more about this topic.
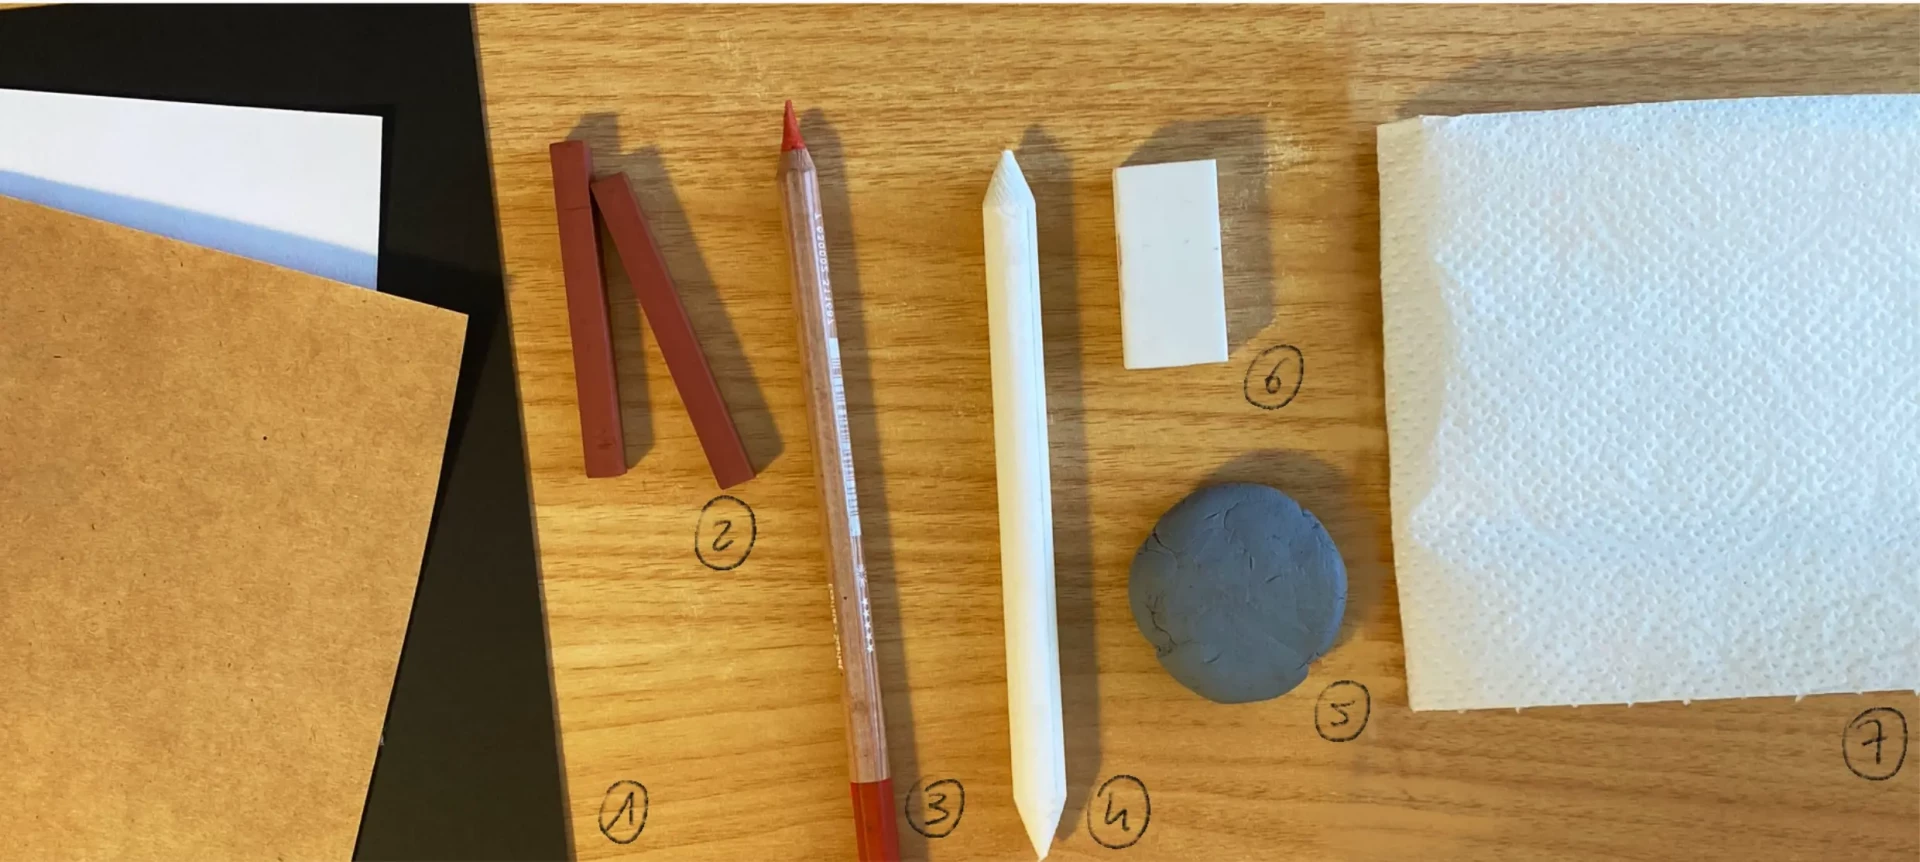
1 - Paper
2 - Red chalk
3 - A sanguine pencil (optional)
4 - A blending stump
5 - A bread crumb eraser
6 - A white eraser
7 - A paper towel
If you feel more comfortable starting with a light pencil sketch, plan for that as well.
Drawing a Portrait with Sanguine Step by Step
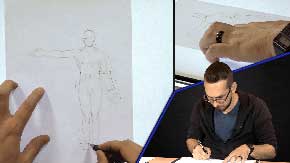
In this article, we will focus on how to use sanguine to create a portrait. I therefore assume that you already have some basic drawing skills, especially regarding the proportions of the face. If this is not the case, or if you wish to review these fundamentals, I invite you to check out the article on how to draw a pencil portrait
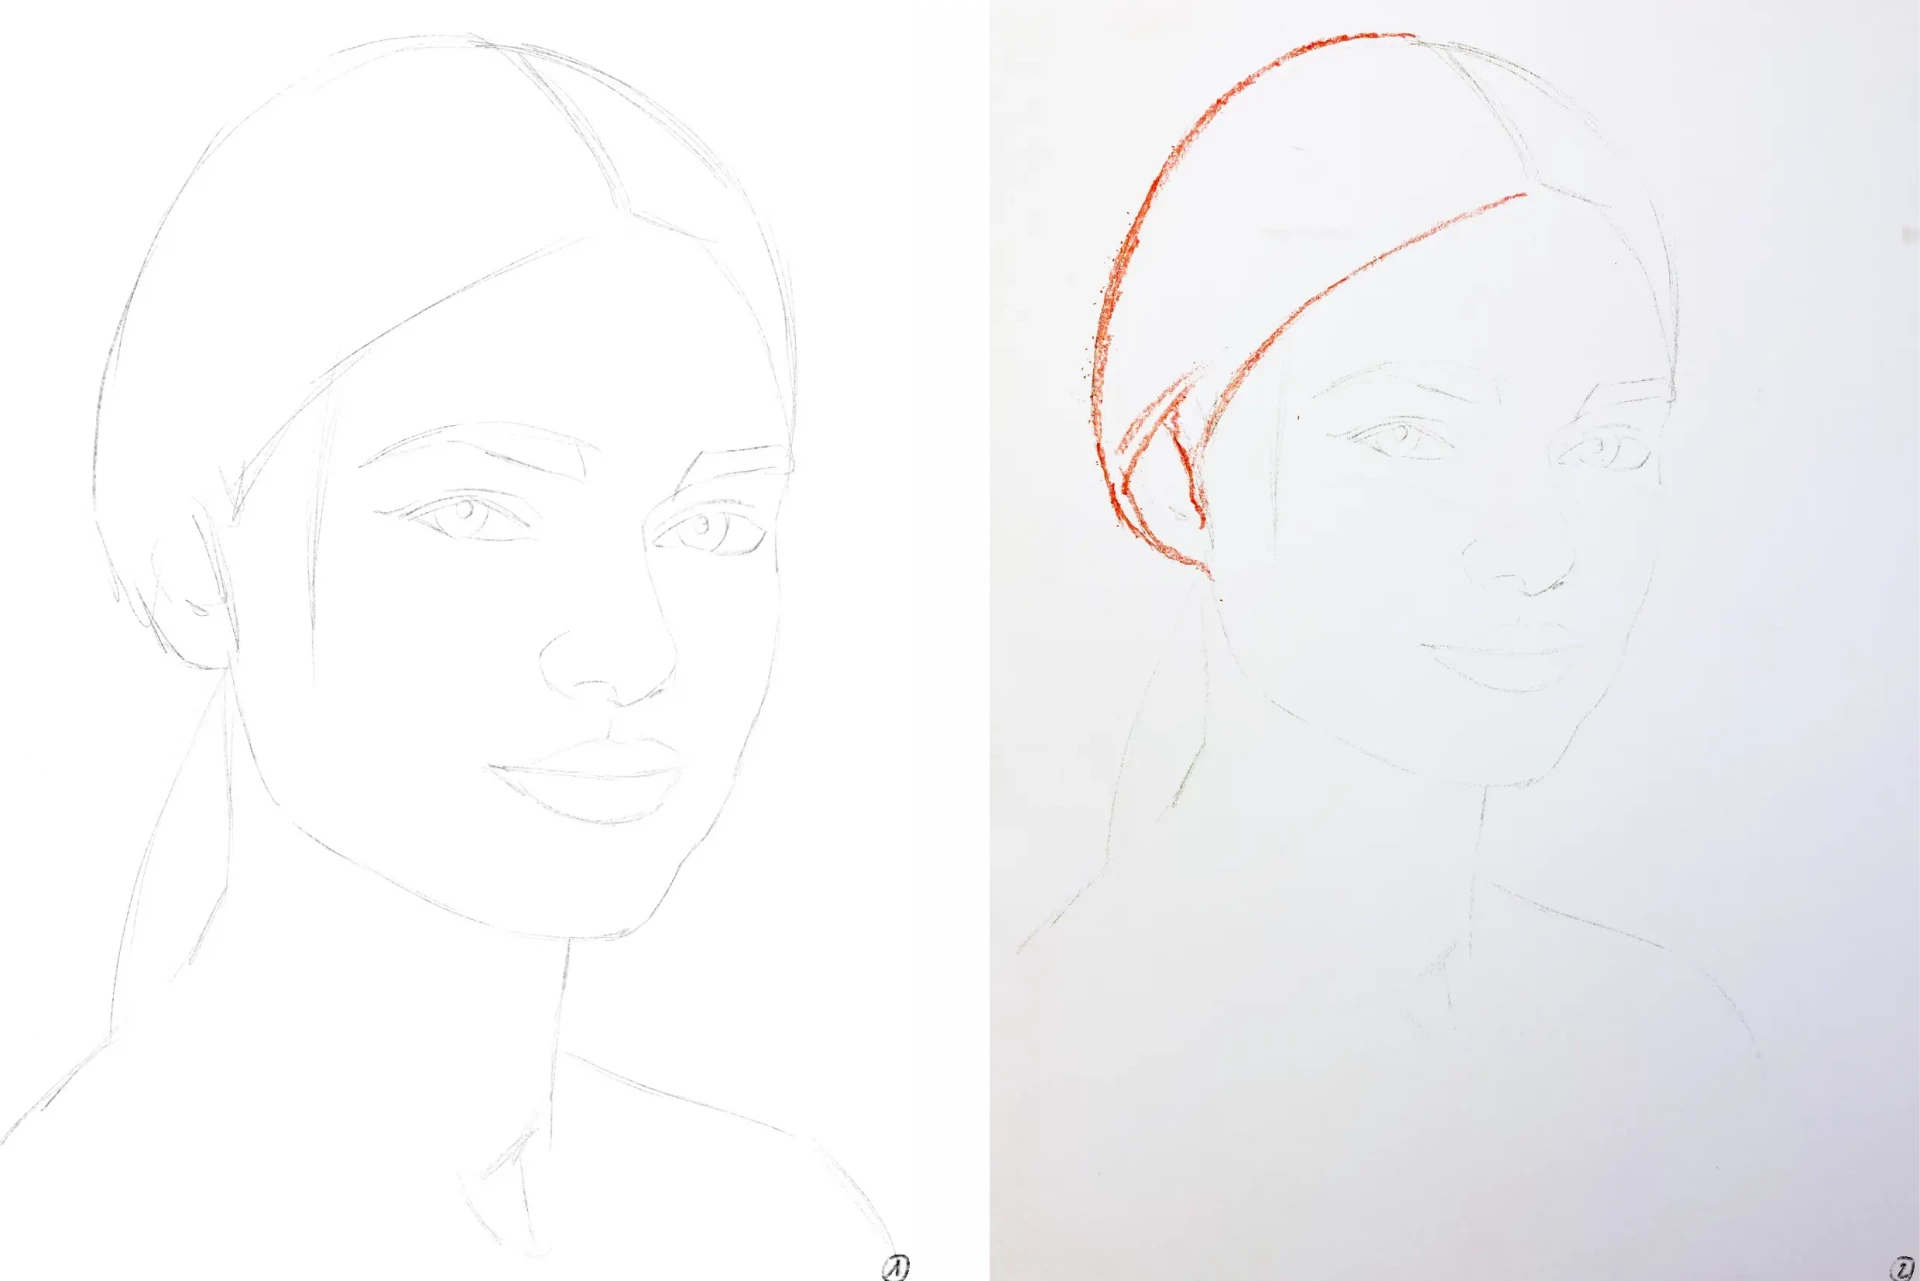
1. To feel more comfortable with sanguine drawing, I like to start with a fairly detailed sketch of the portrait (again, I invite you to check the mentioned article above if you need a refresher on the basics).
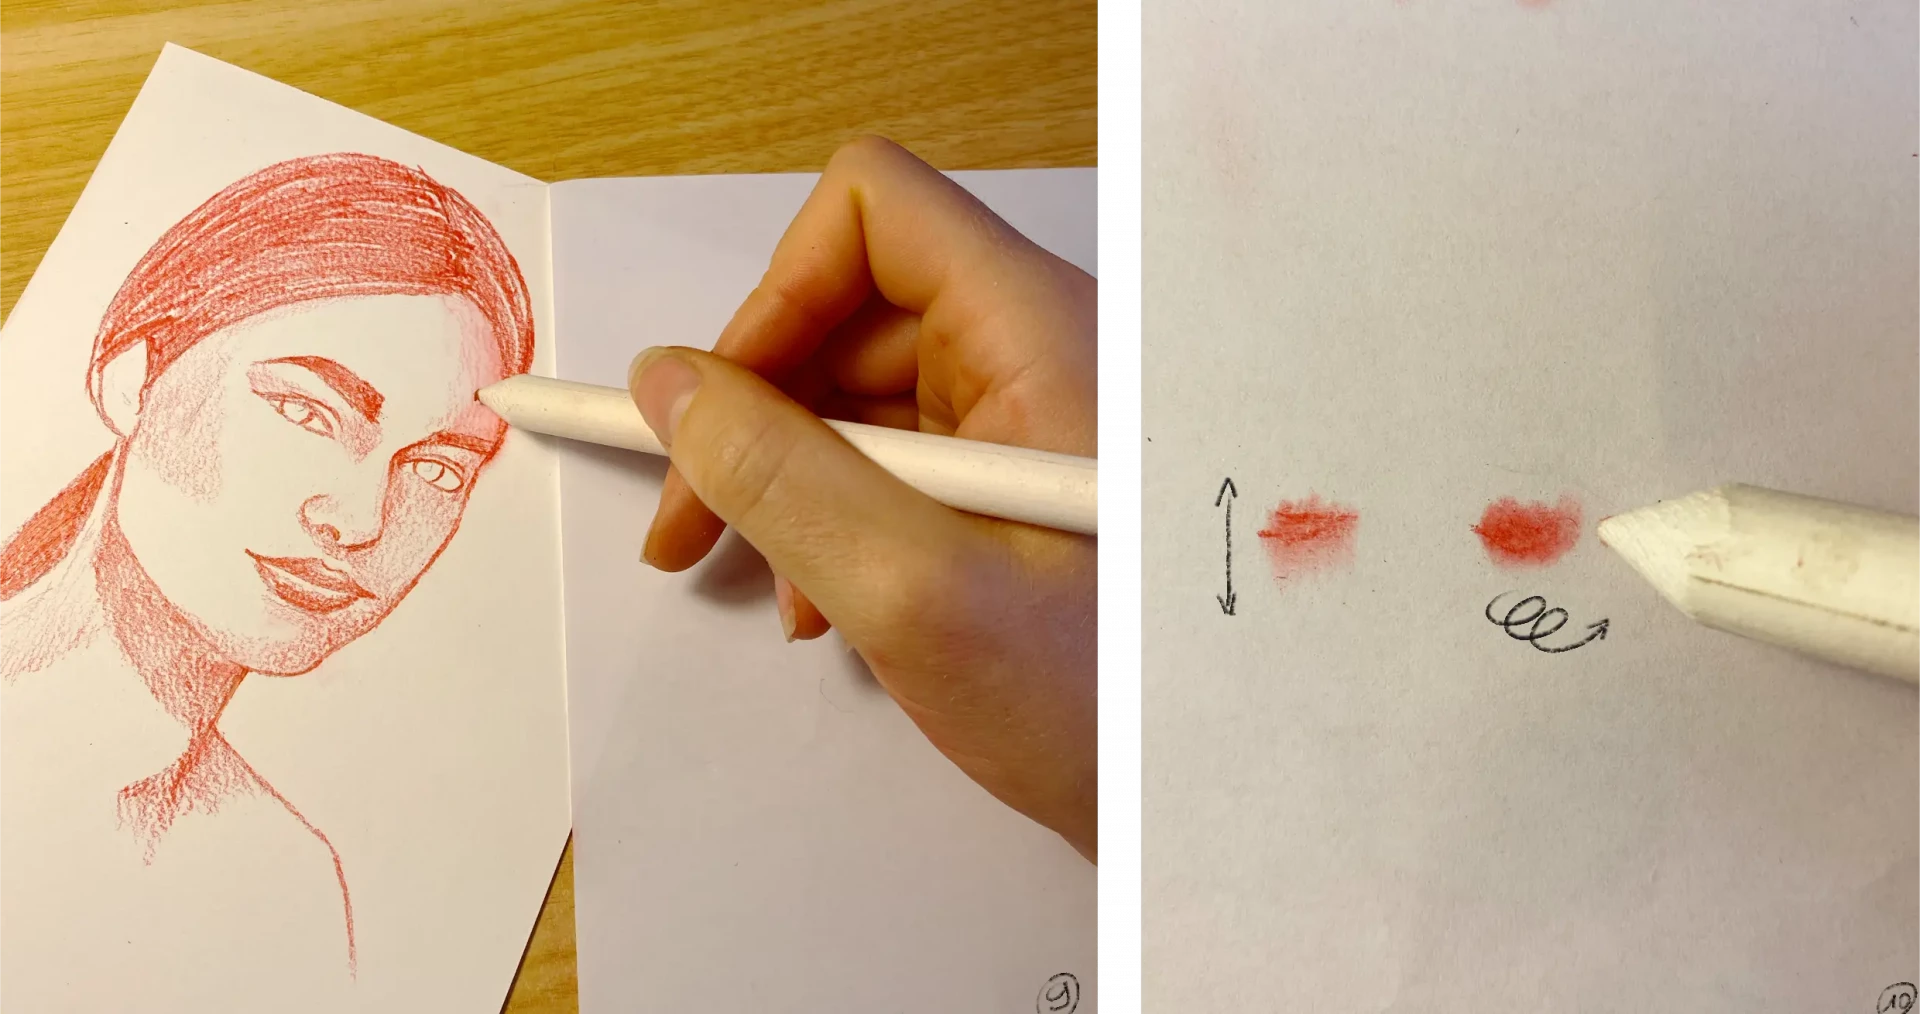
2. I then choose the sanguine pencil for more precision, but you can certainly opt for a chalk sanguine by simply using the tip. I then begin to gently trace over the contour lines.
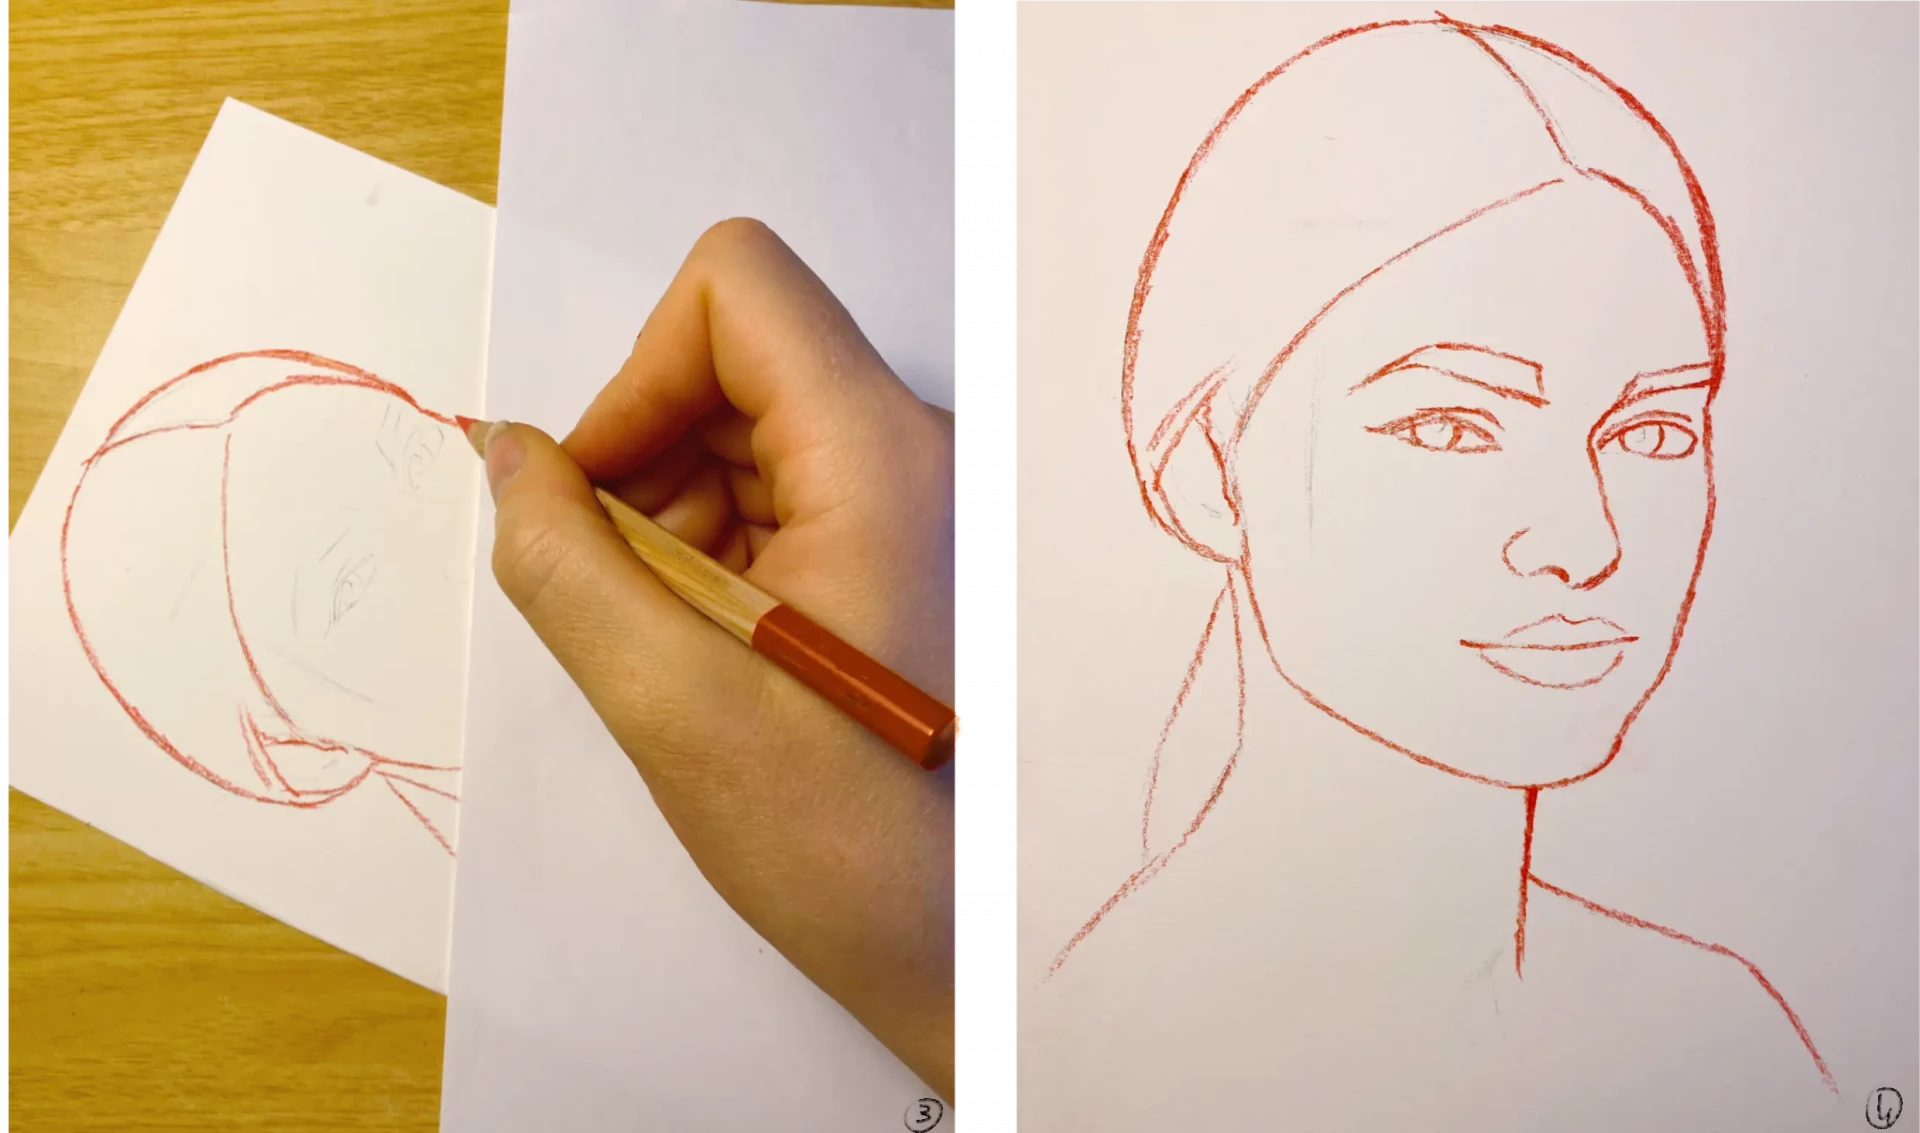
3. I continue to draw the outlines of the face. To avoid smudging the paper with my hand, I place a clean sheet underneath, like a blotter. This helps to keep the paper clean, especially when using a powdery medium like sanguine.
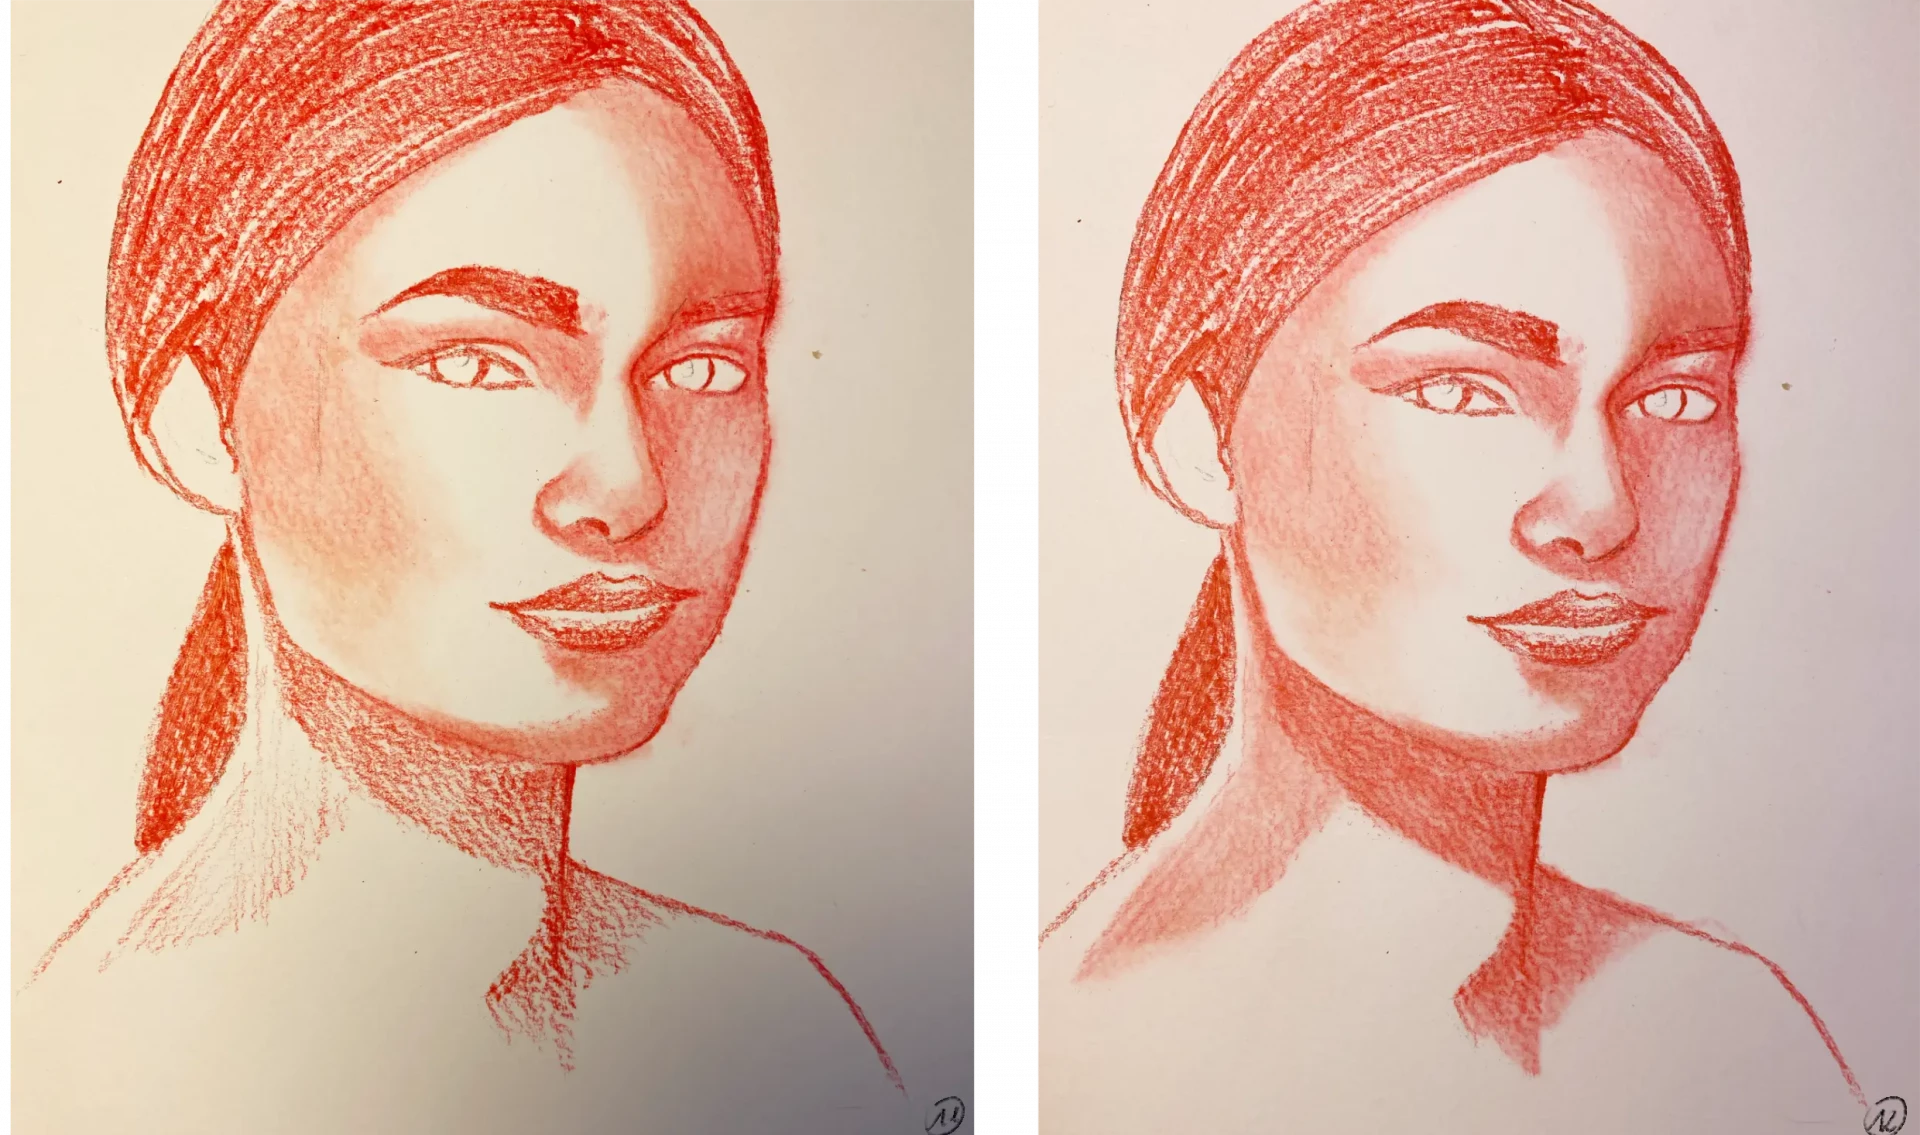
4. I'm already anticipating the play of shadow and light by slightly thickening the line on the right side of the face, which will be in the shadow. This allows me to set the initial foundations of volume from this step.
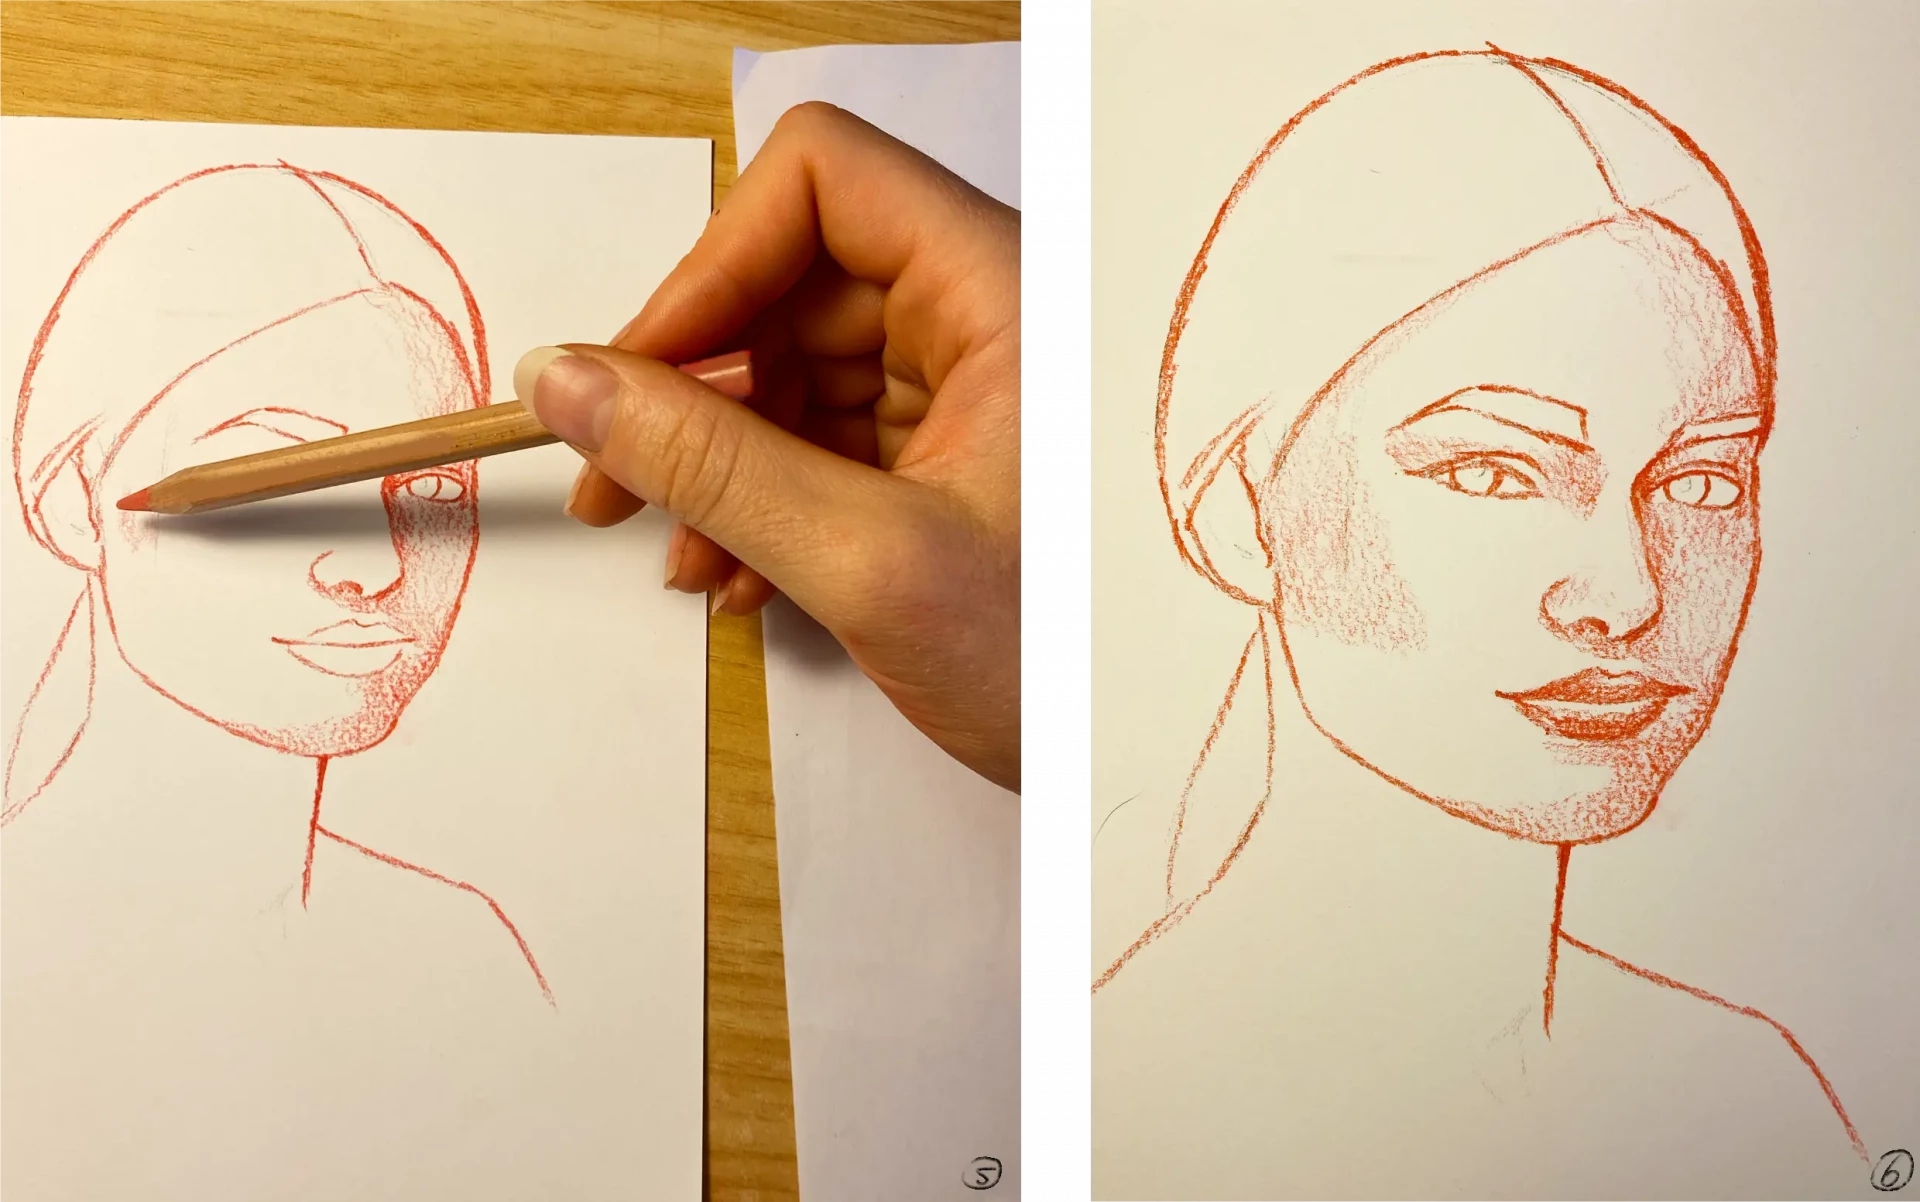
5. I begin to lightly shade the drawing. To maintain lightness and control, I hold the pencil as far from the tip as possible.
6. I only apply the shadow values, leaving the light areas as reserve, meaning white. I press a bit harder on the very shaded parts, like the lips, to clearly mark the contrasts.
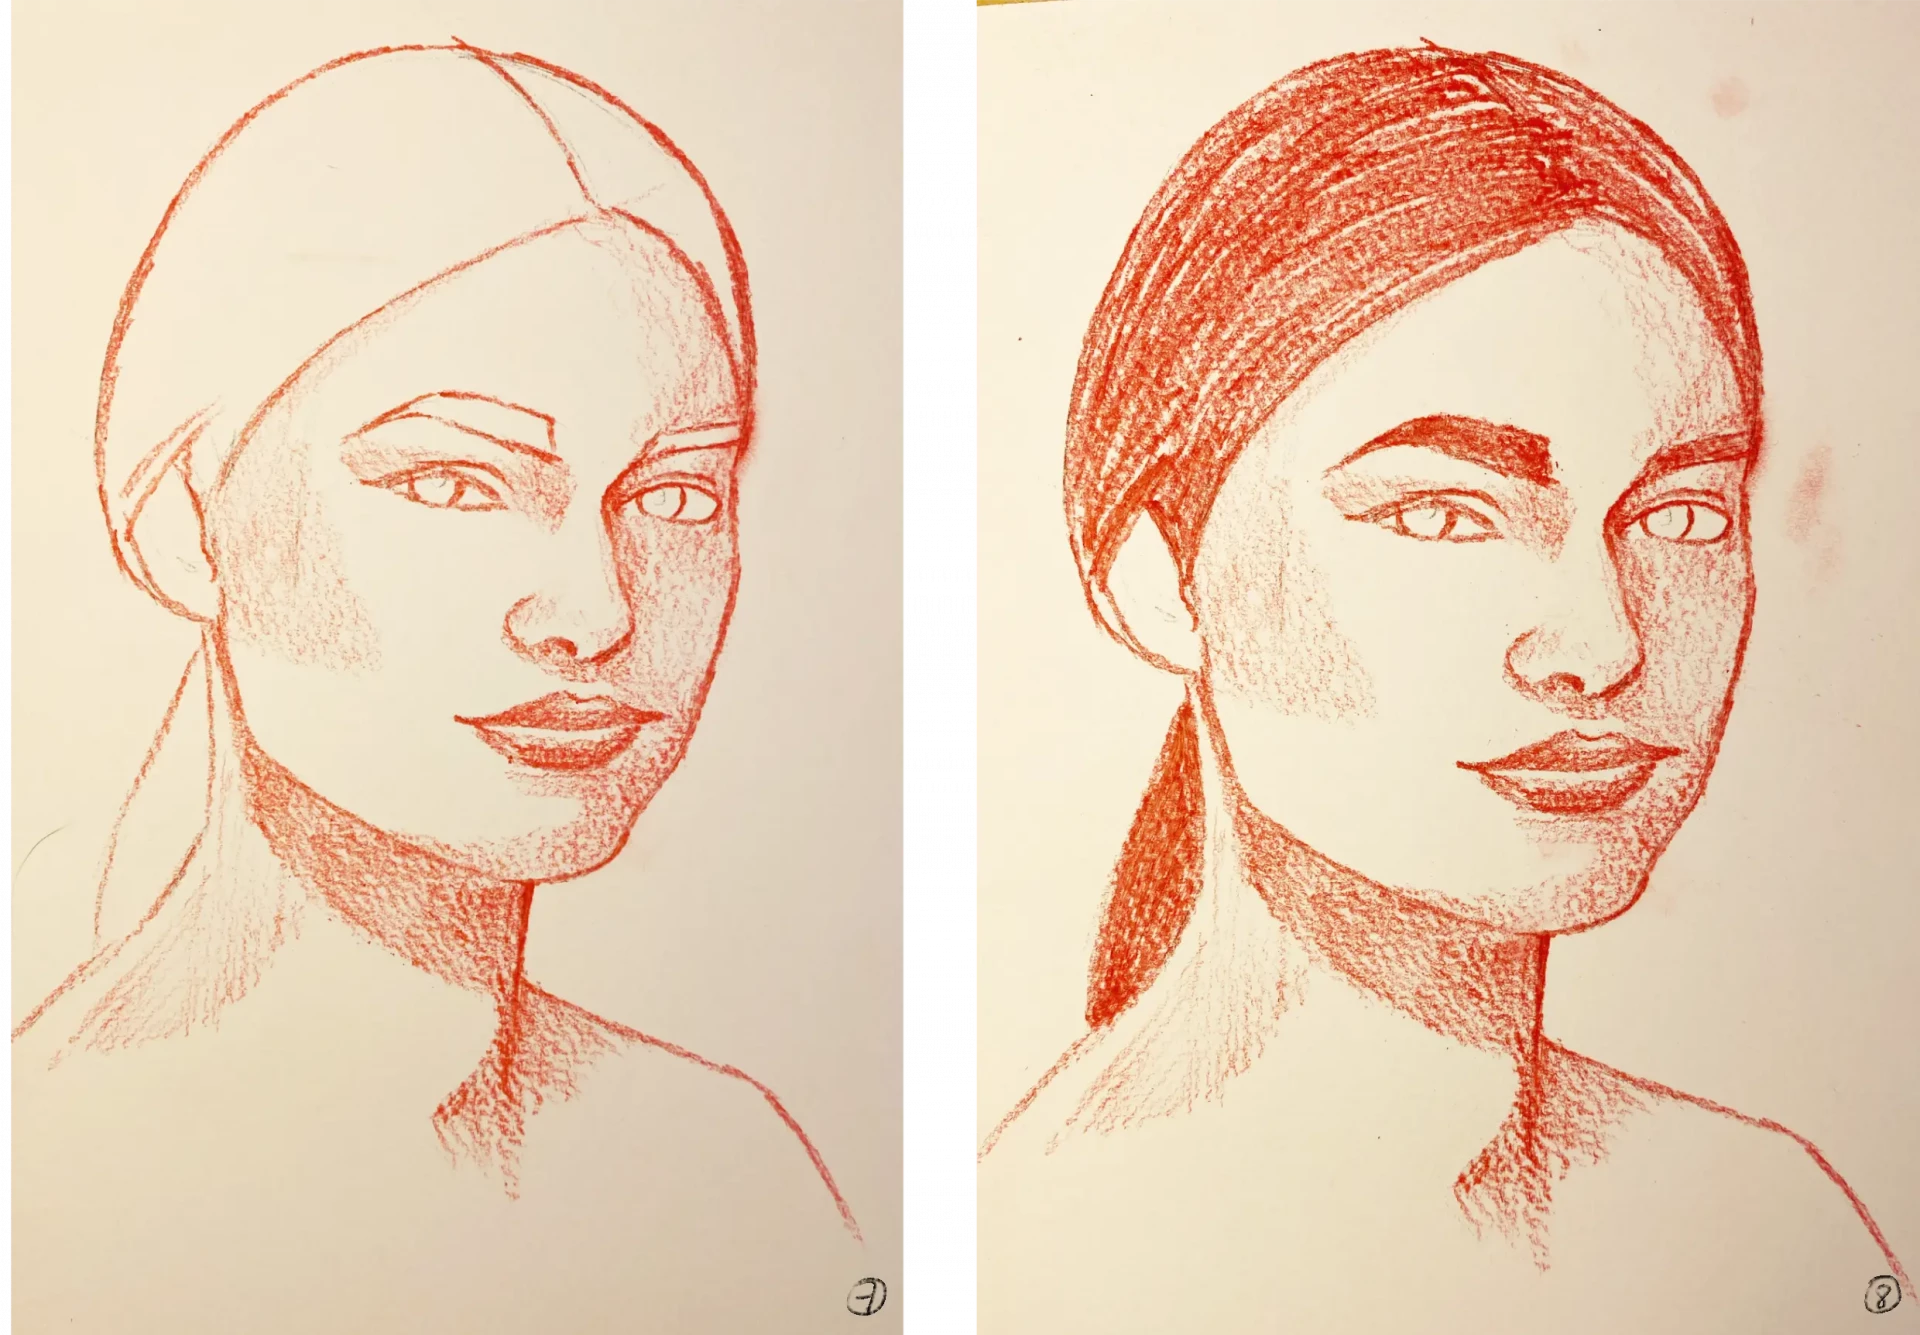
7. I continue to add shadows. Here, for example, I am working on the neck. To play with contrast, I can also create very fine hatching that gives relief and texture.
8. I finish with the hair, which I draw in the direction of its growth for a more natural appearance. I also take the opportunity to erase the small marks left on the sides using a kneaded eraser.
Smudging a Sanguine Portrait
9. I begin to blend the portrait to soften the transitions and unify the shadows.
10. To blend, you have two options: make horizontal or vertical back-and-forth movements, or make small circular motions. I recommend the second option, which allows for a cleaner and more well-blended effect.
Also, remember to always start by blending from the lightest to the darkest shades to create a beautiful gradient.
11 and 12. I continue to blend the different values. This is a time-consuming step, so it's important to be meticulous. If you rush through the steps to speed up the process, you risk leaving unintentional marks that will detract from the aesthetics of the drawing.
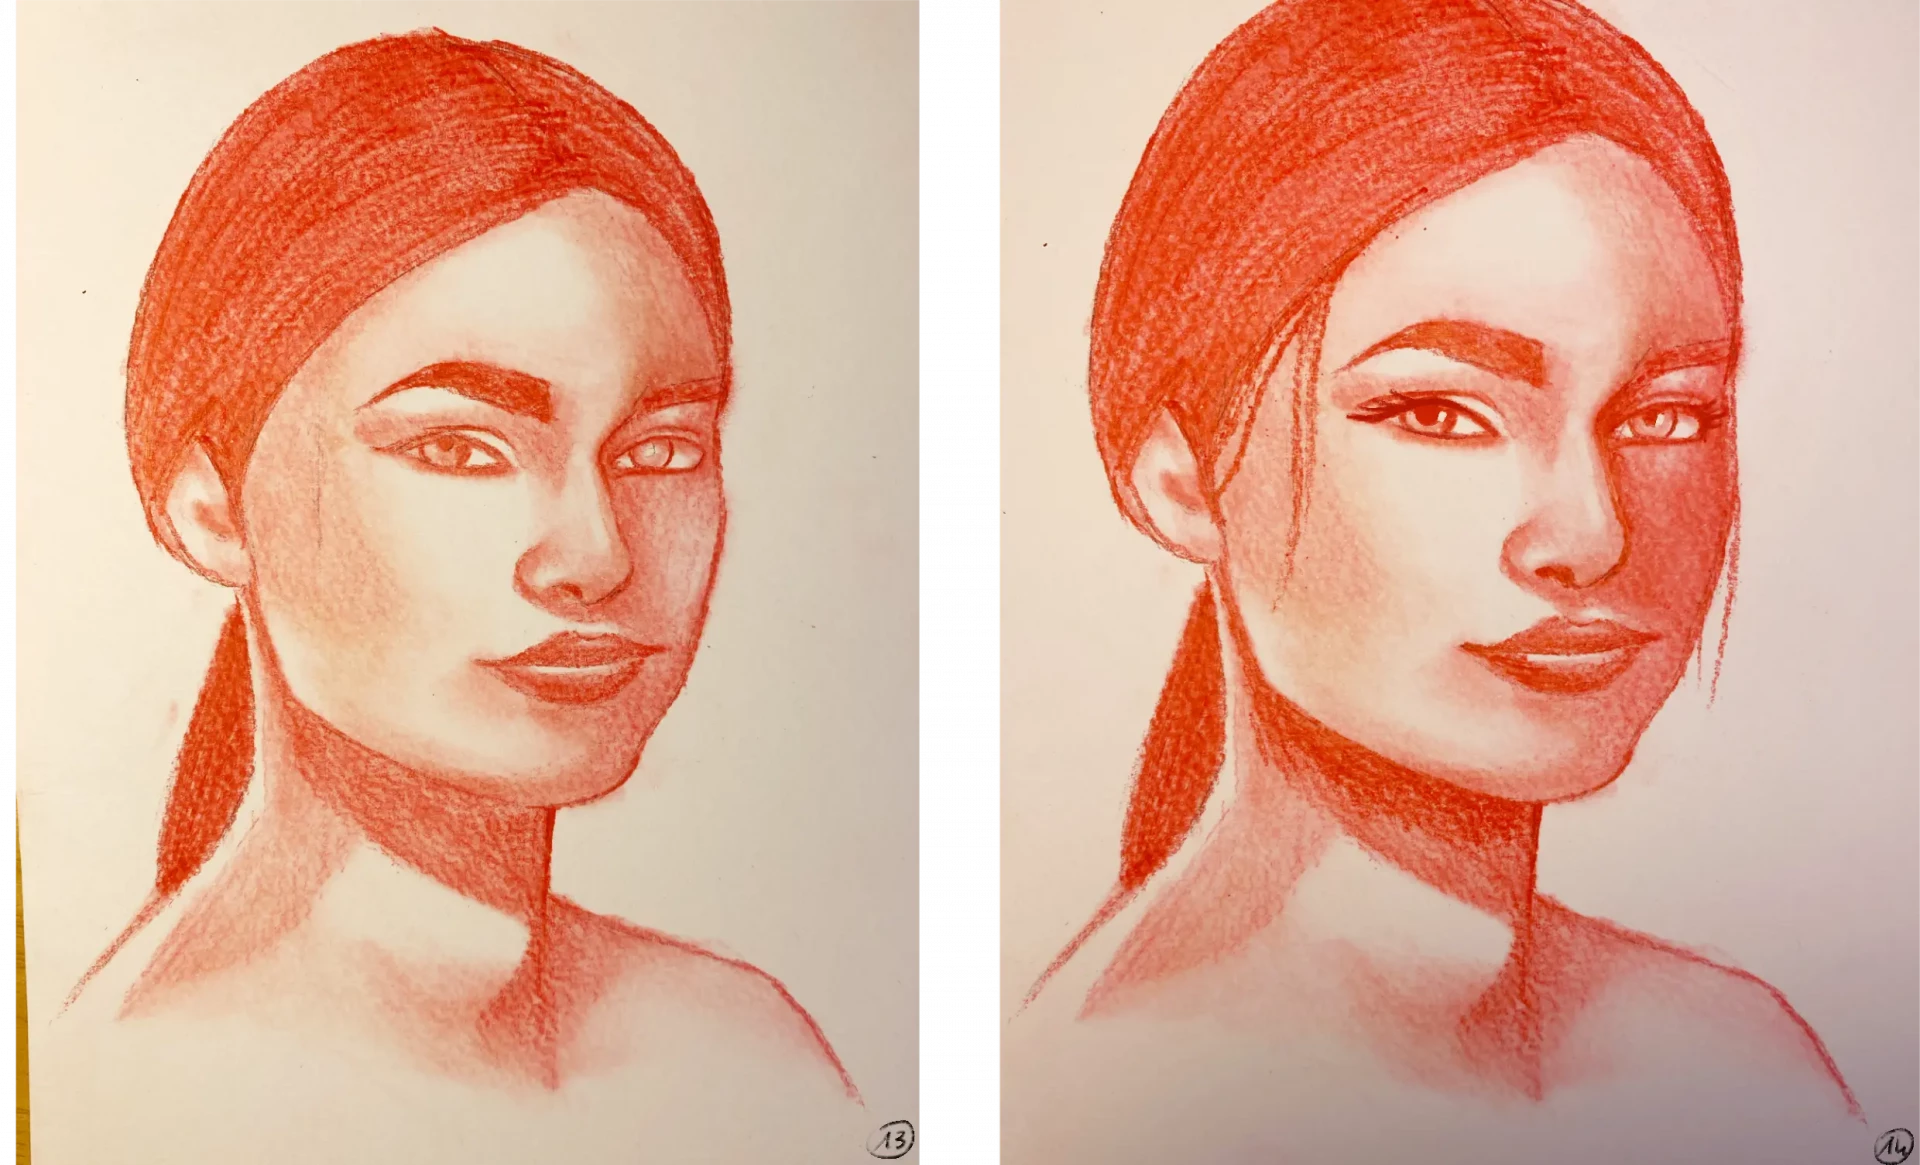
13. I finish blending the entire drawing for a smooth and even finish.
14. Then, I can add some small details, for example, a bit of depth under the neck, on the right side of the face, around the eyes, or even a few strands of falling hair for a more natural look.
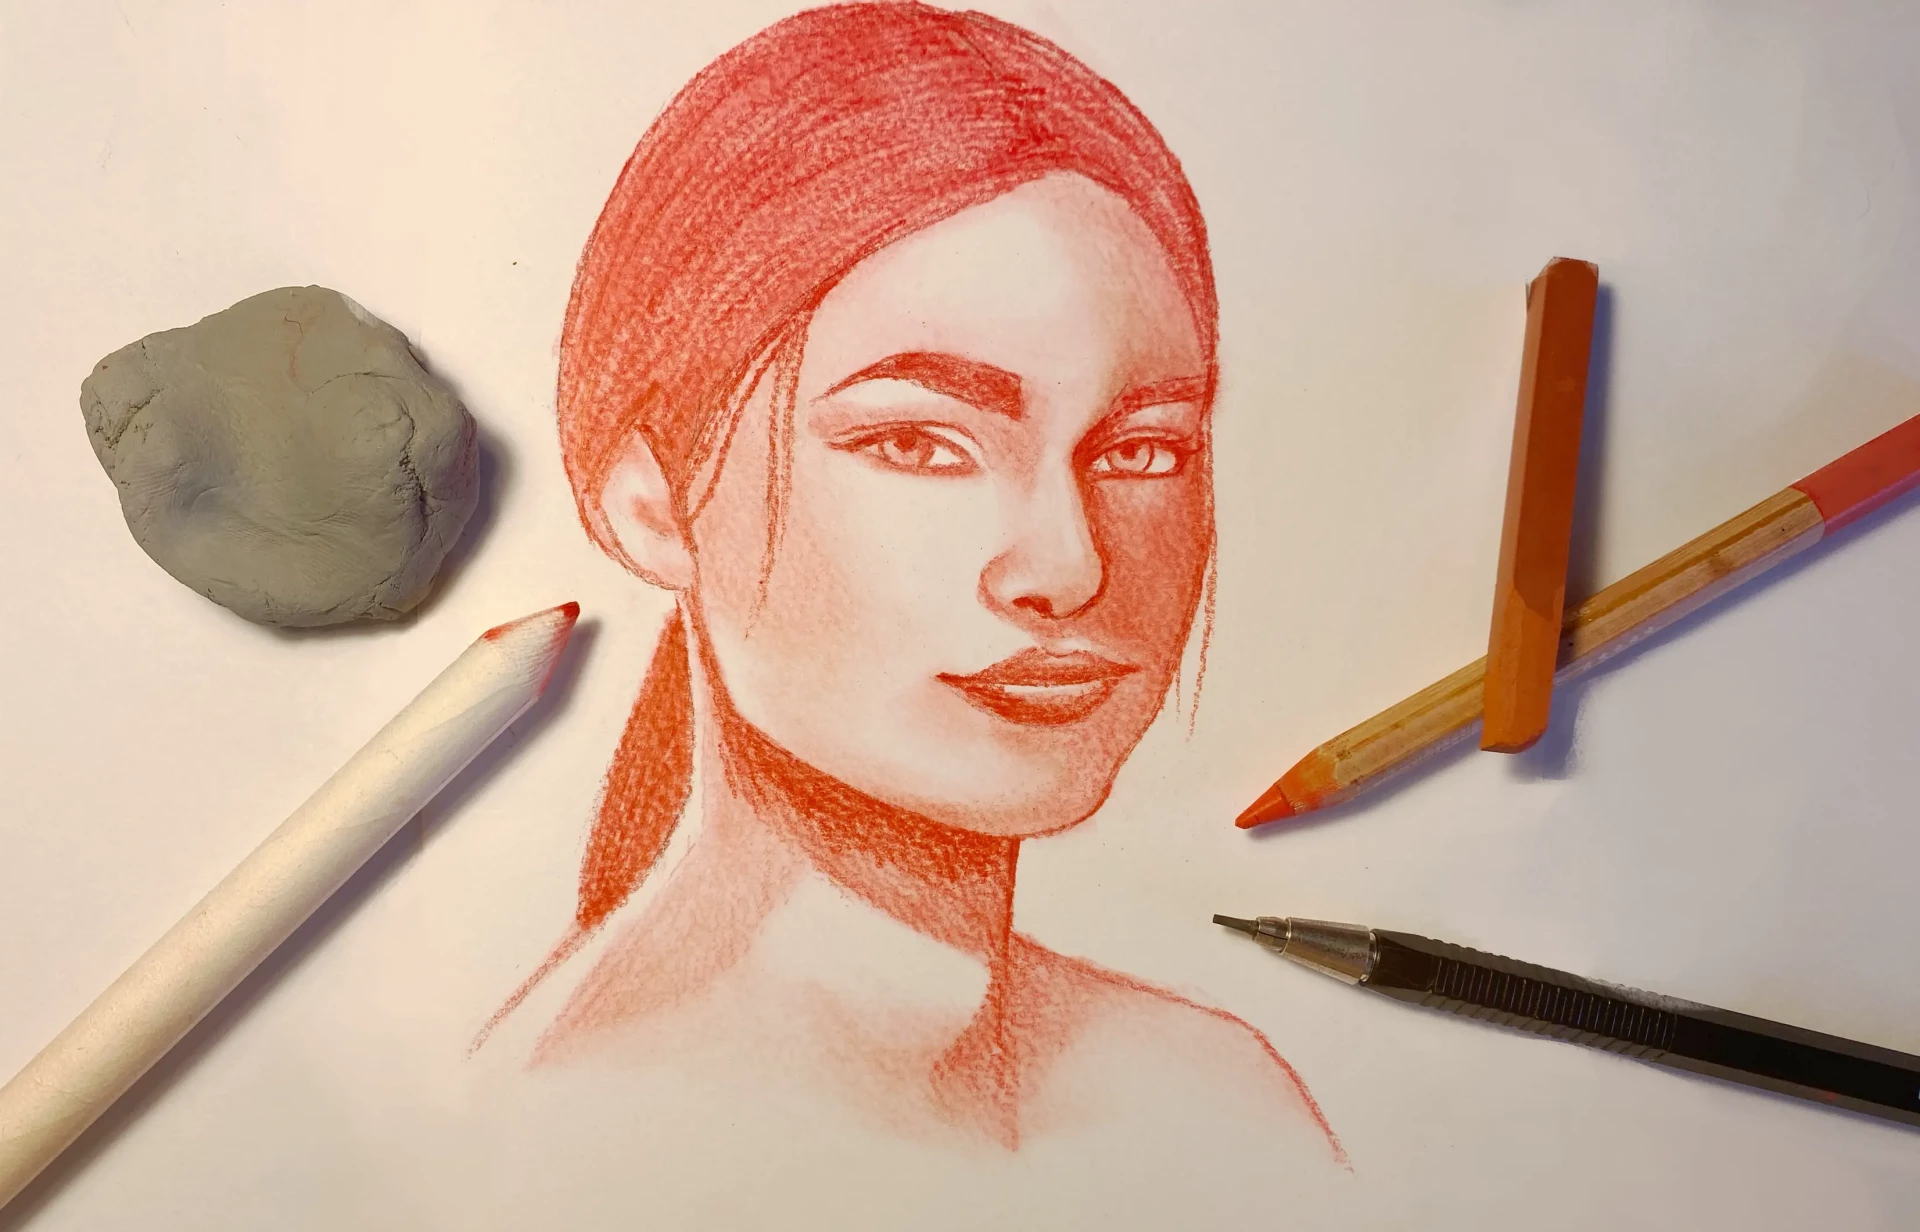
There you have it! The portrait is now complete. As you can see, sanguine is primarily a matter of patience and precision, but it's not a particularly complicated technique. With a little practice, it can truly reveal all the warmth and gentleness of a face.
I hope you enjoyed this article and, above all, that it has inspired you to try your hand at sanguine pencil drawing! 😊
Writer and illustrator: Chloé Pouteau