How to Draw Rain
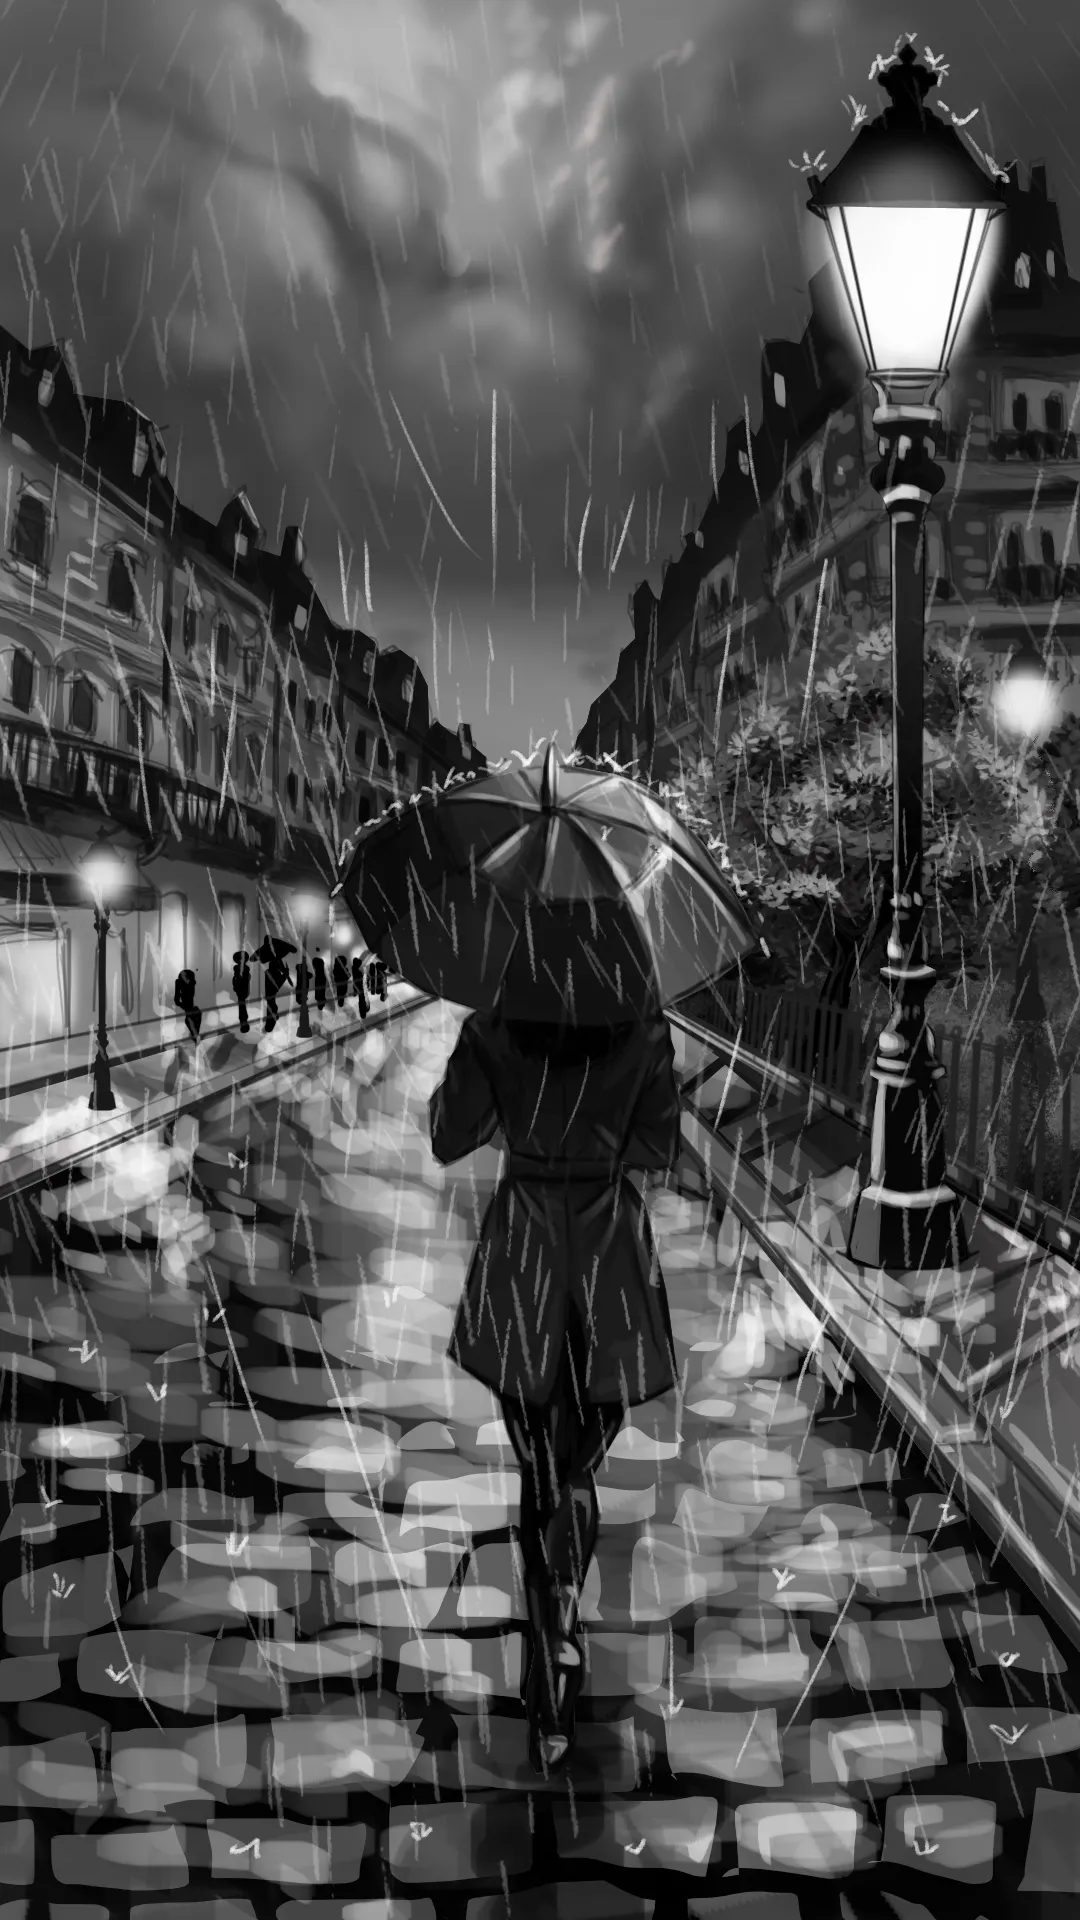
The atmosphere plays a crucial role when illustrating a scene. While drawing, we often think about what we want to convey, and we frequently use elements like the weather to reinforce this intention. Today, I suggest we explore how to integrate rain into a composition to enrich the ambiance of your illustrations.

Draw rain step by step
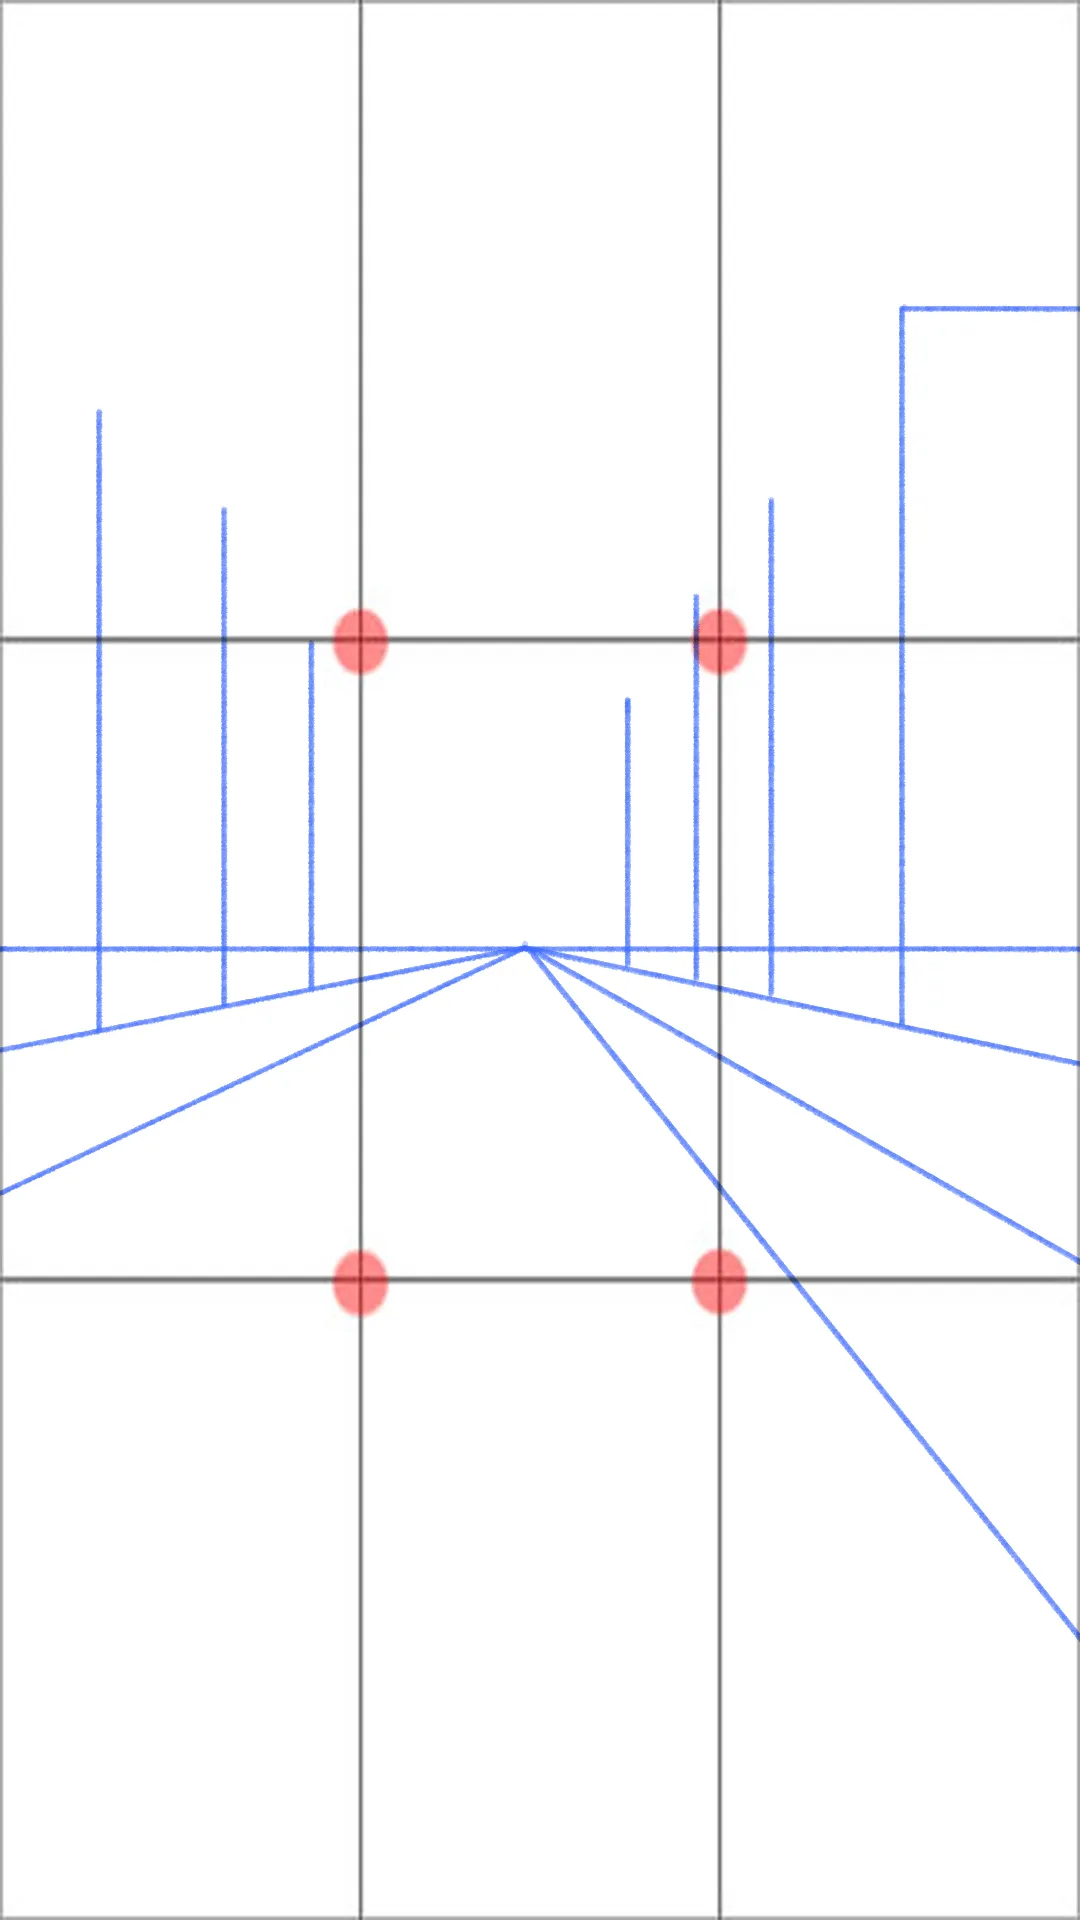
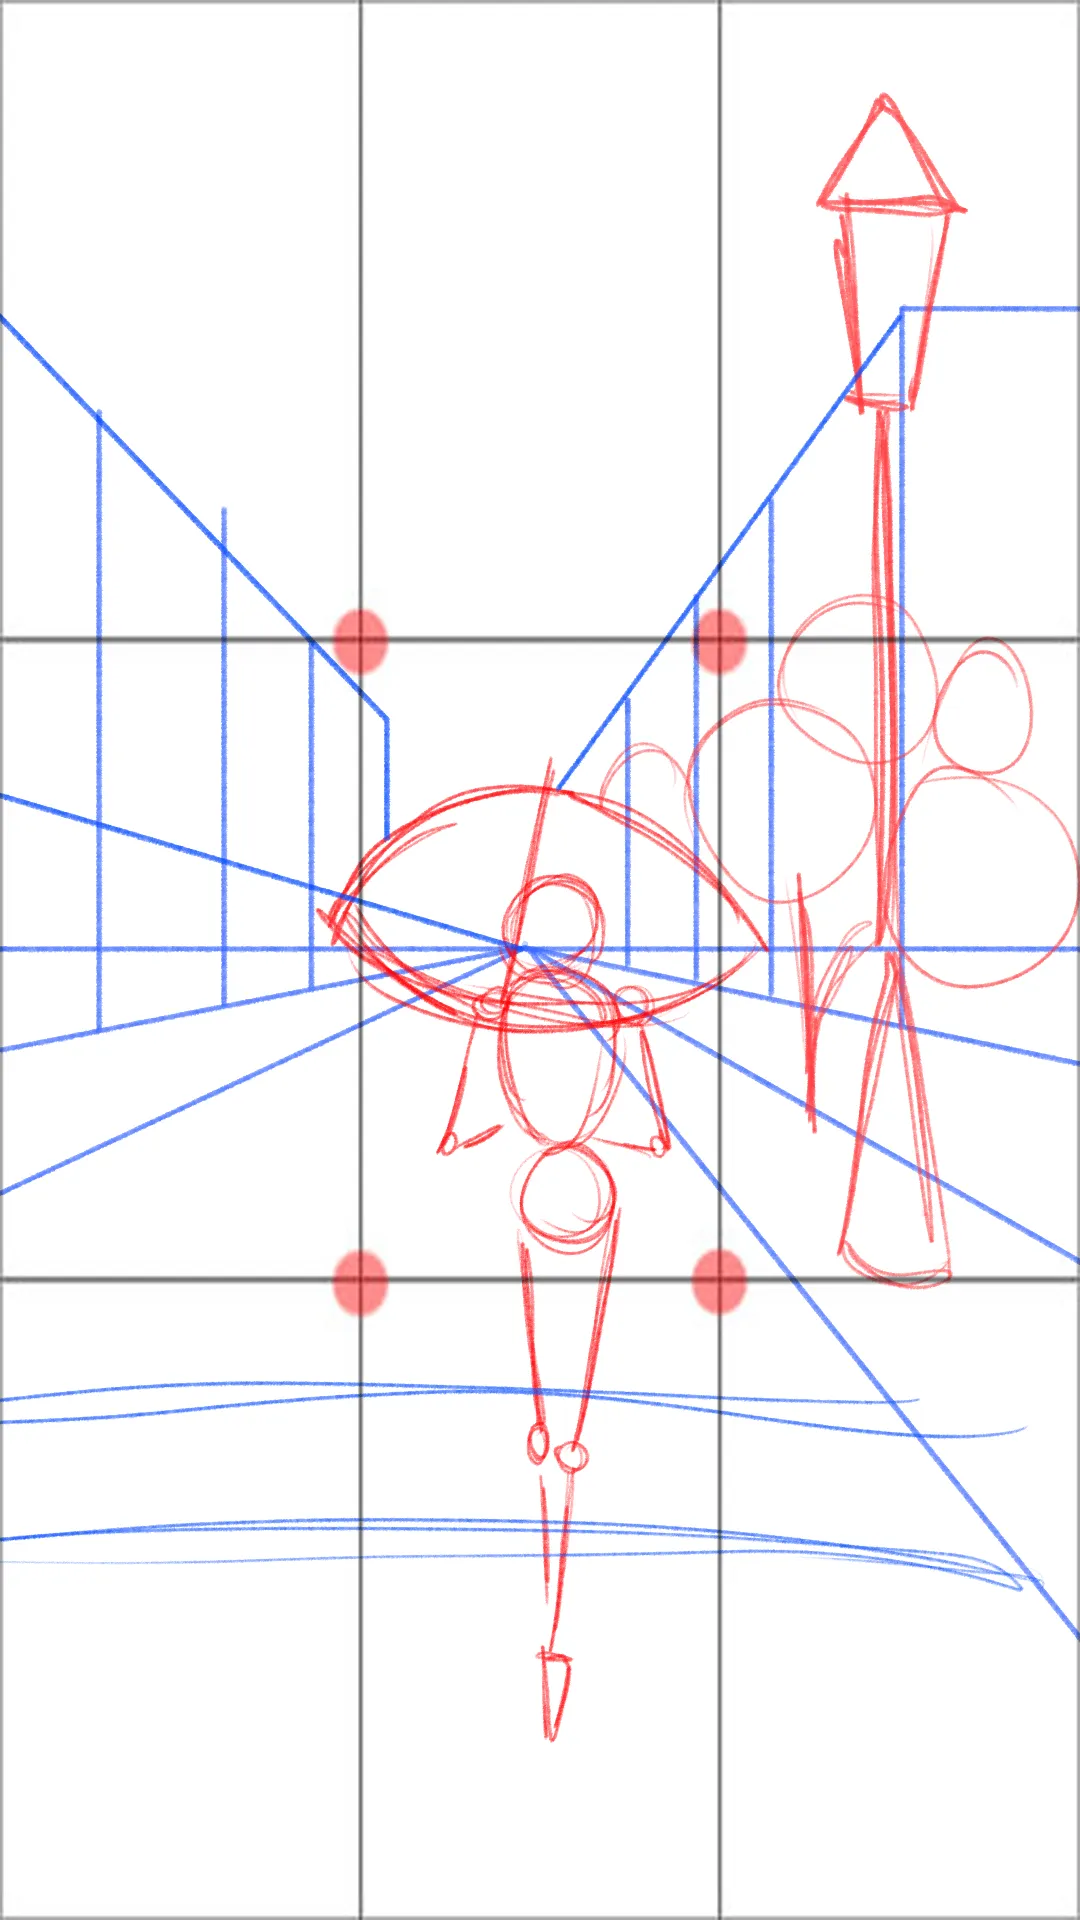
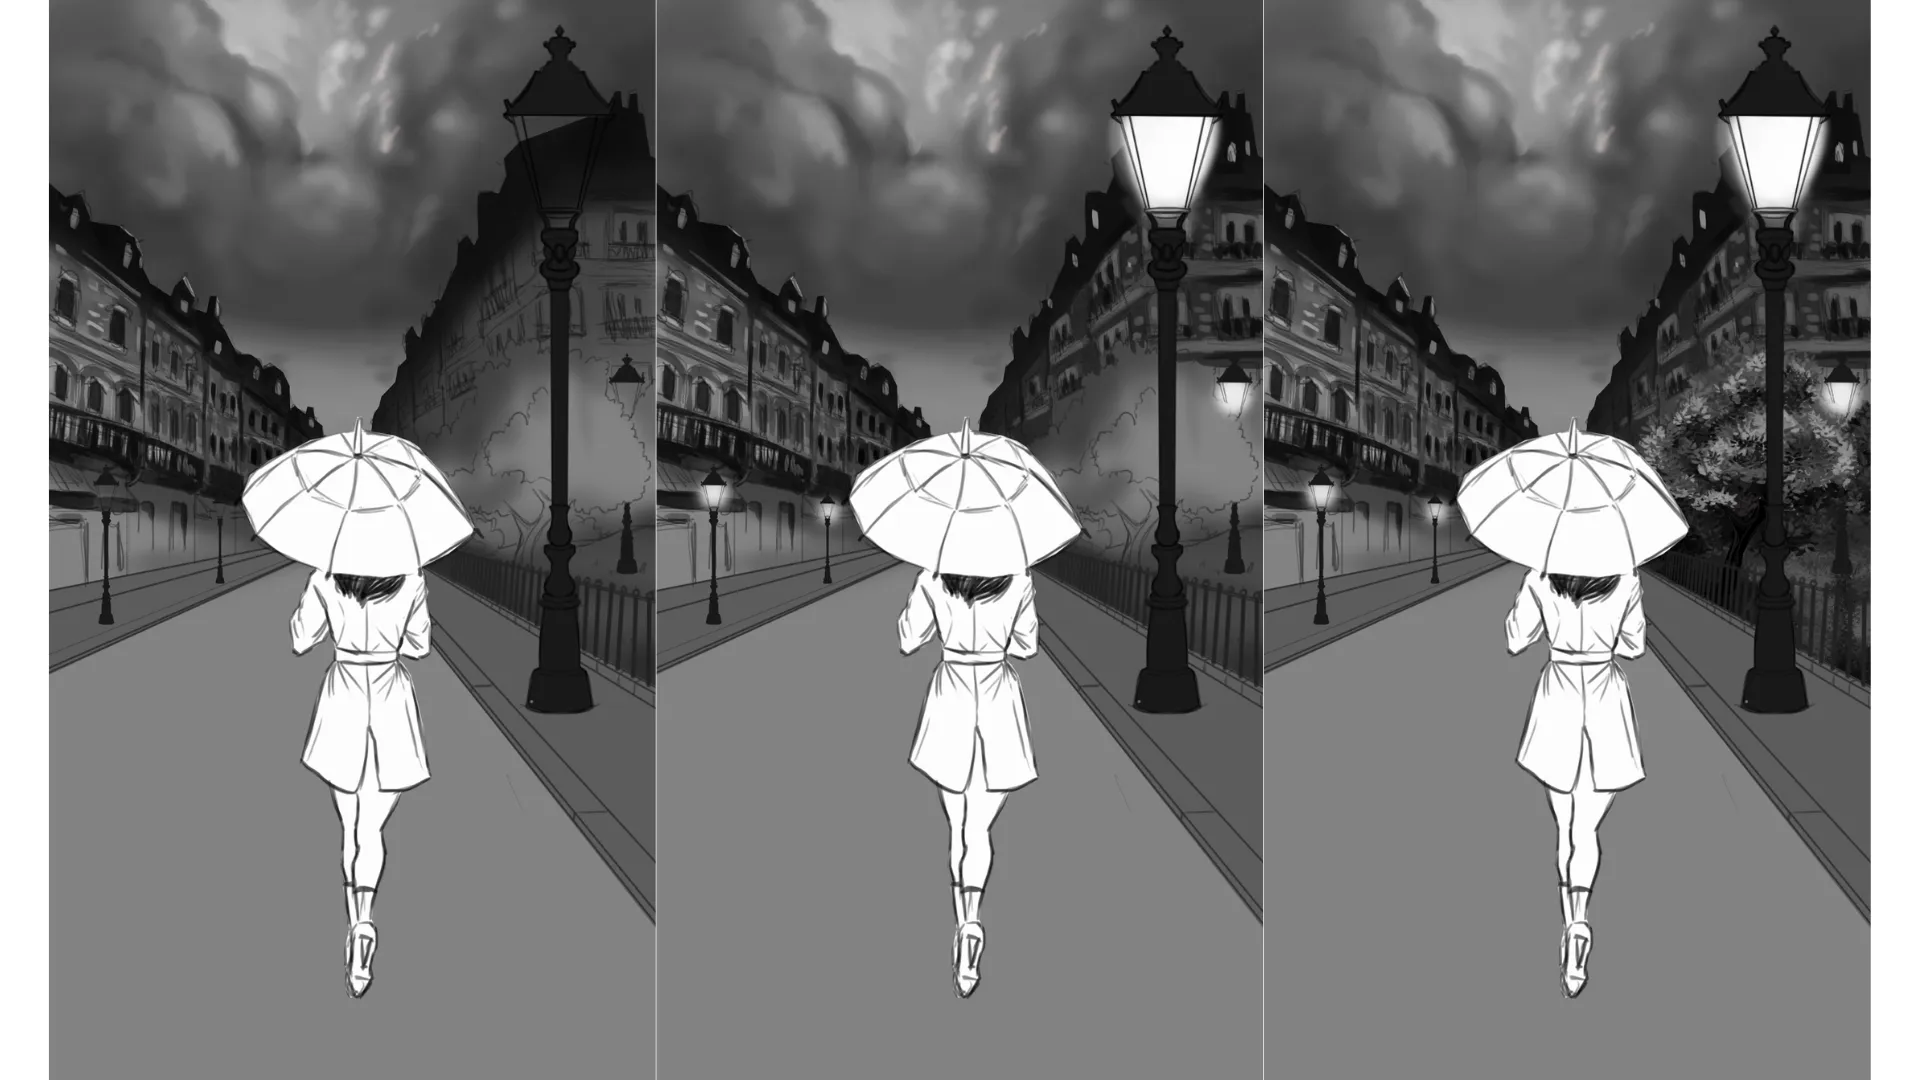
To begin our drawing, we define a horizon line in the center of the image to create a sense of balance. Starting from the central point, project several vanishing lines to construct the sidewalks along the street. Important tip: ensure that the sidewalks are uneven to achieve a more natural look.

Startin from either side, draw straight vertical lines to create the buildings, reducing the distances as you approach the vanishing point.
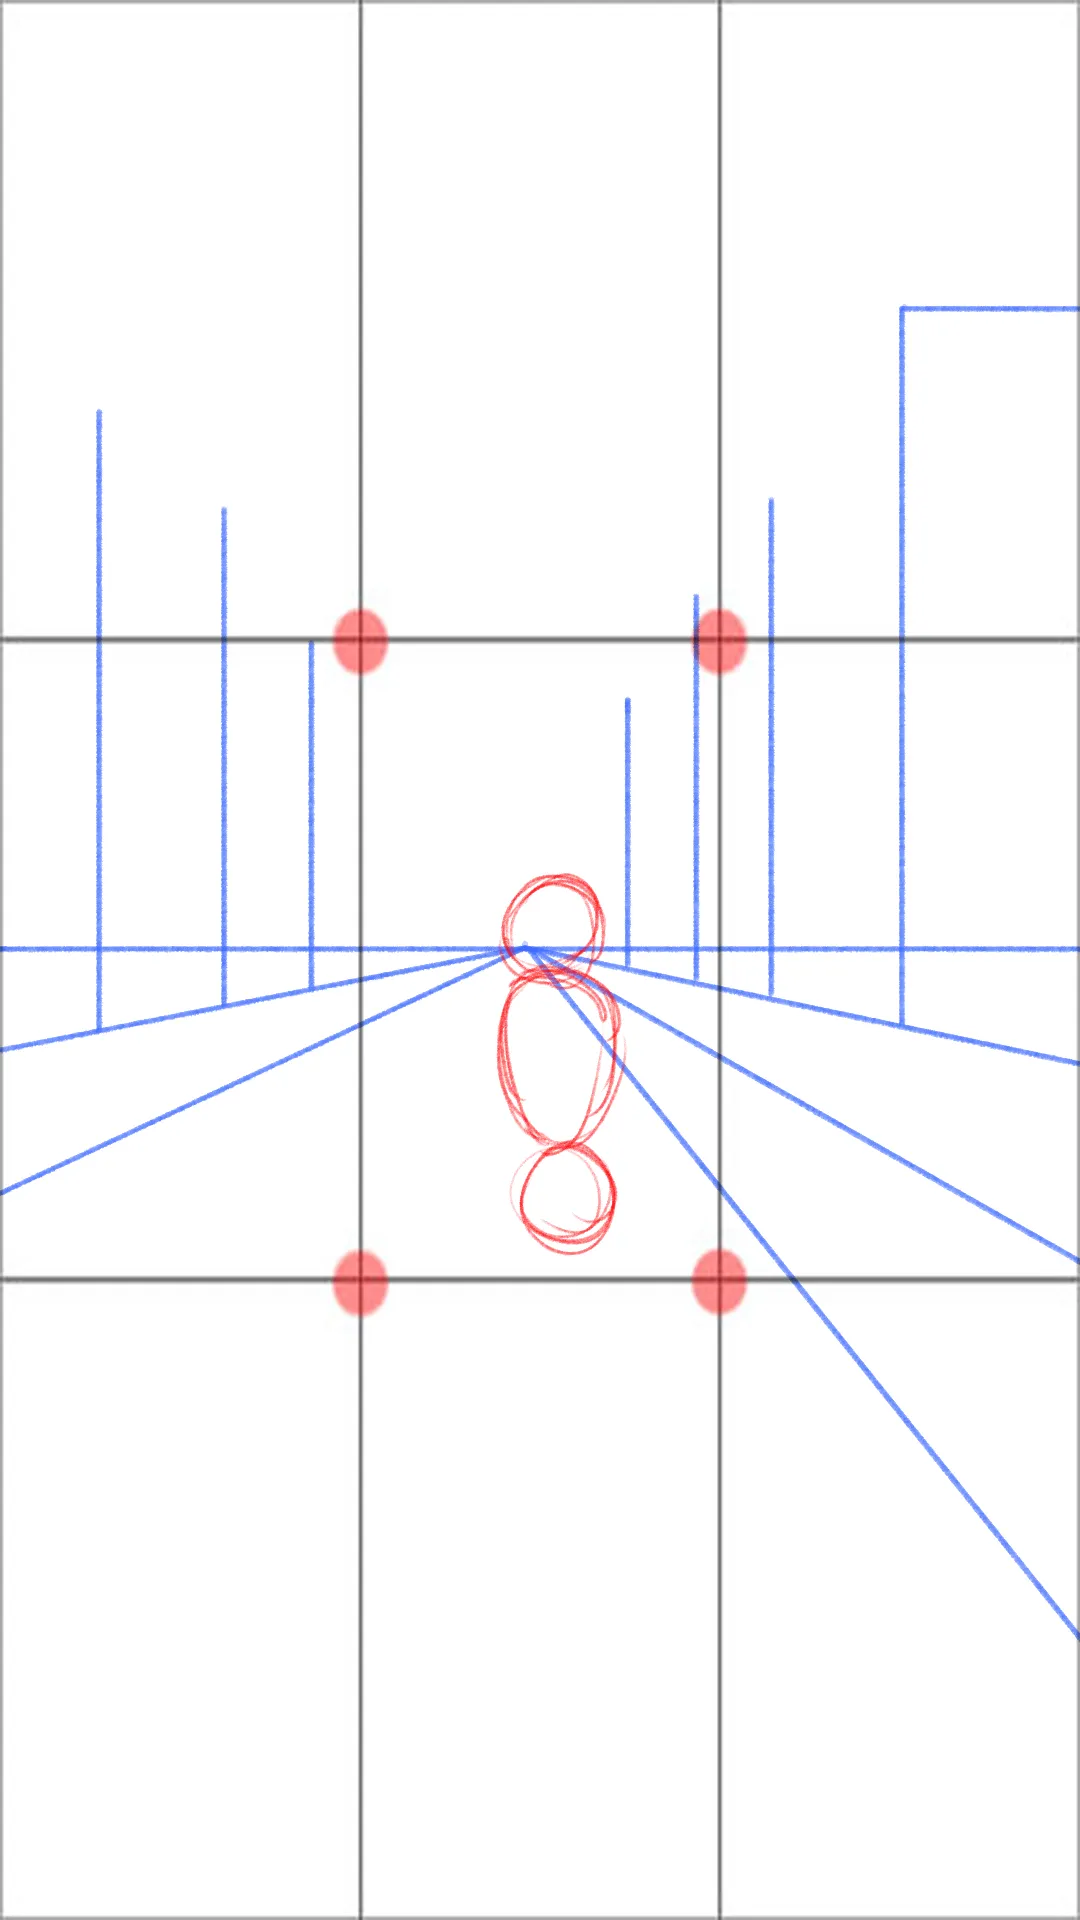
On the horizon line, draw a circle to position the head of your protagonist. Then add two more circles to represent the torso and the pelvis.
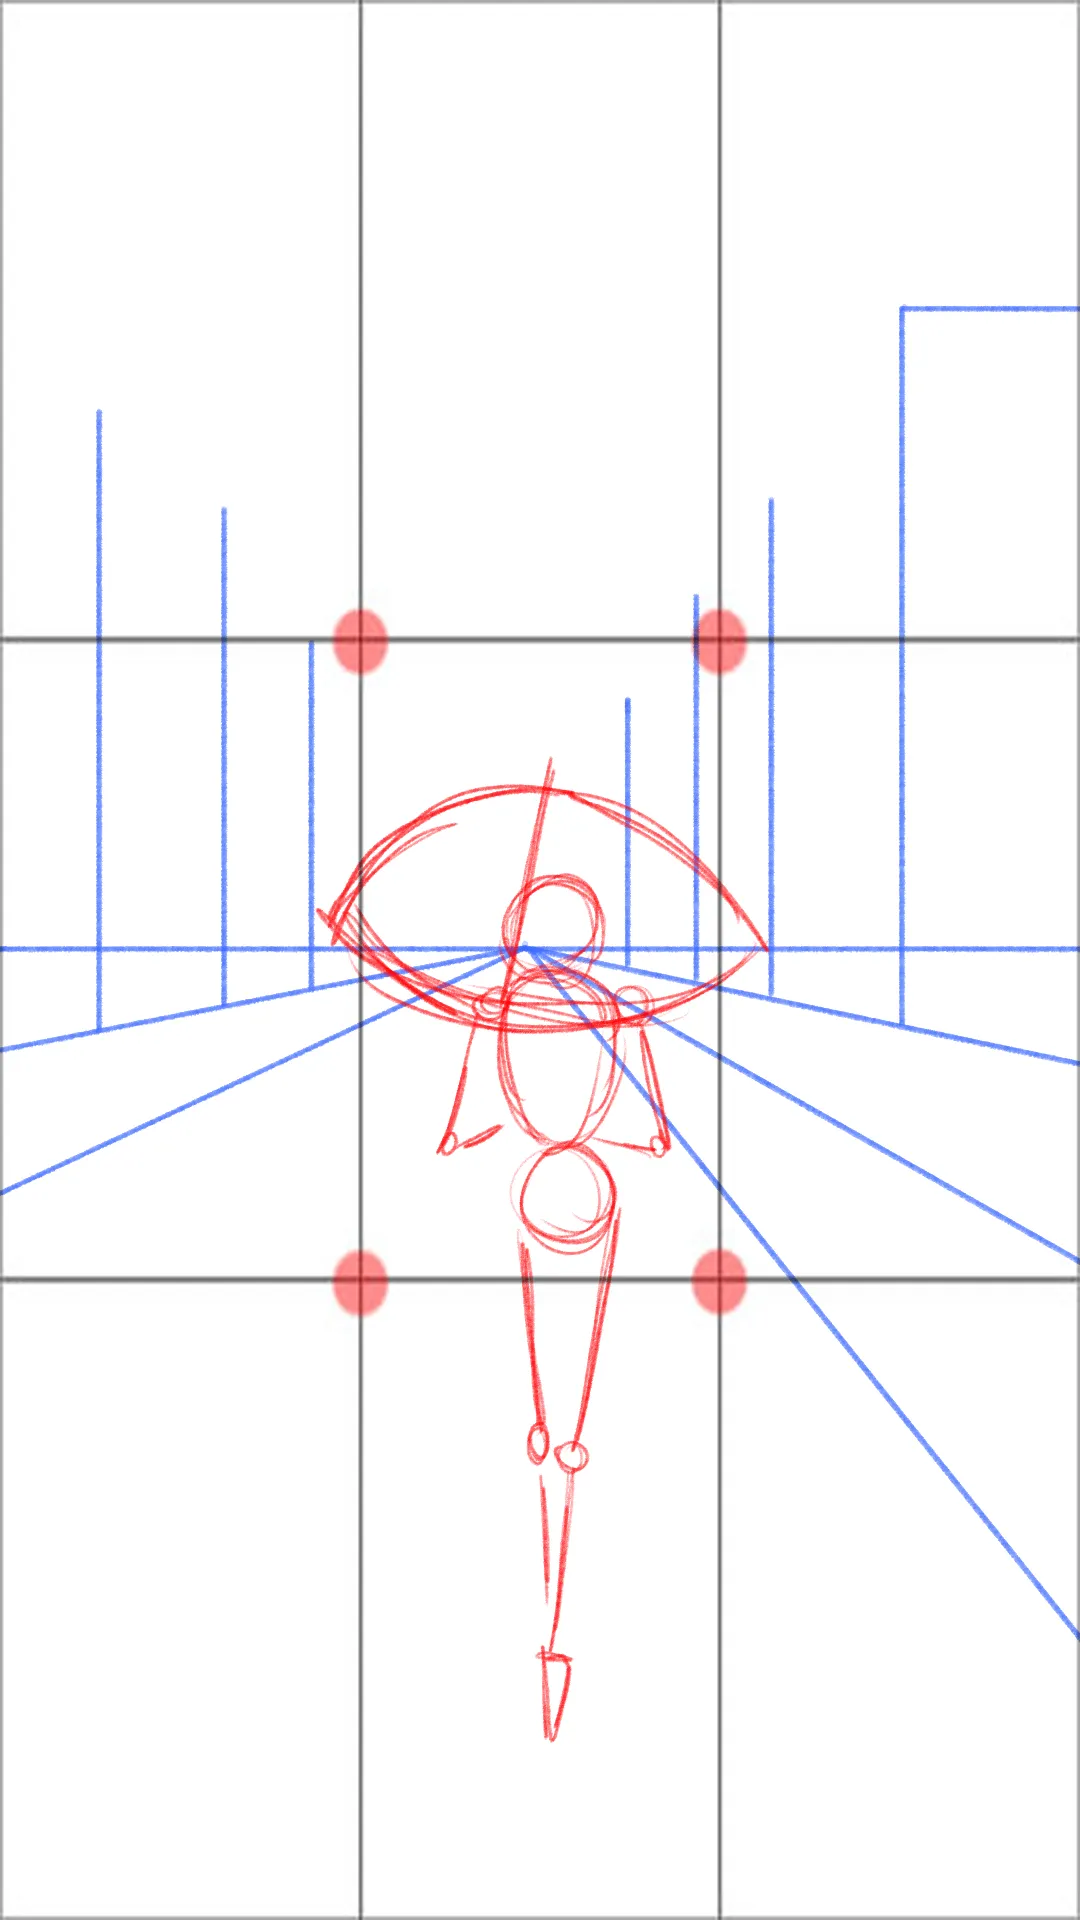
From these basic shapes, draw the limbs of a person walking, with one leg in front of the other. Add an umbrella over their shoulders.
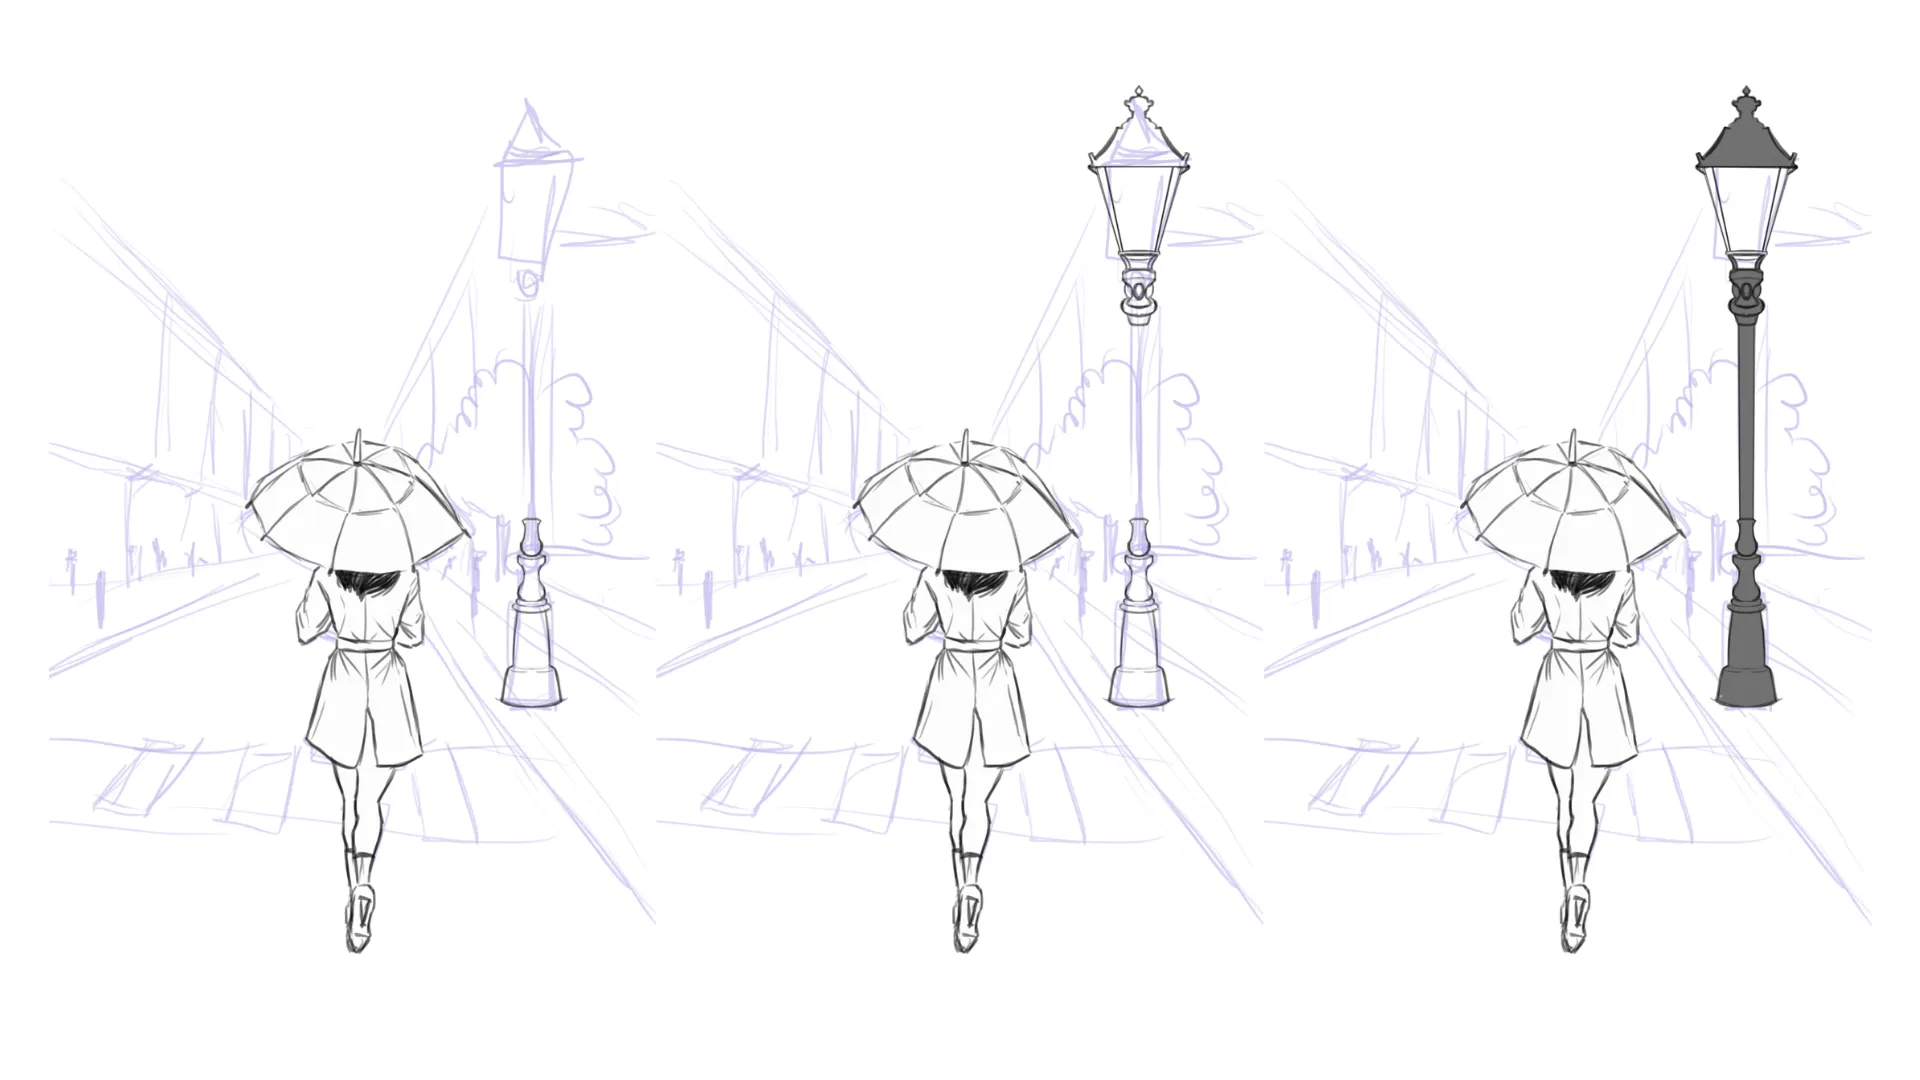
Add some additional elements like streetlamps and trees along the road, continuing to use simple shapes to place the different structures.
Draw a character in a rainy landscape
Then remove the construction elements such as the rule of thirds grid and start to give a more definite shape to the objects.
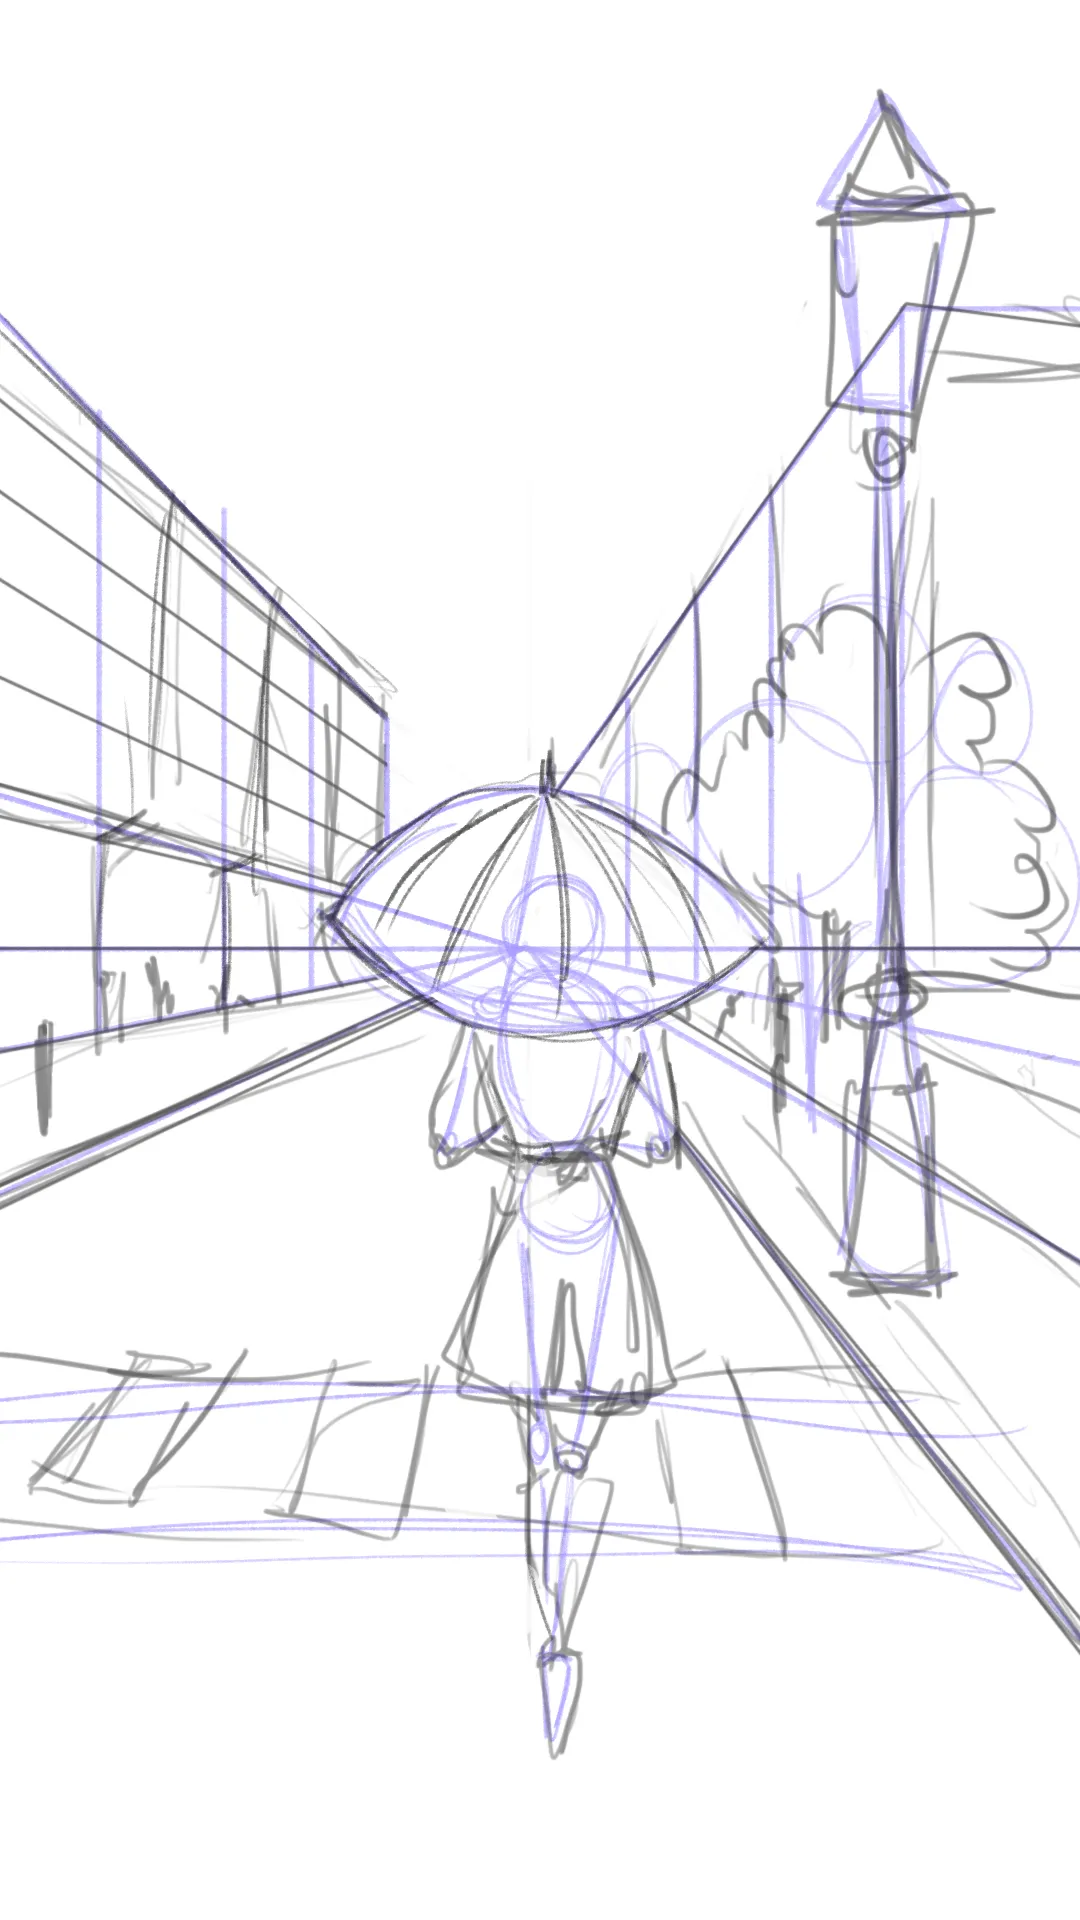
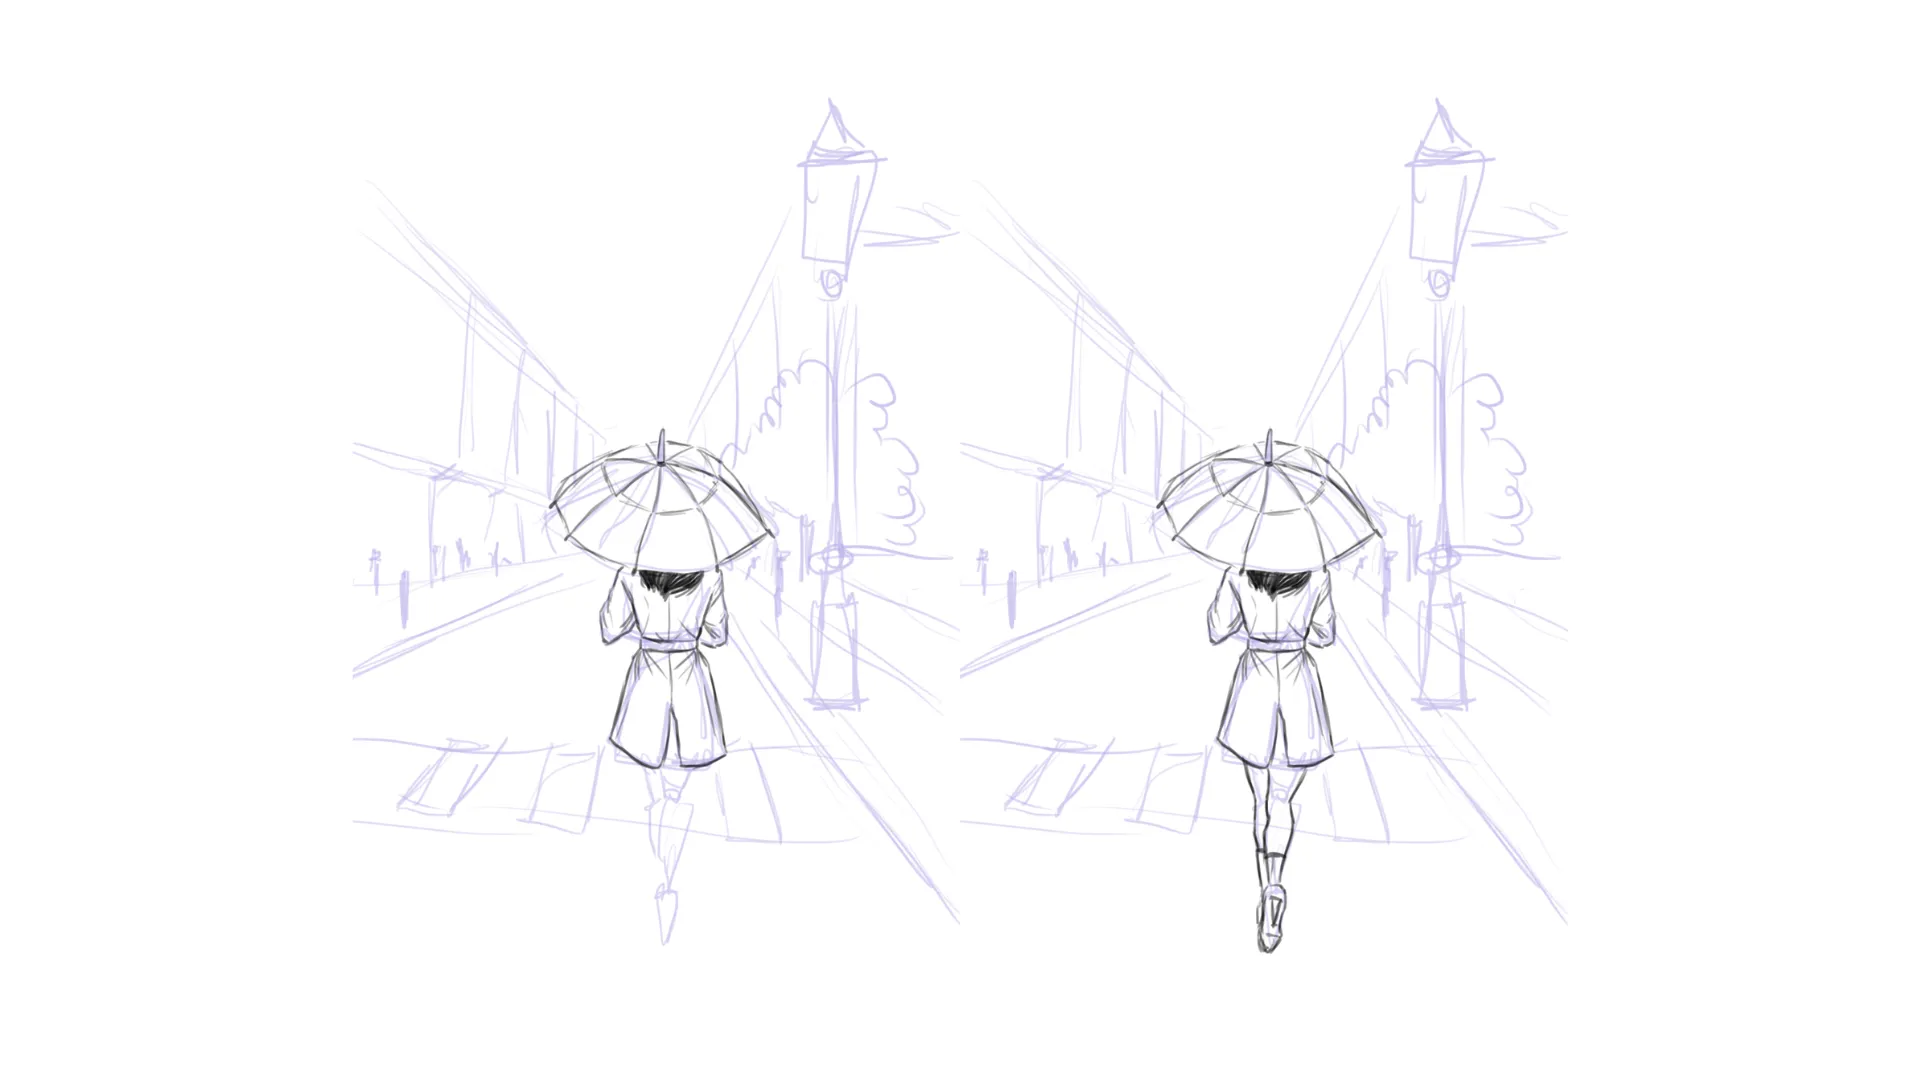
To begin, draw a young girl wearing a coat and holding an umbrella under the light of a streetlamp. These light sources will play a key role in highlighting the effects we will add later.
Draw the umbrella using the metal frame as a guide, then define the silhouette of the young girl.
Draw the coat with a few folds, and position the legs as if she is walking. Her arms are holding the umbrella, and her hunched posture suggests a chill in the air.
The streetlamp is our second key element. Take inspiration from a model to draw it, incorporating various levels of decorative details. Place it high in the composition and color it in a dark shade.
Add perspective to the drawing
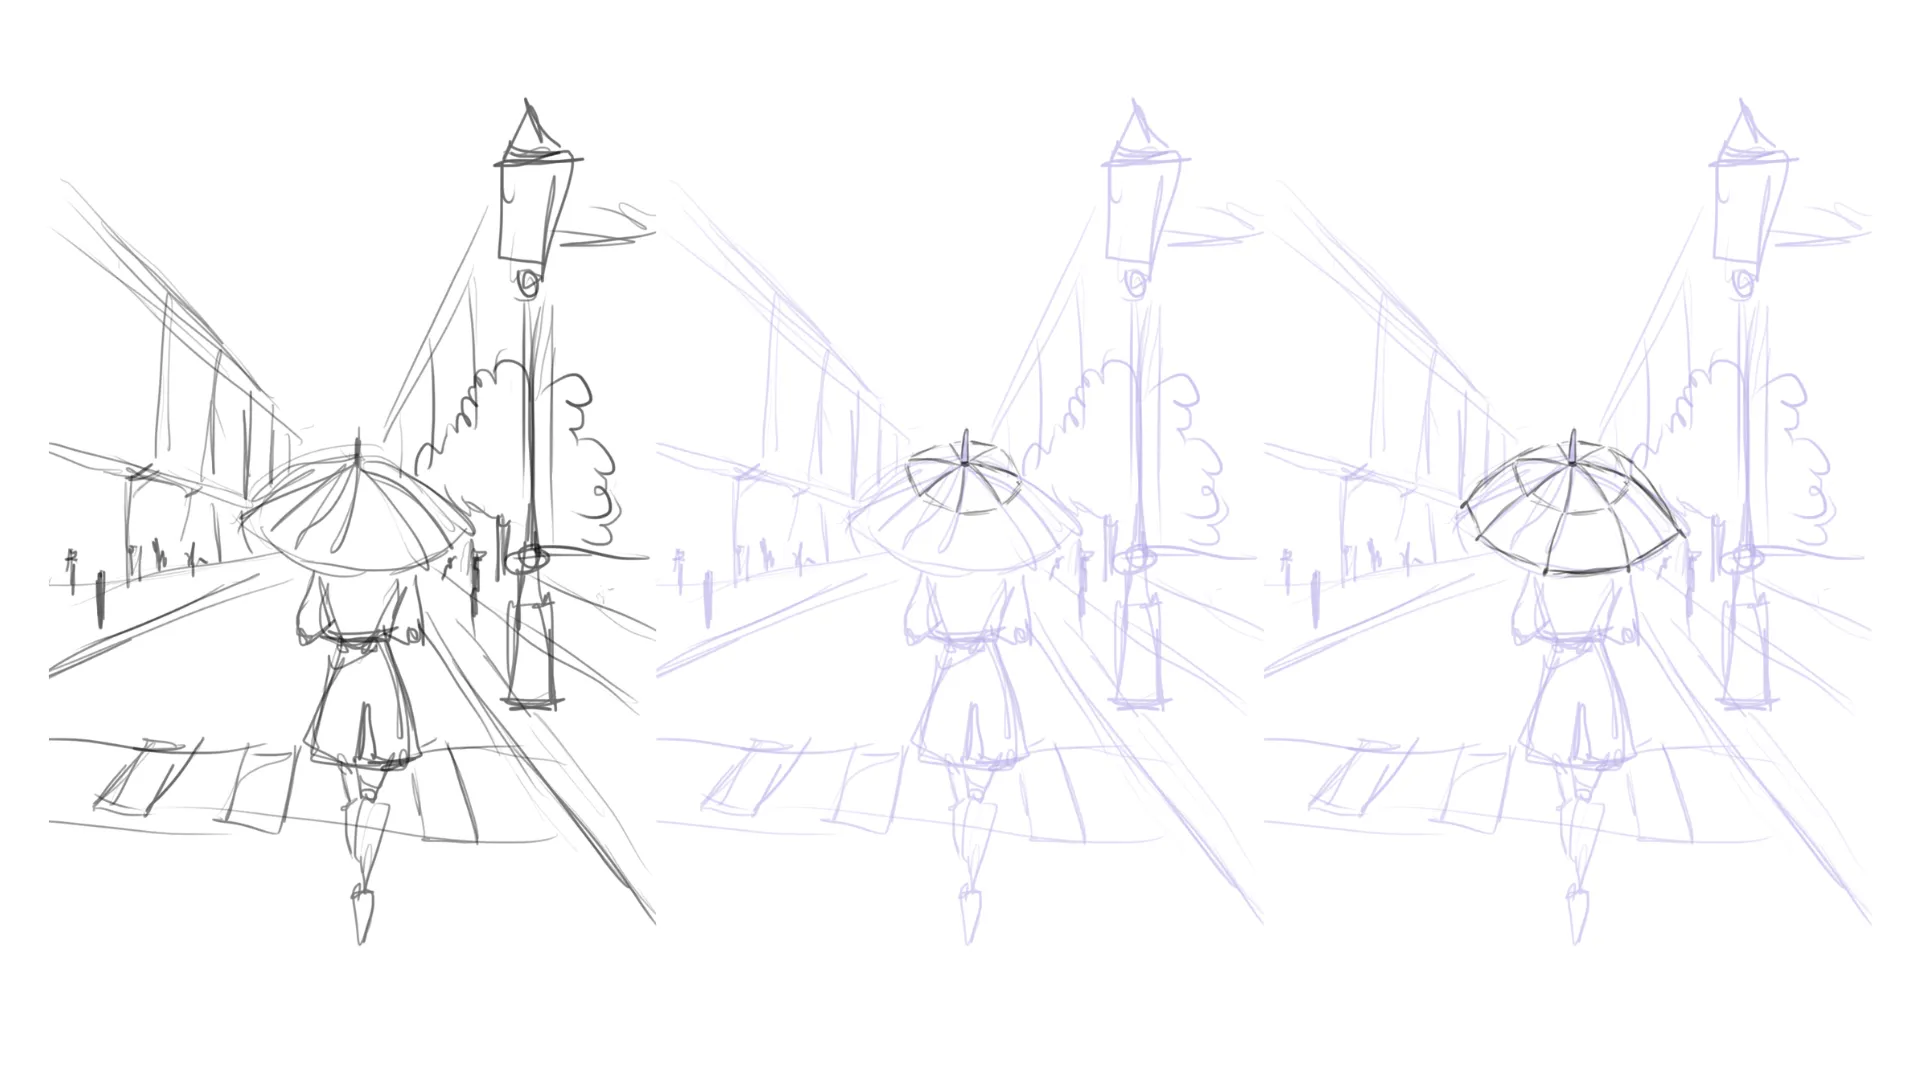
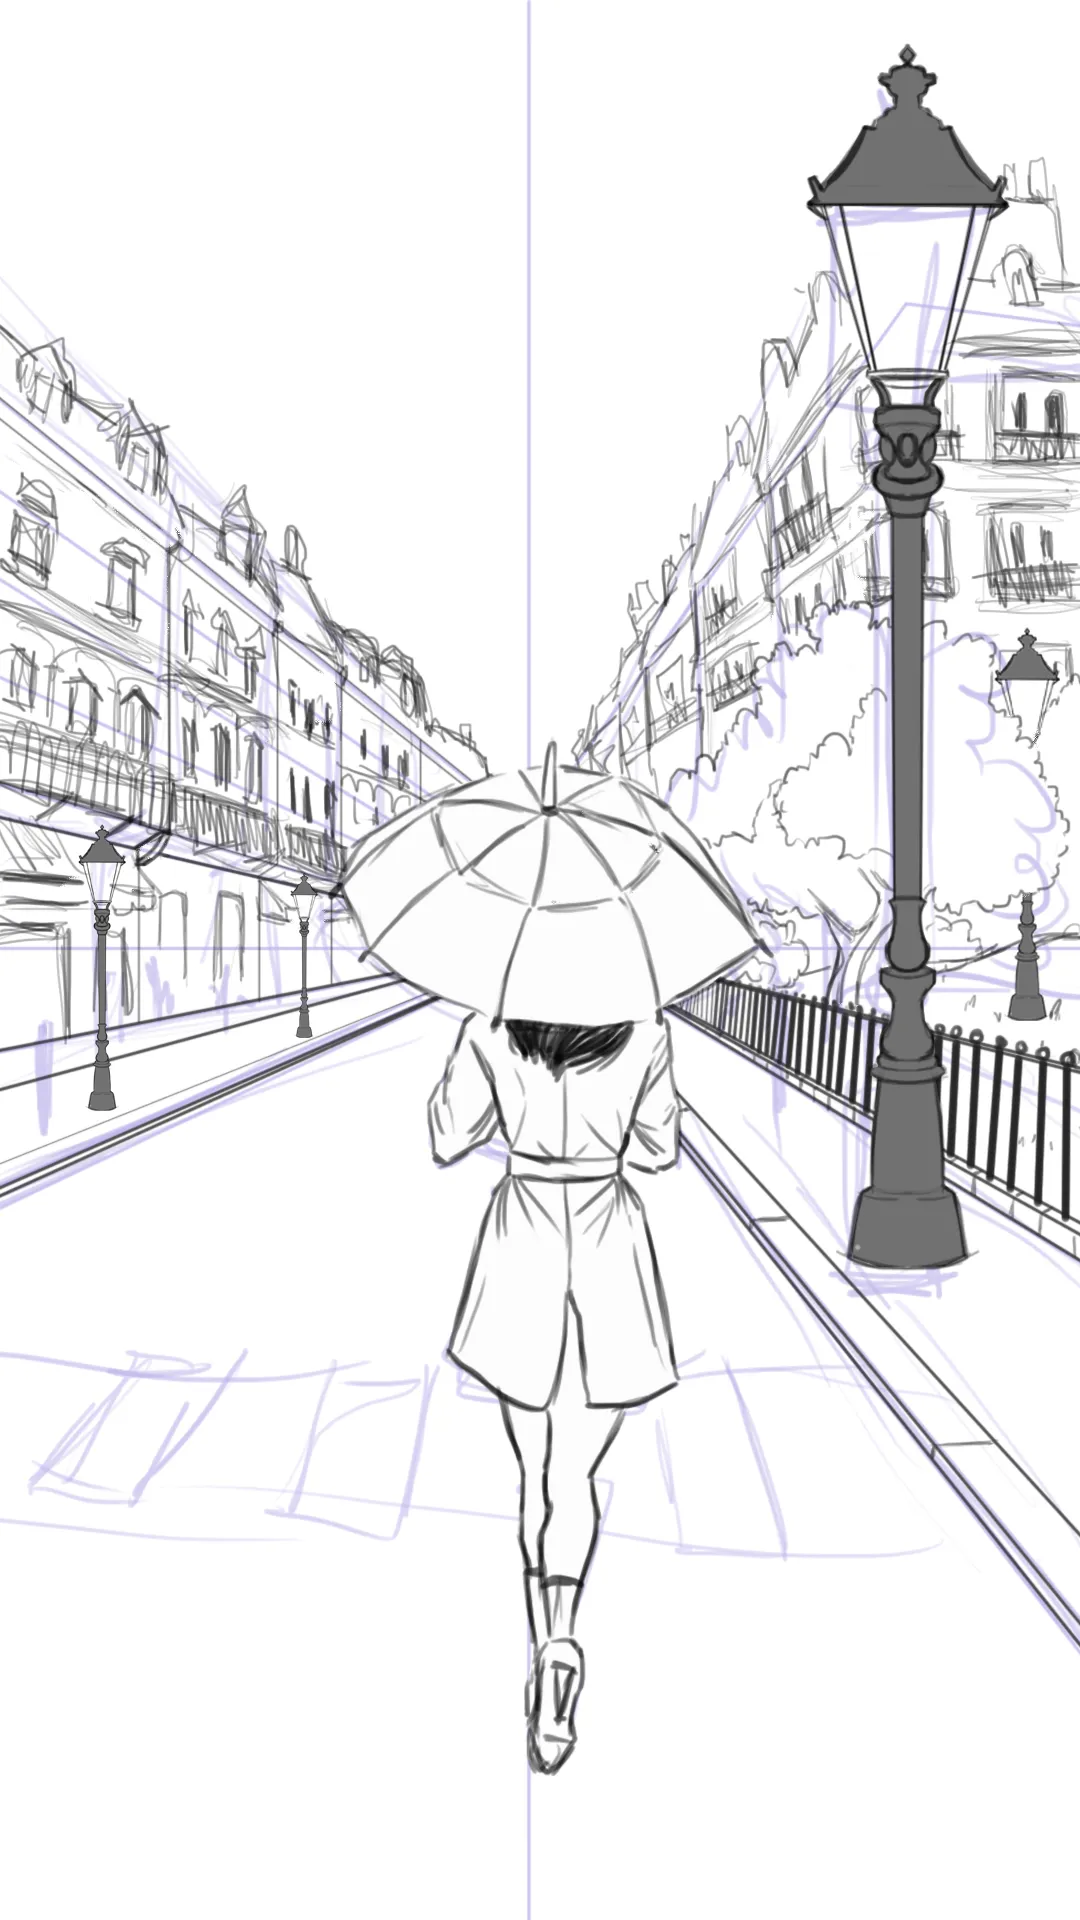
We will now draw the sidewalk. Use the vanishing point and place the horizon line at the shoulder height of the girl to create a good perspective. To vary the composition, you can have different elements on each side: a fence and a garden on one side, houses on the other.
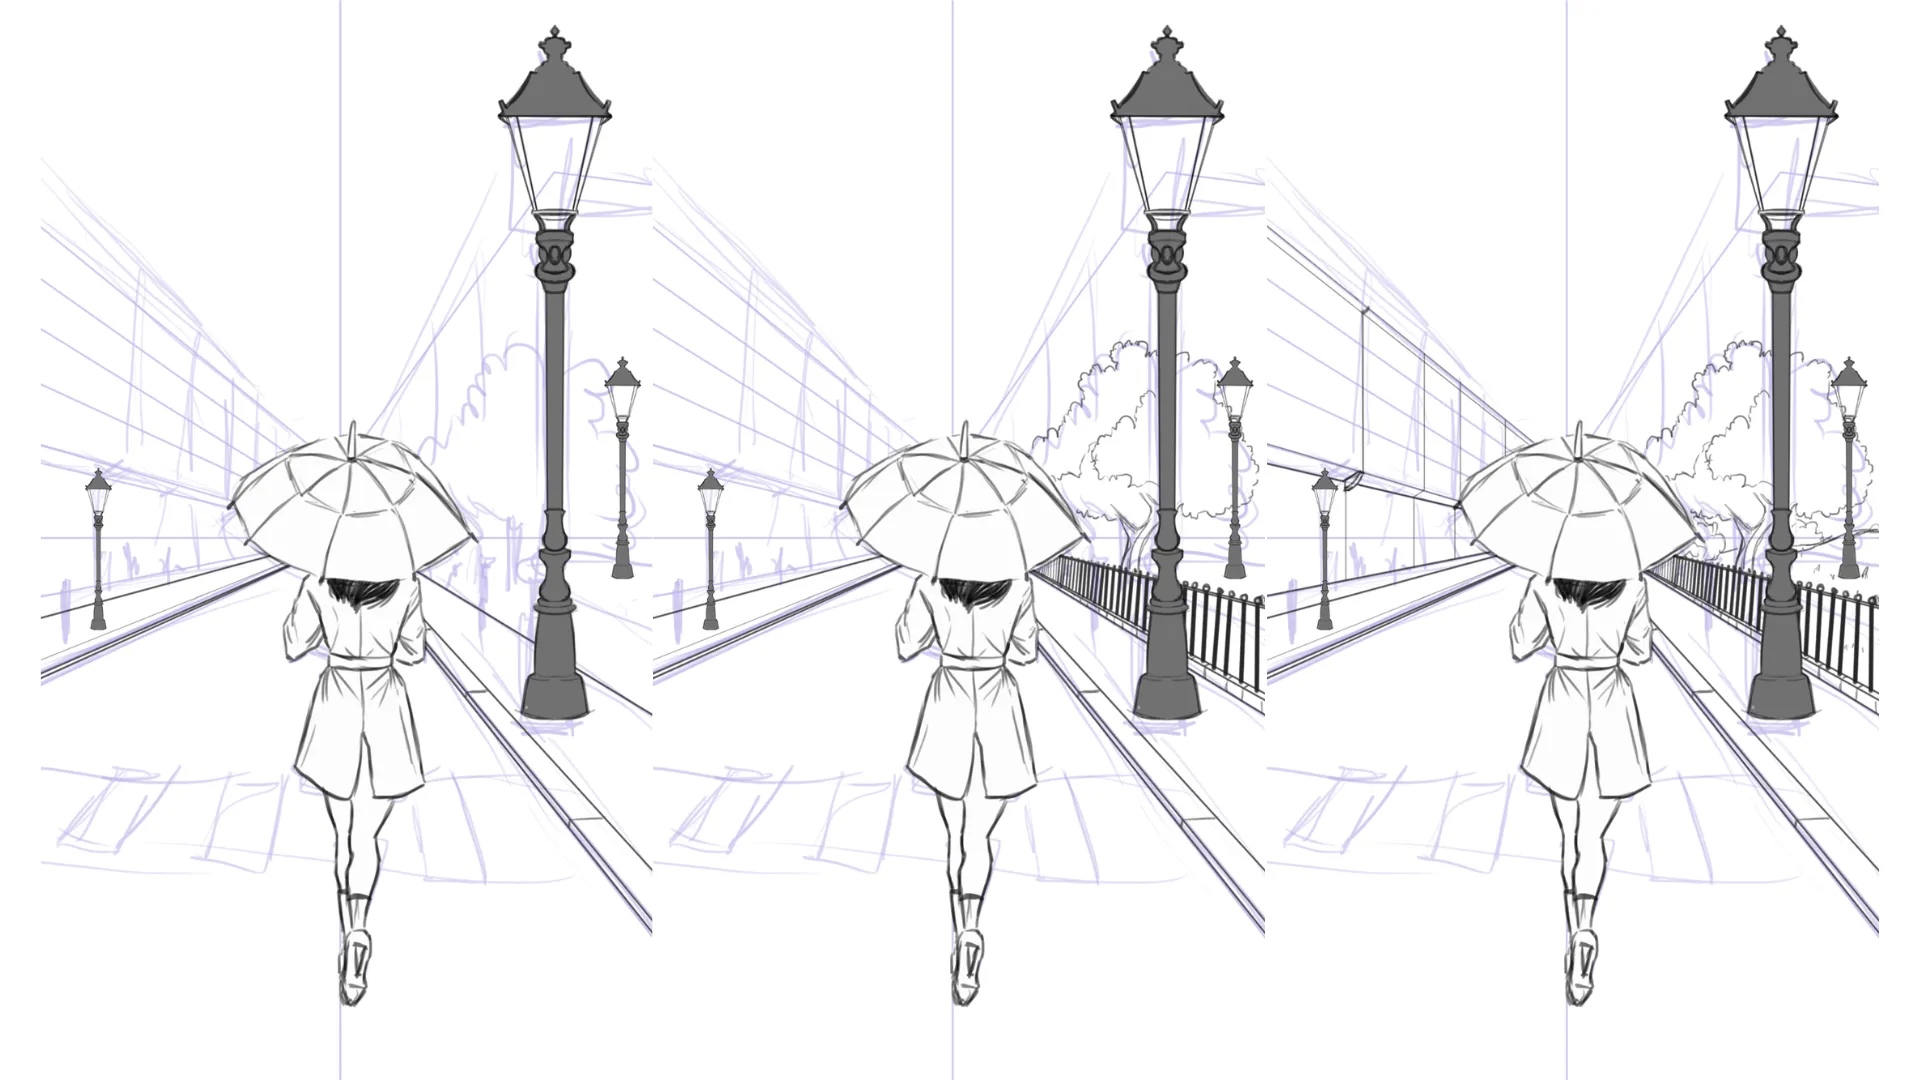
Now add the windows and the details of the houses. If you look closely at the example, you'll see that the architectural elements look like quick scribbles, this is intentional. Remember: when it rains, our vision is altered, and the details of our environment become blurry.
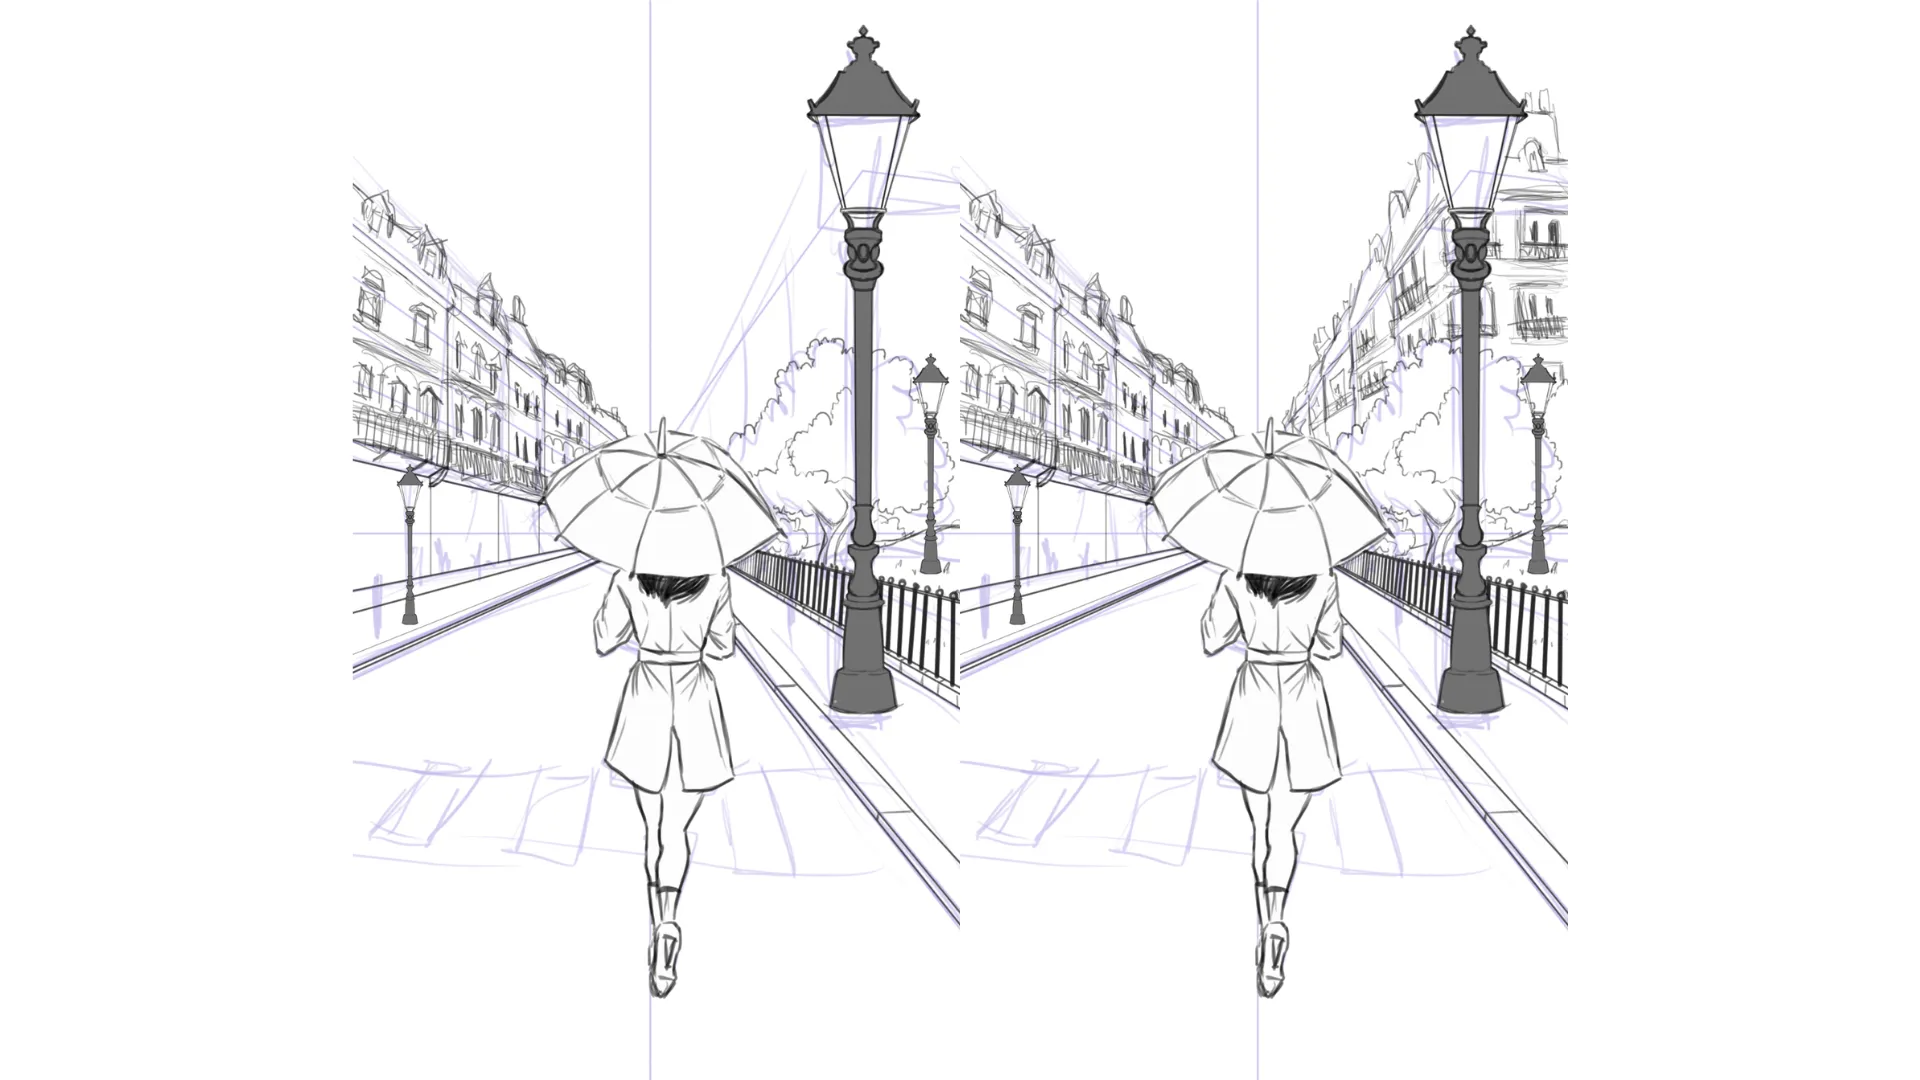
Here is our base drawing. Notice how we have defined two planes just by the type of stroke: details are reserved for the protagonist and the streetlight, while the rest of the scene is relegated to the background, with more simplified but intentional line work.
Add shadows to the rainy landscape drawing
Start by coloring the scene with a fairly dark gray, adding an overcast sky, completely covered with thick clouds. Additional details will add a dramatic touch, but a gray sky with soft shadows is more realistic.

Add color to the houses and the garden in the background. Here, there's no need to be precise: rough, overlapping strokes are enough. Start with the windows and roofs in very dark shades, add details like arches or borders in different grays to break the monotony of the walls. Add some reflections, and most importantly, some streetlamp lights diffused with pure white.
We start by darkening the silhouette of the character, due to the contrast generated by the light coming from above. From this point, lighten the parts exposed to the streetlamp with a medium gray, then accentuate the edges with a lighter shade. The contrast here is crucial, as wet surfaces strongly enhance reflections.
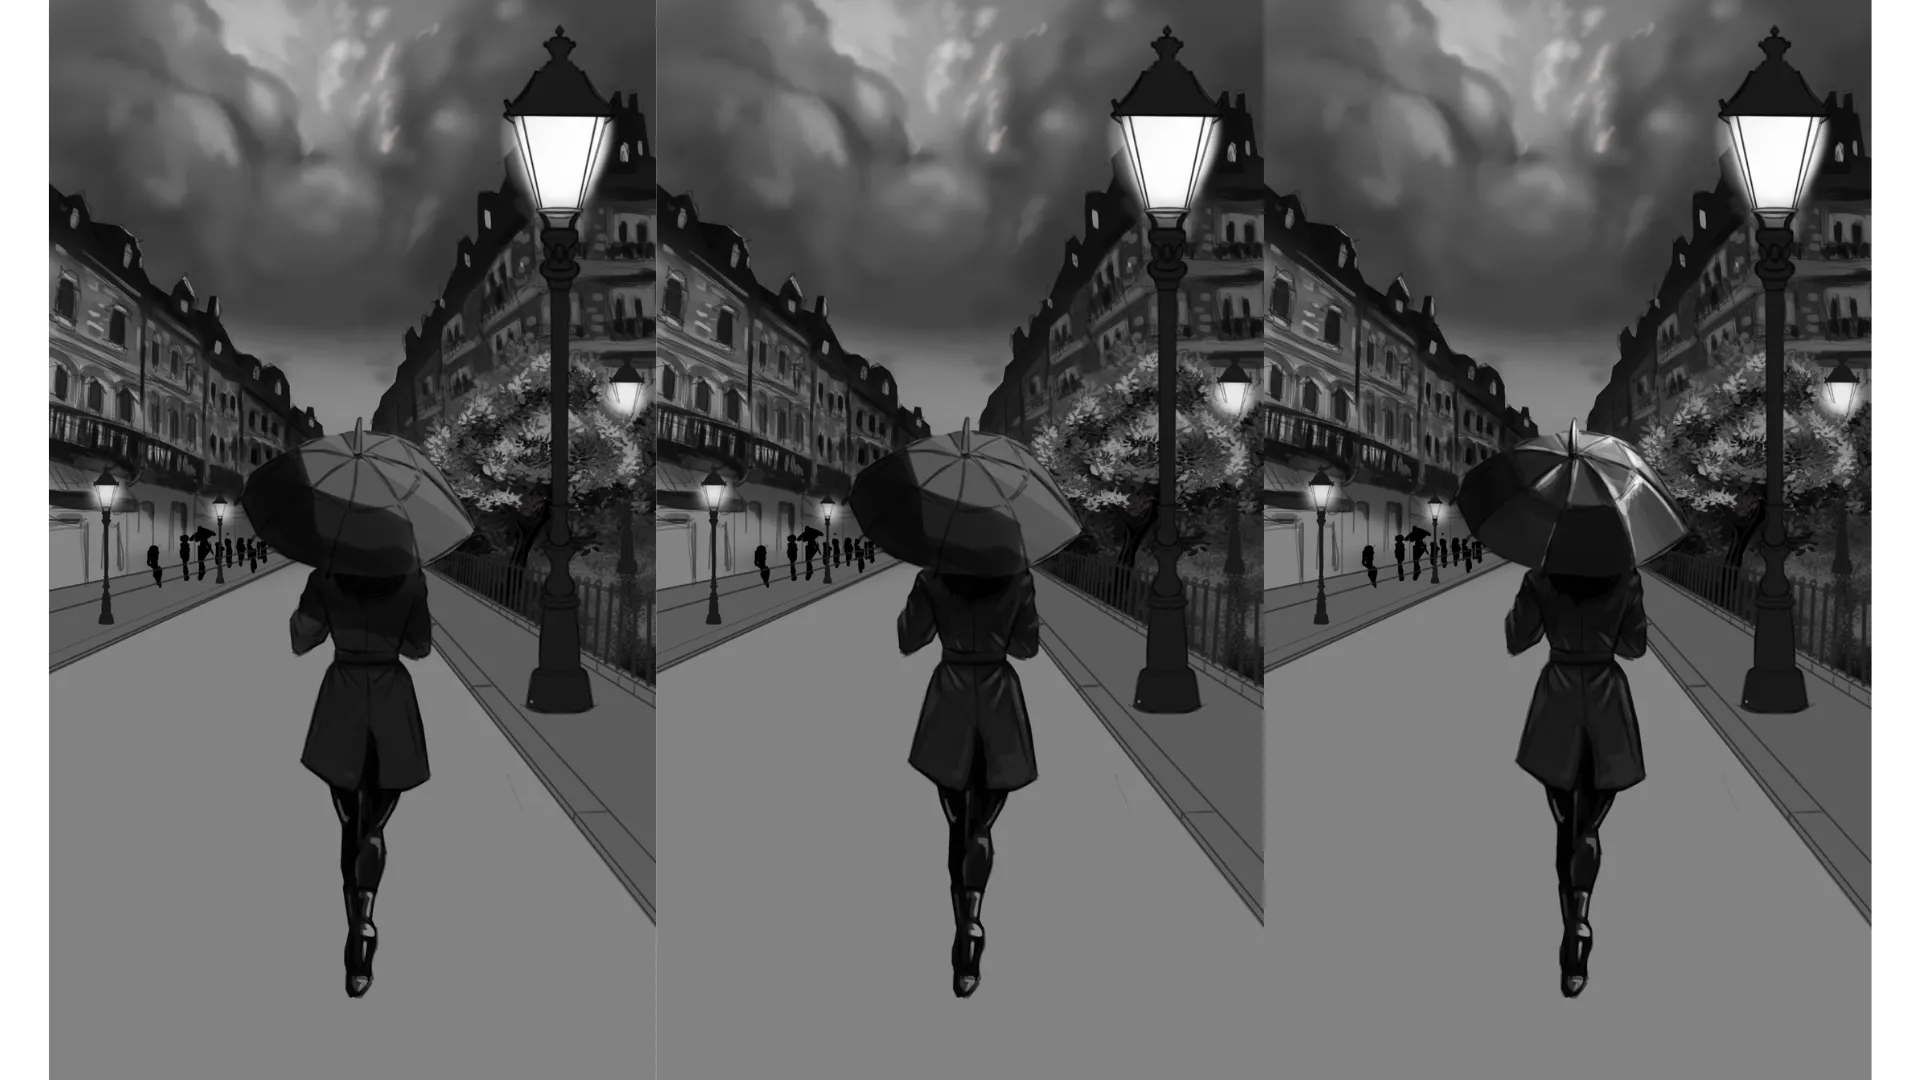
Draw the gaps between the paving slabs, then vary the shades of gray, emphasizing strong contrasts, juxtapose light and dark tones, preferably with transparent effects or light washes.

Draw the rain and water reflections
We are now at street level, just below the feet of our protagonist. To create the effect of a wet surface, start by applying a dark base, then gradually add lighter and lighter strokes. Be sure to draw a path of light around the girl to guide the viewer's eye, enhance realism, and focus attention.
Then draw a few bricks and add reflections in a slightly random manner.
It's now time to add the rain: draw short white lines with slight variations in angle, then gradually blur them as they approach the clouds.

Finally, add small white lines on the umbrella and on the lamppost, leaving a slight space: this will simulate the splashes caused by the impact of the drops. You can also apply this effect to the ground or other nearby objects.

And there you have it, our drawing is now complete! Now you can follow this step-by-step tutorial to create your own version.
Remember that rain reduces visibility: therefore, secondary elements benefit from being slightly blurred or distorted. To enhance the wet surface effect, increase the contrasts and reflections using pure white.
Finally, rain is not limited to just drops: it affects the overall ambiance and is a key contributor to the atmosphere of the drawing.
Discussion
Thank you, I loved working on this Watercolor
That's awesome 👍
Howdy! I saw an advertisement in the local newspaper classifieds for a gaming site, which is pretty rare. I looked it up on my phone. The double bet feature caught my eye immediately. Being able to place two separate bets simultaneously with different cash-out strategies is a smart way to hedge your risks. For strategic players in Pakistan, this adds a whole new layer of depth. I used one safe bet and one risky bet while playing and it works like a charm. I am absolutely satisfied with the strategic options this feature provides to maximize profits!
Howdy! I saw an advertisement in the local newspaper classifieds for a gaming site, which is pretty rare. I looked it up on my phone. The double bet feature caught my eye immediately. Being able to place two separate bets simultaneously with different cash-out strategies is a smart way to hedge your risks. For strategic players in Pakistan, this adds a whole new layer of depth. I used one safe bet and one risky bet while playing and it works like a charm. I am absolutely satisfied with the strategic options this feature provides to maximize profits!
ð§ Silly questions. Rain seems easier to create with digital tools.
But what if it were done with charcoal, pencil, or gouache?
Which technique should I choose? Should I use a latte and a thin eraser to create vertical streaks?
Do it by scraping with a blade?
Are there other ways to achieve it?
Excellent question, and I have the impression that you’ve already found several answers on your own! Indeed, you could use a fine brush to create the raindrops with gouache, or an acrylic marker. The idea of scratching also seems very clever to me!