
How to Draw Shadows on a Face
When learning portraiture, you start with proportions, measurements, and the features of the face. But there comes a point where many beginners encounter the same difficulty: not knowing where to place the shadows. This is precisely what we will discuss in this article, which provides a comprehensive guide to understanding the forms, contours and volume of a face and their interaction with light.
Understanding the key forms and volume of a face
A face is not flat. It is filled with ridges and hollows, which make it a dynamic terrain where light interacts in very different ways depending on the areas.
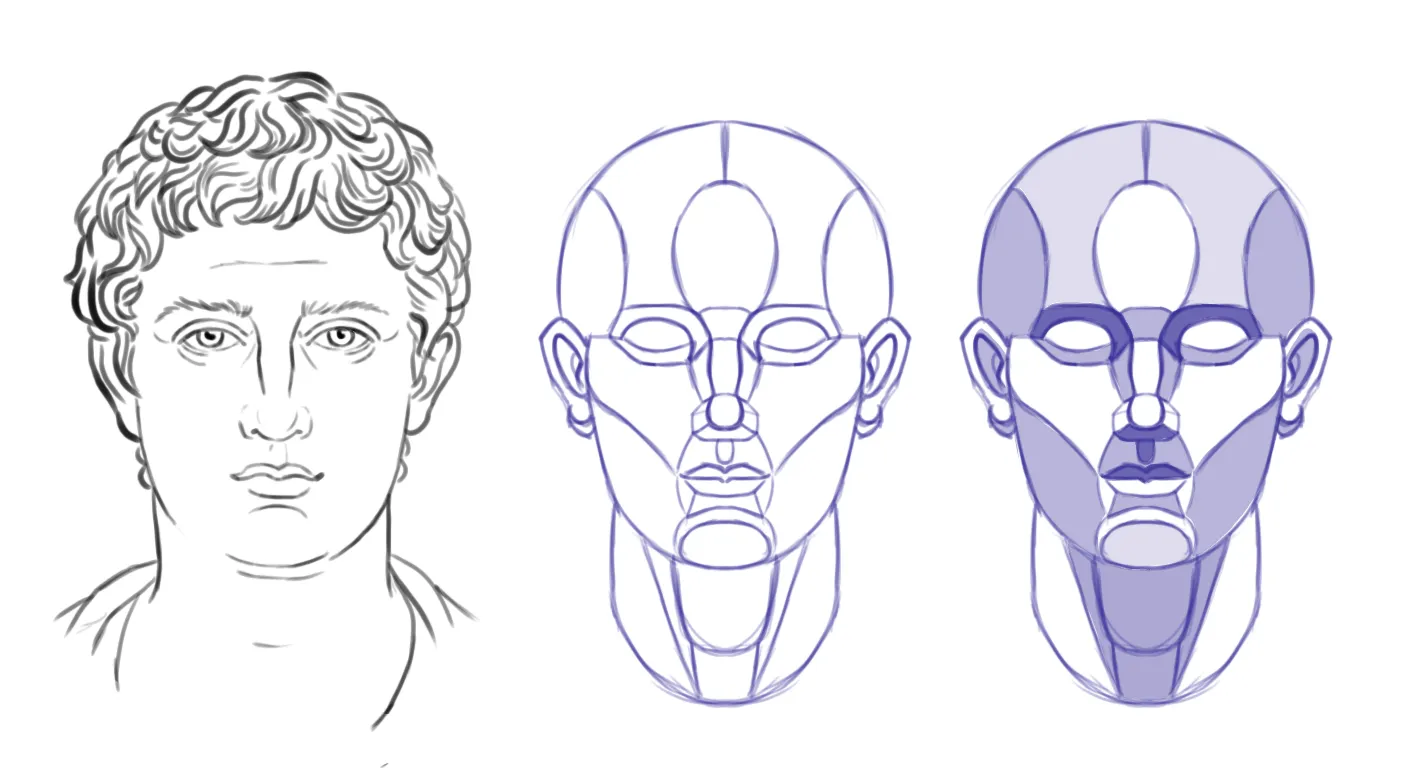
The easiest way to understand this structure is to divide the face into geometric sections. We then observe that the center of the forehead, the upper part of the cheekbones, and the bridge of the nose receive full light. Conversely, the eye sockets, the lower part of the nose, and the upper lip become more intensely shadowed. The rest of the face is rendered with intermediate tones.
The direction of light: how it changes everything
By being aware of the forms and contours of the face, we can create a general lighting scheme. But light is dynamic; it changes everything depending on its point of origin. Here are the main scenarios.
Front lighting
When the light source is positioned in front of the model, the central areas of the face are illuminated while the sides become darker. Unlike the general lighting scheme, the eye sockets and nostrils are well-lit in this case.
Side lighting
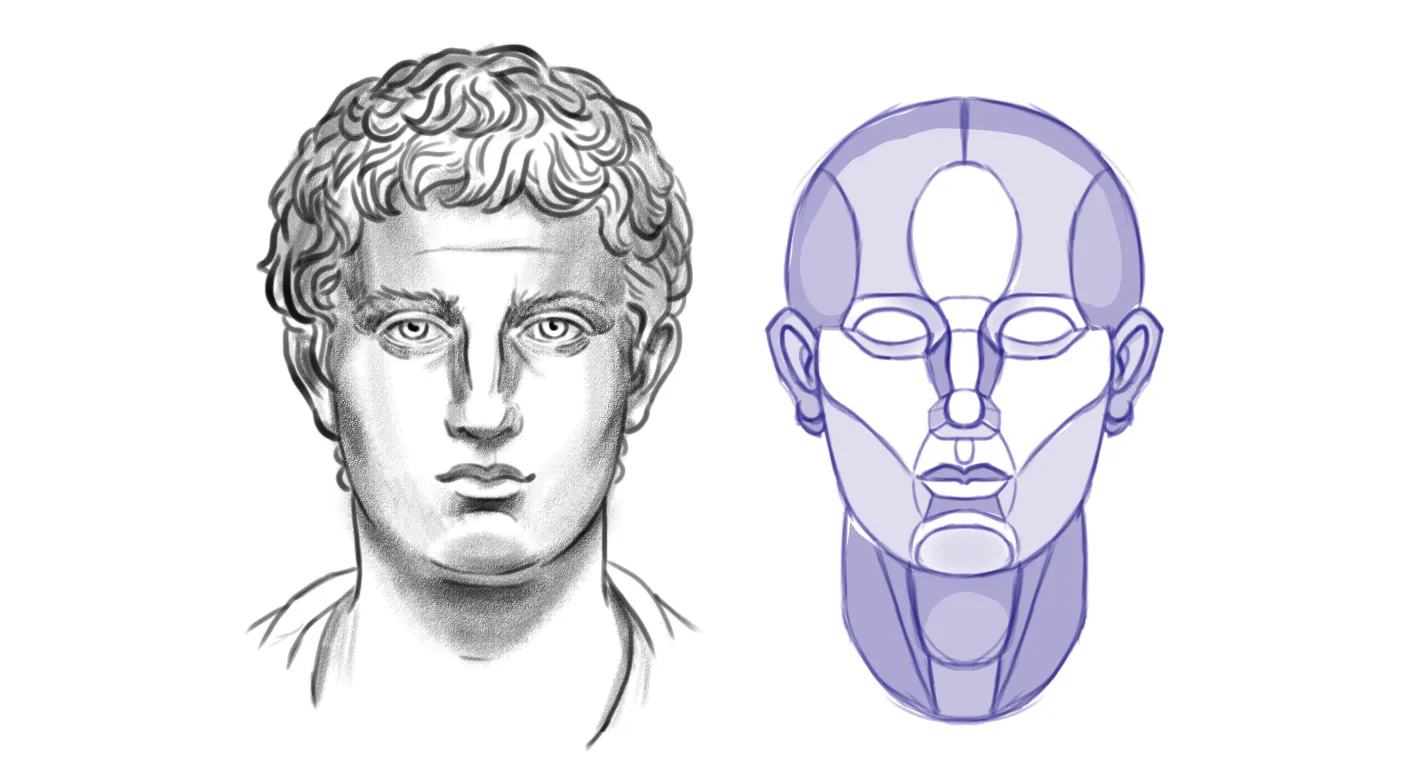
If the light comes from one side, then logically, the areas on that side will receive the strongest impact. The side of the nose is also illuminated as it stands out, while projecting a shadow towards the opposite side.
Overhead lighting
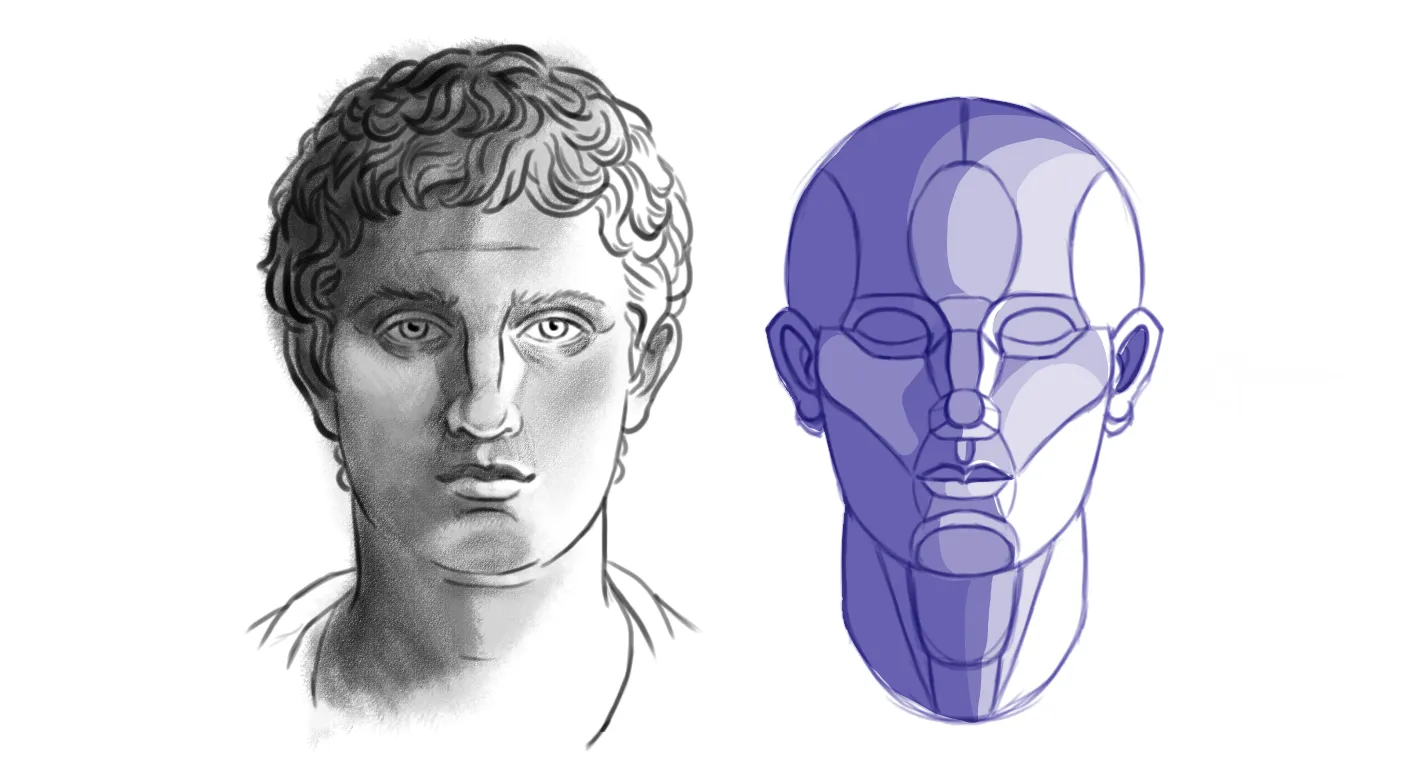
With the light coming from above, the cheekbones, bridge of the nose, lower lip, and the upper part of the nose are illuminated. The eye sockets and the areas facing downwards become even darker.
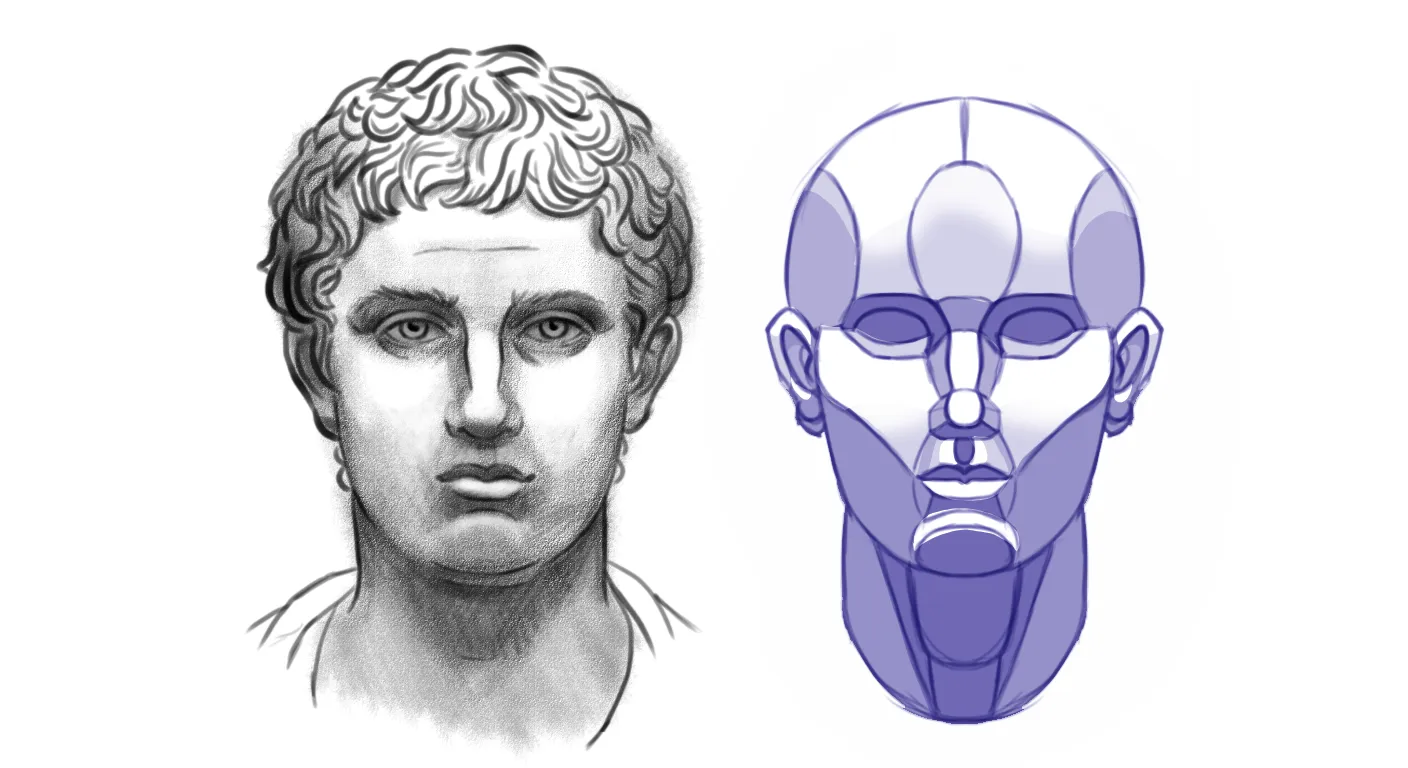
Bottom lighting
This is the typical lighting for horror scenes: the face is almost entirely in shadow, with only the eye sockets illuminated. The areas that are usually dark become illuminated, such as the nostrils, upper lip, and under the chin, which creates a unique expressiveness.
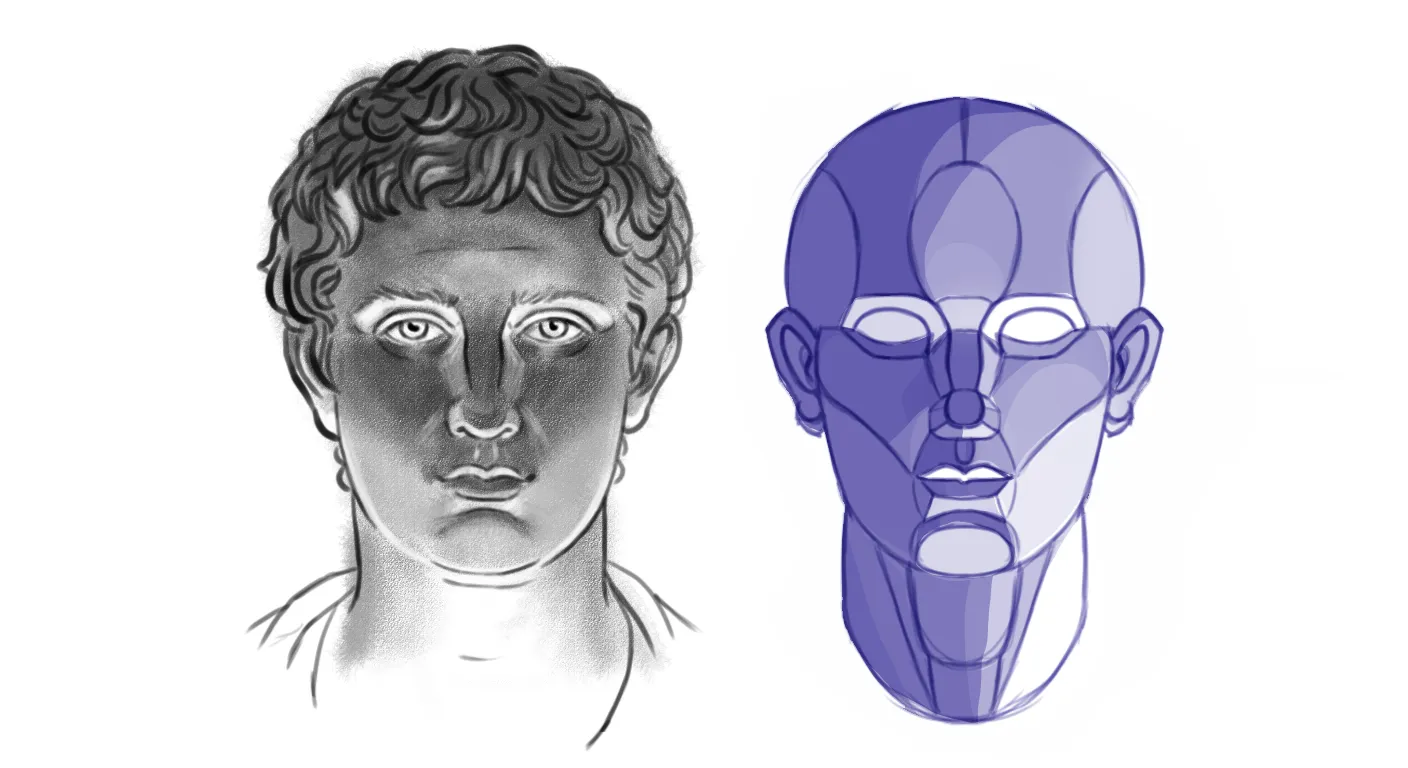
Mixed directions
When two light sources combine, similarities are found with each of the two original points, but it is not a simple addition. The direction always modifies the illuminated areas and the shadow areas. At this stage, the identification of shadows becomes more intuitive.
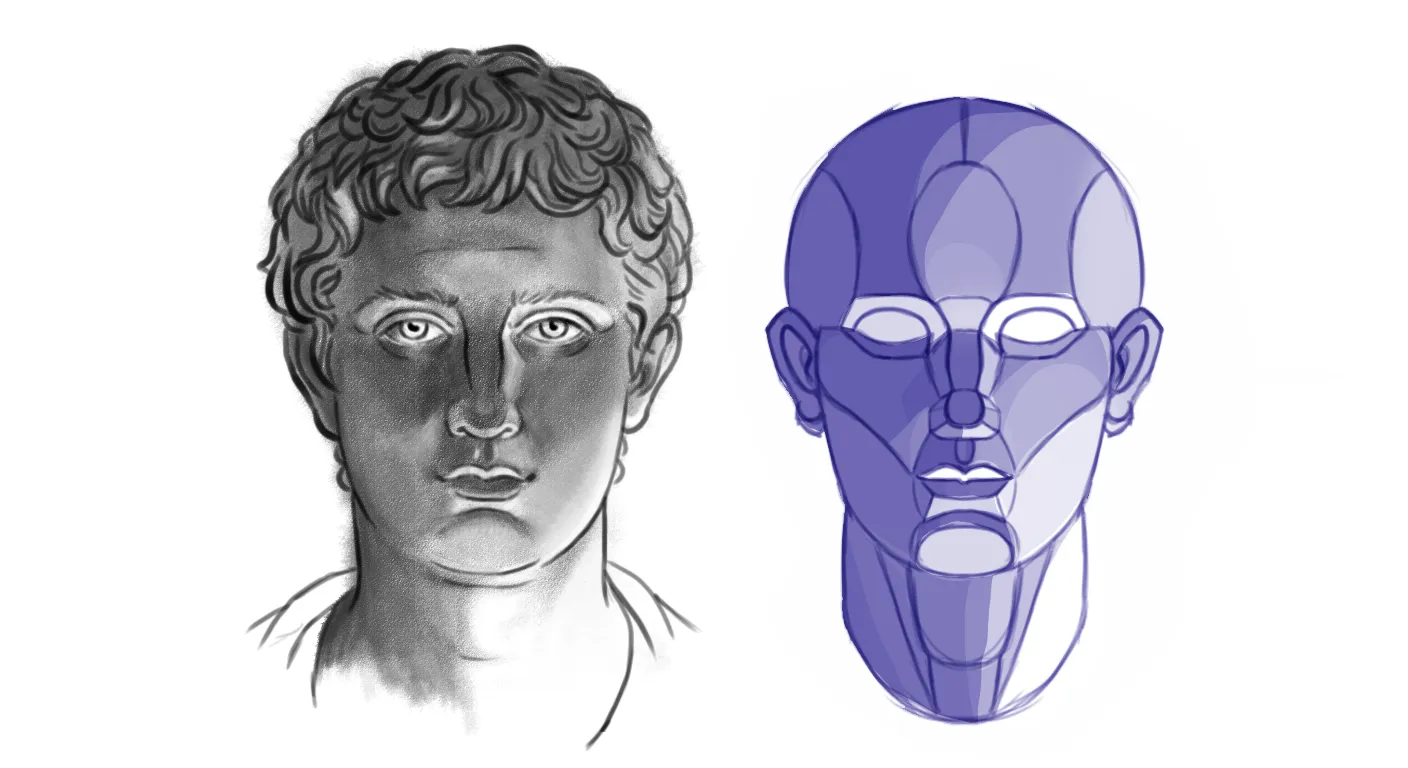
Diagonal lighting: lower side
From a lower angle, the light behaves like bottom lighting, covering most of the face in shadows, while gently illuminating the eye sockets, the side of the nose, the nostrils, upper lip, chin, and the cheek facing the light.
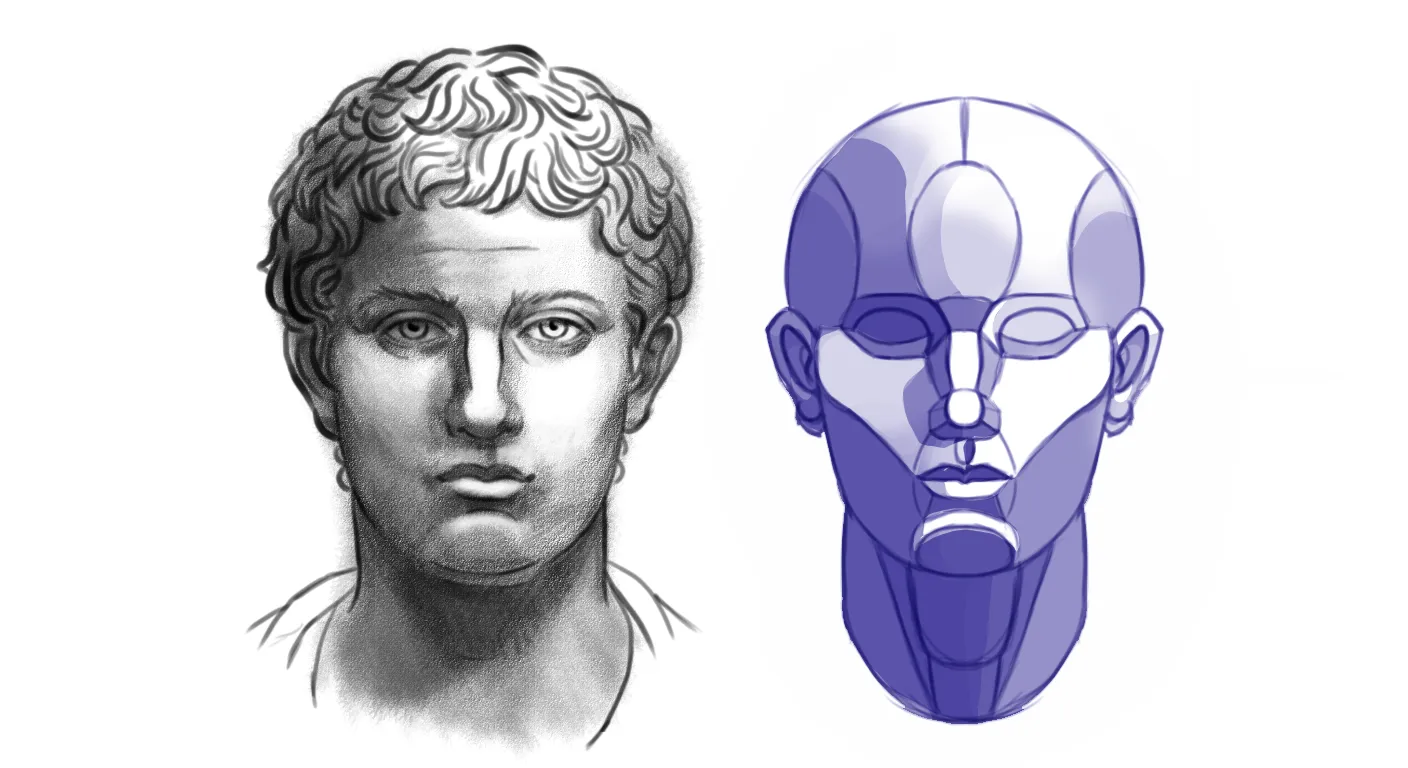
Diagonal lighting: upper side
From a top-down angle, the areas that face the light directly receive intense illumination, while other nearby areas, such as the opposite cheek, are slightly illuminated. The most noticeable difference is in the eye sockets: one darkens much more than the other.
Types of light and their behavior
Direction is not the only factor to consider. The type of light also radically changes the rendering of shadows.
Sunlight
Outdoors, sunlight covers everything. The largest objects cast shadows on their neighbors, shadows full of colors and nuances, similar to a soft glaze that allows you to see what it covers. The position of the sun also changes depending on the time of day: the shadow at noon is very different from the shadow at sunset.
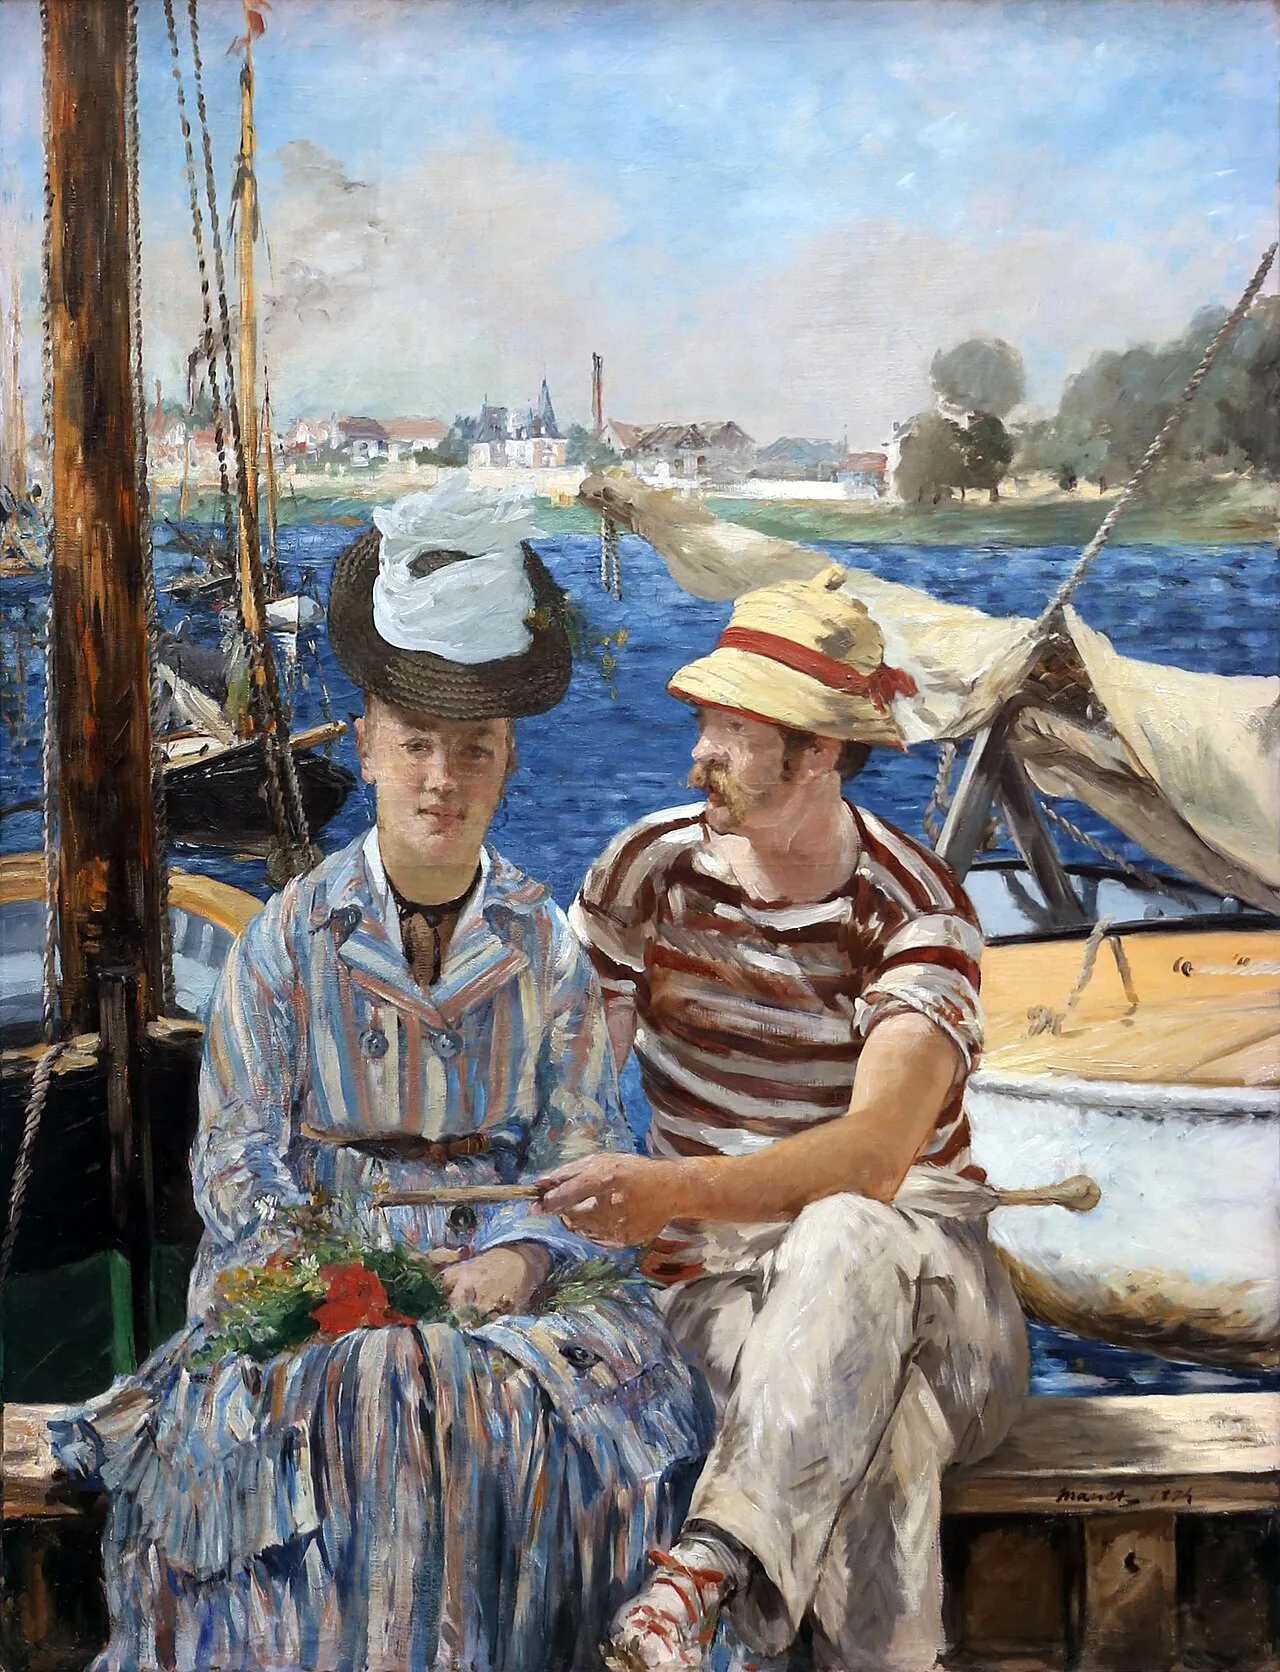
“Argenteuil” (1874) Édouard Manet
Indoor light
Sunlight penetrates our homes, but it bounces off all surfaces, transforming as it does so. Indoors, the shadows on the face are distributed in a more uniform and softer way.
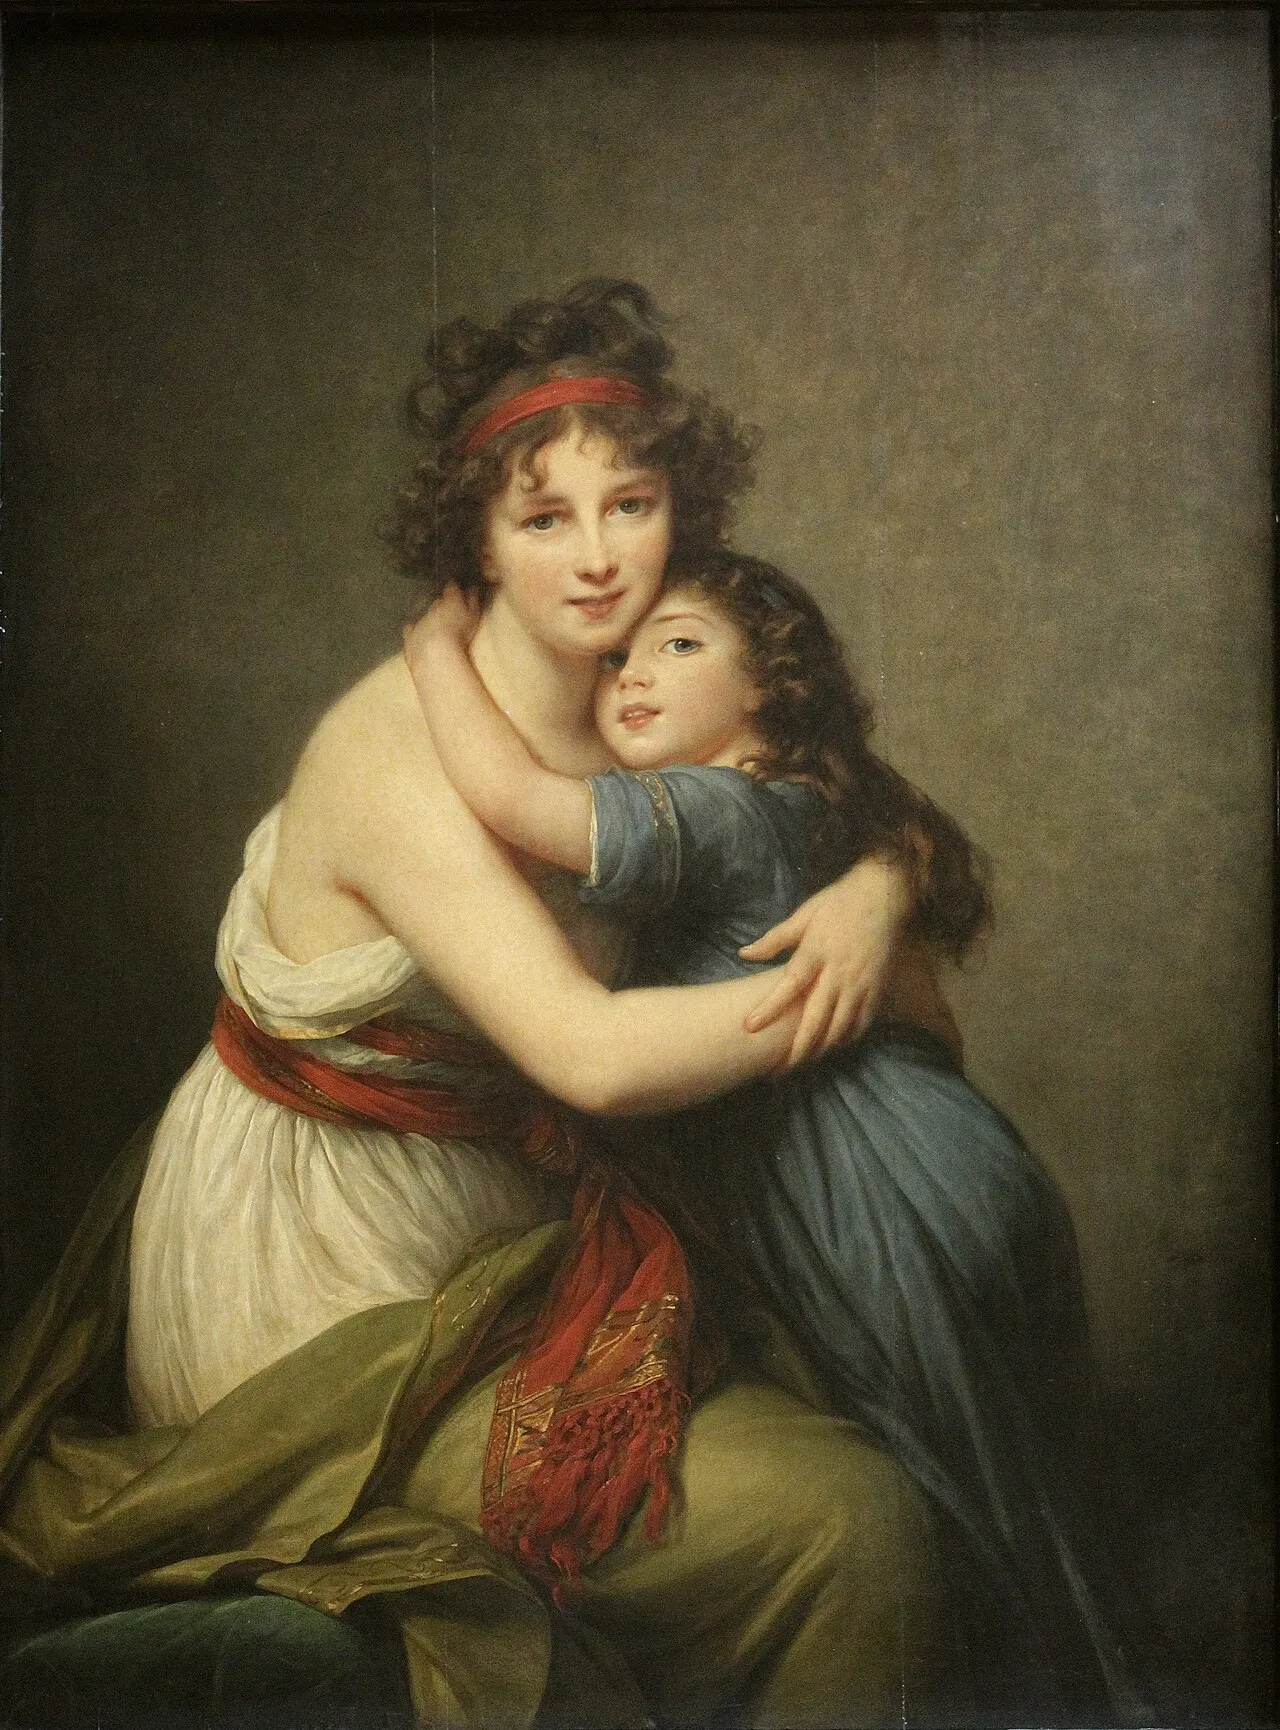
“Madame Vigée-Lebrun with her daughter” (1789), Élisabeth Vigée-Lebrun.
Soft artificial light
Candles, torches, lanterns: these sources emit a soft light over a short range. The result: very strong contrasts, a predominance of hard shadows, and few gradients.
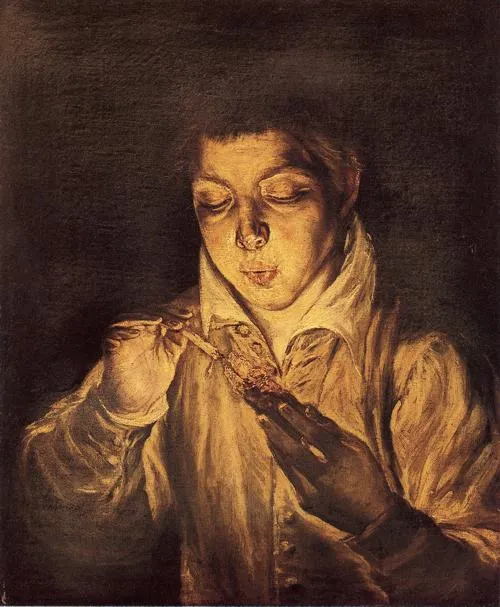
“Boy lighting a candle” (1571-1572), El Greco
How to draw the shadows of a face step by step
Each location and each moment has a unique lighting arrangement. The scenarios mentioned above serve as a foundation, but it is always the actual context that indicates which scheme to apply. Regular study with real models is the best way to develop your own understanding of shadows.
Start with a simple sketch based on your model or reference. Outline the dimensions of the face with guide lines, using a large portion of the surface; larger lines allow for the application of more precise shadows.
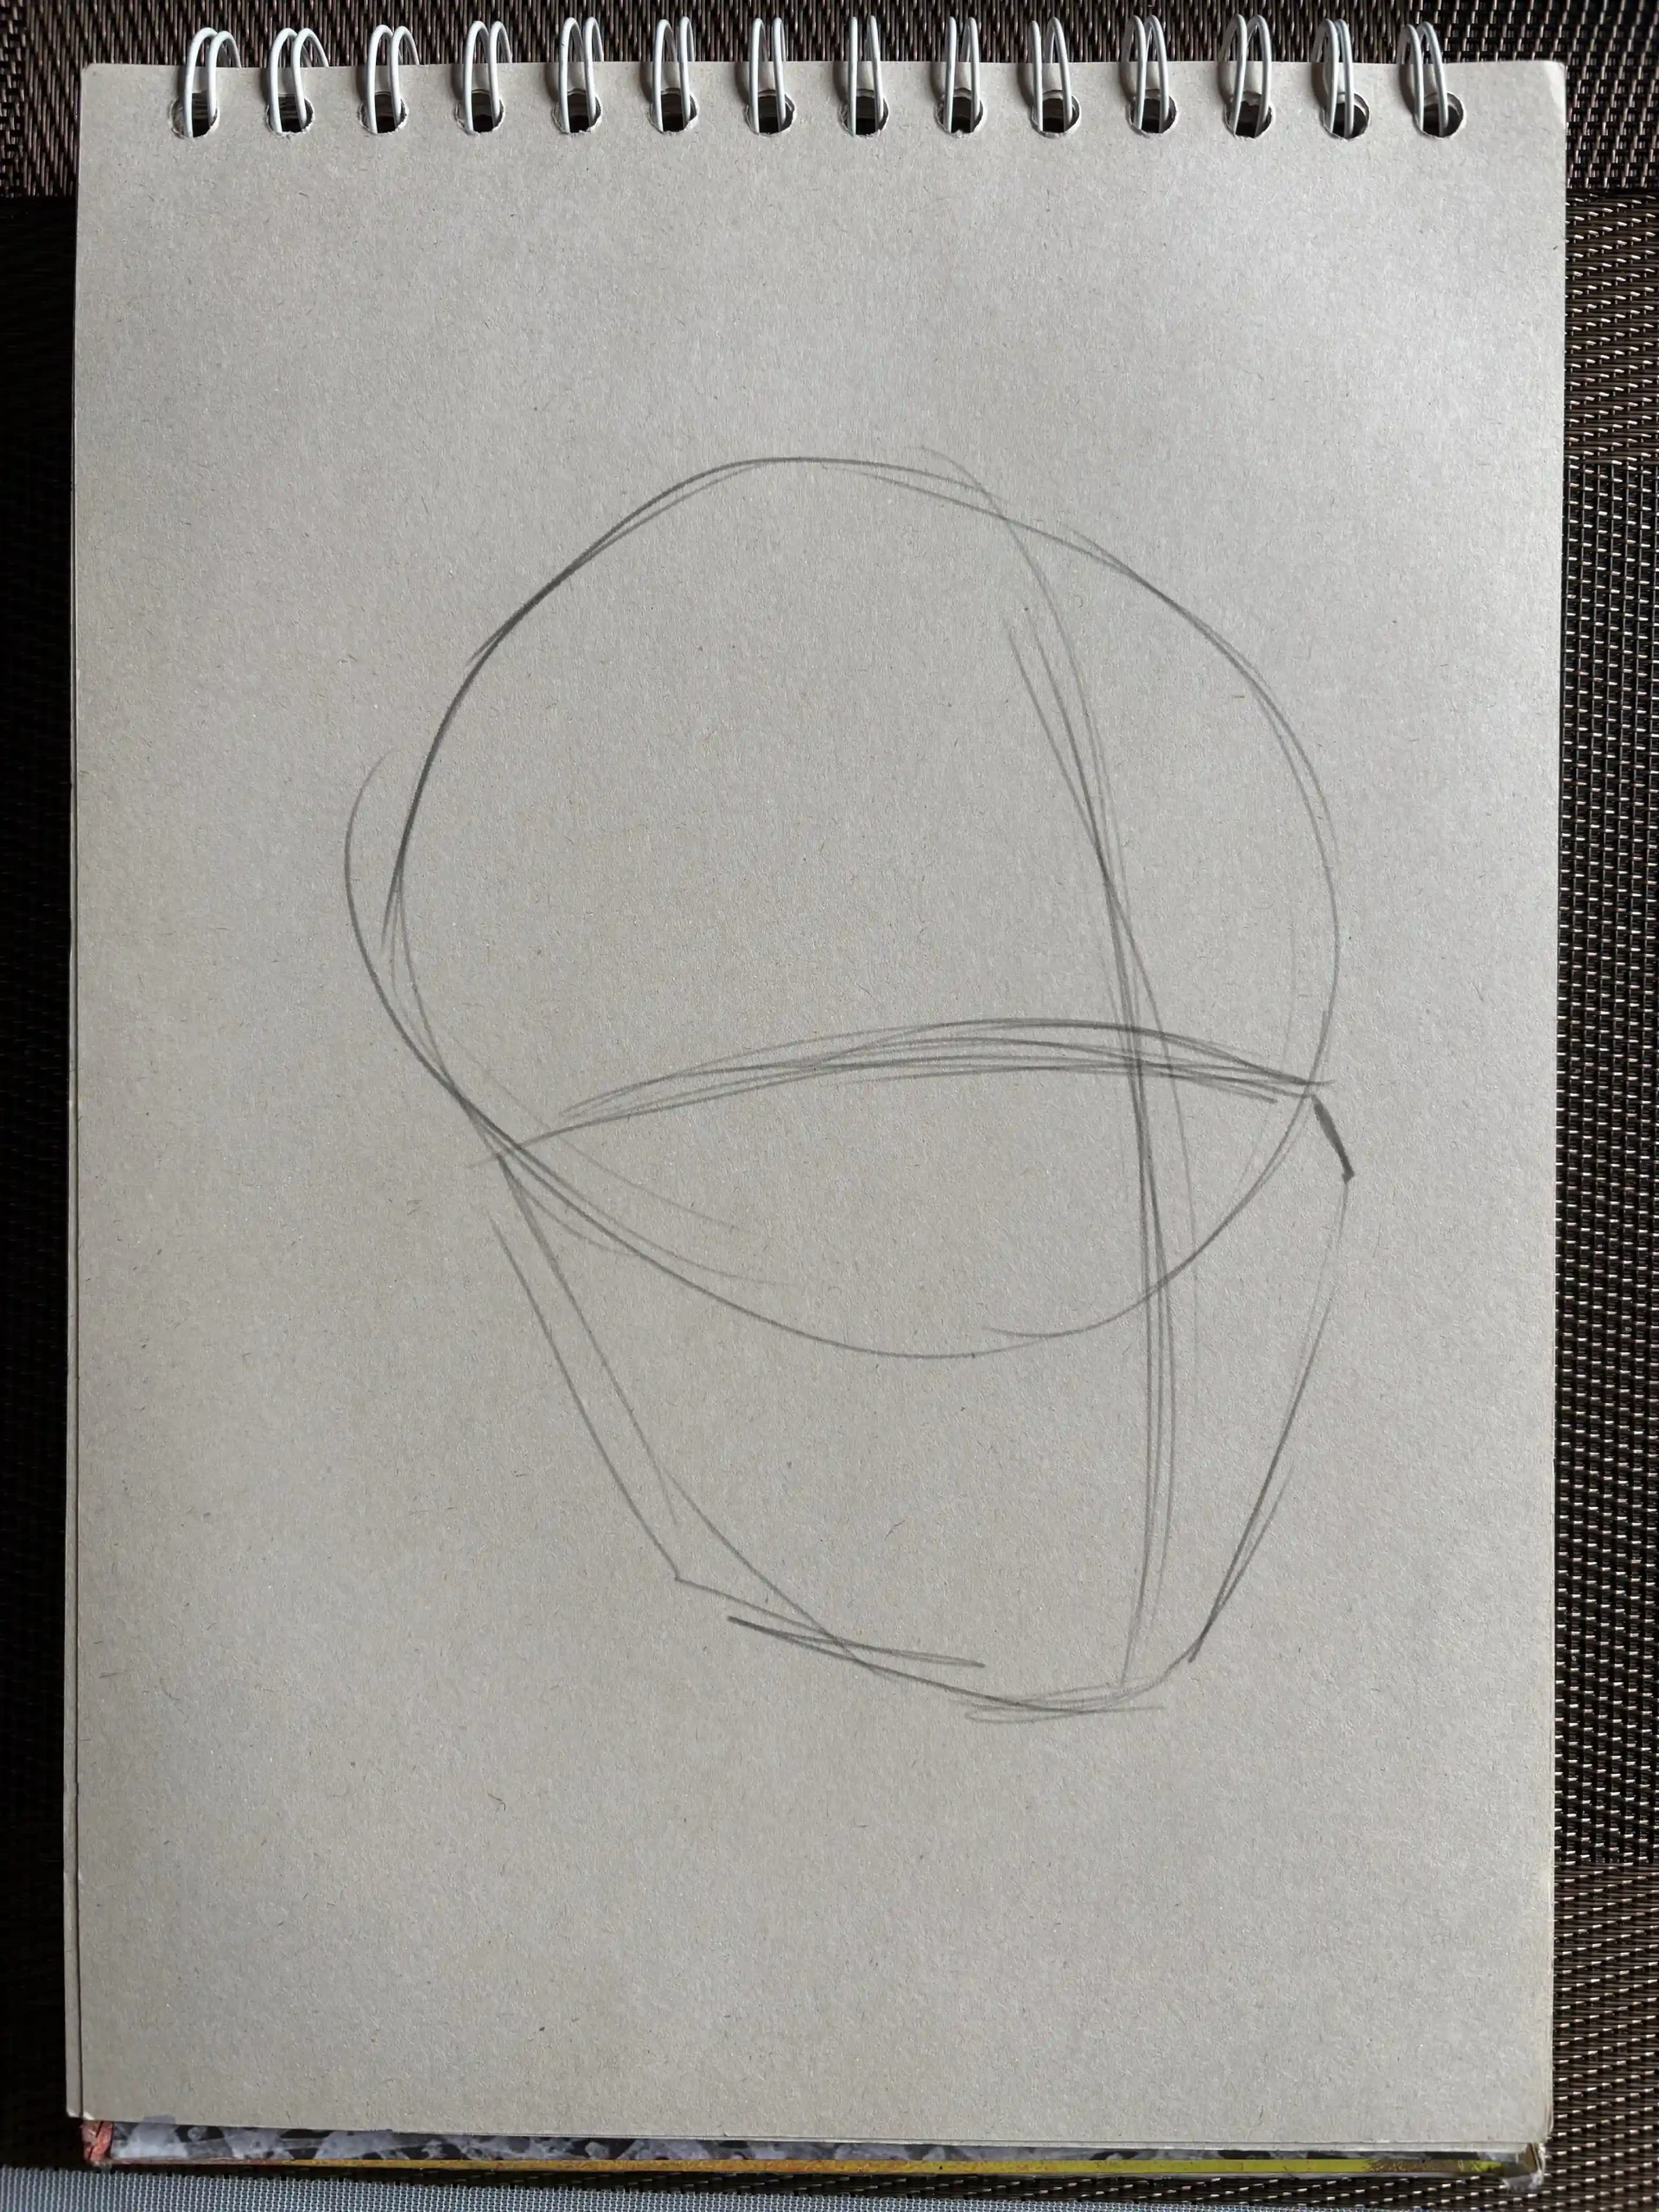
Define the main features, such as the eye socket or the size of the nose, and look for similarities in the dimensions.
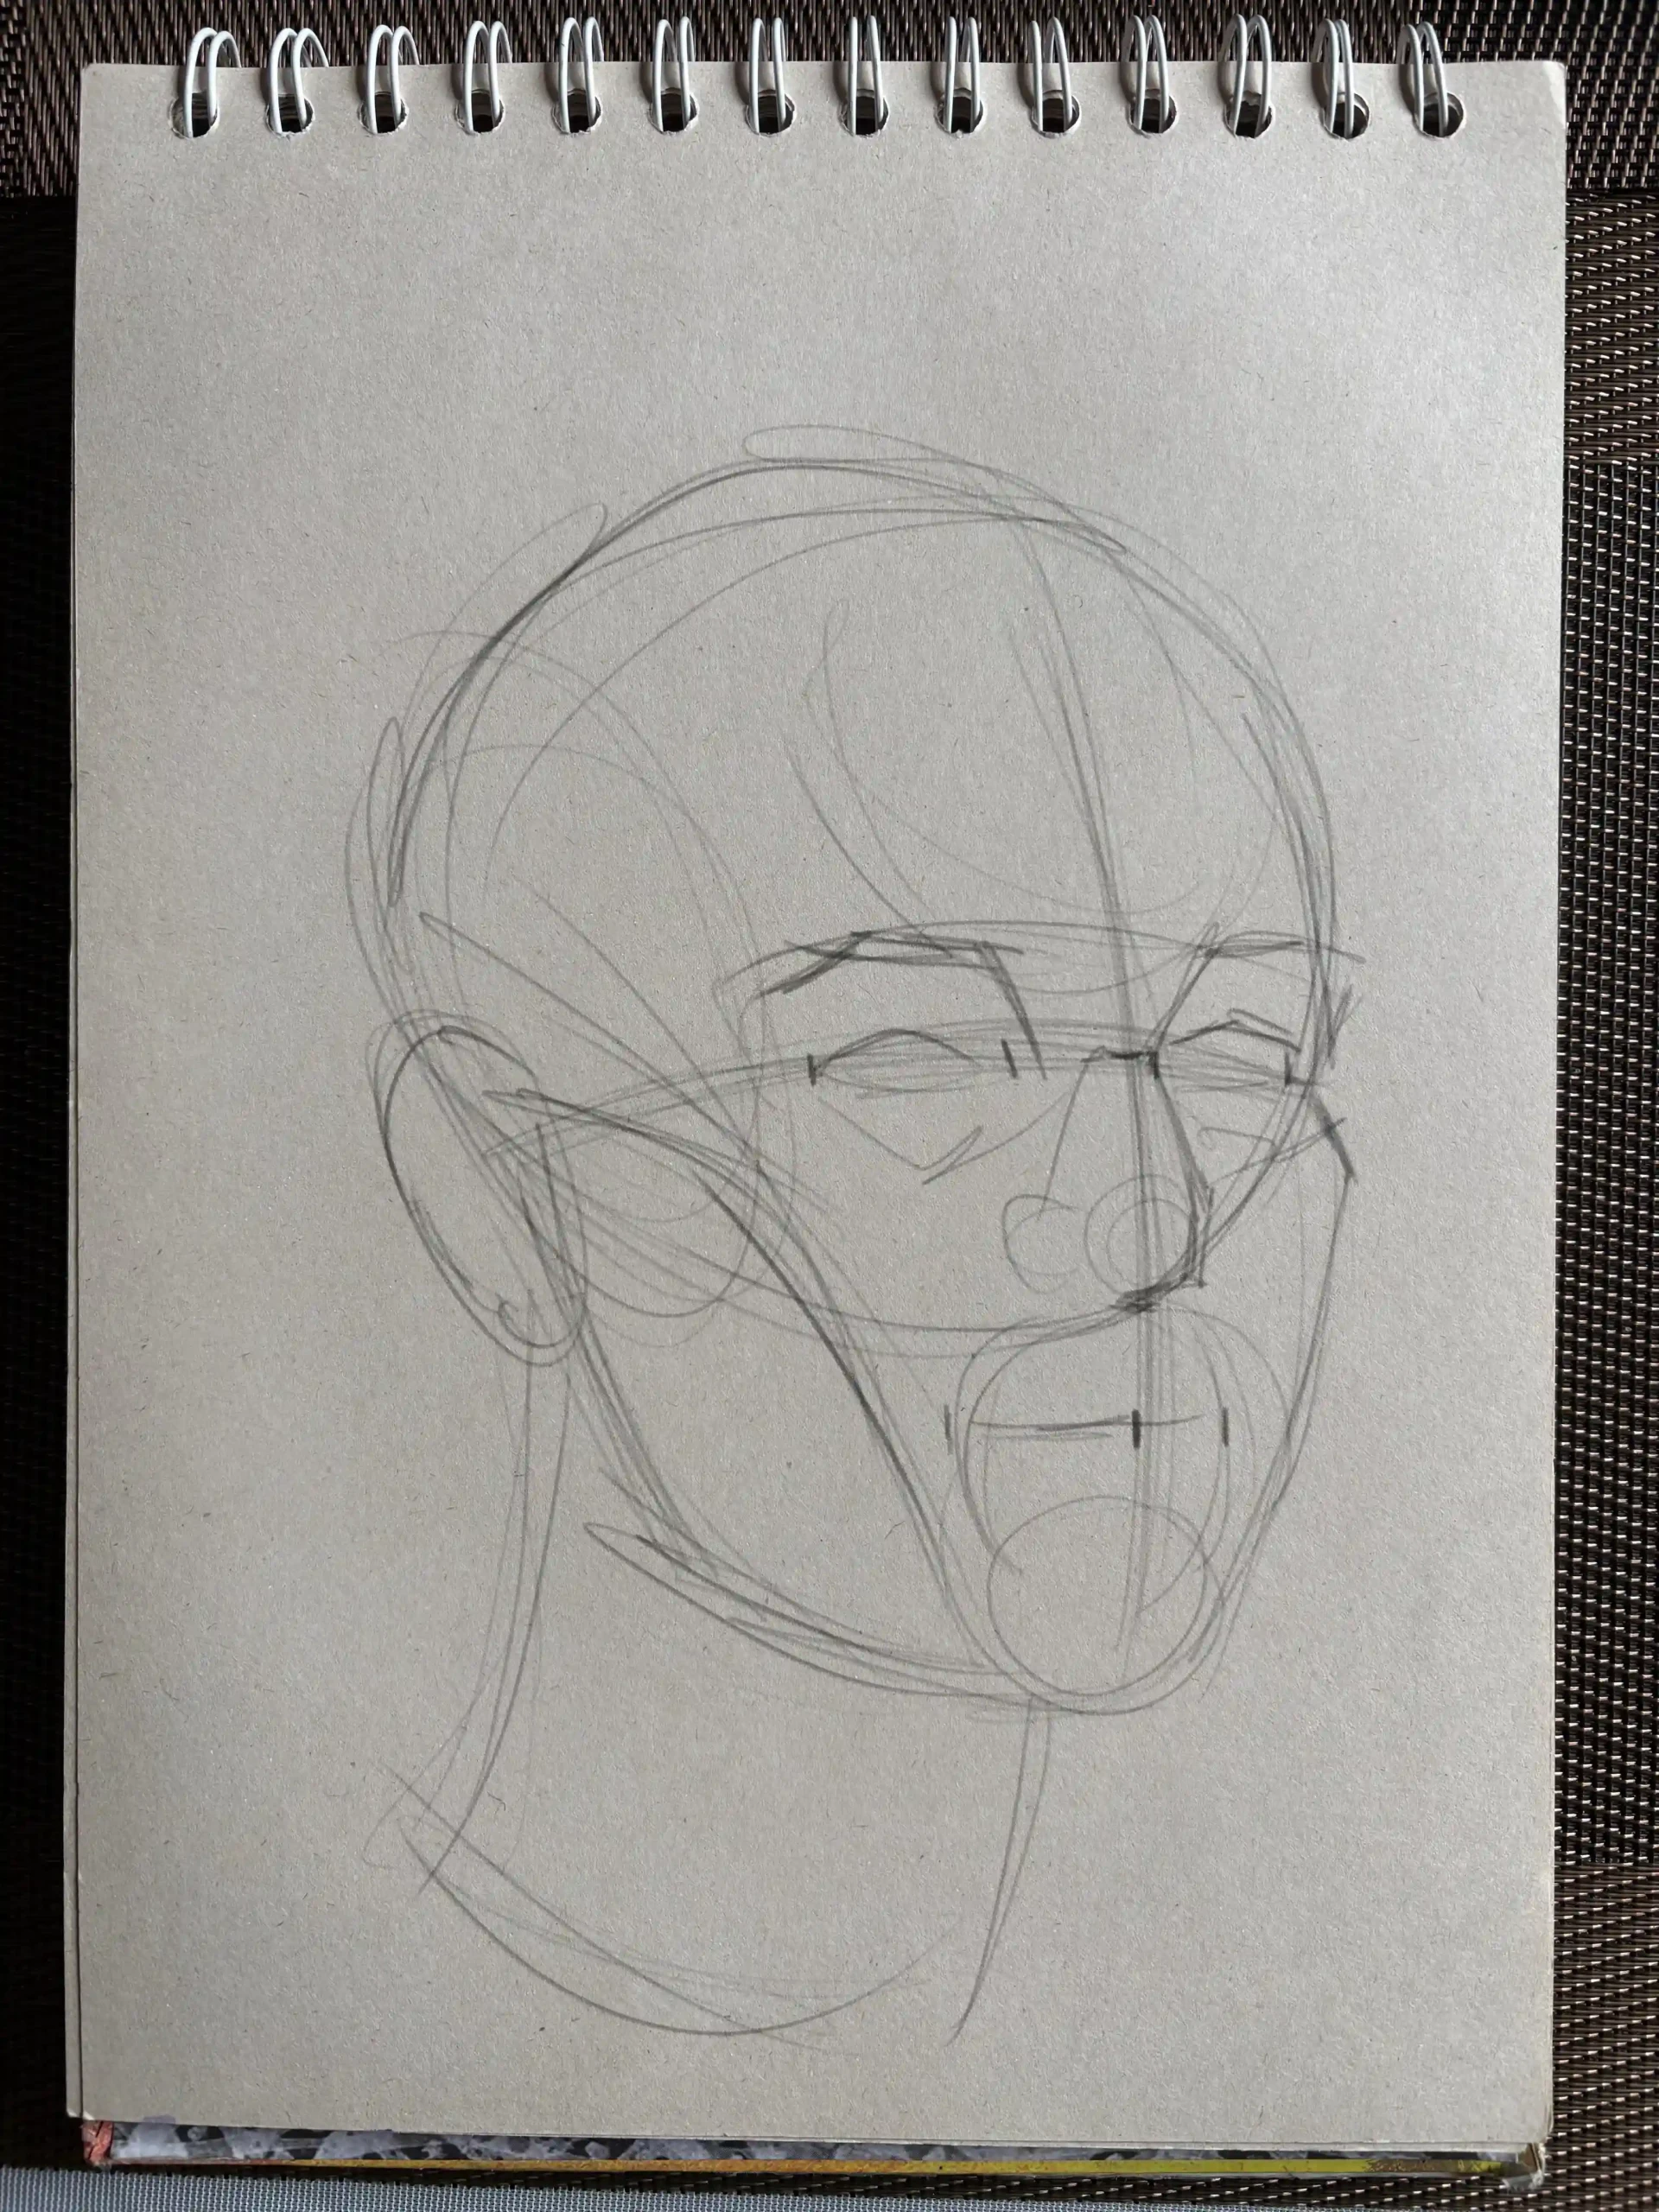
Before moving on to line drawing, soften the sketch with a kneaded eraser or cloth. Then, draw each line with more precise lines, thin for elements exposed to light, and thick for areas of greater depth.
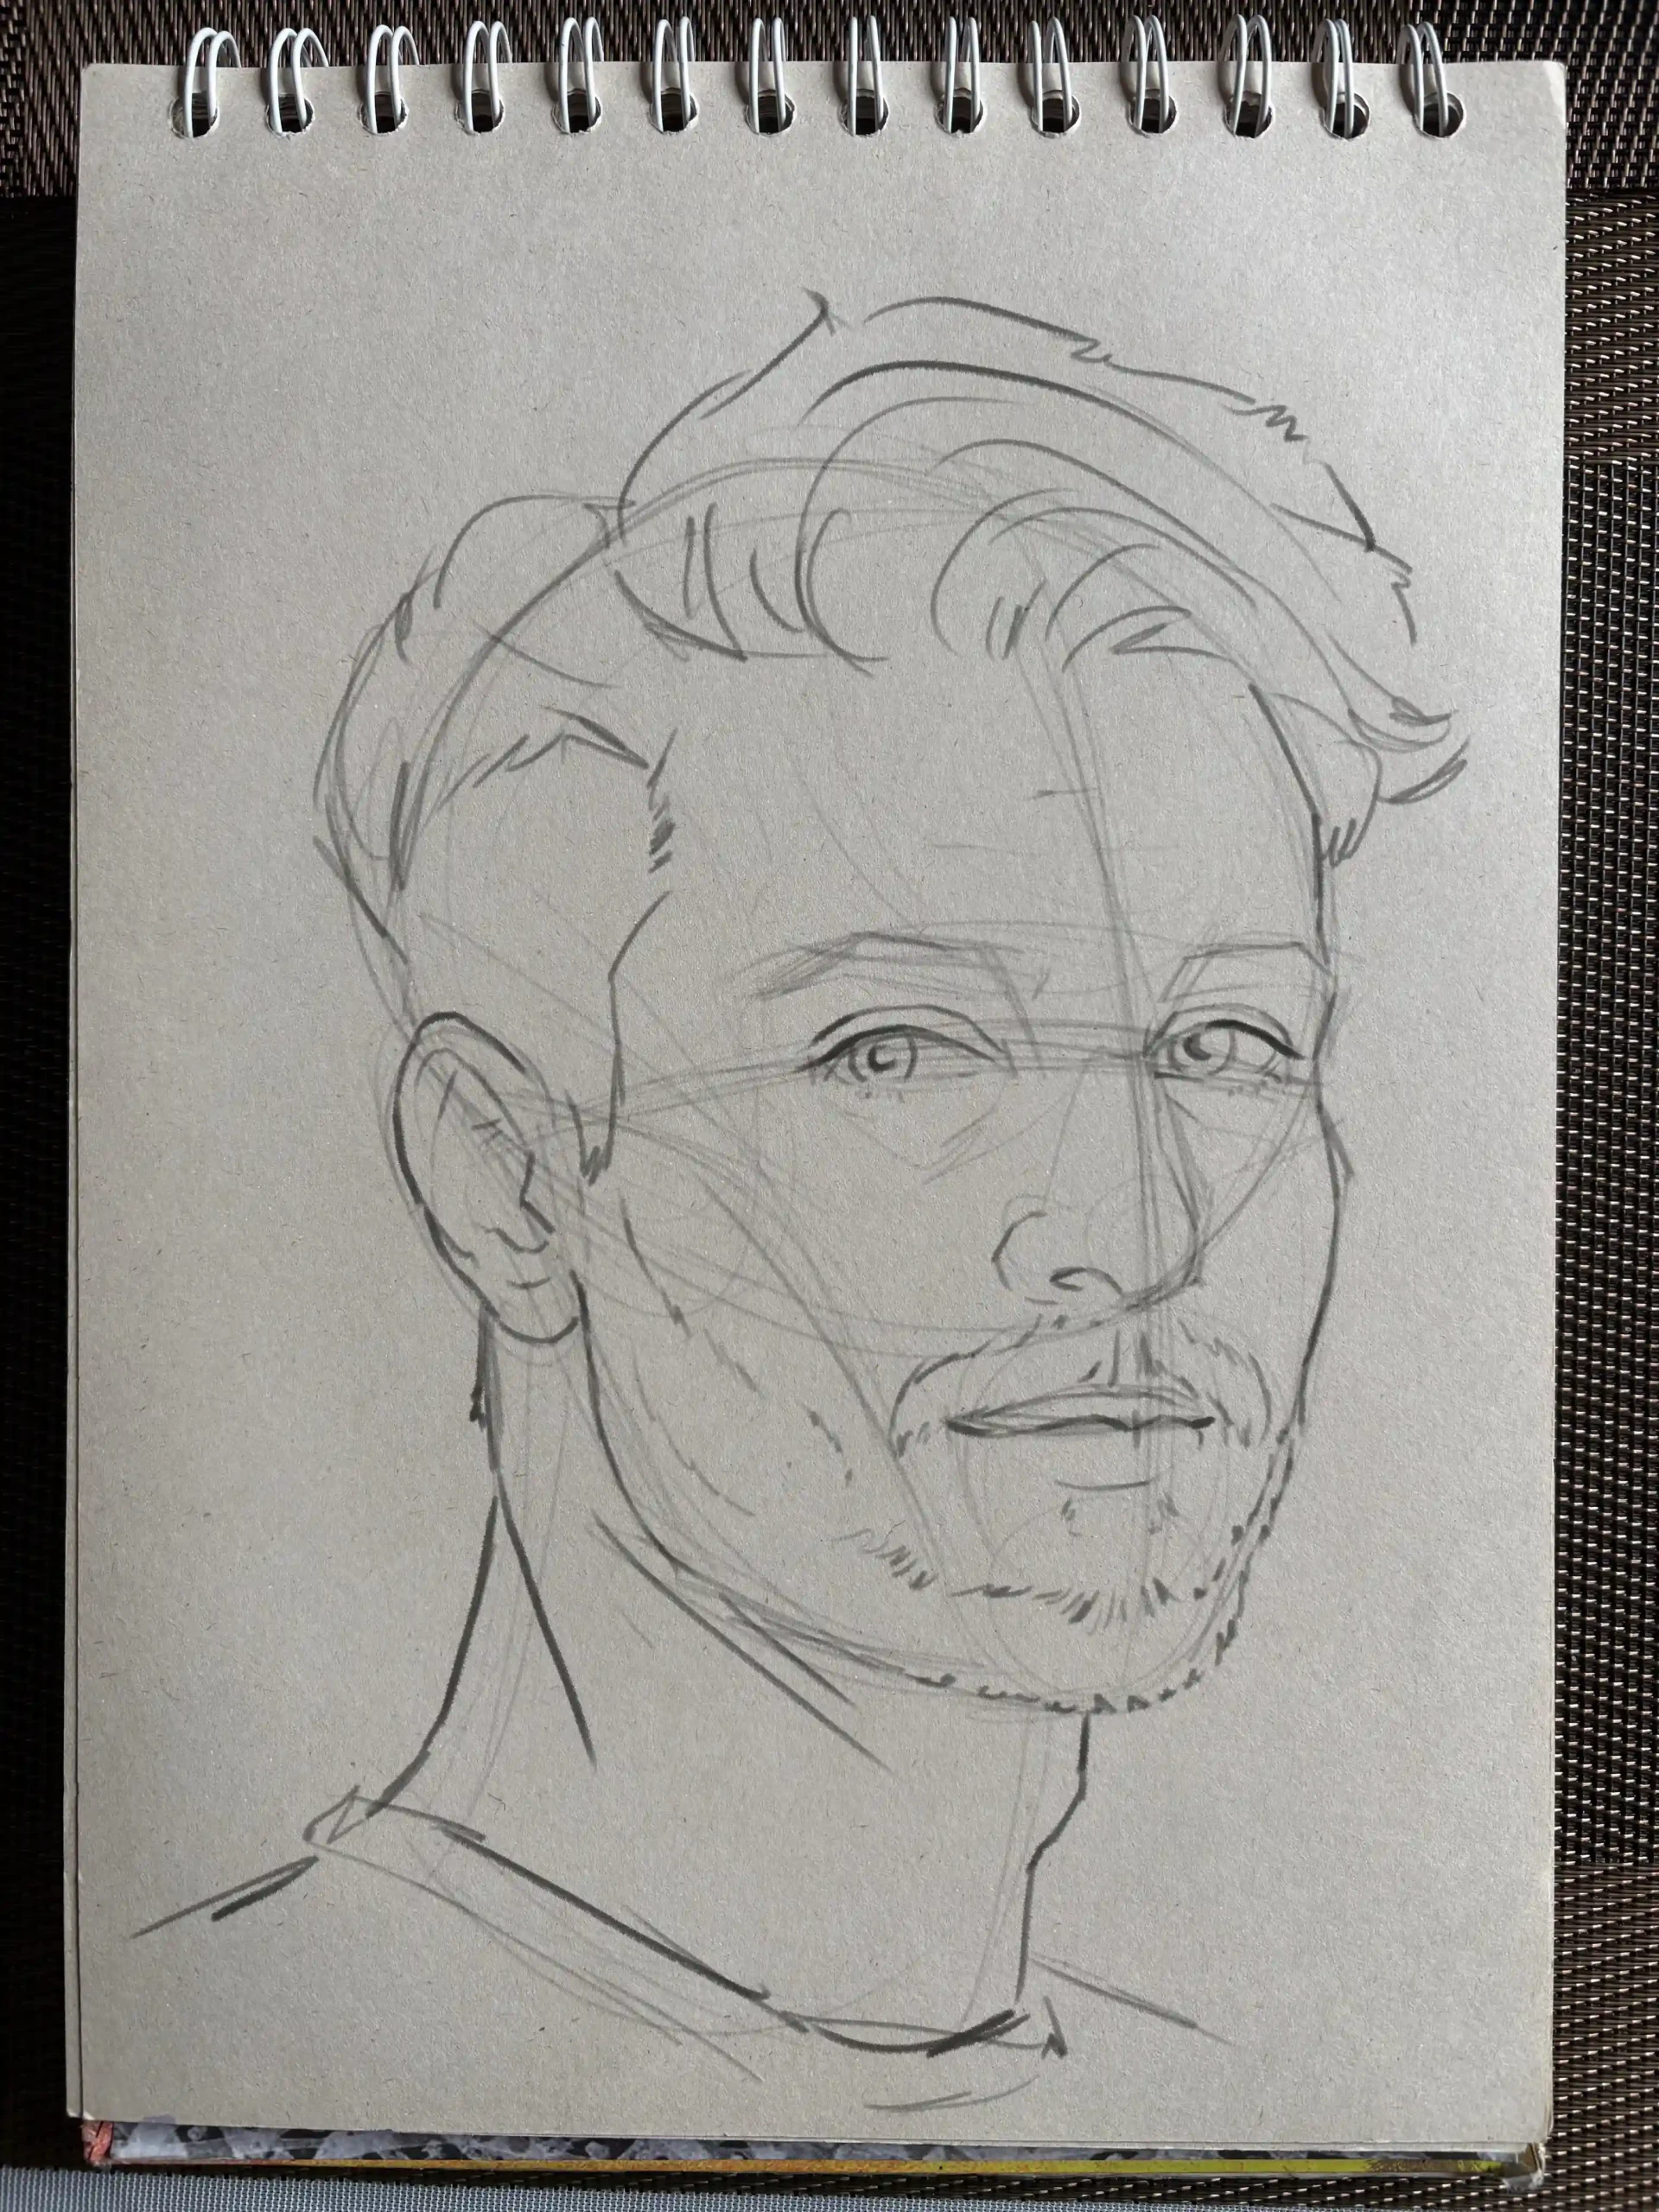
Add shadows to the drawing
Think of shadows as patches that cover the skin. Observe where the darkest ones are and what forms and features they cover.
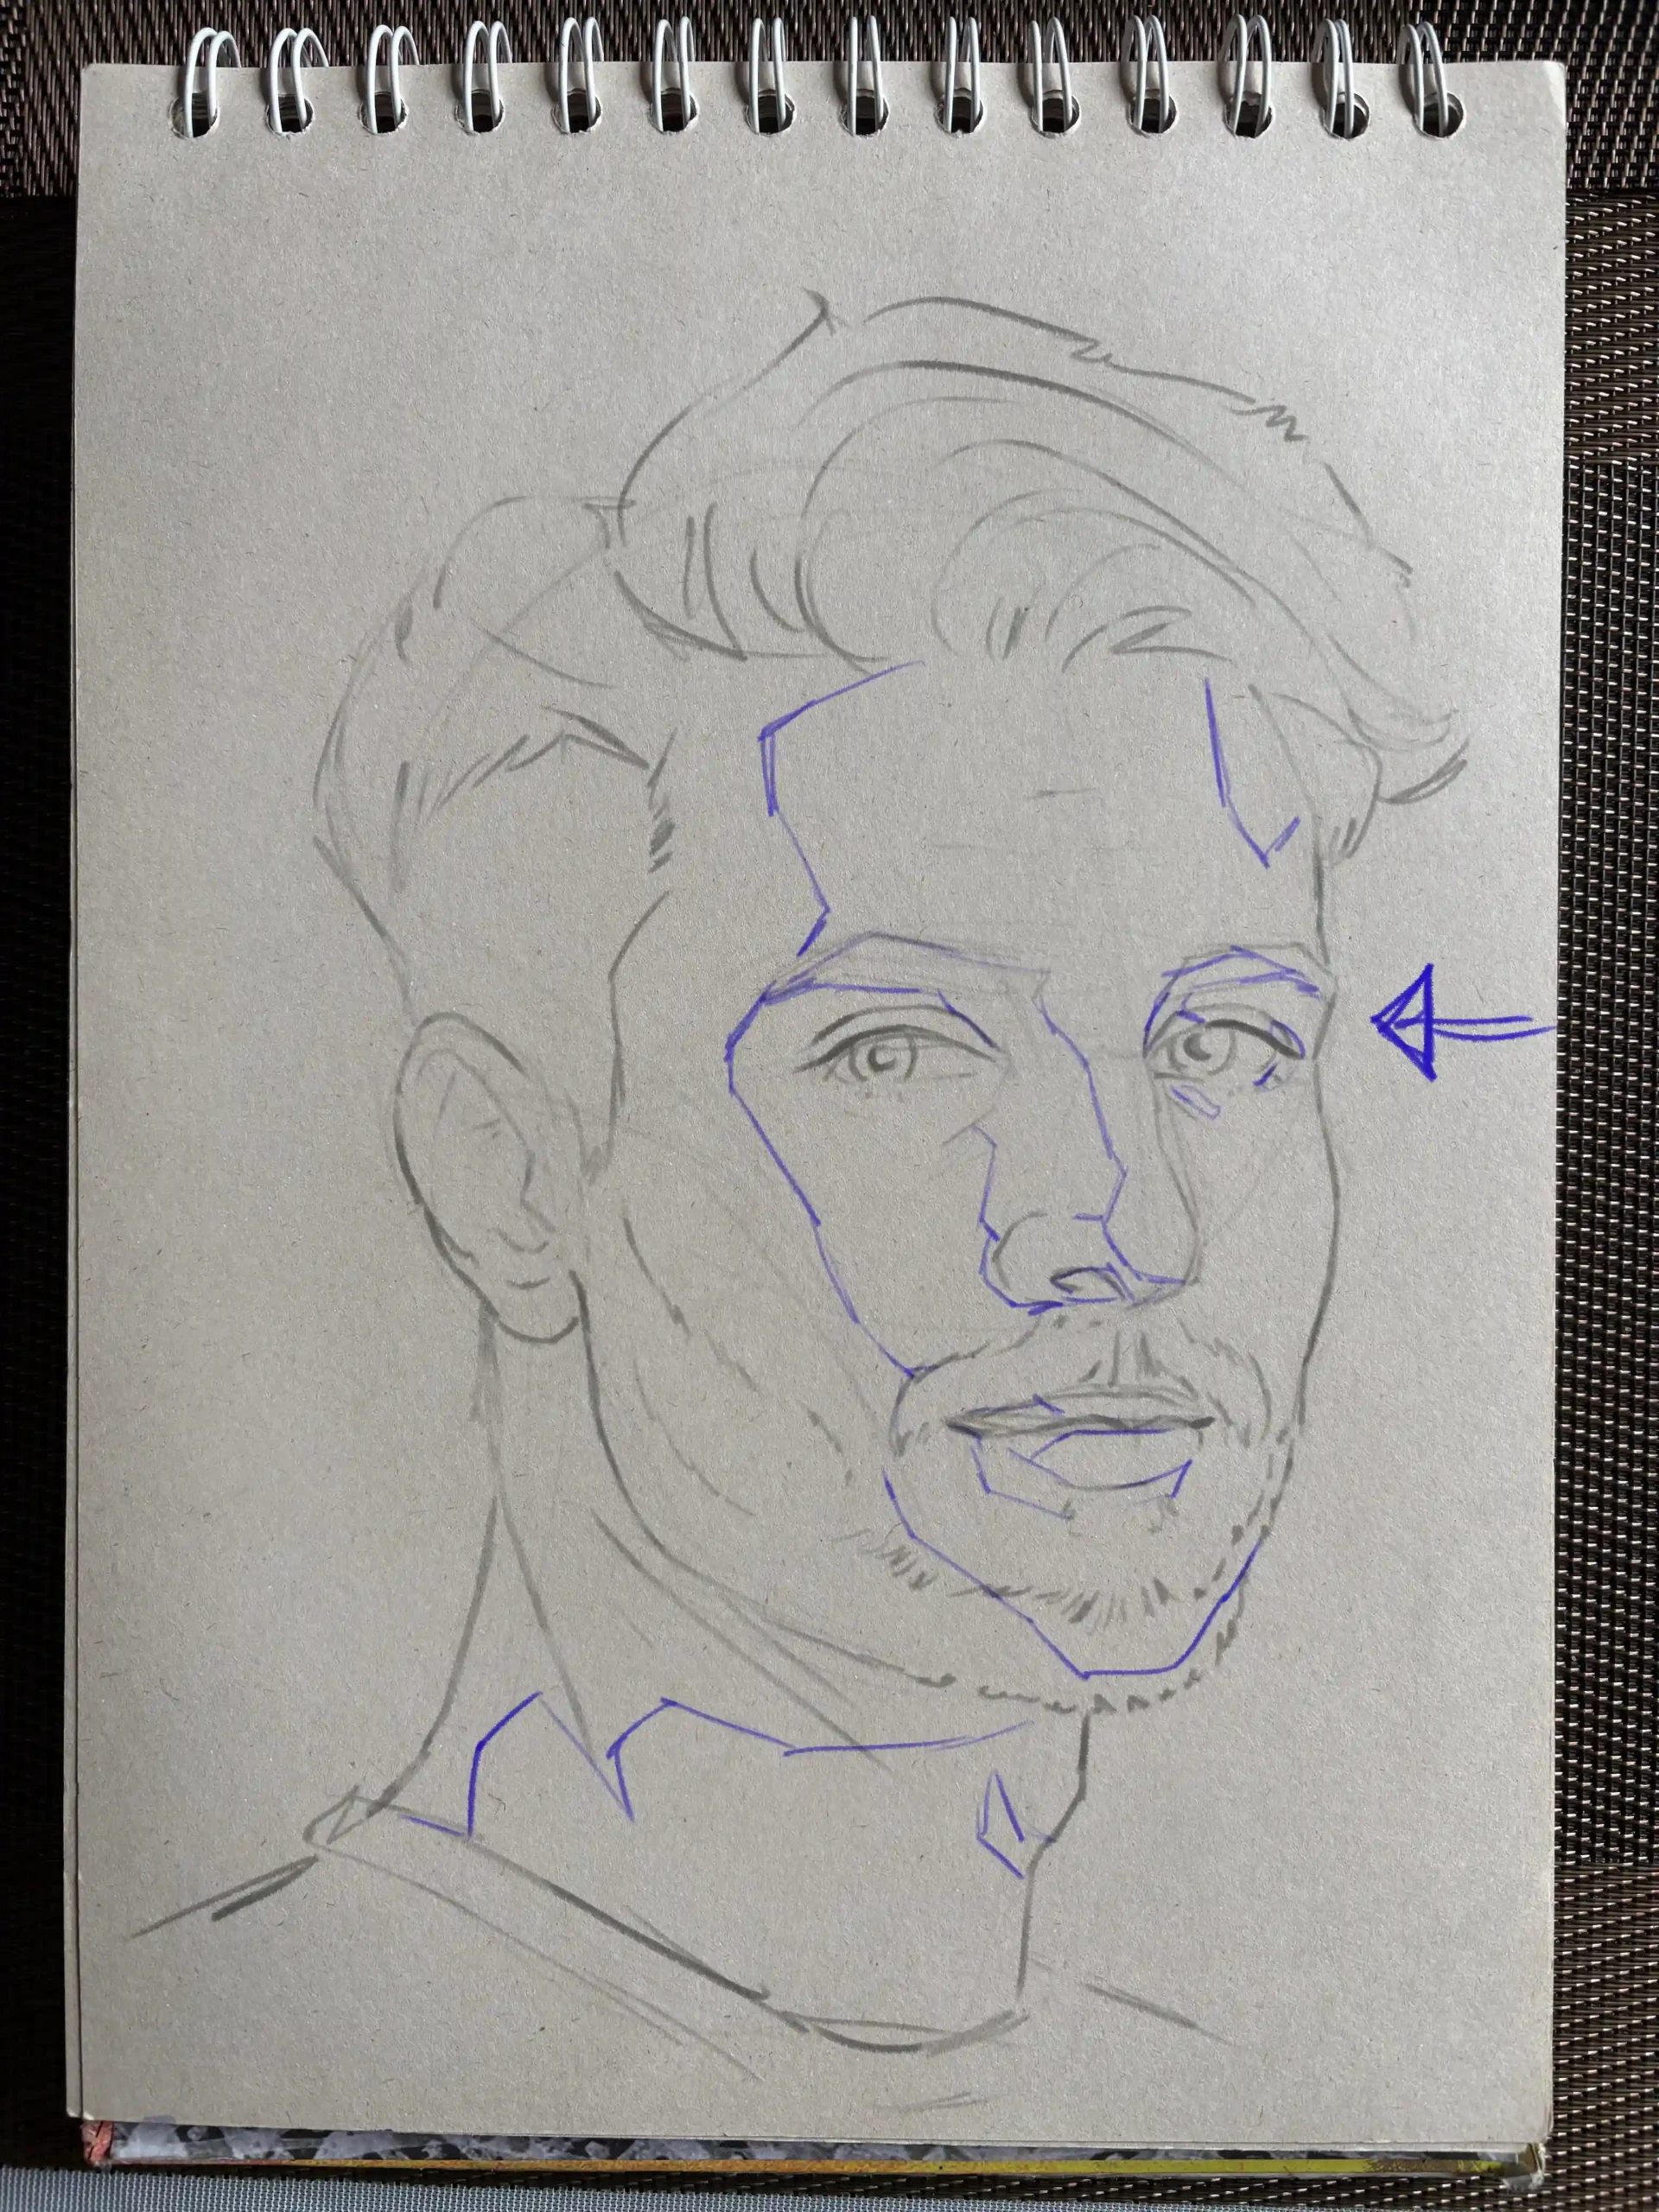
Start by covering the identified areas with a dark layer, then add a layer of intermediate value to create basic volume. Do not try to blend at this stage; what matters is that the areas are well-defined.
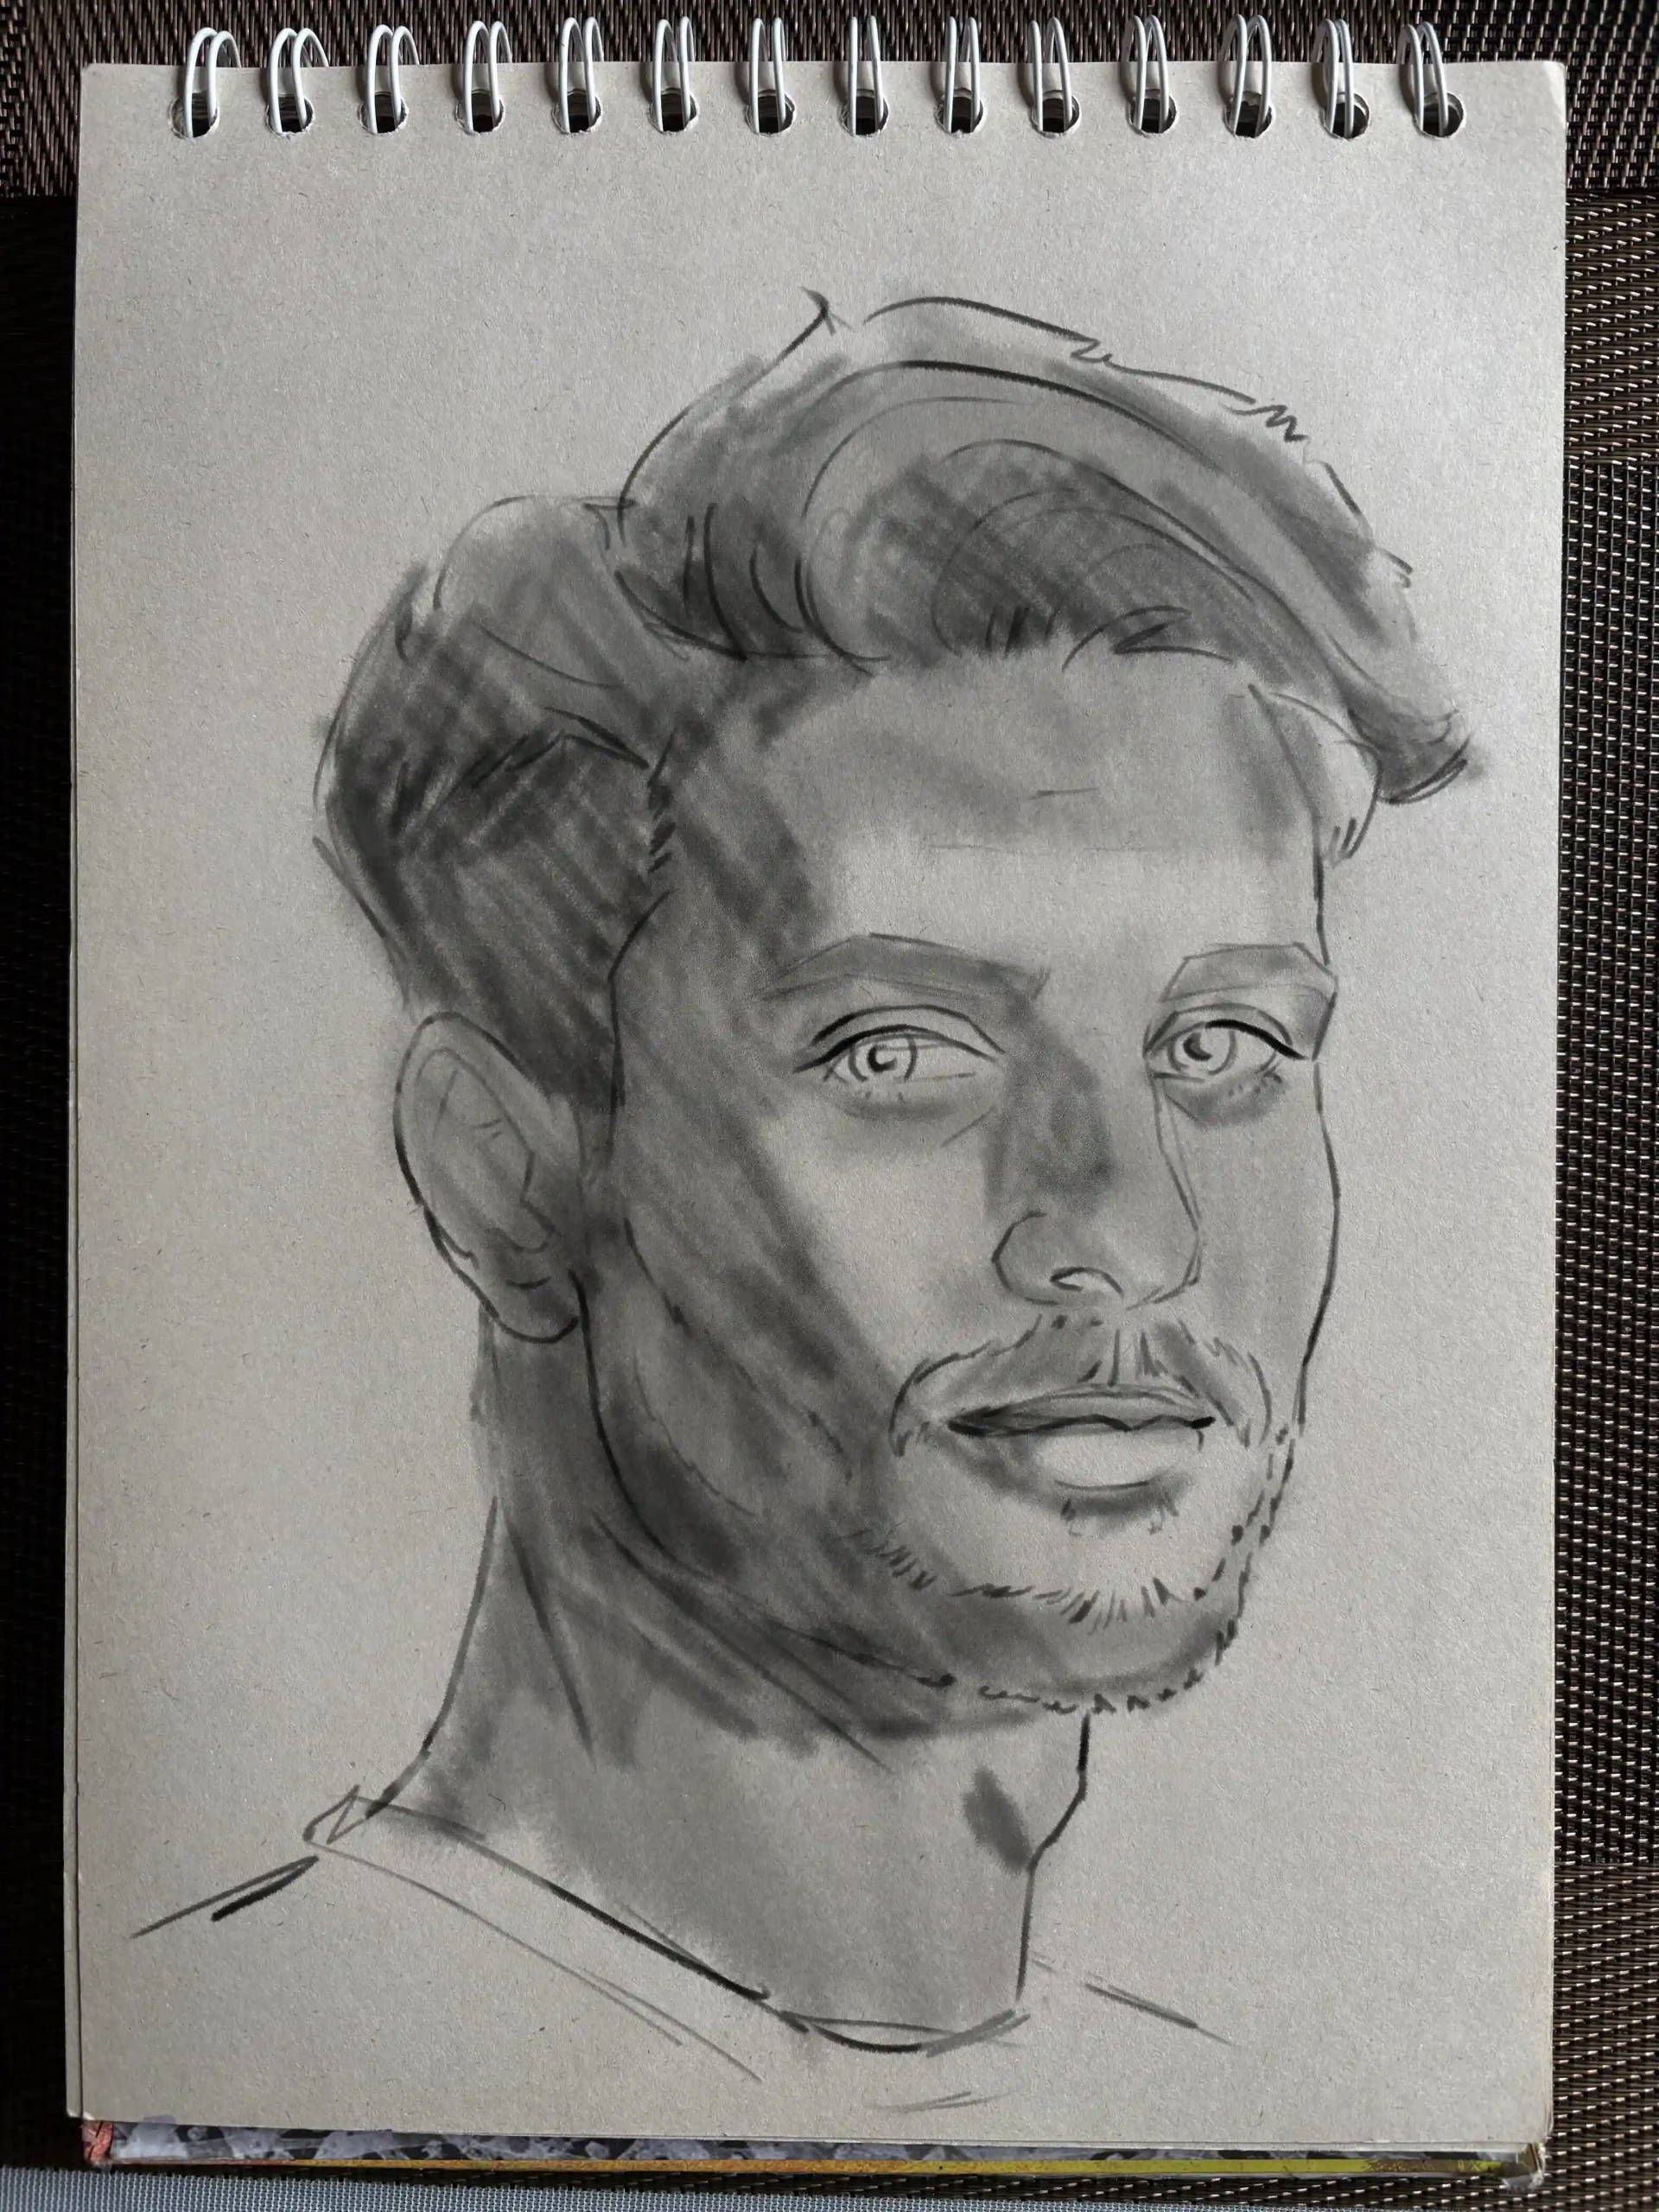
Draw the details of the face
Once you've created the base, select an area and gradually refine the shadows with a pencil and eraser to add and remove material.
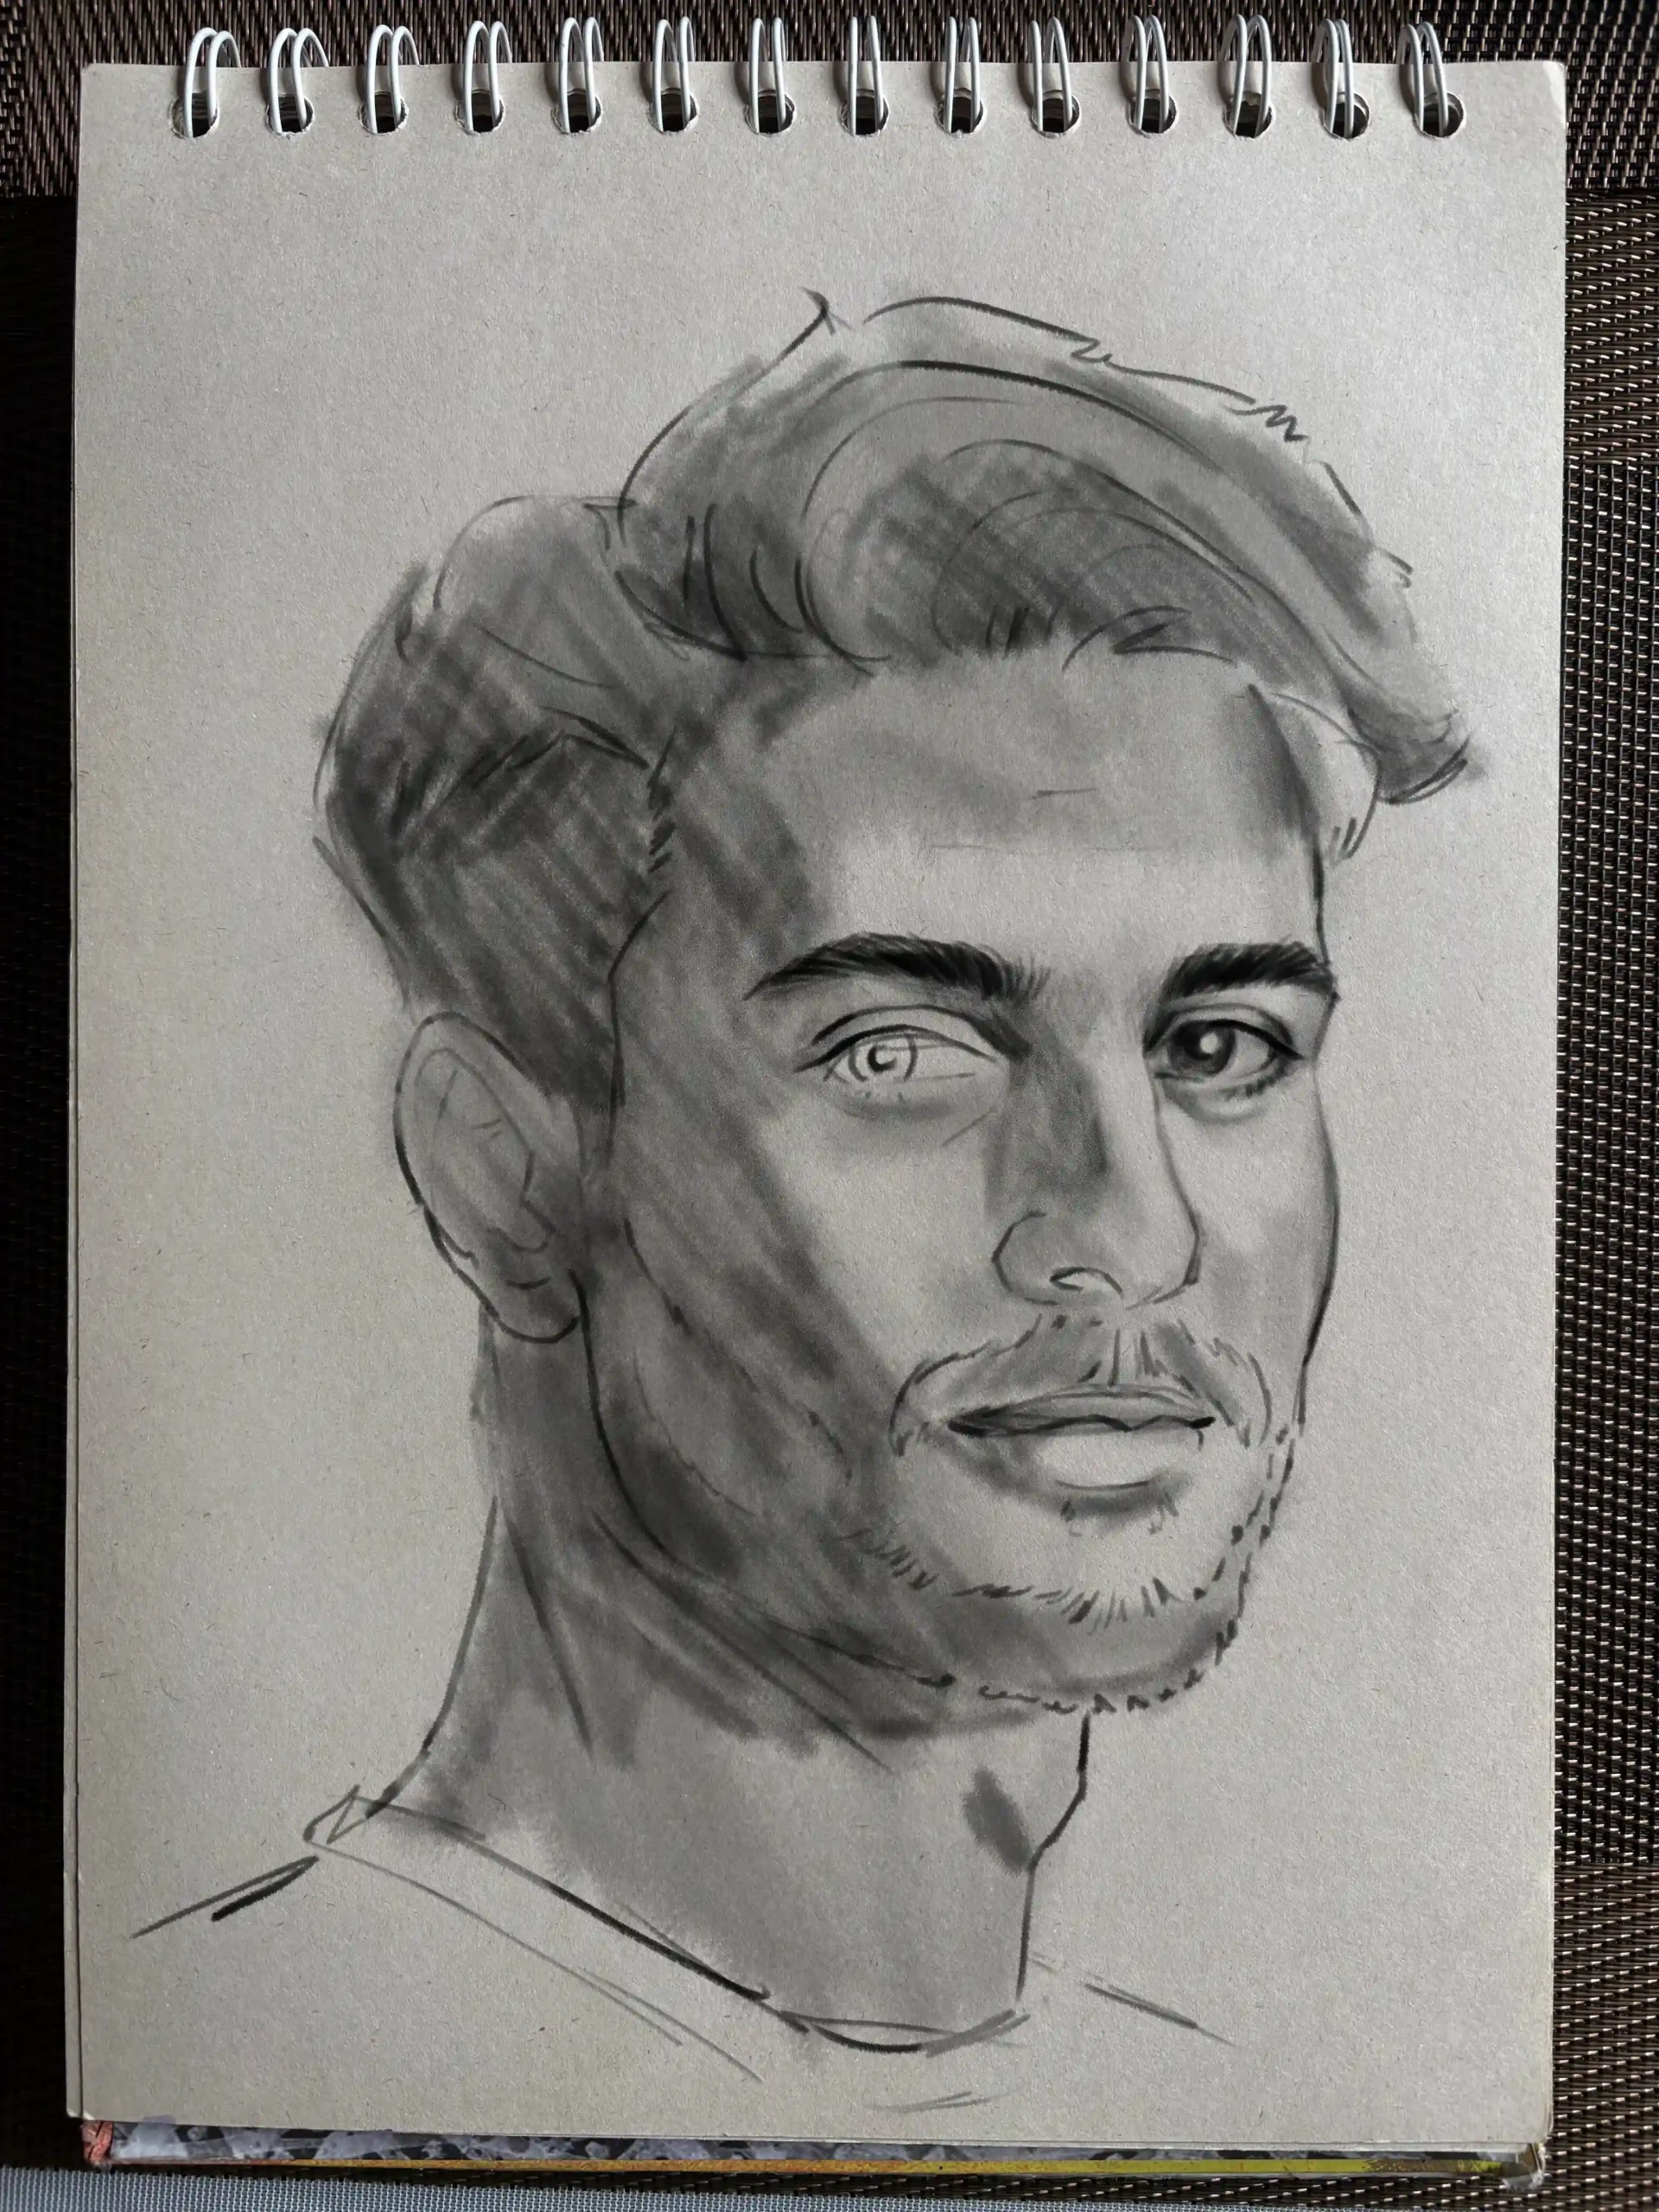
For facial hair, avoid simply creating a dark patch; instead, use short lines that mimic the composition of each hair, clustering them where it’s darker and spacing them out in the lighter areas.
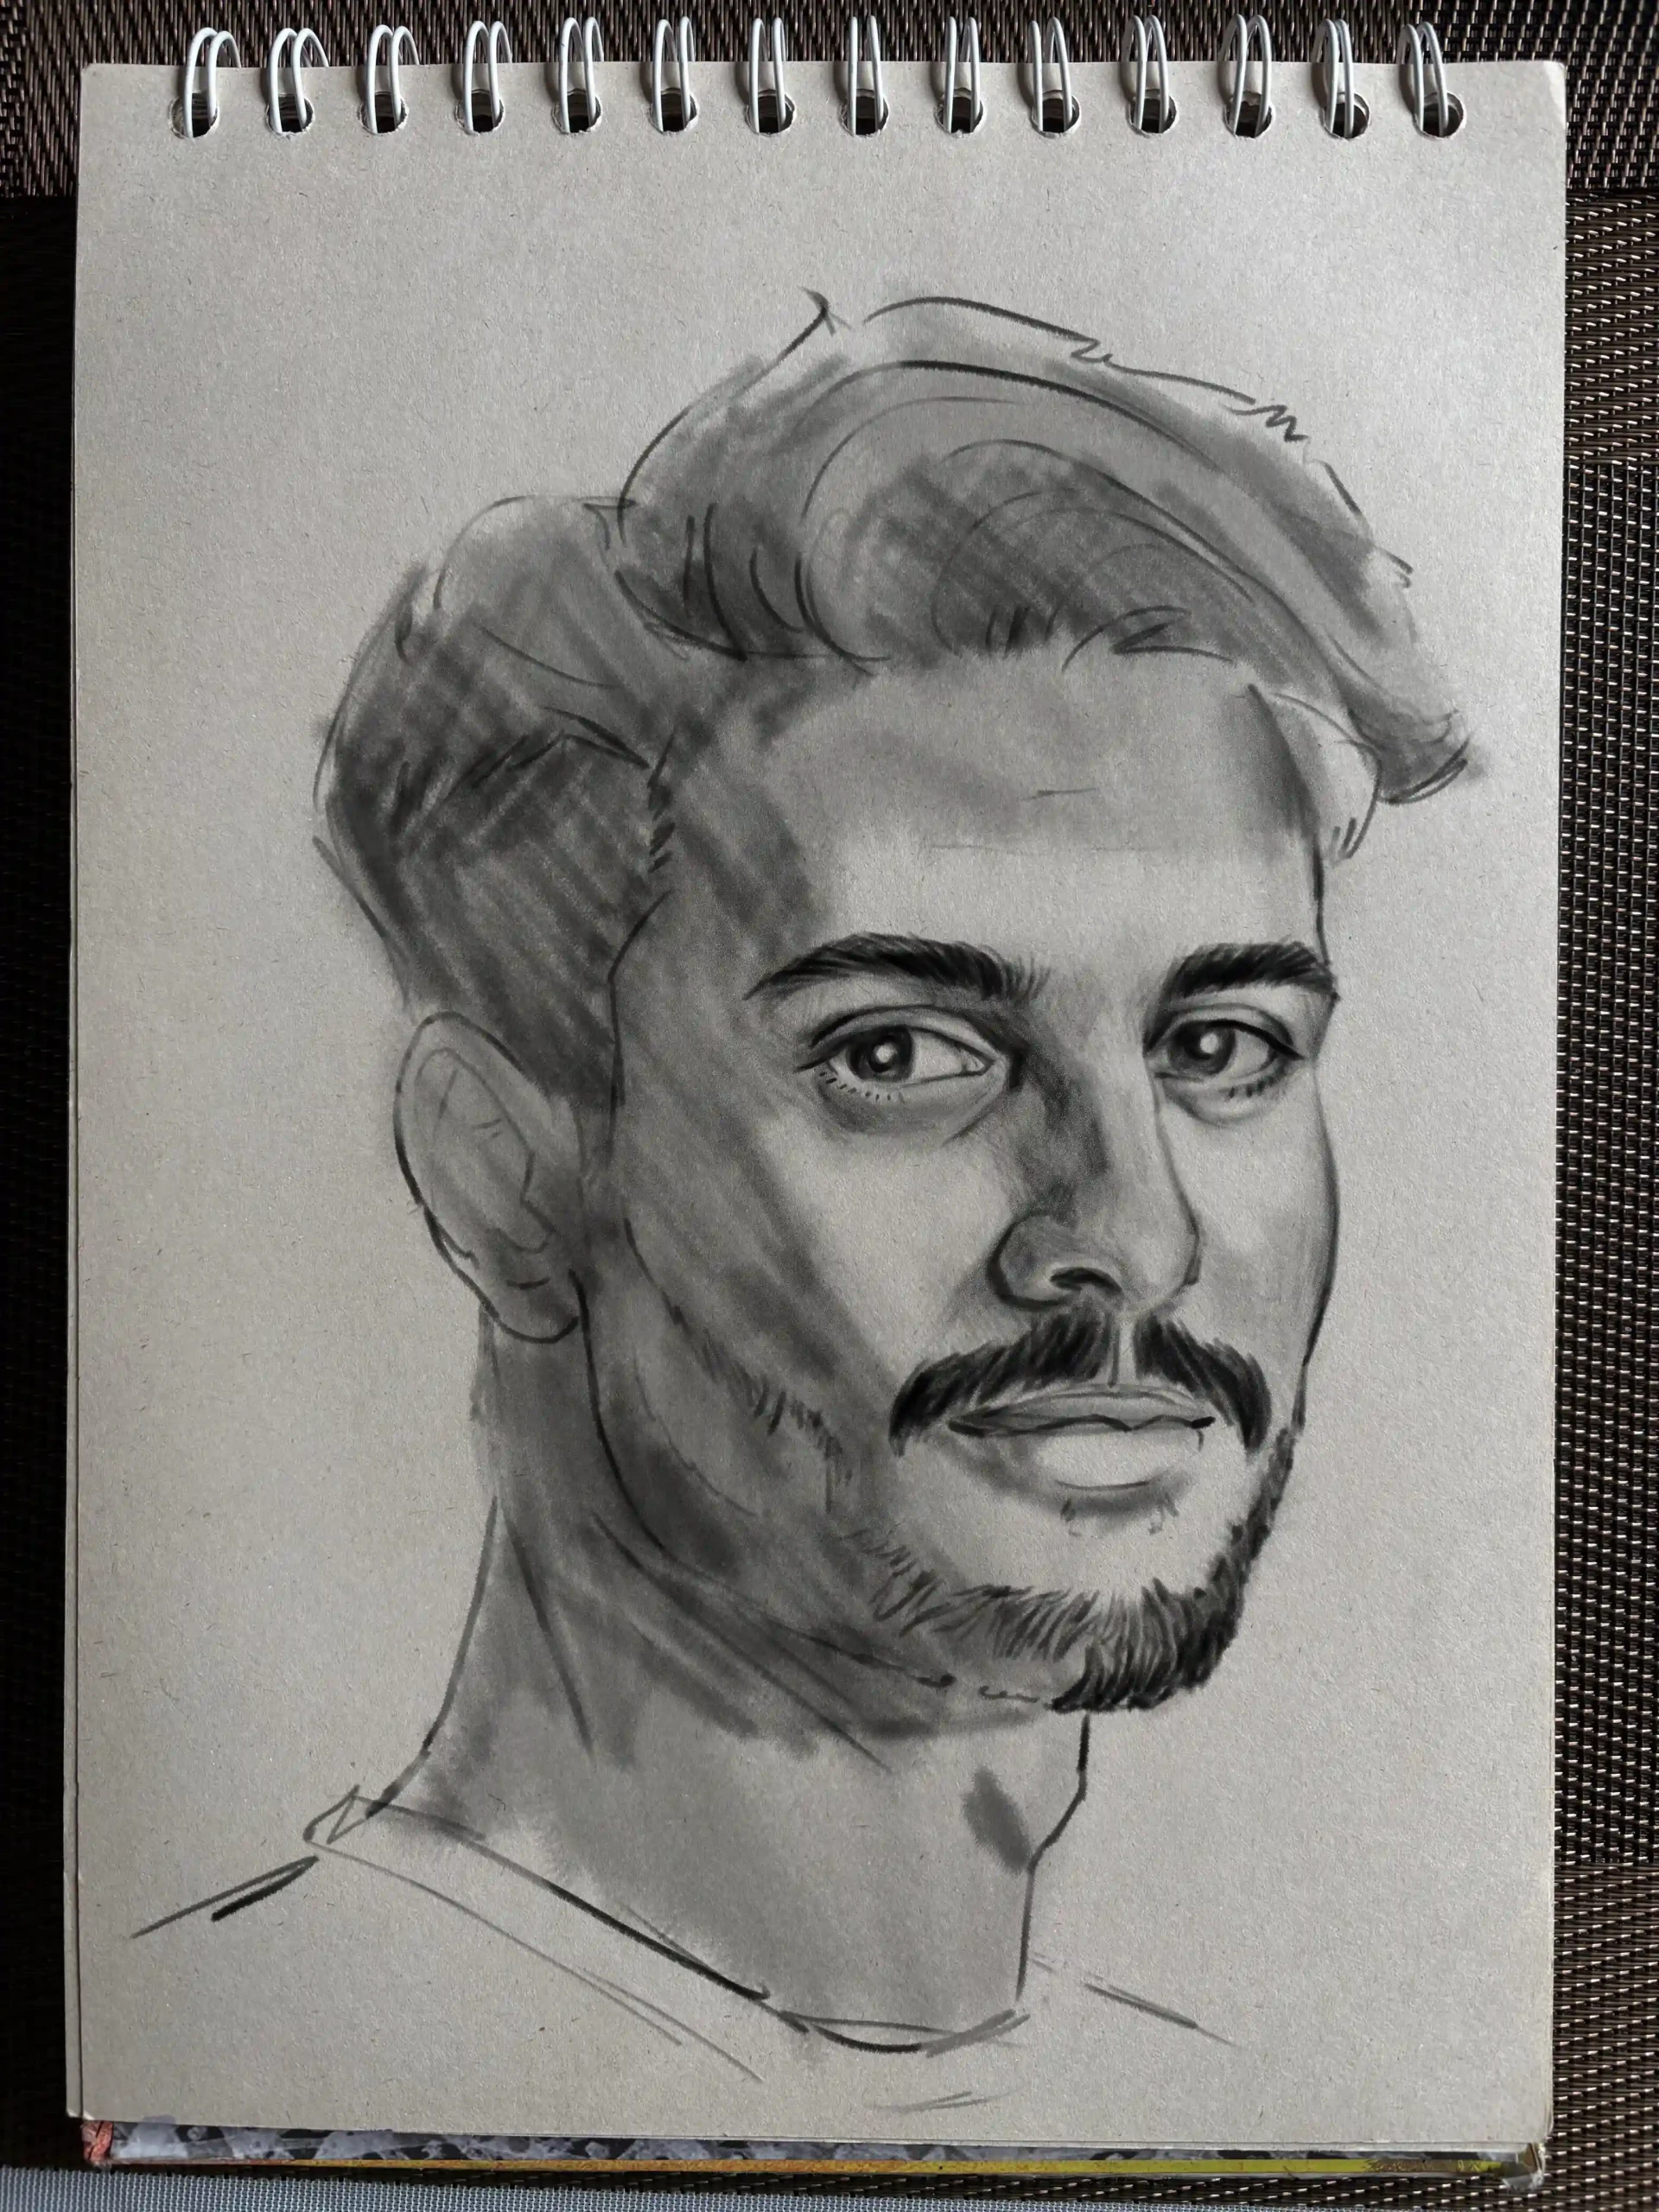
For larger areas such as the forehead and cheekbones, use a blending brush or cotton swab to soften while preserving the necessary contours. For smaller areas such as the eyes, nose, and mouth, the combined use of a pencil and eraser is usually sufficient.
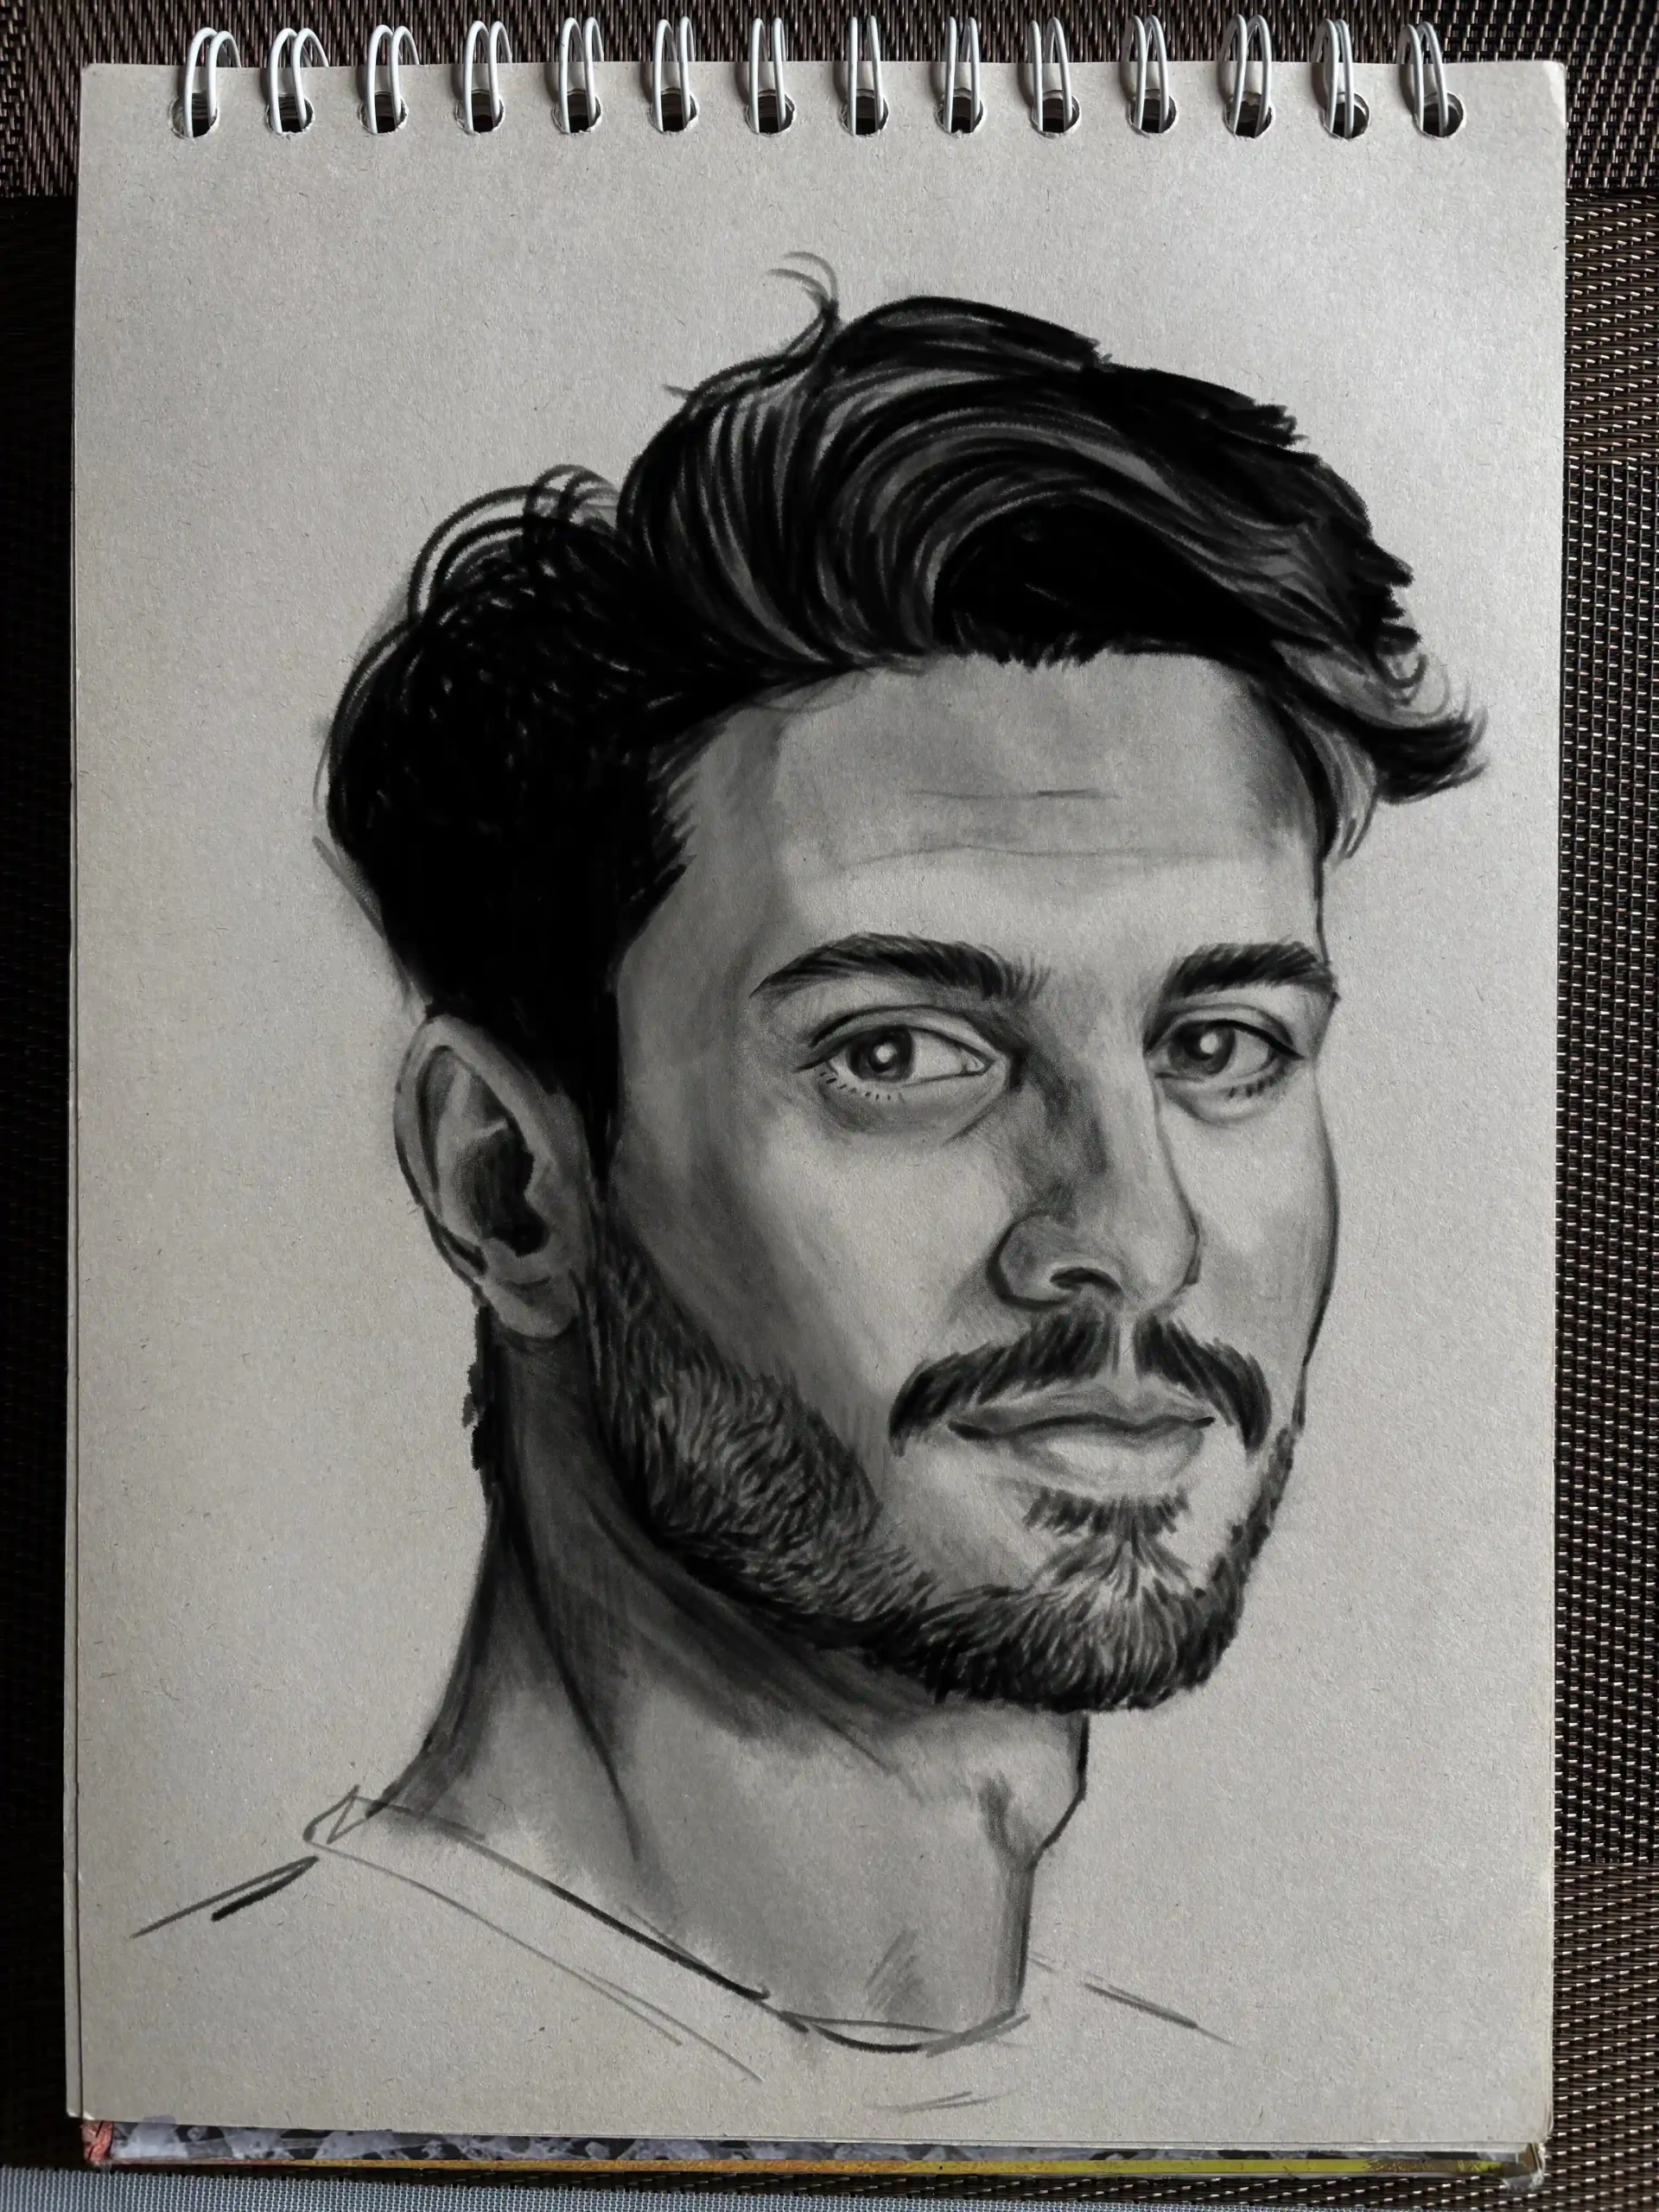
Finalize the drawing
The magic of shadows lies in their contrast with the light areas. Finish by adding a few highlights with a white pastel pencil; a few touches in the eyes and on the nose, lips, and some strands of hair are enough to give a lot of vitality to the drawing.
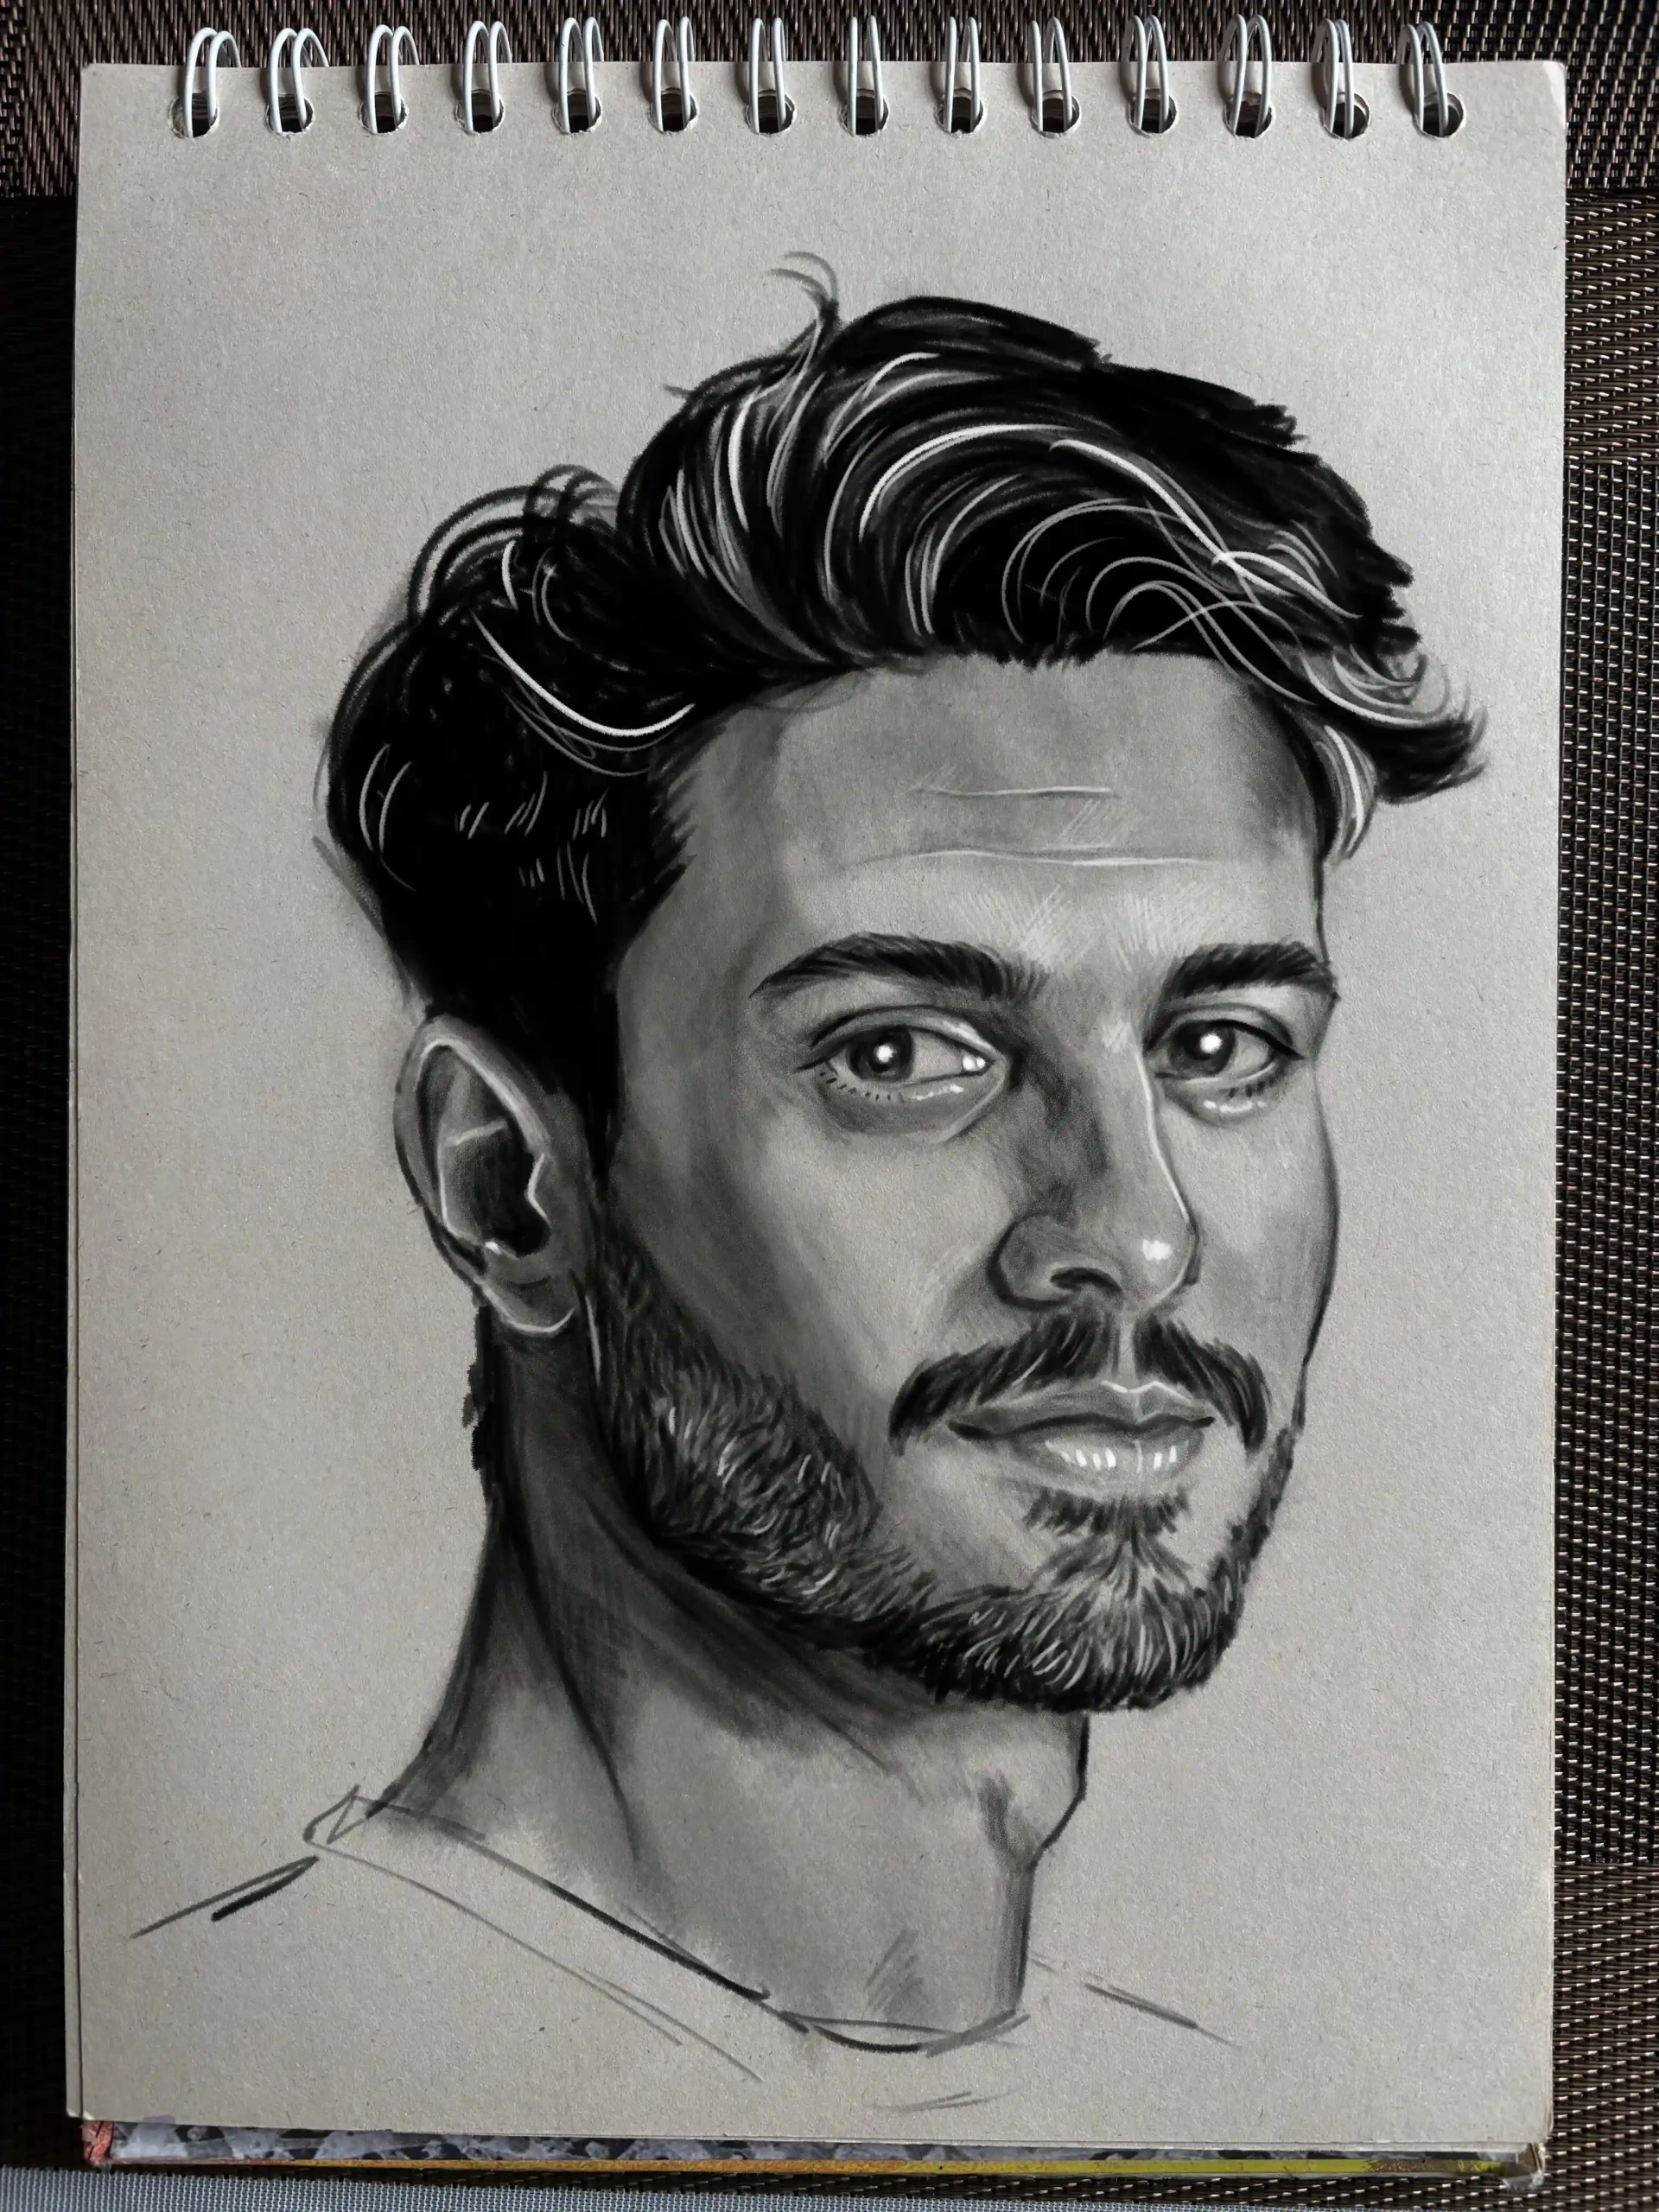
And that’s it for this tutorial! I hope it has given you a better understanding of shadows on the face. It’s a subject that requires practice, but once you start to see the forms and volume rather than the lines, everything changes. Now it’s up to you to get started with your own references, photos found online, or selfies from your gallery. See you soon!
Discussion
Well done, your article is very comprehensive while remaining simple and very clear. All that’s left for me to do is practice, because for now I haven’t done too many portraits. I plan to take the course on this topic.
Thank you very much for your article; the explanations are clear and explicit. I will try to put them into practice.
Thank you very much for this very detailed article; it helped me to visualize the direction of the light.