How to Draw a Village
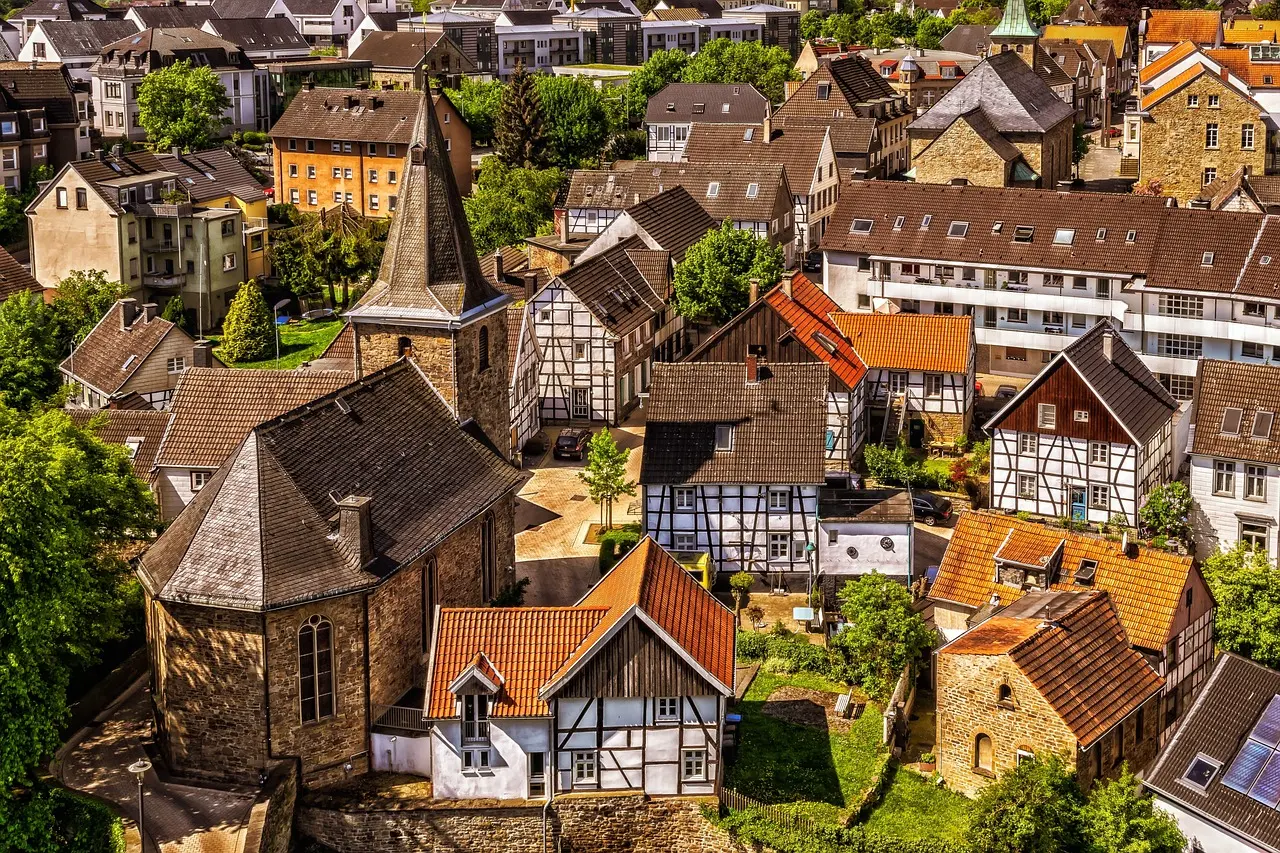
The Middle Ages is undoubtedly one of the most fascinating periods in history. Its unique architectural style has left a mark on our collective imagination.
We have already explored several elements of this period, and today, I propose that we draw a small medieval village. For this, we will look at some essential aspects of composition and architecture.
Draw a village step by step
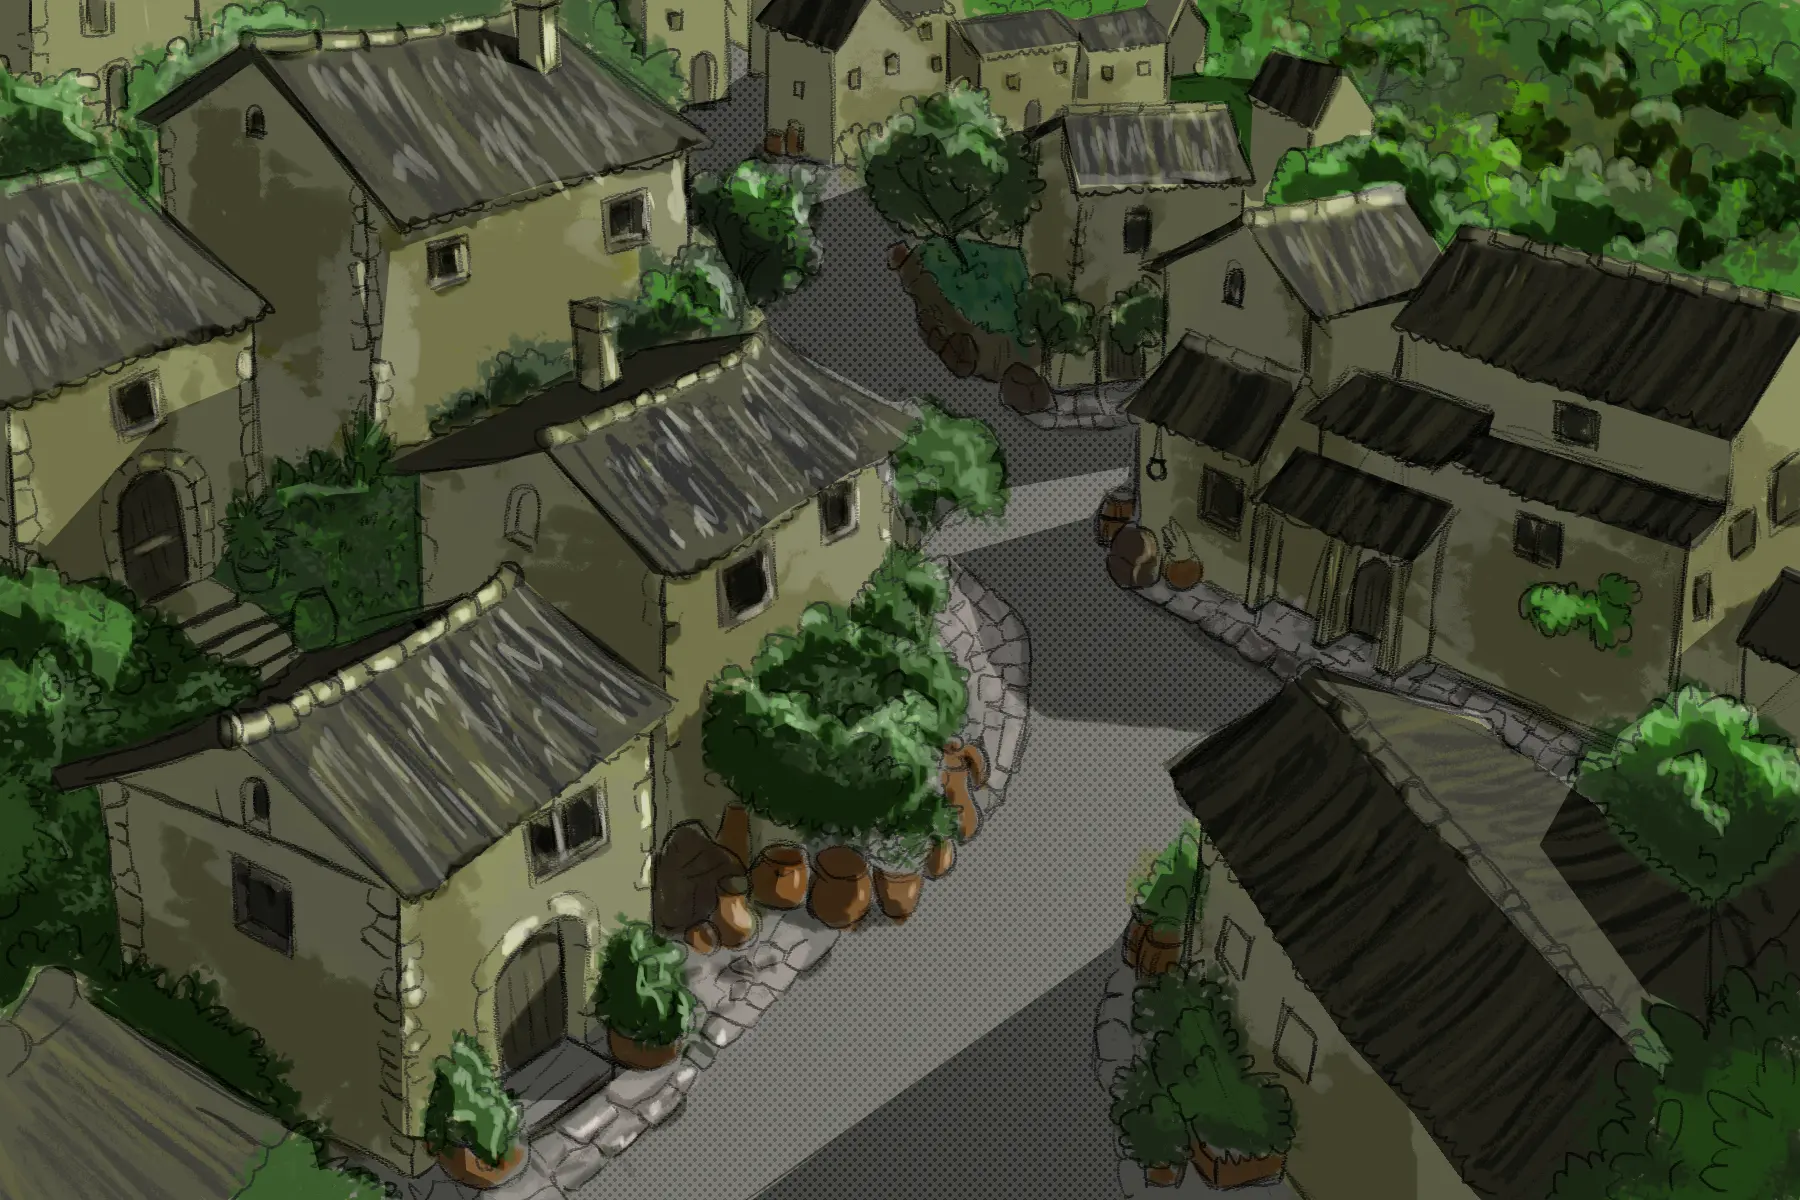
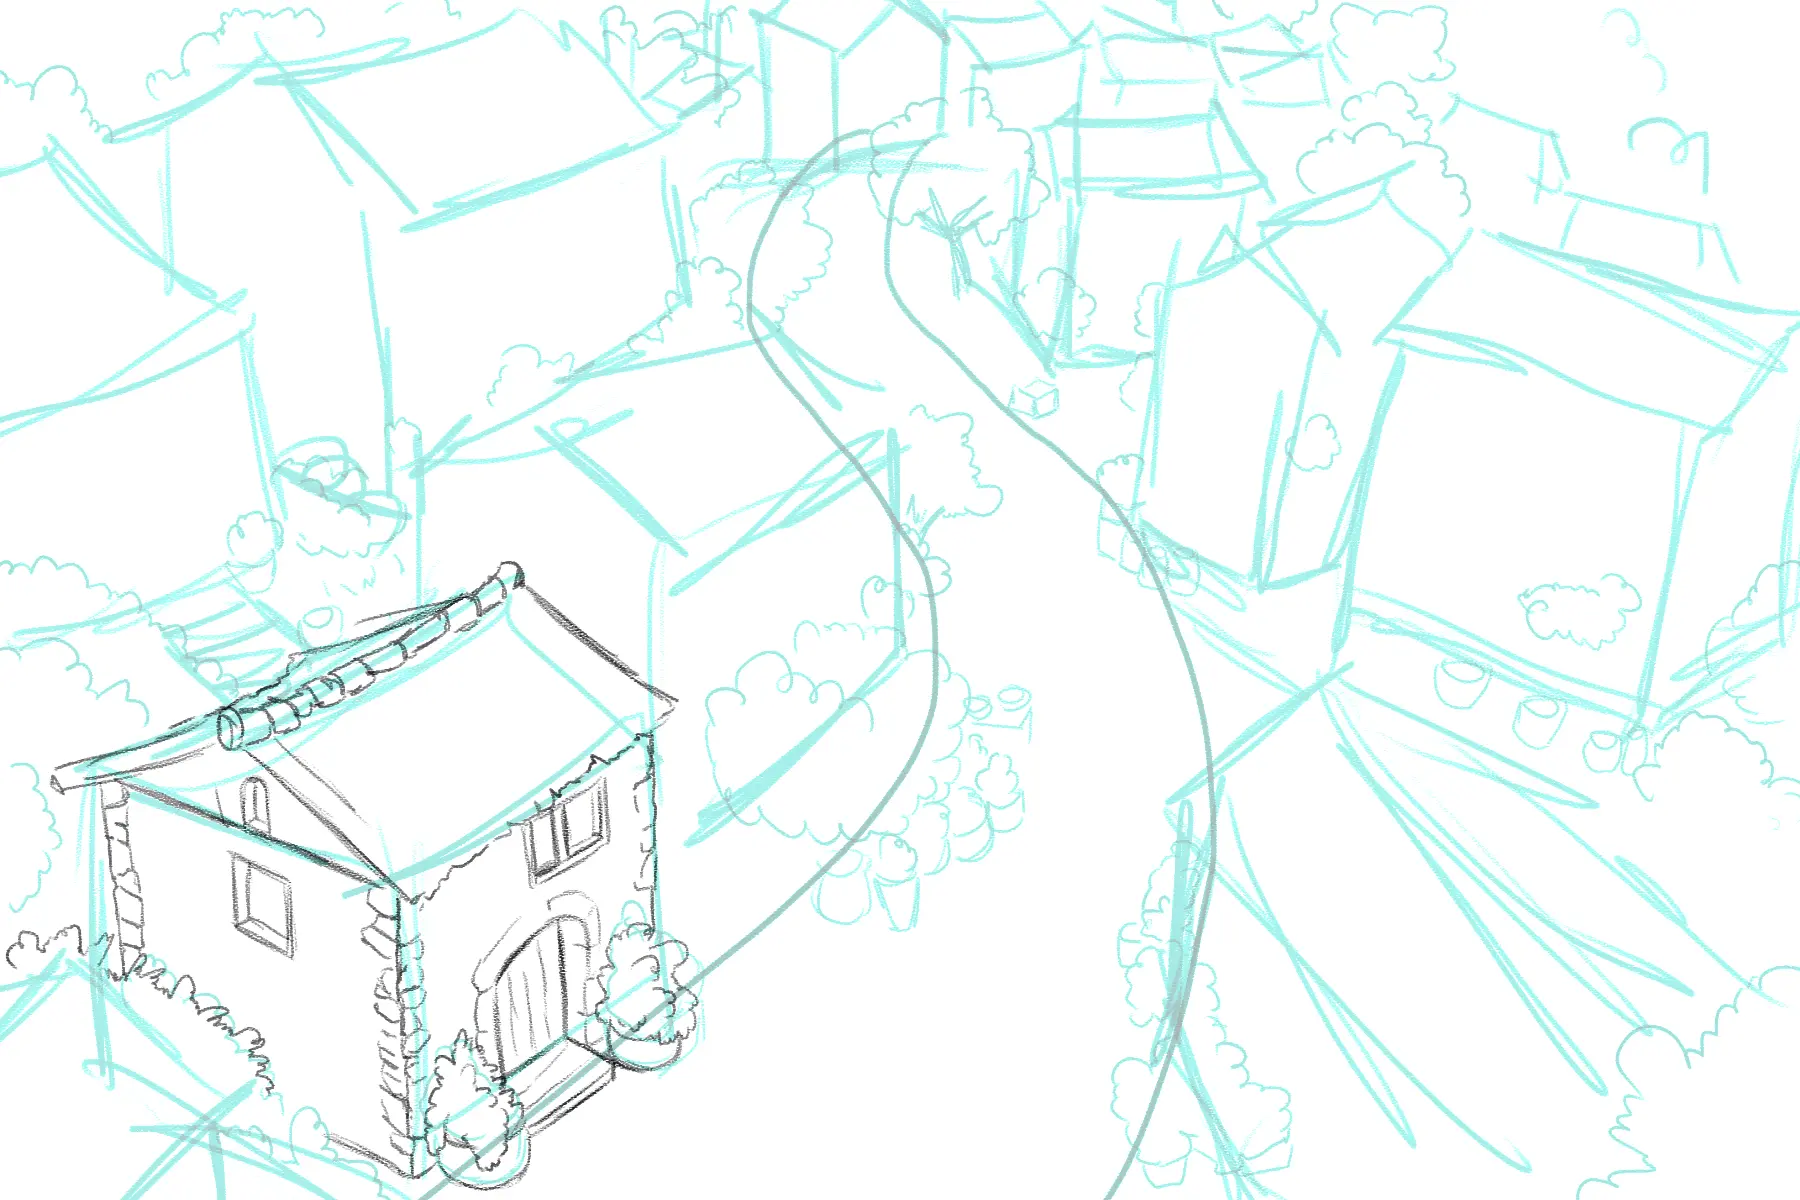
For this drawing, we will choose a bird's-eye view, which will enable us to enjoy a wider view of the landscape.
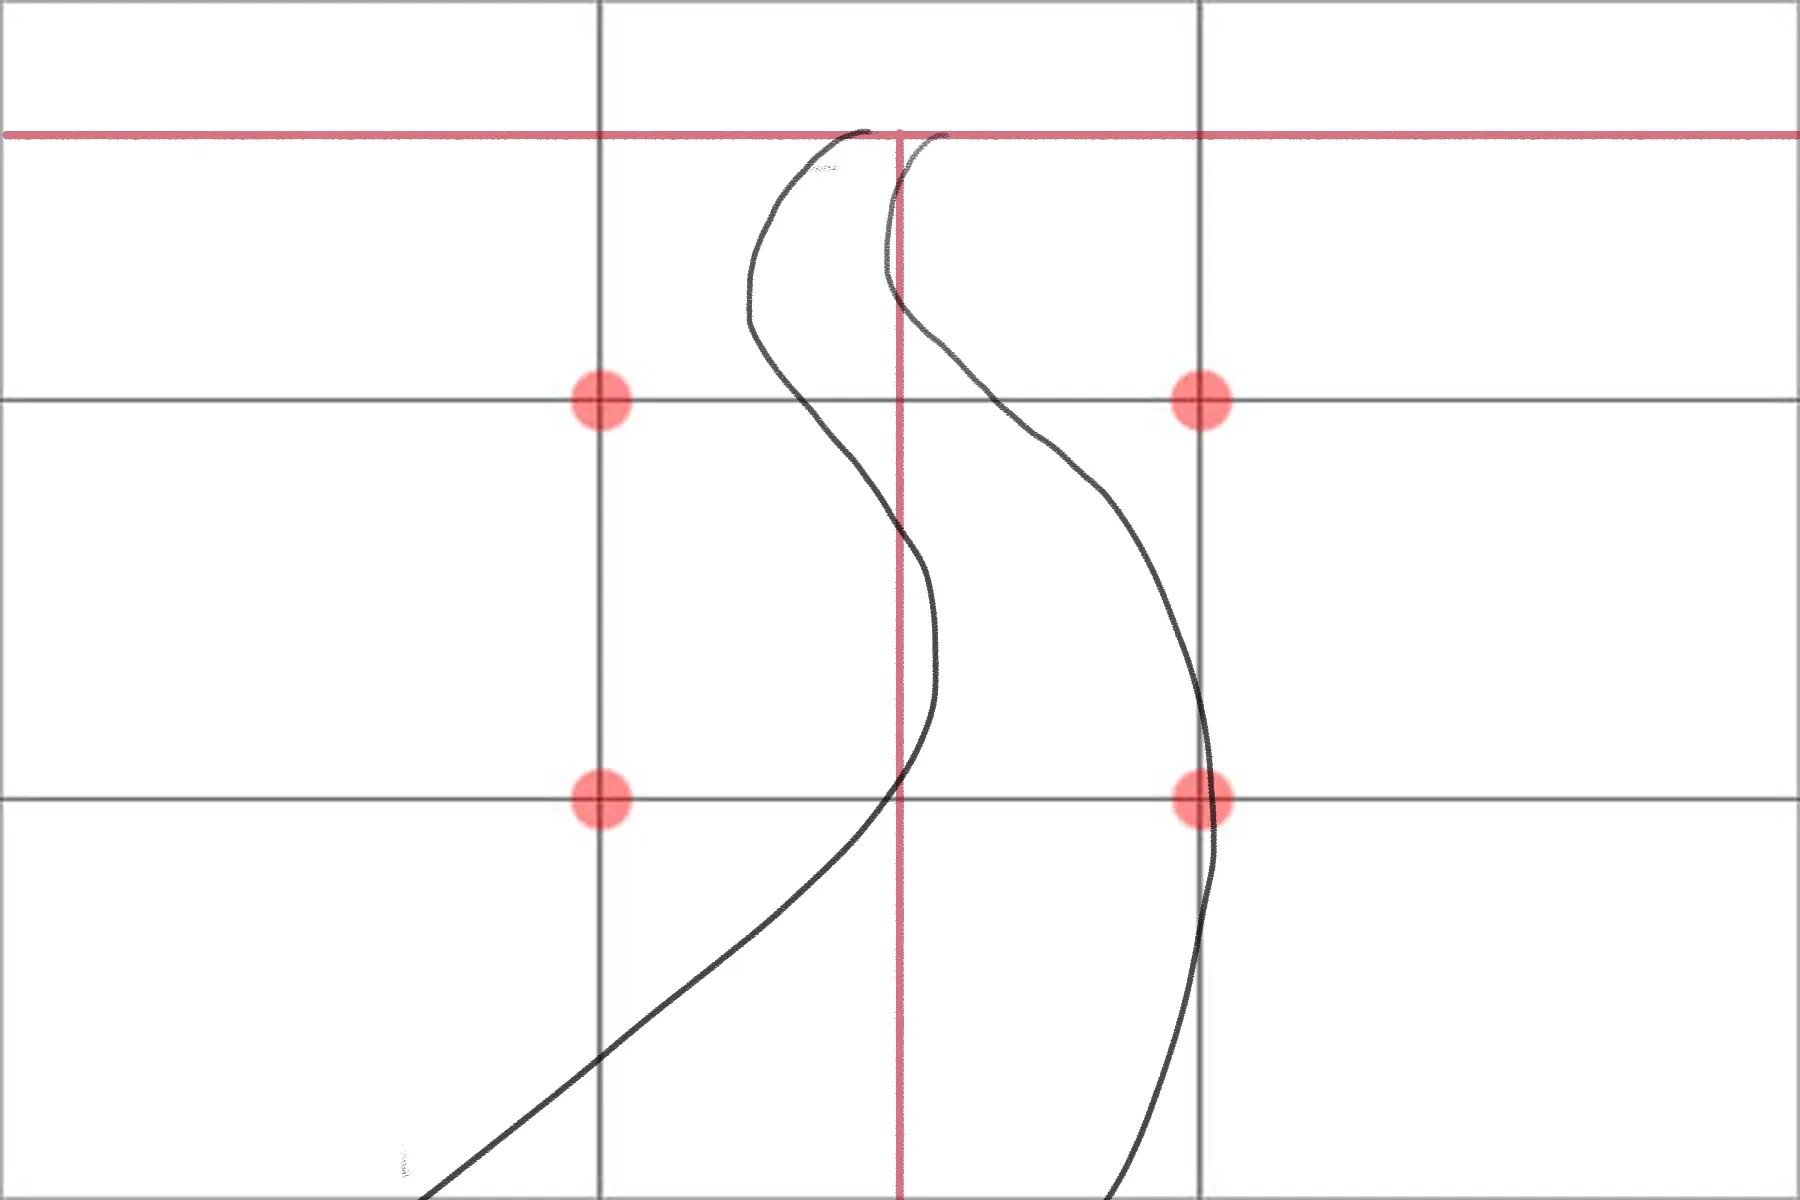
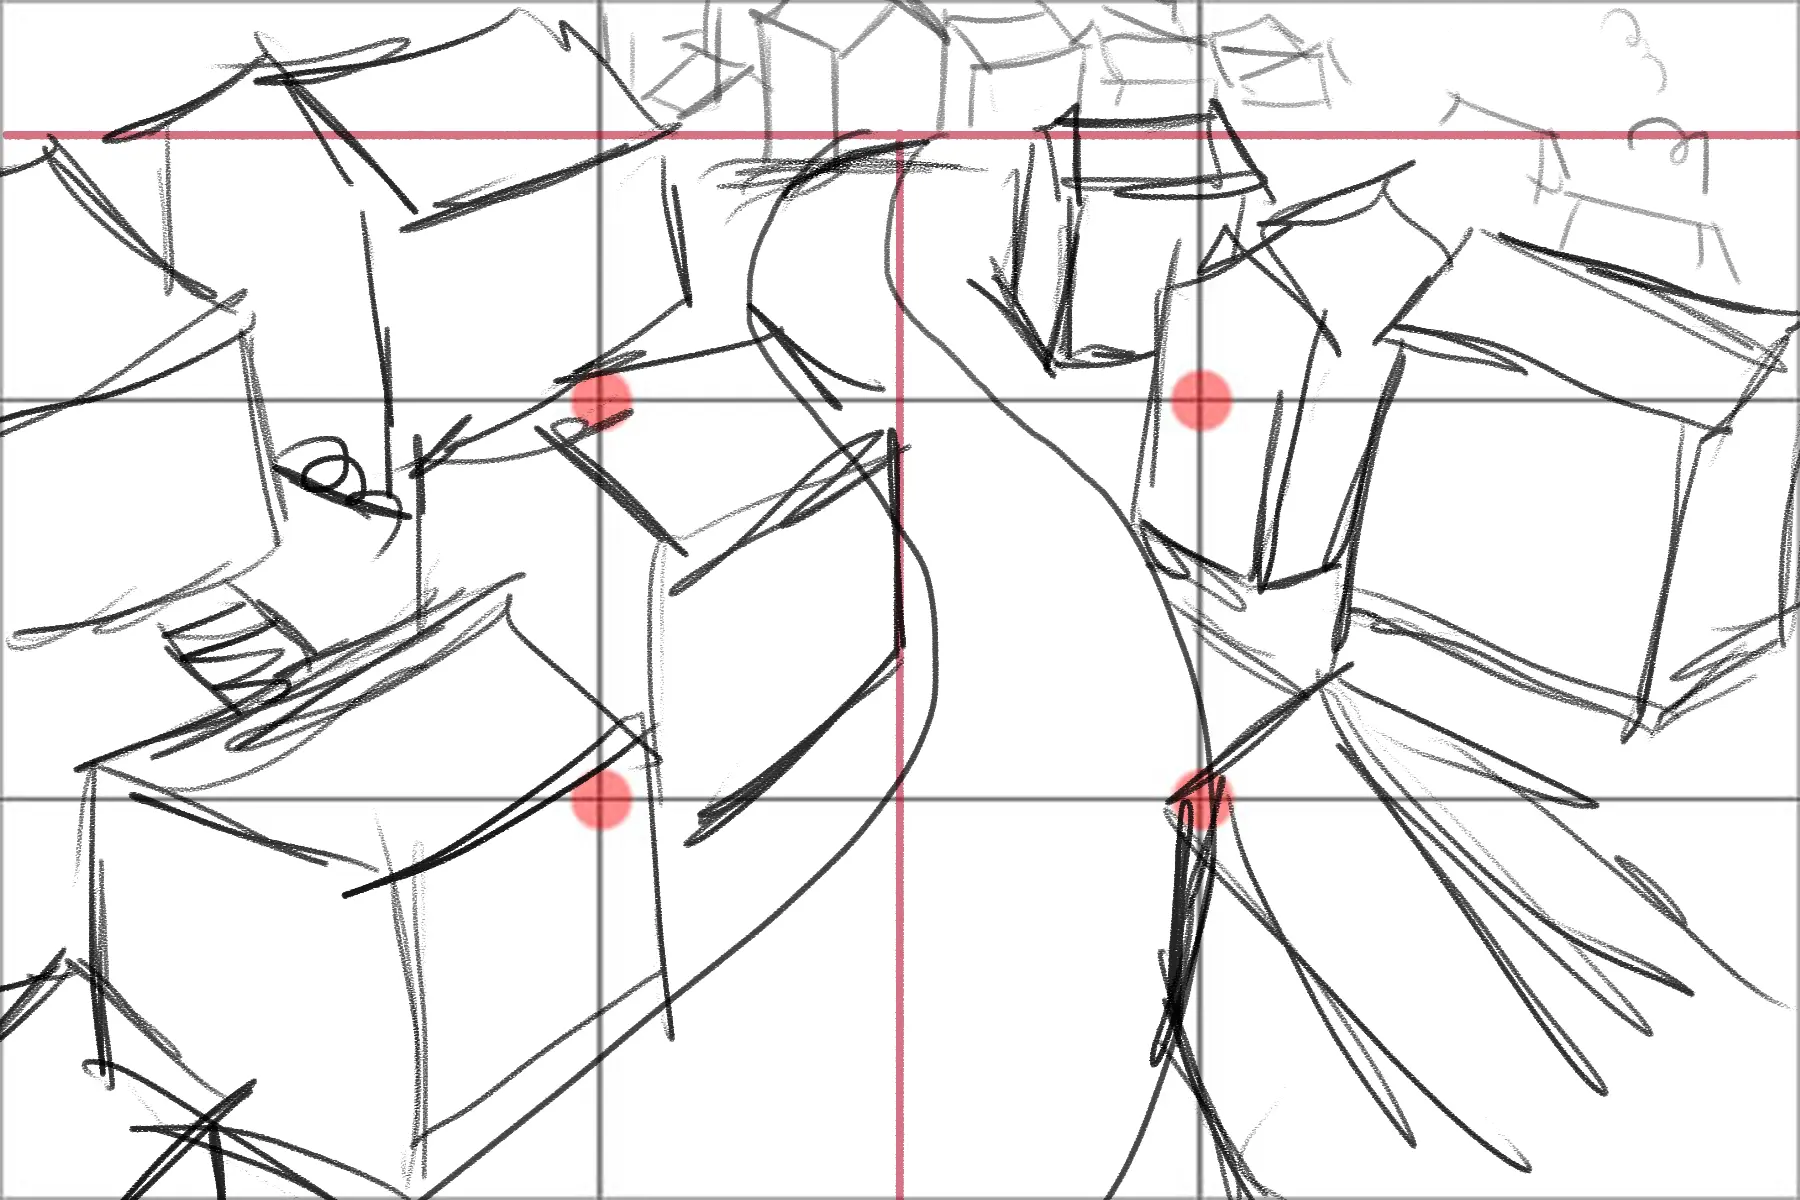
Start by drawing the horizon line in the upper part of your sheet, leaving a small space above. From the center, draw a path that gradually widens towards the bottom of the page.
Around this path, sketch several houses of varying sizes, placed irregularly. Always keep in mind the perspective from the chosen viewpoint.
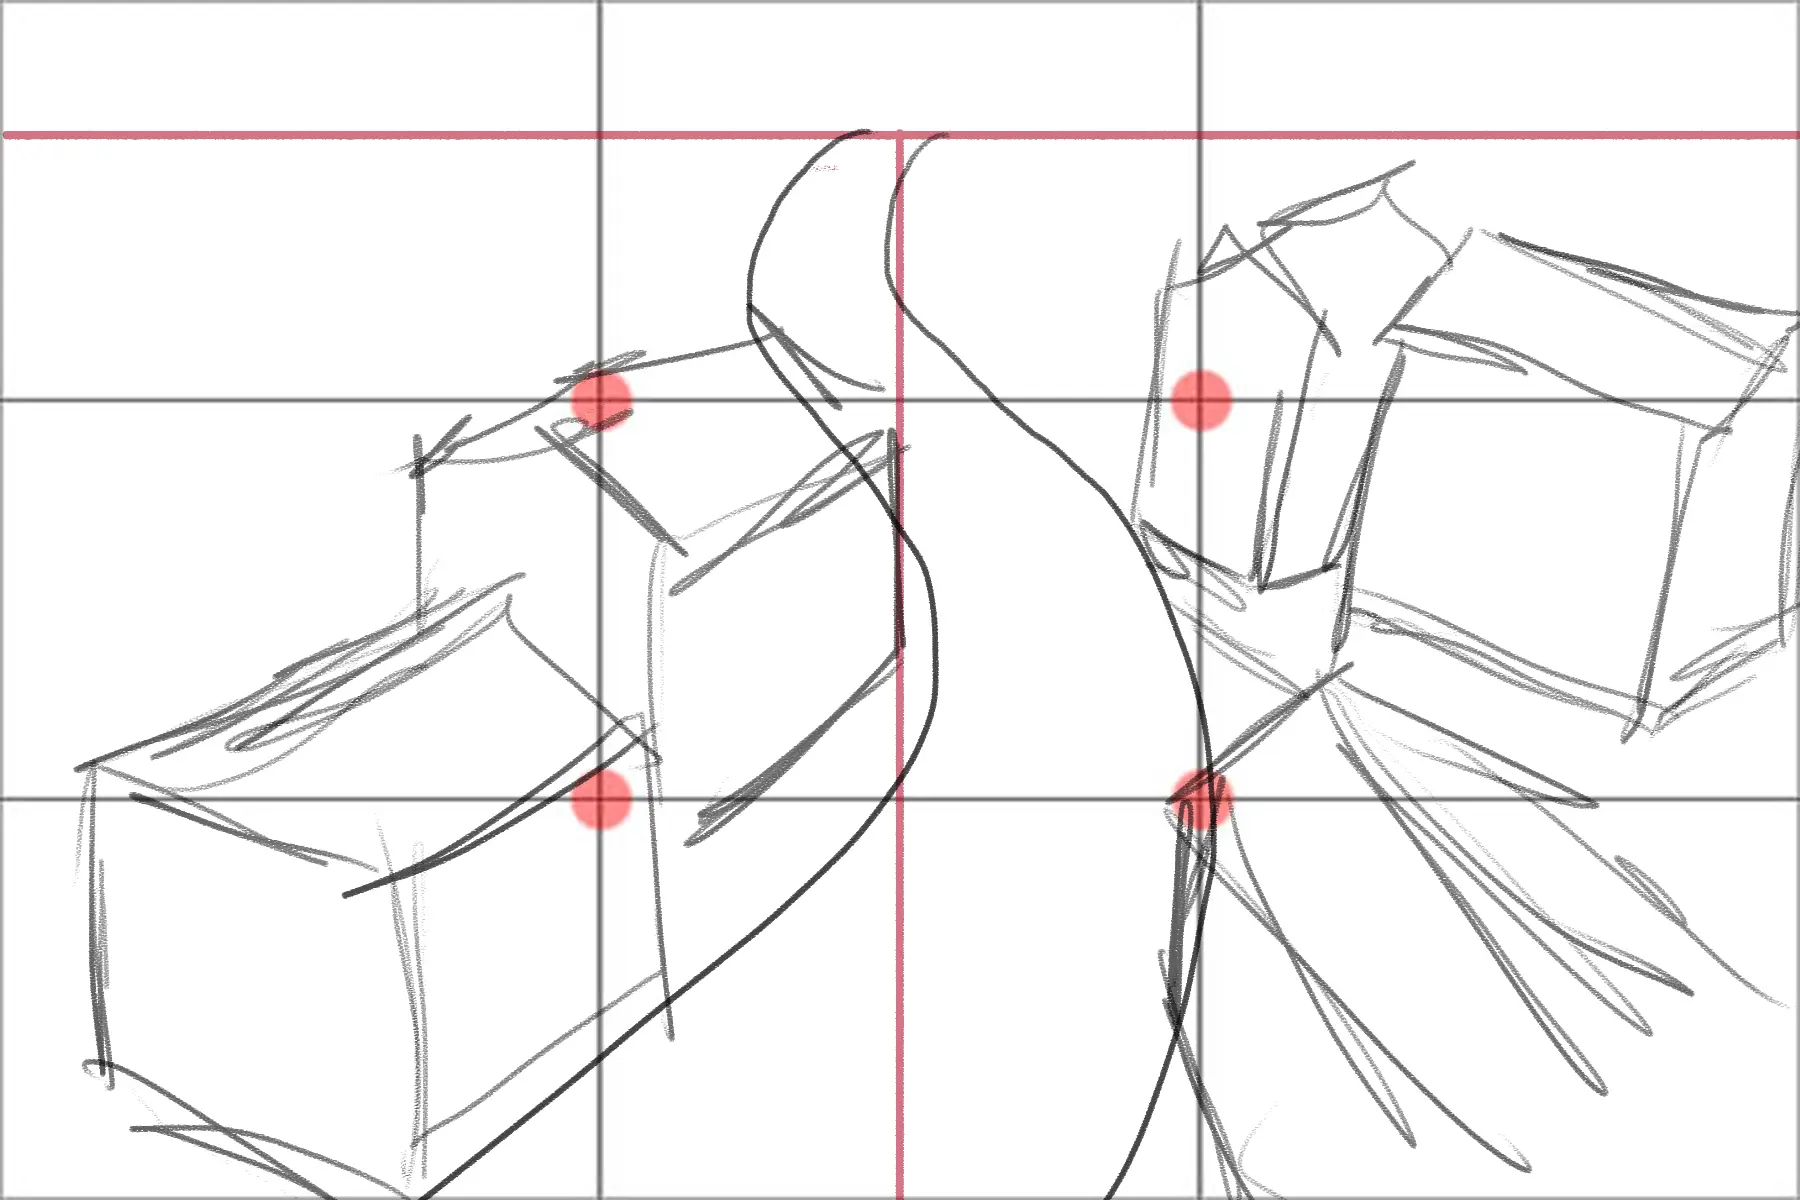
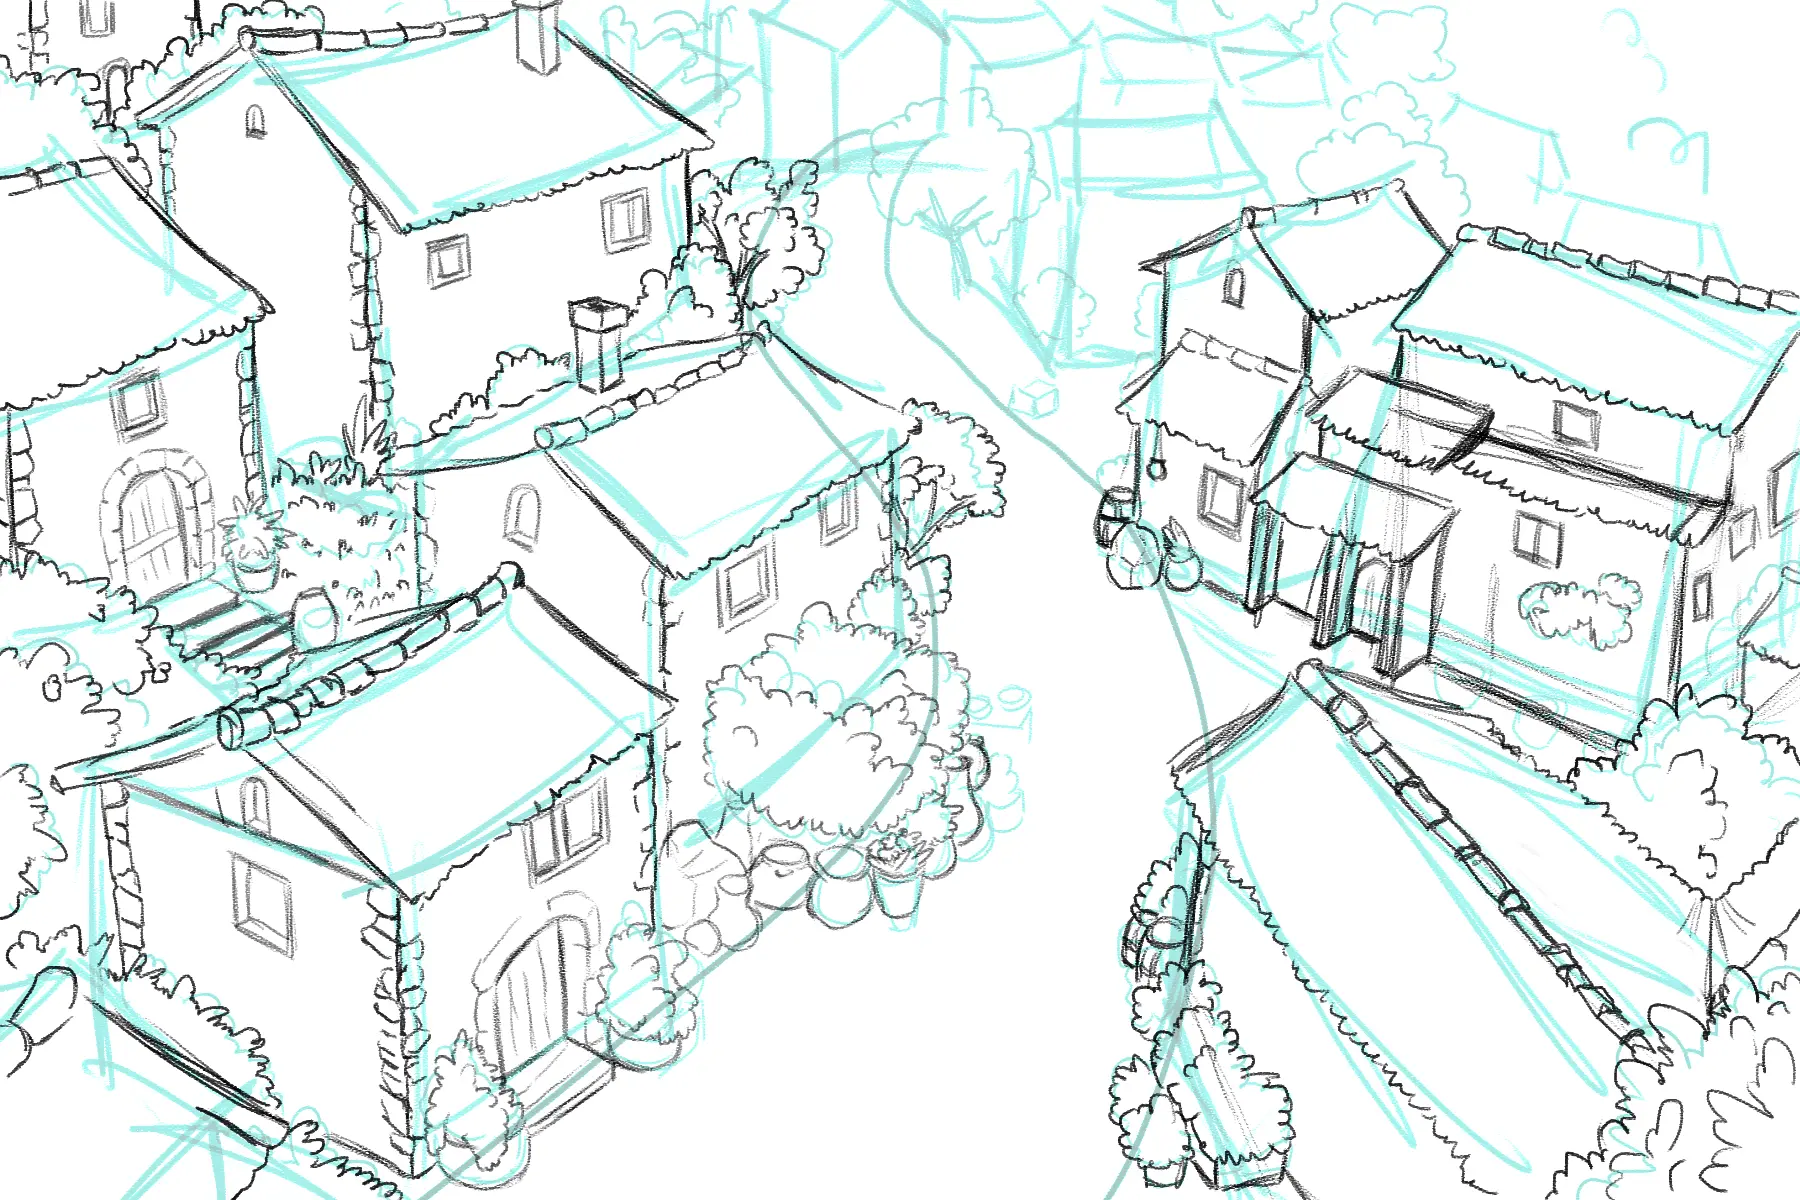
Then complete the drawing by adding more houses on the sides, following the same principles of perspective and depth.
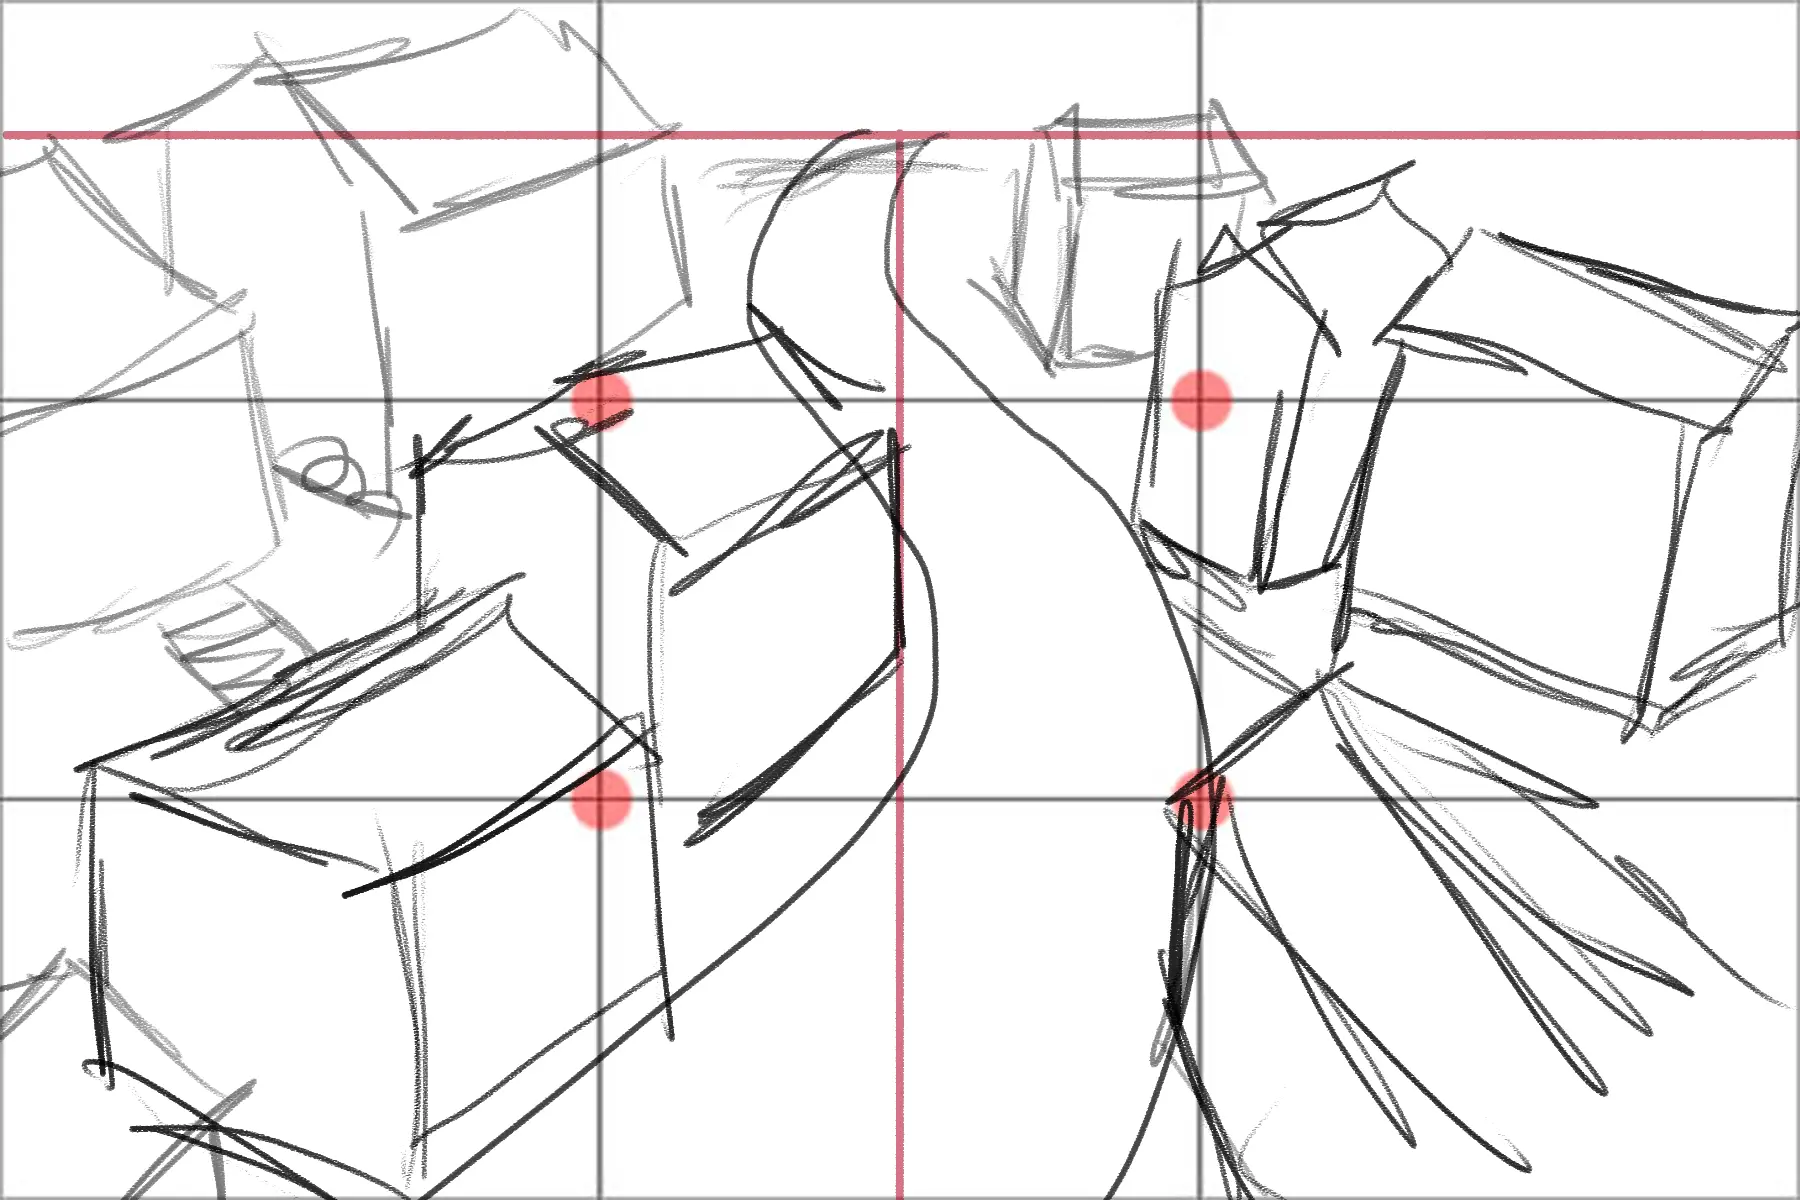
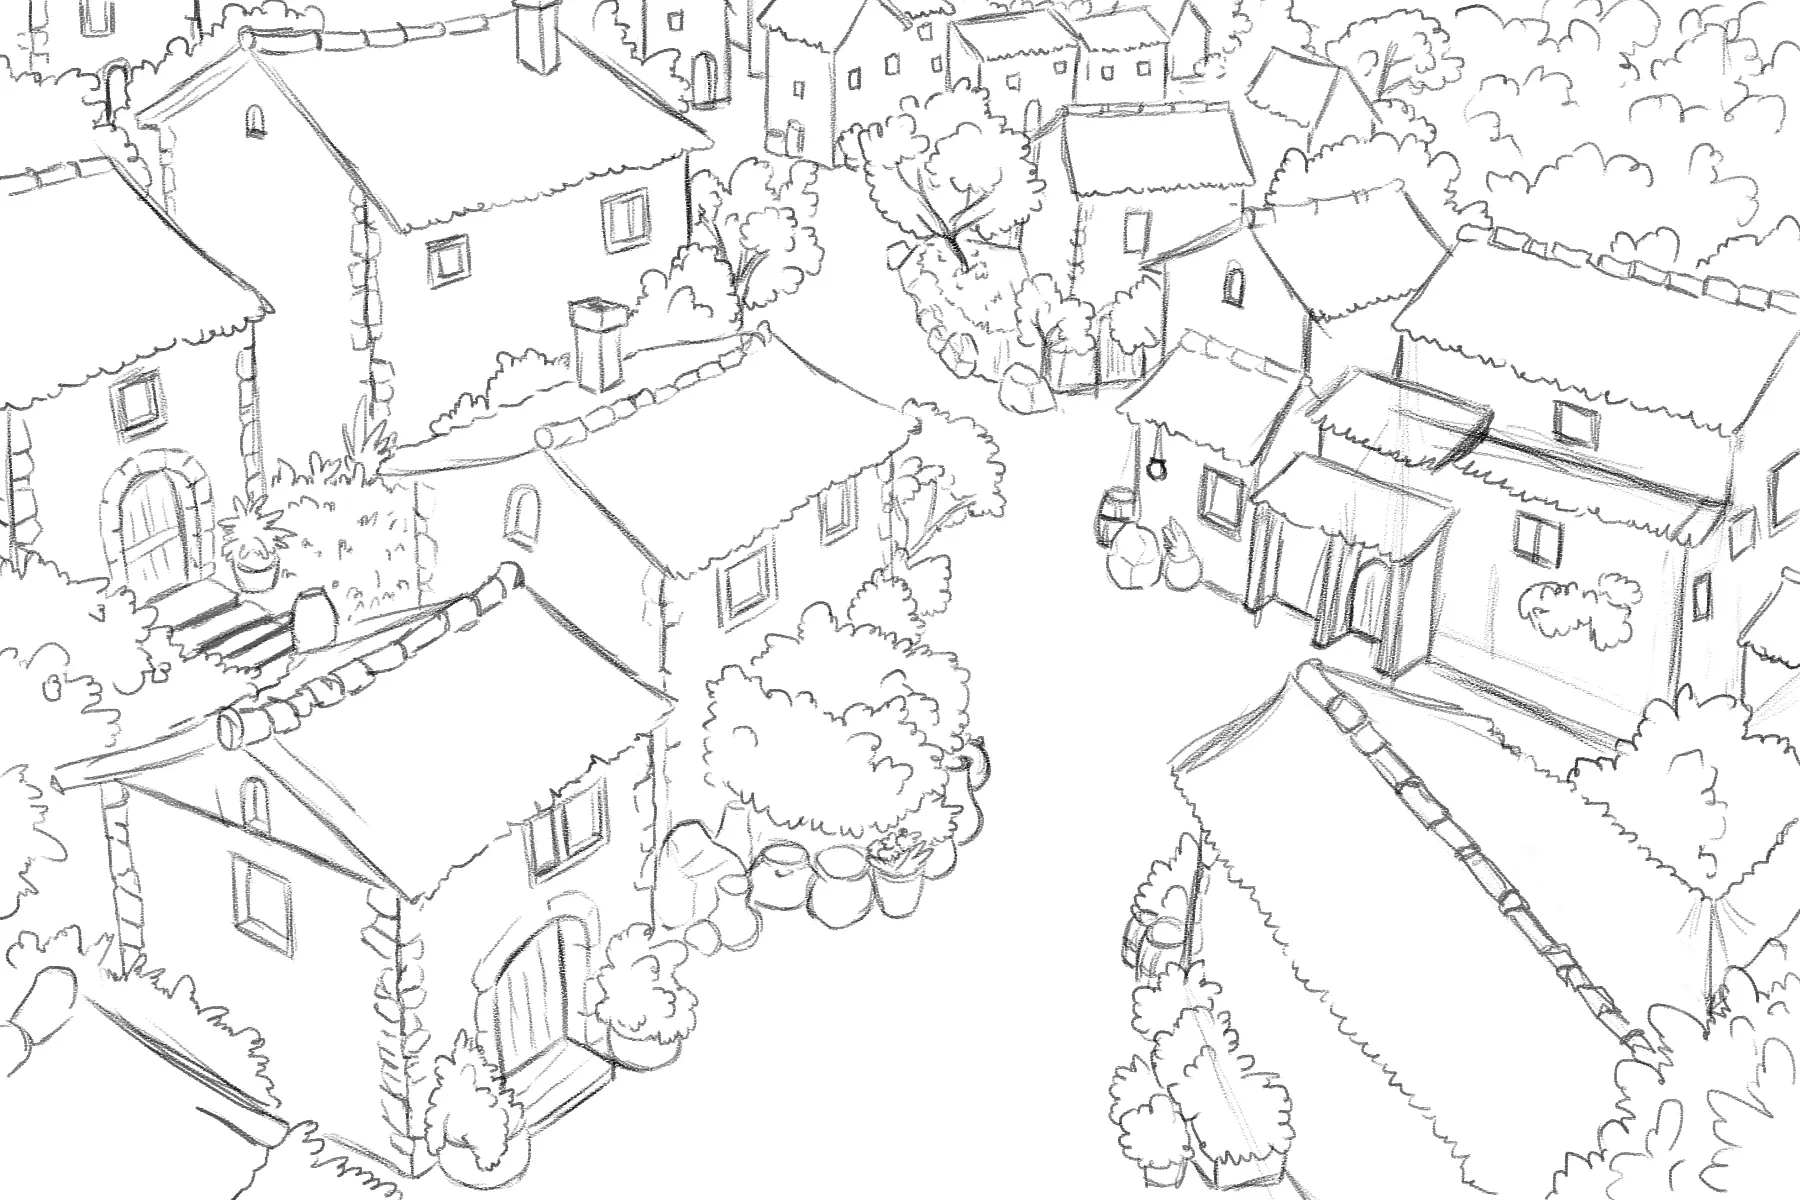
For the most distant houses, use the area on the horizon line: fill it with small, undefined buildings, since the distance means that little detail is required.
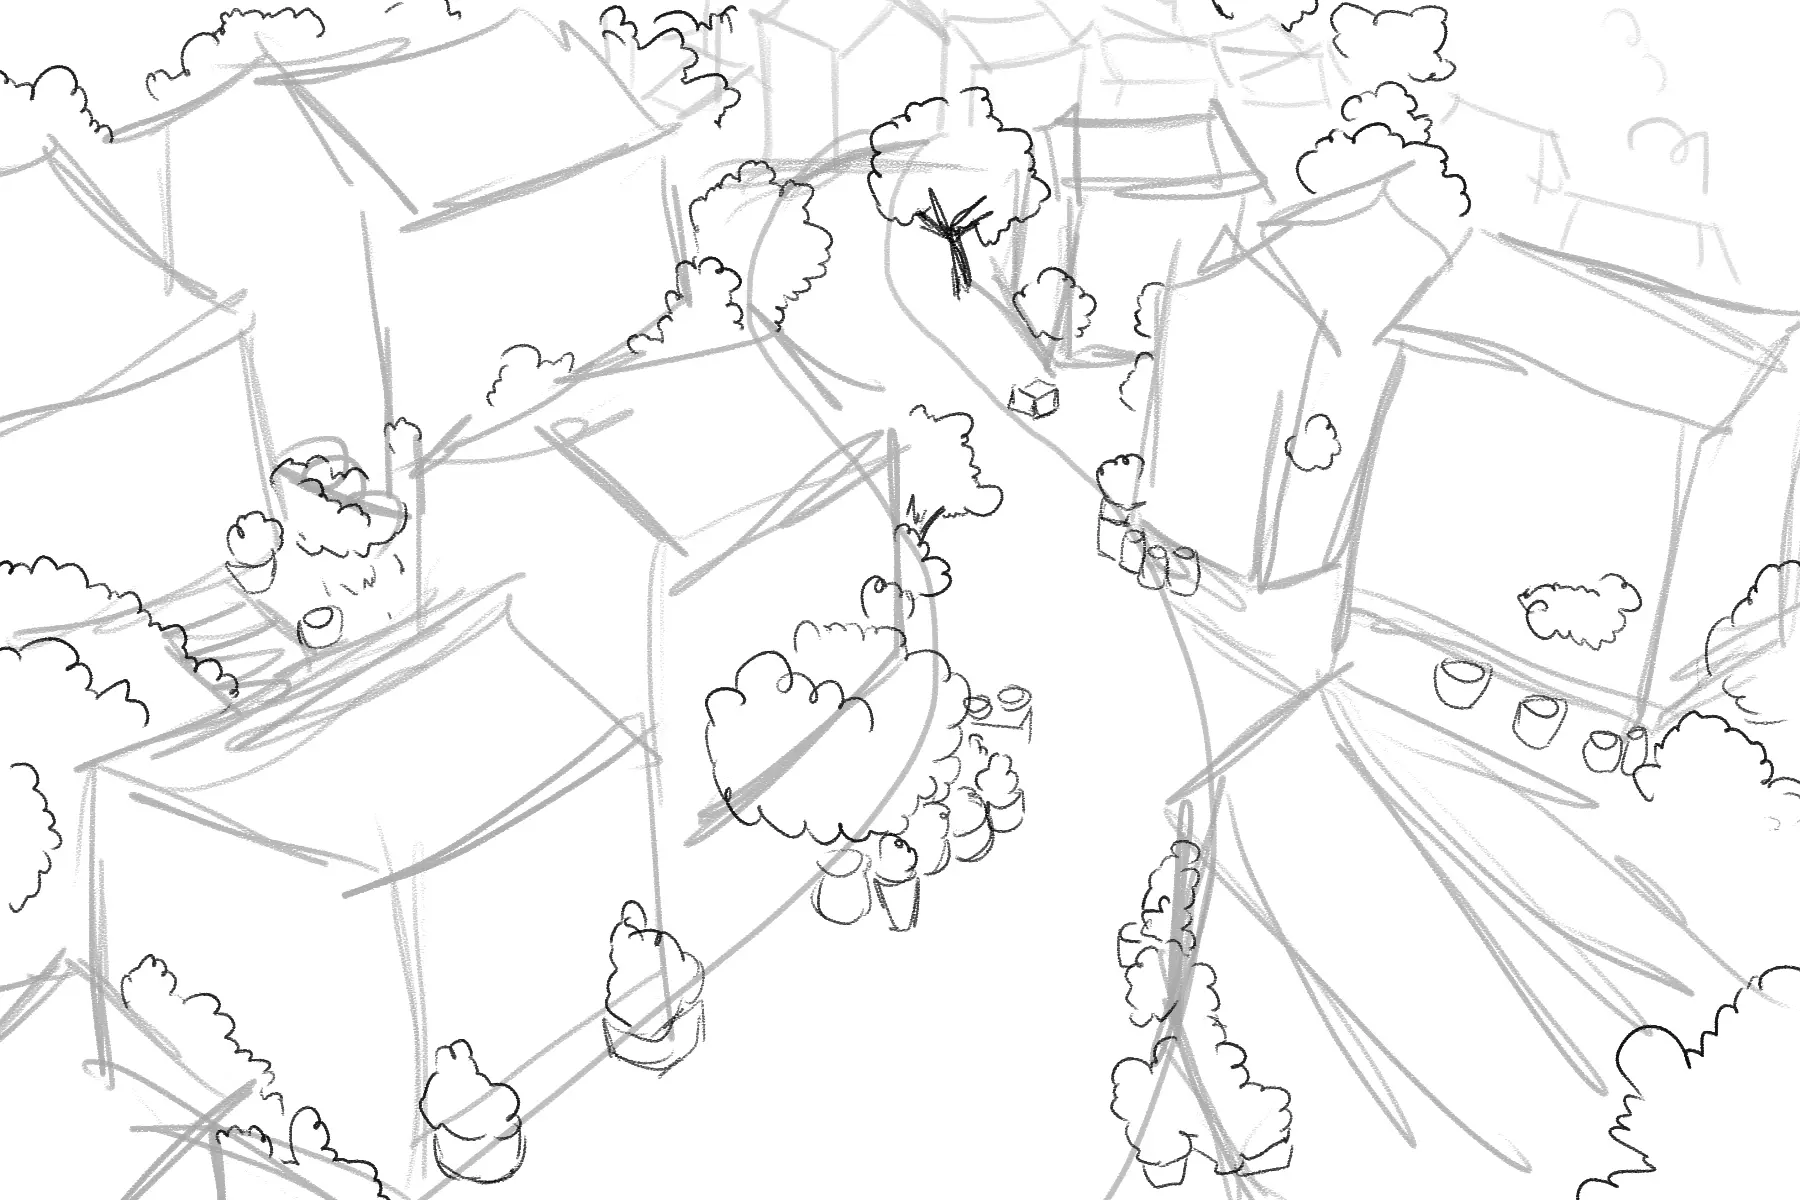
Don't forget that this is a medieval village: at that time, urban planning wasn't as geometric or uniform as it is today. So add trees, flower pots, climbing plants attached to the walls or hanging from windows - all elements that will bring life to your drawing.
Draw the houses
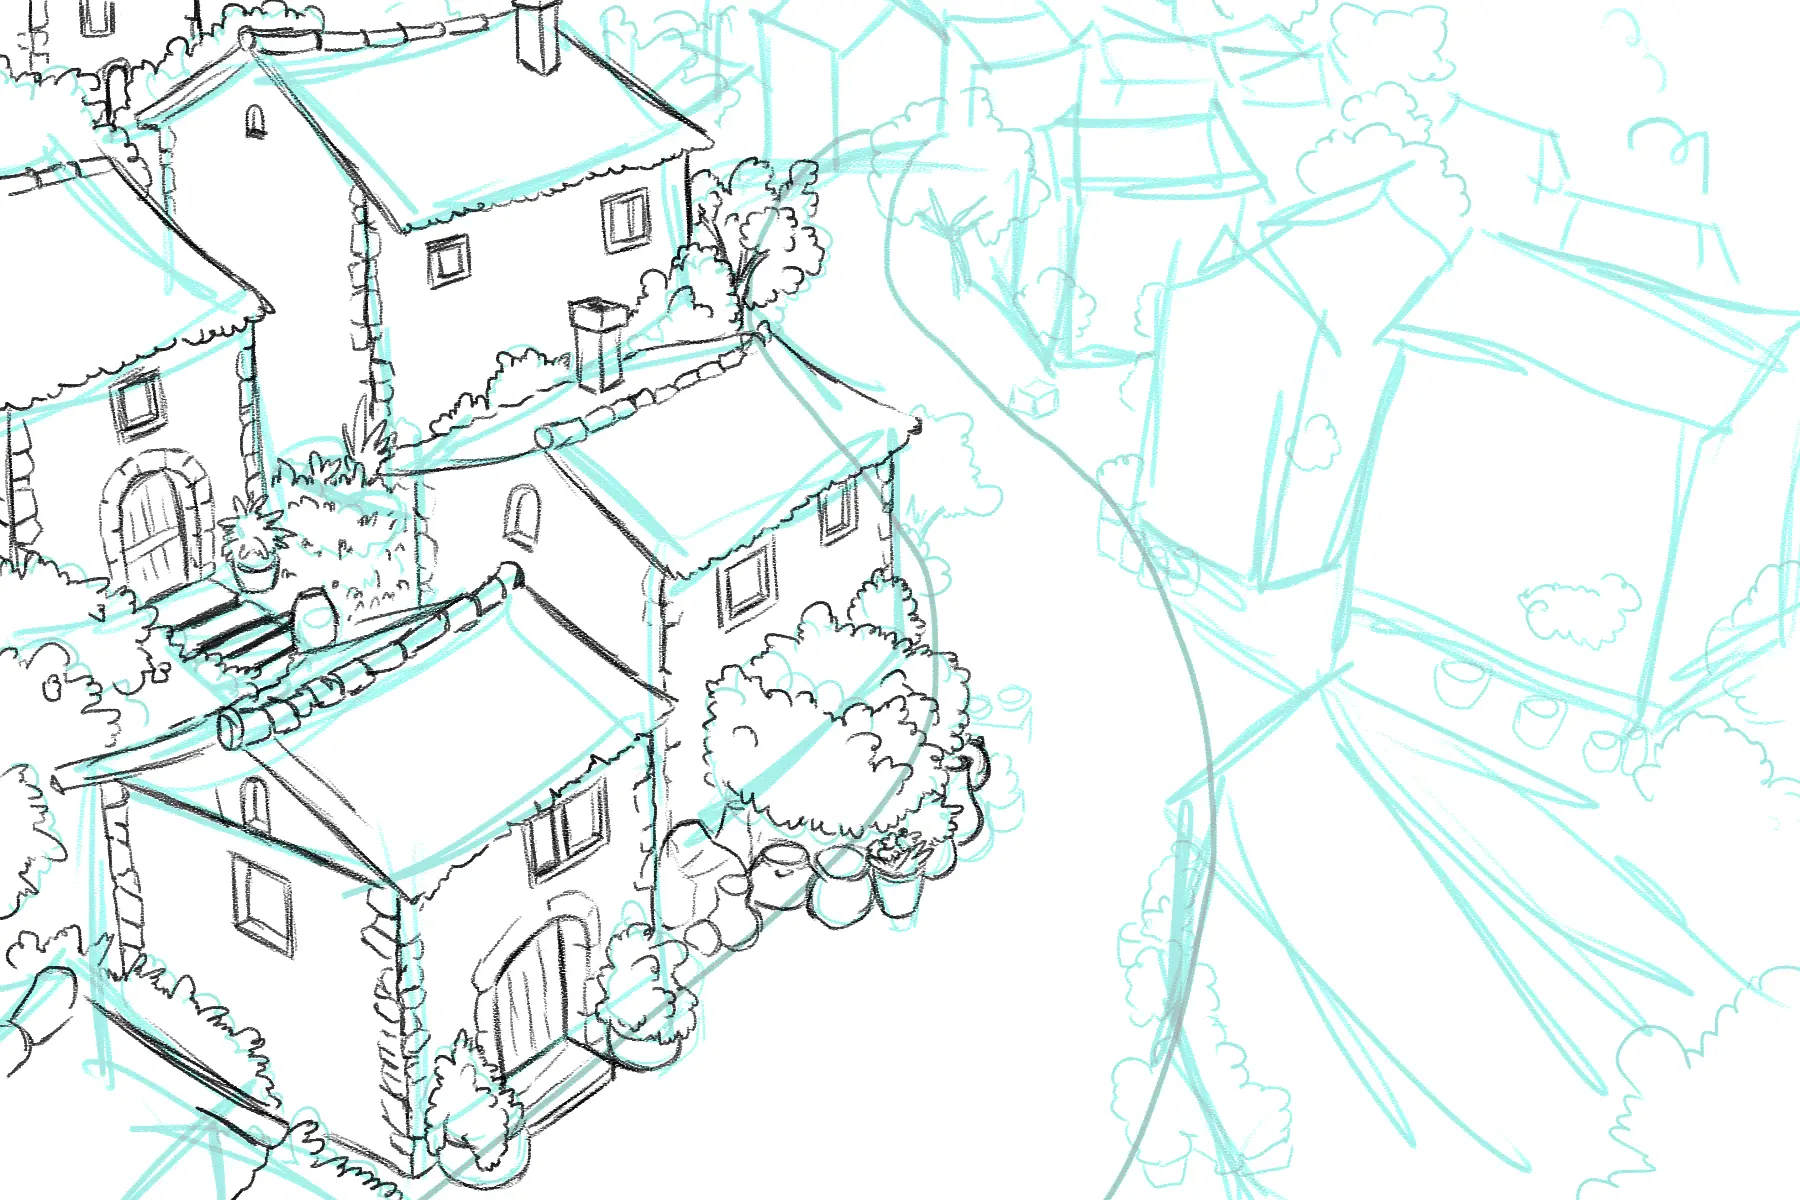
For your houses, draw inspiration from the typical features of medieval architecture.
The walls are often made of stone, with corners reinforced by large, clearly visible blocks.
The roofs, on the other hand, can be made of irregular tiles or thatch, and have a triangular slope. Some buildings are topped with small cylindrical chimneys.
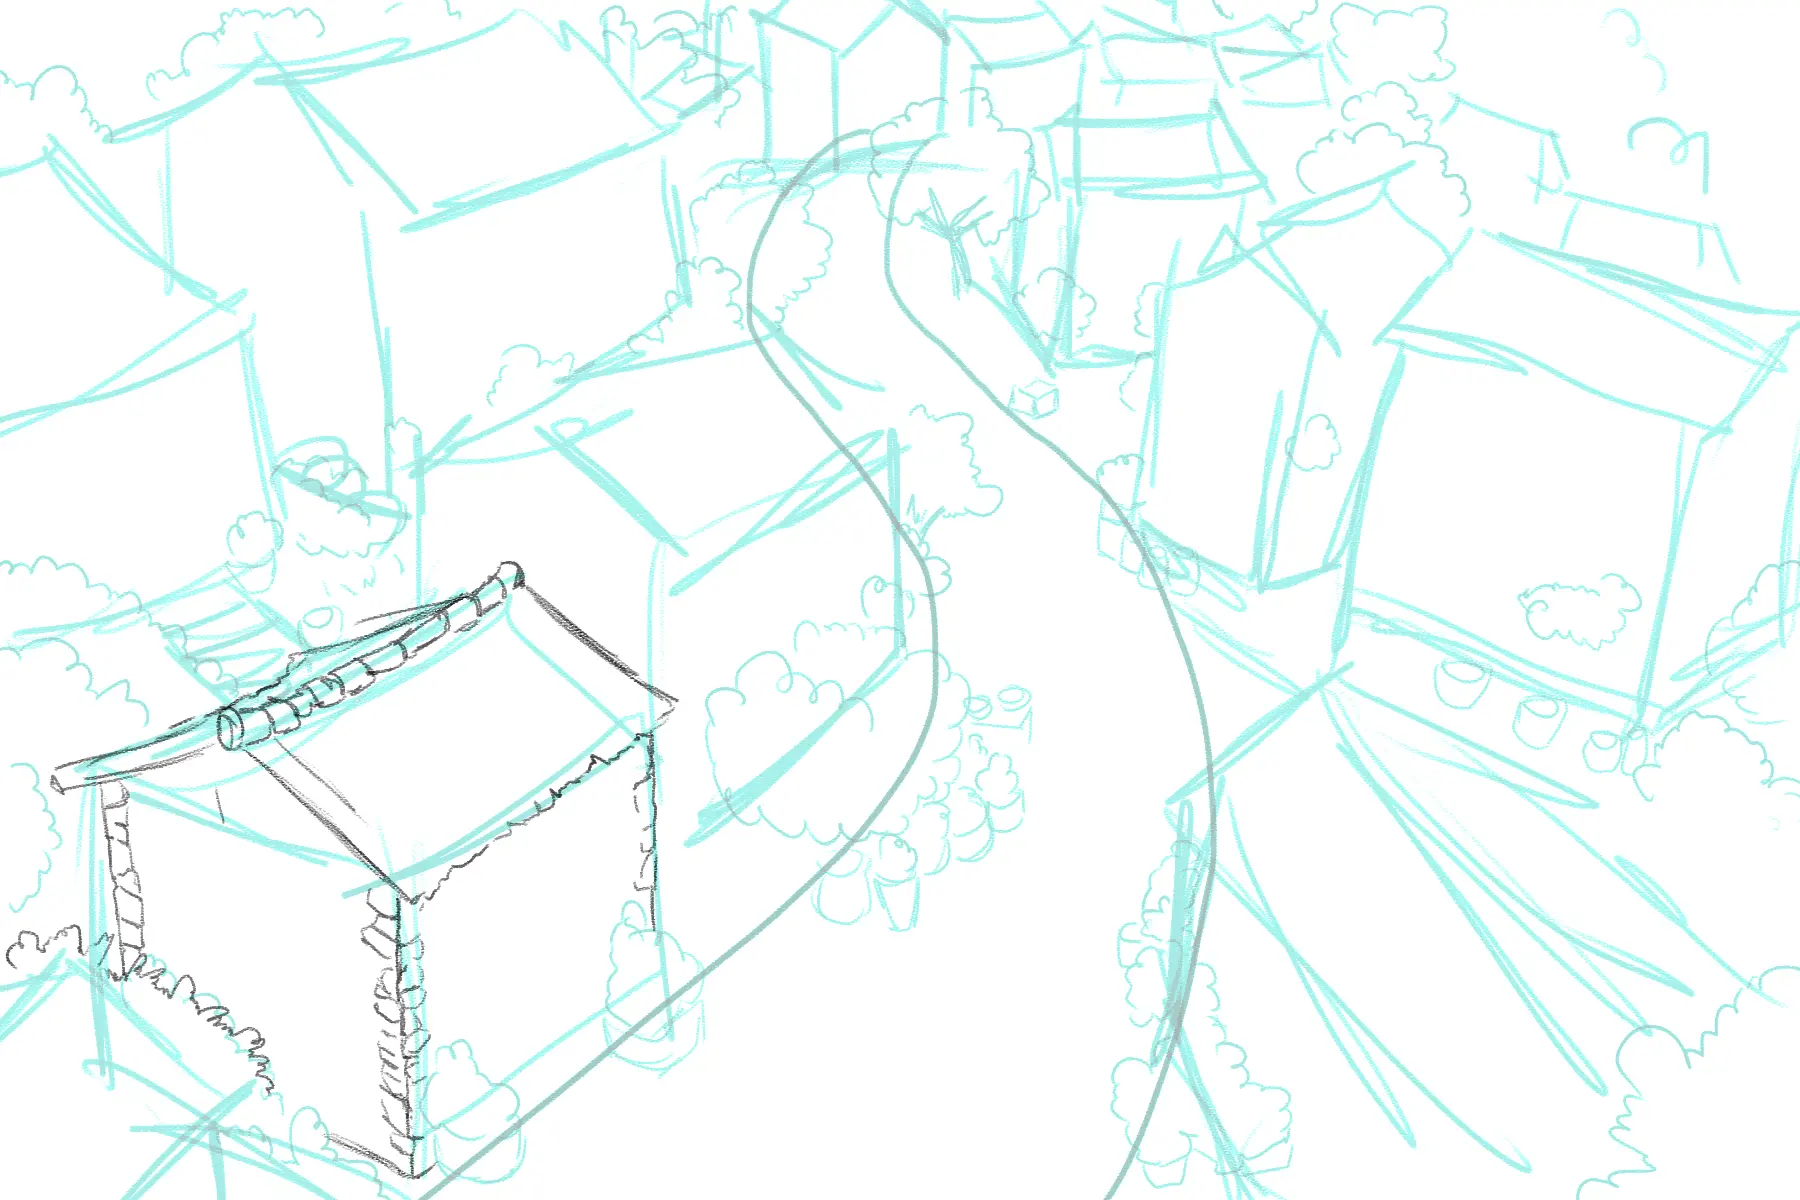
Then draw small windows framed in wood, and a wooden door set in a stone archway, not forgetting some decorative flower pots to add charm.
Continue developing the side of the street by repeating these elements, while incorporating slight variations in the size, orientation, and style of the houses.
On the other side of the street, make slight changes to the rules to make the drawing more interesting: introduce different levels, more complex or ornate shapes, and add a house whose roof is seen from above, to enhance the impression of an aerial view.
Finally, fill in the background with smaller, less detailed houses, and at the very back, the vegetation of a nearby forest, suggested by a few green shapes.
Add shadows, light, and color
To complete the drawing, add some texture to the ground: large stone slabs for the sidewalks and a simple cobblestone pattern for the street.
But the most important step is to work on the lighting: direct all the shadows to the same side, consistently, covering only one or two sides of the houses.
These shadows must also project onto the ground, following a direction opposite to that of the sun, in keeping with perspective.

You can further enrich your composition by adding color and texture: differentiate the green areas, the wood of the roofs, doors and windows, the stone of the walls, or the paving of the path.

And there you have it, your little medieval village is complete!
I hope this tutorial has inspired you and made you want to experiment with new compositions.
Remember: always start by establishing the perspective, then organize your elements around a central landmark, such as a path, a square, or a river.
Vary the shapes, add small details of daily life, and above all, let your stroke come alive: the charm of a drawing comes from its irregularities.
Discussion
Thank you Bryam for this great example. I took screenshots to keep a record, it's so well explained, nice!
Thank you Bryam for this great example, I took screenshots to keep a record, it's so well explained, nice!