How to Draw a Waterfall
Nature offers a wide diversity of landscapes that stimulate our imagination and sharpen our vision. Among them, waterfalls reveal all the majesty of water.
Today, I propose we go through a step-by-step tutorial together, filled with tips, on how to draw a landscape where a waterfall is the central element.

Waterfall types
Water has an amazing ability to adapt: it conforms to the terrain, flows effortlessly, and, when faced with a precipice, plunges into the void, striking rocks and obstacles in its path. To accurately represent it, keep several parameters in mind:
Height of the waterfall: we often imagine waterfalls as being very tall, but this is not a rule.
Width: some form a true wall of water, others are thin and slender.
Free fall or interrupted: obstacles can break the fall and alter its course.
Stepped fall: the waterfall can unfold over several levels, giving the impression of successive cascades.
Split waterfall: upstream rocks can split the same stream into several distinct threads.
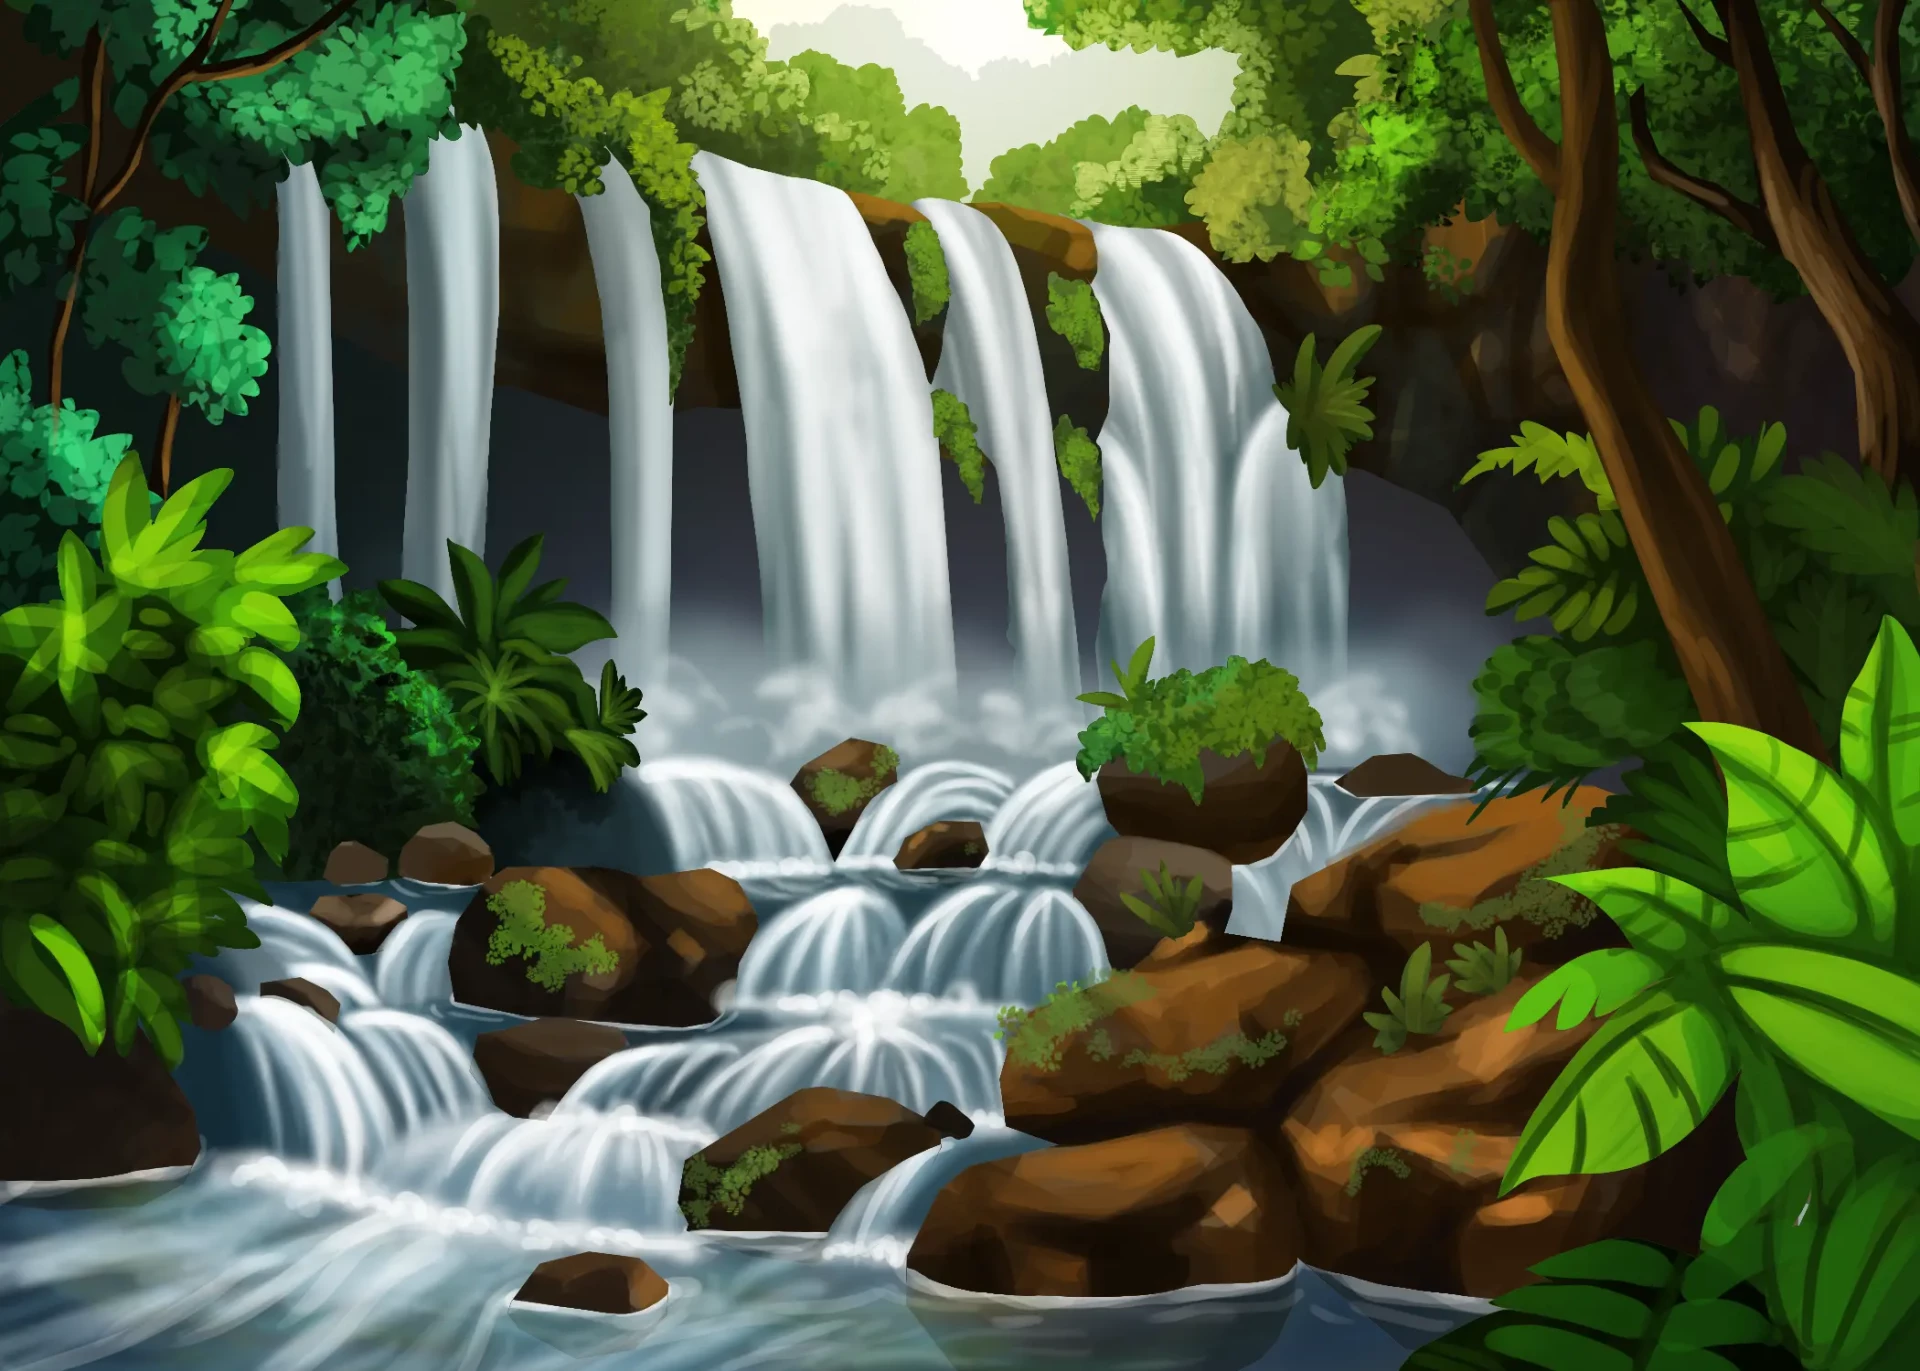
Drawing a waterfall step by step
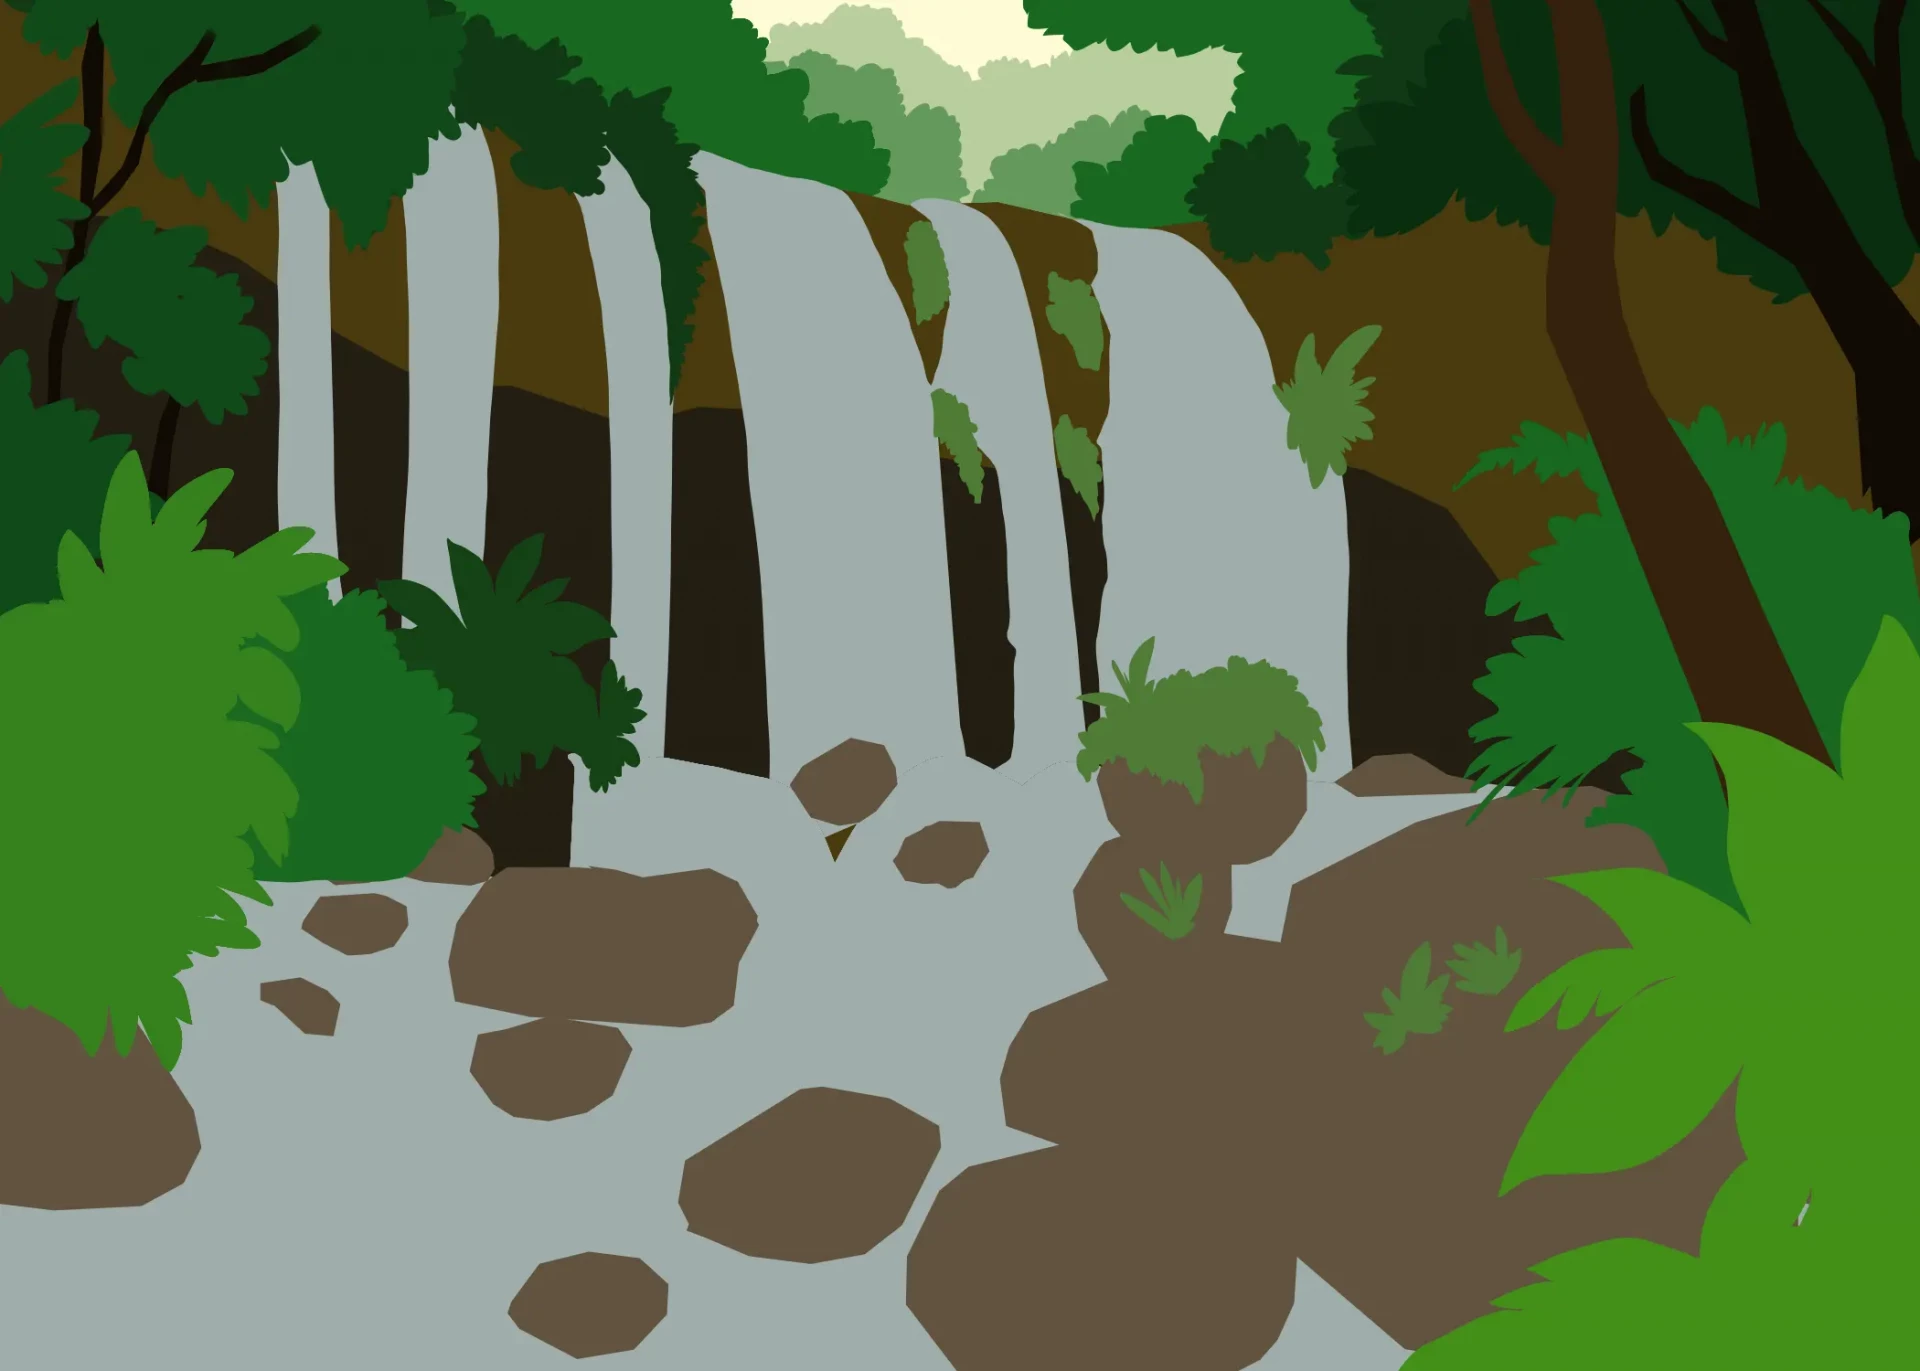
To start, divide your drawing into three bands: in the lower band, place the water area where the waterfall spills over; in the middle band, apply a brown wash for the rocky wall from which the water falls; in the upper band, draw the vegetation, separating the planes and lightening the values as they recede.
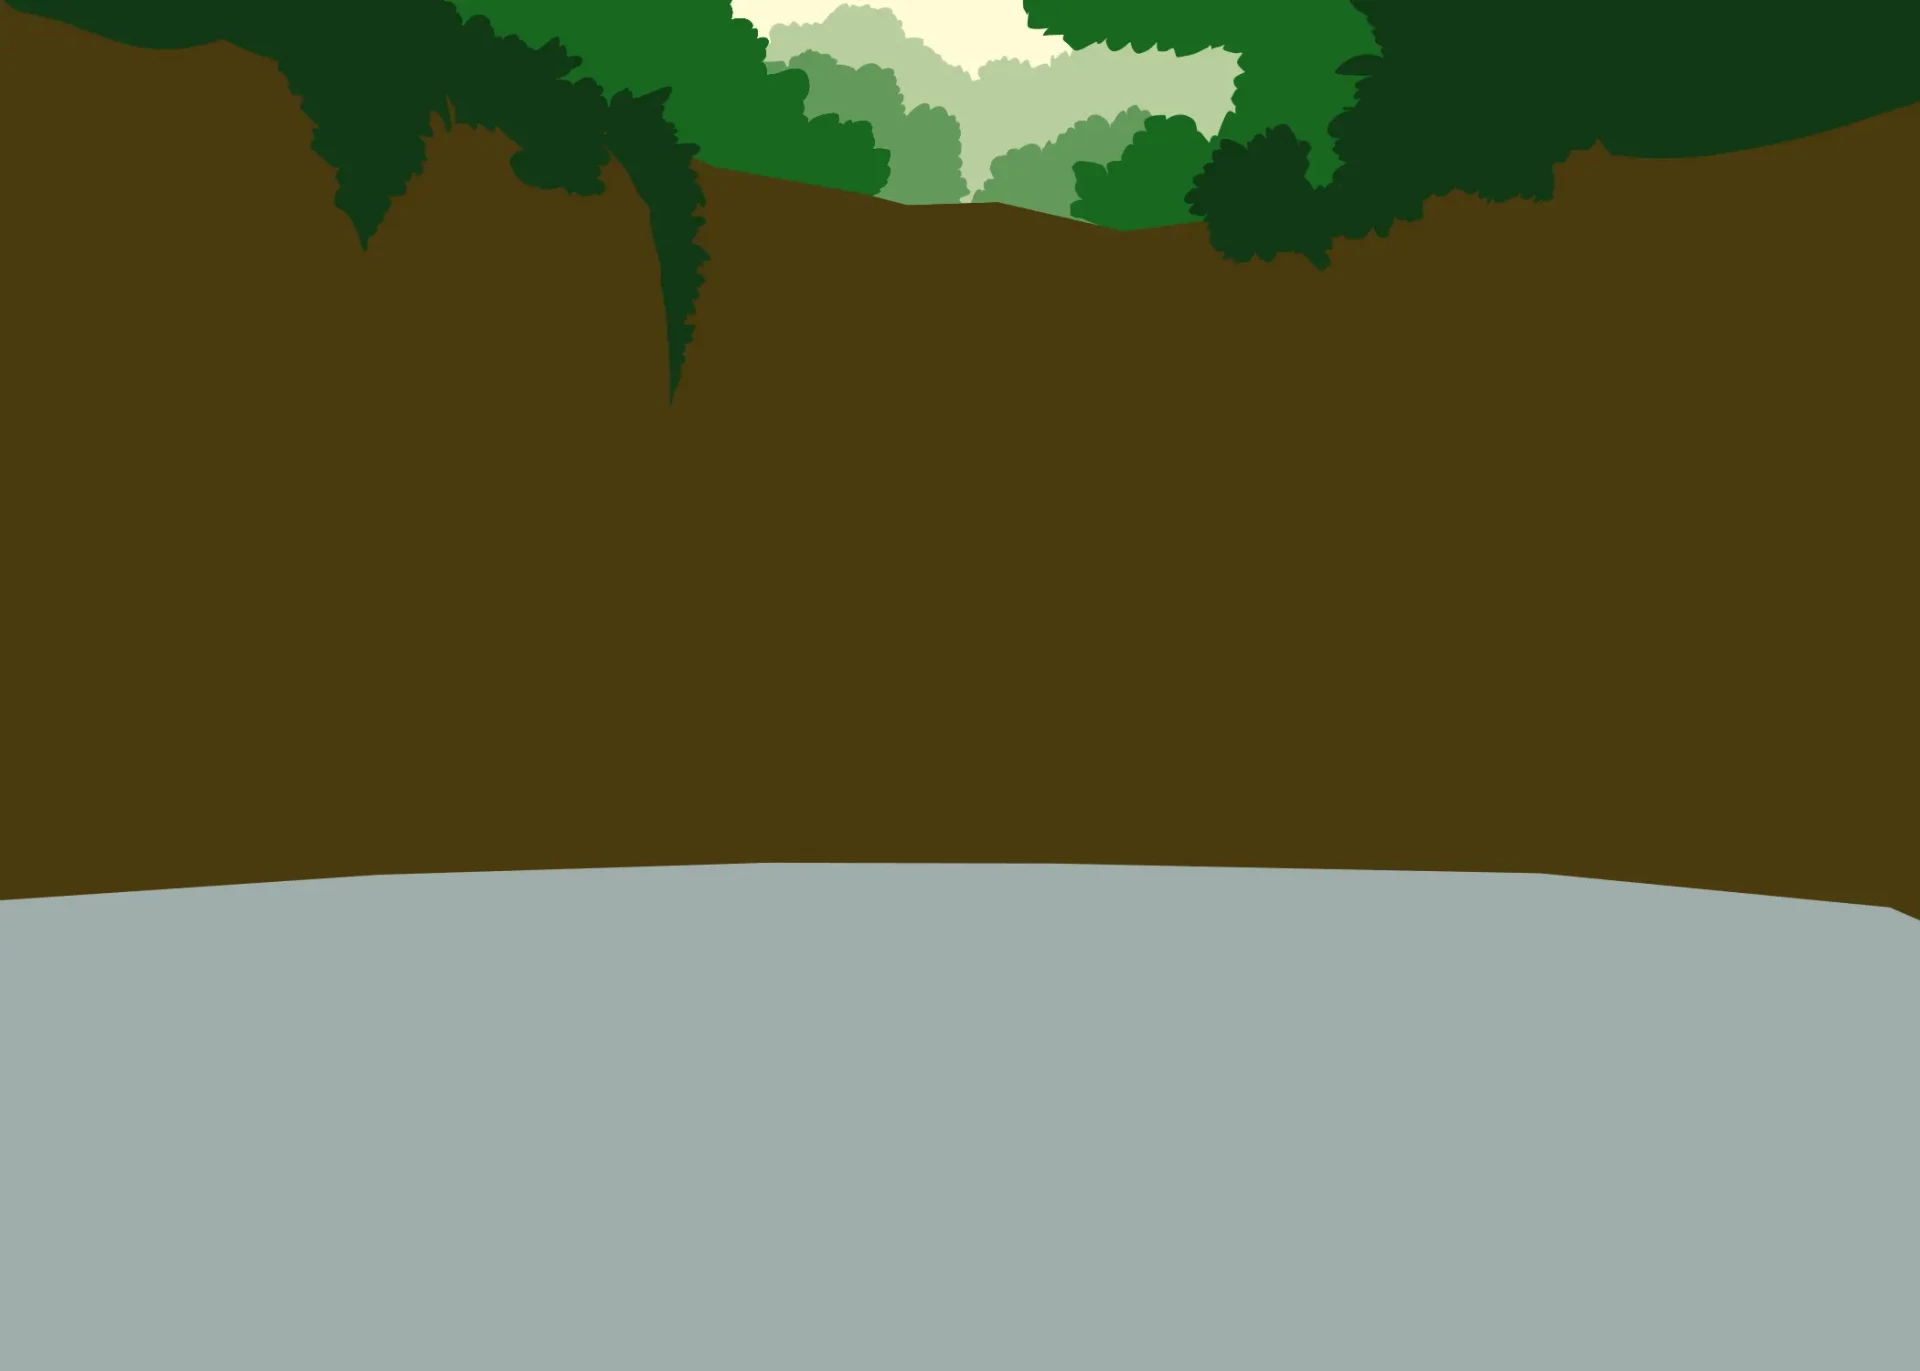
On the surface of the water, draw some irregular shapes in a neutral shade, close to the background: they will represent rocks and give rhythm to the composition. Distribute them randomly: you will see that they structure the scene more than you might think.

Add more vegetation to the sides of the drawing, with shrubs and trees. Vary the greens to create a tropical ambiance. Let your imagination run wild by alternating the shapes and silhouettes. You can place vegetation behind, on, or between the rocks.
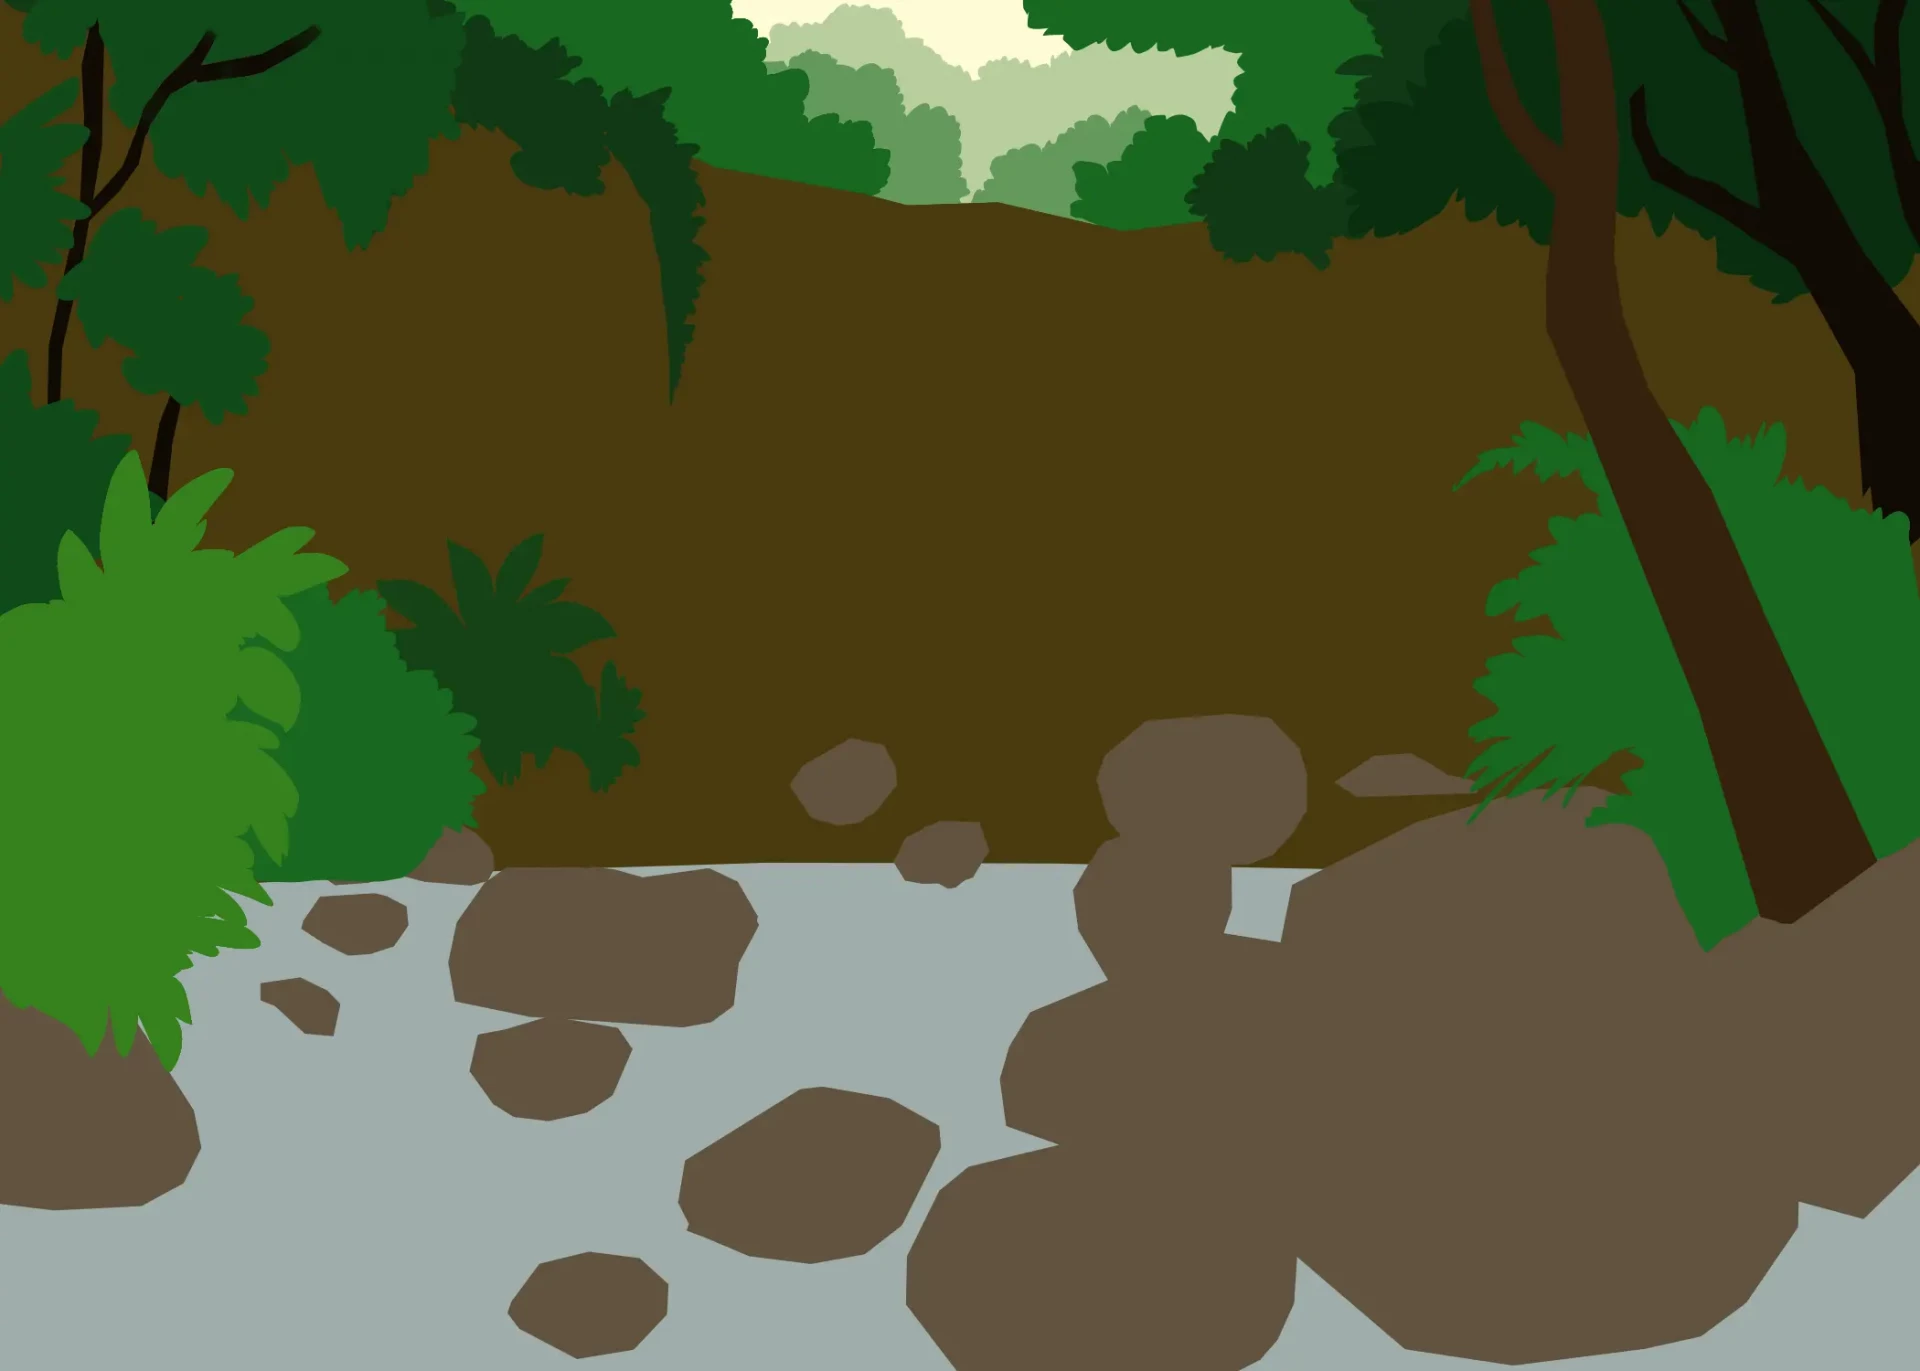
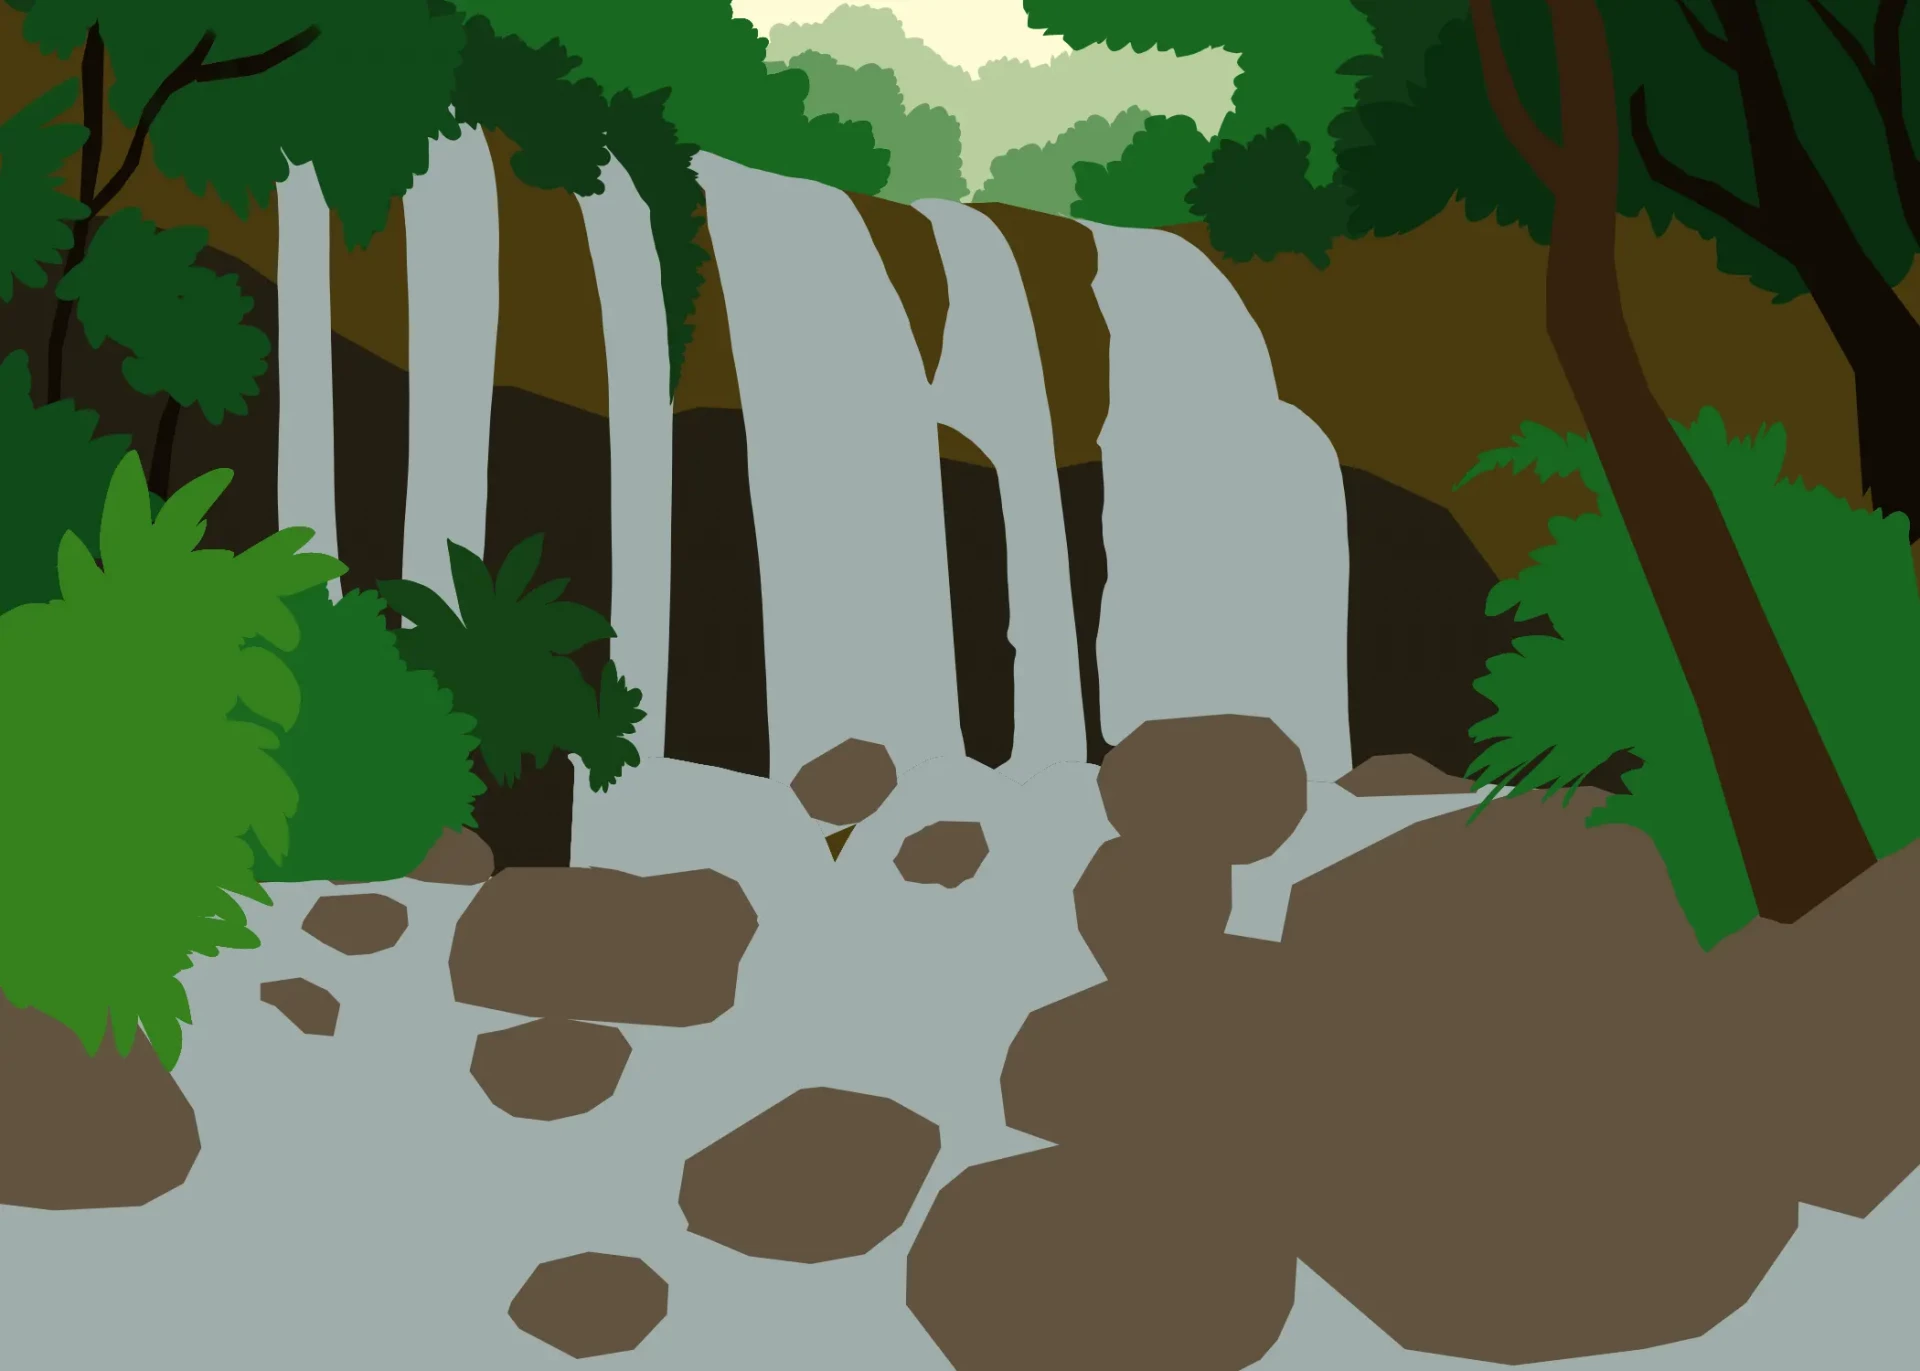
Draw a divided waterfall. Go for long, flowing, descending strokes.
Finally, draw some vegetation in the foreground: a group of large leaves in one corner is enough. To complete the composition, draw moss or other plants between the rocks.
Drawing moving water
Here, we are drawing lively, powerful, and fast water. For the waterfall, start with a dark blue base, then overlay with longer and descending trails of increasingly lighter shades up to white. Follow the shape of the fall, and if necessary, add additional water streams.
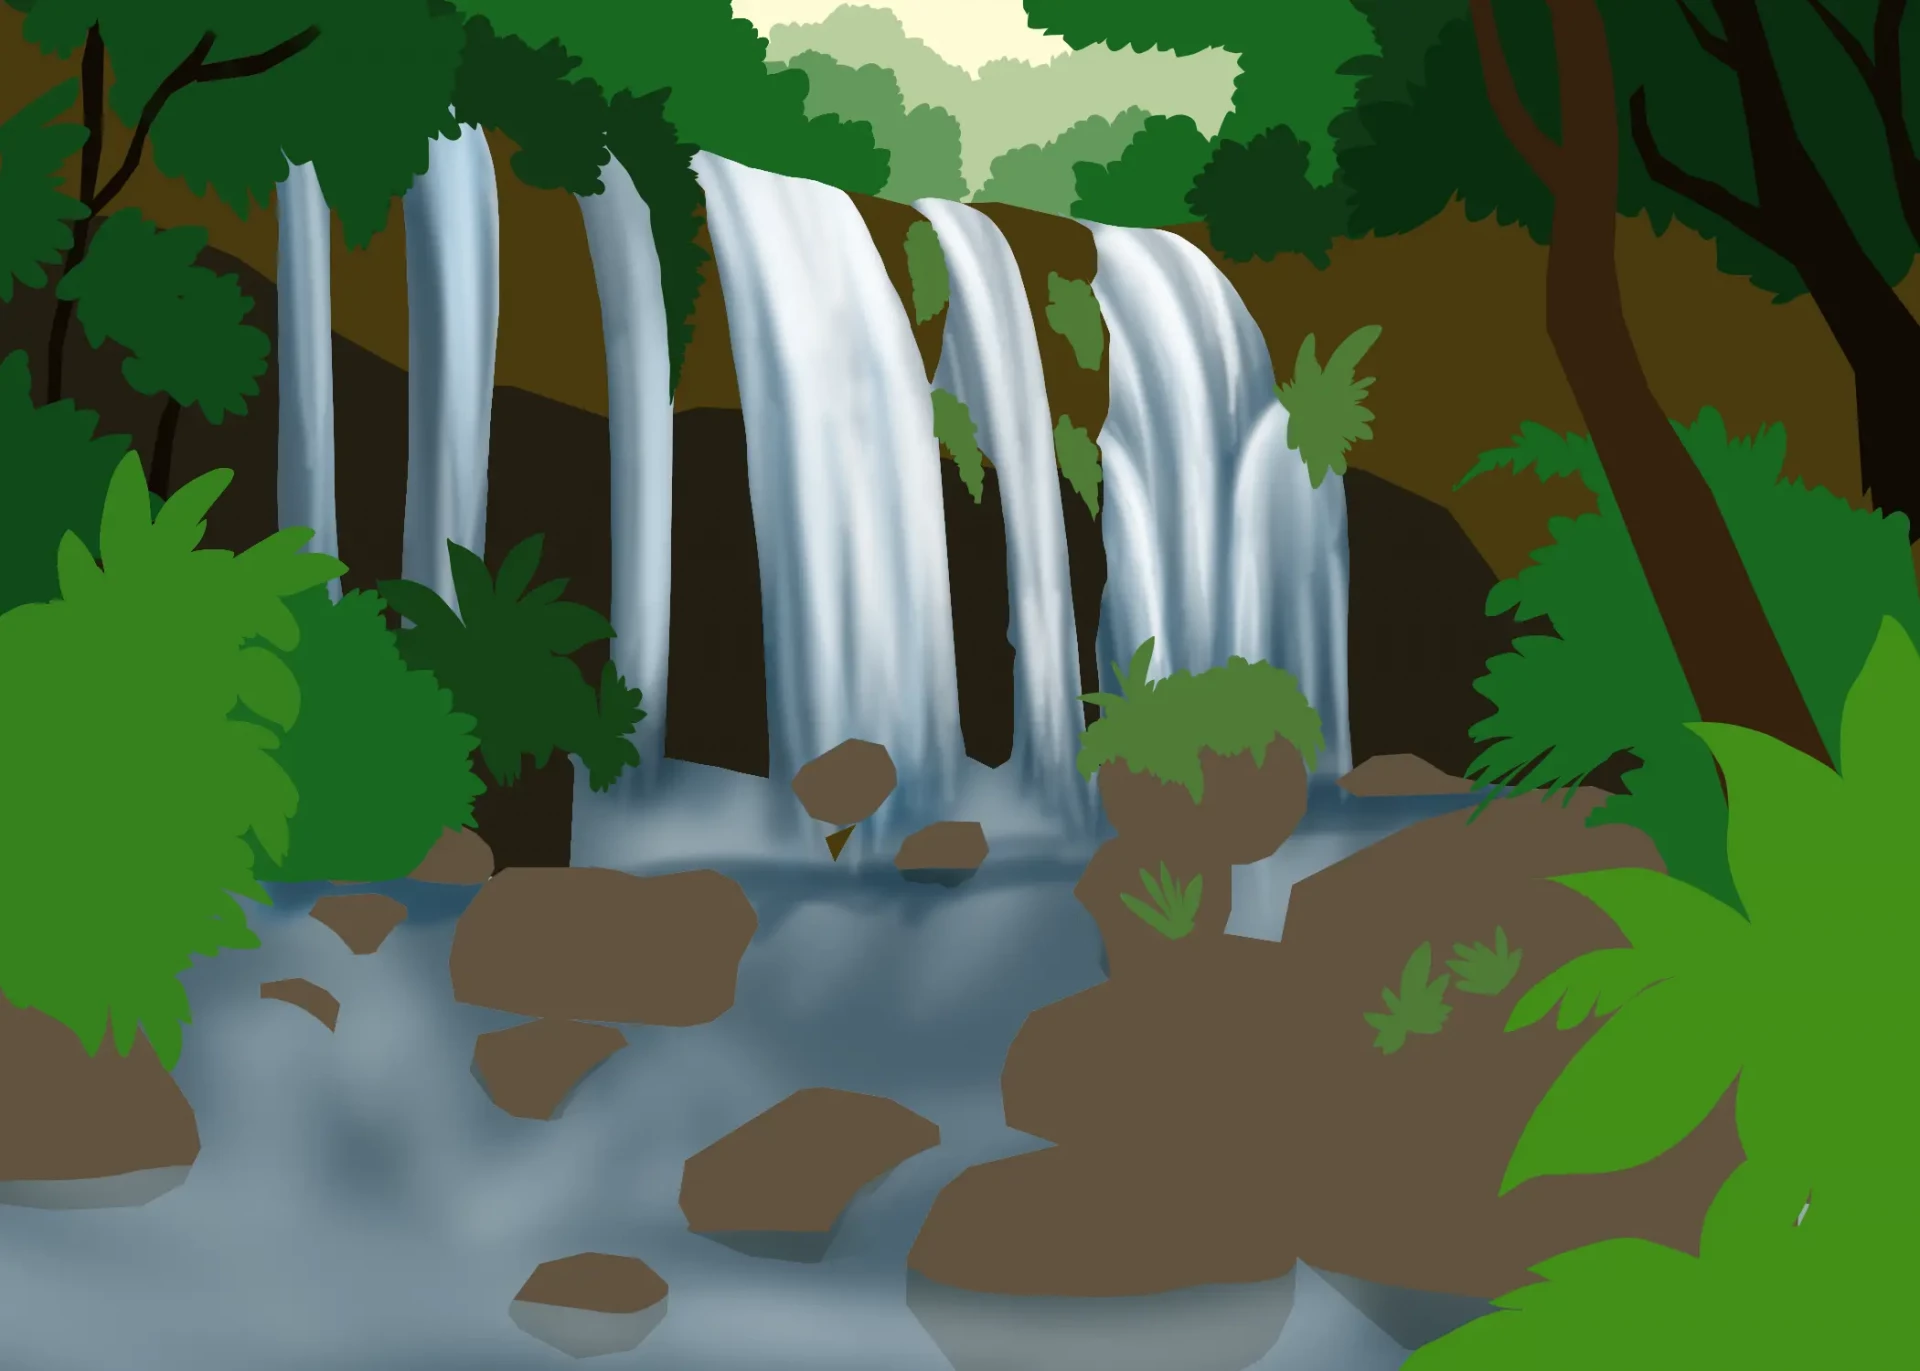
Let's move on to the rocks: add small waterfalls between them using the same principle, a dark base enhanced with lightening traces, but with finer and slightly curved lines.
Note that at the base of each waterfall foam forms, and for the most impressive waterfalls, a mist associated with the splashes.
To finalize this part, draw the calm water at the bottom of the image. Start with a dark base that gradually blends into lighter tones, more subtly than for the waterfall.
Leave the partially submerged rocks and draw a thin outline around their edges. Finish with a few green and brown touches to reflect the environment.
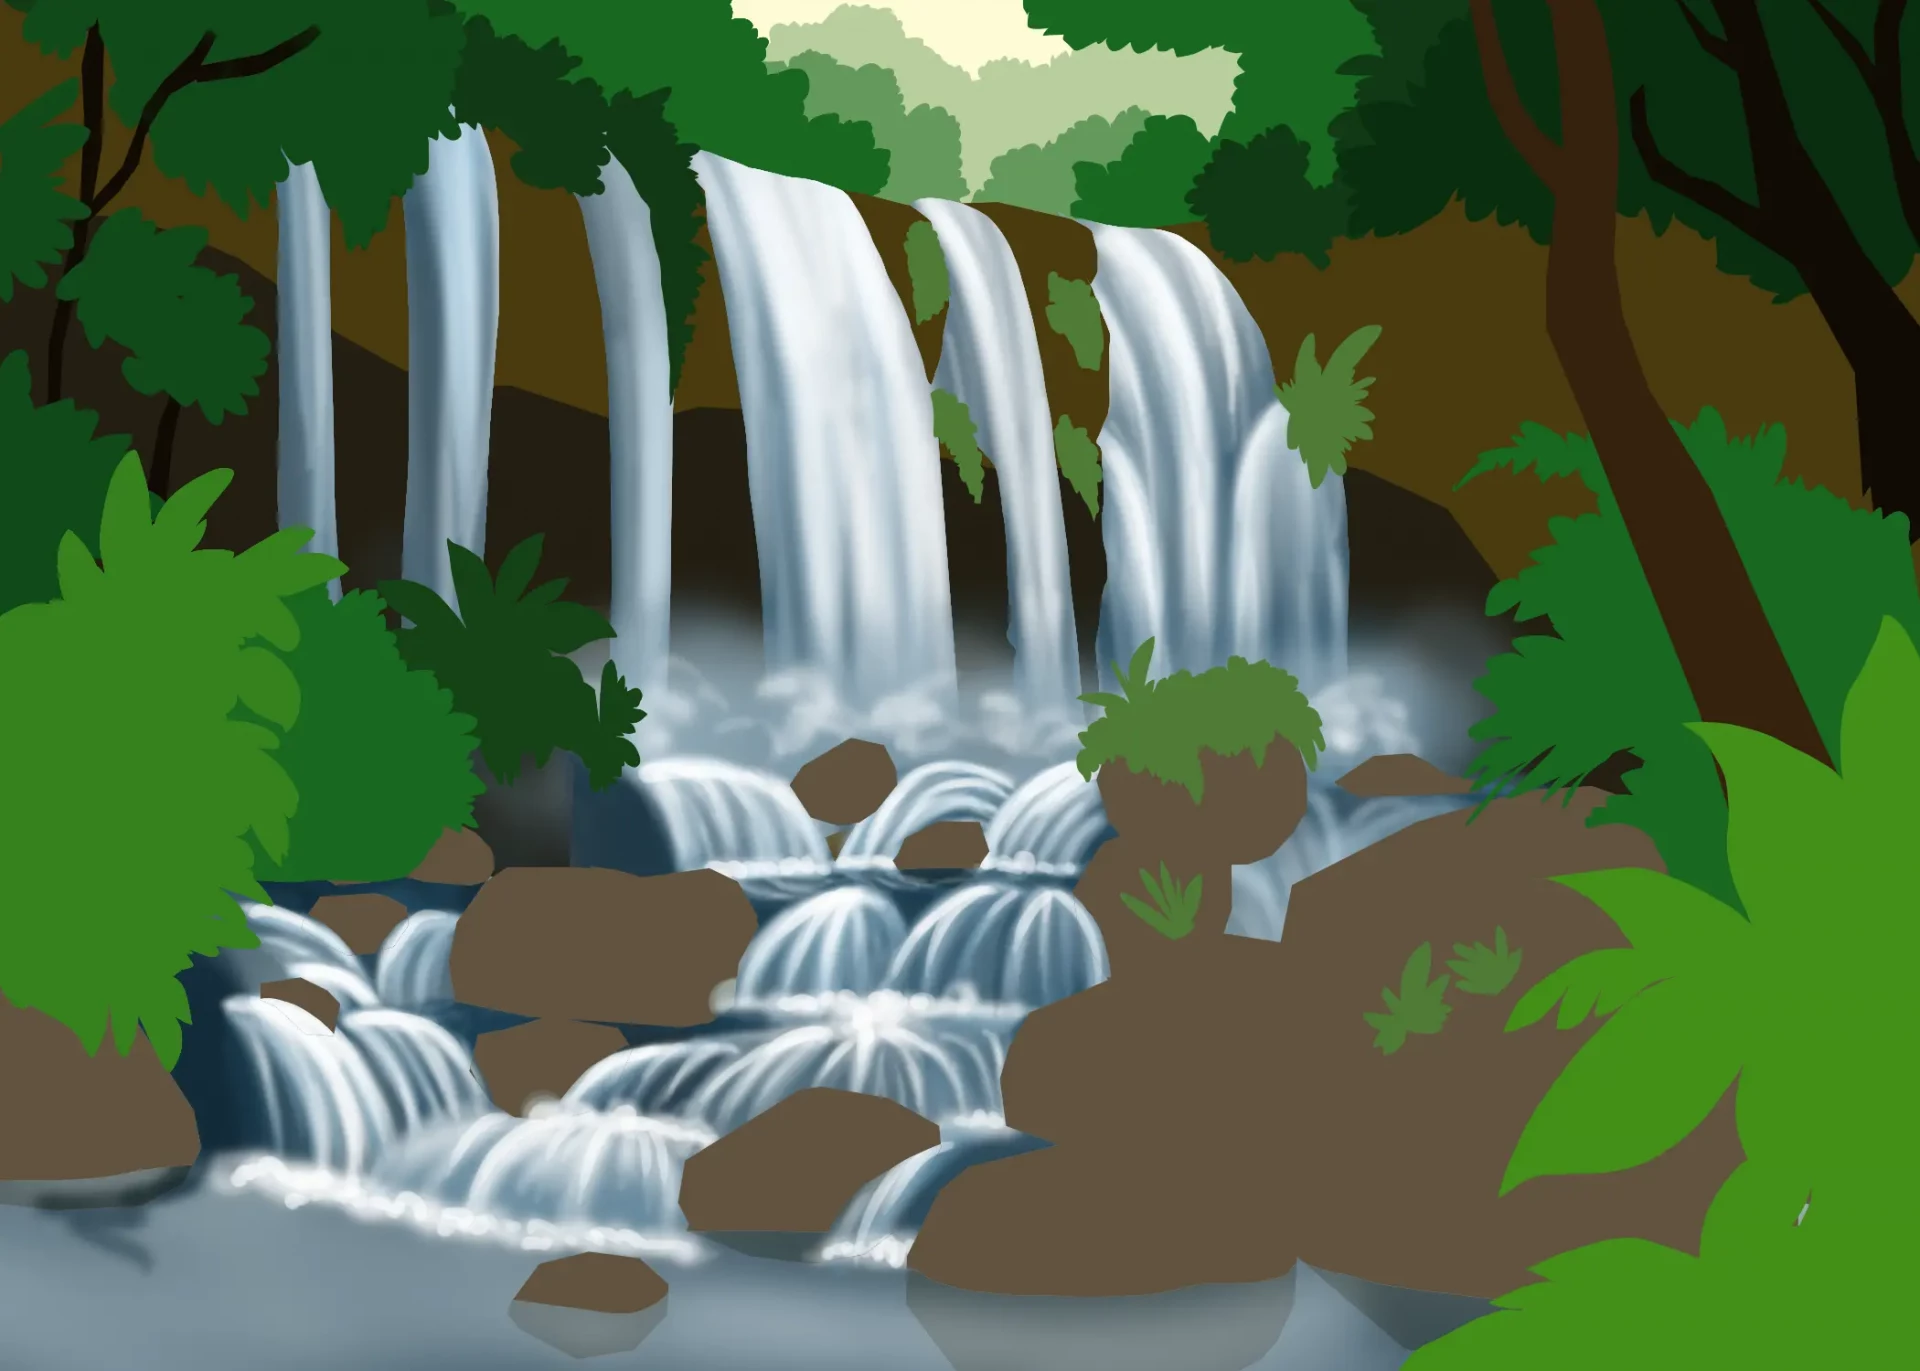
Draw rocks and vegetation
For rocks, use short and firm strokes with sharp edges (little or no gradient). Add more saturated highlights, counterbalanced by very dark areas. Vary the browns by incorporating greenish or bluish tints.
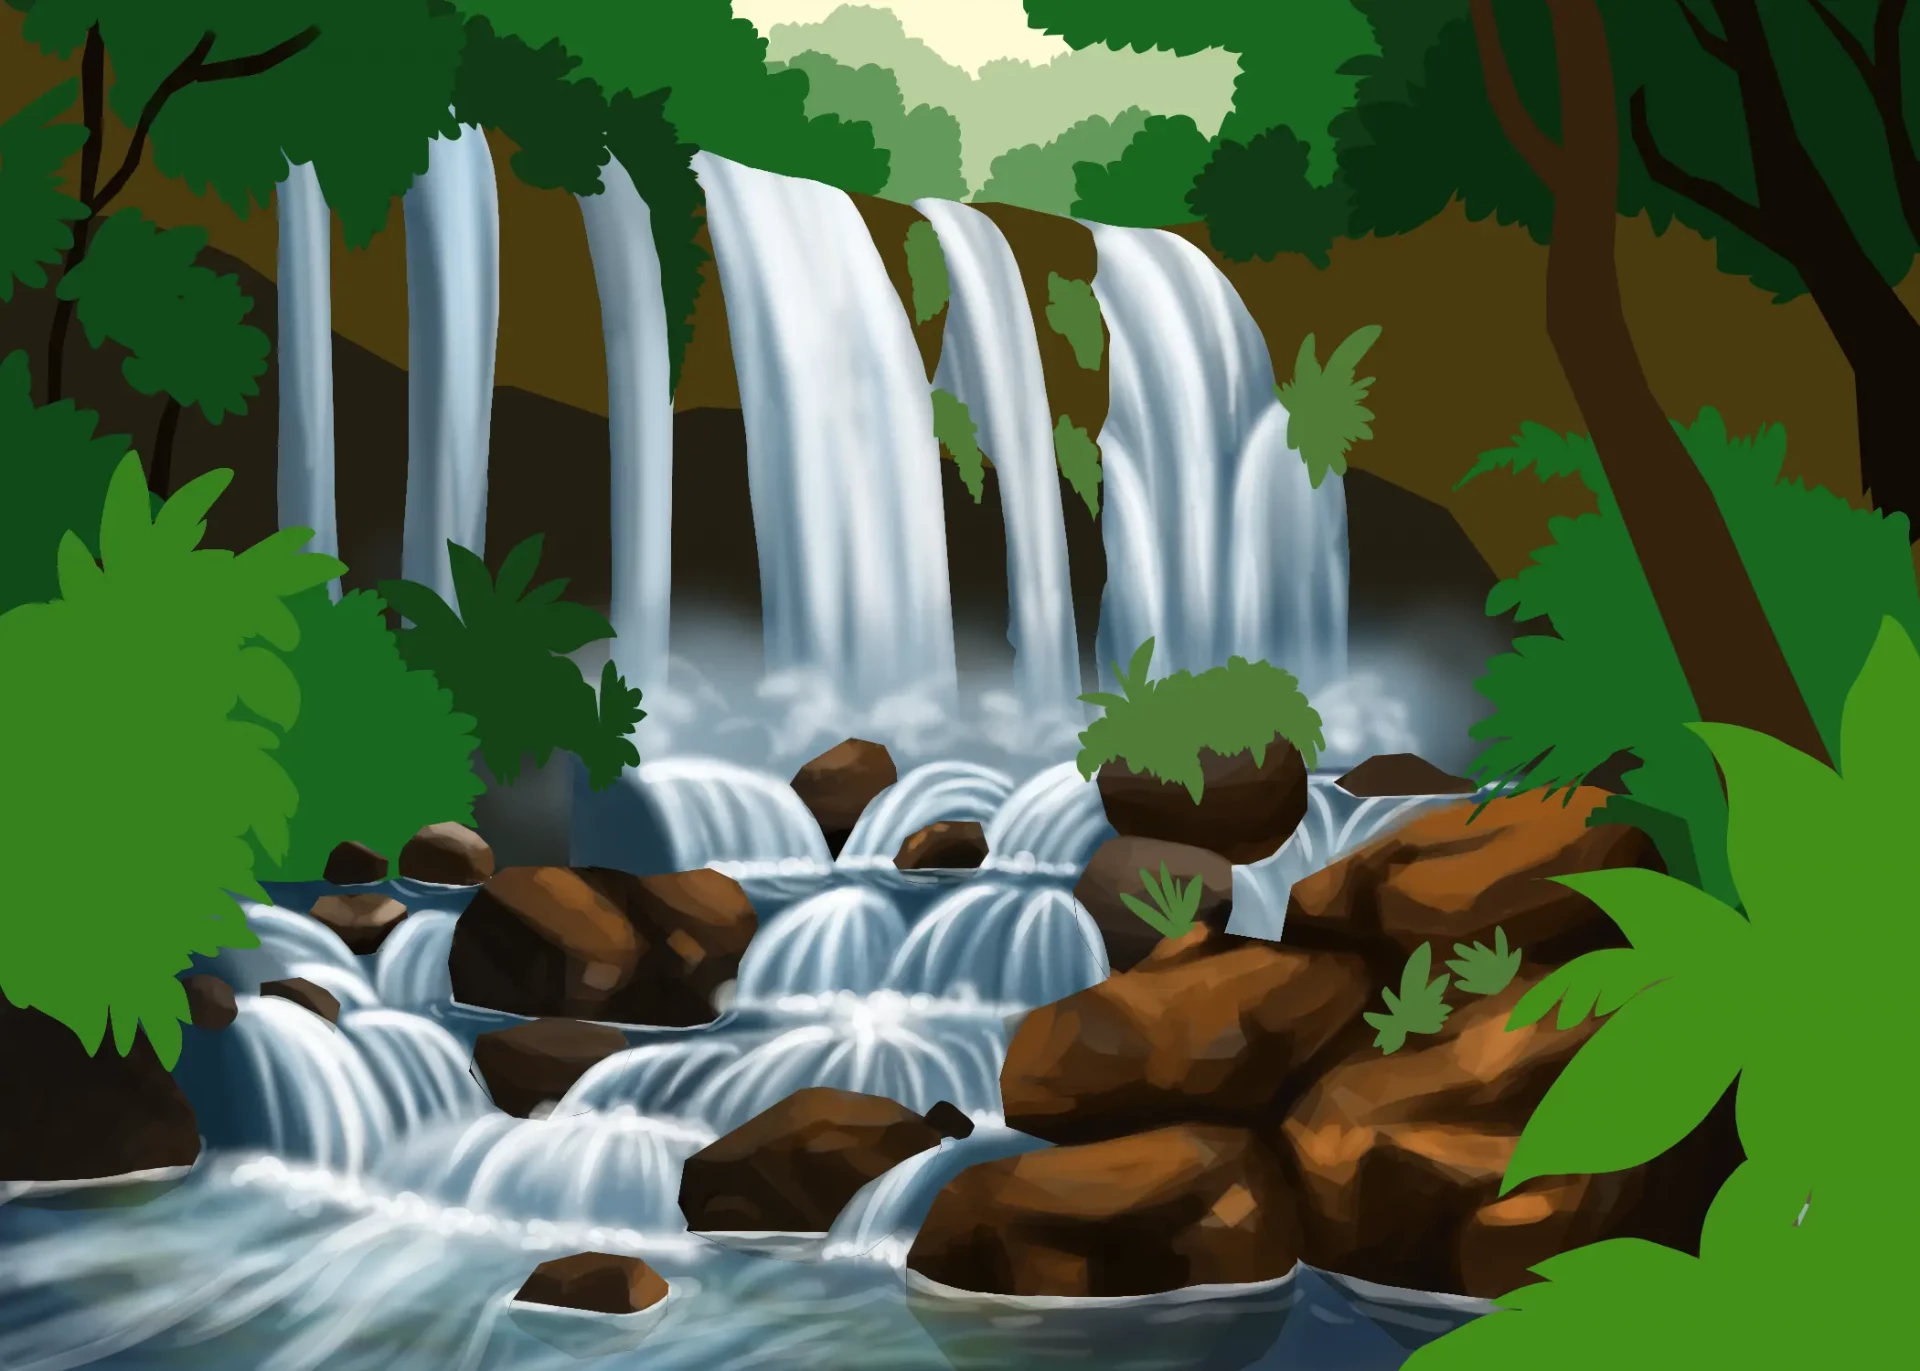
Then draw the rocky wall behind the waterfalls: divide it into irregular sections and treat it like the rocks, but with less saturation and fewer details to indicate distance. You can unify the whole with a light opaque blue veil to harmonize with the water of the falls.
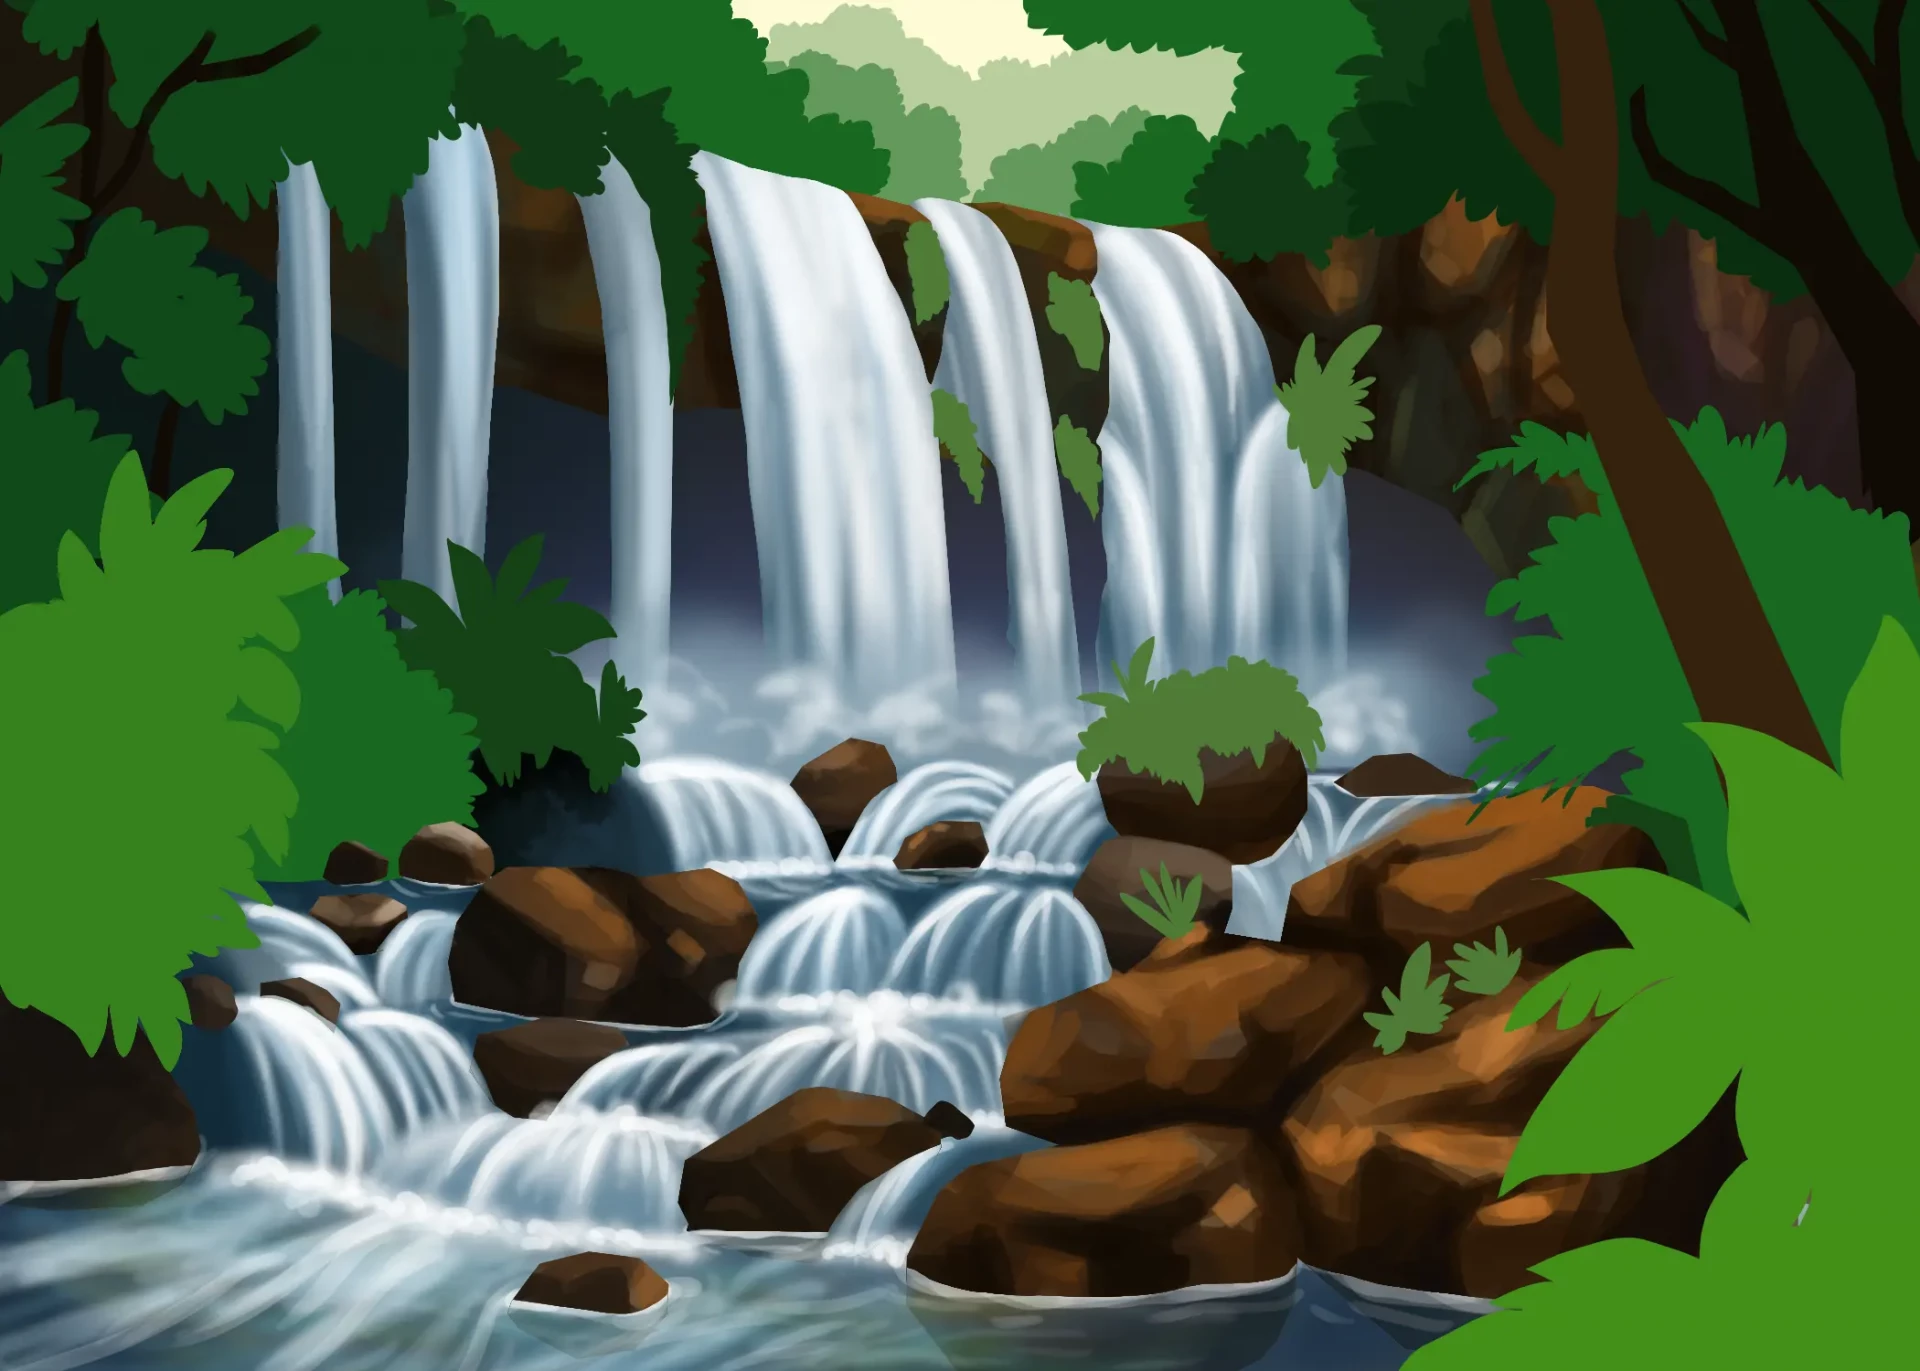
For vegetation, use spontaneous brush strokes and blend the greens into brighter yellows. Place the light source high up, at the center of distant masses. To avoid uniformity, vary the shades and, if possible, the textures from one shrub to another.
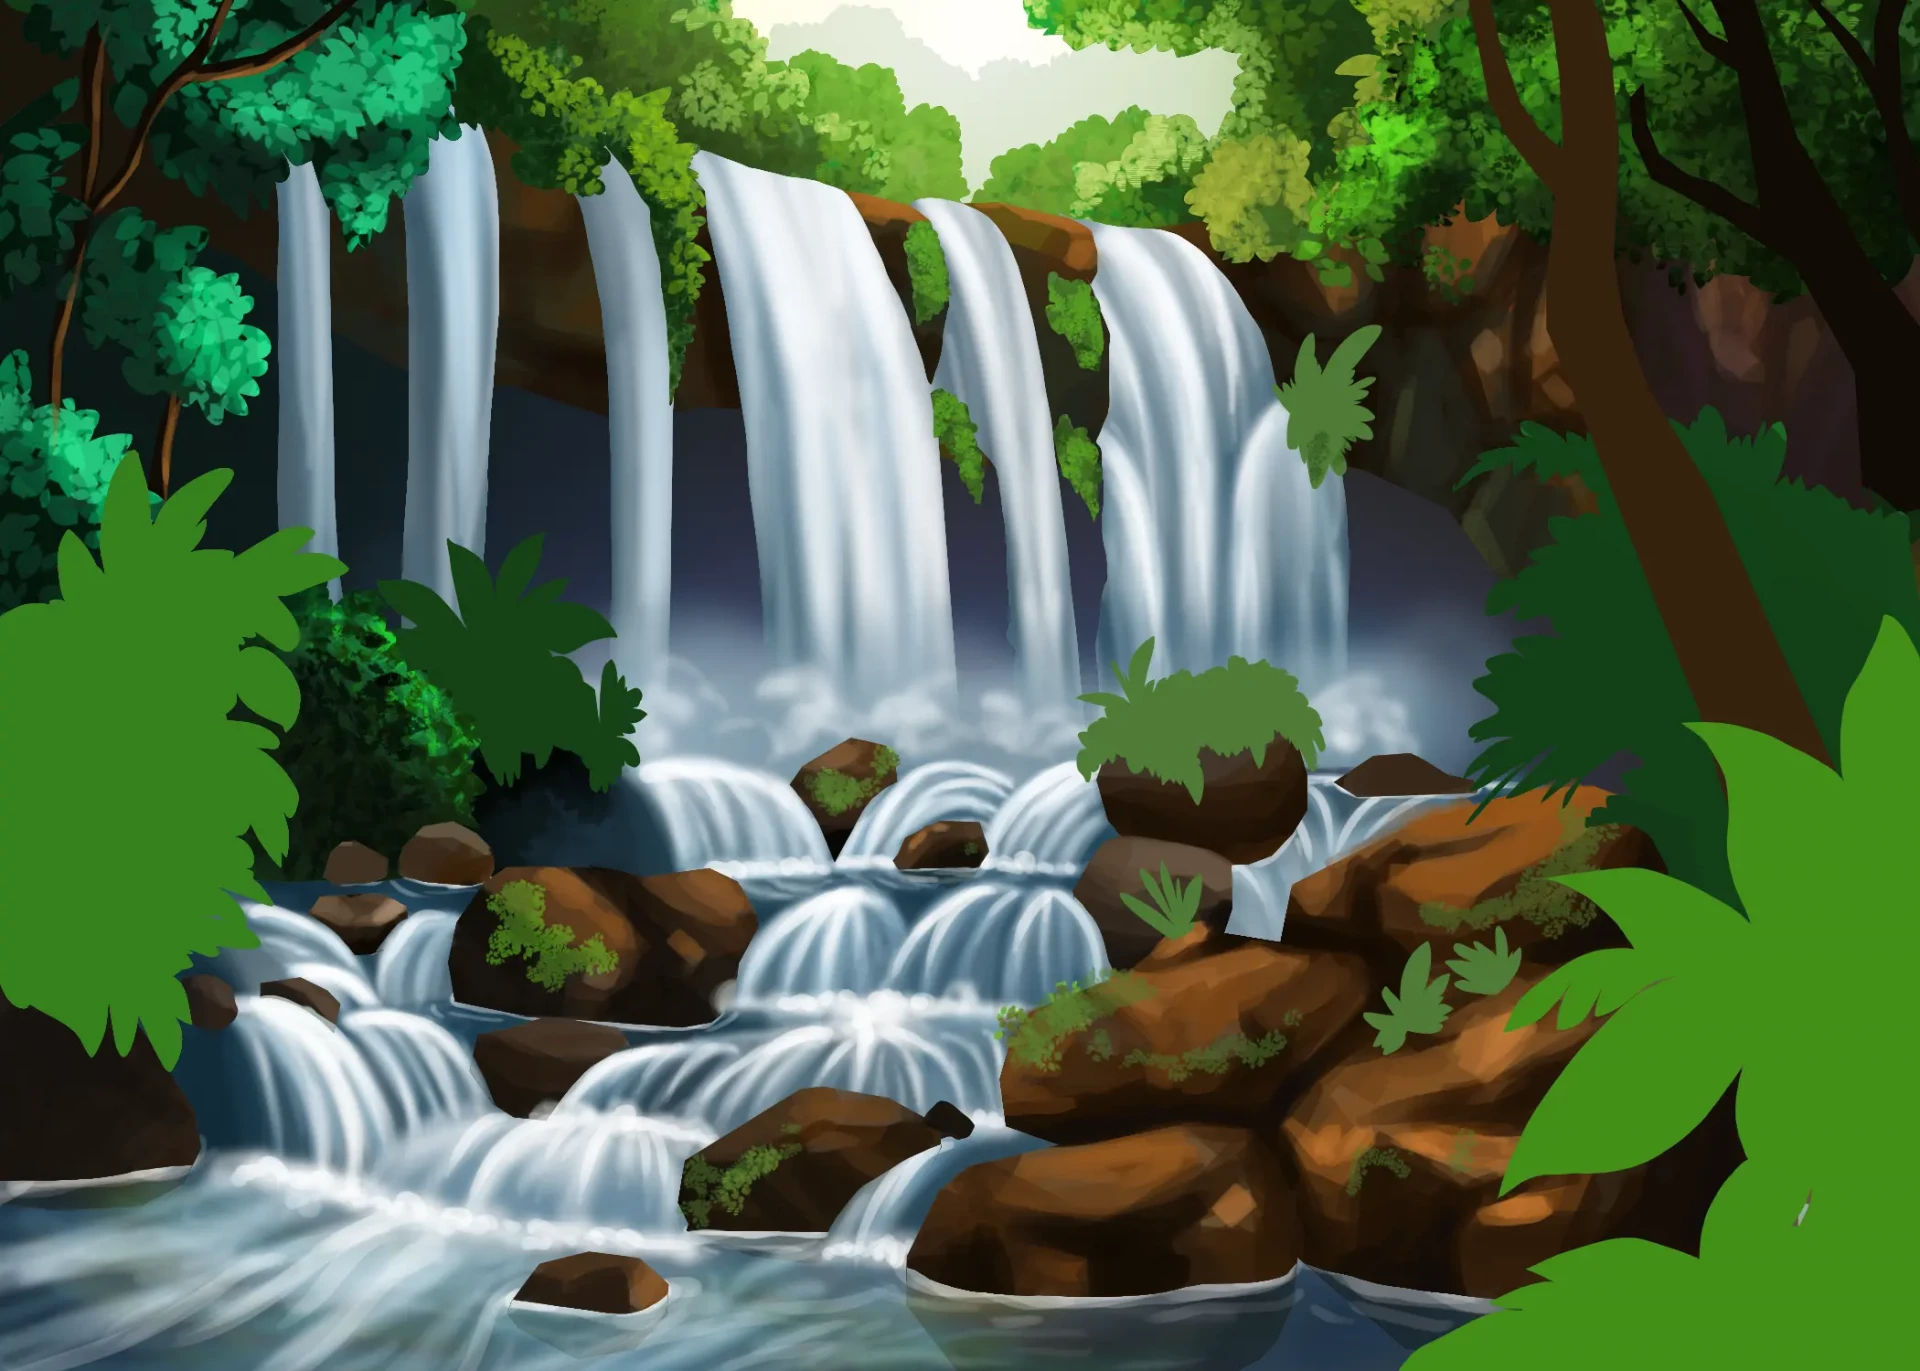
In the foreground, detail a few leaves and suggest the rest: this discreet plane enhances the depth.

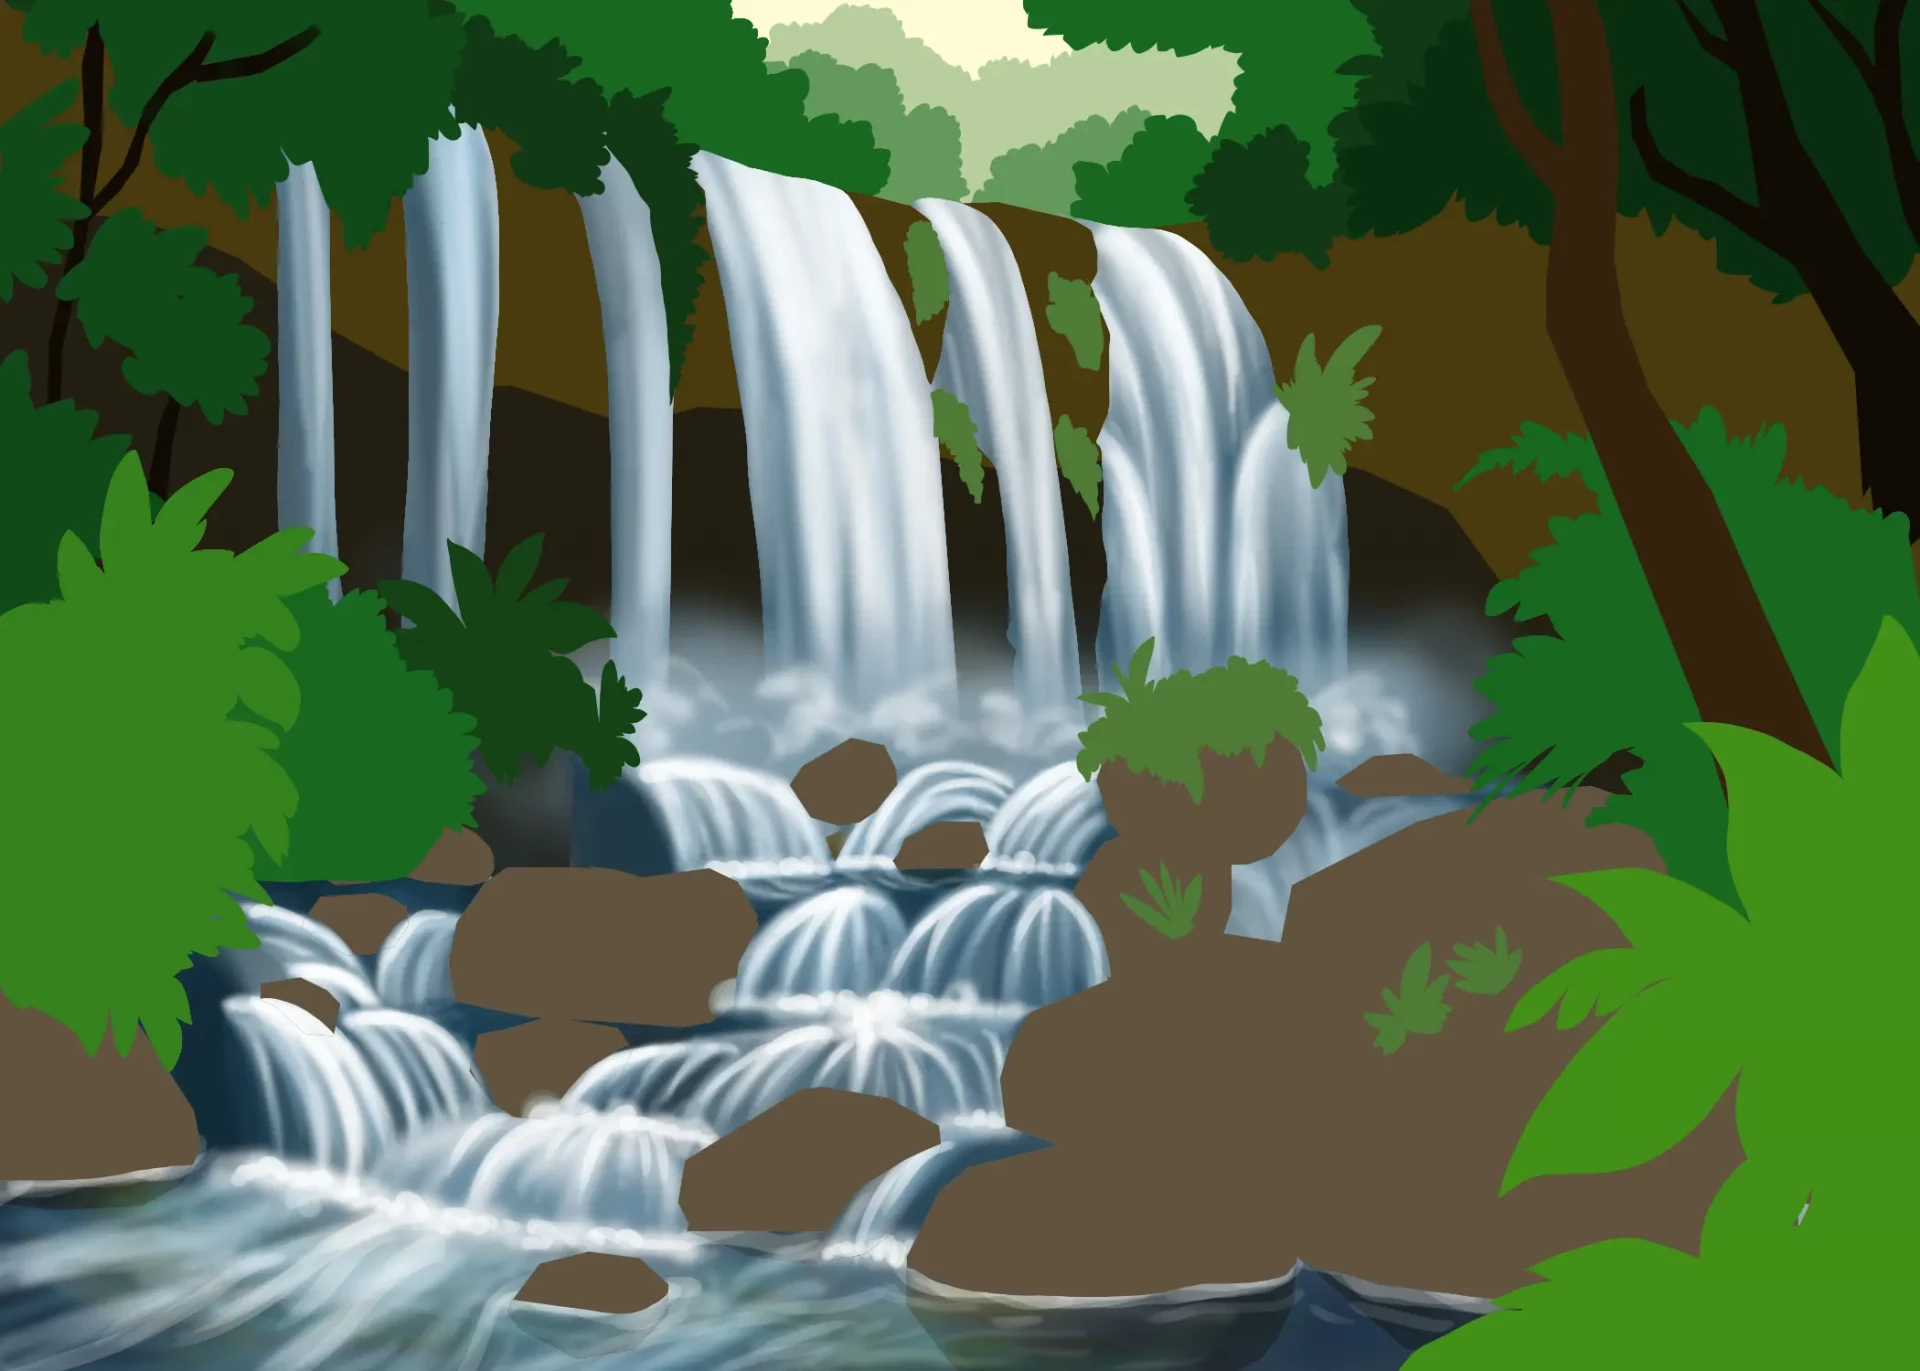
Here, our drawing is finished. Thank you for following this tutorial.
Discussion
No comments yet.