
How to Draw a Woman from Behind
Drawing a woman from behind allows us to approach the human body from a different angle. The silhouette changes depending on the posture, and shapes can be interpreted differently than when viewed from the front, which means a little more attention is required in order to fully understand the volumes.
In this tutorial, we will explore how to build this view step by step, working on the proportions and then the shadows to give the drawing relief and a natural look.
Key points for consideration when drawing a woman
Beyond pure anatomy, drawing a woman also involves questioning how femininity has been represented throughout history and across cultures. Forms, postures, proportions - each era and artistic tradition has brought its own vision to bear on these.
Before you start, take the time to look at a variety of references to inspire your own artistic vision.
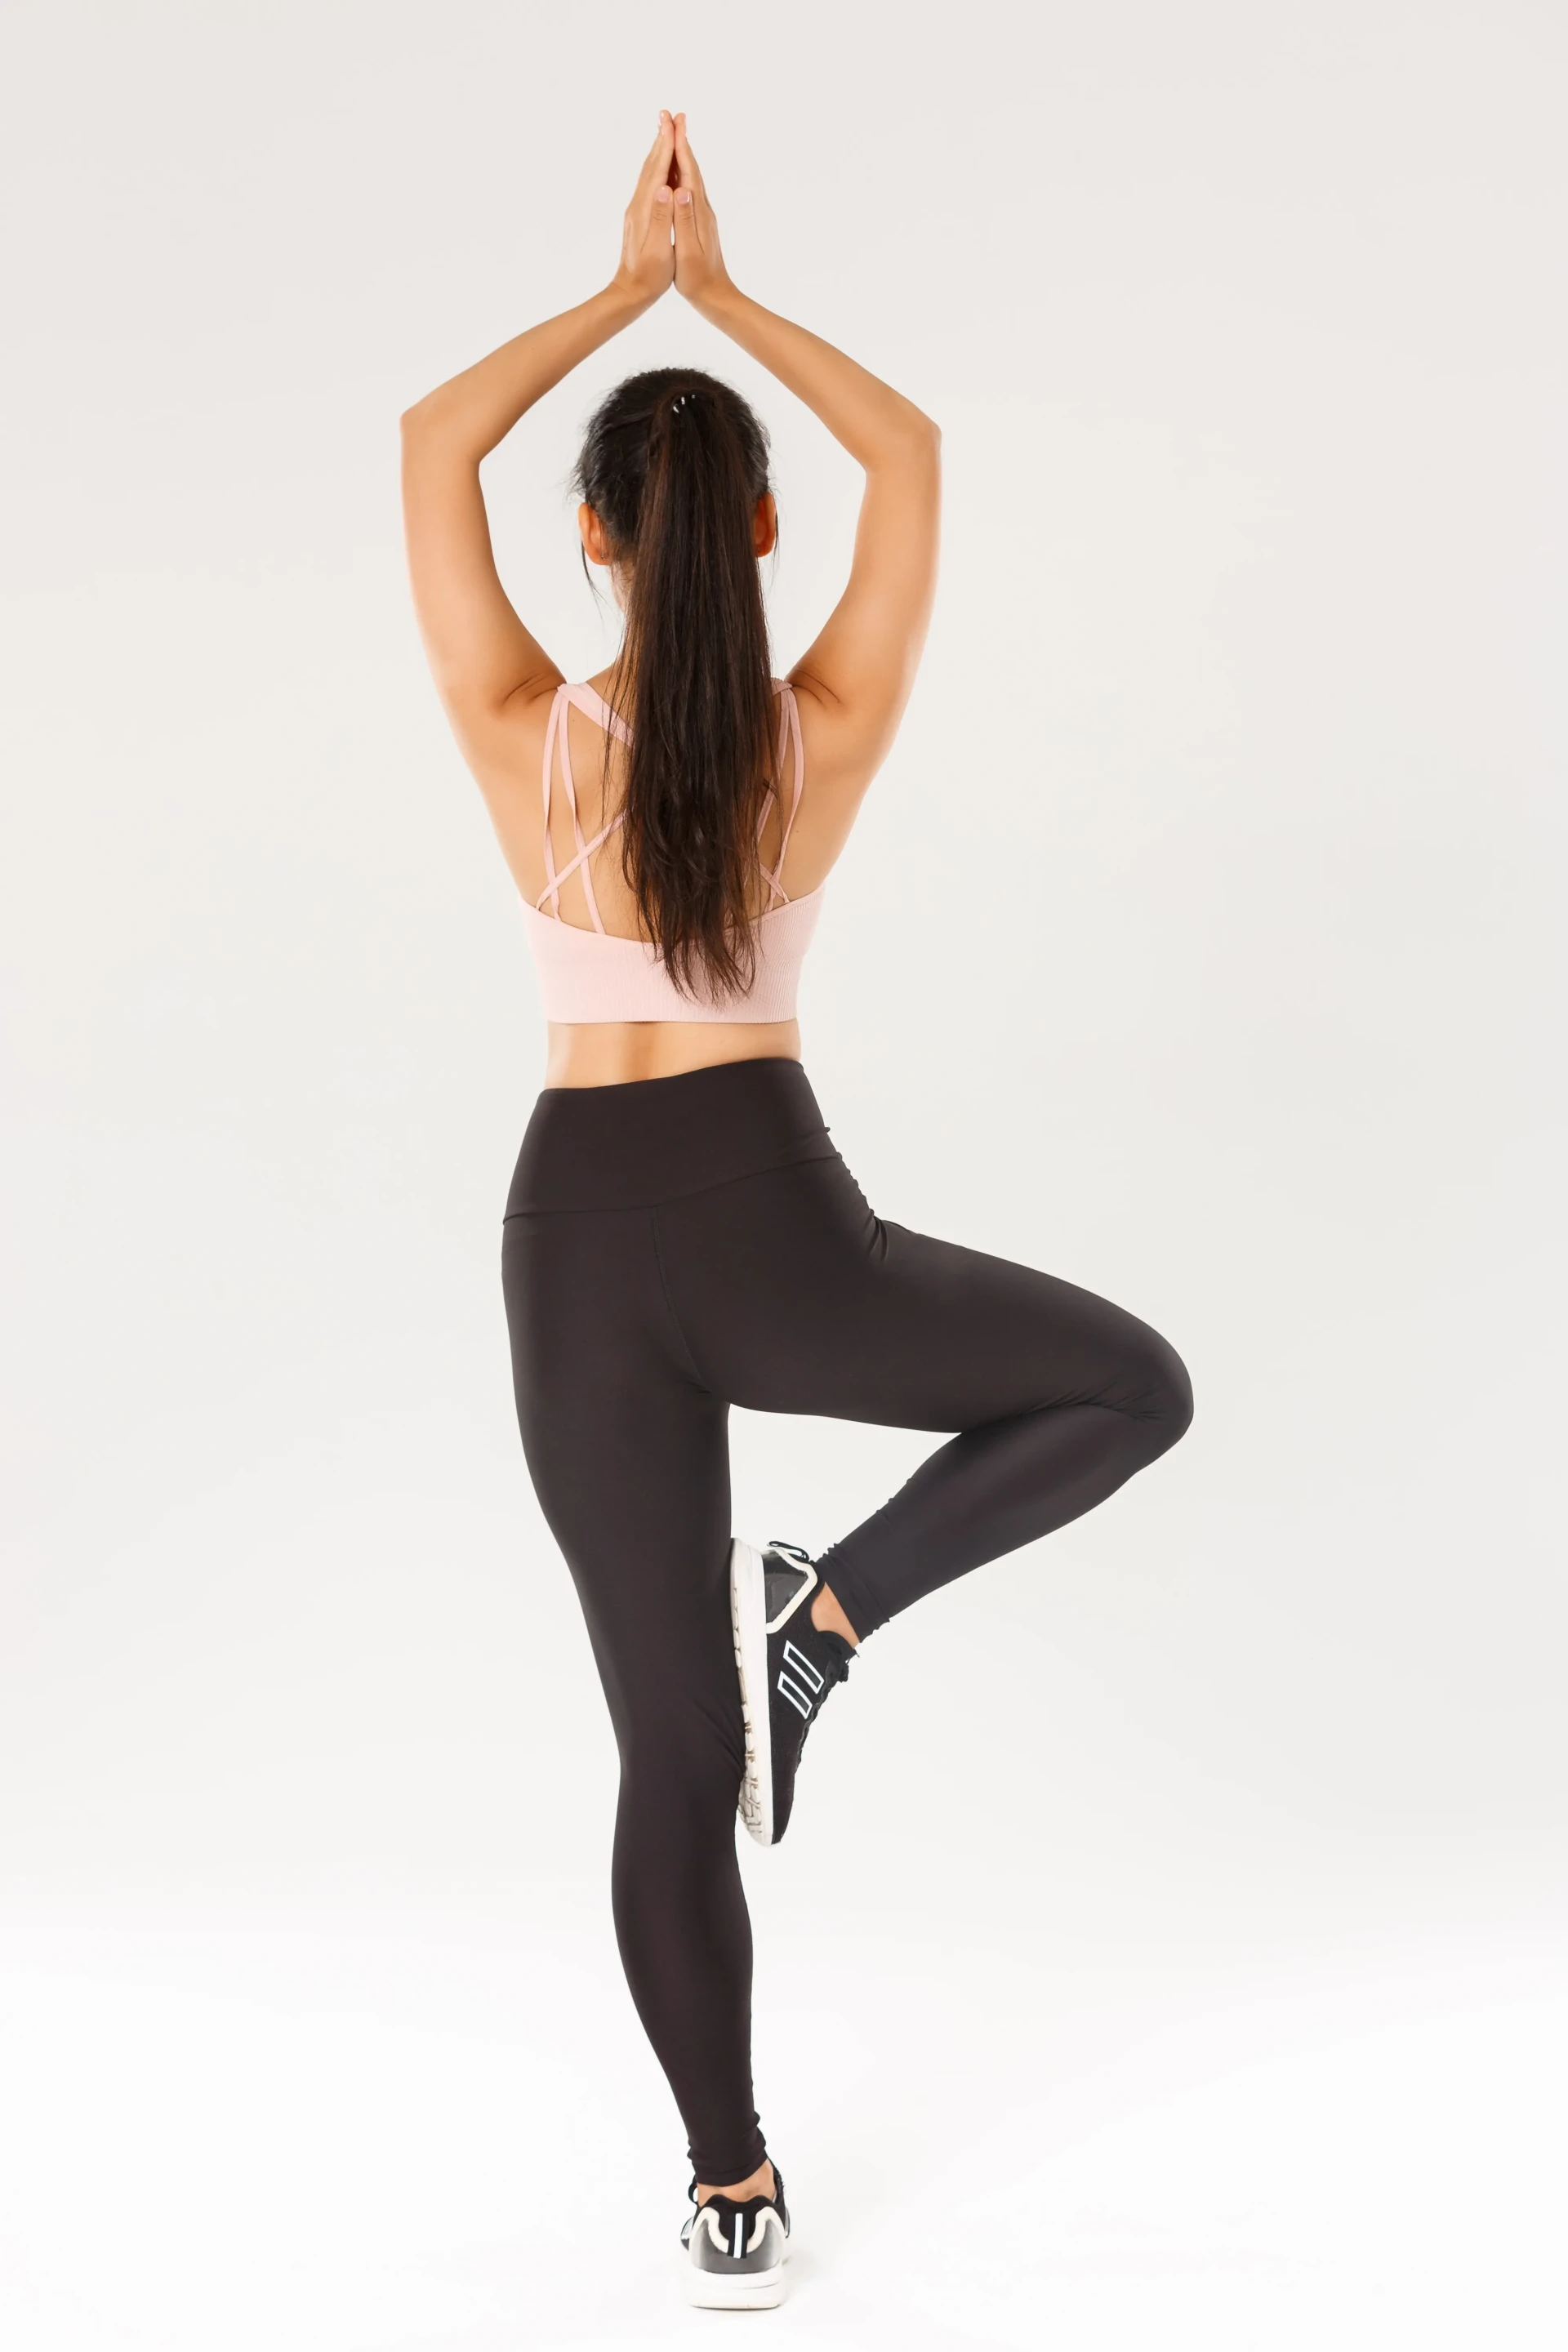
Step-by-step guide to drawing a woman from behind
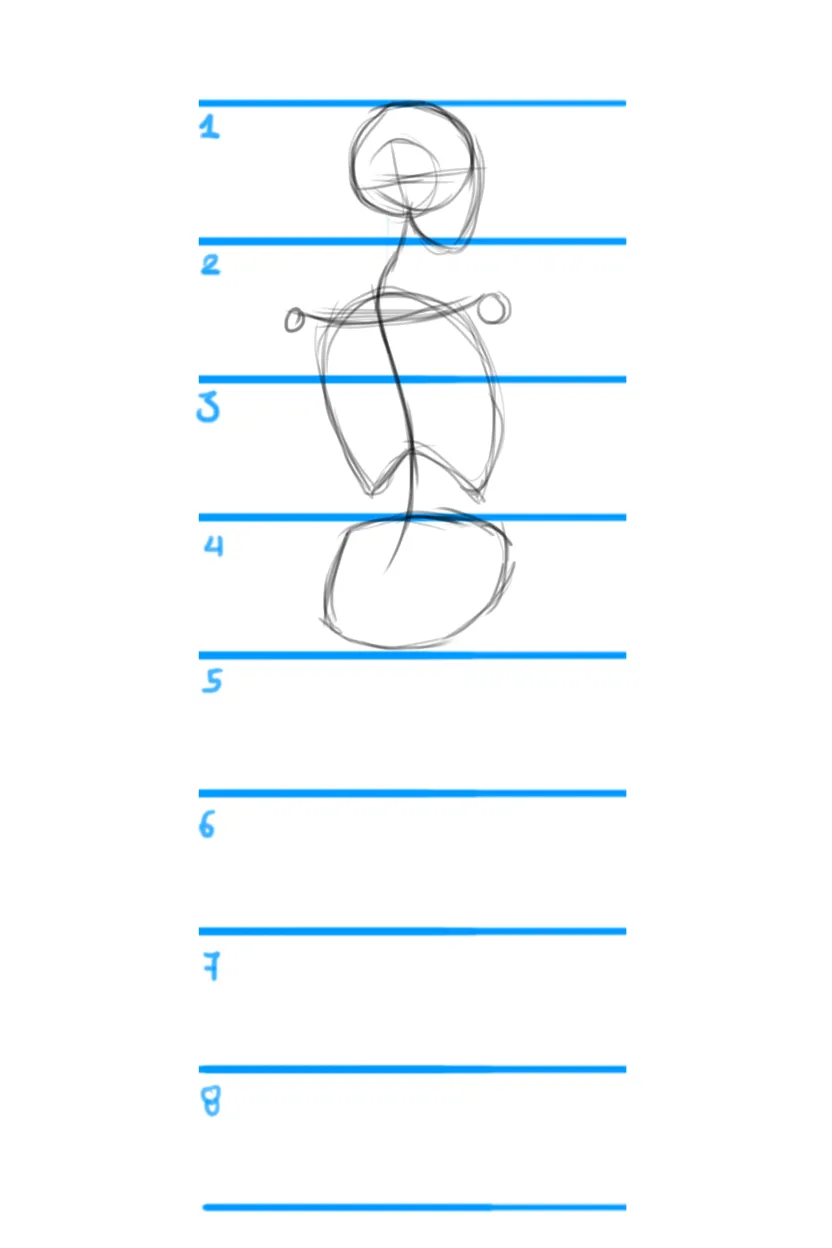
Start by drawing a head in profile, or at the angle of your choice if you have a reference model. Using this measurement as a basic unit, create a guide of 8 equal sections from which we will construct the proportions of the body.
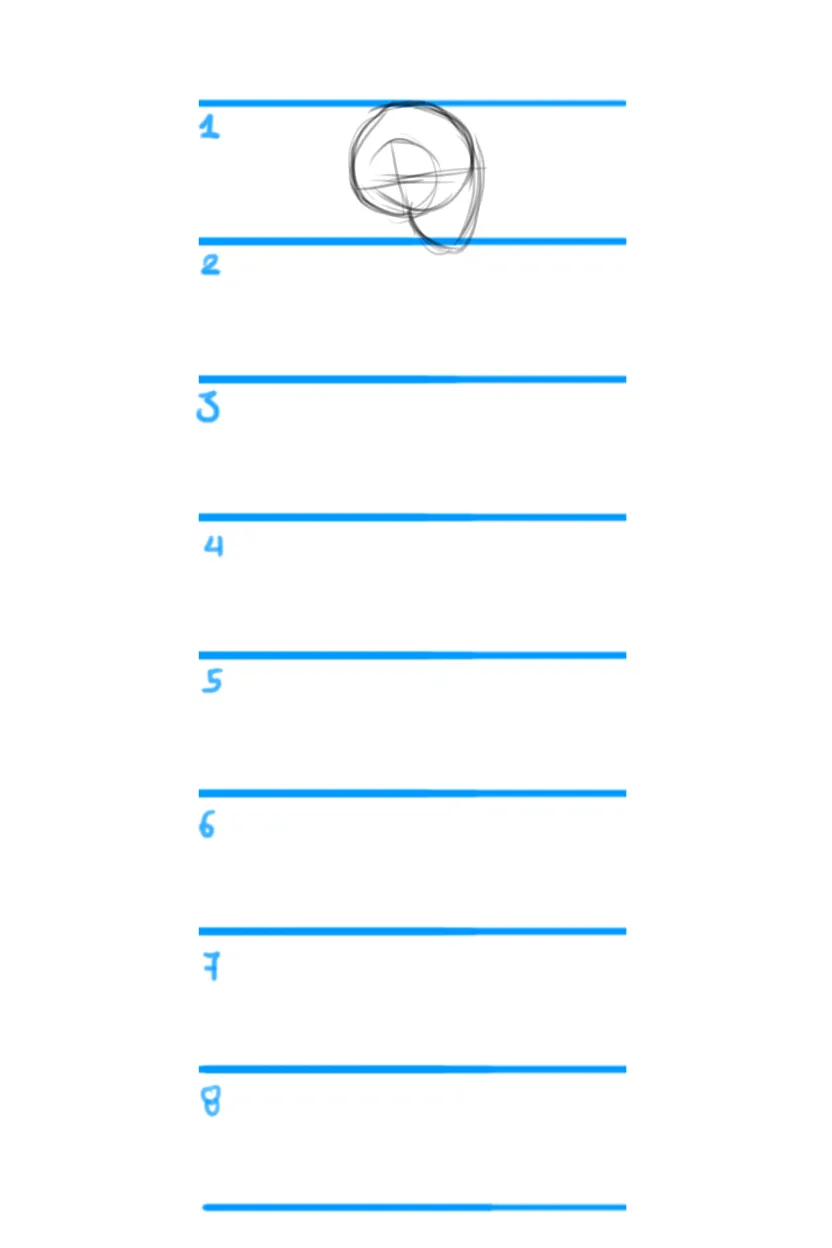
In section number two, we place the neck and shoulders, which will reach halfway across the box. Make sure they are not too wide, but not too narrow either.
The rib cage will continue almost to the end of section number three.
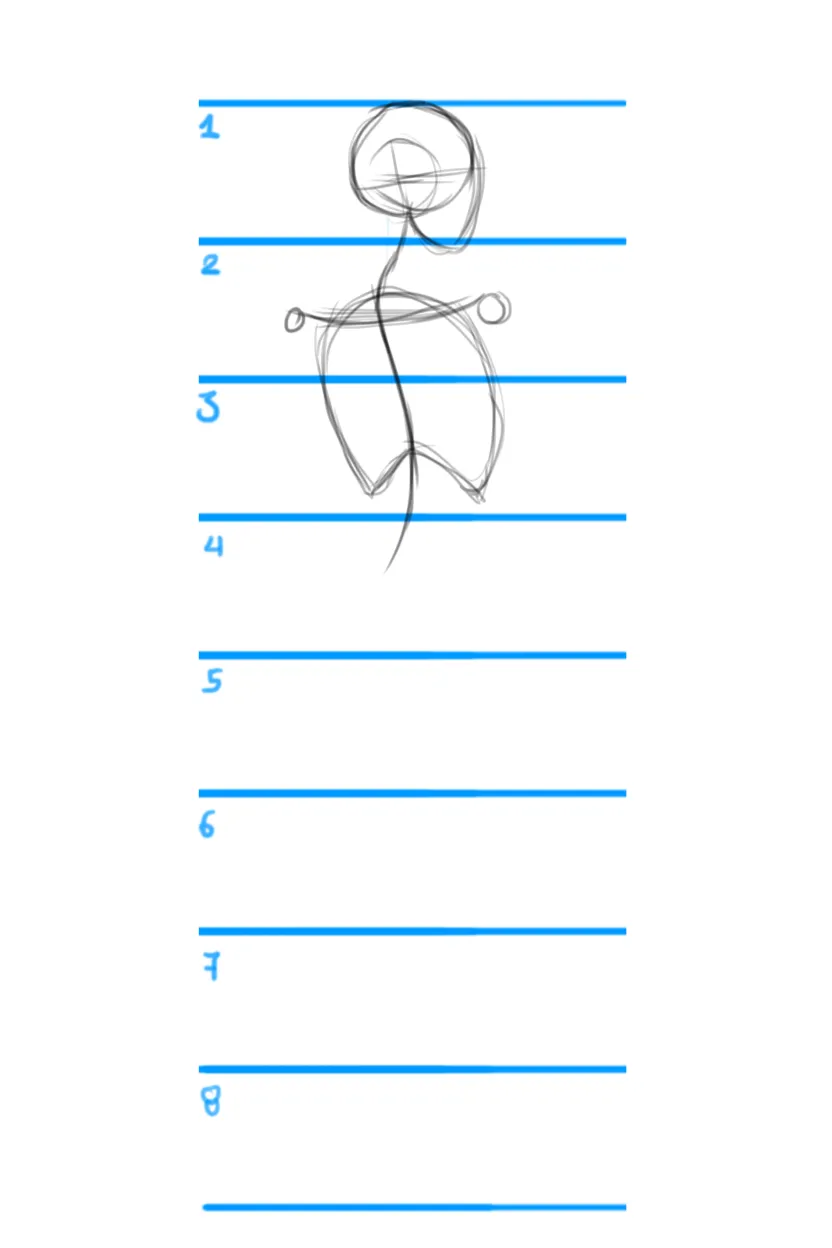
When we get to section number four, we draw the hips, keeping in mind that they may be wider than the rib cage, but not as wide as the shoulders.
Now, we will draw the limbs. The elbows will be placed at the height of the limit of section 3, so that the forearms can extend to the limit of section four, or a little lower depending on the angle. The hands will only reach halfway up section five.
For the legs, we’ll position them in the middle of the fourth section. The knees will then be placed in the middle of the sixth, while the ankles will reach the edge of the seventh. This leaves half a section for the feet.
Here, however, I chose to depict the feet raised. They therefore occupy the entire height of the section.
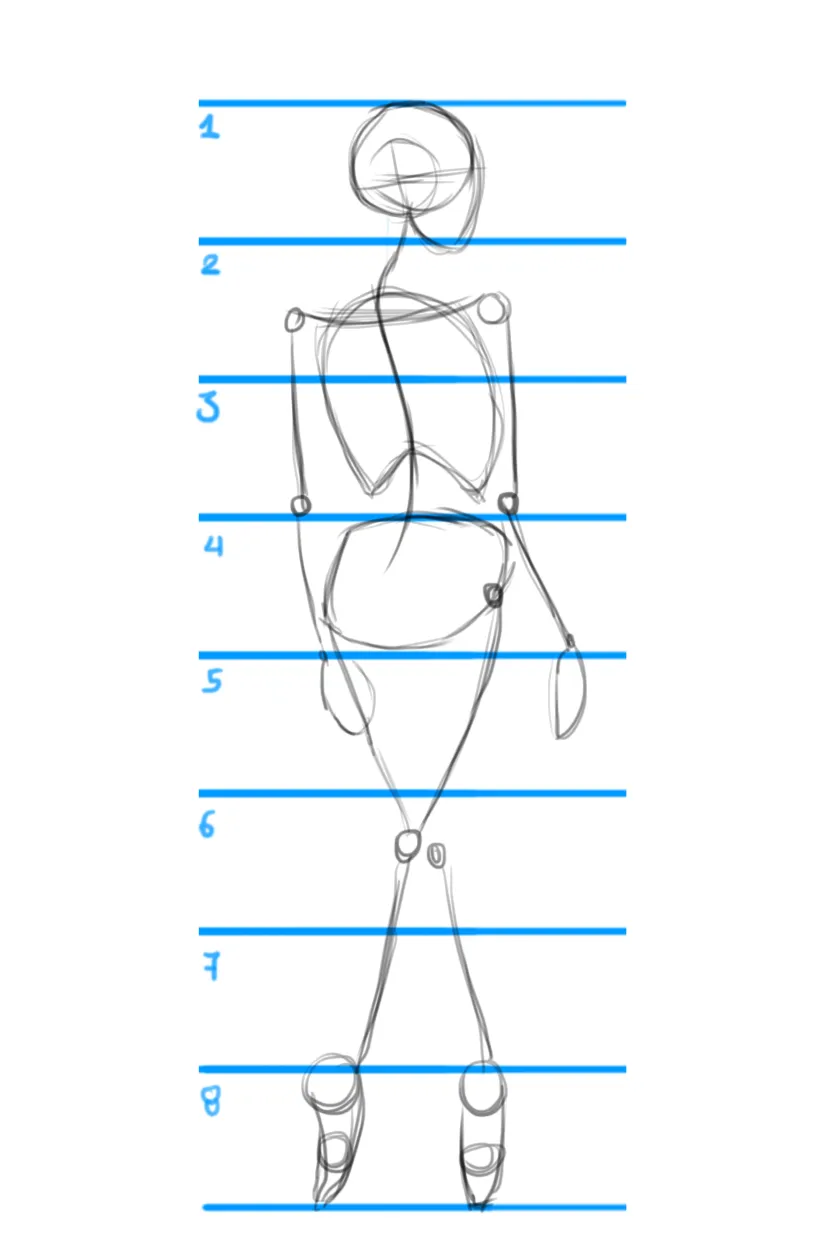
Draw the sketch
Start with the face and hair. The back view only shows a portion of the face, so pay more attention to the hair. A short haircut helps to reveal the back, but long hair falling over the shoulder also works very well.
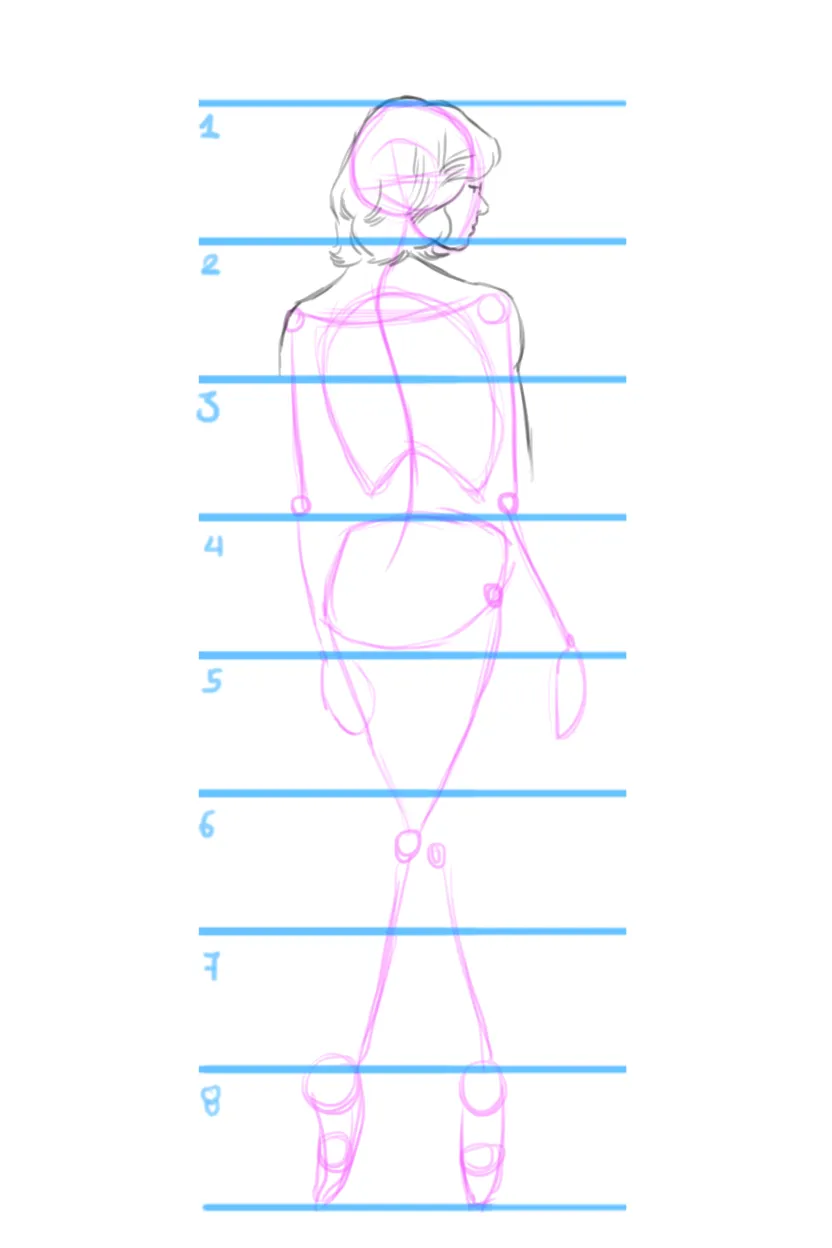
Continue towards the arms, which are usually slender, making sure that the bend of the elbow is at the same height as the shoulder blades protrusion.
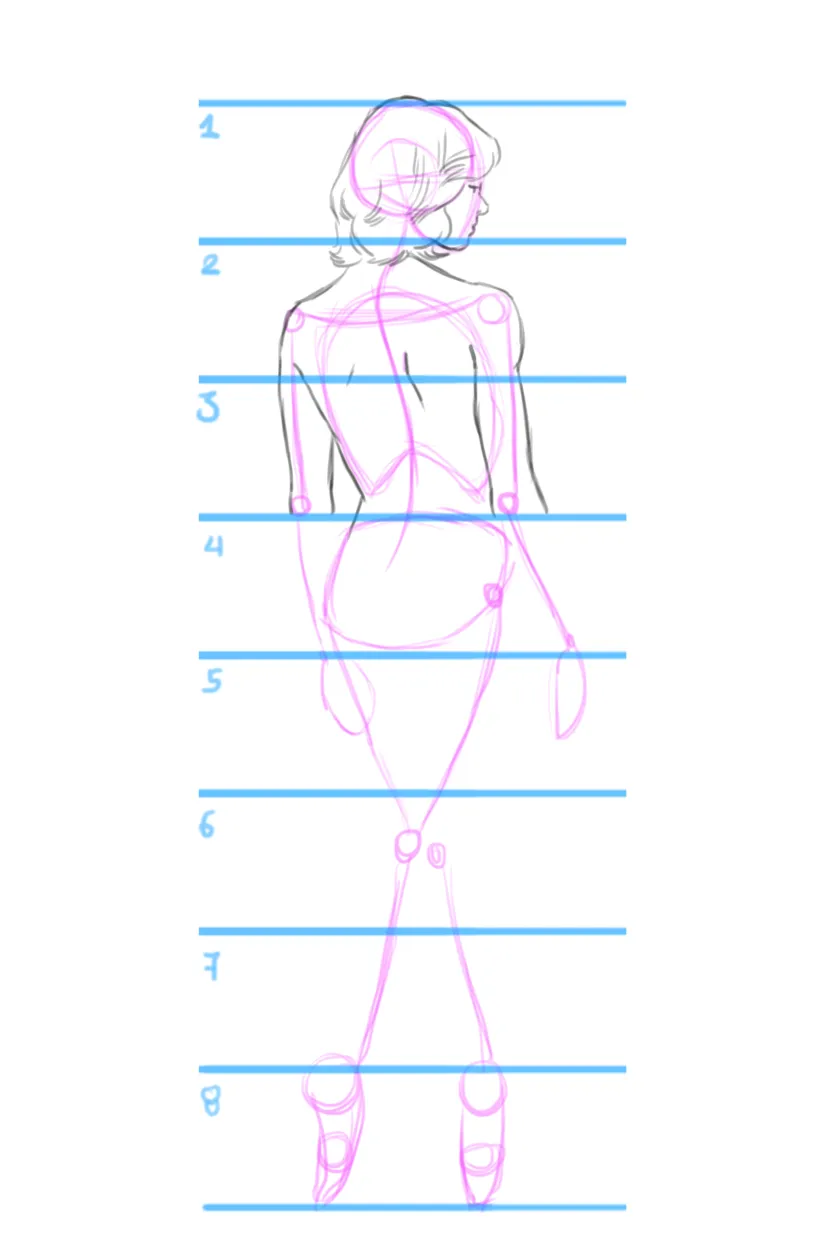
At the edge of section 4, draw the buttocks and connect the hip to the thorax with a well-defined curve.
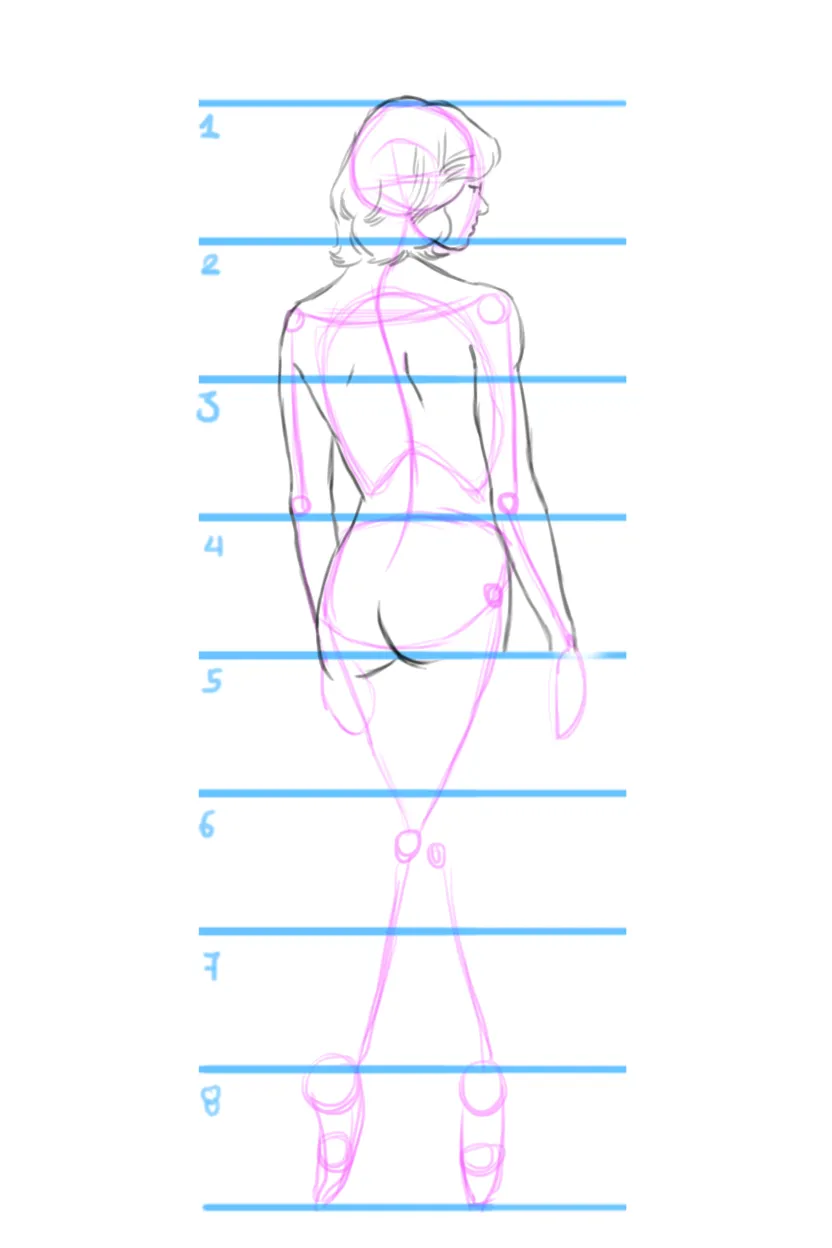
Draw delicate relaxed hands. Since this is a general study of the entire body, it is not necessary to go into a lot of detail if you do not wish to.
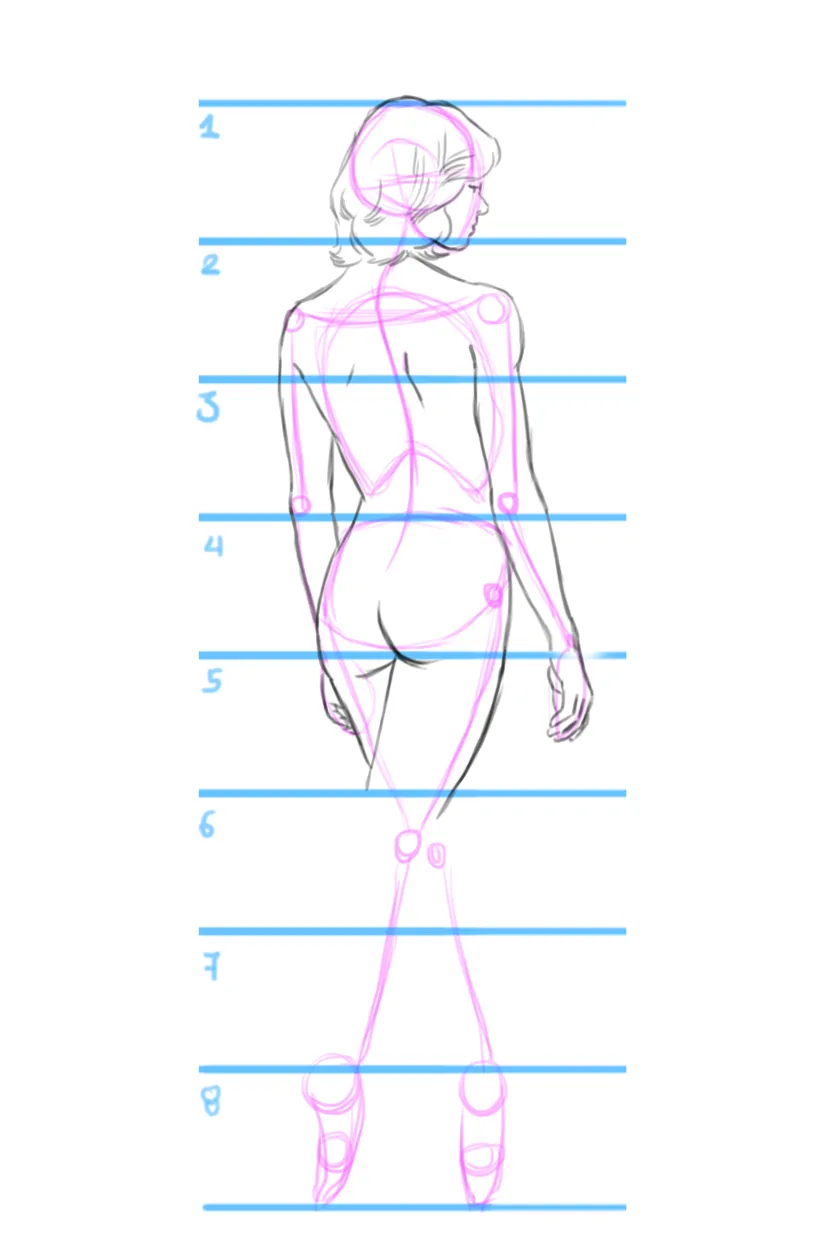
The legs, even though they appear thin, are still much thicker than the arms, so give them the space they need.
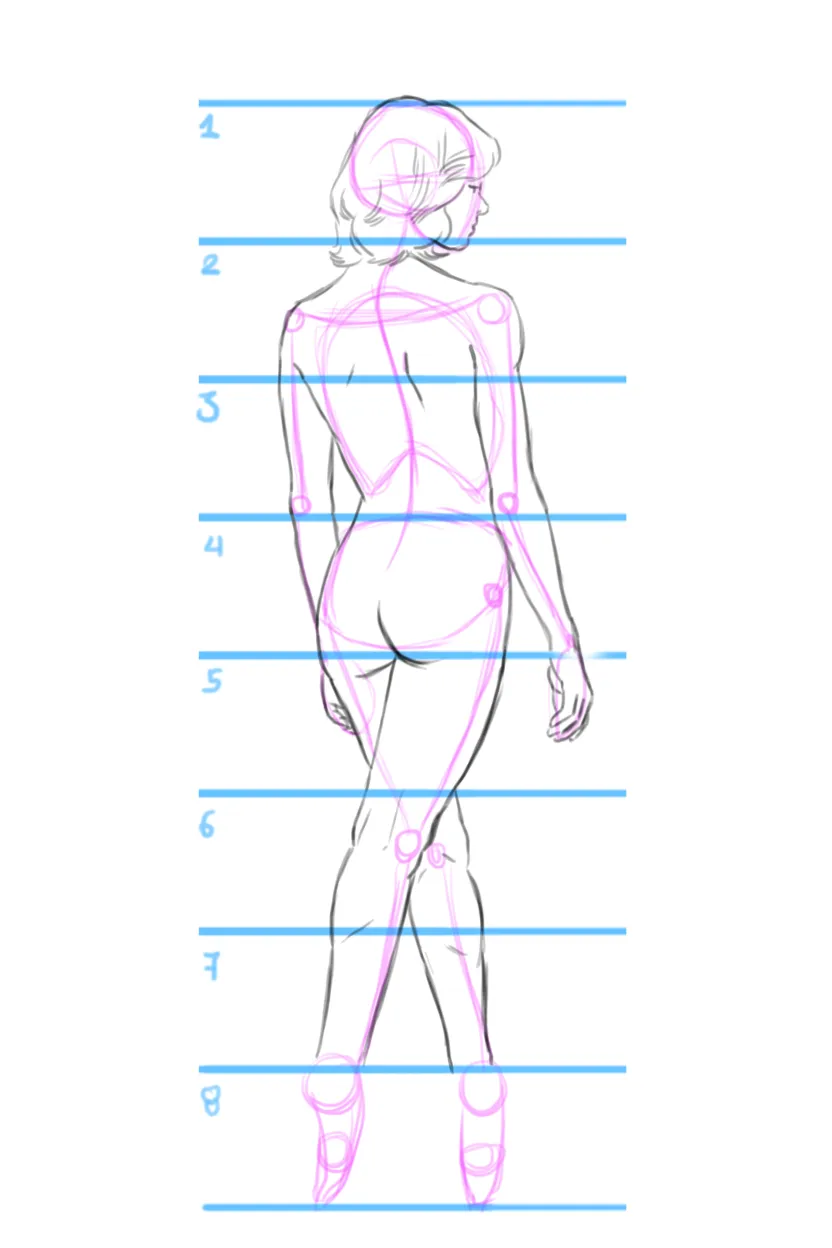
Since we are dealing with a dancer here, I will not go into the details of foot anatomy. We will simply draw the outline so that we can then depict her ballet shoes.
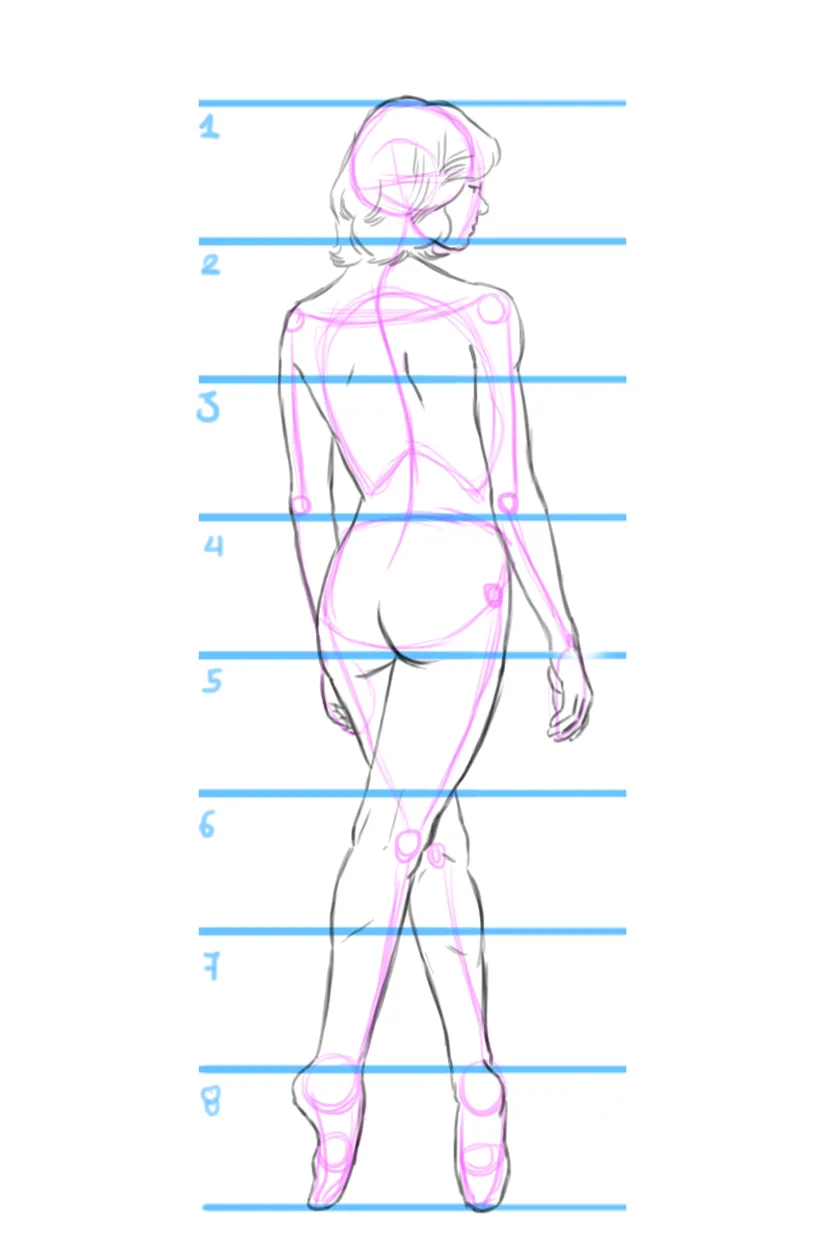
Finally, let’s add the clothing. For this example, I decided to use a leotard, so that we can appreciate the body parts and shapes we have drawn.
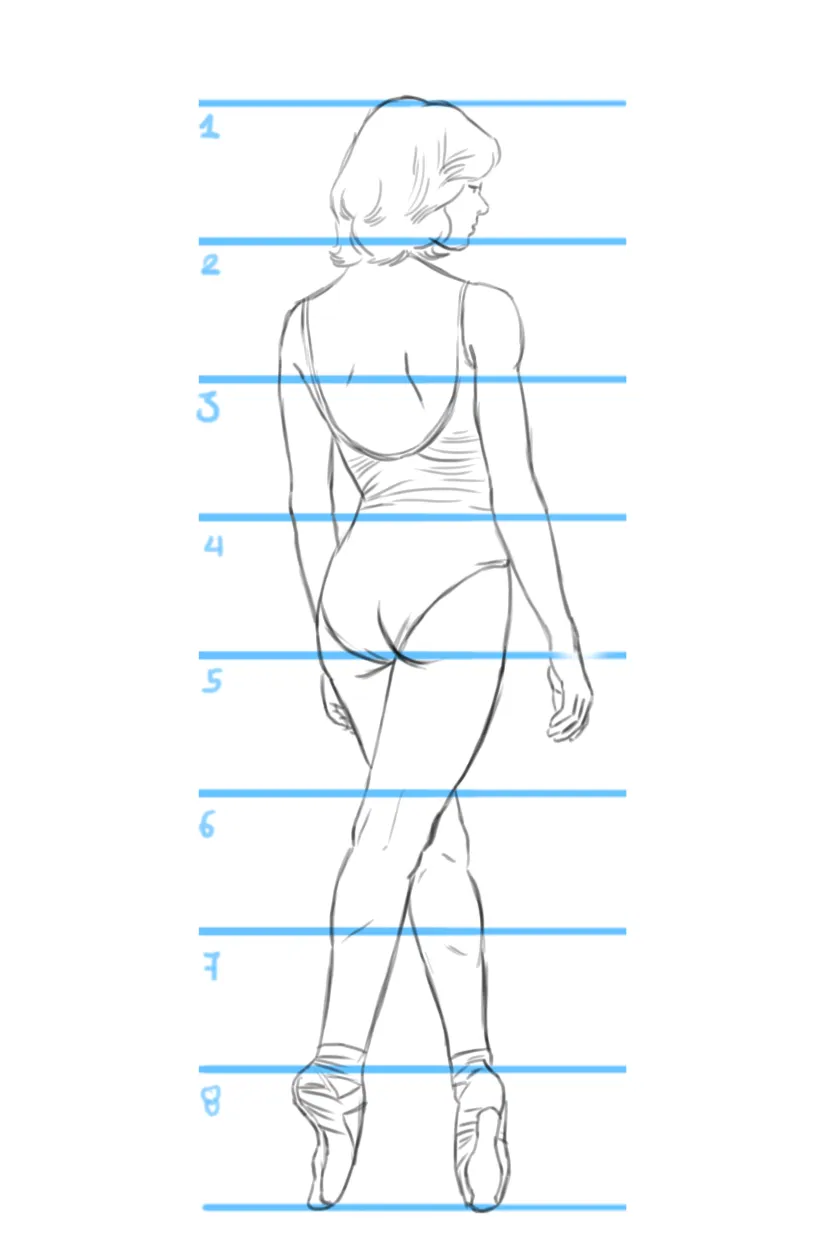
Then, erase all the guide lines. In the traditional drawing method, ink the final drawing before erasing the graphite, or erase it gradually as you add shading.
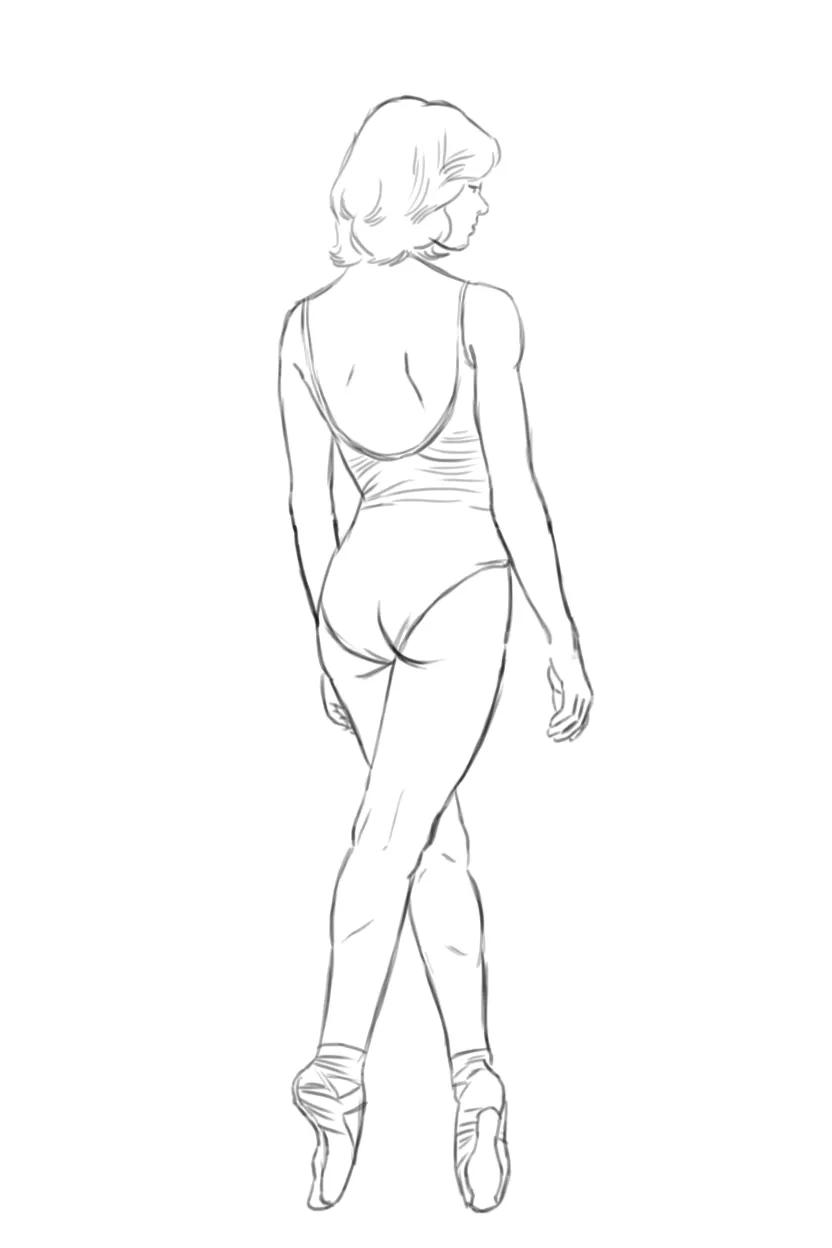
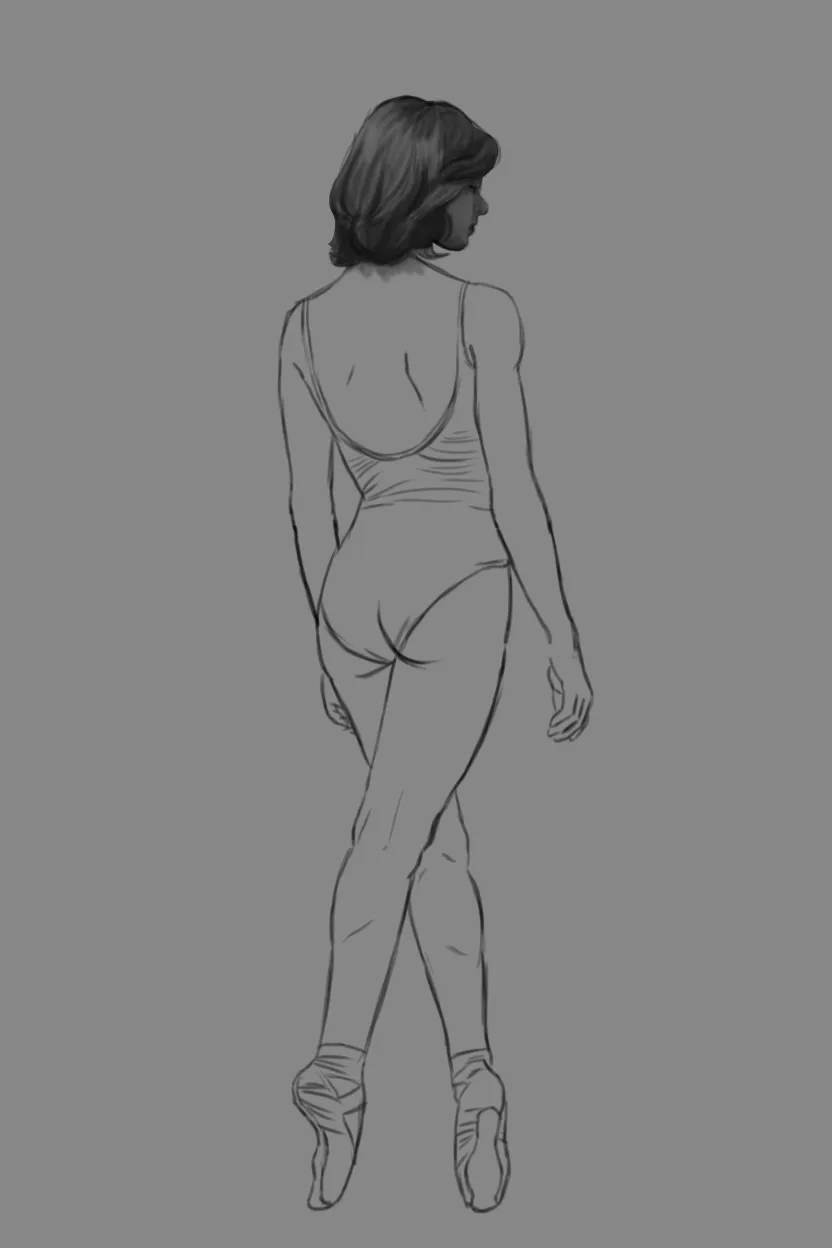
Add shadows and highlights
Let’s start with the head. Cover the face with shadow by gently shaping the form of the chin, nose, and cheek. For the hair, draw gray lines that follow the natural curve we defined in the sketch.
Add darker tones while always leaving a light area, in order to create the desired texture.
Now let’s move on to the back. First, apply a soft shadow to almost the entire area, except for the part closest to the shoulders. Then, identify the darkest areas, the folds created by the shoulder blades and vertebrae.
Finally, blend well to create smooth and natural transitions. If it is necessary to darken an area further, do not hesitate to do so.
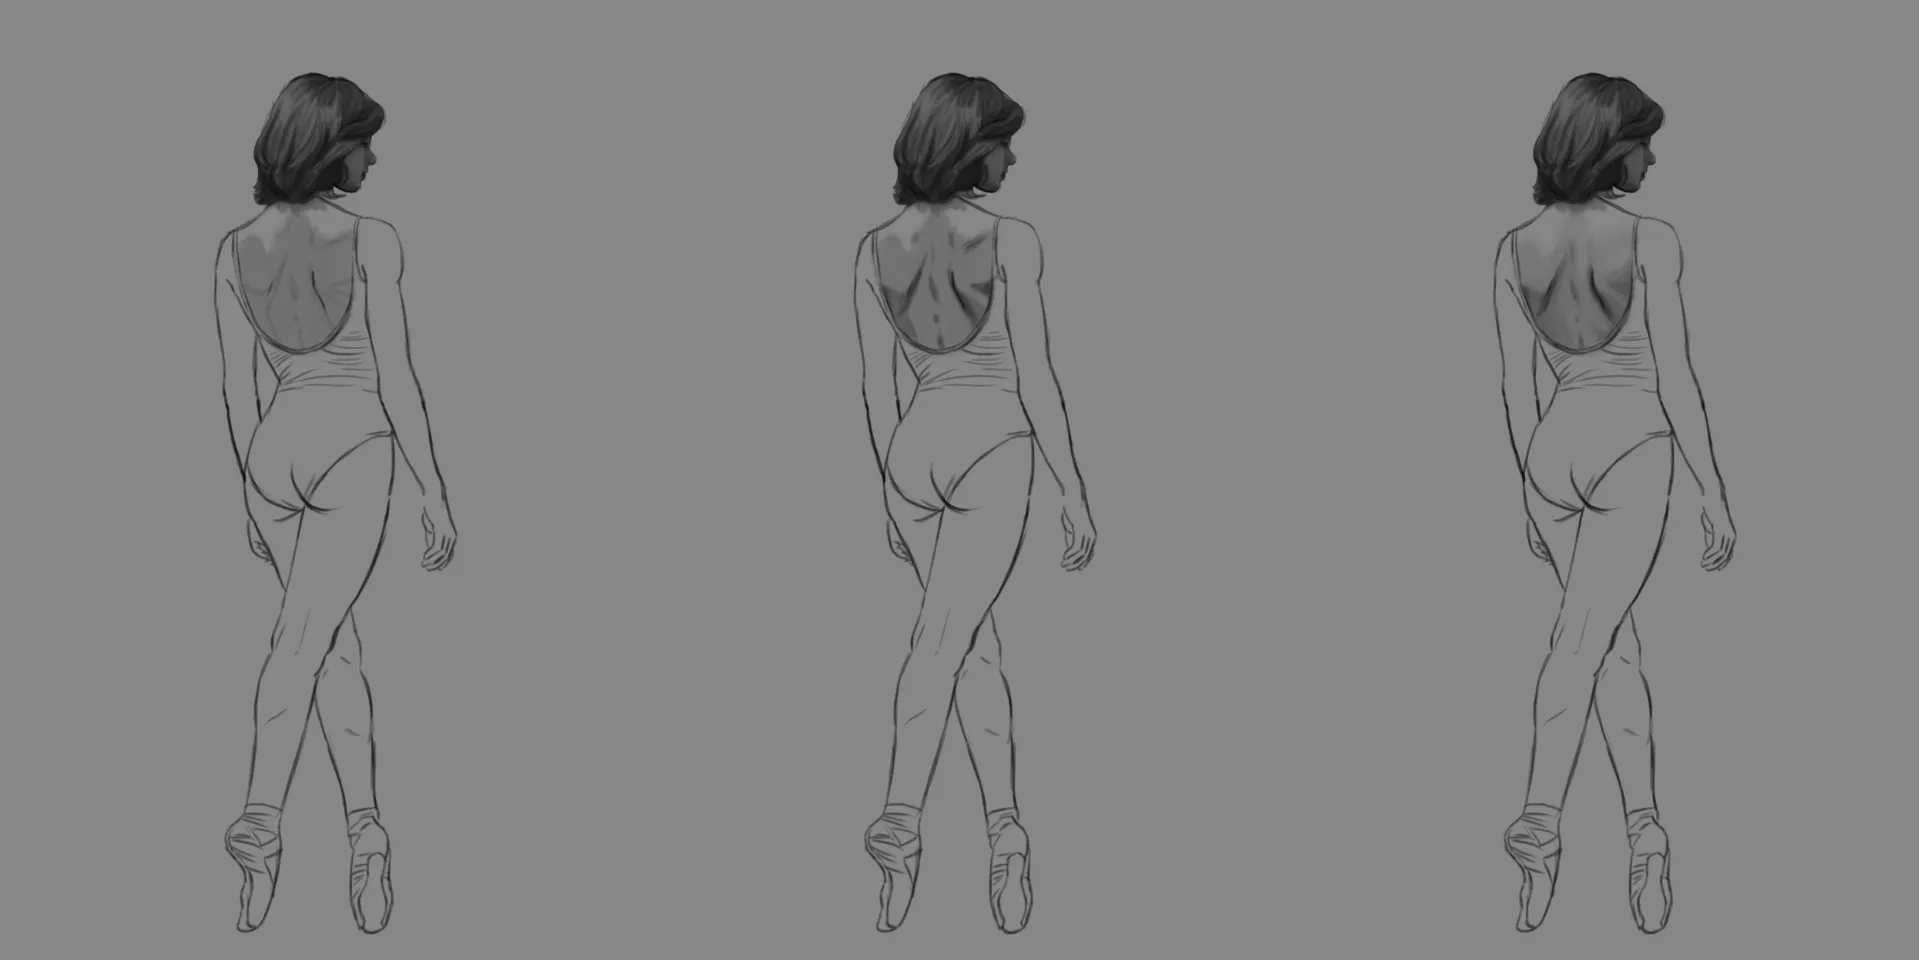
Now we move on to shading. The shadows are mainly located in the area of contact with the arms, in the folds, and on the thigh. Apply a base layer, then carefully shade the wrinkles and folds.
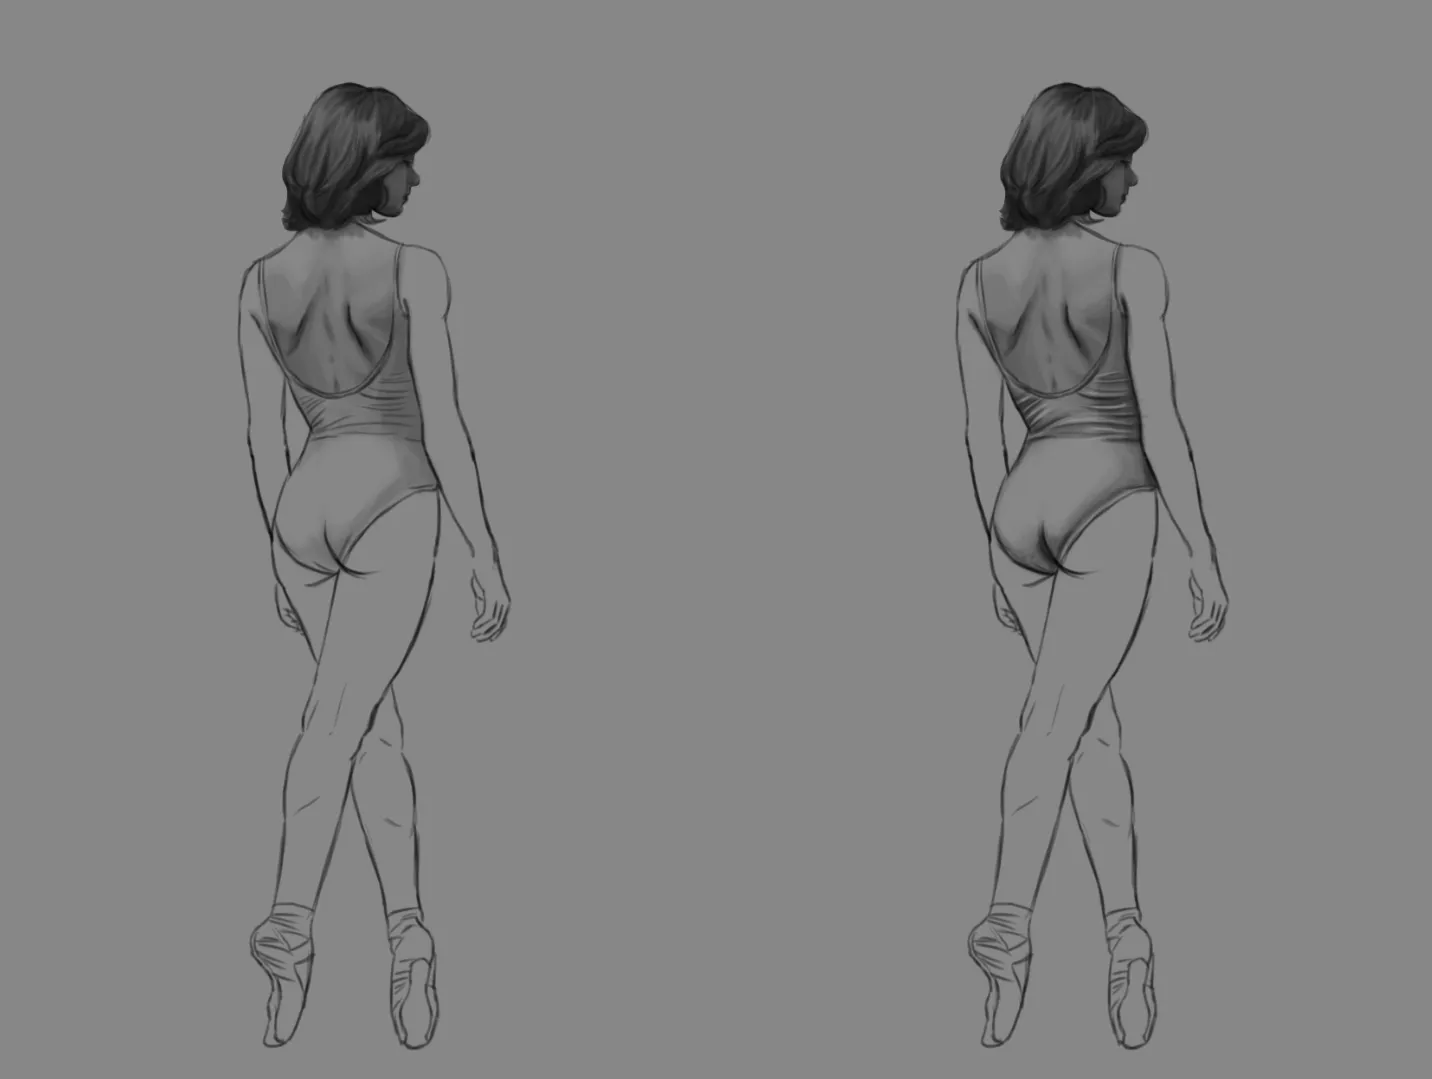
The shadow of the arms is more pronounced on the right side, with the light coming from the opposite side. For the hands, darken the area between the fingers and the upper surface, leaving the outer edge illuminated.
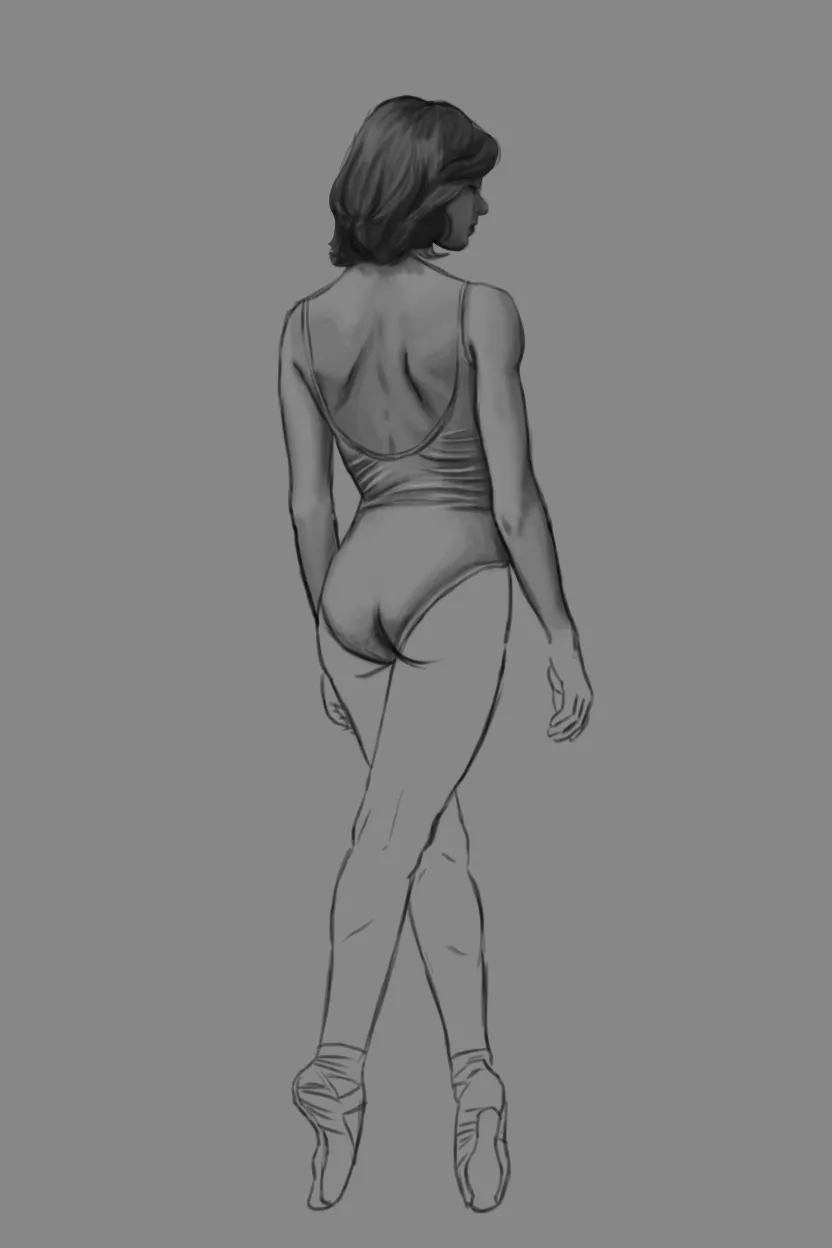
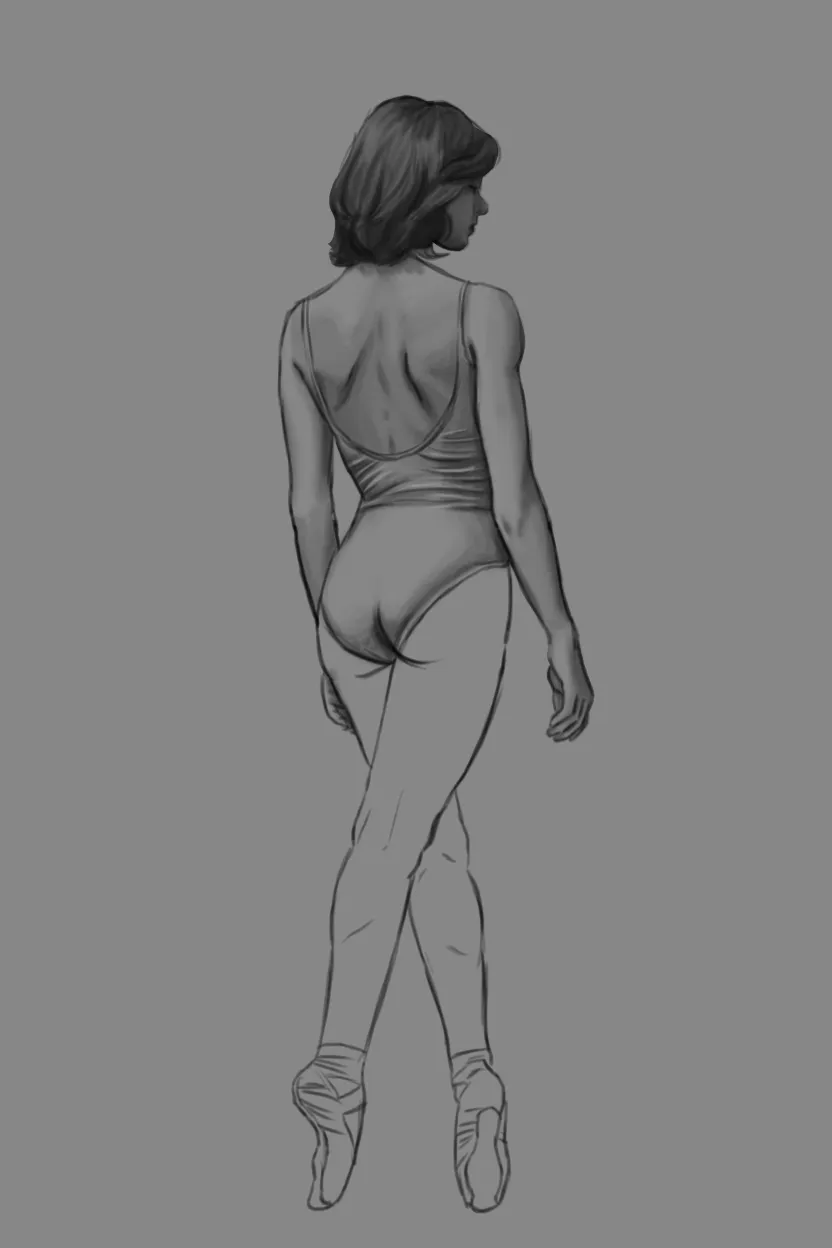
Now we come to the hands, a difficult subject that would require many tutorials on their own. But, broadly darken the area between the fingers and the top of the hand, leaving the outer edge illuminated.
Now let’s move on to the legs. The direction of the shadow remains the same. Carefully observe the forms, the back of the knee, and the calf. On this particular model, there is tension, because the muscles are exerting the force needed to rise onto the tips of the toes.
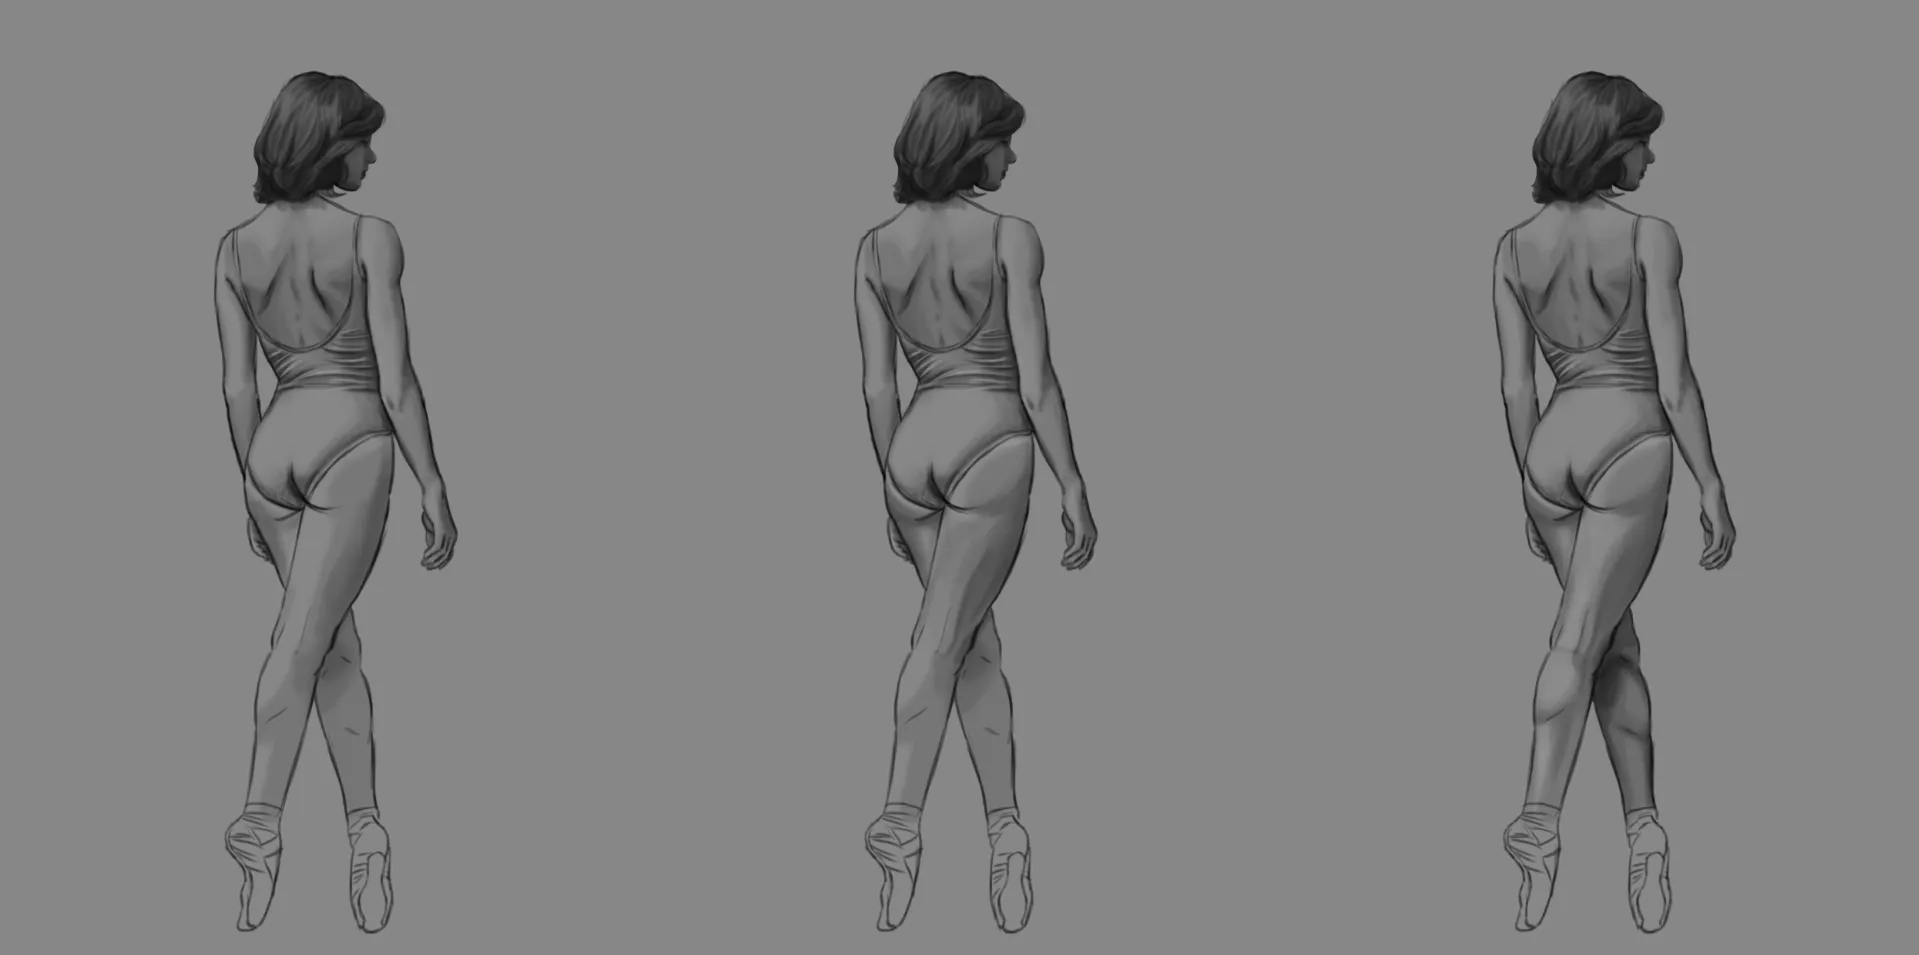
For the ballet shoes, shade them by following the folds of the material, with a clearly darker area for the sole.
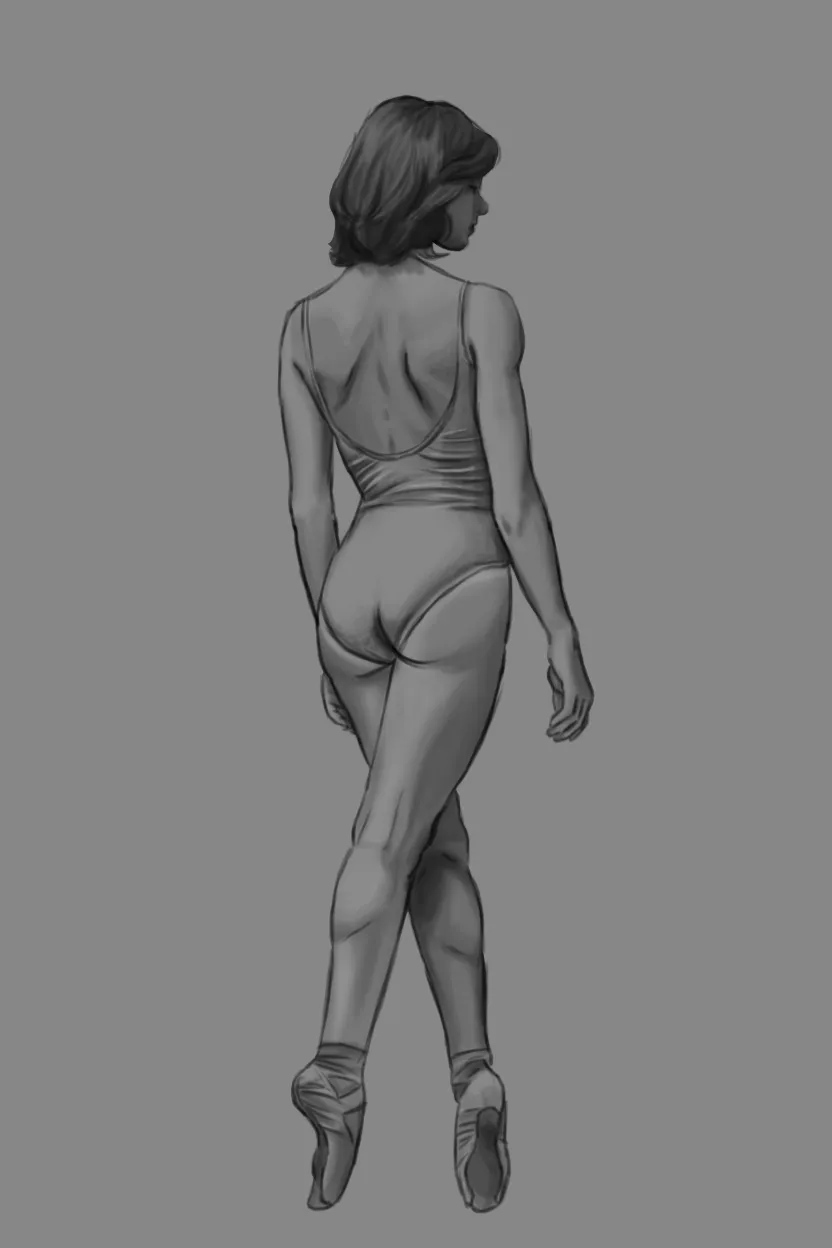
Finalize the drawing
In the final step, add some highlights to very specific areas: a few strands in the hair, on the shoulders, on the contours of the arms and certain areas of the legs, as well as on the folds of the clothing and shoes. These small touches are what give depth and realism to the overall image.
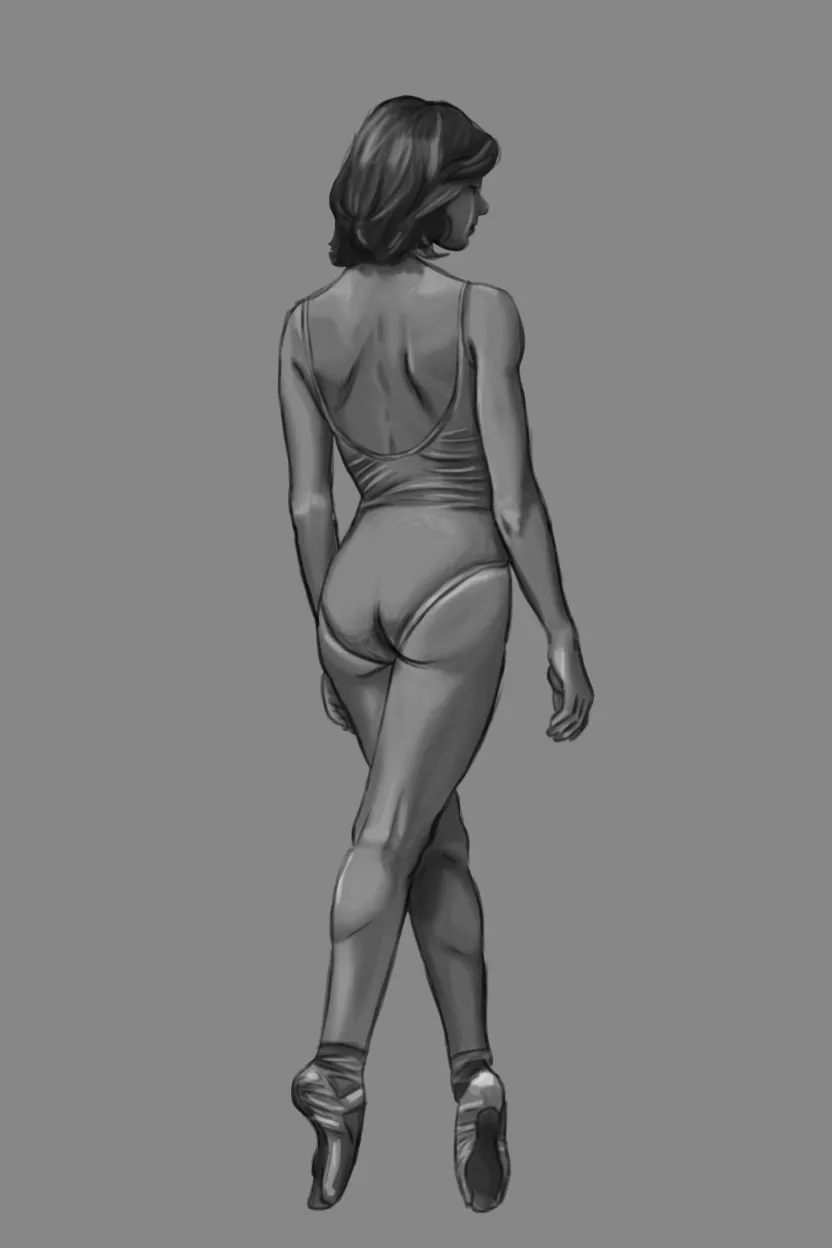
And there you have it, your drawing is finished! The rear view enables you to work on the silhouette and volumes in a different way, while paying particular attention to proportions and posture. Don’t hesitate to repeat this exercise with other poses or references: by varying the angles and attitudes, you will quickly see how the body transforms depending on the position. This is also a good way to gradually gain confidence when it comes to drawing a silhouette from a less familiar angle.
Discussion
No comments yet.