Landscape Drawing with Charcoal Art Pencils
Today, I'm going to show you how to easily draw a landscape using charcoal. I won't talk much about charcoal in general, or its various uses, as I've written a complete article on that topic. You can find it on the blog.
Charcoal art pencils are highly valued in landscape drawing because they are an ideal tool for beginners and for creating black and white artworks rich in contrast. The drawing should remain simple, and the shadows must be pronounced in order to achieve a play of light between the contrasting black of the charcoal and the white of the paper. In this article, we will mainly talk about natural landscapes, because that is what I draw most often! I will quickly tell you about the necessary materials, then I will explain some easy elements to add to landscape drawings, and finally, I will guide you step-by-step on how to create a charcoal landscape!
THE MATERIALS NEEDED FOR LANDSCAPE DRAWING
Before starting to draw with charcoal, make sure you have with you charcoal sticks or compressed charcoal, and charcoal pencils for details. Also use a fairly textured paper with a weight of at least 150 g/m². If you wish, you can use colored paper to start with a certain base color.
Also take a paper stump to soften the shading and even out the pigmentation of the drawing. You will need a kneaded eraser to create highlights, and correct your mistakes, if necessary.
Finally, use a fixative to protect your artwork once the drawing is completed.
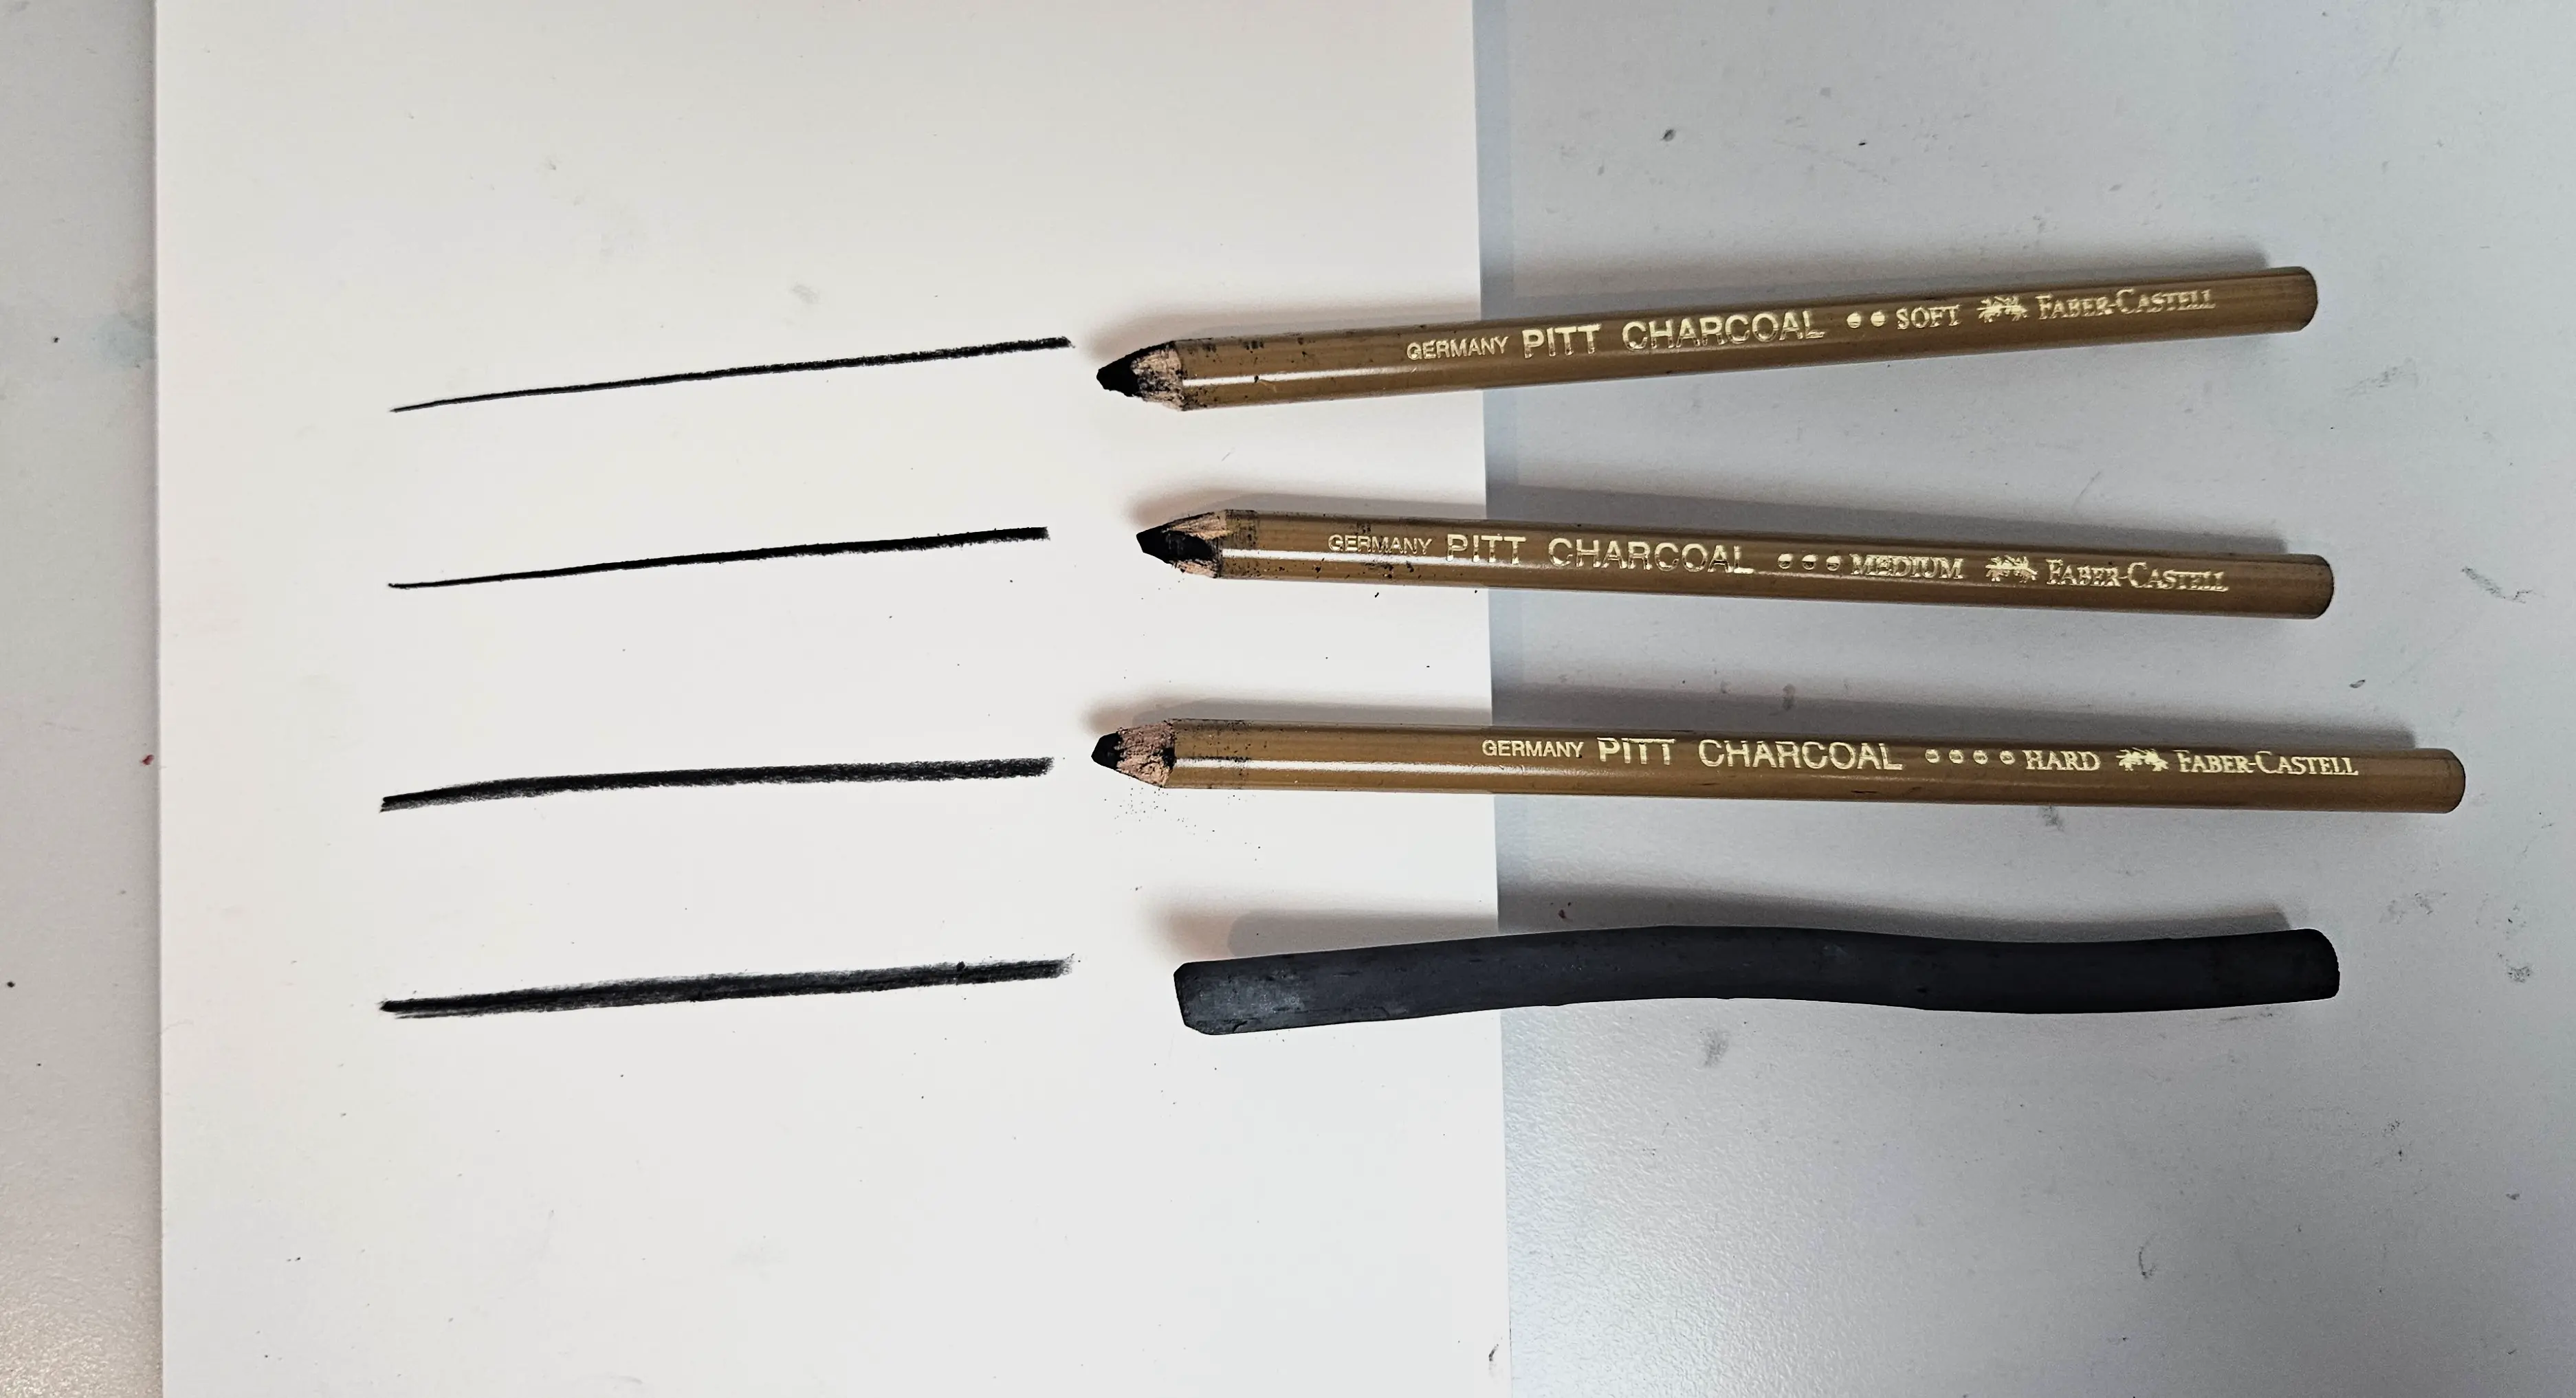
For my part, I often use the soft charcoal pencil for sketching, and to add shadows. For larger shadows, I use the soft charcoal stick. You can also sharpen your charcoal with a cutter, and refine it with sandpaper, to achieve details and be more precise.
DIFFERENT CHARCOAL LANDSCAPE ELEMENTS
In this section, I will show you how to quickly sketch key elements commonly found in natural landscapes: trees, mountains, rocks, etc.
TREES
There are several ways to draw trees. When drawing with charcoal, it's important to keep it simple and not overcomplicate things. Initially, I sketch the underside of the trees by marking the shadowed areas, which are located under the recesses of the foliage.
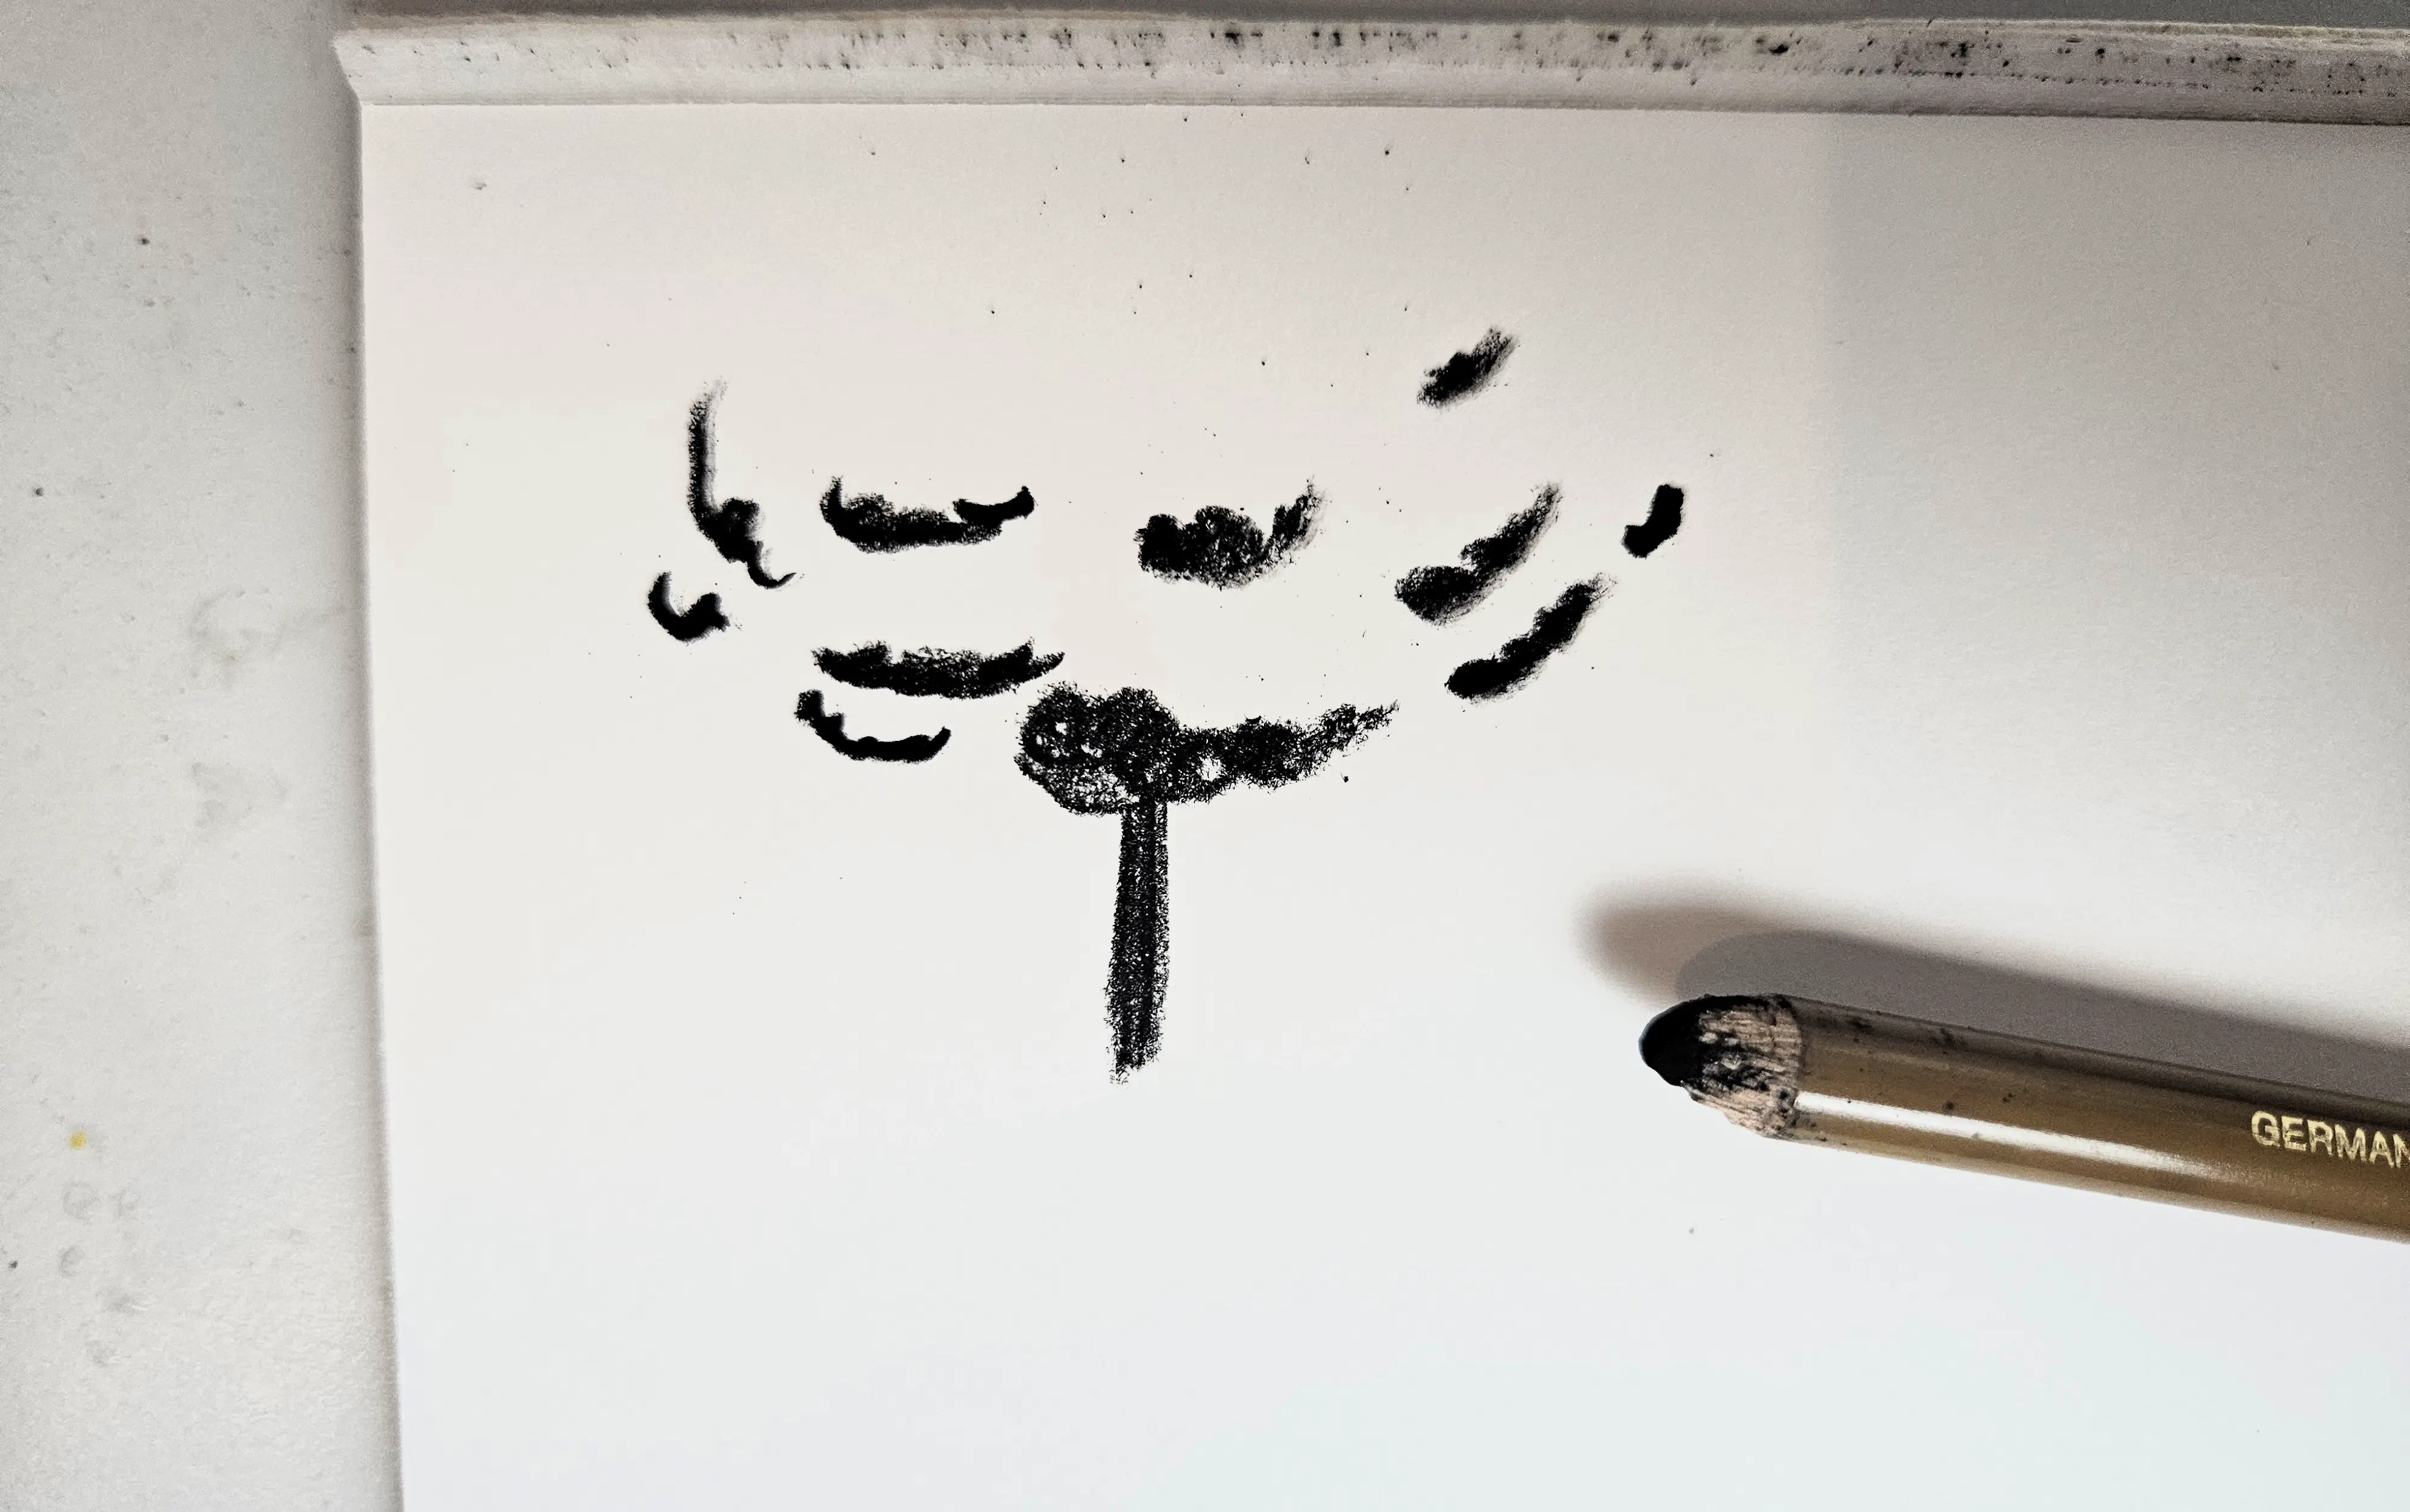
Then, I use my smudging tool to simply blur the rest of the foliage, taking care to leave some white for the light. I can also use a kneadable eraser if necessary. And that's it! We have our first tree. No need to add more charcoal, the smudging tool will simply pick up the existing powder and move it elsewhere.
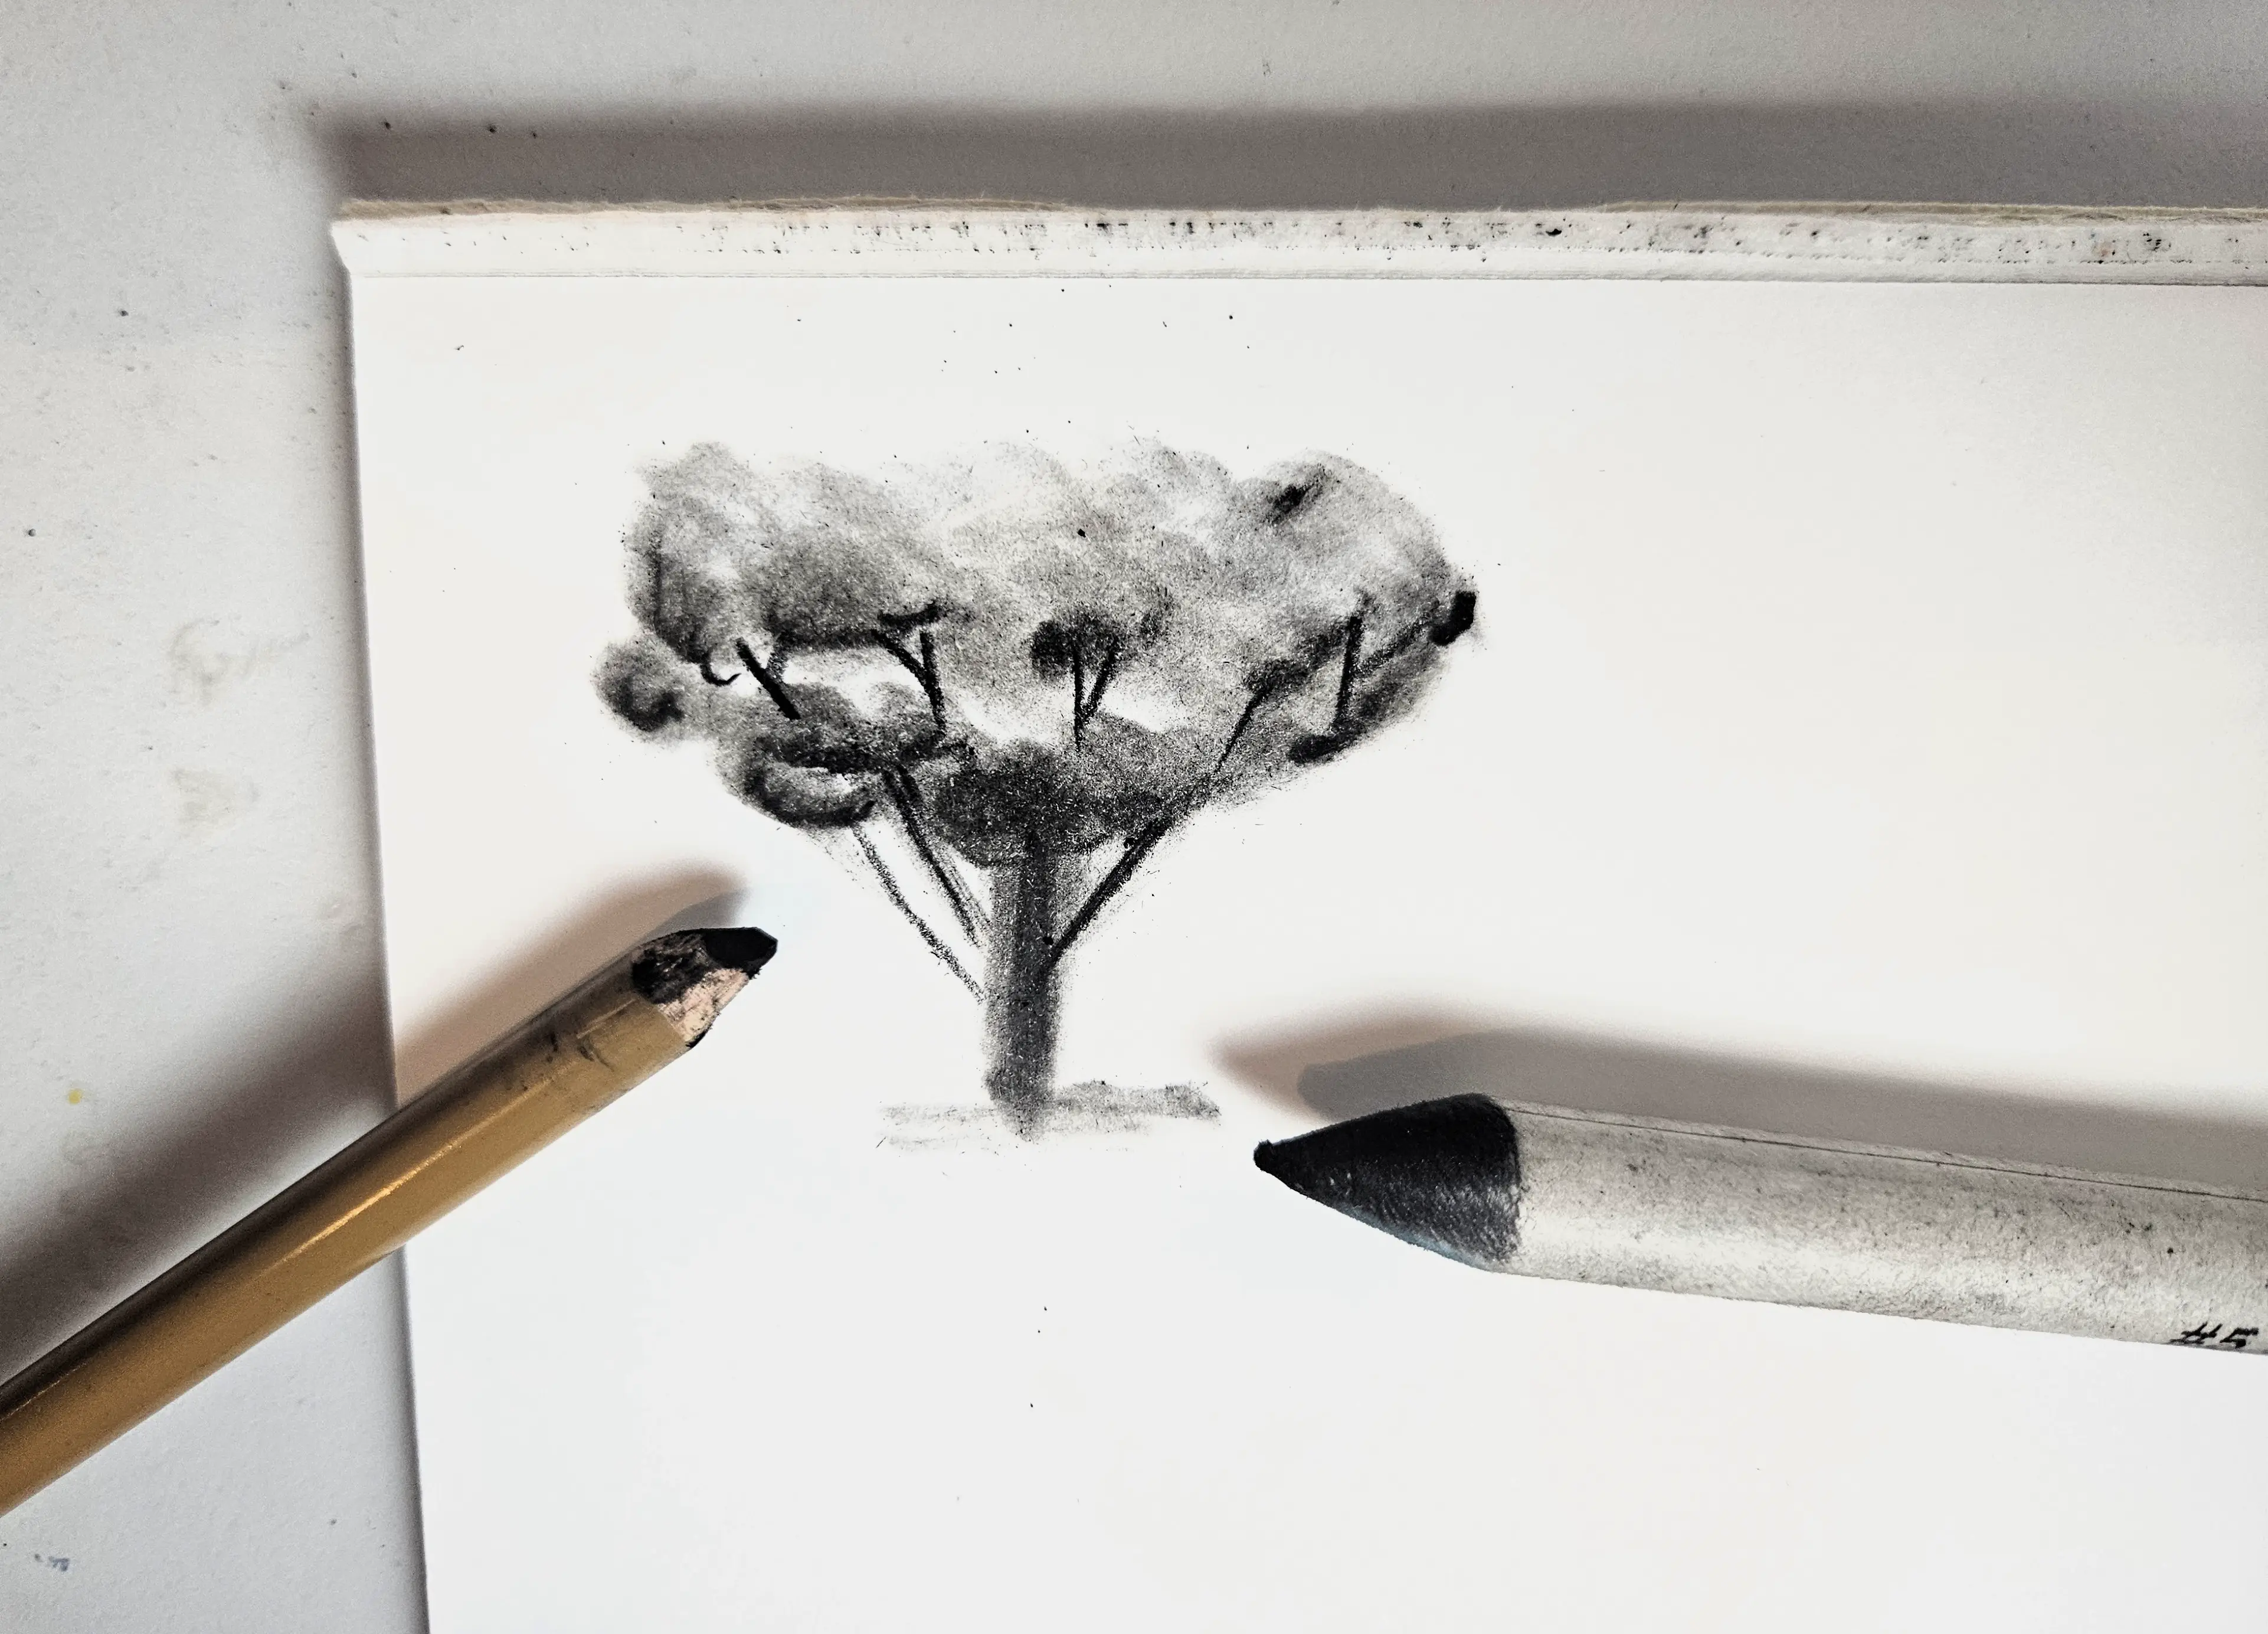
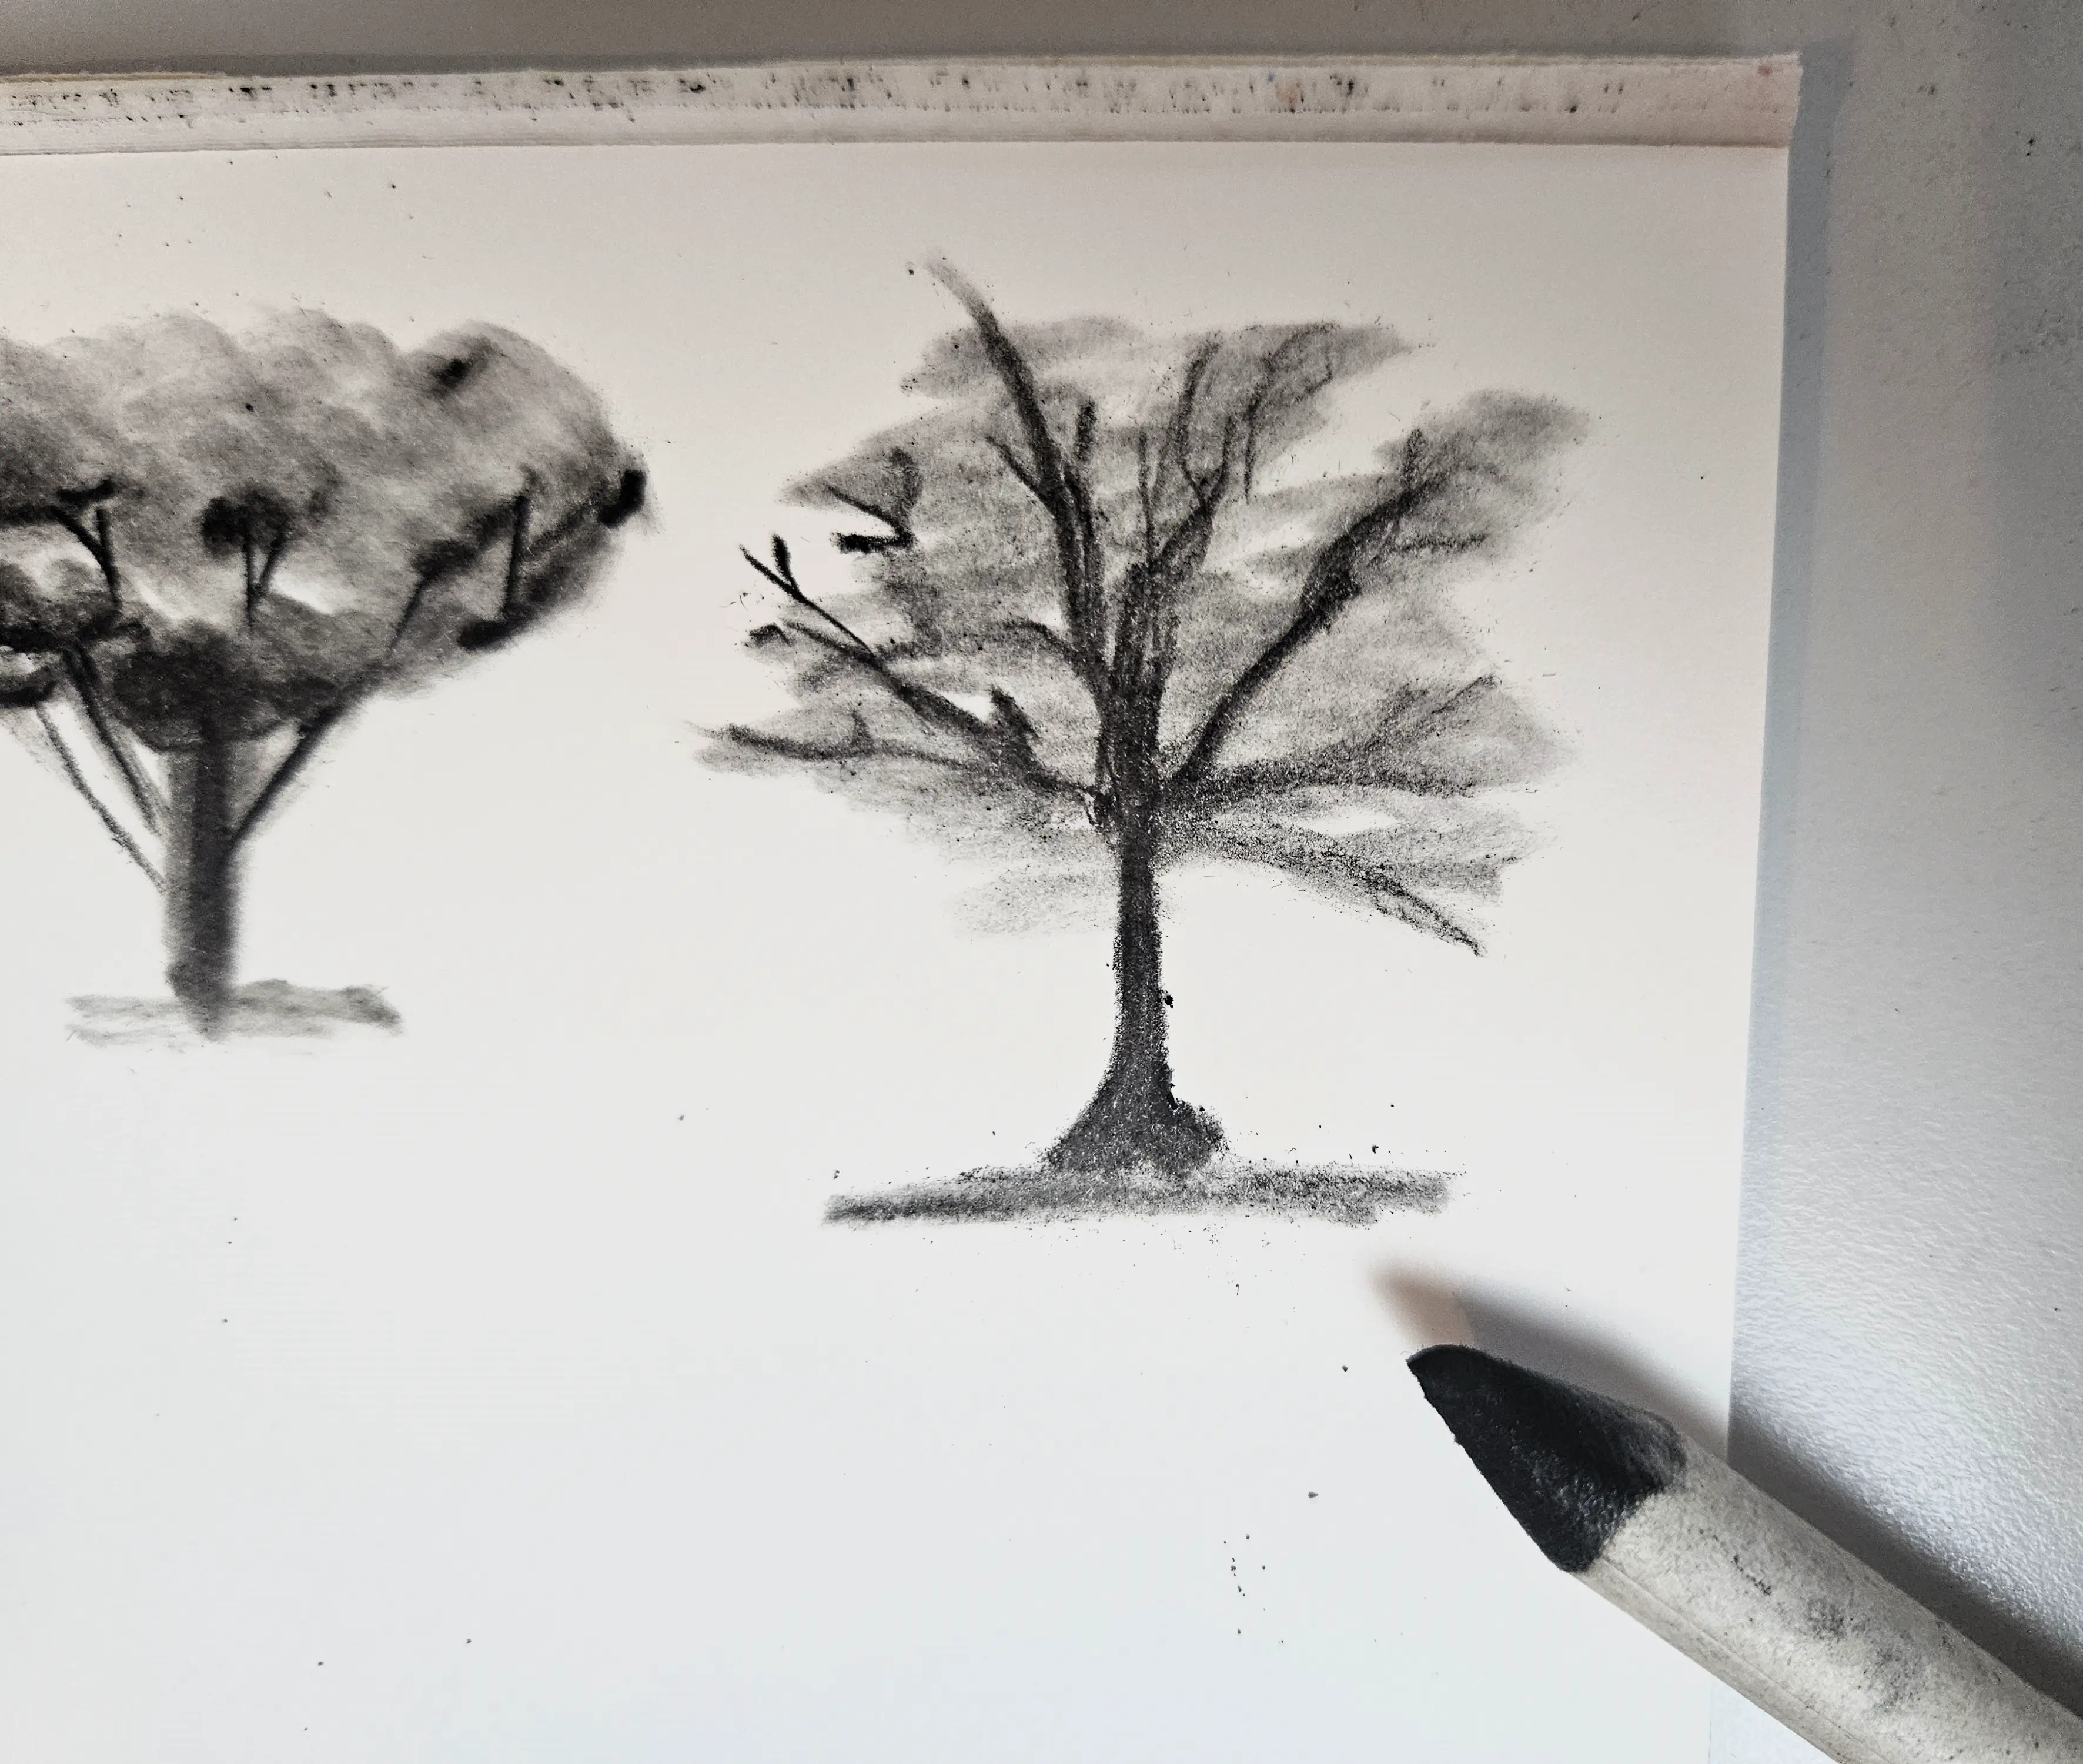
Another technique involves quickly sketching the drawing with a charcoal pencil. I mainly sketch the branches and the trunk, and add a little shadow at the bottom if I feel like it.
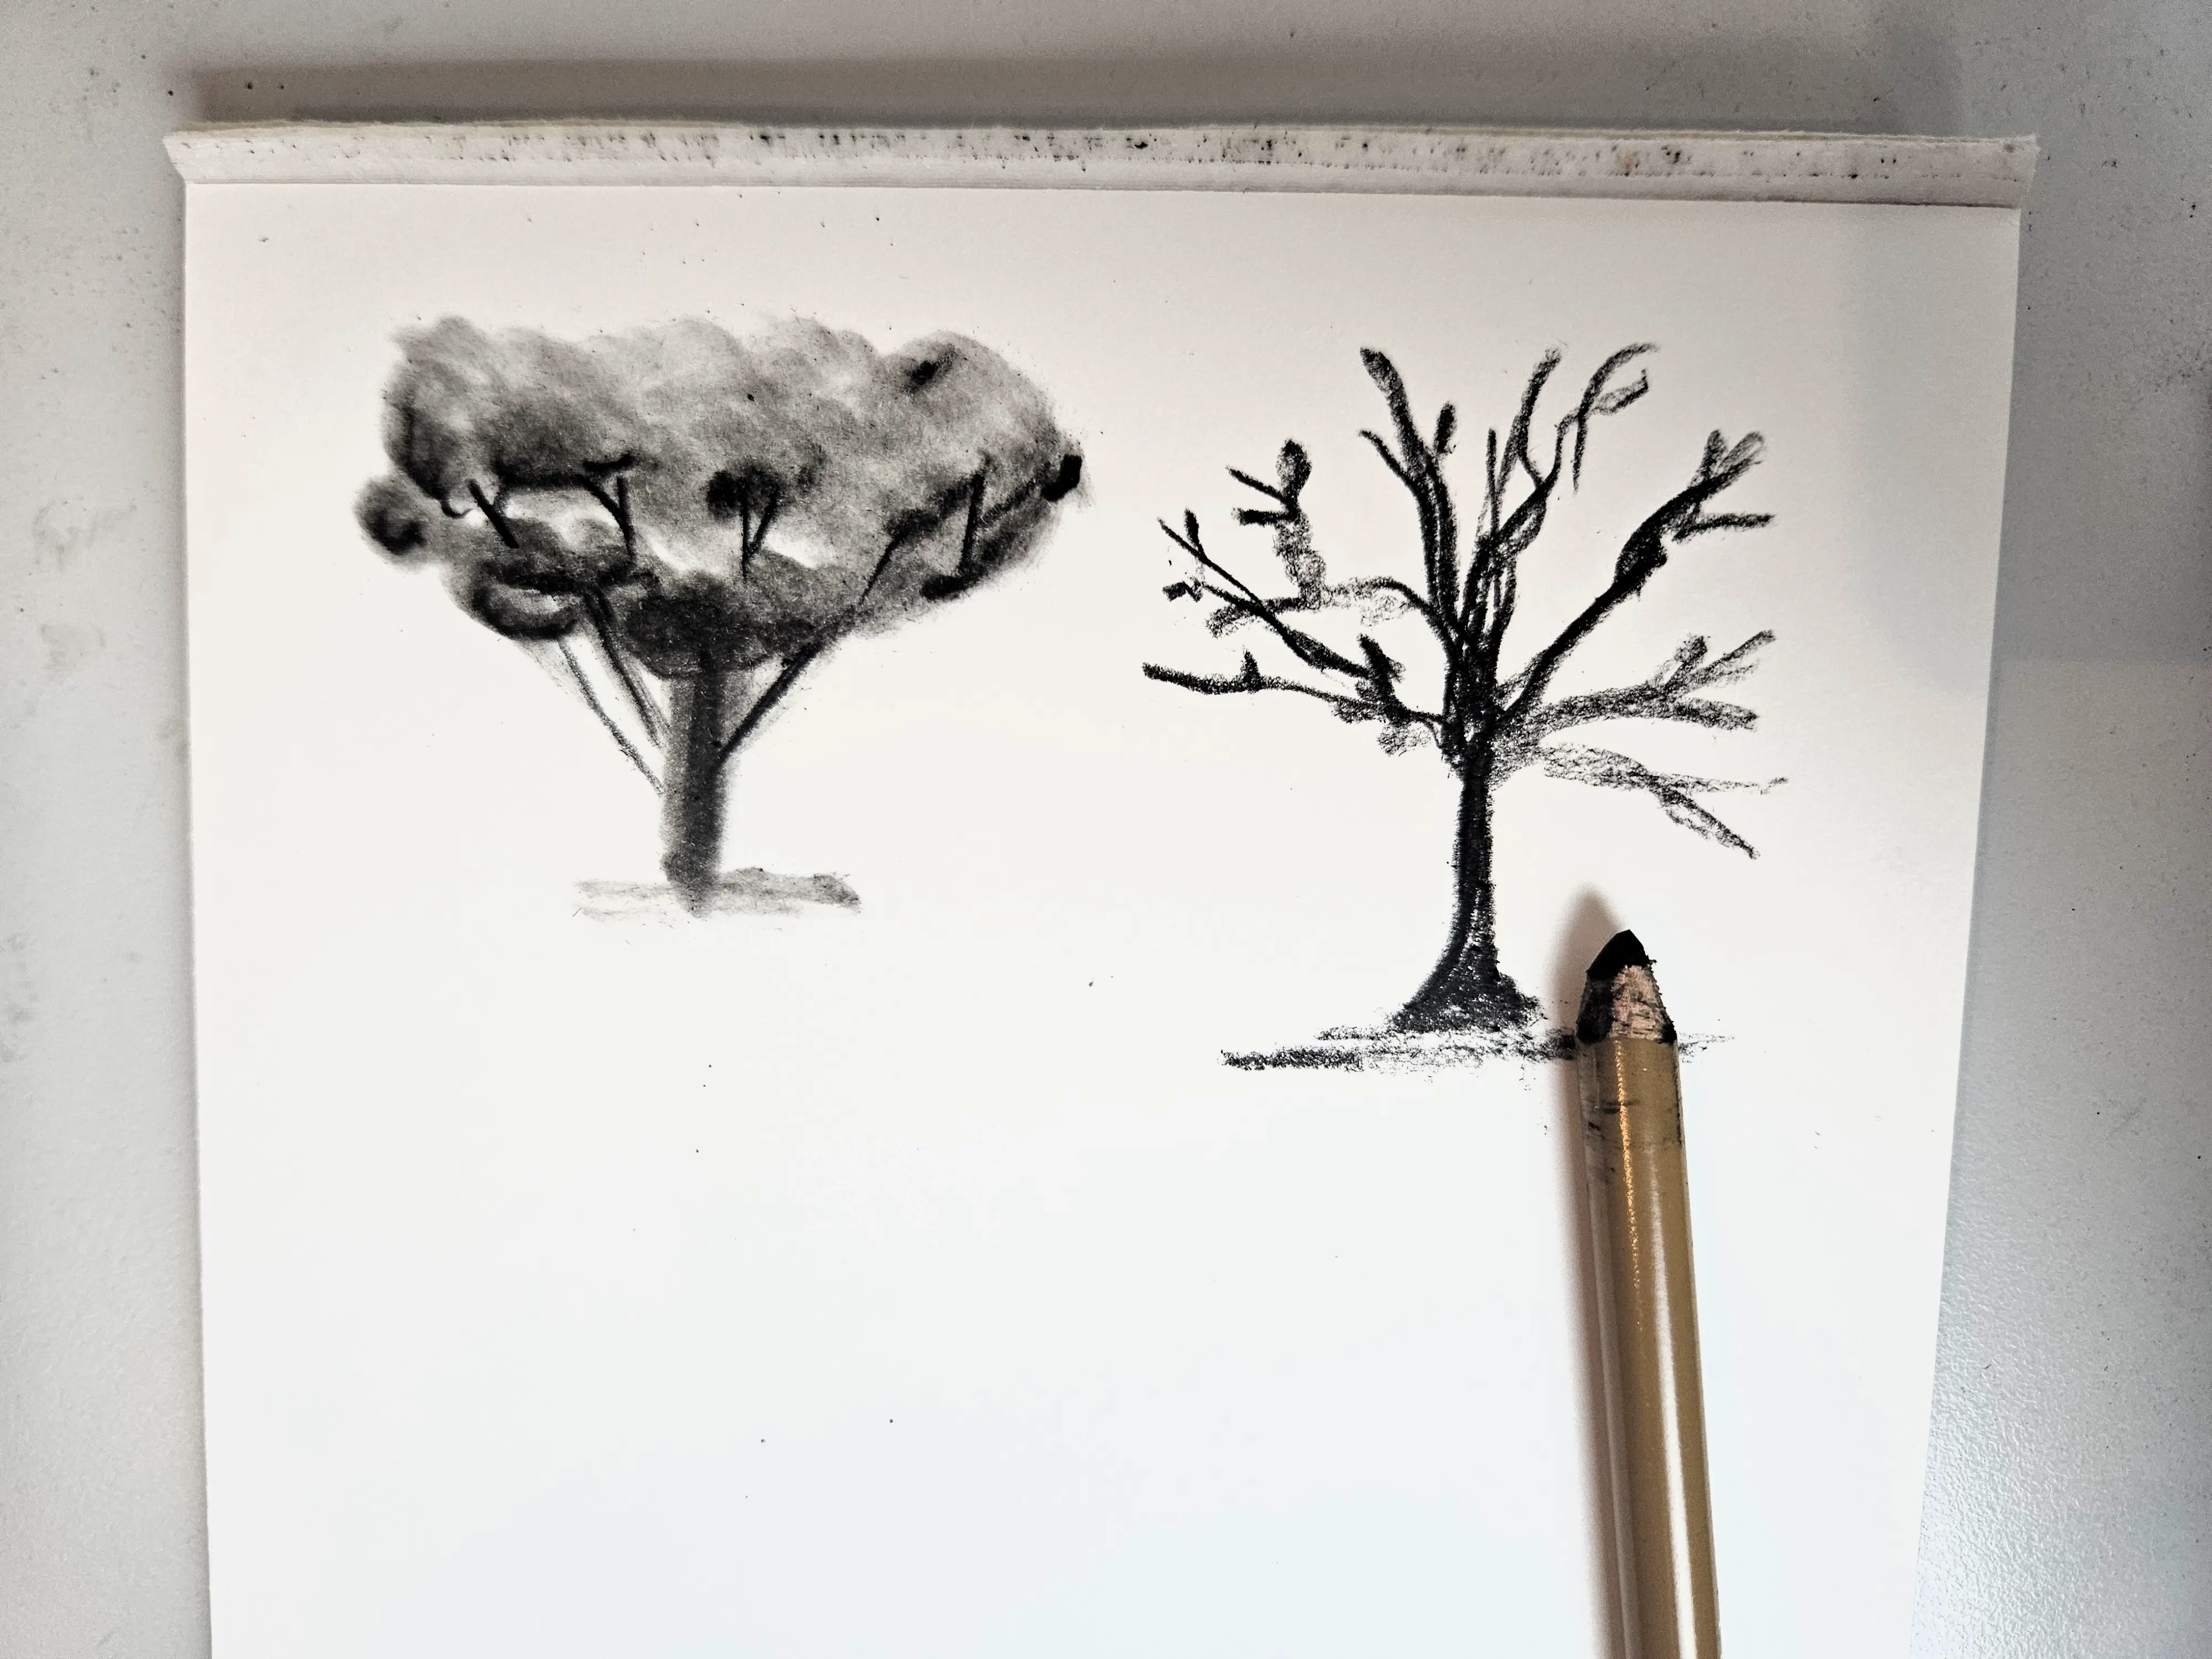
And then, likewise, I take my paper stump and add a bit more depth. I can make a circular motion and horizontal strokes with my stump to somewhat mimic the foliage and the shape of the leaves. Here is my second tree, sketched very quickly.
MOUNTAINS
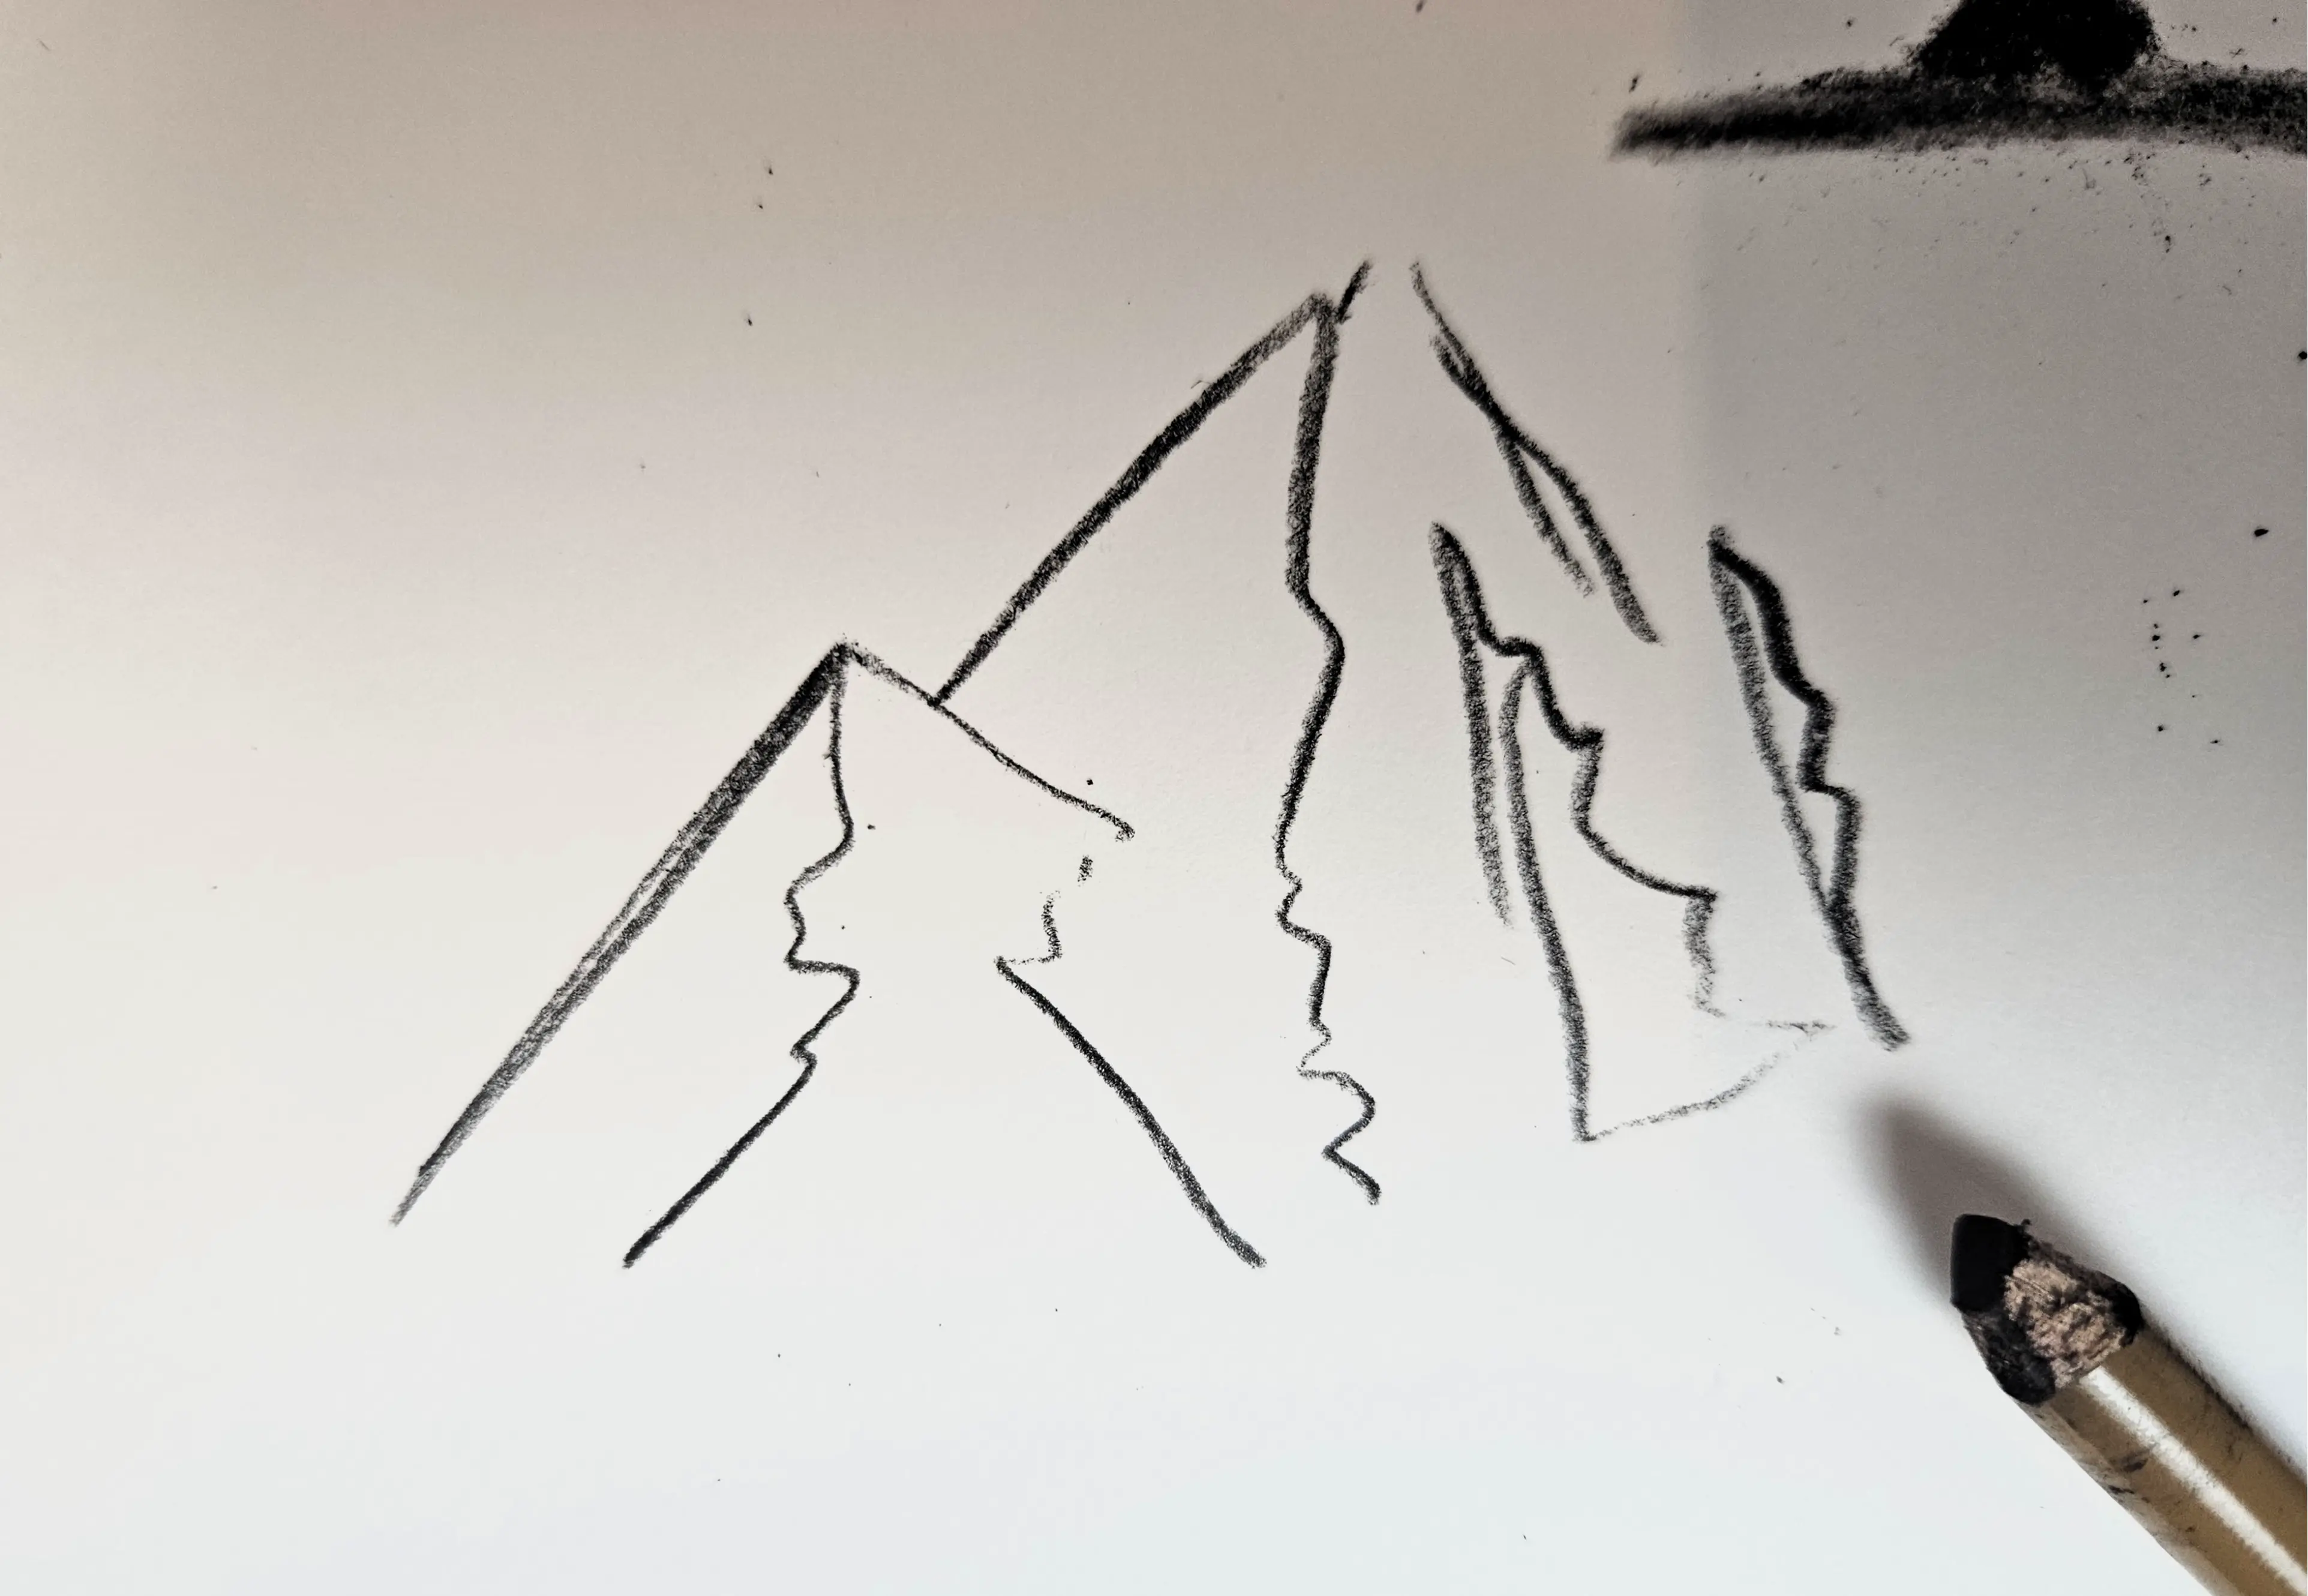
To draw a mountain, we first quickly sketch the mountain we want to draw. To make it simple, mountains generally have a triangular shape with small zigzags inside that will help us delineate the mountain's shadow areas.
Once the sketch is complete, this time I take my soft charcoal stick to shade the hollows in the mountains. I bring out the features as much as possible and create the highest contrast I can.
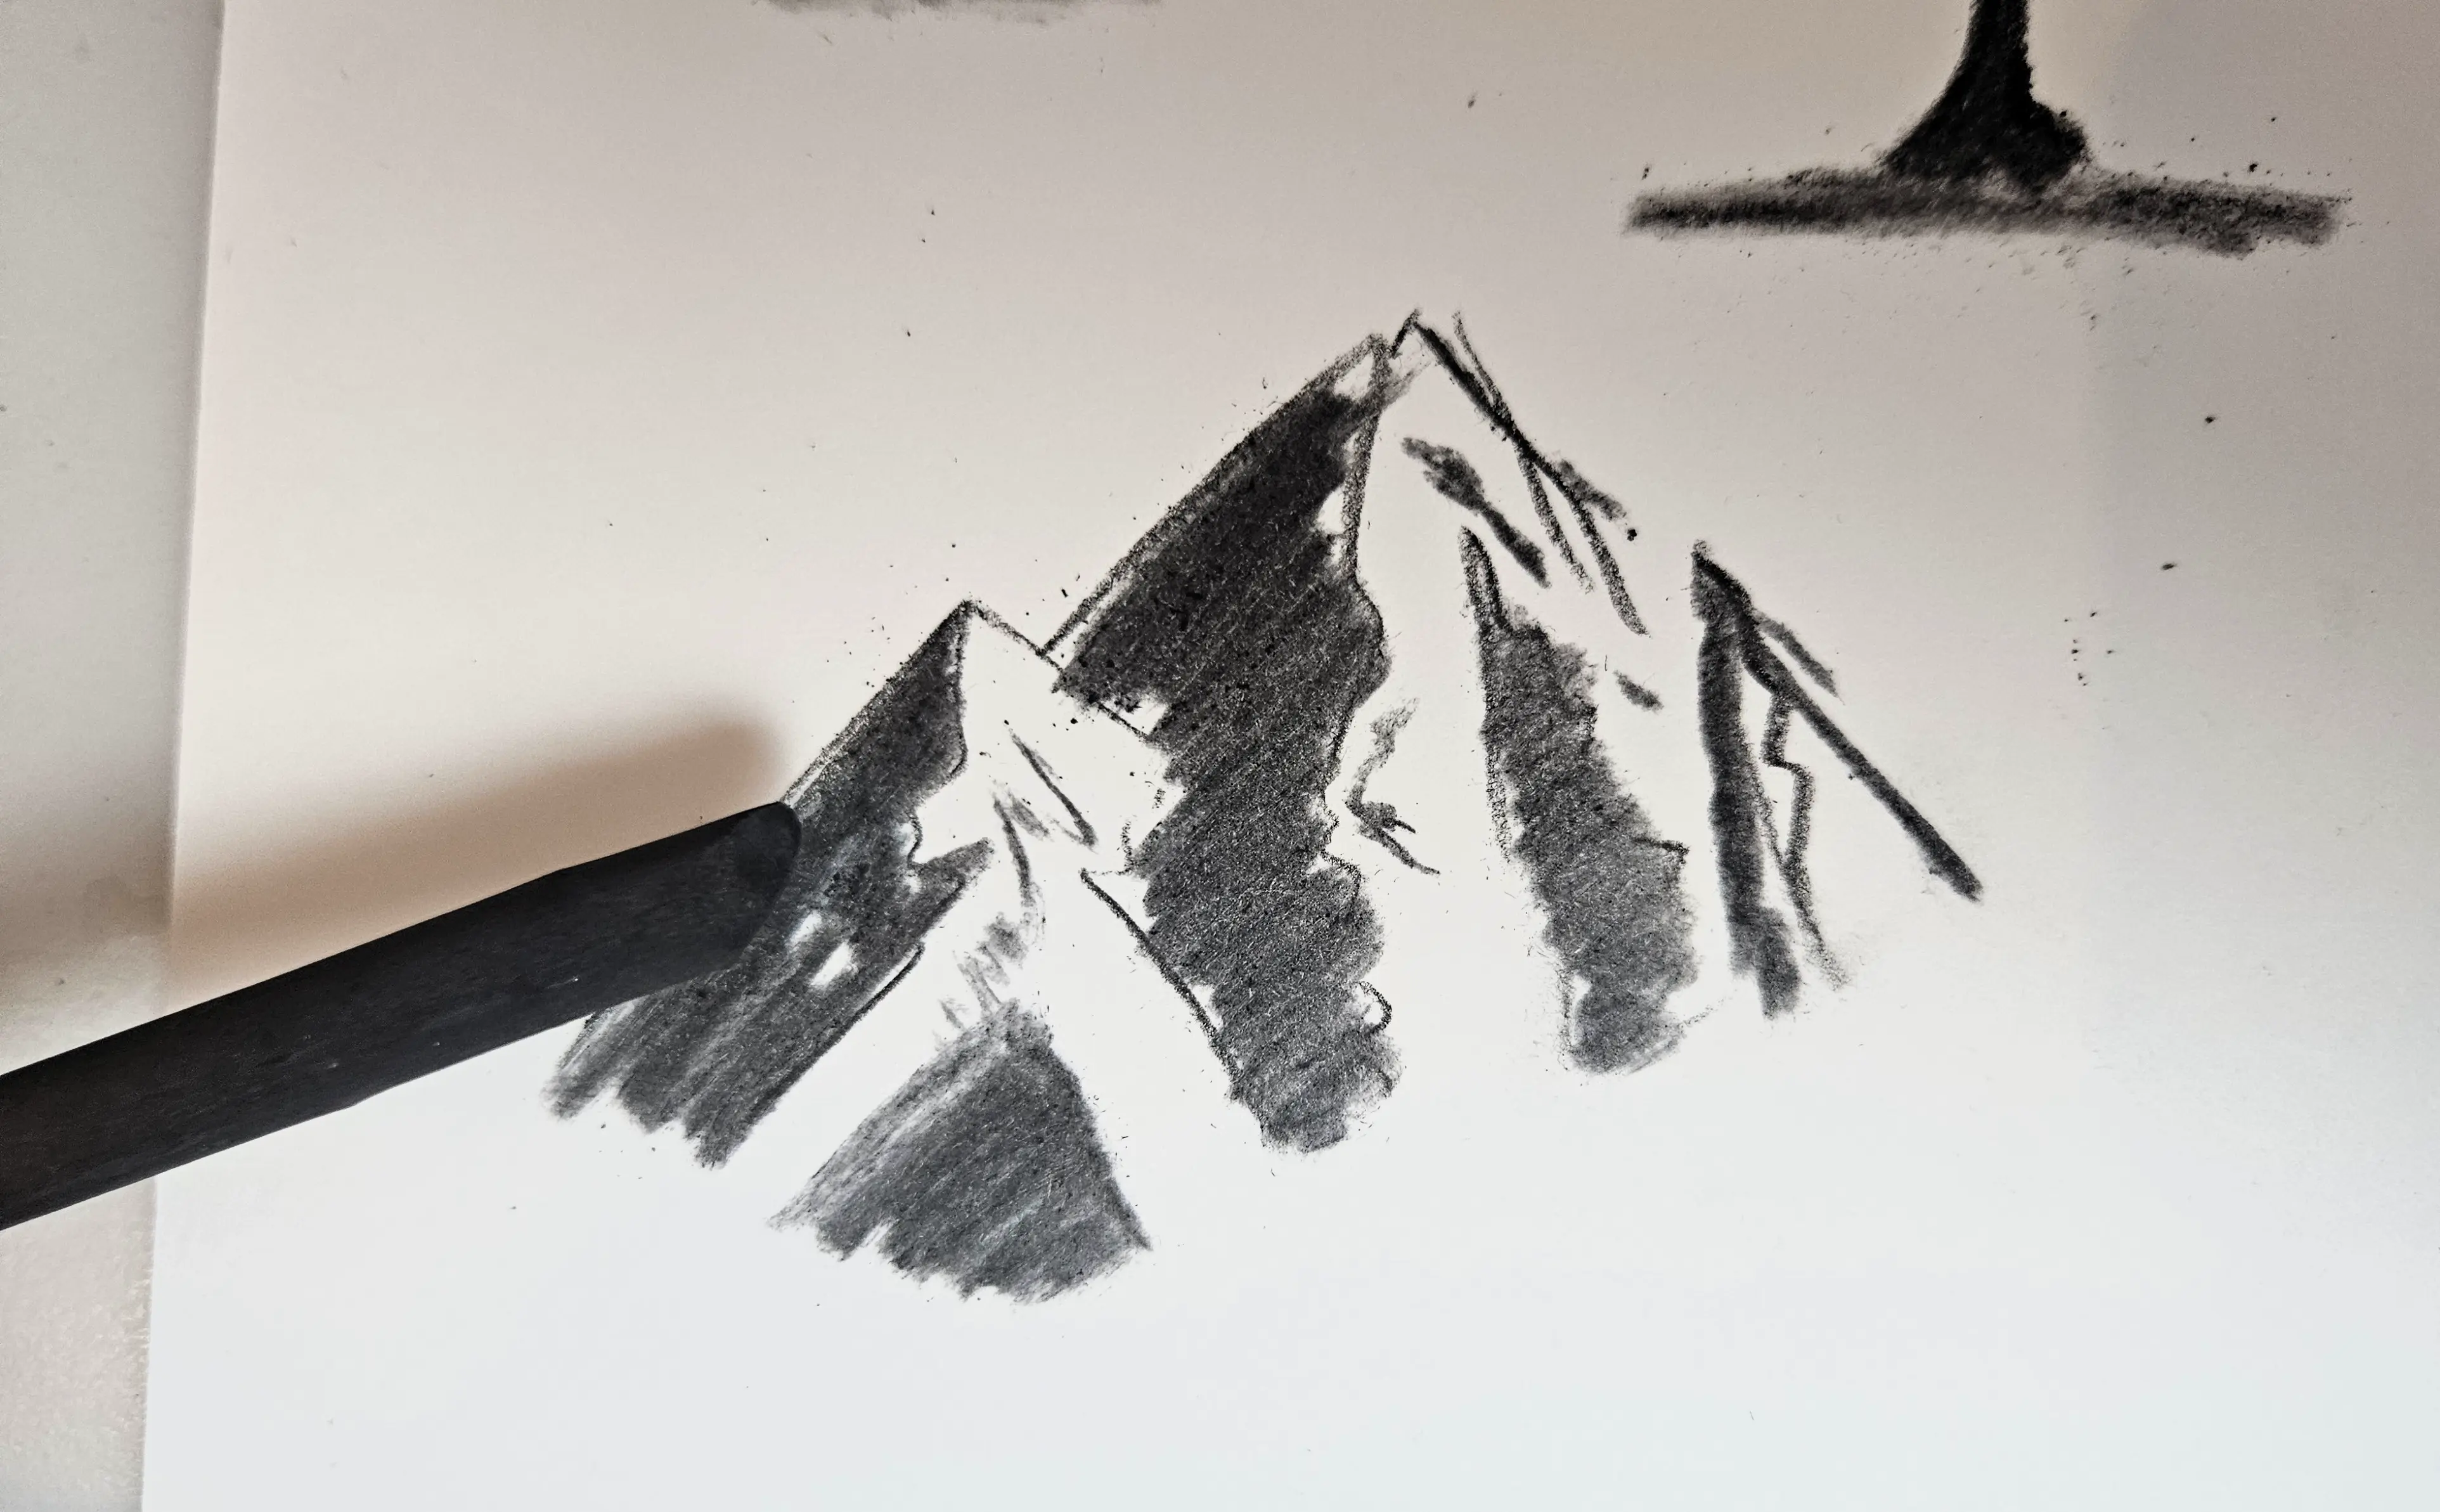
Very quickly, we see the mountain appear: the sun is coming from the right. Then, you can take your smudge tool or your finger to blur the dark part, and pick up some powder which you use for the lighter area, adding a bit of texture, little dots, small lines, etc.
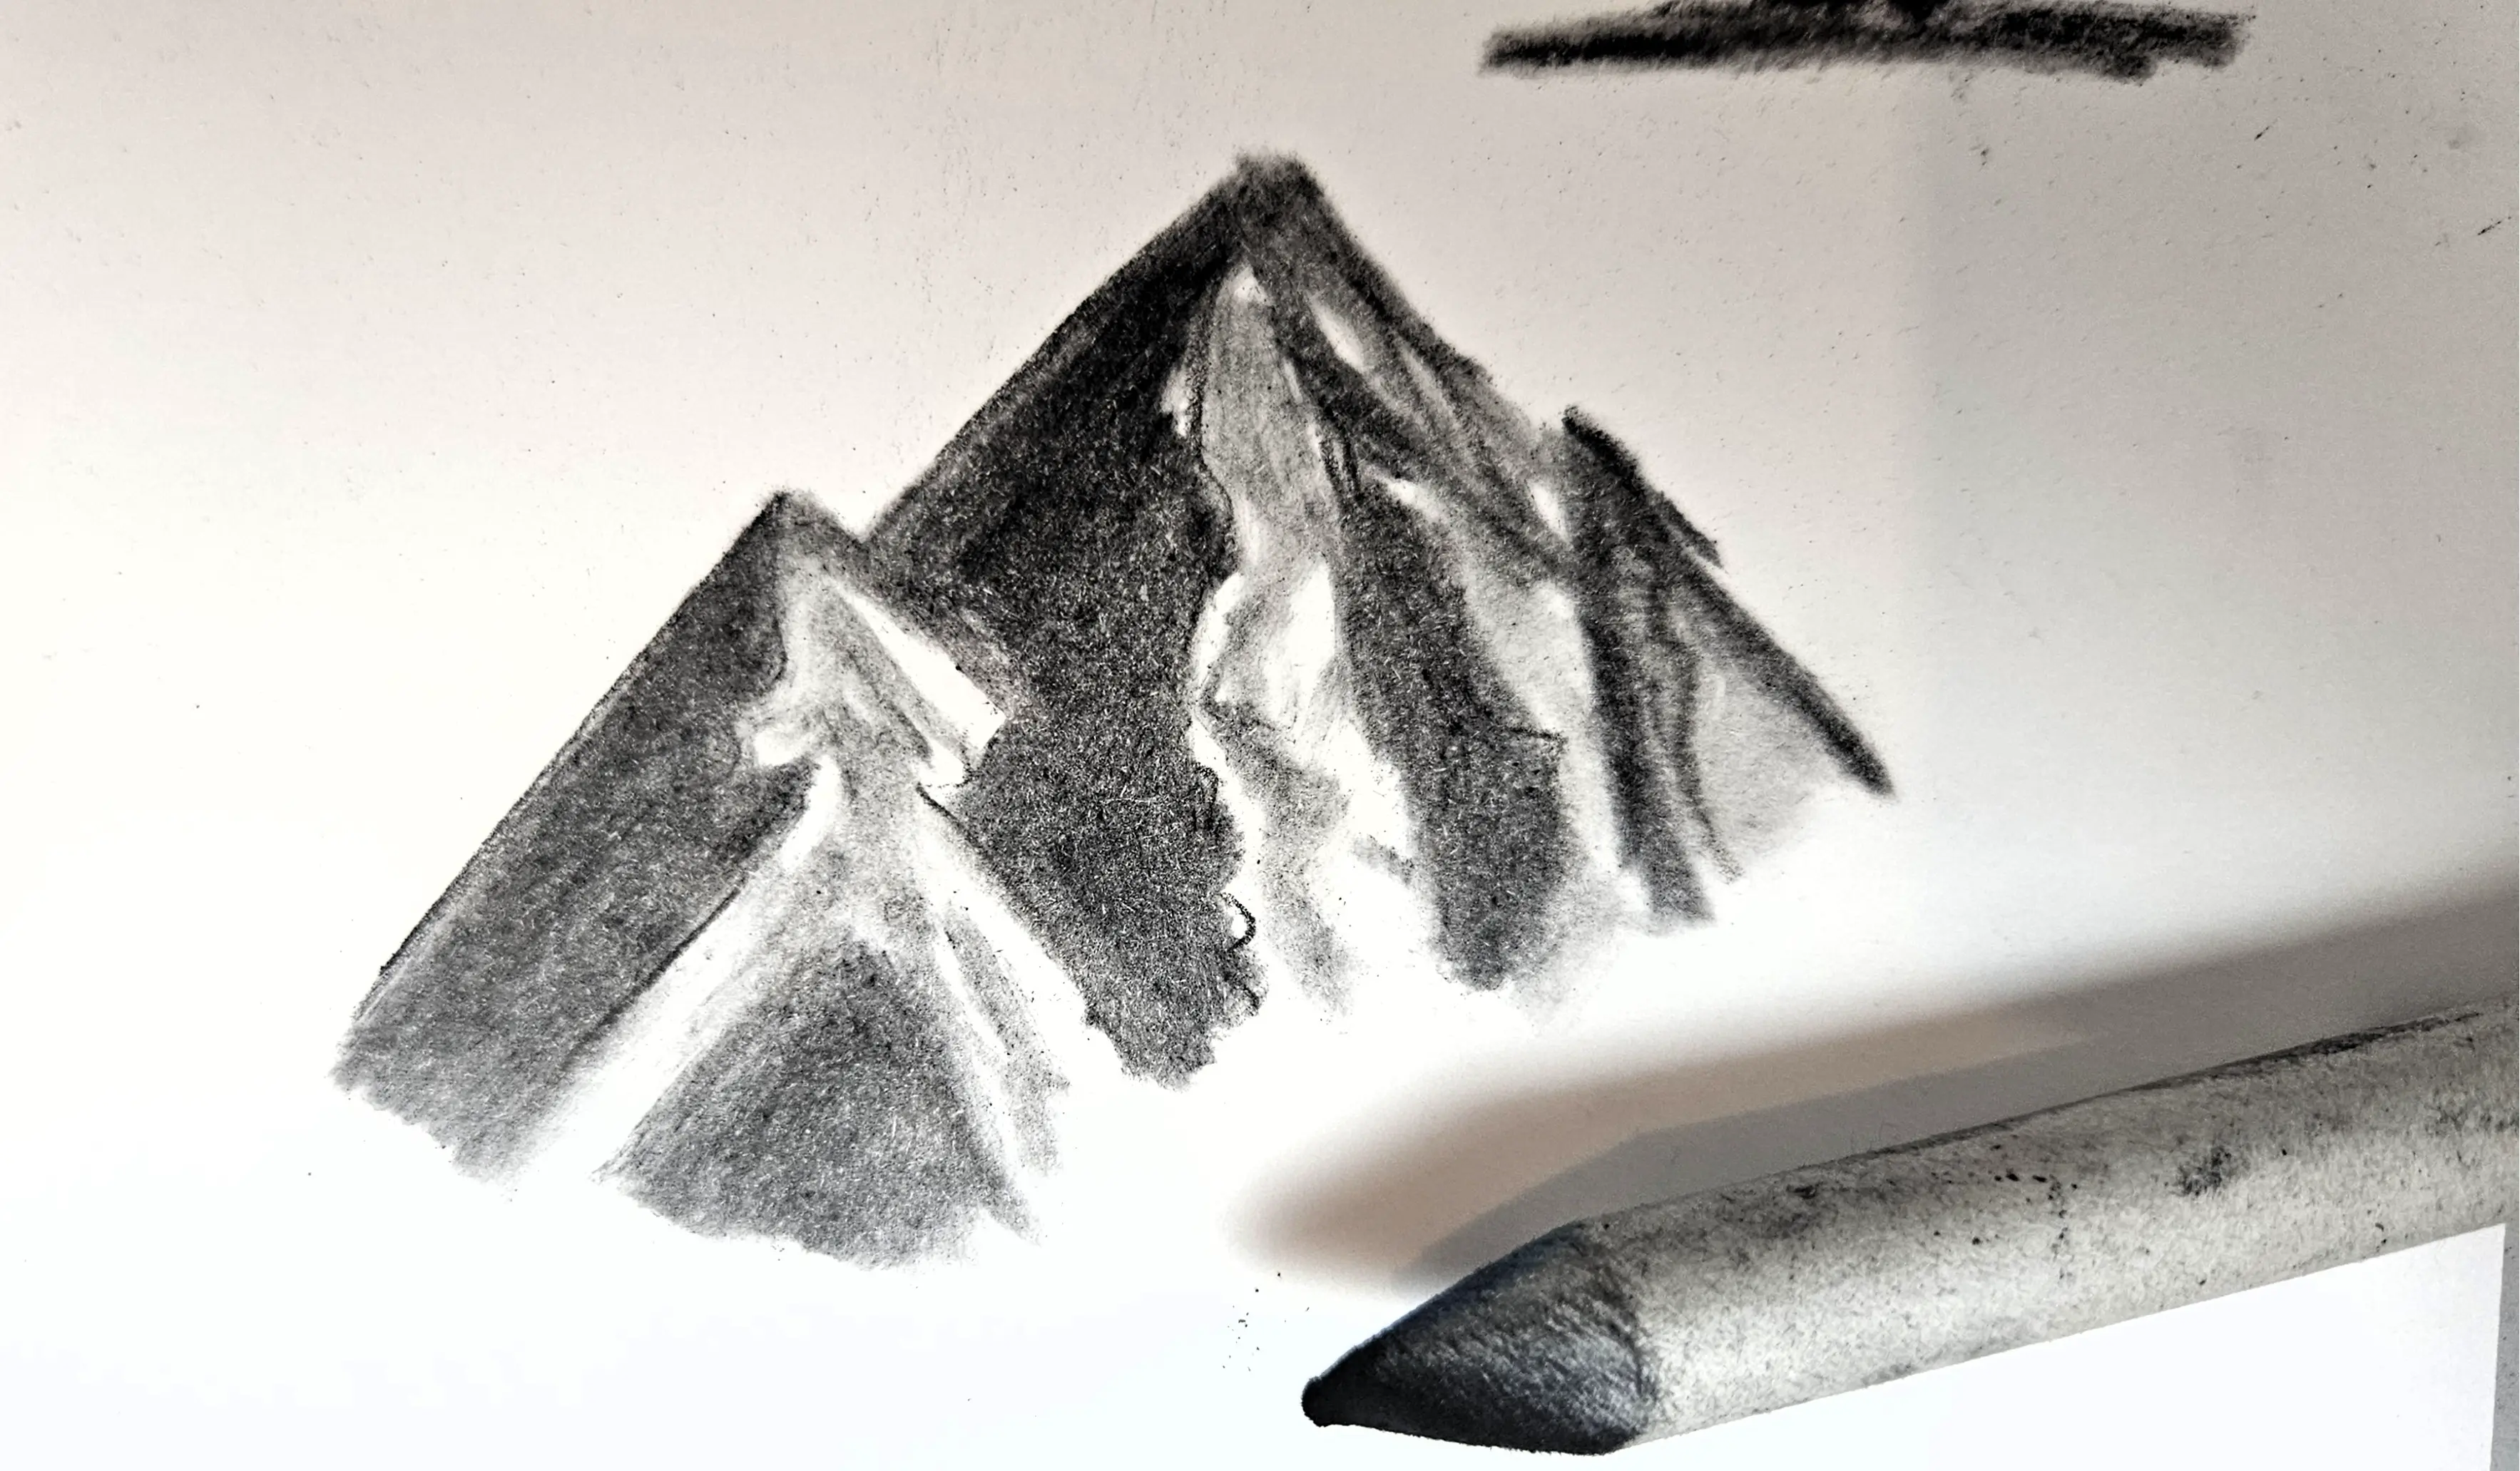
We can create an image easily in a few minutes.
DRAWING TEXTURES: WOOD, BRICK AND ROCK
To draw landscapes, you also need to practice creating several different types of textures: wood, rocks, bricks, pebbles, and other textures that can be found in a landscape.
To start, it's always the same thing, we outline the texture that we want. Here, I have depicted rocks, bricks and small pebbles. Don't mind the yellow on the drawing, that's my previous drawing overflowing. I can also add some shading with either my soft charcoal stick or my charcoal pencil.
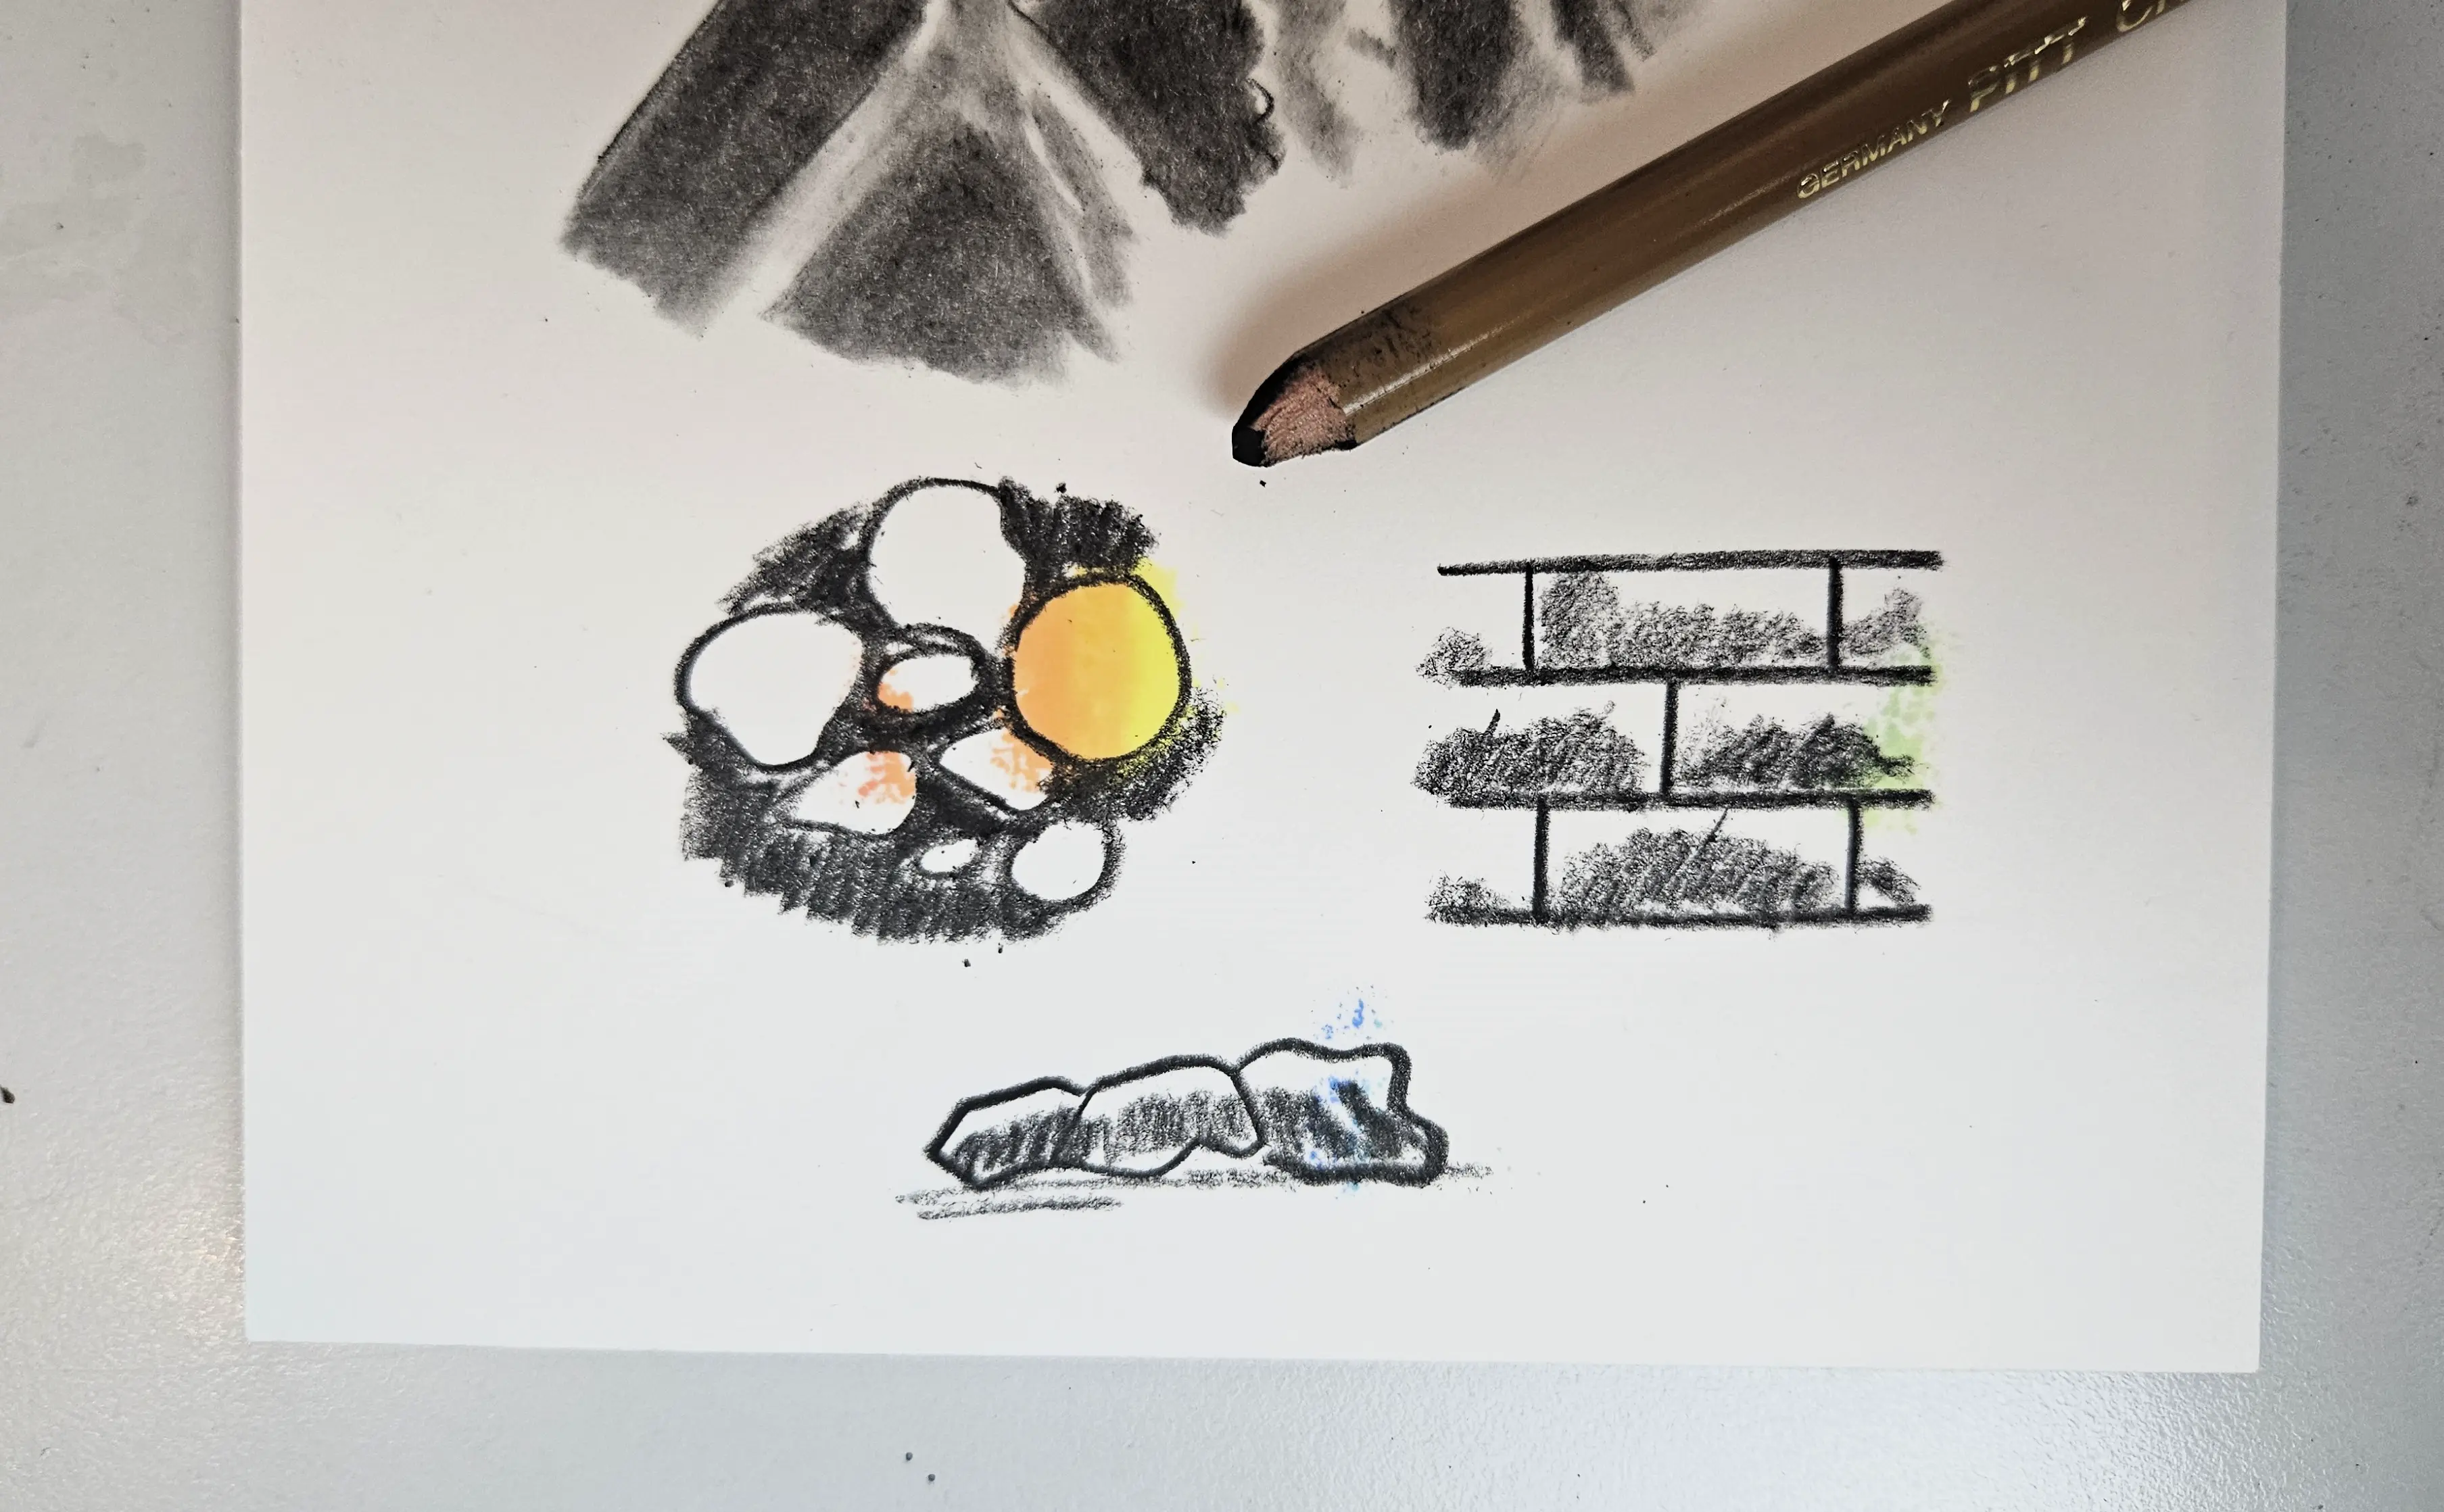
Then, again, I take my paper stump and I blend until I get a result that I'm happy with.
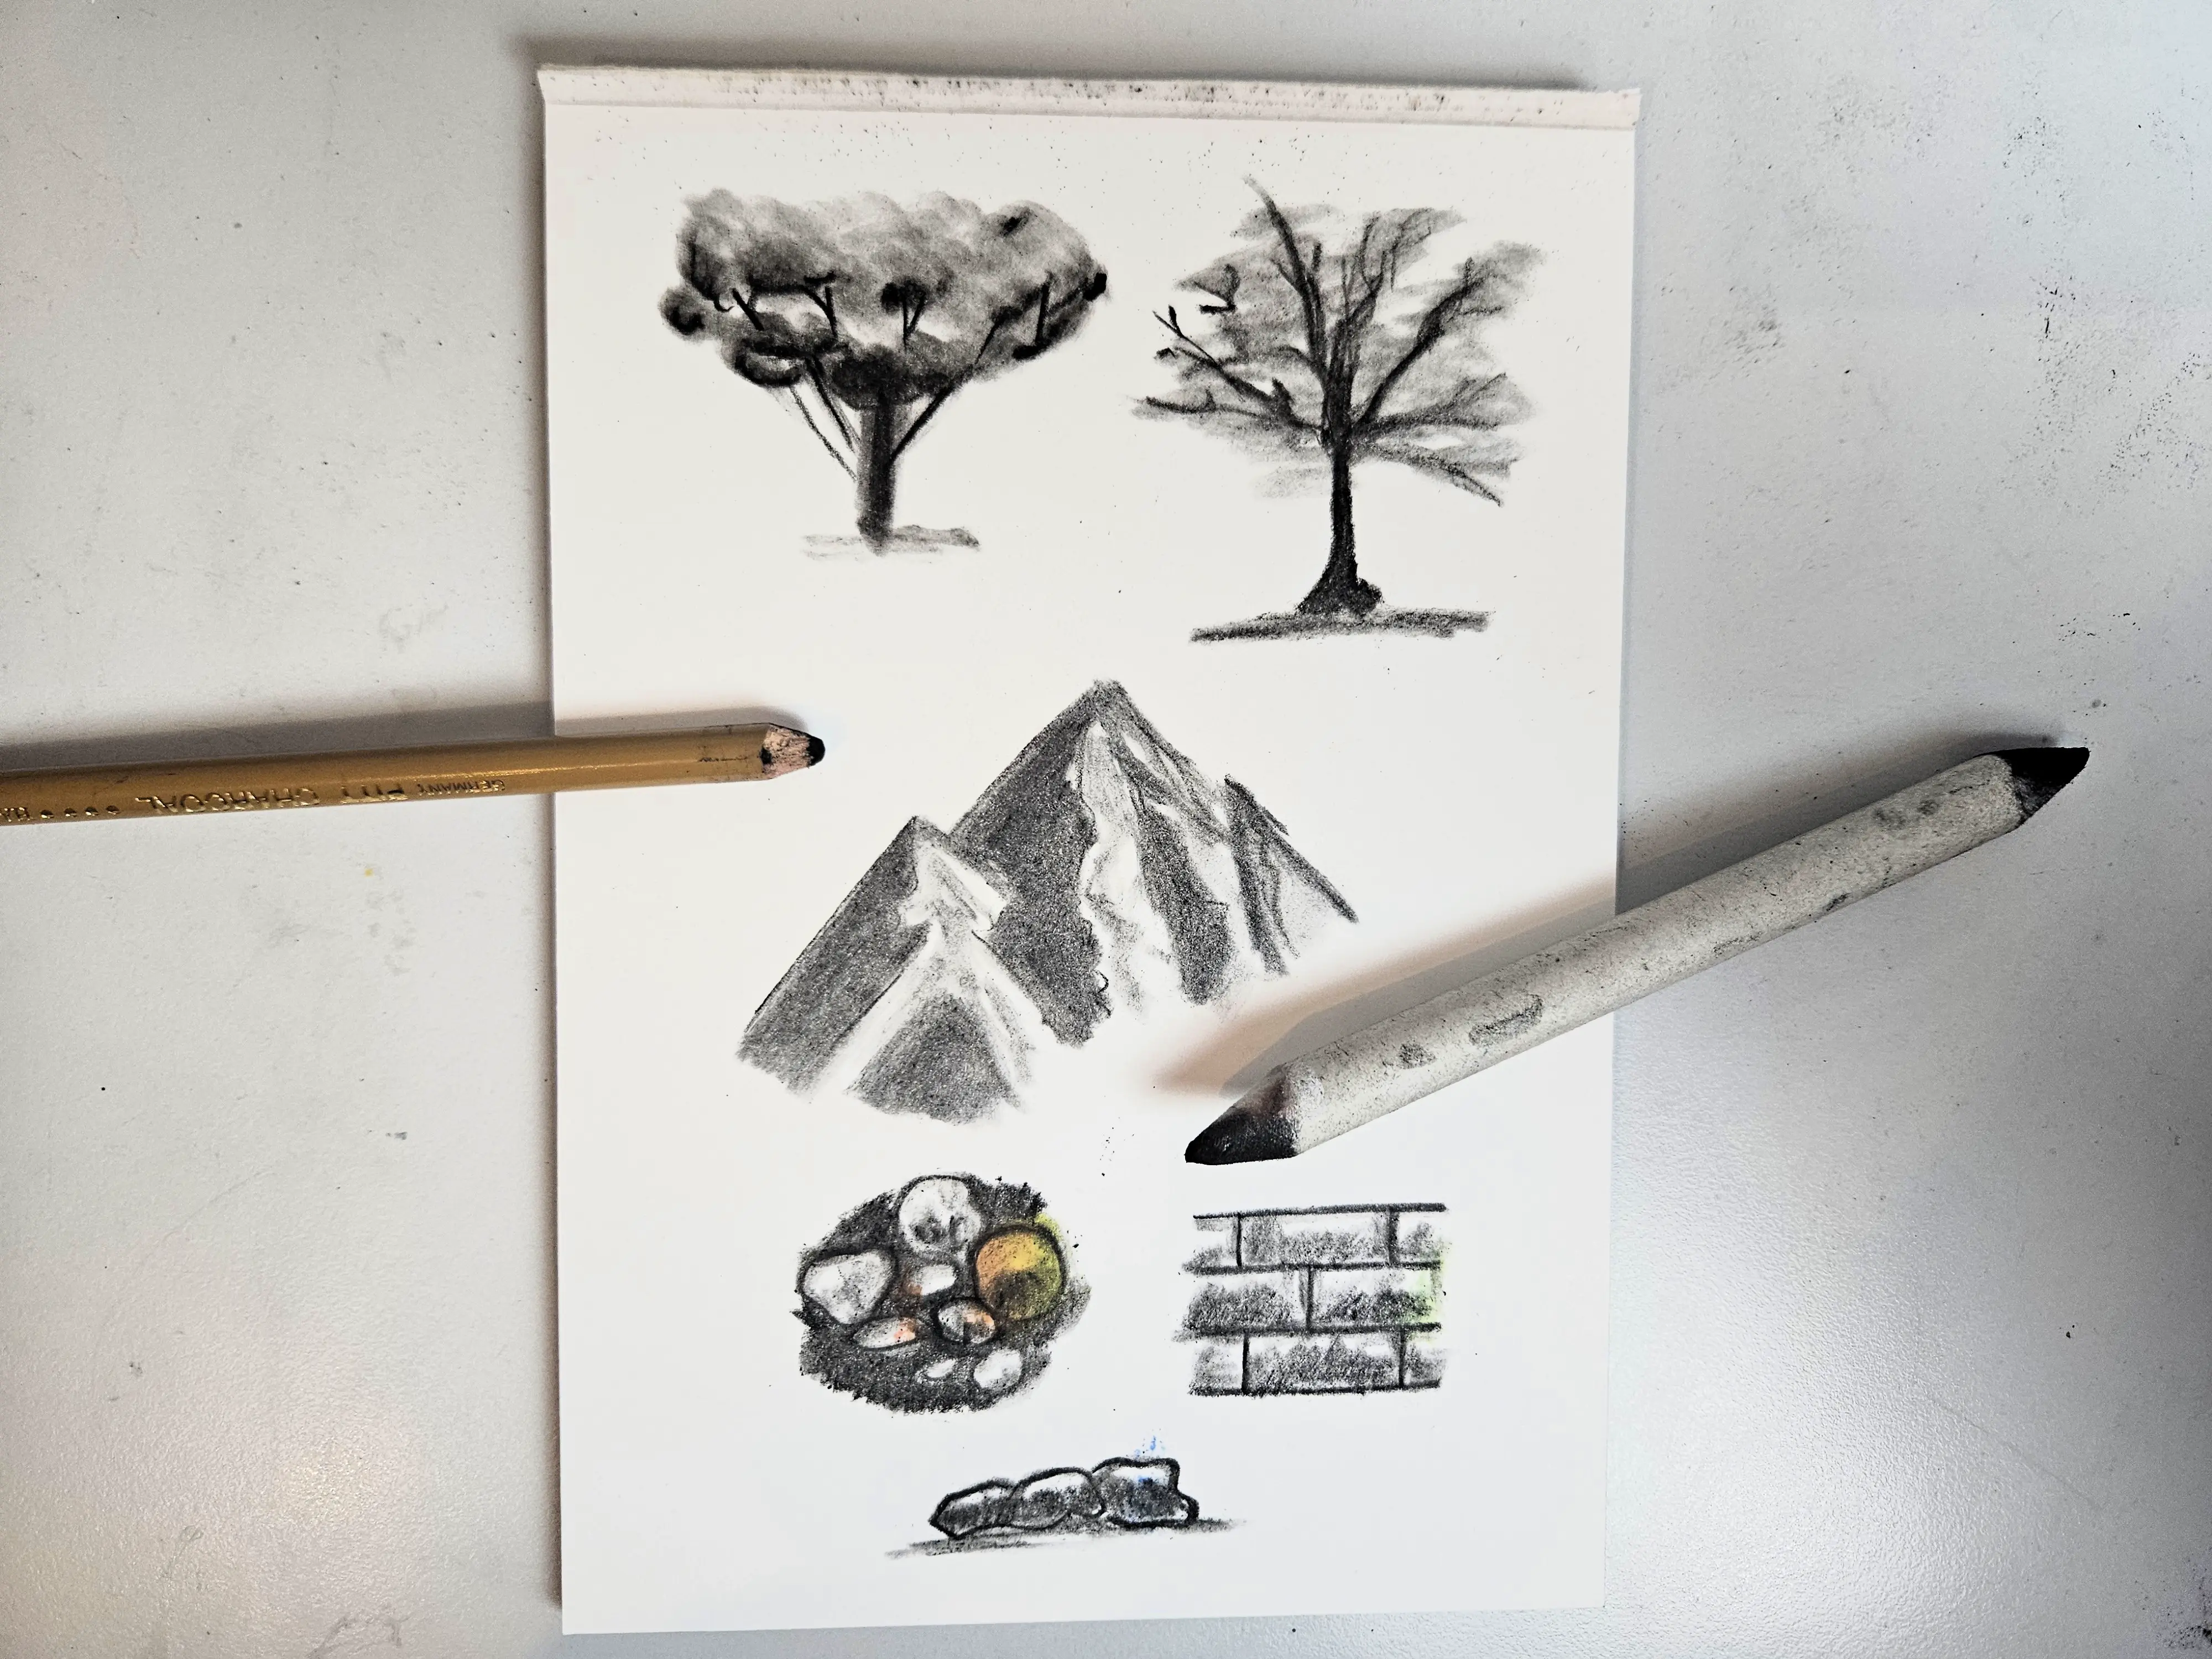
And there you have it, in just a few minutes, you can have a page of small sketches. You can practice drawing what you see outside. First, you sketch in simple shapes, then you shade briefly, deepen some of the shadows, and finally, you blend. You can also use a kneaded eraser to correct parts of your drawing or to create light areas.
To draw a slightly more complex landscape, you should choose a landscape that inspires you, but also one with strong contrasts, so that the drawing stands out well in charcoal. You can choose mountainous landscapes, a forest, a beach, etc. If you are a beginner, make sure the landscape is fairly simple with few details.
I chose to create a landscape from my imagination, in order to try and incorporate all the elements we've seen before (trees, rocks, mountains).
A CHARCOAL LANDSCAPE STEP BY STEP
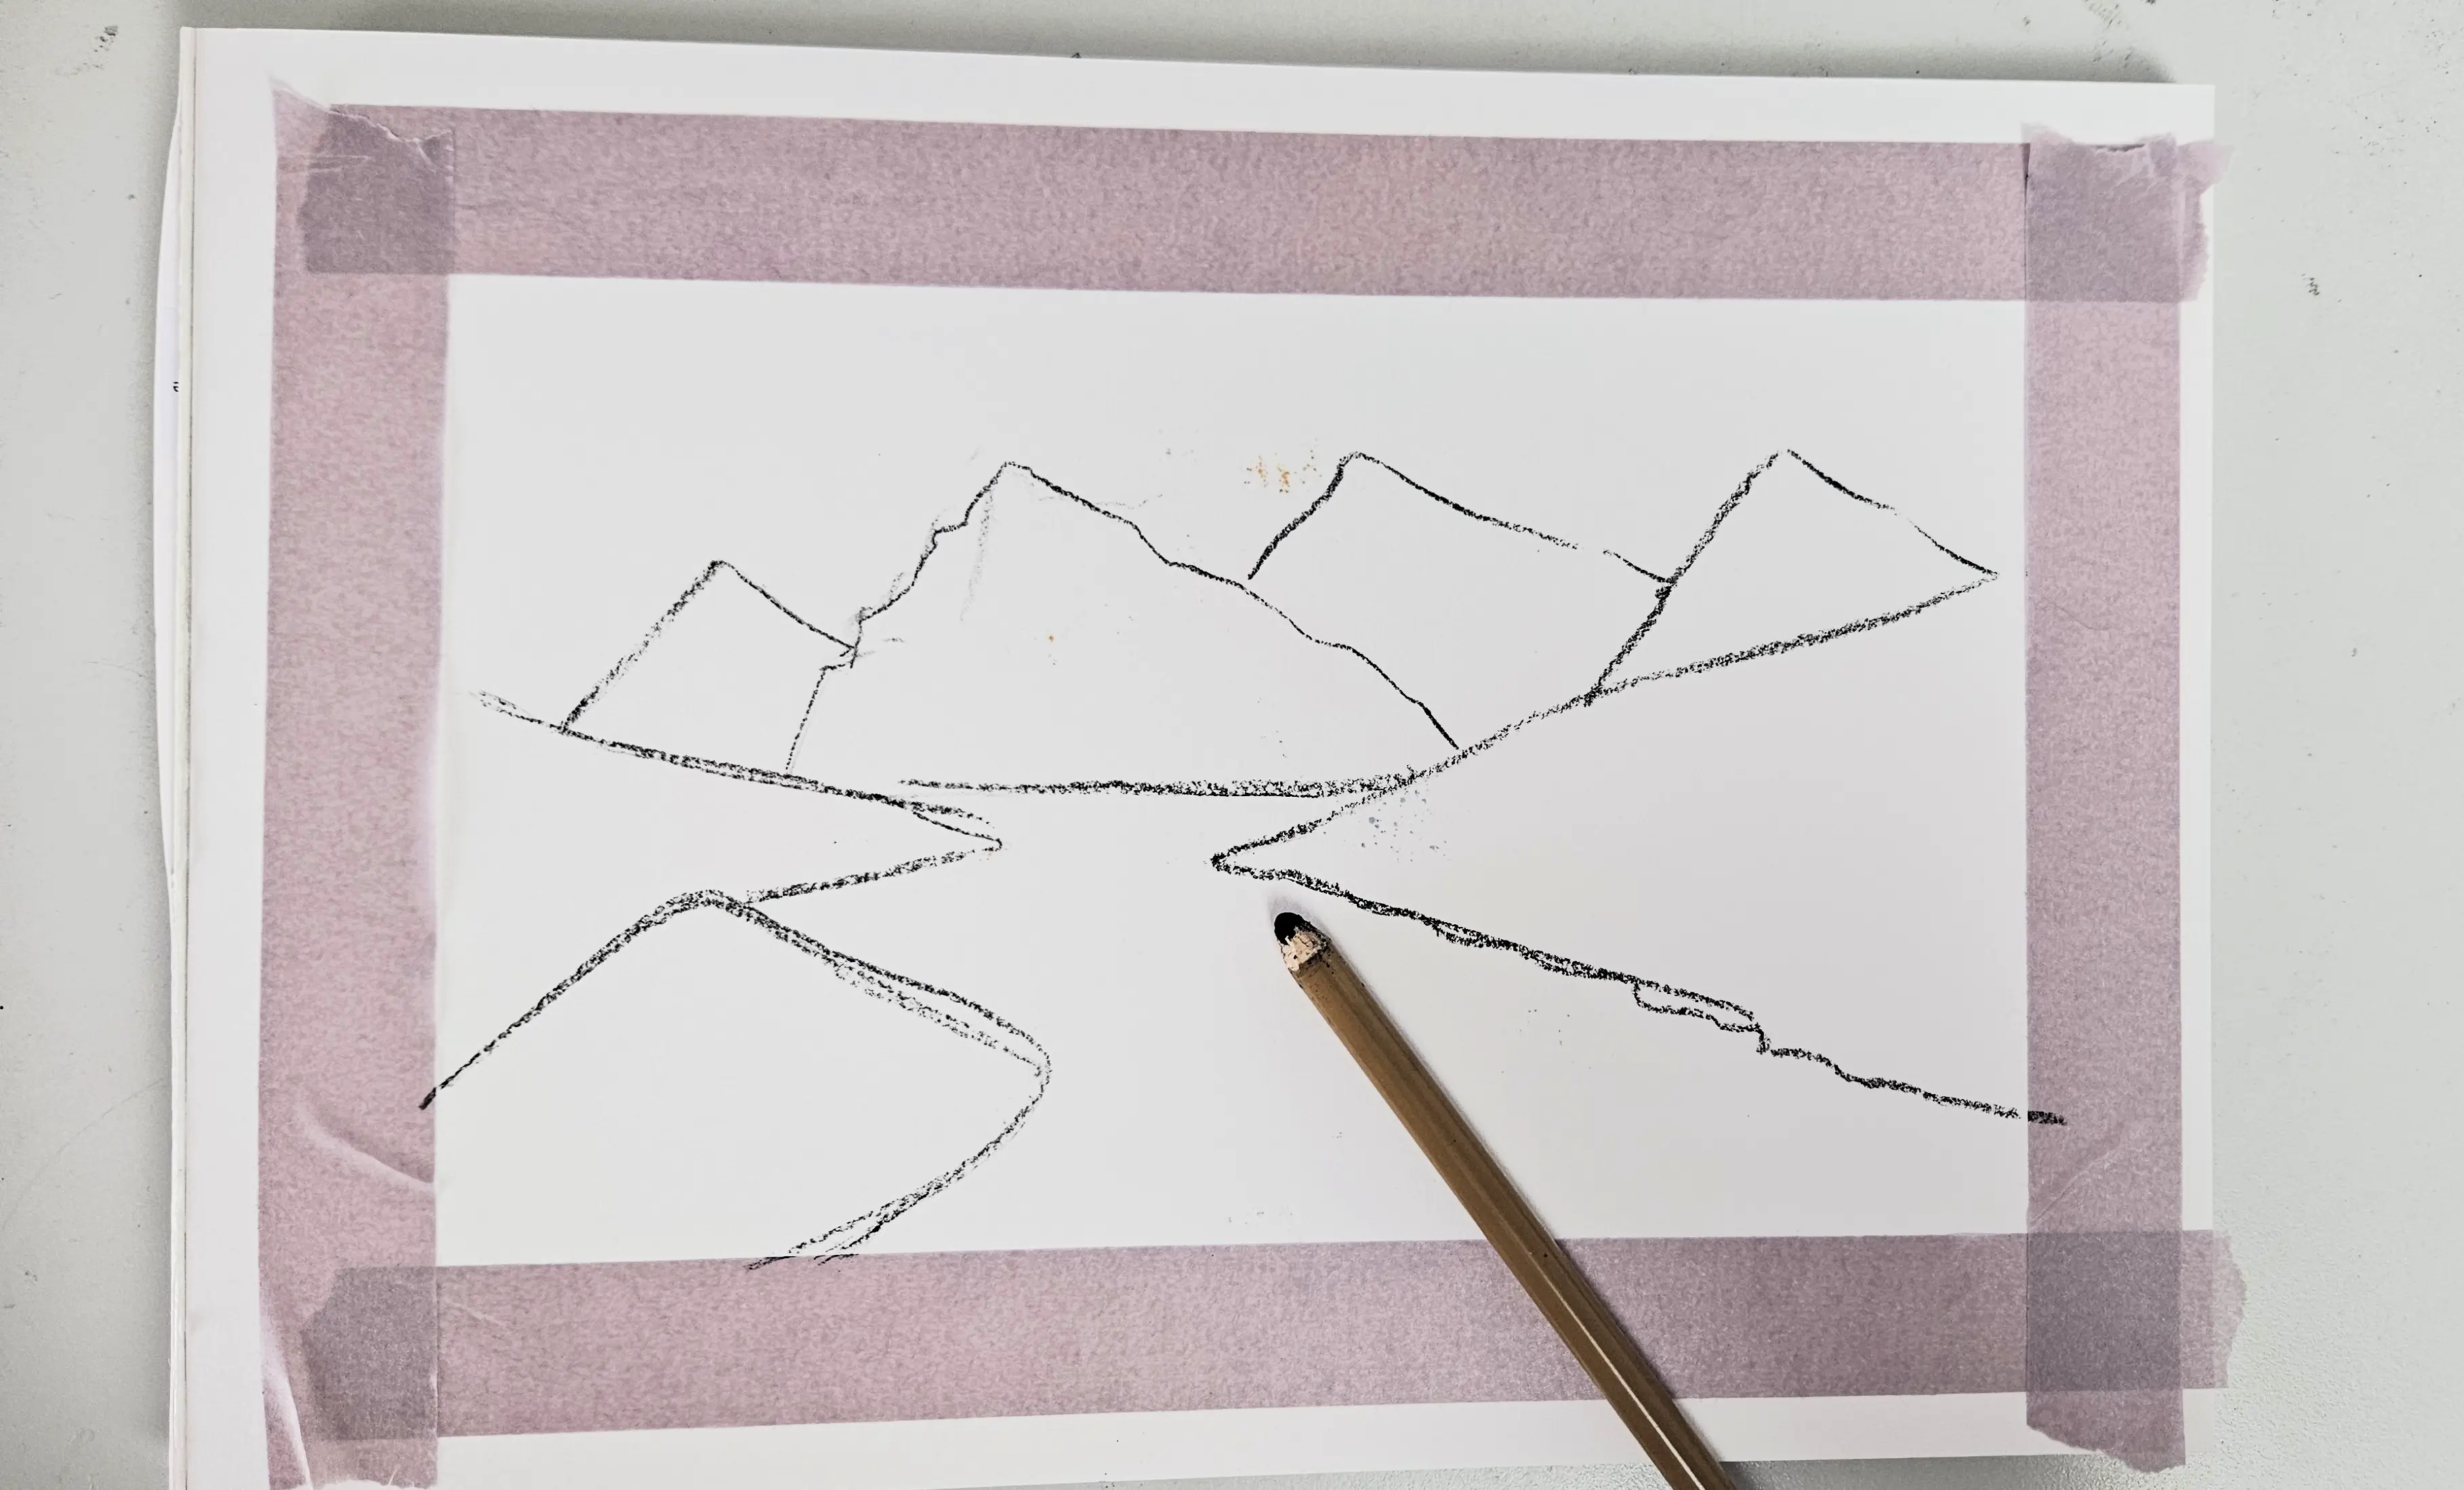
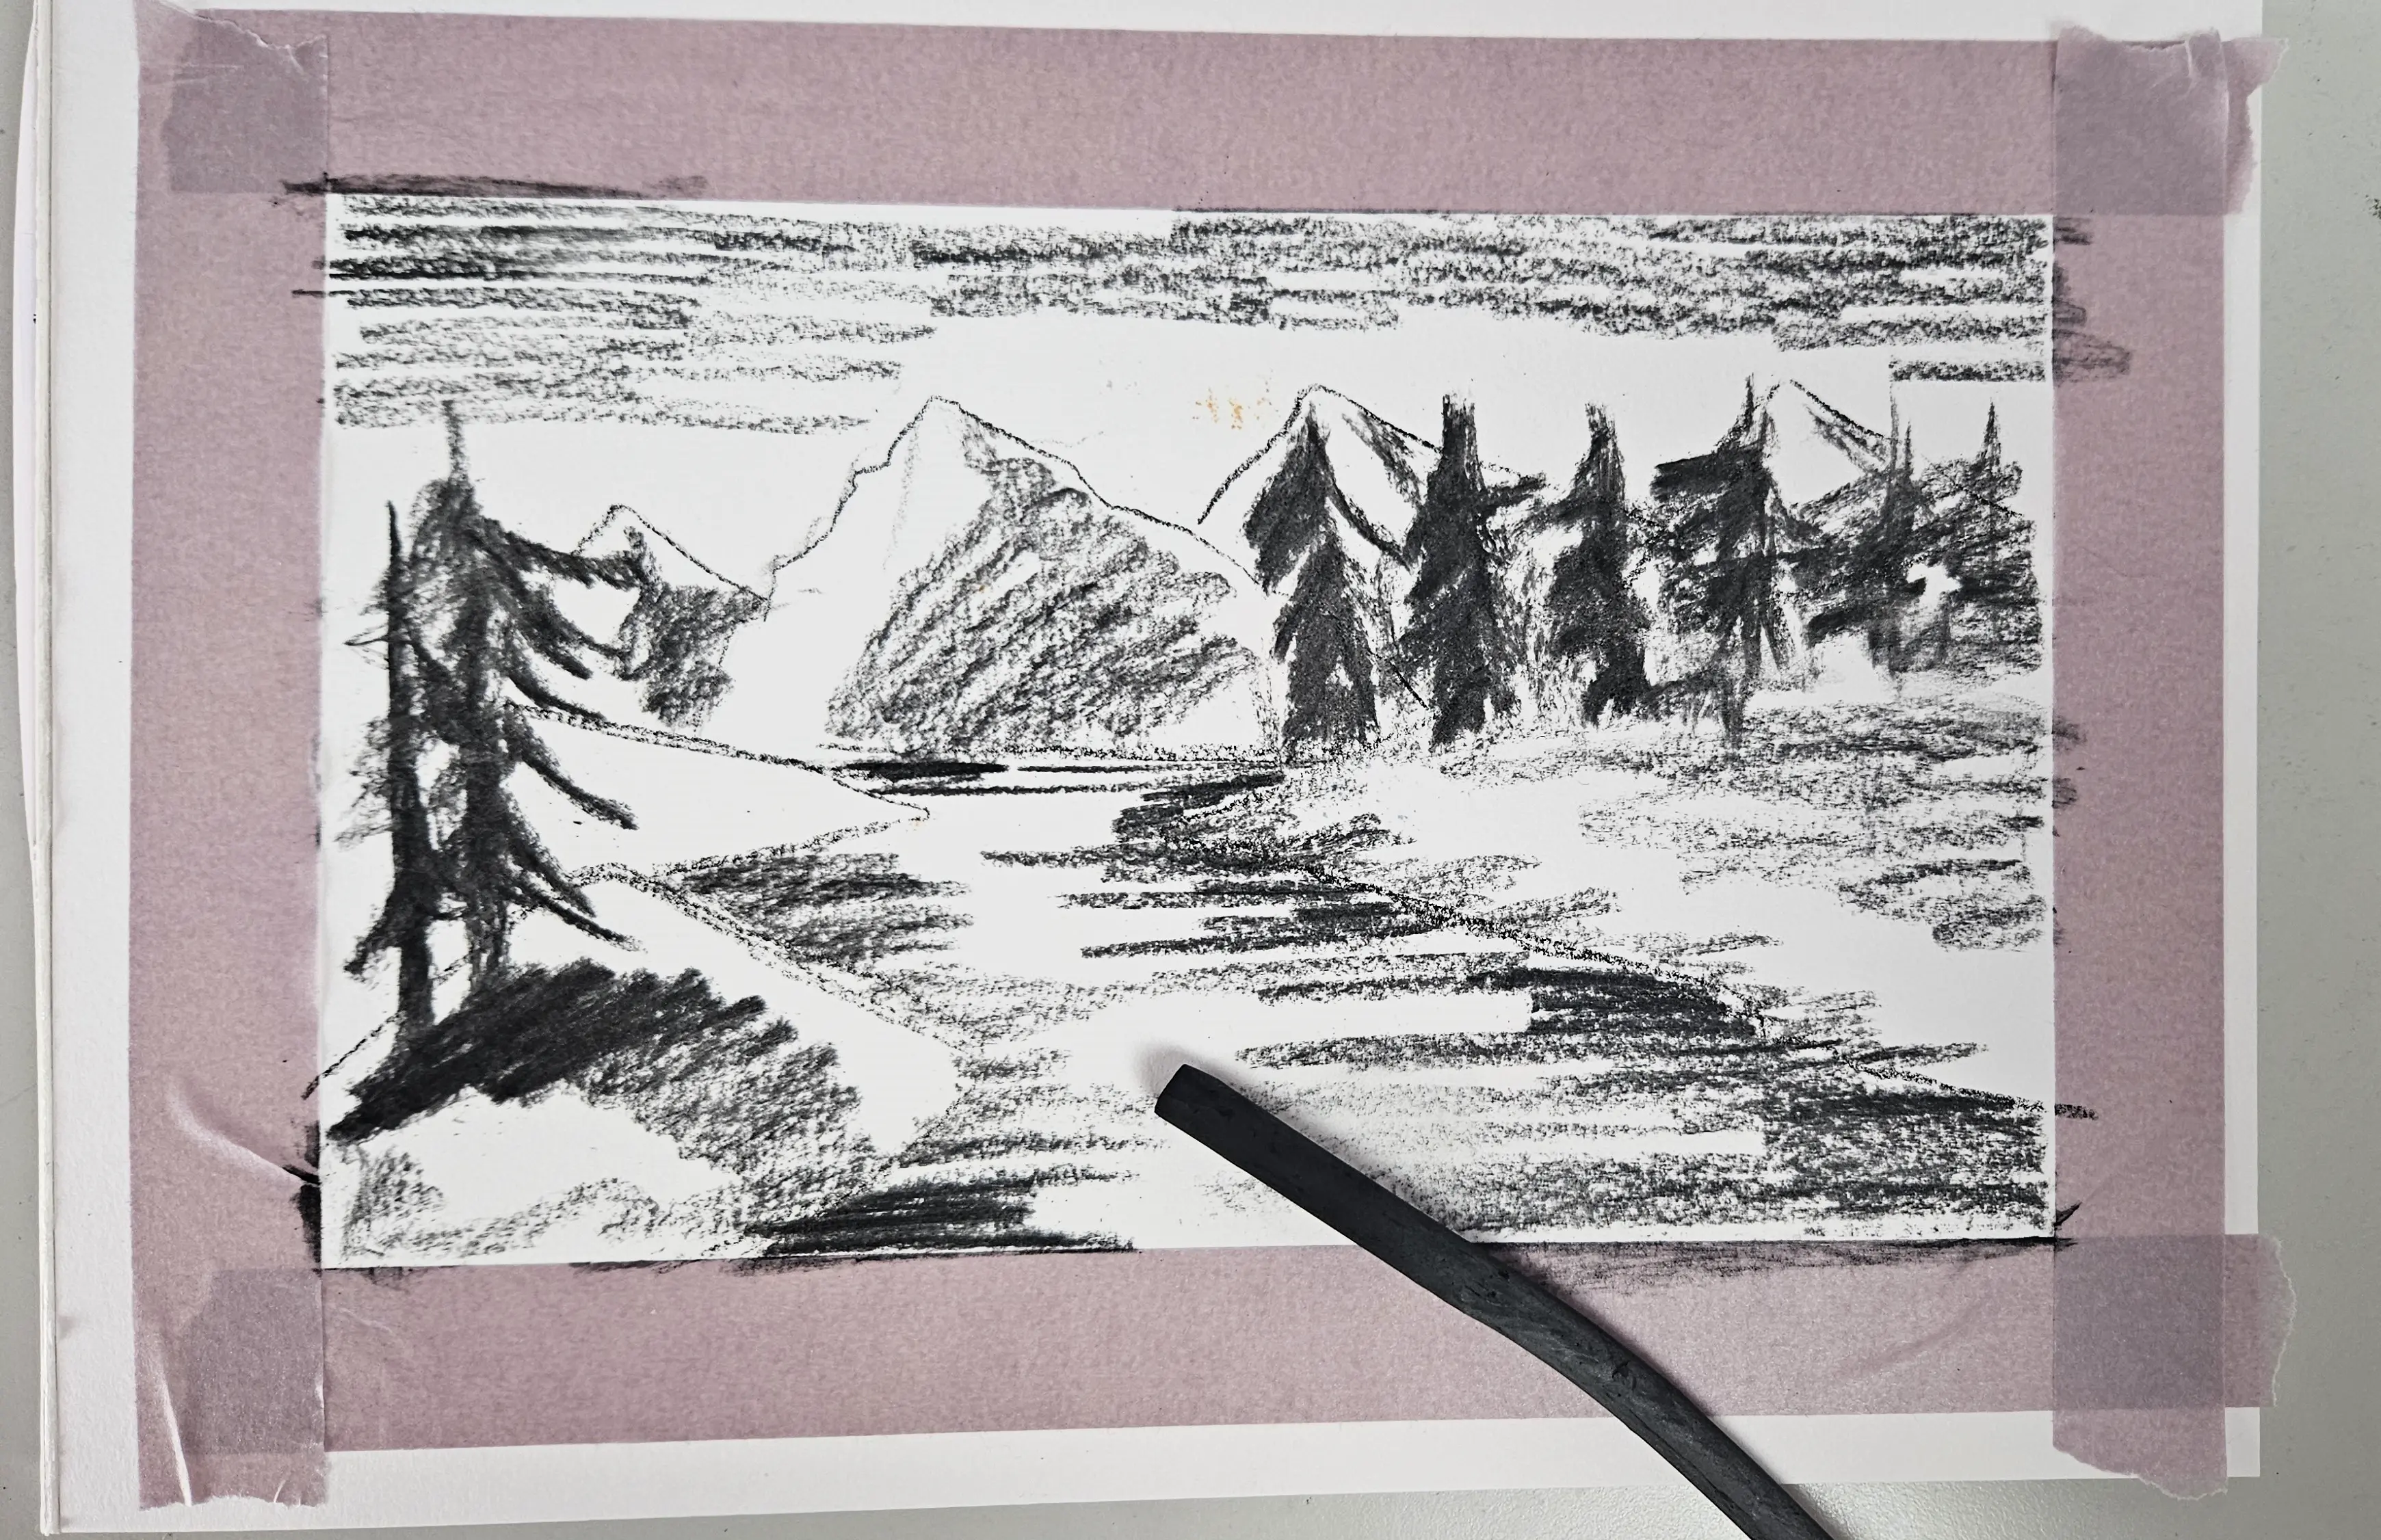
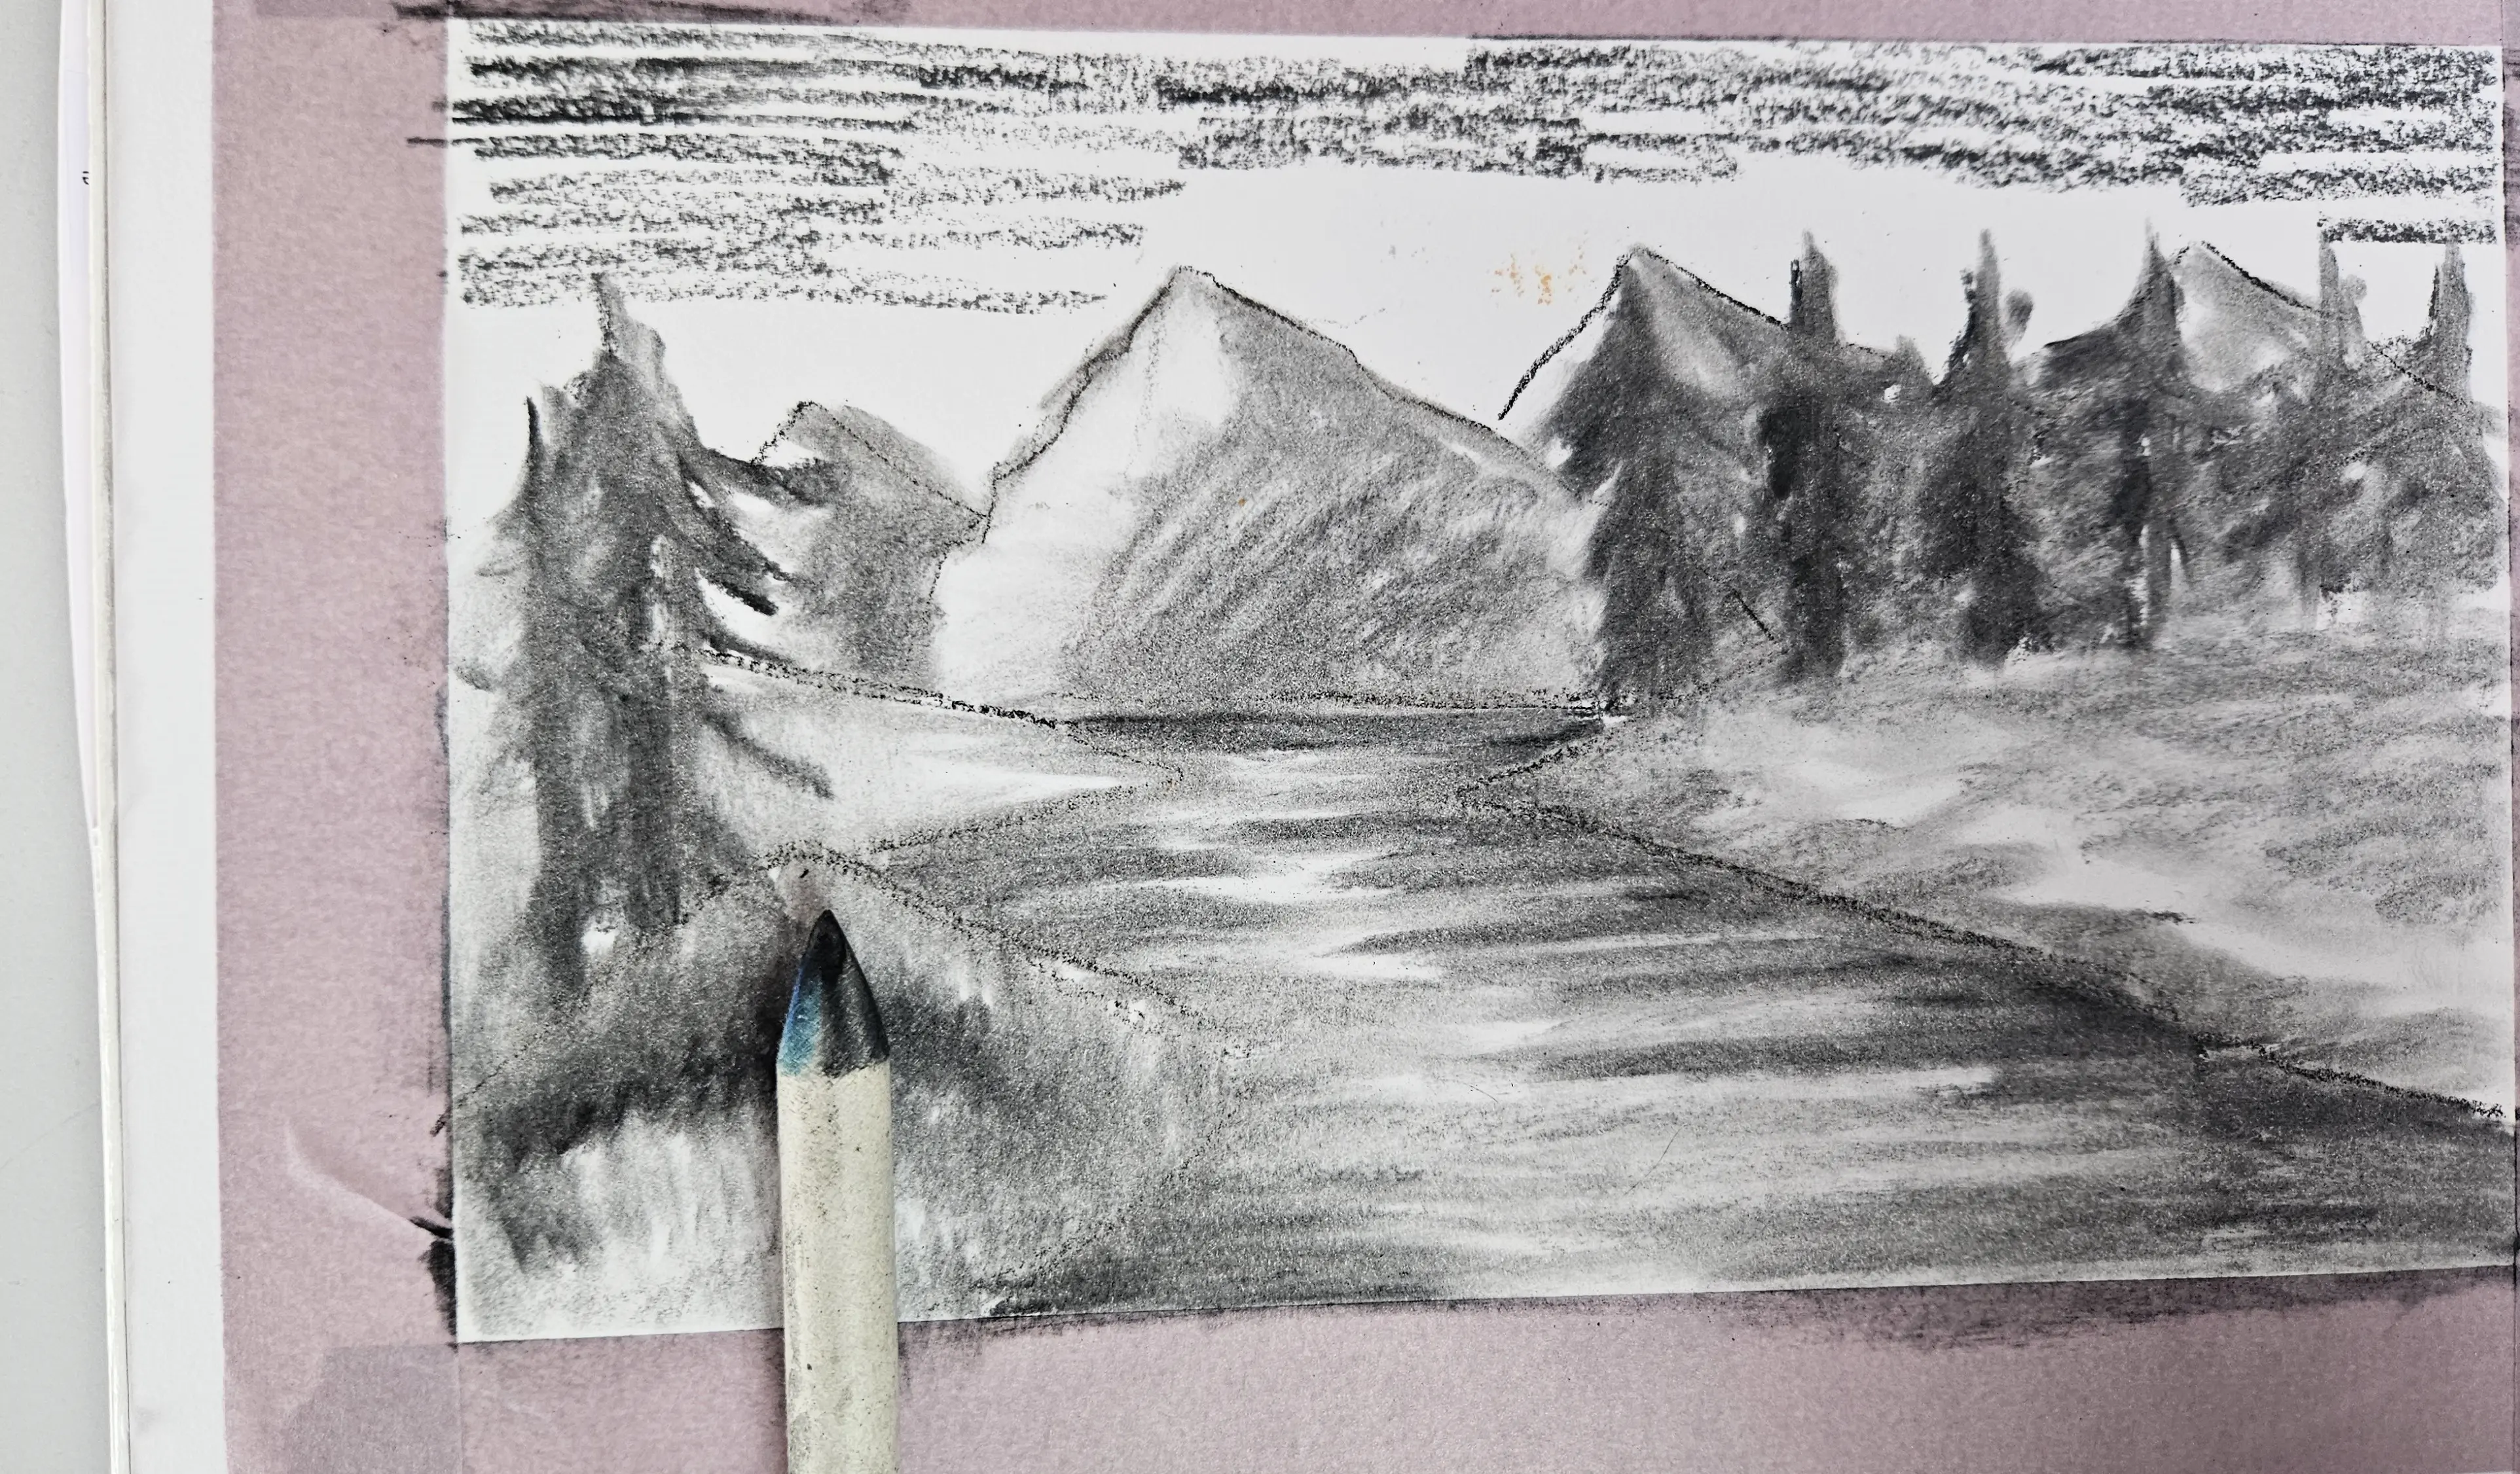
Generally, as specified throughout my article, we always start by sketching the major forms of the landscape: mountains, contours, rivers, etc. The composition should be simple and balanced. I often sketch with a small soft charcoal pencil.
Then we proceed to apply the main shadows. We can mark the darkest shadow areas, under the trees, in the hollows of the mountains, etc.
I chose to use stick charcoal here because the black is a bit stronger, and it allows for better contrast.
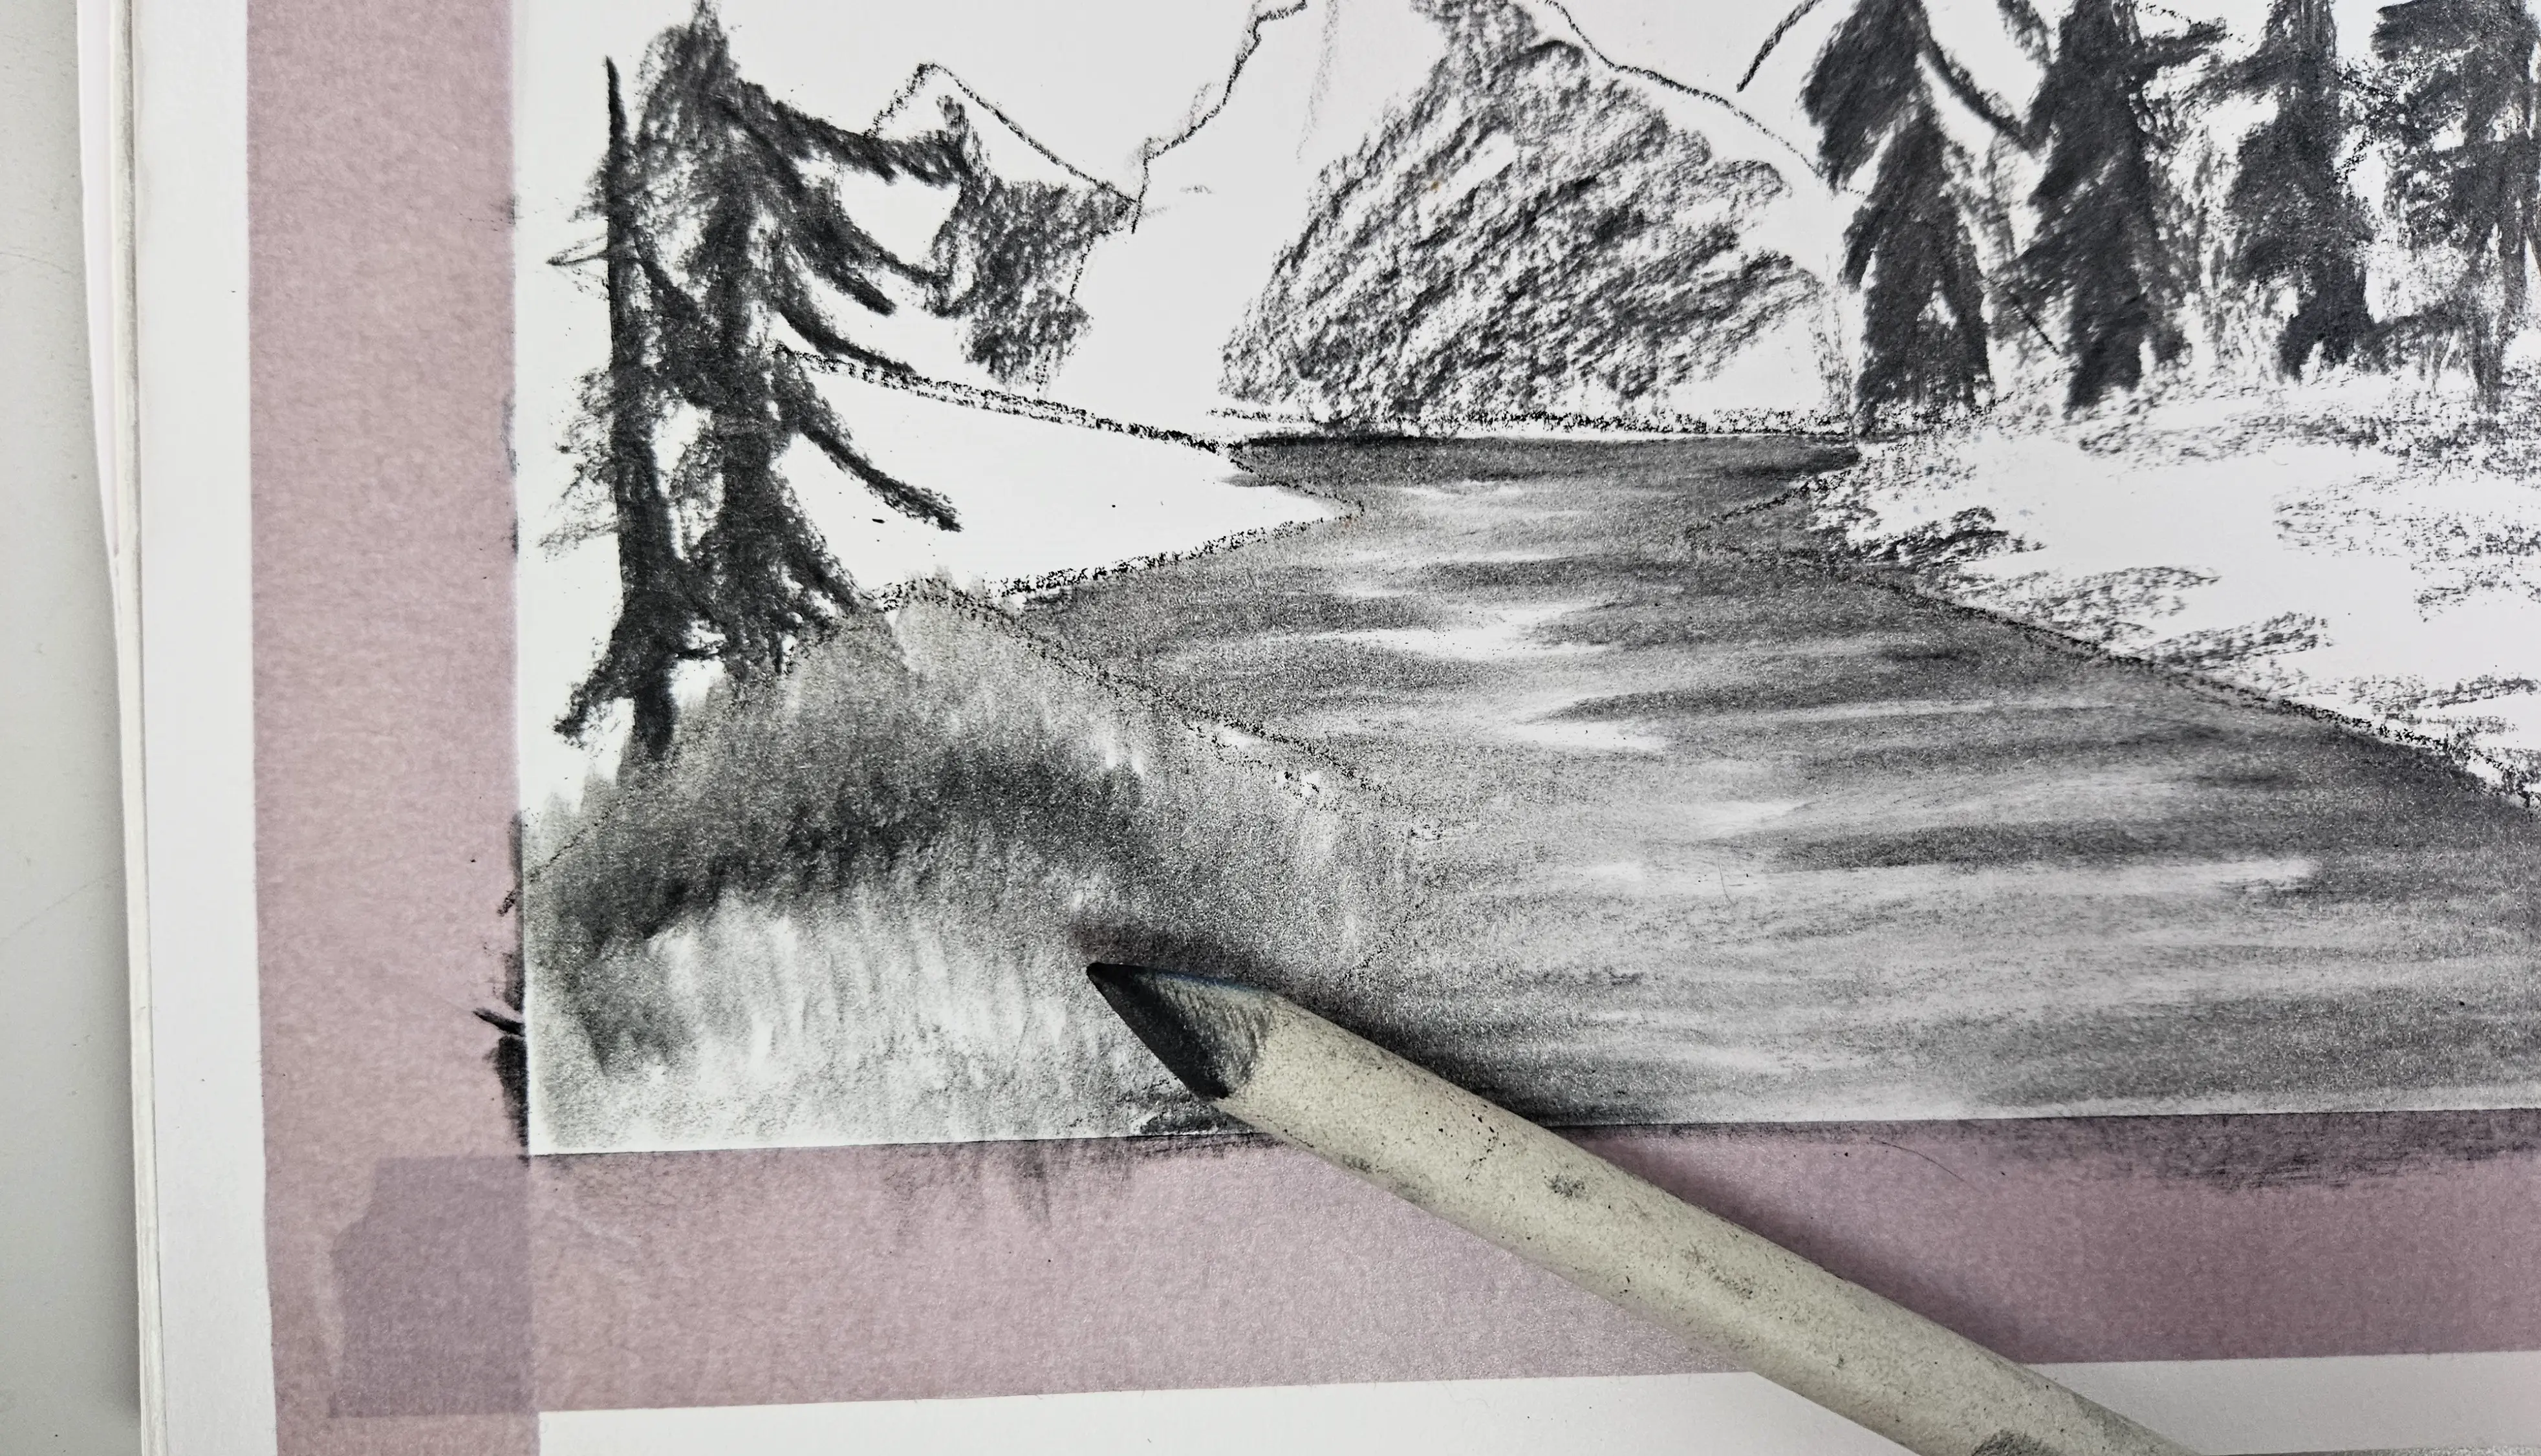
We can use a stump or our fingers to lightly smudge and create slightly smoother transitions. I'll take the example of the small river in the center of the drawing. To give a sense of movement, we will smudge our lines horizontally. We take care to let some of the white of the paper show through. You can see that the water effect appears very quickly with a few strokes of the stump.
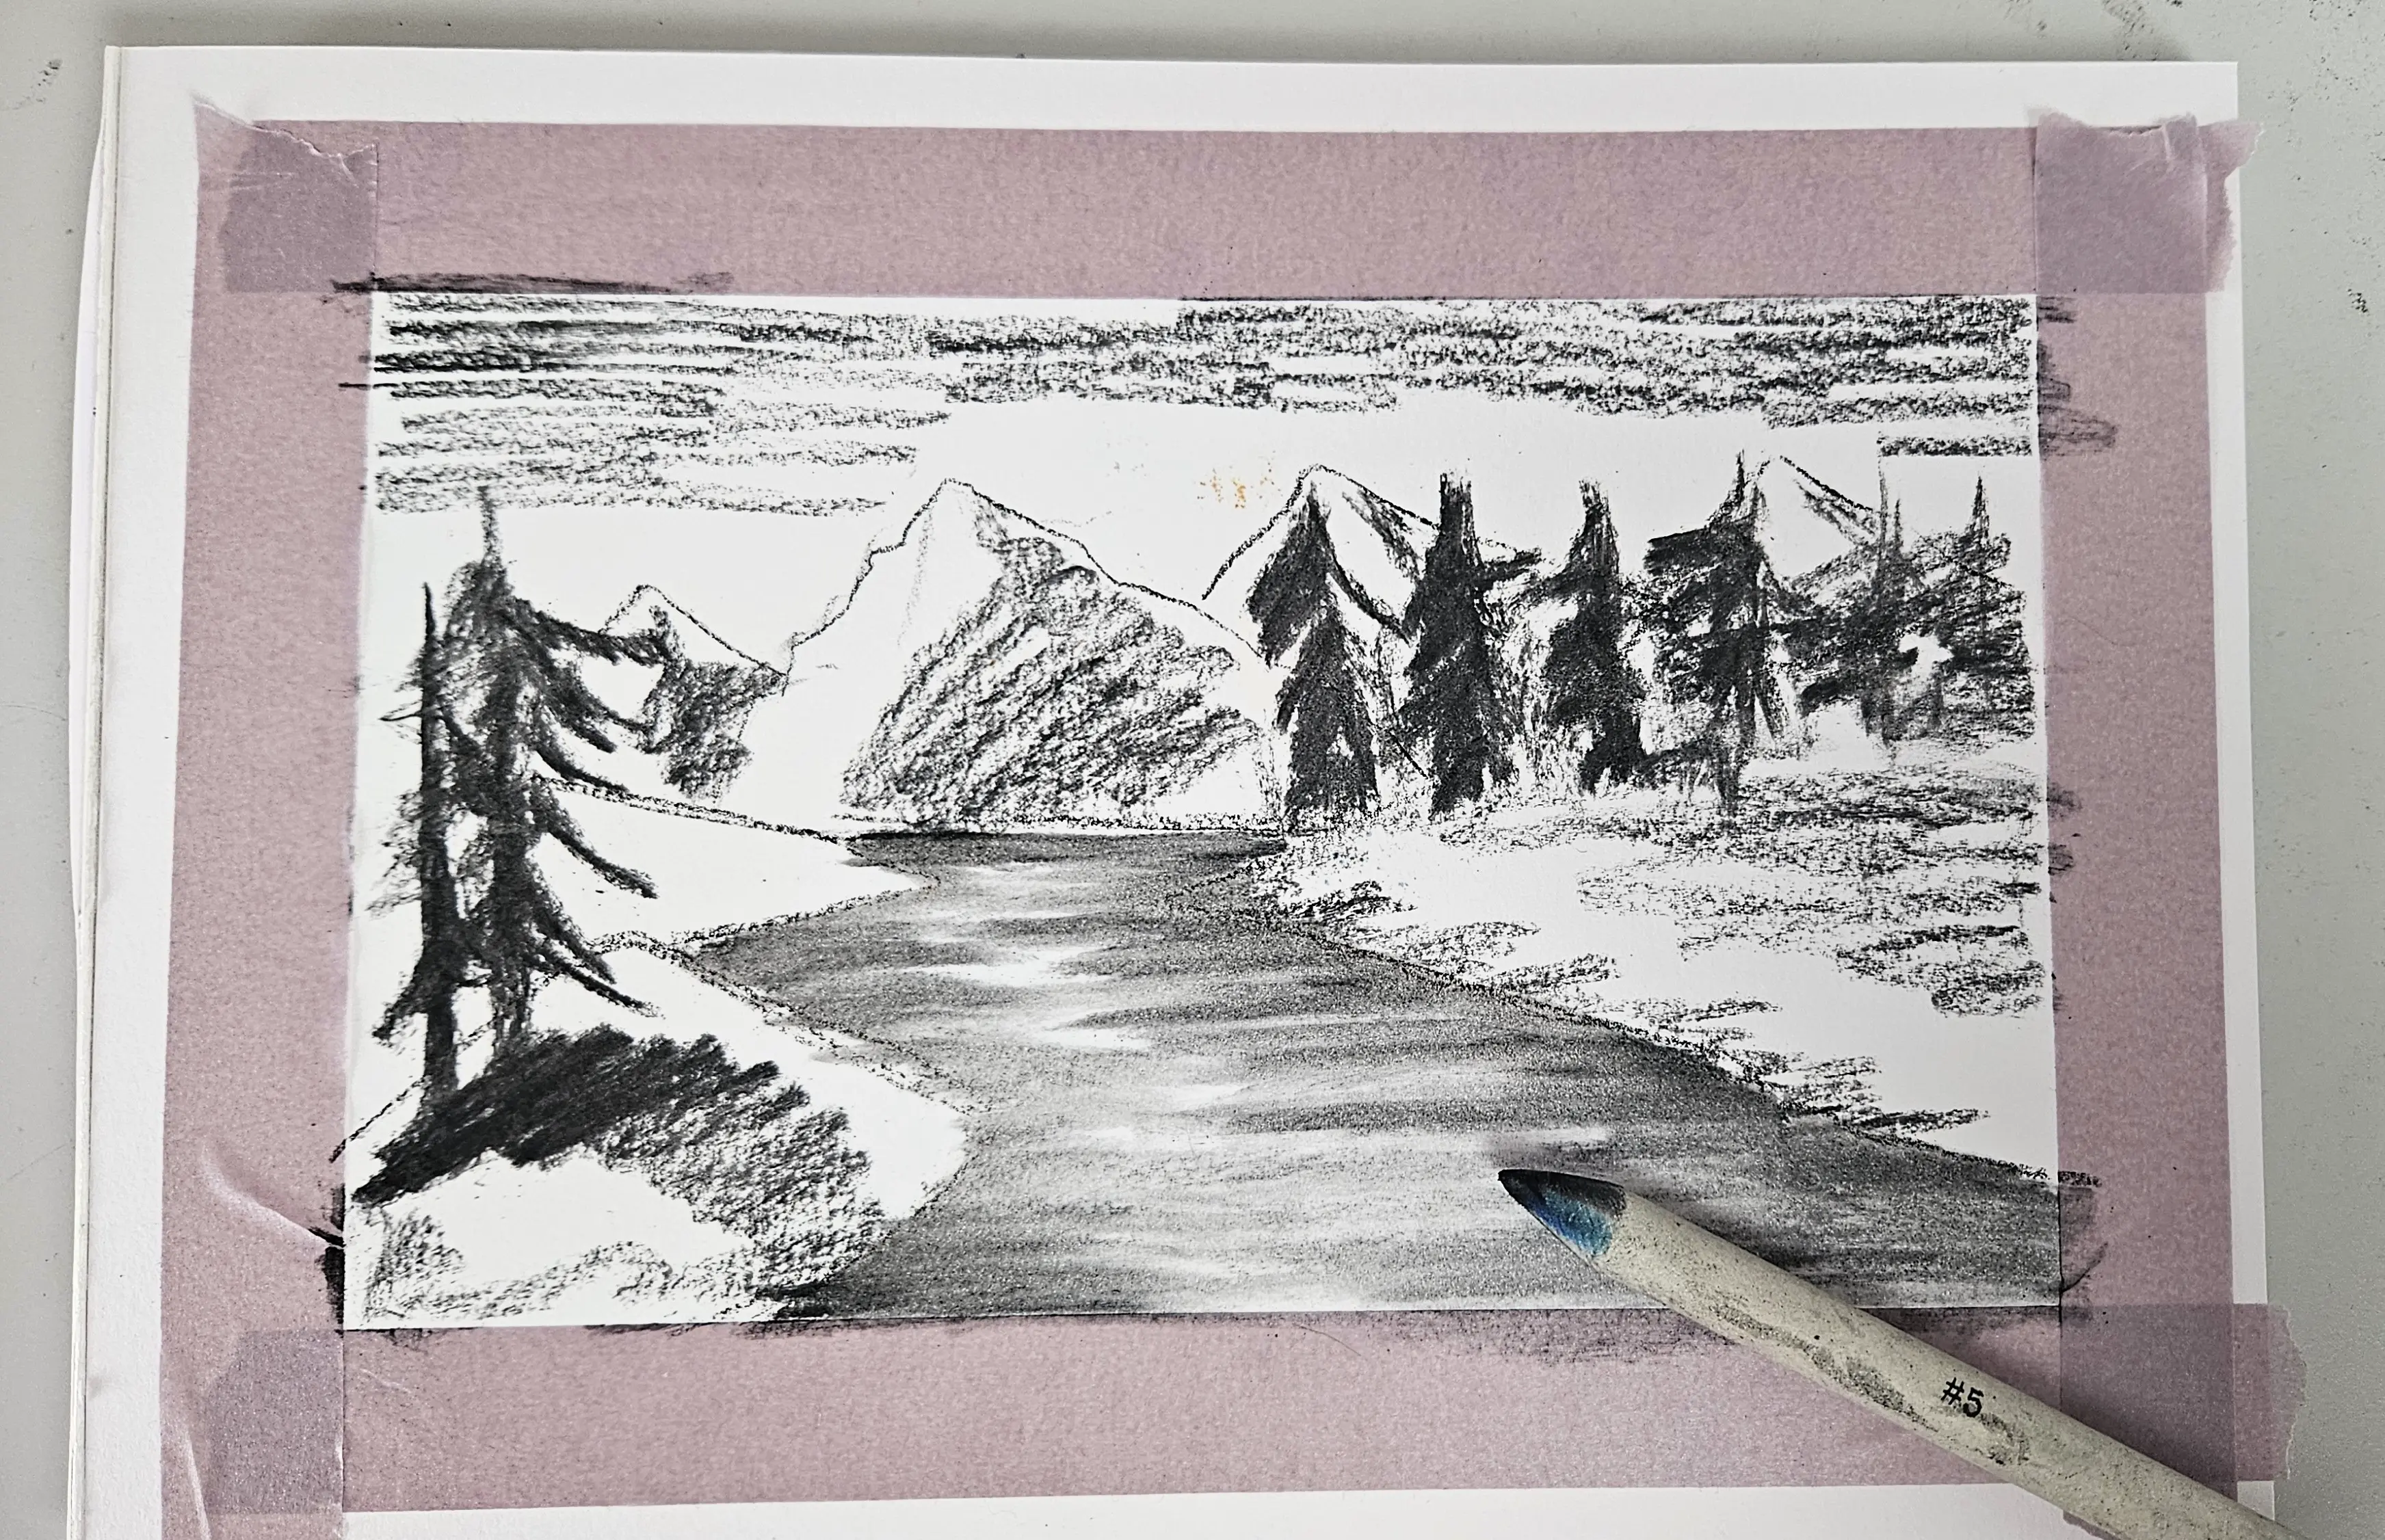
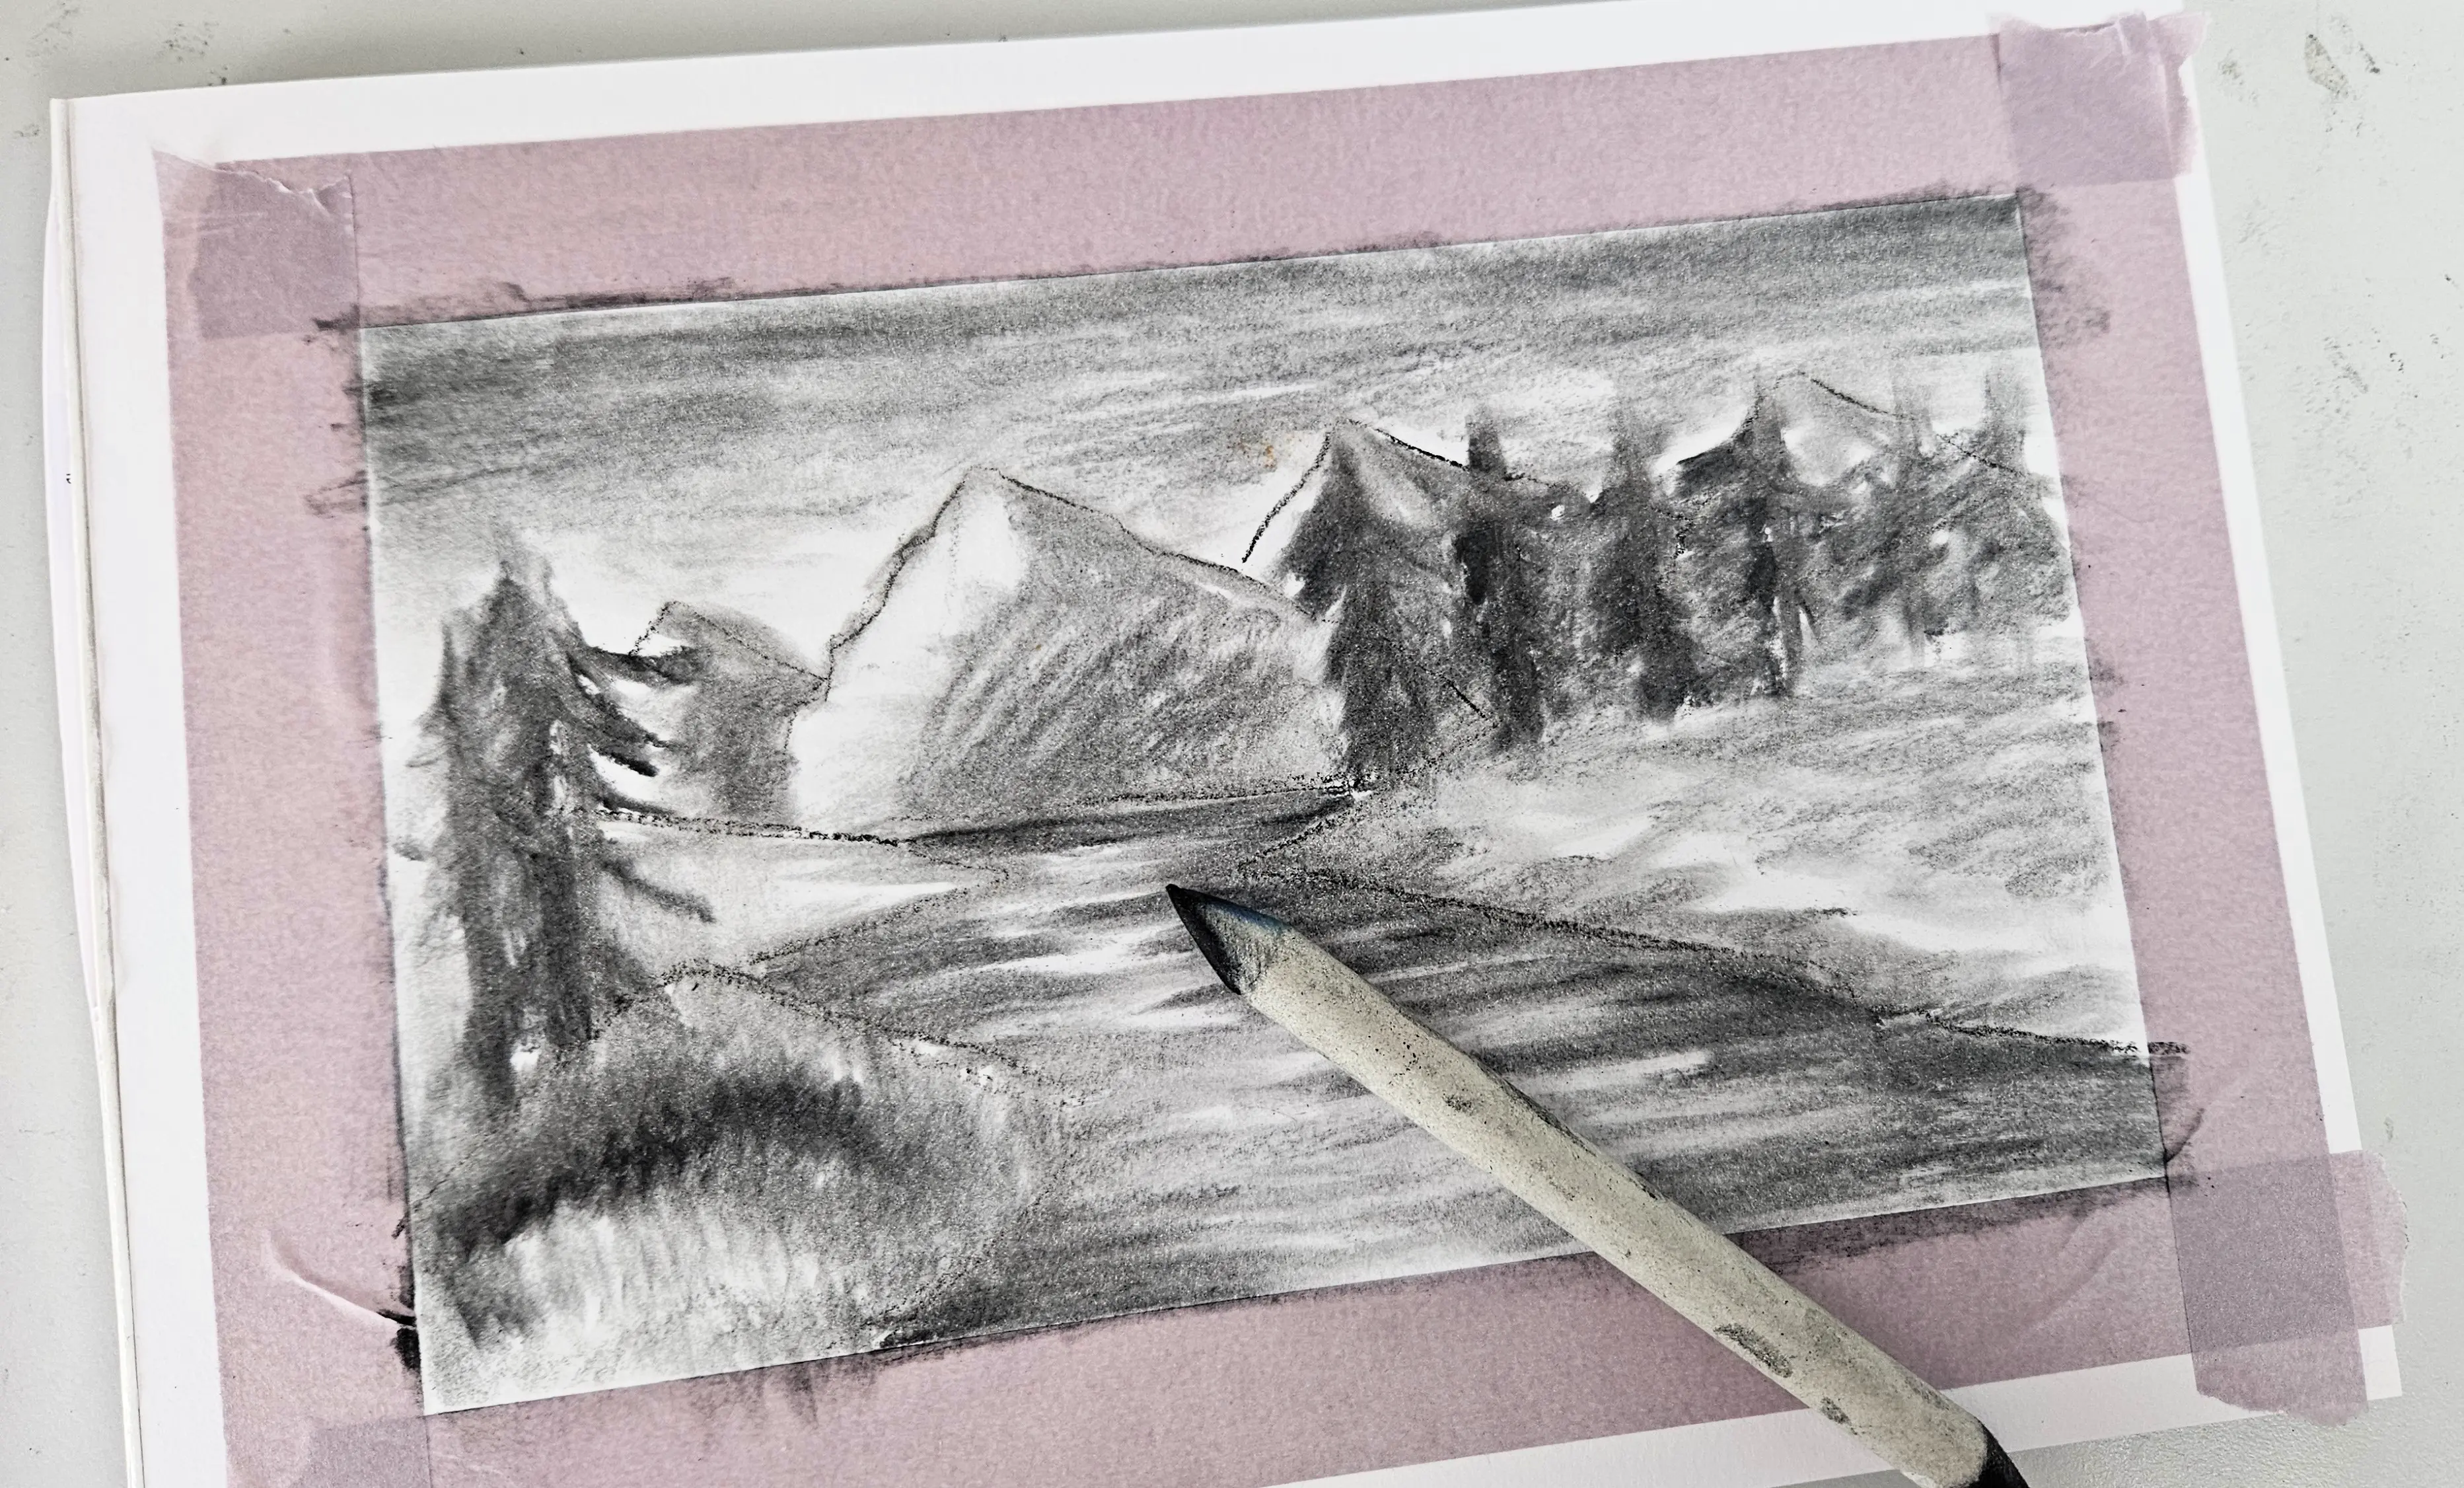
Conversely, for the greenery, I choose to blur my lines vertically, in order to bring out the movements of the grass. I make fine, smaller strokes with my blending stump. You can quickly see a form of greenery appearing in the foreground.
I continue to smudge the other areas. This time I'm tackling the trees in the background, smudging smoothly, which will create a kind of background blur. Later on, we can add trees in front of these trees. As you can see, for each element, I smudge in different ways.
You should always ask yourself the question: in which direction should I make my smudging movements? For instance, in the case of an animal, you will always smudge in the direction of the fur.
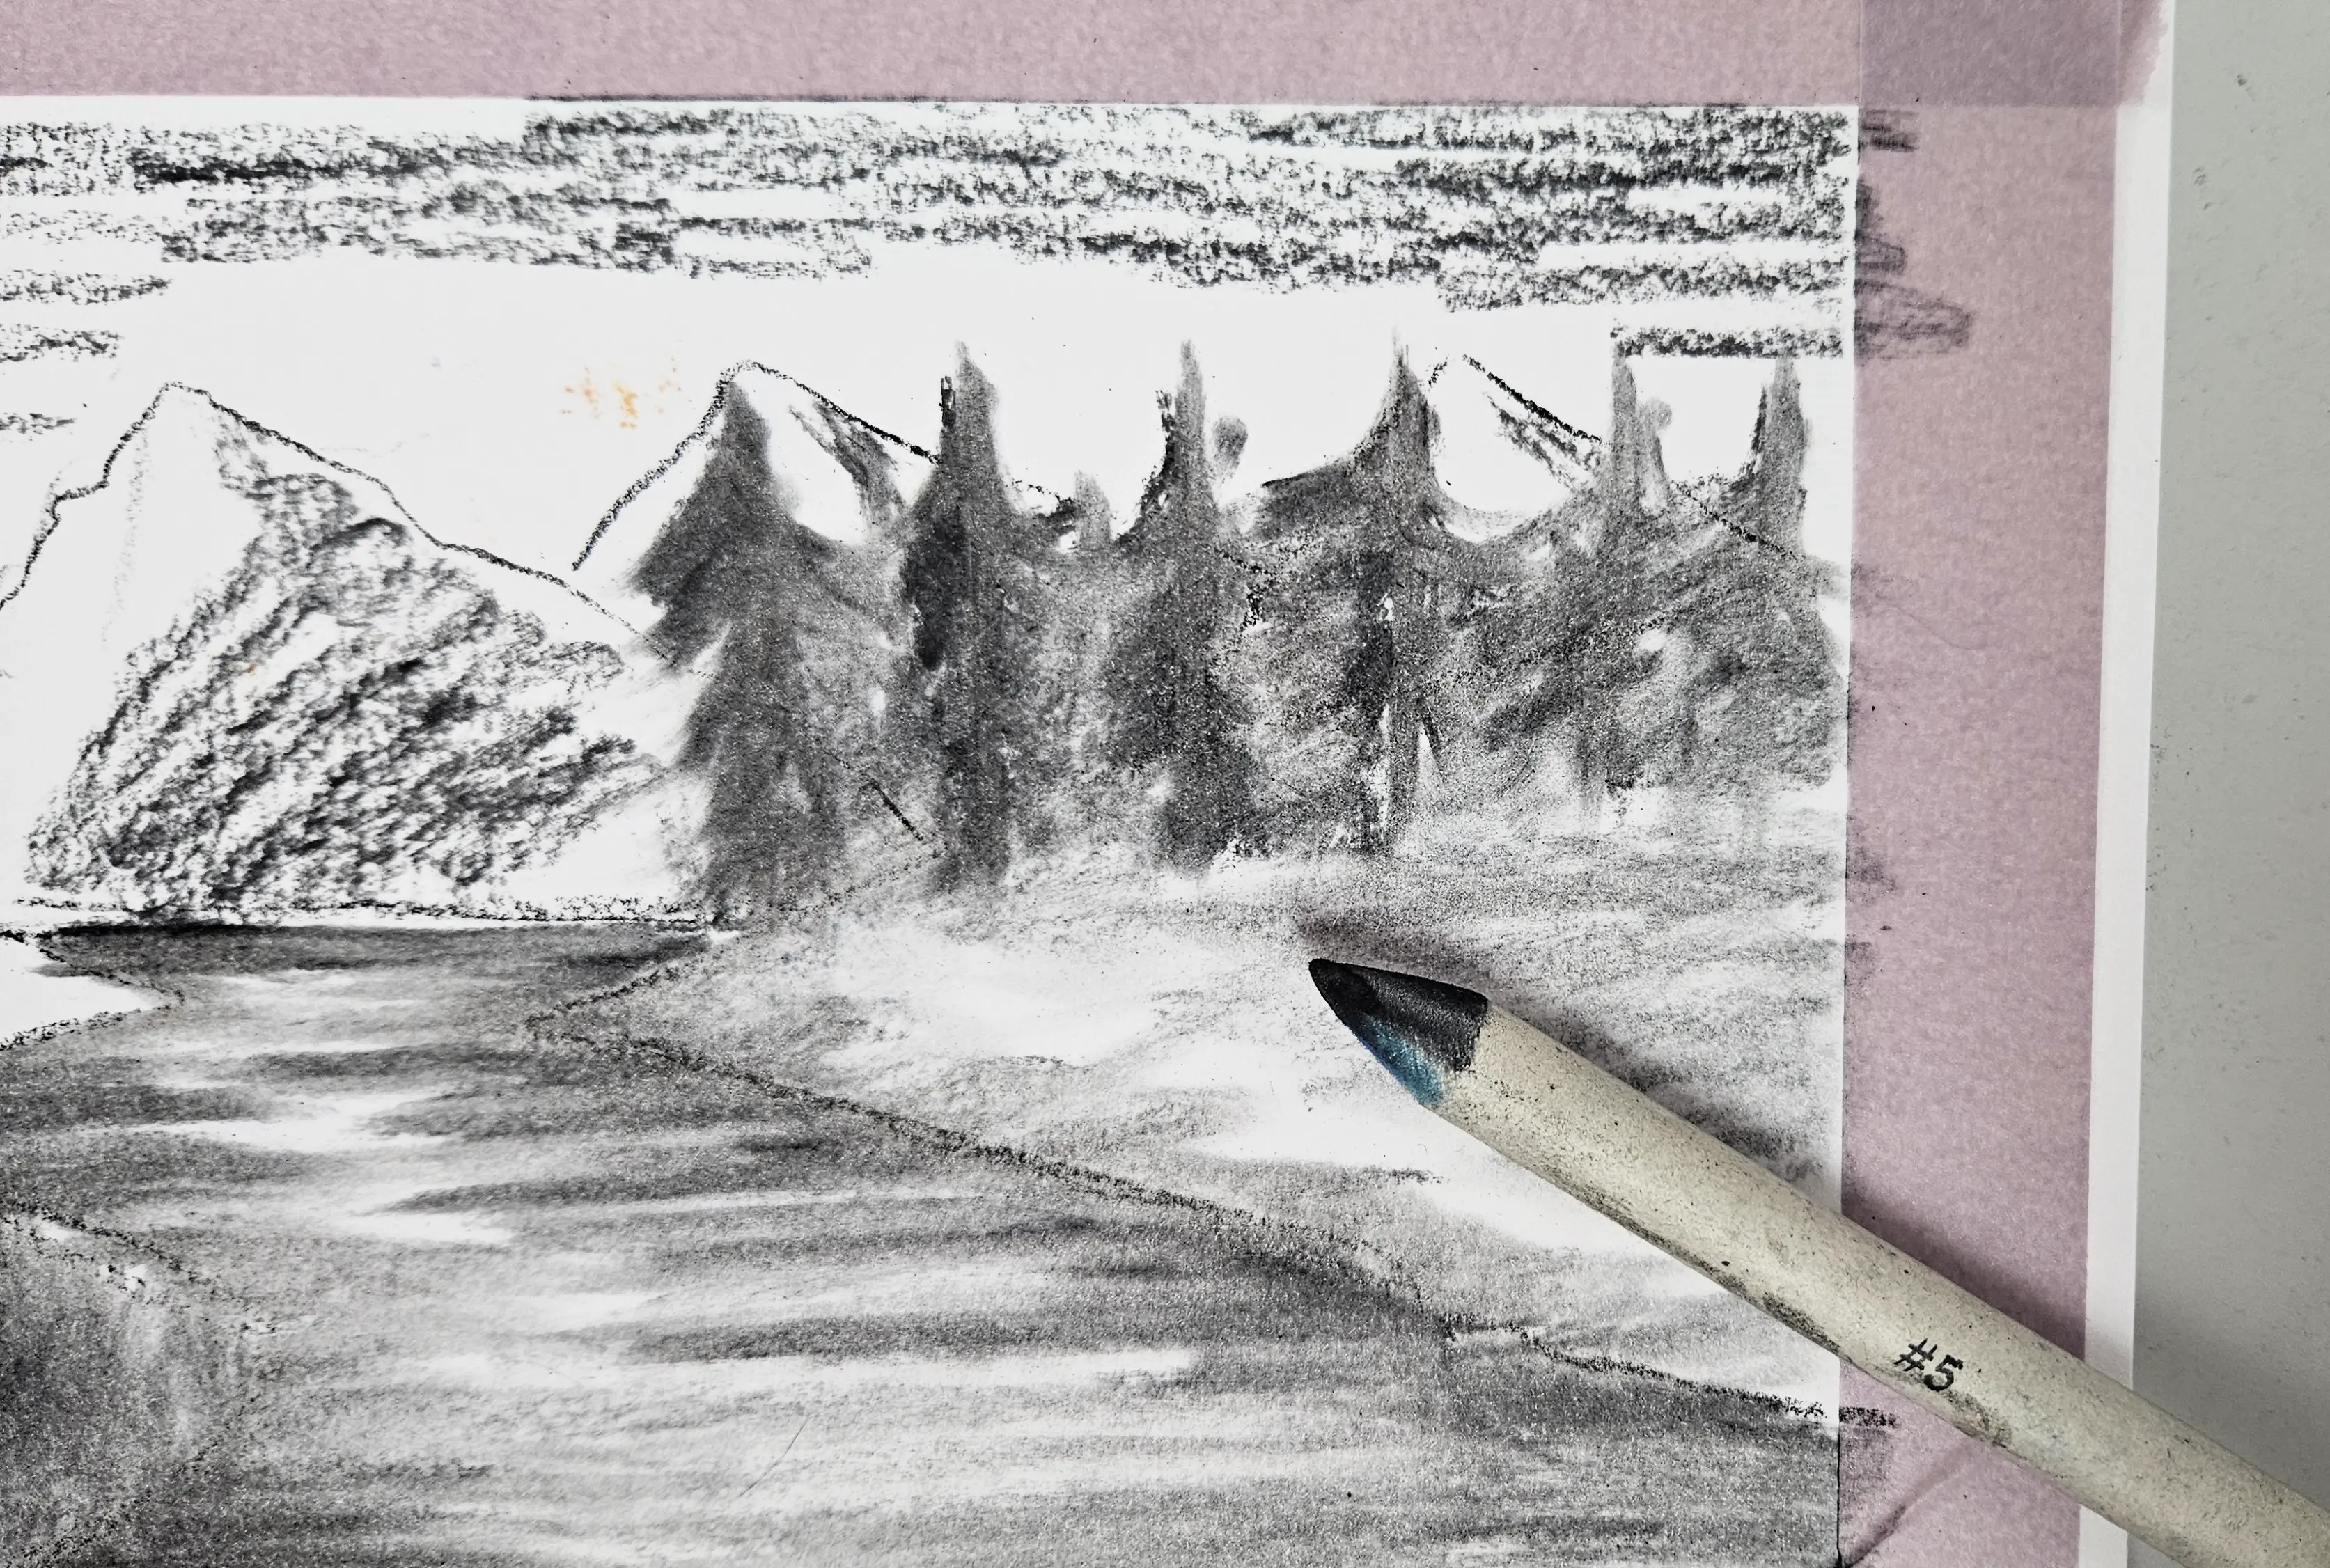
I still have 2 elements to smudge: the mountains and the sky. For the mountains, I will make small zigzags to represent some sort of path. I also leave white spaces to simulate either snow or light.
And finally, I blur the sky with horizontal strokes. I also leave white space between the mountains and the sky to show that the sun is present and illuminating the mountains.
I then add some details with my charcoal pencil. For example, I can add trees in the foreground, tall grasses, clouds, some extra contrasts, and so on. We can also add textures, for trees, for rocks, etc. We will vary the pressure of our hand to vary the intensity of the strokes and create depth.
I am trying to maximize the contrast in the drawing, which I must remind you is in black and white, so it’s very important to have a lot of difference between the bright areas and the darker areas. It's also important to distinguish between the foreground and the background.
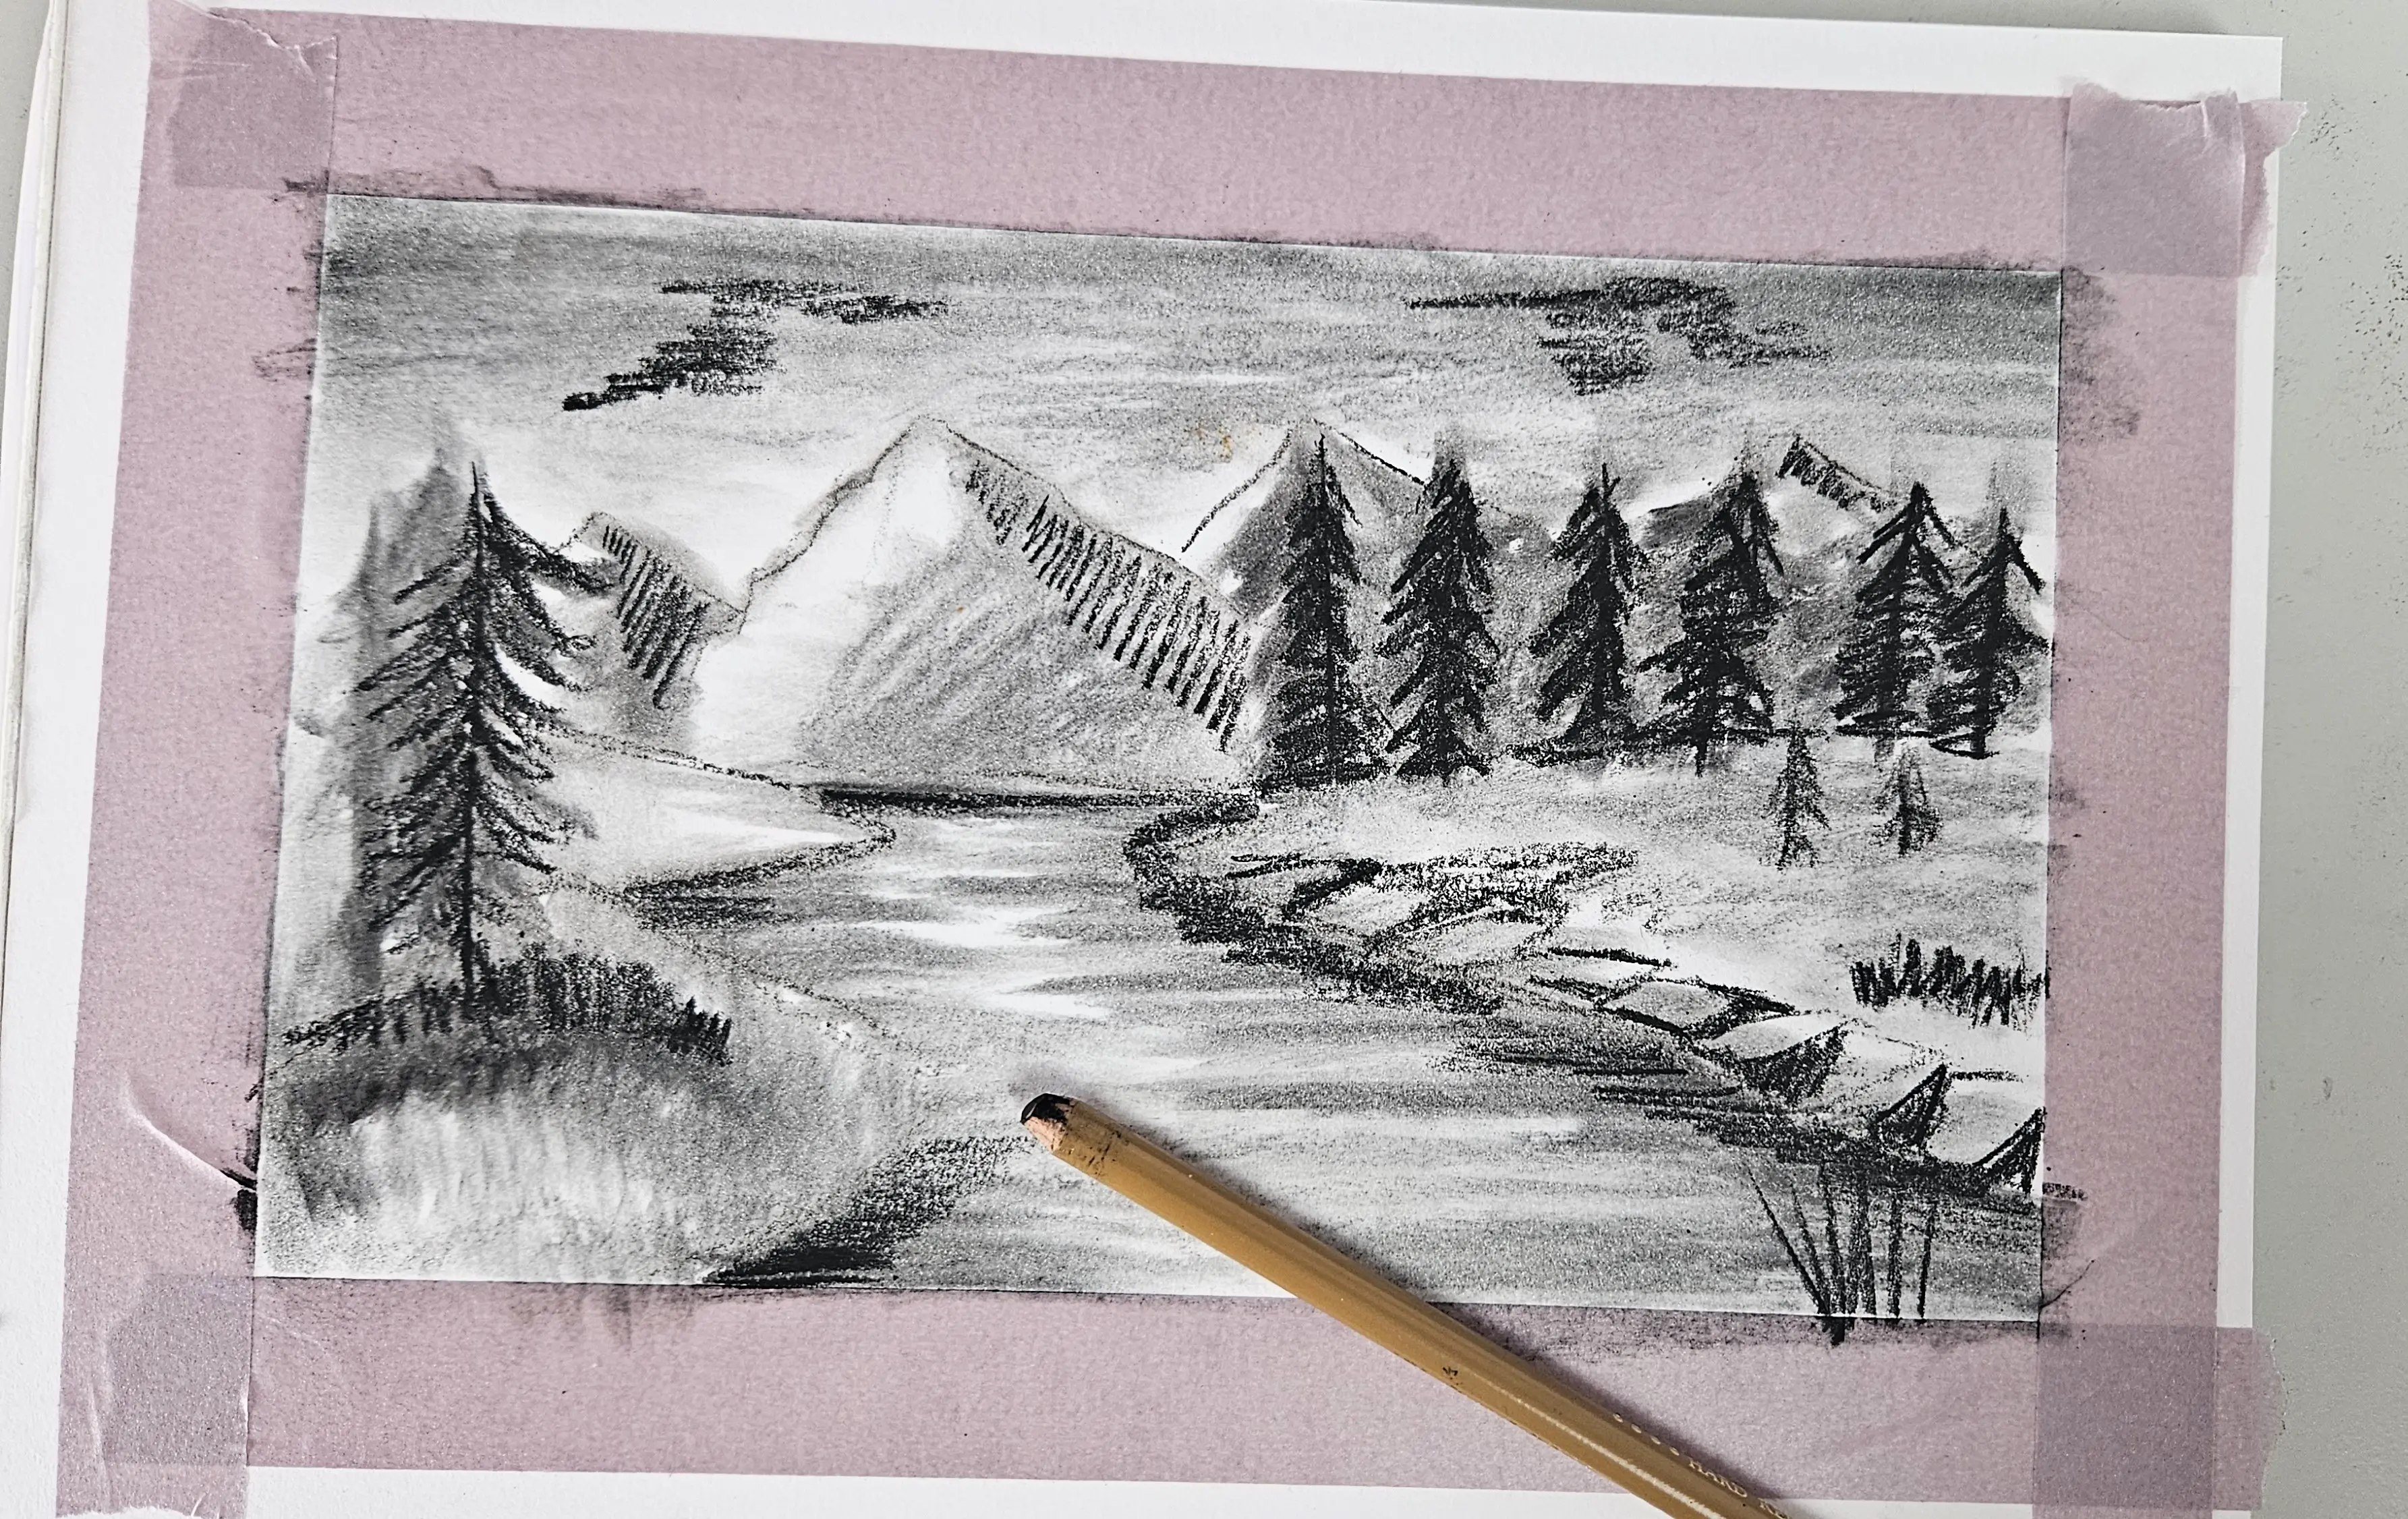
And there, I add extra smudging to the details I included. I try to even out the pigments while trying not to blur the added elements too much. So, it's important to smudge less than before. I also added the reflection of the trees in the water.
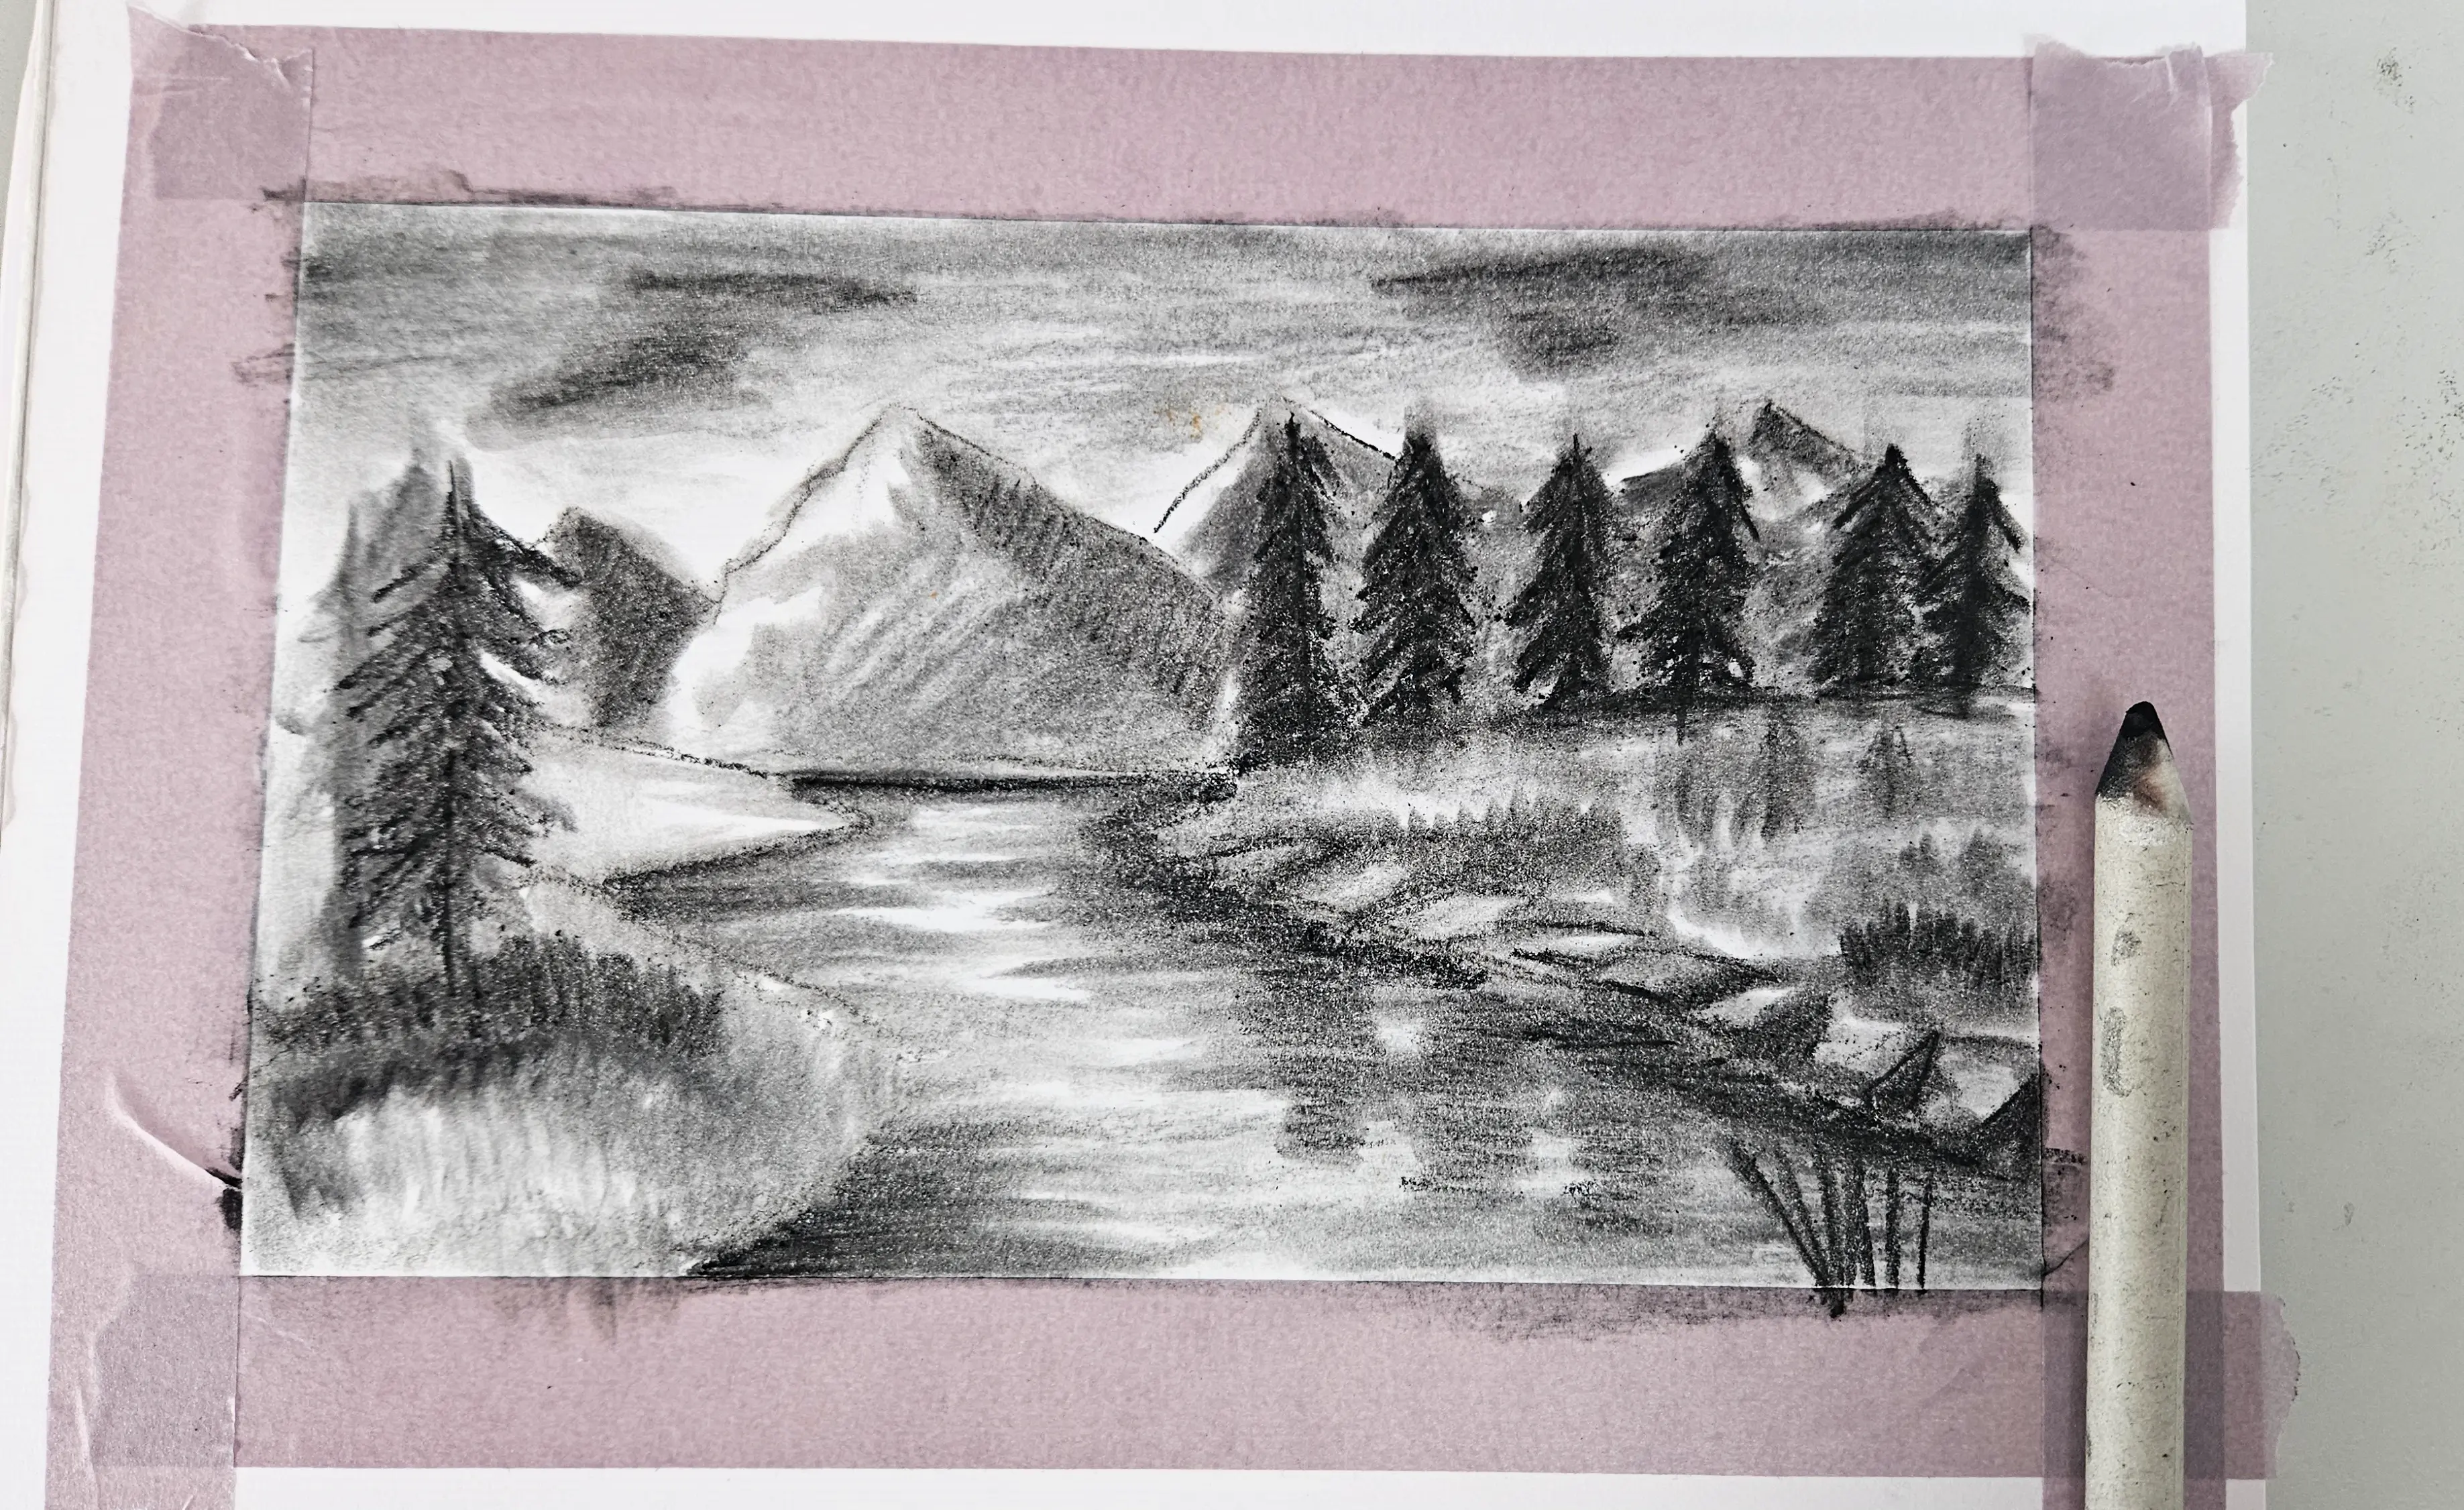
Then, we use a kneaded eraser to remove parts of the charcoal, and to bring out the bright areas, the mountain tops, the reflections on the water, etc. As mentioned at the beginning, we can also leave light areas with the white of the paper for even more light.
For the bright and small detailed parts, such as the small grasses in the foreground or some details on the mountains, I can use a very small stump, and attach my kneaded eraser to it. This enables me to be much more precise in the areas to be erased.
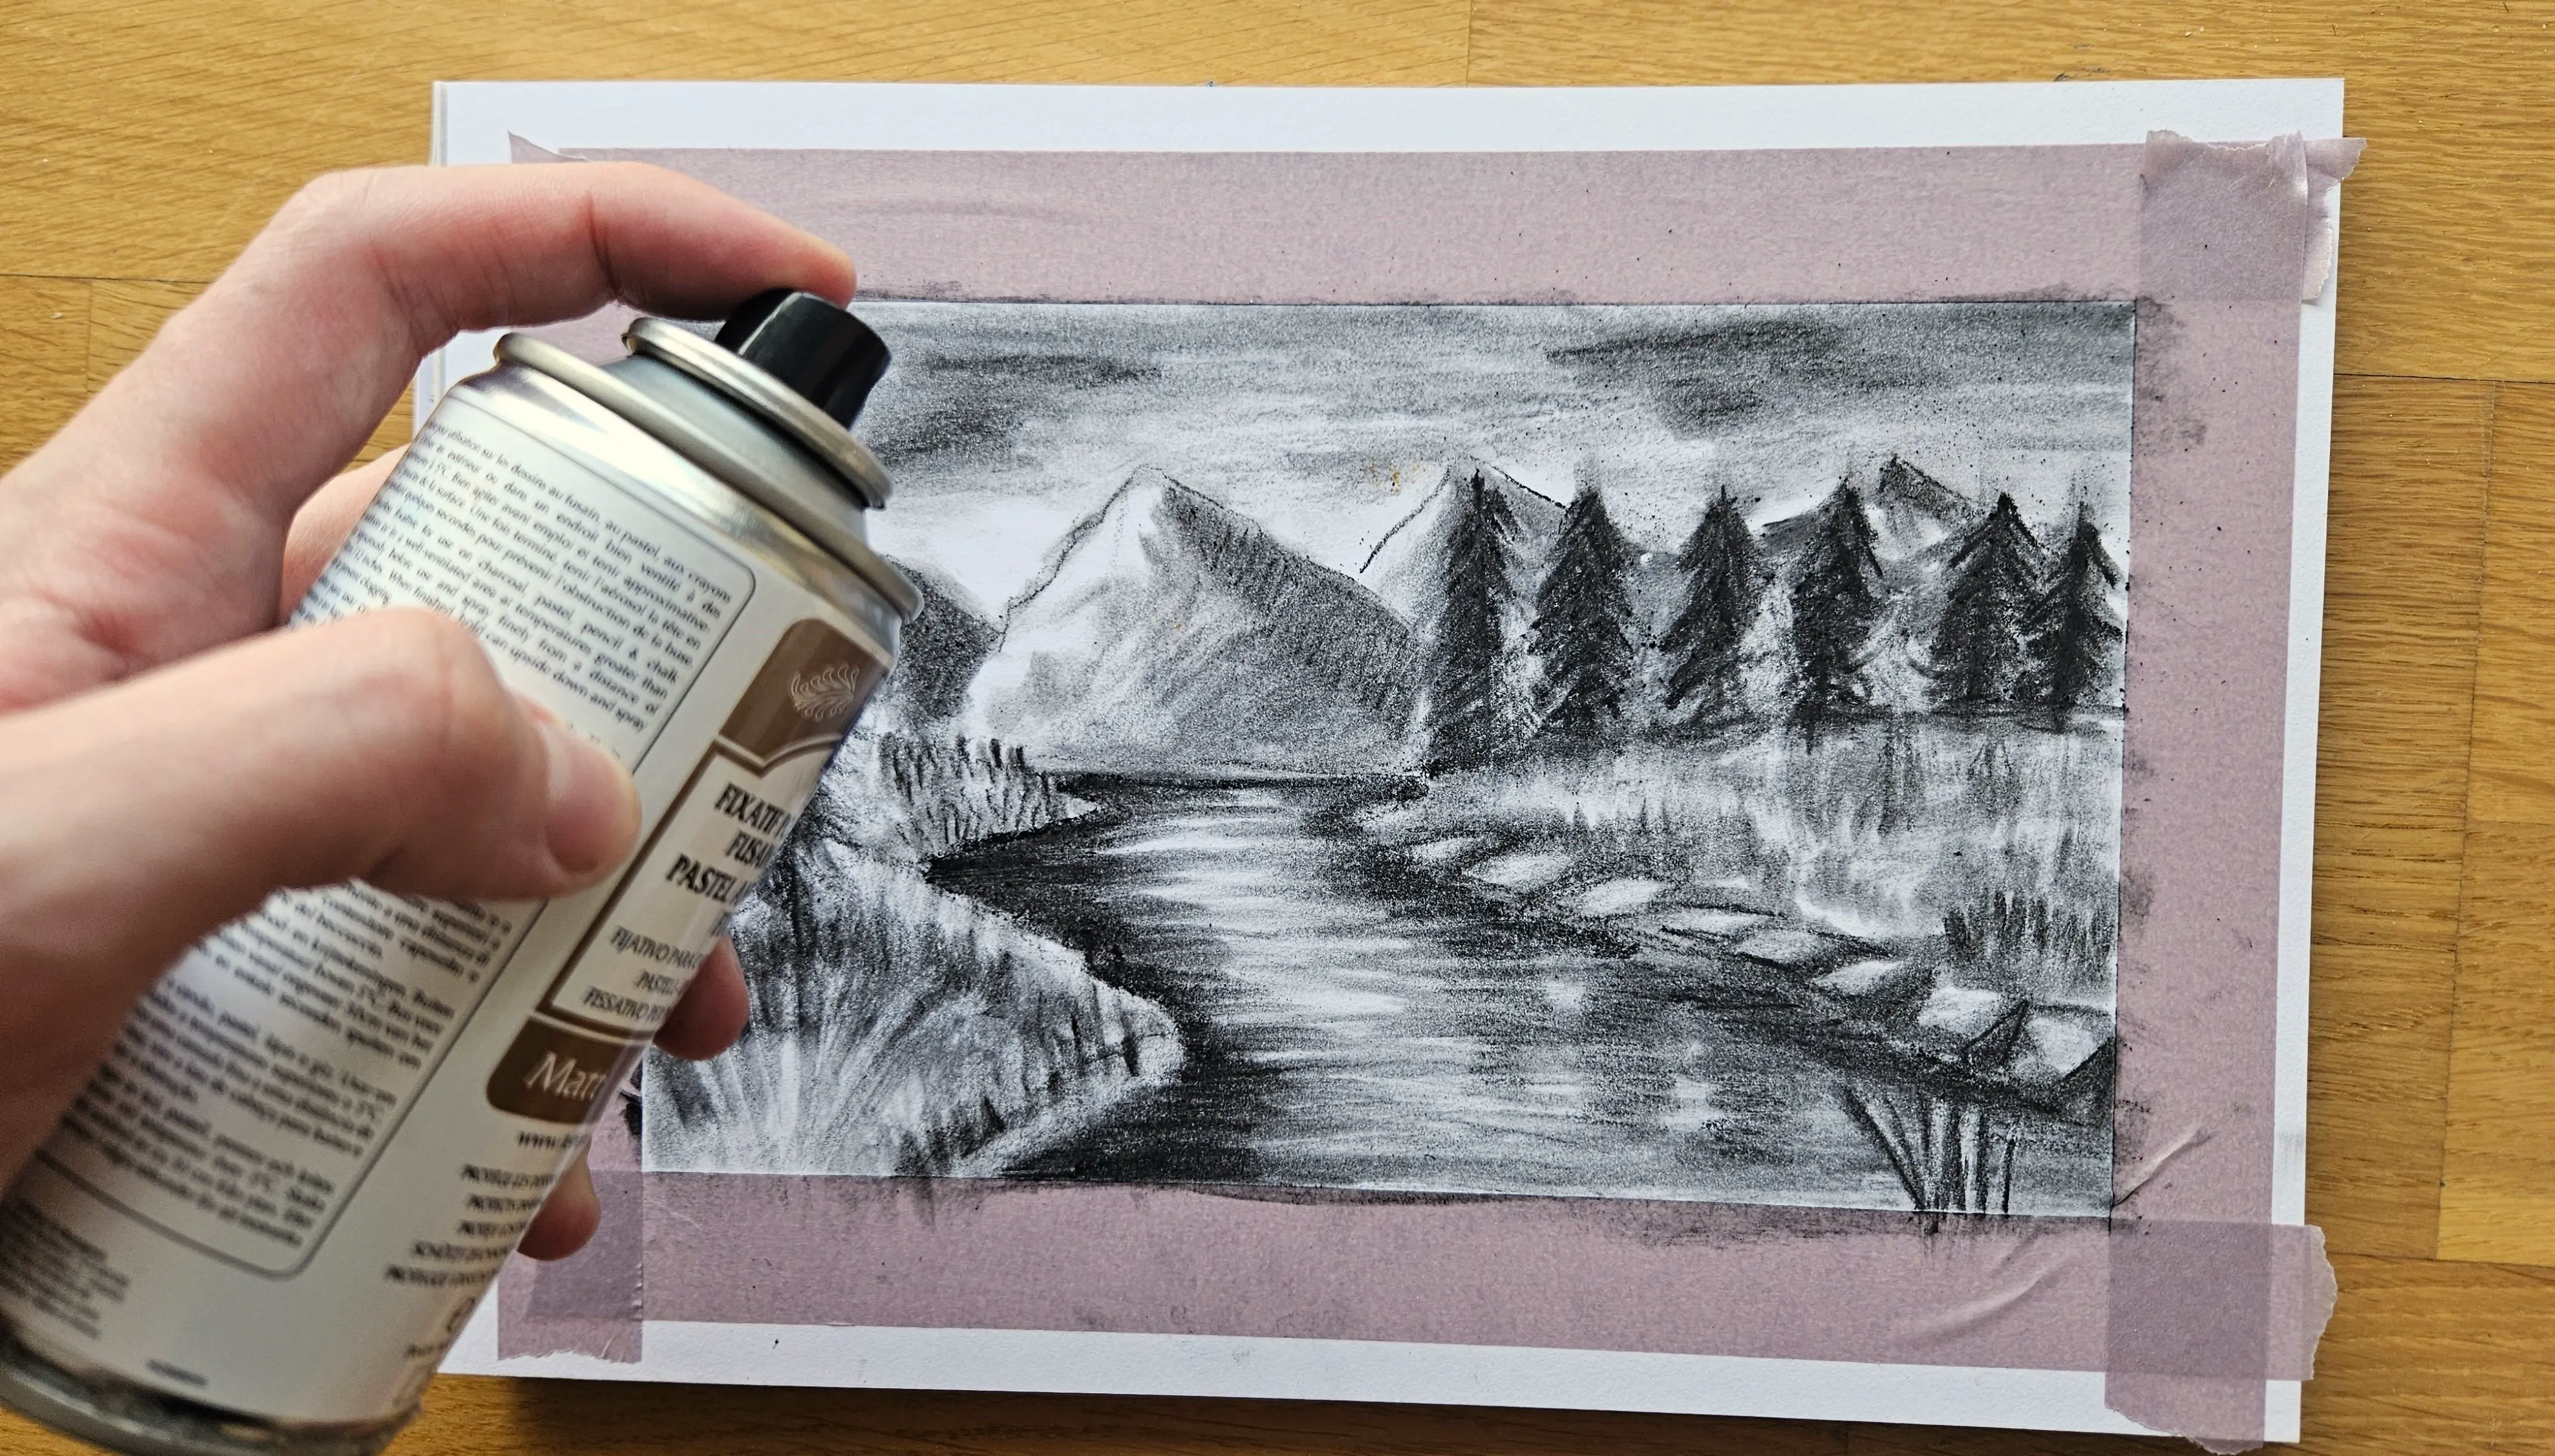
Then, the final step, once we're sure of the result, is to fix the drawing with a spray! You have to be sure, because afterwards you won’t be able to erase or modify the drawing anymore. You can only add a few additional layers if you want to add elements, but you won’t be able to remove anything. The spray will help protect the drawing in the long term. I use a fixative spray for charcoal. You can use any fixative suitable for charcoal.
Place it on a flat surface, and one that’s not too messy, such as outside on a balcony. The smell is quite strong. You can then let it sit for a few hours before final fixation.
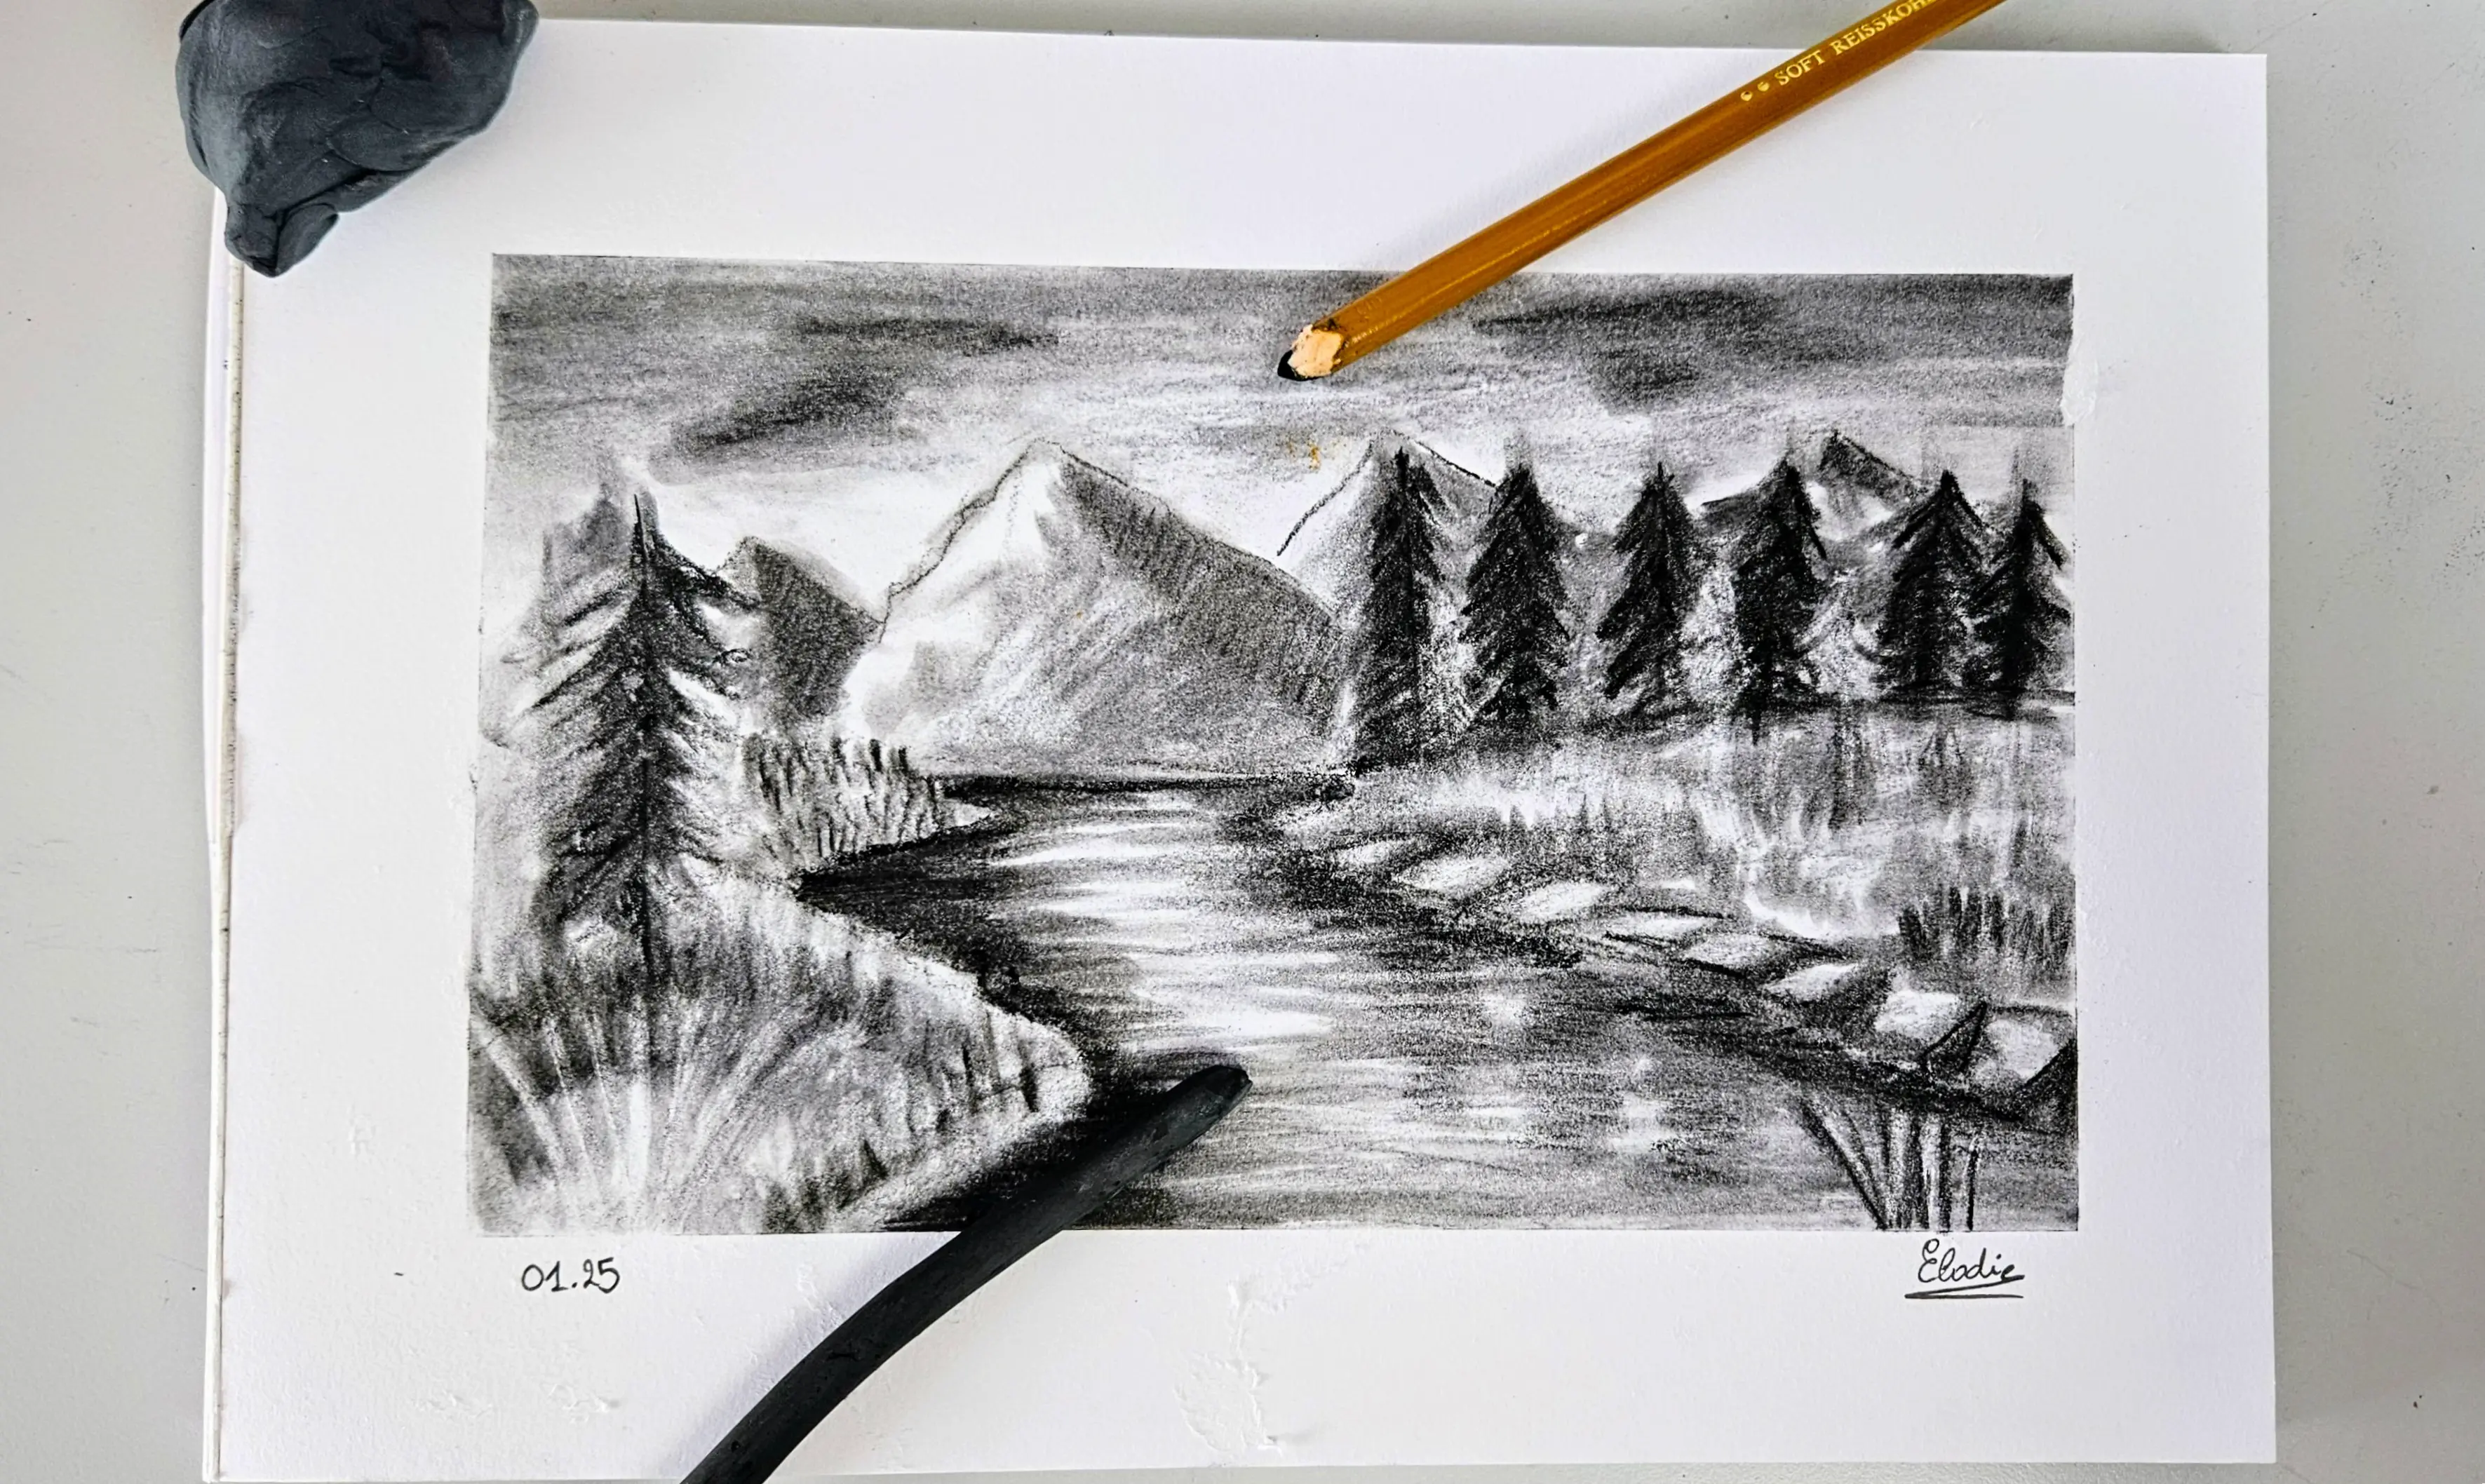
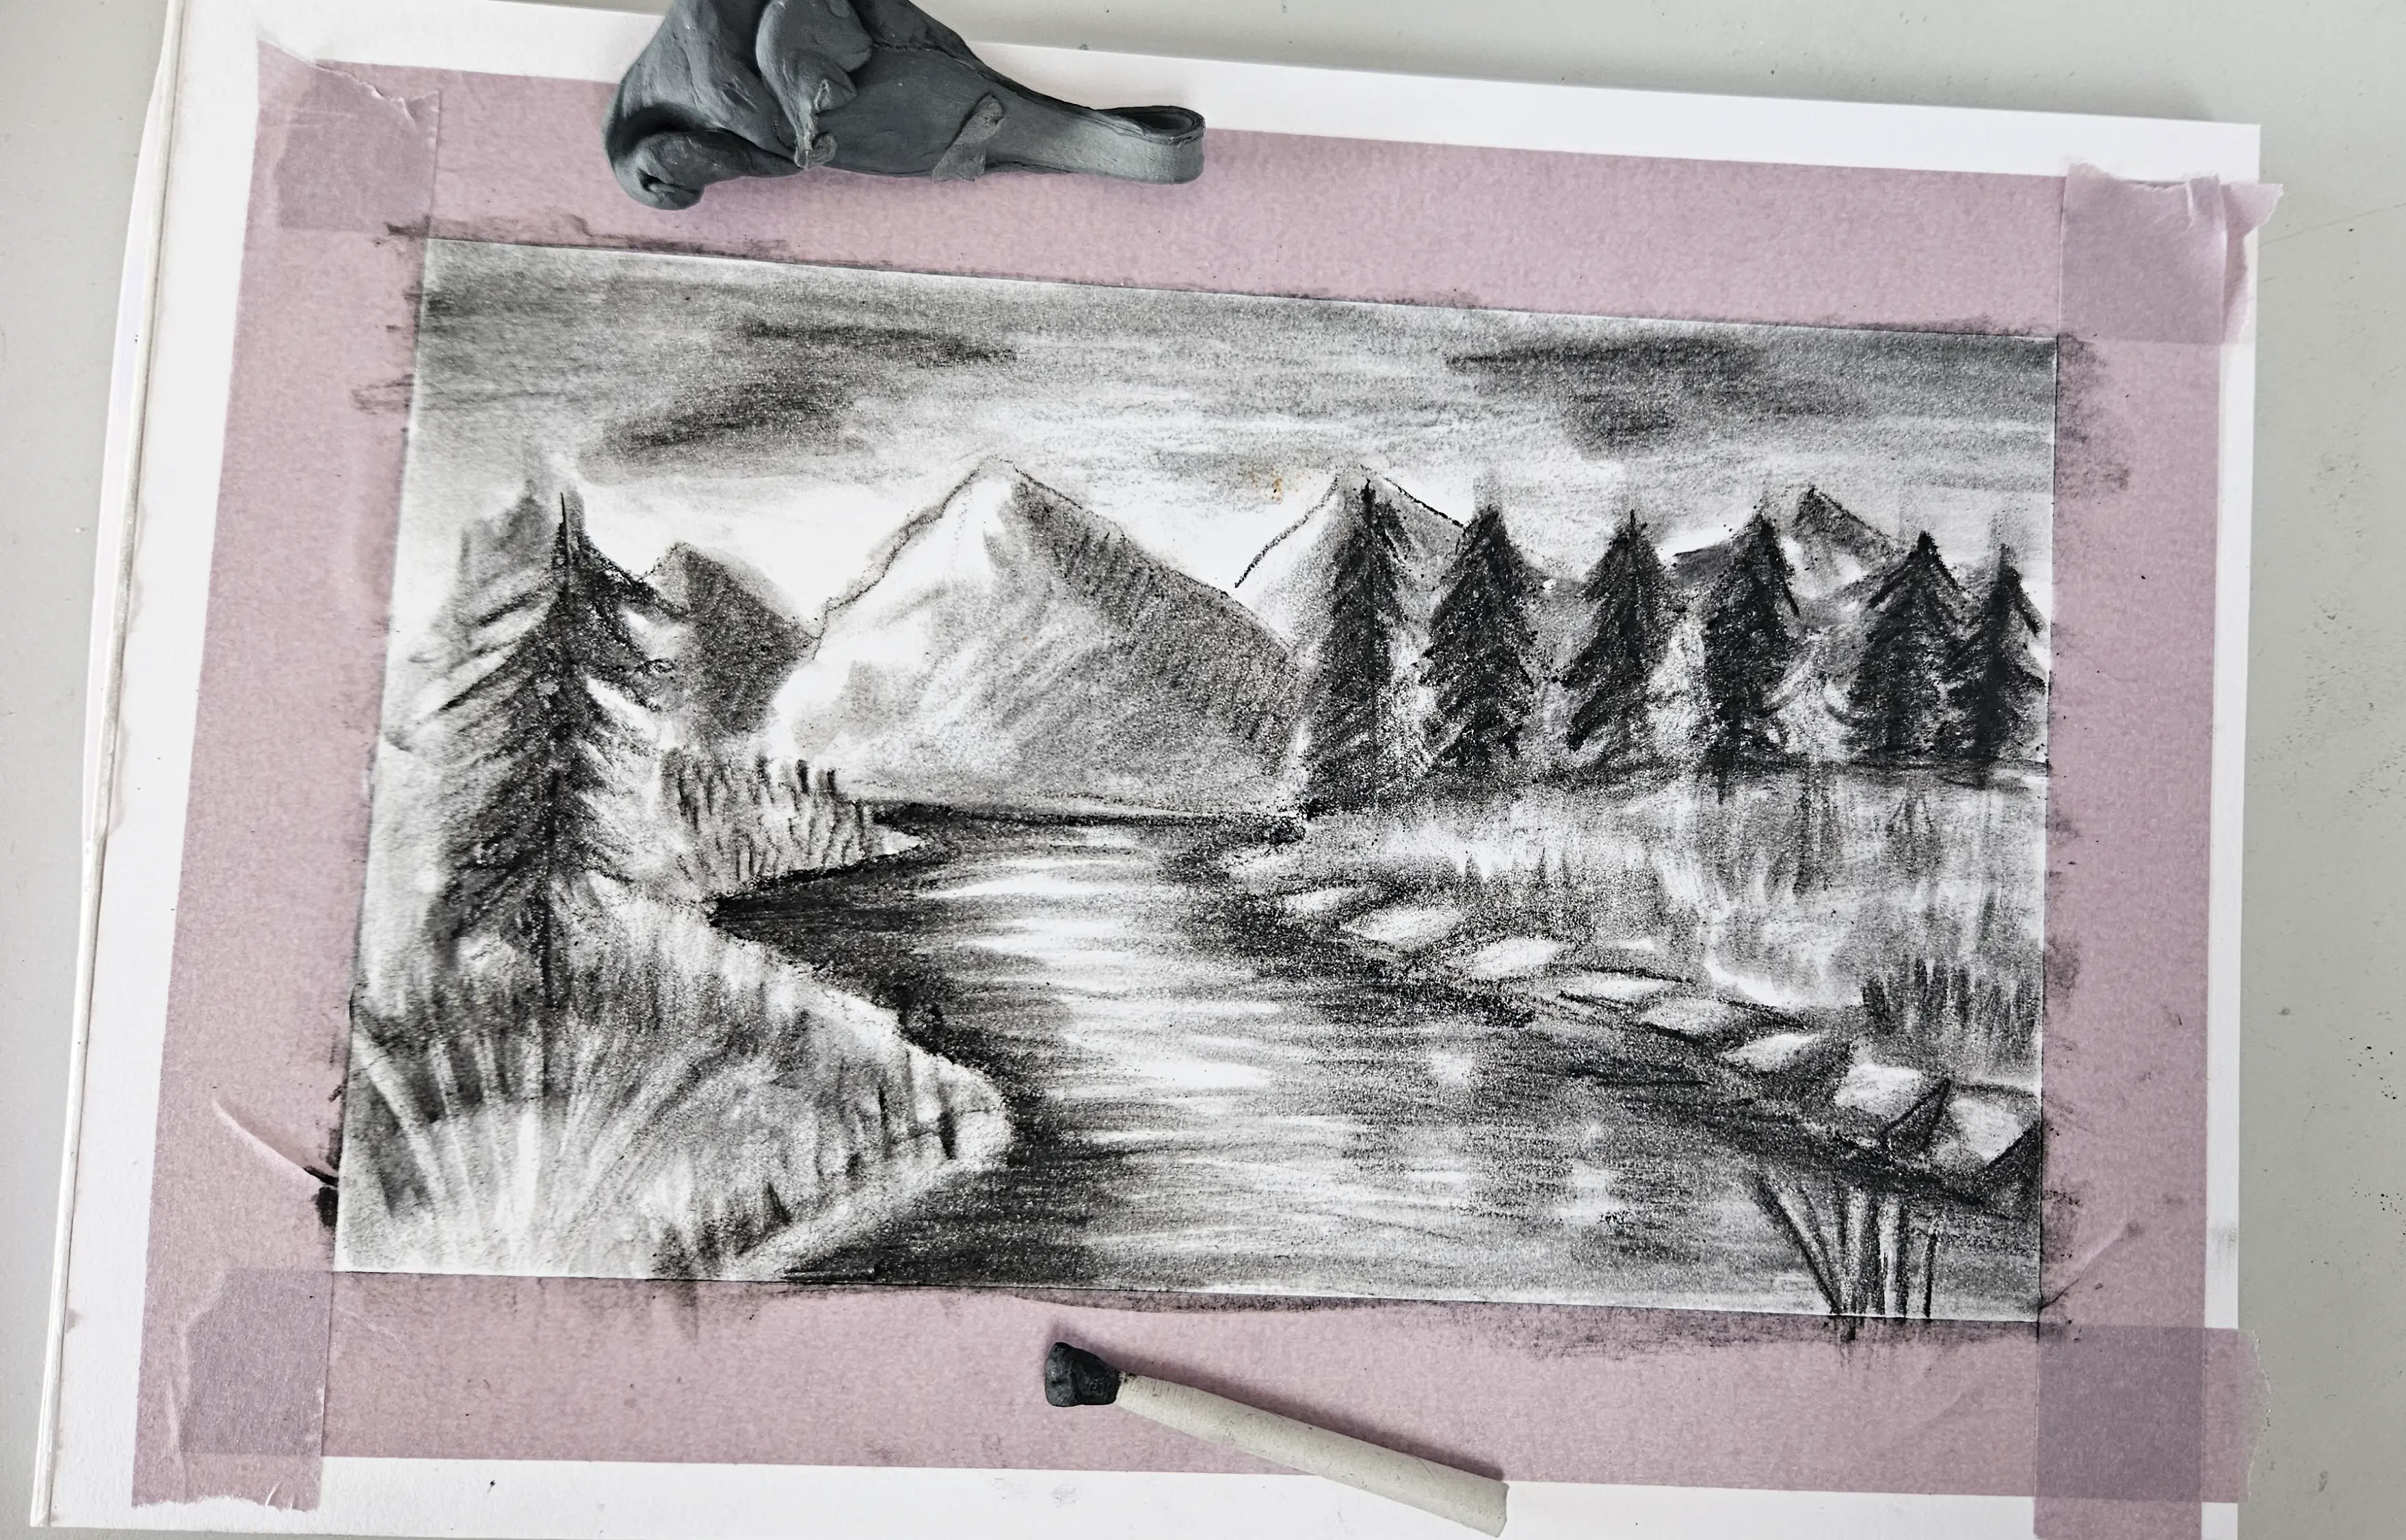
Here is what the landscape we created together with charcoals looks like, once it's finished and fixed.

This article is now finished, I hope it will help you to quickly and easily draw a landscape with charcoal. Practice, observe around you and test it out!
Discussion
No comments yet.