How to Draw a Three-Quarter Face
The face is one of the most complex body parts to draw. When starting out, we tend to draw it from the front or in profile, which are considered "flat" angles. In this tutorial, we will see how to add volume to the face by drawing it in three-quarter view.
WHAT IS THE 3/4 ANGLE?
In drawing, when we speak of a ¾ face, we are referring to any angle between the full frontal face and the profile. Therefore, one can have a “perfect” ¾, i.e. the head is shown ¾ from the front and ¼ from the profile, or more towards the front or towards the profile.
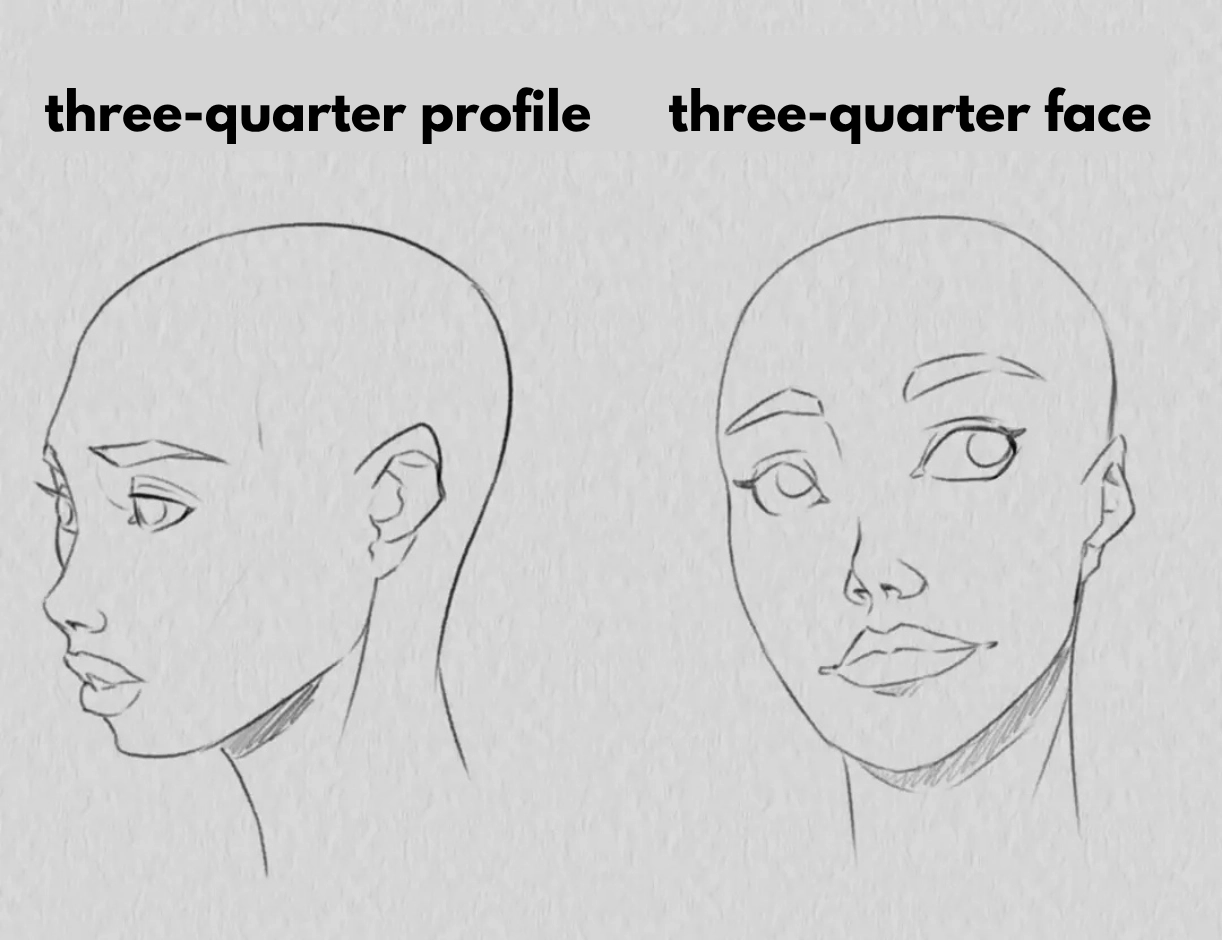
There are two particular ¾ angles known as “faux-profil” and “faux-face”. These are faces seen from the front and side, but slightly rotated to add some volume. As they are generally more complicated to draw than basic ¾ views, we will not cover them in this tutorial.
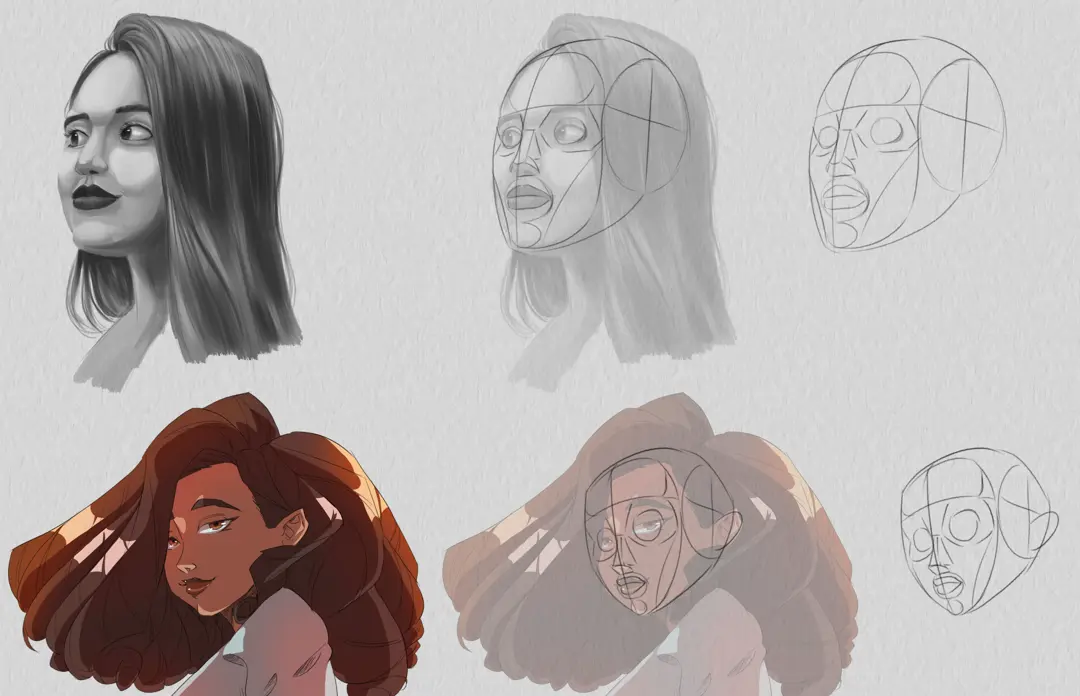
DRAWING A 3/4 FACE STEP BY STEP
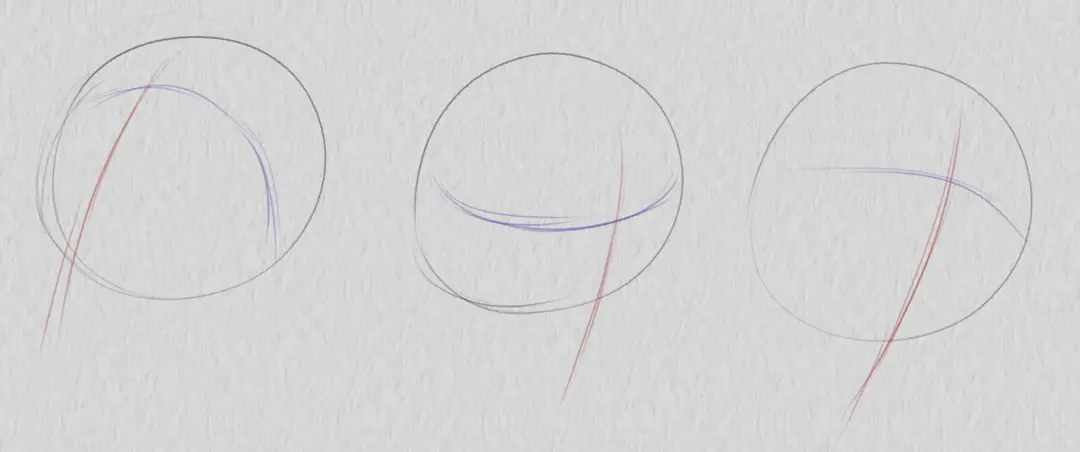
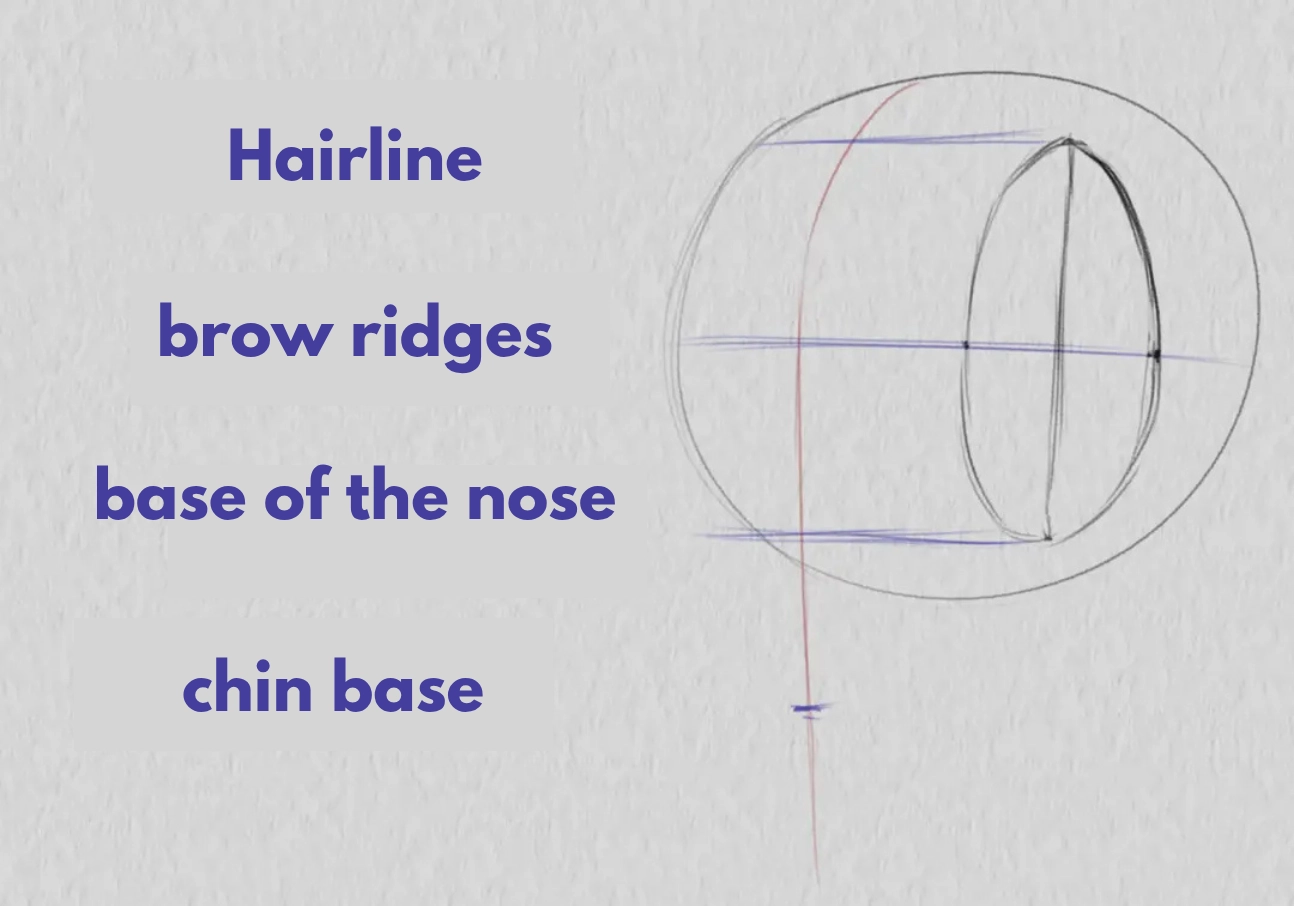
As already mentioned, ¾ is an angle of the head between the front and side views of the face. This concept is very important and we will use it throughout the exercise. To begin my ¾ head, I first draw a sphere, which I then orientate. I position the orientation line slightly off-centre to the left to represent the lateral rotation of the head.

I add a horizontal marker to the equator of my sphere. This marker represents the arcs and, combined with the previous orientation line, draws the cross of the gaze: it is a commonly used reference in drawing that allows the head to be easily positioned in space. In this case, it is a ¾ right view, i.e. neither from above (cross of gaze downwards) nor from below (cross of gaze upwards).
Since diving and low-angle shots are more complicated, we will not deal with them here. However, I will provide an example to give you an understanding of how the line of arcs behaves in space.
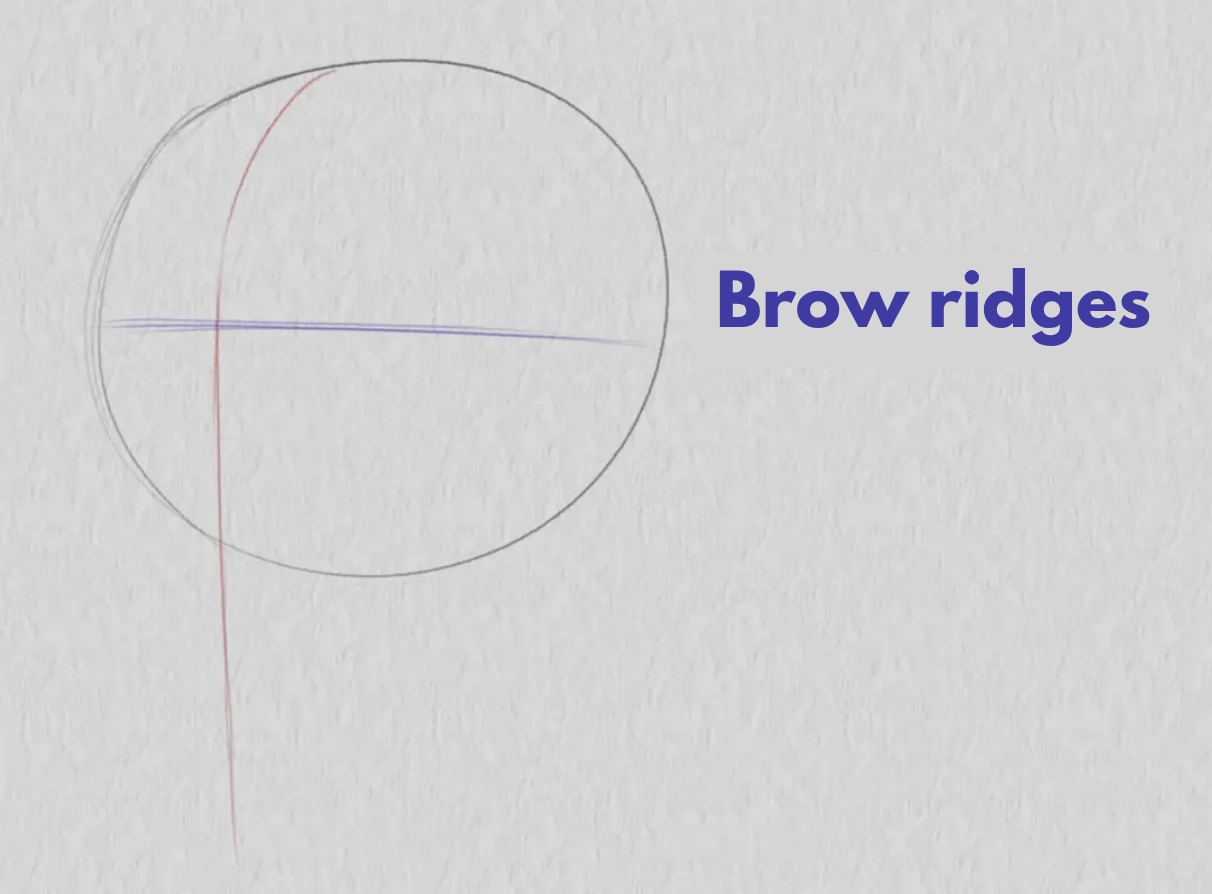
The skull is not a perfectly spherical volume. In fact, it is flattened at the sides. To symbolise this flatness, I will draw an elliptical cut on the visible side of my ¾. I start by drawing a cross with a large vertical diameter and a small horizontal diameter located on the eyebrow arch reference.
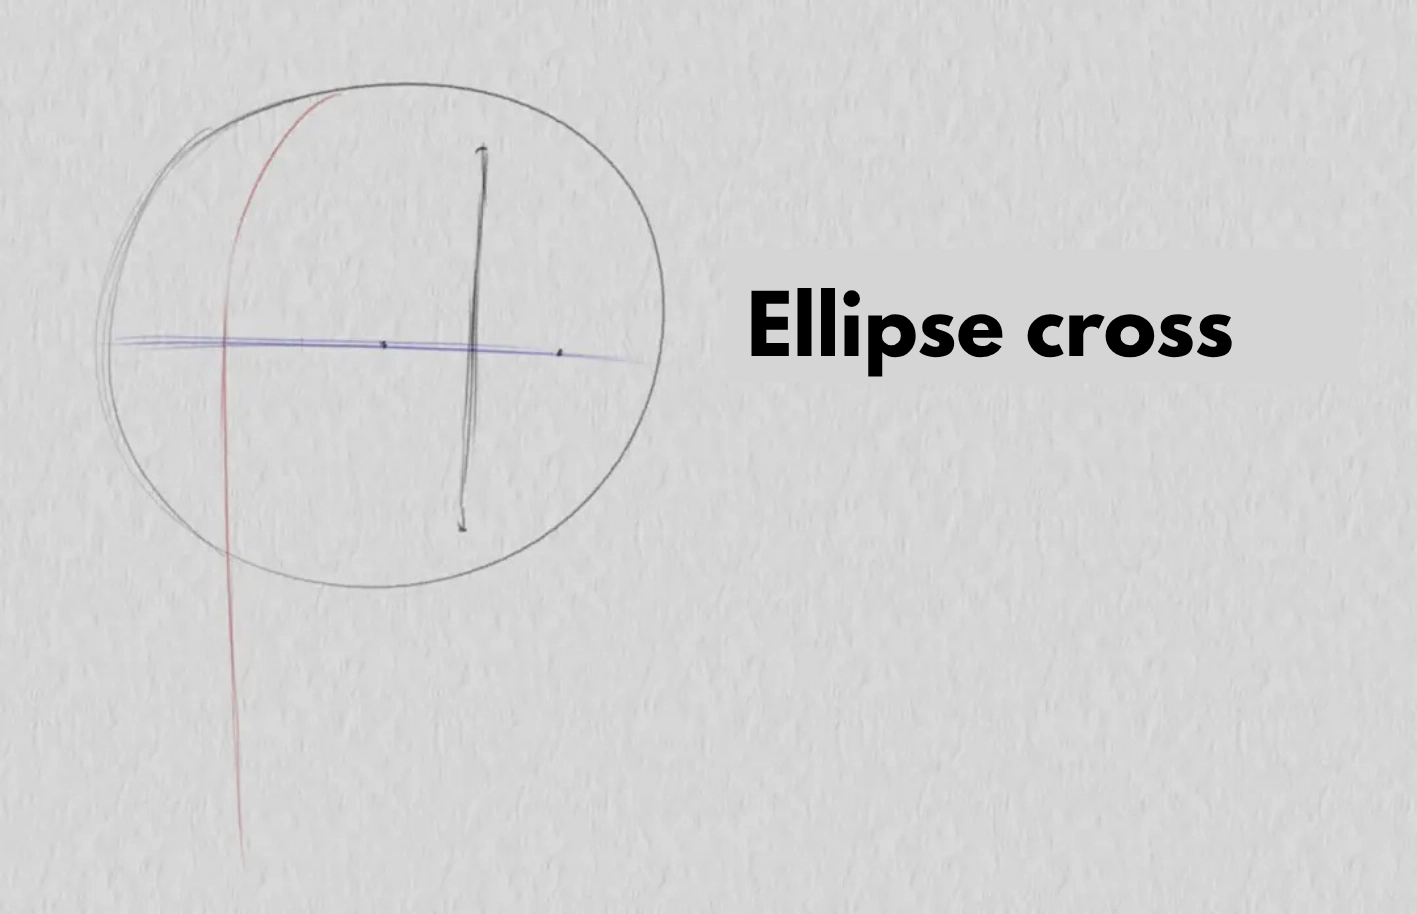
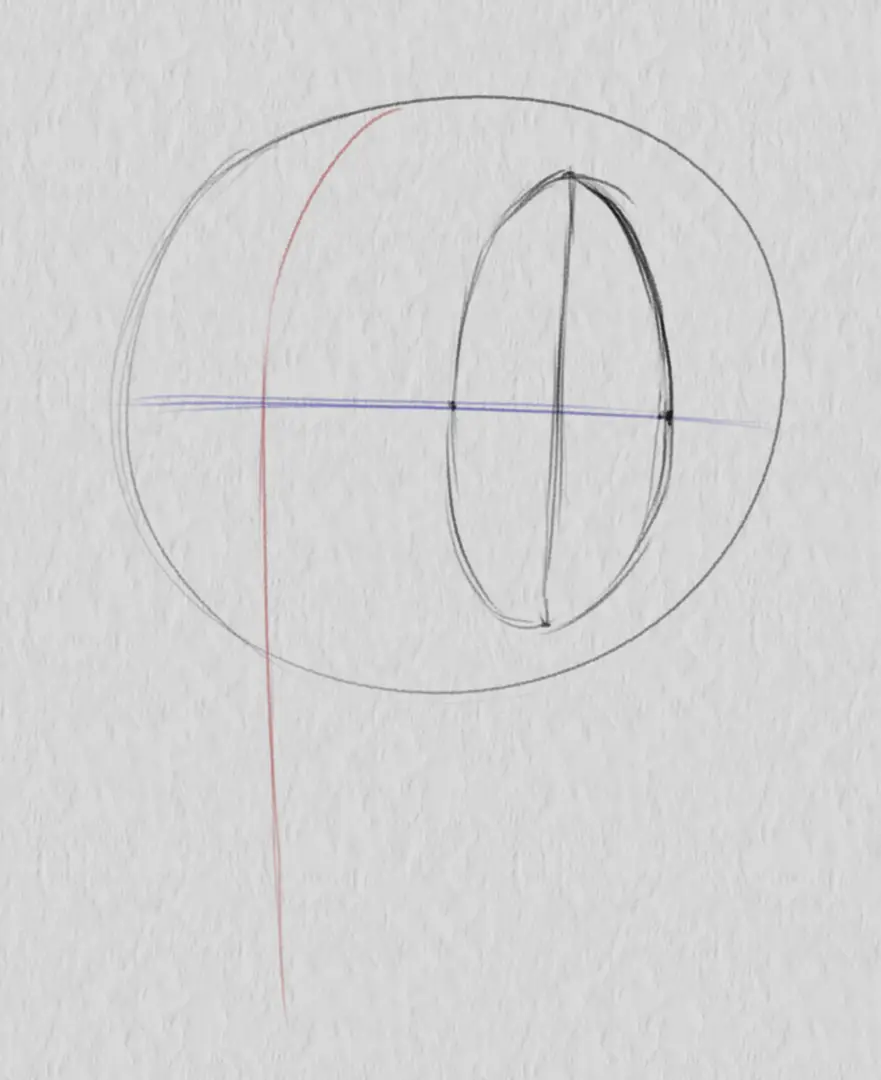
This cross is the so-called ellipse cross. It's a tool used in drawing to trace ellipses. So, I draw an ellipse passing through each vertex of my cross to symbolize the flatness of the skull.
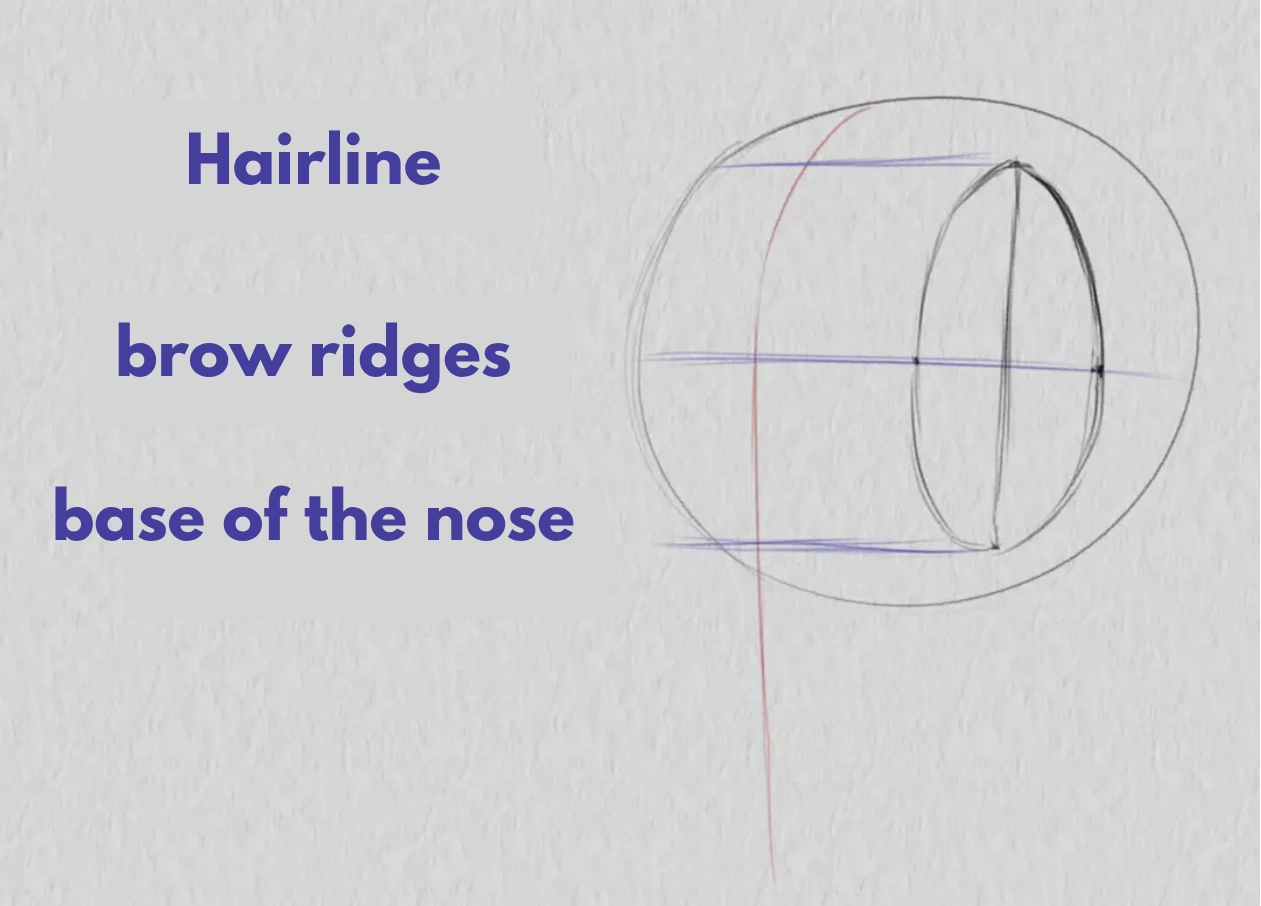
I use this ellipse to mark two other horizontal reference points: the base of the hair and the base of the nose. These reference points divide the head into two areas: the upper part of the face, which houses the forehead, and the central part of the face for the ears, nose and eyes. These areas are called “thirds”. They are more or less equal.
I now position the last third of the face: the lower jaw. For this purpose, I transfer the length of one third to my orientation line and place a new horizontal marker representing the lower part of the chin.
Finally, I connect the bottom of the chin to the skull: one end finishes its course at the bottom of the ellipse cross, and the other goes up more straight towards the eyebrows.
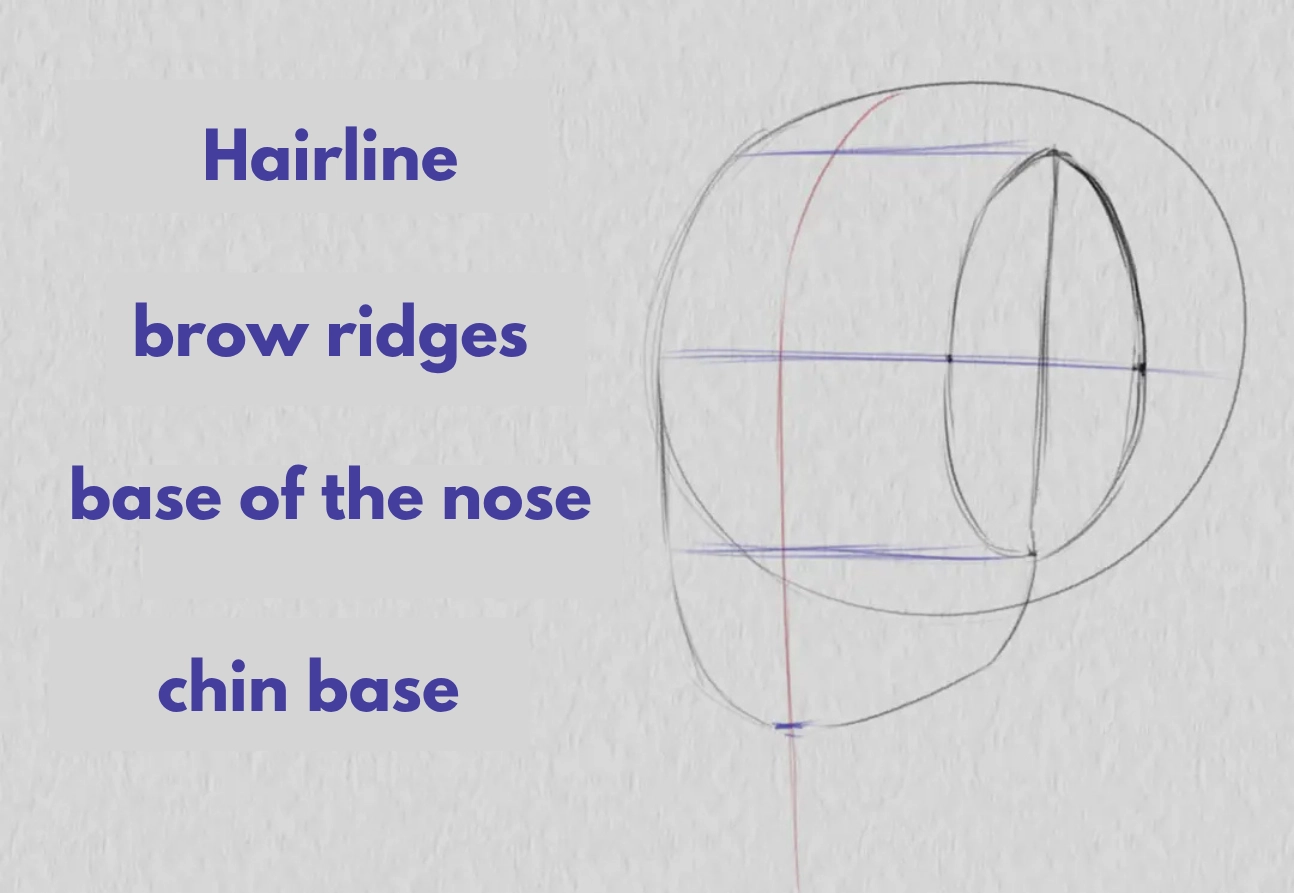
To complete the base of the head, I install two curves to isolate the face from the top of the skull and the side of the head. The upper curve stops at the hairline, and the lower curve follows the shape of the jaw down to the bottom of the chin.

DRAWING SMALL VOLUMES
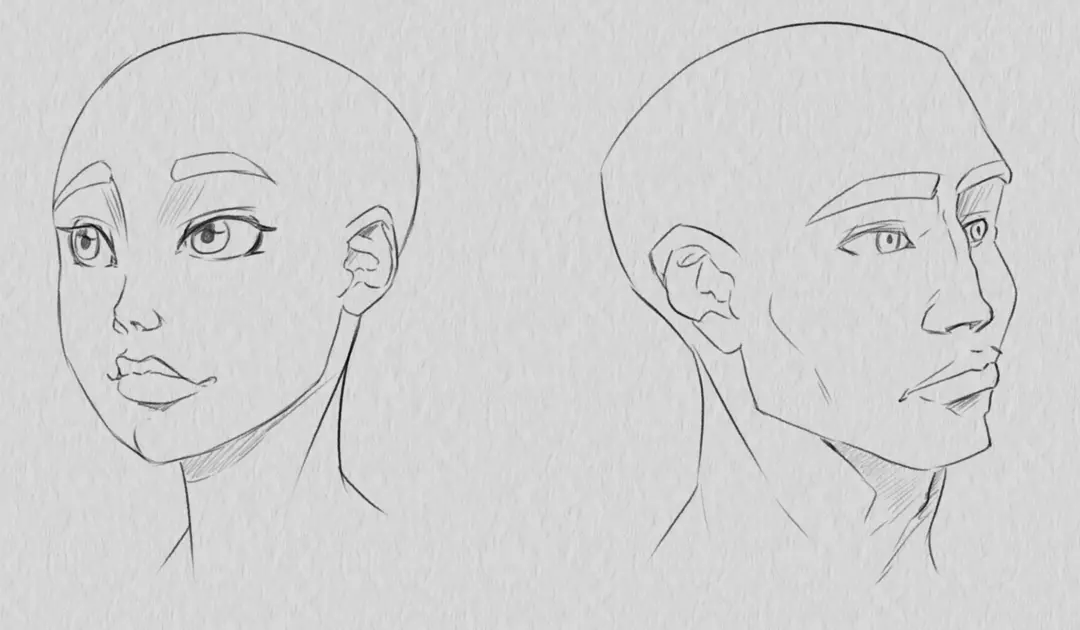
Now that we have the basics of our ¾ head, we can add the smaller volumes of the face: eyes, nose, ears, and mouth.
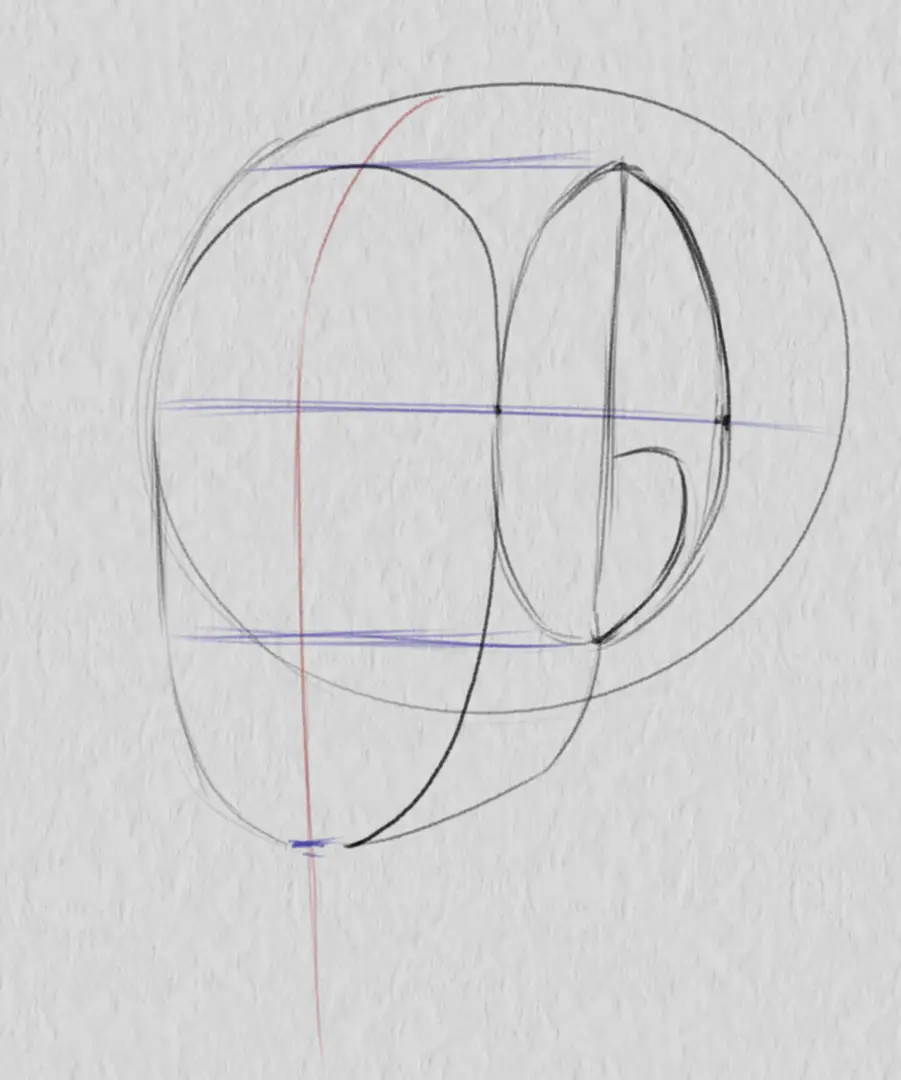
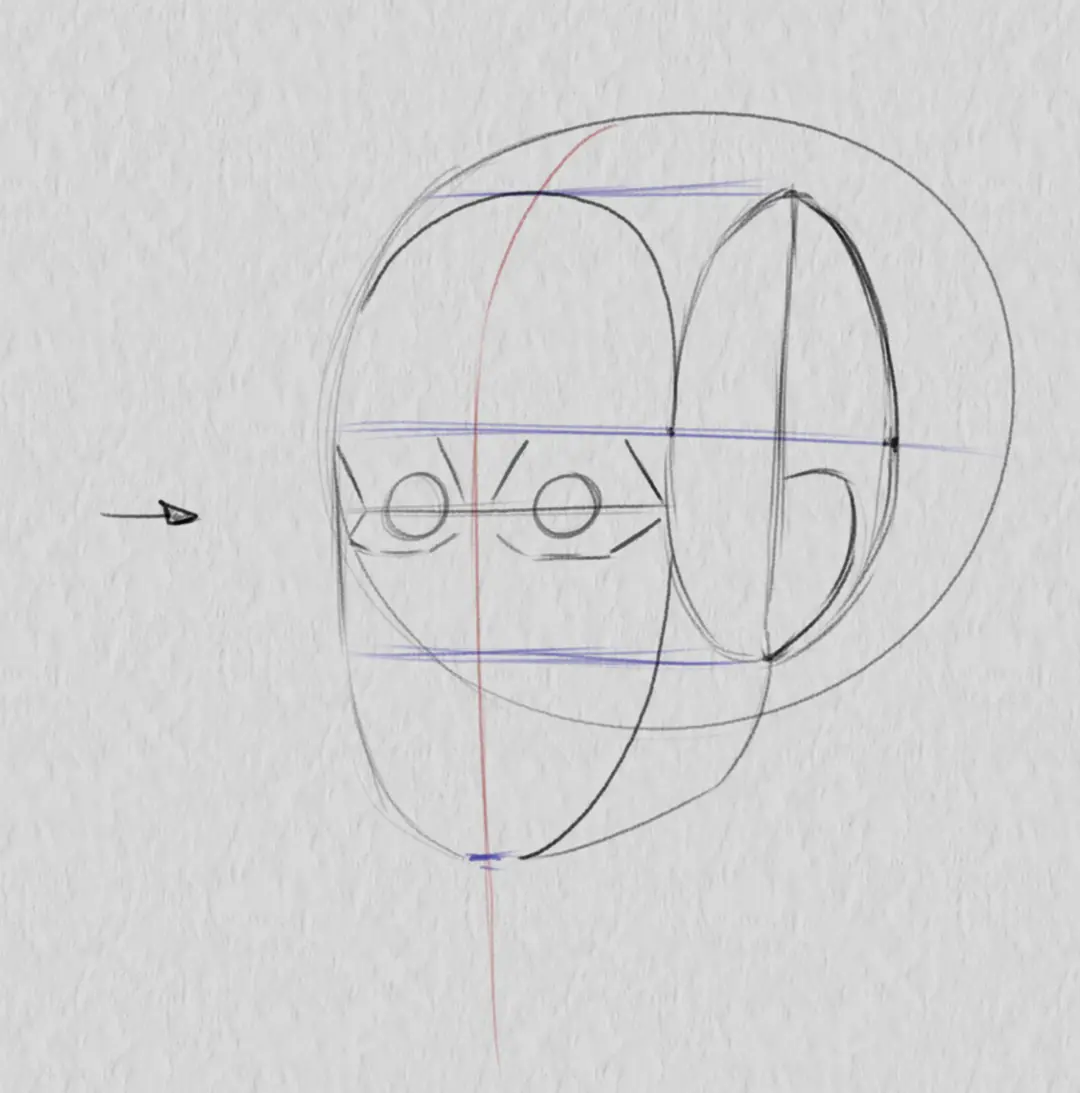
I begin by positioning the ear. It is located at the height of the cross of the ellipse, in the lower hind quarter. The ear starts at the height of the nose line and rises towards the eyebrows. Depending on this, it can be larger (touching the eyebrow line) or smaller. The base of the ear will always be at the height of the base of the nose line, regardless of its size. I have chosen to represent it with a parabola shape, which is sufficient at this stage.
Next, I draw a line under the eyebrows to place the eyes. Depending on the size of the eyes, I can place this line higher or lower in relation to the eyebrows. I place two spheres to represent the location of the eyes. They are slightly recessed into the head, as the face is three-quarters view, but less recessed than on a profile view.
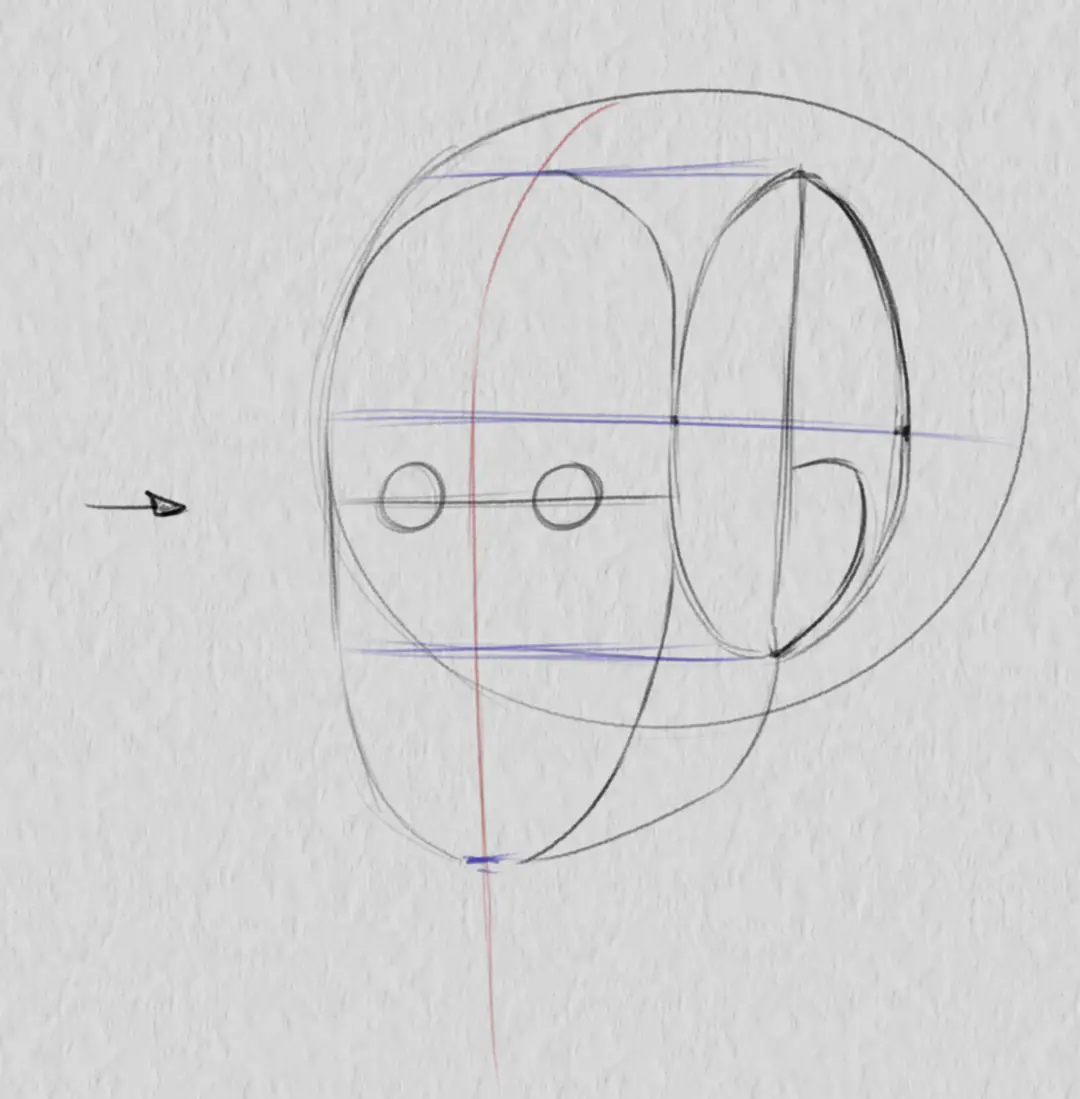
I sculpt the eye sockets. They have a "glasses" shape around the eyes. The most visible part of the orbits will tend to recede into the face, like a profile. The most visible part will have a “house roof” shape, seen from the front.
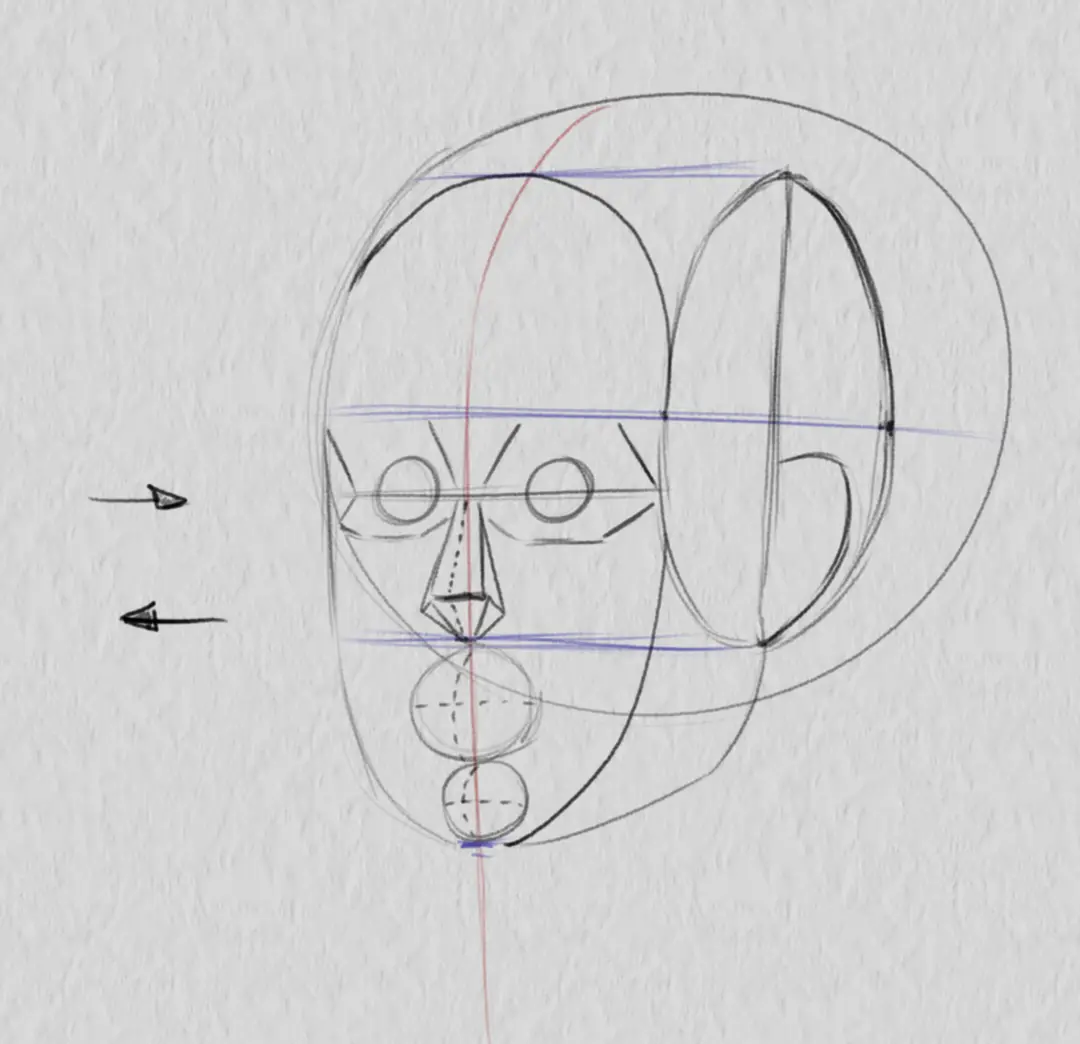
Under the eye sockets, I place a diamond shape for the nose. Unlike the eyes, the nose is a volume that protrudes from the face. Therefore, the diamond will be more pronounced outwardly, but less so than on a profile.

After completing the central part of the face, I can move on to the lower jaw. I add two spheres under the nose: one for the mouth and one for the chin. Again, I can vary the size of the spheres depending on the volume I want to give to the mouth or chin.
I sculpt the sphere of the mouth to place the lips. The area between the upper lip and the nose will accommodate the philtrum, and the area between the chin and the lower lip will be for the chin dimple.
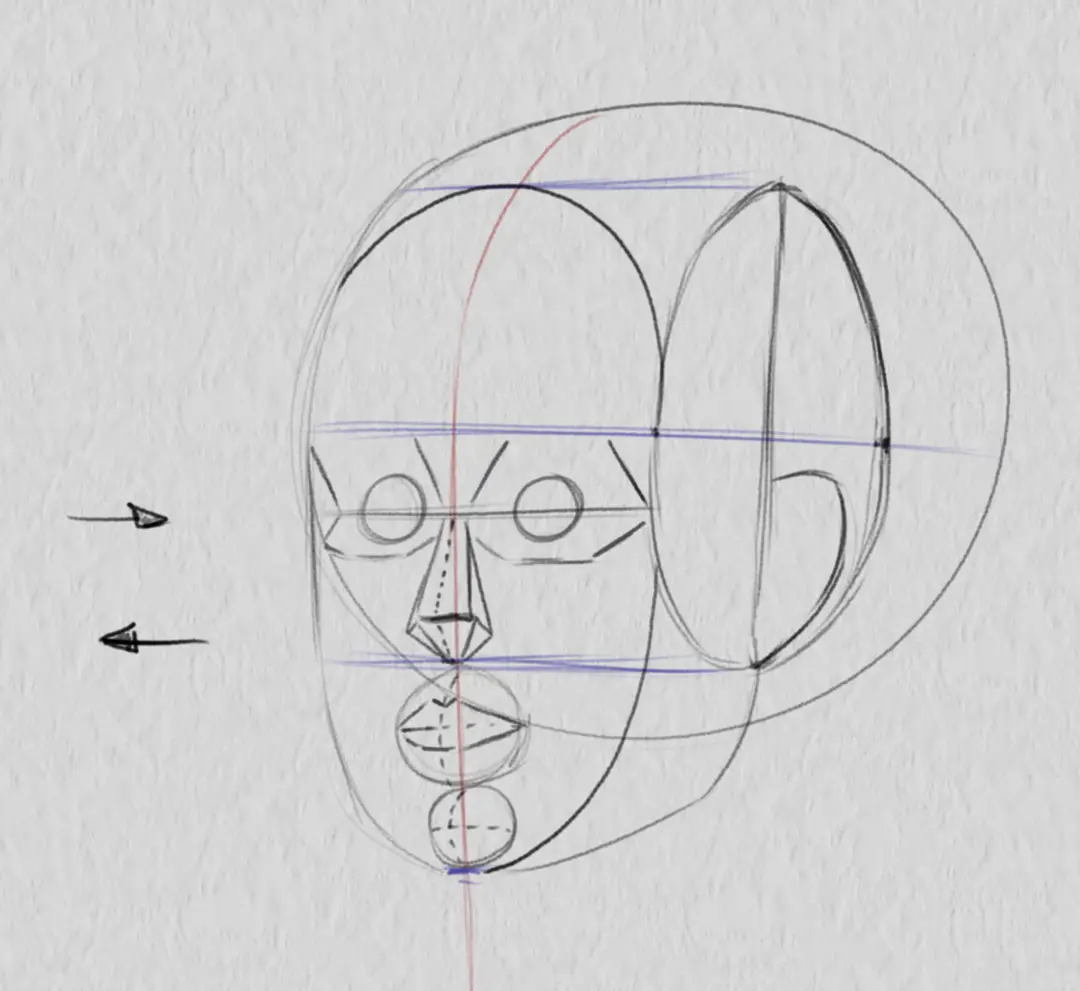
Finally, I add some optional markers to indicate the finer features of the face: the cheekbones, forehead planes, etc...
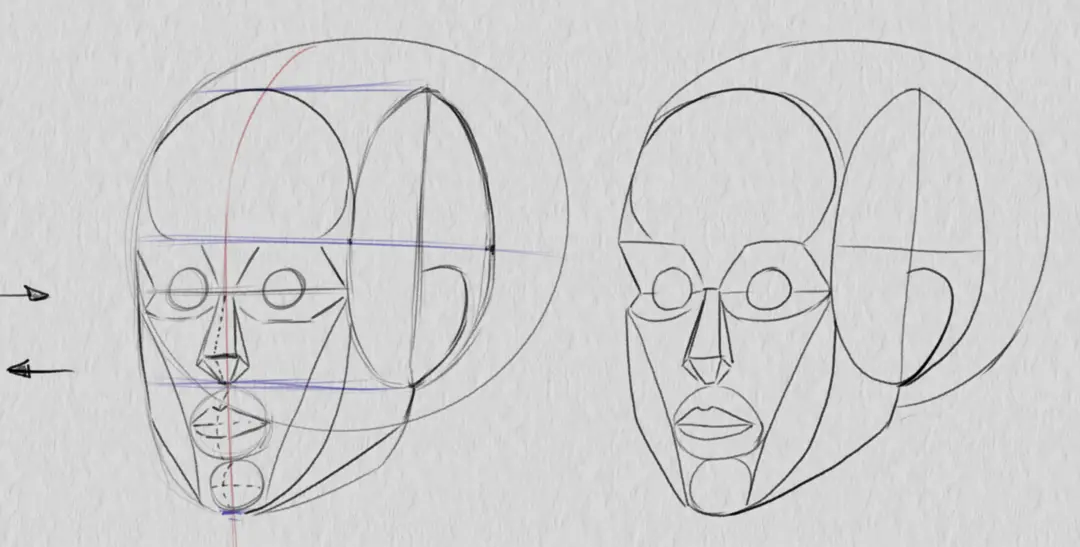
Here we have all the construction lines necessary to draw a 3/4 view face! Now you can adapt them to stylize your heads or get closer to a more realistic result.

Our tutorial on the ¾ face is complete. If you want to learn more, see our articles on stylised faces or realistic portraits.
Written and illustrated by Louis Grieves.
Discussion
No comments yet.