Drawing a Portrait of a Woman
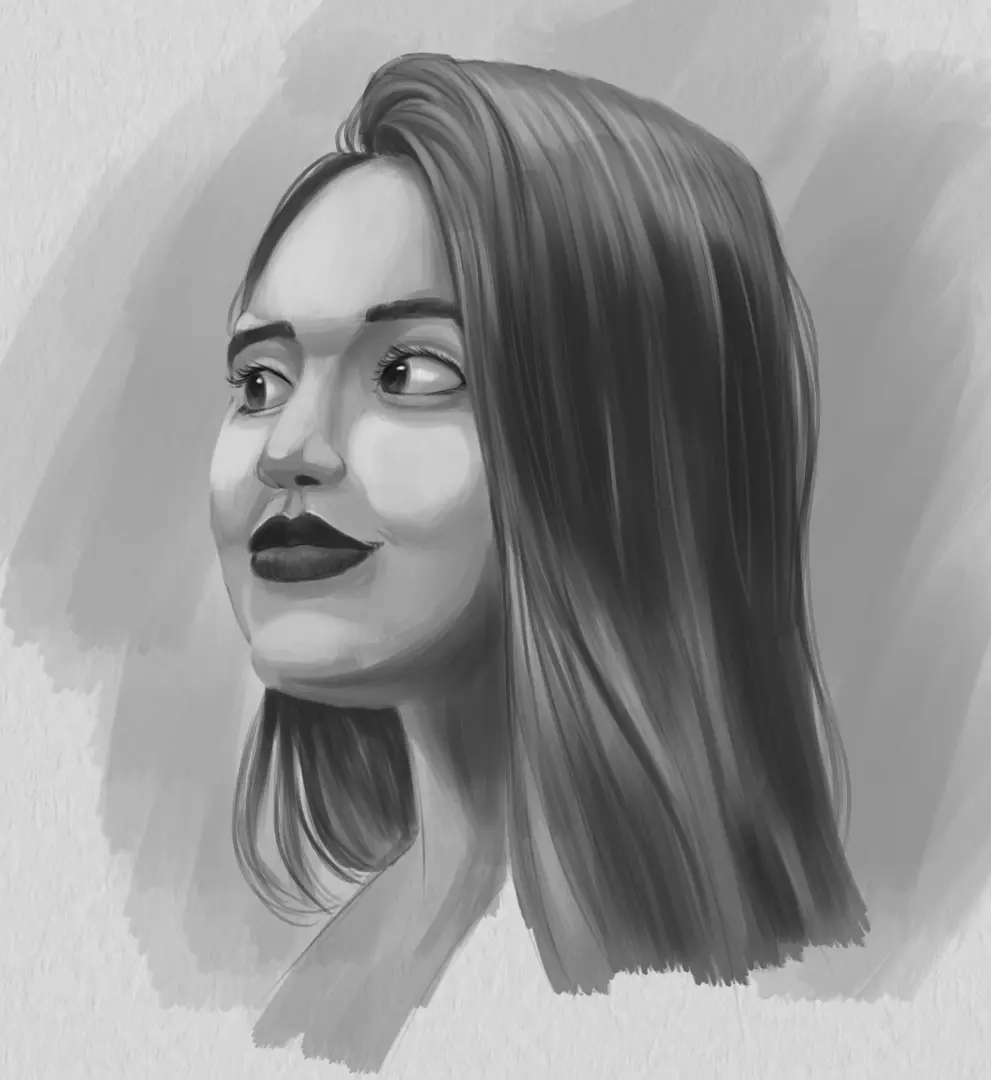
The portrait is an exercise that may seem difficult at first, especially for a female face. In this article, I will show you how to draw a woman's portrait step by step.
CHOOSING THE RIGHT MODEL BEFORE DRAWING
Before we even begin to draw, we must choose our model. In fact, to get a good rendering, we need a model whose volumes are legible. Therefore, we will favour photos in which the lighting gives clear, sharp shadows on the face. Avoid taking photos in which the lighting is multiple or too diffuse, such as fashion photos: they are made to smooth out the volumes as much as possible and are too flat for our exercise. Finally, if you are a beginner, prefer black and white photos: volumes will be easier to read than in colour photos.
If someone is posing for you, make sure to have lighting conditions equivalent to those mentioned earlier. Having a live model is a real advantage over a photo! The model can strike the pose you want and, most importantly, you can move around to better understand the nature of the volumes of their face.

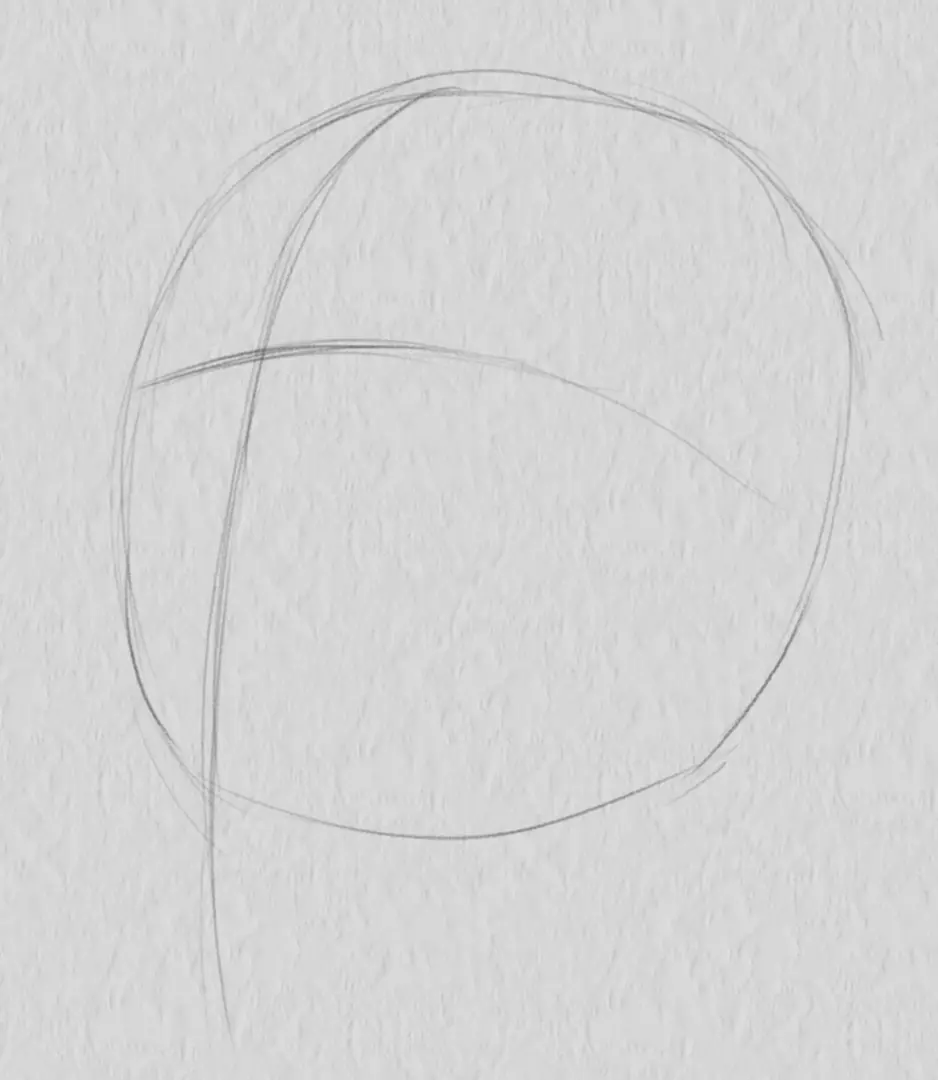
DRAWING THE LARGE VOLUMES OF THE PORTRAIT
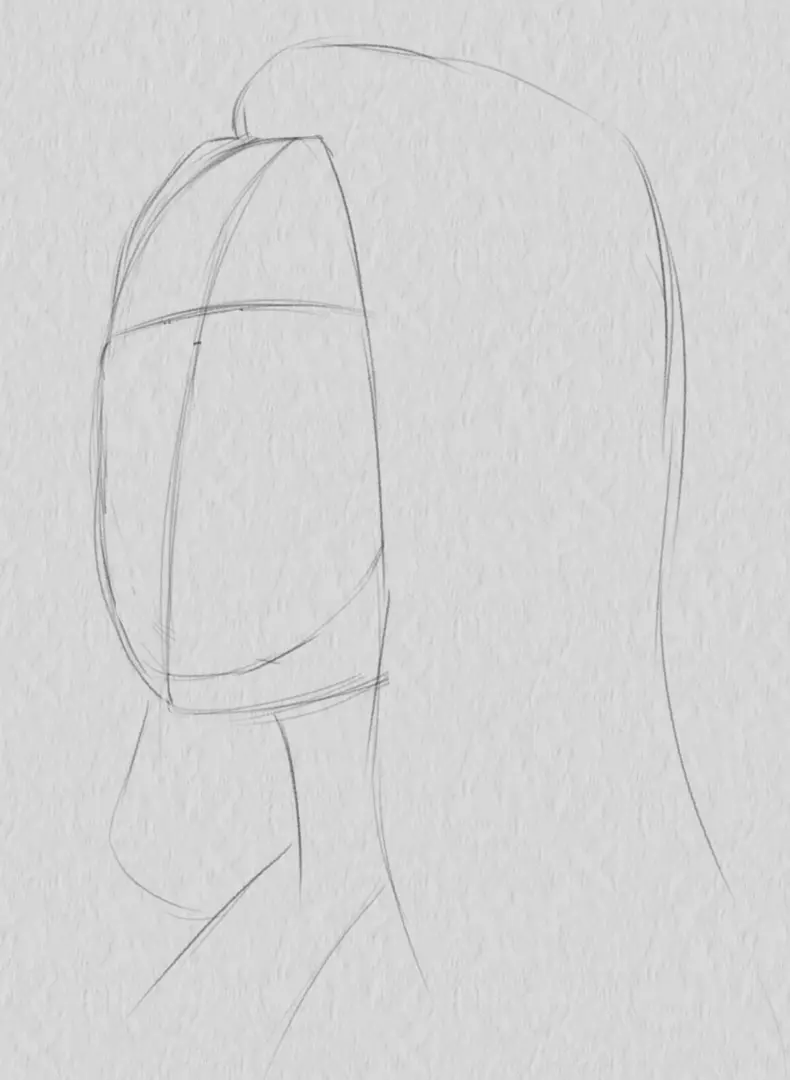
To begin my portrait, I will first concentrate on simple and large volumes. The aim will be to roughly shape my forms to get a general idea of my drawing. I will start by drawing a sphere for the head which I will then orientate: I will place a vertical line representing the orientation of the head and a horizontal line which will then help me position the eyebrows. This is the so-called line-of-sight cross.
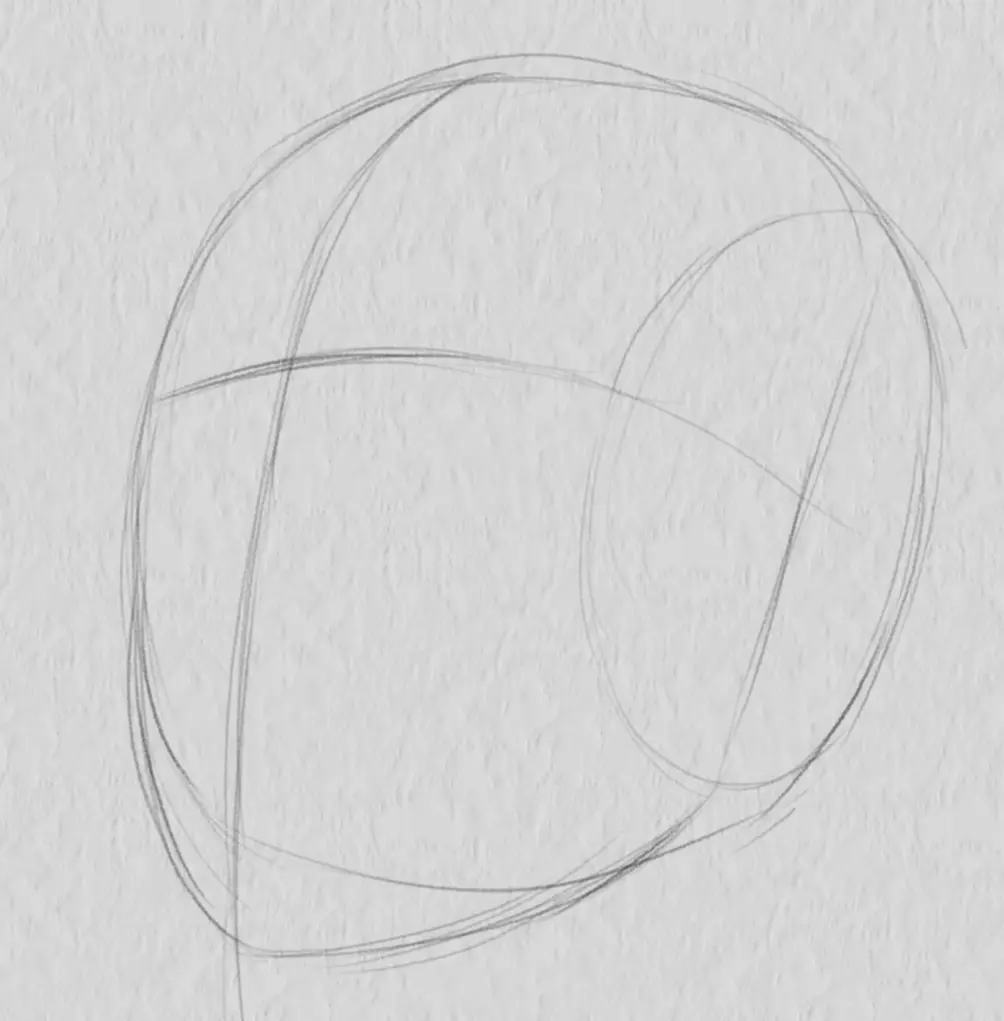
I will then indicate the side of the head using an oval on my sphere. Although the side of the head is hidden by my model's hair, this will help me fix the lower jaw and neck.
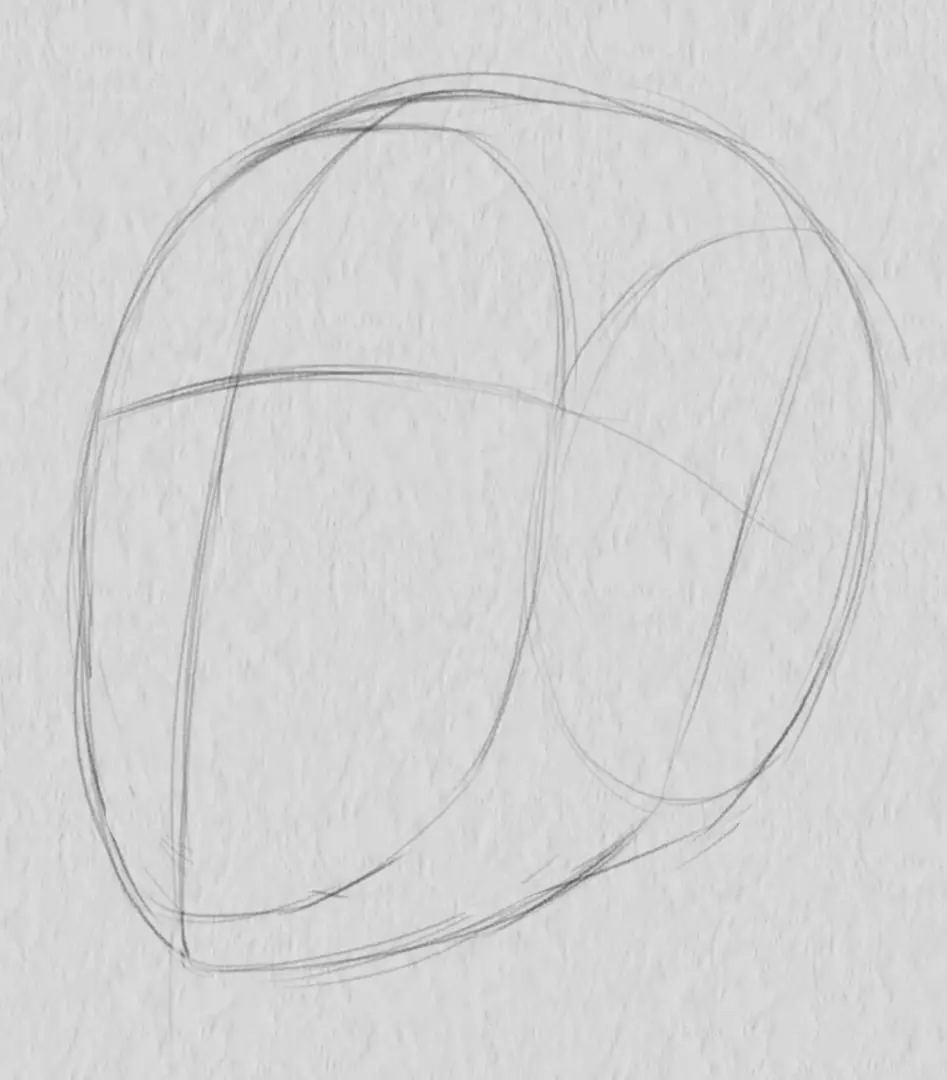
I outline the different planes of the head, that is, the skull, the face, and the side of the jaw. I isolate the face based on the hairline for the top, and the shadow defining the side of the head for the jaw.
To finish the large masses, I will position the hair and neck area. The hair will cover the skull and the side of the head, while the neck will originate from under the head.
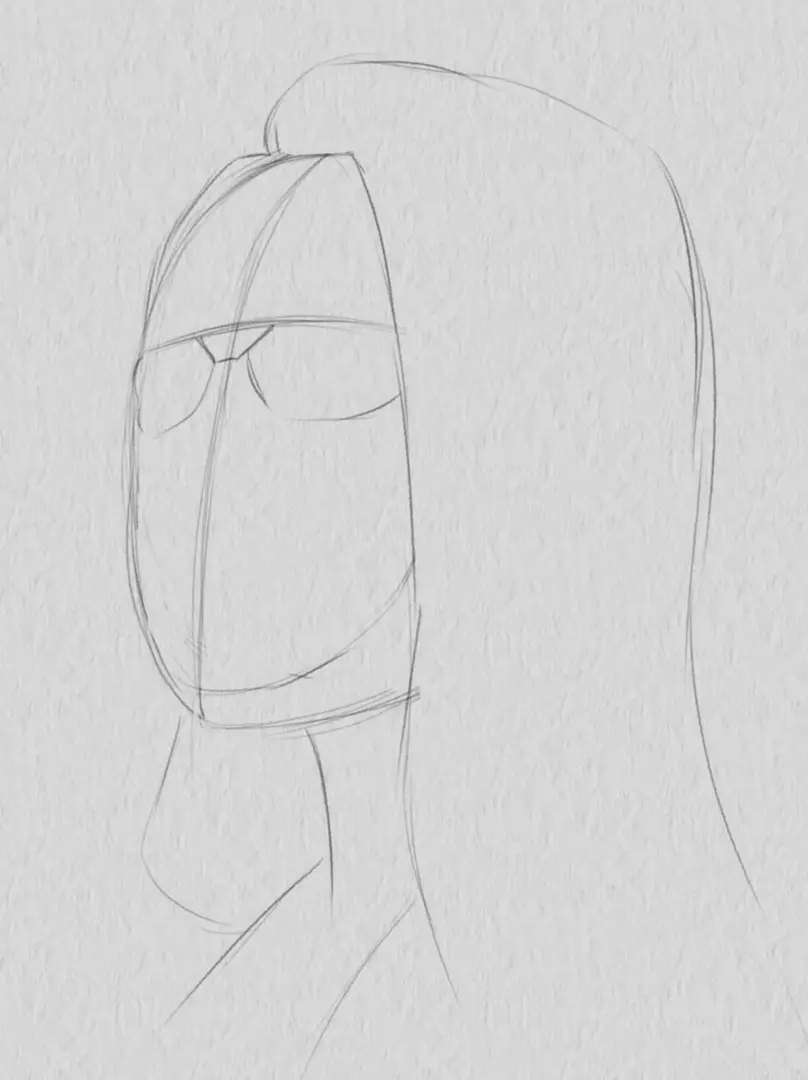
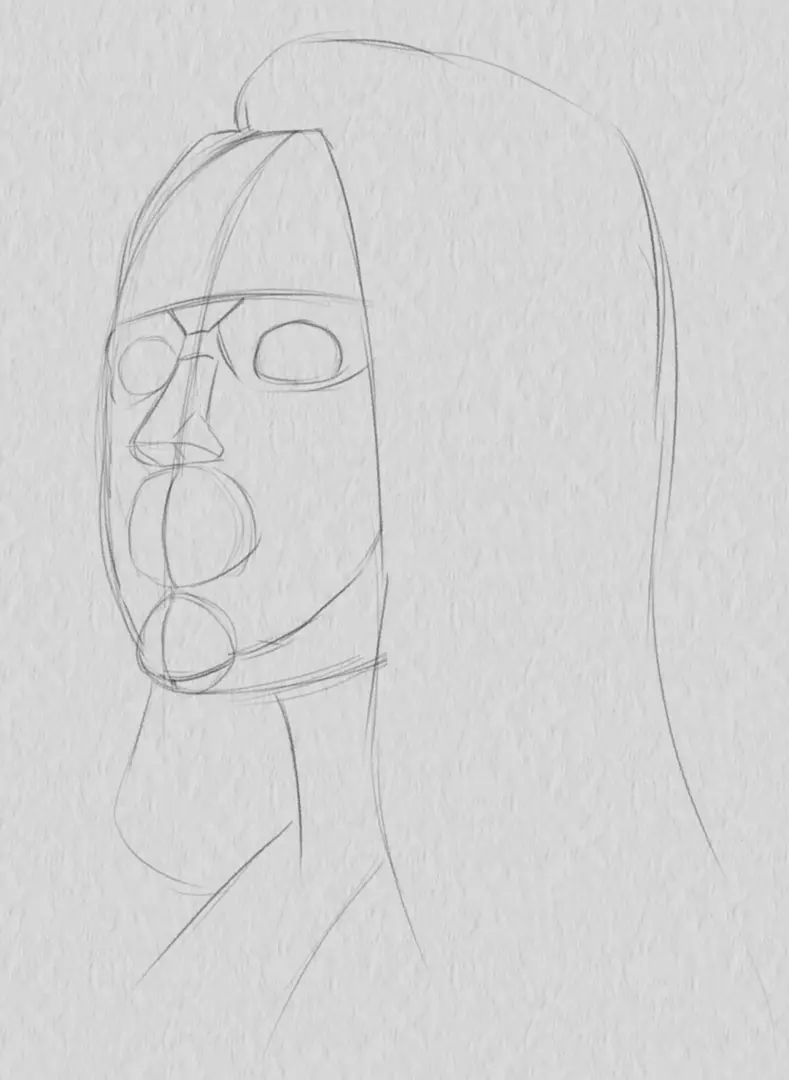
I "sculpt" the head by placing different planes and volumes on the face. This is where our head will begin to refine more and more. It is therefore important to maintain soft and curved features to keep a gentle face.
I begin by pointing to the orbits. They are shaped like “glasses” and are rooted below the eyebrow line.
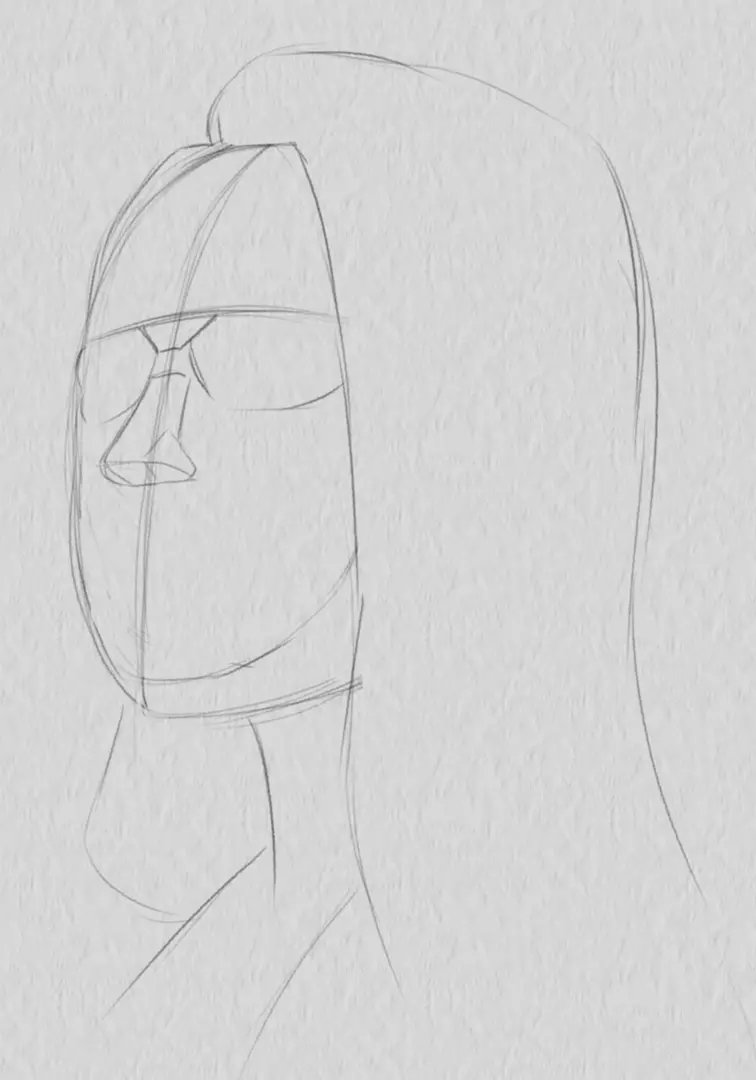
Then, I place a small pyramid under the eye sockets to mark the location of the nose.
I add two spheres under my nose to isolate the mouth and chin area.
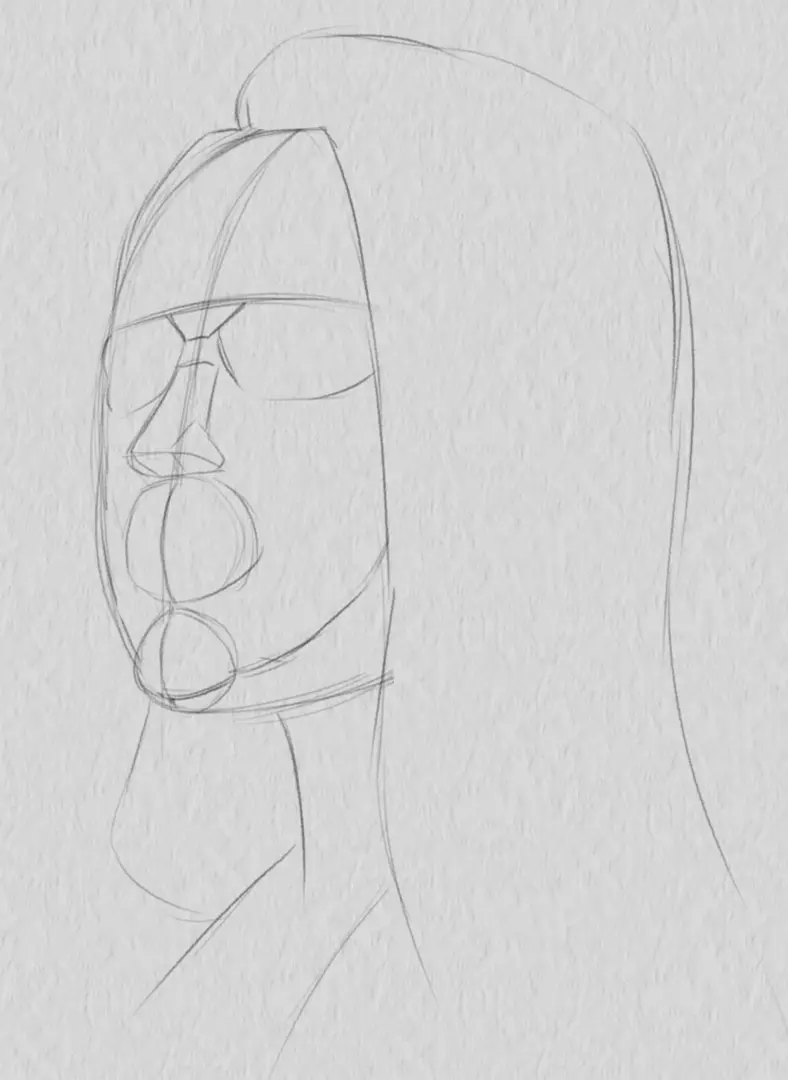
Finally, I add two spheres in the eye sockets for the eyes.
ADDING DETAILS TO THE DRAWING
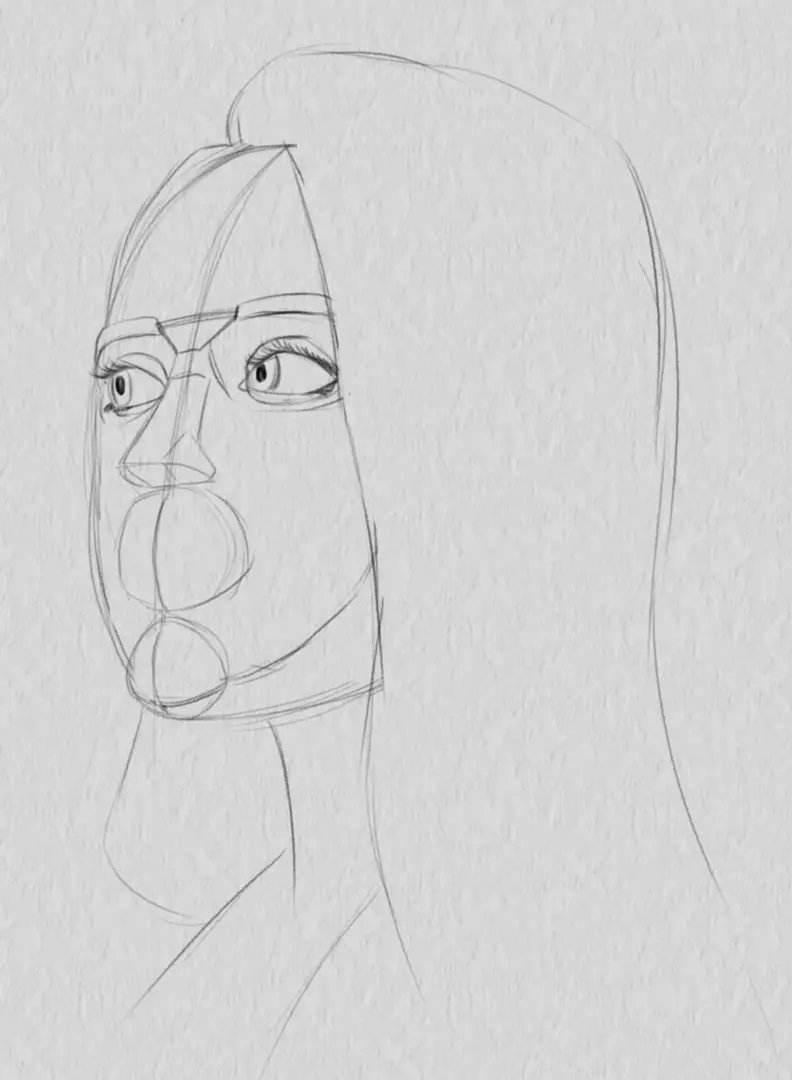
The main volumes are ready, now I can start adding more details. I add the eyelids and the inside of the eyes, making sure to correct the proportions to the model if necessary. I also take the opportunity to place the eyebrows just above.
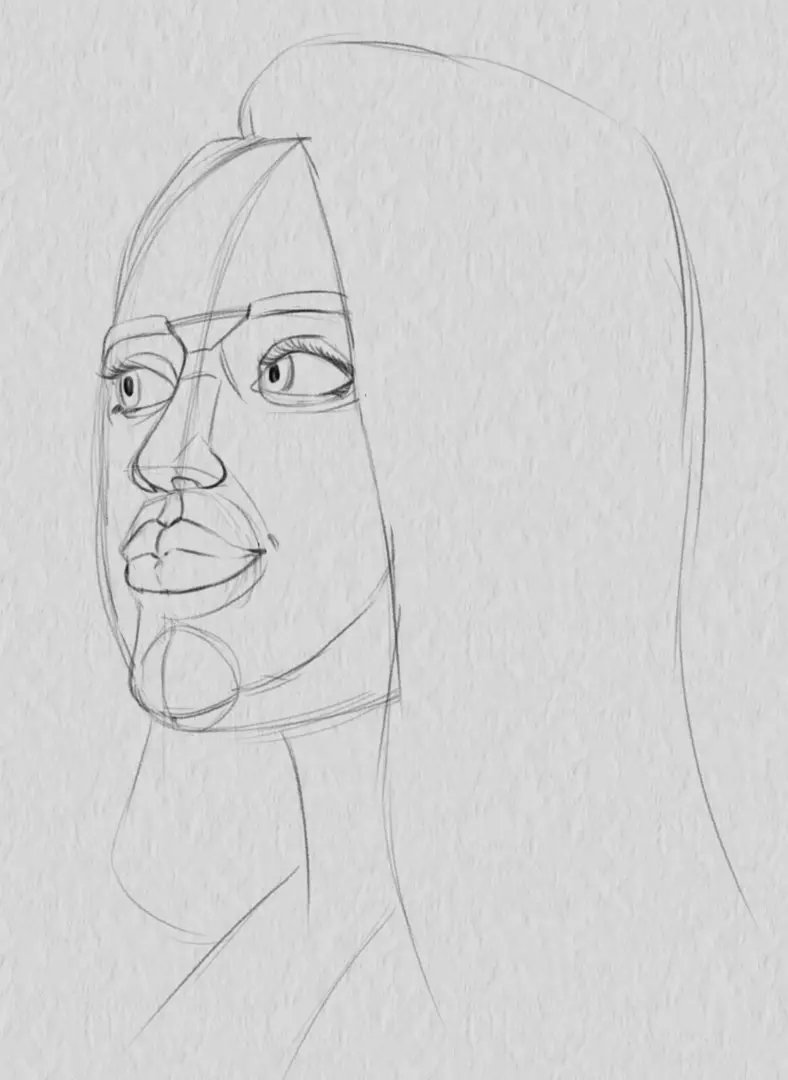
I apply the same process to the nose and mouth: I “sculpt” simple volumes into smaller, more complex ones.
I can do the same with hair to isolate large strands.

If necessary, I can add construction lines. I like to mark the cheekbones, for example, and the chin dimple. These lines will be very useful for the shading phase.
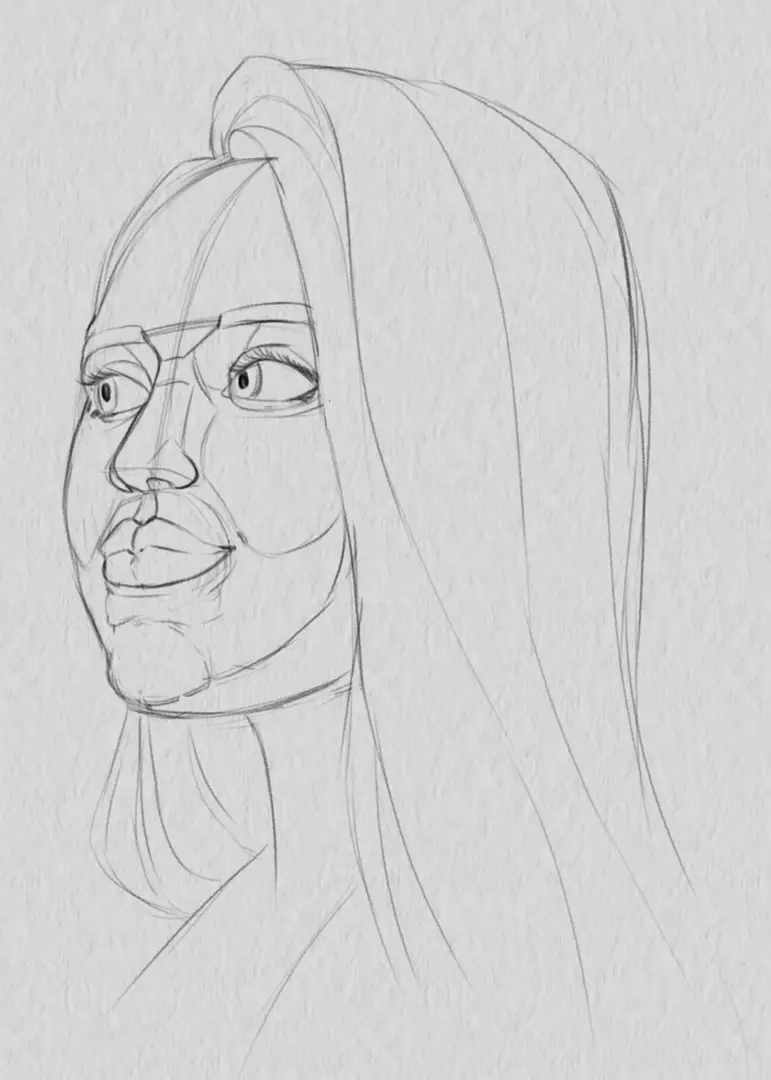
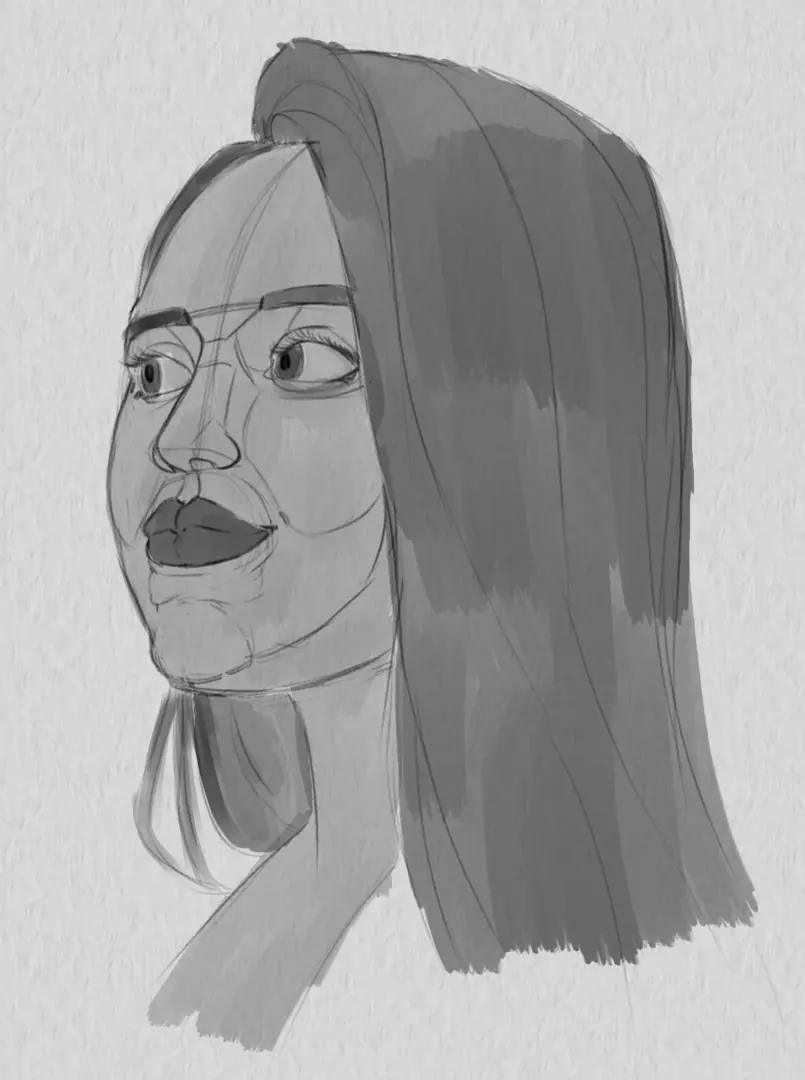
My sketch is finished! I can now move on to adding volume.
ENHANCE THE VOLUME OF THE FEMALE FACE IN THE PORTRAIT
To begin, I apply an average value to the different volumes that make up my face: a medium-light grey for the skin, a light grey for the eyes, a dark grey for the mouth and hair, and so on... If you work in the traditional way, I advise you to start by applying the lightest value of your elements, i.e. the brightest areas. It will be easier to darken rather than lighten later.
In general, there should no longer be any white in your drawing from this point on: since white is the lightest possible value, we will reserve it for the brightest, most radiant parts. Look closely at the model: even the "white" parts such as the eyeballs are actually light gray!
Now I will begin to position the large shadow areas. They are slightly darker than the halftones and allow me to identify all the volumes in the shadows. I will do the same with the light areas for the bright parts.
I rely on the construction lines of my sketch to clearly delineate the different parts. Depending on the surface, my boundaries will be fairly sharp for very distinct planes such as the eye sockets, for example, or blurred for rounder parts such as the chin or cheeks.
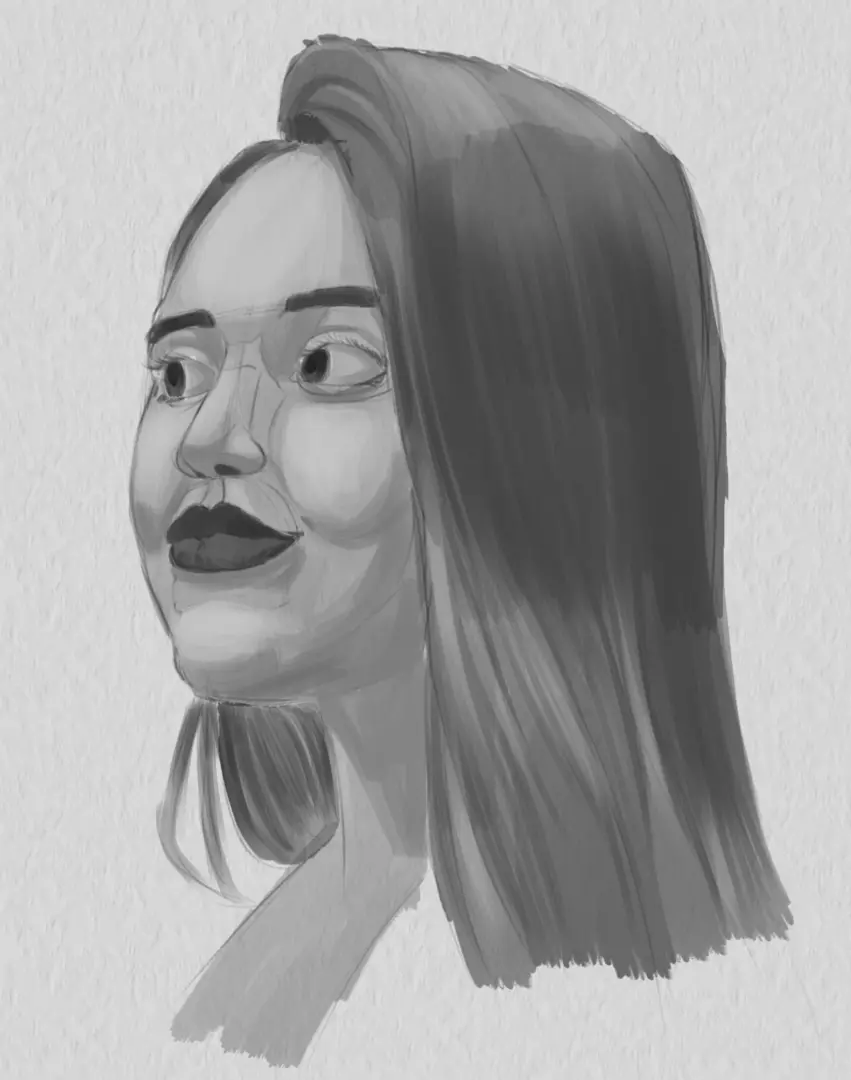
From here, I can continue to refine my drawing based on the final rendering I want to achieve. I can work on my shadows and hair detailing more if I want a more realistic effect, or emphasize the contour lines for something more stylized. Feel free to check out our related articles if needed.
Once again, I am careful not to harden the features of my portrait too much: I keep the beautiful curves and do not over-accentuate facial expression lines.

Now you know how to construct a female face! Feel free to explore the stylisation of the face, exaggerating or diminishing certain details, or to try different types of rendering. Don't forget to keep the features.

Discussion
No comments yet.