How to Draw Harley Quinn
In this article, we will focus on an iconic character from pop culture. Whether you like comics or not, you've definitely heard of her. Known for her volatile personality and questionable humour, in recent years she has established herself as the quintessential anti-heroine.
I definitely want to talk about the sublime Harley Quinn!
BUT WHO IS HARLEY QUINN?
If you live in the bottom of a cave or have no interest in comics, movies, or anything else, you might have missed this eccentric blonde.
Harley Quinn is considered one of the most popular characters in the DC Comics universe and in pop culture in general. We see her everywhere: in cartoons, comics, movies, TV shows, merchandise, ...
It is impossible to ignore this phenomenon.
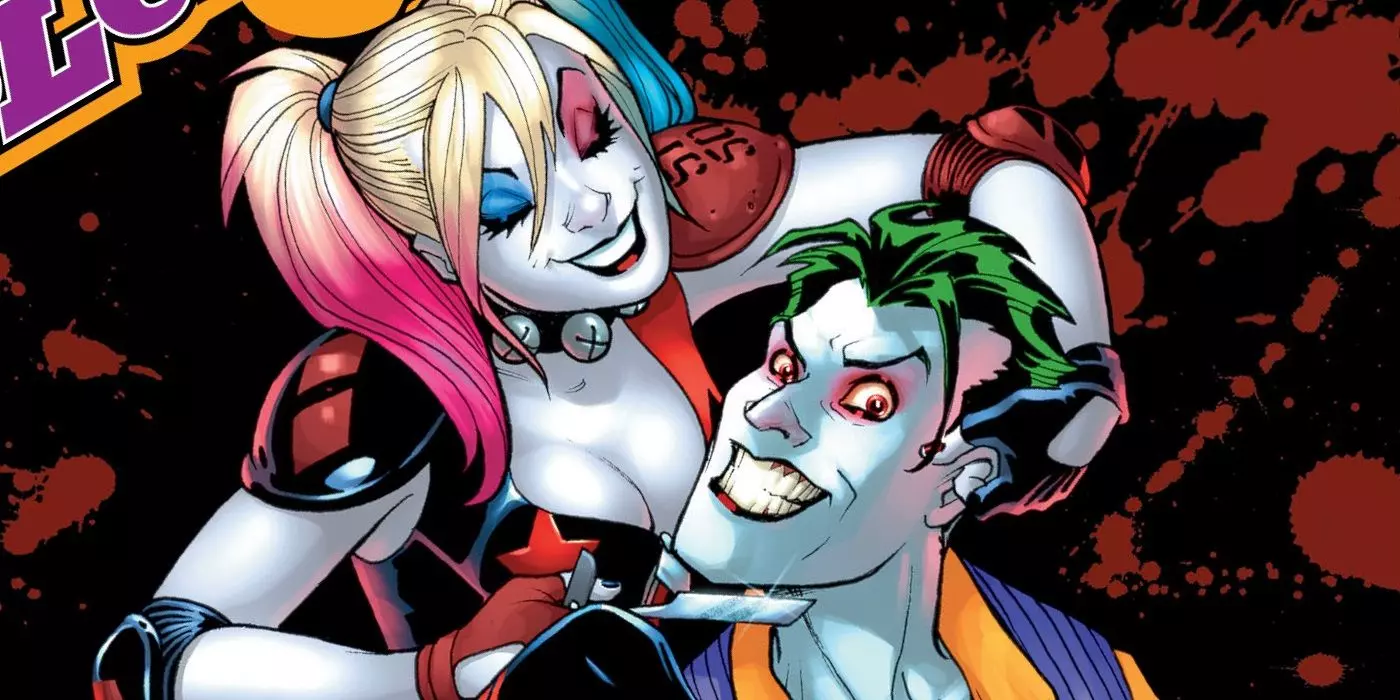
Created in 1992 by Paul Dini and Bruce Timm, she was originally conceived as the Joker's accomplice. Over time, the character developed into a character in its own right..
Harleen Quinzel was a psychiatrist working at Arkham Asylum. Not only was she a model student, but she was also skilled in many areas. Quickly fascinated by the Joker, she decides to follow him and do everything to cure him of his madness. However, she is eventually manipulated by him, who makes her fall in love with him and uses her to escape from Arkham. After a few adventures, she ends up becoming Harley Quinn and, above all, the Joker's accomplice.
Their unhealthy and twisted relationship becomes one of the most famous in comic book history, making the Joker and Harley Quinn one of the most fascinating and popular ‘couples’ in pop culture.
In the course of time, Harley Quinn went through a good number of adventures, most of them without the Joker (although he is always mentioned), and from a simple sidekick she became a complete (anti)heroine, making her an unpredictable character with an interesting evolution.
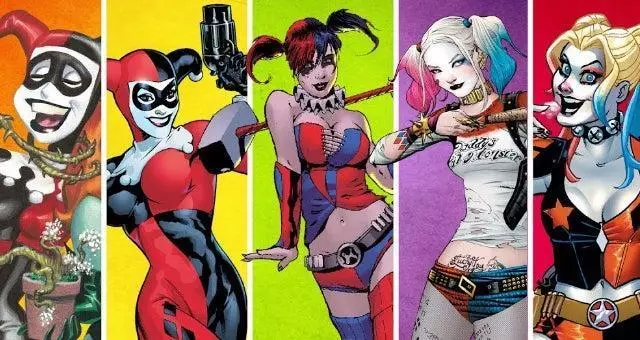
HARLEY QUINN COSTUMES
Yes, because to draw her you have to know what she looks like.... Well, Harley has a very complete wardrobe....
Her basic appearance remains the same, blonde, fair skin, blue eyes, eccentric makeup, and usually her dominant colours are red/black and blue/pink. She always sports a very sexy and sensual look.
As for these clothes ... You are spoiled for choice ...
She has quite an extensive collection of costumes, there's something for everyone!
DRAWING HARLEY QUINN STEP BY STEP
First of all, here is what you need:
- A reference image
And if you prefer the traditional, you will also need:
- A blue and red pencil
- What you need for inking (markers, pens, ...)
- Optional colour
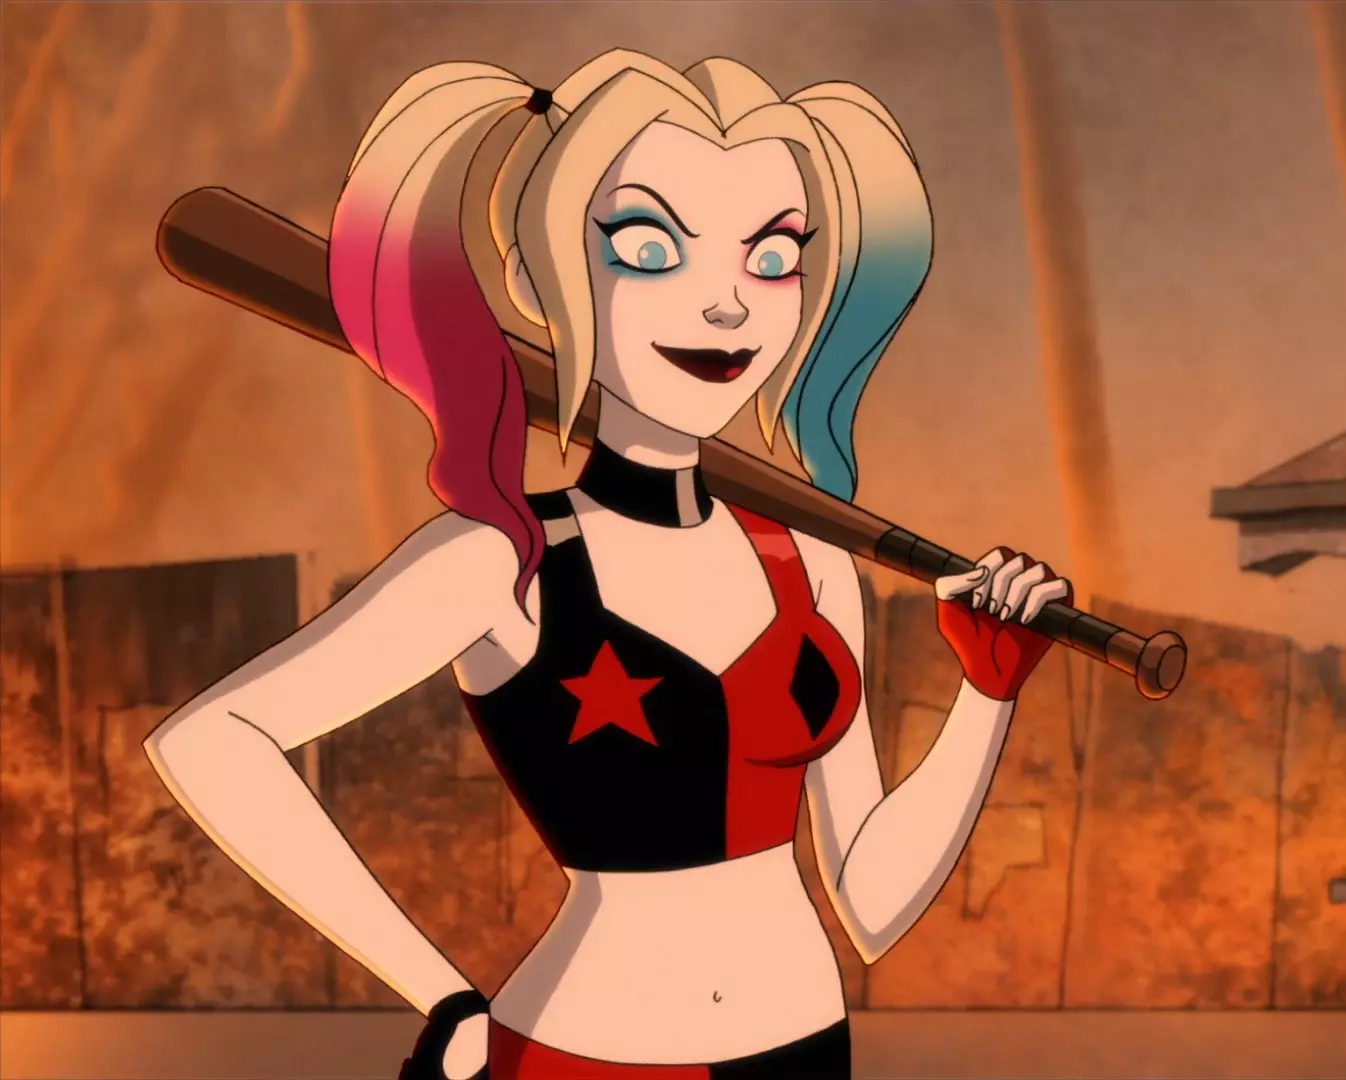
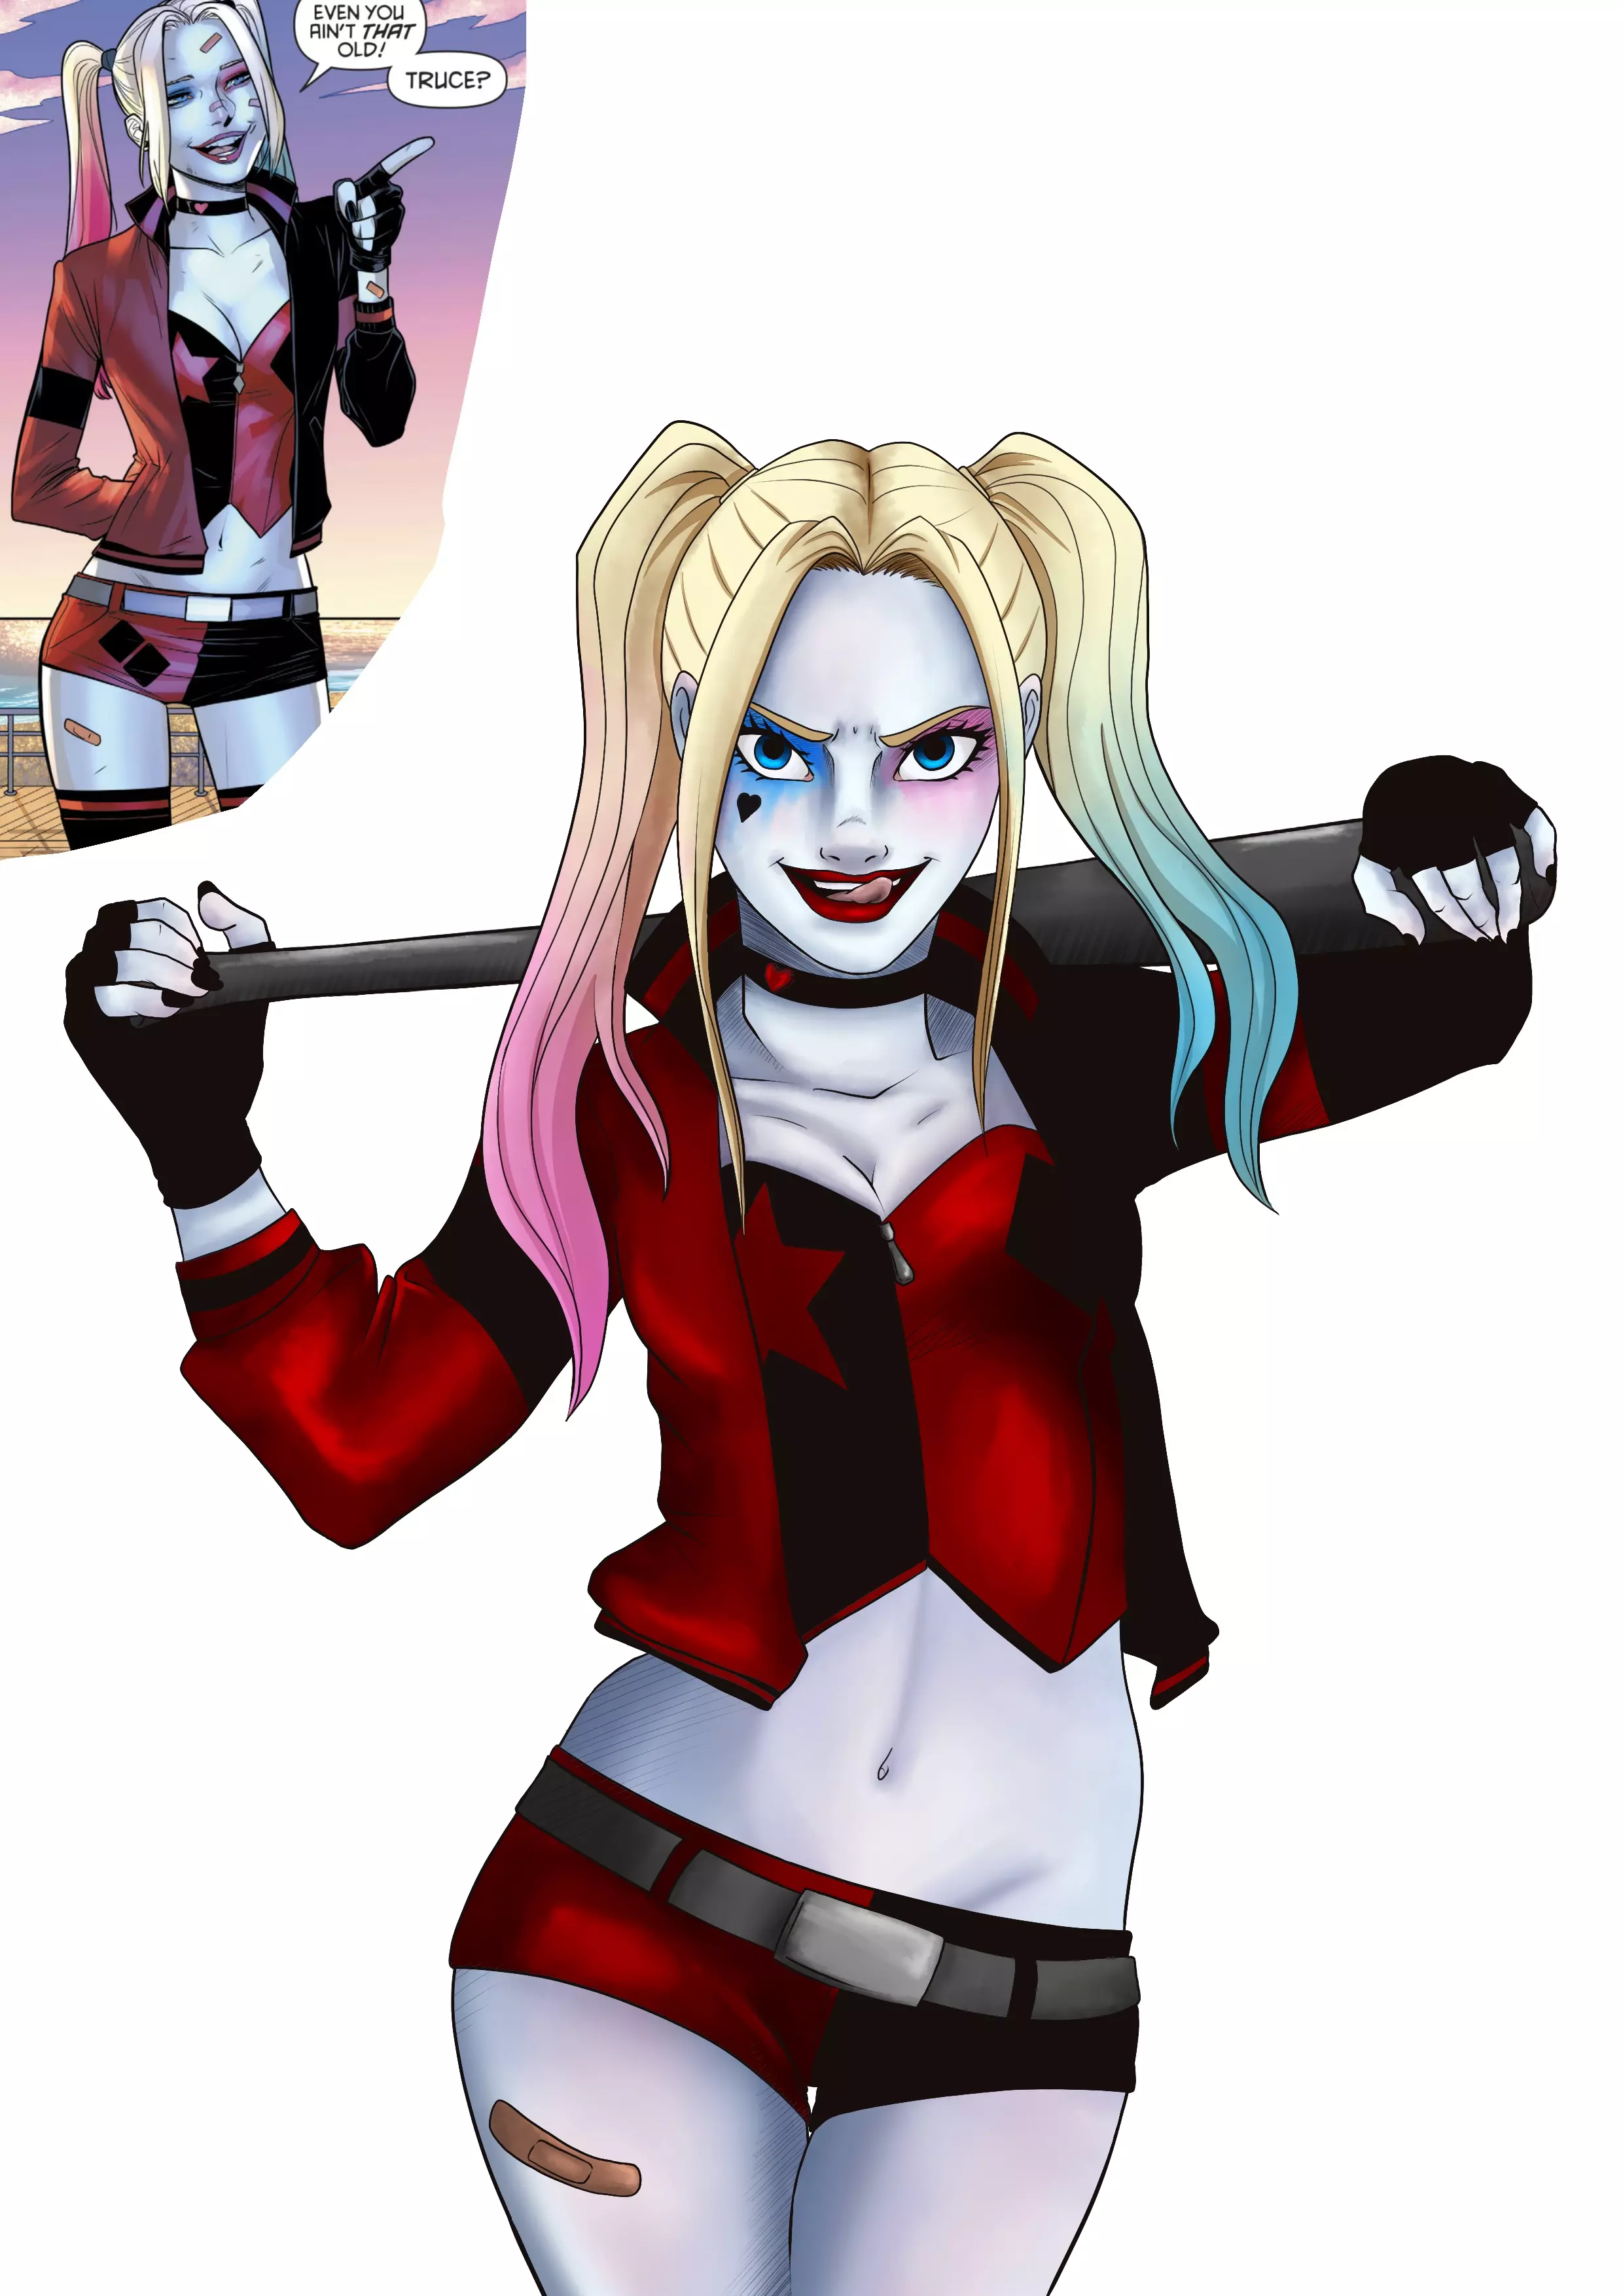
Alright, here is my reference image:
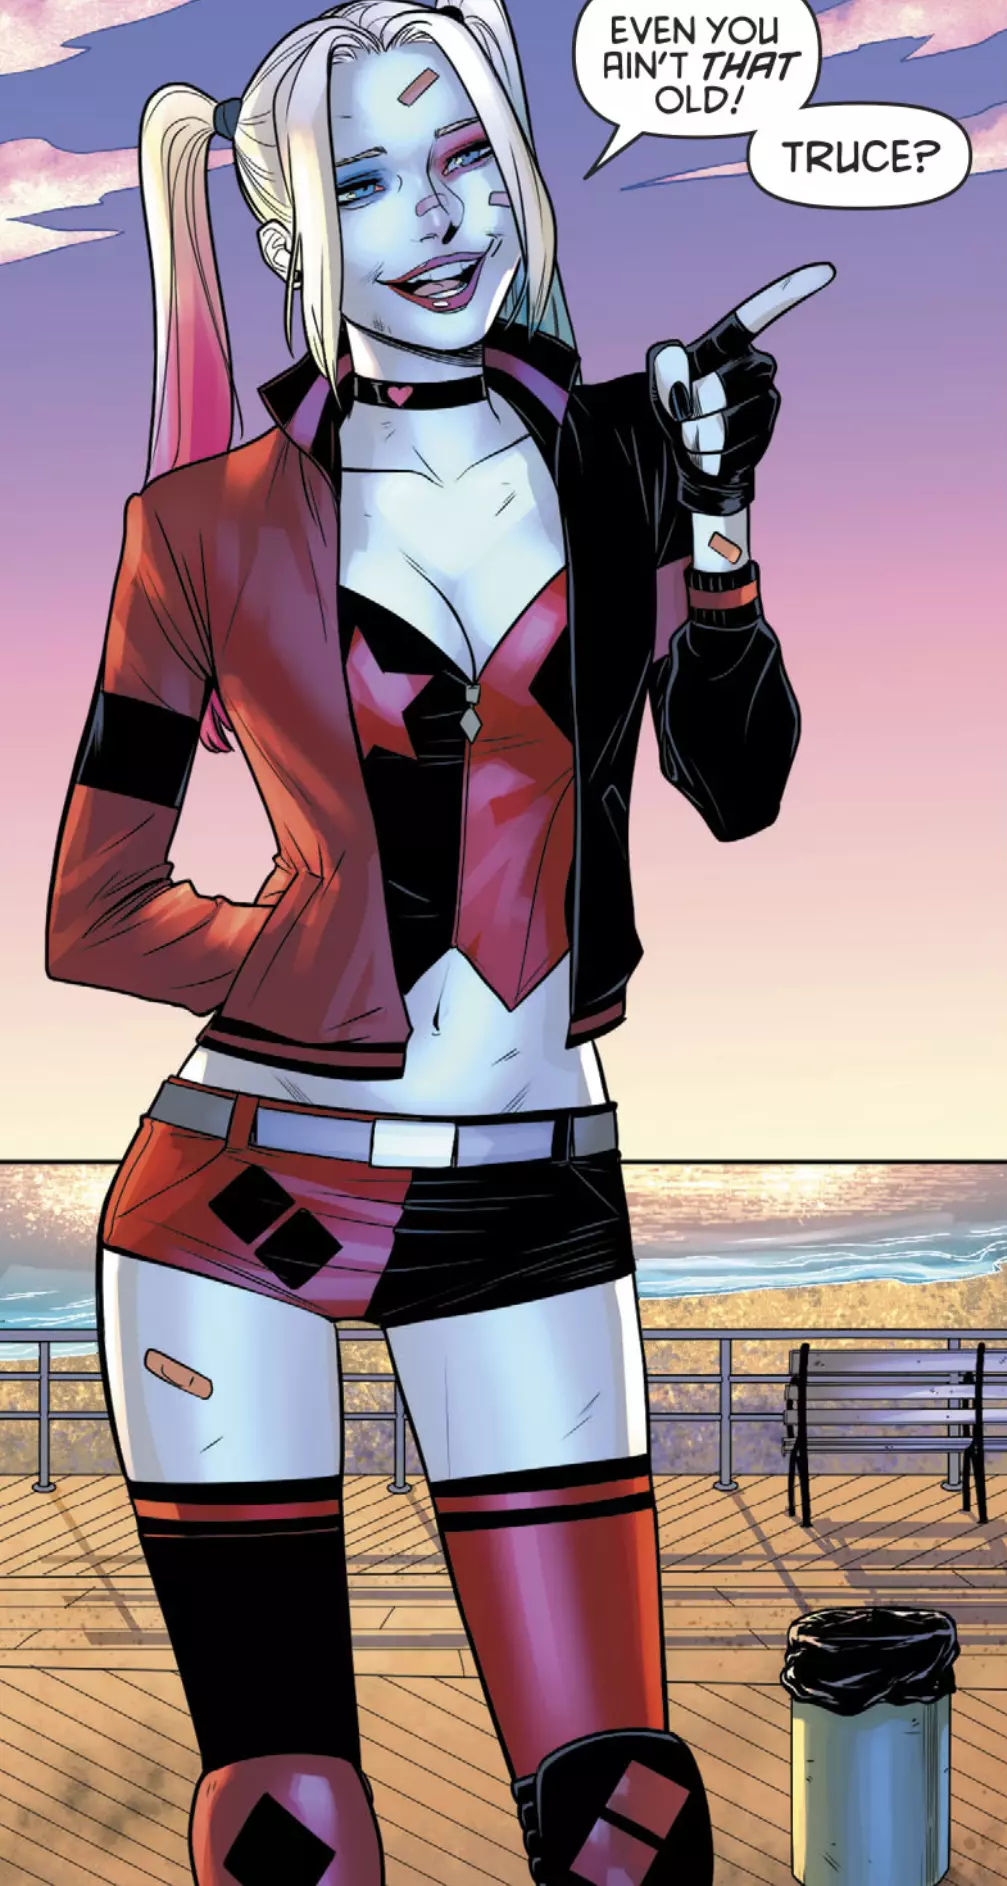
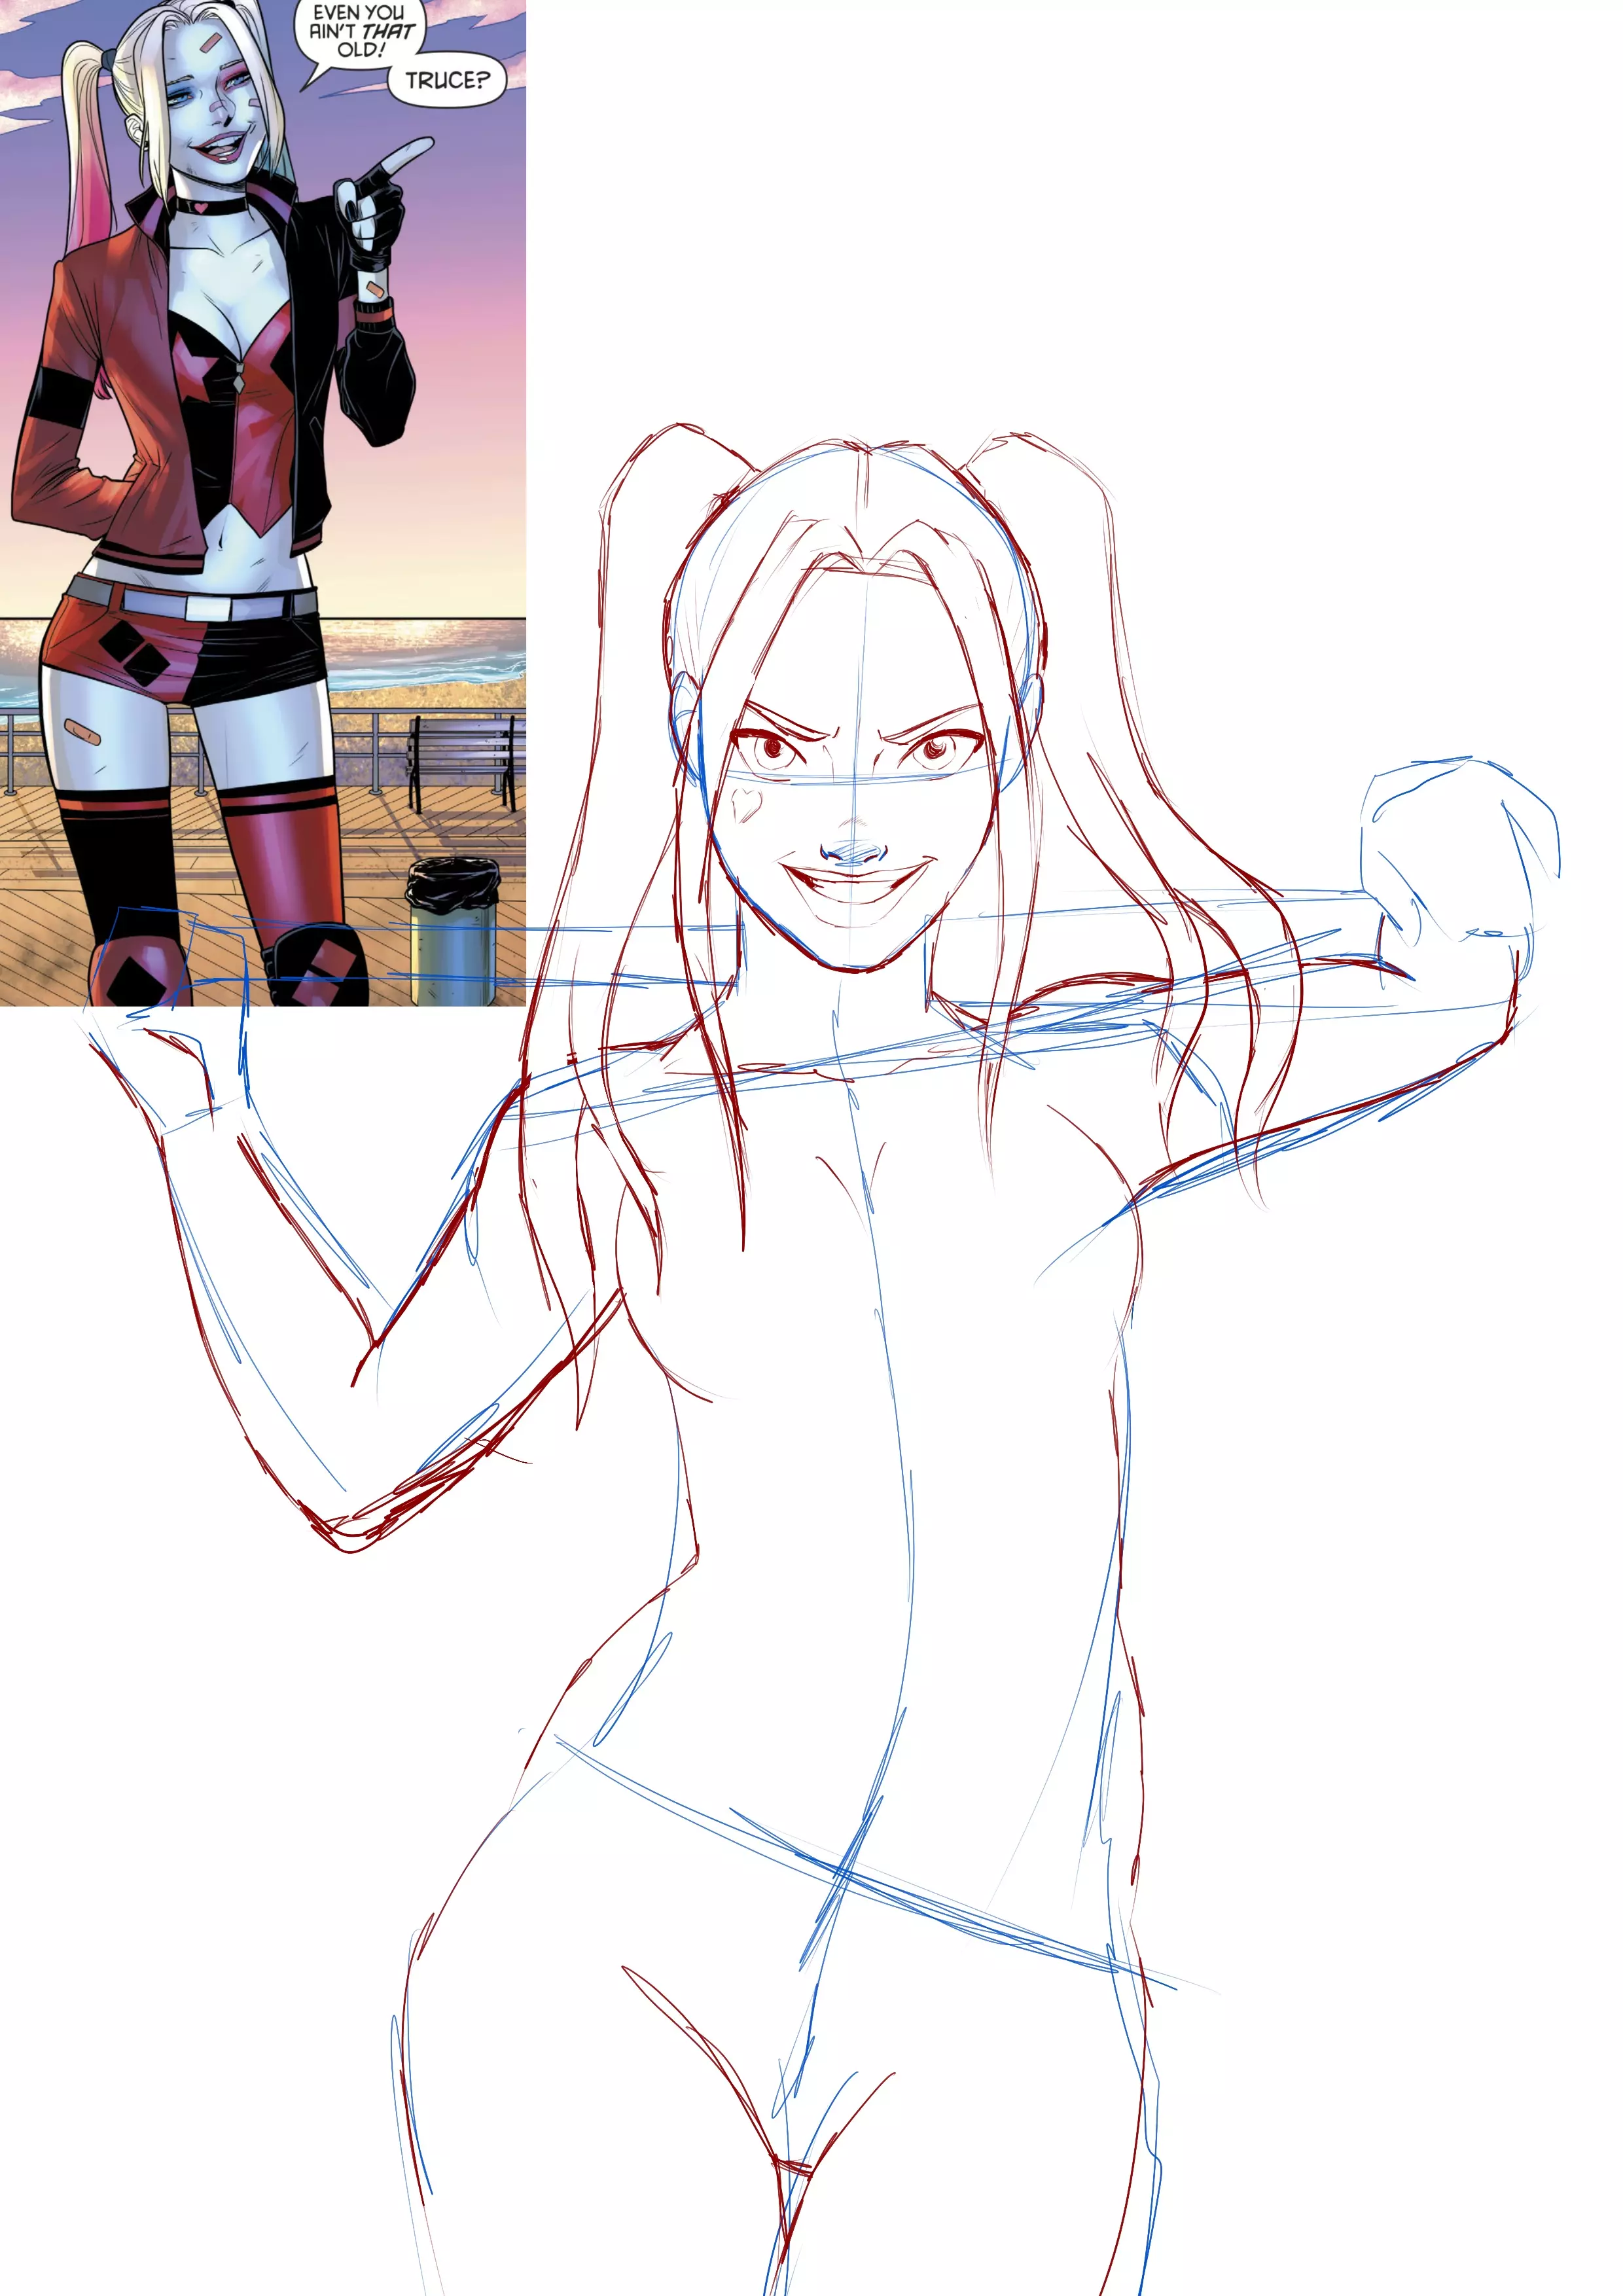
I will use this as a model for her physique and clothes. For the pose, I'll improvise without reference images. I already have an idea of how to draw her: slightly in 3/4 view, hips tilted to give a sexier movement, all while holding the bat on her shoulders.
DRAW HARLEY QUINN STEP BY STEP
We will start with a preparatory sketch. I will sketch Harley's pose. For this purpose, I will use blue.
If you are doing traditional work, be careful not to press with your pencil! These lines will have to be erased.
DRAWING SKETCH
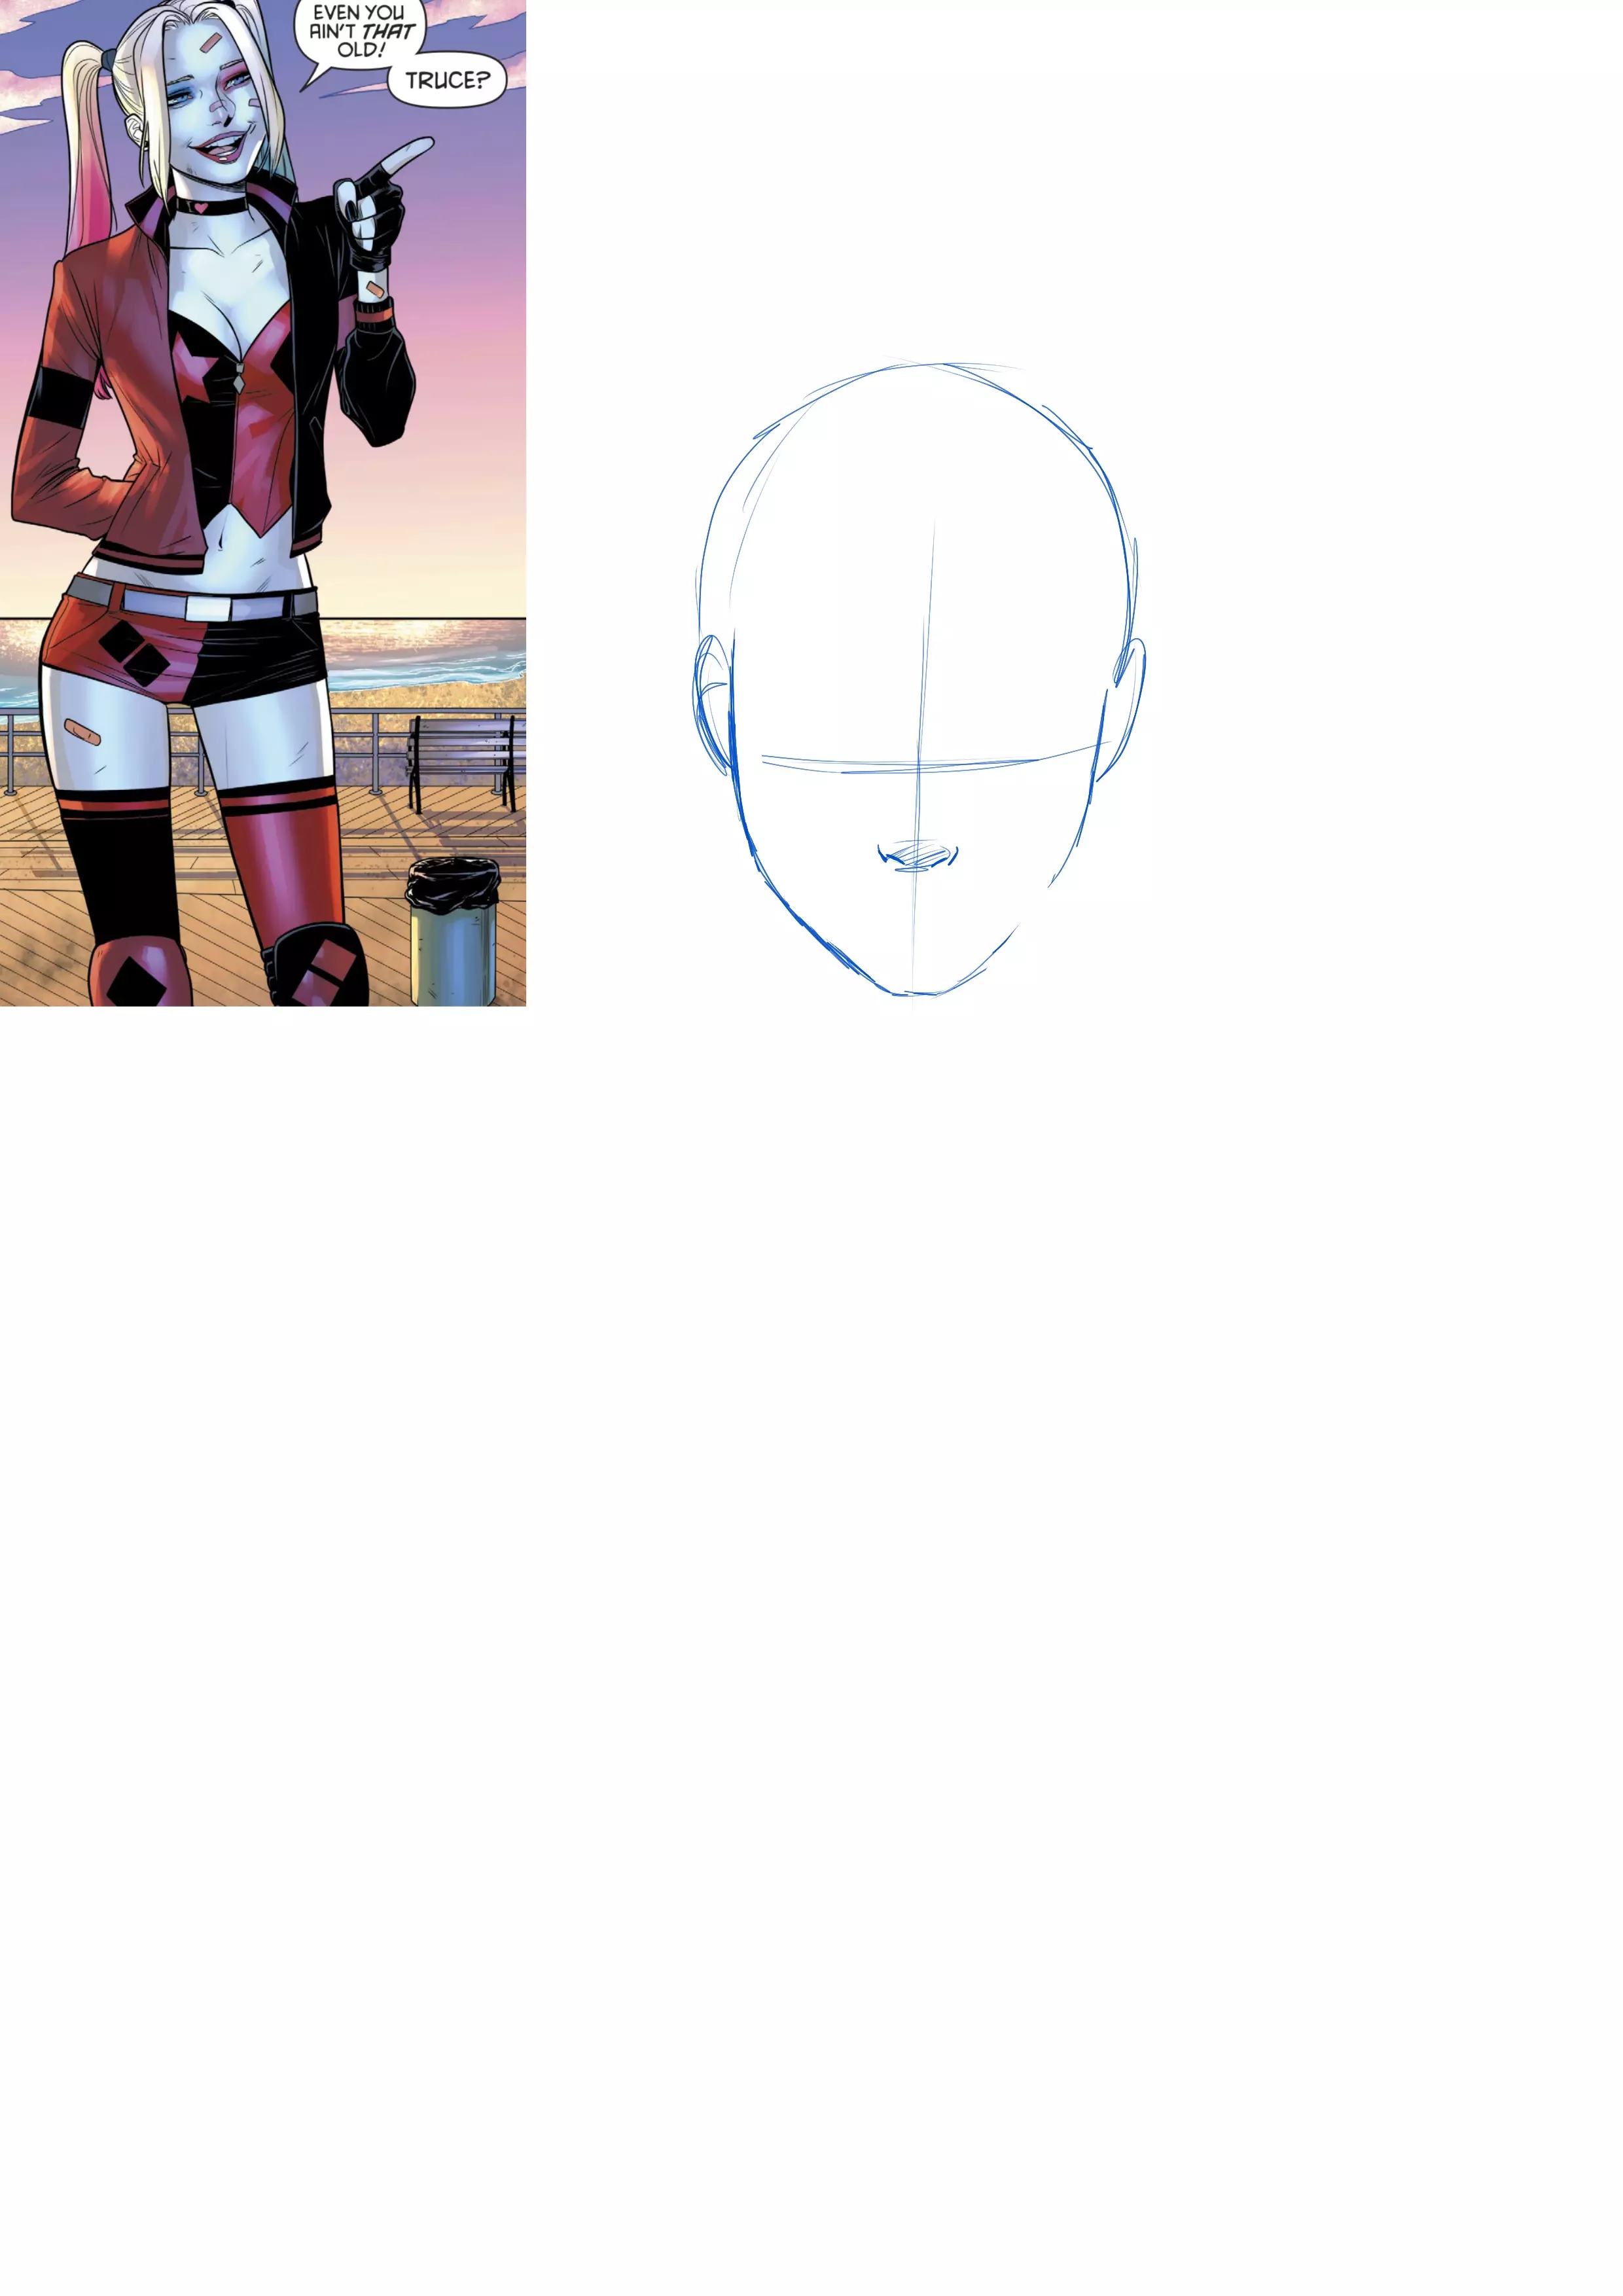
I start by drawing the head. To do this, I make a first circle that will be the base of the skull, then I draw the jaw.
I draw her at a slight 3/4 angle so that the skull sticks out more on one side than the other. The same goes for the ears.
I draw the nose to have a reference for direction. I did it with the head tilted slightly downwards, so that I could draw the gaze upwards, giving it a more menacing appearance.
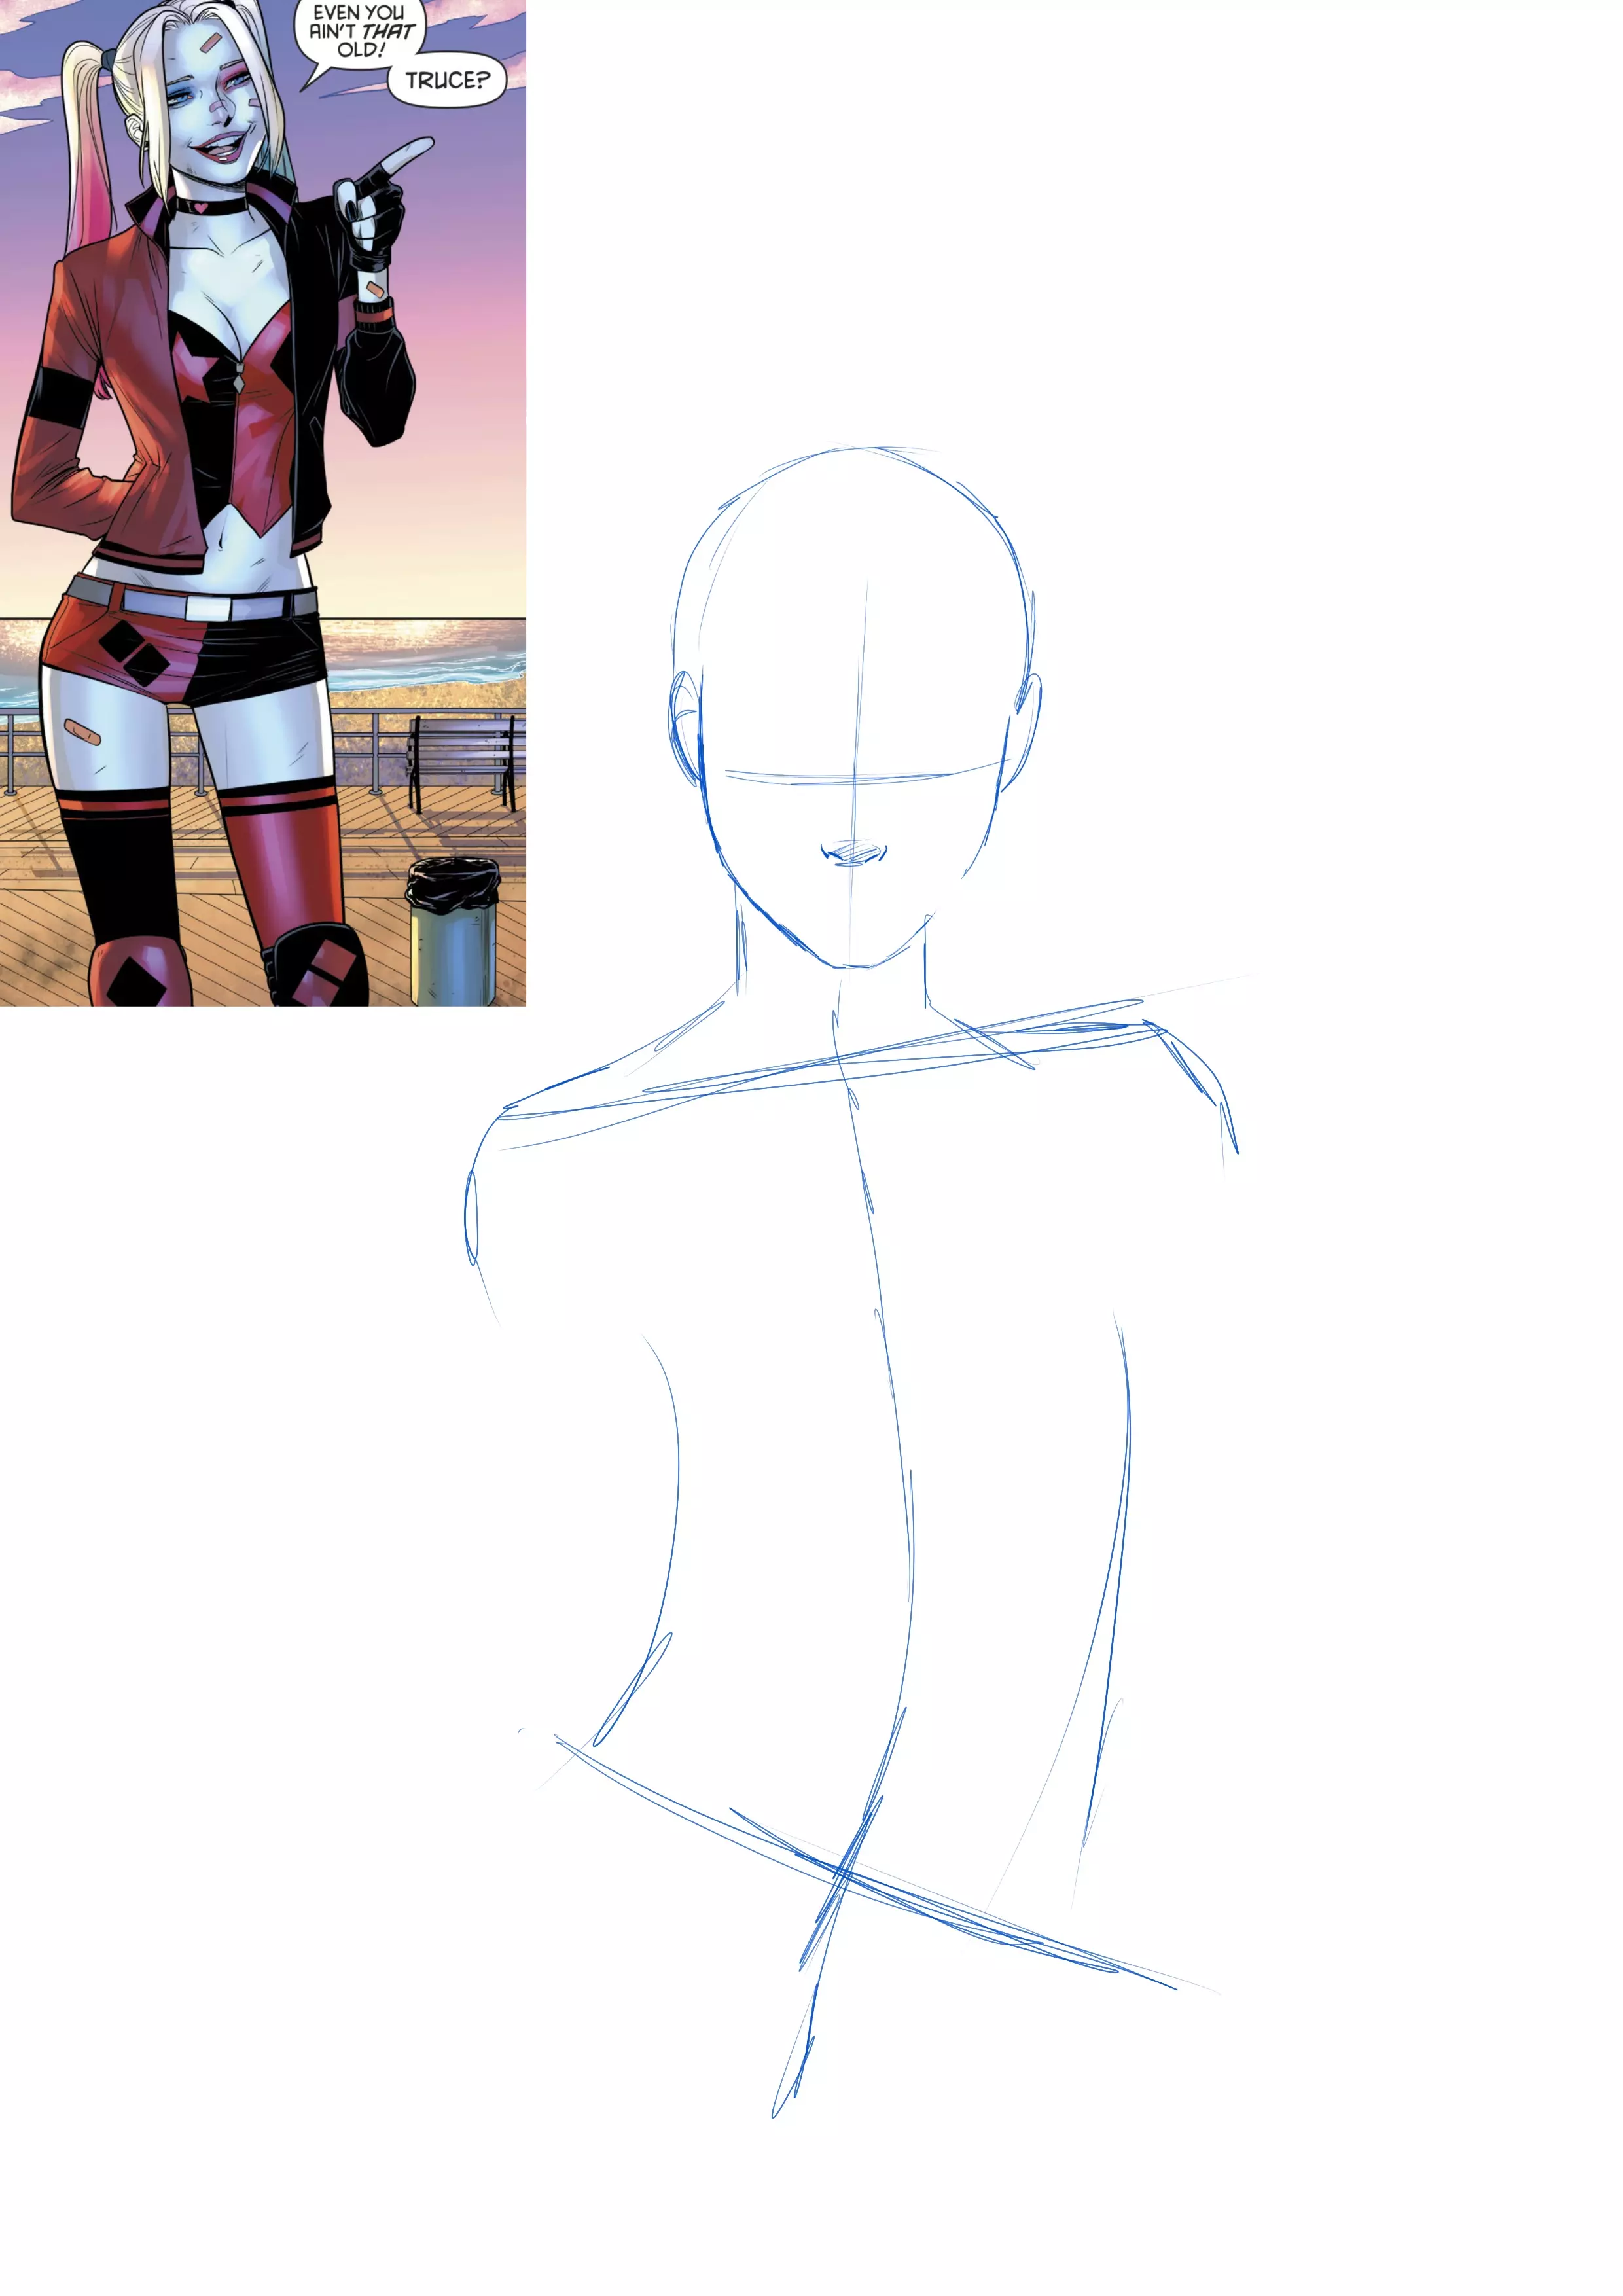
Once the head is drawn, I continue with the body. I start with simple shapes, defining the movement of the torso. It's the bust that guides the body.
To add more dynamism to the pose and to have a natural movement, I always contrast the shoulder line with the hip line.
If the right hip goes up, the right shoulder goes down.
All the inclinations of the body follow one another. Having a tilted hip with straight shoulders is not natural. To understand this better, pose in front of a mirror and see how your body works (or ask someone to pose if possible). Your body will move naturally.
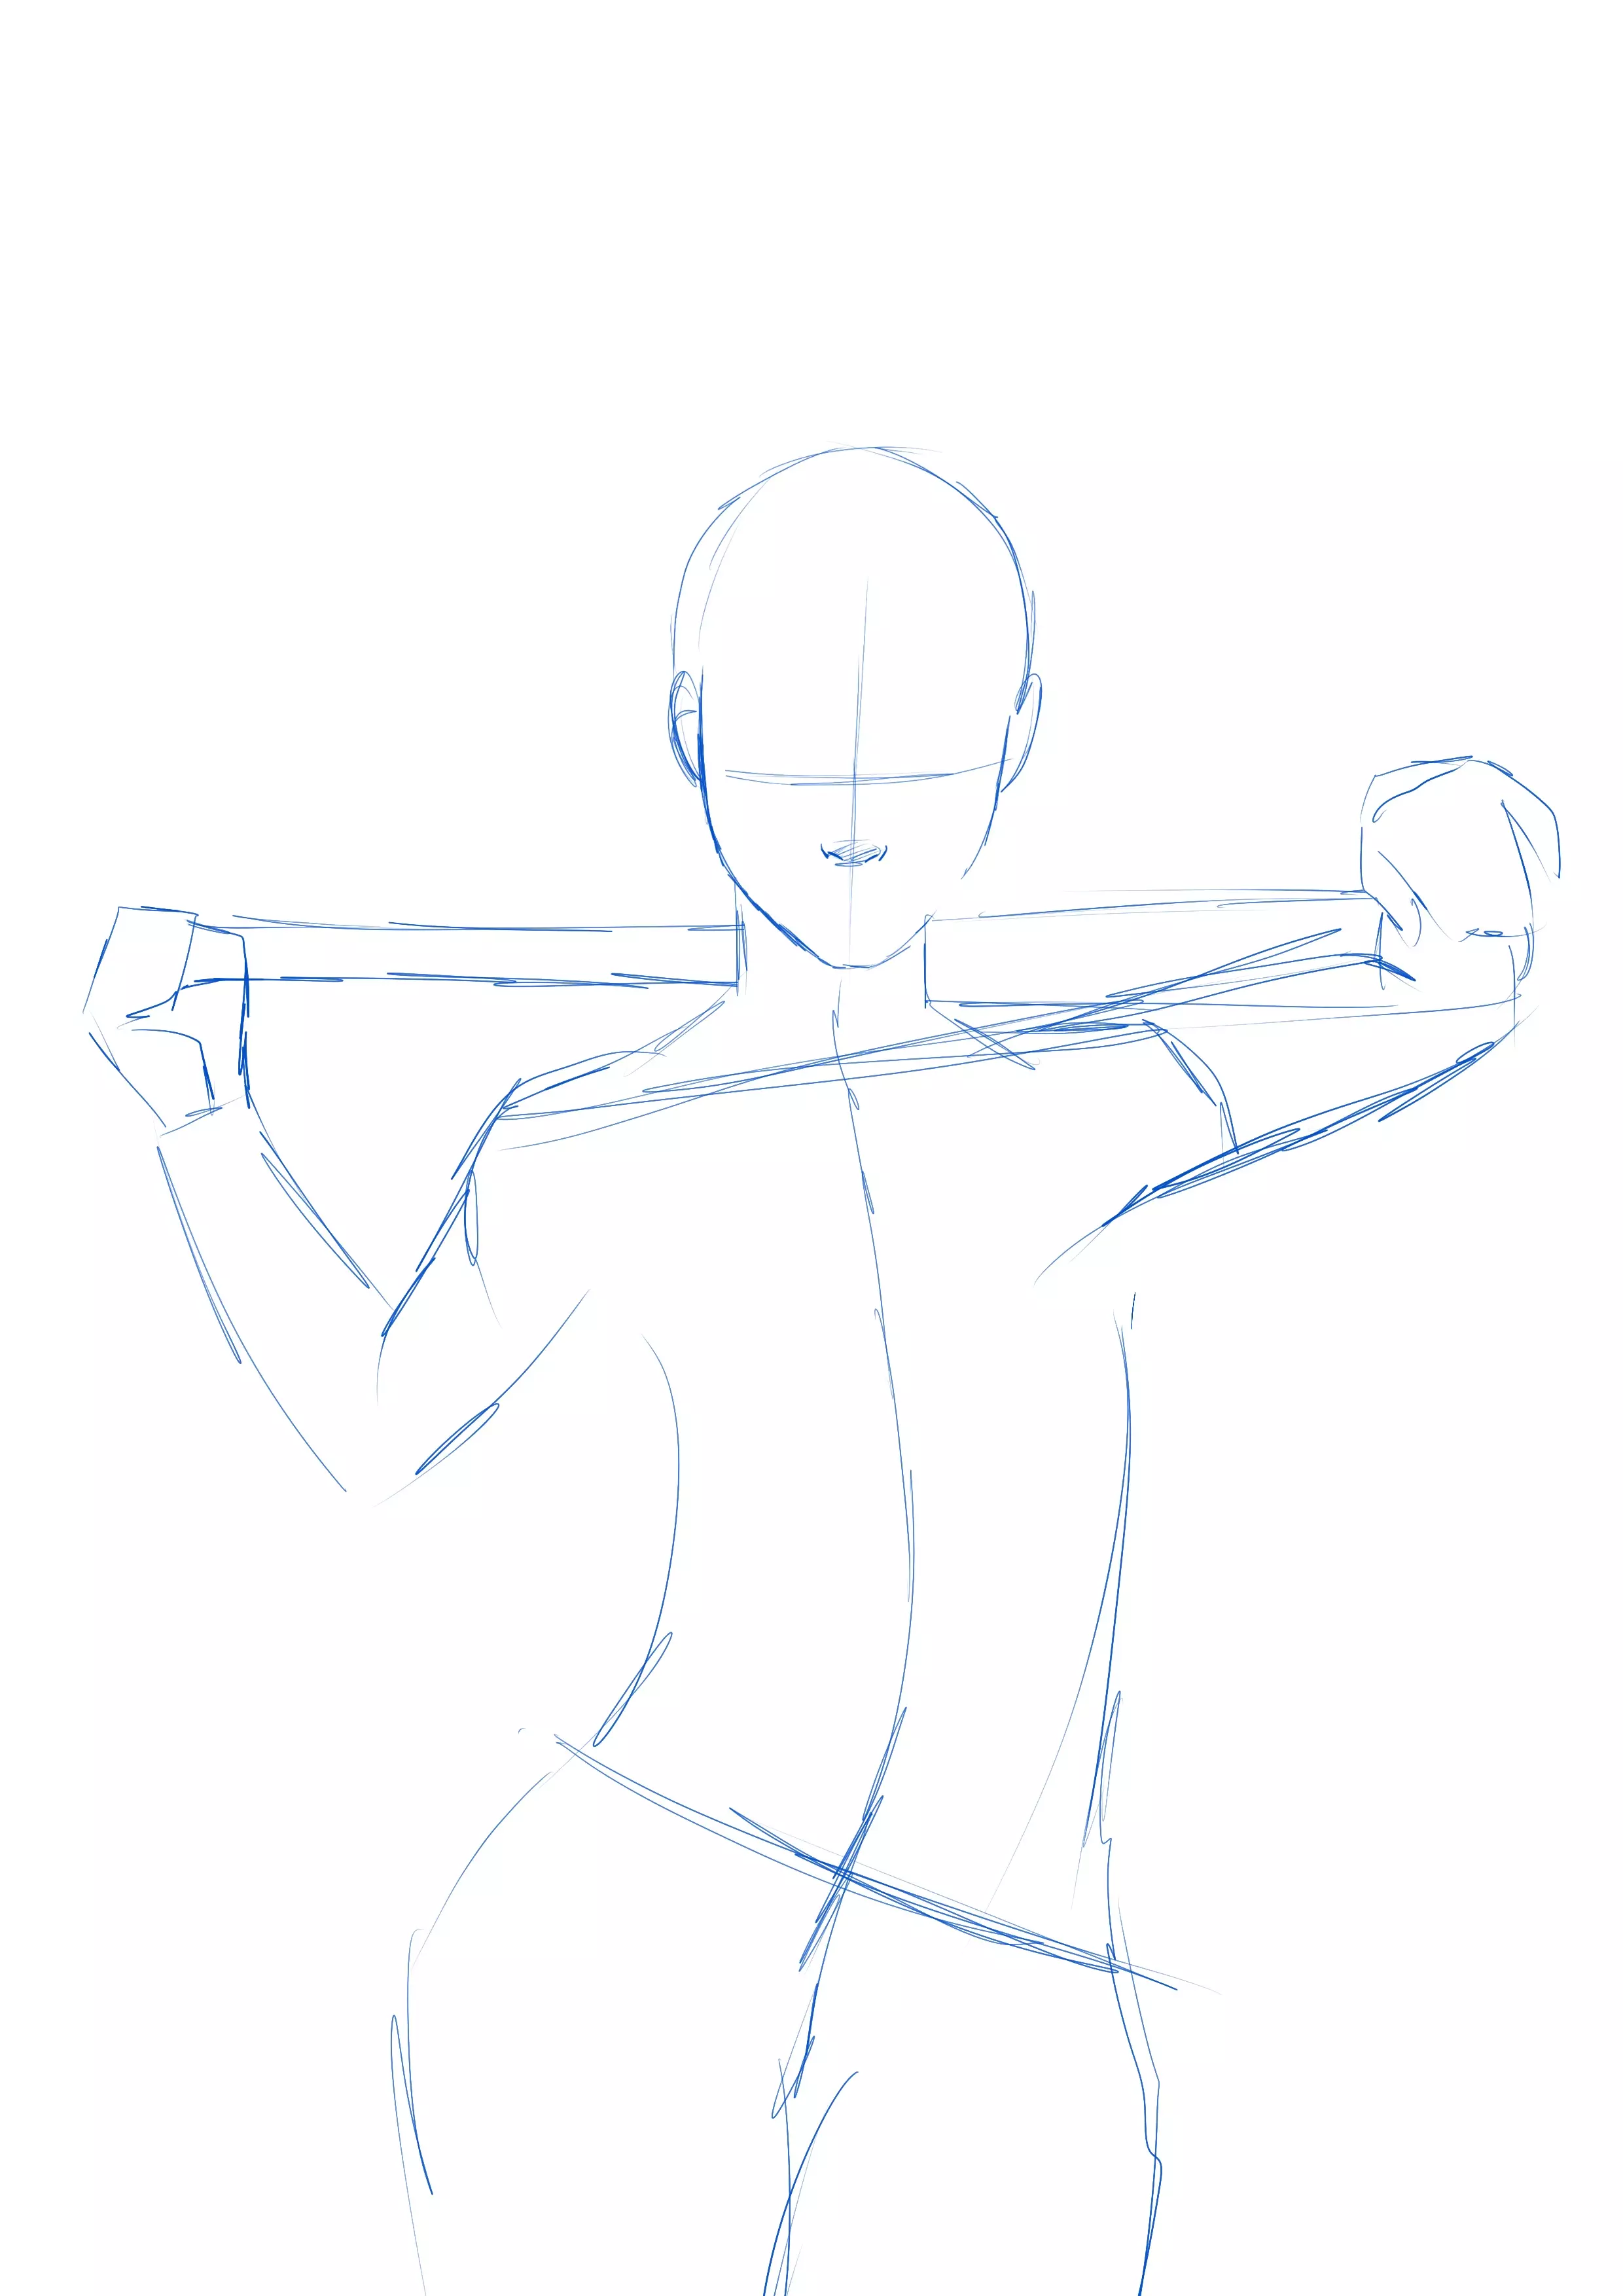
I continue by drawing the bat on the shoulders to use it as a support to draw the arms and hands.
The left hand rests on the bat; there, one must feel that the wrist is resting on it.
As for the right hand, it acts as a counterweight and holds the handle of the bat; there, one must feel that it is the elbow that is resting on it.
(My reference image is skipped on this page, but I keep it in view anyway).
Once your pose sketch is finished, you can move on to the next step.
DRAWING THE BODY AND FACE OF HARLEY QUINN
We will sculpt her shapes to make a body.
With the colour red, you will redraw over your blue sketch, but adding the appropriate shapes.
A human body is composed of bones, muscles and fat, so the outline is not straight, there are curves (even for thin people).
Especially since Harley Quinn is slim, but still has a voluptuous body with a well-defined chest, hips and thighs (and anyway, my reference image is milder in terms of shape than some versions).
At this stage, it will also be a matter of sketching the face, positioning the eyes, nose and mouth.

I also draw her heart tattoo she has on her cheek, in some versions, and add hair.
She is often depicted with two pigtails, so I keep that version.
One of the two pigtails rests on her shoulder, while the other rests lightly on her bat.
We can now move on to clothing. For this, I used dark gray, but you can stick with red. I just did it to make it easier to read.
For the clothes, it depends on the reference you have taken.... I chose a variation of her red and black harlequin costume.
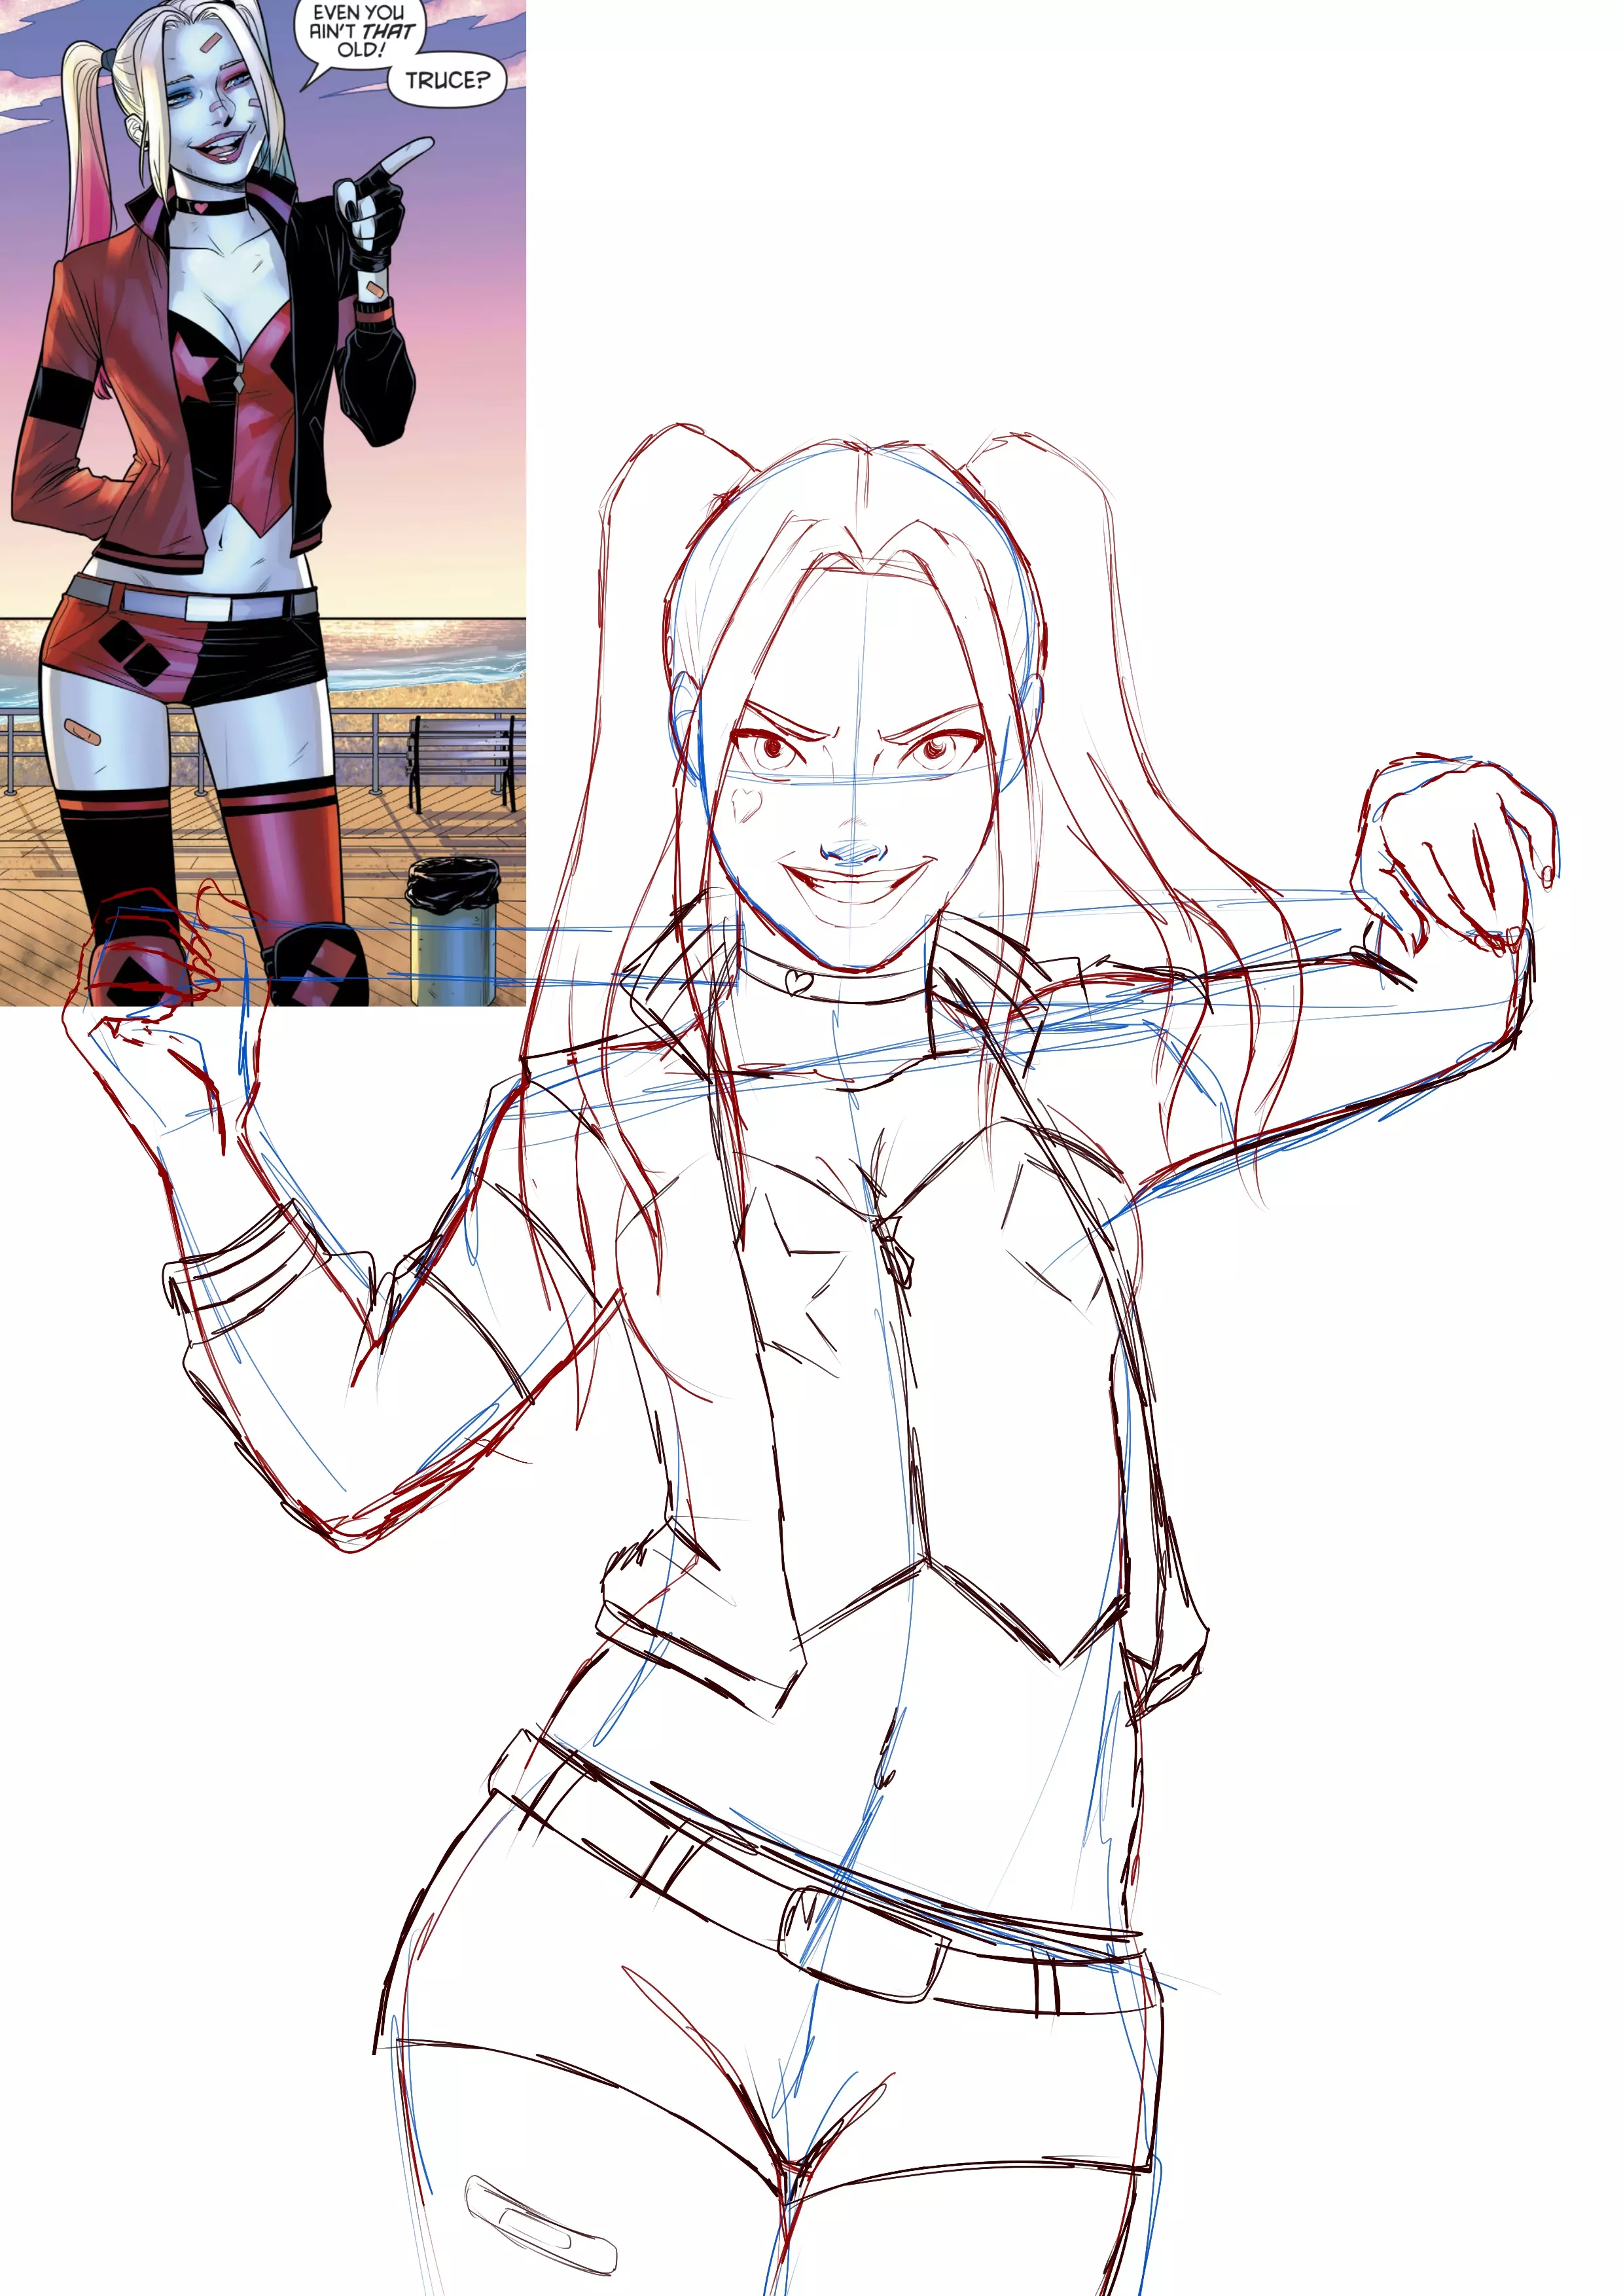
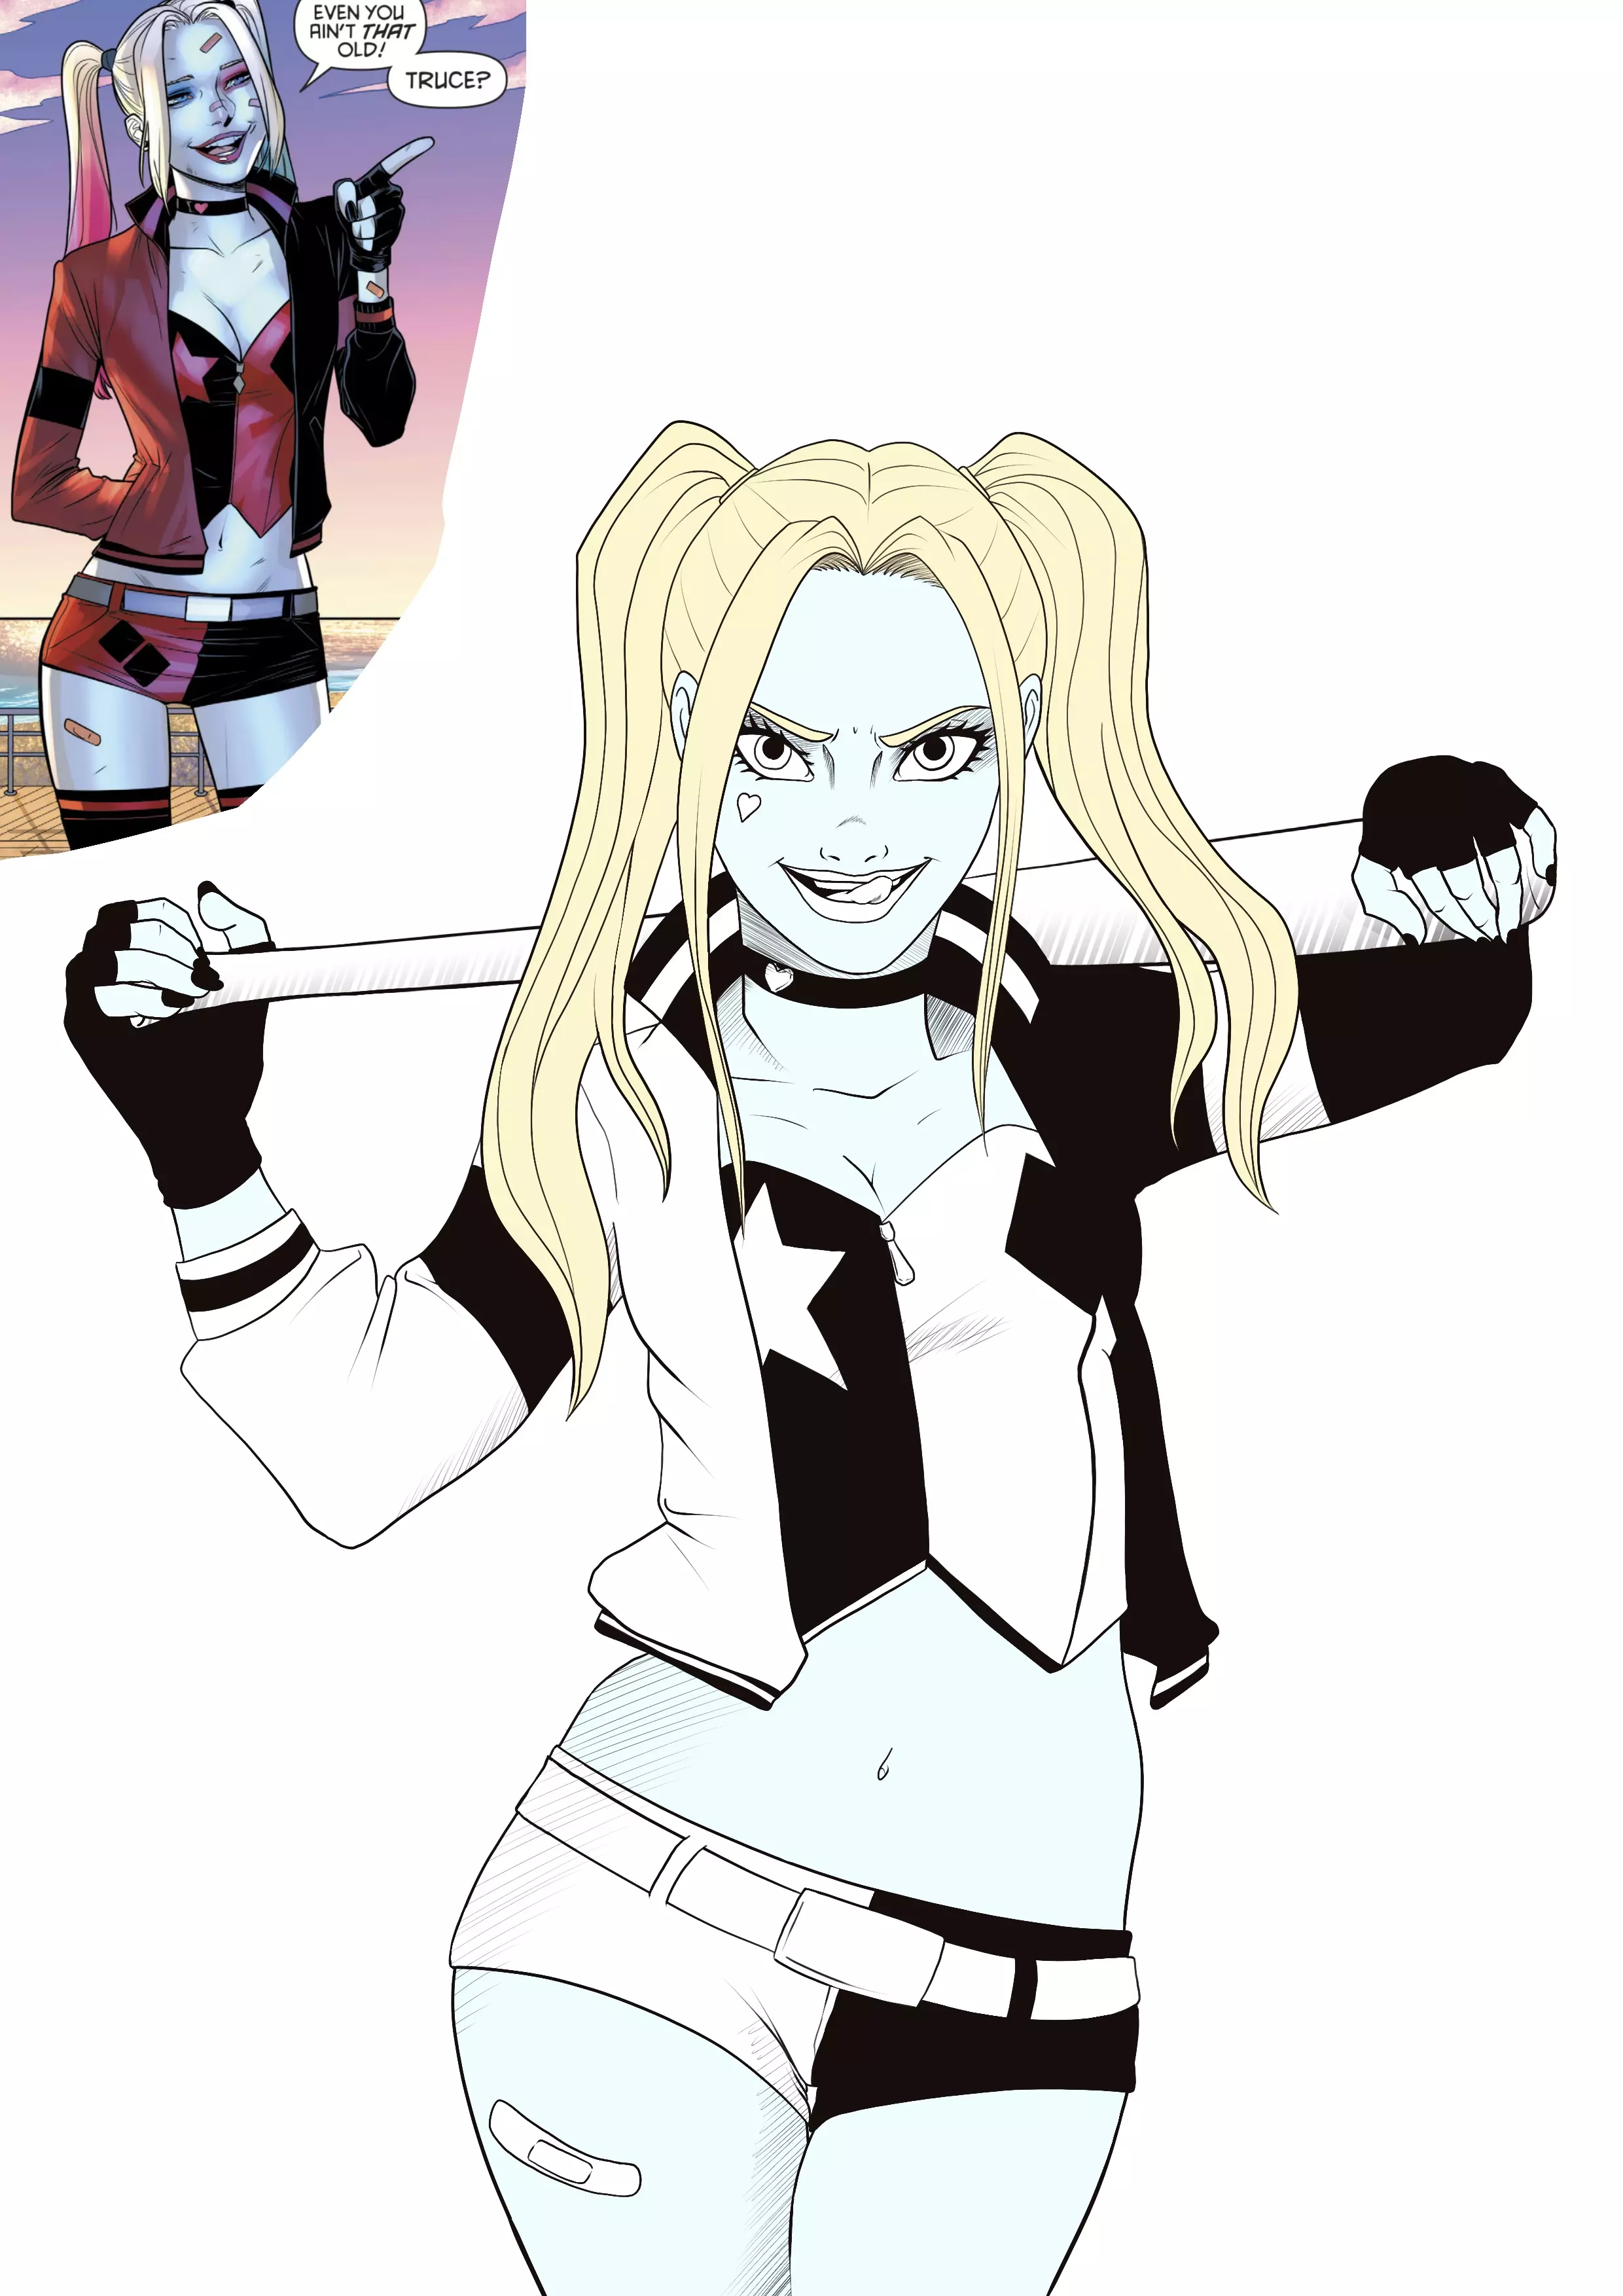
If you're sure tha everything is ok, you can move on to inking.
INKING THE DRAWING
I took advantage of this phase to correct some details that I did not like (such as too wide hips, for example).
Consider playing with the thickness of the lines to give your character a dynamic look.
You can use this step to add some missing details or some hatching in the shaded areas, to achieve the Comics effect.
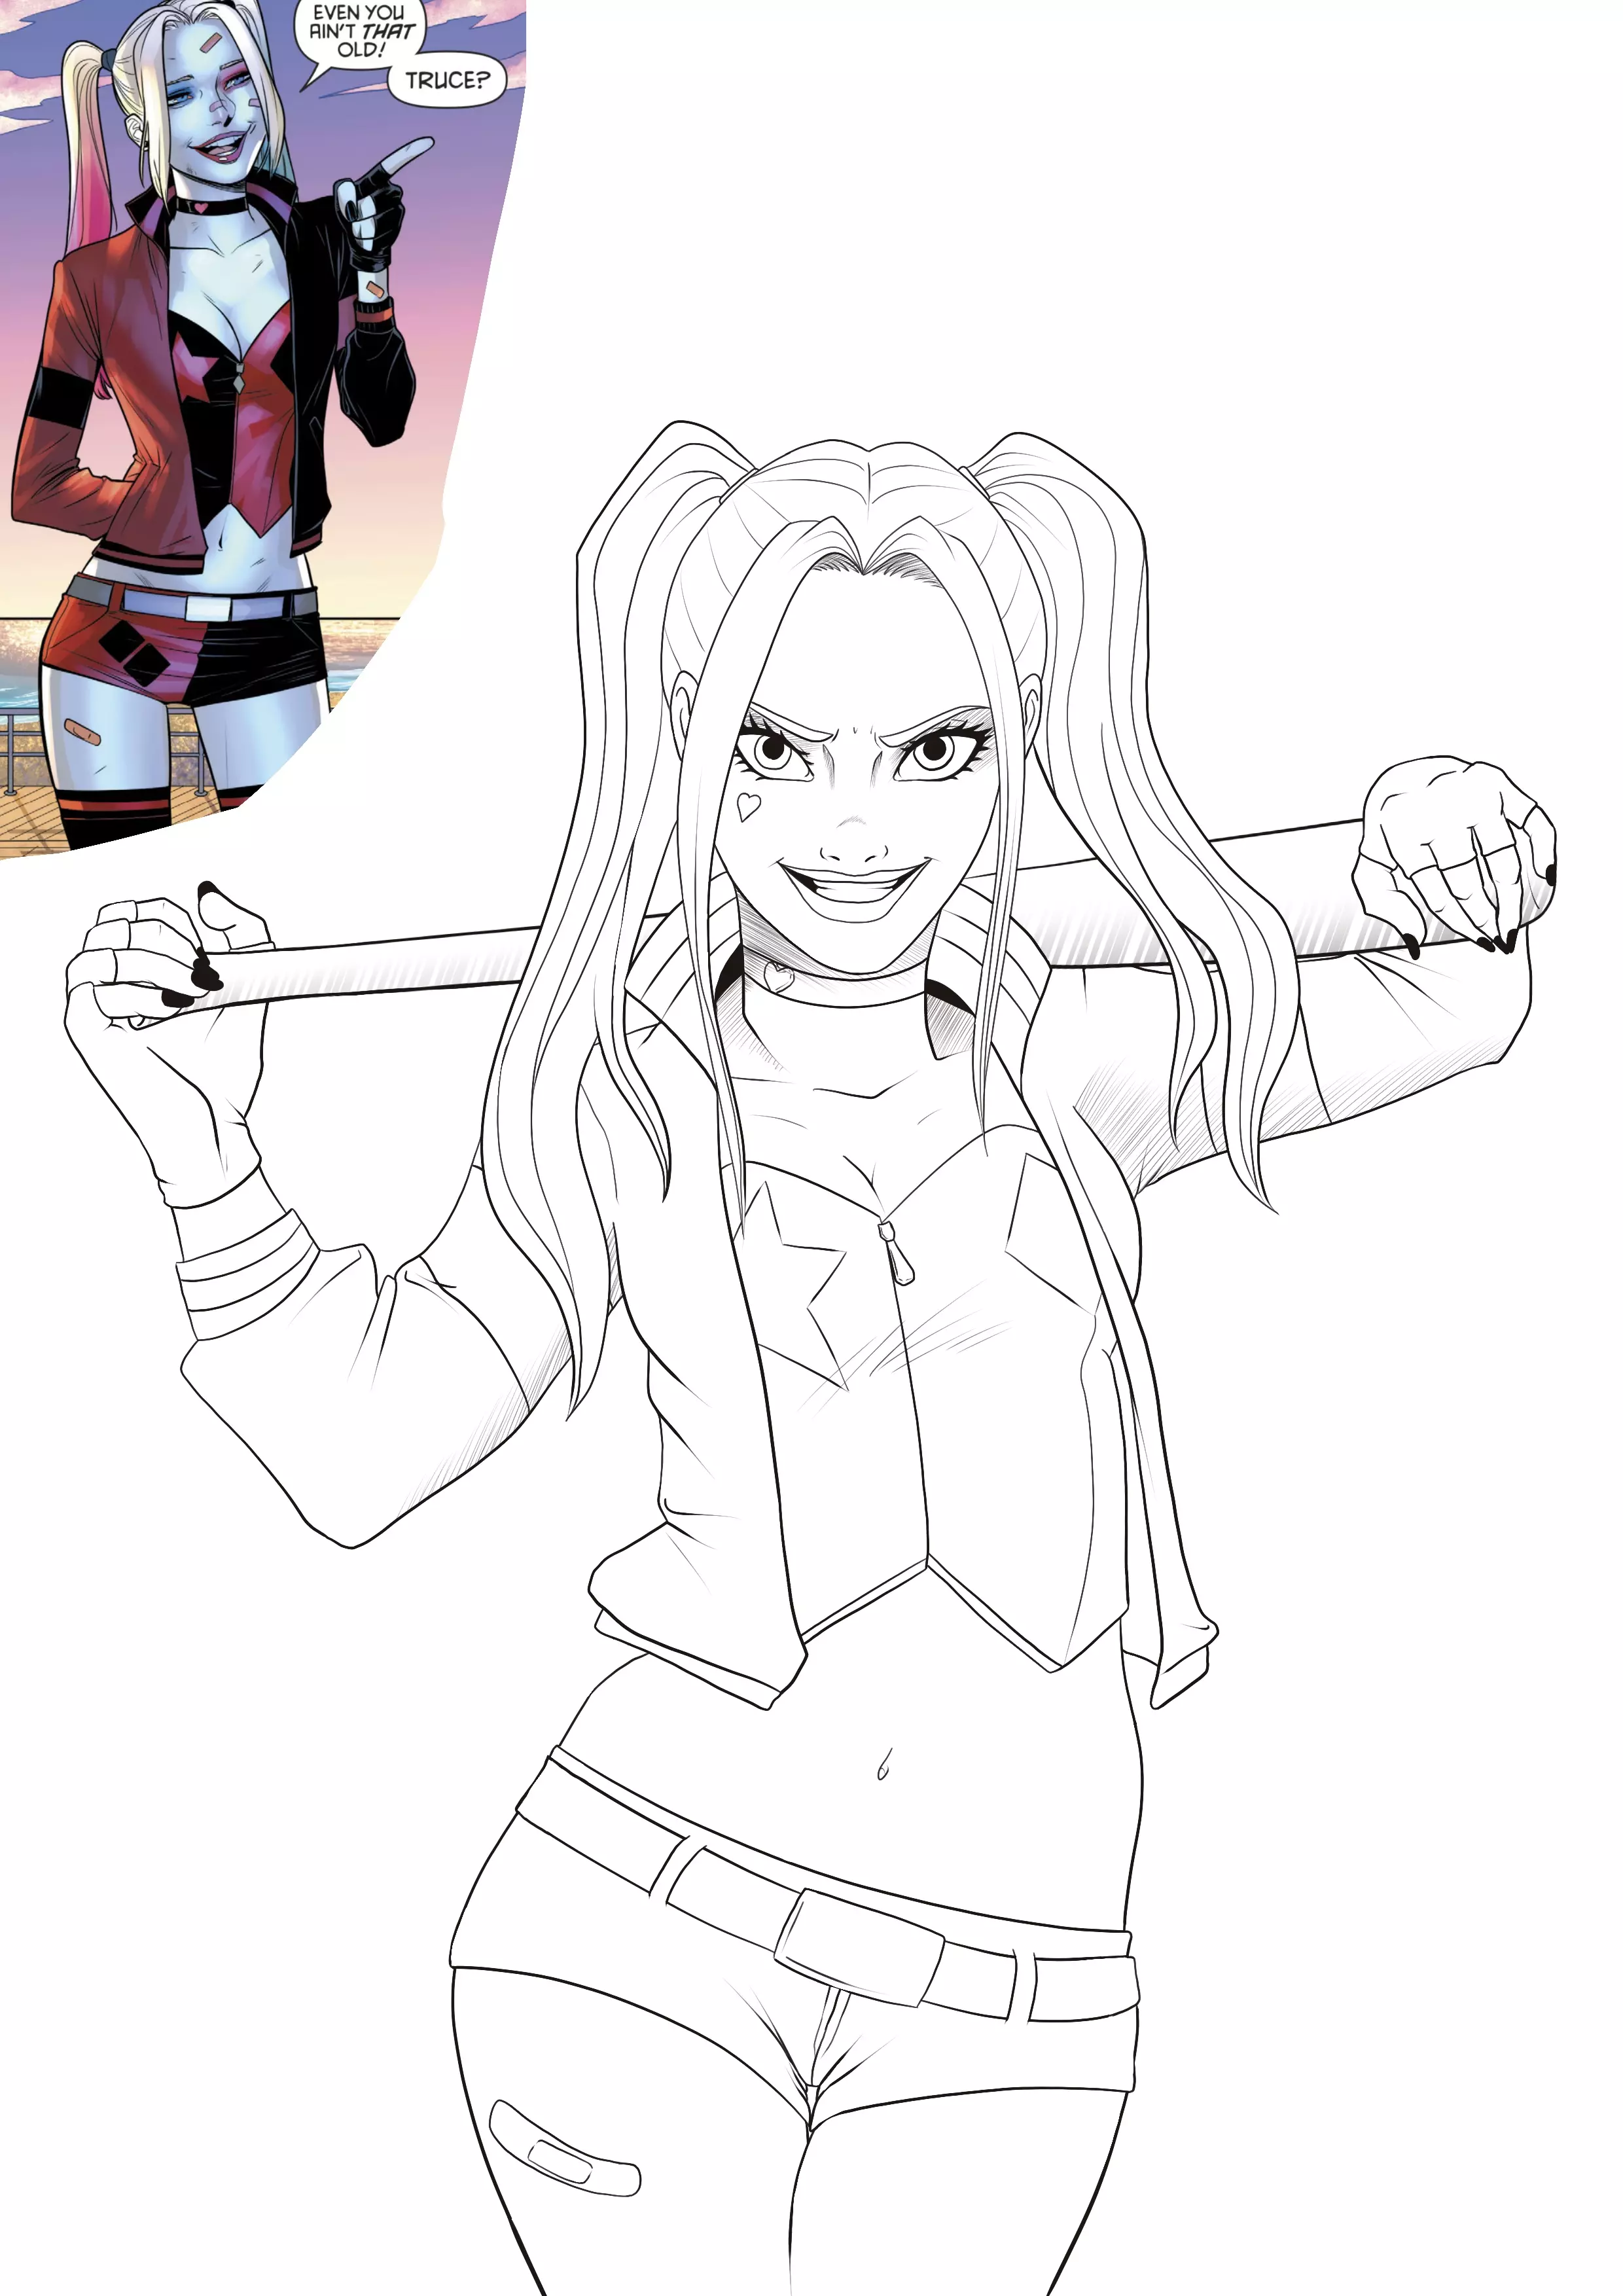
While inking, I also modified her mouth by adding the tongue to give it a playful and provocative effect.
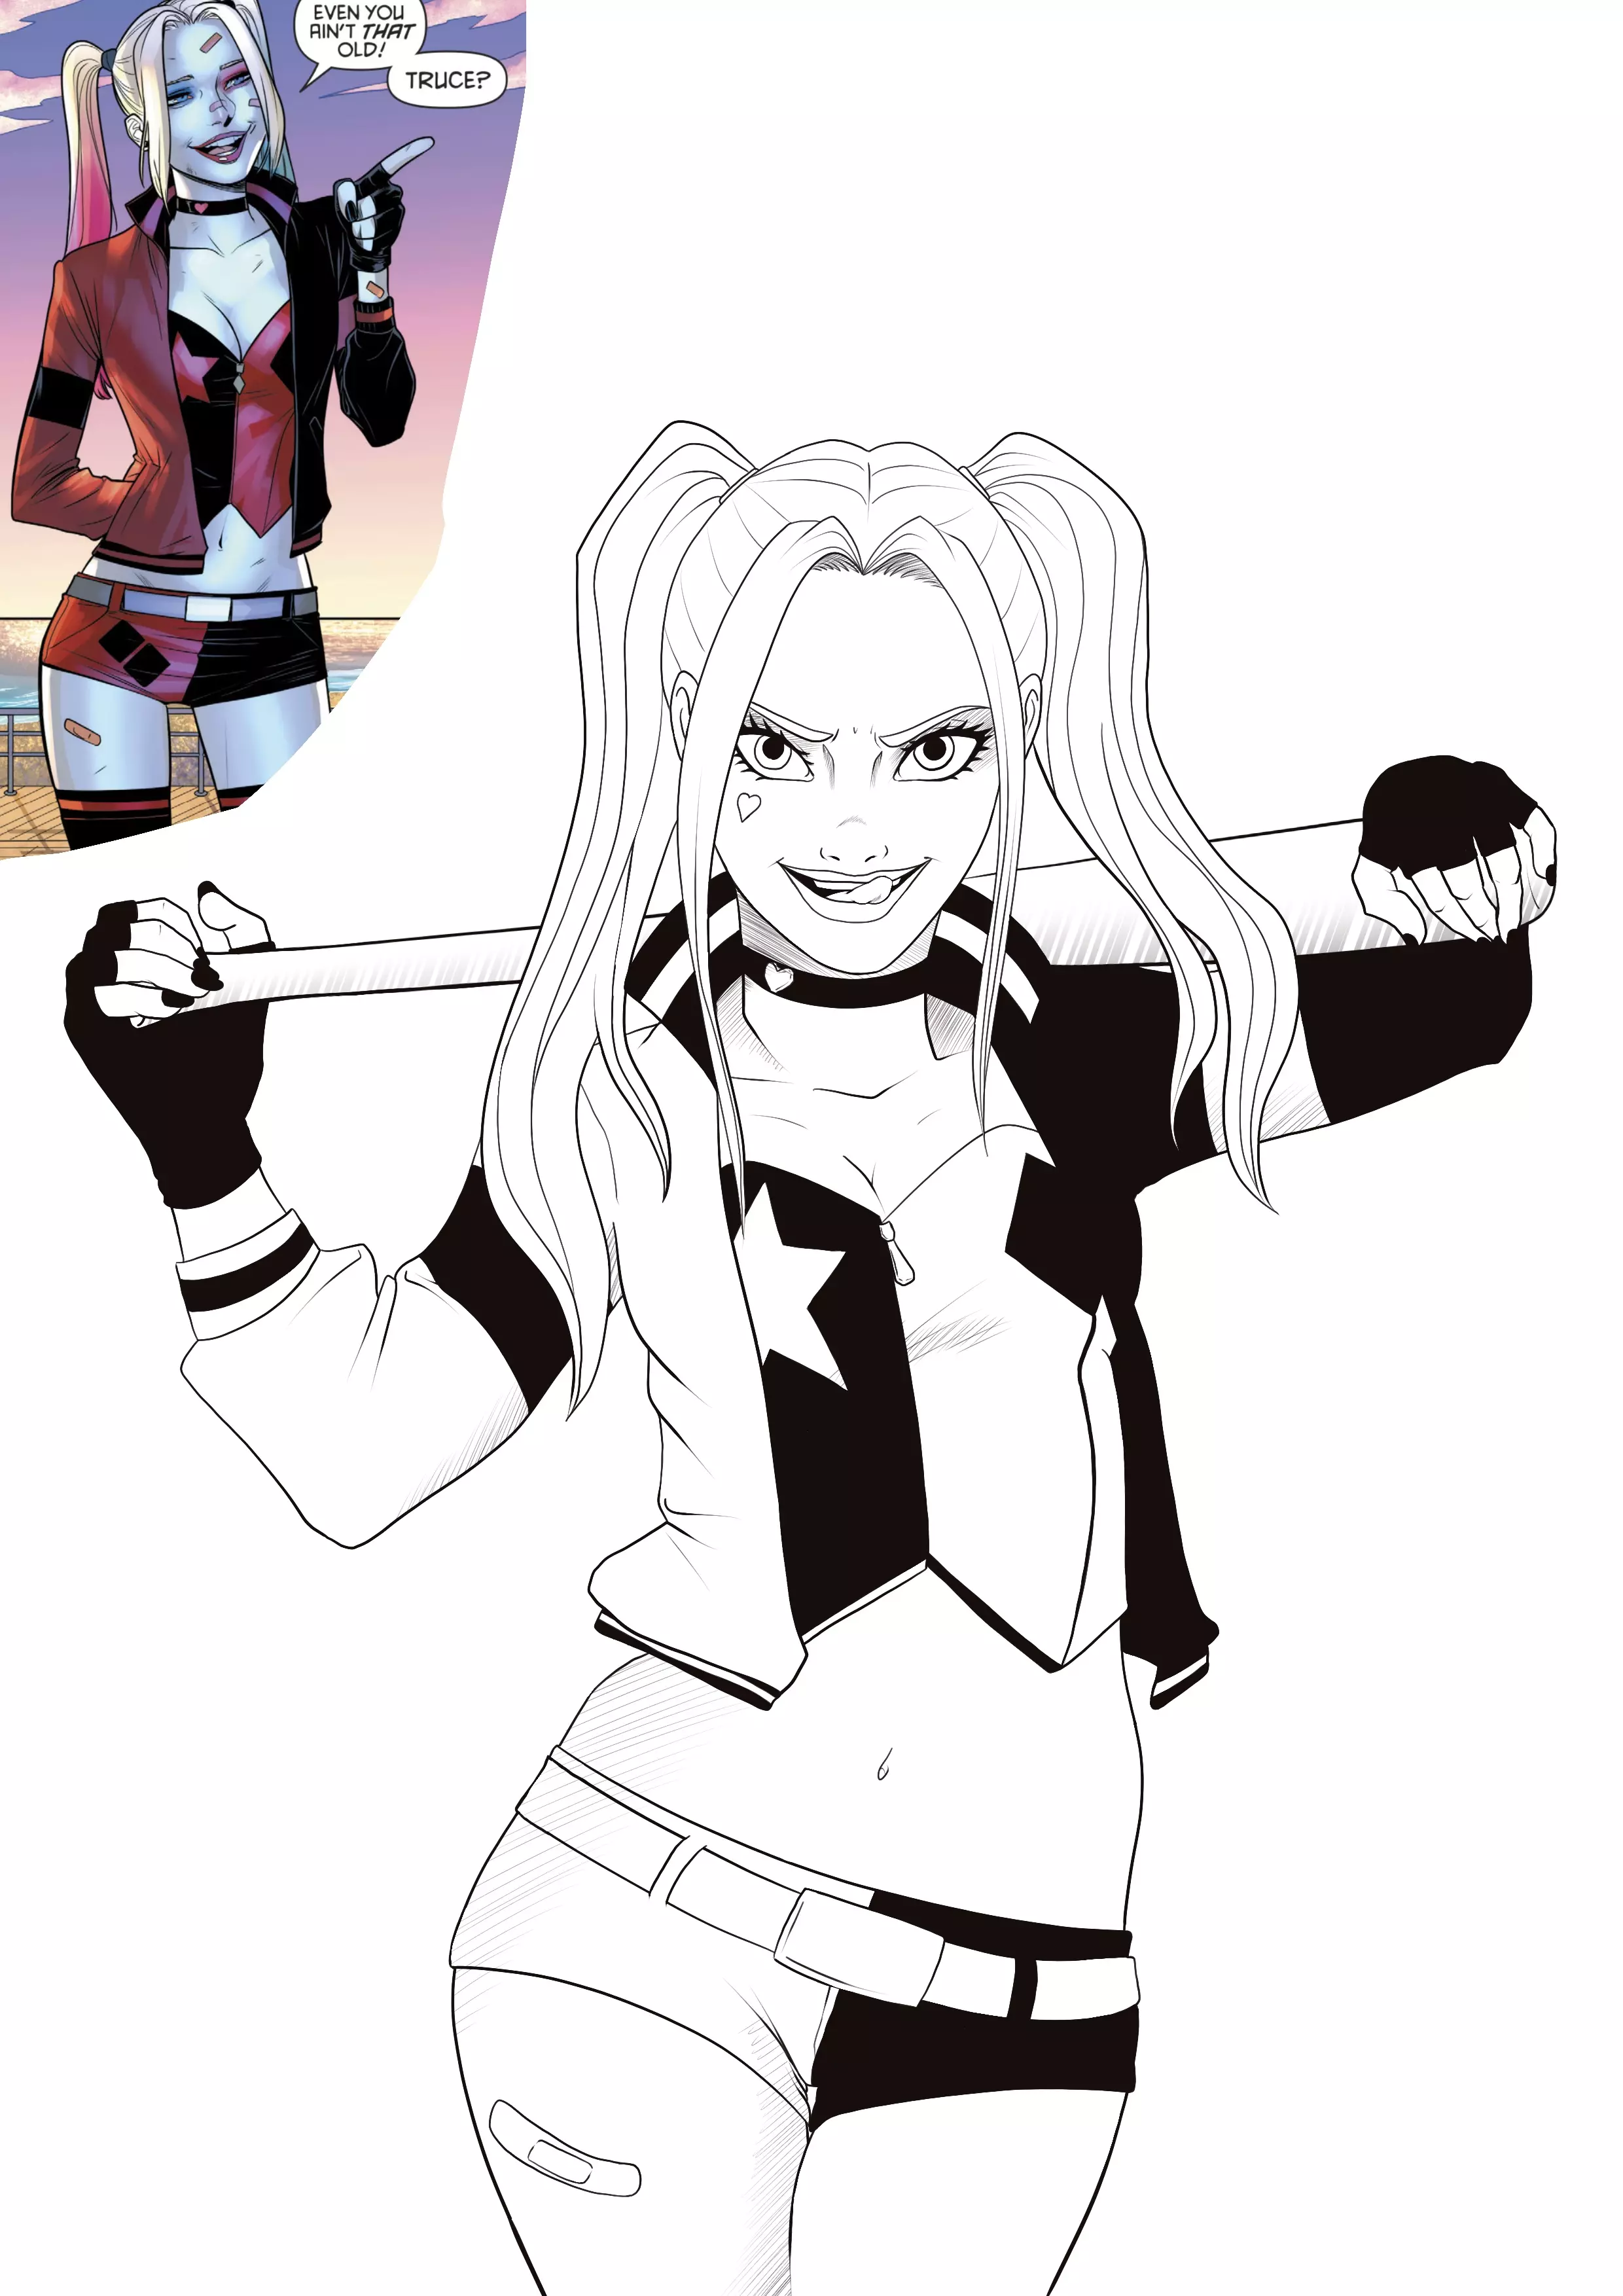
I continue the inking by colouring all the black parts.
If you want to keep the drawing in black and white, feel free to accentuate the hatching and add even more than I did.
I have kept this part fairly light because I will be adding colour and shadows, so in order not to overload the drawing I have chosen a fairly discreet hatching.
From now on, everything else is optional.
We will move on to colouring.
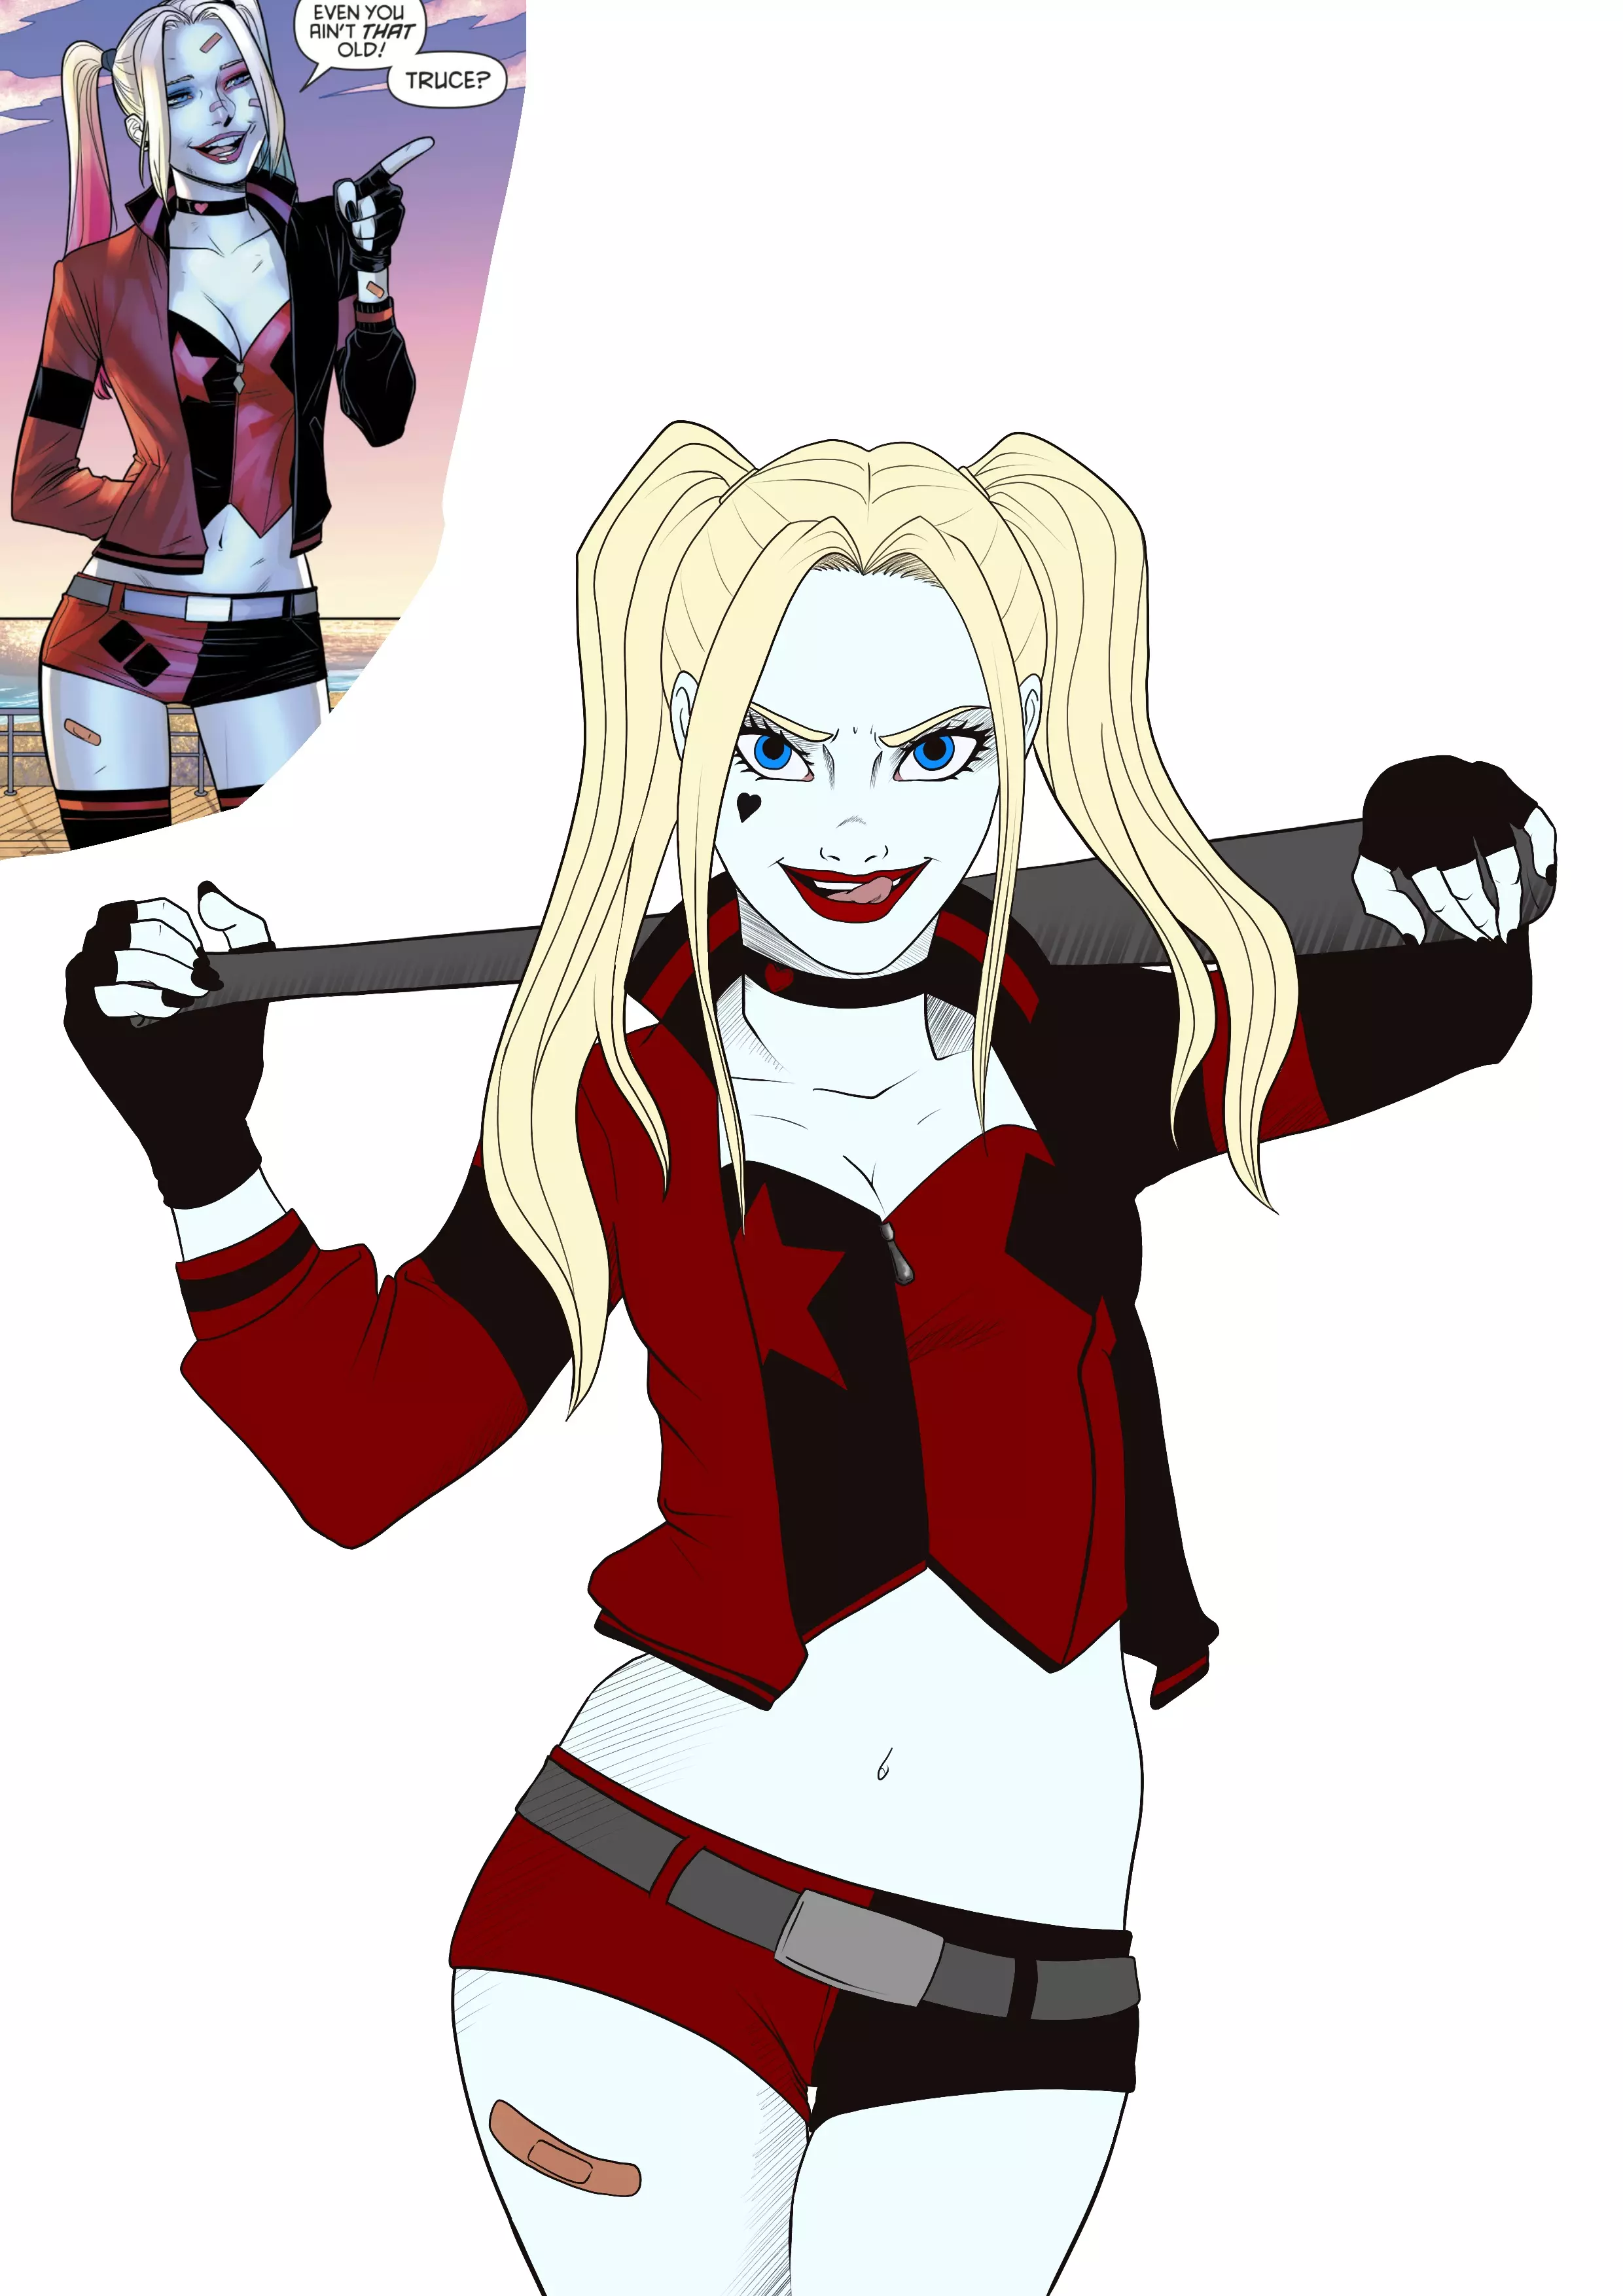
APPLYING COLOUR TO THE DRAWING
Harley has very fair skin that tends to be slightly blue, as a result of his little dip in the chemicals... Therefore, it is important to be careful not to use colours that are too natural for the skin.
As for her hair, it is mostly pale blonde, but she has also done black, red, green dyes... Again, it's up to your taste.
Regardless of the colours you choose in the end, you should start by applying a medium tone colour, so that you can darken or lighten it later.
I then move on to the clothing where, for once, half of the work was done in inking.
I also colour the bat.

I'm finishing the small details of the face.
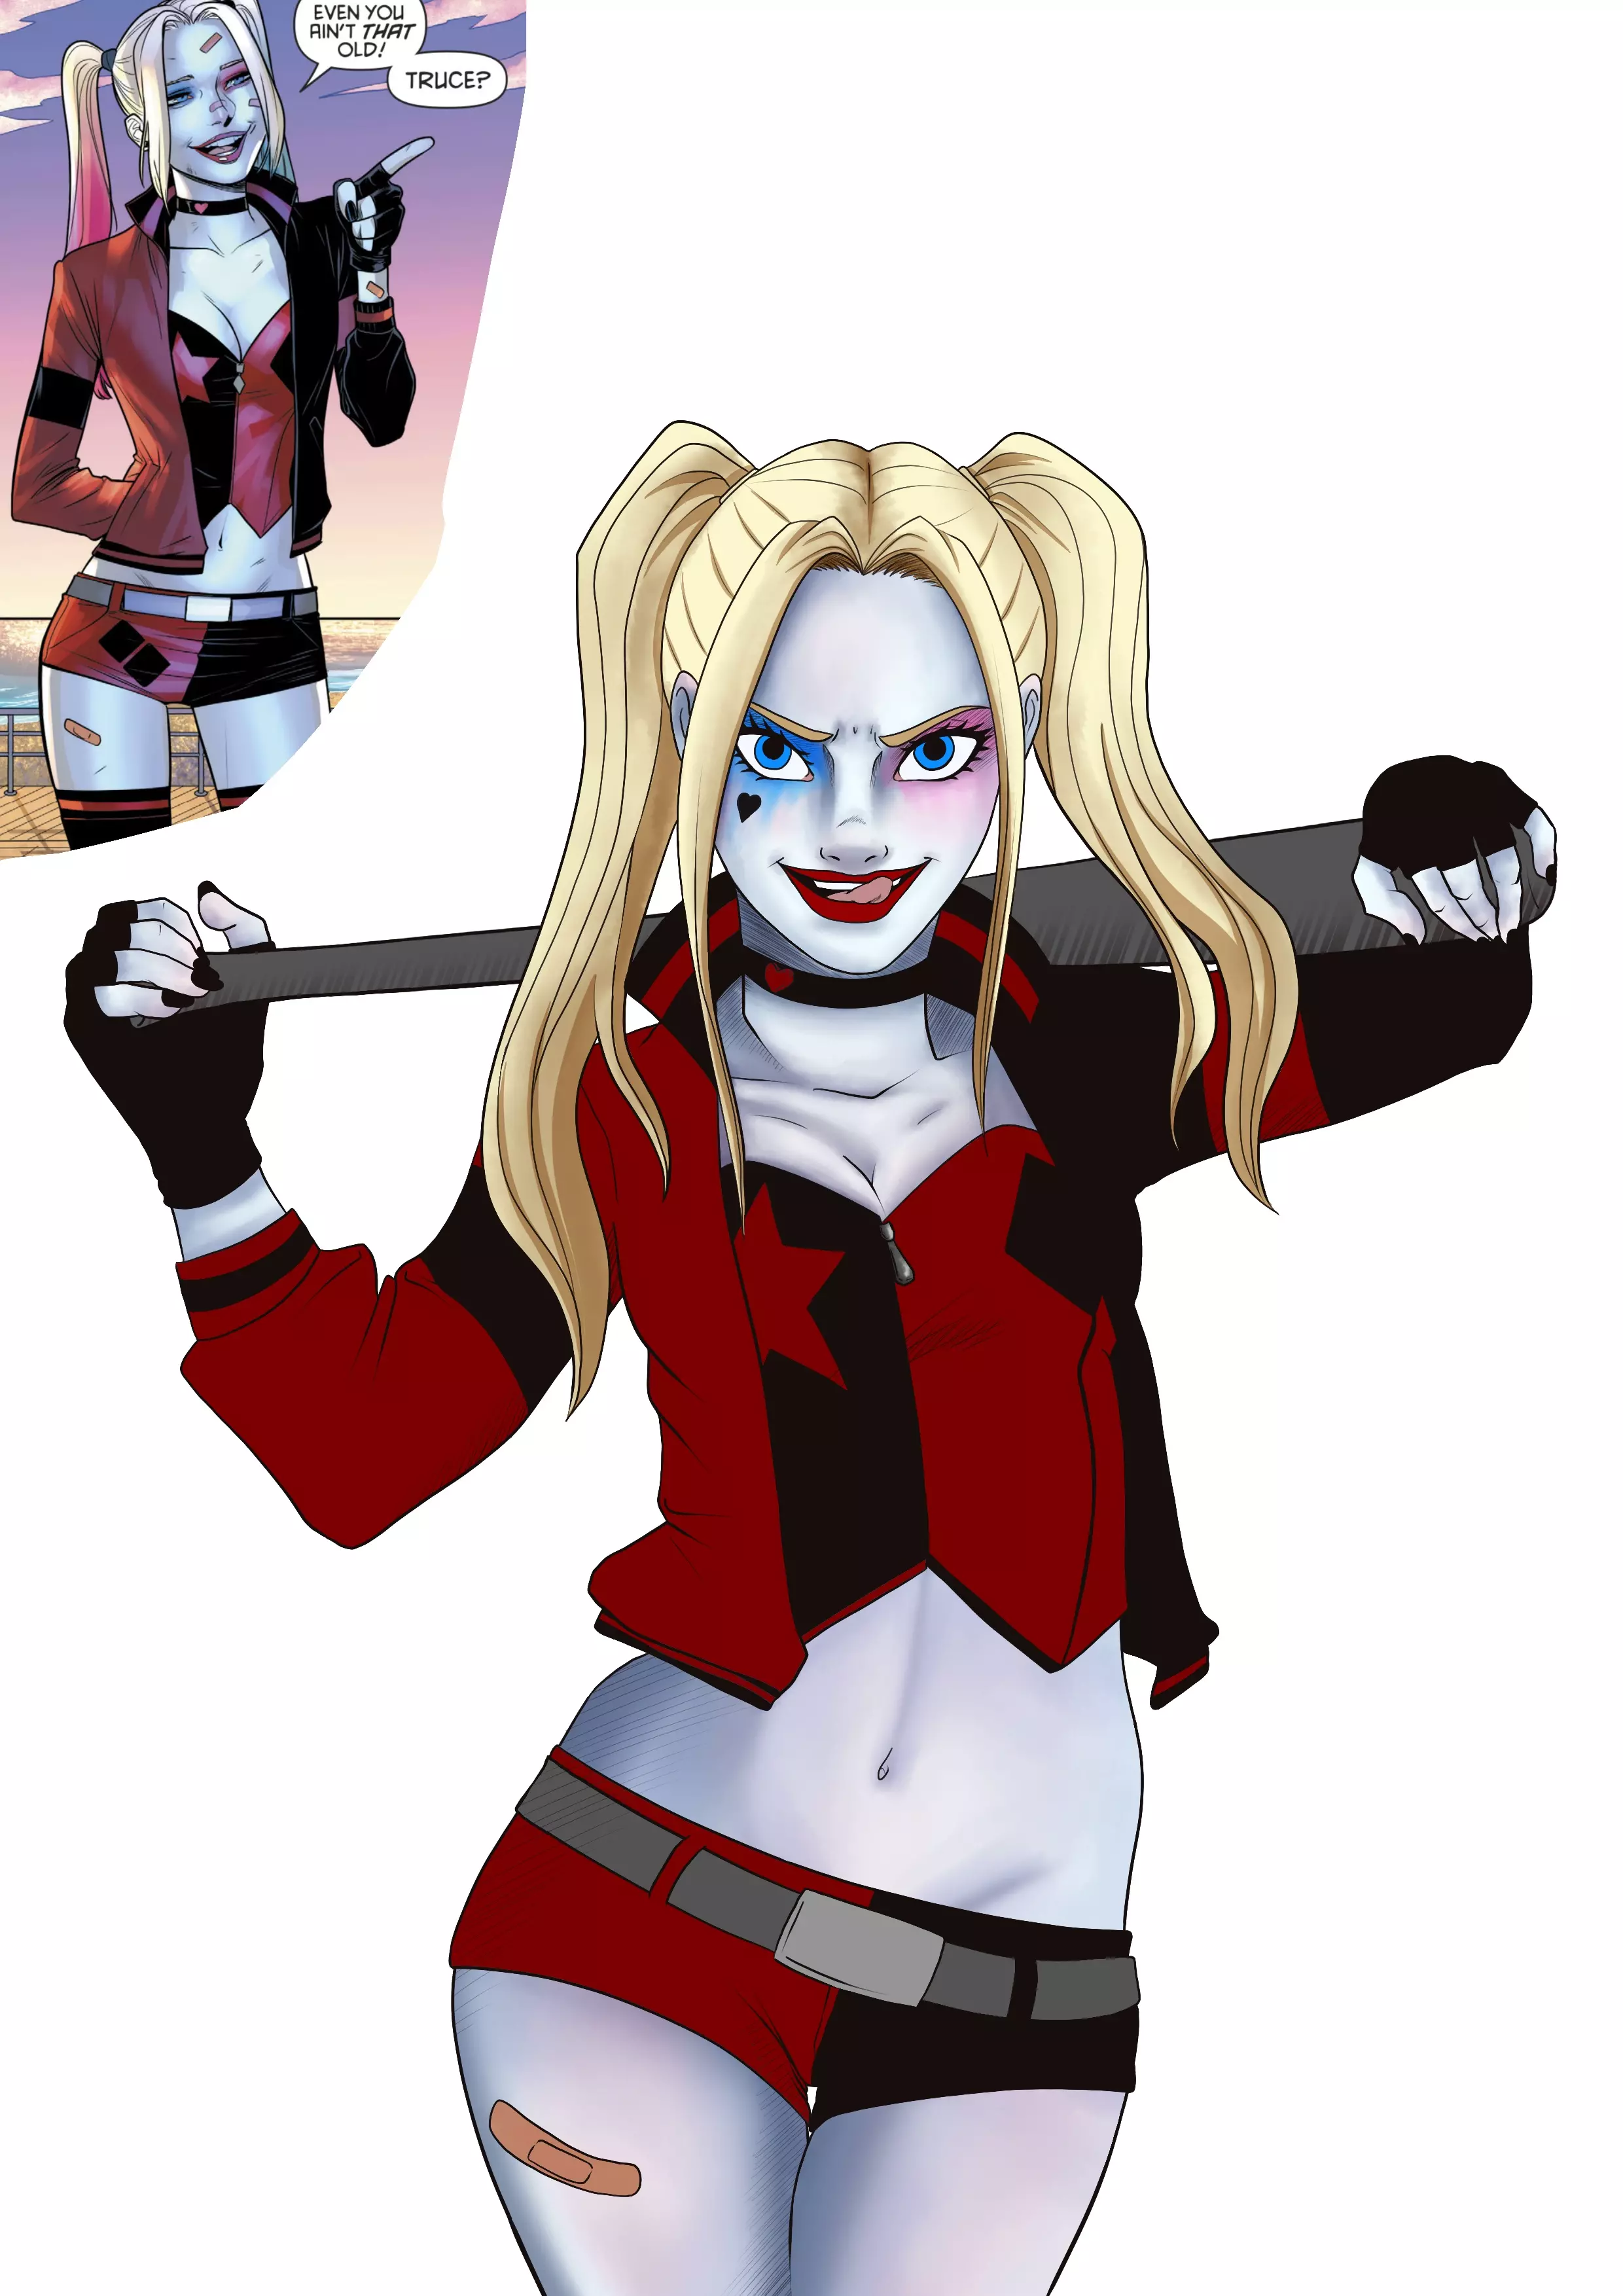
Once the base colour has been applied, I deal with the shadows.
I start by treating the skin and continue with the hair.
To create shadows, don't start with black or grey. Actually, shadows (like lights) are composed of many colors.
On a medium beige skin, you find blue, purple, red, and green for shadows and pink and yellow for the light.
Pure white and black do not exist.
Yet, I have mentioned the main colours. In reality, depending on the subject's environment, colours and intensities can vary...
Then you have to figure out how to mix the different colours to achieve convincing shadows and light.
For Harley, the dominant colour will be blue. I will add touches of green, purple and red in some places, but blue will be the strongest shadow colour.
When I describe all the colours, you will surely imagine something strange.... Yet look...
I have used all the colours mentioned above, yet you will not recognise them at first glance. However, if you focus well and squint your eyes, you might be able to catch a glimpse of some samples.... It is especially noticeable in large areas such as the belly or thighs.
As I said, it's all about balance. And a colour is not necessarily saturated.
By mixing all these colours with small touches, I achieved a shaded skin.
Back to shading. I do the same thing for the hair, but in this case, I go more to brown, dark yellow, orange and a light touch of blue.
Once the shadows are applied, I add the eye and hair make-up colours. It is no mystery that we are moving towards blue and pink.
Then, we move on to clothing and the rest. We continue to follow the same logic of mixing different colours and not using black or white.

Finally, we finish with accessories and small details ...
Our Harley Quinn is officially finished!
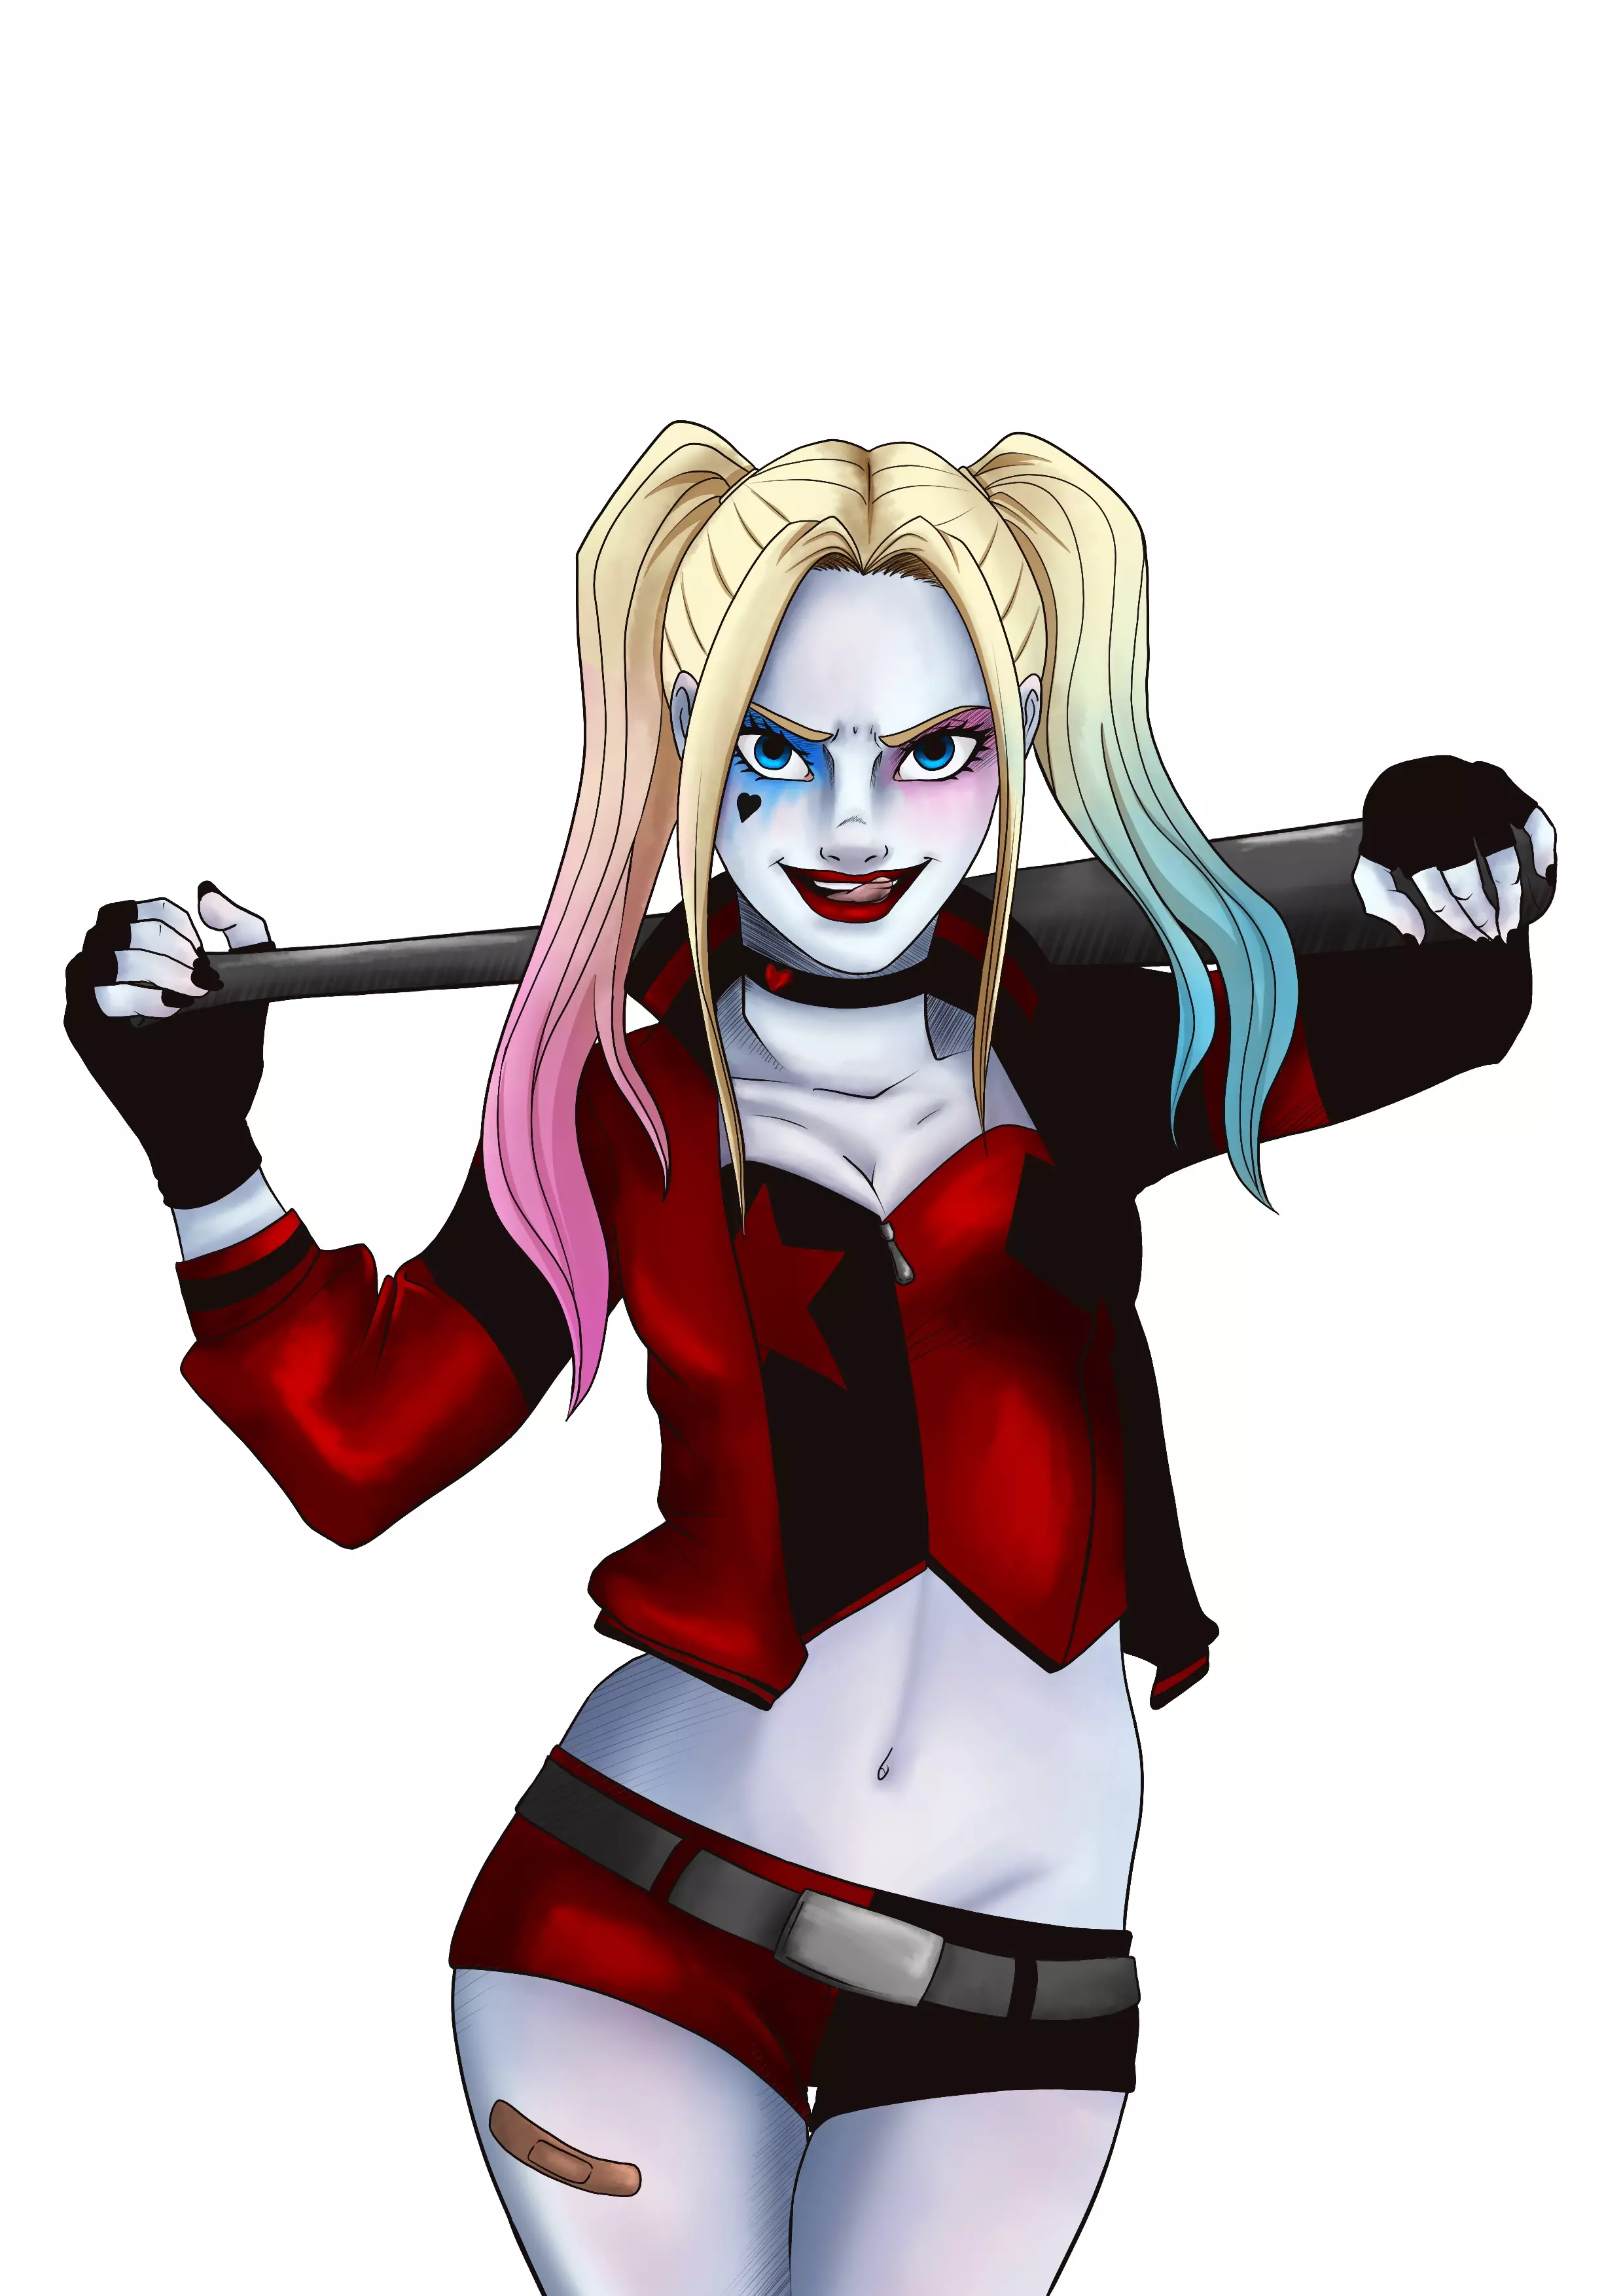
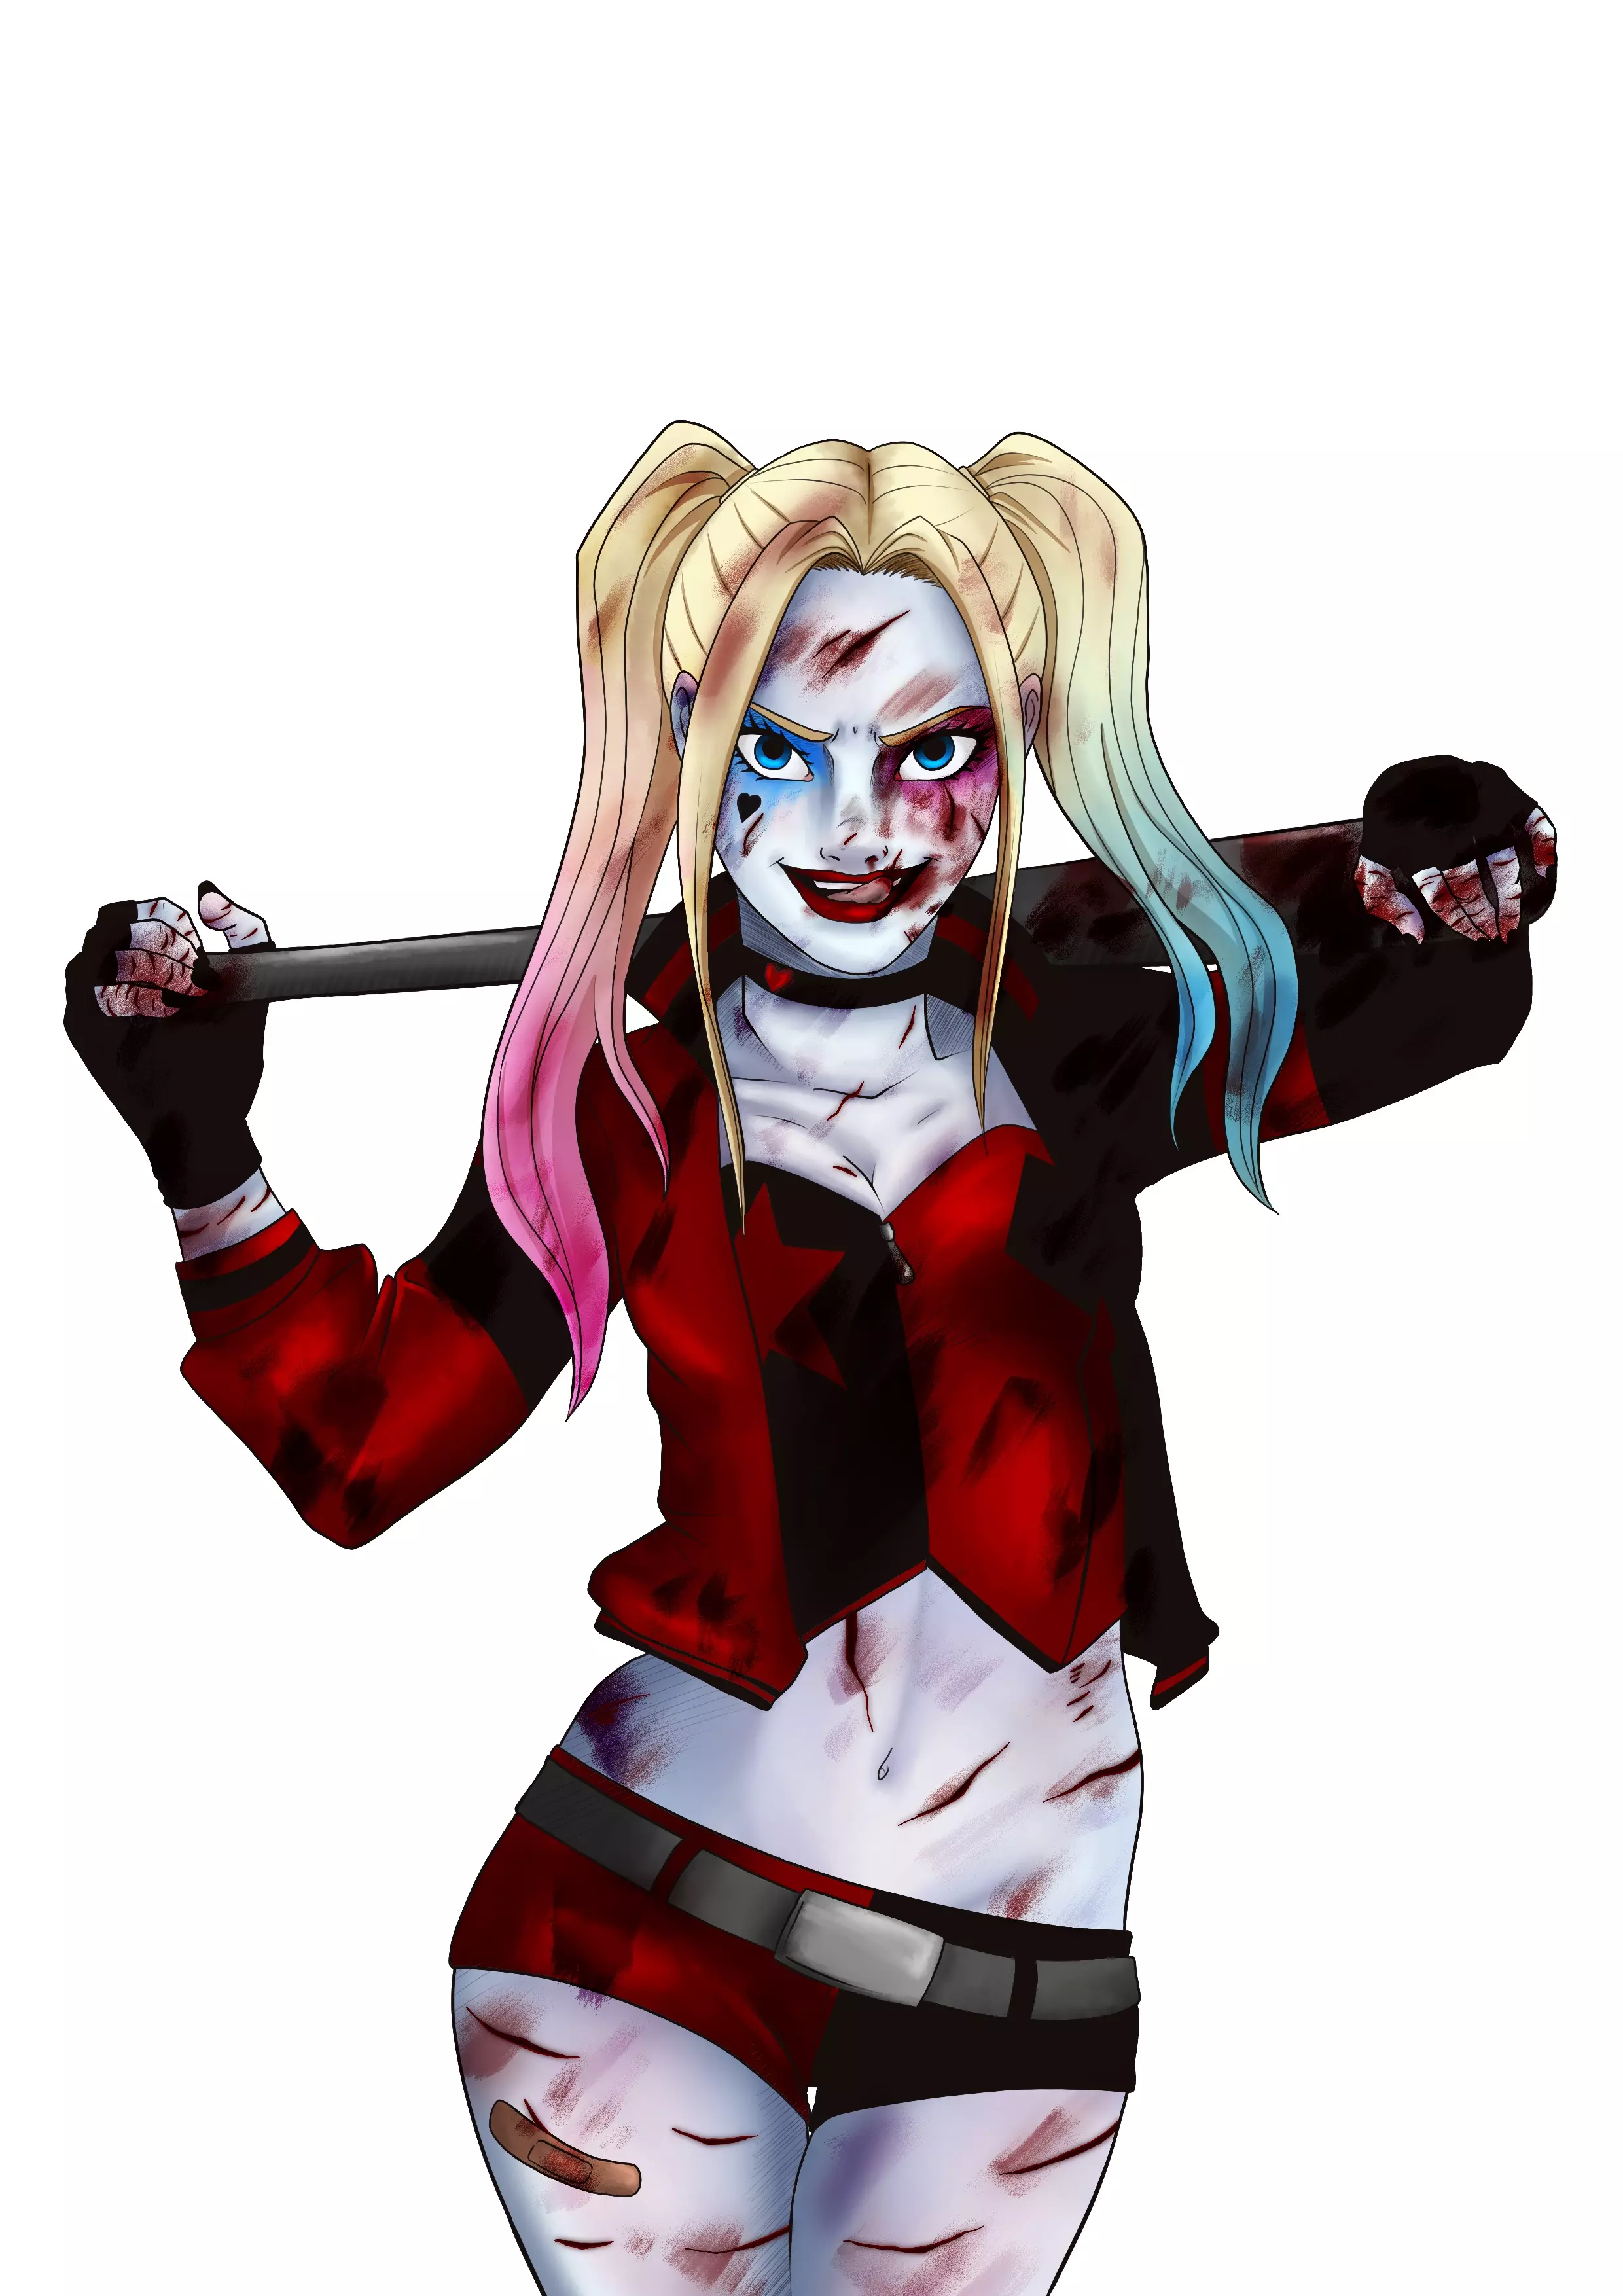
Yet, there are still some small things that can be added to perfect ... Harley Quinn represents chaos, destruction and madness. She does not hesitate to kill. And inevitably, all these ‘activities’ soil her ...
When I draw Harley Quinn, if there's one thing I always do is depict her after her killing frenzy. It's the moment when I find her most interesting. She exudes a satisfaction mixed with sheer madness, which is what makes this character so fascinating. So I tend to add wounds, dirt and blood - in good quantities.
At the beginning of the drawing, I told you that I drew the tongue to add a hint of provocation.... But not only that... In fact, in the full version I imagined, she is licking a wound on her lip.
Again, this step is optional and I will not describe it in 10 pages, but if you want to make a more ‘bloody’ Harley Quinn, read on. Otherwise, you can stop here.
Since I know that some people are sensitive to the sight of blood, ... I will only talk about this passage at the end of the article, so that you can read the conclusion in peace.
First of all, congratulations on finishing the job. Harley is not necessarily an easy character to draw, given her unique psychology that you have to manage to convey. By drawing her over and over again, you will come to make the character your own.
KEY POINTS TO REMEMBER TO MAKE OUR DRAWING
- Working on the basics is essential. A good base, a good preparatory sketch allows you to draw and ink calmly.
- Do not hesitate to use yourself for character posing. There is nothing better than having real references. Also, if you are new to drawing or do not yet know the basics of anatomy, I advise against using other drawings/illustrations as references for your poses. In fact, an artist draws according to his or her own style and therefore may distort proportions. If you learn to draw with incorrect proportions, correcting these errors will be a hassle later....
And I speak from experience! I started drawing by copying everything I saw, everything but reality. When I entered art school and took my first courses in realism and character design, I quickly realized that my approach to drawing was completely skewed. I had to relearn how to draw and work hard to lose my bad habits. Of course, I immediately saw the difference between my old drawings and my new ones! Today, as an illustrator, I still use the mirror and myself (or a poor nearby victim) as a reference for my characters.
- Shadows and lights are not made of black and white!!! This is a common mistake people often make when starting out; they tend to create shadows with black and then adjust the opacity, and do the same for lights with white. Observe the world around you; you will never see black and white. As I said before, in reality these colors do not exist.
In fact, they are not even actual colors. Technically, they are shades. They are used to change the appearance of colors (green, blue, red, yellow...).
What you think is black is actually a very dark grey (or another colour). Your eye sees it as black, but it is not. Pure black only exists if there is no light, but in reality zero light, not even in the slightest. The places where pure black can be found are therefore very rare.... The way to achieve a semblance of black in images is to mix additive colours.
As for white, it is the opposite, it is obtained through light, but not just any light: from unfiltered sunlight. Also, in images, it is obtained by mixing subtractive colours.
Here's a small diagram so you can visualize the thing ...
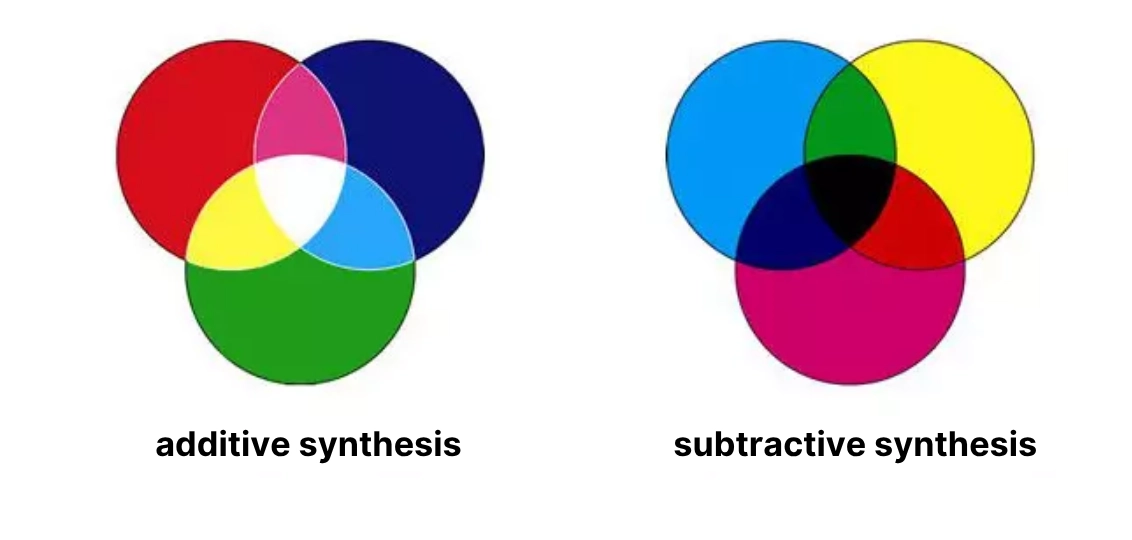
I will not go into more detail so as to not confuse you further, but remember the main points: no black and no white.
I've finished with my long conclusion!
Don't forget to post your drawings in the comments, we'll be delighted to look at them! I can't wait to see your versions of Harley Quinn ♥
As for the less sensitive among you, we'll see you right below ...
â
â
✡
â
☟
☟
â
â
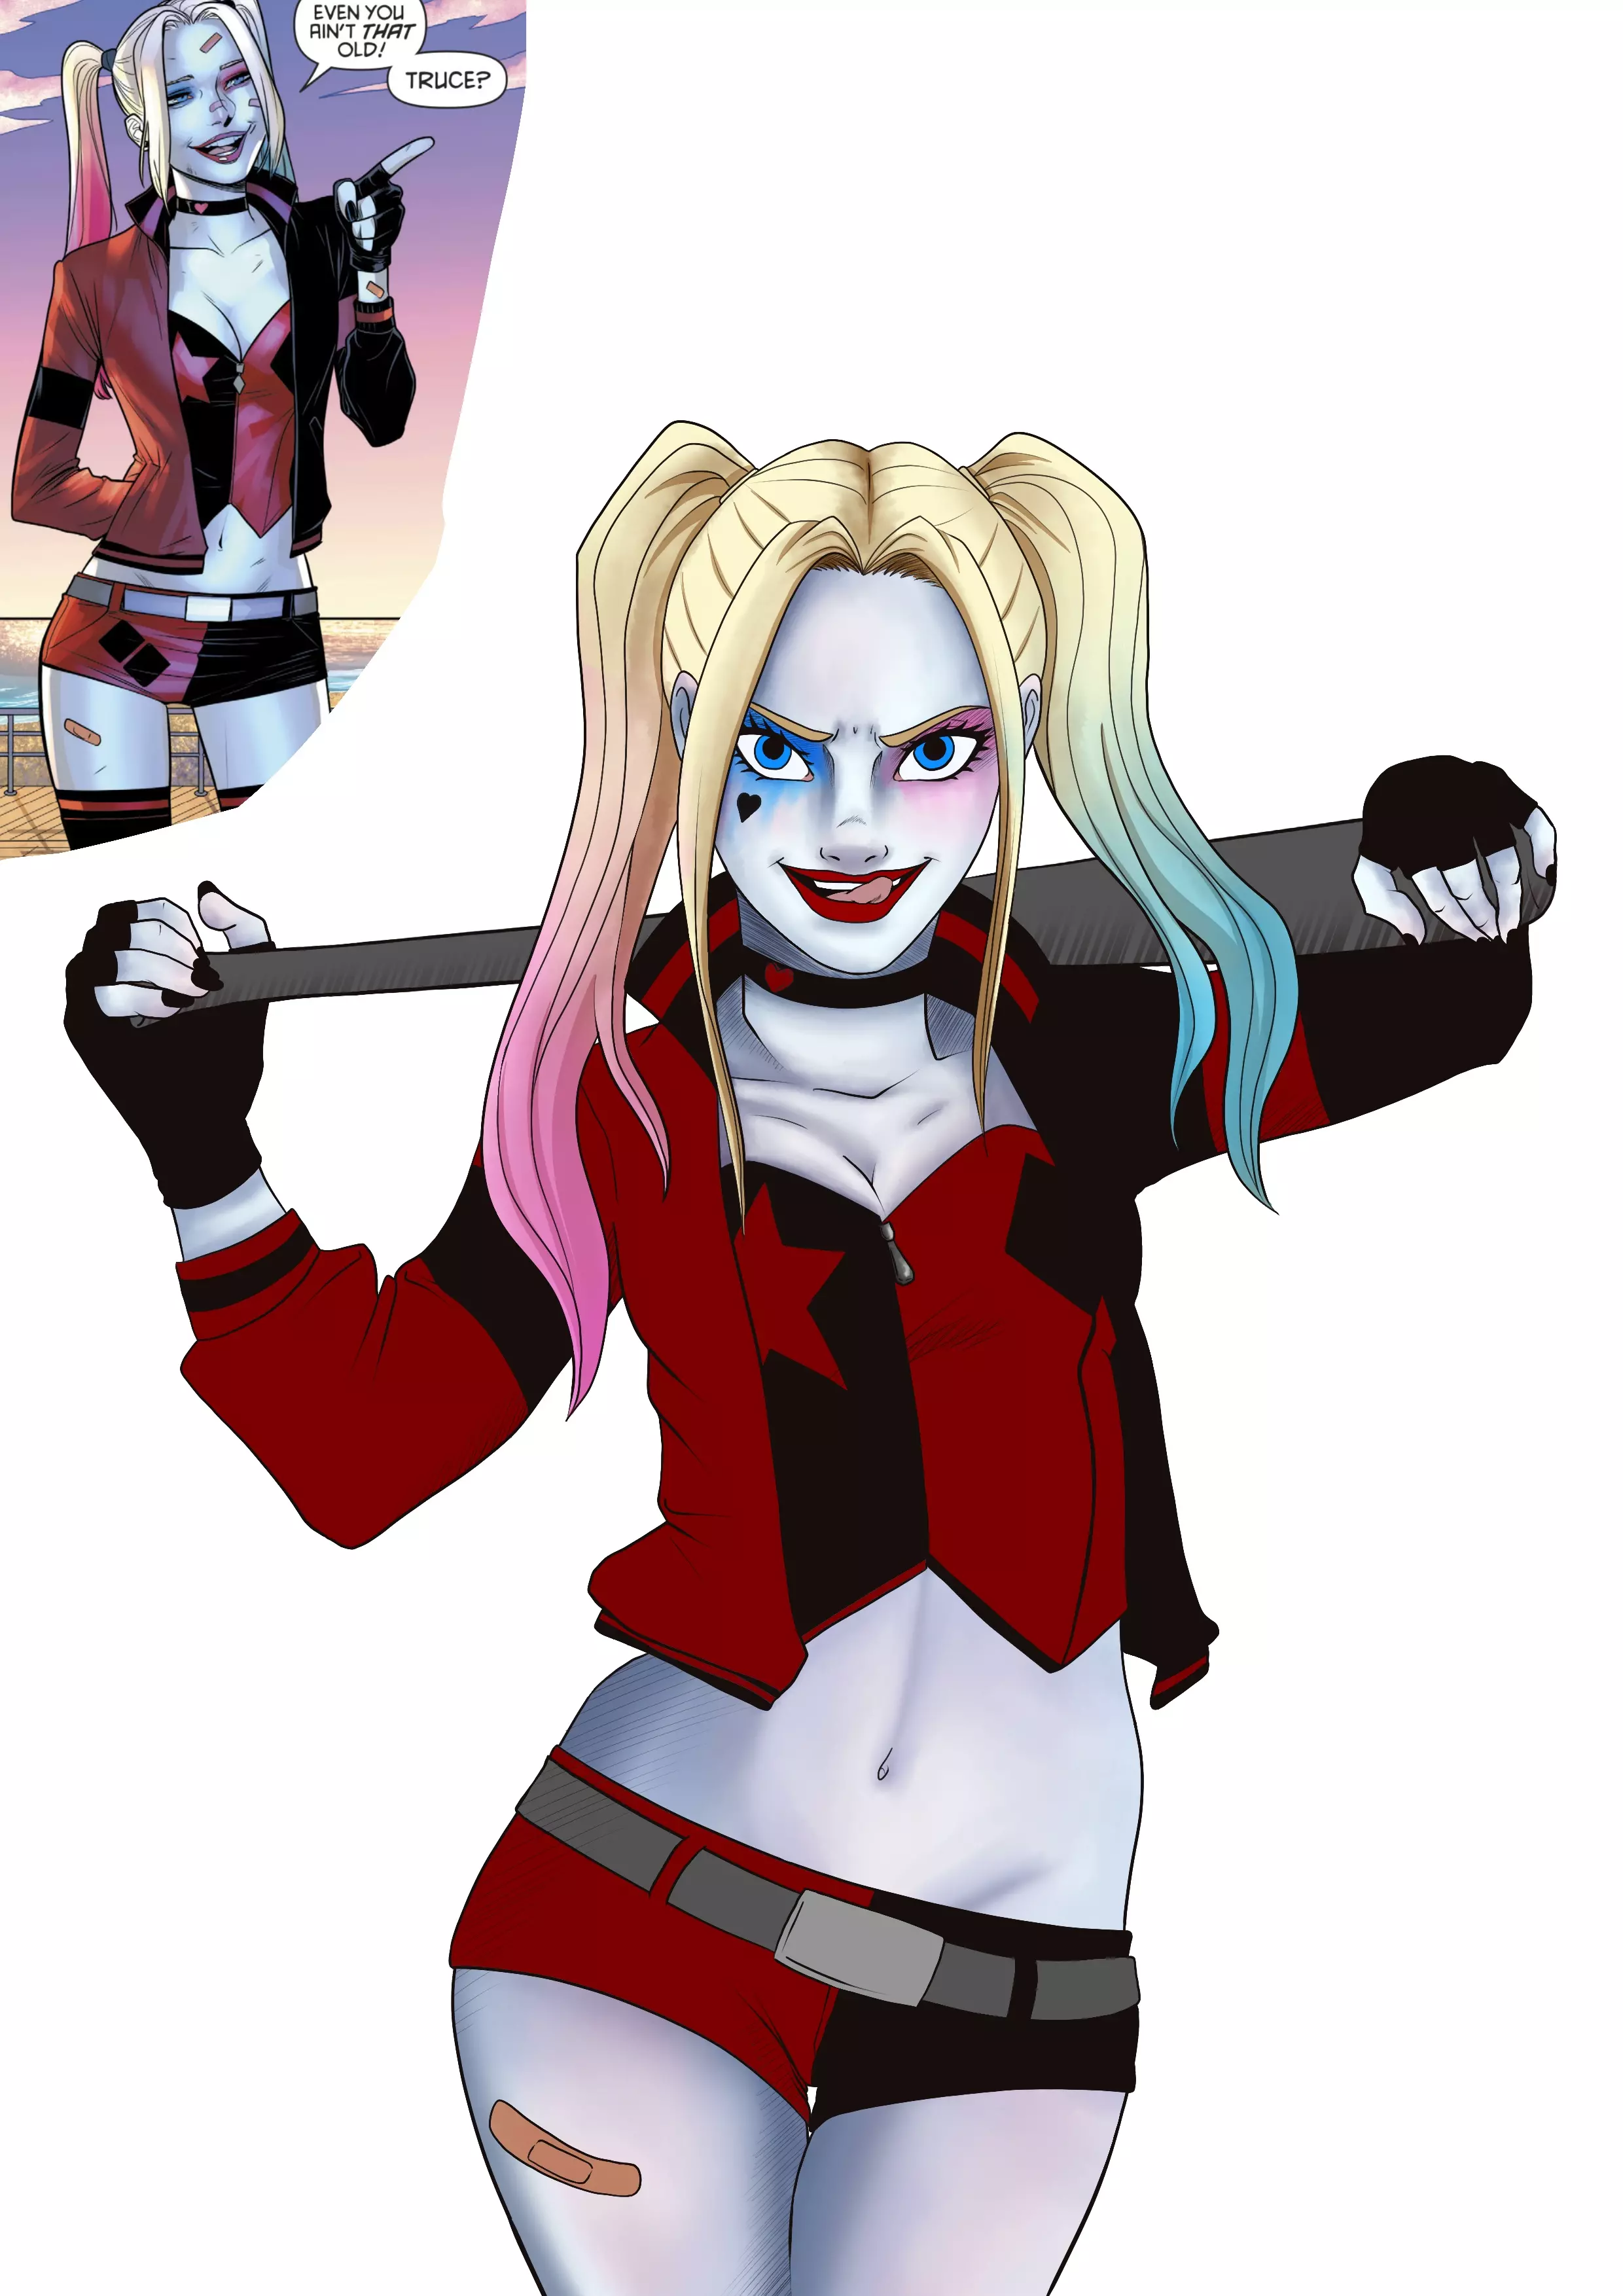
⚠️ TW: BLOOD + INJURIES
BONUS: DRAW HARLEY QUINN IN ANOTHER VERSION
As I said, I'm a big fan of a very destroyed Harley Quinn... So I've added her dose of hits and injuries to my drawing.
To do this, start by adding touches of blue/purple/green to create the bruises and marks. I didn't use a lot of these, preferring to give the bloodstains as much as possible....
Add some blue and gray streaks to simulate dirt, it shouldn't be too clean after a fight.
Next, add the cuts. If I did several on the body, it's mainly on the hands that I focused heavily. Harley Quinn fights with her bat, but also with her bare hands, so her hands inevitably end up quite damaged during a fight.
I also put some on her face area.
We add a few traces of blood which we blur slightly, and others that we keep raw.
And our bloody Harley is finished!

Discussion
I'm a huge fan of this drawing and the tutorial is great! I don't dare start it until I've finished the basic training. So, I'm going to motivate myself even more to be able to do this drawing 😁