How to Draw Mickey Mouse
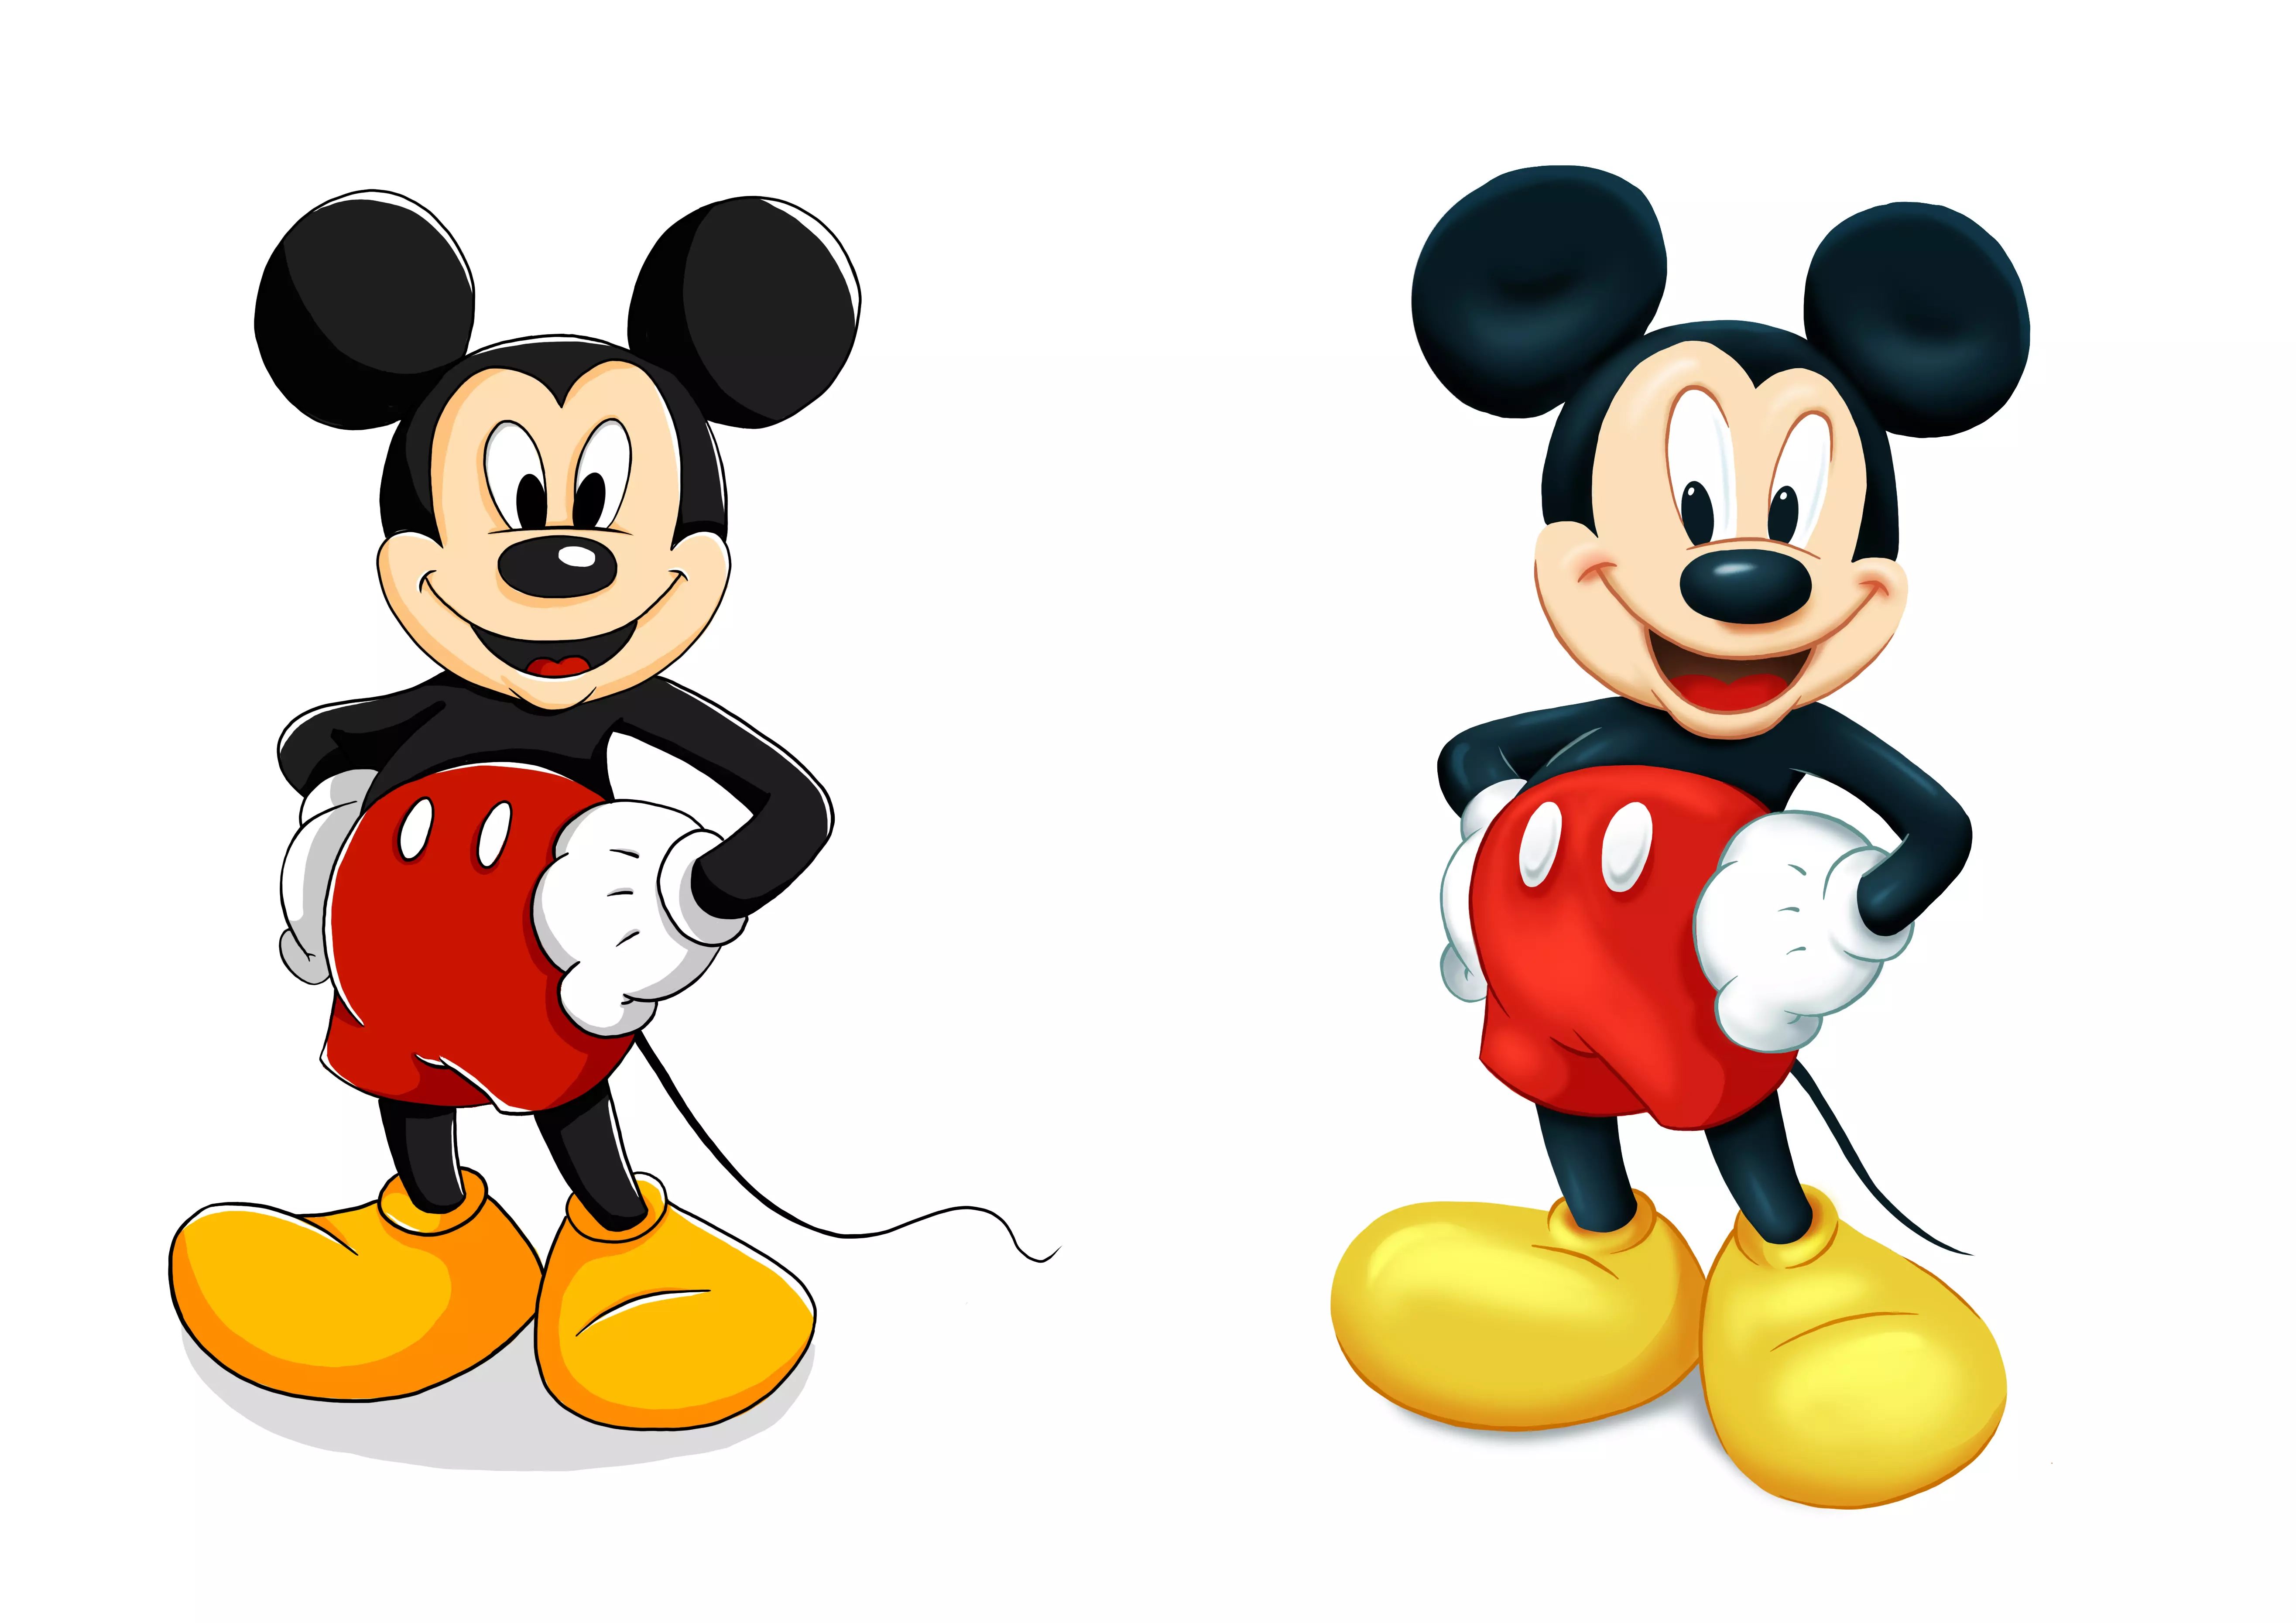
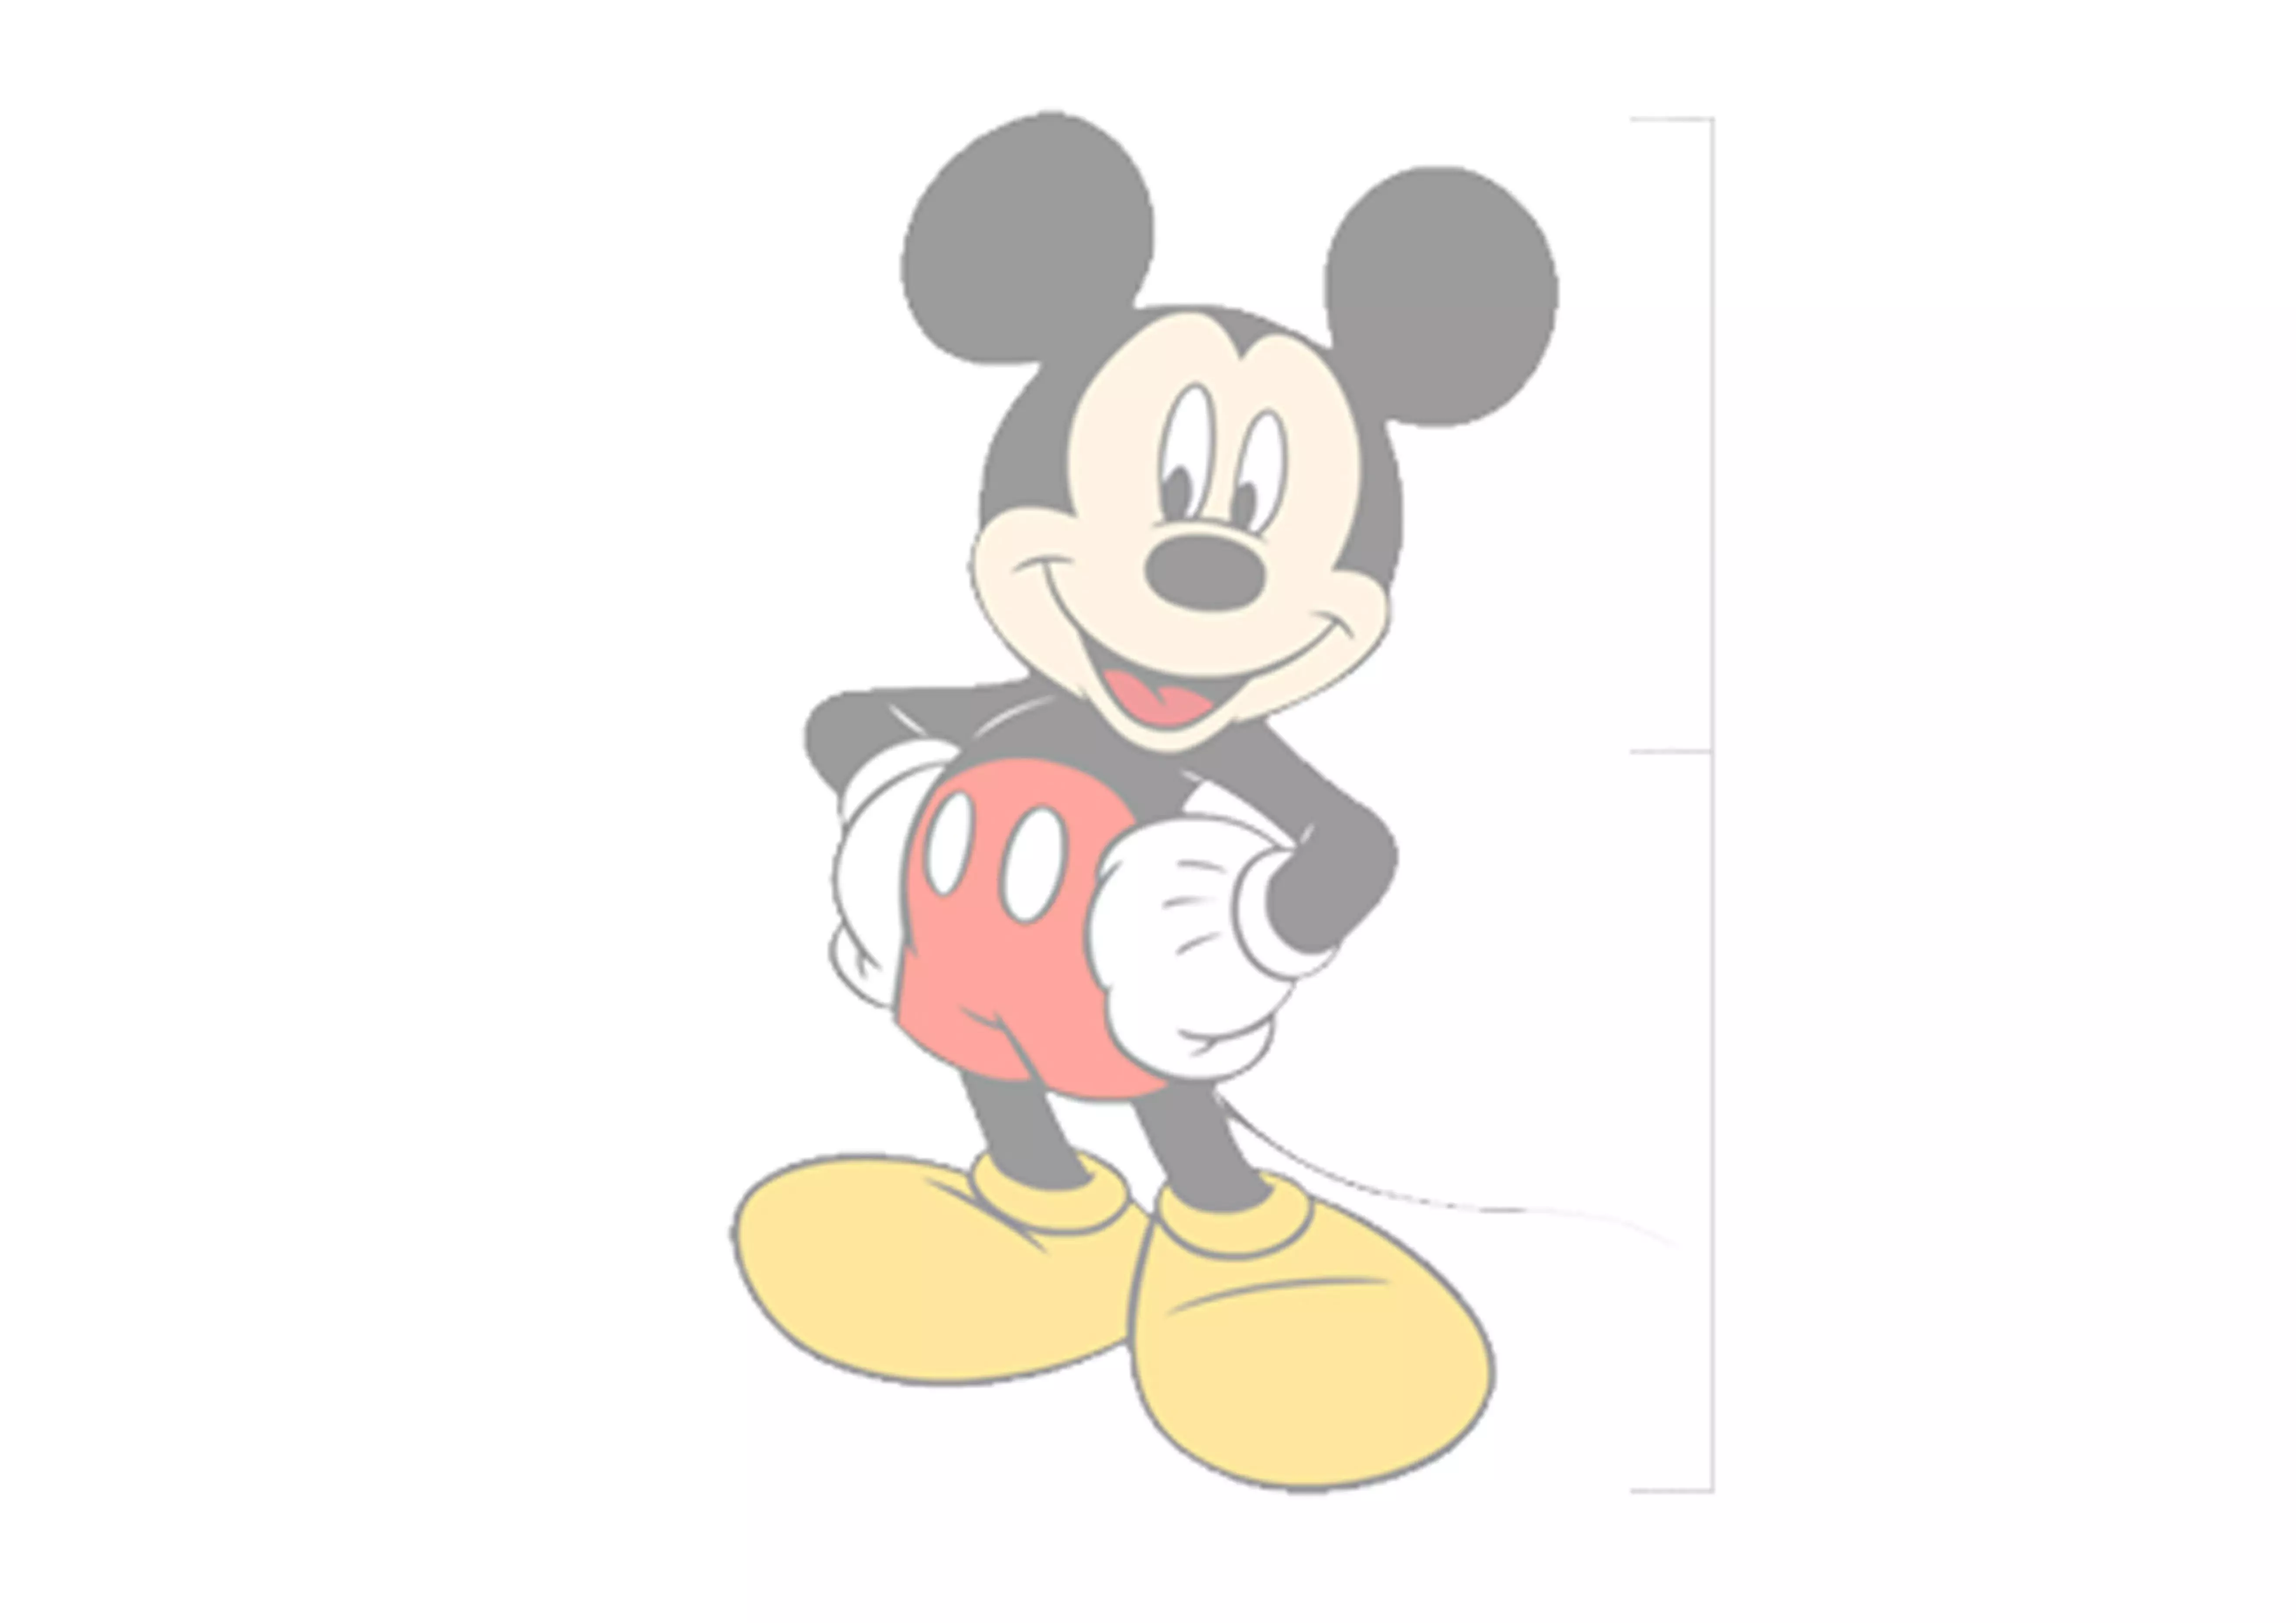
We often forget that this mouse, known all over the world, was once just a simple sketch on a piece of paper. So nothing better than a well-known character for everyone to focus on the technique rather than the creation.
The golden rule of drawing is... *drumroll*: observation!! So let's observe and break it down.
It's easier to deconstruct all the elements into geometric shapes, circles, squares…
DRAW MICKEY STEP BY STEP
A little tip! Don't erase the construction lines, they will help you a lot during the inking.
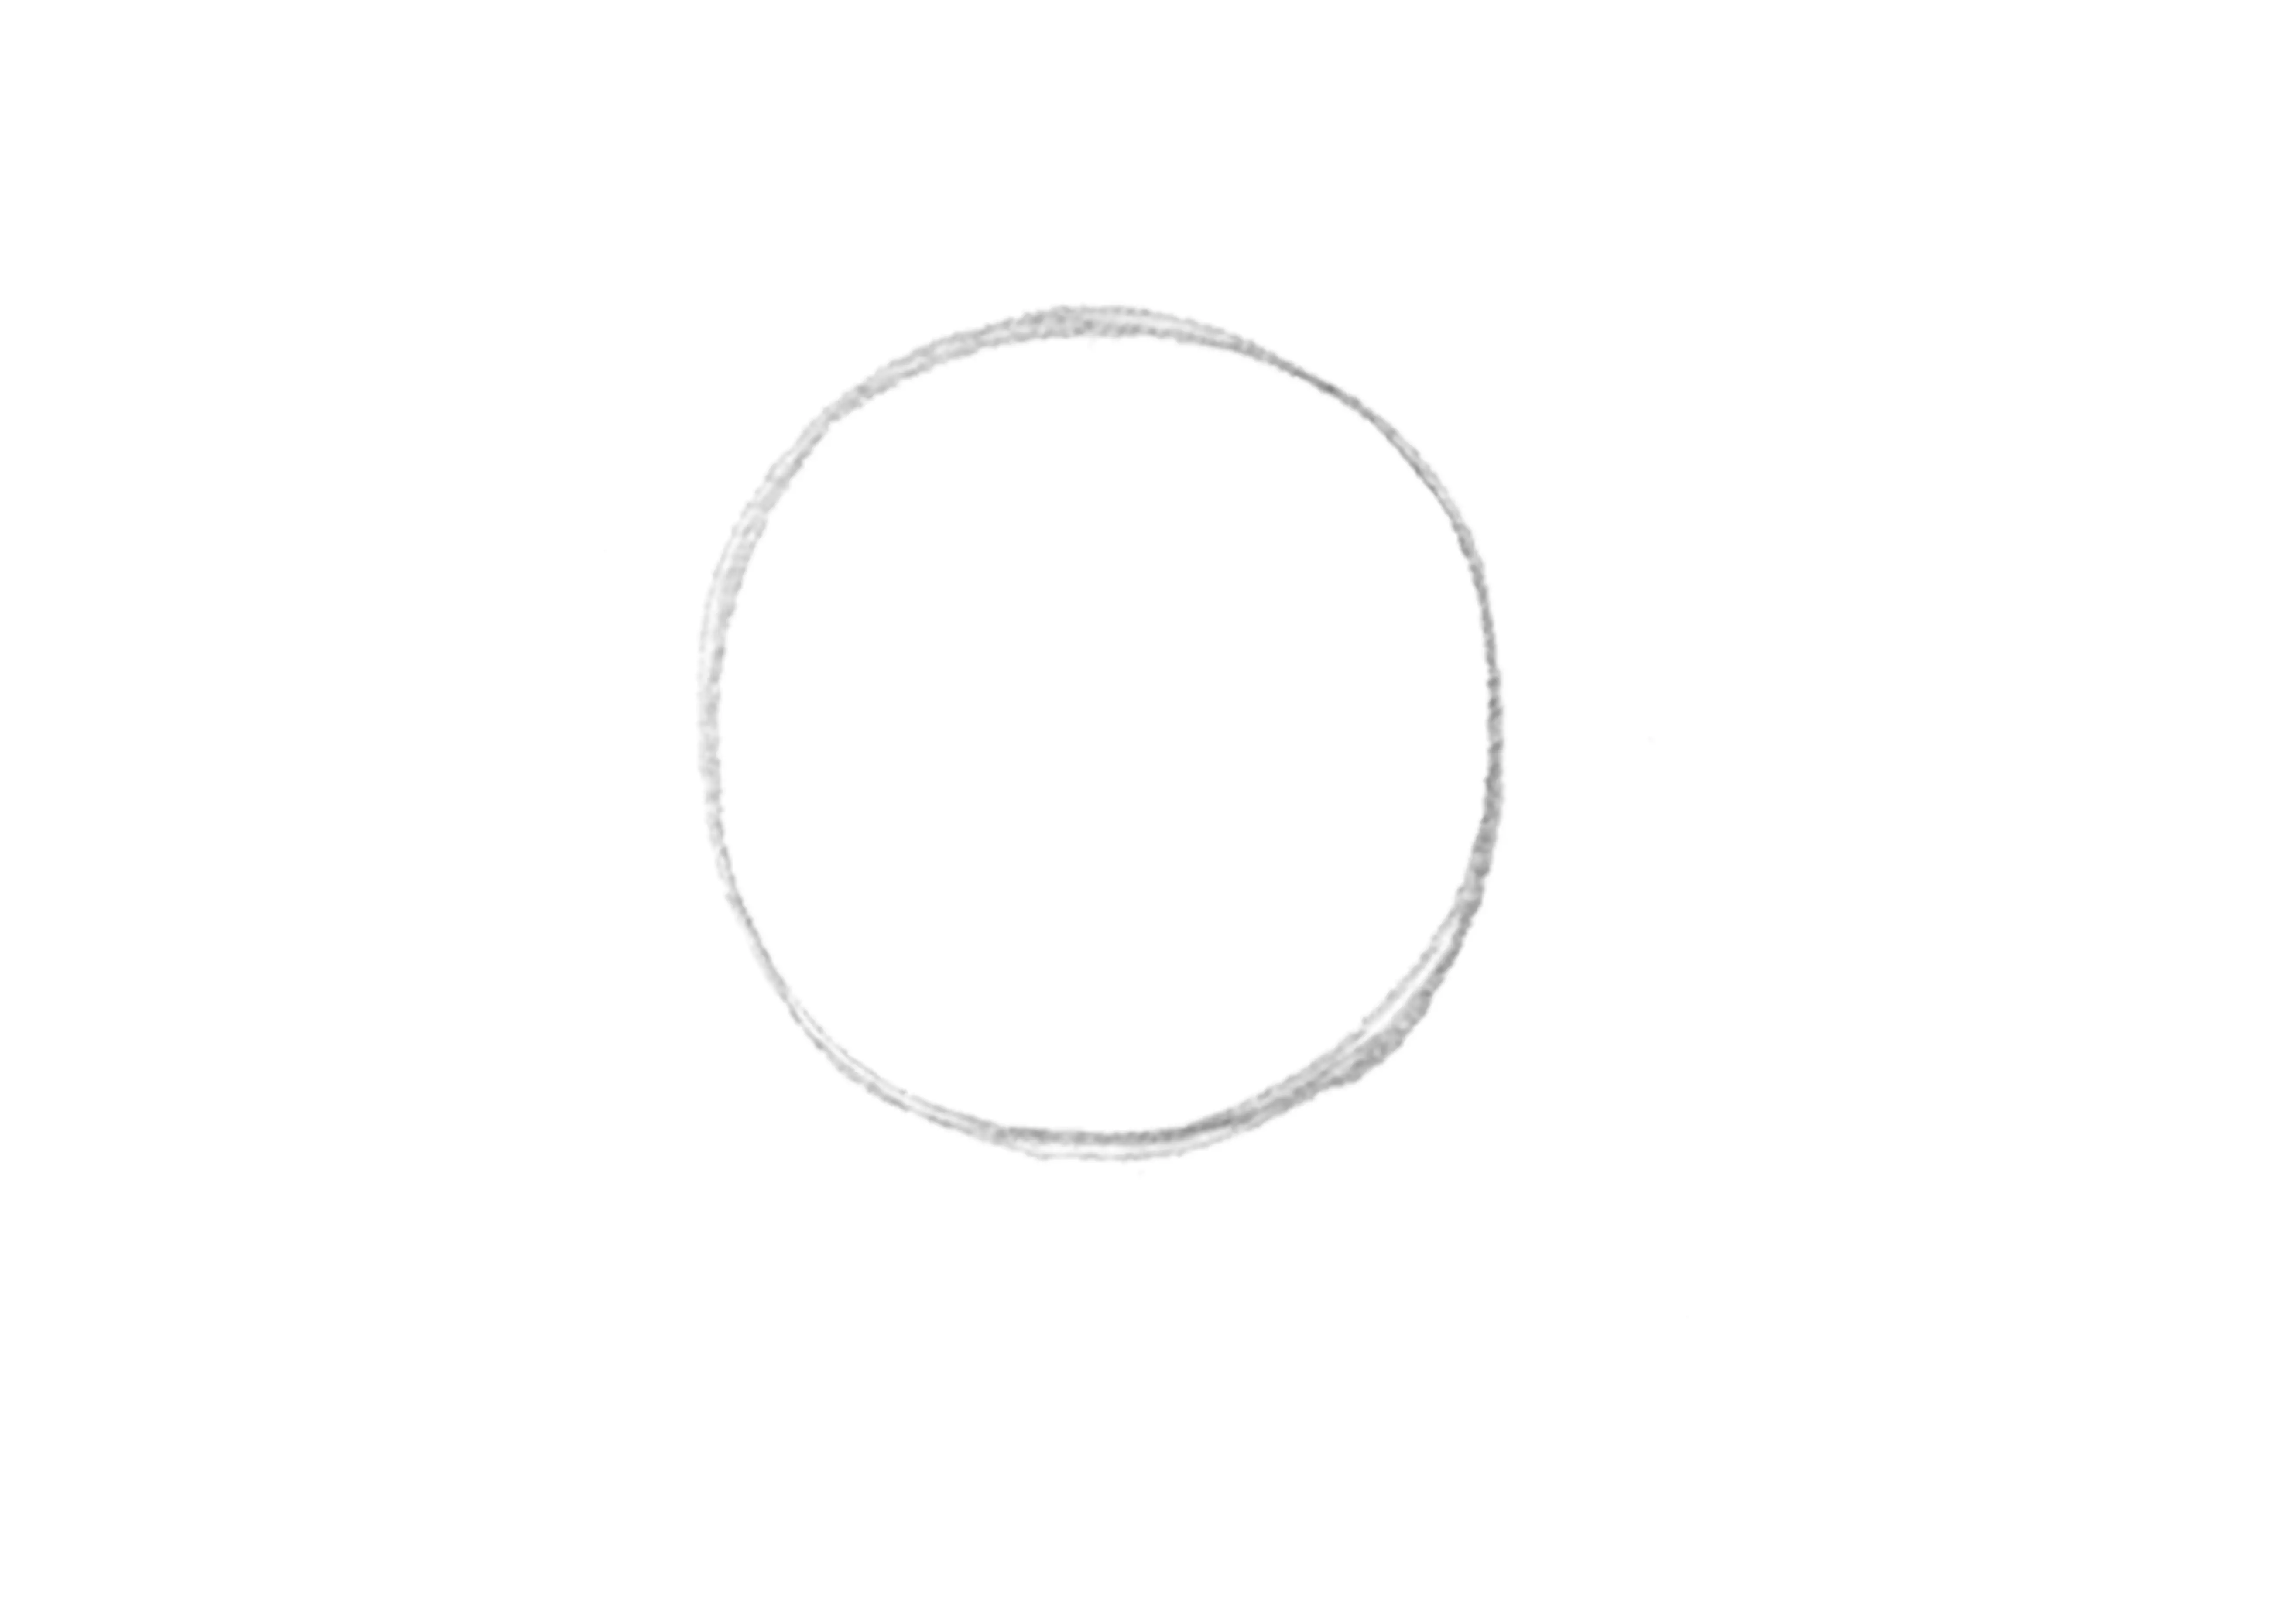
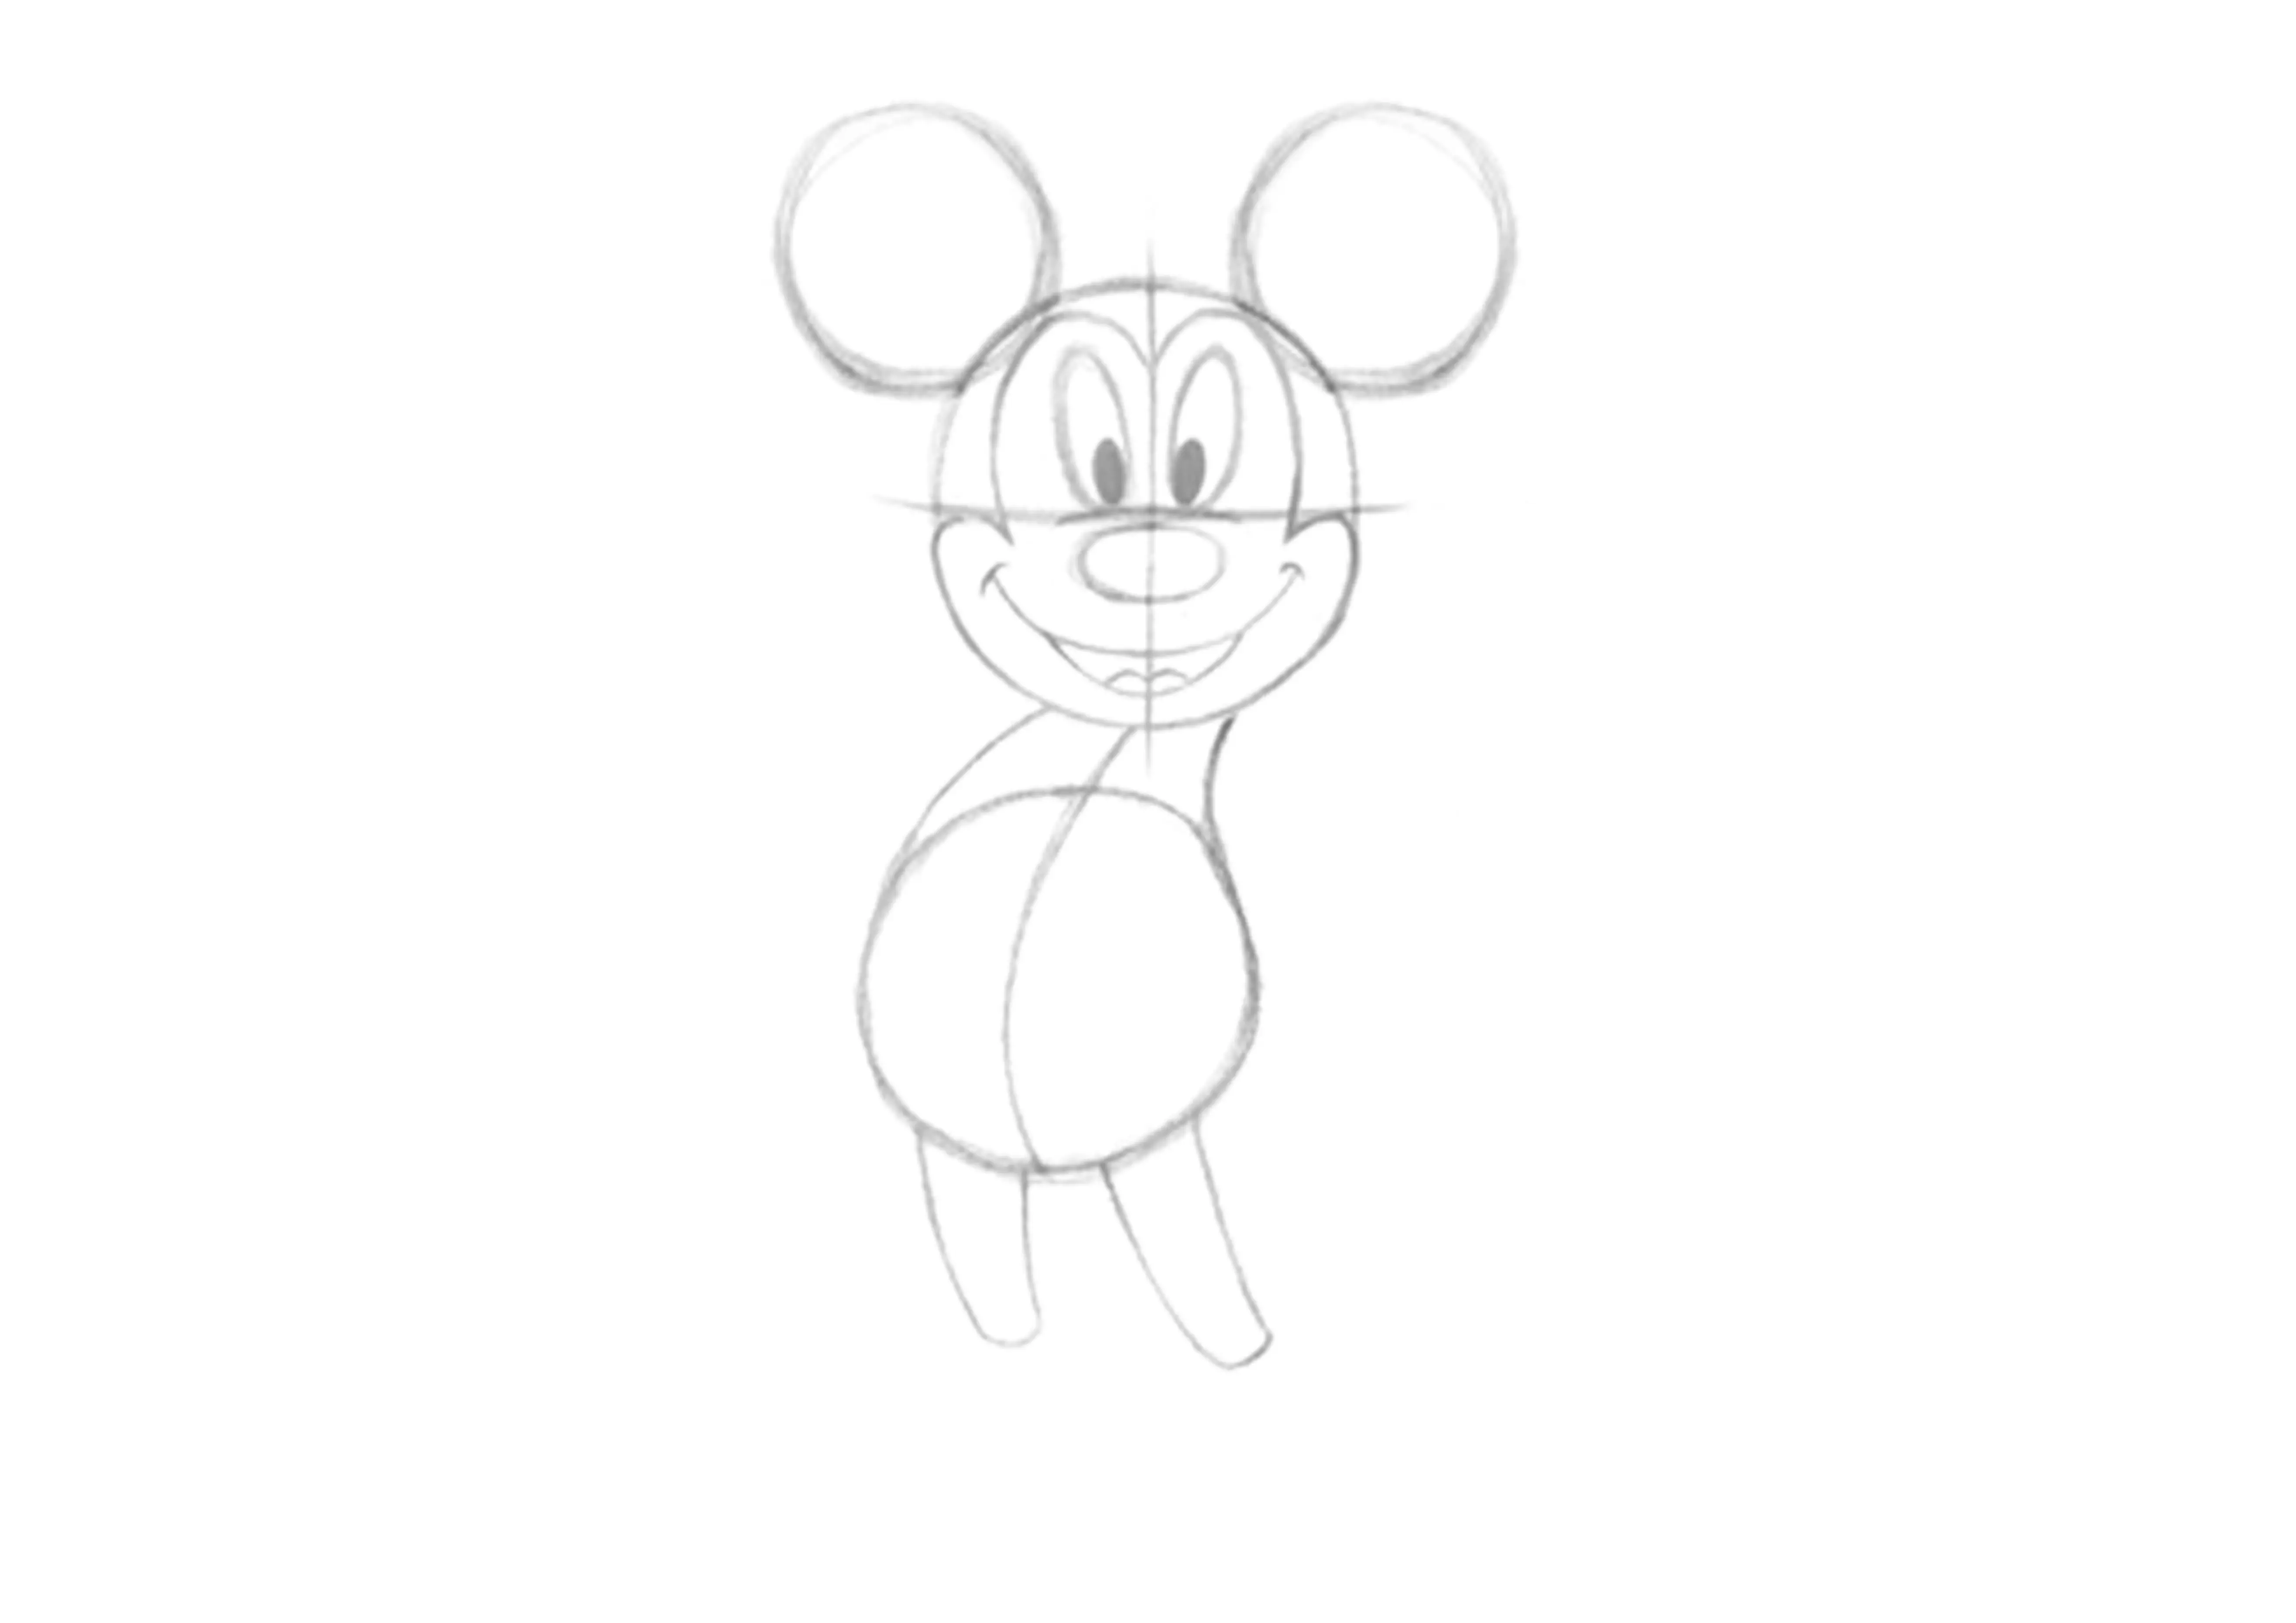
DRAWING THE HEAD
Now, get your pencils ready, starting with the head. I preferred to draw its face frontal to understand it better, but have fun turning it, paying attention to perspective: always follow the curve! ;) If you feel comfortable, emphasize the axes to add more movement.
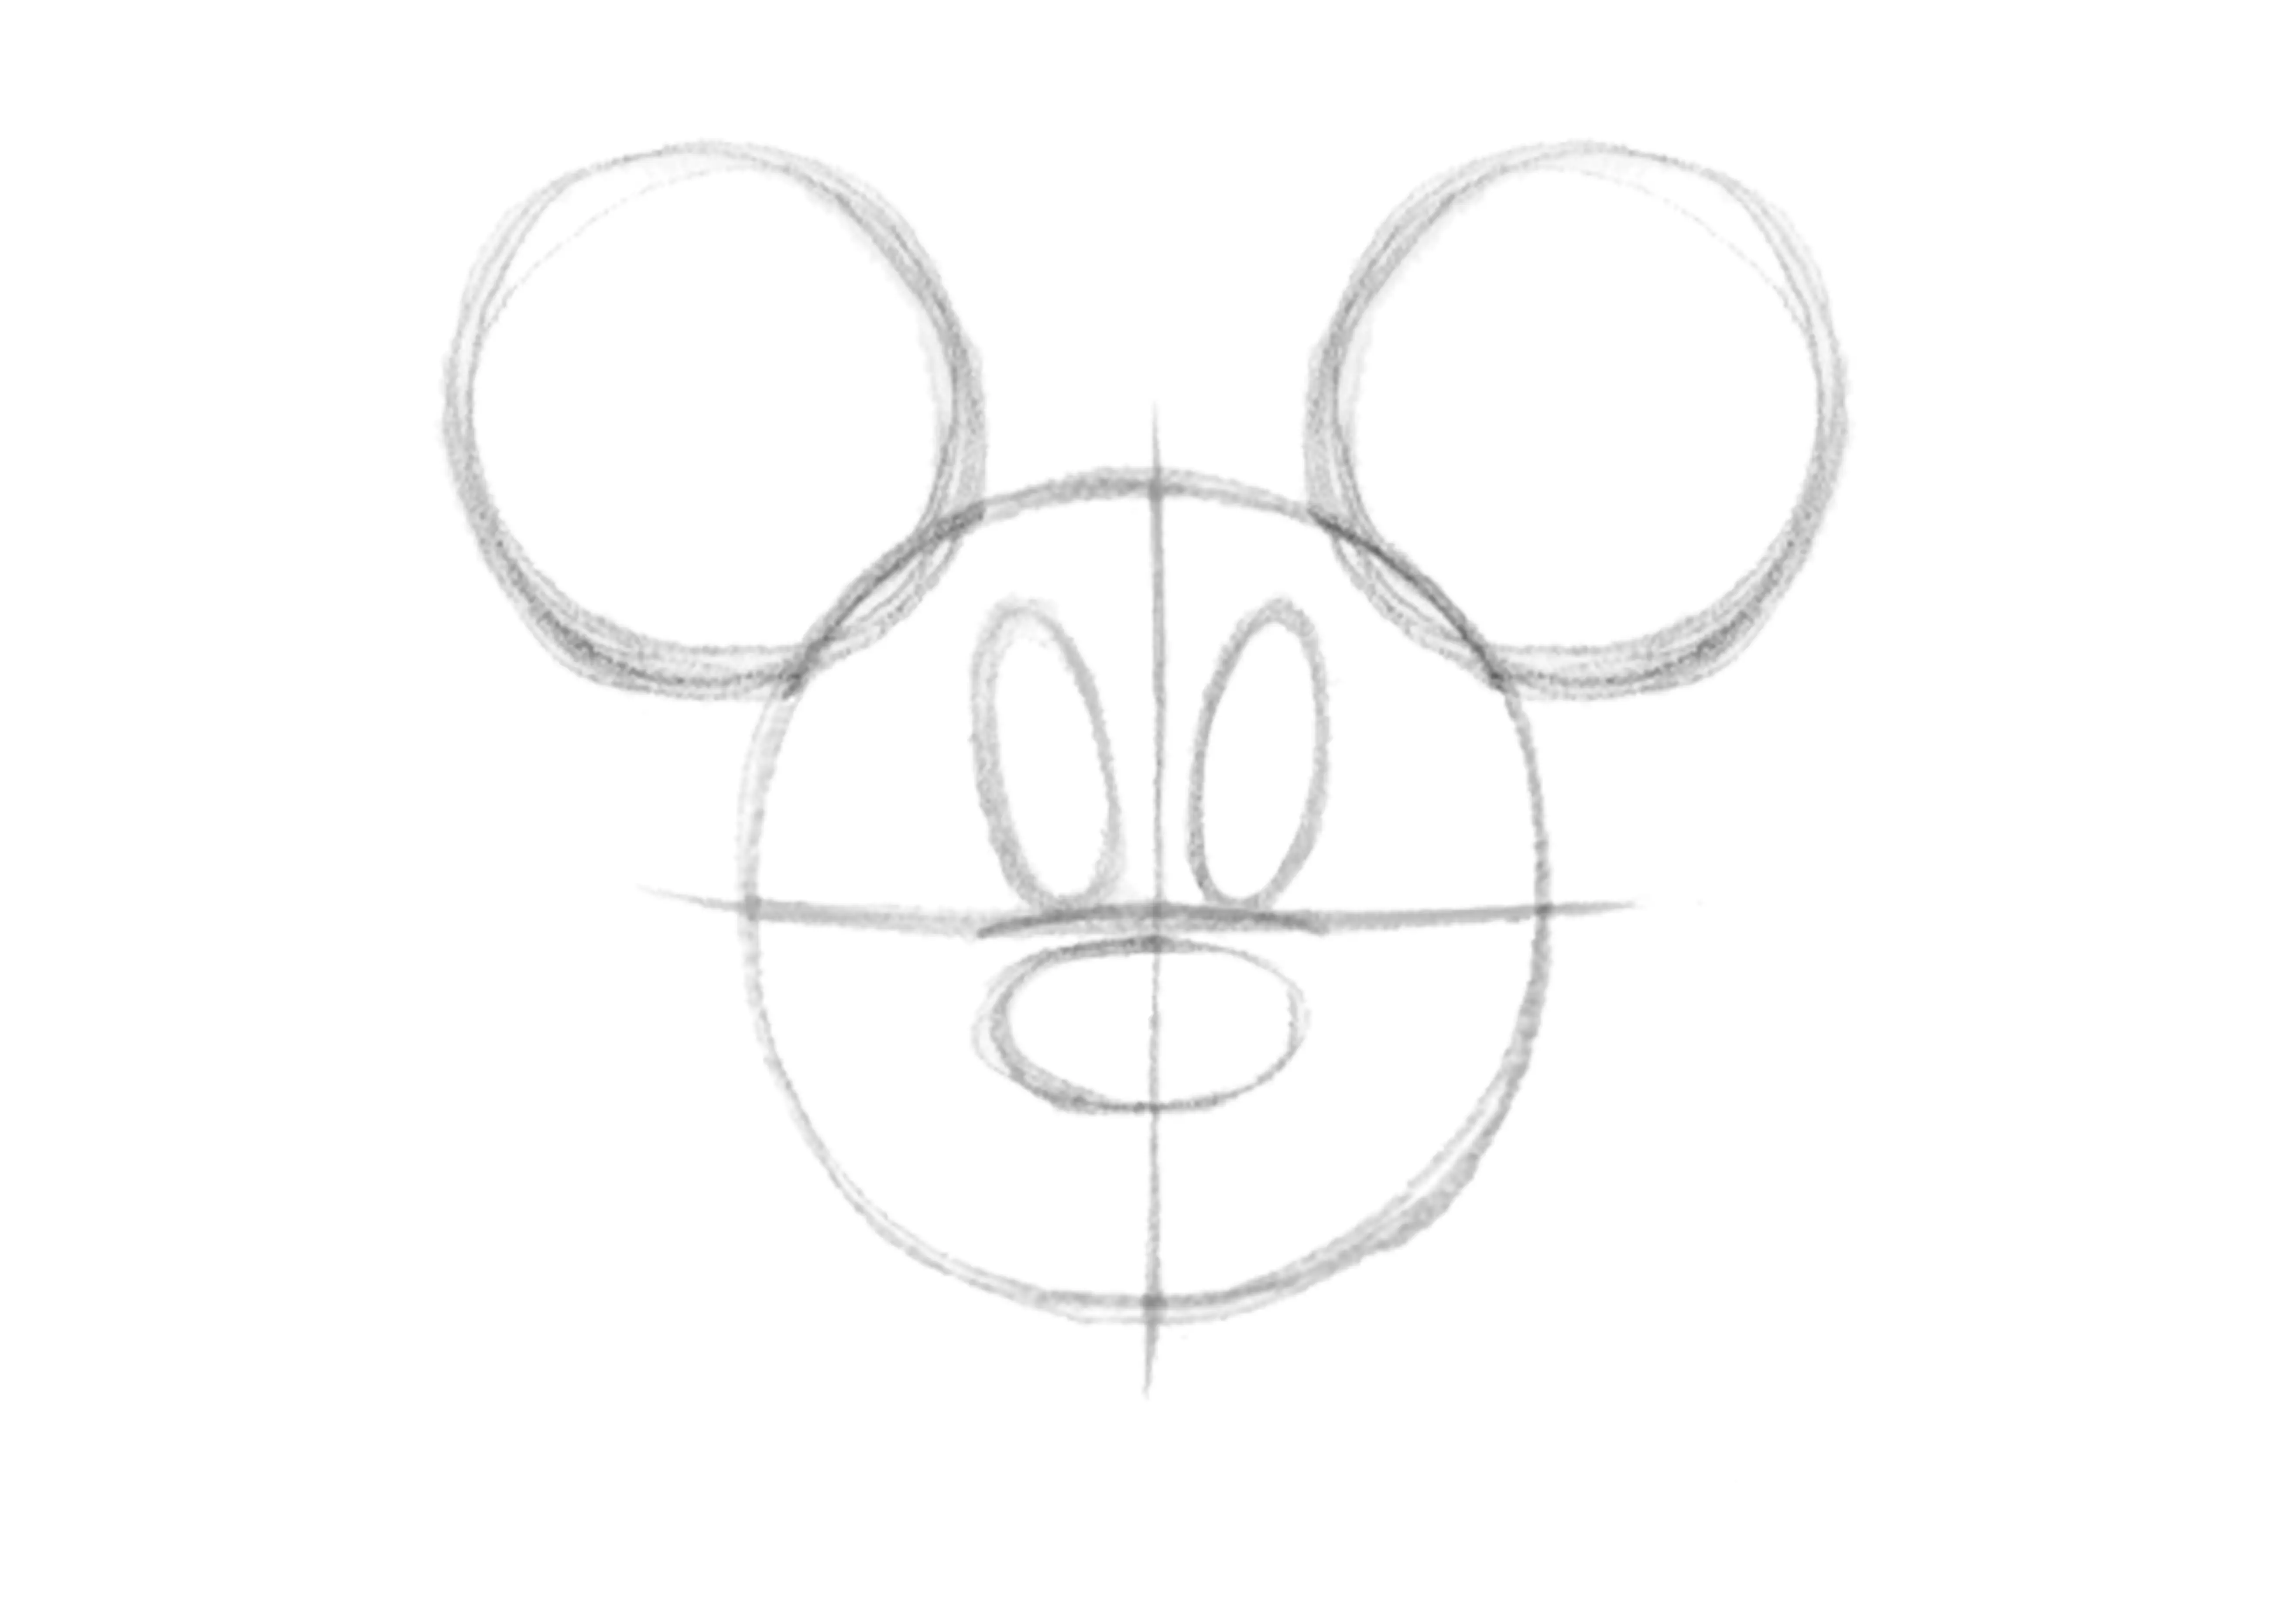
A simple circle for the head:
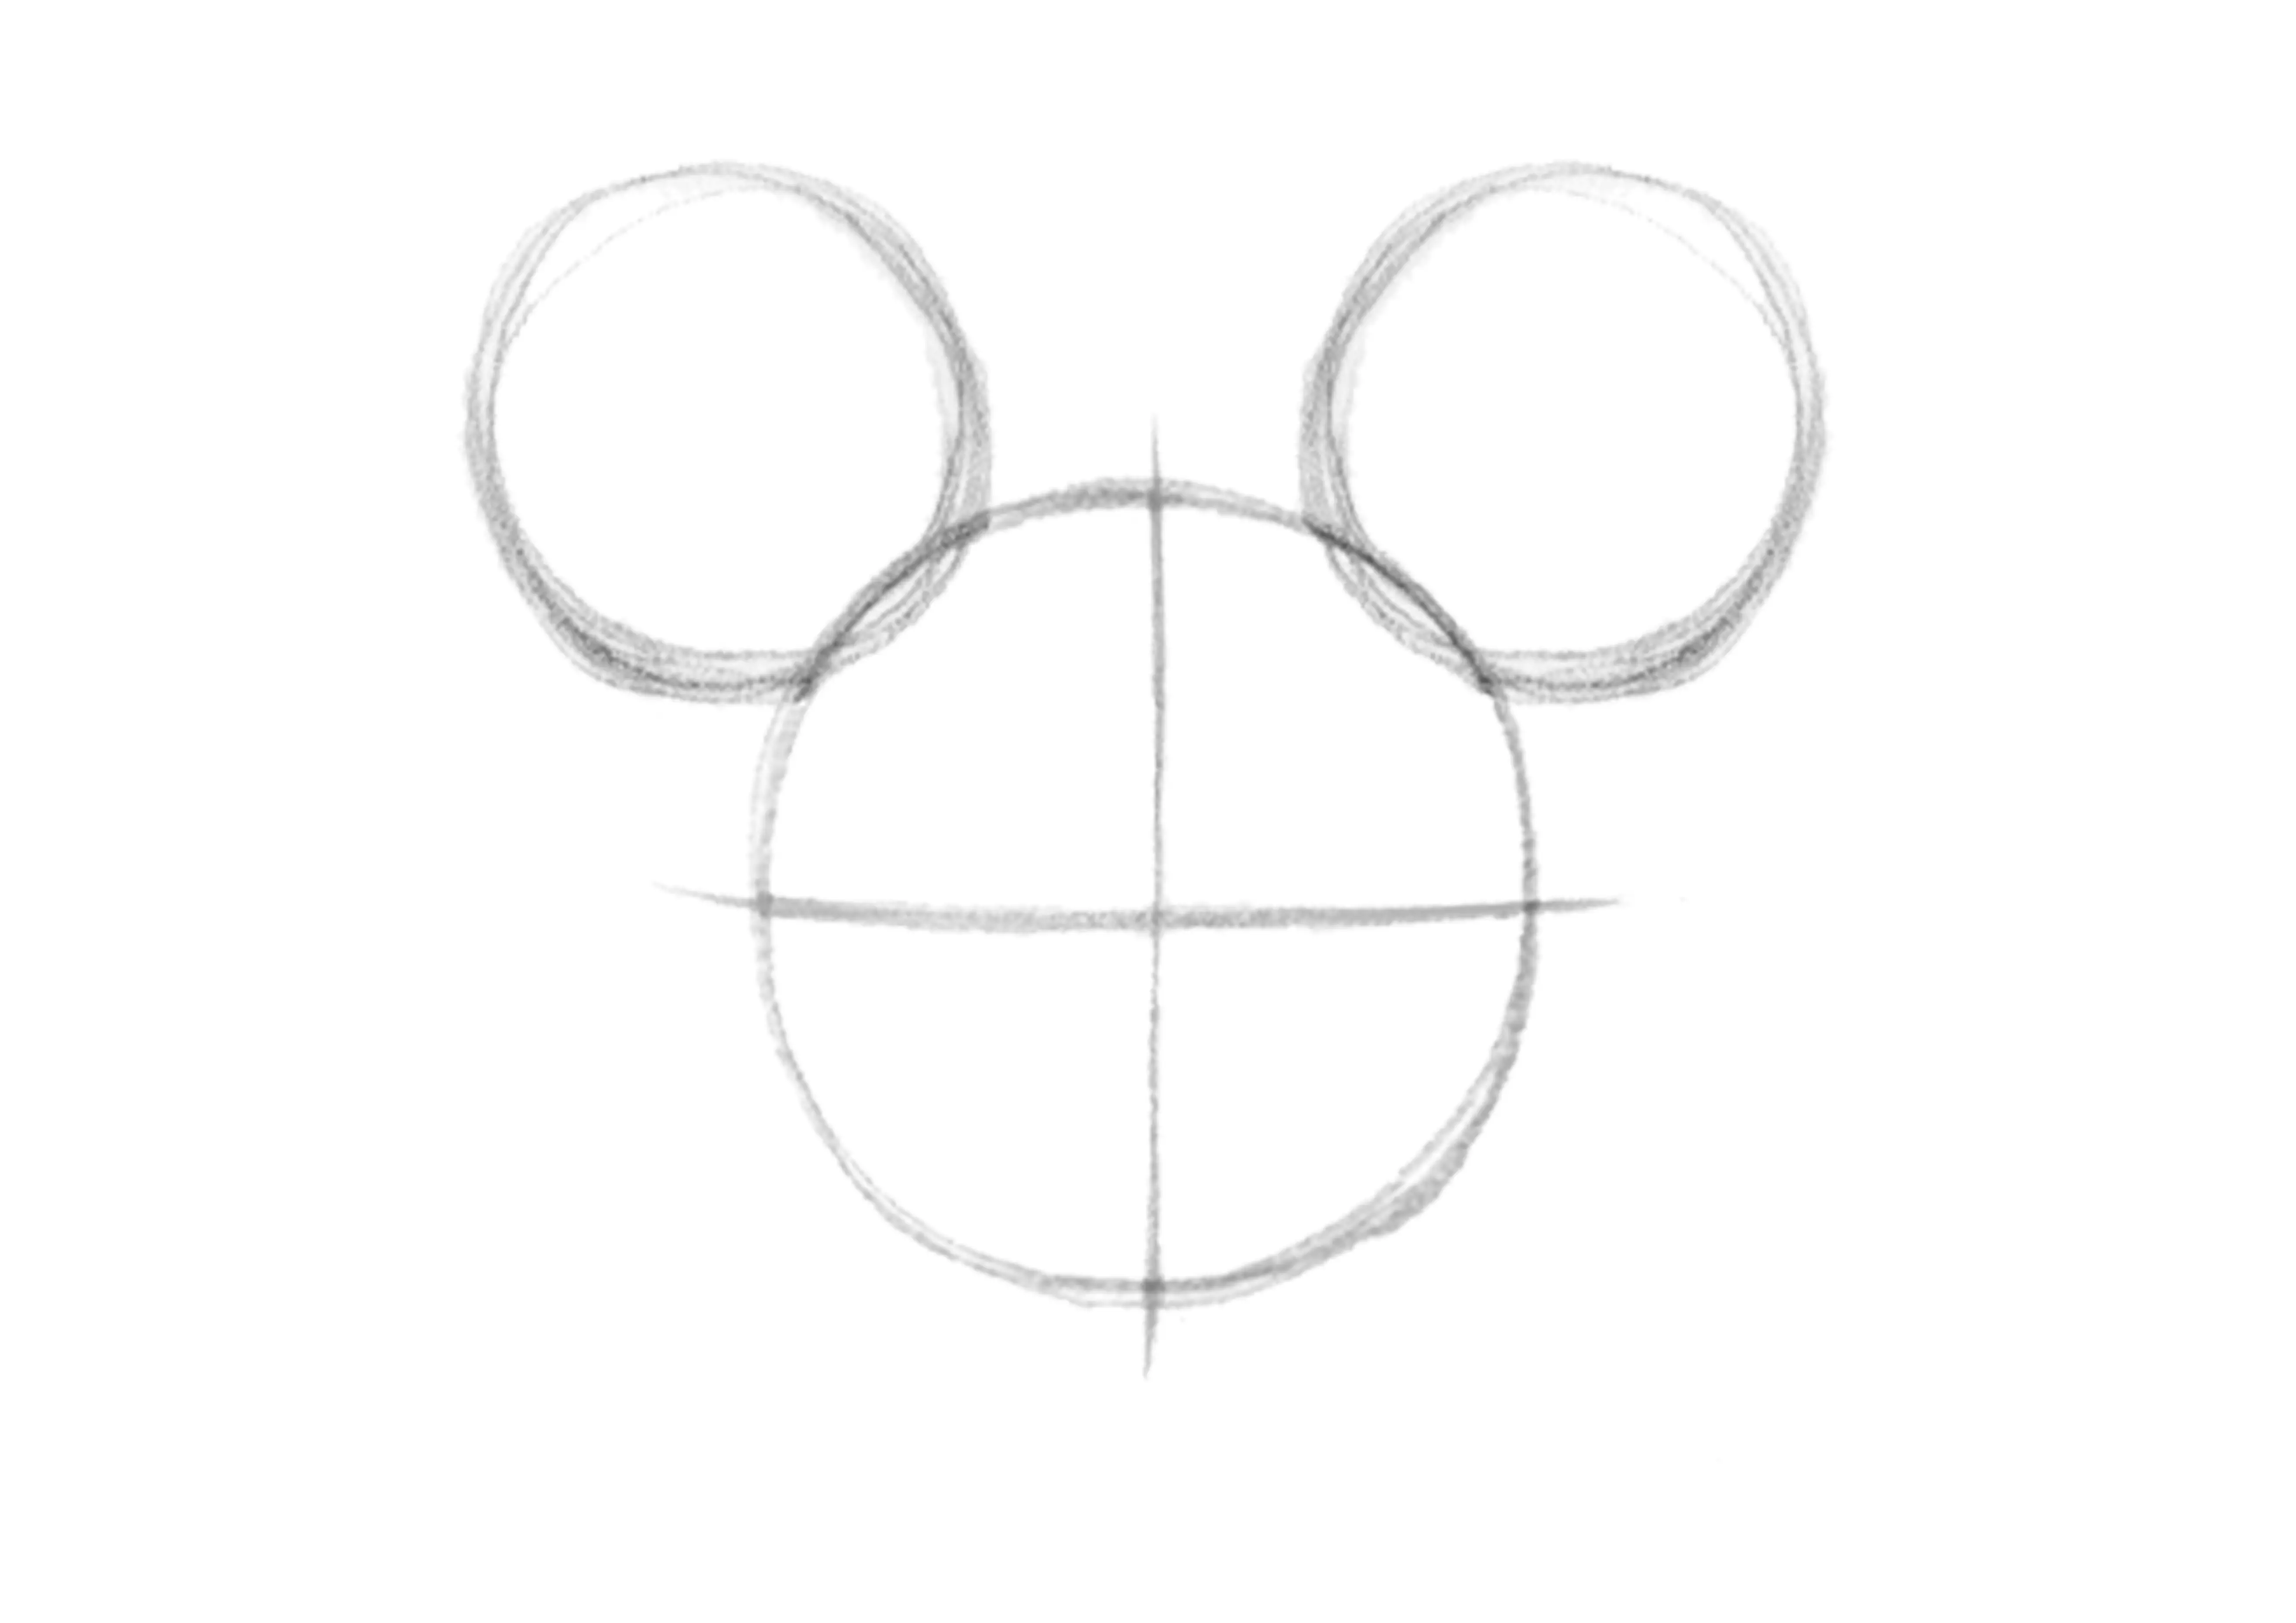
Draw two axes, specifically the eye line and two smaller circles for the ears:
Place the nose line at the intersection of the axes, below place an oval for the nose and finally two ovals above the nose for the eyes. We'll do the pupils later:
A bit of a technical part: draw the cheeks, a sort of 3 arcs of circles:
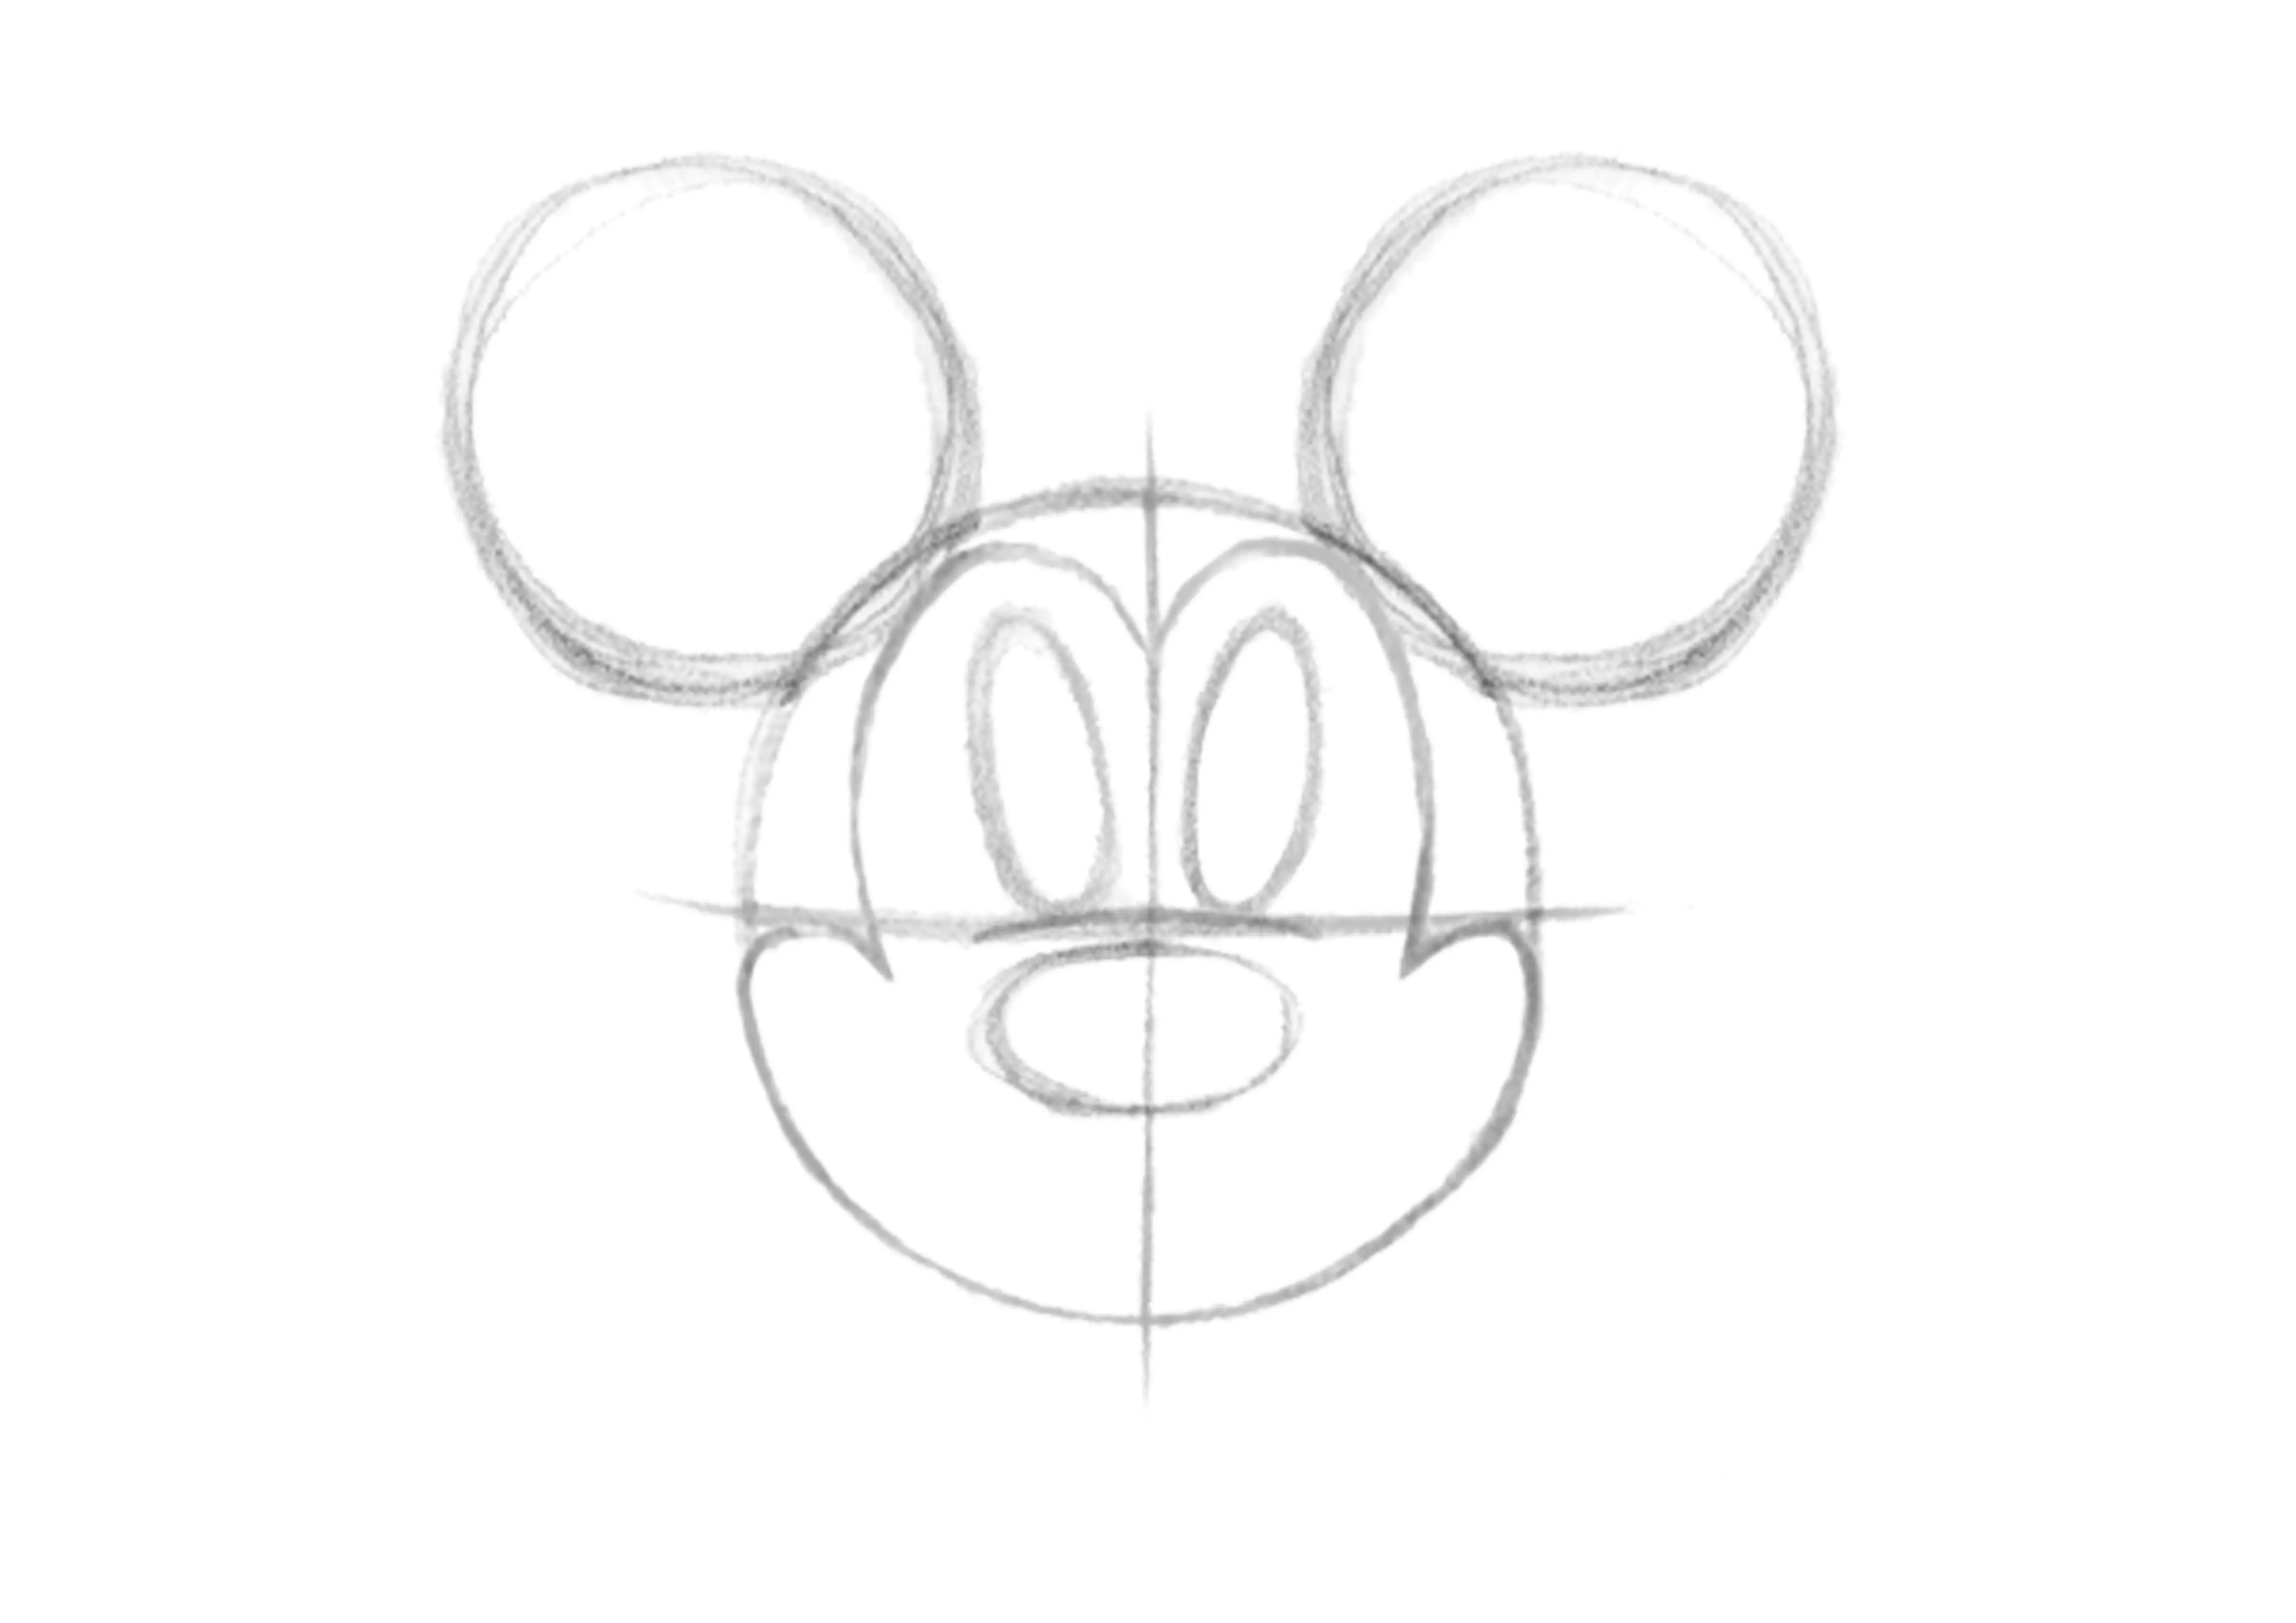
For the mouth, place it slightly lower, slightly open with the upper part in the shape of a heart for the tongue. The lower lip will be added later.
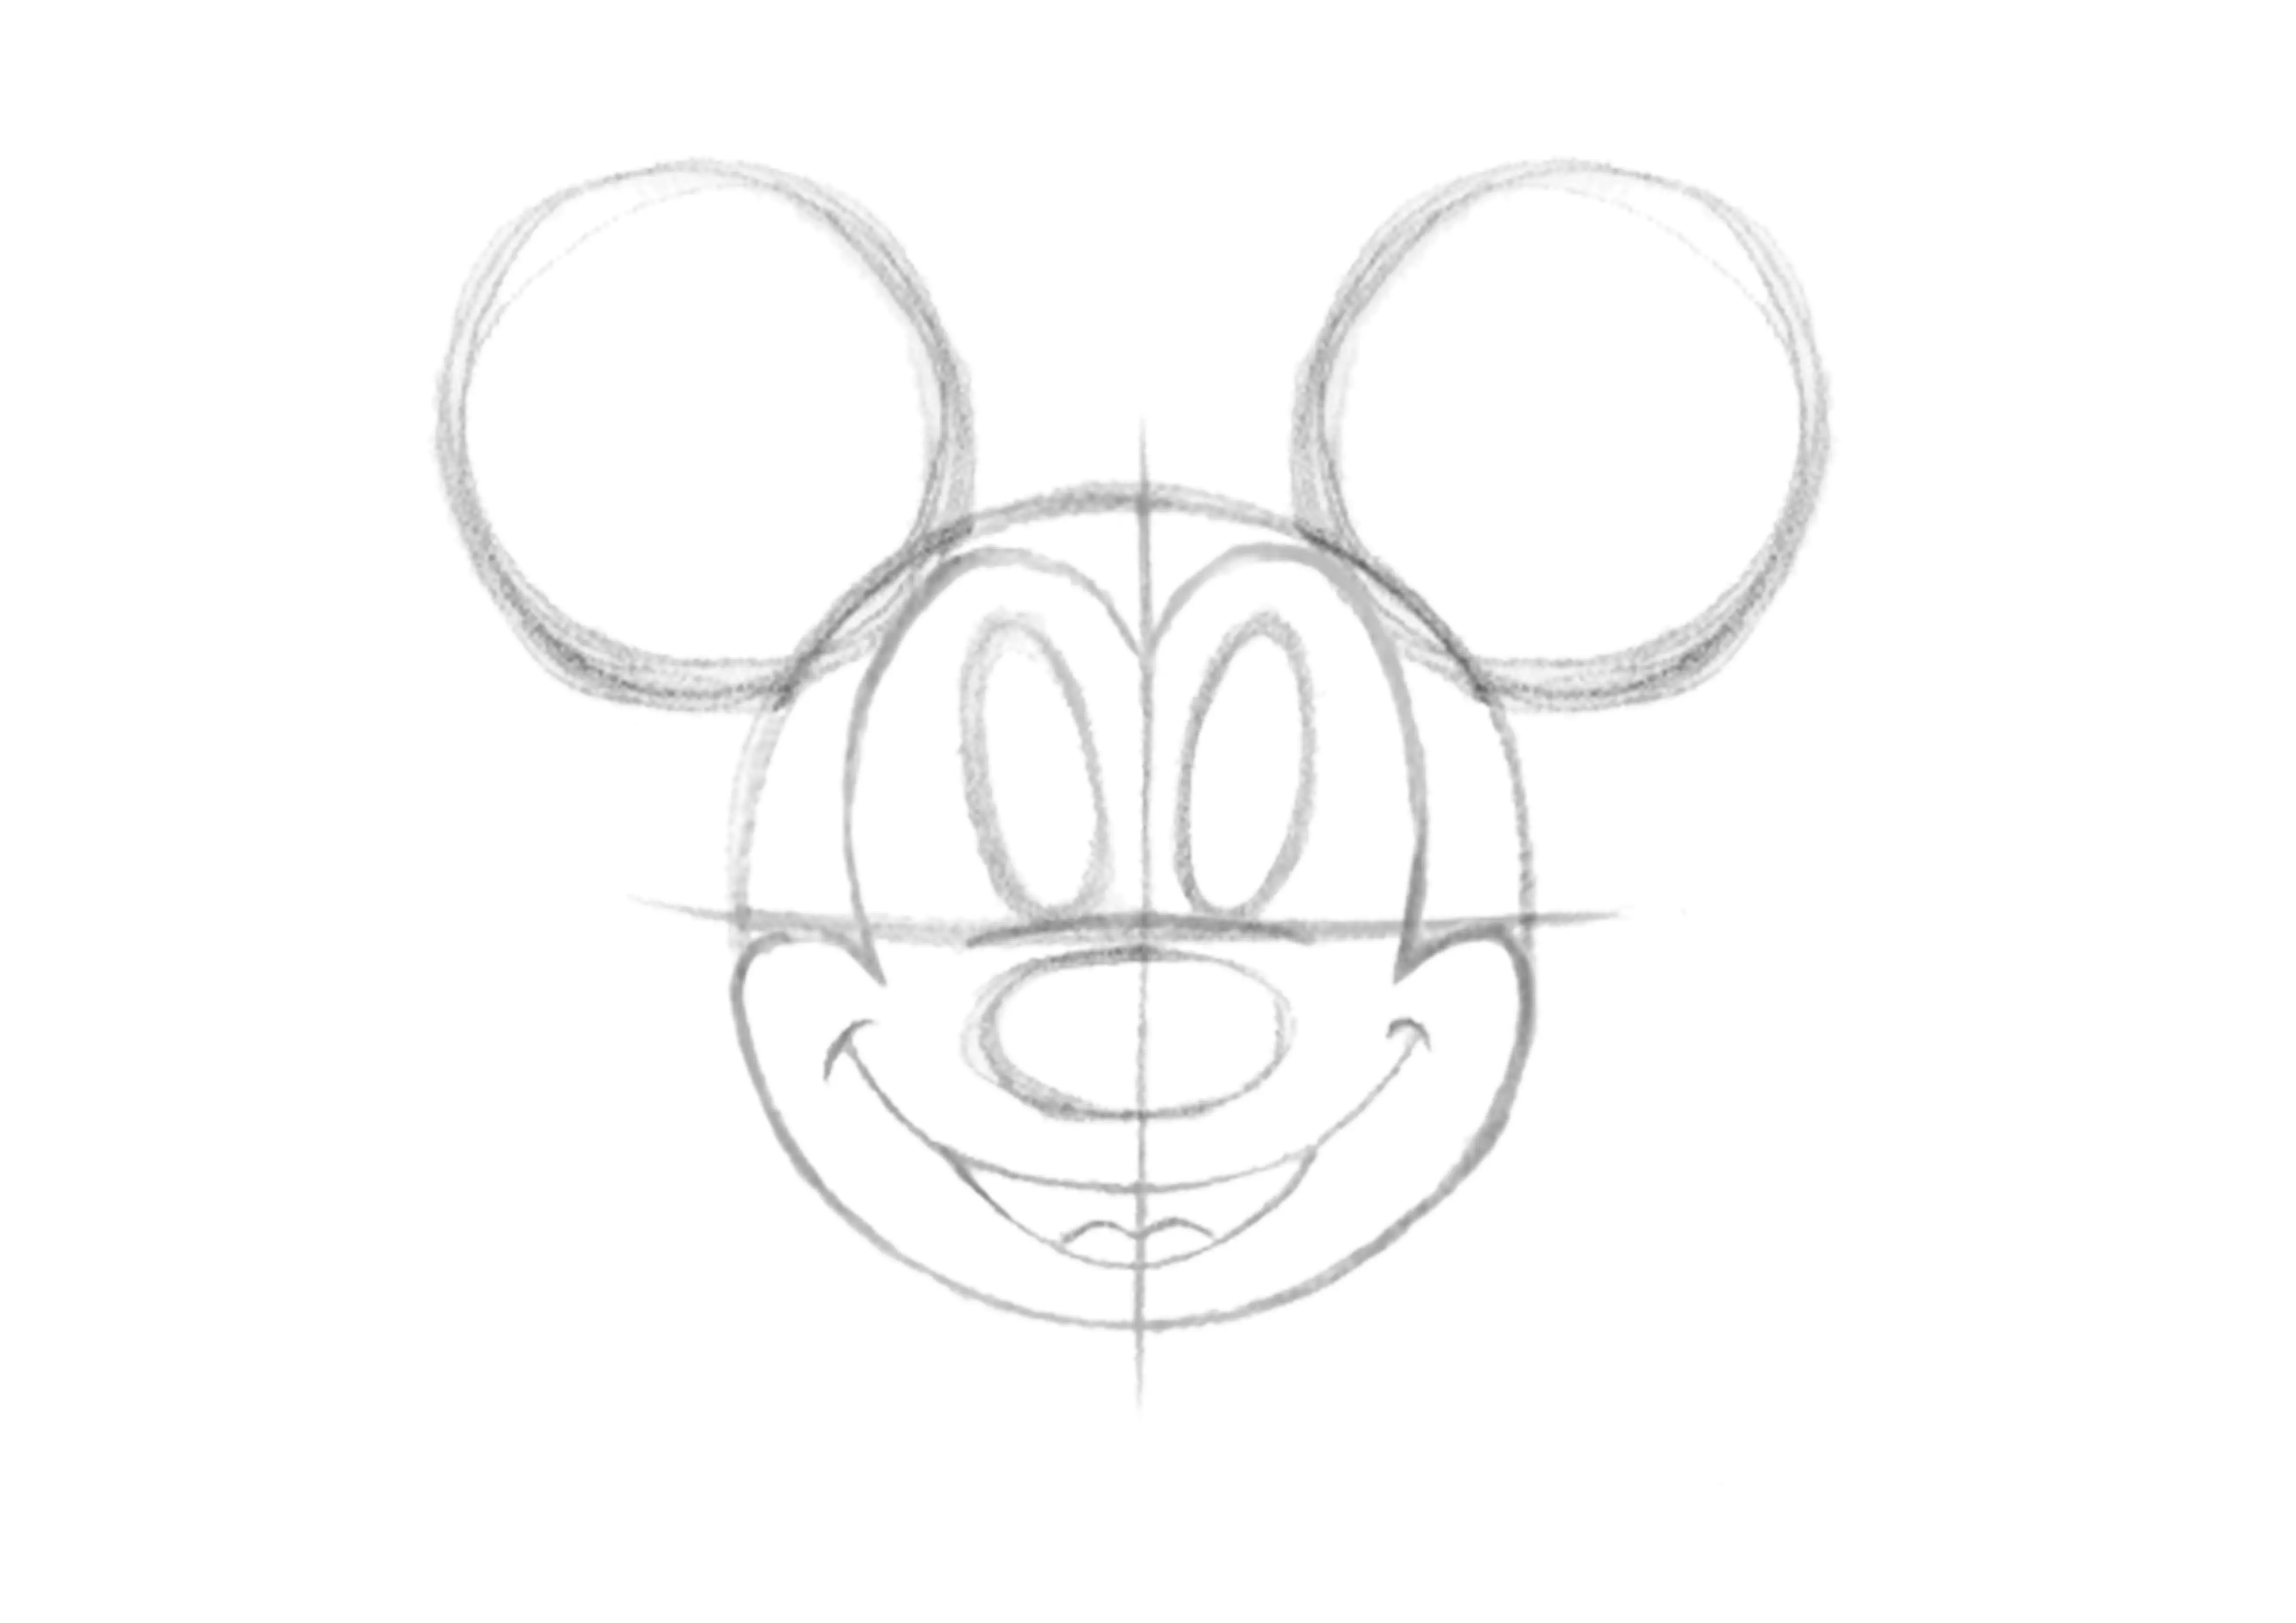
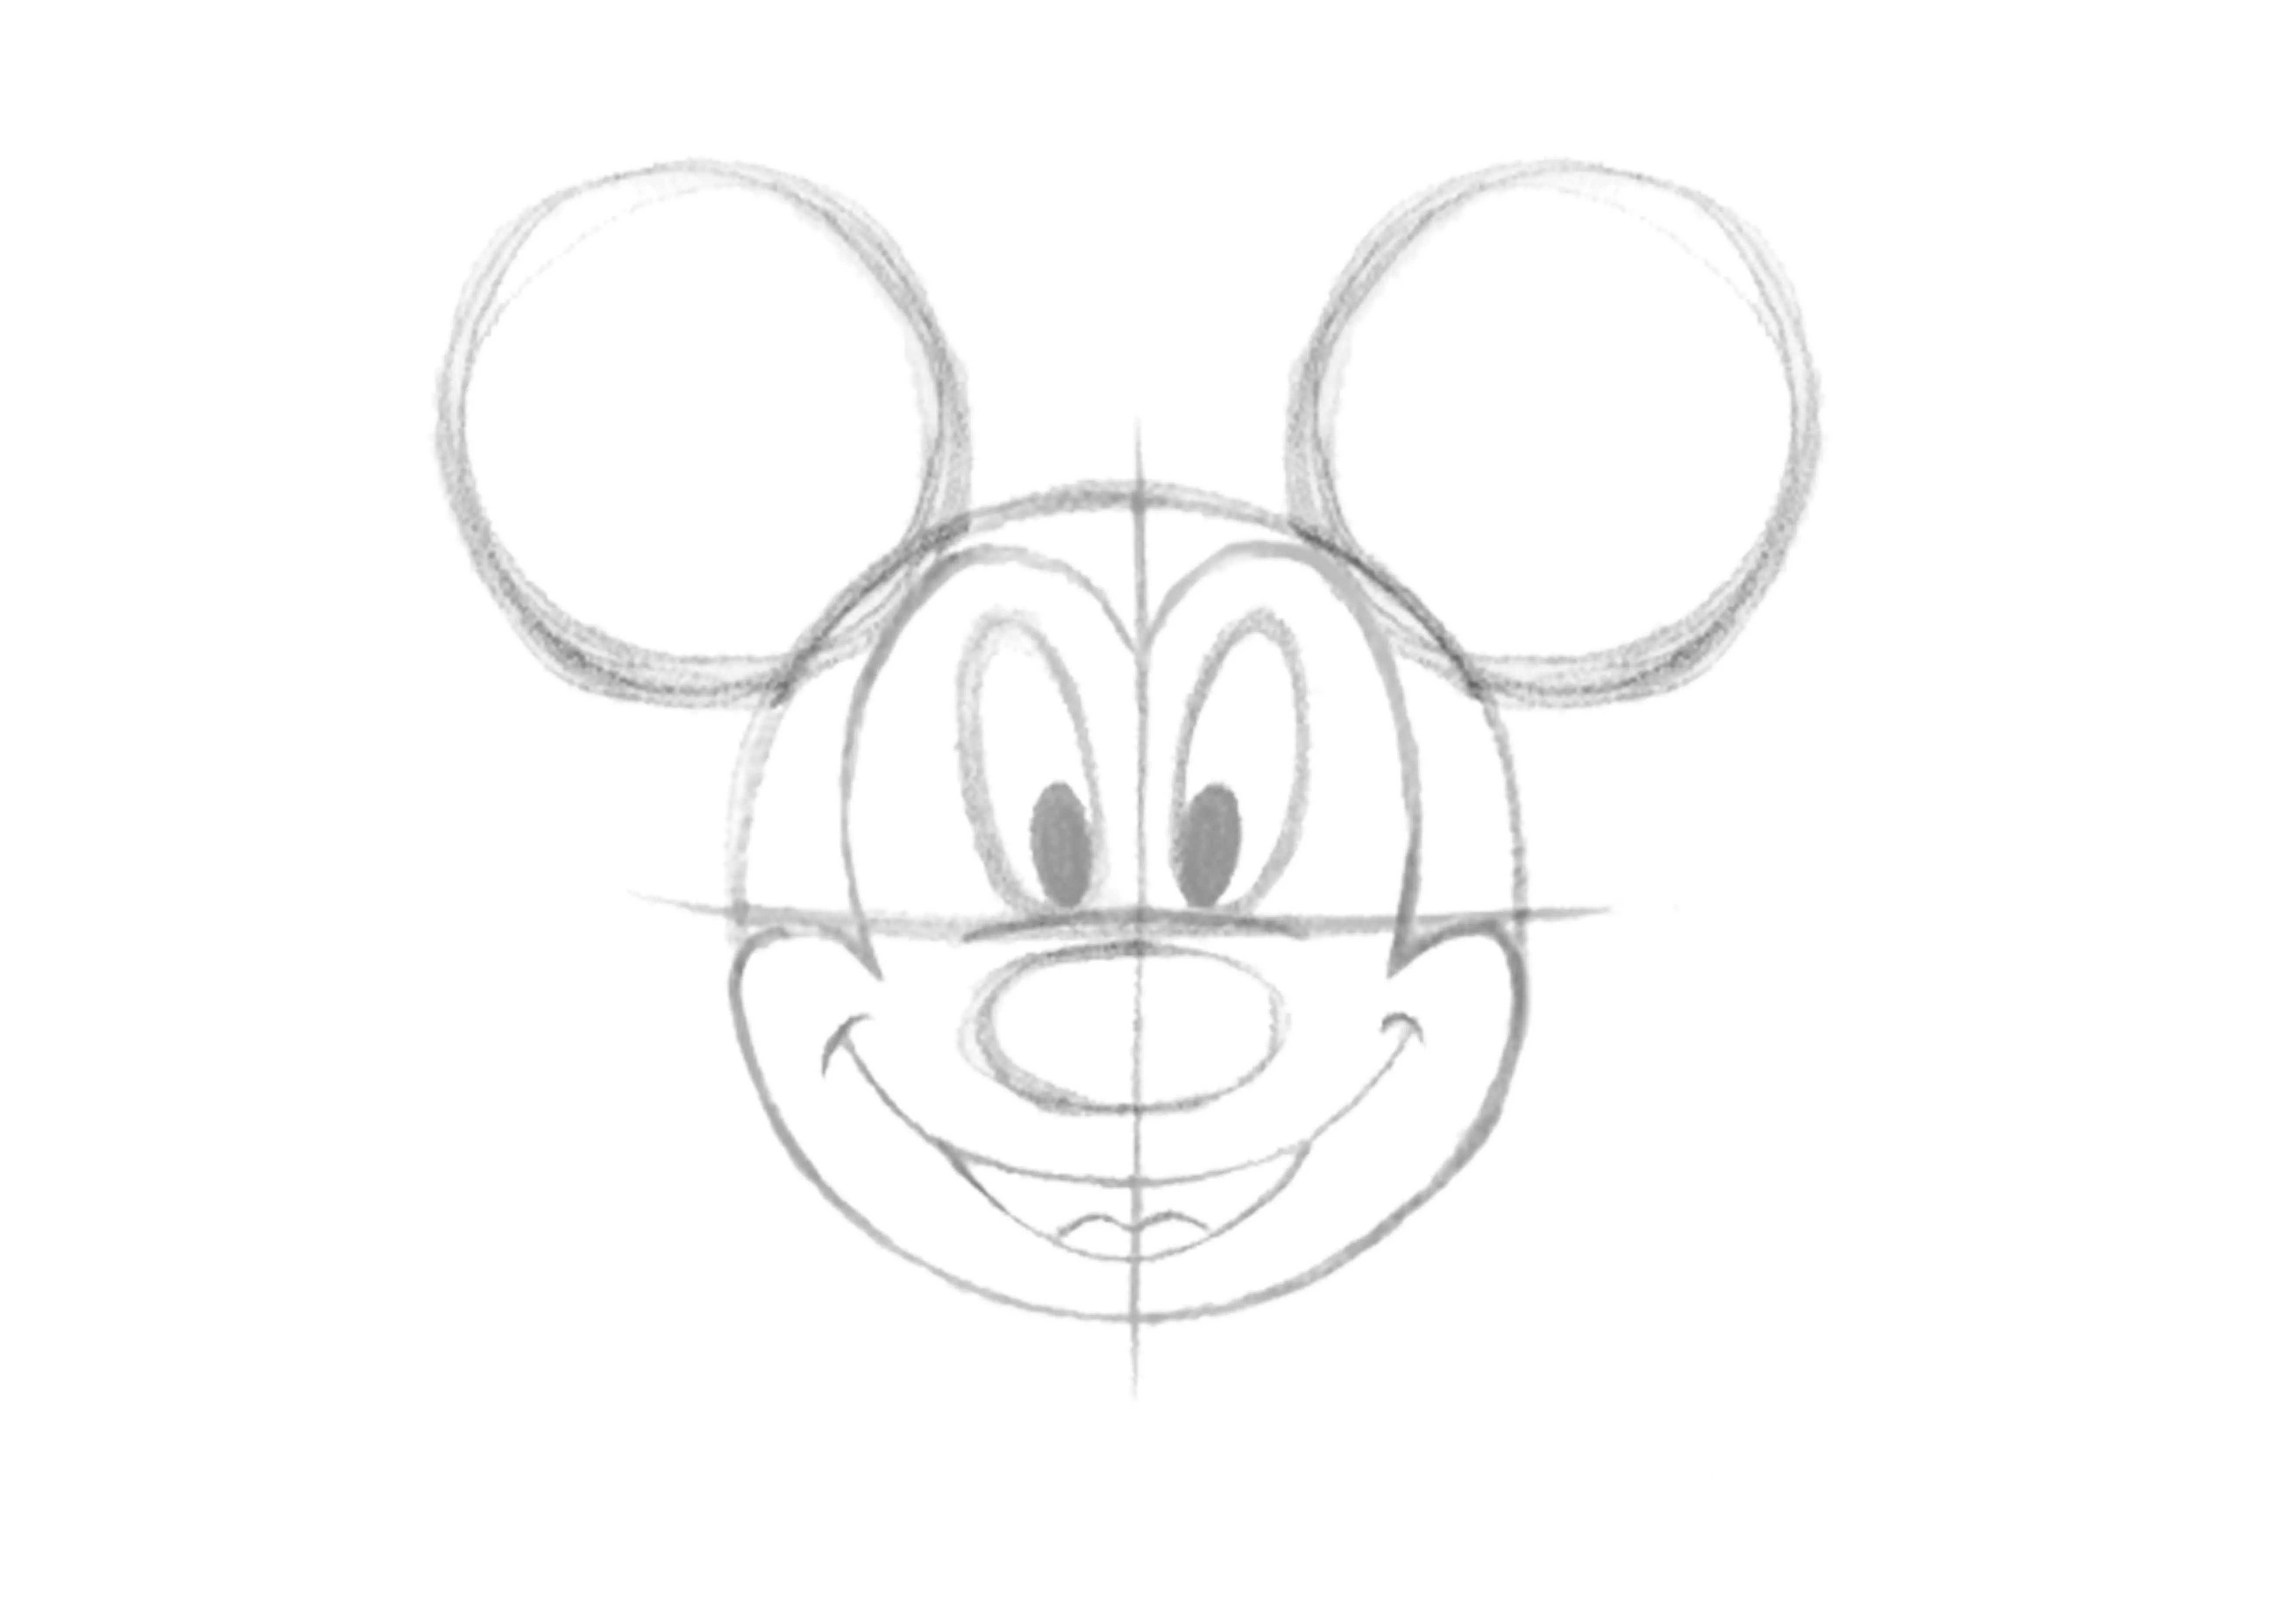
And we add pupils to give more life! It is always very delicate to place the pupils, because they are the ones that will give life to the look; if they are 3 millimetres off, the character will be squinting... which can be fun.
DRAWING MICKEY'S BODY
Mickey is part of the Cartoon style and very often in the cartoon style, a character is two heads (or 3) high.
So the body (excluding the head) should be about the same size as the head. Note that in this case you have to measure the distance Ears —> Mouth and Mouth —> toes.
In the same way, we cut into geometric shapes. First, draw an axis to help define the movement of the body, which is pear-shaped.
Draw a circle to form the lower part of the body, leaving some space between the head and the beginning of the circle. When you think you have positioned the lower part of the body correctly, position the legs (two cylinders). Pay attention to the movement of the body and make sure the legs are straight!
For perspective, the right (side) leg is slightly set back i.e. shorter.
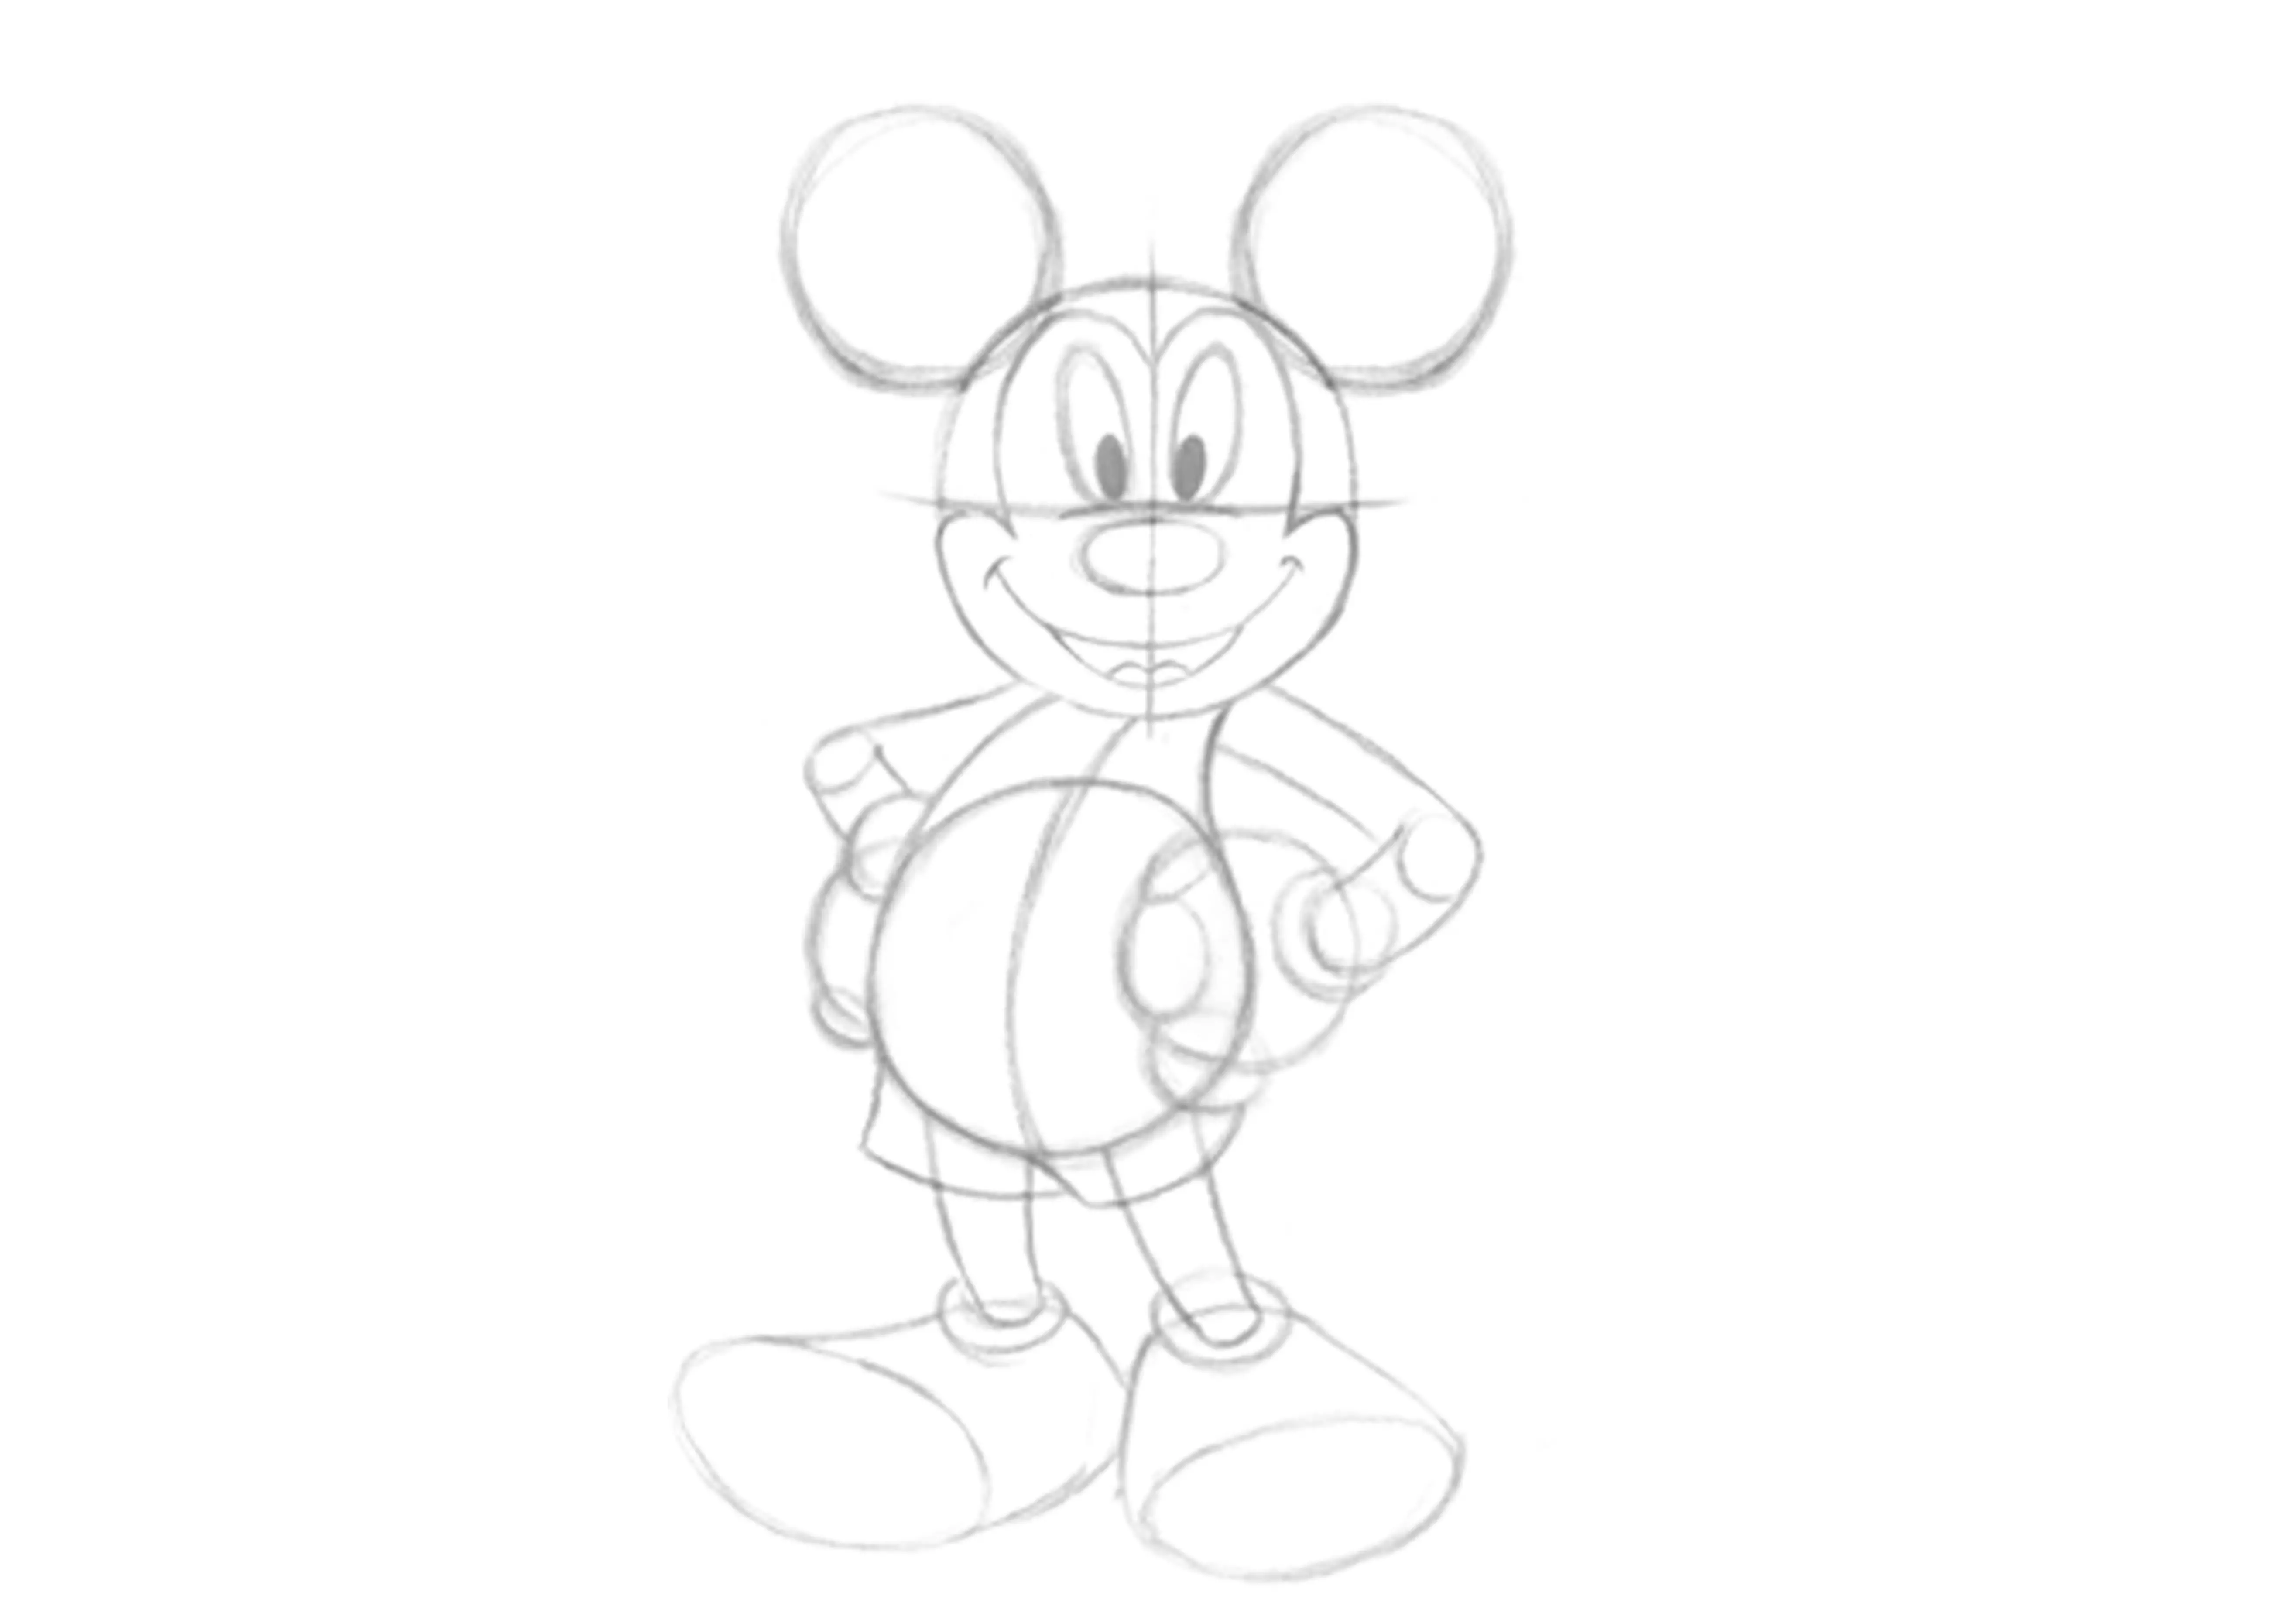
THE ARMS
We'll make circles, circles, and more little circles. Look closely at the sketch.
RIGHT ARM➜ The elbow (joint) = a circle, the wrist (top of the glove) = a circle, the back of the glove = a slightly larger circle, the hand = a larger circle and 3 small ovals for the fingers.
LEFT ARM➜ Same principle but hidden by perspective.
Do not hesitate to give yourself other references in relation to the other arm, in relation to the head. Observe carefully and always refer to the basic image, not one of your sketches.

THE FEET
Two flattened and rounded triangles, together with circles for the tops of the shoes.
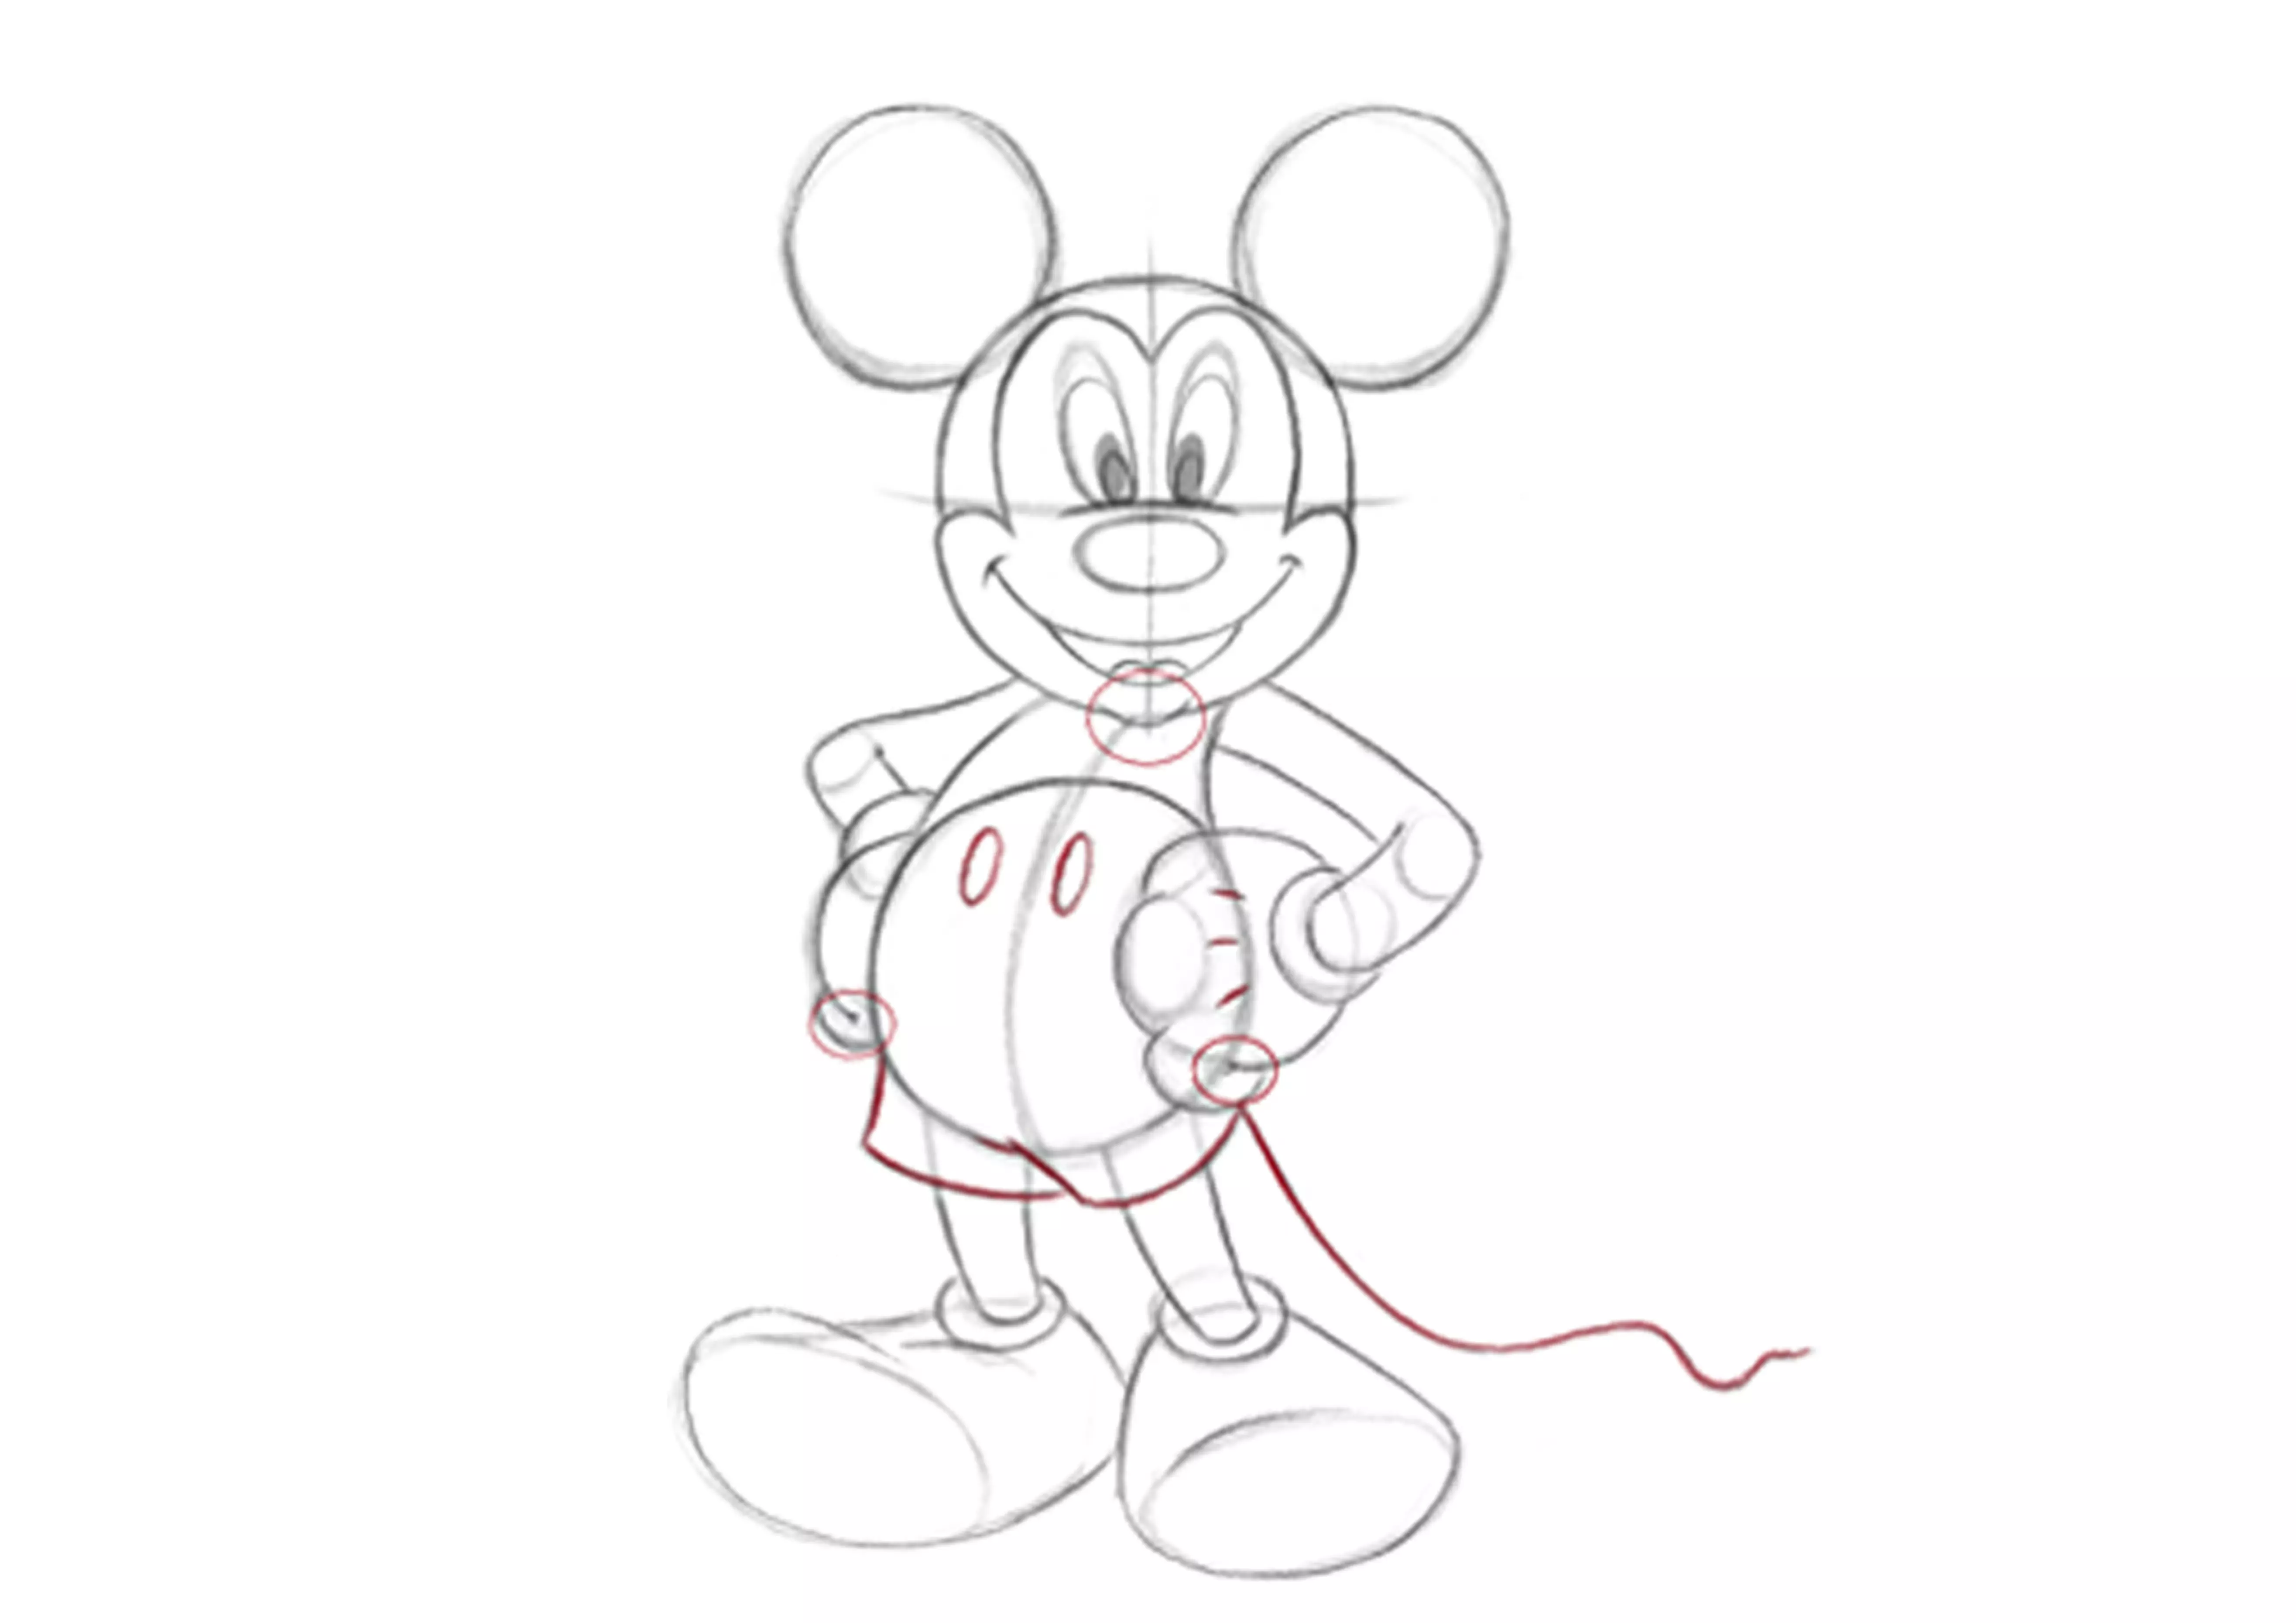
You can add the details: the bottom of the pants, the lower lip, the tail, the buttons of the pants.
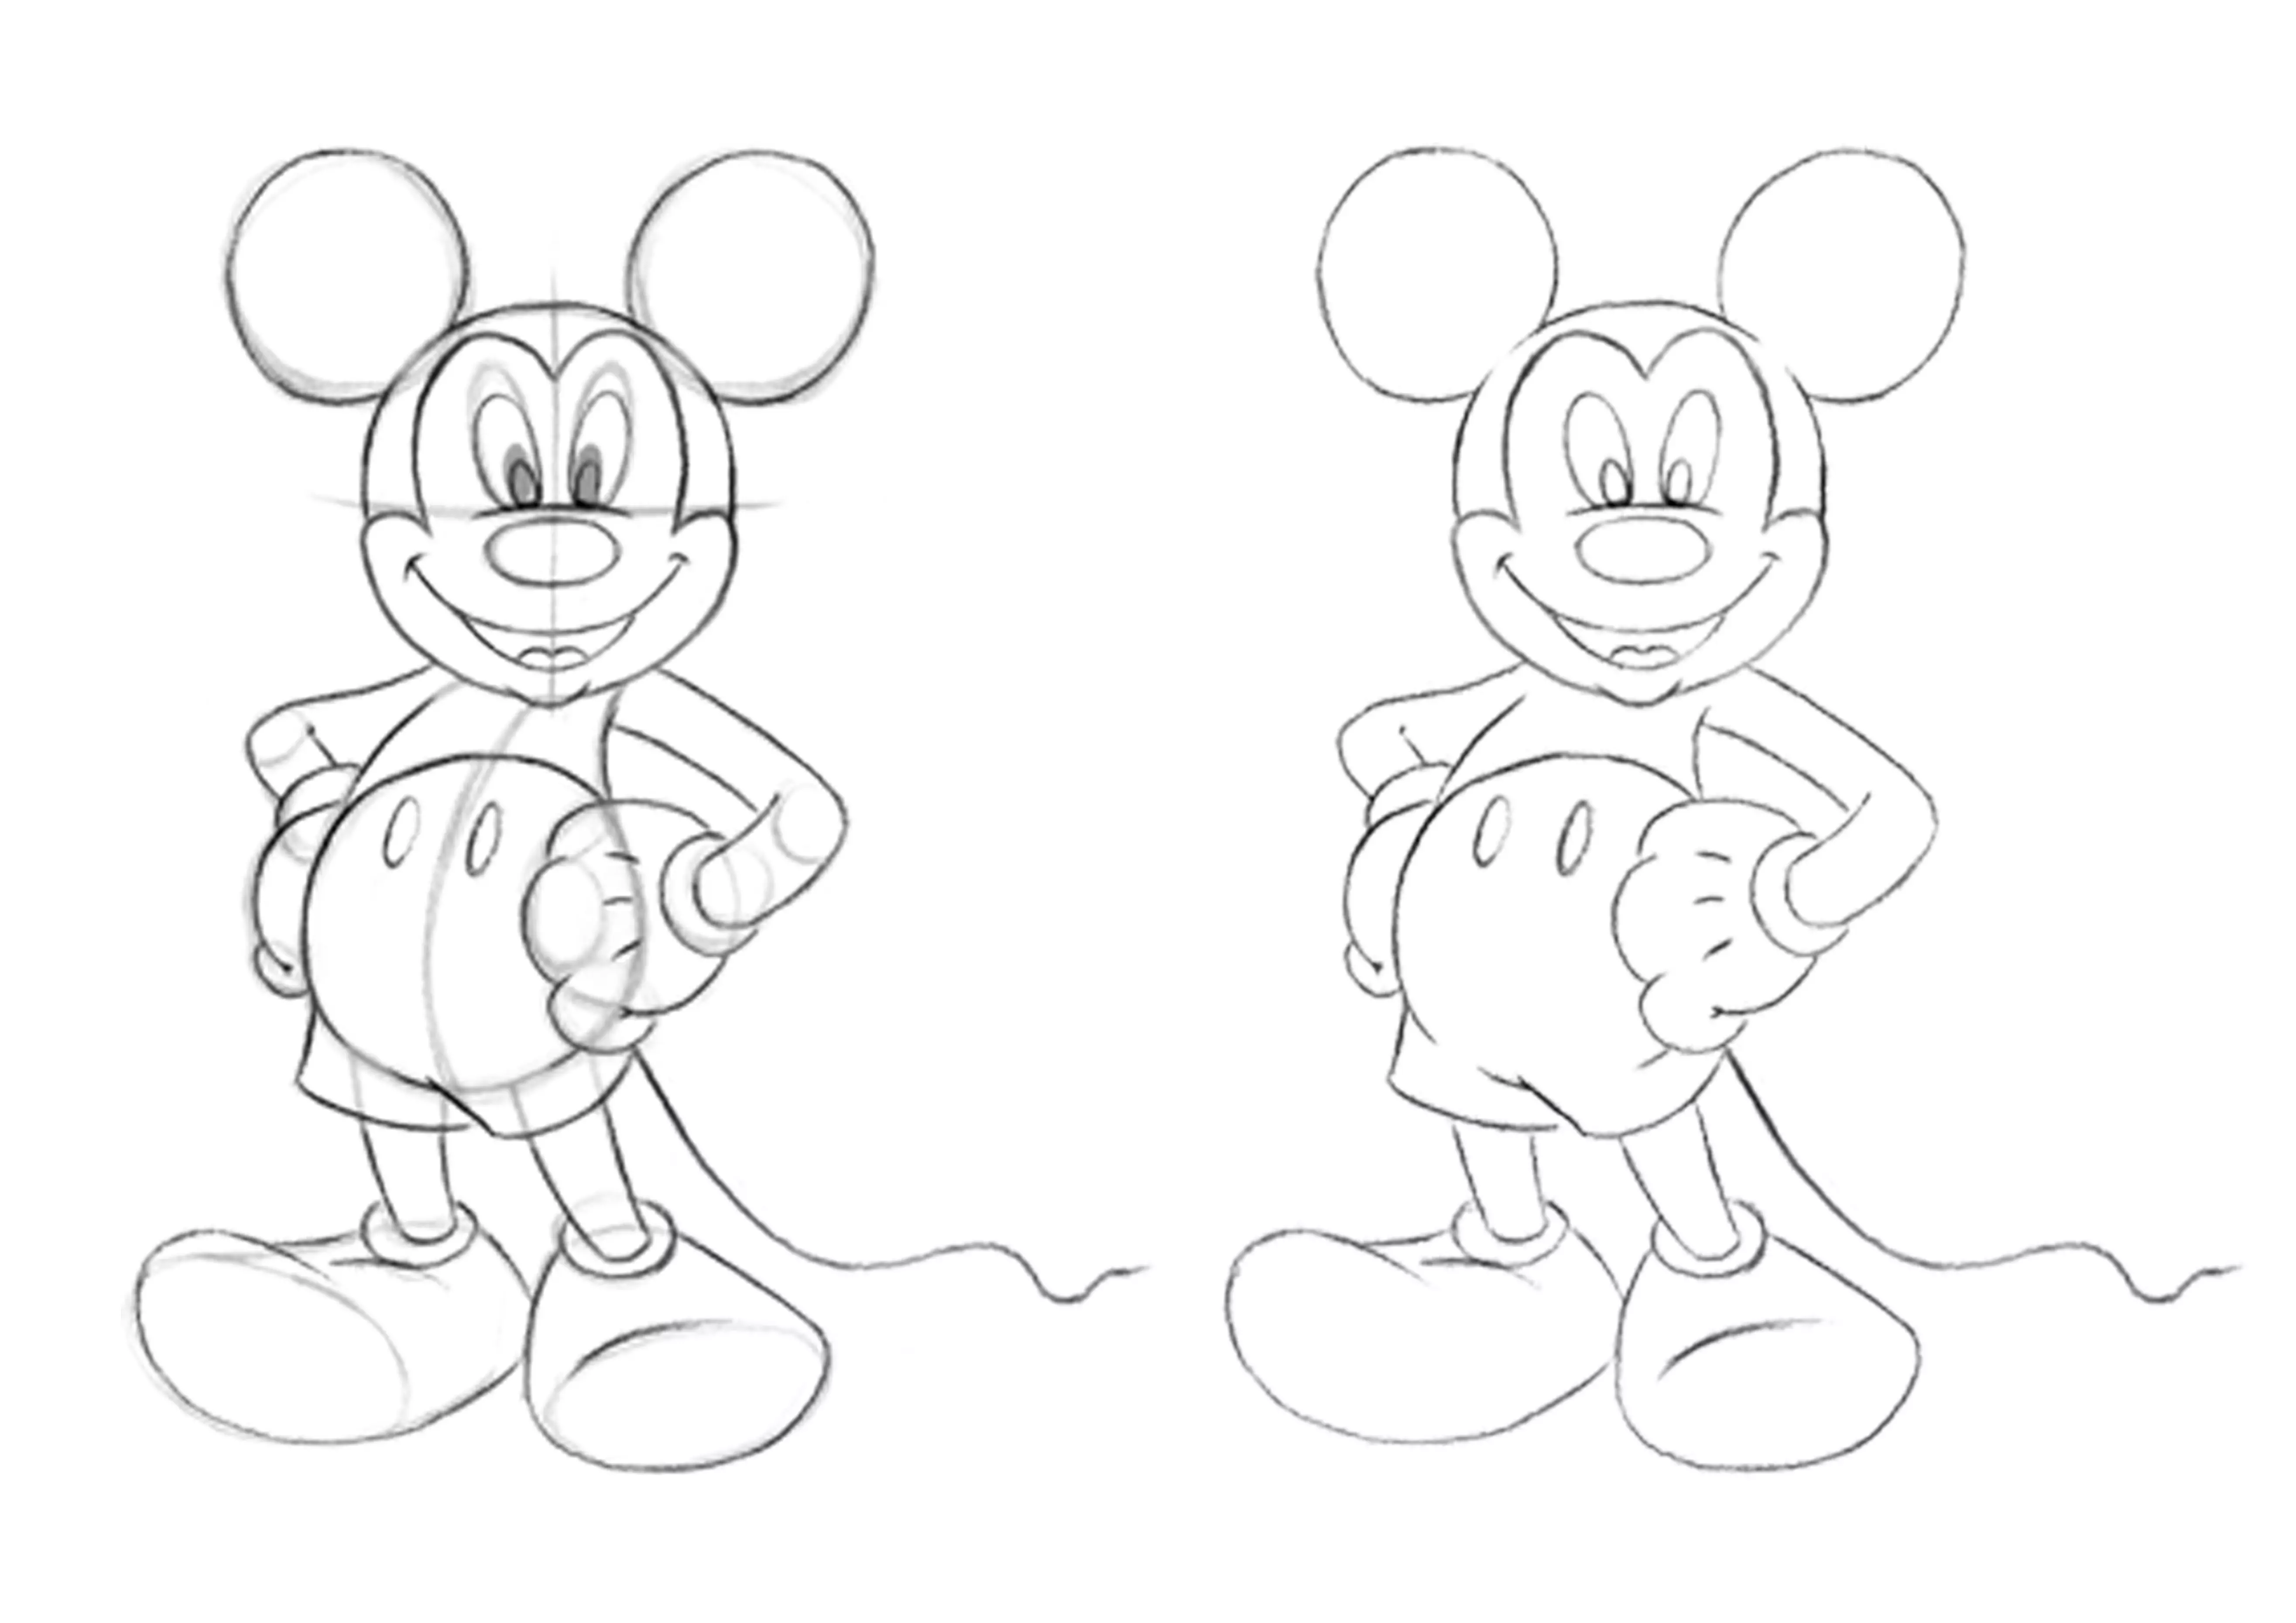
INKING THE DRAWING
With a darker tool, go over the shapes correcting the drawing. Do not close all the lines and mark the folds.
Note that with inking, I modified the eyes, pupils, shoes.
Inking can be done in several ways: a softer pencil (1,2,3 B), a pen, a coloured pencil or something else, it's a way to clean up the drawing!
APPLYING COLOUR TO MICKEY DRAWING
SKETCH
Now, I will show you a technique for quickly adding colour to a drawing.
I use Photoshop, but if you understand the principle, you can use this technique traditionally (coloured pencil, watercolor). I will provide the details for those who are plan to do it with PS.
Let's get started! We go back to the basic sketch.
Note: until the end of your drawing, do not flatten the layers!
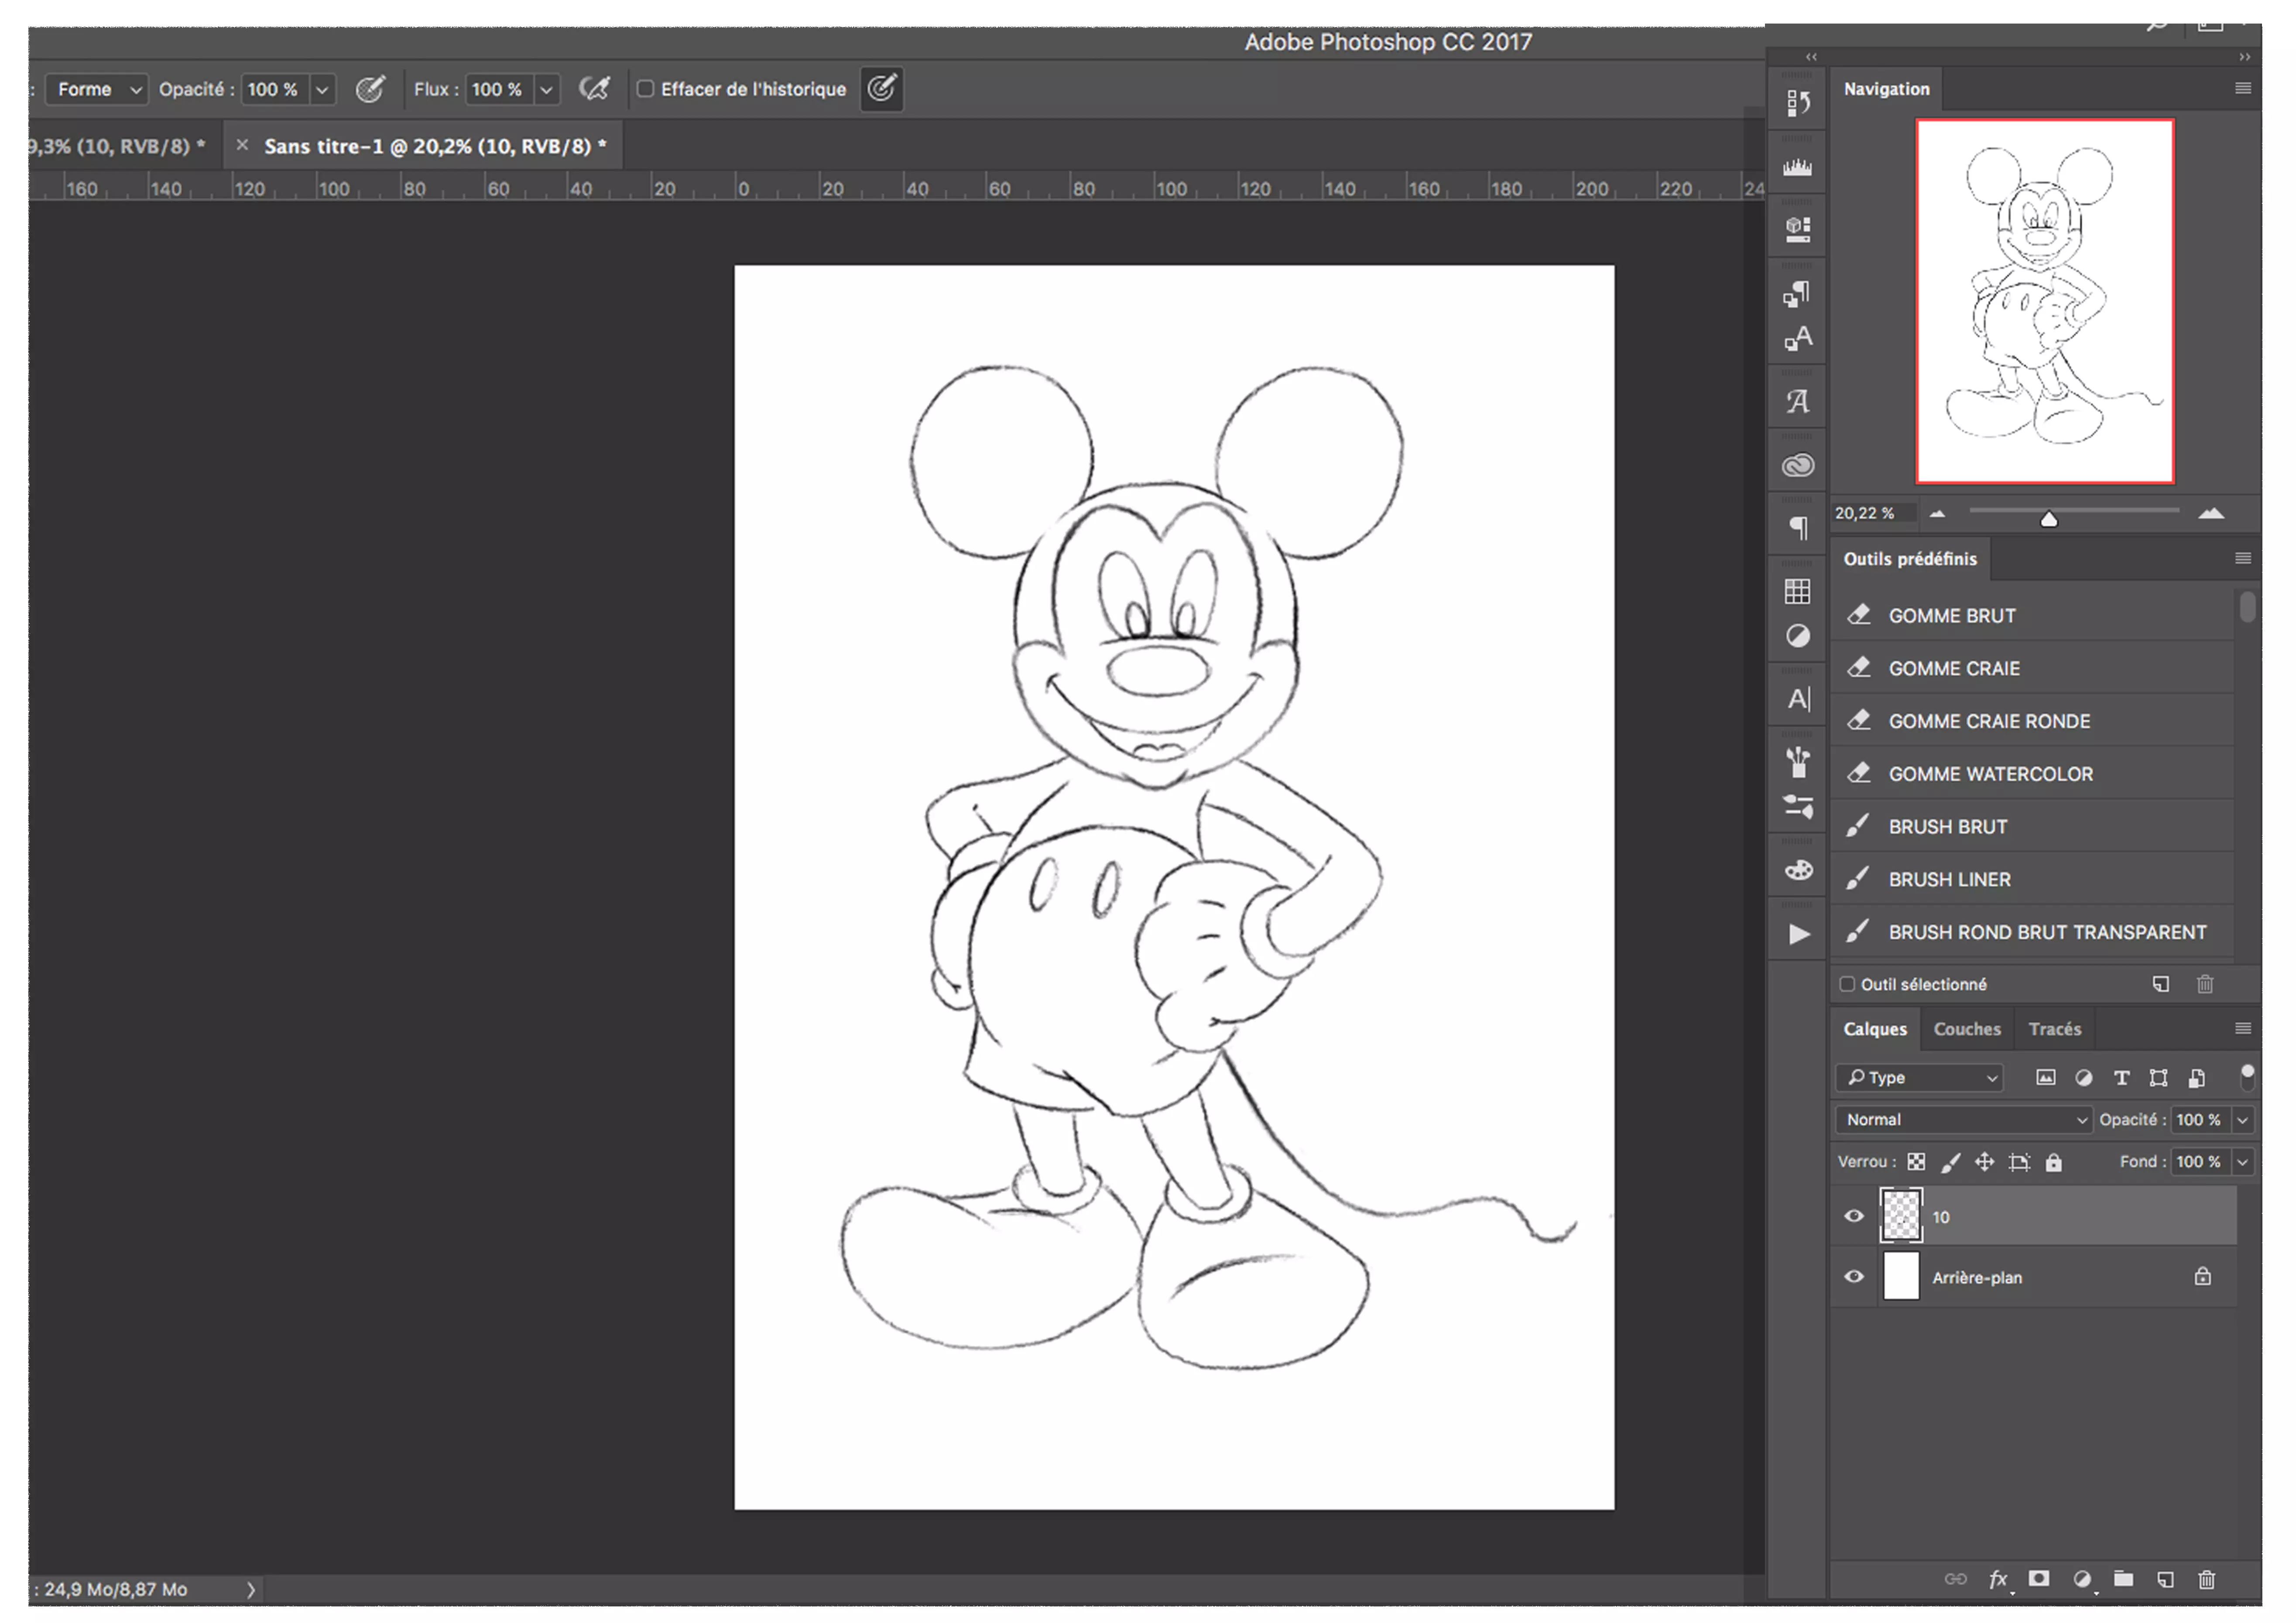
Here is the background layer which is locked, there is no point in unlocking it. Above it, there is the layer with the sketch (pencil). First of all, for better visibility, reduce the opacity of the sketch layer: you have two percentages (background 100% - opacity 100%), personally I set it to 50%.
We are now ready for inking. Let's create a new layer (rename the layers as you go, it will be easier).
I use a basic brush in black (it’s inking, and it’s Mickey, so we can use 100% black); or of course, another colour!
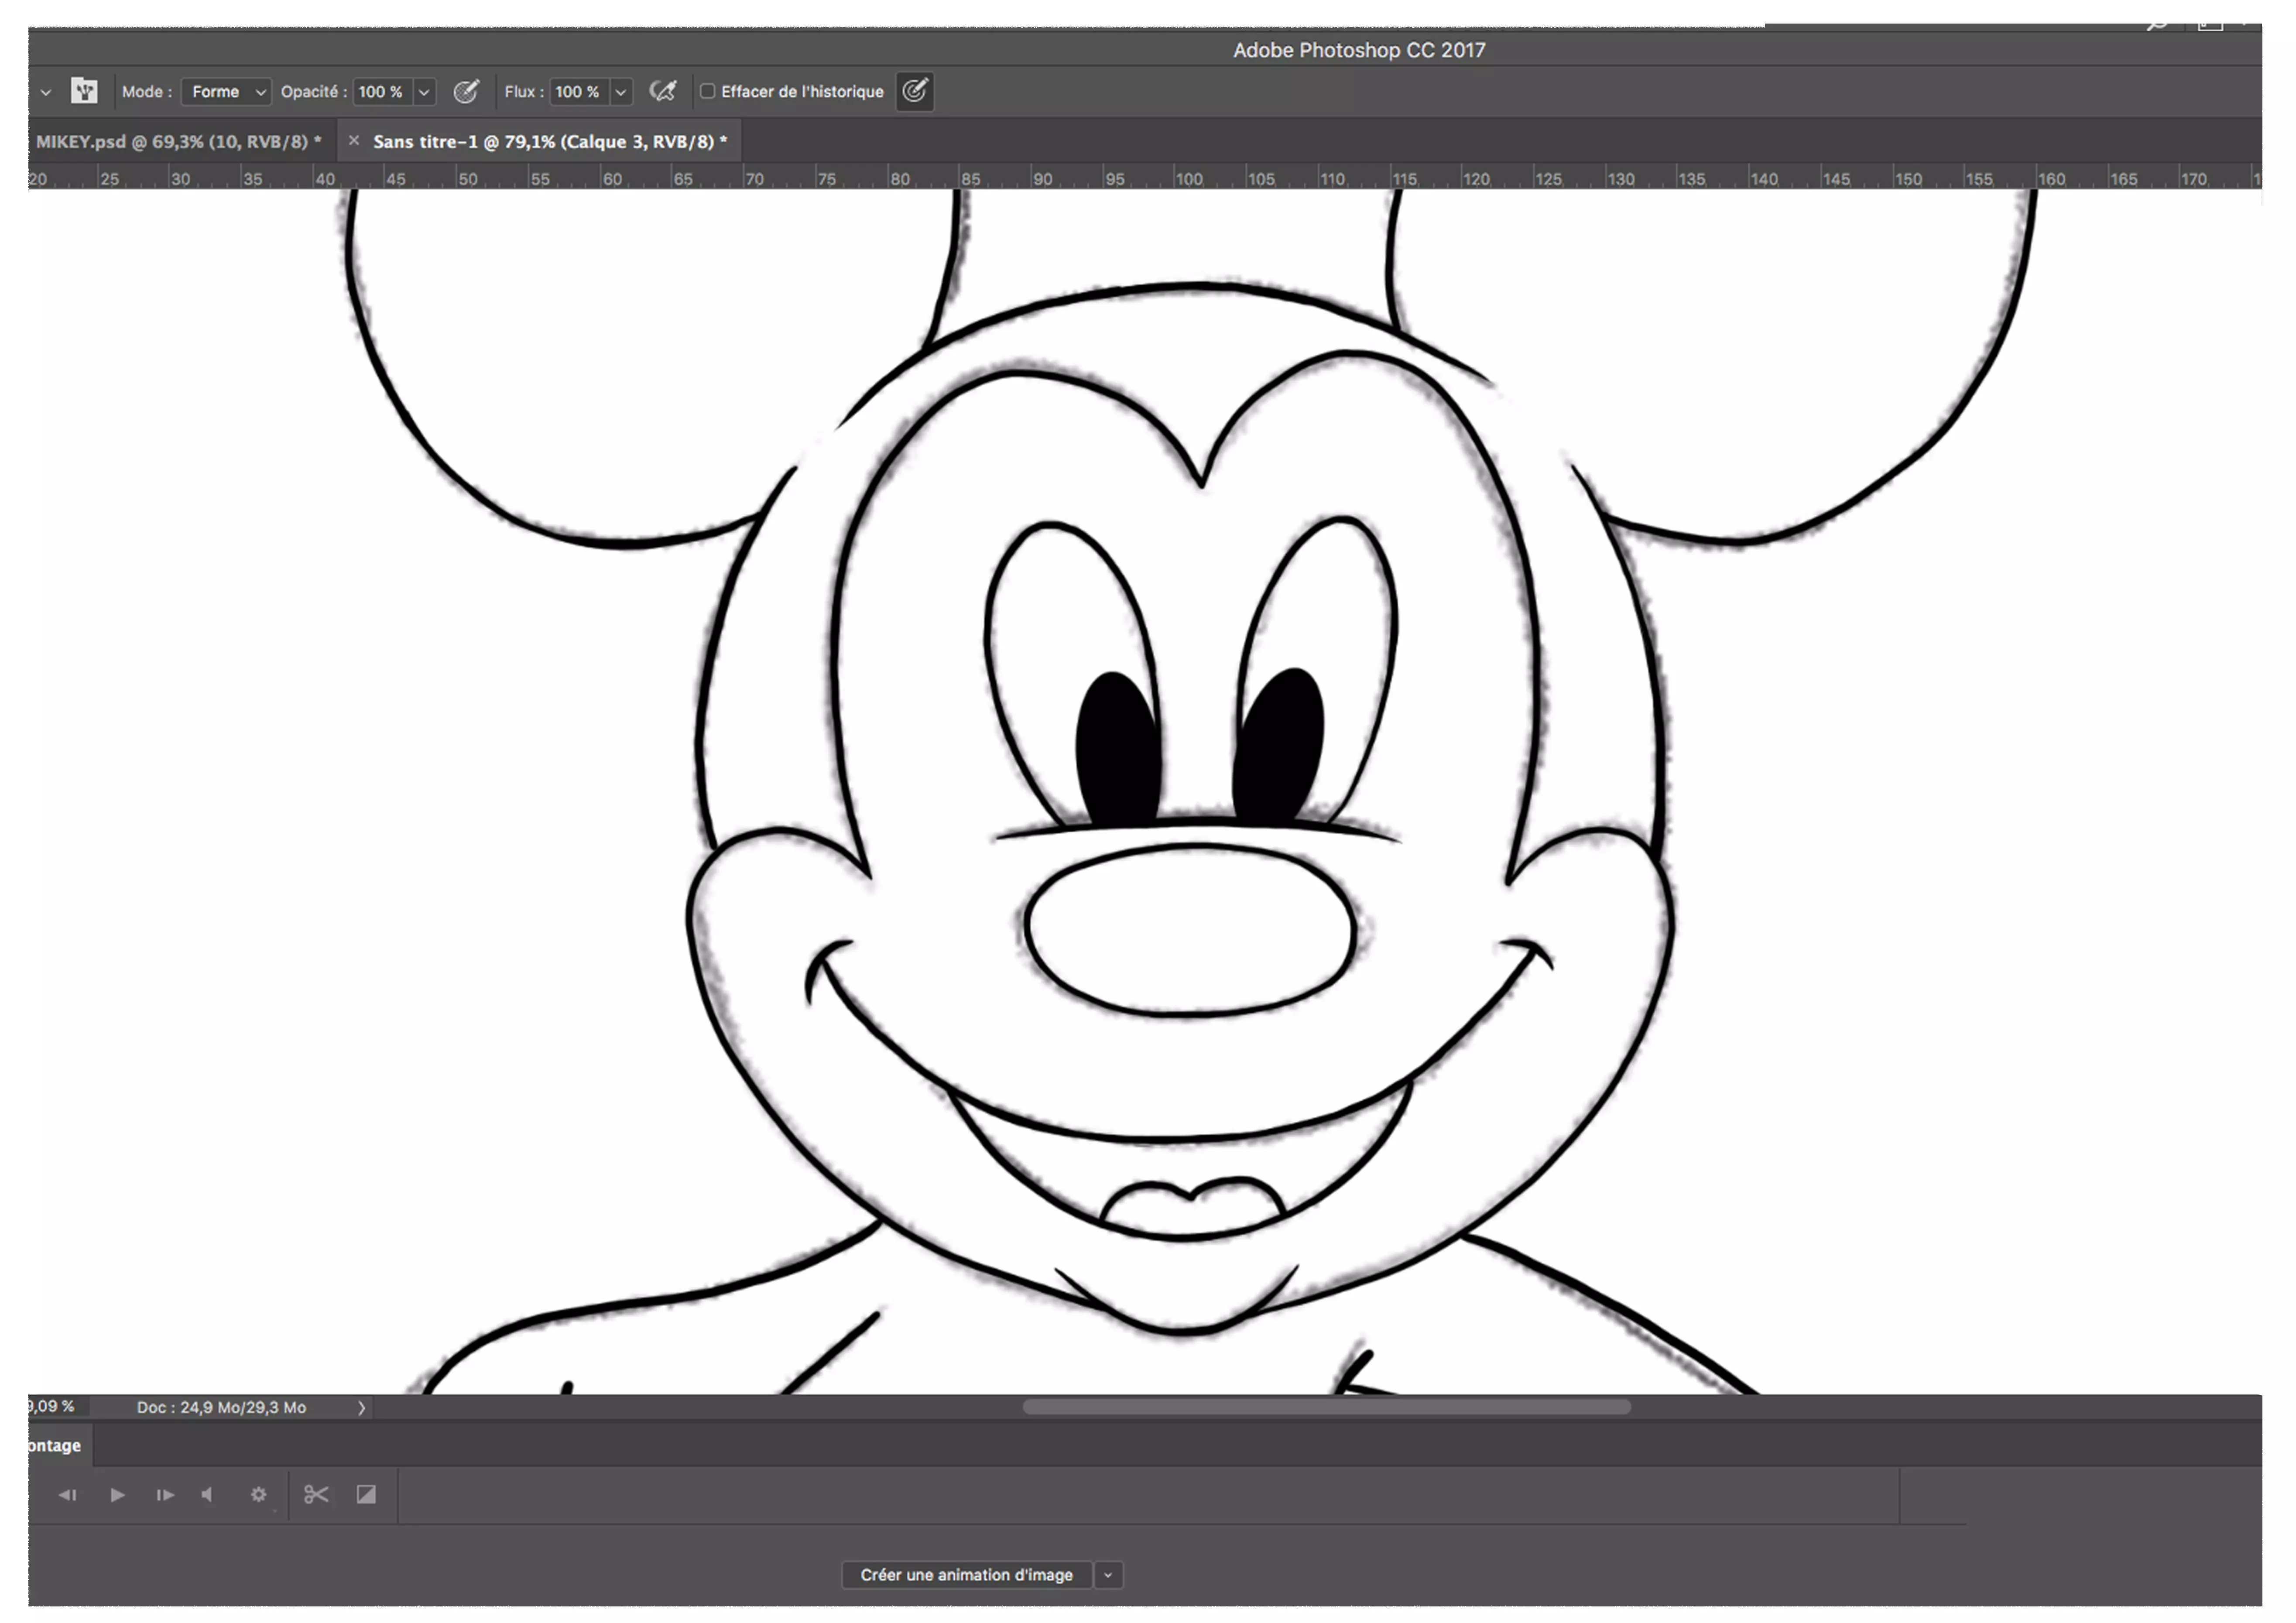
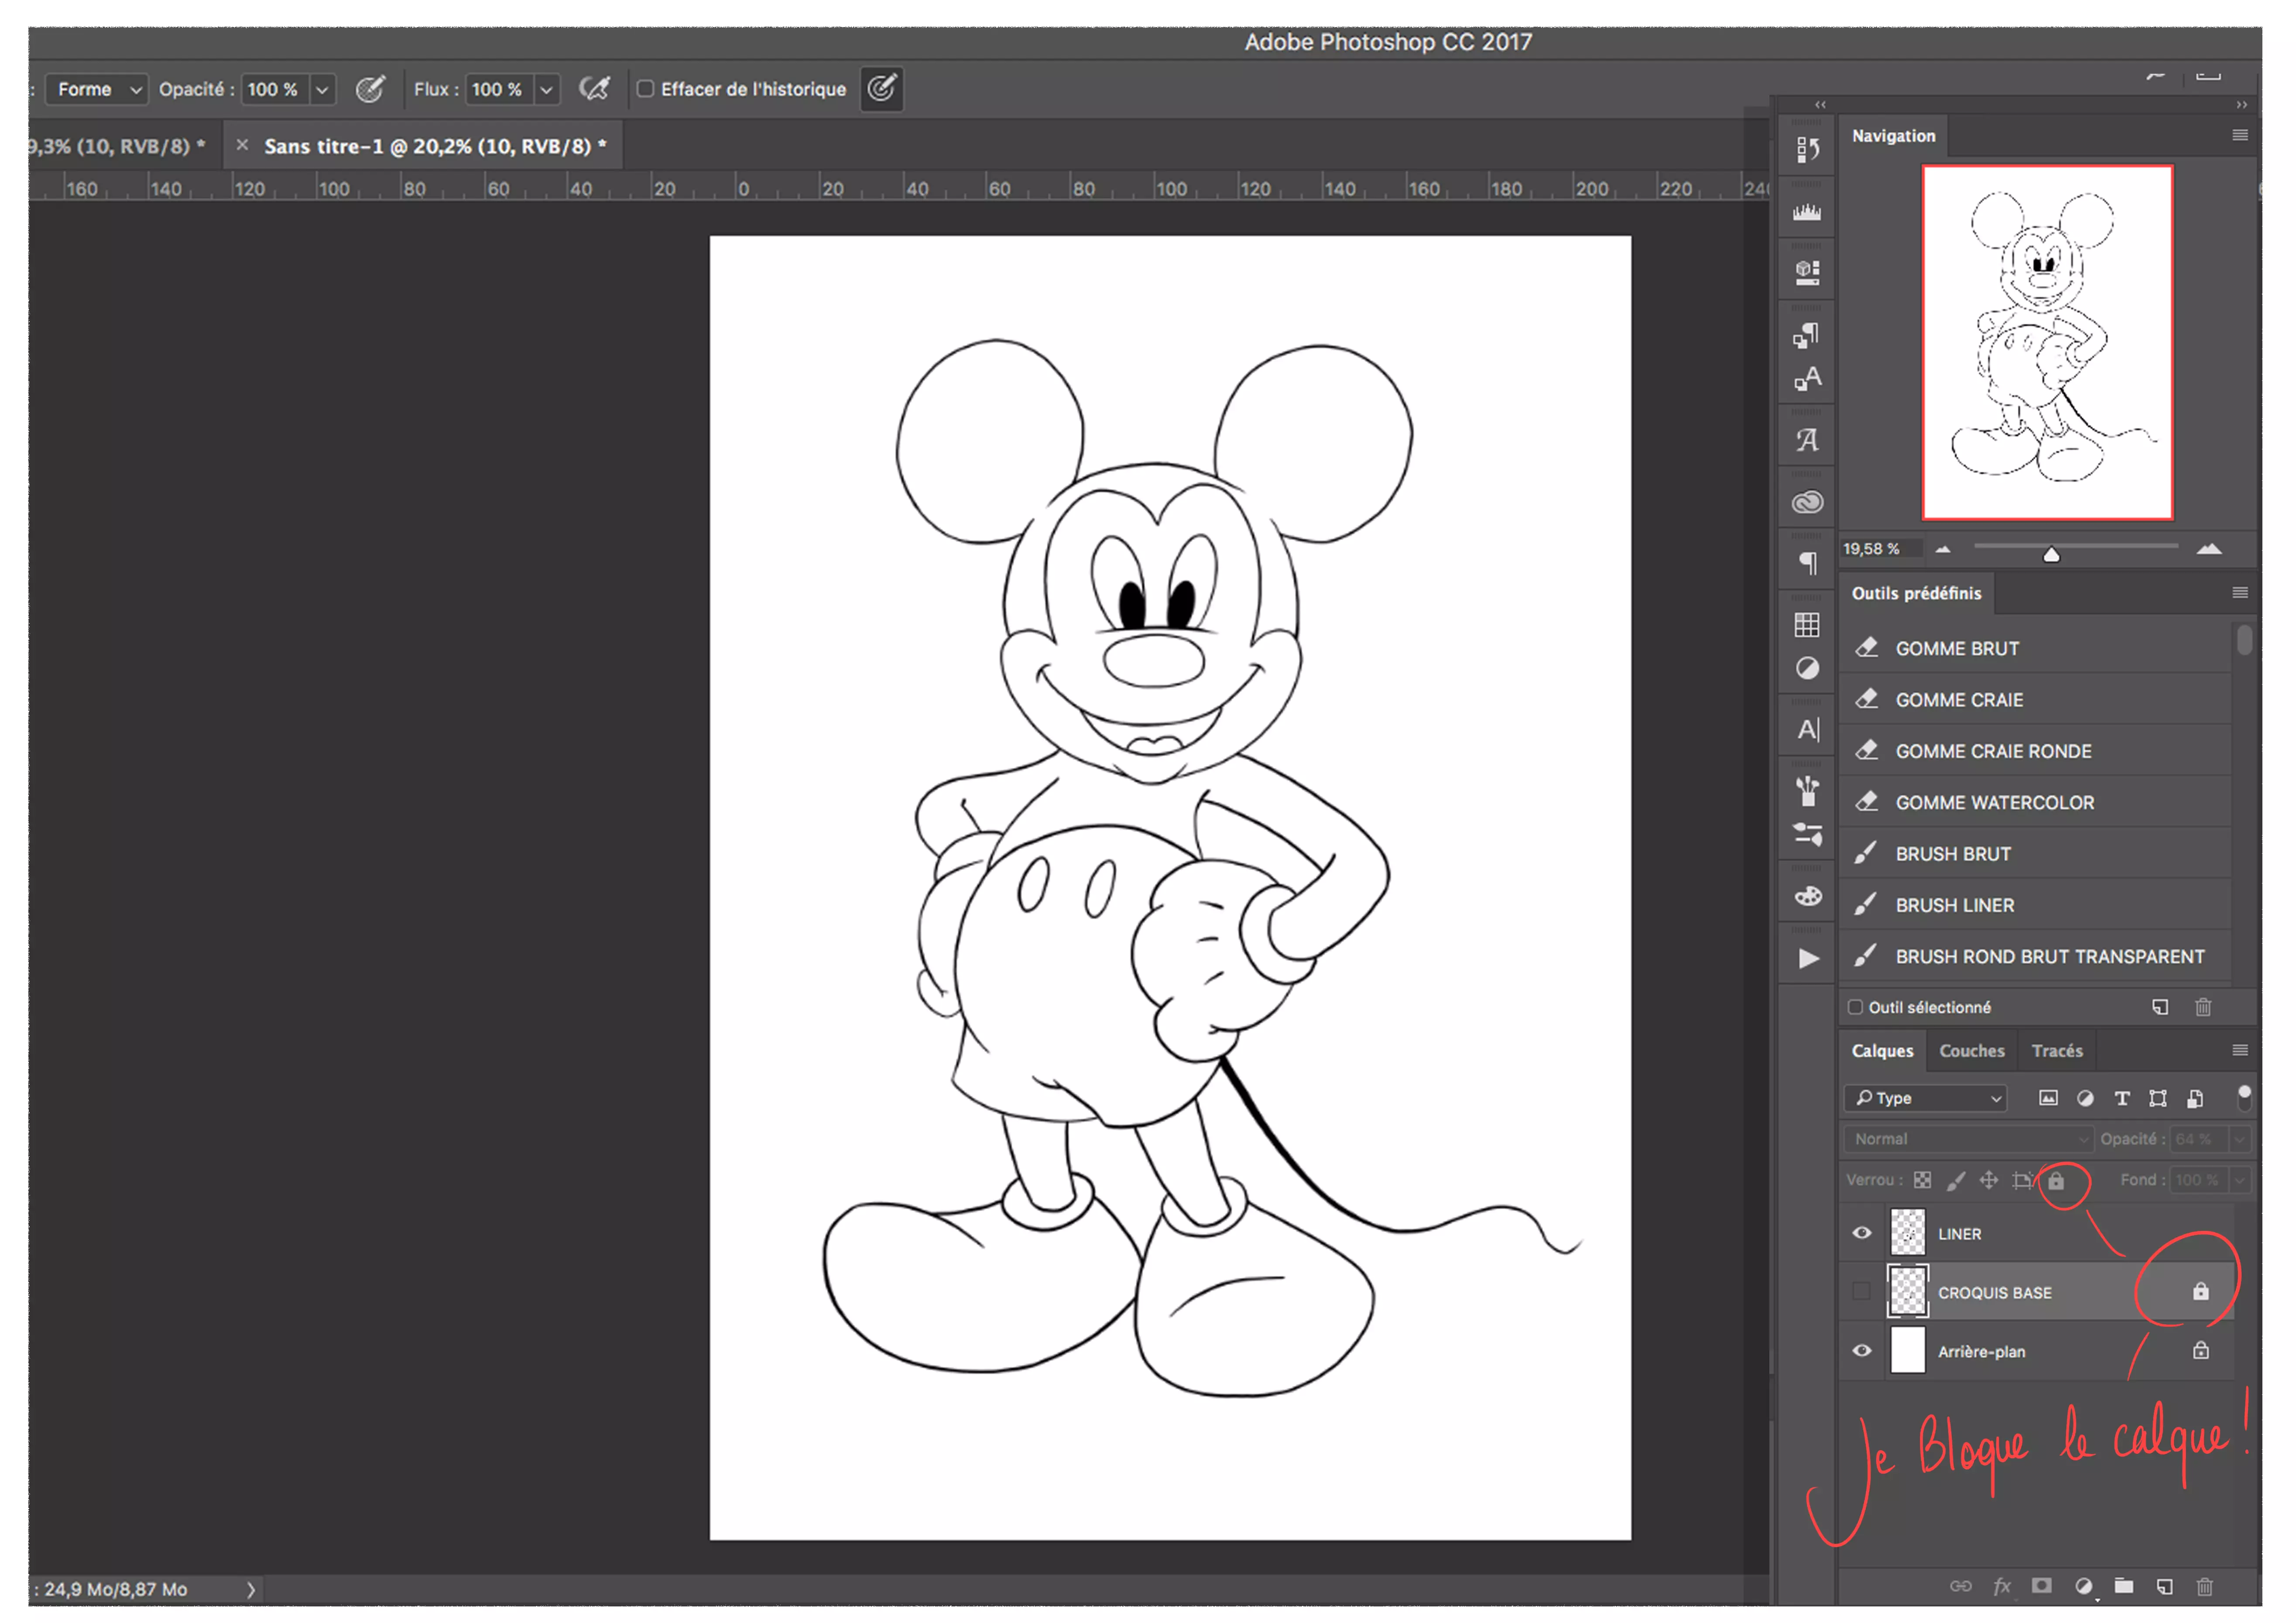
Here's what it looks like: inking layer over the sketch layer. As a habit, at this point, I lock (padlock) the sketch layer and hide it (eye). That way, if you get lost in the colouring, you keep your sketch intact and can reuse it later.
Moreover, when you have an inking, always leave the layer (here liner) first in the list, above all other layers.
COLOUR BLOCKING
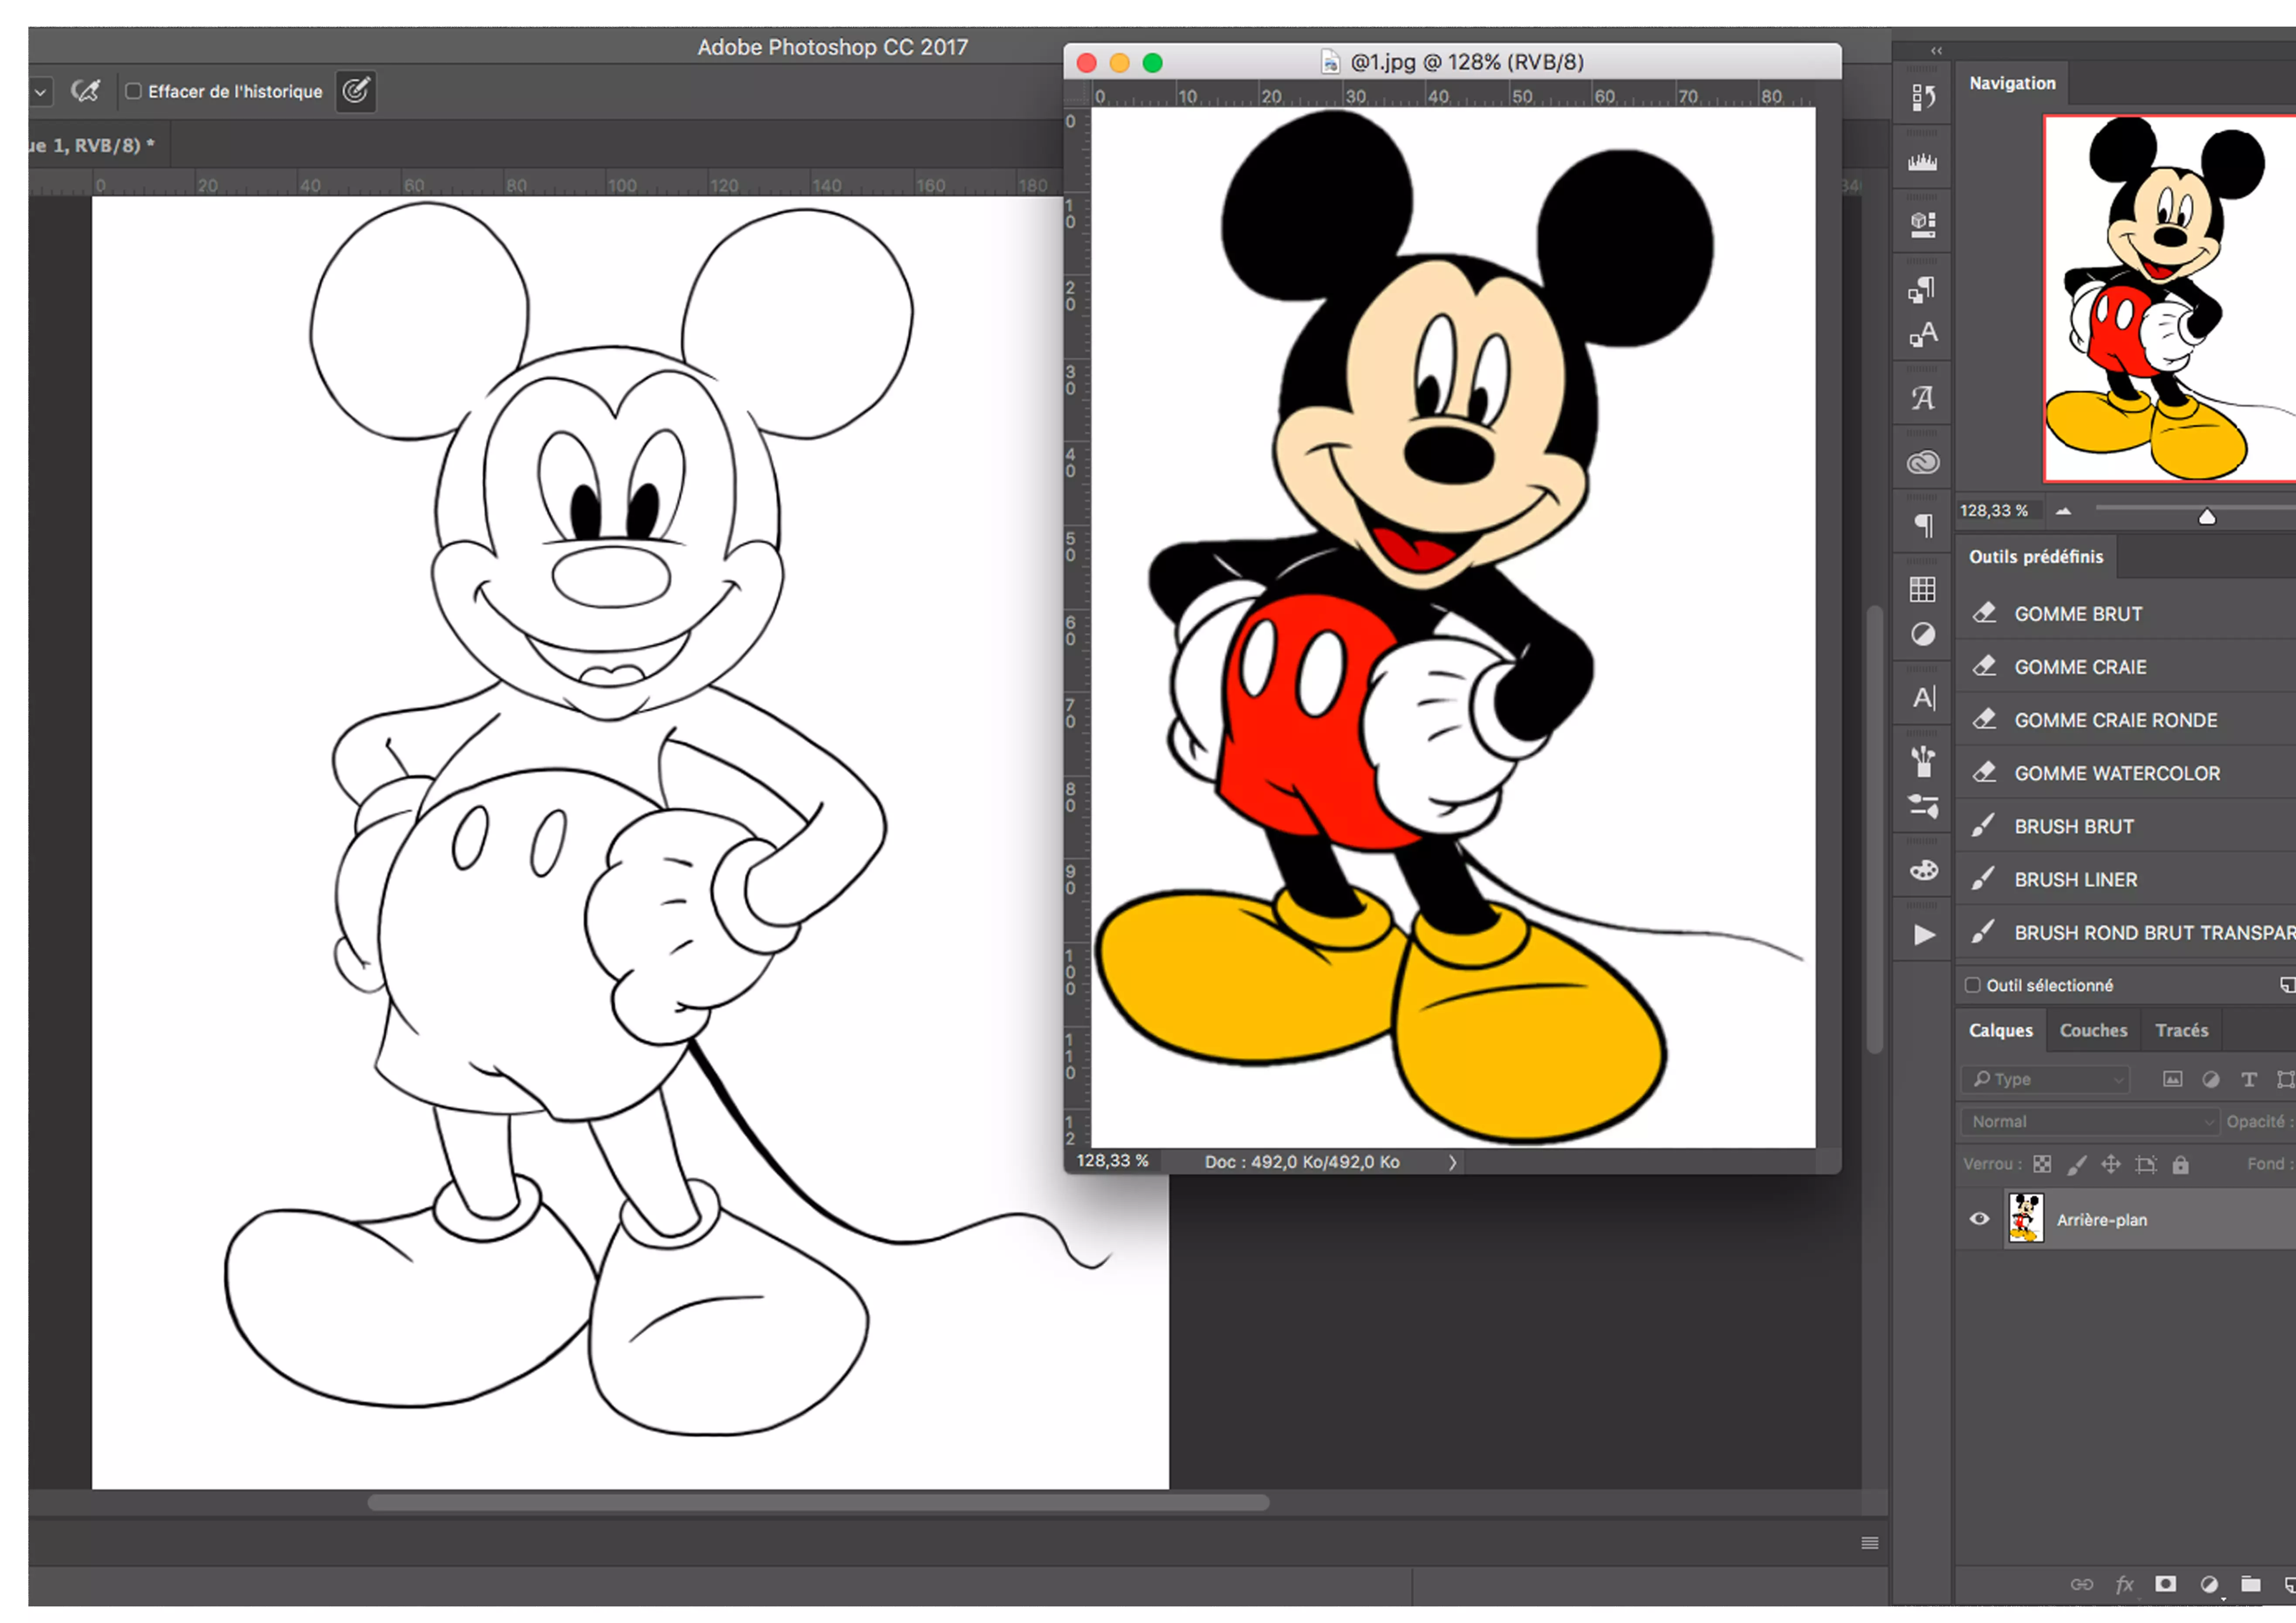
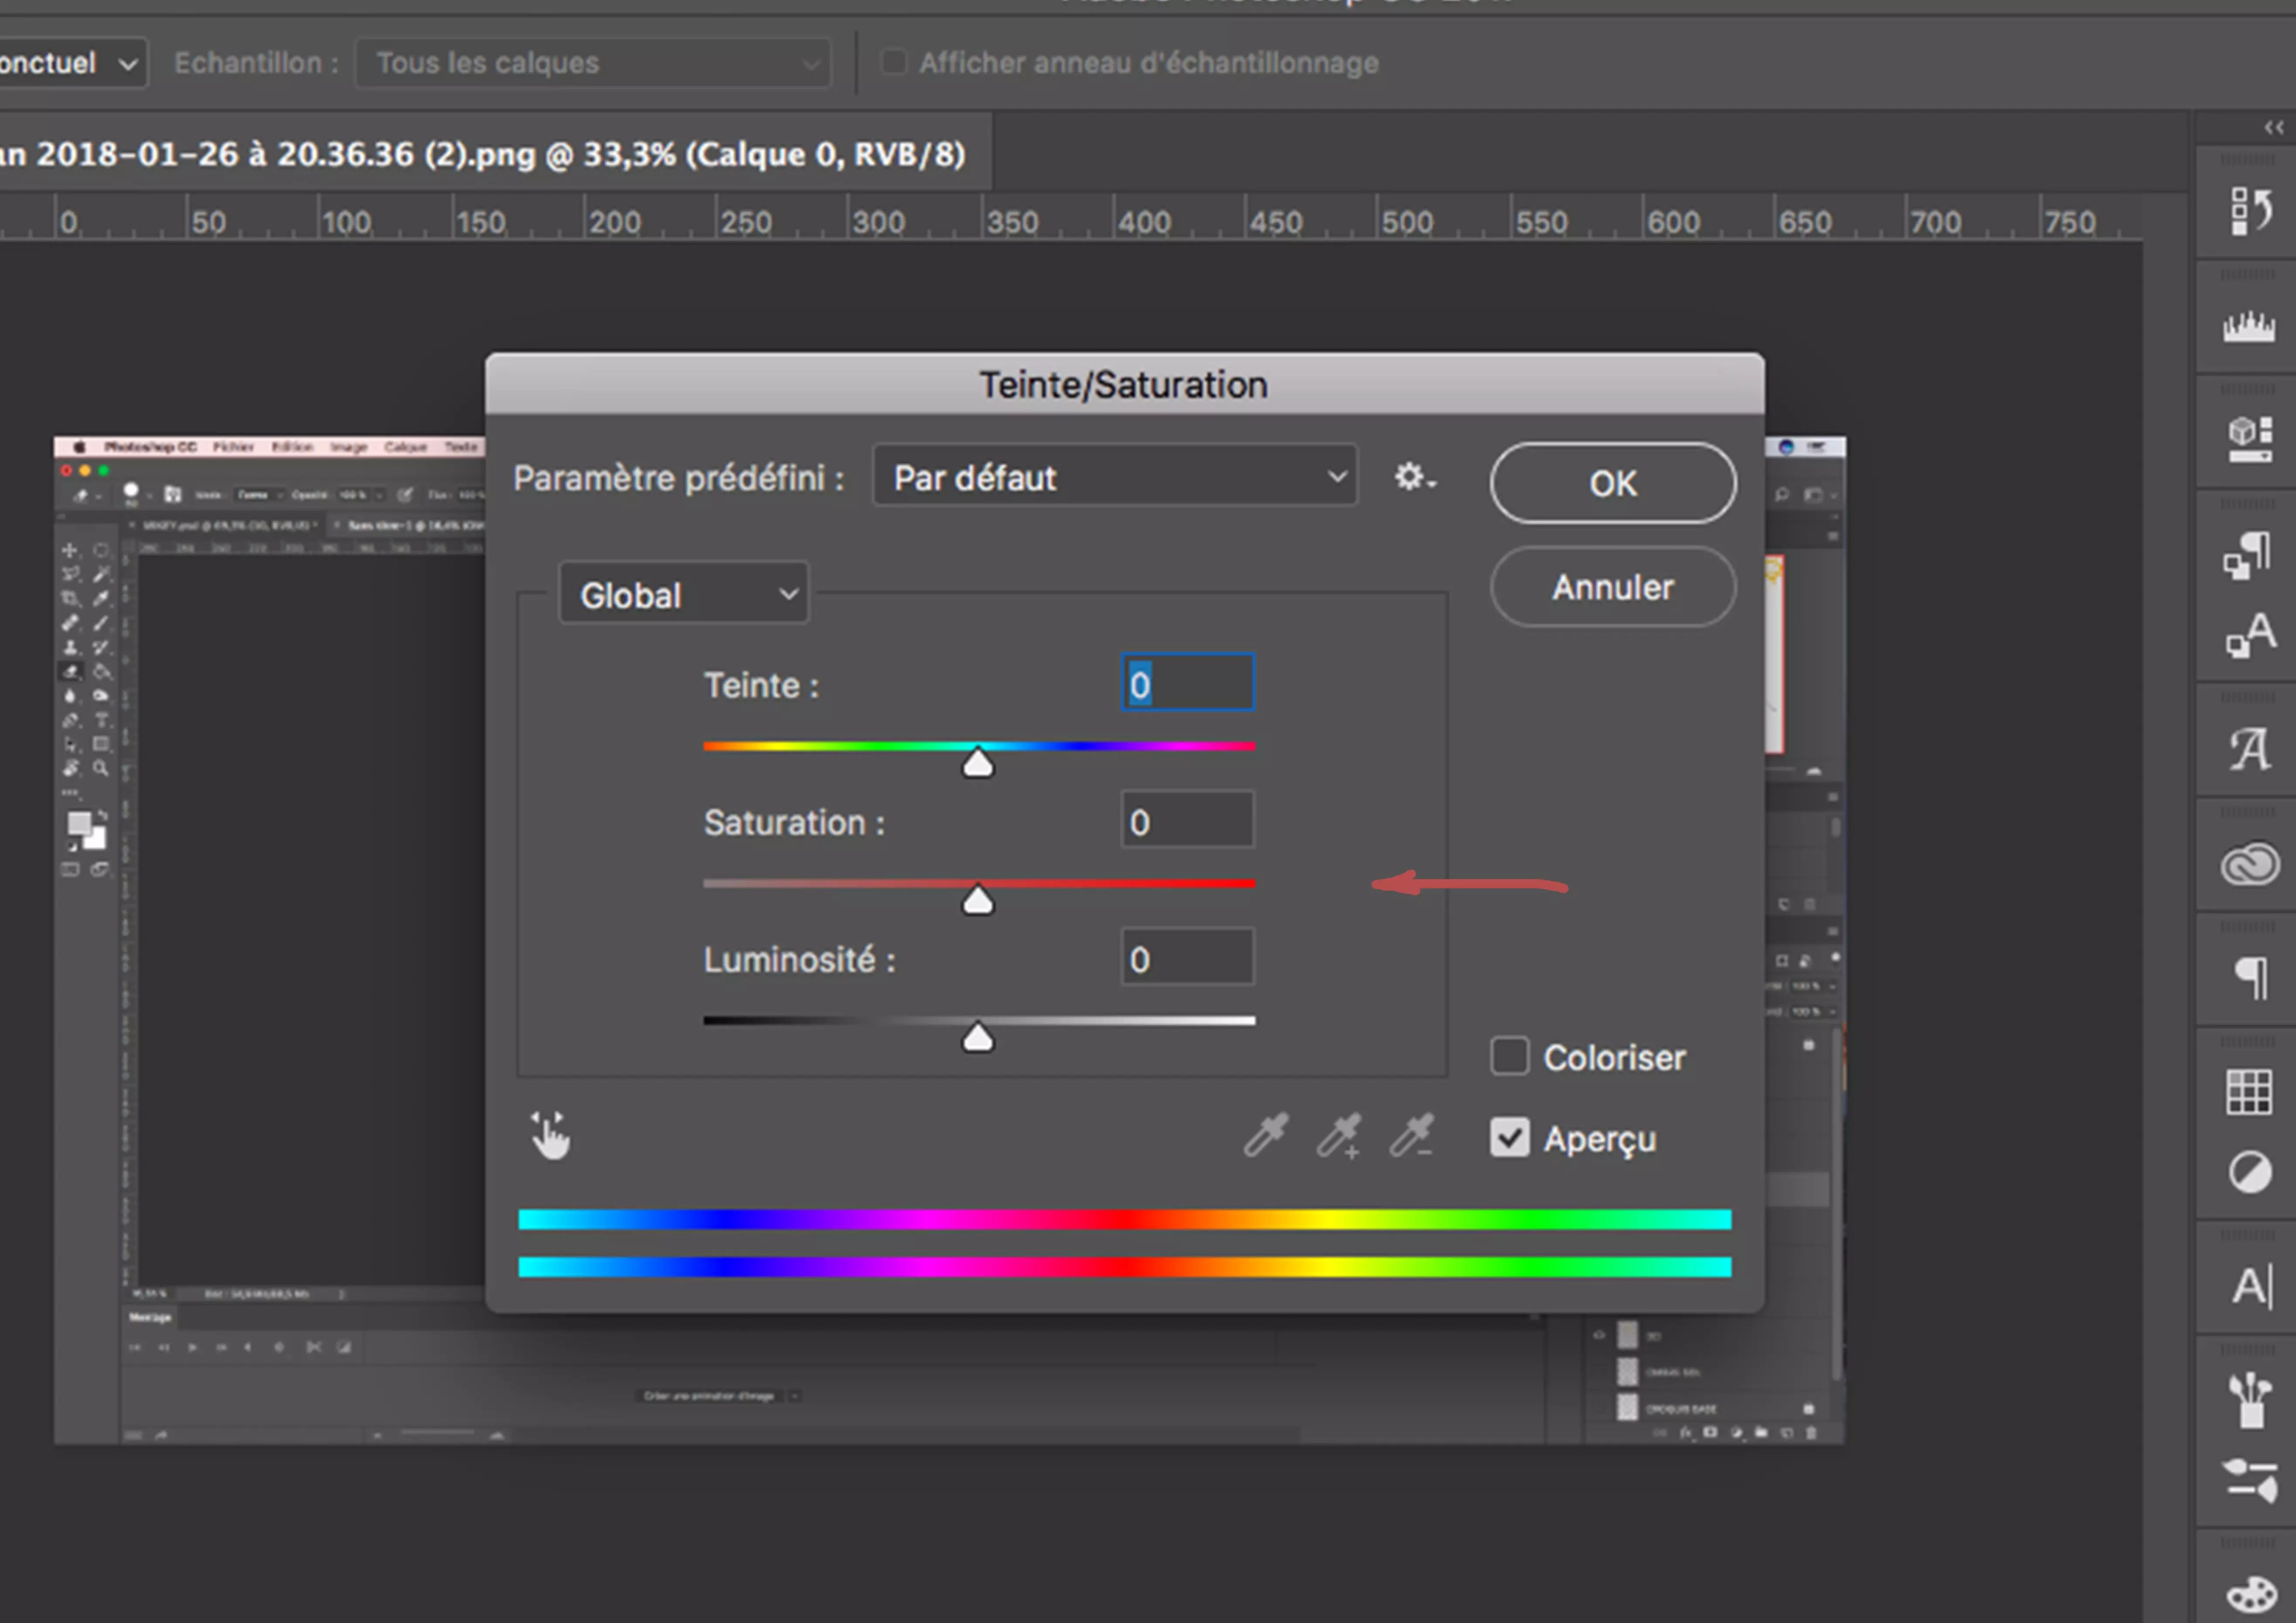
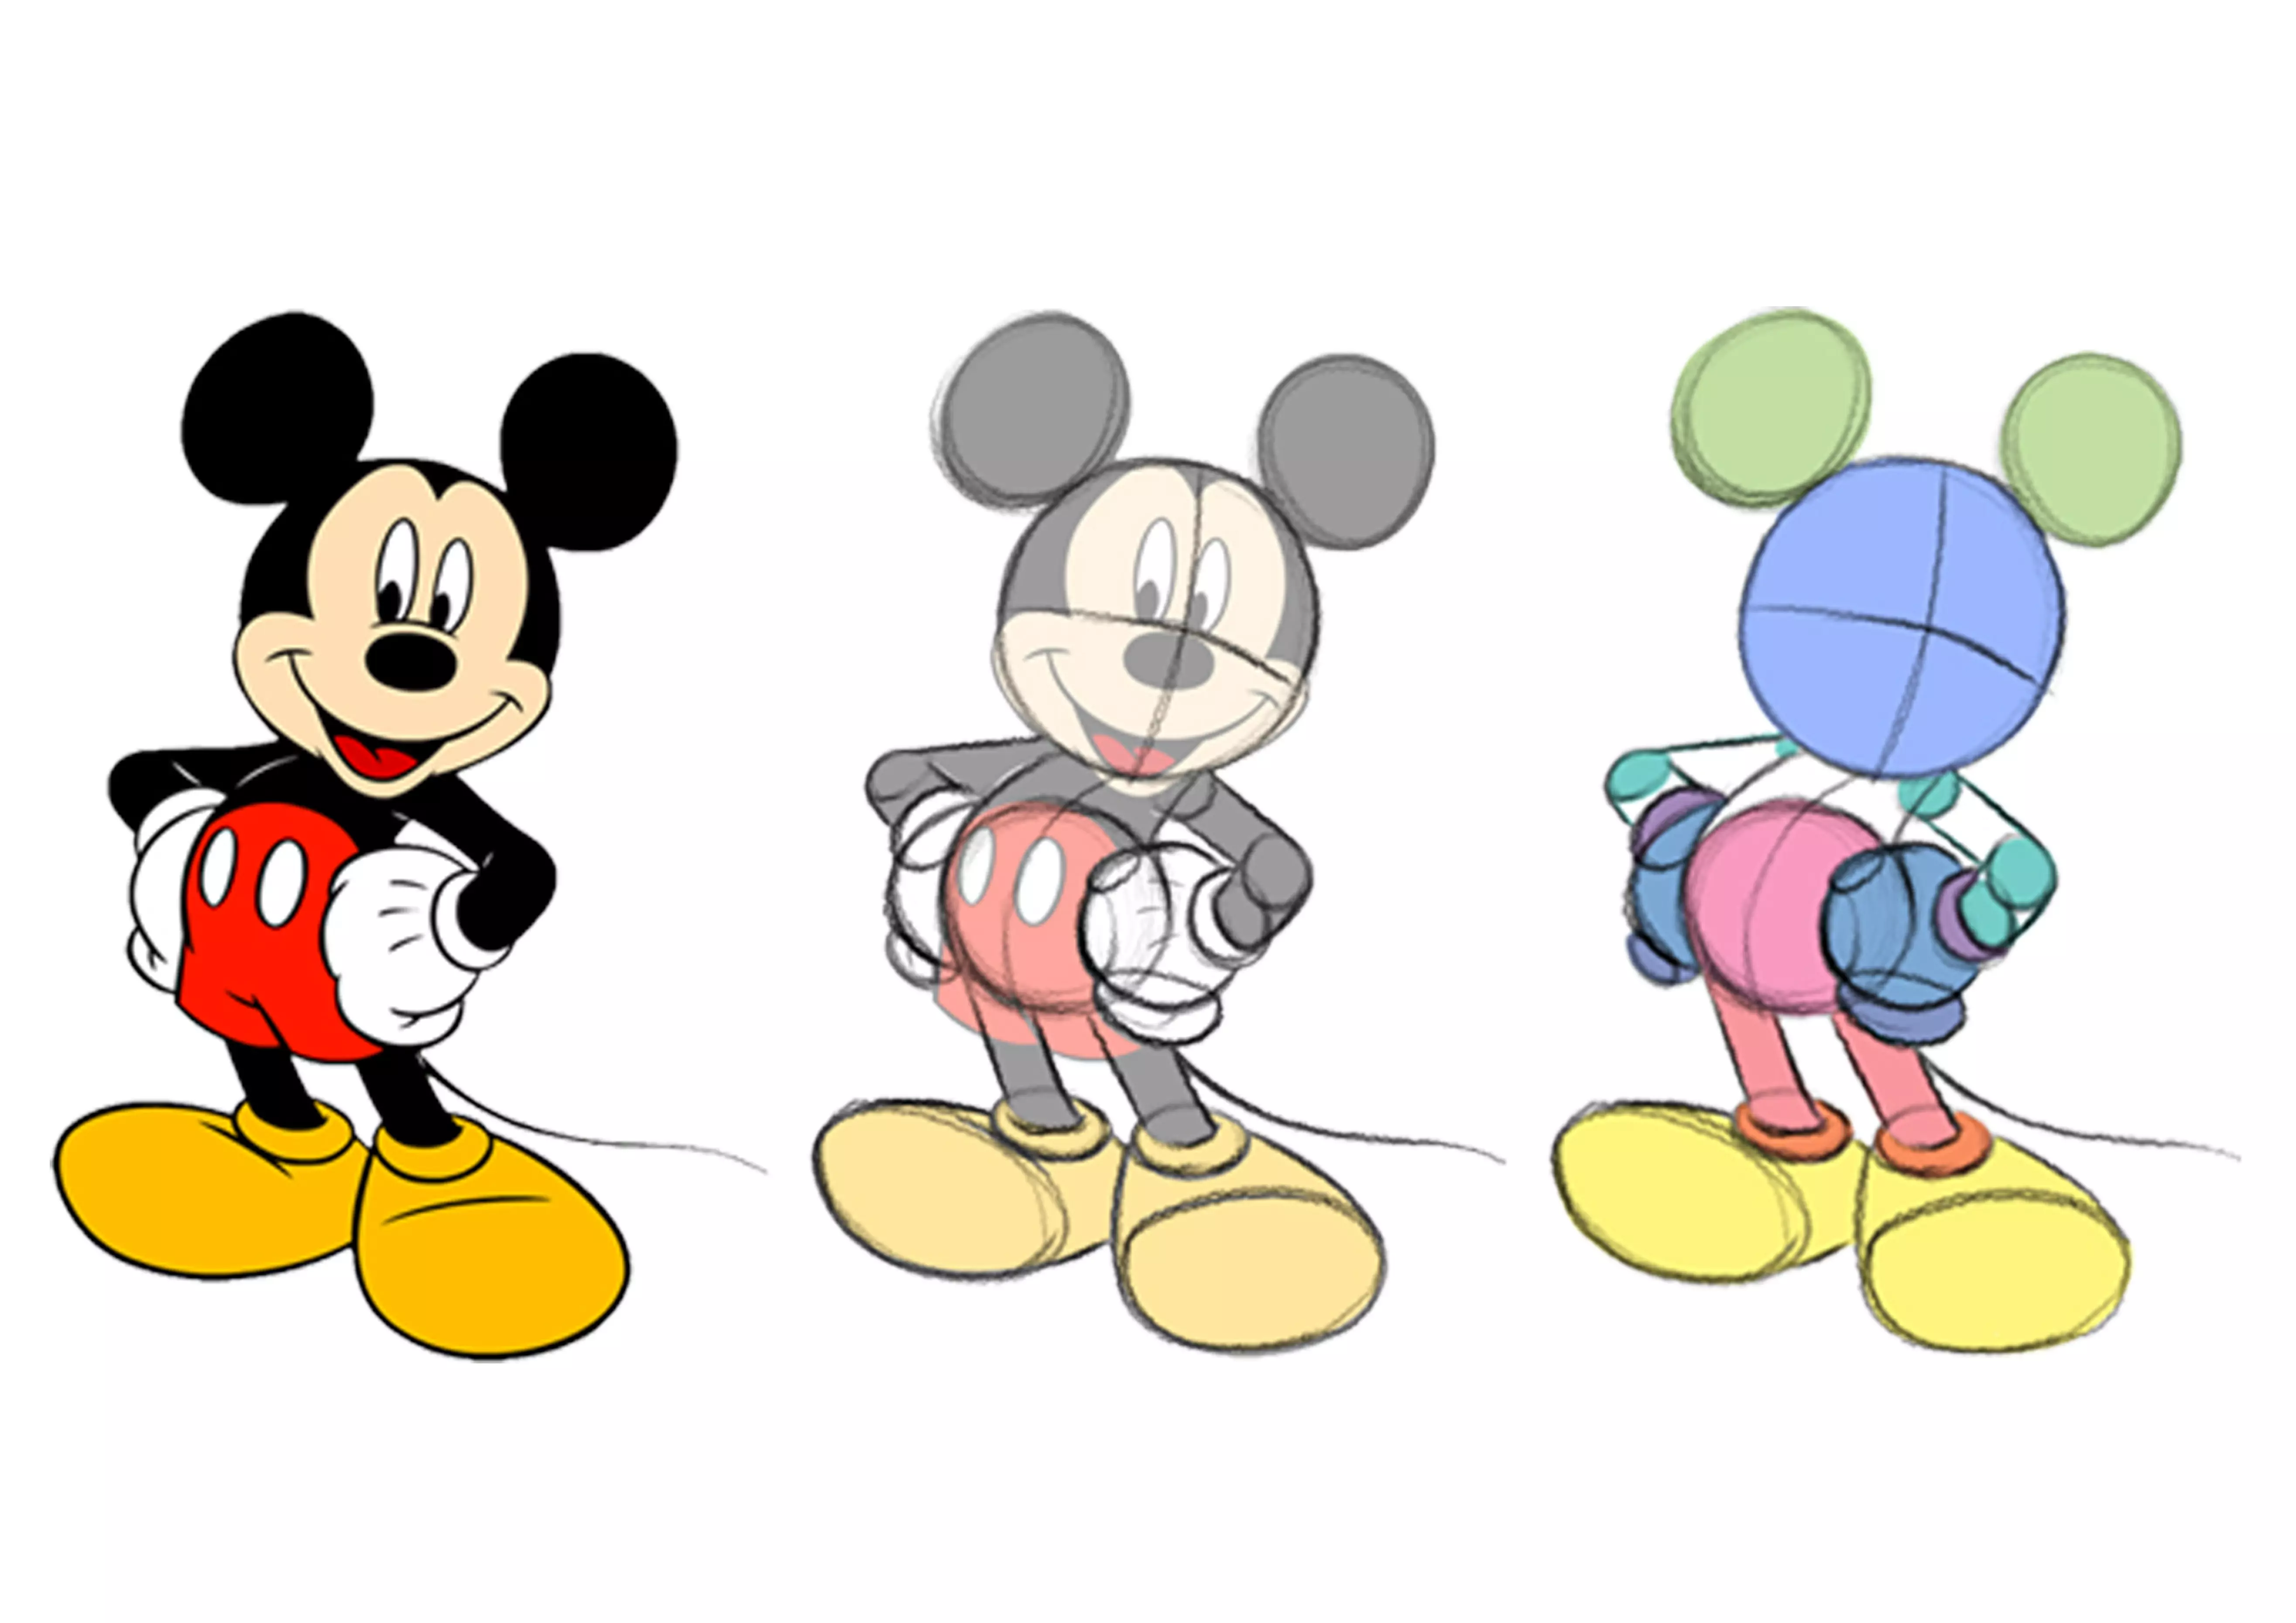
Well, we have our inking. Let's move on to colour. I will only do flat colors! And I start with my basic model. I find Mickey's colours too saturated (bright, flashy) Image ➜ Adjustment ➜ Hue/Saturation
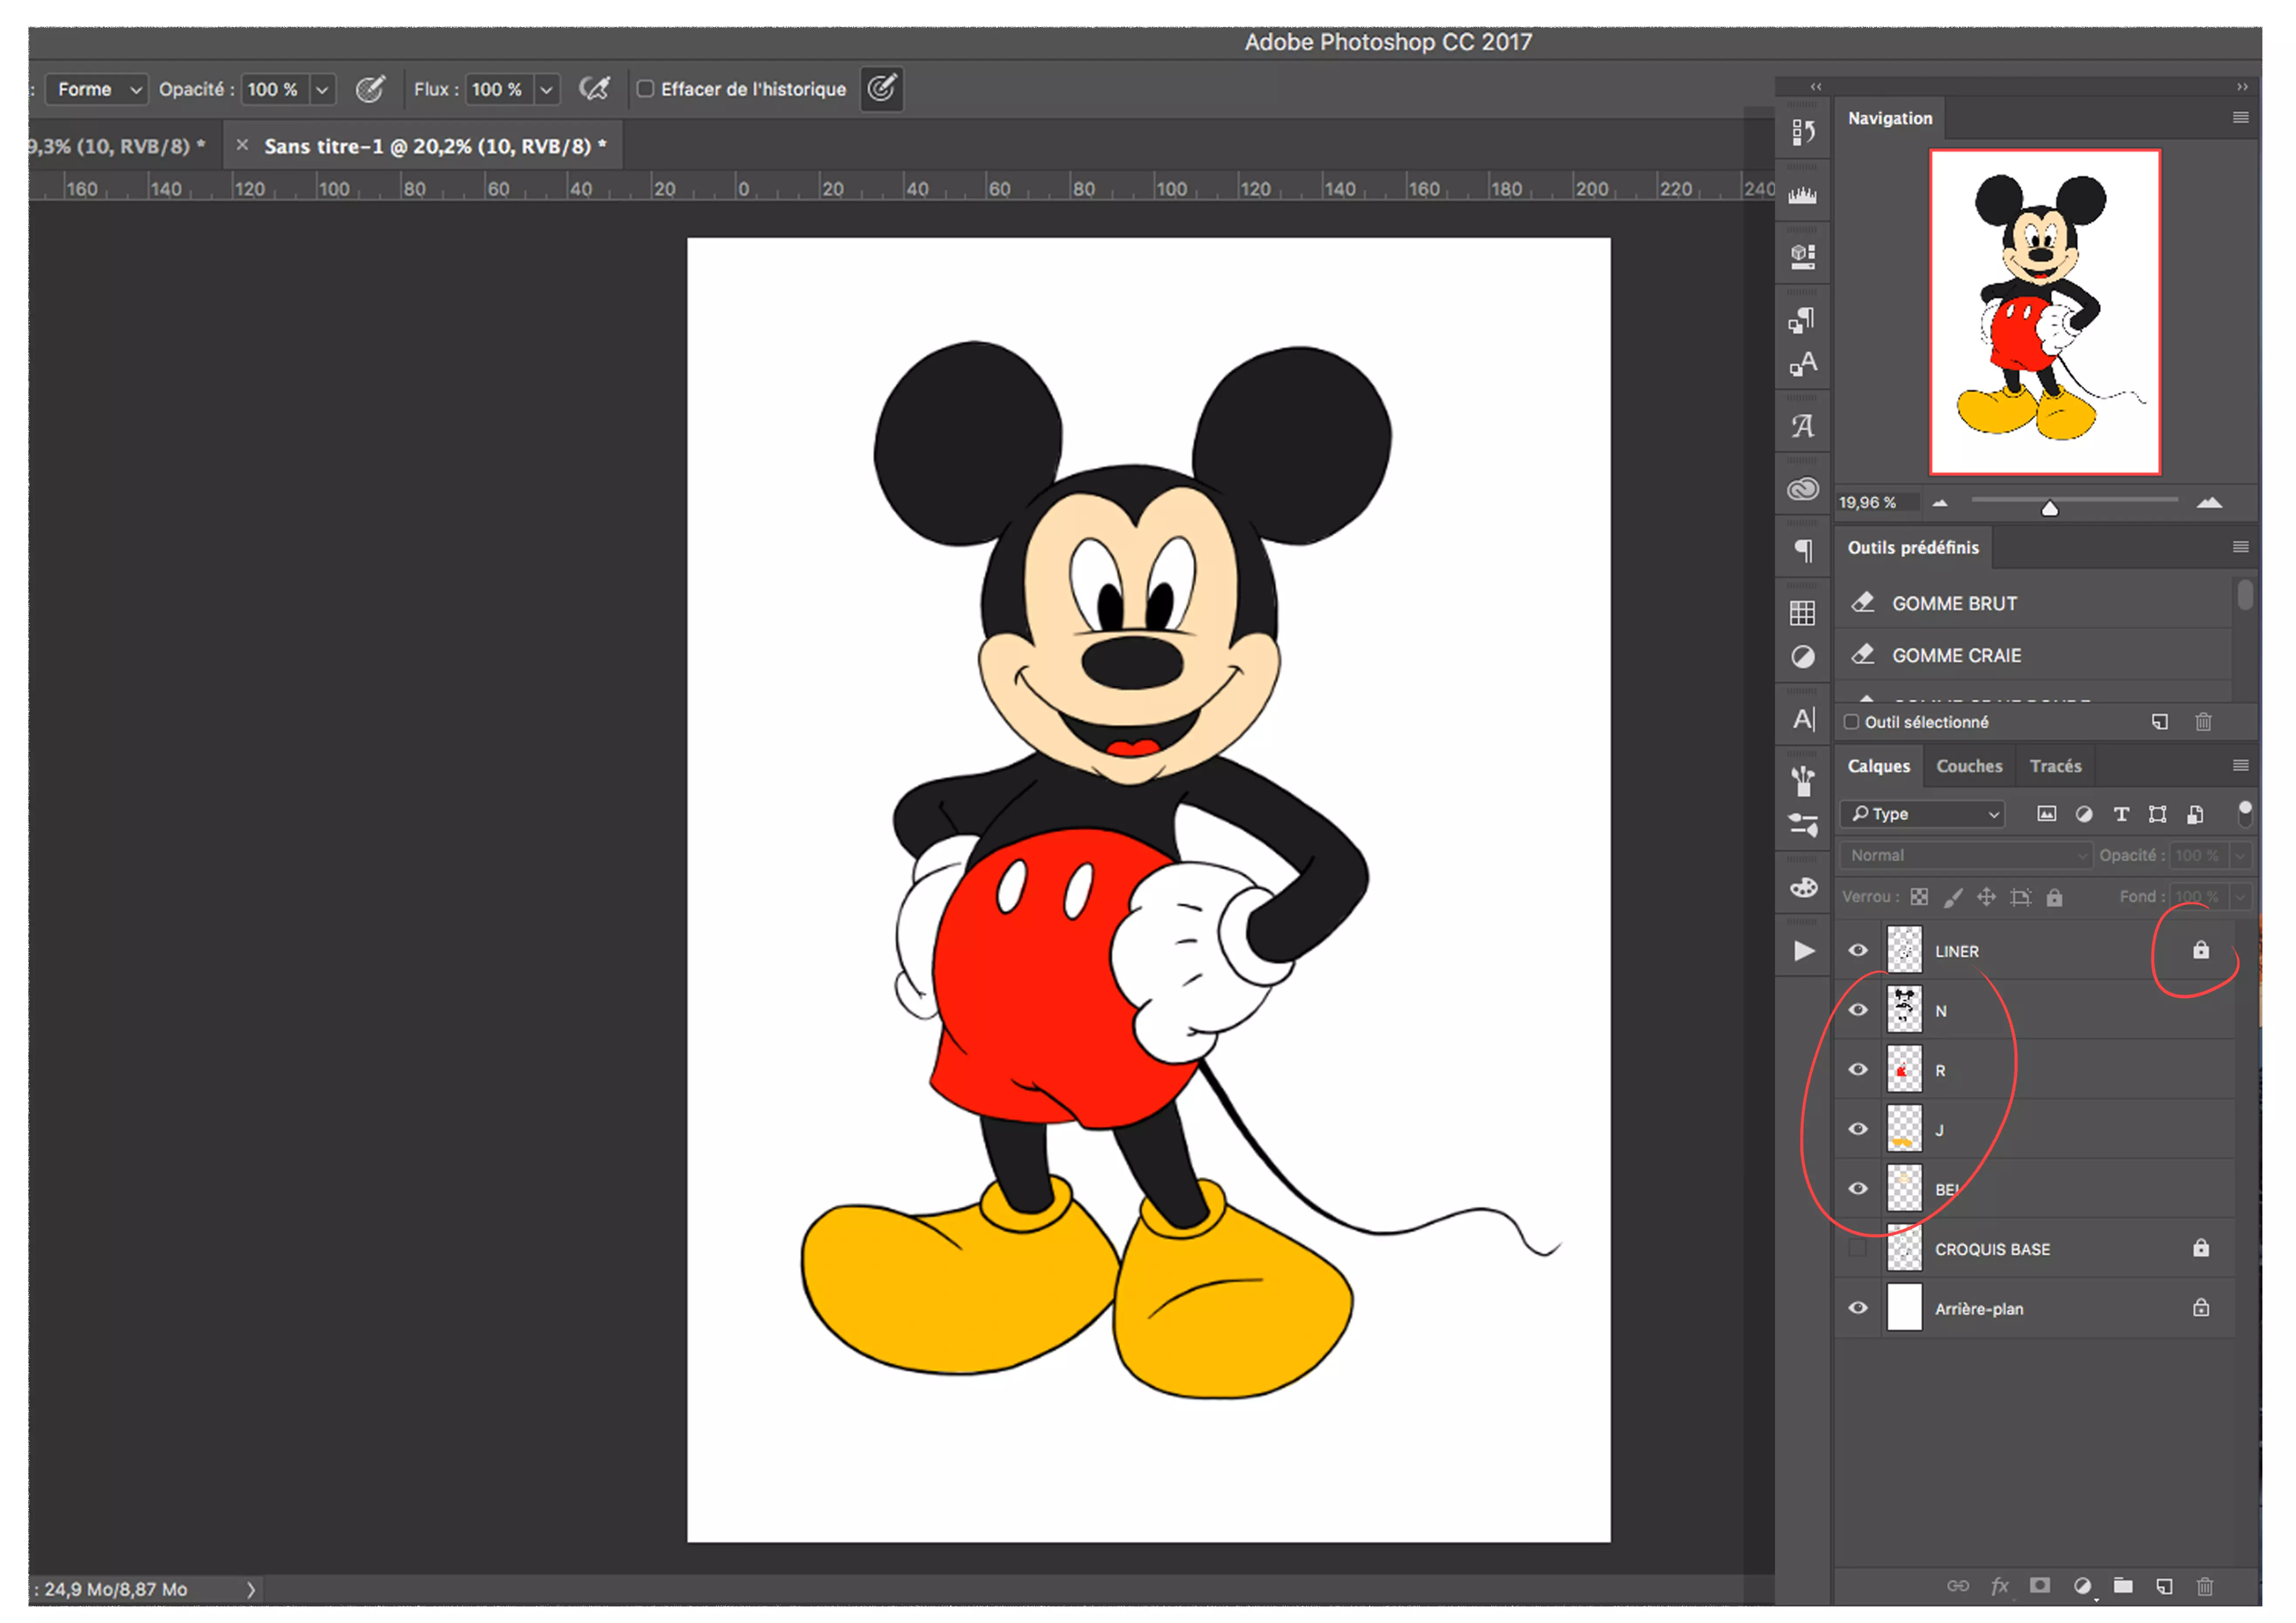
Create a colour on a different layer each time, with the inking always at the top. The black I use is not a pure black (100%) but a dark grey. It is never black before the end.
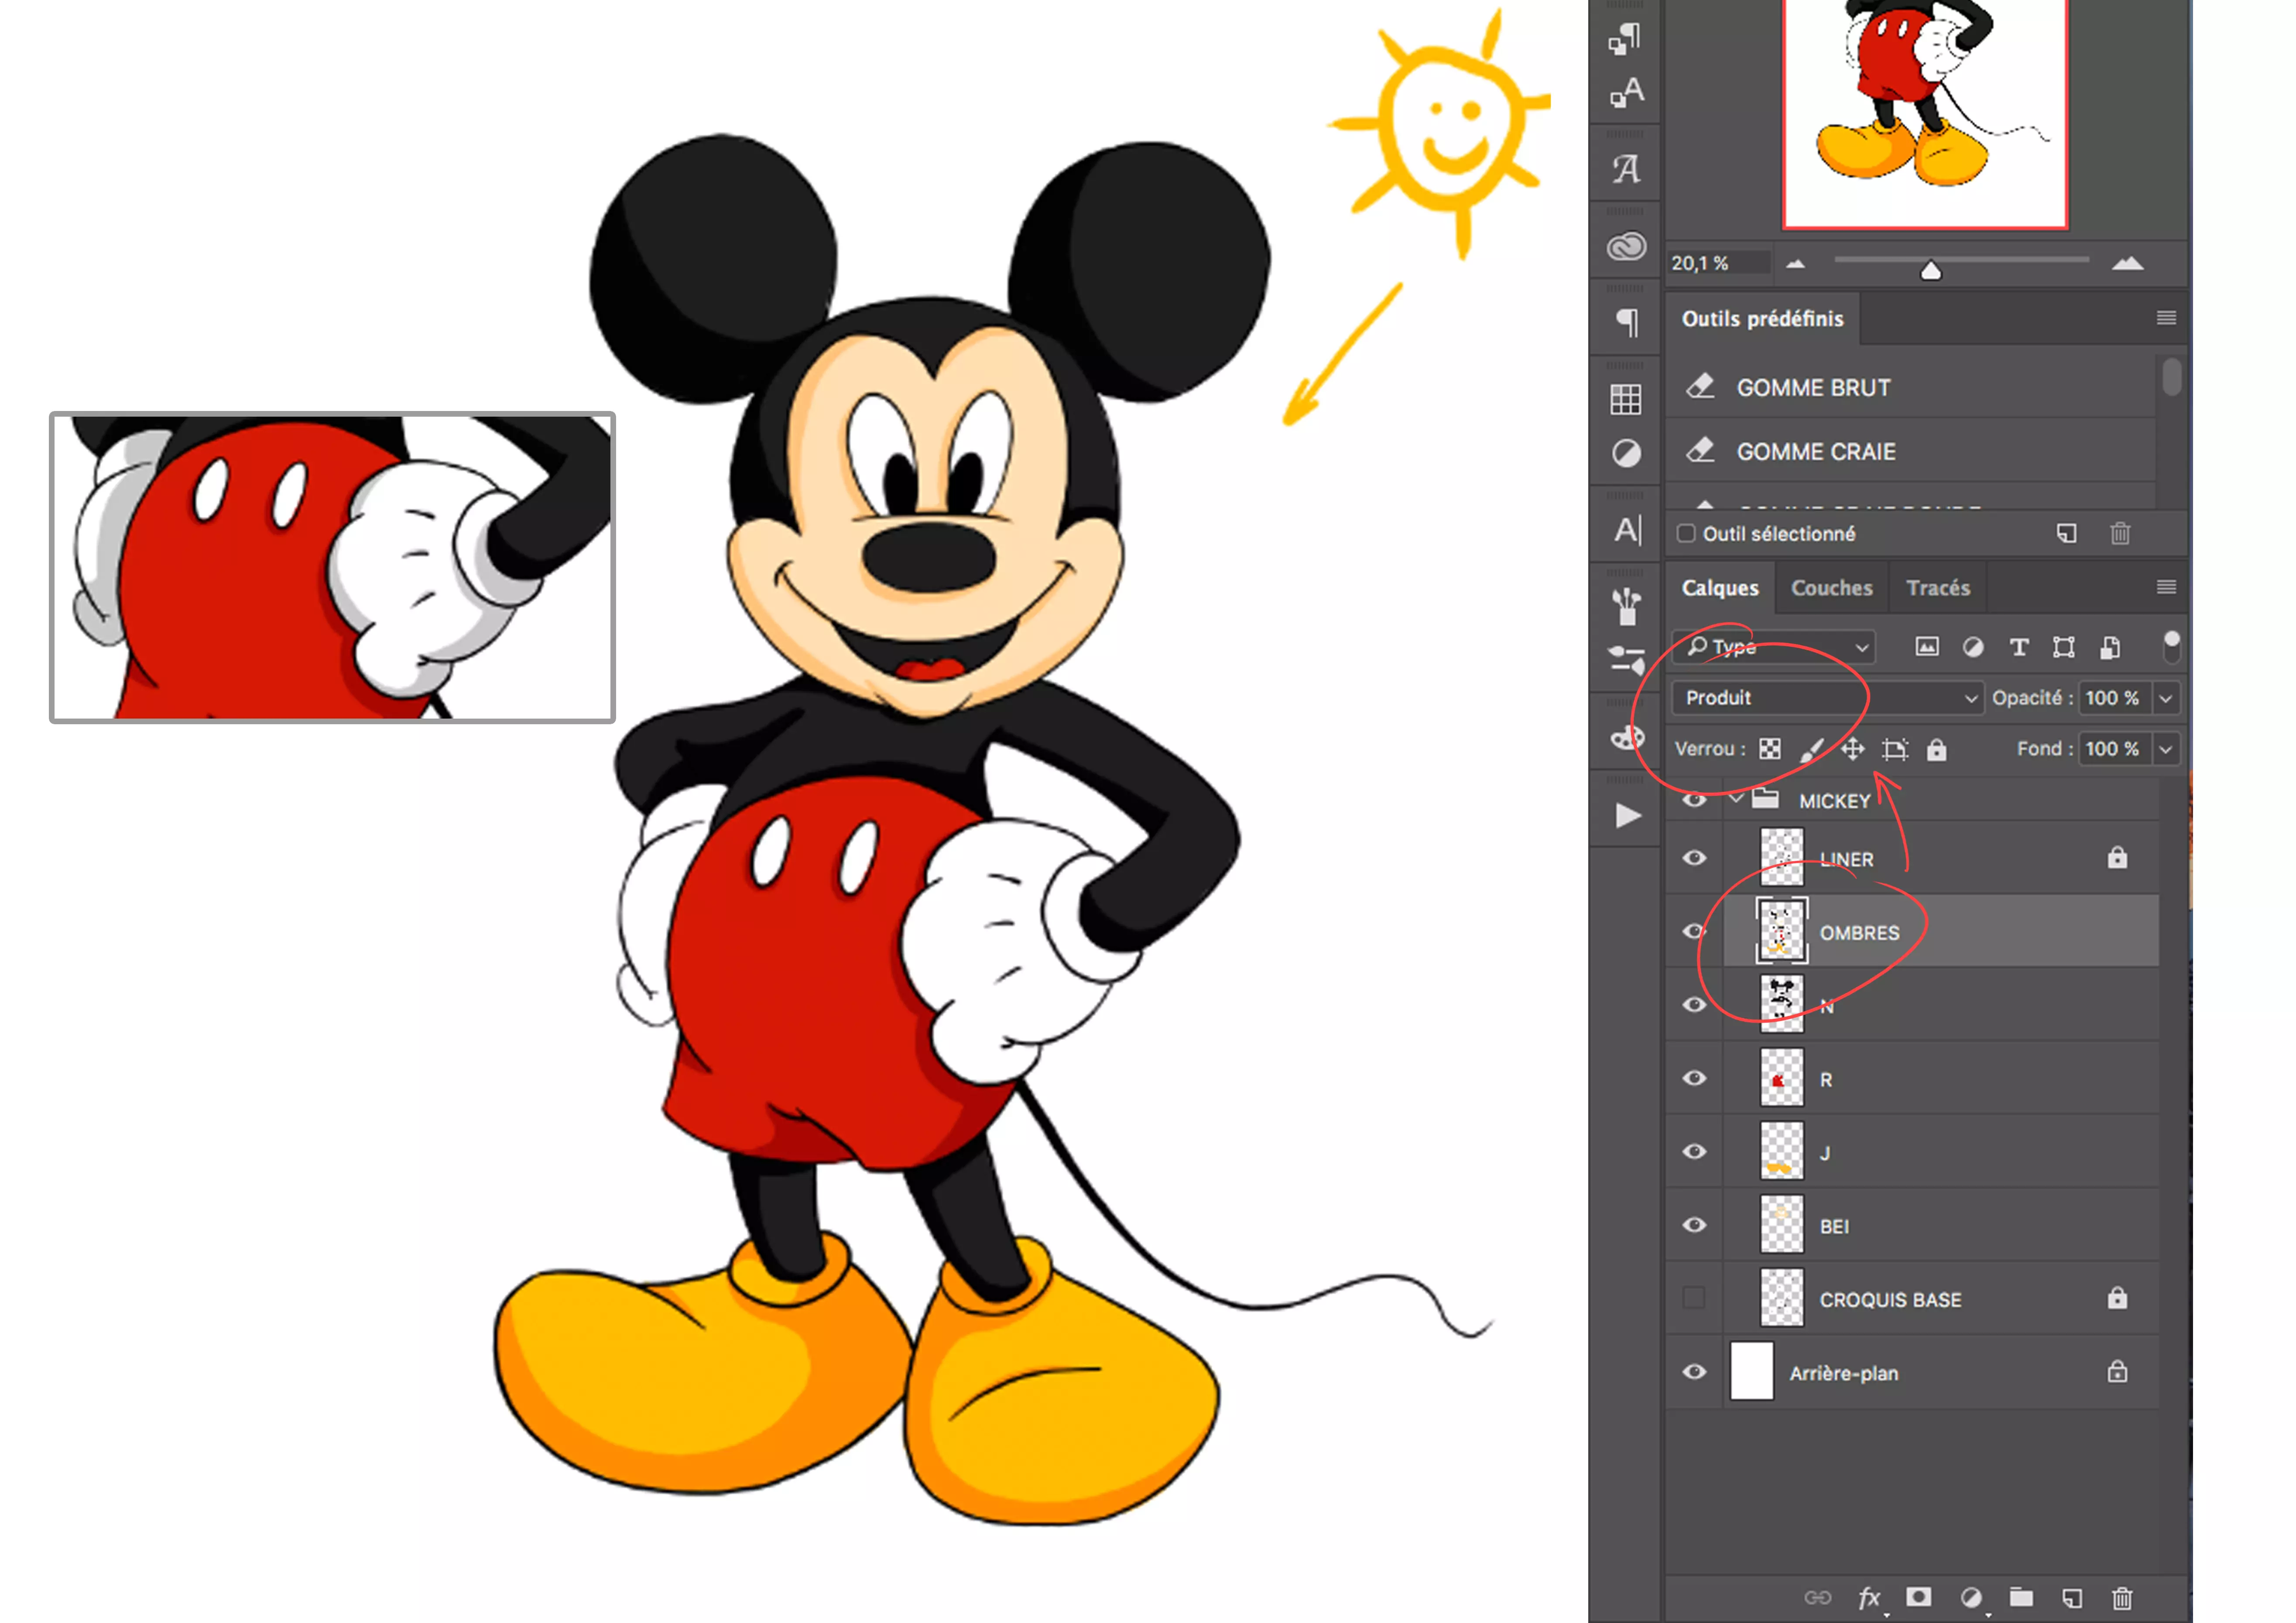
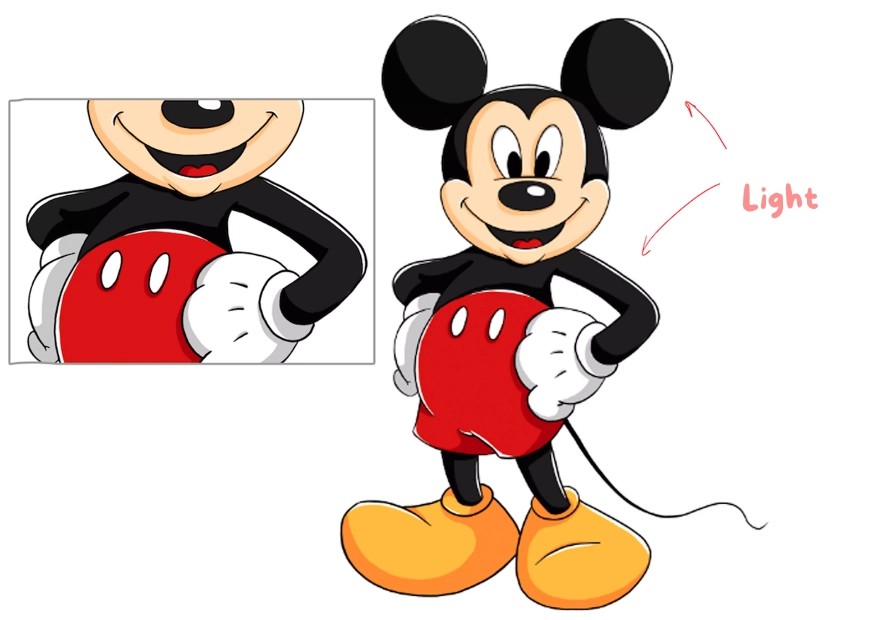
SHADOWS
We determine the position of the light. Working with light is very complex: depending on distance, intensity, and position, it changes completely. In this case, we will simply say that it is the sun in the top right corner.
I have put all the shadows on the same layer out of habit, but do not hesitate to create a different layer each time; if you rename them, there will be no problem. So it's simple: 1 color ➜ 1 shadow.
*I set the shadow layers to MULTIPLY.*
**Select a colour (press the "Command" key on the small icon in front of each layer)**
EXAMPLE WITH THE COLOR RED:
New layer ➜ in product* ➜ select** the colour red (the colour will then be outlined, small dashes) ➜ take the same colour (here red) ➜ on the product layer, do the shadows, the colour will appear darker ➜ deselect with command D (select ➜ deselect)
Here, I don't know if this is very comprehensible! It might make more sense with the image!
For Mickey's gloves, since they are white on another layer (not on the product, white on white doesn't work), use a light gray and make the shadow of the hands.
Take all volumes into account: the ears, for example, are slightly hollow, so the shadow takes the shape of the curve. The same applies for the nose, shorts, and feet.
LIGHT
(optional)
Create a new layer and mark with white for direct light.
And finally, add a shadow on the ground to place our Mickey in the space.

On the right, you can see another colour composition, with more pronounced shading and lighting. This is to show another possible result.
CONCLUSION
Drawing is mainly based on observation. It's important to understand the model to avoid the pitfalls of perspective, hidden arms, etc.
Don't be afraid to start over. Even Picasso made sketches and started over hundreds of times! You need to be patient. Even if you spend 15 minutes just looking at your model, that's a good start. Break down all parts into simple shapes and if you ever get stuck on one part, let your mind breathe and focus on something else.
A little tip:if you really get stuck, take a sheet of tracing paper and trace the model. I'm not telling you to recalculate it for your drawing, but drawing over the model will help you understand body directions and proportions, especially with bases like Mickey's, which are already drawings.
To understand colour properly, you need to understand volume. Have fun moving the light source (the sun). Use everyday objects to observe the light and help you.
Discussion
No comments yet.