How to Sketch Poses
Do you know how to draw characters but find them too static? In this tutorial I will show you how to learn how to draw dynamic poses to bring your characters to life.
WHAT IS POSE DRAWING?
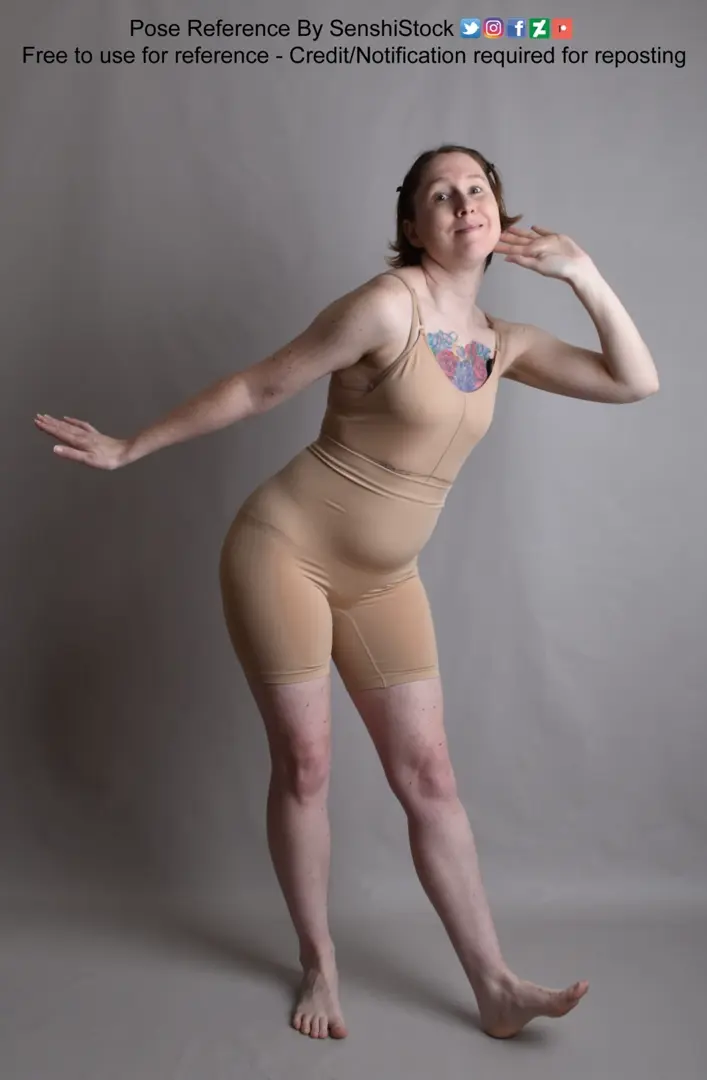
If character drawing relies on understanding shapes, drawing poses requires highlighting movement. To do this, the main construction lines will be the action lines. These lines describe the body's movement and will serve as our basis for drawing. Take this pose for example, obtained from the AdorkaStock website:
DRAWING A POSE STEP BY STEP
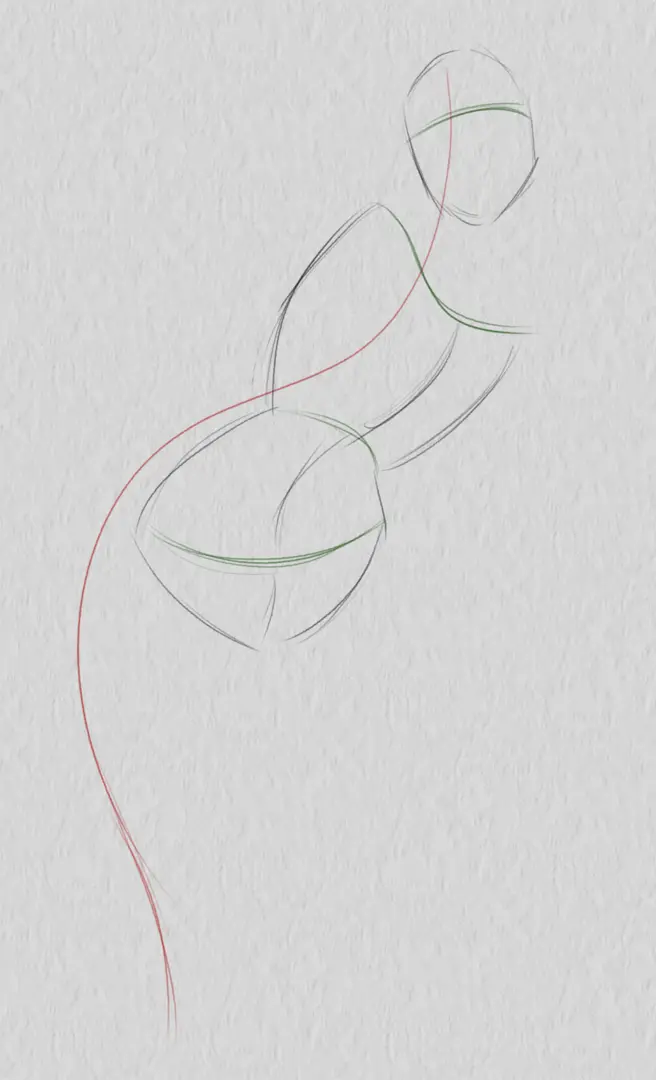
We will look for a line that can summarize the overall movement of the model. This line is generally long and runs through the body: it's the main action line. You will surely see several in the same pose, but you must choose only one. It will be the main axis for the rest of our construction. I will take this one:
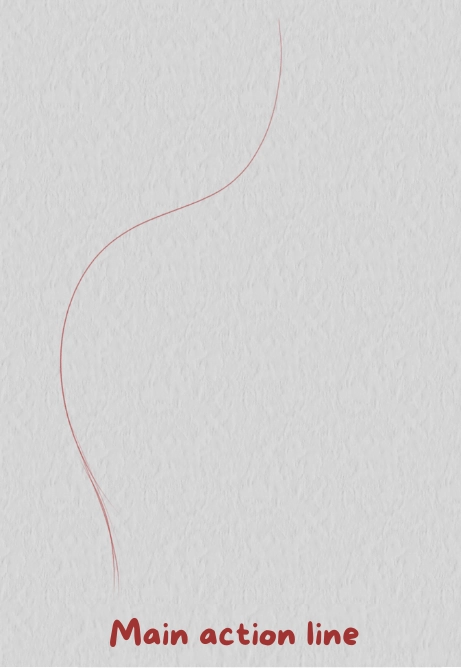
You will notice that my main line of action is more linear than the model's pose. When drawing poses, it is important to look for exaggeration to find dynamism. My line is also curved. Action lines are often drawn curved, in the shape of a C or S, to encourage movement. Beware of lines that are too straight, as they will make your drawing static!
STRUCTURE YOUR DRAWING
Now that our main movement has been described, we will add structural markers to draw our large volumes: the torso and the head. These markers are the horizontal lines of the body. There are four of them: the curves, the shoulders, the waist and the hips. As for the action lines, we will position them curved to maintain dynamism. This will also indicate the orientation of our large blocks.
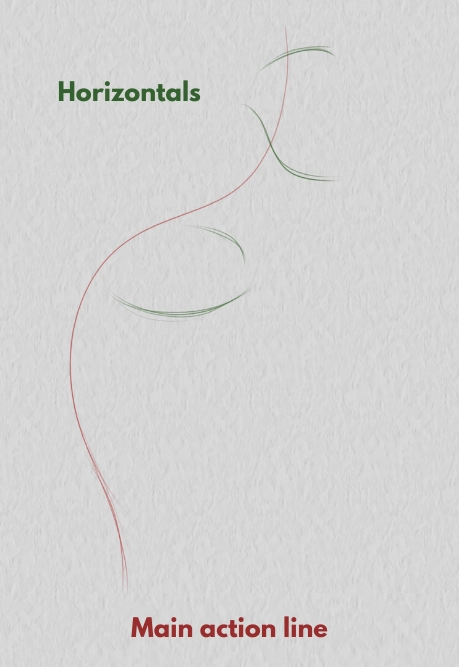
Once the horizontal lines are in place, I then draw the head and torso around them.
ADDING SECONDARY ACTION LINES
The main structure is finished, but our character is still missing limbs. To solve this problem, I will add action lines that describe the movement of the limbs: secondary action lines. These can follow the direction of the main line of action or cross it. The same curvature rules apply, which means that I will try to minimise straight lines as much as possible, even if it means curving some areas slightly.
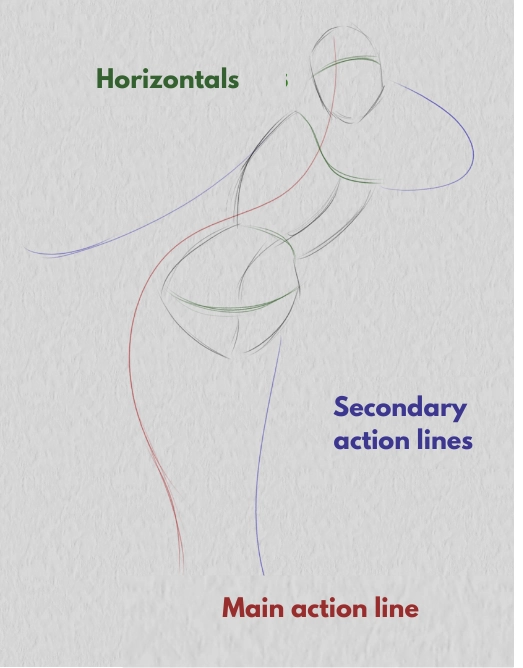
Secondary action lines are shorter and a bit less bold than the main action line, but remember to still keep them dynamic.
DRAWING THE SILHOUETTE
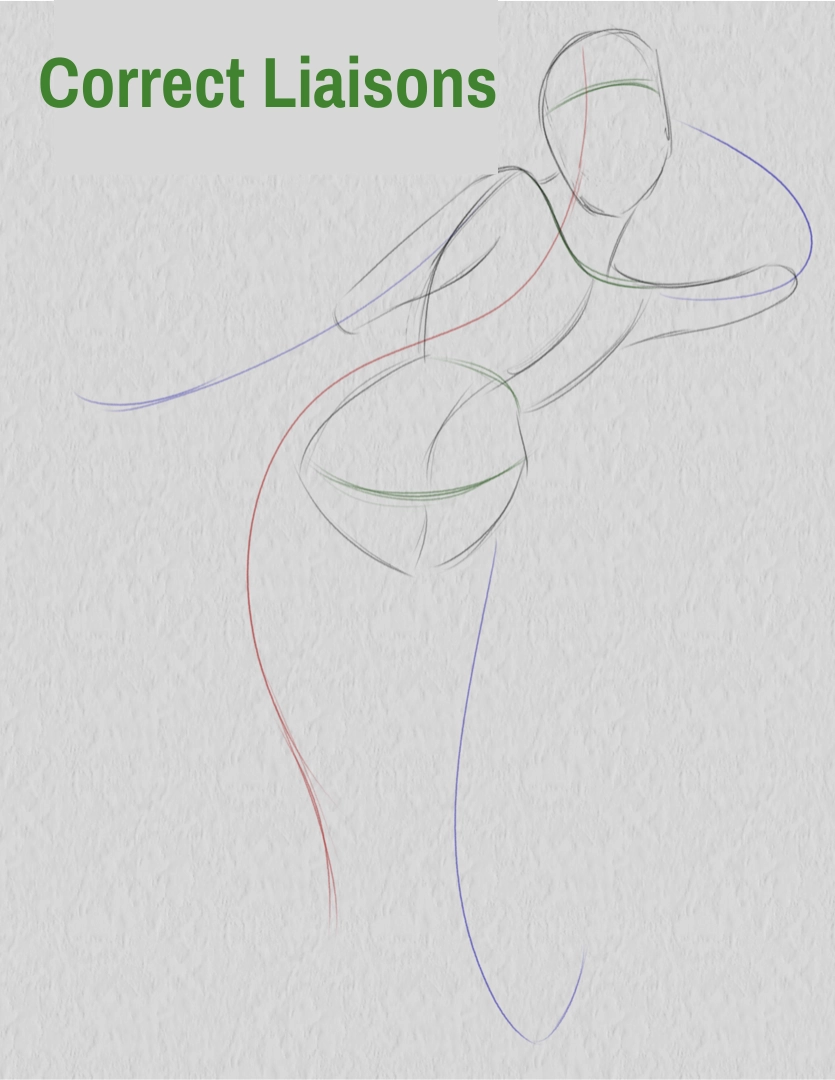
I will use the secondary action lines as a guide for drawing limbs. With regard to the shape of the limbs, I will always prefer curves to straight lines, but I will also pay attention to refining my character's silhouette: the goal is to avoid "jerks" in the silhouette and to favour long lines that can connect several parts of the body at the same time: this is called creating connections.

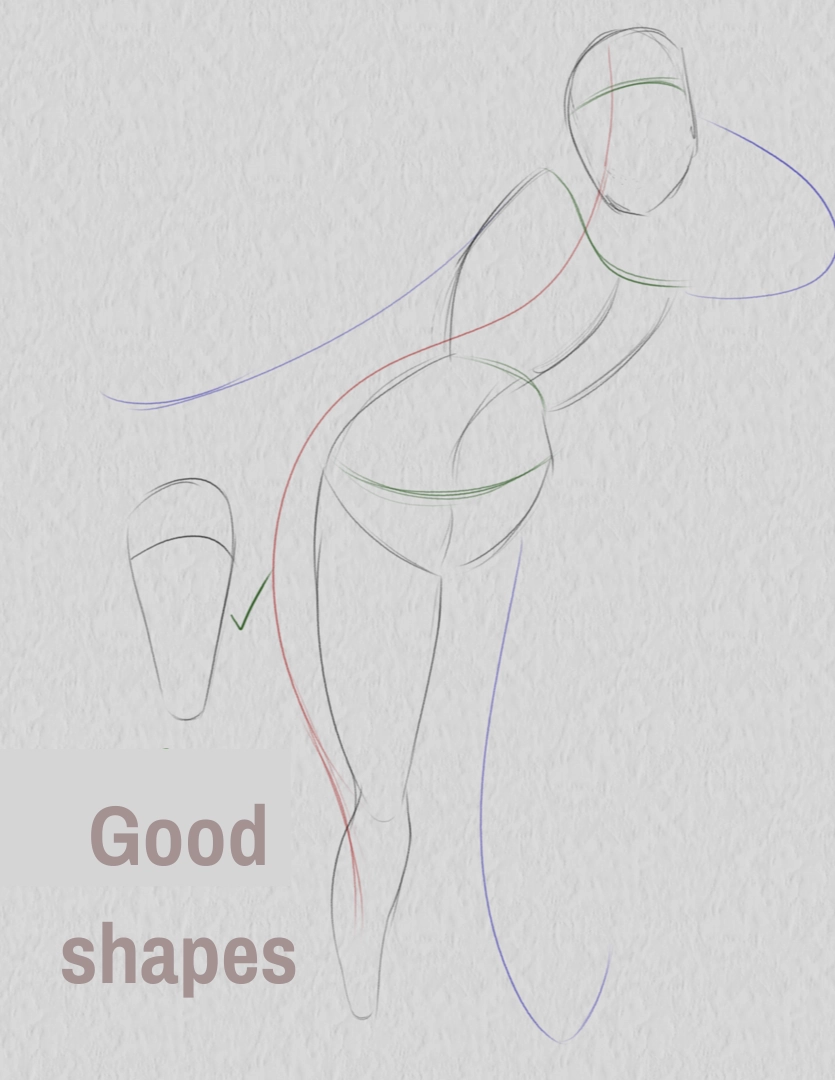
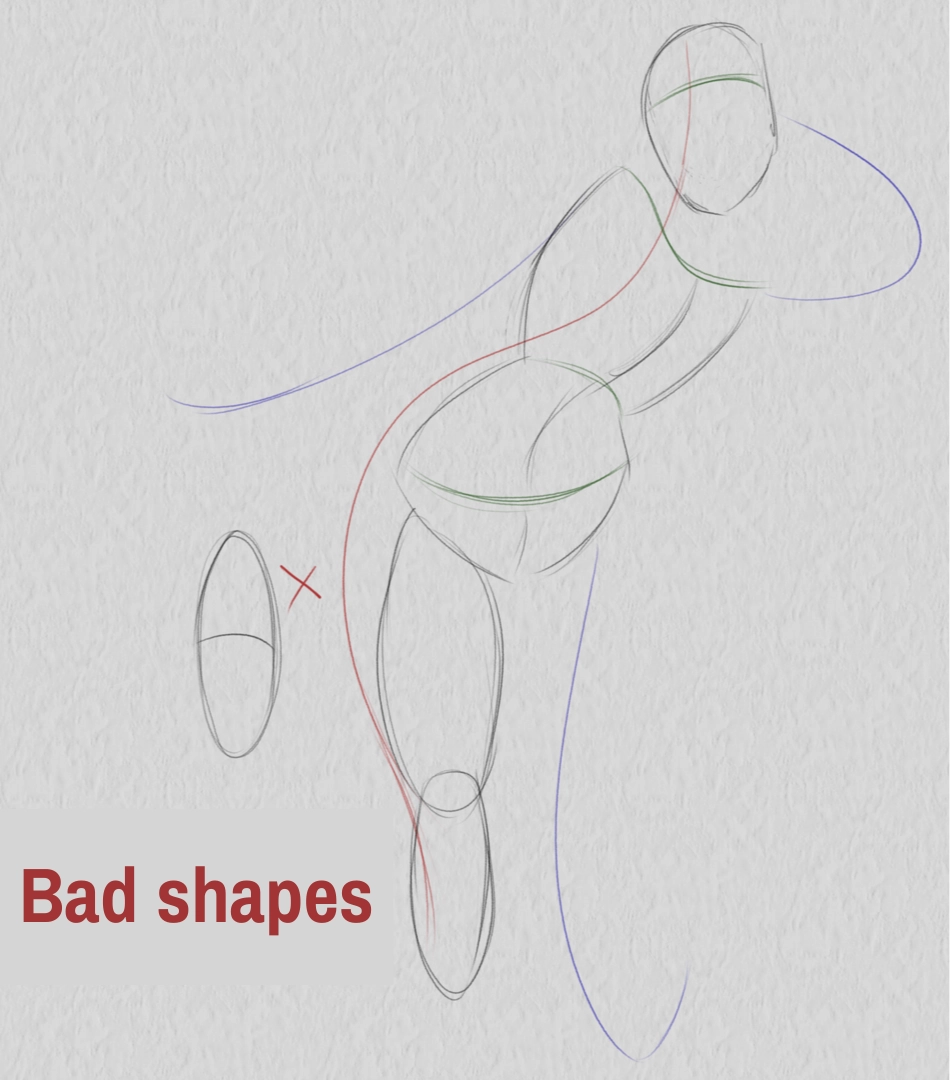
To maintain a legible movement, I also pay attention to the shape of the limbs. Indeed, it is tempting to represent the limbs as cylinders or ellipses, but these shapes only give the direction of movement, not its meaning. Therefore, I will use a more asymmetrical shape, which will be wider at the large joint and thinner at the small joint. In this way, both the direction and the meaning of the movement are preserved.
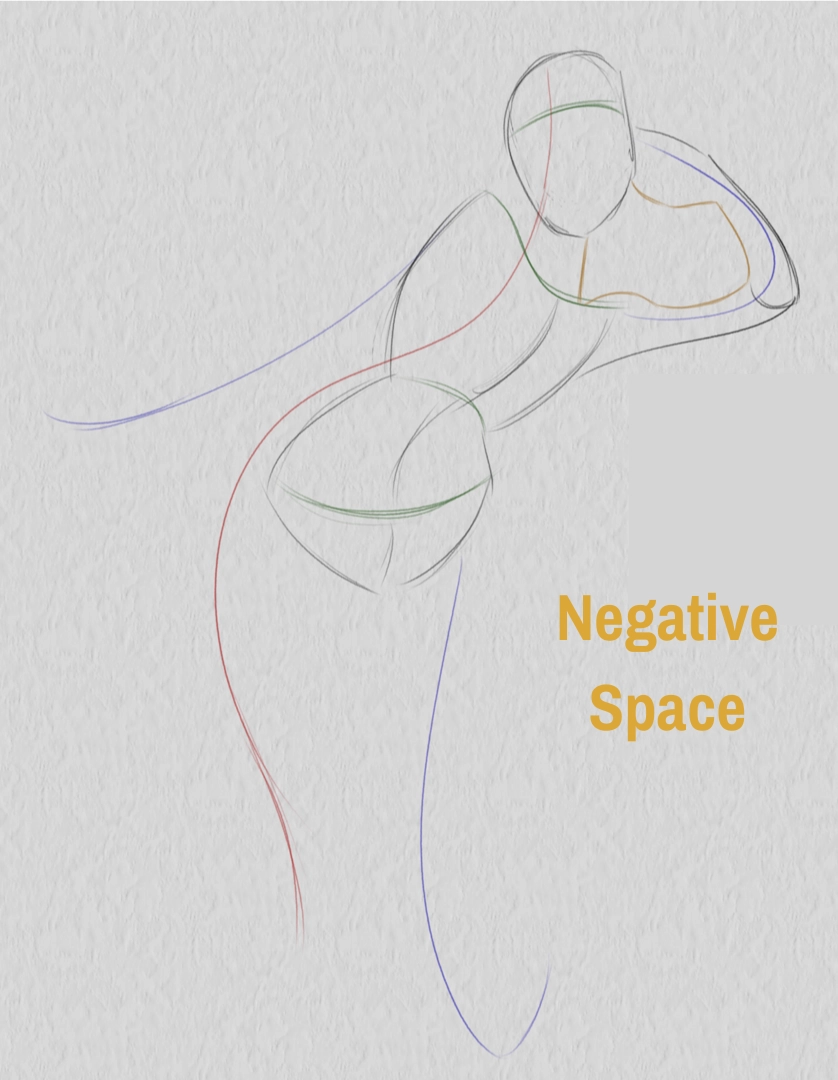
Some poses sometimes display spaces within the silhouette. These are negative spaces. It is often practical to draw them before the limbs to facilitate their placement. This is a very useful tool for easily positioning limbs that are resting on one another.
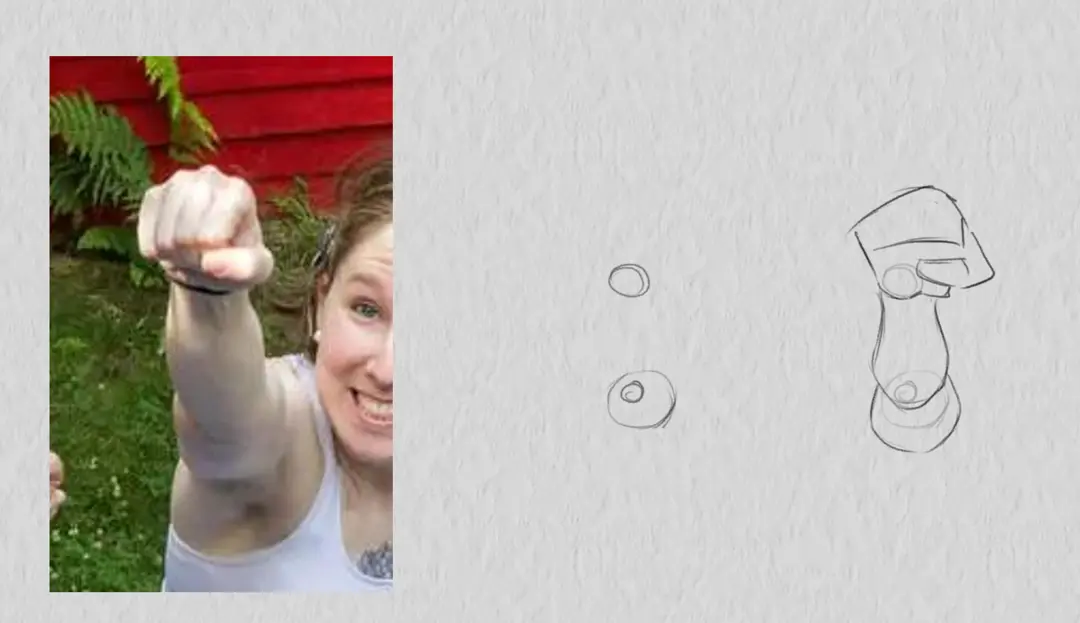
Another fairly practical technique for positioning the limbs is to first draw the joints and then the limbs. It's a very useful tip for easily managing shortcuts.
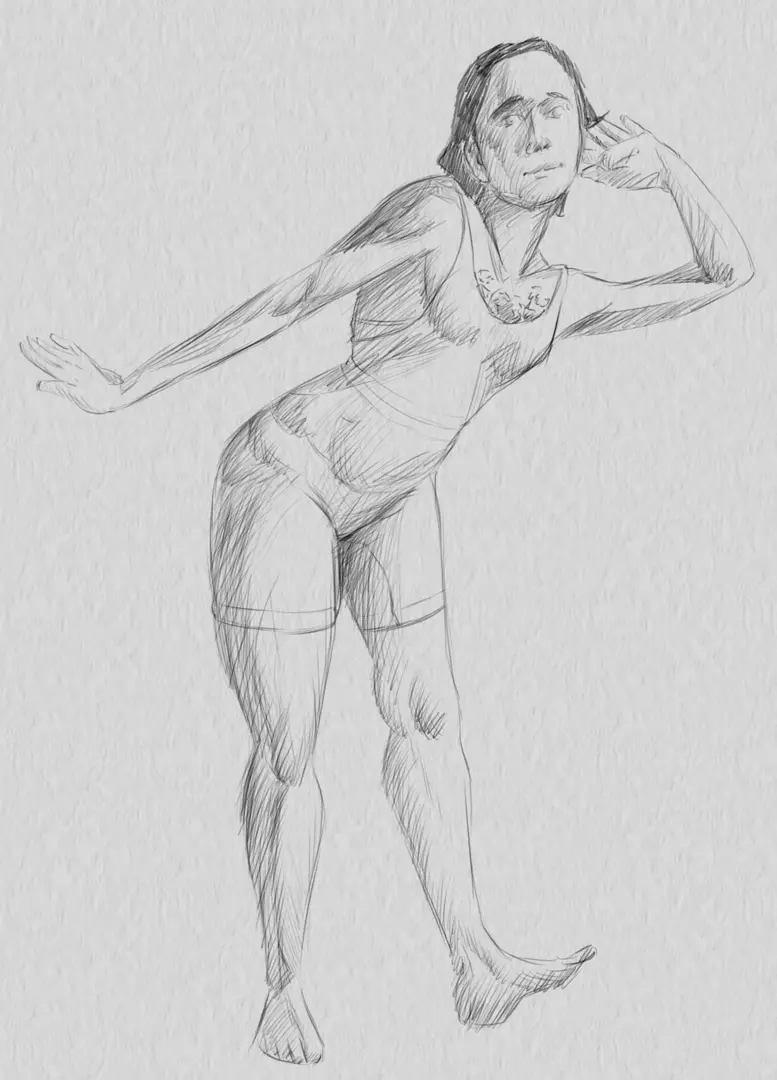
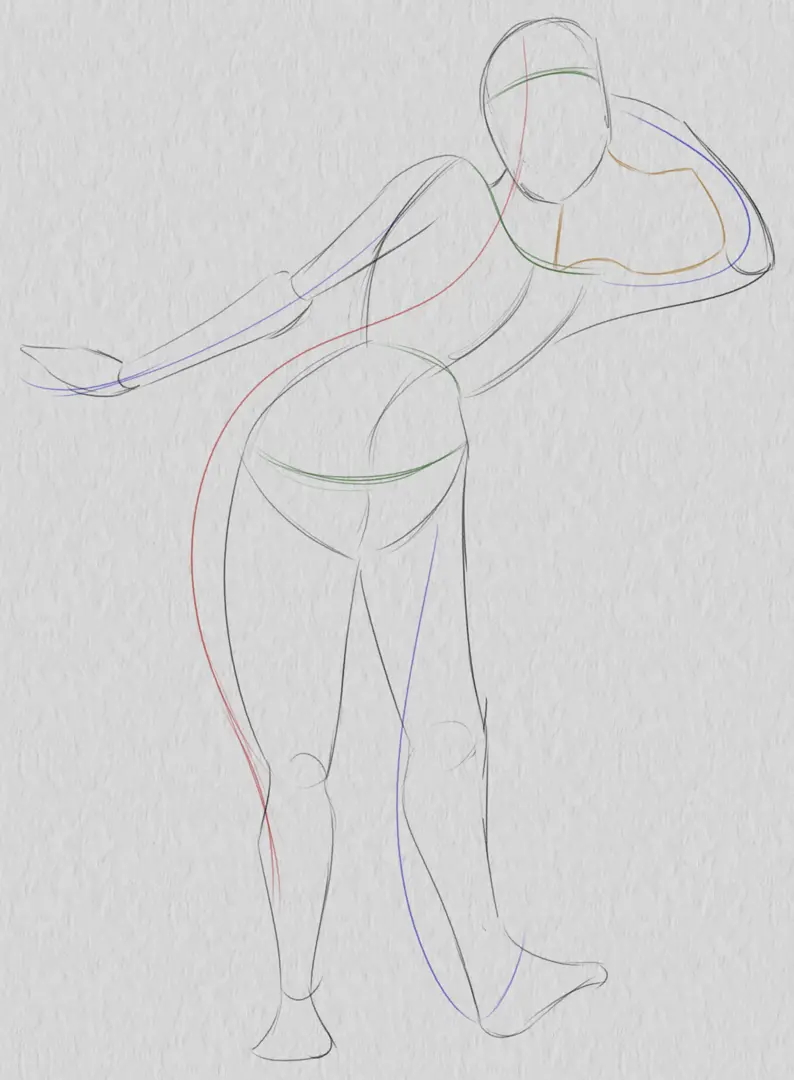
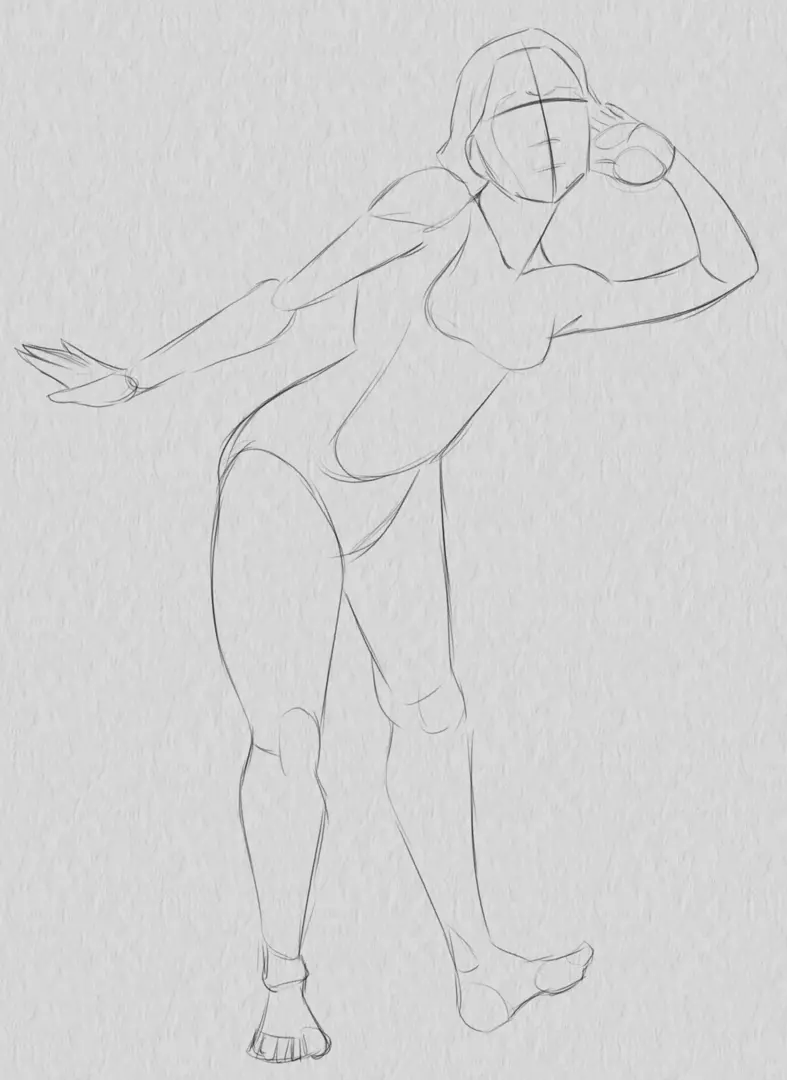
Our silhouette is now complete! We can move on to the details.
SCULPTING THE POSE
Now you can add the desired level of detail to the pose. Here I add some construction lines that will help me add more detail to my character. I will not elaborate on this part as it is not the focus of this tutorial, however here is how my construction lines look:
I will also add shadows to give depth to my pose. I am obviously basing this on the model to define my main shadow areas.
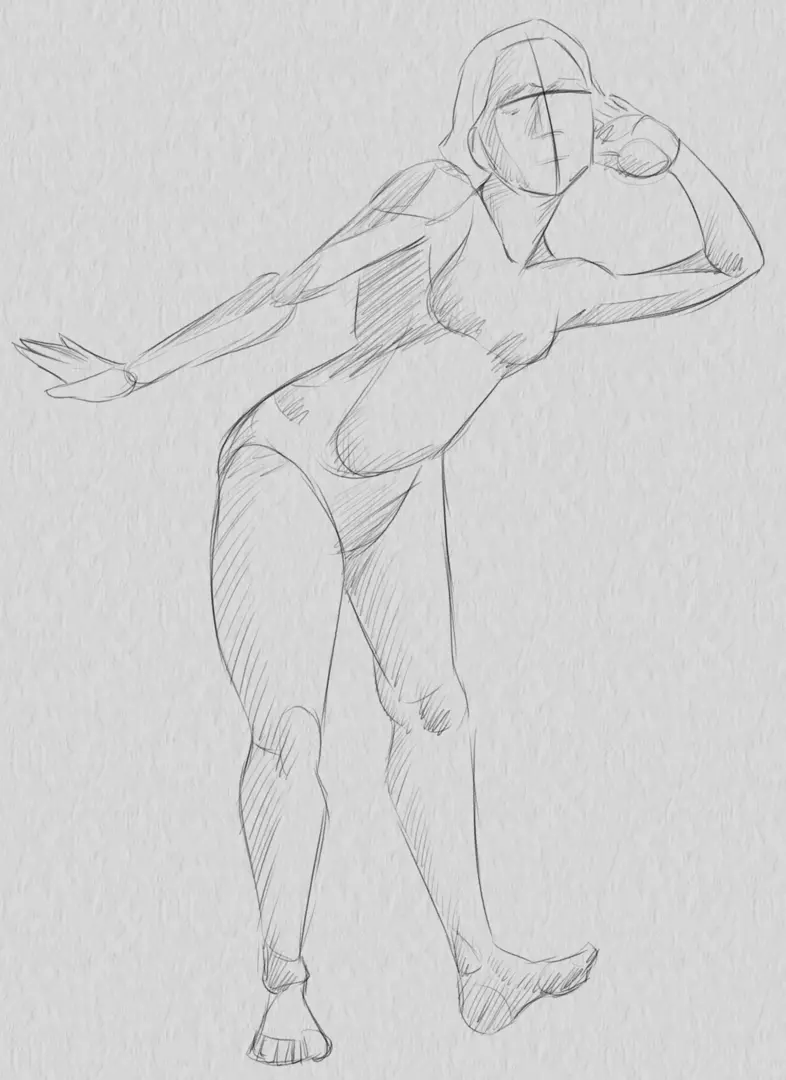
And finally, I will refine my shadows for more accuracy with the reference photo, add details, etc...

You now have all the tools to draw dynamic poses! In this tutorial I have tried to stick as closely as possible to the model, but feel free to draw the character of your choice in the pose you have extracted from the model. It is up to you to make these poses your style!
Discussion
Very good advice, forcing myself to make curved lines in a single stroke allows me to concentrate and prevents my essential tremors from disrupting the drawing. However, I also place a vertical line to ensure the pose is stable.