How to Draw The Snow
Hello everyone, snow is a very important element when you want to create a drawing that represents winter or a very cold place, but drawing snow can sometimes seem like a challenge. In fact, how do you draw white on white? Today, I propose to show you how to draw snow correctly.
Prepare your pencils, your paper or your tablet, and most importantly, your creativity! Let's go!
OBSERVE THE SNOW
And yes! To draw it correctly, we will start by looking at it. In our imagination, as soon as we think of snow, we think of white, but if we look at the different pictures below, well, snow is not so white. This is the first point to remember. Actually, if we want to go into detail, yes, technically snow is white, but it reflects the light and colour of the environment, a bit like water is blue because it reflects the sky.
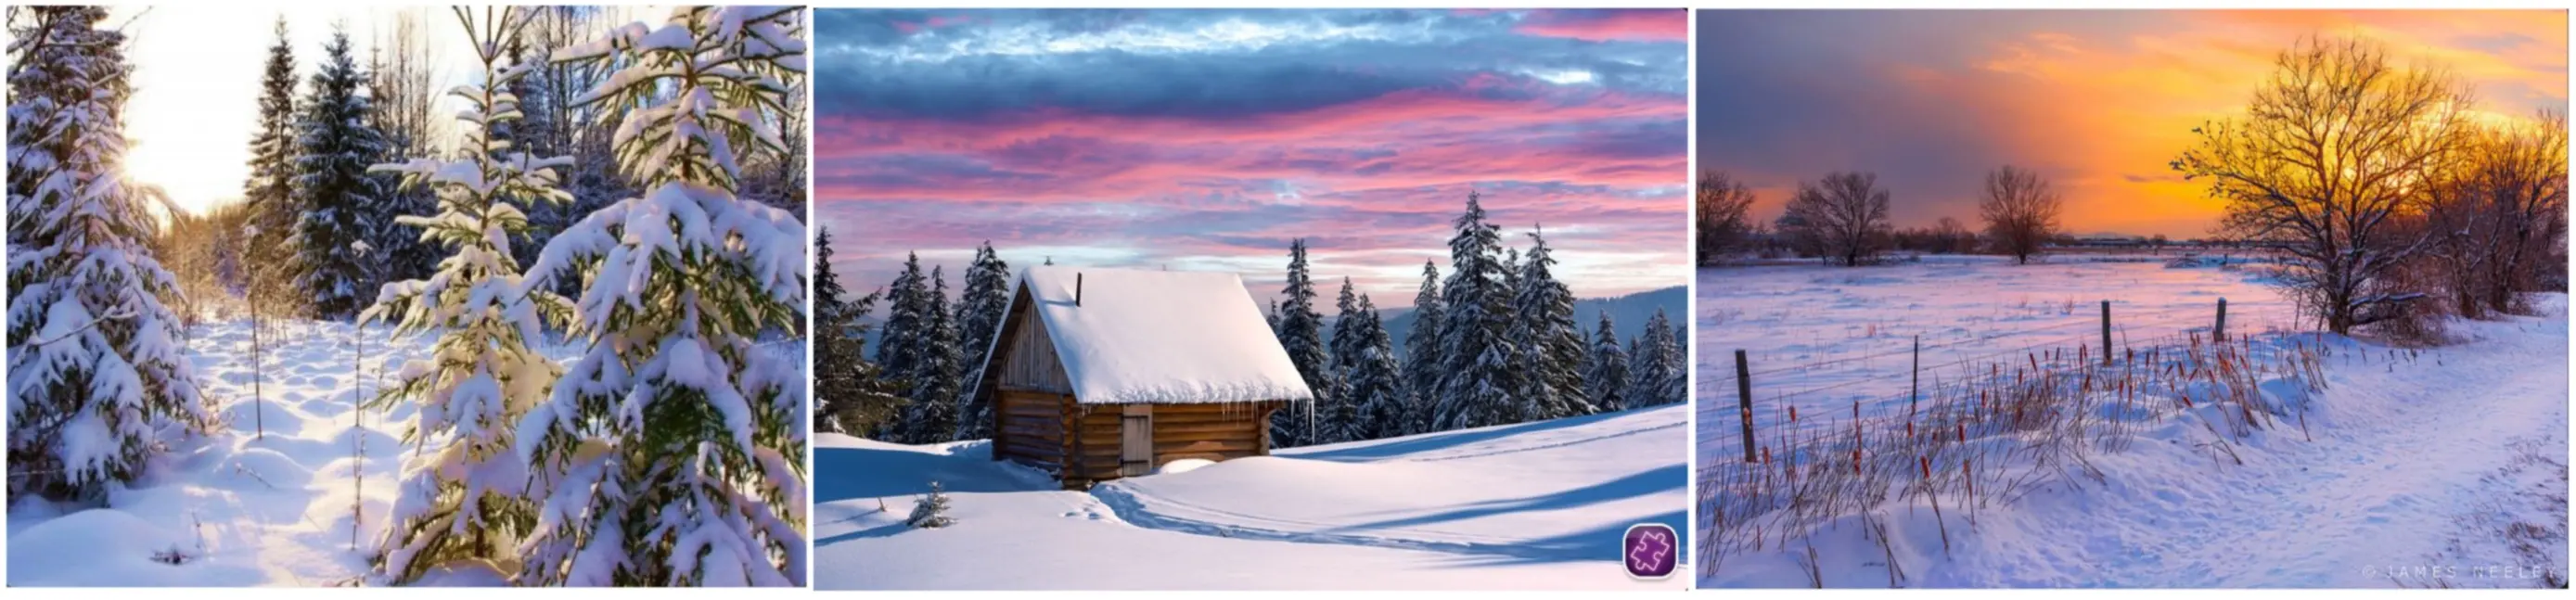
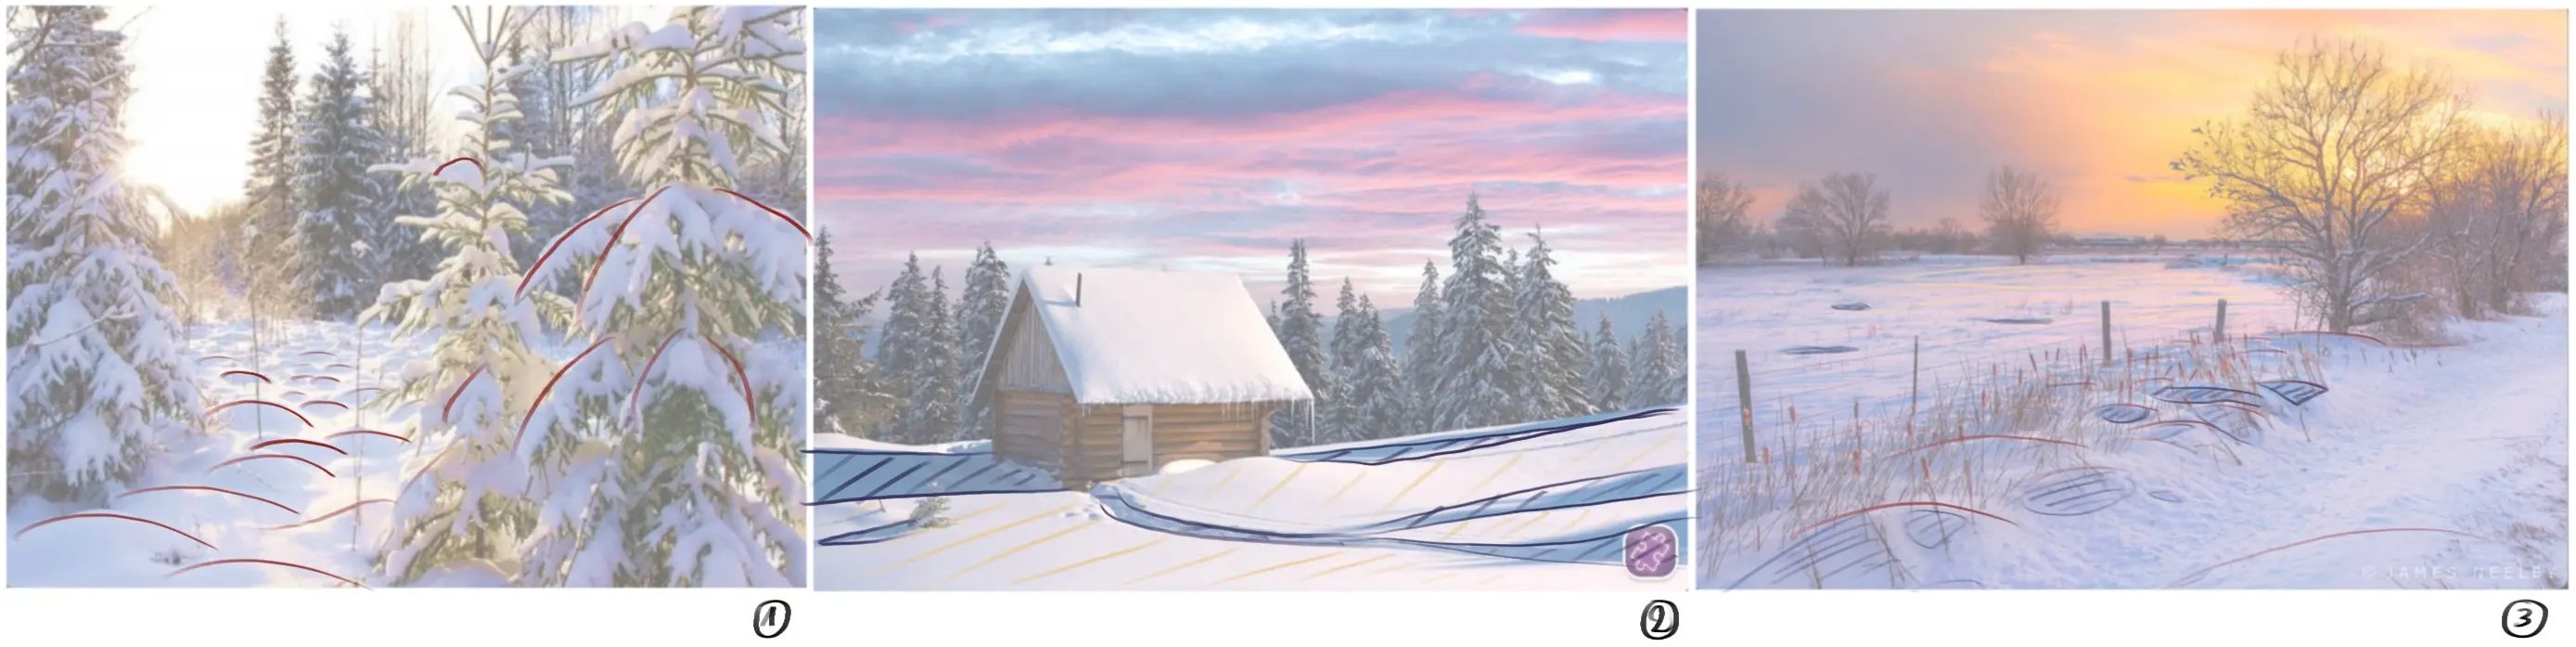
To further our observation, we can also note that snow almost always creates rounded shapes (highlighted in red in the photos), which is due to its volume. In our drawings, it will therefore be important to create well-rounded shapes to represent snow.
Finally, we also note that snow reflects light very well (in yellow) and consequently the shadows are well defined and precise (in blue)
To successfully draw snow, we must pay attention to its colour, volume, shadow and light.
WHITE AS SNOW?
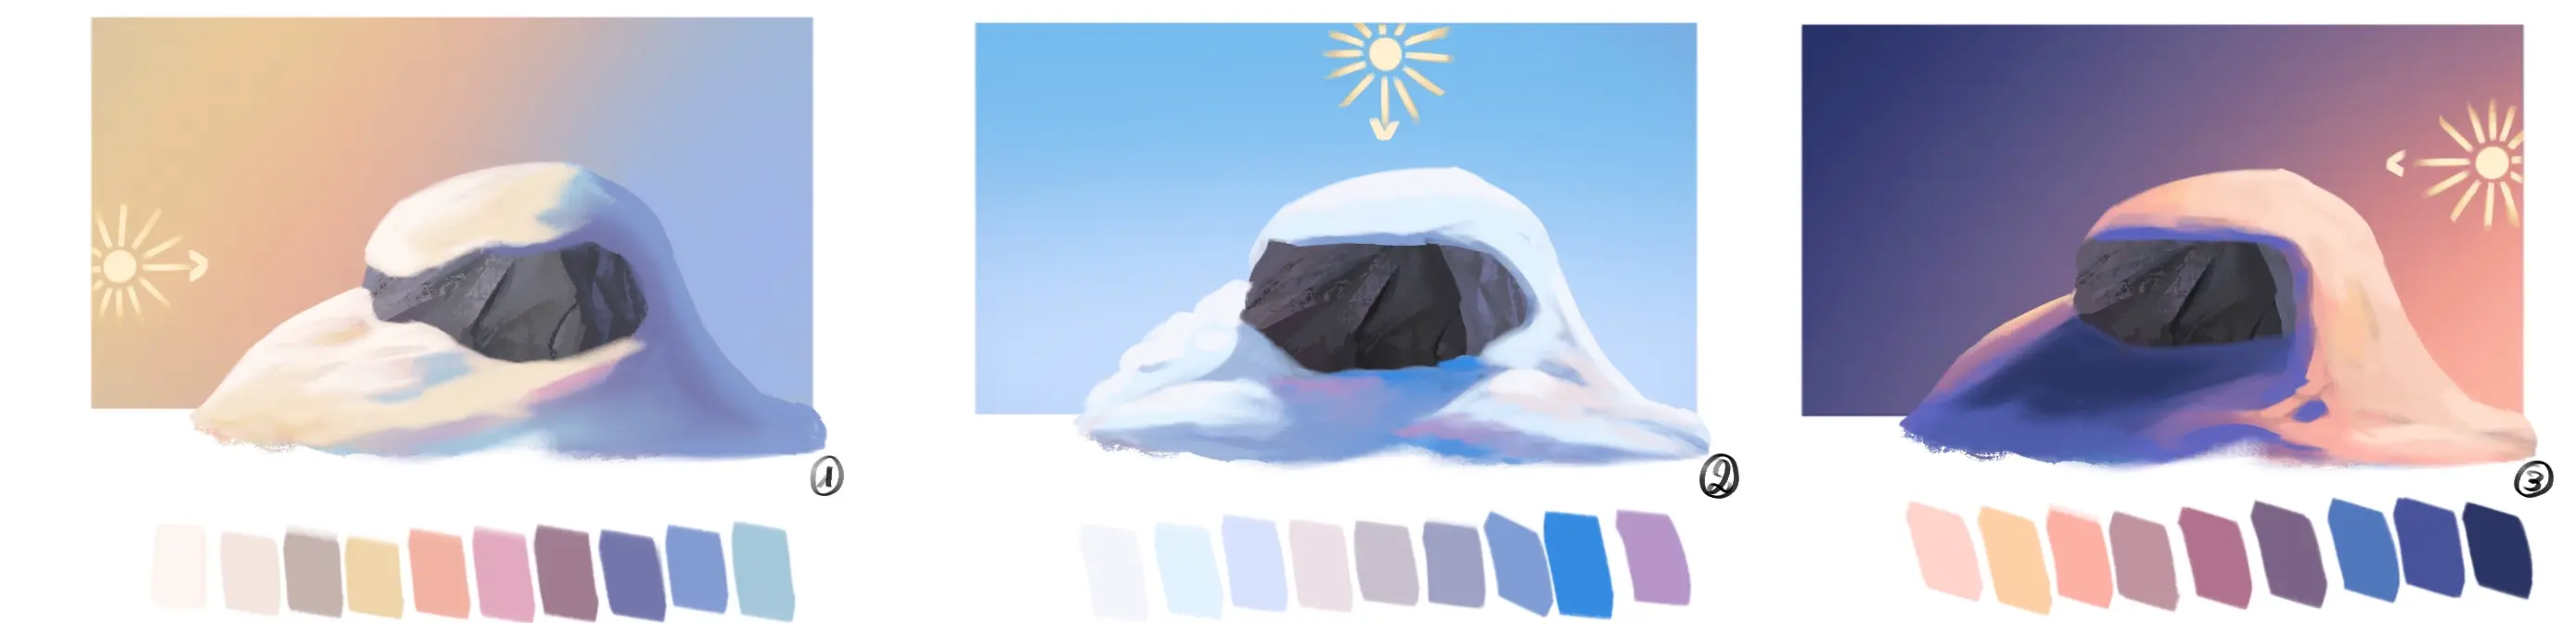
To properly understand the different colours used when drawing snow, you can look at how other illustrators represent it and analyze the colour palette they use.
When we look at these illustrations, we immediately understand that it's snow, yet no white has been used. The lightest colours are blue or yellow. For the darkest colours, there is also blue or purple.
Looking at the different colours, one essential element stands out: the colours used are reminiscent of the sky. If the sky is blue, the tones will be blue; if there is a golden light with a blue sky, the snow will have shades of yellow; if it is dusk, the snow will have shades of orange, pink, purple and light blue...
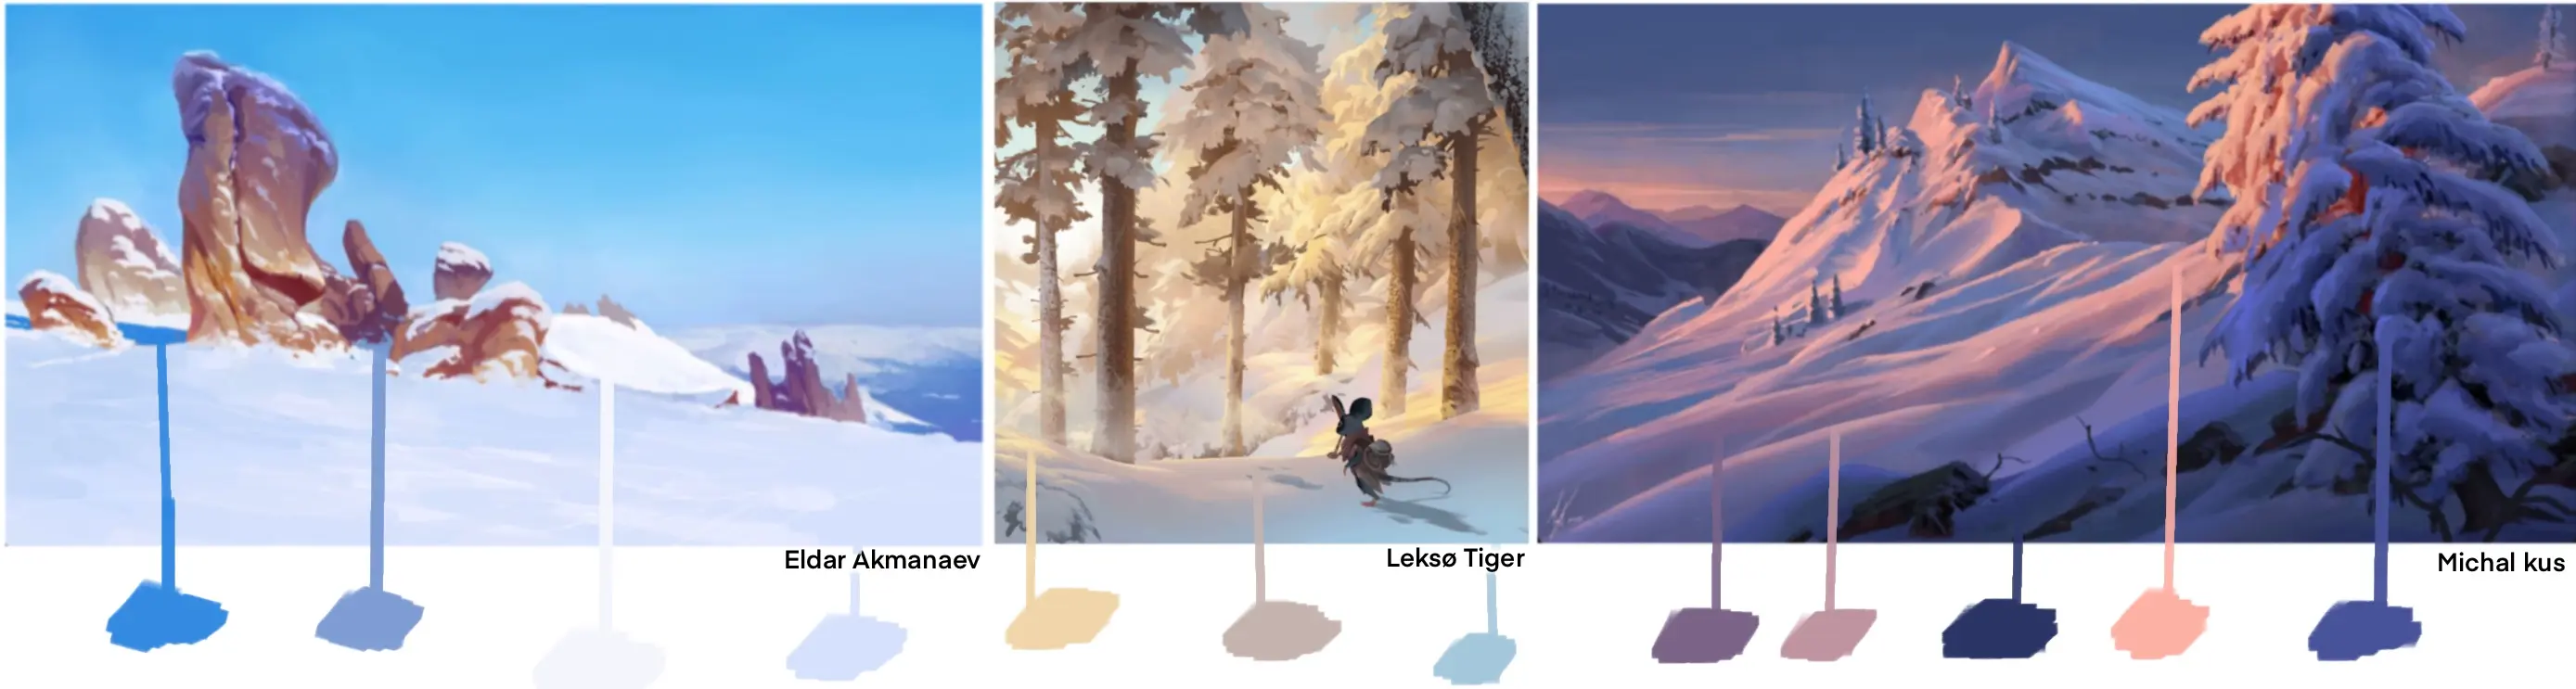
To successfully achieve our snow drawing, it will therefore be important to carefully consider our sky and the overall atmosphere of the illustration.
To give you an idea, here are the ranges of colours that can be found depending on whether it is dawn (1), daytime (2), or dusk (3)
If you observe closely, the colours for dawn and dusk are quite similar, except that those of dusk are more saturated and a bit darker.
HOW TO DRAW THE VOLUME OF SNOW
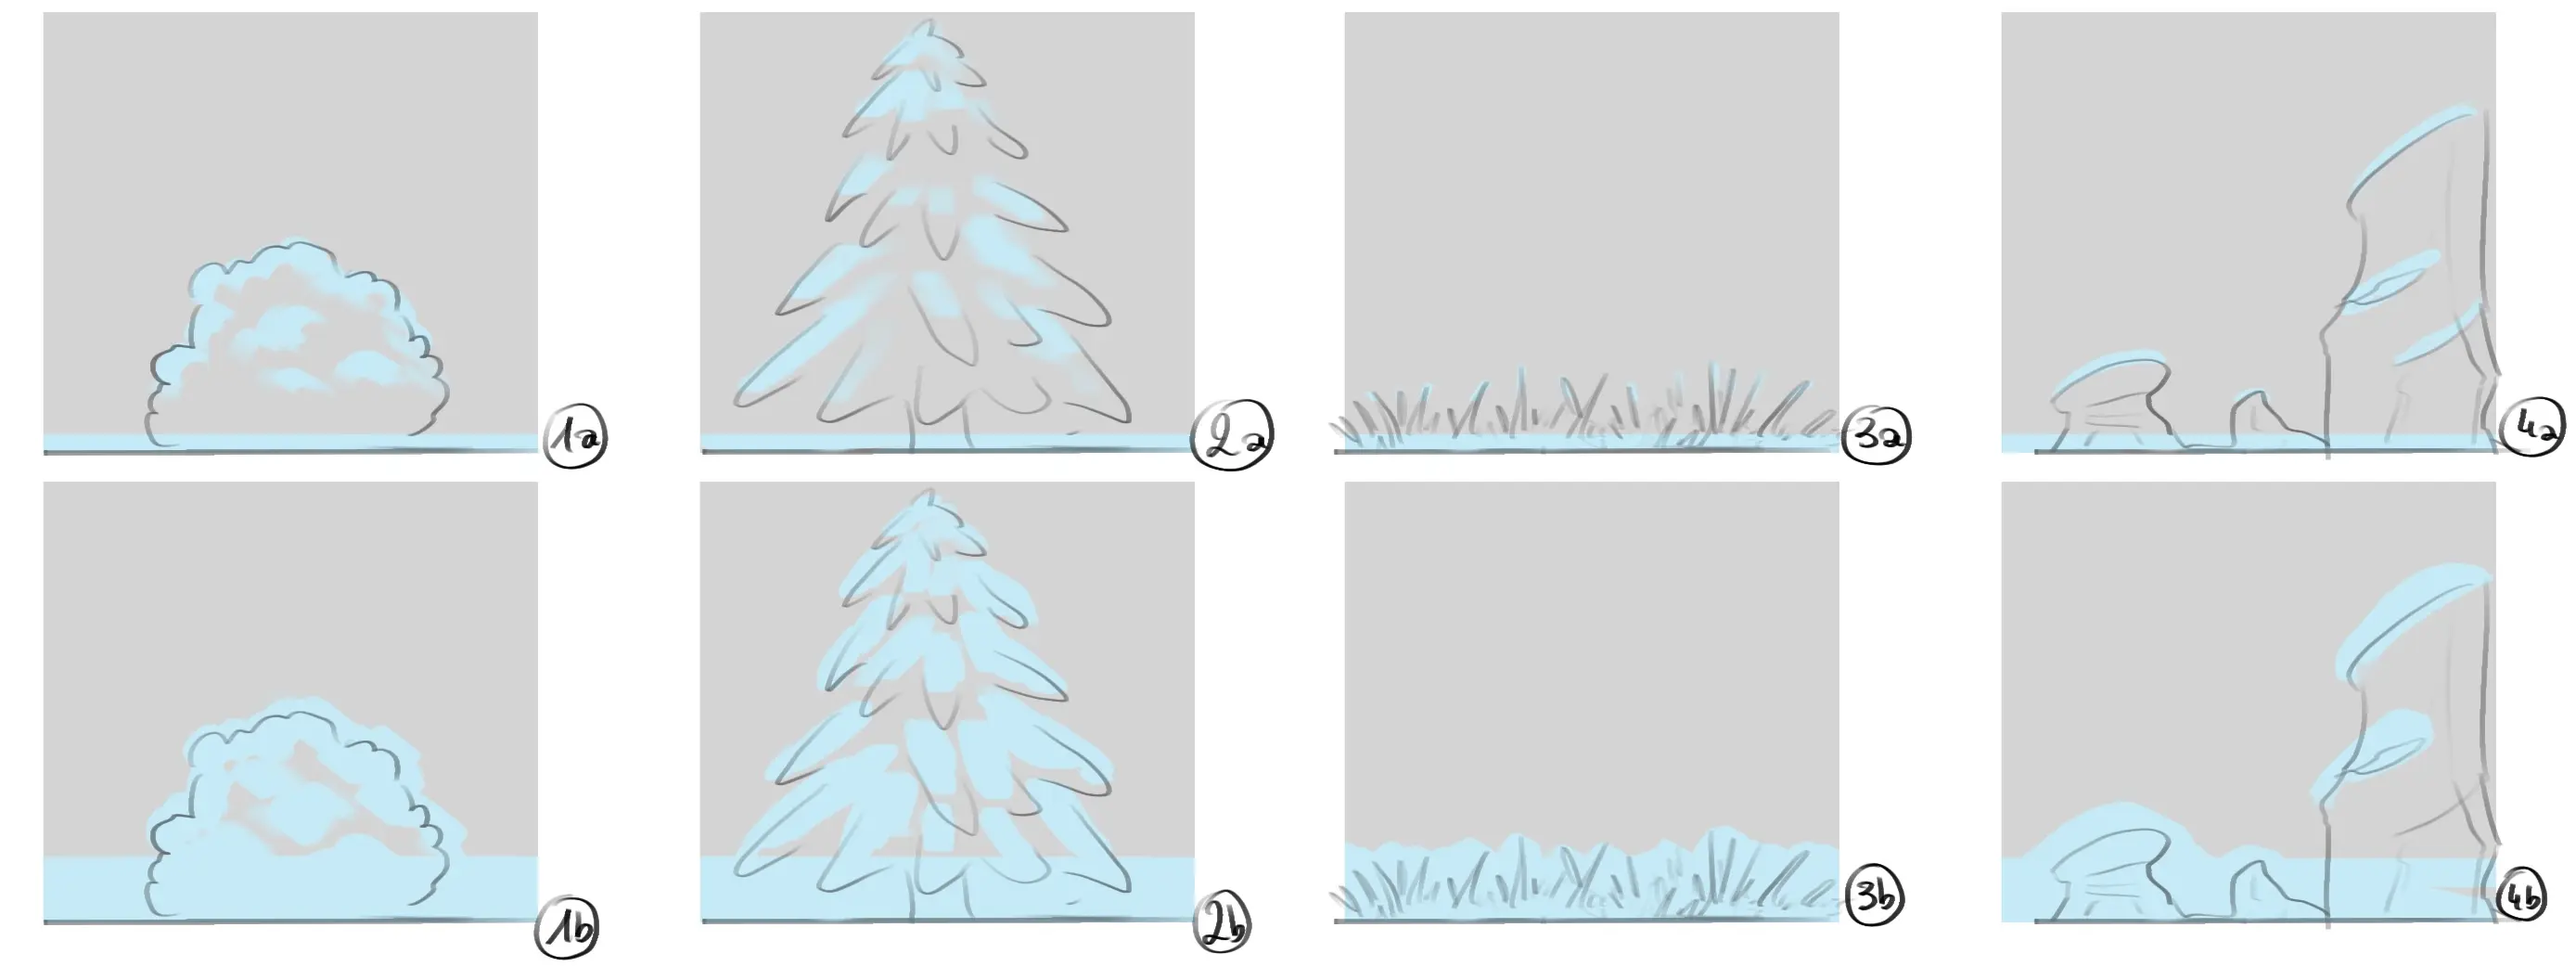
Understanding the volume of snow is quite easy. All you have to do is imagine an element (like the rocks below) and then imagine how much snow has fallen. The more it has snowed, the greater the volume of snow will be and it will cover that element.
Part of the snow will fall on the ground and another part on the flat or hollow surfaces of the various terrains.
The only areas where the snow does not settle are those that are very steep.

Furthermore, it can be observed that snow, falling evenly, sticks to different elements and always creates rounded surfaces (as in the case of grass (3a/3b) or stone (4a/4b).
Regarding plants, snow will cling to some of their branches and leaves but not entirely (due to mass, angles...) until there has been enough snowfall to cover them completely, the tree/bush will always have parts with no visible snow.
DRAWING A SNOWY LANDSCAPE STEP BY STEP
We've just gone through the theory, so I suggest we create a snowy landscape step by step to see how to apply it. I chose to create a landscape with just mountains and trees so it's easy for you to make, even if you're a beginner.
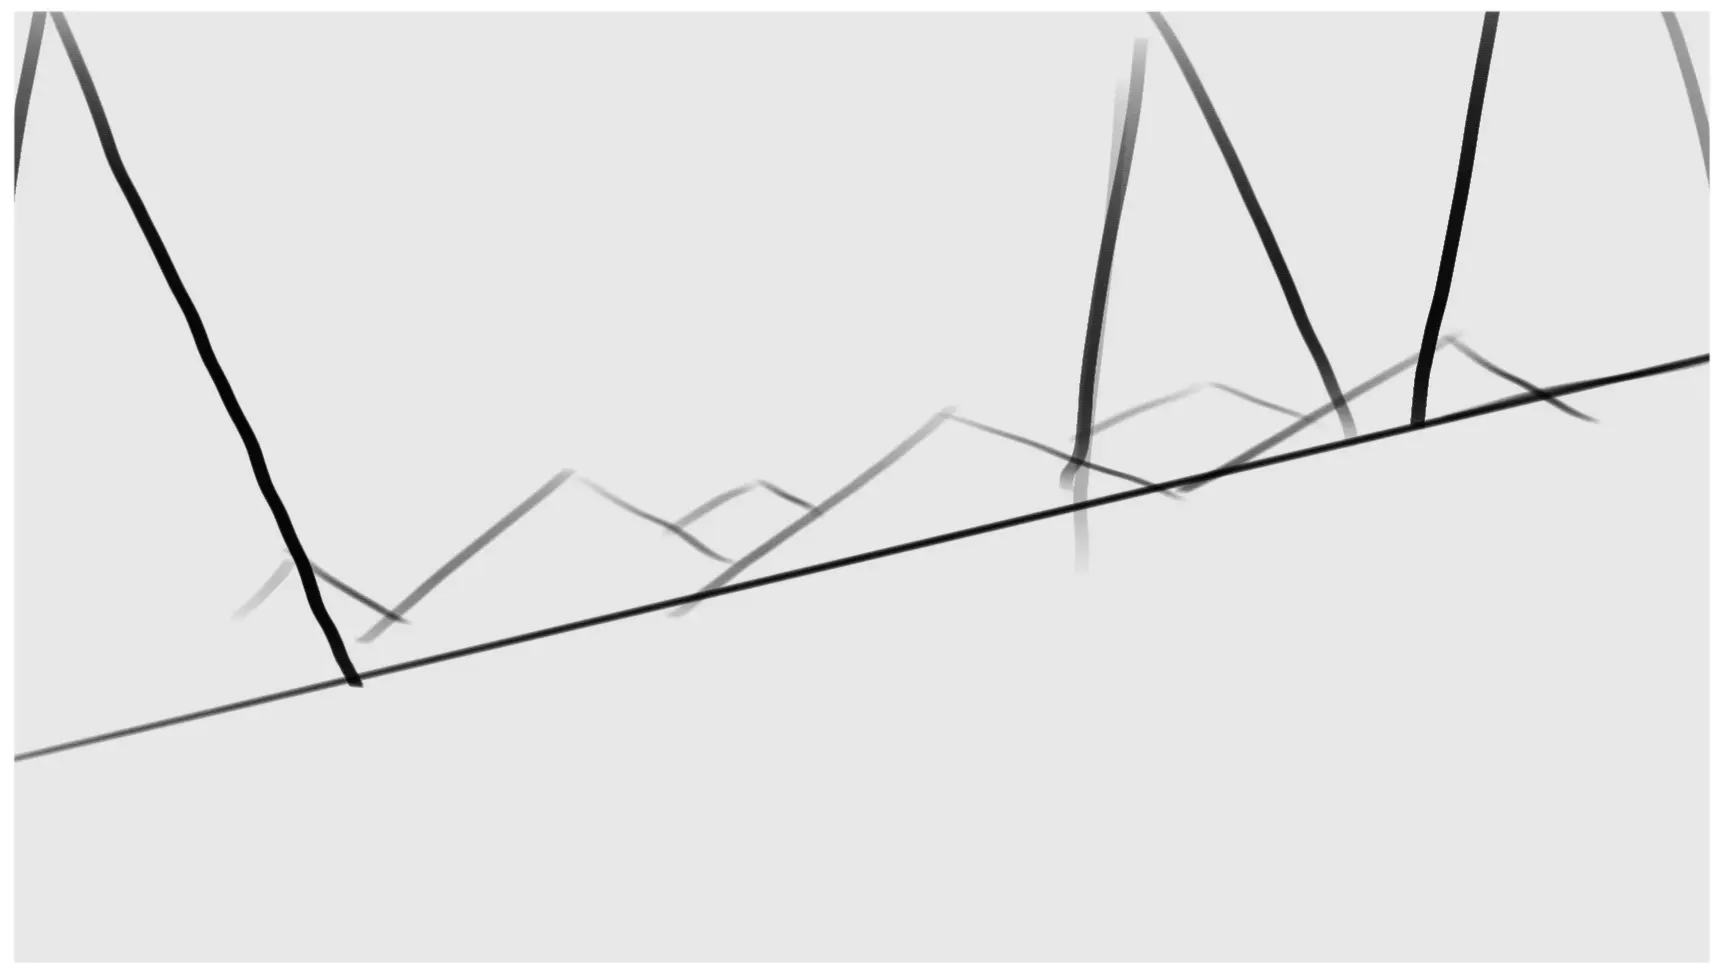
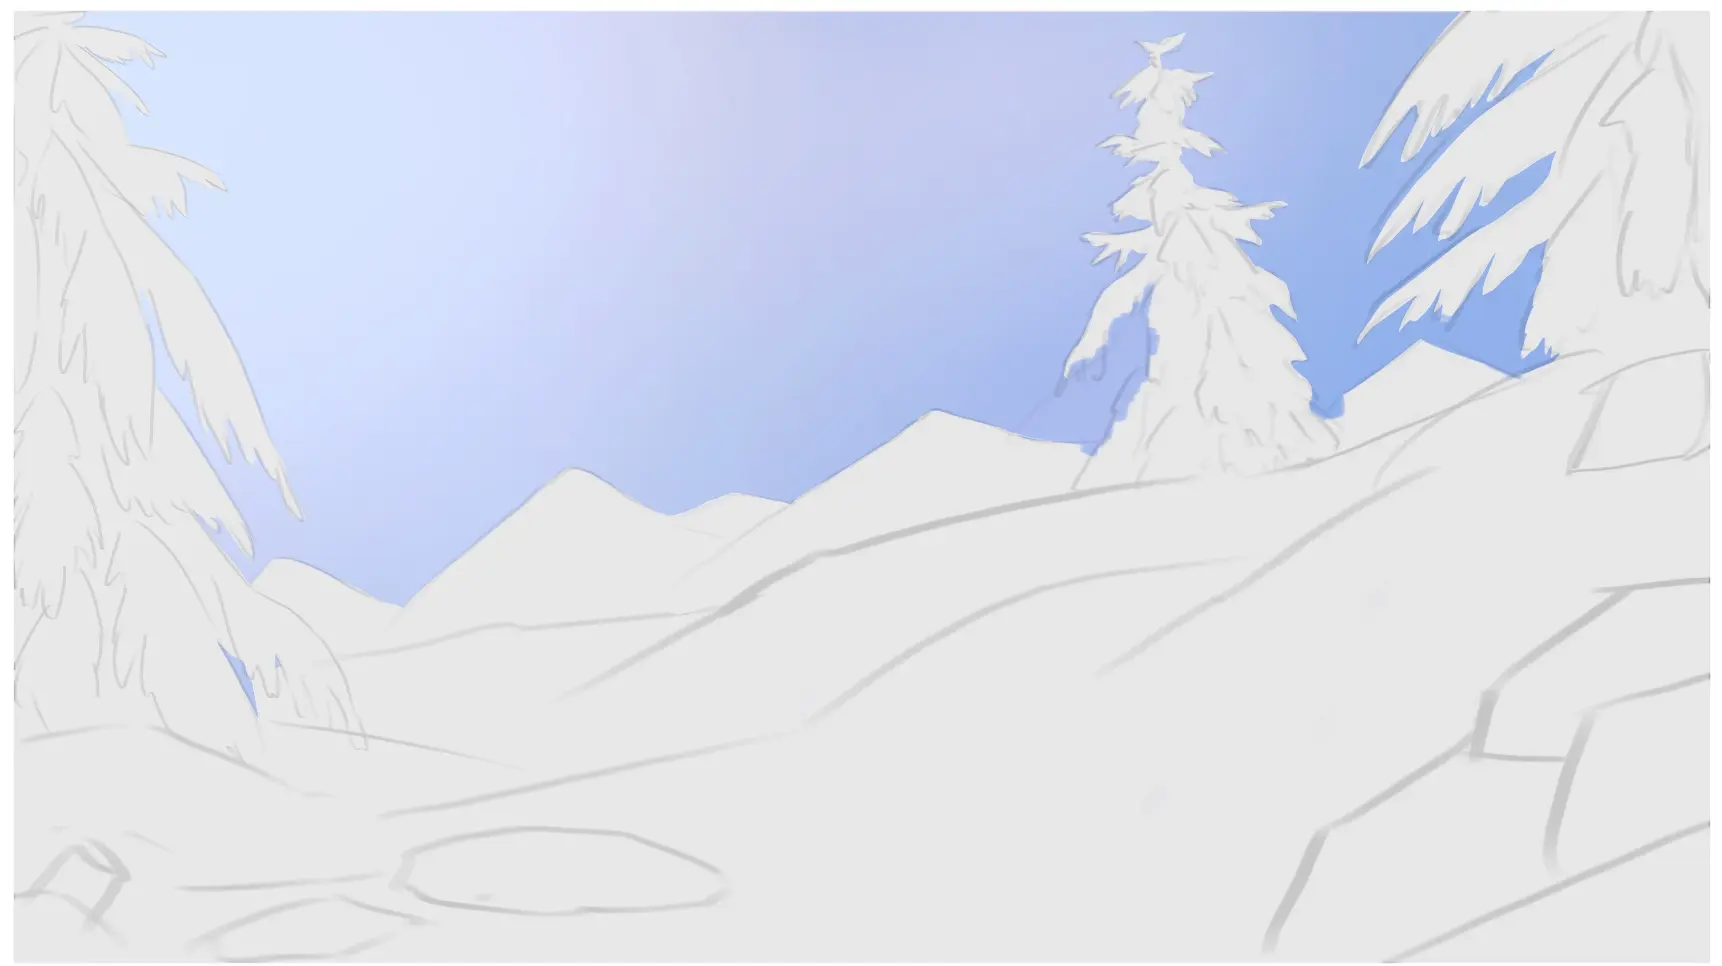
I start by drawing a very simplified sketch: the vertical line represents the snowy area, the triangles in the foreground represent trees and those in the background represent mountains.
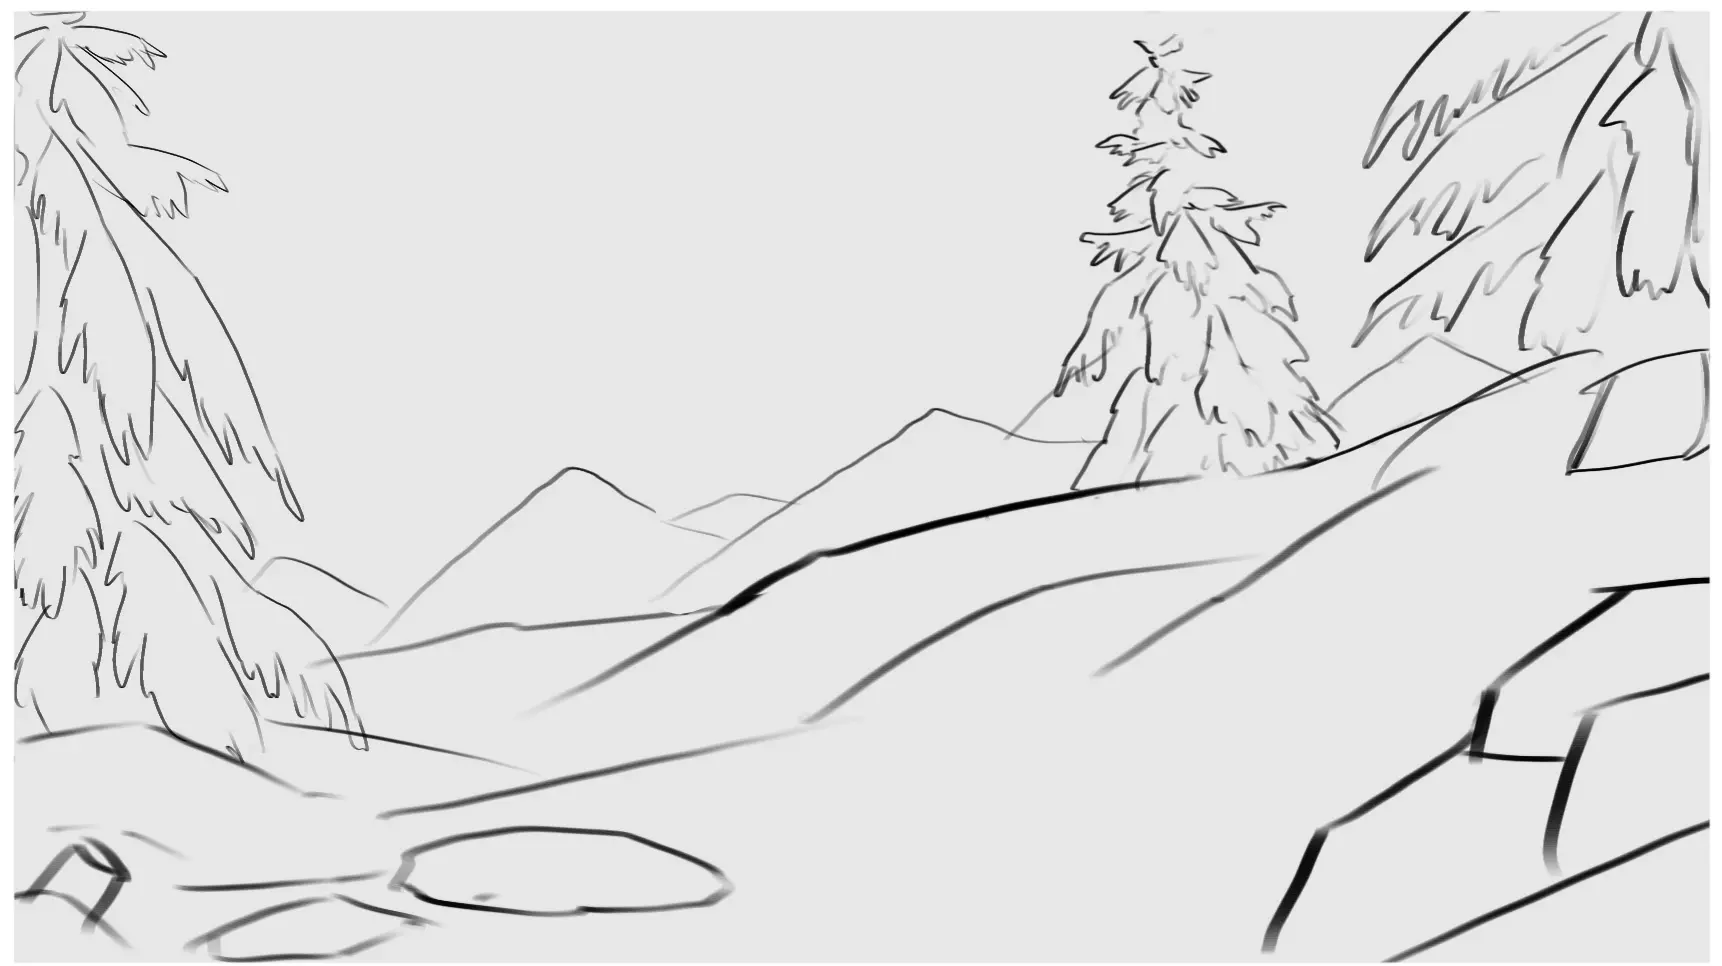
I add some details to my sketch, putting in many small rounded protuberances to symbolise the volume of the snow (and thus possibly the presence of rocks or something underneath). For the trees, I draw fairly simple branches, creating a curve on the outer side and small points on the opposite side.
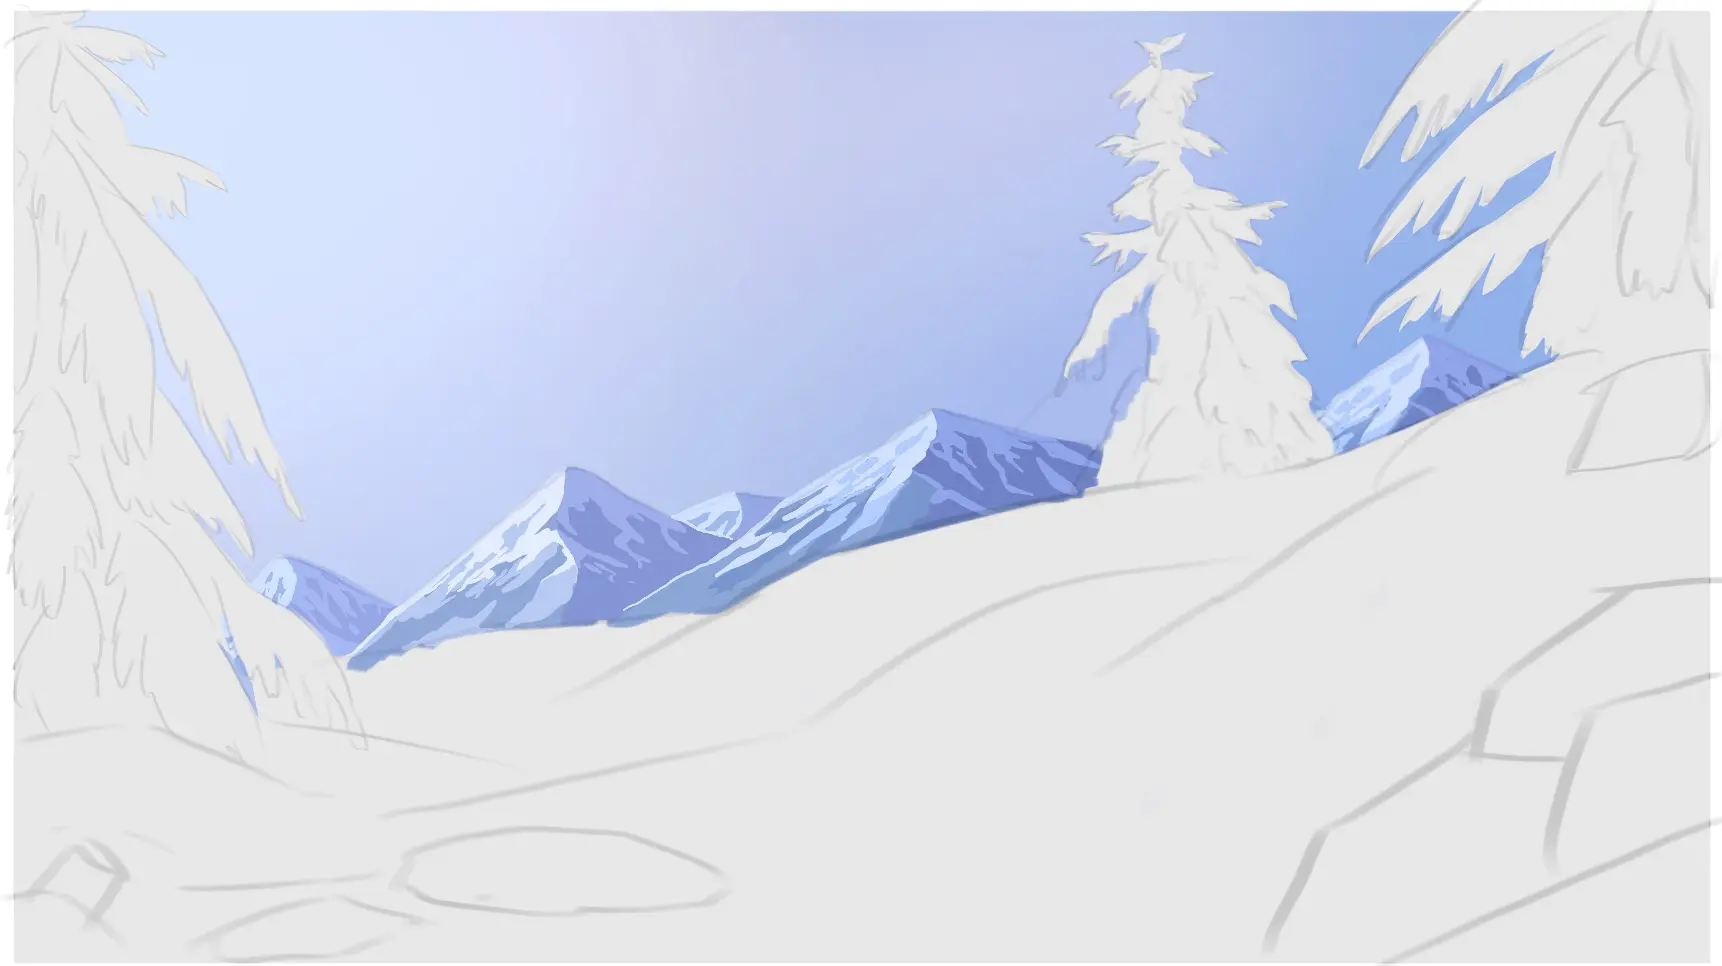
I blur my sketch a little and start drawing the sky. To make it easier, I chose a blue sky. Therefore, I create a gradient in the sky with different blues to symbolise the sun.
When I colour the mountains, I only use shades of blue. I start by dividing them in two to show one side lit by the sun and the other not. I use light shades of blue to symbolise the snow and darker shades of blue to symbolise the mountains. The areas of snow do not have to be very precise, they look more like patches at the top than at the sides.
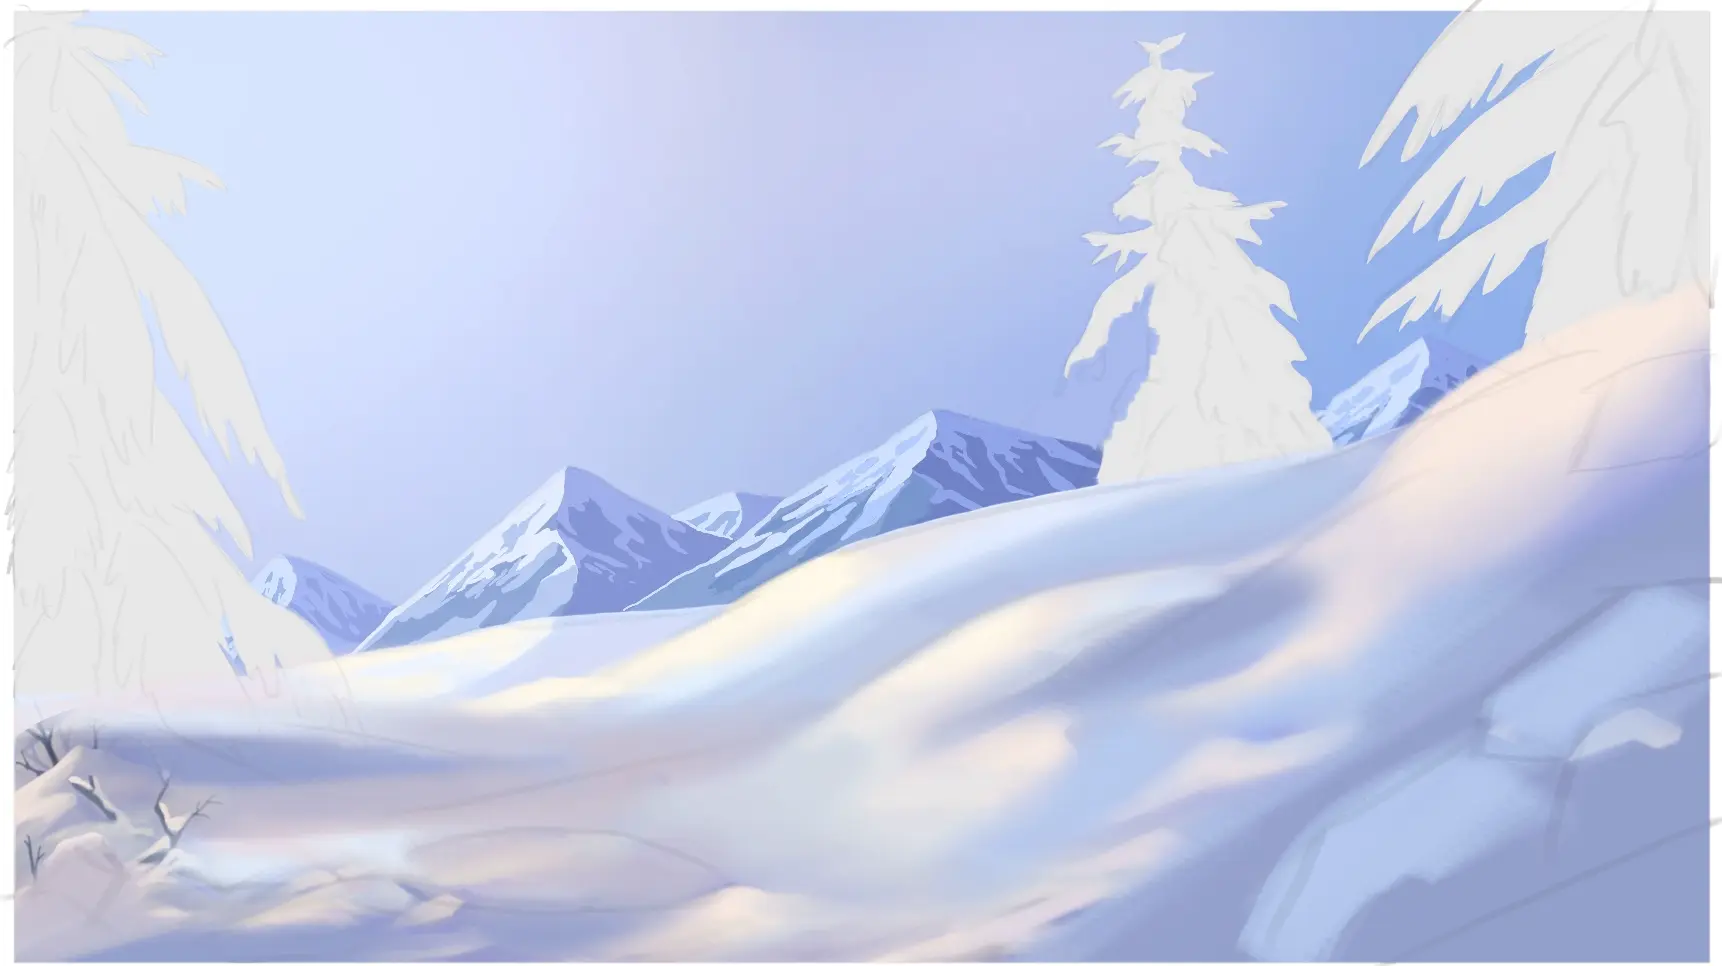
I am currently working on the snow on the ground, which at this stage is still rather imprecise. I am creating very soft gradients between yellow, beige, a little grey and blue to highlight the initial volumes of snow. I am working mainly on the light areas using light colours.
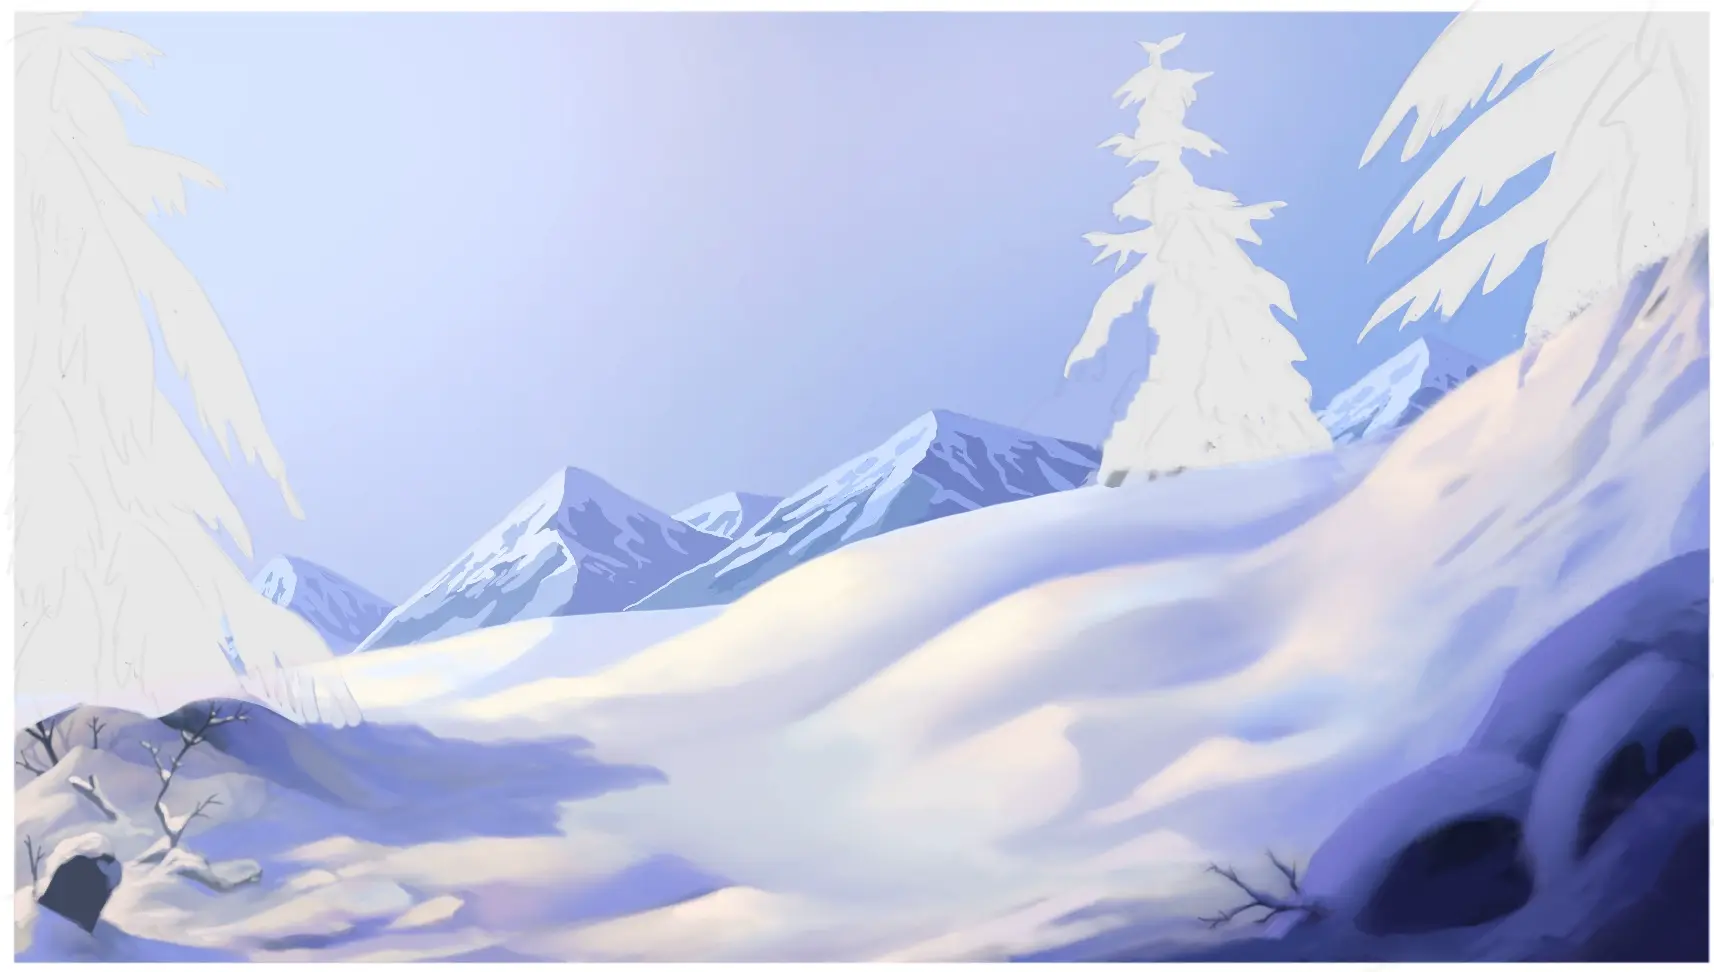
I add more volume and contrast by reworking the shadow areas with purple and blue. I take the opportunity to mark the shadow on the ground of the fir tree and I add details with branches and trunks of snow-covered trees, which brings a bit of life to the drawing.
I start colouring the trees, again I choose light shades to start with, mainly the same as the ground but with a little more grey and green for the centre of the fir tree.
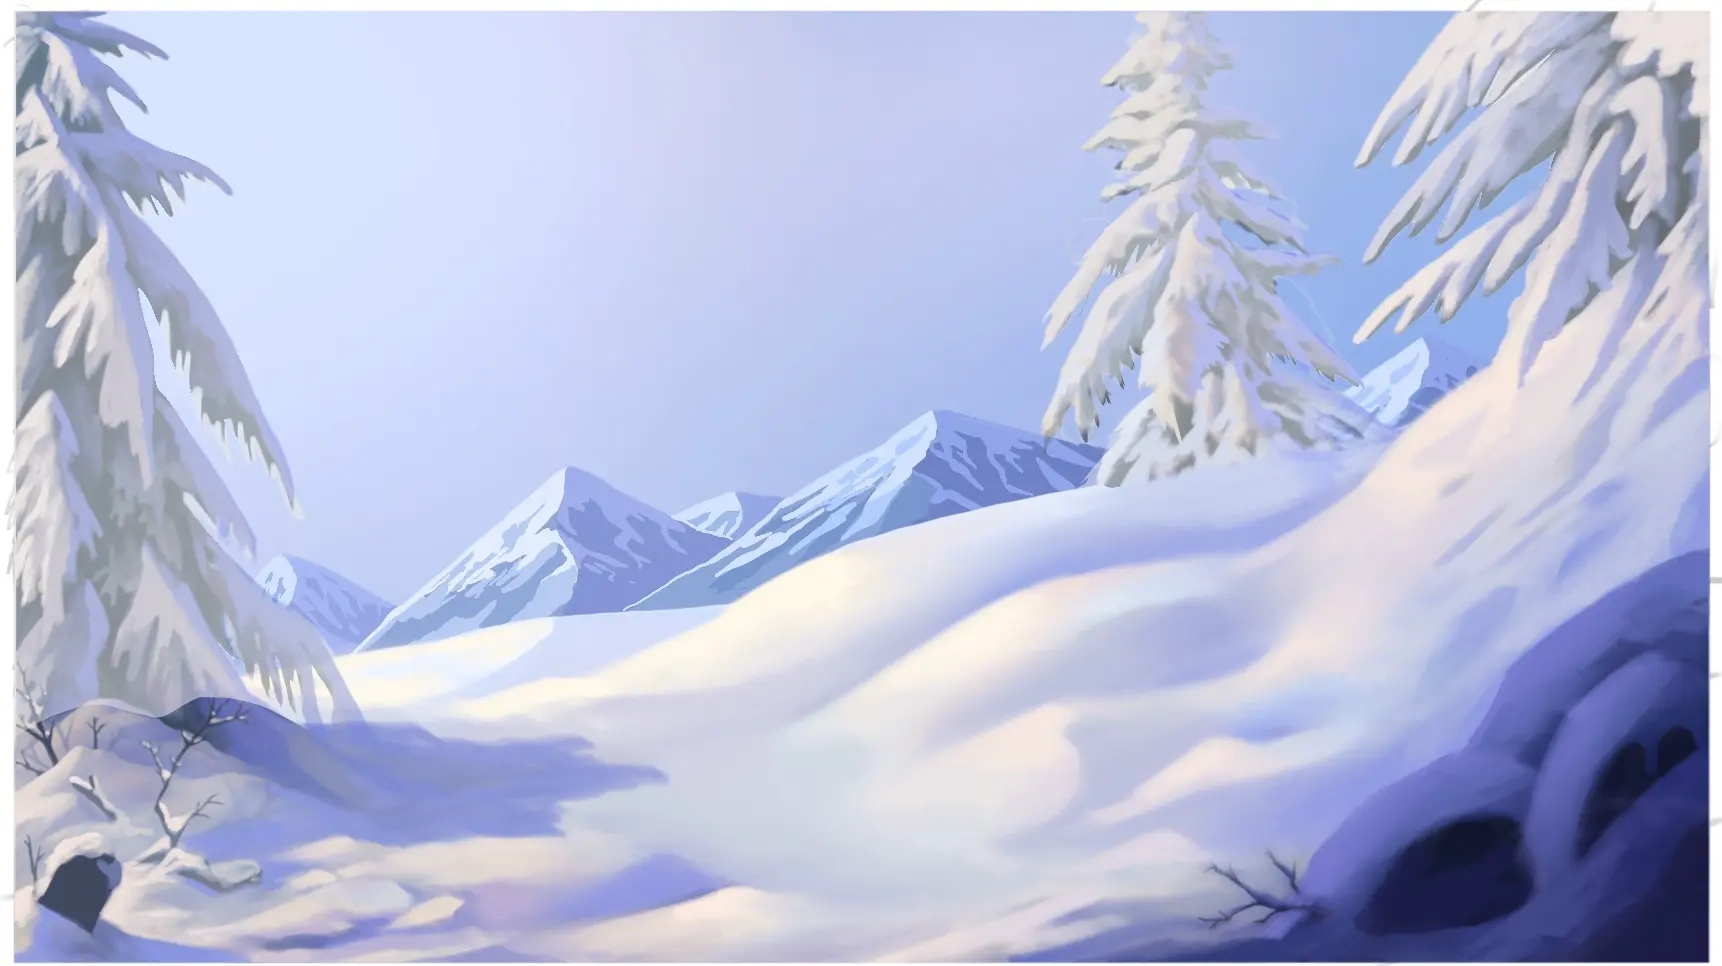
I add darker colours to really bring out the volume of the trees. I am gradually working on increasing the colours to make it simpler.
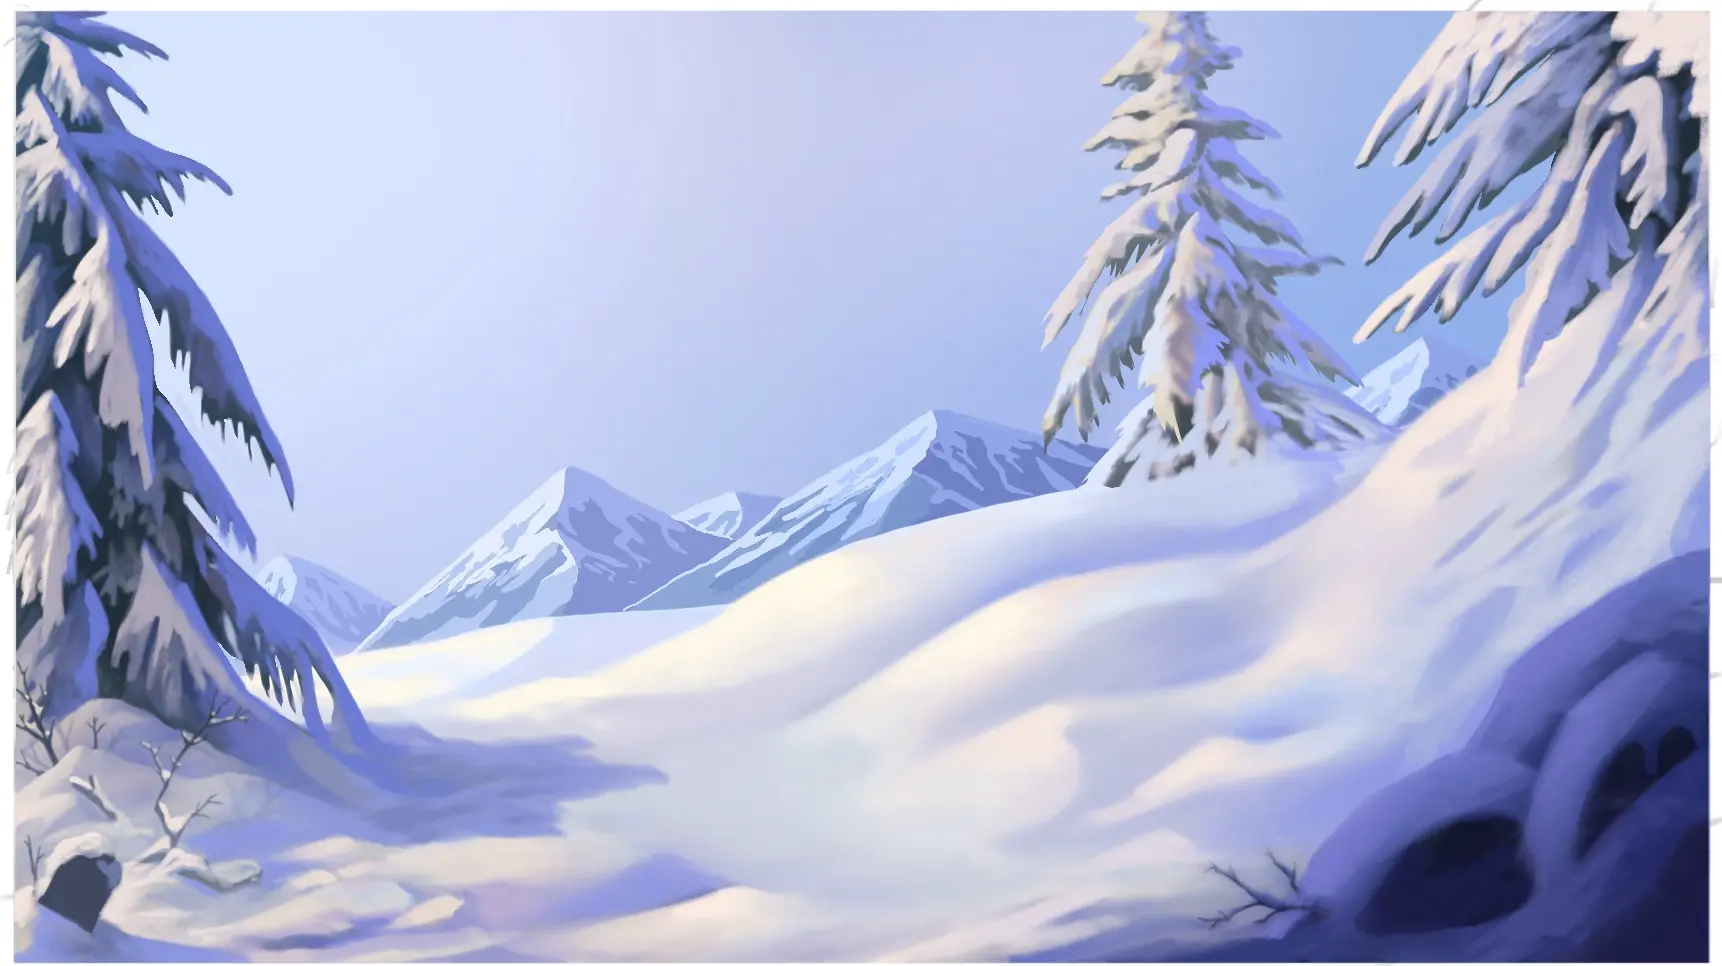
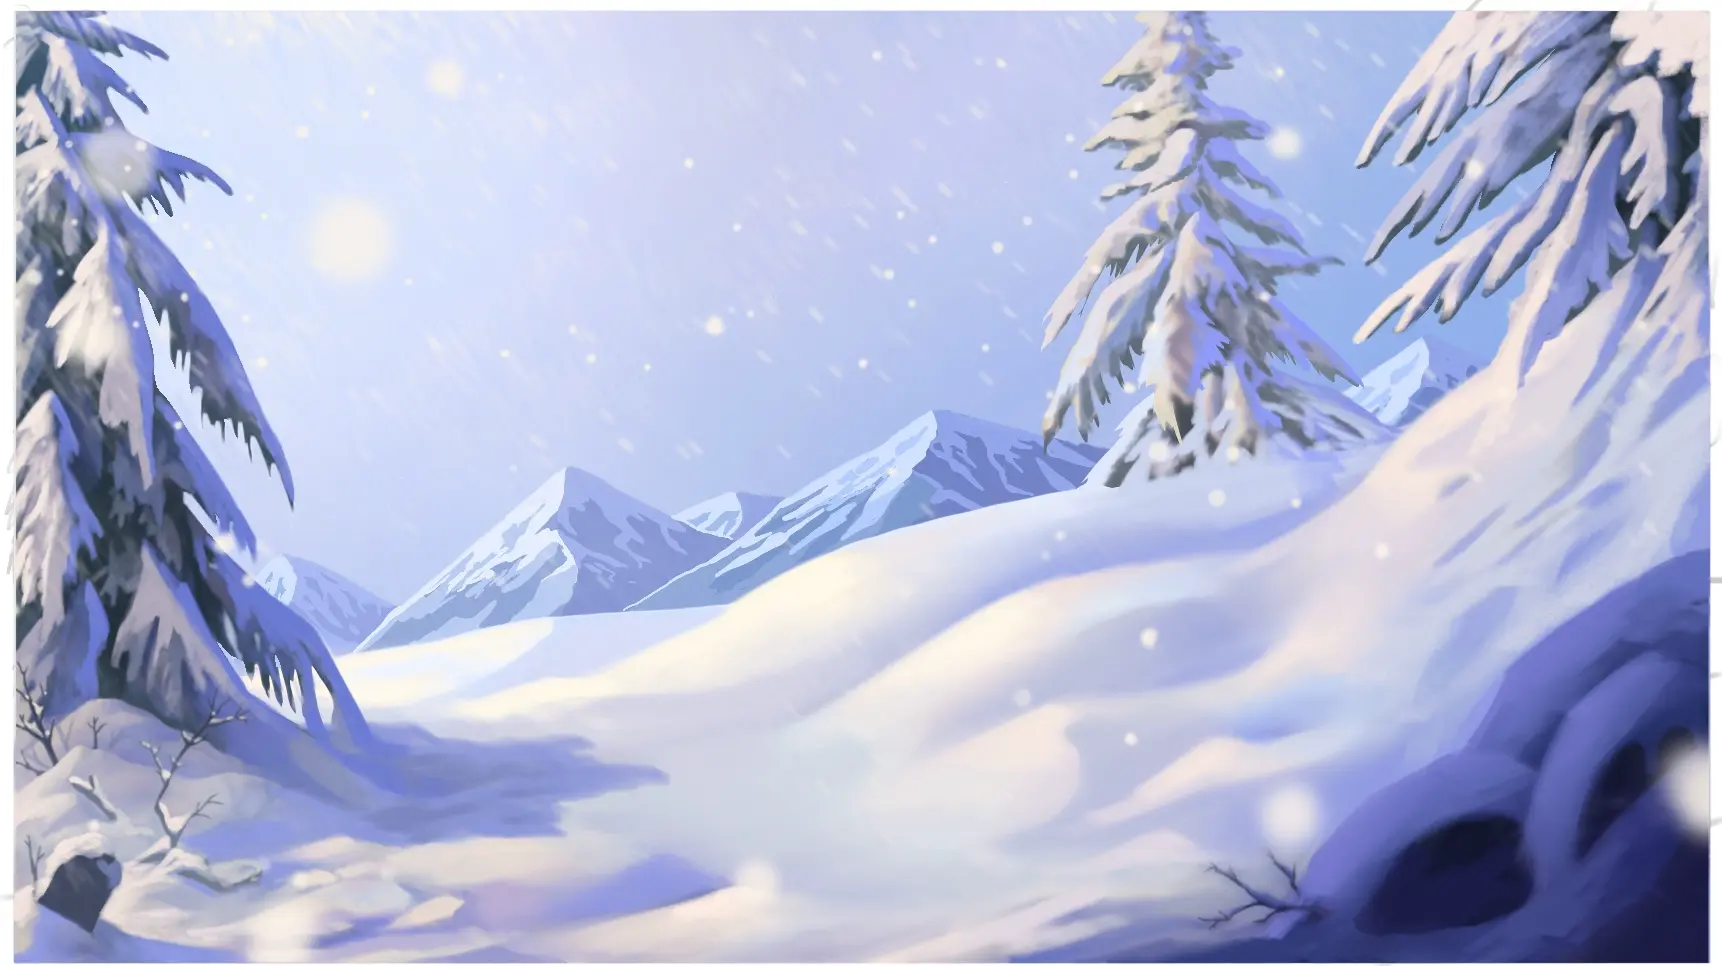
To add a little extra life, I draw snowflakes. To do this, nothing simpler, I make little lines with a very, very light blue in the background with a few extra dots. For the foreground, I make little bigger circles and try to make them a bit blurred.

And there you have it! We have just created a snowy landscape without using white! Now you have all the makings of fantastic snowy landscapes! I hope you enjoyed this article 😊
Editor: Chloé Pouteau
Discussion
Hello,
Very beautiful drawing❤️, but your snowflakes are quite white against a blue-toned sky! How do you do it if you're not using white?
LaureenR
Hello Laureen, in reality the flakes are very light yellow-orange, it's the contrast with the bluish sky that gives the impression they are white. If you are drawing traditionally, you can leave small white spaces and then apply this very light but more "rich" shade than white :)
Hello,
Very beautiful drawing❤️, but your snowflakes are indeed very white against a bluish sky! How do you do it if you don't use white?
LaureenR
Hello,
Very beautiful drawing❤️, but your snowflakes are still quite white against a bluish sky! How do you do it if you don't use white?
LaureenR
Hello,
Very beautiful drawing❤️, but your snowflakes are still very white against a sky of a bluish tint! How do you do it if you don't use white?
LaureenR
Hello,
Very beautiful drawing❤️, but your snowflakes are indeed very white against a bluish sky! How do you do it if you don't use white?
LaureenR
Hello,
Very nice drawing❤️, but your snowflakes are really white against a bluish sky! How do you do it if you don't use white?
LaureenR
Hello,
Very beautiful drawing❤️, but your snowflakes are still very white against a bluish sky! How do you do it if you don't use white?
LaureenR
Hello,
Very beautiful drawing❤️, but your flakes are indeed very white against a bluish sky! How do you do it if you don't use white?
LaureenR
This is your drawing, it's really beautiful, realistic, and sparkling like a photo
Impressionné