How to Draw SpongeBob Squarepants

SPONGEBOB SQUAREPANTS: CHARACTERISTICS
SpongeBob SquarePants is an American animated television series created by a cartoonist/animator/director, Stephen Hillenburg.
The main character, carrying the name of the series title "SpongeBob", is, as his name suggests, a sponge.
The character is thus an anthropomorphic object, i.e. its apparent form resembles that of a human being; it has gestures, speech, wears clothes, etc.
When we look at SpongeBob, his head is a square sponge. Then, at the bottom, we can see a small rectangle representing the torso (from the neck to the pelvis); a rectangle divided in two with the shirt on top and the top of the shorts underneath. Finally, the two legs and two arms extend from there.
Many of us love and want to draw this iconic character. That is why we now move on to the drawing step.
For this, gather the necessary materials listed below.
We start with the pencil step, the pencil will be erased at the end, that's why do not press too hard while drawing to avoid marks that will spoil the appearance of your drawing.
NECESSARY MATERIAL
Pencil, eraser, pen or black marker, colored pencils in blue, black, red, khaki and yellow. Or simply a drawing software.
DRAWING SPONGEBOB STEP BY STEP
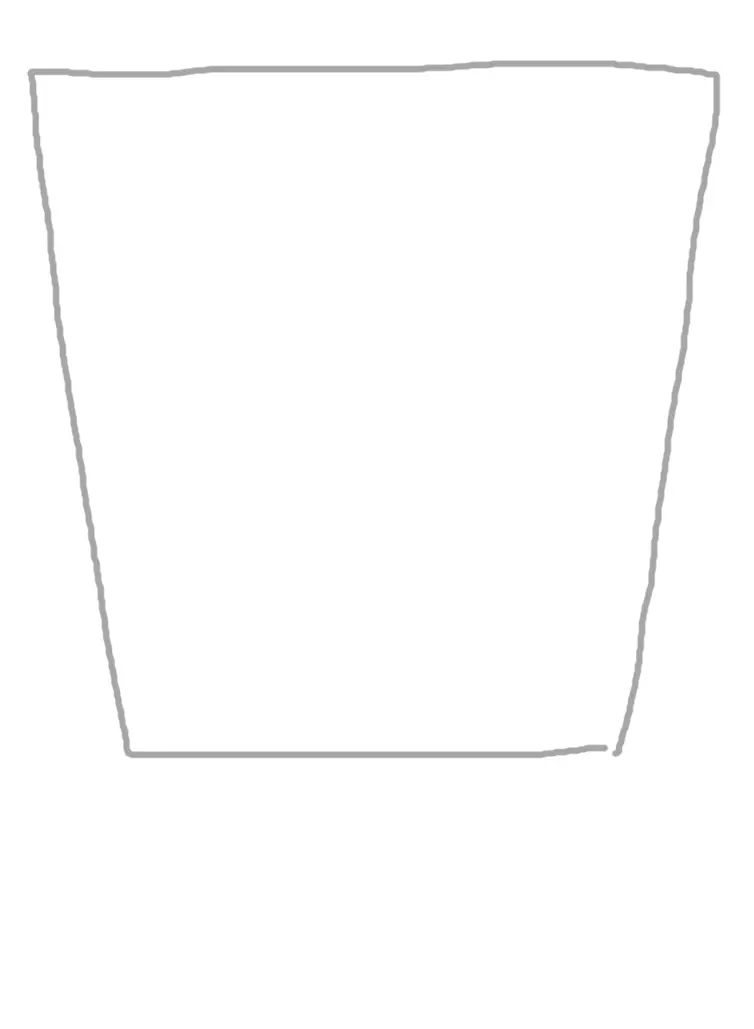
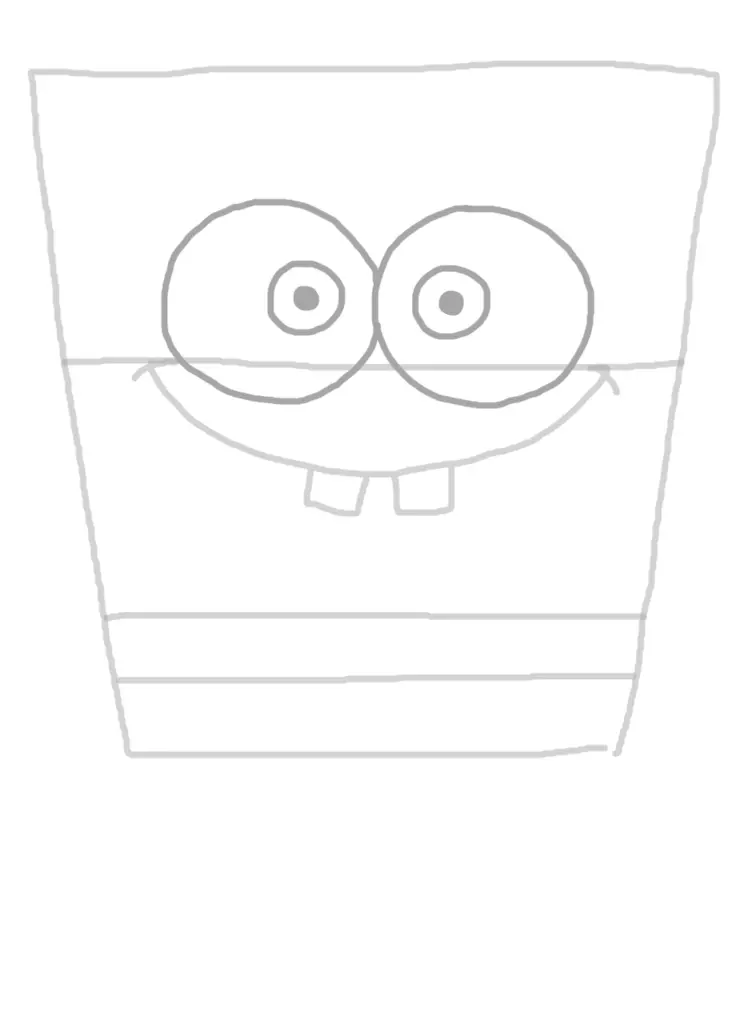
Get your pencil and start by drawing a sort of "vase" (the base of SpongeBob's body).
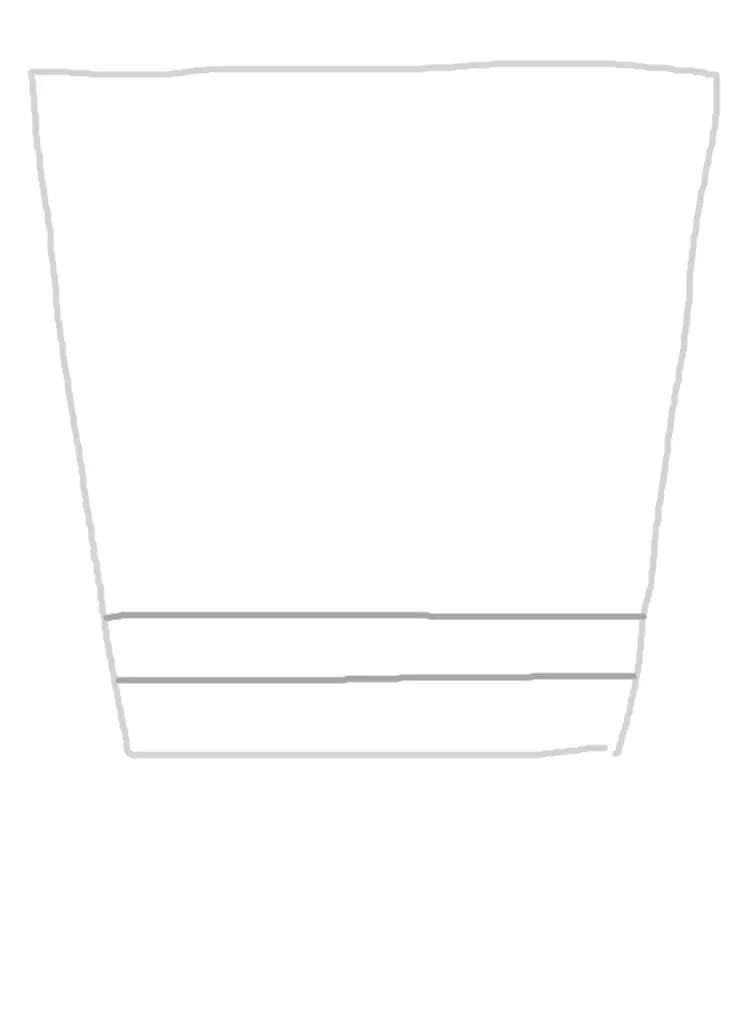
Add two lines at the bottom that will be the shirt and shorts.
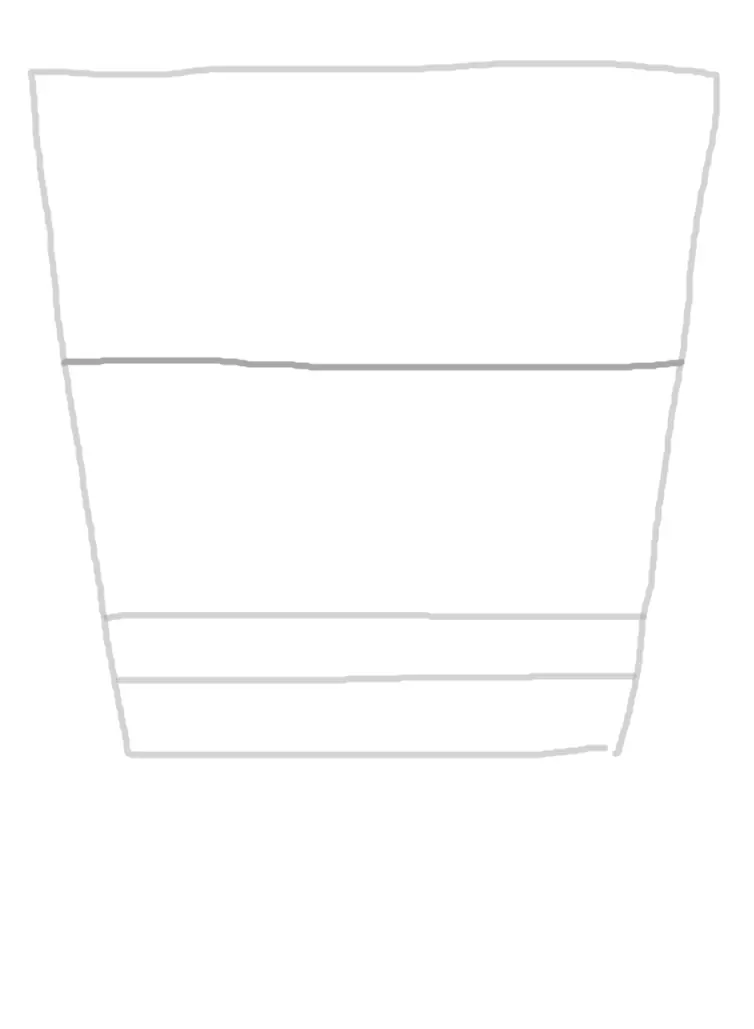
Draw a line in the center of the upper part.
This will help position eyes, cheekbones, and mouth.
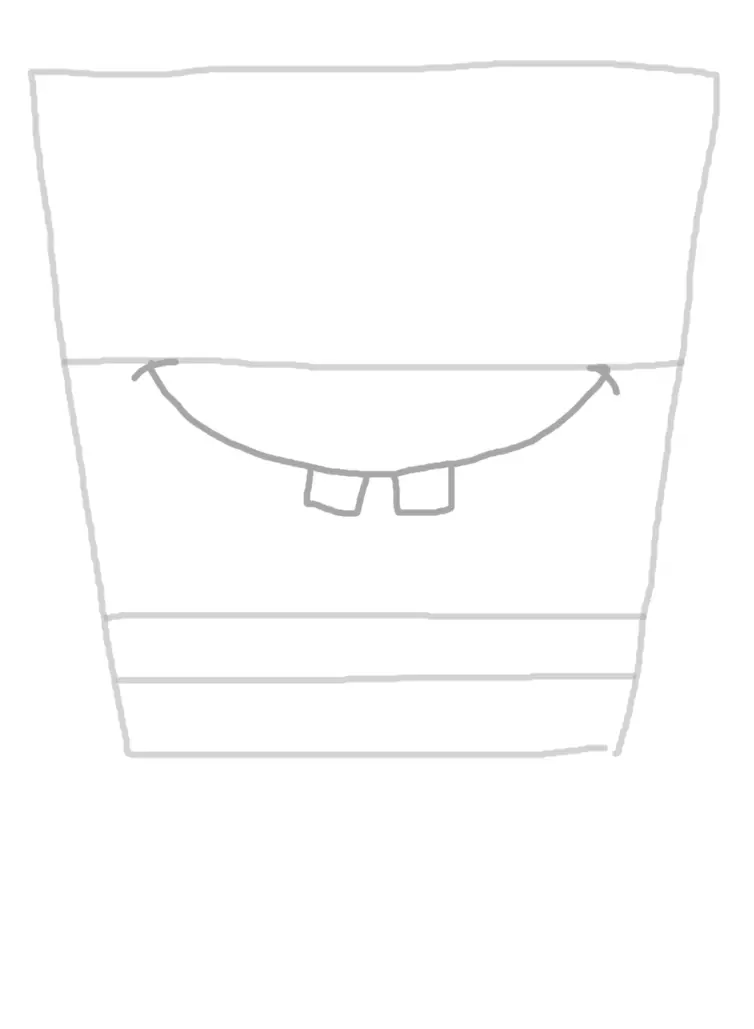
Draw an arc below this line, starting and ending at the level of this line.
Add smile marks and teeth.
Let's move on to the eyes.
Draw a first circle to the right and then a second circle to the left that closes over the first (as if slightly below).
Draw a smaller circle on the inner sides of each of these circles.
Add a thicker dot to the centers of the small circles.
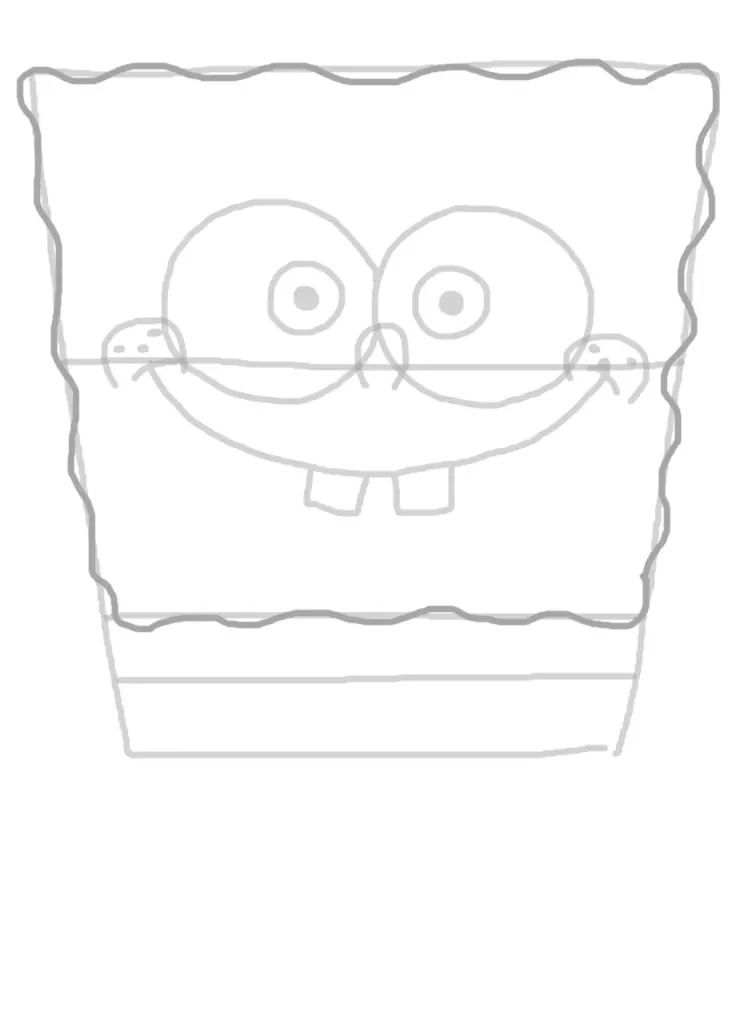
SpongeBob, as his name indicates, is a sponge, so it's necessary to represent this spongy aspect.
In the "main block", draw a sort of wave all around, above the lines.
Add on each side of the smile, the cheeks, by creating arcs and freckles.

Now draw Bob's shape by creating small waves, which will form his “sponge” side.
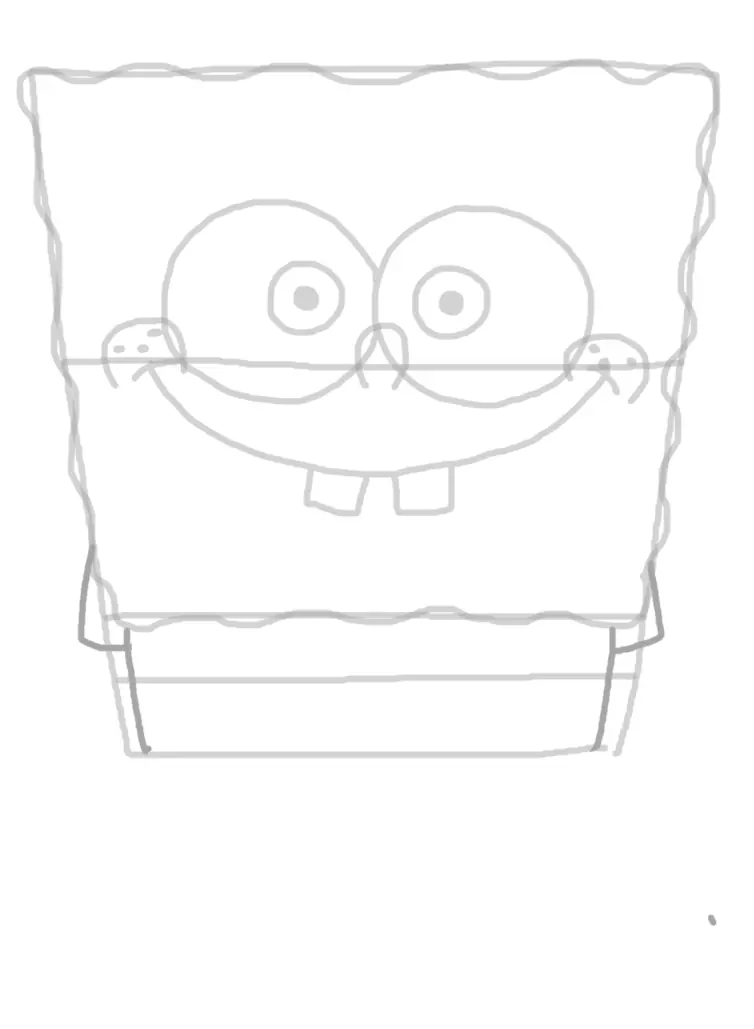
Now make the arms.
In the lower rectangle (shirt and shorts rectangle), draw a line on each side, not too far from the two already present.
Add the sleeves. Starting from the head, form a corner and “close” the sleeve on the first line.
It's time to create the hands.
As in many cartoons, this character only has four fingers.
Draw an oval on each side under the shorts.
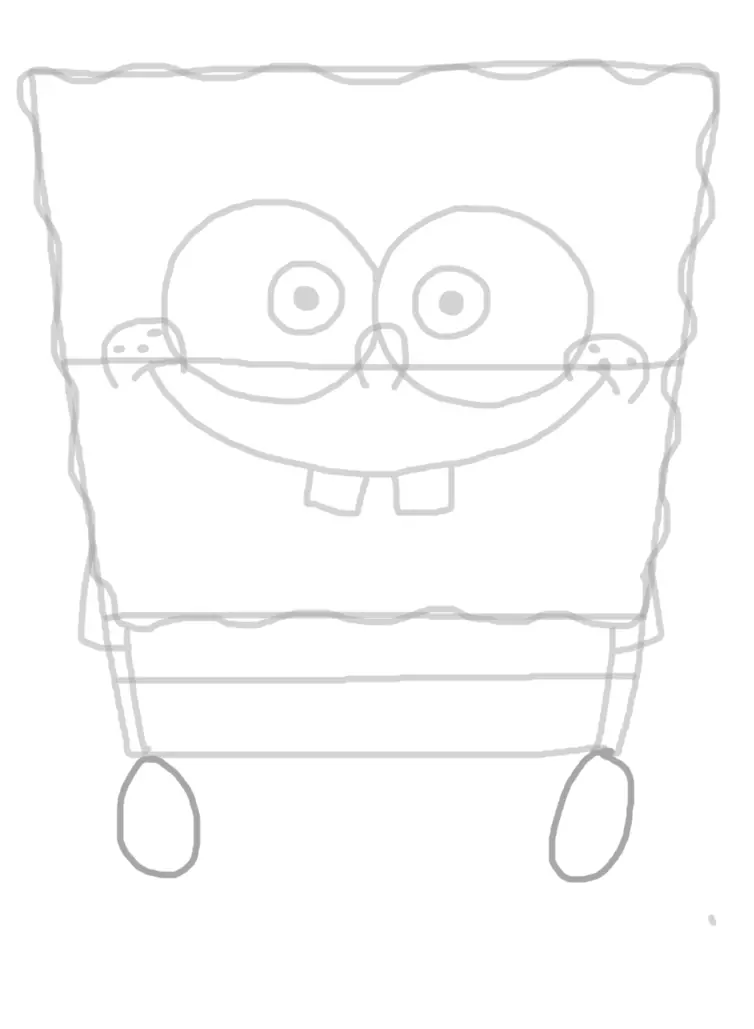
In these ovals, add the thumbs.
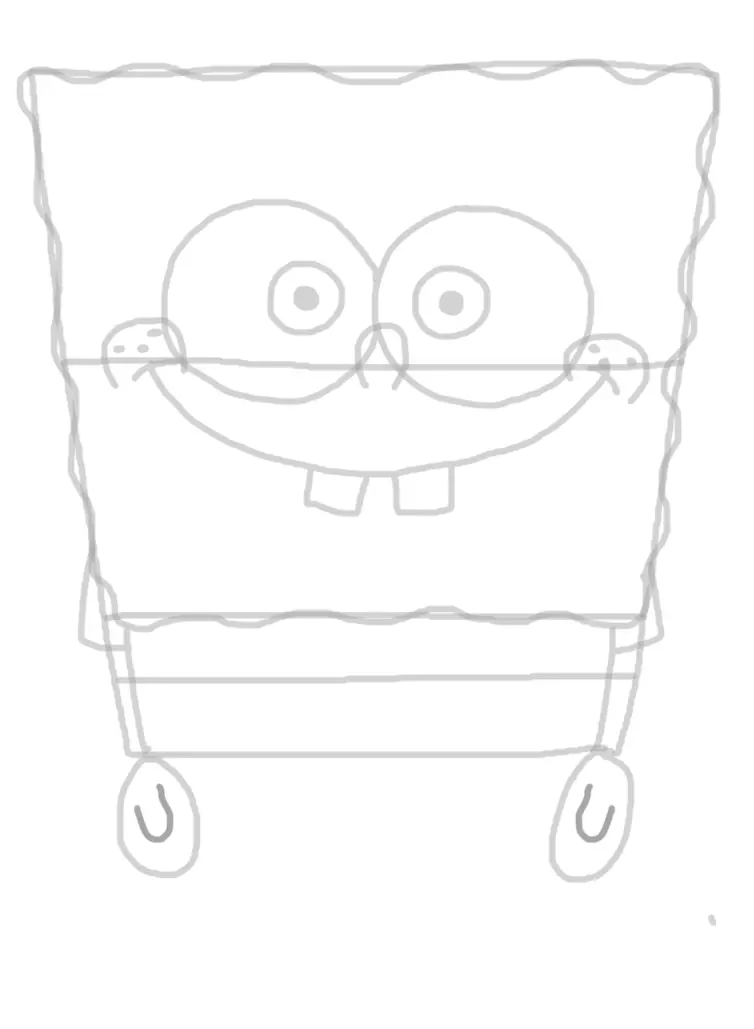
Now, we need to draw the fingers.
Start with the index finger; create the finger starting from the thumb going all the way down the oval creating a curve (tip of the finger).
Do the same for the 2nd .
For the 3rd, start the line from the top right of the oval, create a notch and finish the finger as for the first two.
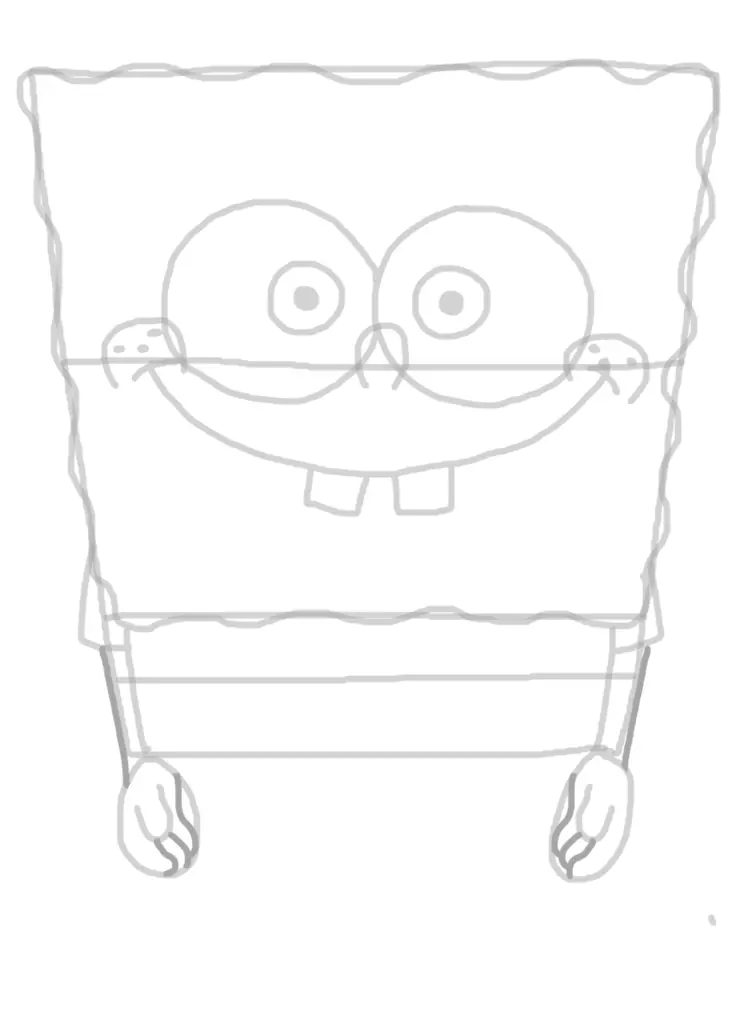
Now we have to create the legs.
Draw the rest of the shorts under the “short” rectangle, a kind of small rounded rectangle at the bottom.
Then draw roughly parallel lines to create the legs.
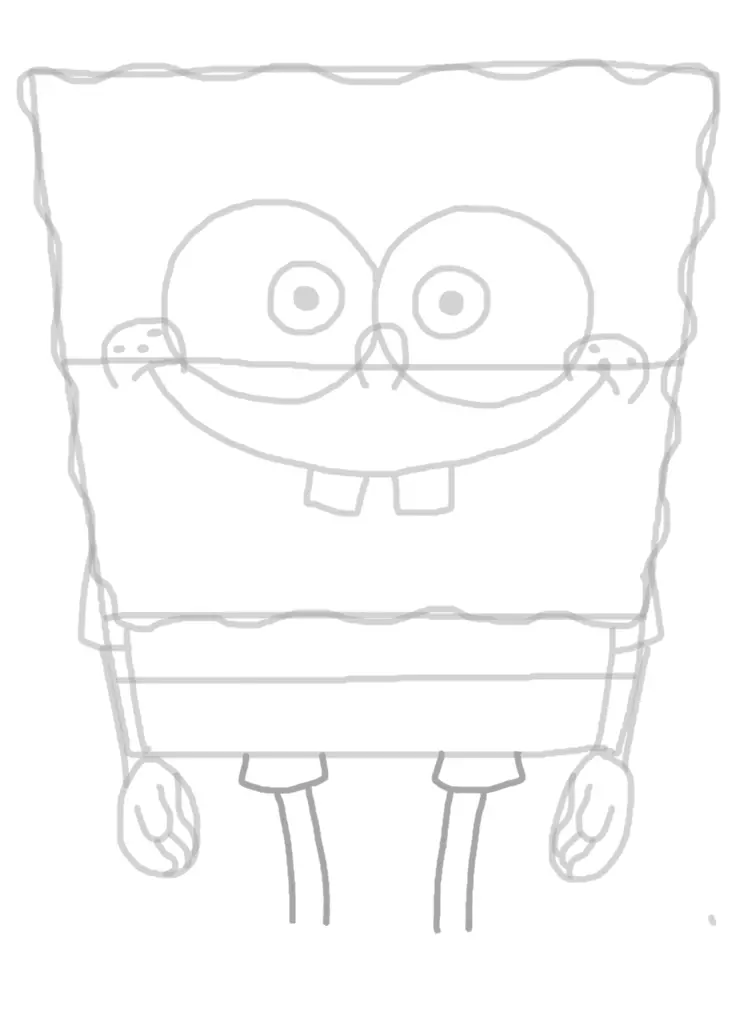
Let's draw the shoes.
Draw a circle under each leg.
Draw a second circle a bit larger on both sides of the first circles, slightly overlapping them.
Add a small heel on each side.
Make the upper part of the shoe by creating two small arches that “close” each previously made leg.
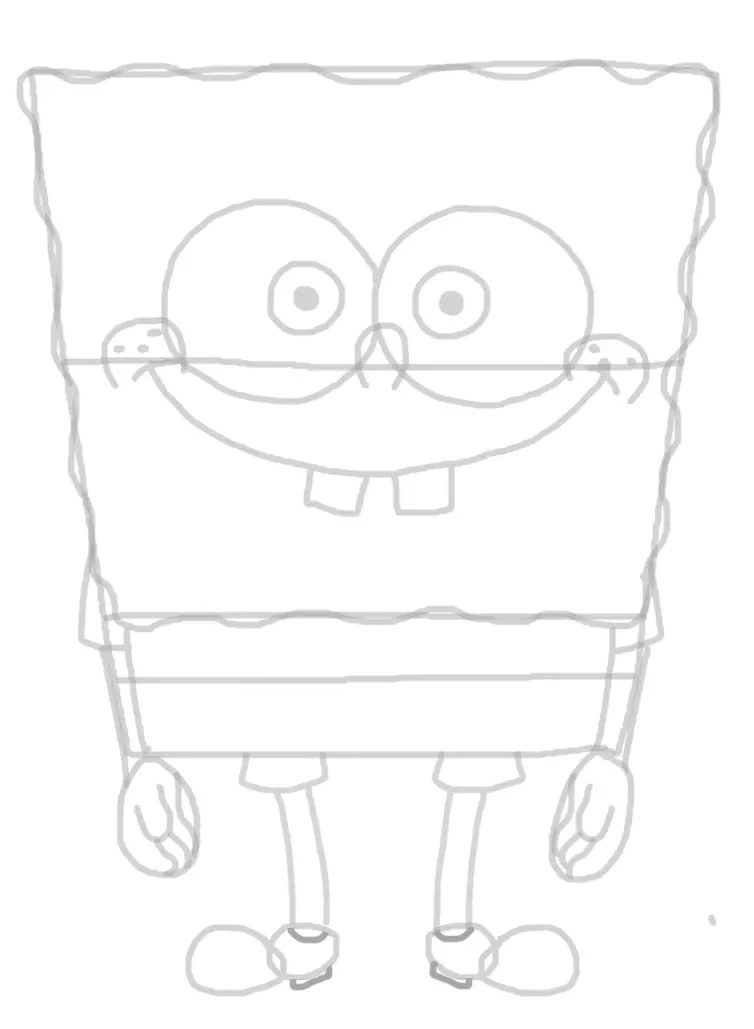
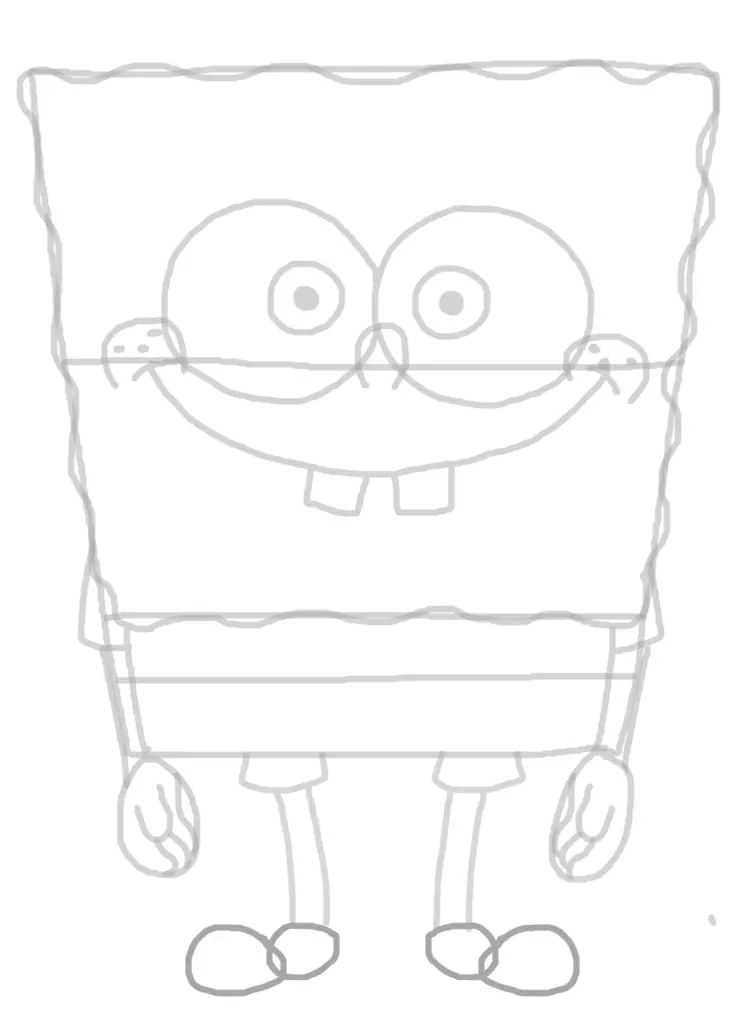
SpongeBob has a shirt and a tie.
Create two small triangles under the head (collar of the shirt).
Then, using the collar, create the tie.

ADDING COLOURS TO YOUR DRAWING
Now take a marker or a black pen to go over the important lines of the drawing.
Be careful not to retrace unnecessary lines that were only used as an aid in realisation.
If you have any doubts, observe this drawing closely to do it.
Check that the ink is dry and that the pencil marks can be erased.
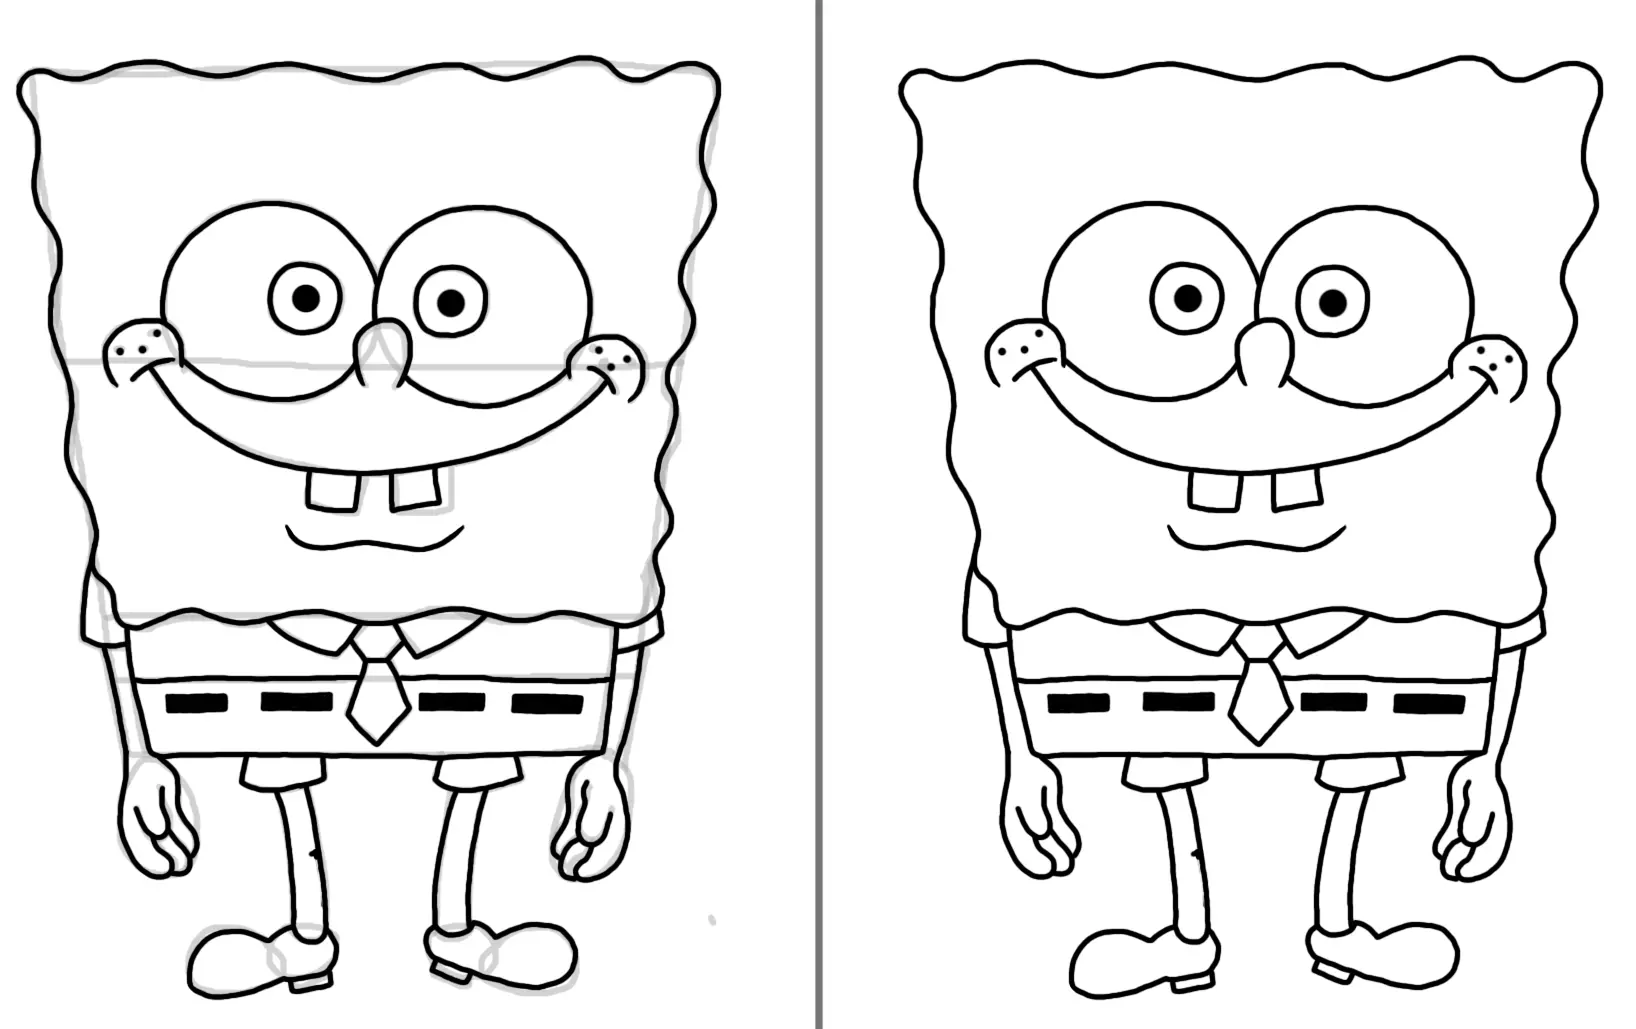
You can now proceed to colouring.
With a khaki pencil, draw ovals and circles in various places on the head to create the sponge holes.
Use blue for the eyes, red for the tie, black for the shoes, and these three colors for the sock stripes.
Use brown for the shorts.
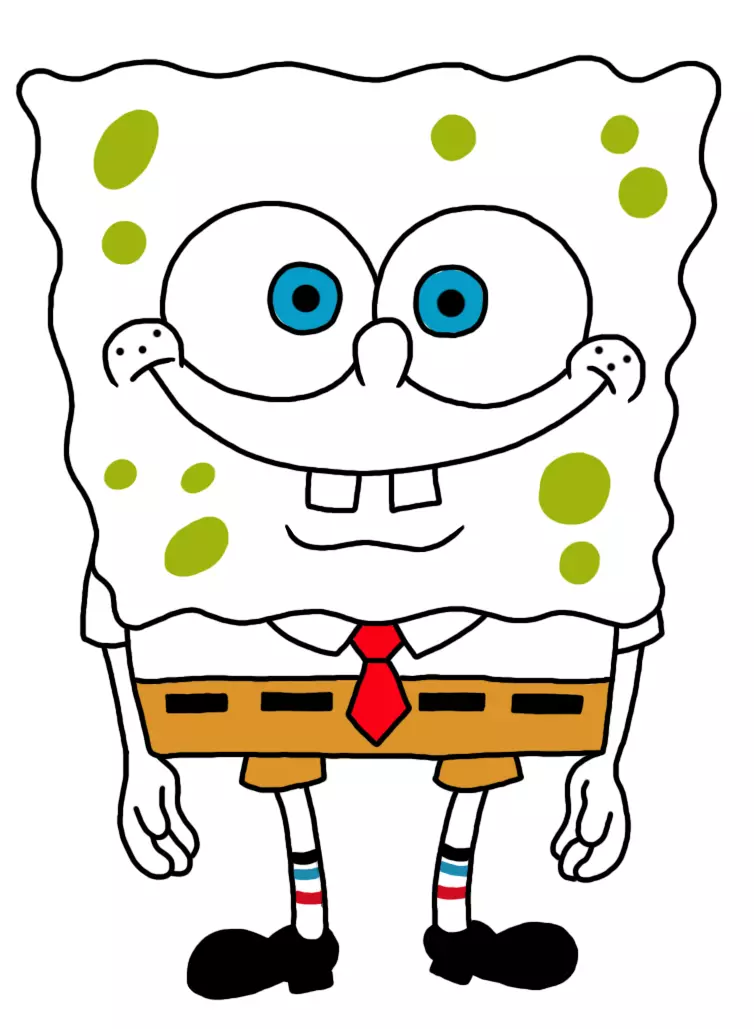
All that remains is to use the main colour, yellow, for the head, arms and upper legs.
And that's it, your SpongeBob character is finished!

Discussion
No comments yet.