How to Draw Ears
Among the details of the face, the ear is a very particular and unique shape for each person. Nevertheless, it seems more complex than it really is. In this article, we will take a detailed look at how to draw an ear.
Synthetic forms for drawing an ear
In order to be able to draw our ear, we will use an approach based on synthetic shapes. This means we will first try to draw simple shapes that we can make more complex later on.
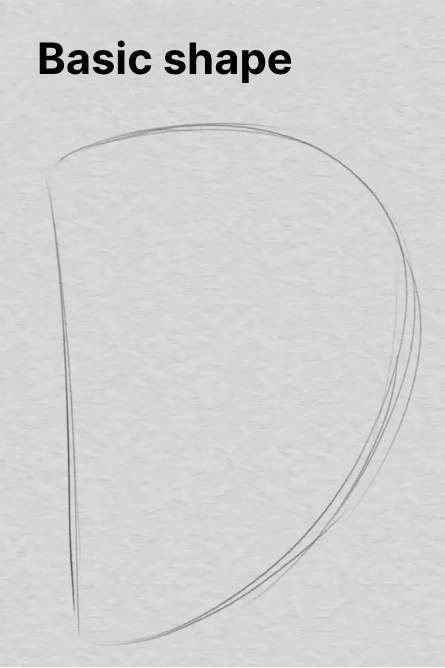
So, I will start by drawing a parabola shape that looks like a D with the widest point slightly raised. This will serve as the base for constructing my ear.
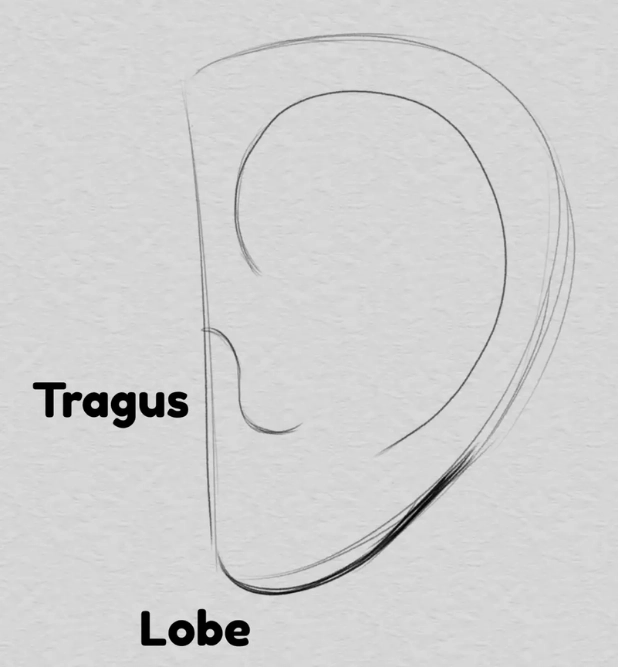
Next, I add a curve inside my basic shape. It follows the protruding part of the D and curls slightly inward. This will be the main construction line for the upper rim of the ear: the helix.

I then refine the bottom of my base shape to represent the lobe and draw the tragus, the small piece of cartilage that covers the opening of the ear canal, in an S shape.
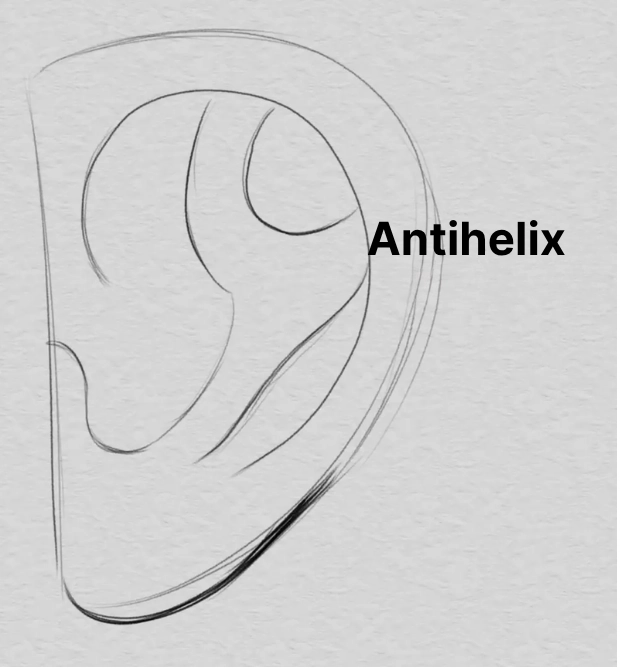
Lastly, I position the antihelix, the curved part inside the ear's concha. This shape is quite complex, but it roughly resembles a Y. The two upper branches anchor under the helix, and the lower branch ends its course towards the tragus.
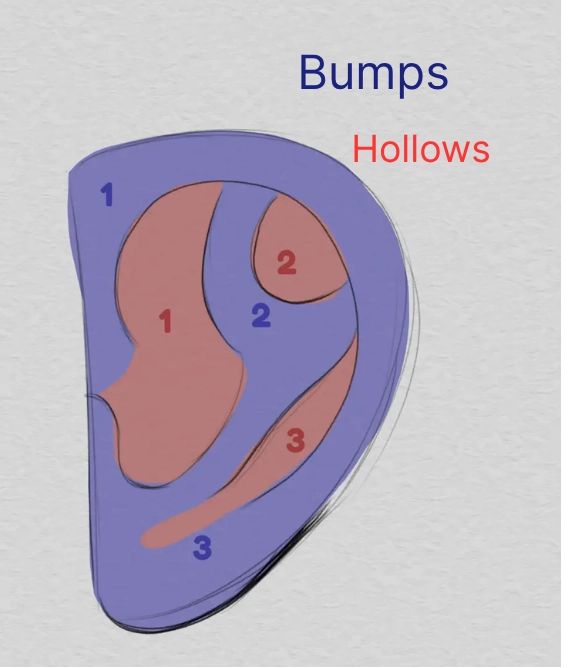
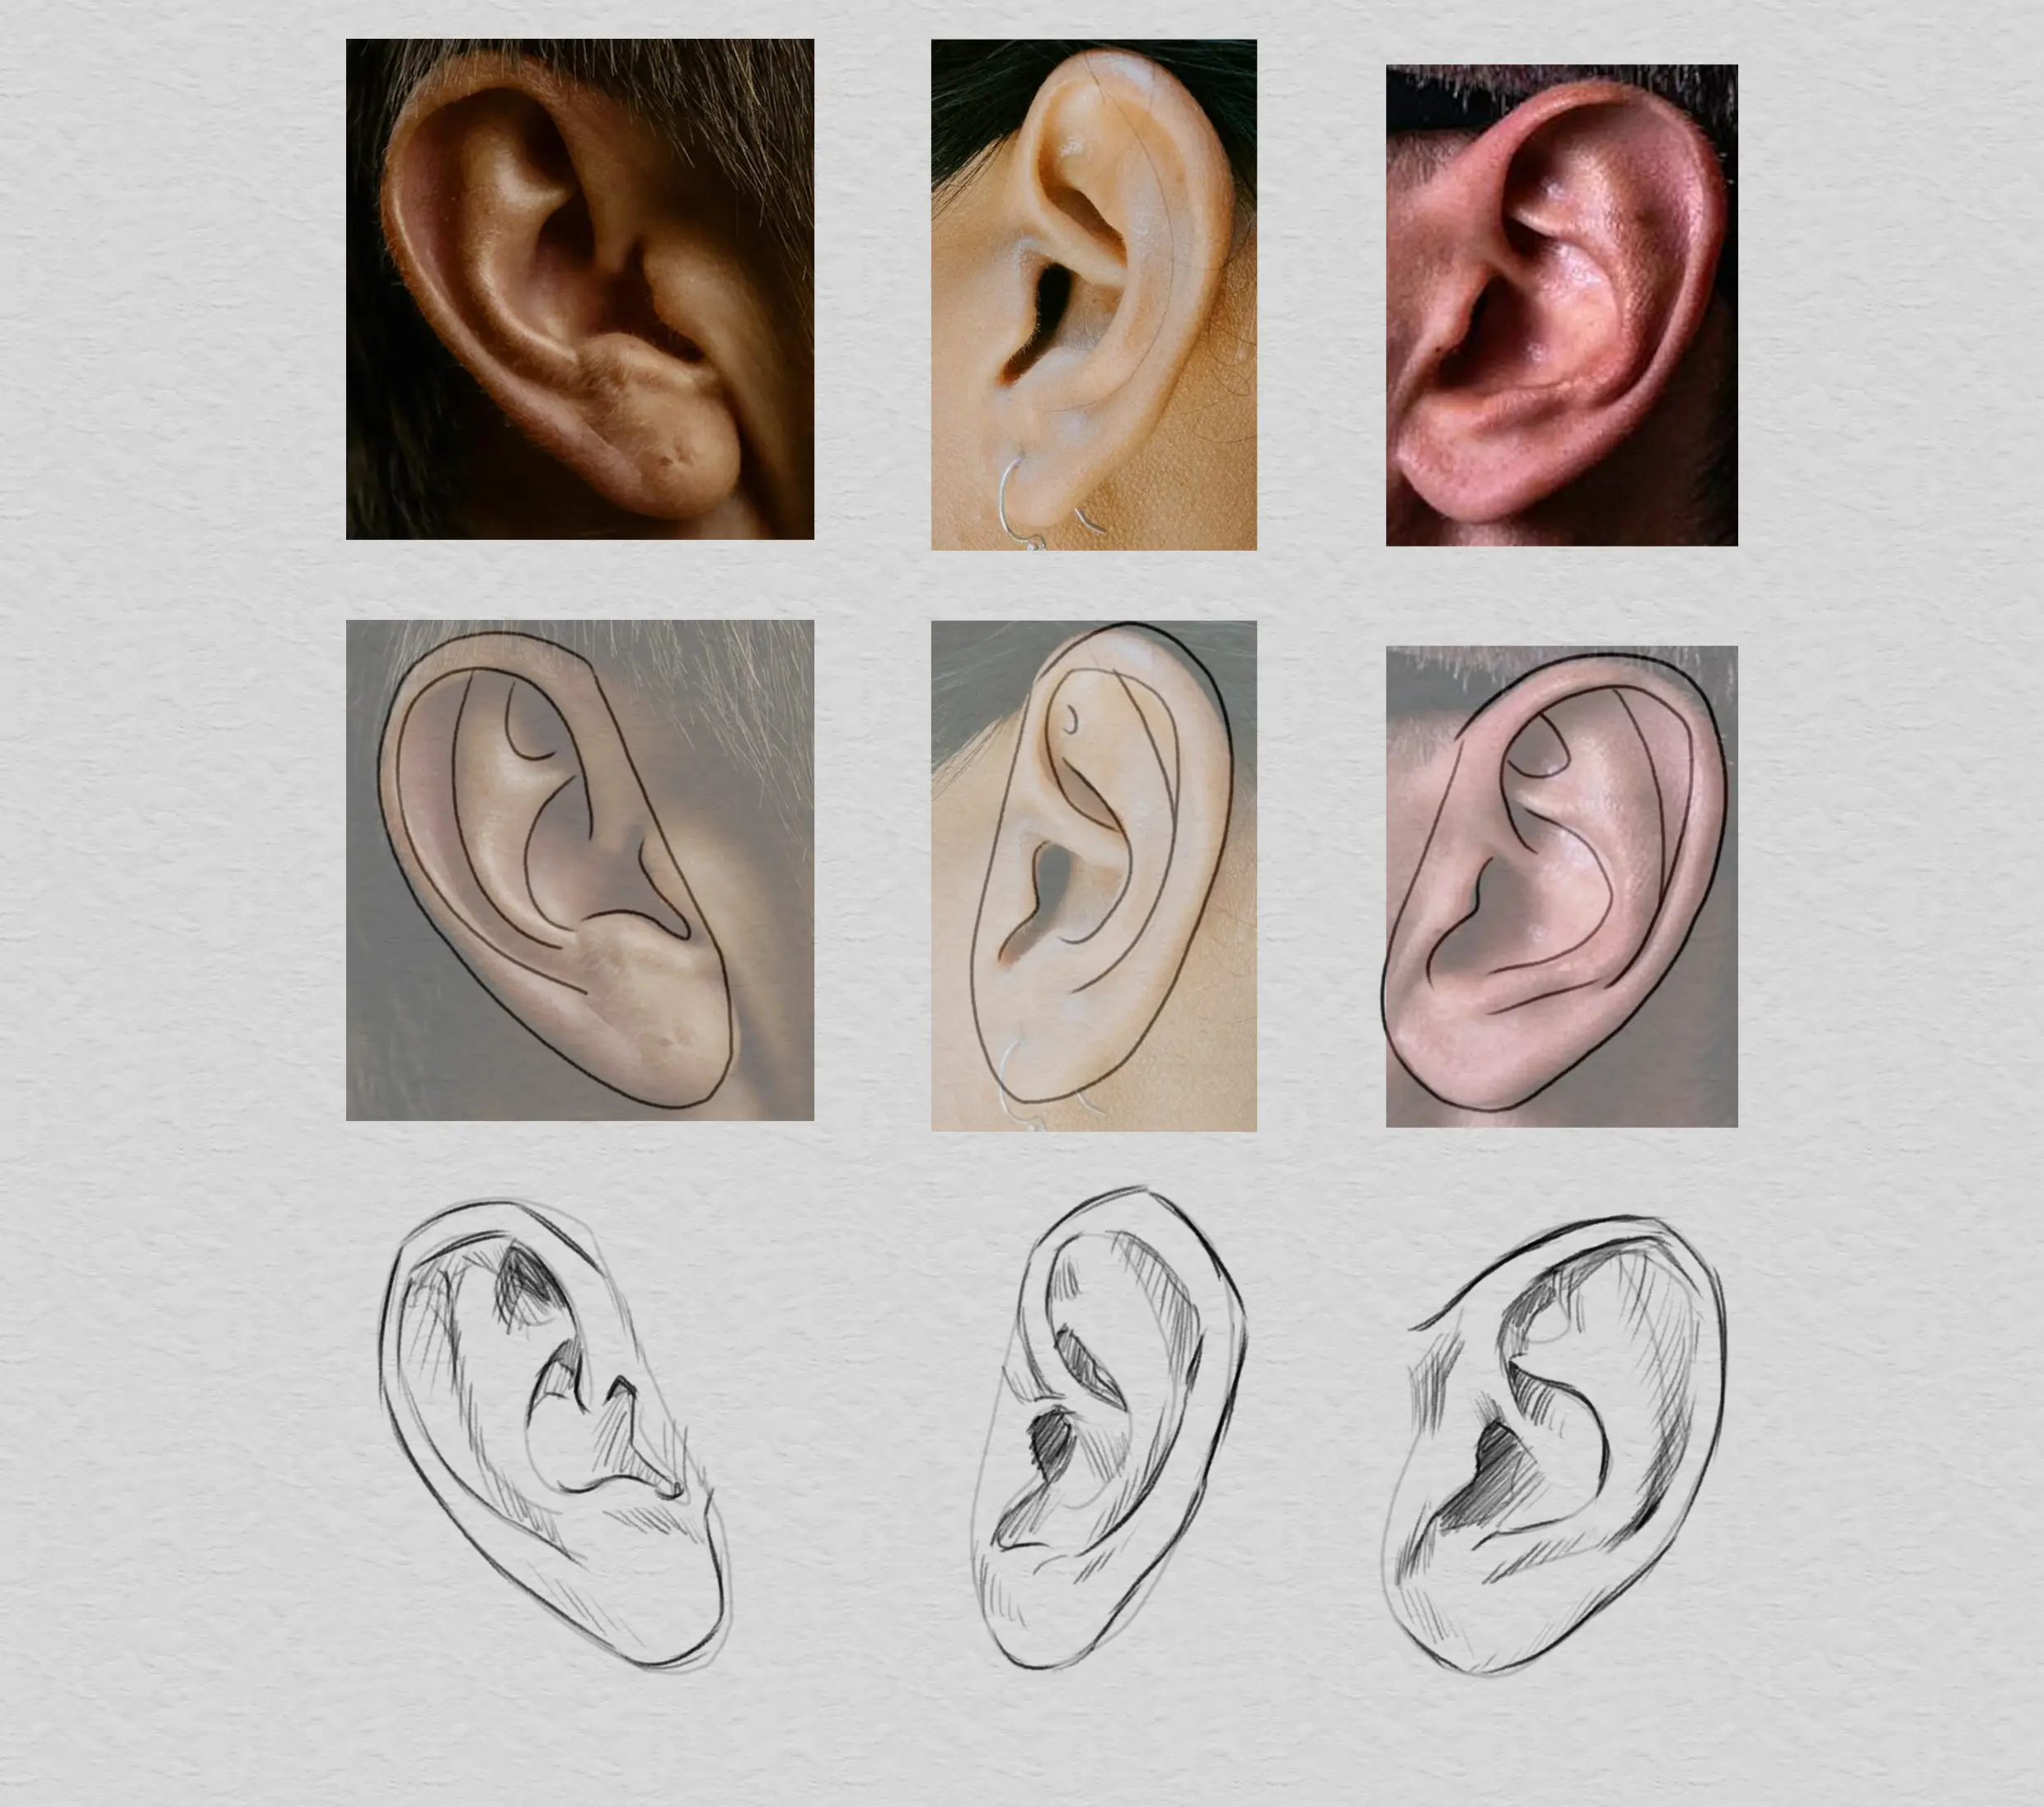
Our large shapes are done. Nonetheless, the bulk of the ear is largely open, meaning it is defined more by shadows and light than by contour lines. So we need to understand where the hollows and bumps are located. In the following diagram, I have identified the three main hollows and bumps of the ear. Obviously, these surfaces can themselves consist of other hollows and bumps, but they are less pronounced.
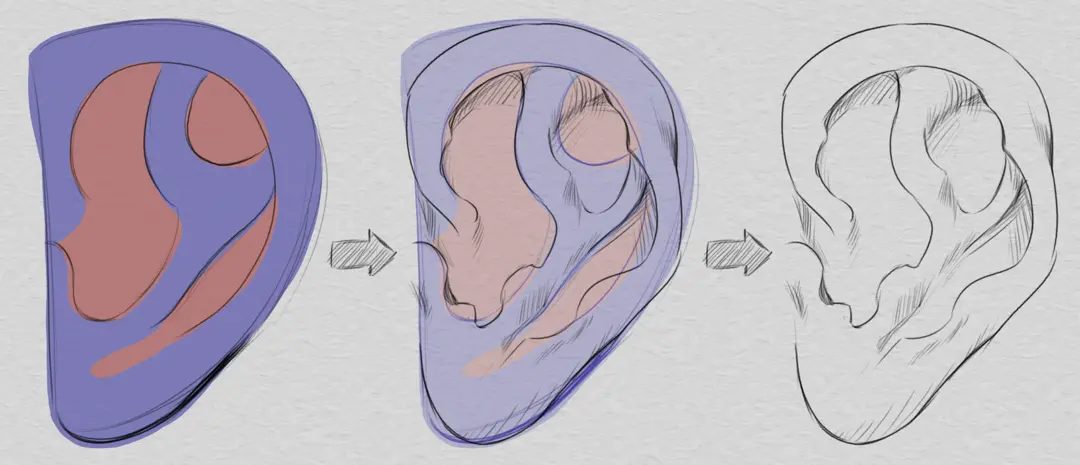
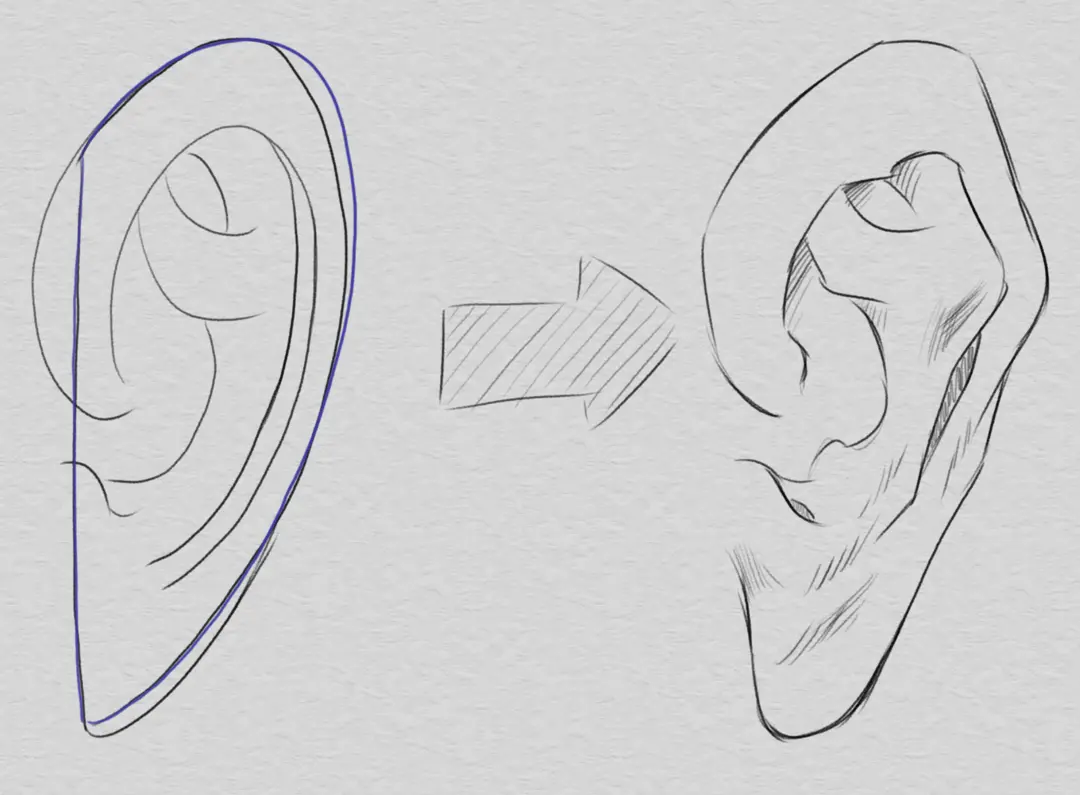
We have our main bases; now we can add the details. Here, I'm just making the existing curves more complex and adding shadows to indicate depth while respecting the schema above. The ear below is completely drawn from memory but is realistic because it follows the simple structure we presented earlier.
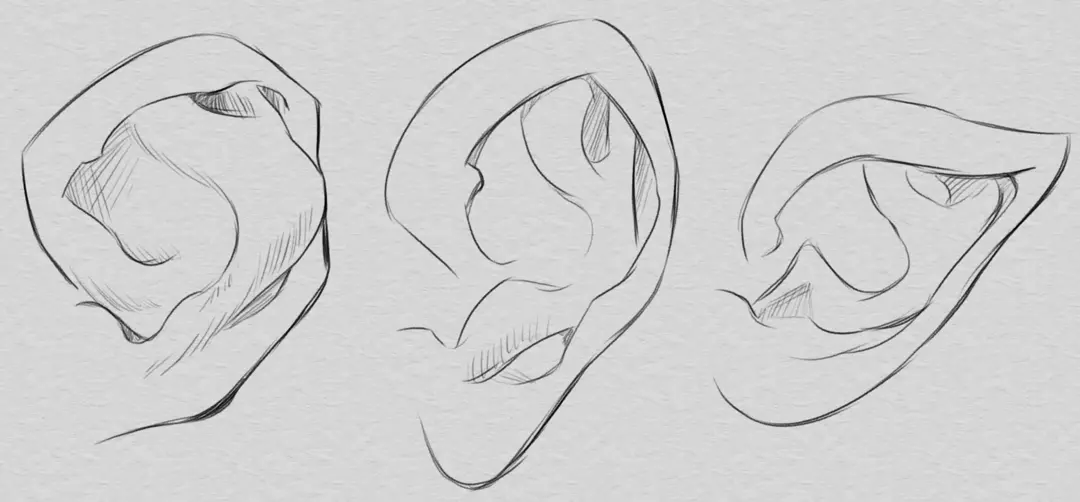
Other views of the ear
We just saw how to represent the ear from the simplest angle: the profile. However, the approach using synthetic shapes enables us to represent the ear from other angles of the head by applying the same principles. Thus, it is possible to draw the ear as seen from the front by basing it on the profile view. This will be more compressed than the previous one, and some parts may overlap depending on the type of ear you want to draw.
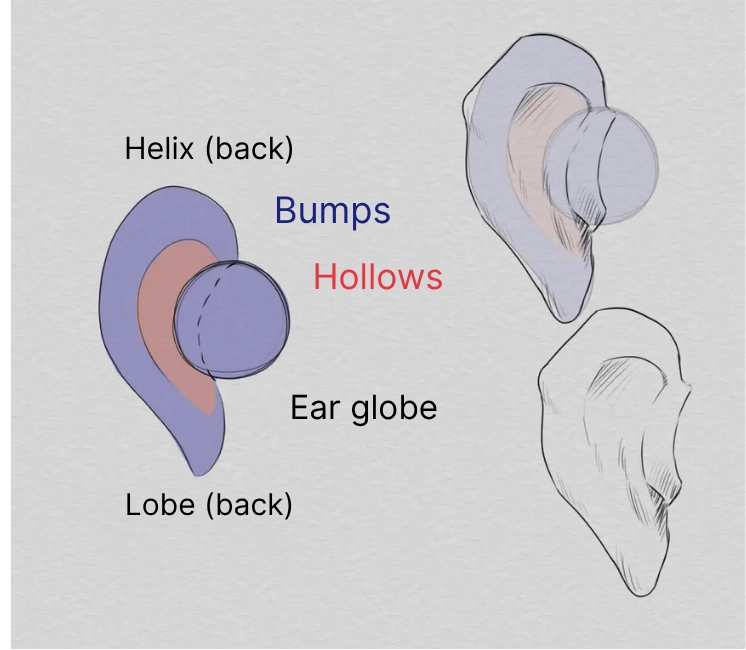
The last angle that we want to look at is the rear view. This time, the representation is simpler but very different from those seen above. Indeed, we no longer see the inside of the ear, and we can see the earlobe behind the helix. It attaches to the head and enables the ear to face forward.
A unique drawing
You now have the basics for drawing ears. If you would like to go further, start by observing ears on different subjects. The ear is unique to each individual, and the more you try to copy them, the better you will understand their subtleties.
Finally, feel free to create your own ears! Once you've mastered the basic structure, it is easy to create realistic ears.

Discussion
No comments yet.