Painting Clouds with Acrylics
The sky is a mesmerizing spectacle: its deep blue, clouds that are vast yet light, with unique shapes and a fluffy texture that draw our gaze. Today, I'm going to take you through a tutorial to recreate this natural element with acrylic paint.
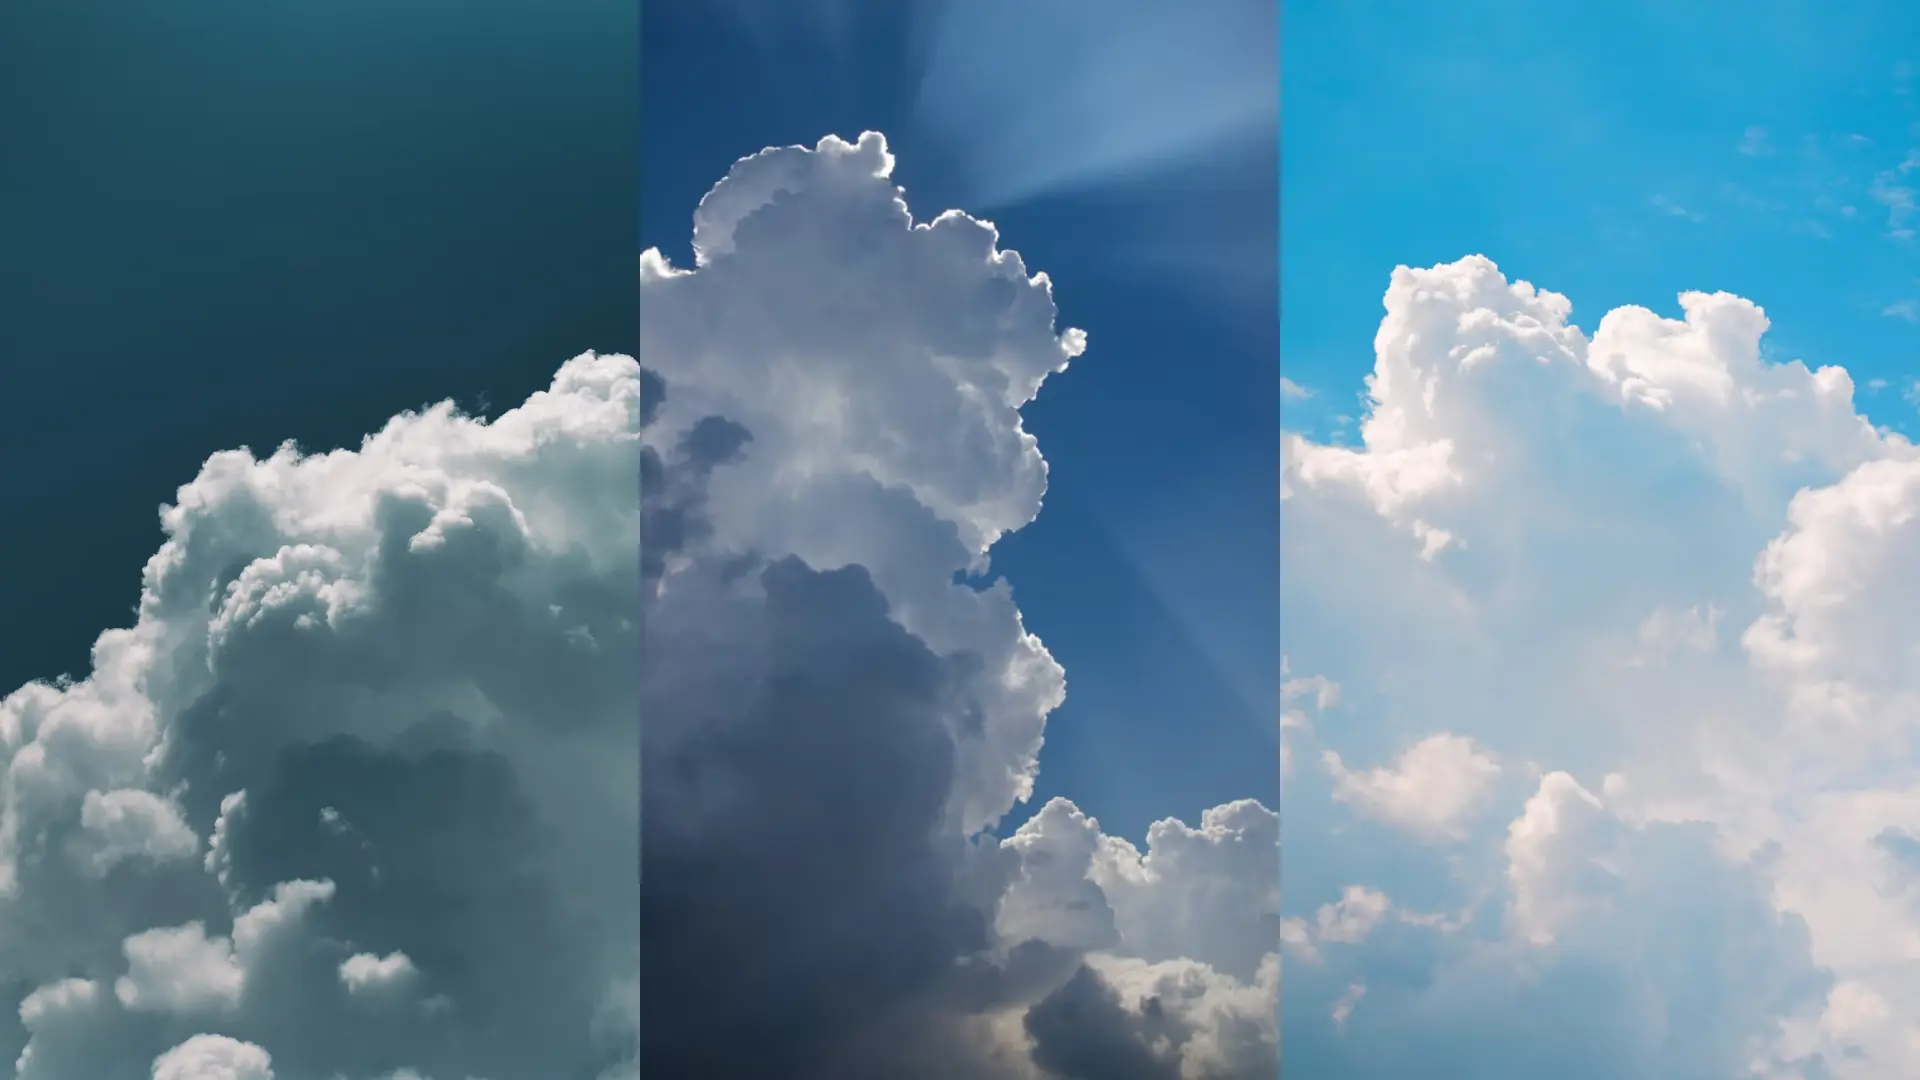
Preliminary cloud analysis
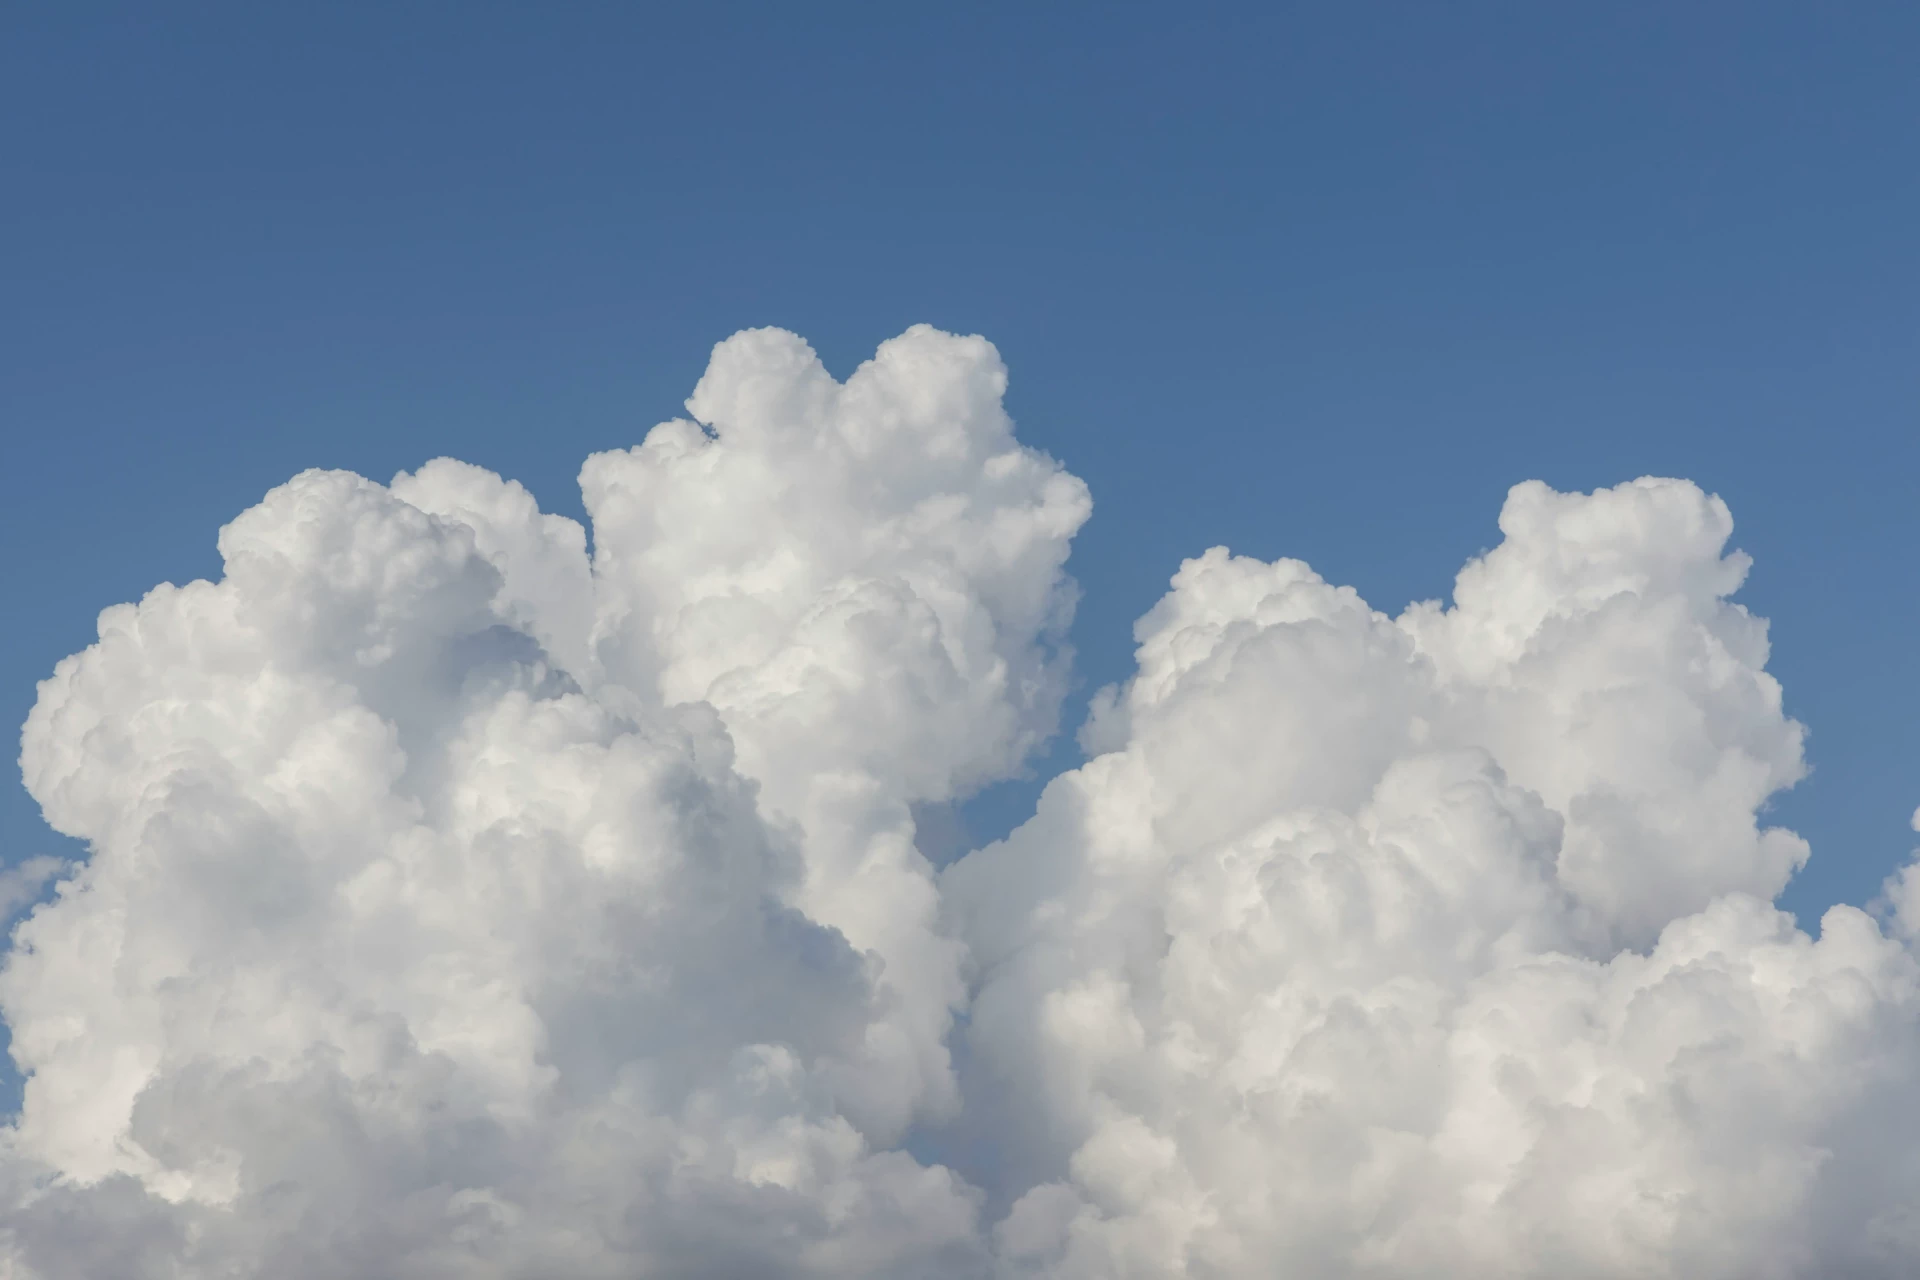
Let's start by analyzing the shape, color, and texture through several models. During observation, it is important to compare different versions in order to get a more complete mental image. So let's list the common points:
The shadows display tones derived from the color of the sky.
The edges are variable: sometimes well-defined and rounded, other times vague, as if dissolving.
They feature multiple layers of contrast, meaning dark areas whose contours are strongly illuminated.
Observing clouds in a painting
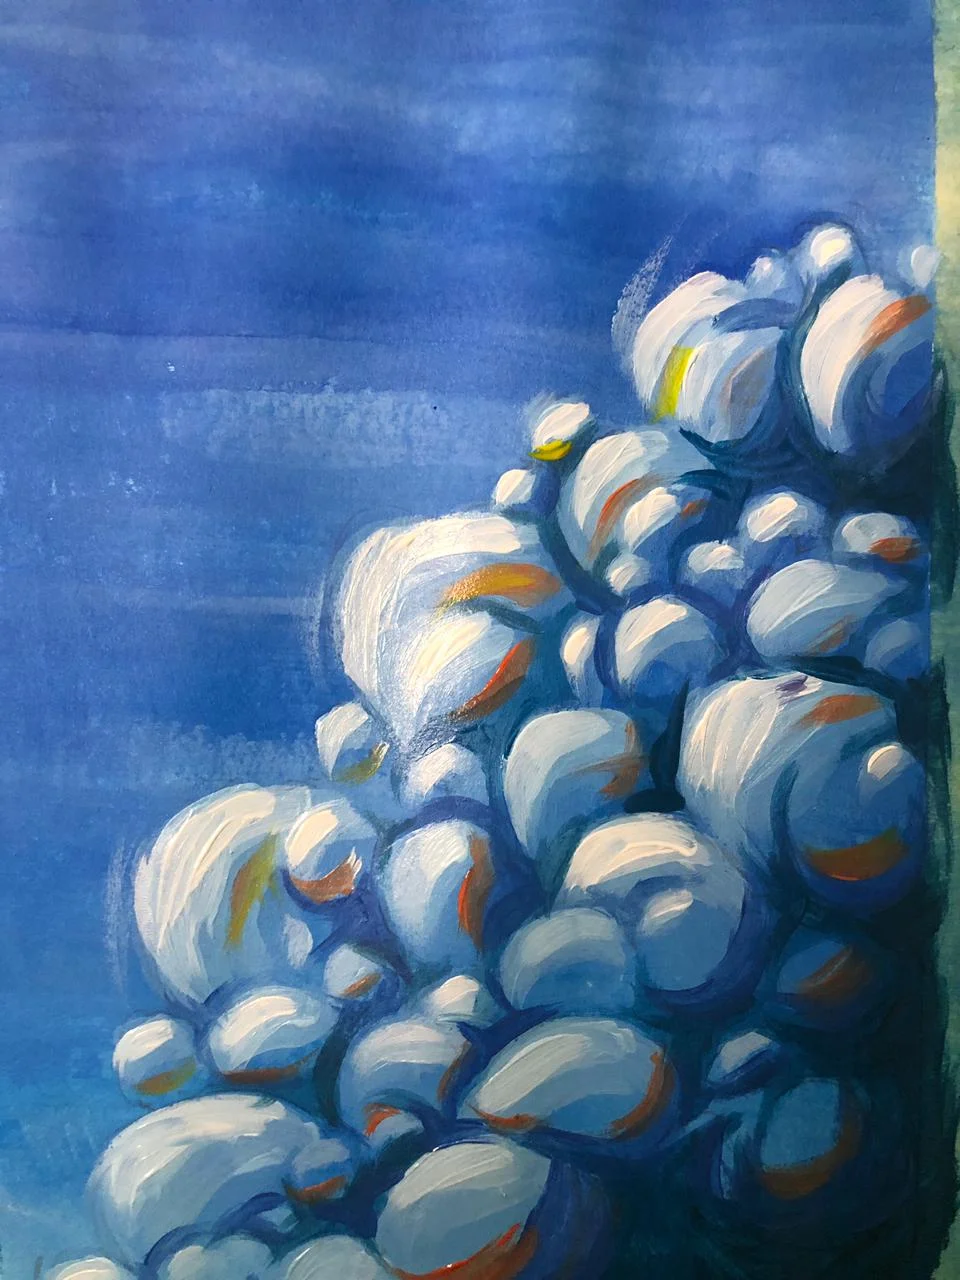
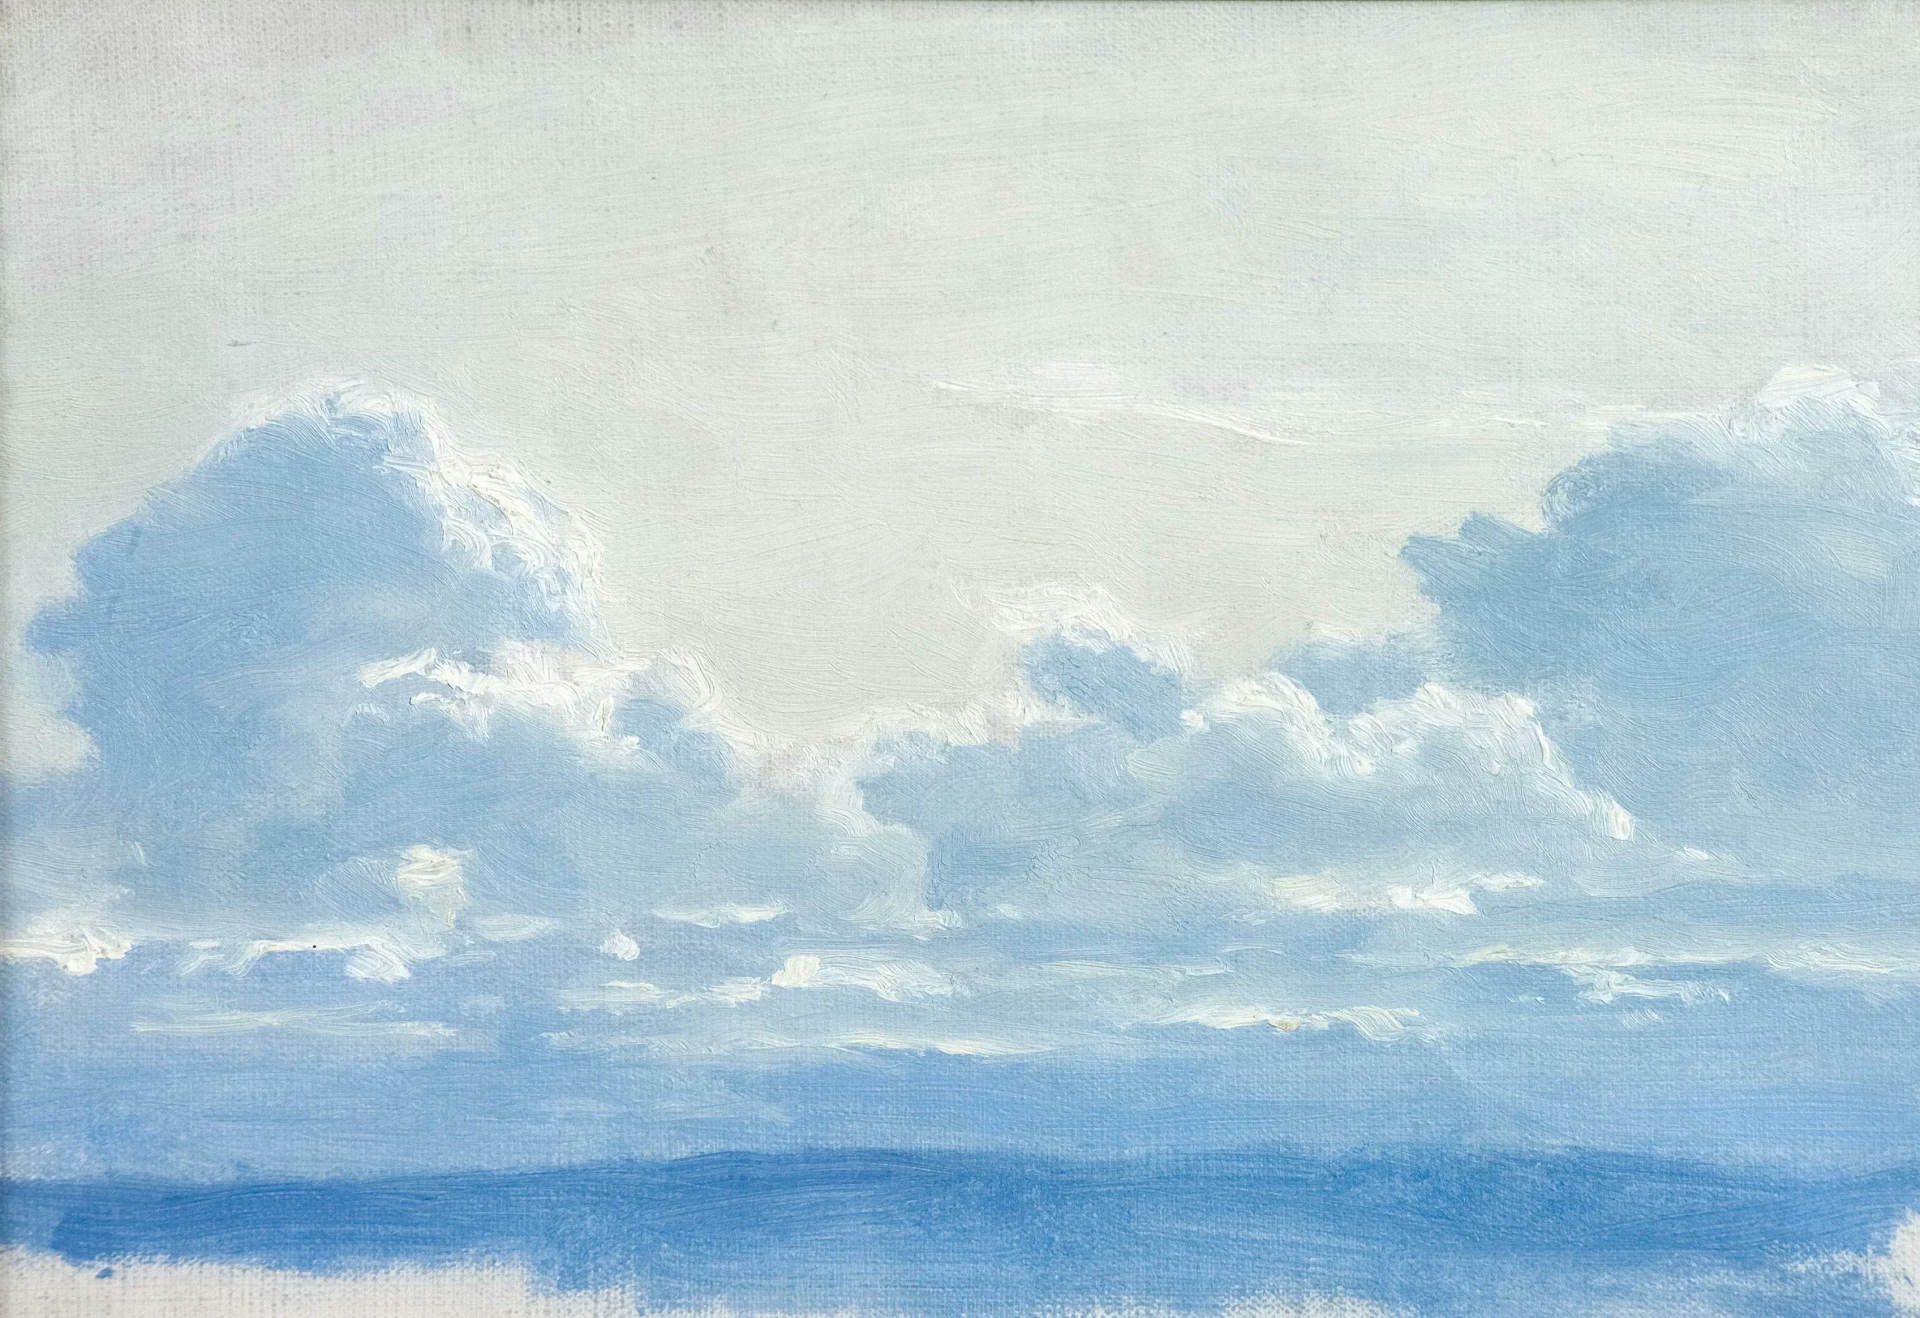
Let's now look at an example of the application of these concepts in a painting. Keep in mind that each type of paint and medium has its own characteristics; for example, in the case of acrylics, the texture marked by the brushstroke gives it a very aesthetic visual identity. Therefore, if you want to achieve soft and delicate clouds, it would be better to use a more suitable material, like oil. In our case, we will achieve dramatic and vibrant clouds.
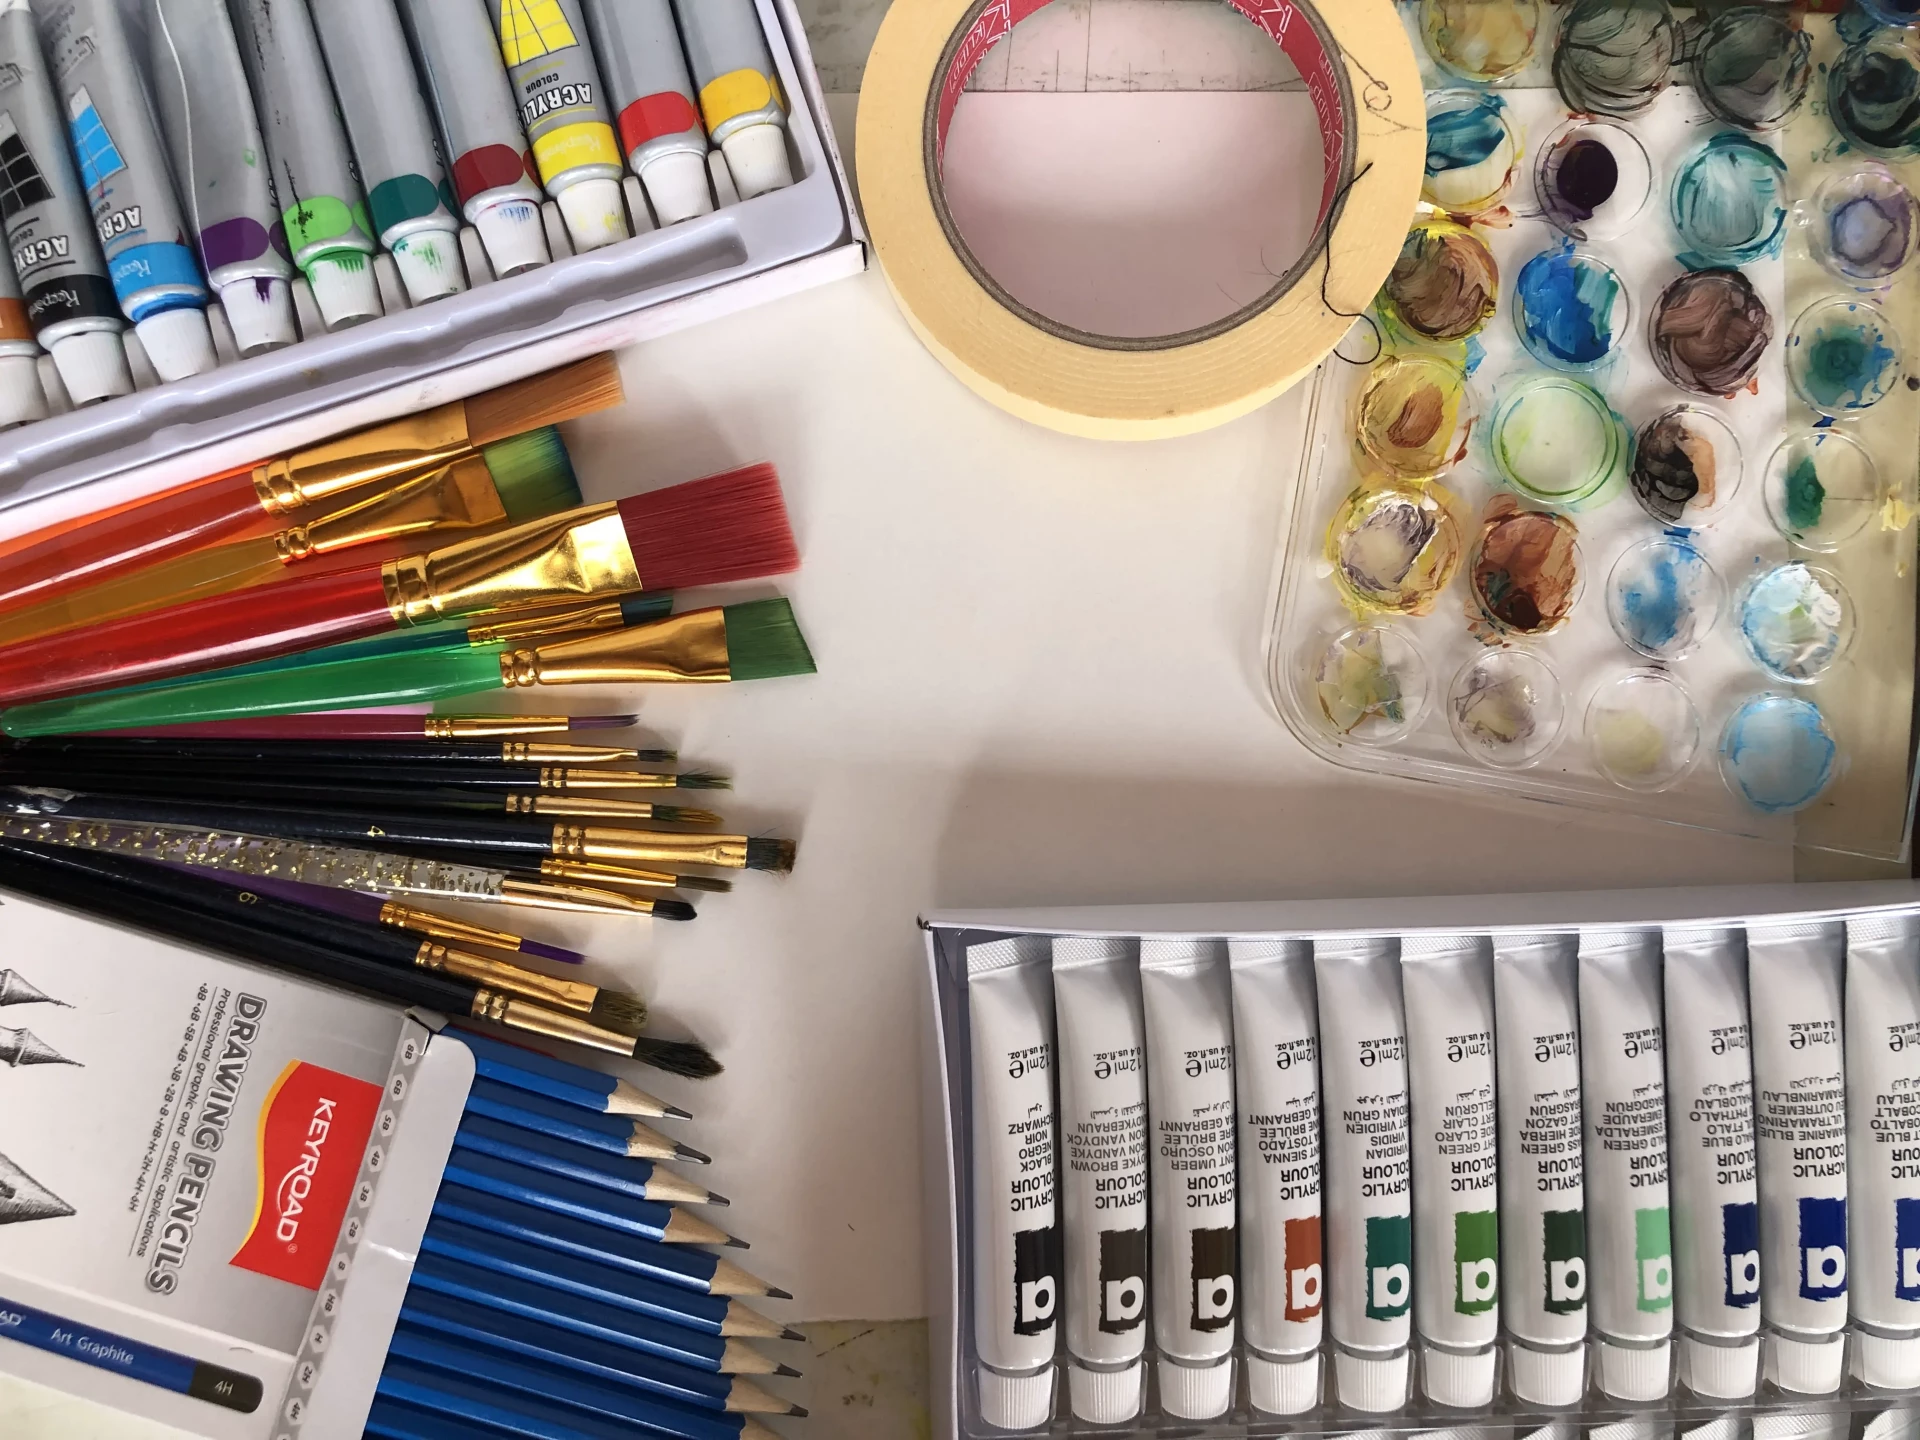
Equipment for acrylic painting
Find a well-lit, spacious area large enough to accommodate all the equipment. Take a piece of paper and a pencil, and write down the following list:
A set of acrylic paints.
Heavy paper, minimum 200 gsm.
Brushes of different shapes and sizes.
A palette for mixing.
Masking tape to attach the paper.
A container of water to rinse brushes and/or dilute the paint.
A cloth or a piece of fabric to absorb excess water.
Begin by securing the paper on a flat surface, making sure to cover the edges well with masking tape. Once ready, you can start sketching.
Painting clouds with acrylics step by step
The first step today will be to paint the sky before anything else. This will give you more freedom to achieve a cleaner gradient. So choose a blue of your preference, load the brush with paint and moisten it with a bit of water to dilute it.
Then quickly cover the largest possible area, reload the brush and start again. It is best to use a wide brush or paintbrush. As you go down, add a little white to lighten and create a gradient.
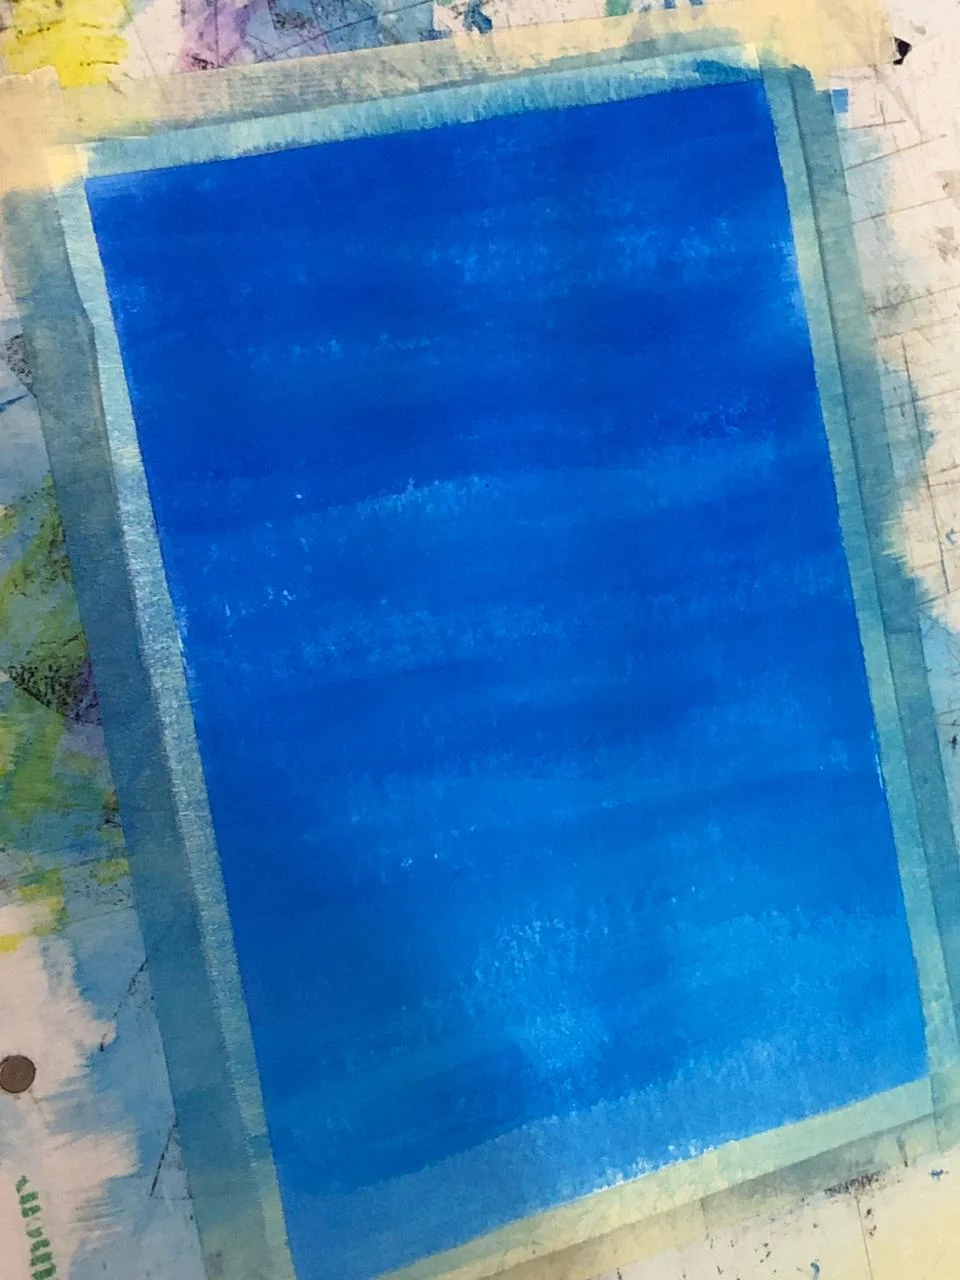
Tip: you can also apply a layer of water with a brush before painting, so that the paint behaves a bit like watercolor.
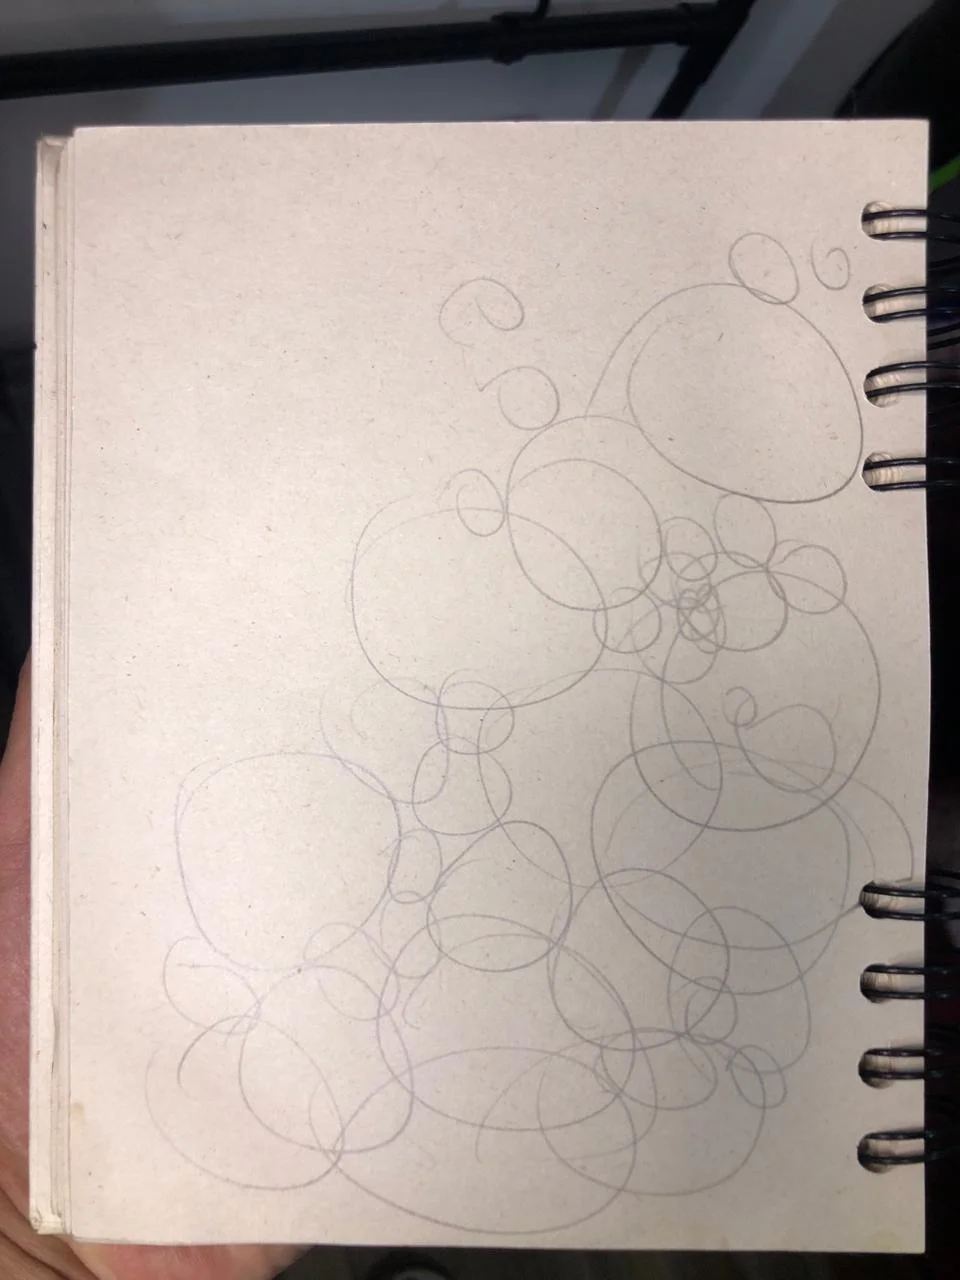
A sketch based on circles
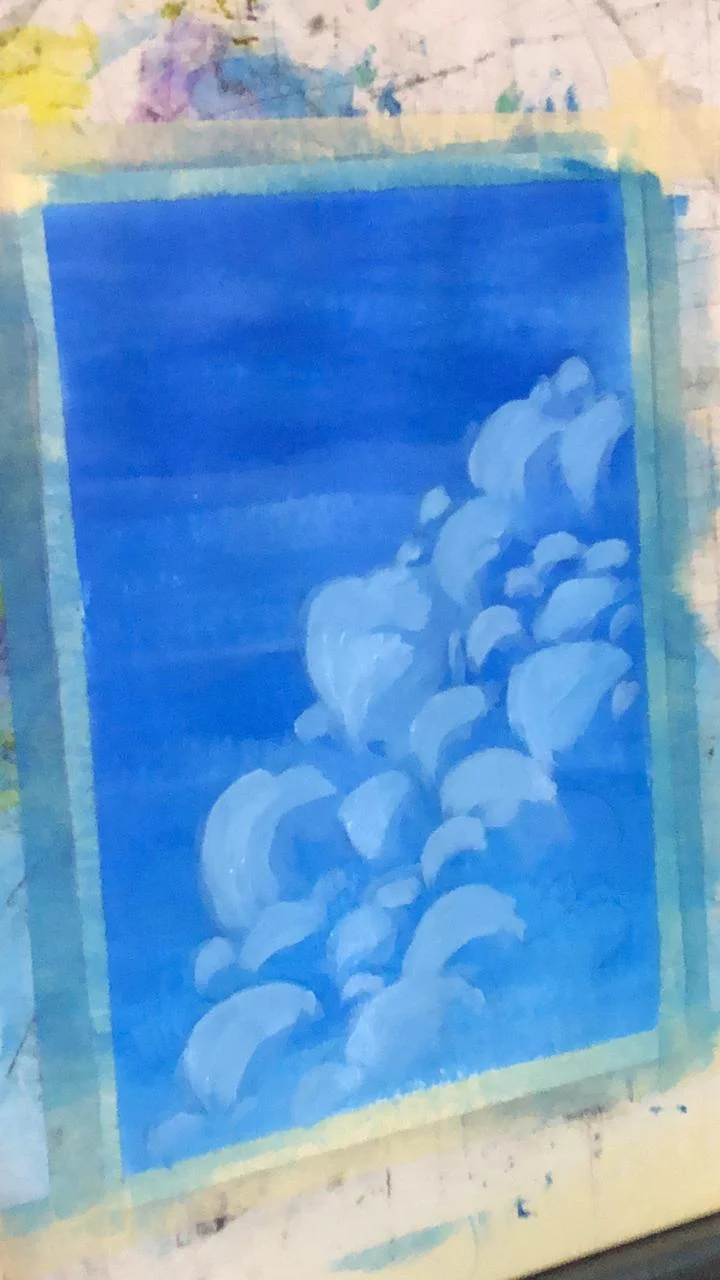
We will start by drawing many grouped circles. Draw some big and others smaller, placed in different positions. Don't worry if they aren't perfect, on the contrary, it’s better that way. Create ellipses and free forms: this will give more dynamism to the composition.
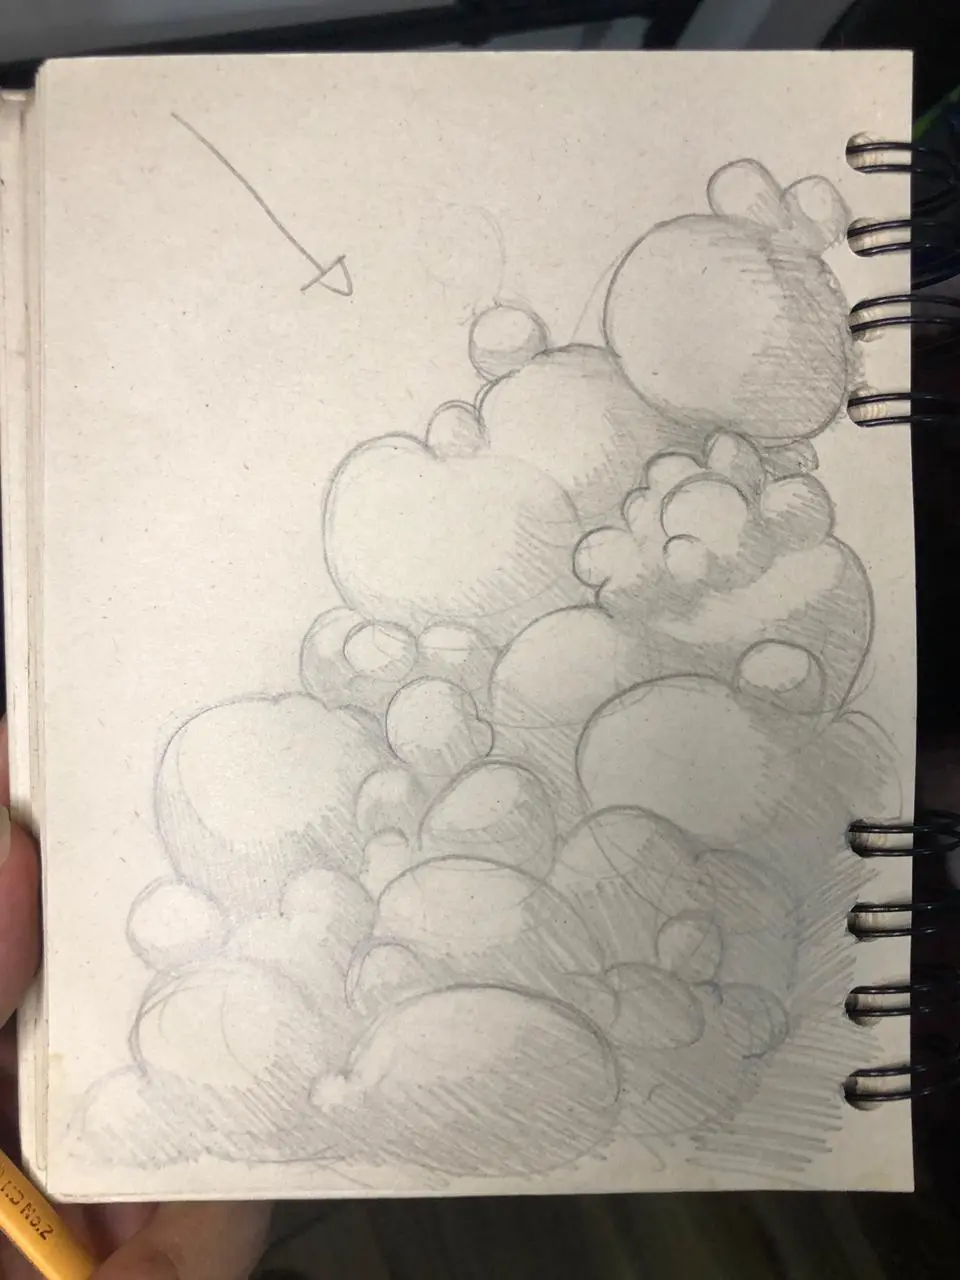
Once you have completed your cluster of circles, choose a light point and draw the general projection of the shadow by transforming the circles into spheres. Then, merge the shadows to form larger areas of volume.
Add light gradually
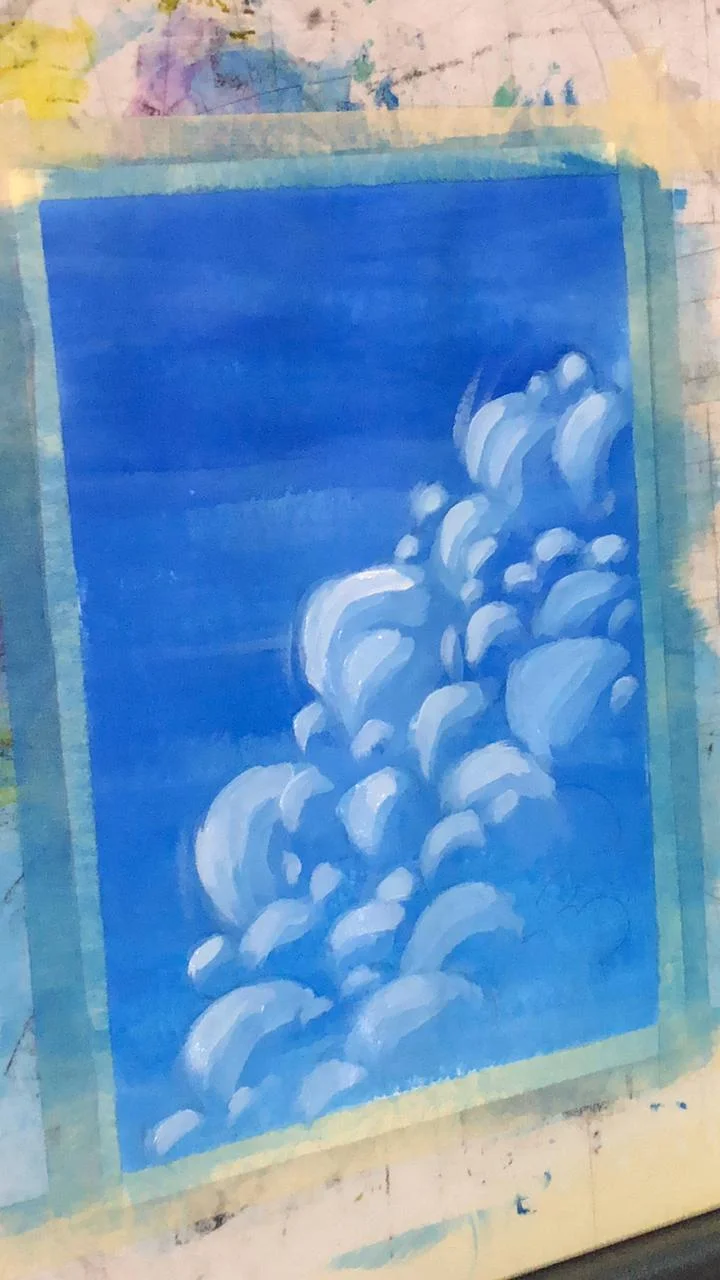
Begin by applying a layer of blue slightly lighter than the sky in the brightest areas. Use light strokes, and if you wish, continue to thin the paint with water to obtain transparent layers, like glazes.
Continue adding layers that are increasingly lighter and thicker. Remember: if you want the new layers to contrast well without blending, you must wait for them to dry before continuing. Take a few minutes break between the brightest layers.
Paint the dark areas with acrylic
Take your base color (the same as the sky) and darken it. Remember not to use black: in this case, it is important to maintain saturation. Instead, add a little orange, as it is its complementary color, or purple, which is the darkest shade. You can also use both in different areas to create tonal variations.
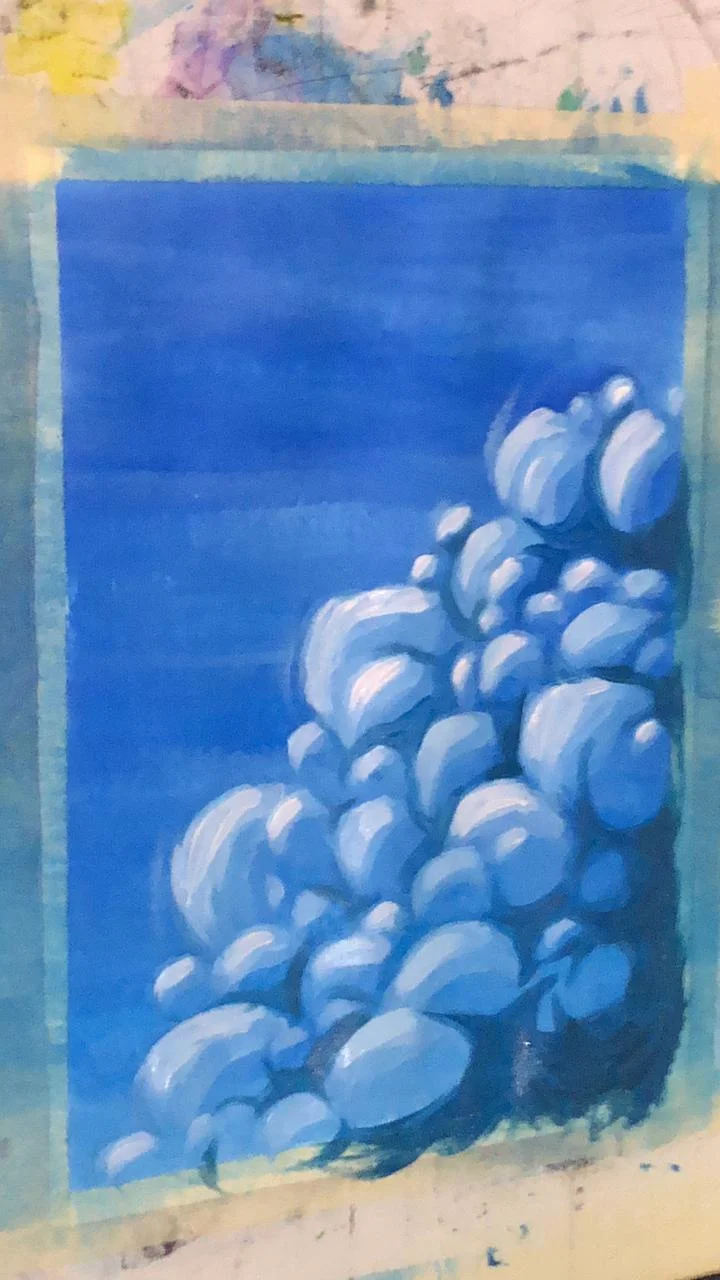
At this stage, we can let ourselves be carried away by pictorial freedom by adding touches of colors like orange, yellow, or even turquoise. This will give the work a much stronger surrealistic character aesthetically.

We've come to the end of today's tutorial. I hope it has helped you better understand how to use this material. As always, I encourage you to create your own version or apply these principles in your own paintings.
Just keep in mind that the base color directly influences the color of the clouds, a point that is particularly useful for painting sunsets or storm scenes. Gradually lighten by using water as a thinner, while allowing areas of contrast to appear.
To darken, opt for a complementary color or a darker neighboring shade, and avoid black if you want to maintain good saturation. Finally, don't hesitate to stray slightly from realism to add more strength and vitality to your work.
Discussion
No comments yet.