How to Paint a Portrait with Gouache
Hello everyone! Today, I'm going to help you discover a vibrant and colorful technique: painting a gouache portrait of a woman. Bright, vibrant, and rich in texture, gouache enables us to capture both the softness and strength of a face with a relatively spontaneous look.
Get your brushes, your colors, and your paper ready, and let's make a start!
Gouache painting materials
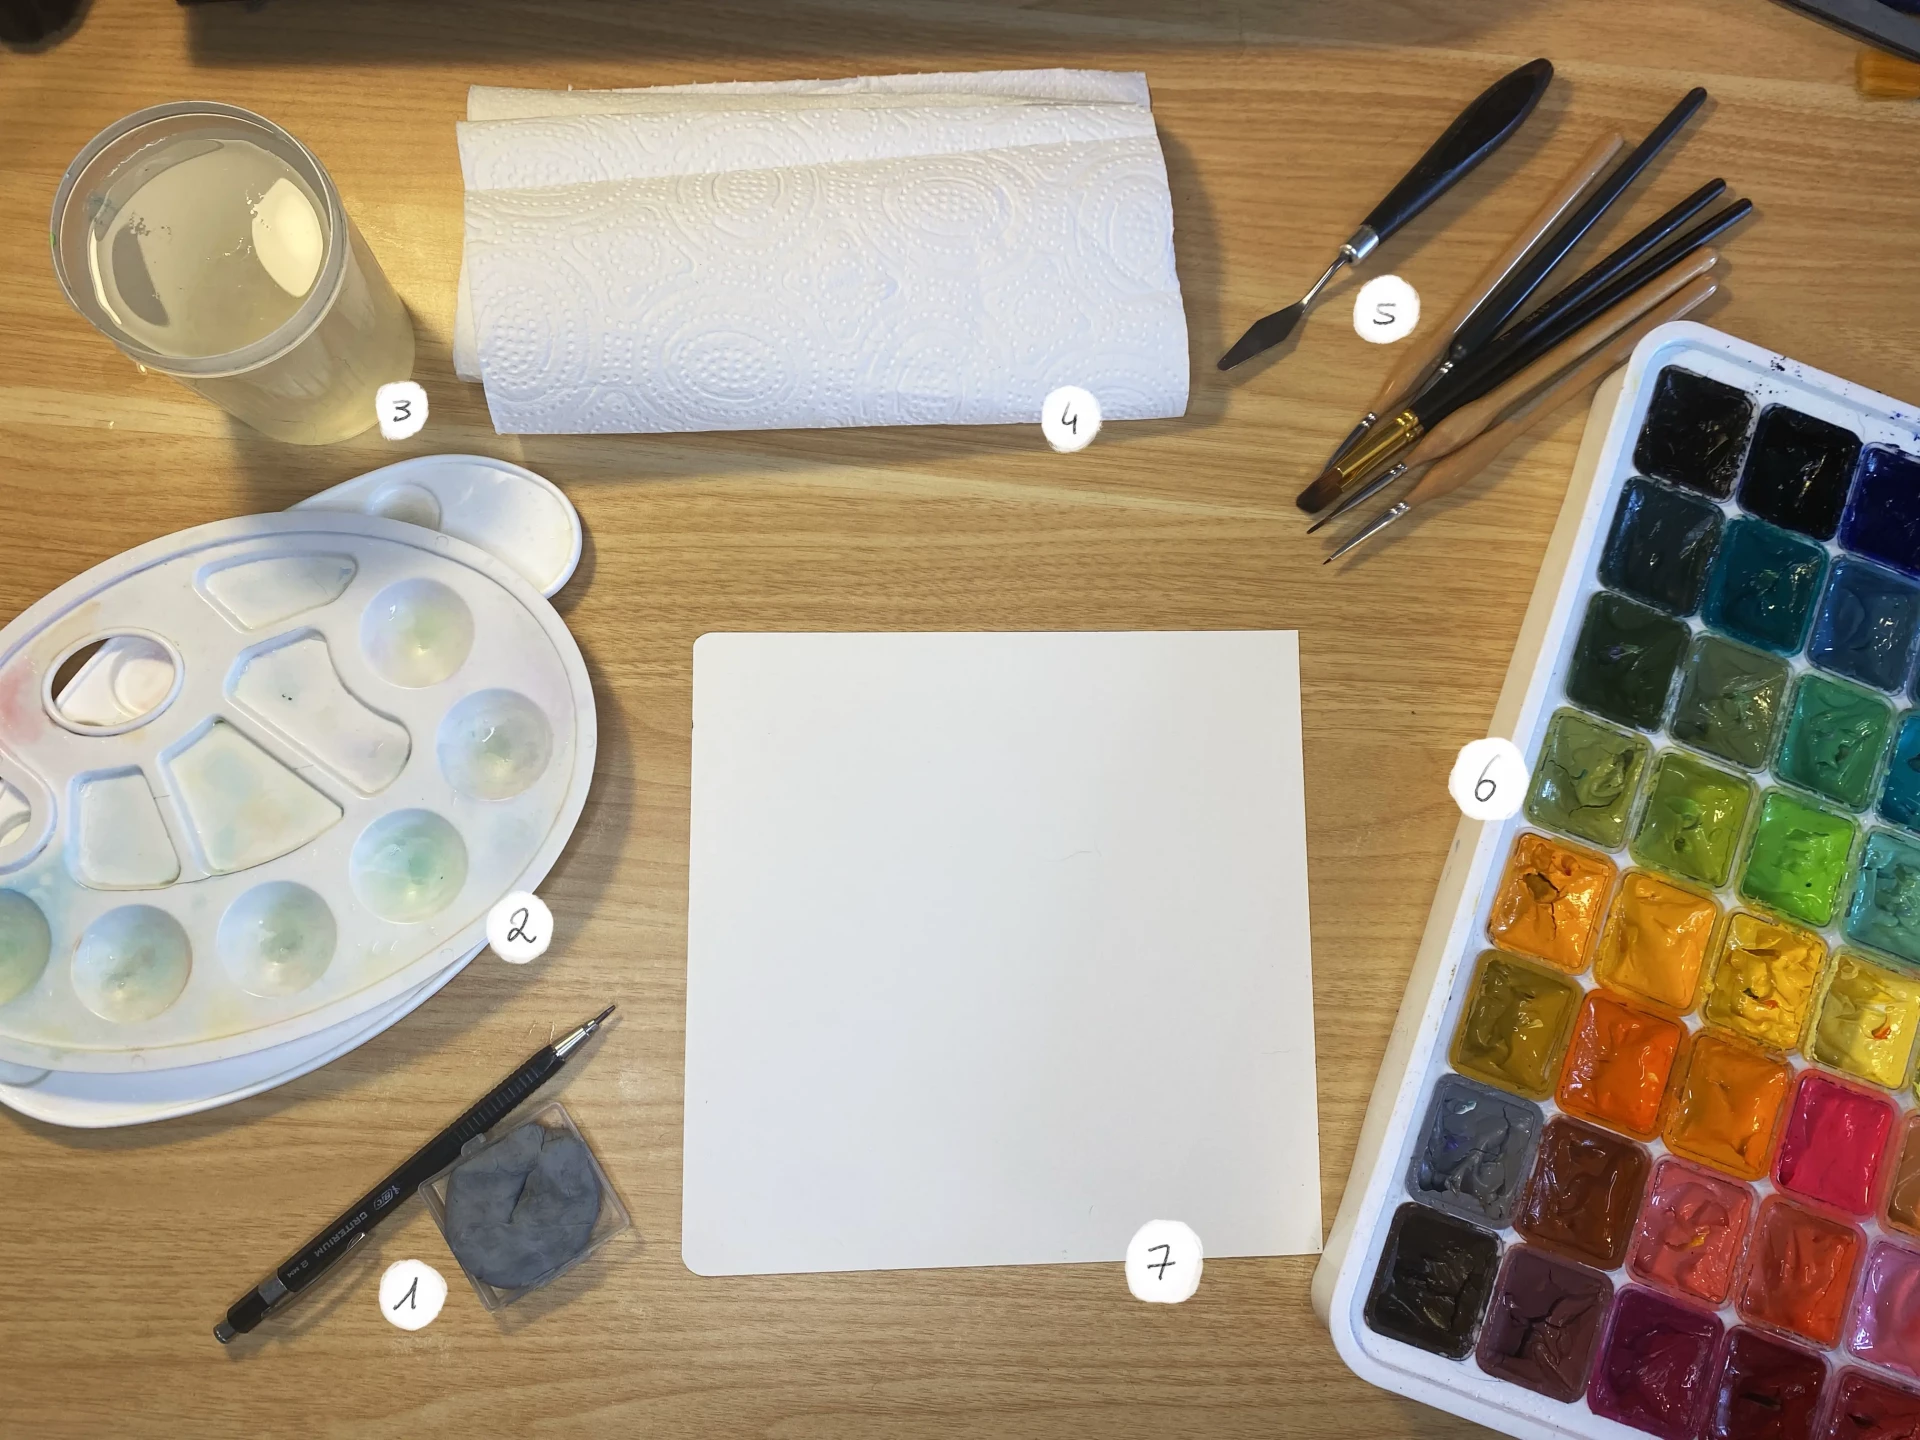
The materials required for painting with gouache are quite basic, let's see:
1. A graphite pencil and a kneaded eraser for making a preliminary sketch
2. A palette (any type, as long as it can hold paint, anything will do)
3. A glass of water, or even two, is even better
4. A paper towel (or a cleaning cloth) to wipe your brushes
5. Brushes and optionally a knife to remove or apply paint
6. Gouache in palettes or tubes: use whichever you are most comfortable with
7. A thick sheet of paper (at least 250 g/m²) to prevent it from warping
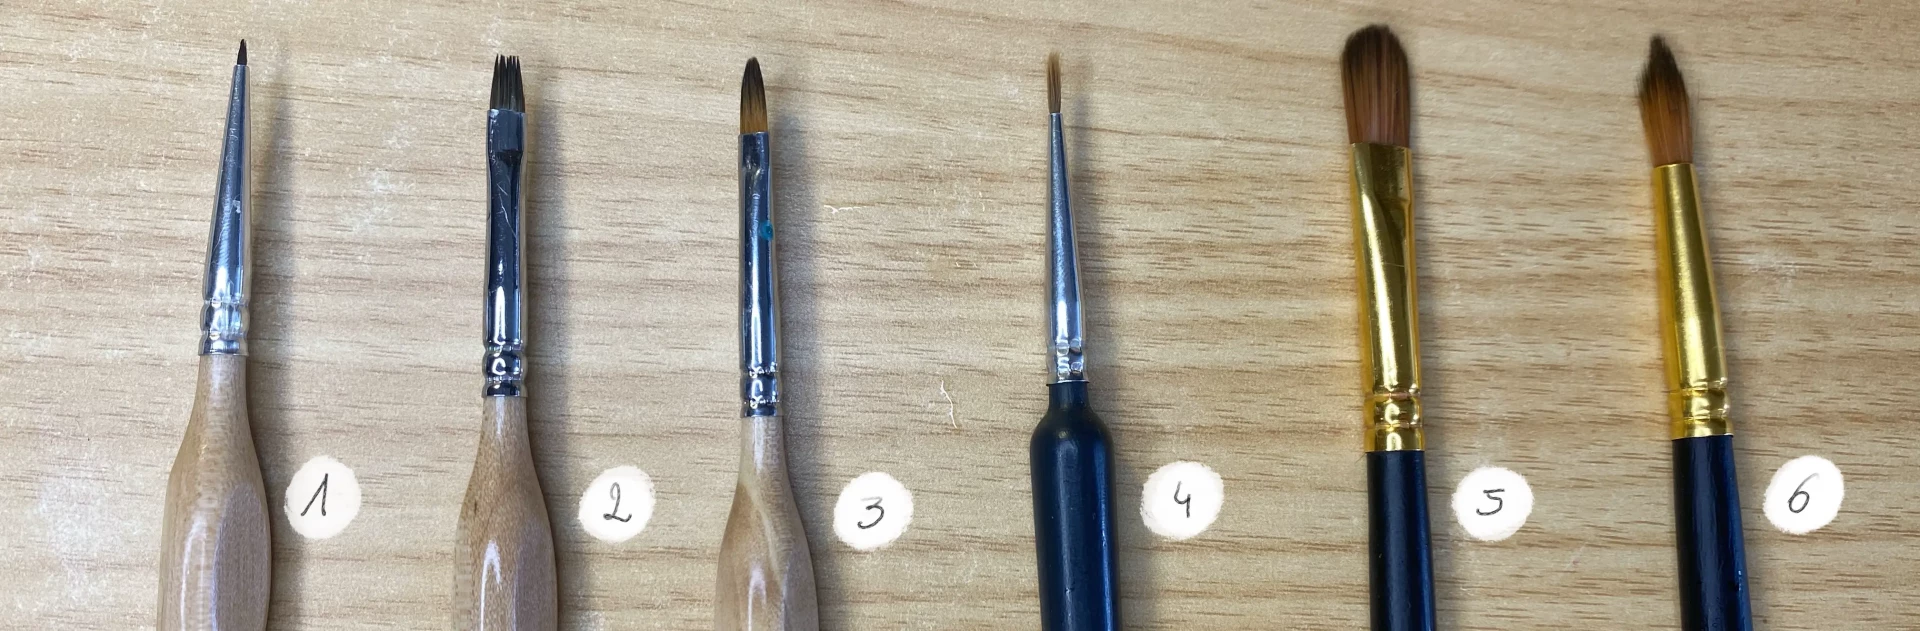
Regarding brushes, there's no need to have so many: the main thing is to choose ones that are suited to the size of your surface. Here, I'm working on a fairly small format, so I use small brushes, which are more precise and easier to handle on this kind of surface.
If you are working on a larger format, you will need wider brushes to quickly apply the colors without too much effort. I'm showing you several brushes here for more ease while painting, but you can absolutely limit yourself to two or three well-chosen ones.
1 very fine liner for fine contours and small precise strokes such as eyelashes.
2. Flat, for neat solid sections or angular areas (jaw, nose).
3. Fine round, for detailed areas.
4. Liner, for small details: reflections, pores, tiny contours.
5. Cat's tongue, to gently blend colors, follow the contours of the face.
6. Round, for main shapes, wide areas, and smooth gestures.
Paint a gouache portrait step by step
Let's move on to painting. Before we start, if you want to review the basics of portrait drawing, I suggest you check out our article on how to draw a pencil portrait.
It is also important to keep in mind that a gouache portrait will not have the same effect as an oil portrait, for example. With oil painting, colors blend easily directly on the canvas, allowing for a very smooth, subtle, and realistic result.
With gouache, it's different: the transitions are less smooth, the mixes often have to be made separately, and a lot of patience is required if you're aiming for a very realistic look. Generally, the brush marks are still visible, and in my opinion, that's precisely what adds all the charm to a portrait painted in gouache.
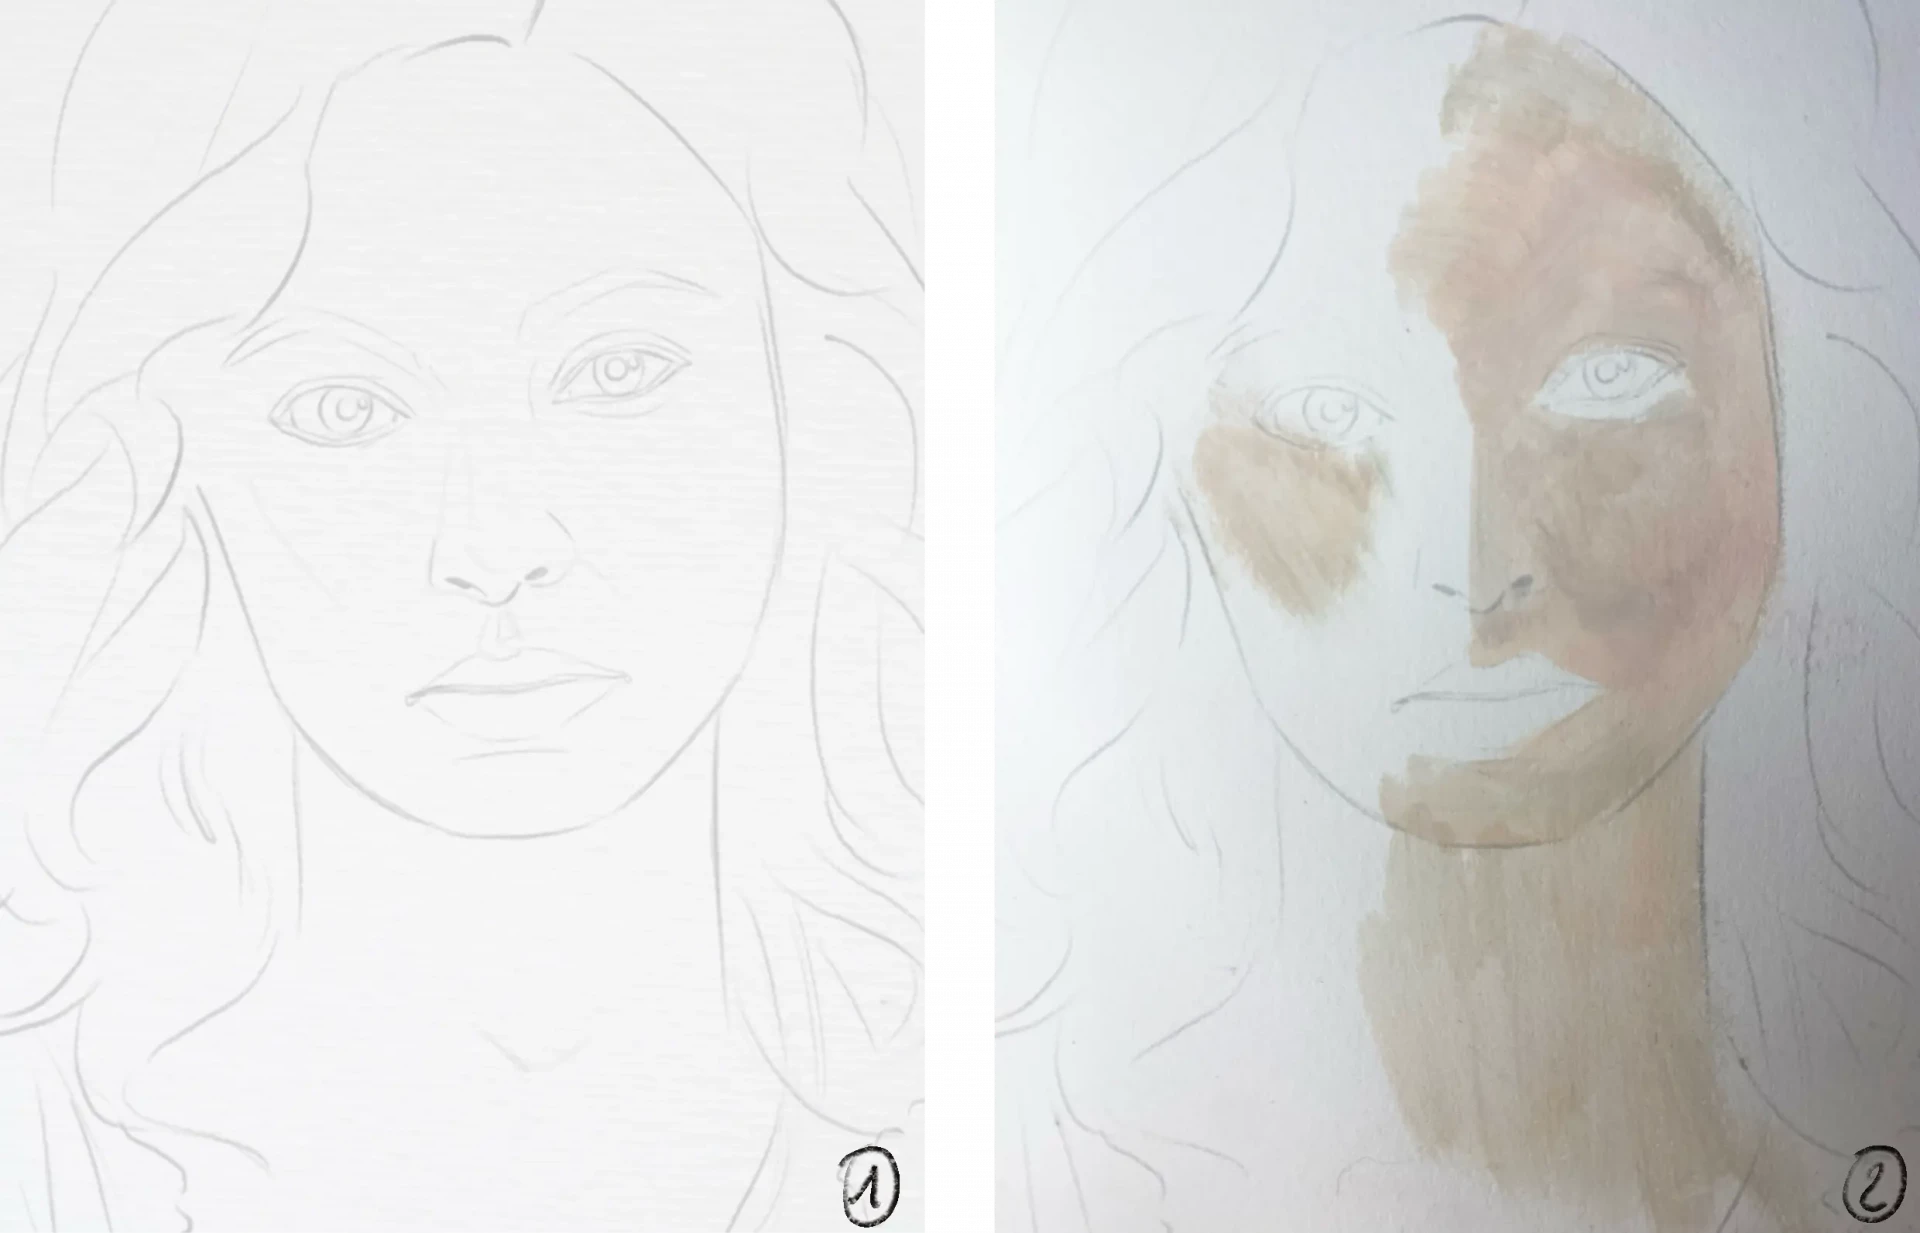
1. I start by making a preliminary sketch in pencil. I like to not press too hard on my lines, but since the paint will cover them later, you can draw them a bit more strongly if you need to.
2. I then start by applying a base color, here a beige. It's a mix of white, red, and a tiny hint of yellow. The idea is to achieve a color that leans slightly towards pink. I apply it in a light layer: it simply serves as a base on which I will build the rest.
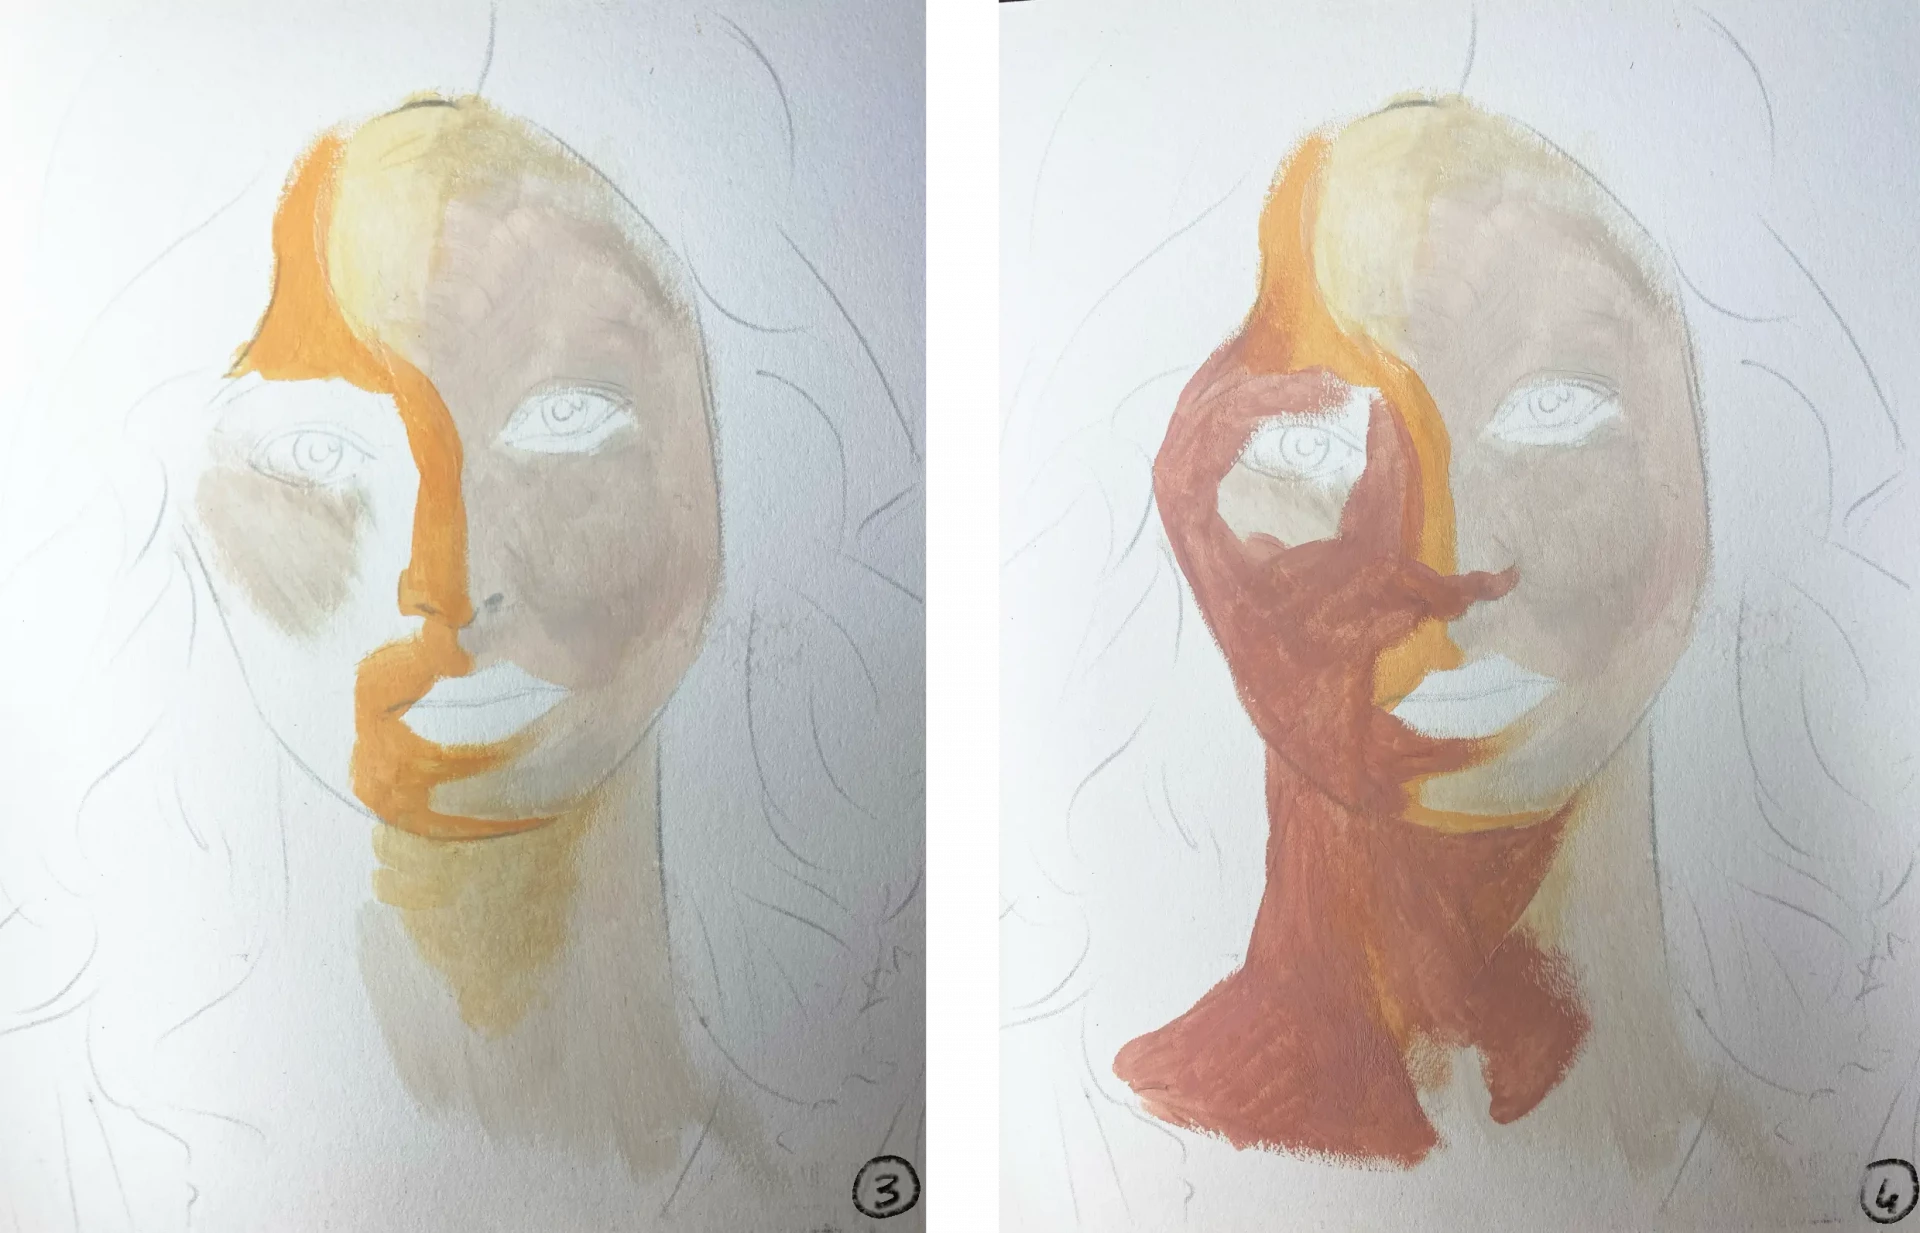
3. I then apply a warmer beige that leans towards yellow, as well as an orange. These colors will help transition between the highlighted areas and the shadow areas. If you look closely, the skin is often very saturated at this point, especially around the cheeks, nose, or ears.
4. I then apply the first color for the shadows: here, a rather desaturated orangey pink. To achieve this shade, I start with the same orange as before, to which I add a little blue and red. In general, shadow areas on a face lean towards slightly cooler hues, often in blue or purple tones.
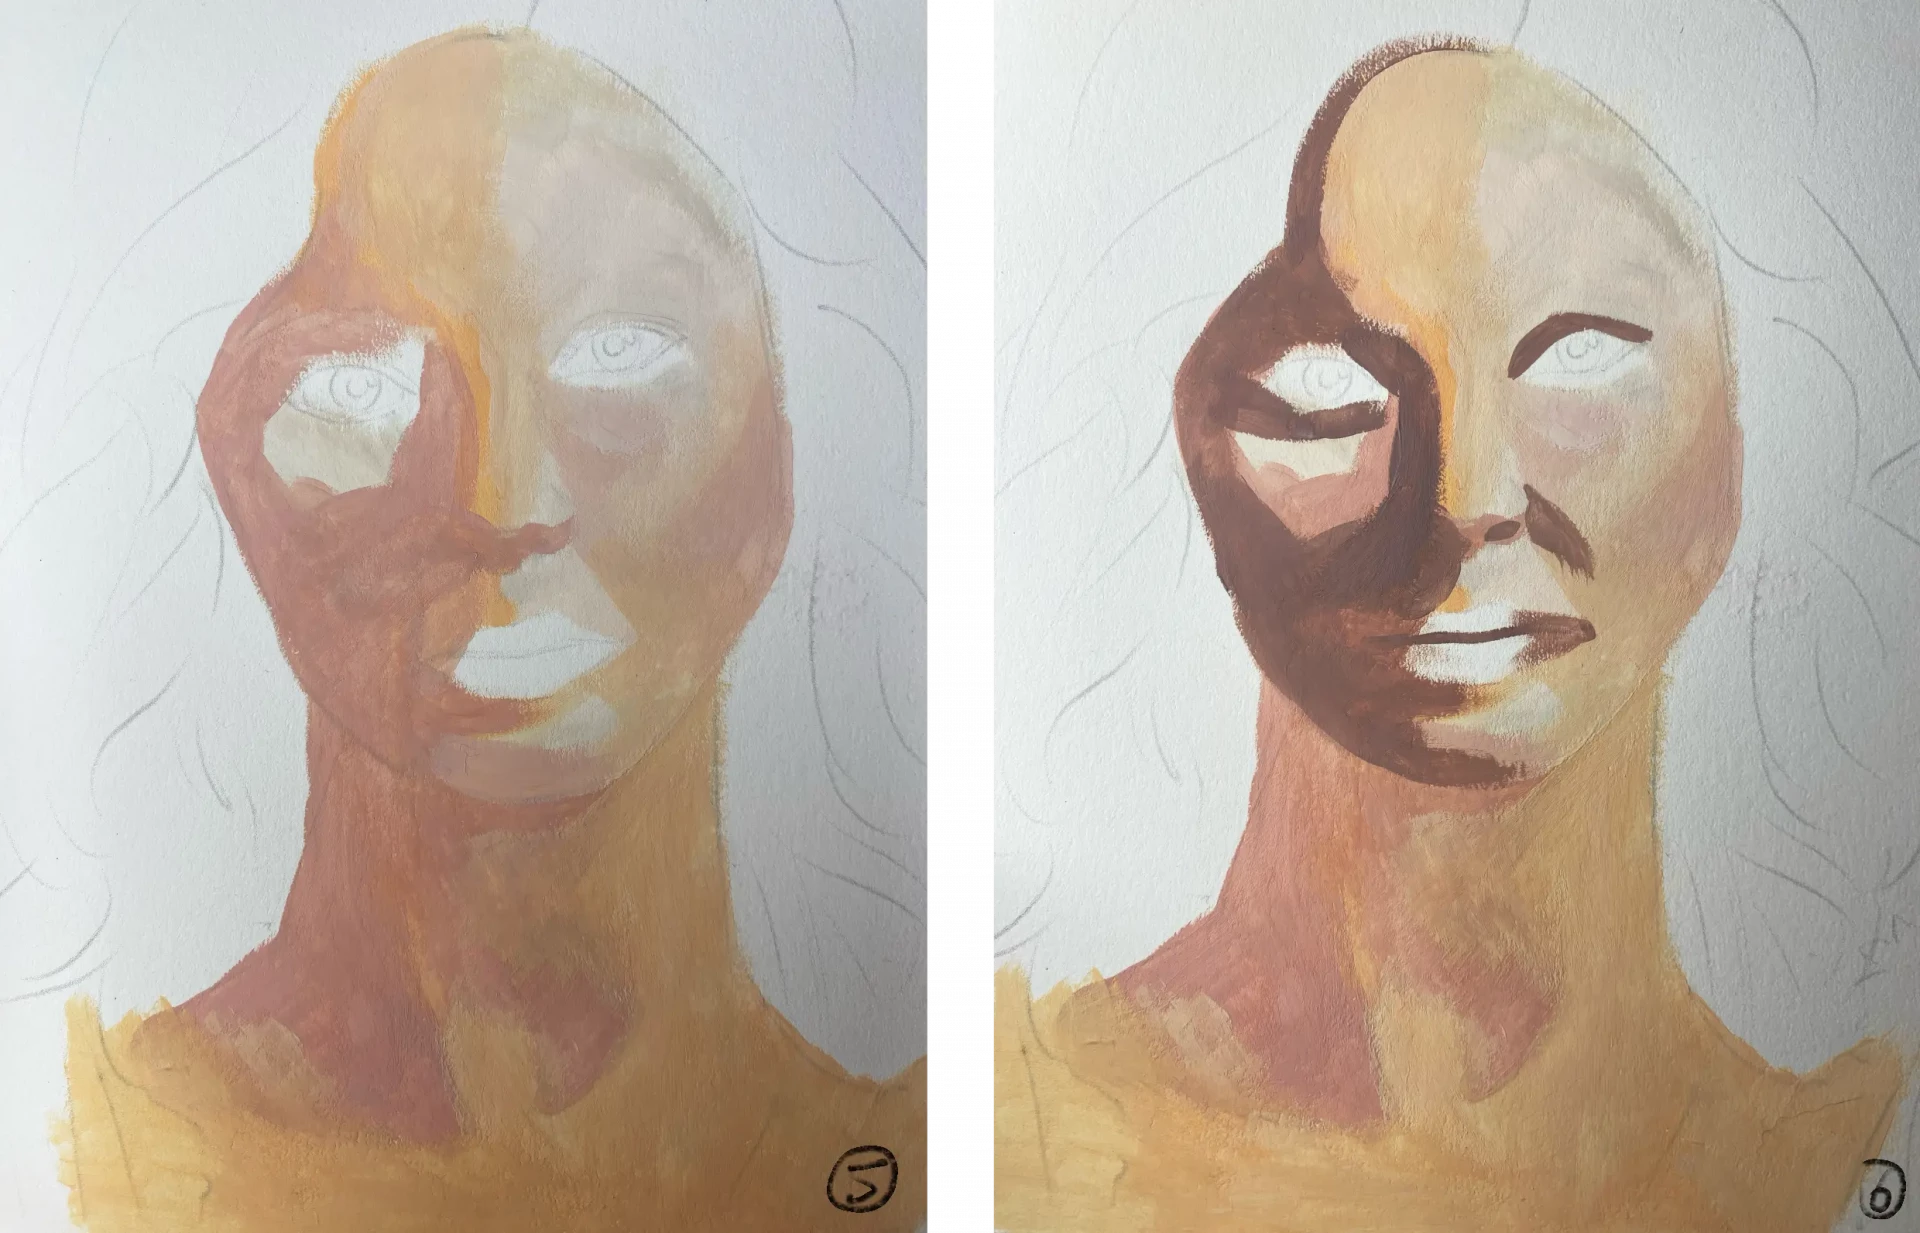
5. I then reapply the orange/beige mixture to the rest of the neck. This helps to unify the base while keeping consistency with the shades used for the face. Keep in mind that with gouache, colors change slightly as they dry.
6. Thus, we have to expect some back-and-forth: we often return to apply several layers to refine the contrasts and achieve subtler transitions. Here, I am adding a brown that slightly leans towards pink, to reinforce the shadows while maintaining some warmth in the complexion.
Add the background to the painting
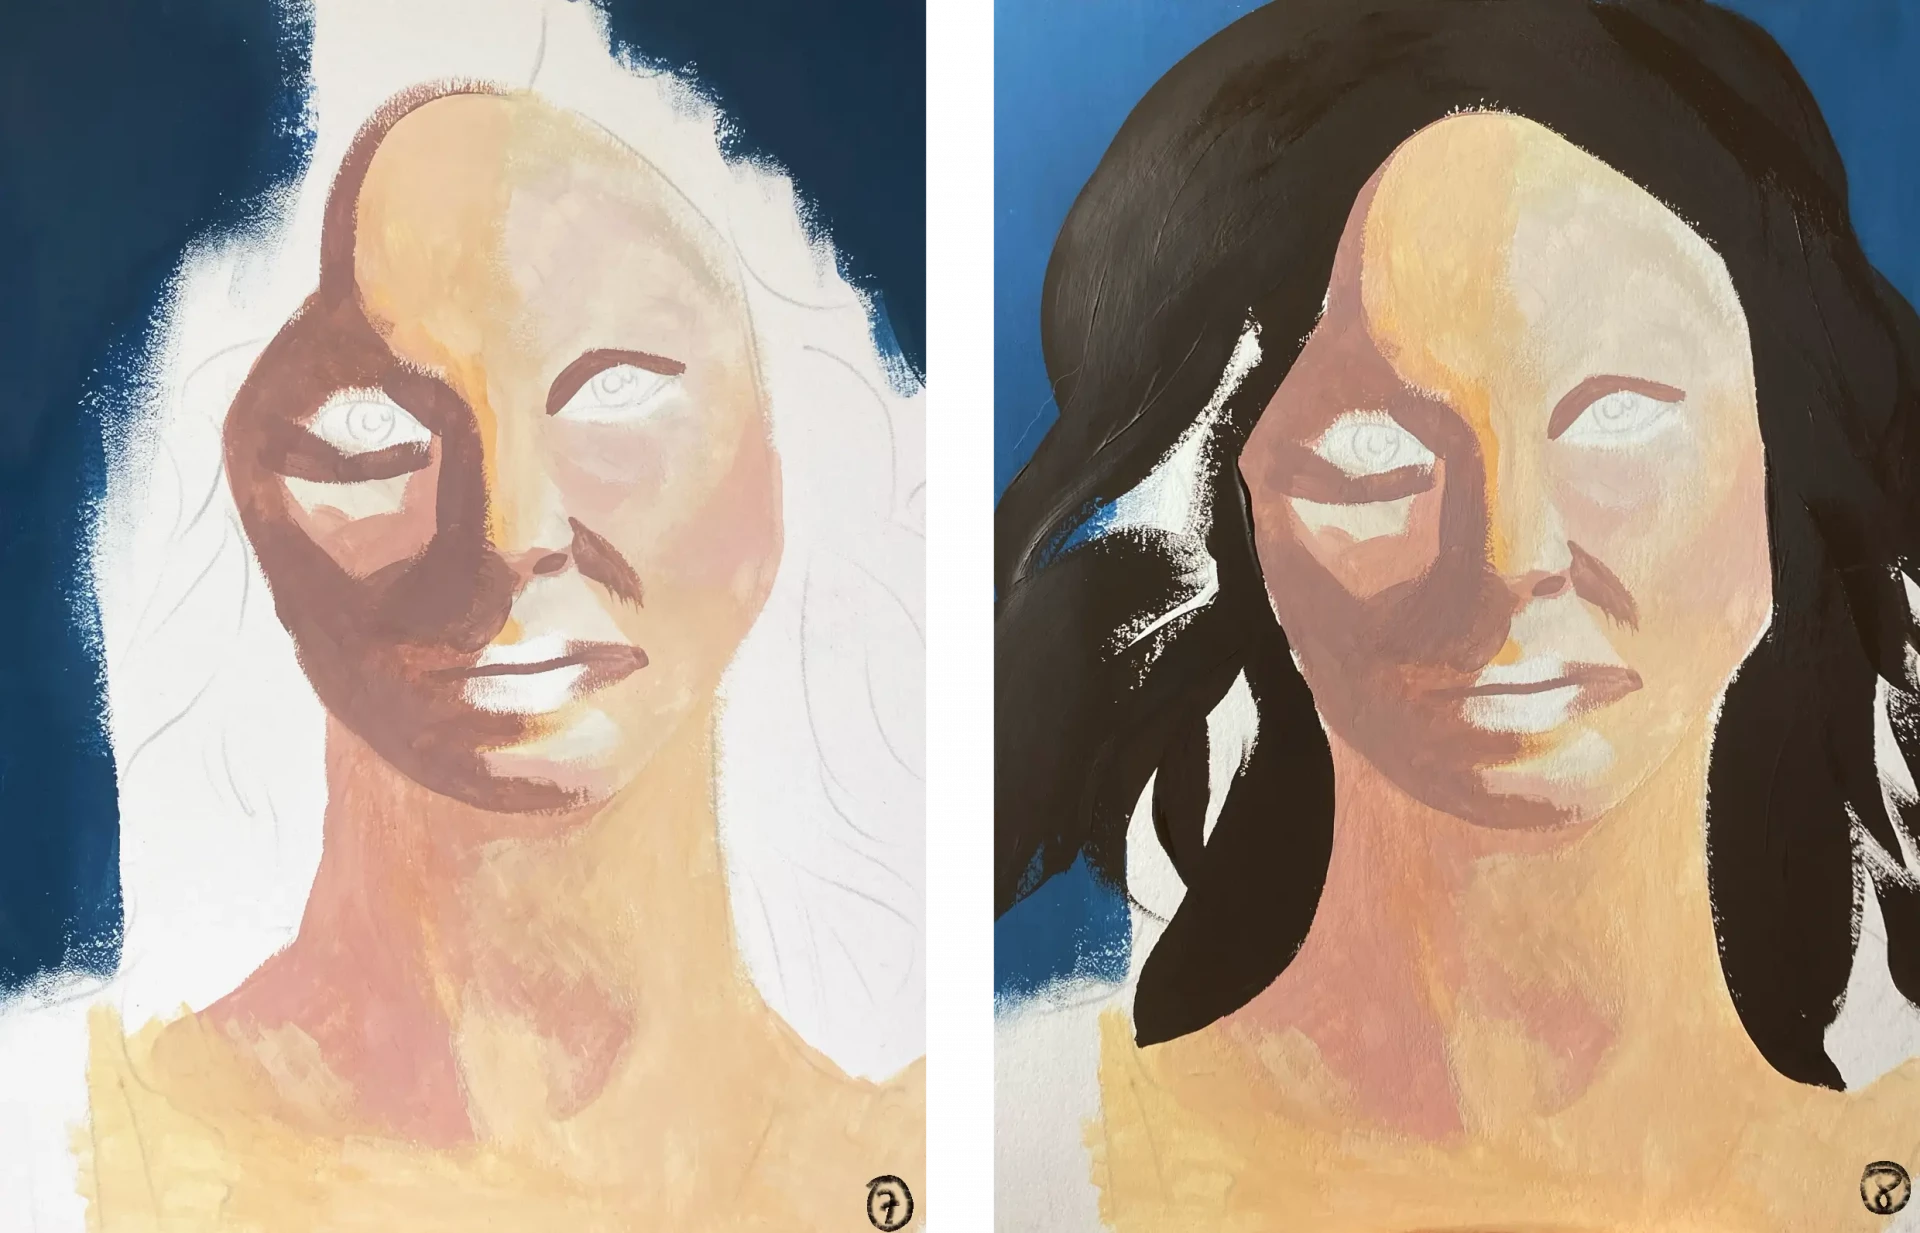
7. To better assess the contrasts, I've just painted the background. It immediately changes the perception of the colors already laid down: they suddenly appear much lighter. It's a good trick for better adjusting the values.
8. I then apply the hair color, starting simply with a flat coat. The idea here is just to block out the general shape, I will add details and nuances later.
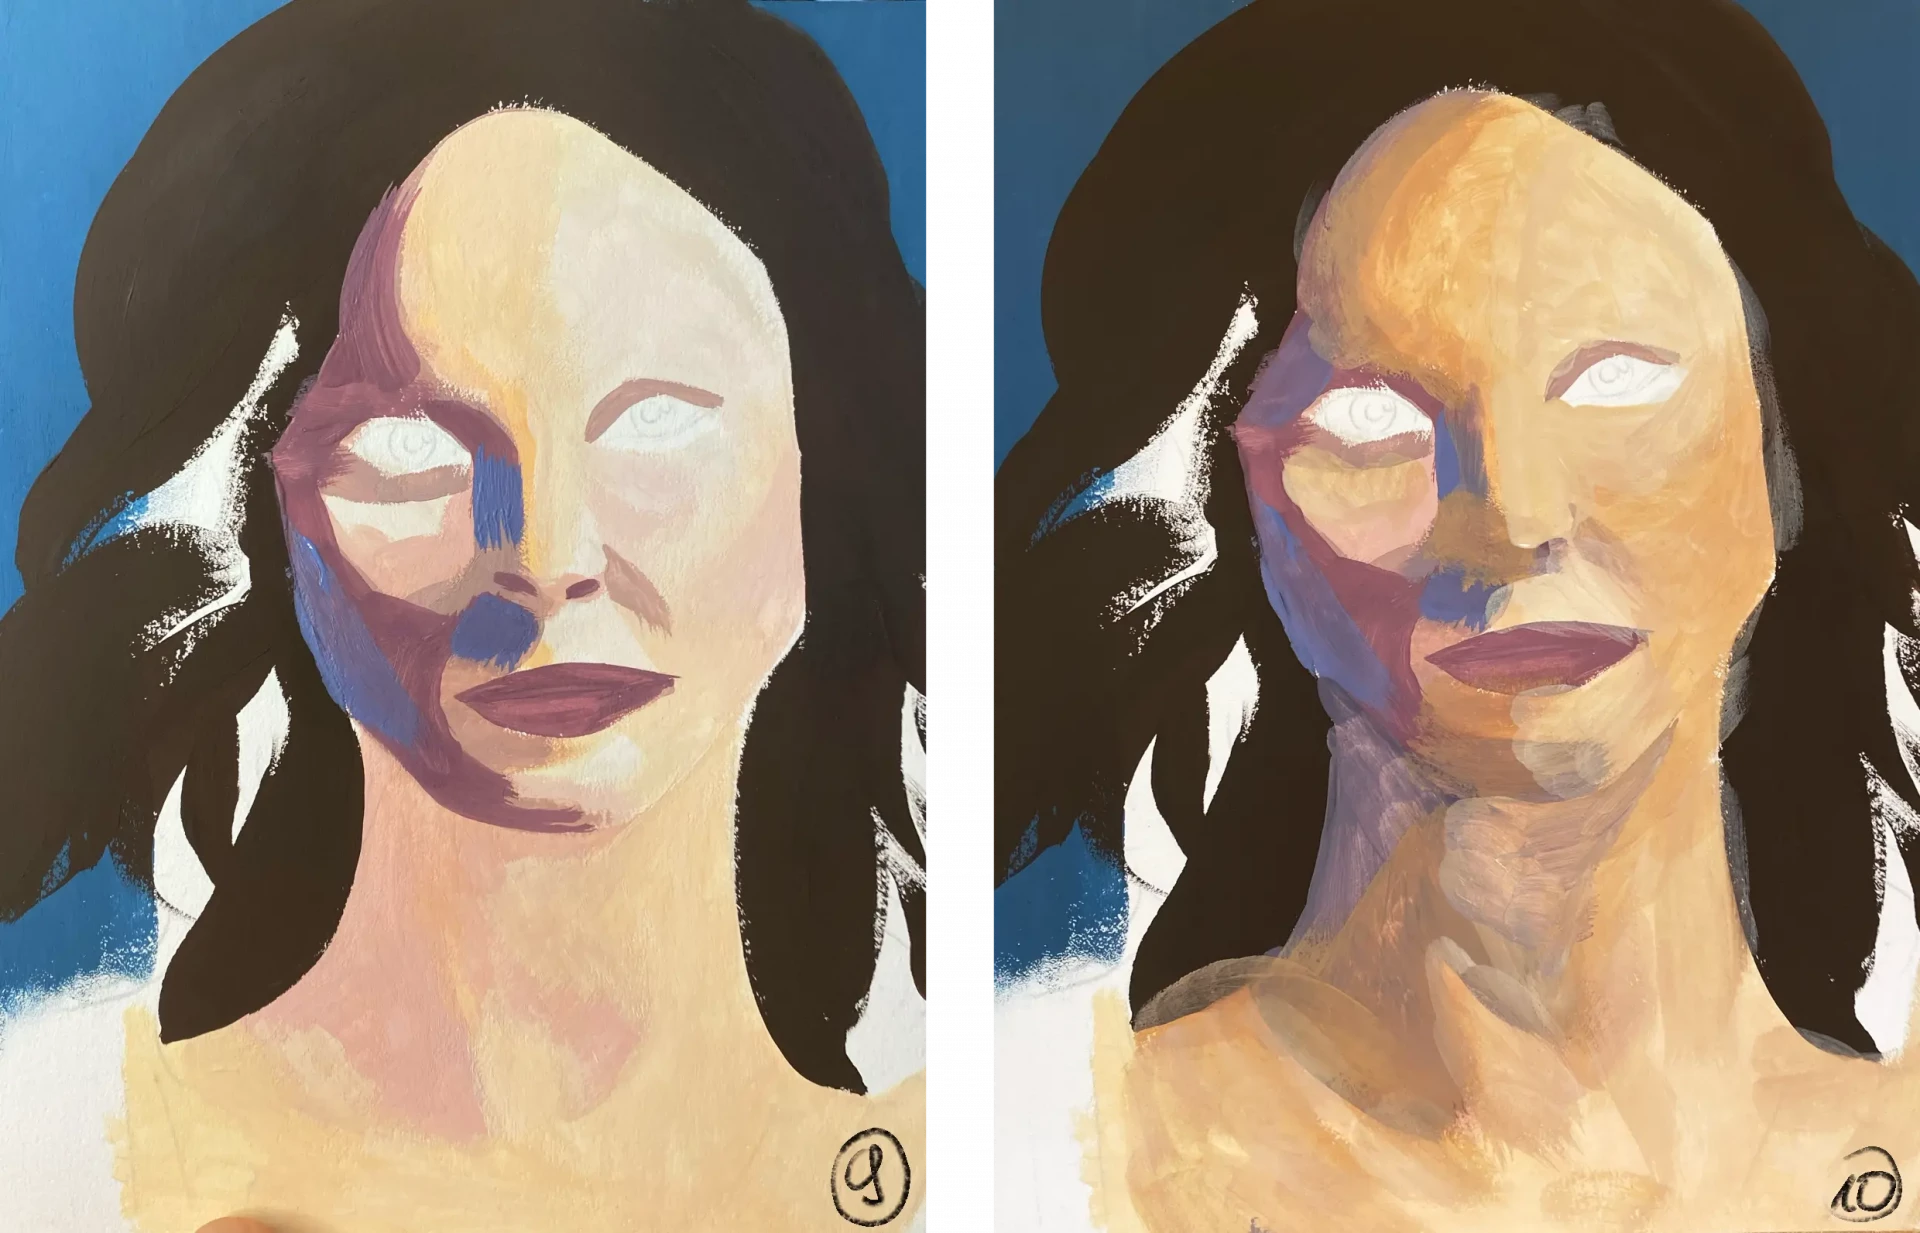
9. I will apply more nuances using a blue, which serves to represent light refracted by the environment, which will bring more depth later on.
10. I reapply an orangey beige to intensify the colors of the portrait a bit. I'm working with rather diluted paint to show the colors subtly. We're arriving at the stages where perseverance is necessary and we must not think that the portrait is just ugly.
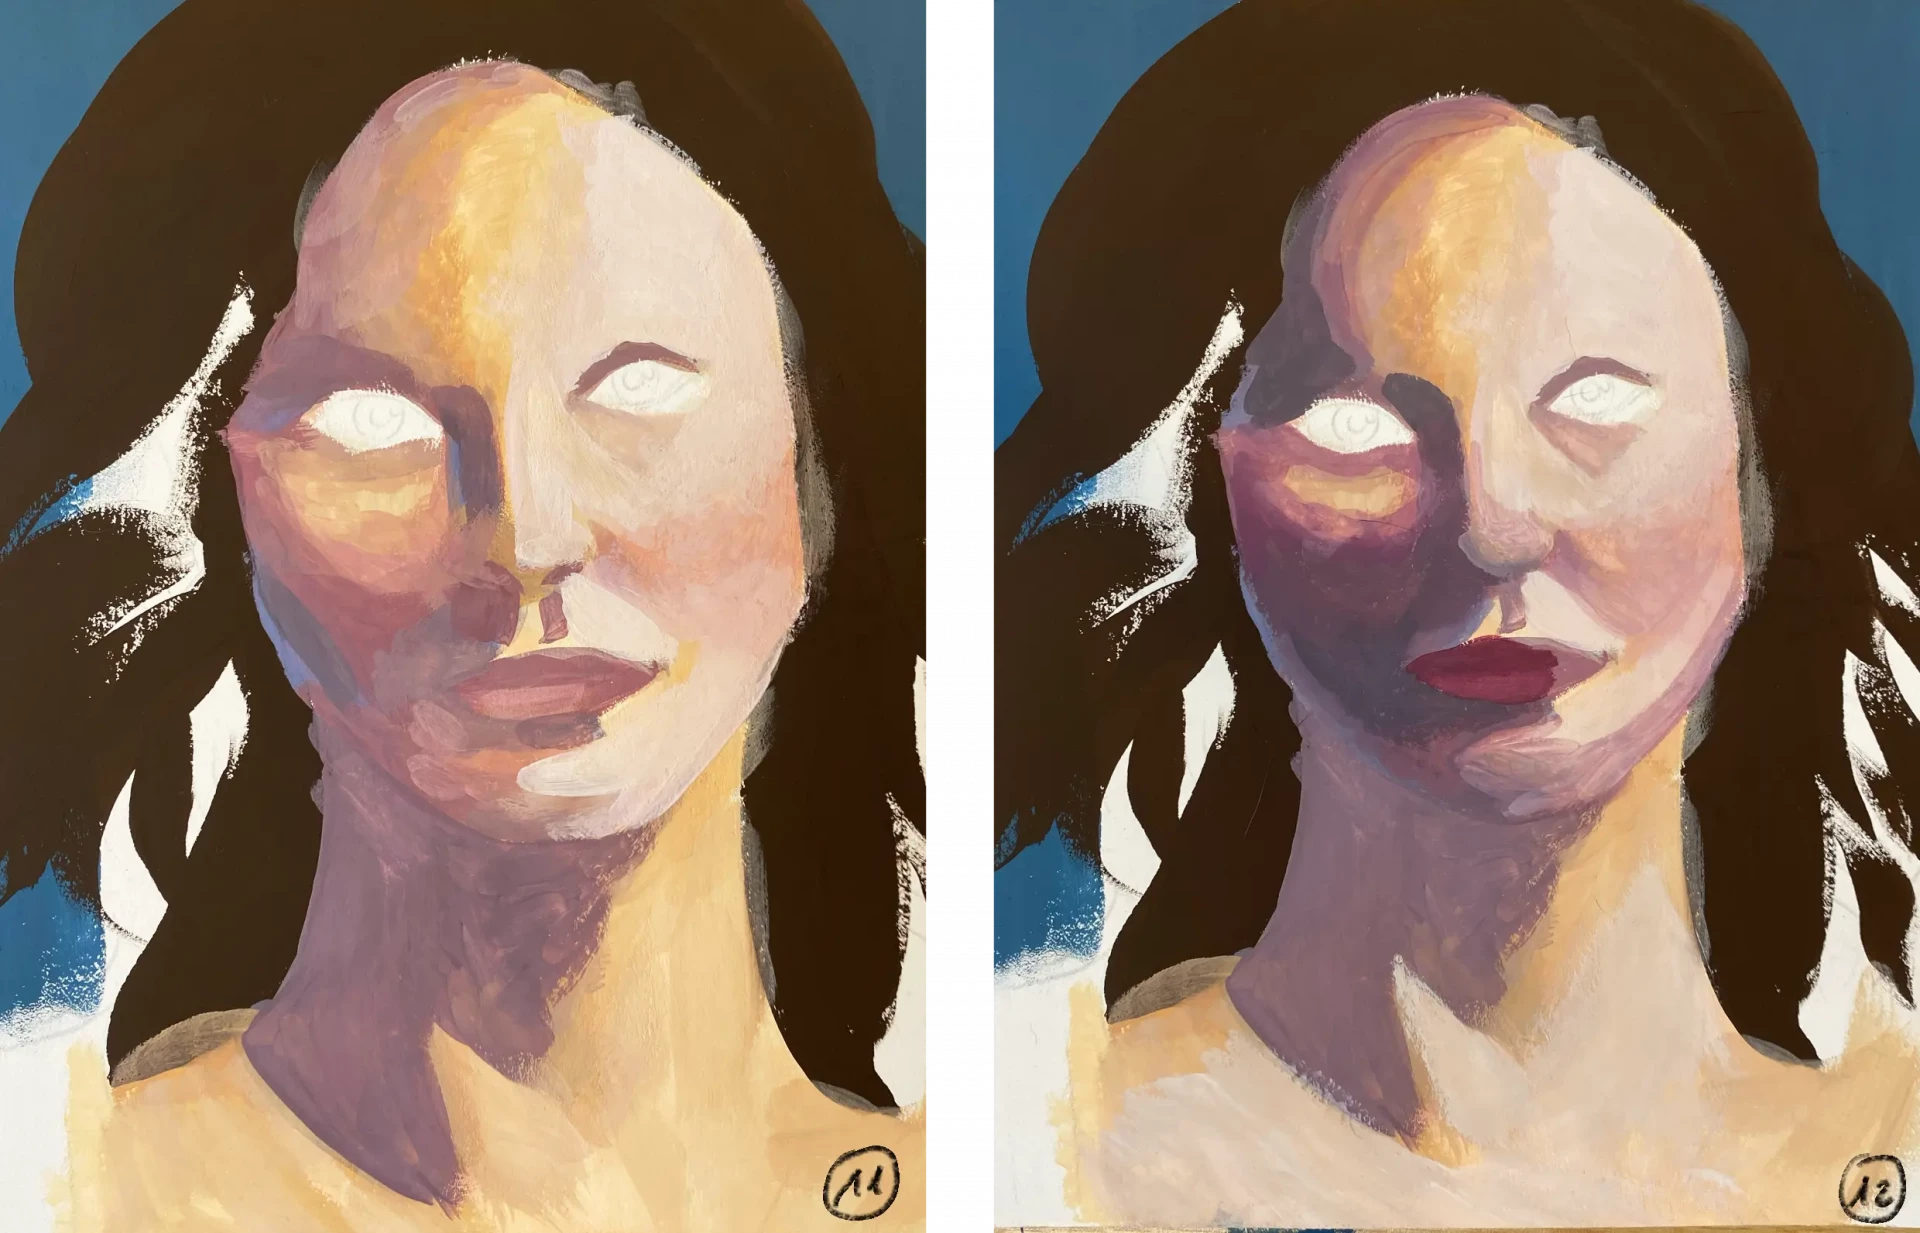
11. I continue to gently increase the contrasts with quite diluted paint. I add a purple for the shadows, and a very light pink for the highlighted areas. Try to always paint following the shapes of the face.
12. I apply several shades to add variation to the shadows: a saturated purple around the cheekbone, a purple for the lips, a very desaturated blue for the deepest shadows. It is the interplay among all these shades that creates depth.
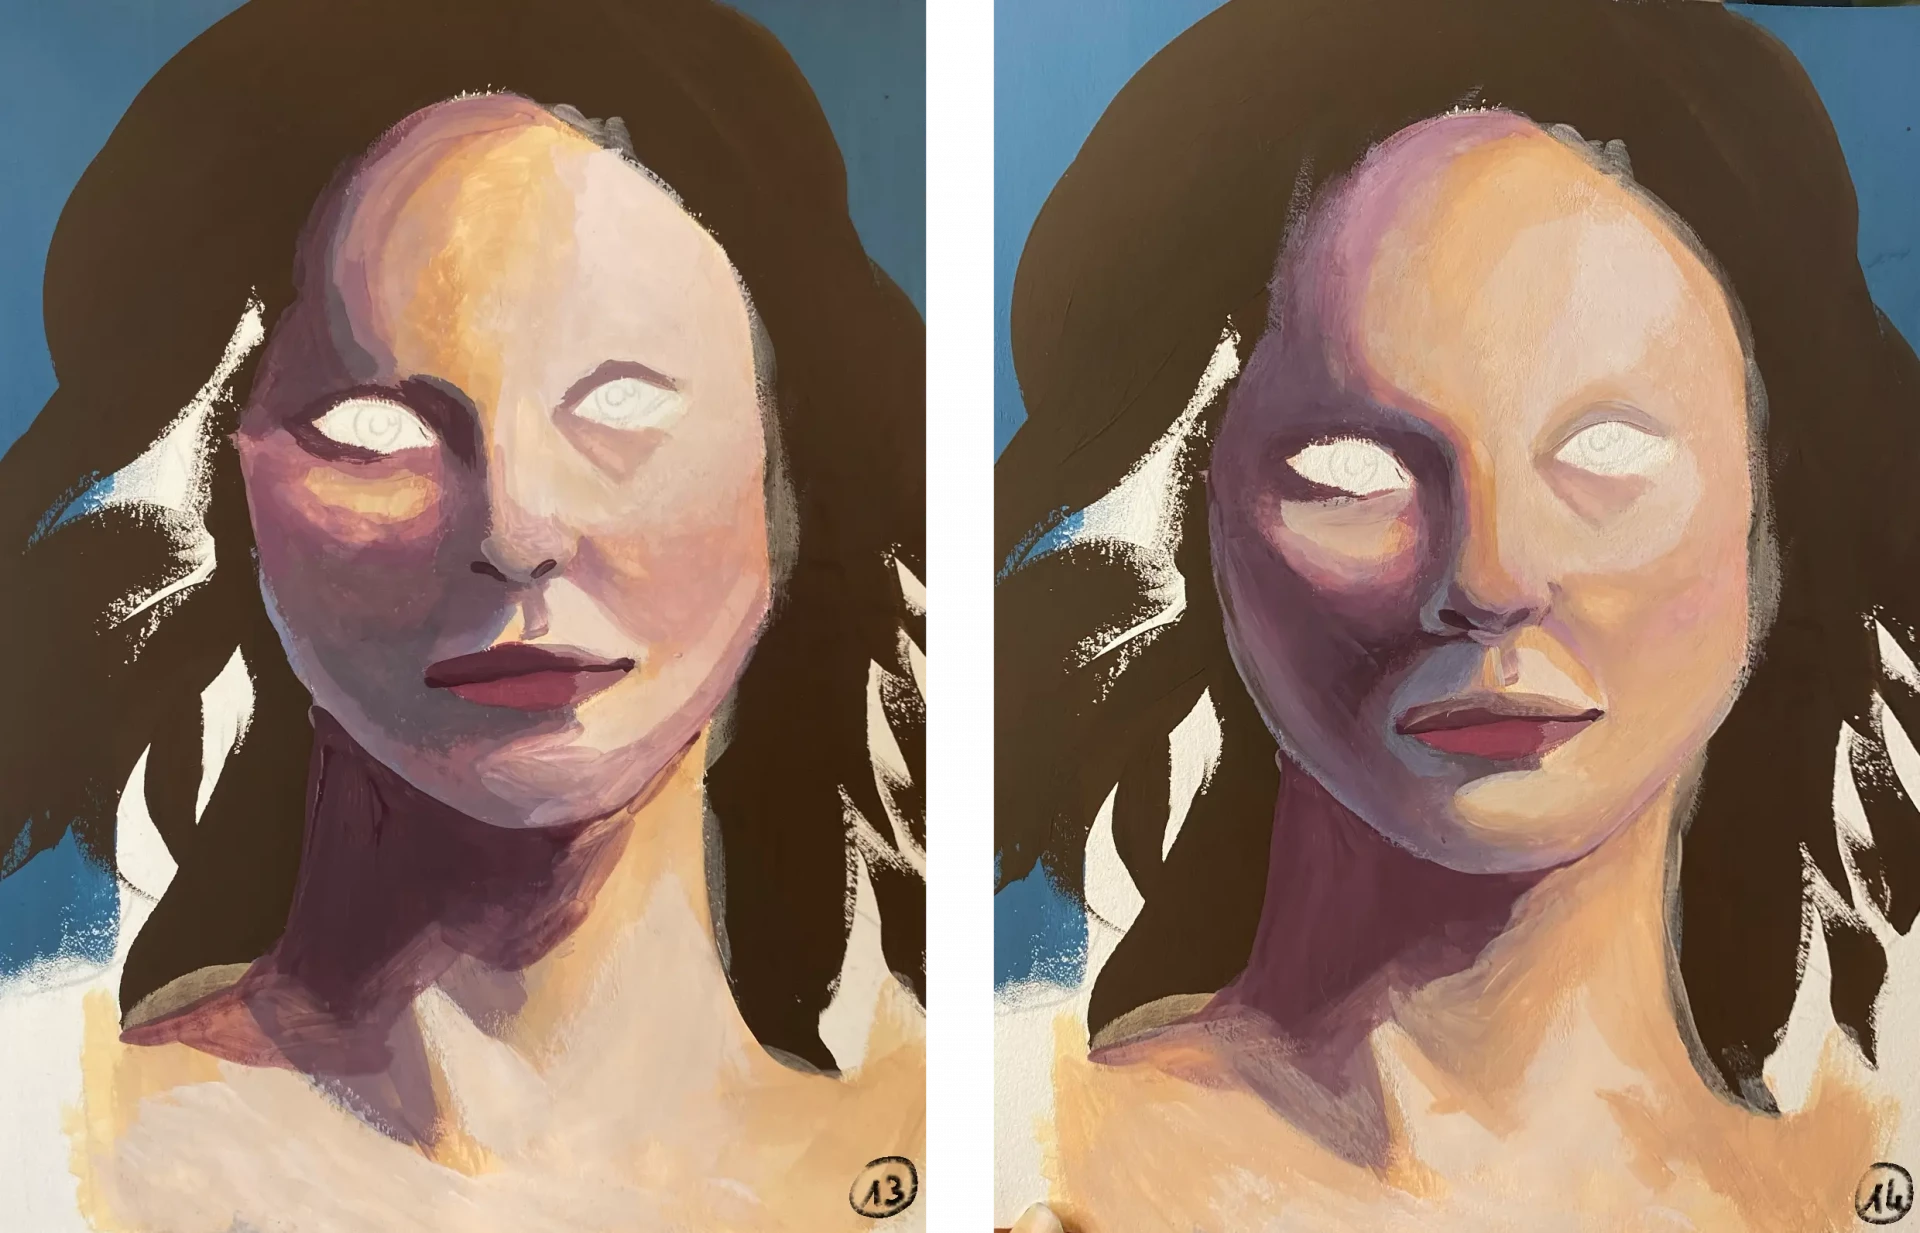
13. I'm adding even more contrast by using a purple that leans toward blue. I also start to better rework the separations between different areas.
14. We are starting to get comprehensible volumes for the face. I alternate between all the shades already used to properly redraw all the areas.
Add the portrait details
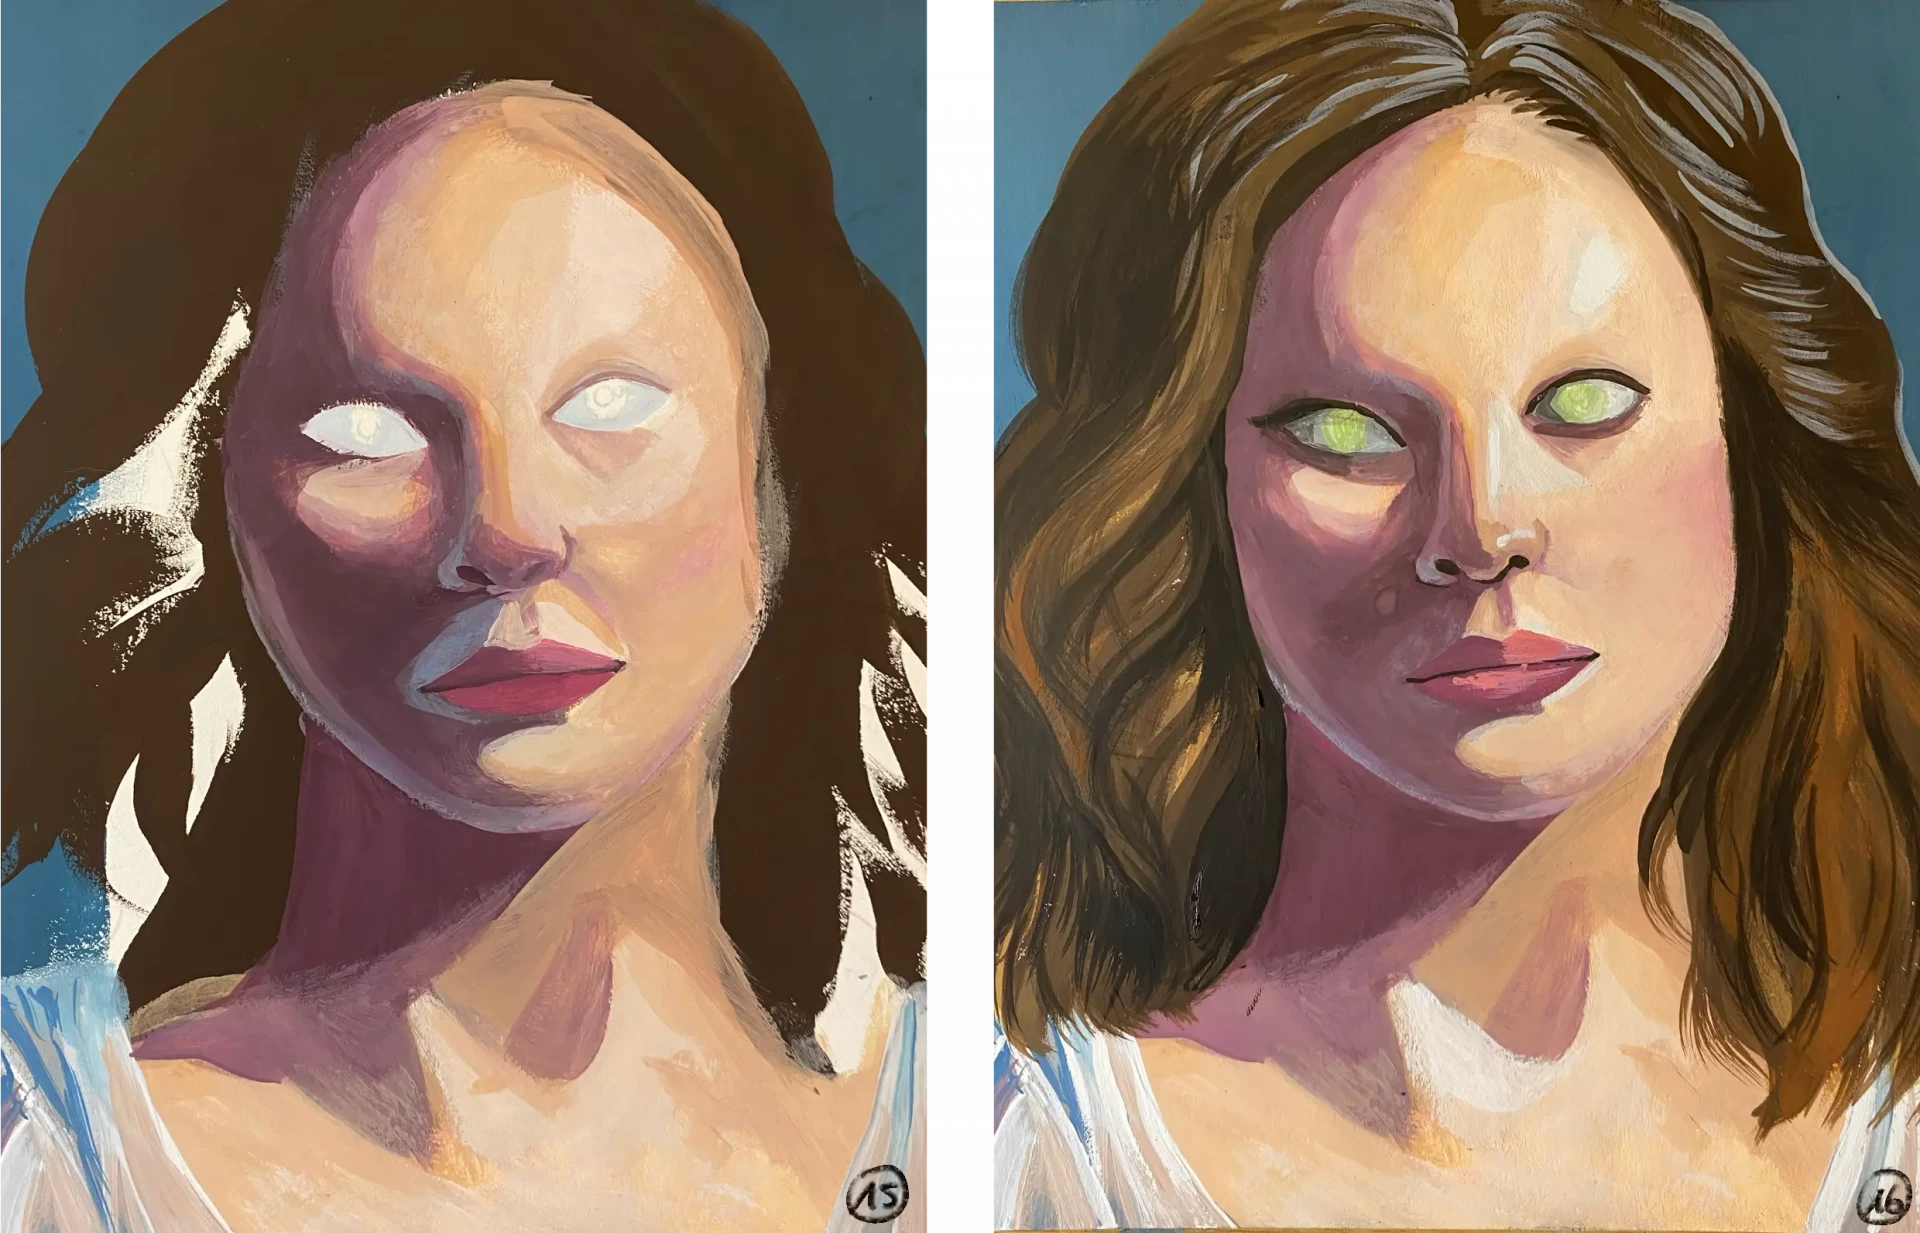
15. I continue to provide precision and details.
16. The face is quite clean, so I move on to the hair. I do it the same way, starting with the lighter colors and gradually building up the details with darker colors.

17. The portrait is starting to look quite neat, the colors have mostly dried and are beginning to blend well. I continue to add a few small details.
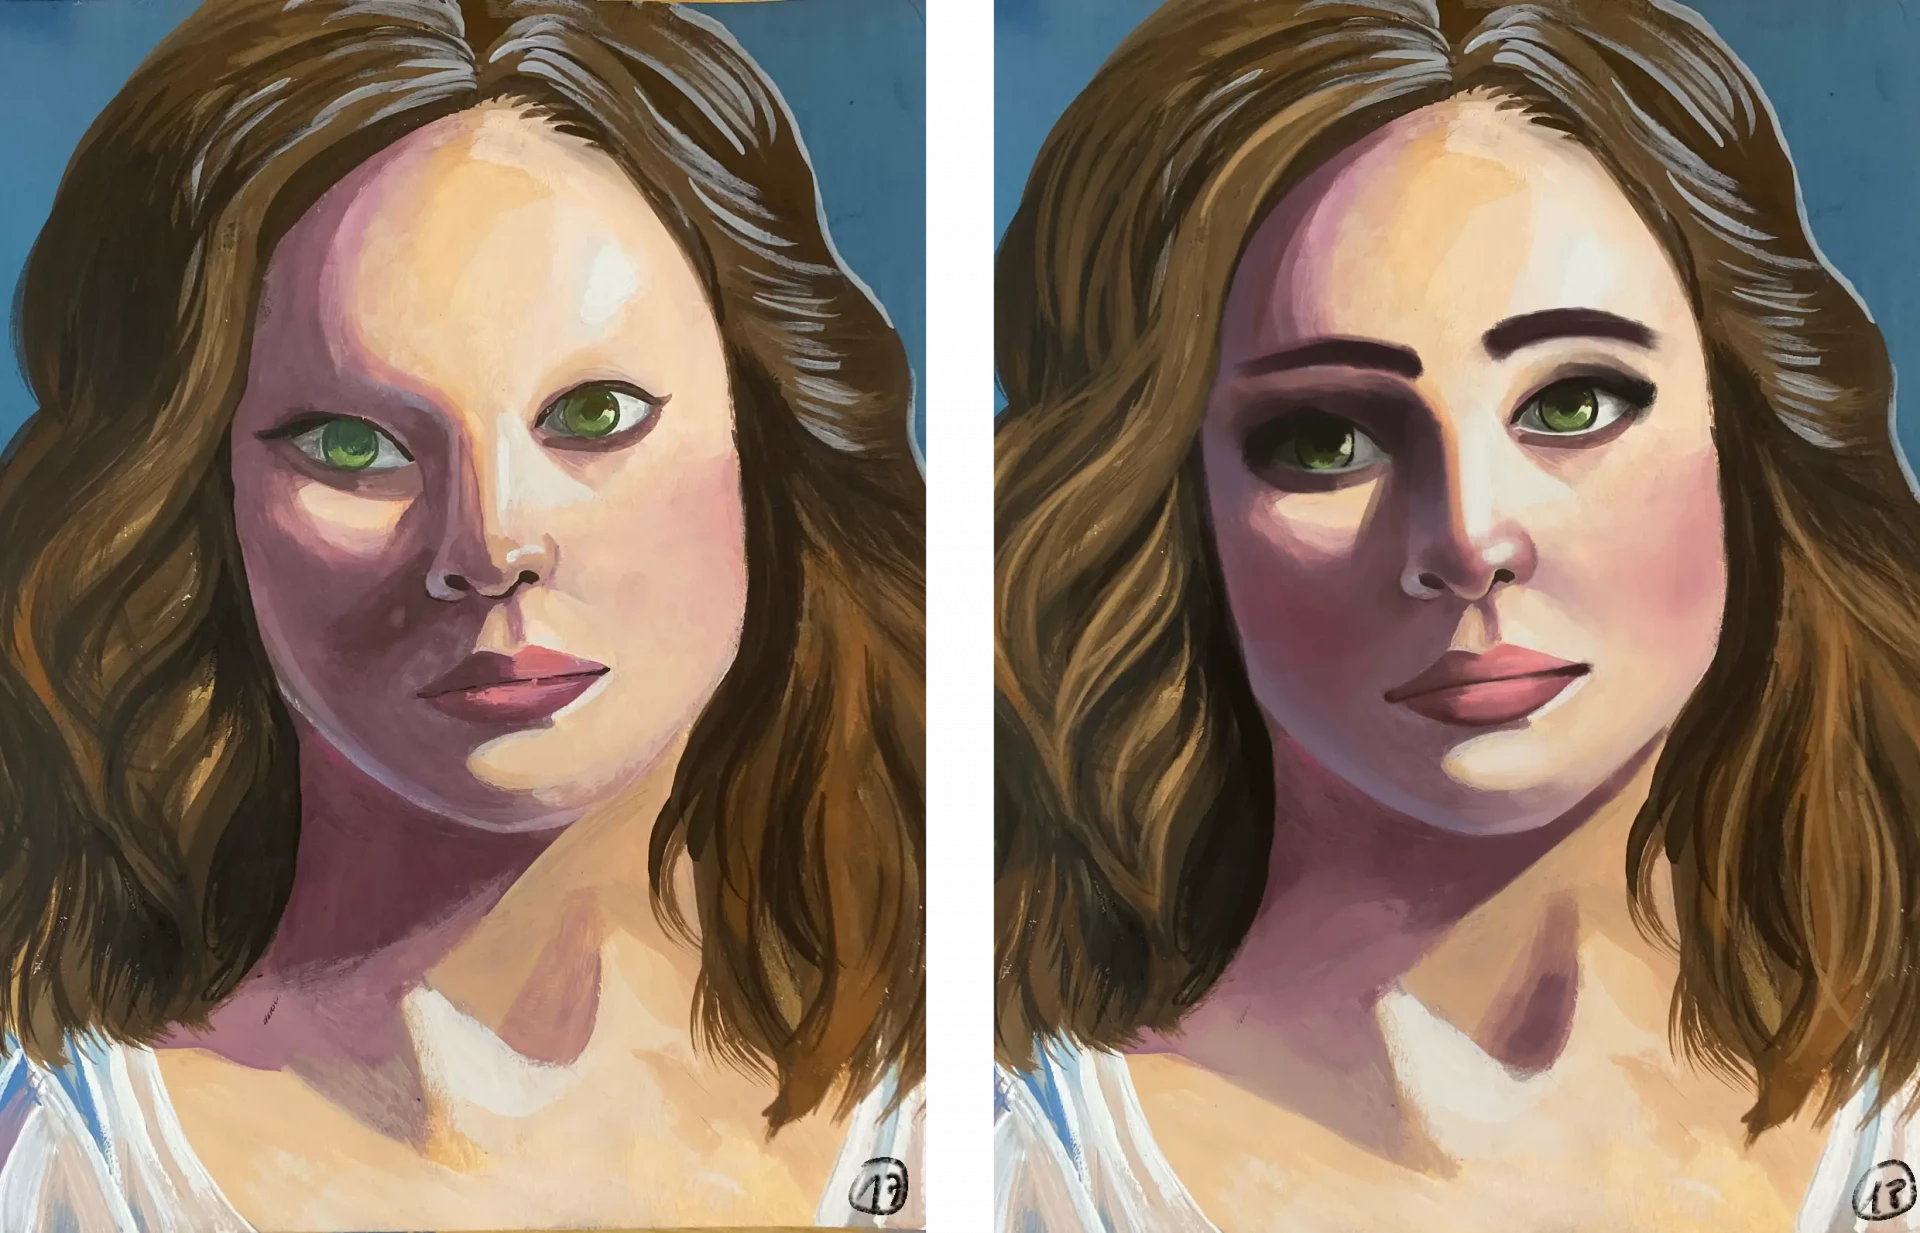
18. I finish the portrait by adding the details of the eyes, as they really make the difference and enable the transition from a "work in progress" portrait to one that looks finished. I also take the opportunity to correct some details, such as the mark left by an accidental drop of water.
Here we go! The gouache portrait is complete. The most important thing is knowing when to stop and when to continue. As you can see, in painting, we often go through a phase where everything seems a bit ugly and blurry. Usually, when we're beginners, it's the moment when we feel like stopping, convinced we're on the wrong track. Yet, this is exactly when we need to continue: applying colors, going over them, again and again. Gouache is a back-and-forth process to gradually achieve the depth, light, and harmony that make a portrait come alive and succeed.
I hope you enjoyed this article. If you truly want to master gouache, I encourage you to check out our course Introduction to Gouache.
Discussion
Usually, I paint with oil. I did a test and the result was manageable until I decided to make some additions. I no longer recognized my initial drawing because I didn't know when to stop. The paint dries so quickly. I will start over until the result is presentable. Thank you for putting your instructions in steps.