Drawing with the Zentangle Method
Hello everyone, today I propose to explore a way of drawing without any graphic technique, merging relaxation and drawing, called Zentangle. In this article we will look at the materials needed, the different rules, some drawing examples and then create a zentangle step by step.
Prepare your black markers and your creativity!
WHAT IS ZENTANGLE?
Zentangle, before being a drawing technique, is a relaxation method created by Rick Roberts and Maria Thomas. This method allows one to let go and enter a state of deep relaxation akin to meditation, which helps develop concentration, improve dexterity, and most importantly, release stress and anxiety. The word Zentangle itself summarizes this philosophy: Zen = relaxation, Tangle = repetitive geometric shapes.
Zentangle involves creating non-figurative patterns with a black pen on a 9*9cm square of paper without worrying about the final result. When drawing Zentangle, there is no such thing as a mistake because it is considered part of the process. Moreover, there is no need to worry: this method is suitable for everyone.
THE NECESSARY MATERIAL FOR THIS METHOD
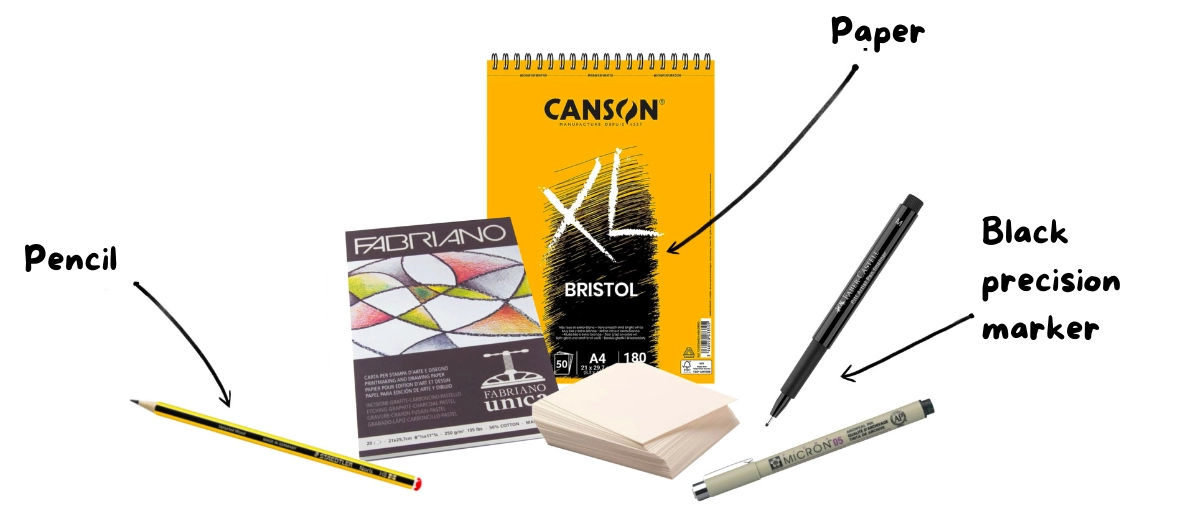
The Zentangle method is rather rigid in terms of the materials needed, but they are very easy to obtain. You will need:
- The smoothest possible white paper of high quality, ideally bristol board.
- Pencil, used only to draw the string.
- A black pen or a precision black marker that doesn't smudge.
Note: To provide all its benefits, Zentangle must be done in traditional drawing.
THE RULES OF ZENTANGLE
It may seem slightly contradictory for a relaxation technique, but Zentangle has very precise rules in order to reap all its benefits:
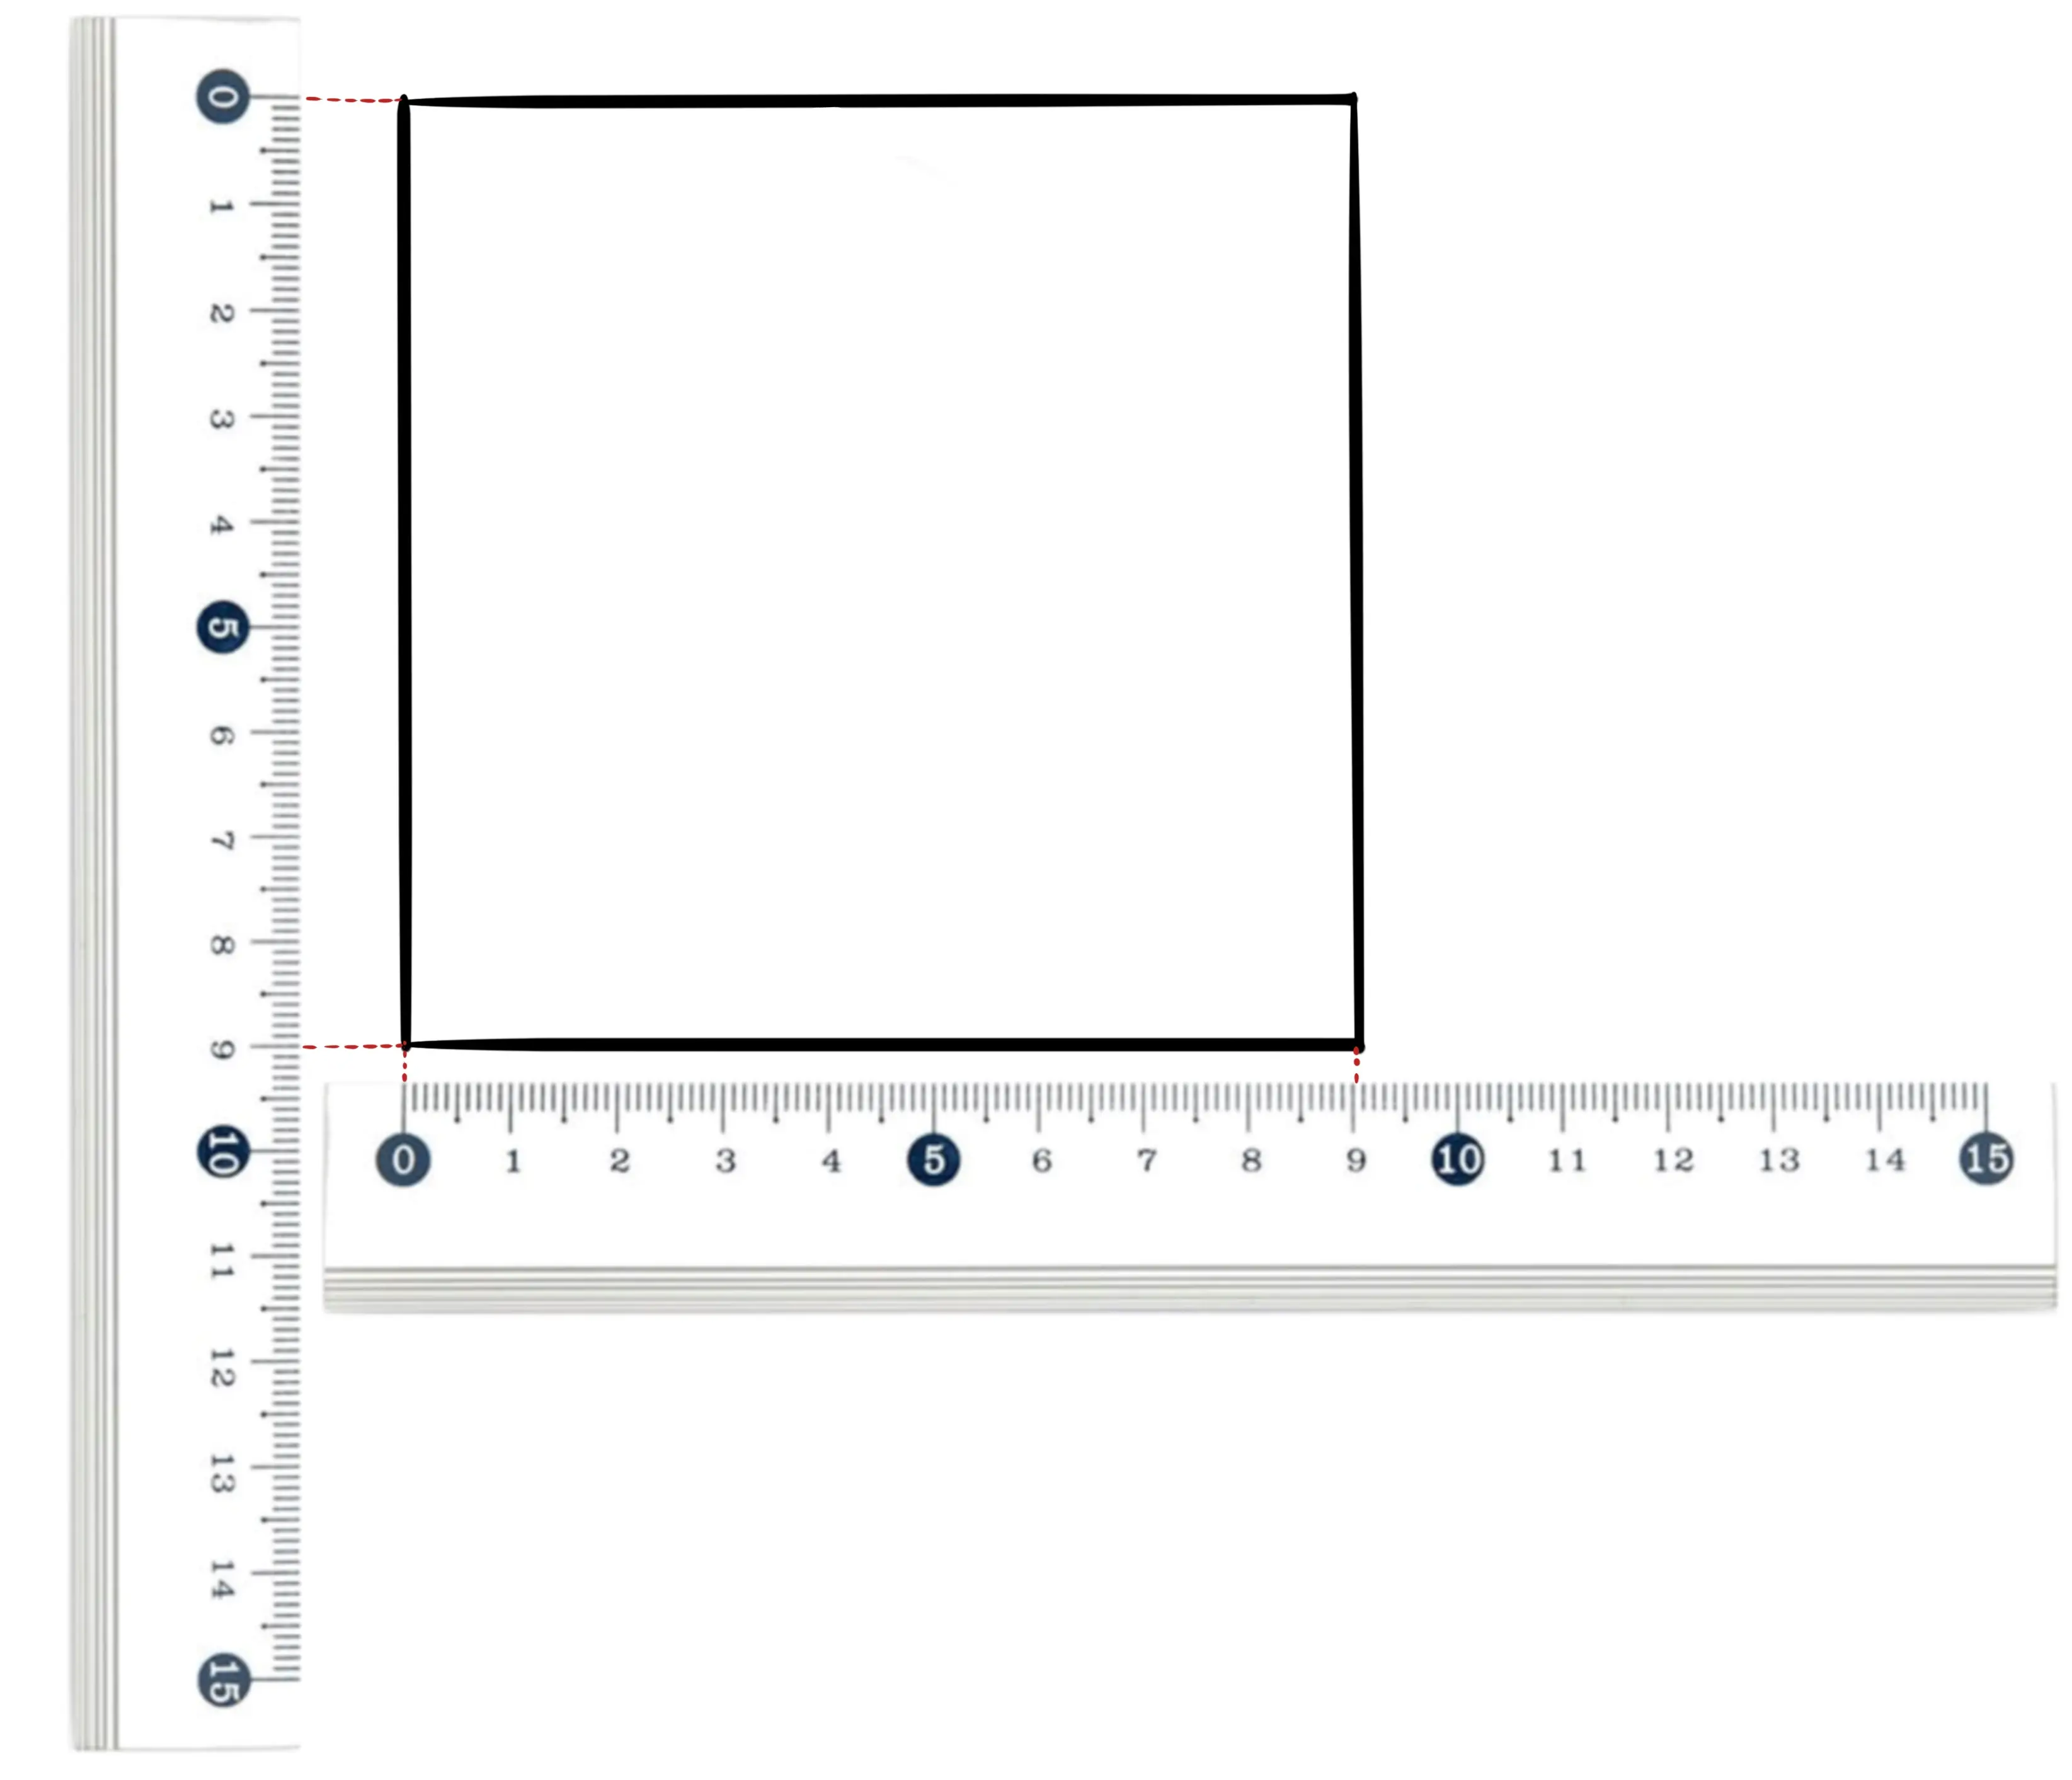
- Each Zentangle must be done on a 9*9cm white paper square called a tile.
- We only use the pencil to trace the line.
- We never erase because there is no such thing as an error.
- All the patterns are drawn with a black pen/marker.
- The drawings must be non-representational.
- The drawings must be readable from all directions, just like the end result.
- Do not focus on the end result, but only on the current phase.
- Let your creativity take over.
- Do a thorough job by taking your time to draw each model.
- Do not use a ruler to trace the patterns.
As you can see, the rules are ultimately not very restrictive because they mostly require you to let go when drawing, to trust yourself, and to enjoy the moment. The most important of these rules is that mistakes do not exist; if you make a mistake in a stroke, it's not serious, you can incorporate it into your pattern.
SOME EXAMPLES OF PATTERNS TO DRAW
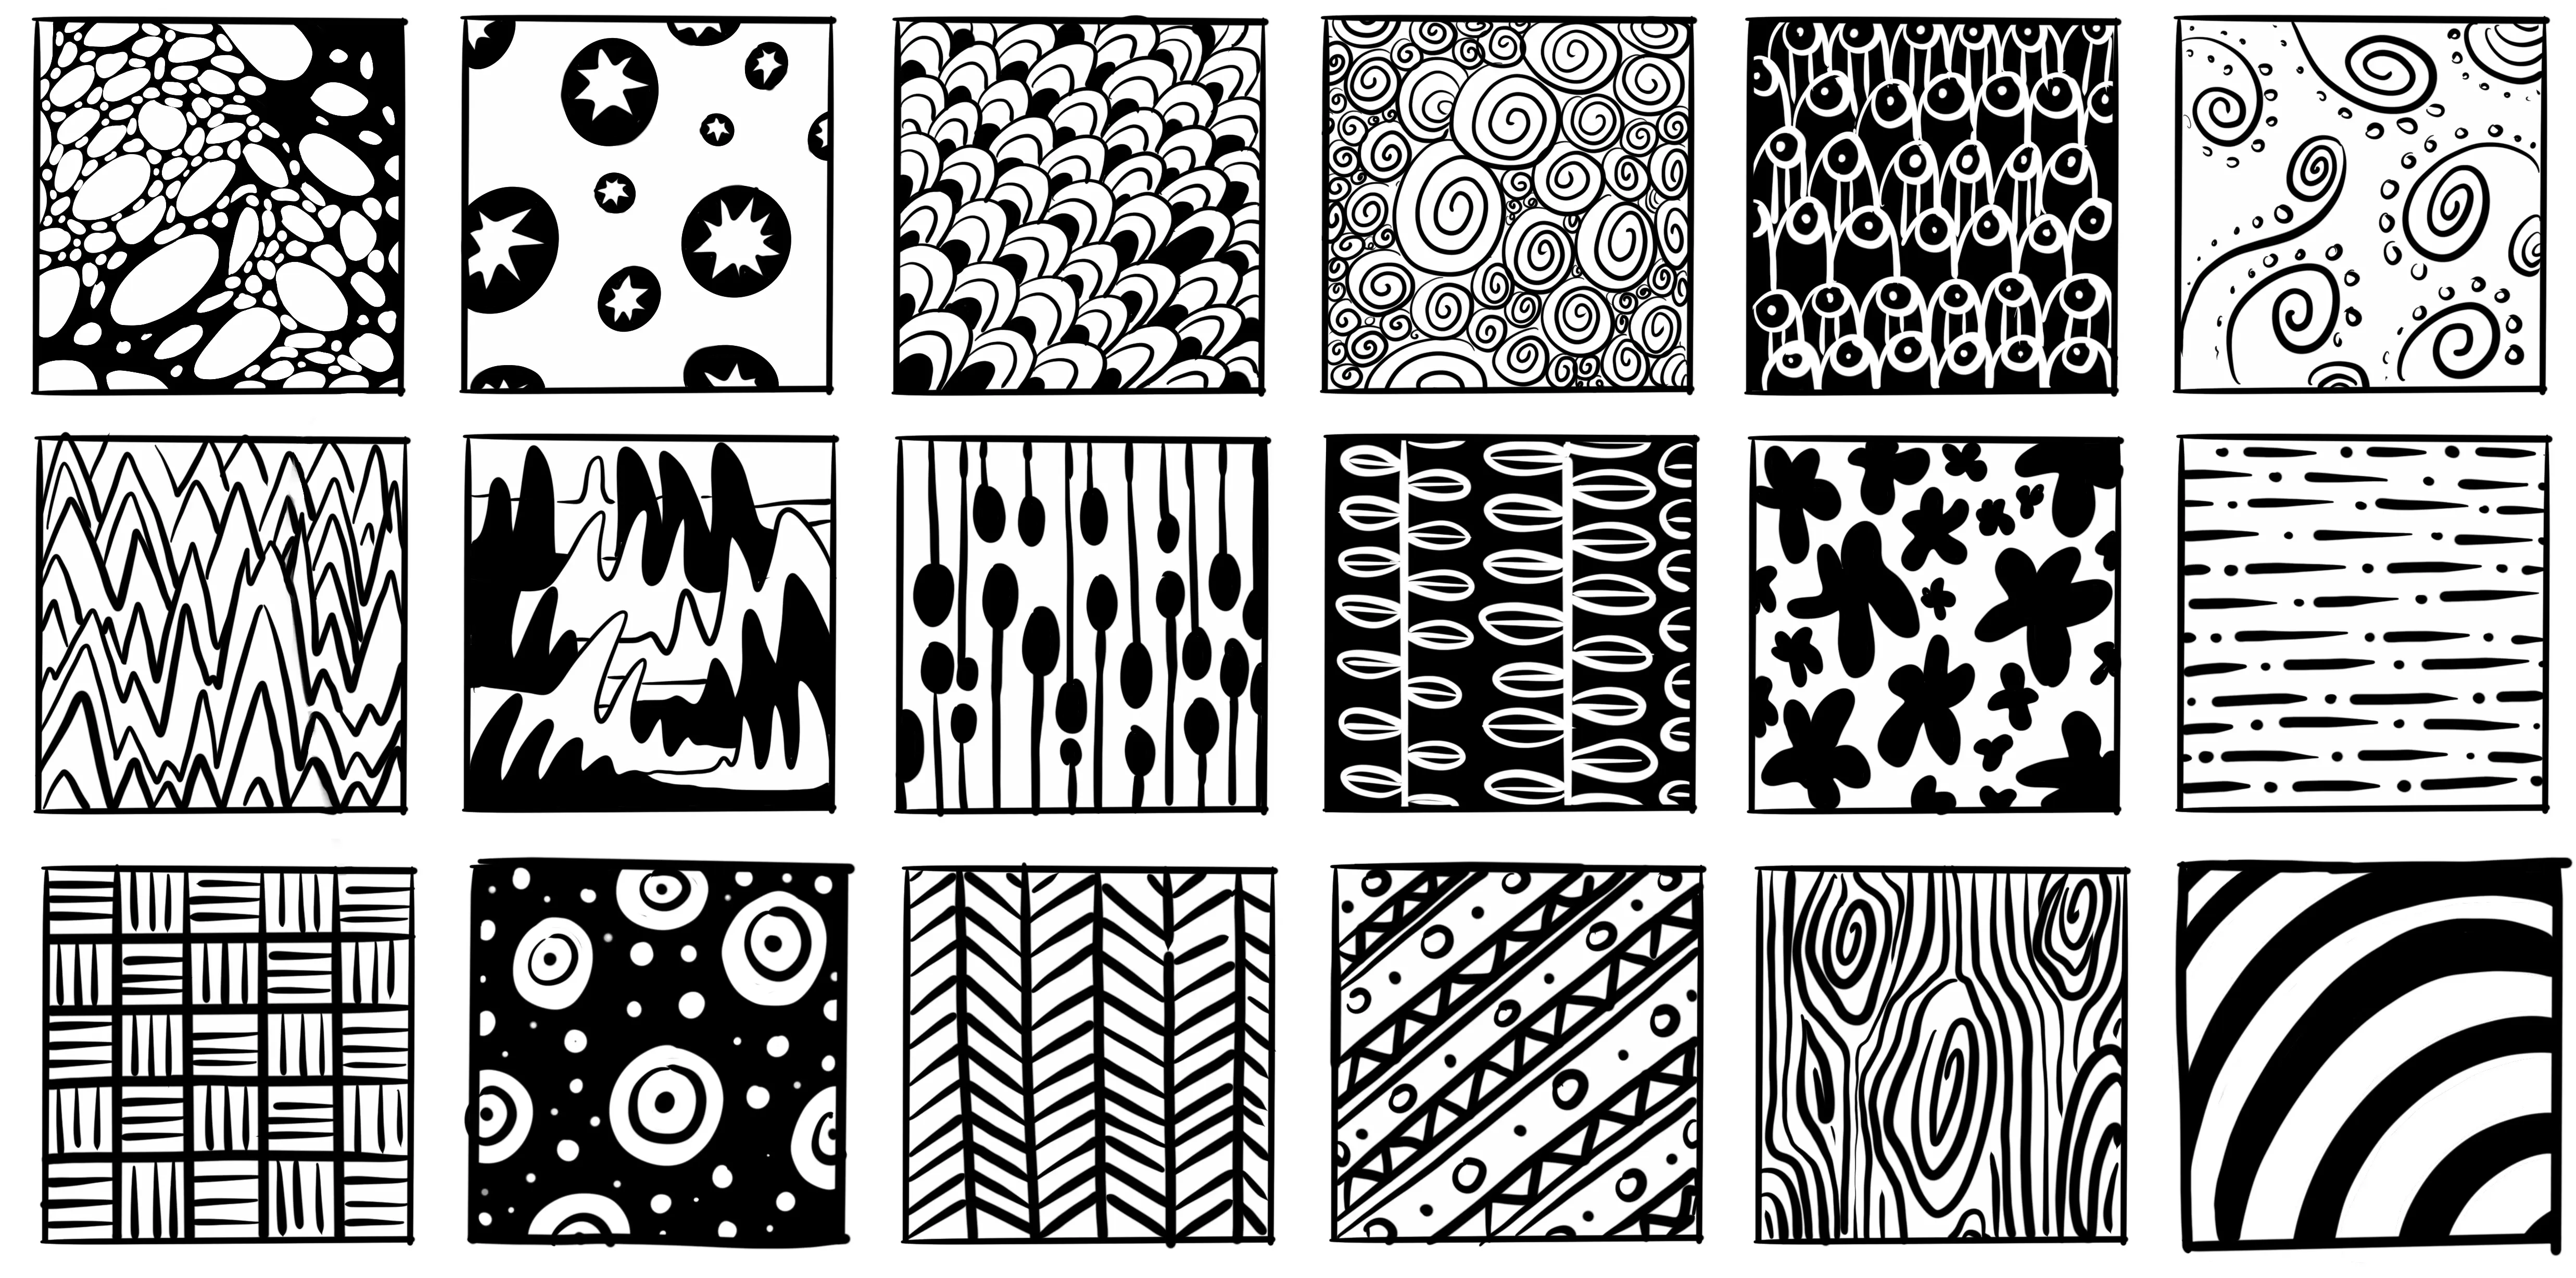
If you are completely new to this, you may be wondering what zentangle patterns might look like, so here are a few examples to inspire you. However, do not forget that the most important thing is to let your own imagination take over!
Note: White patterns on a black background can be more complicated to achieve because they require visualizing a bit in advance and colouring in all the blanks in black, not the pattern itself. If you are a beginner, I recommend starting with black patterns on a white background.
DRAWING A ZENTANGLE STEP BY STEP
Now that we have covered the basics of Zentangle, I propose we create a tile together to see all of this in practice.
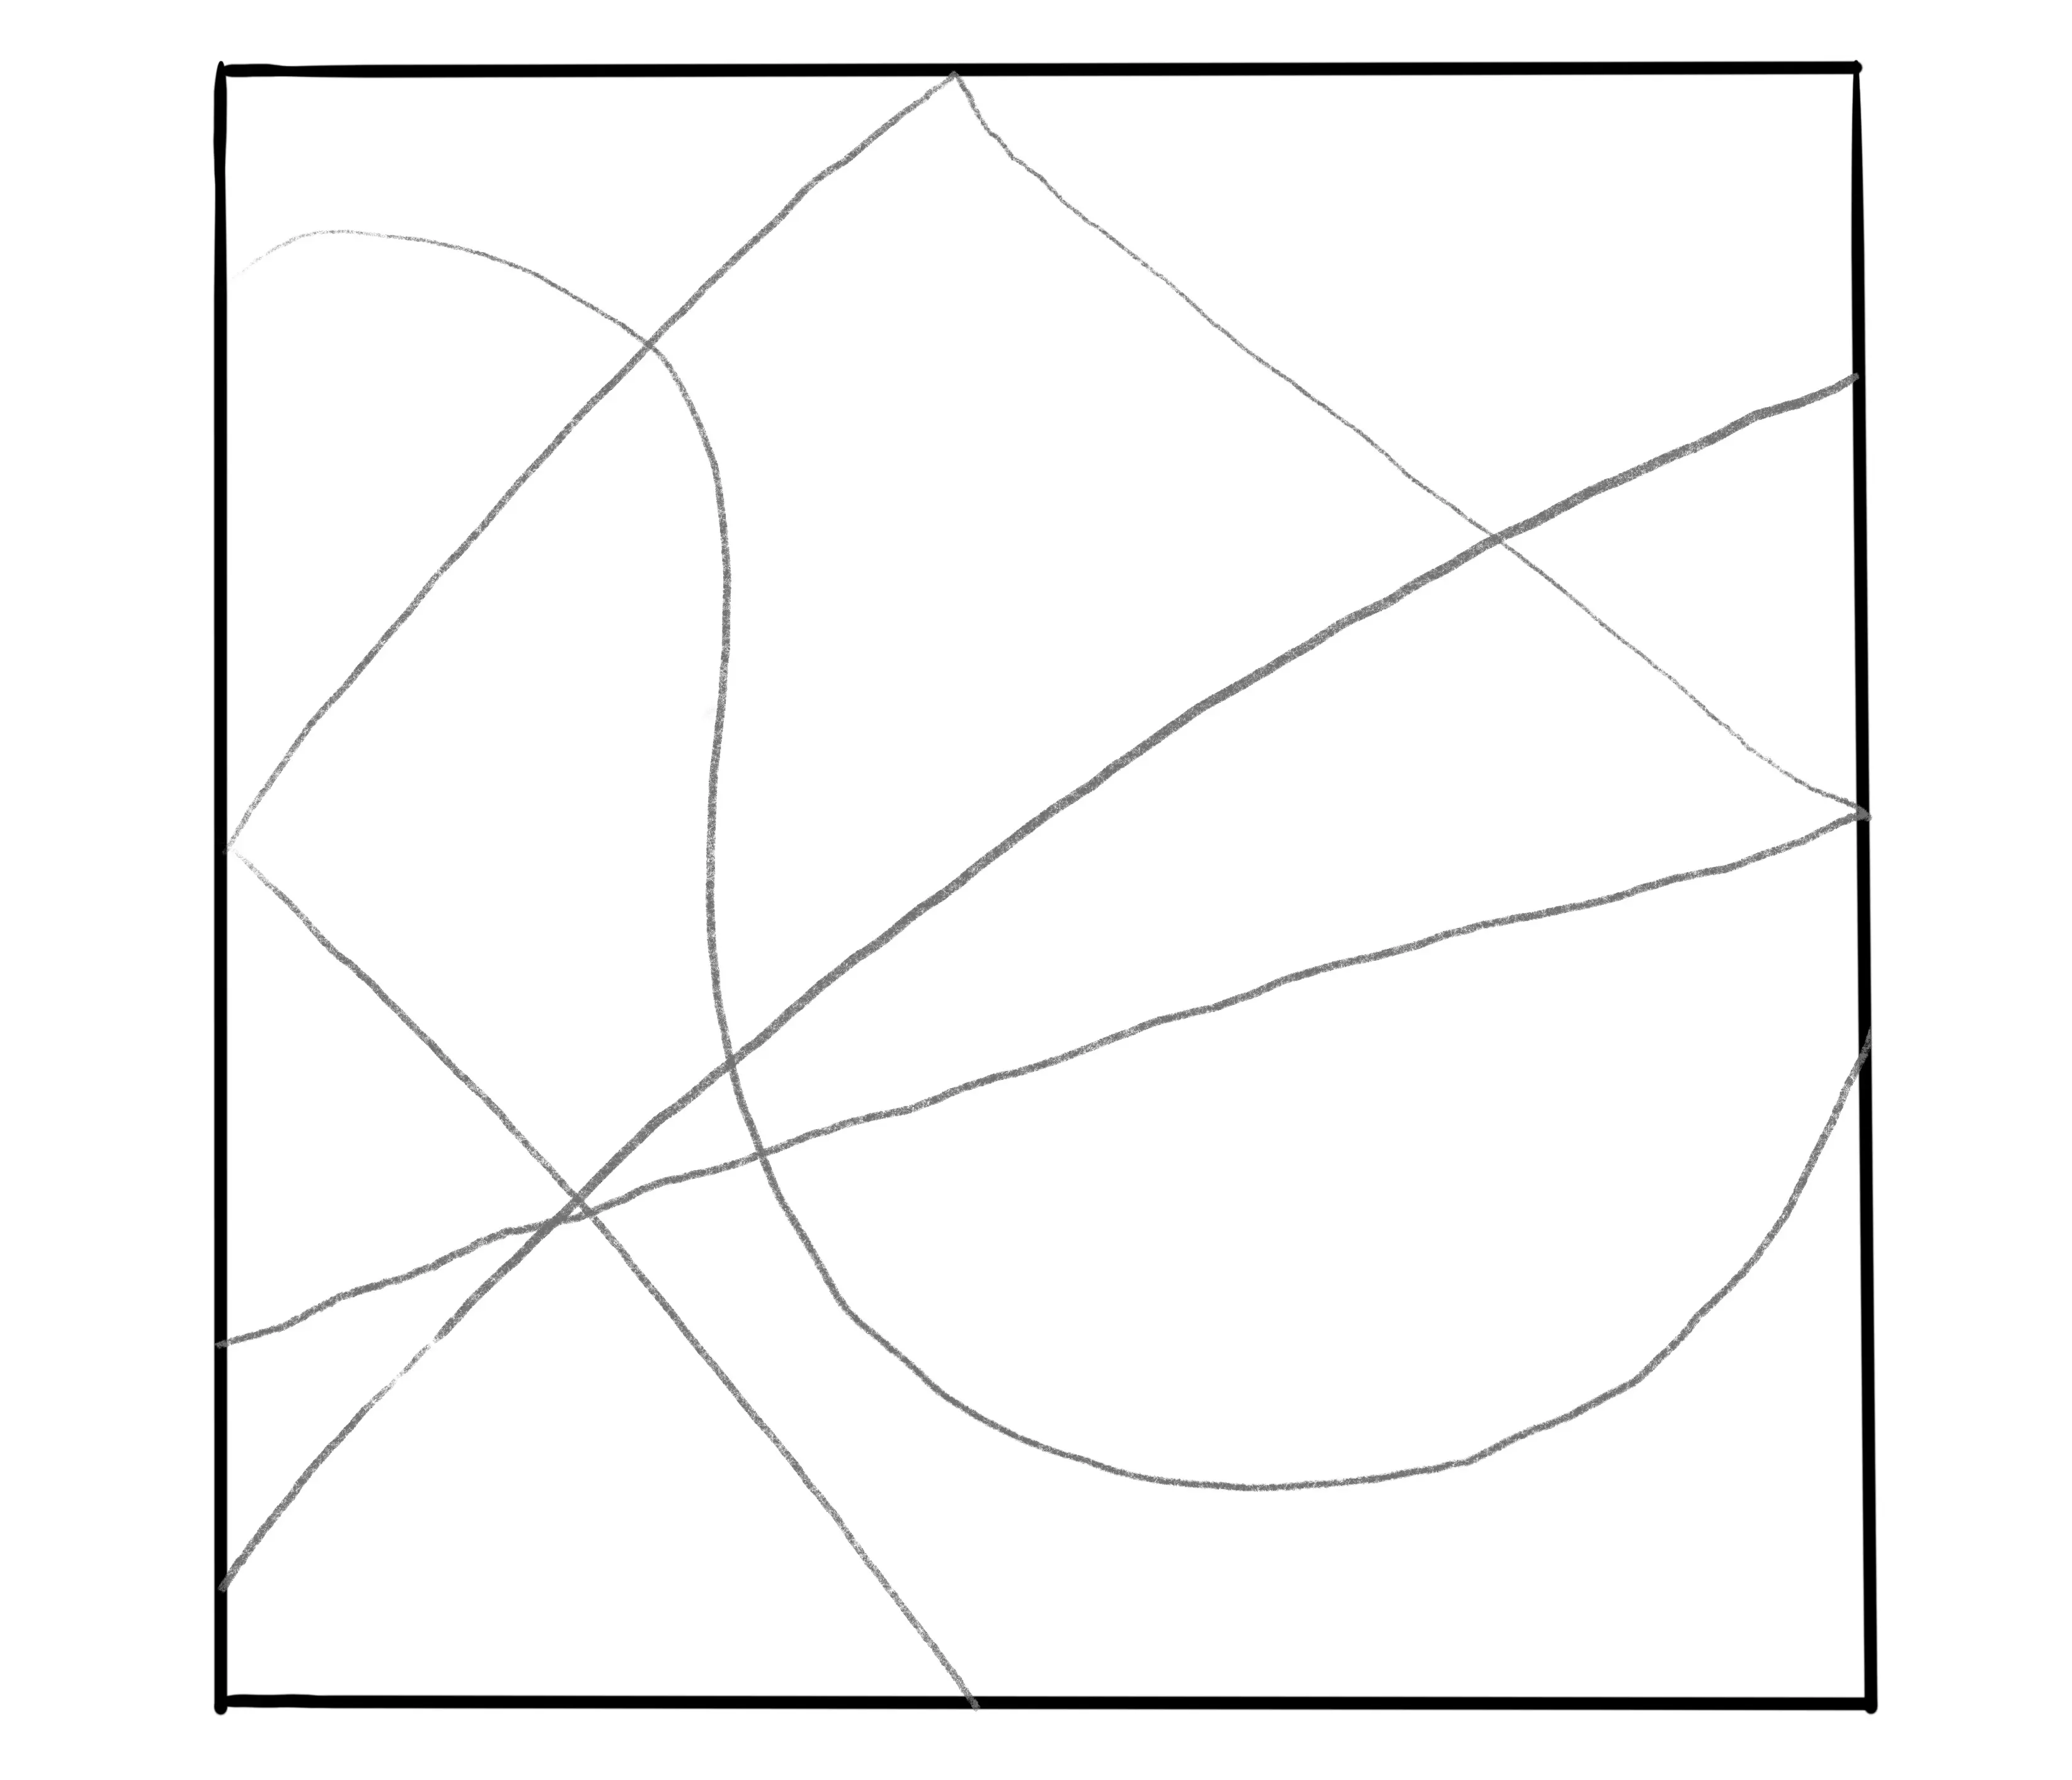
I start by cutting a piece of paper 9*9cm
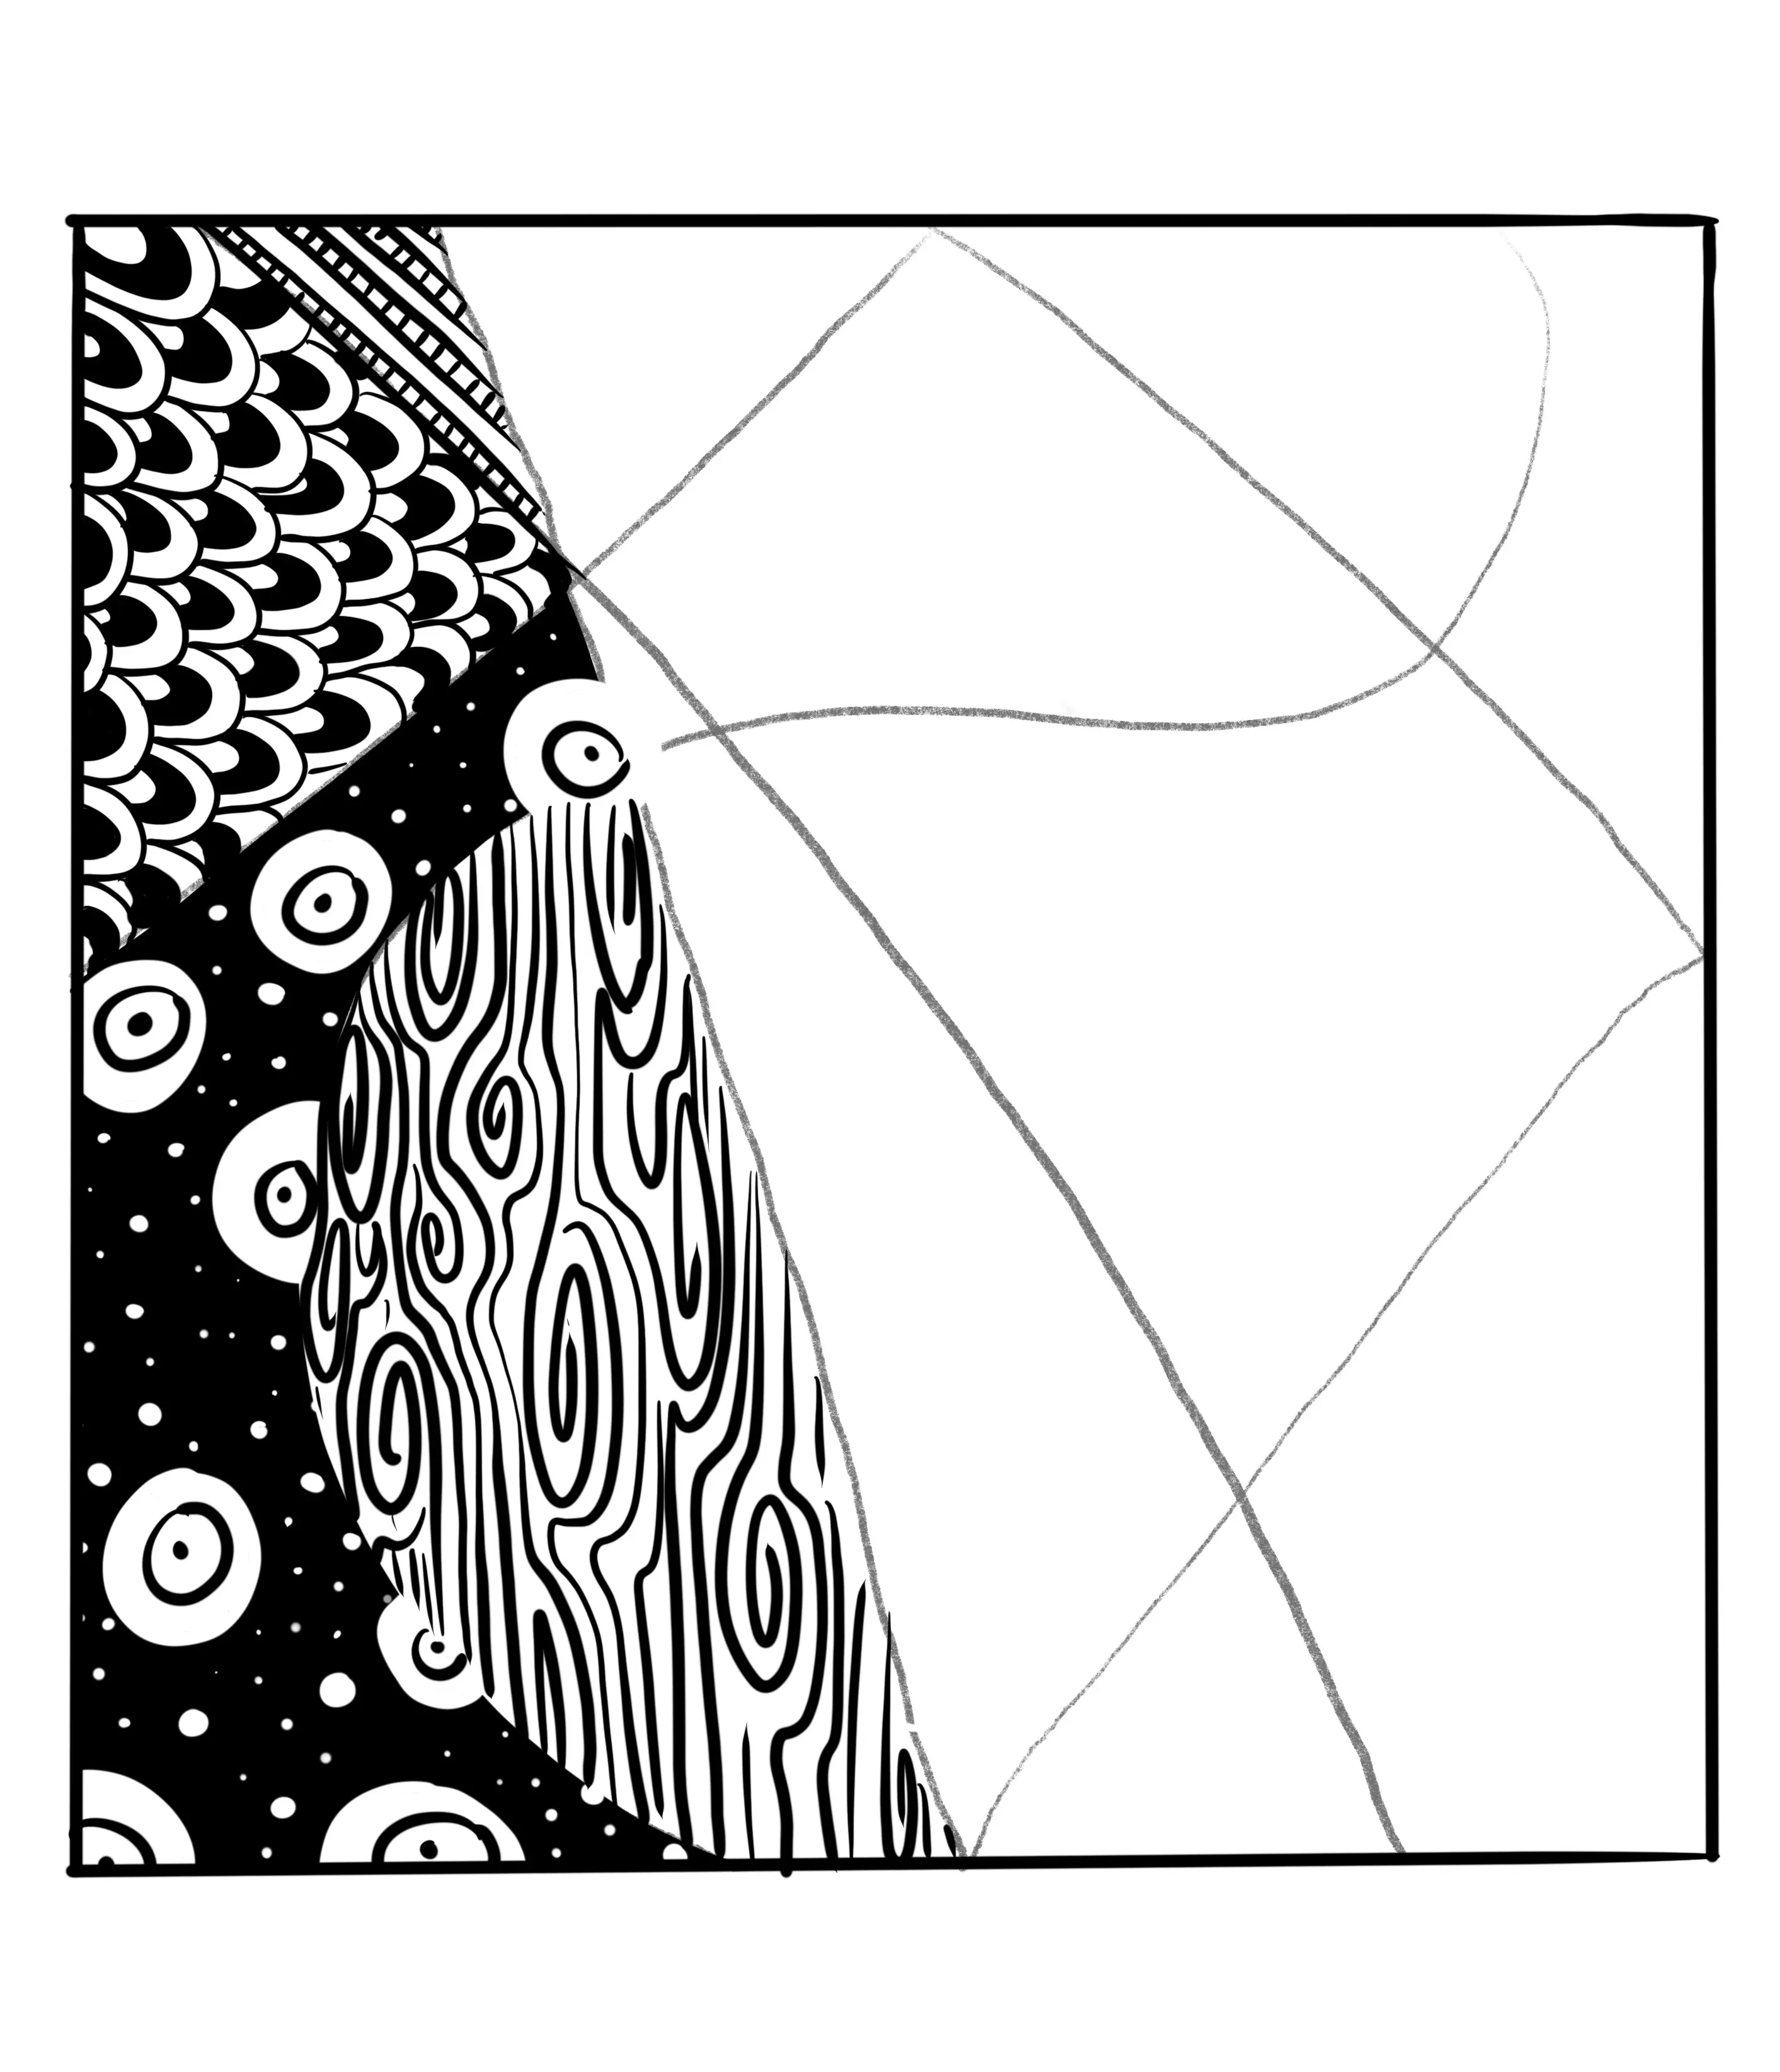
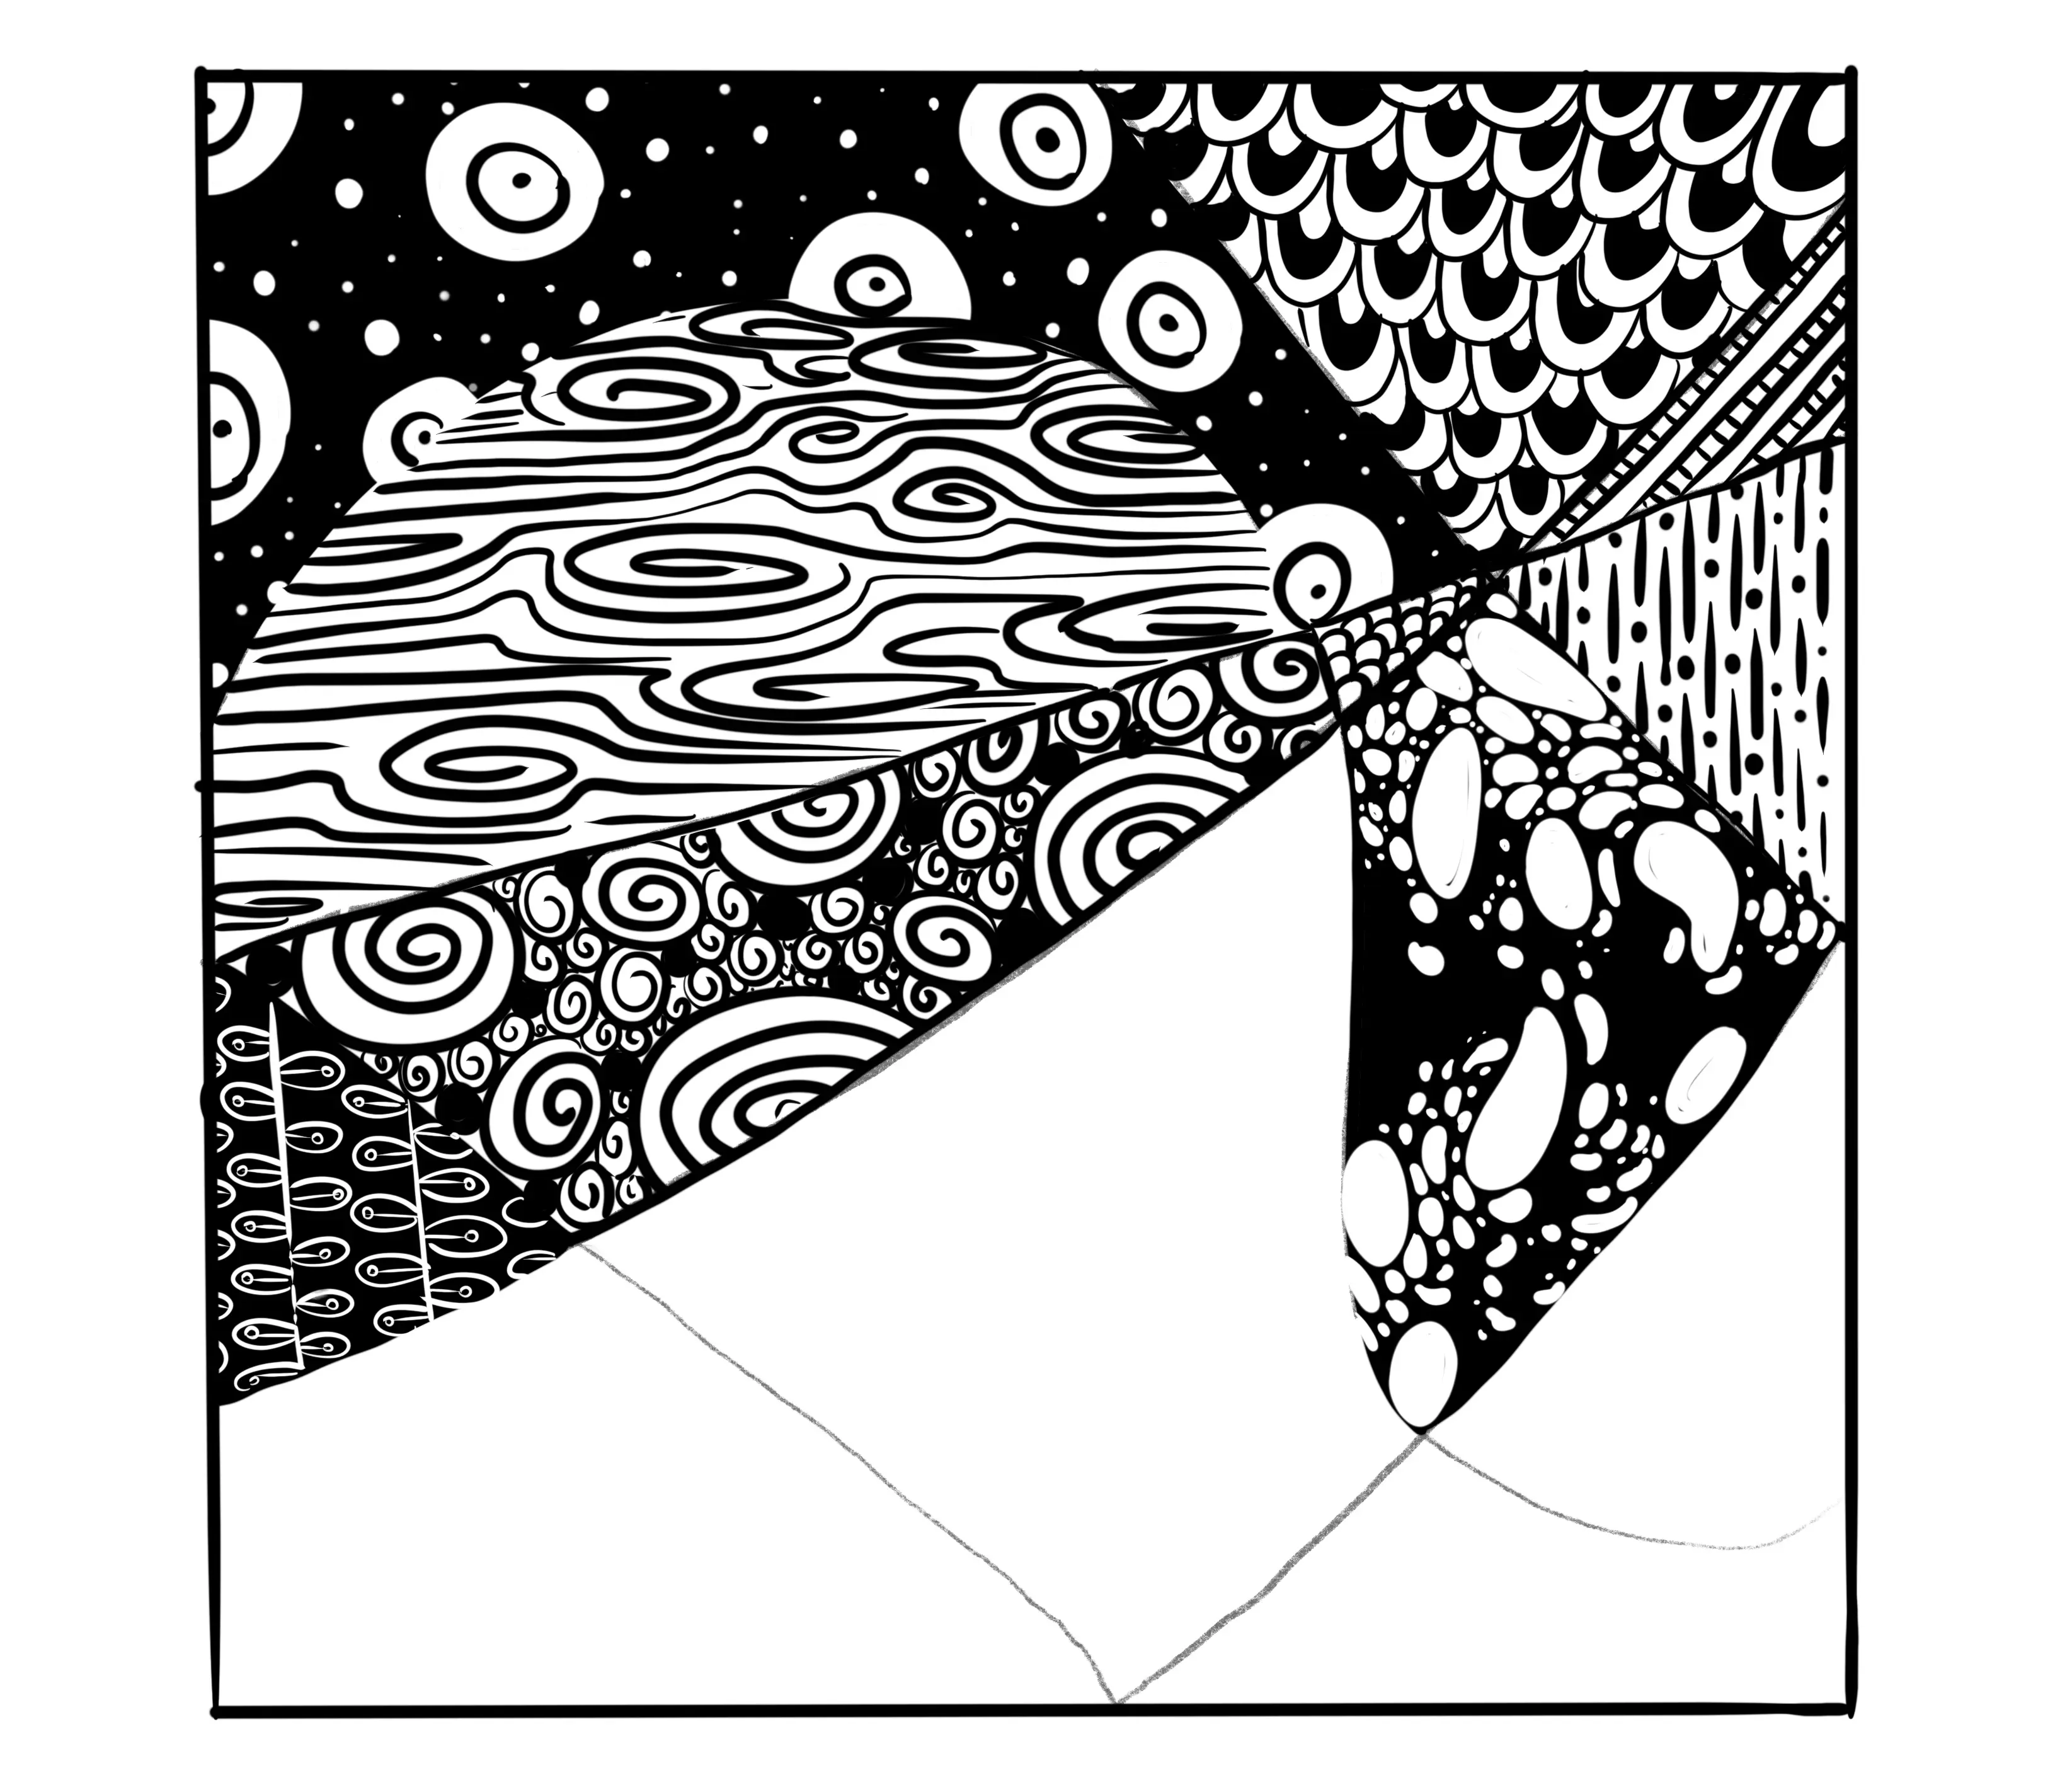
Now I will draw intersecting lines with the pencil, allowing me to create different areas in which I will execute each of the patterns, this is what is called a layout.
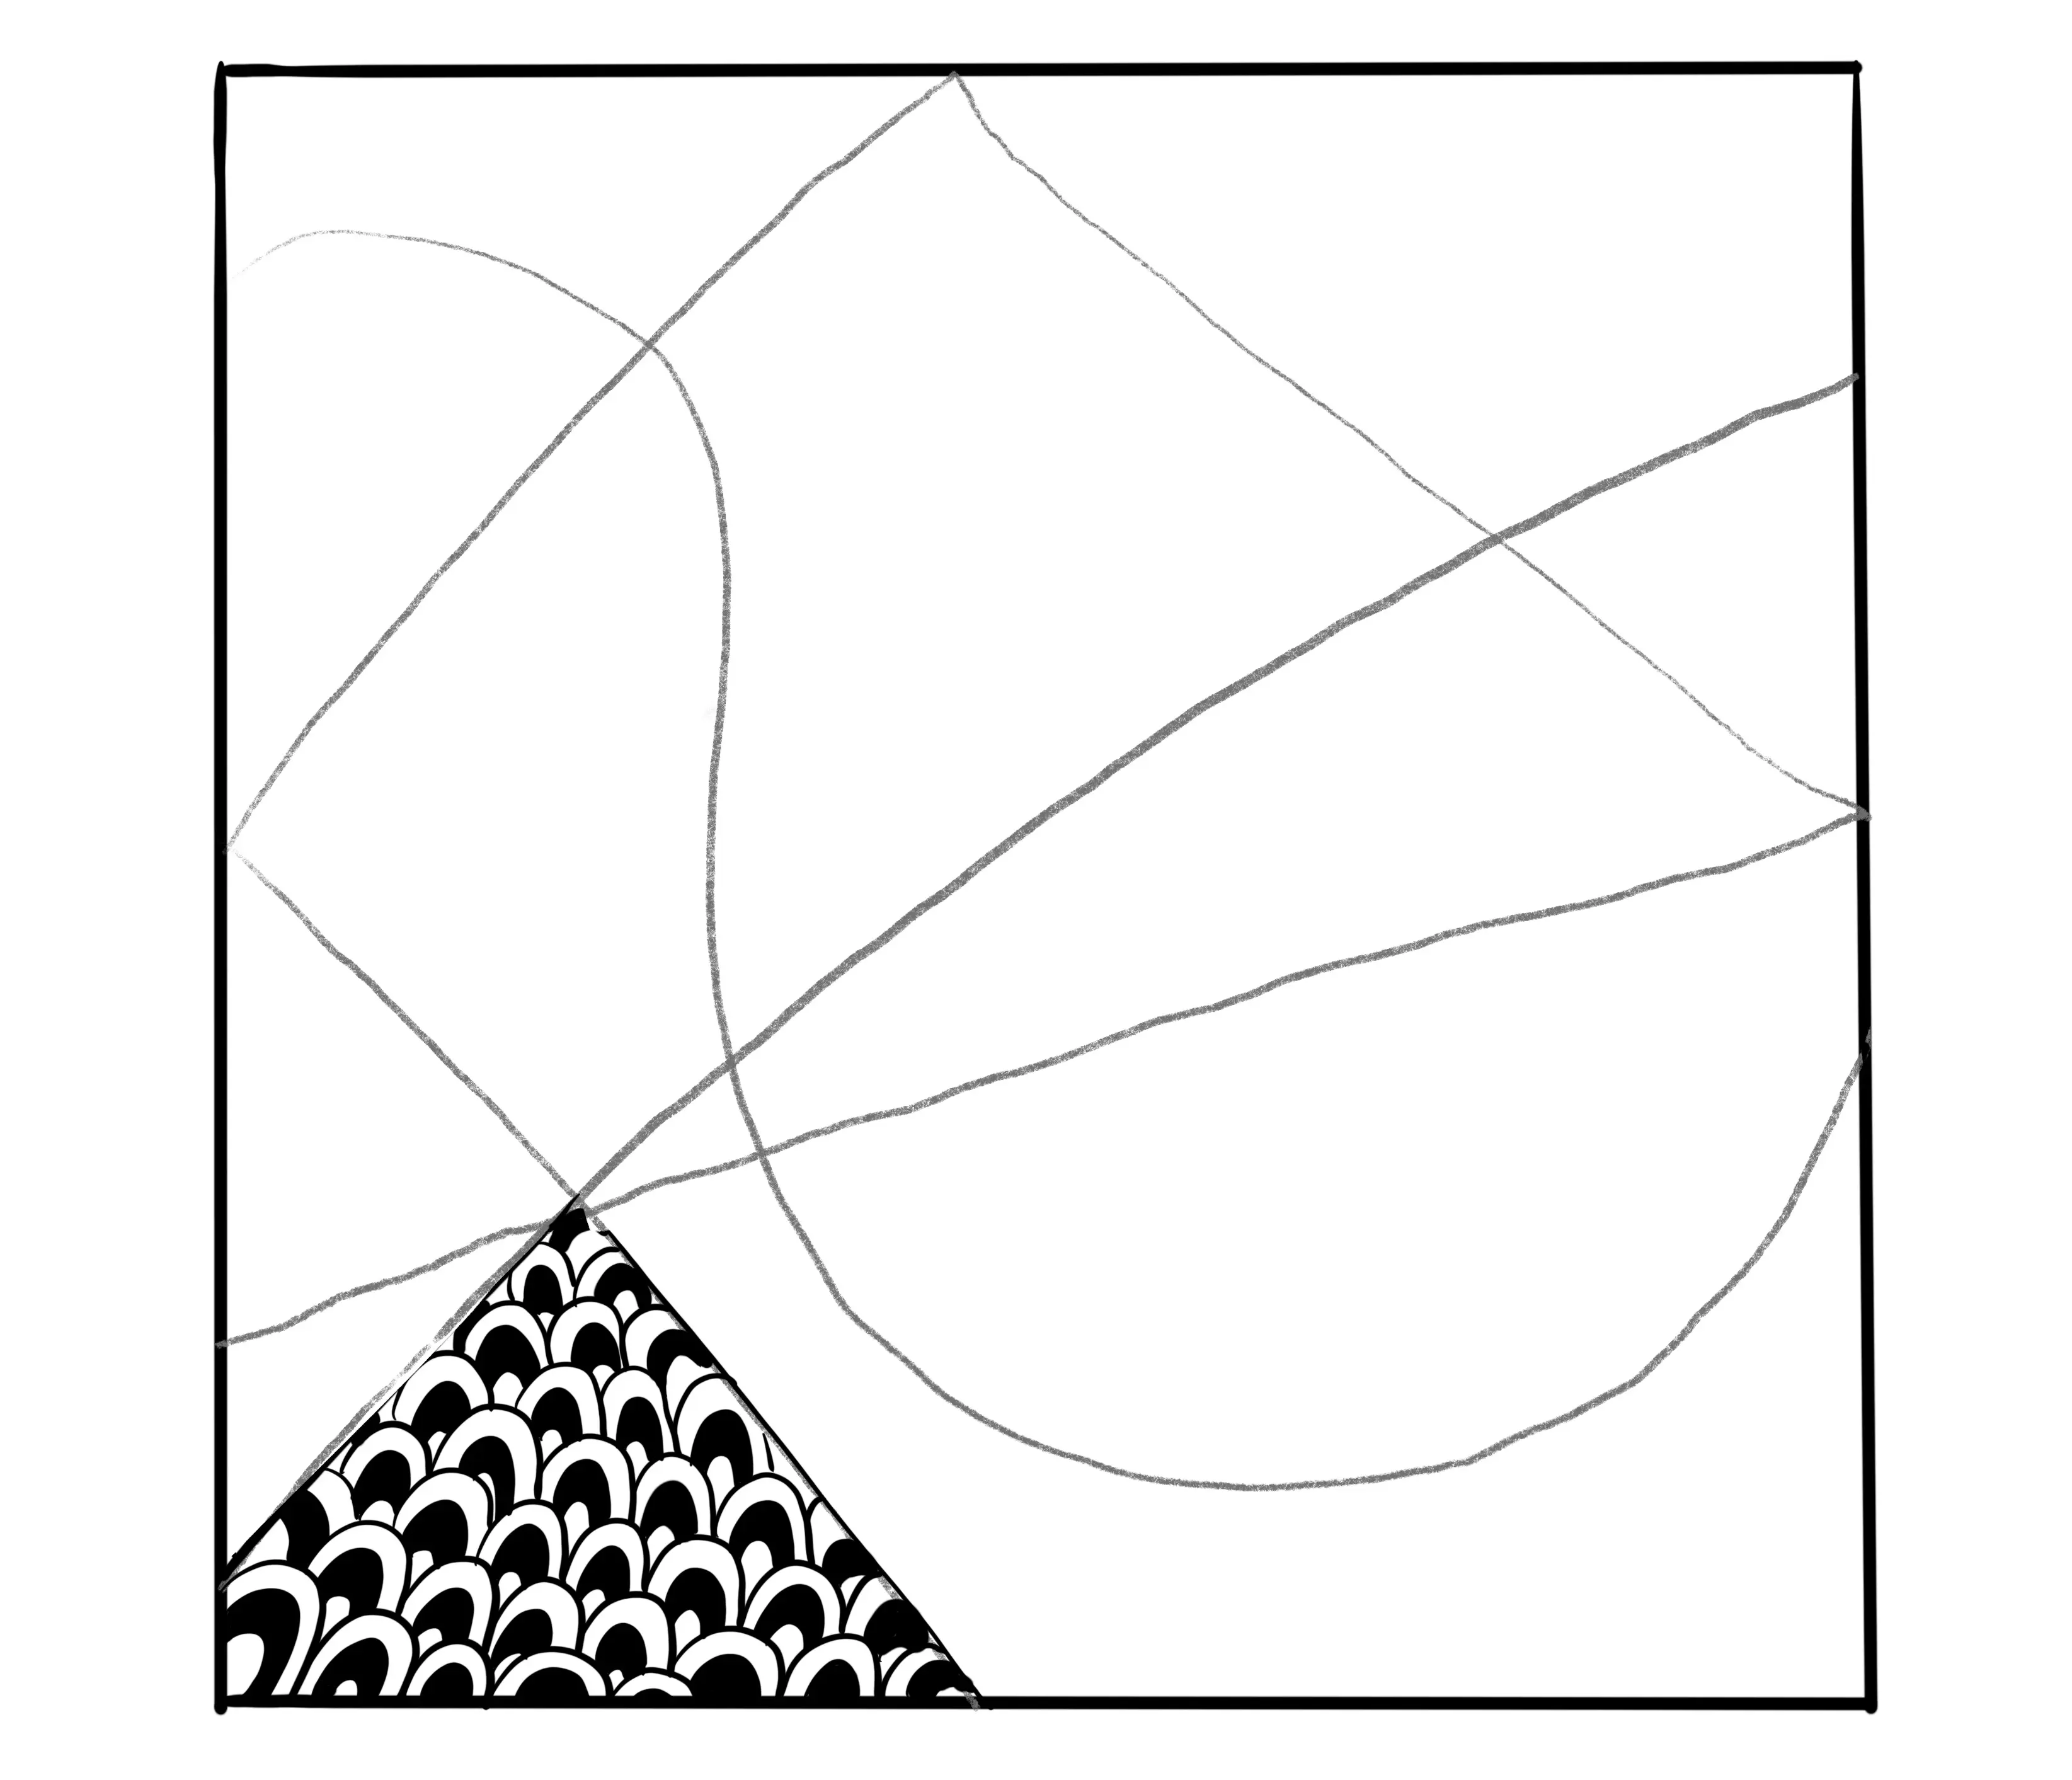
I start with the first motif. I like to start with the corners, but you can start with whatever you like. To create this motif, I draw circle arcs on top of each other and then add a thick black arc to the centre of each arc.
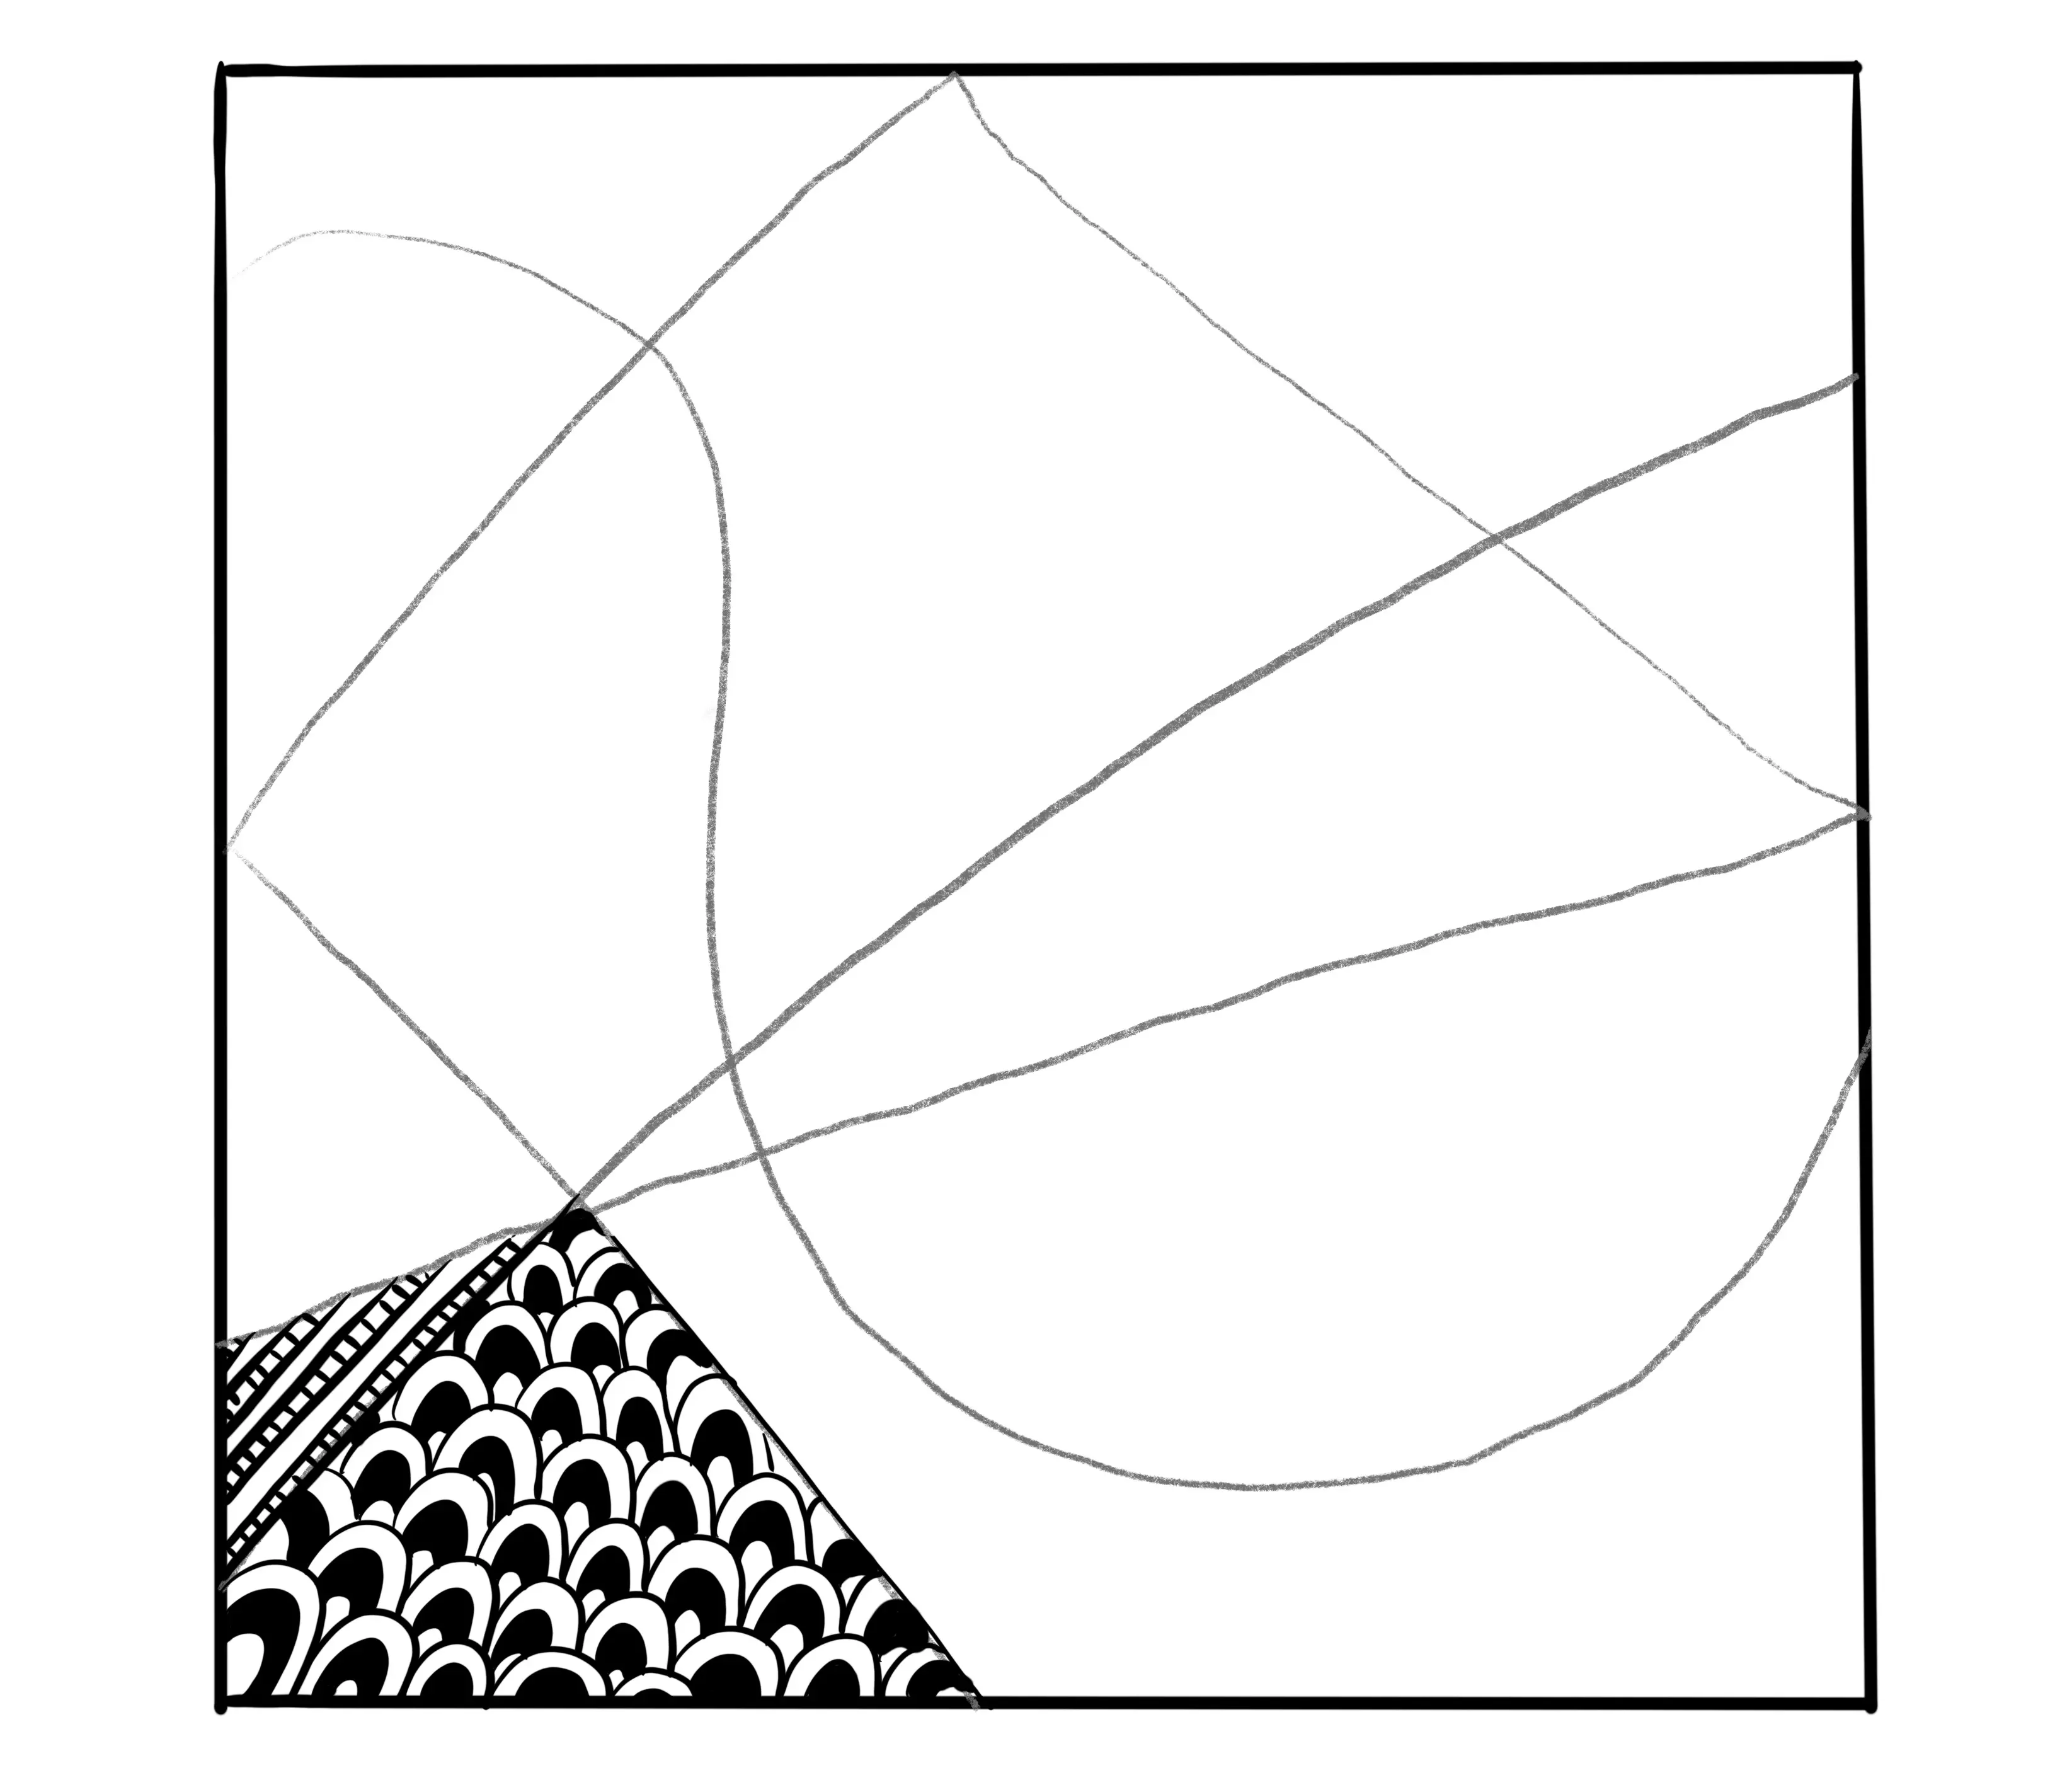
For the second pattern, I draw parallel lines and then perpendicular lines, alternating every other line.
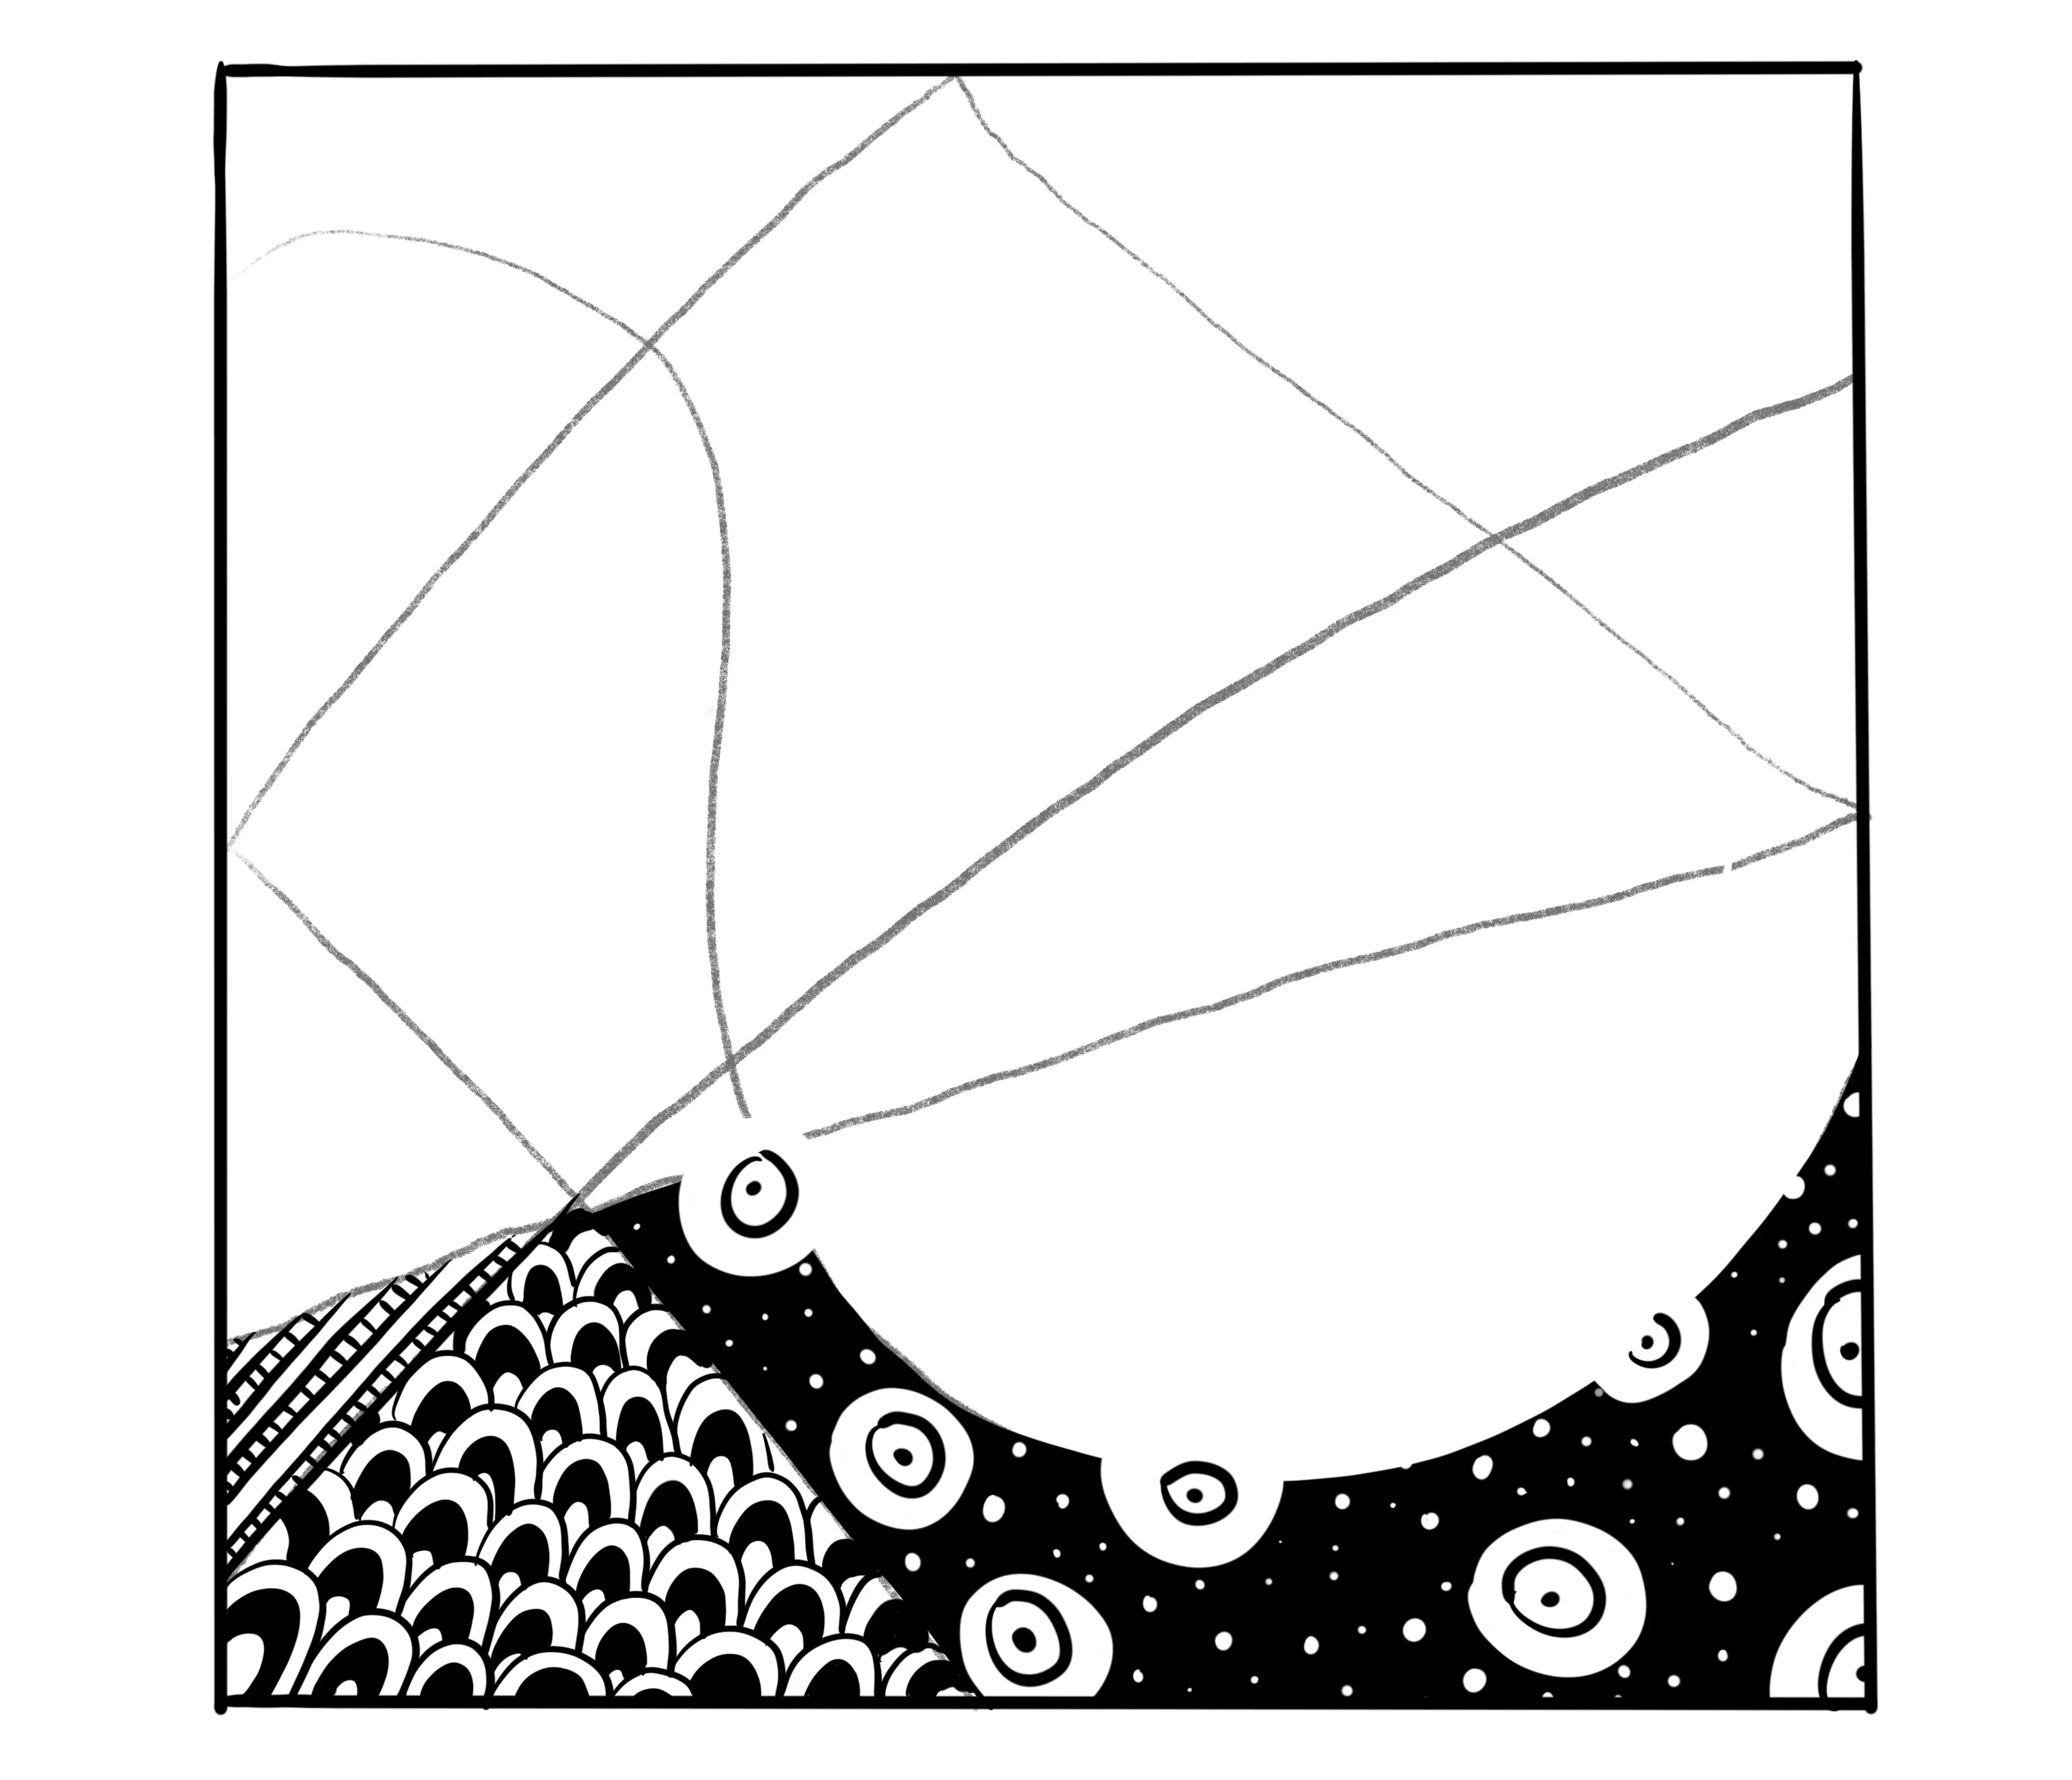
The third pattern is on a black background and therefore a bit more complicated. I draw some fairly large circles and others very small. I colour in all the empty space between the circles. Then, I redraw circles in the white "bubbles" and a dot in the middle of these circles.
For the fourth model, I decided to change direction of approach. I made rounded lines with spirals in some places.
I change the direction of the sheet again for the fifth pattern. This allows me to vary the dynamics of the cells. This pattern is very simple; I make thicker lines at the end than at the beginning and I alternate with dots.

For the sixth very small pattern, I create sorts of small scales.
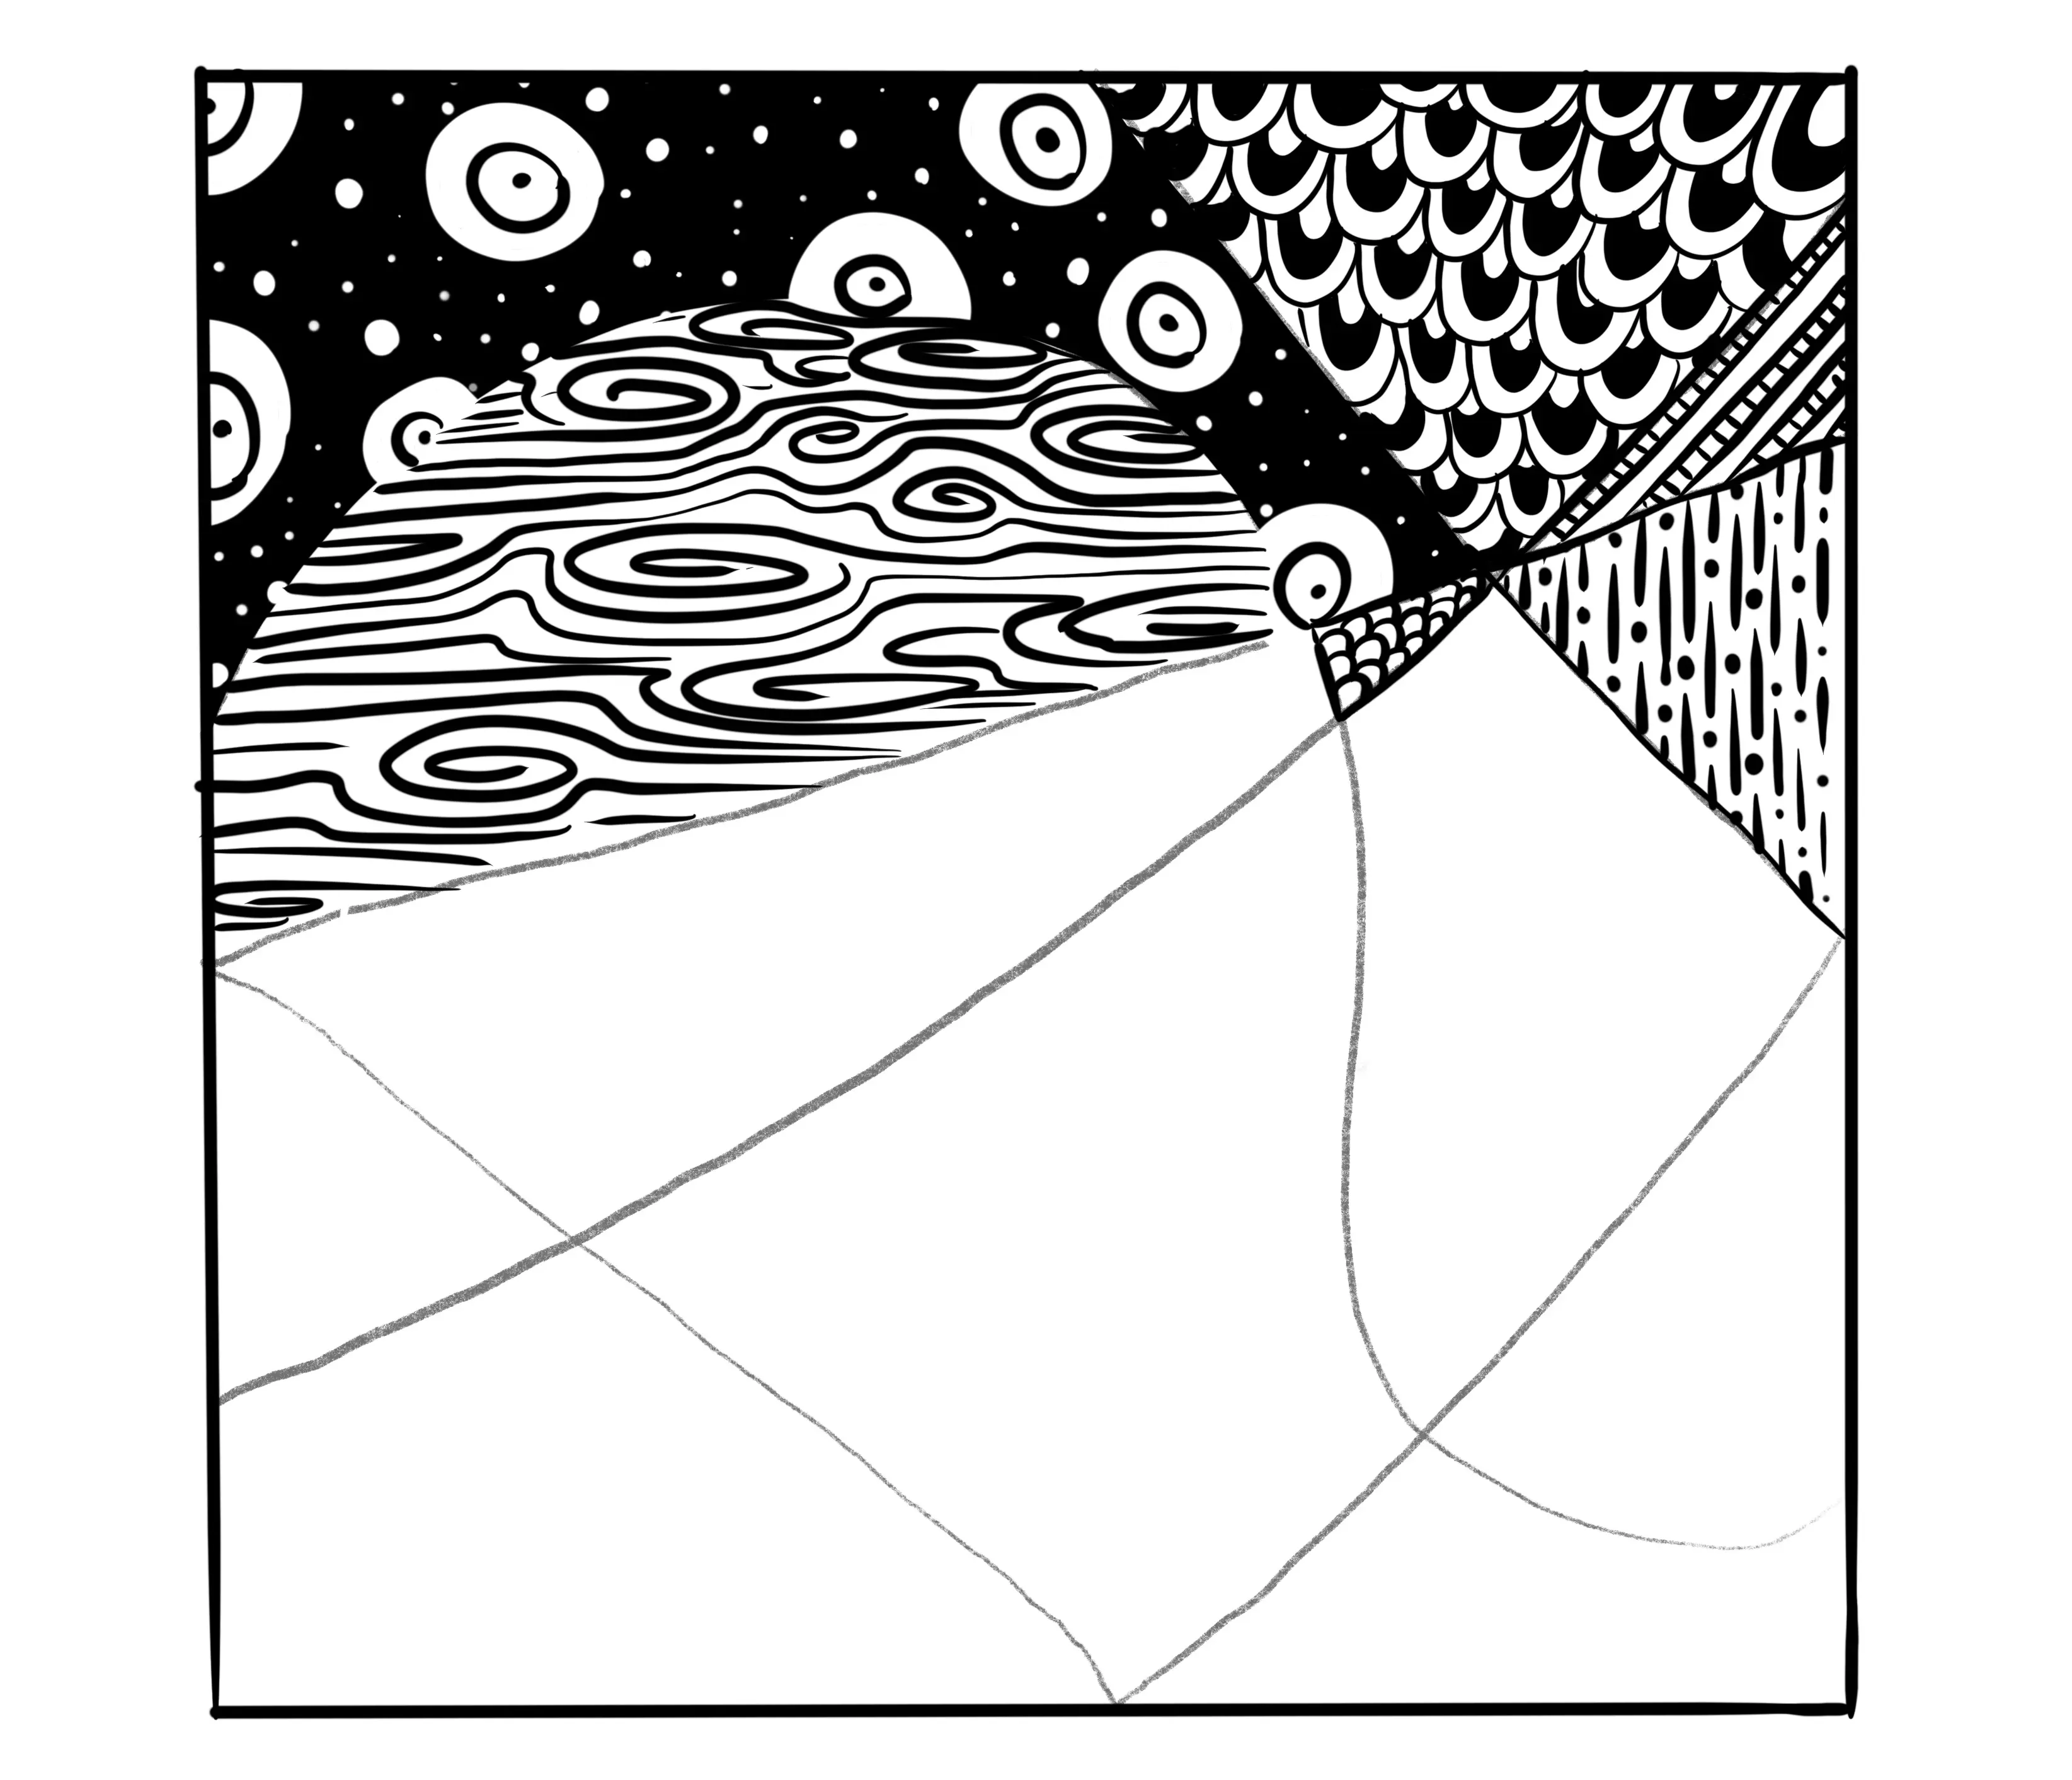
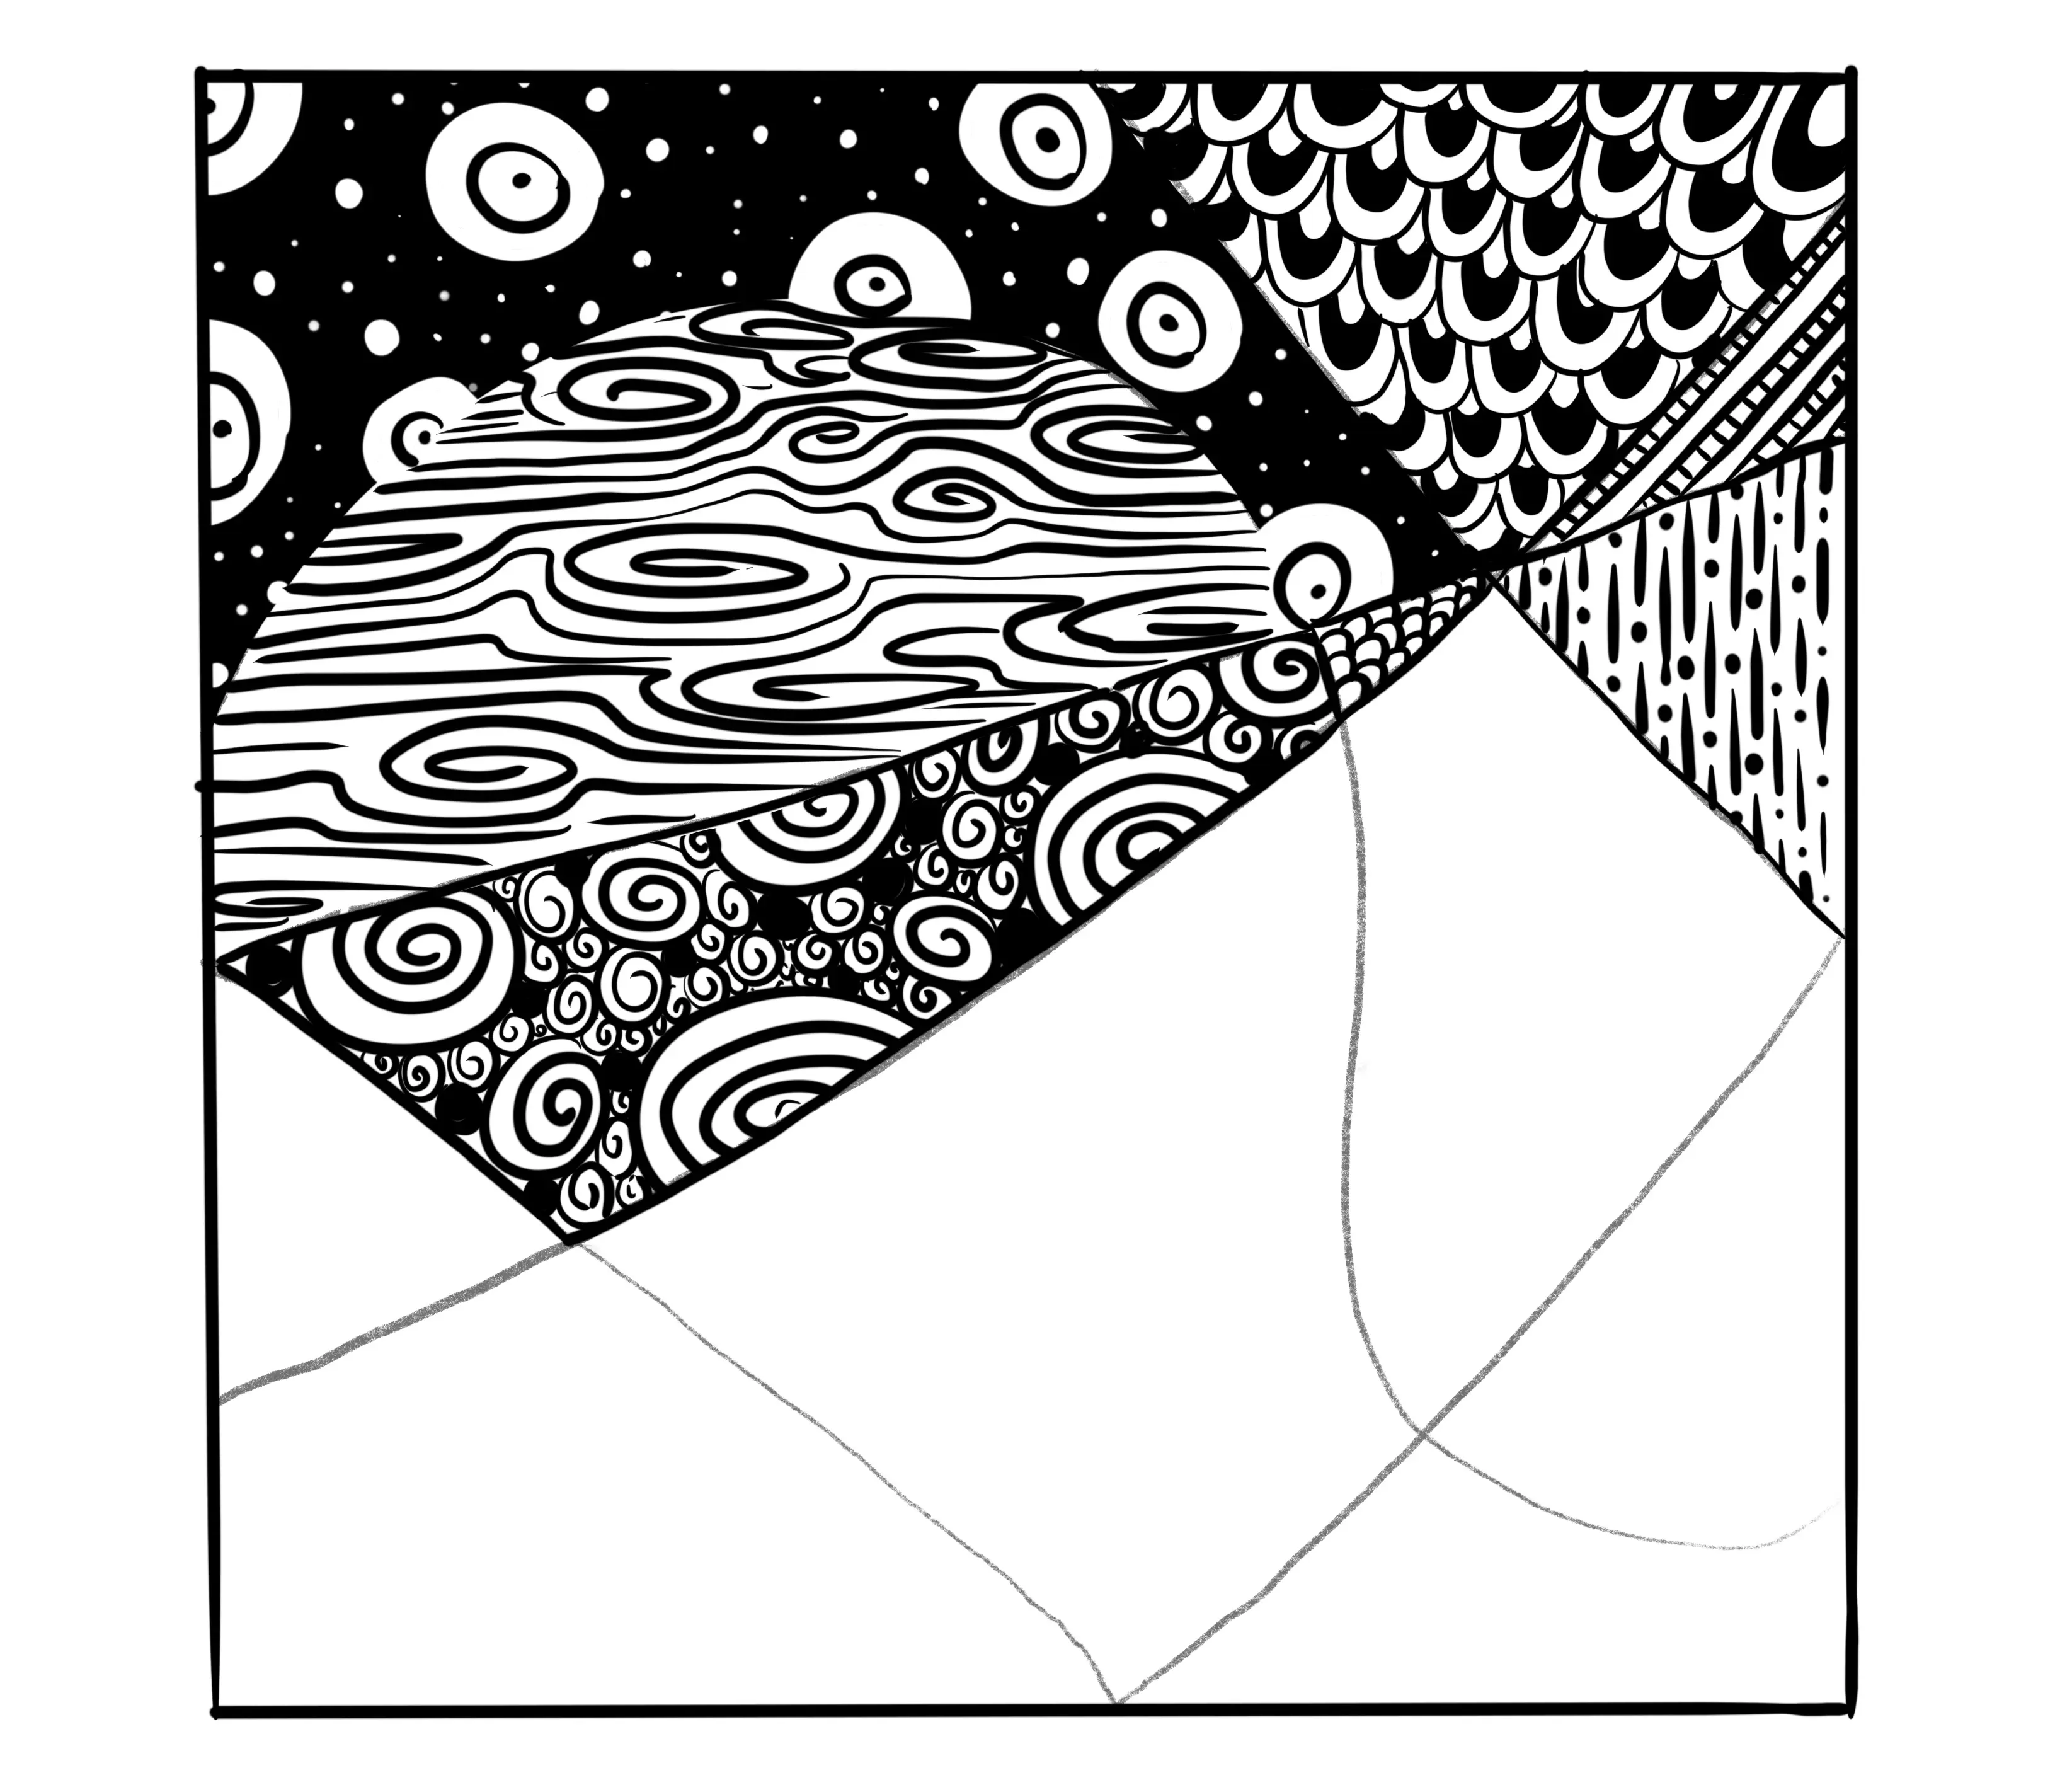
The seventh design is again on a black background. First I draw circles of different sizes. Then I colour the space between the circles and draw spirals inside the circles.
The eighth pattern is perhaps one of the most complicated. I draw ovals along an imaginary line, alternating the sides. To create the line, I do not close the ovals completely. Then I draw the space between the ovals. Finally, I close the inside of the ovals, leaving a new imaginary line and a dot.
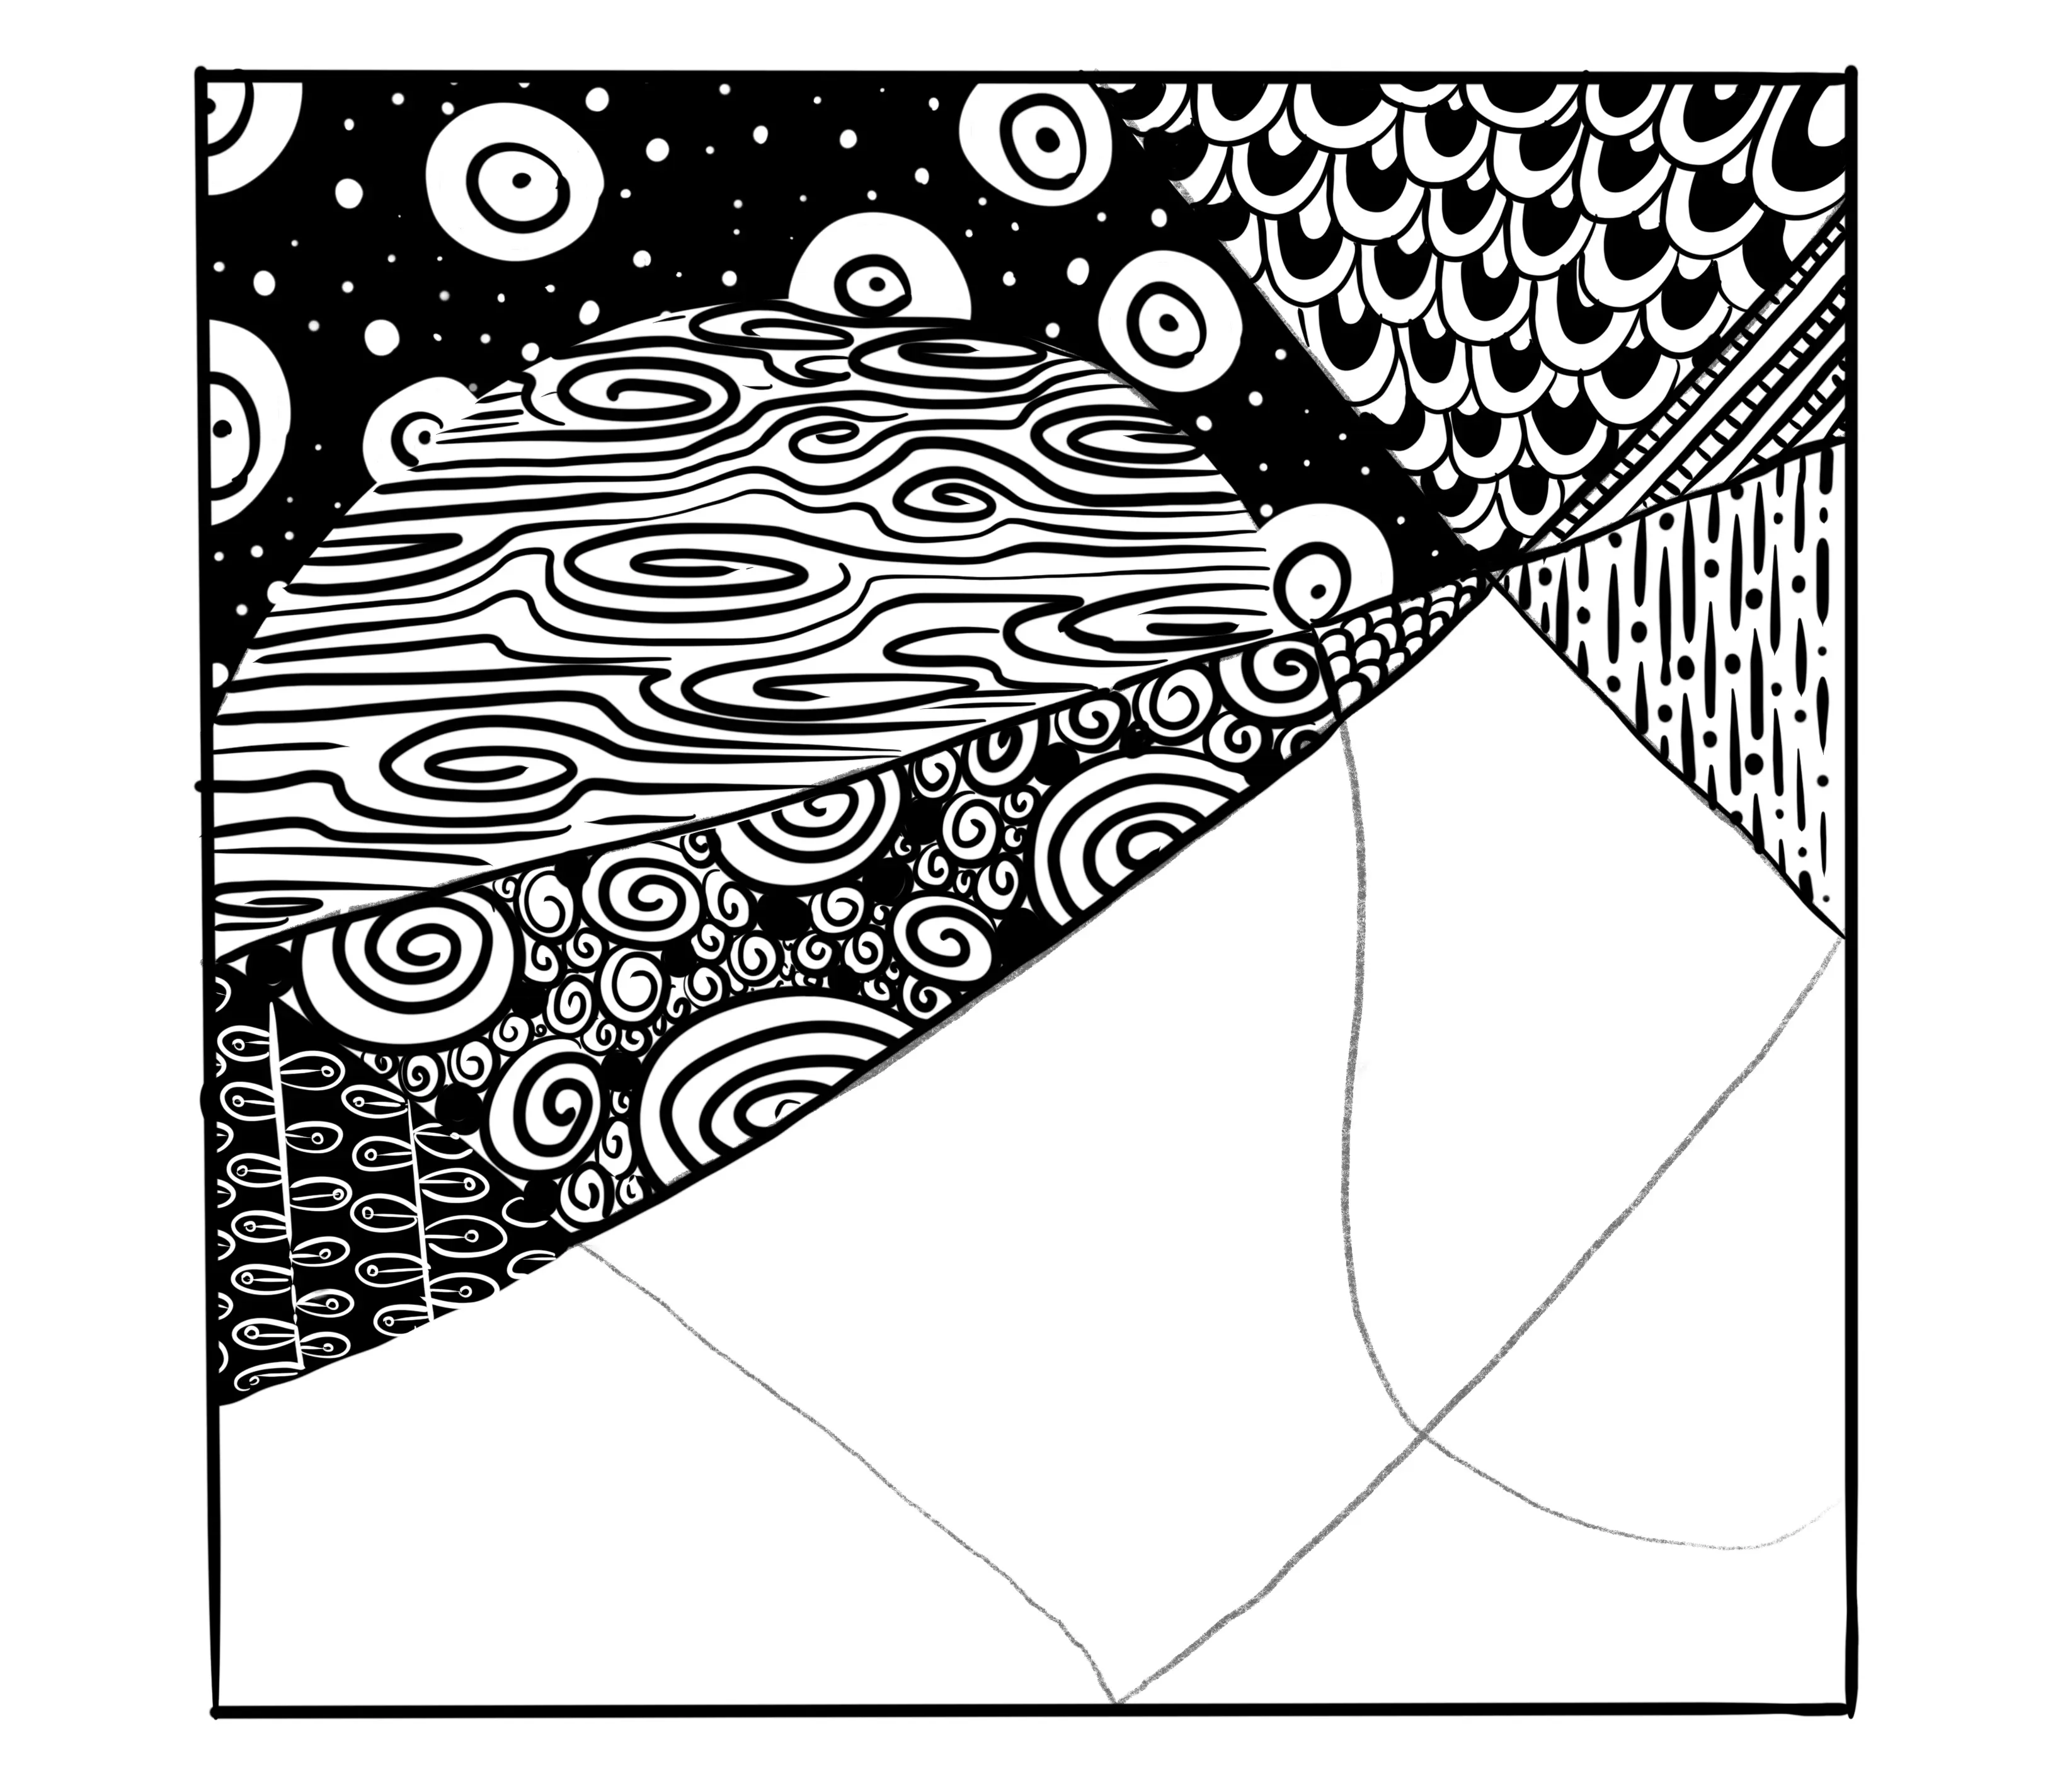
The ninth pattern is still on a black background but much simpler. I draw rounded shapes similar to cells of different sizes and then colour in the space between them.
For the tenth drawing, I again change the direction of the paper. I draw intersecting lines to form a grid, then in each of the resulting squares I draw lines alternating the direction and varying the pressure on the marker.
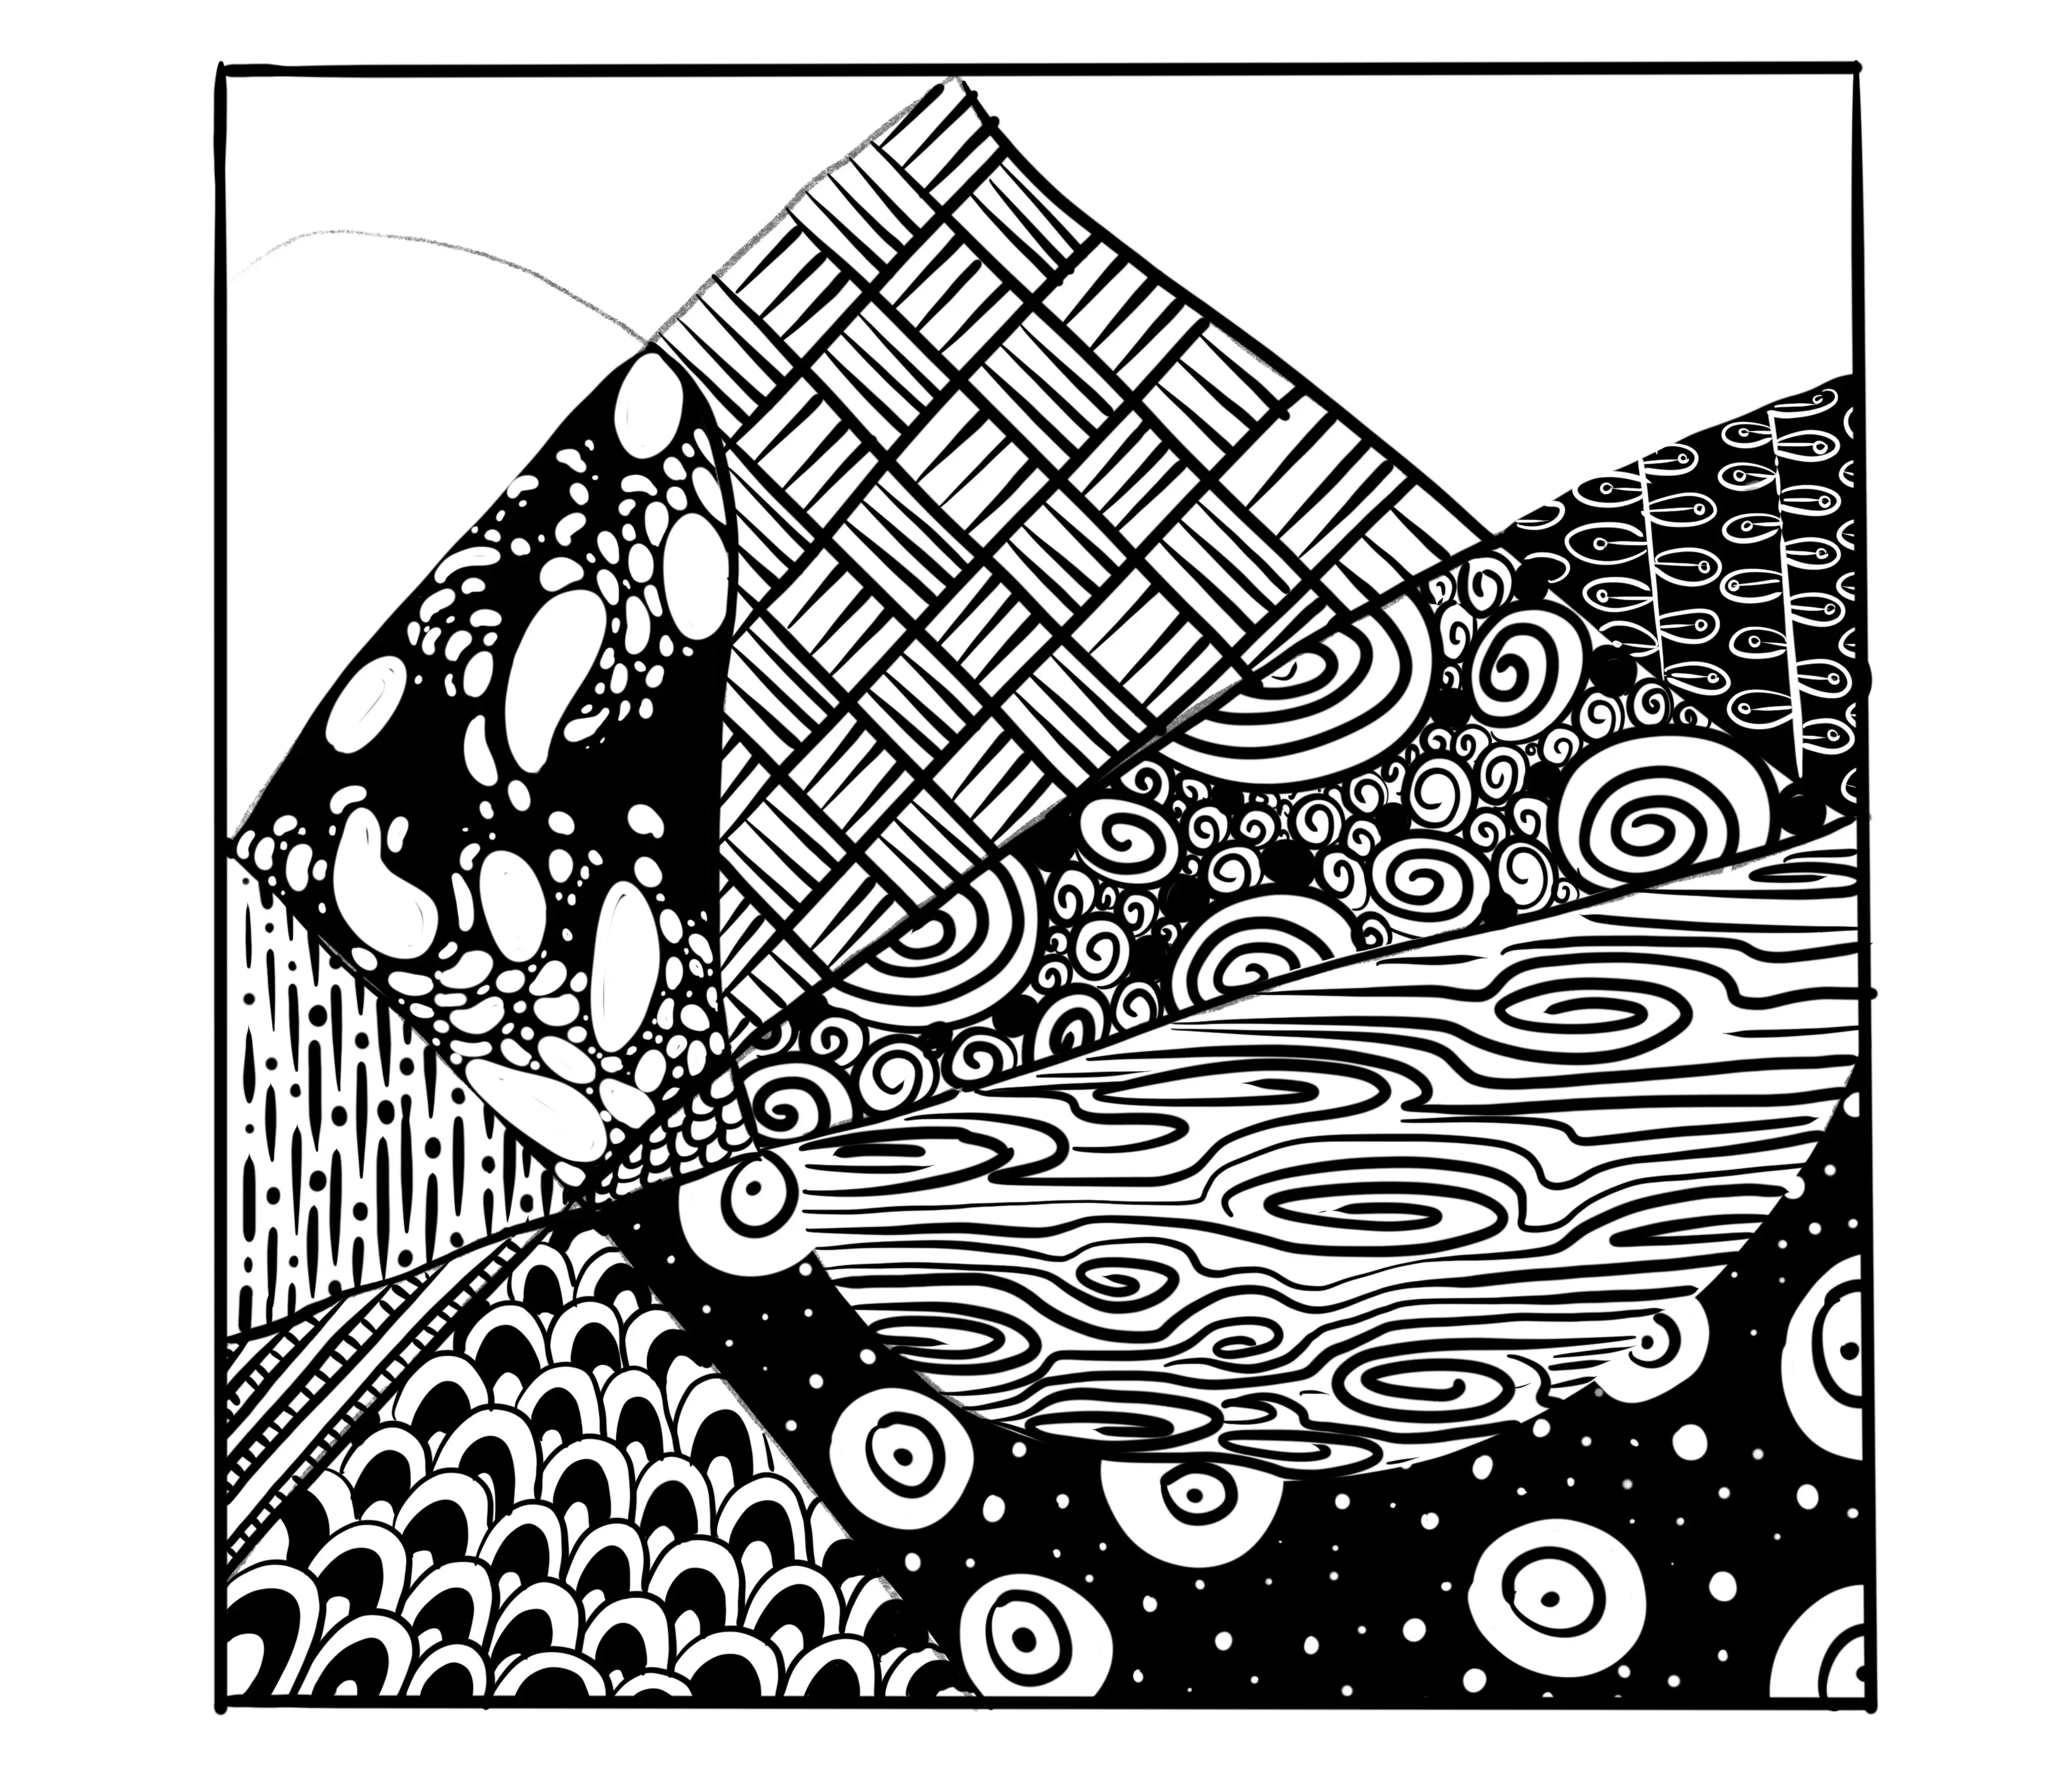
For the eleventh pattern, I change my direction again. I draw curves with little rounded peaks. I colour some of the curves in black.
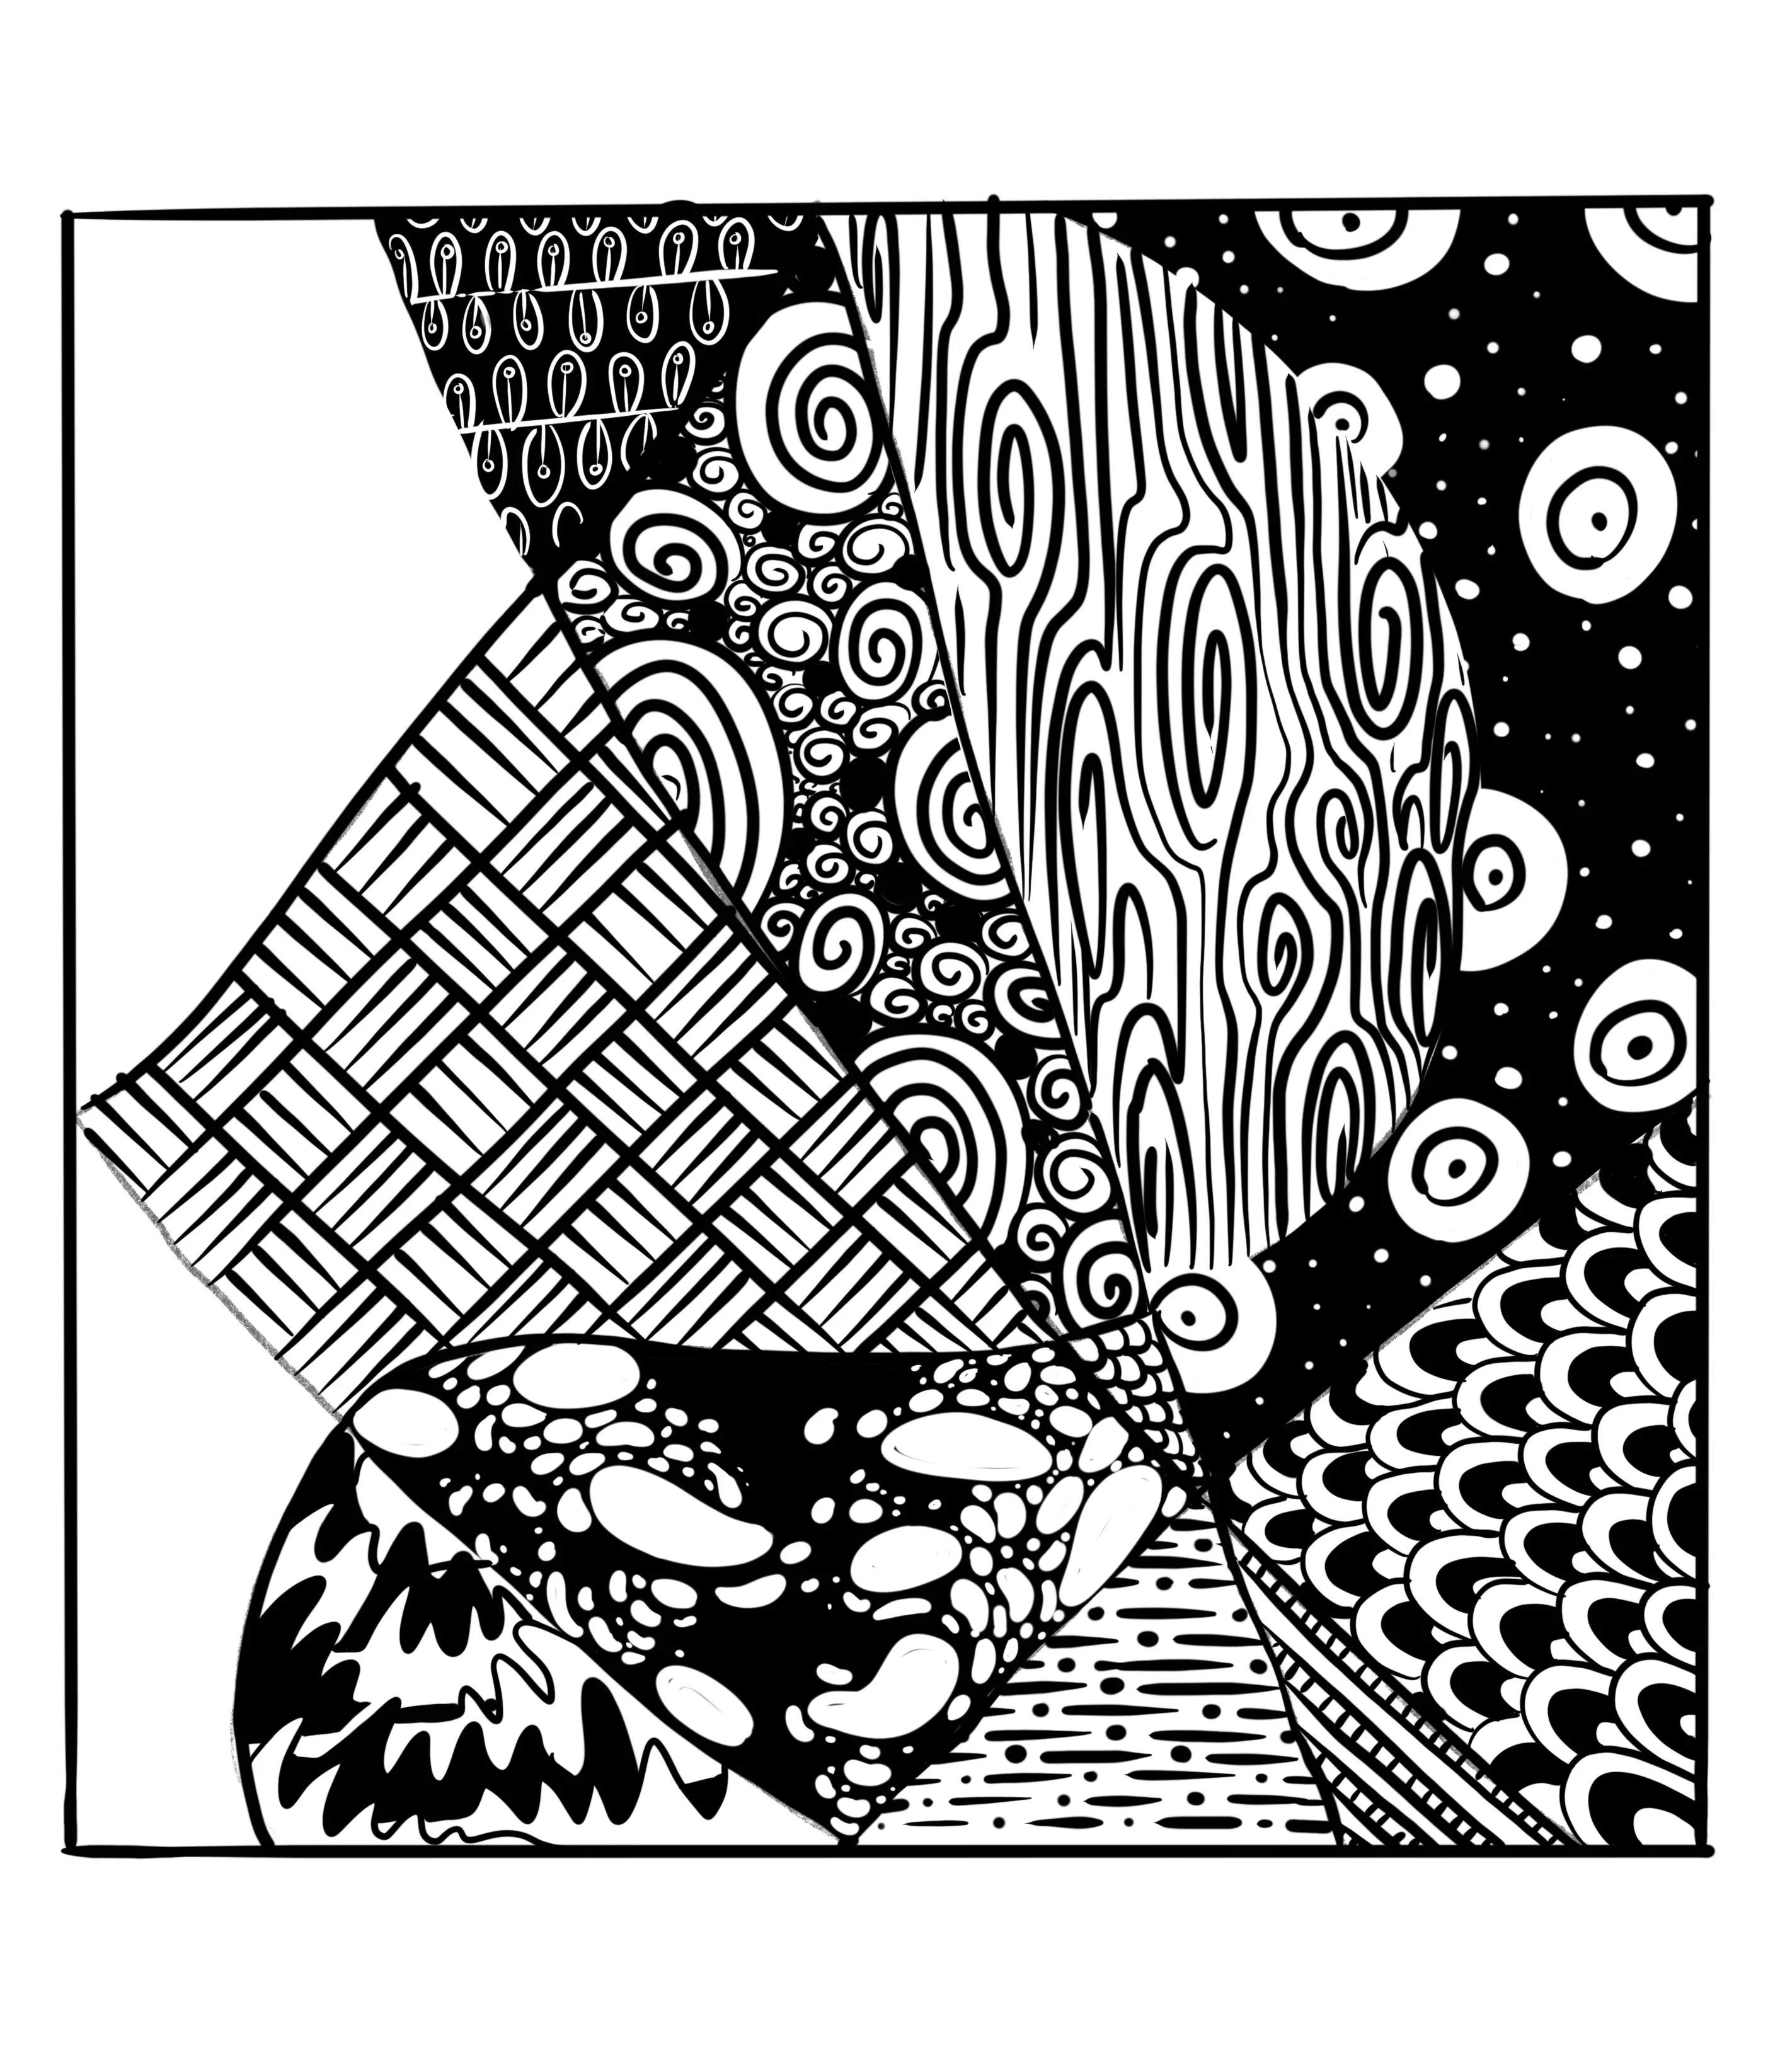
For the twelfth motif, I again change the orientation of the sheet, draw parallel lines and then create more diagonal lines as for a chevron motif.
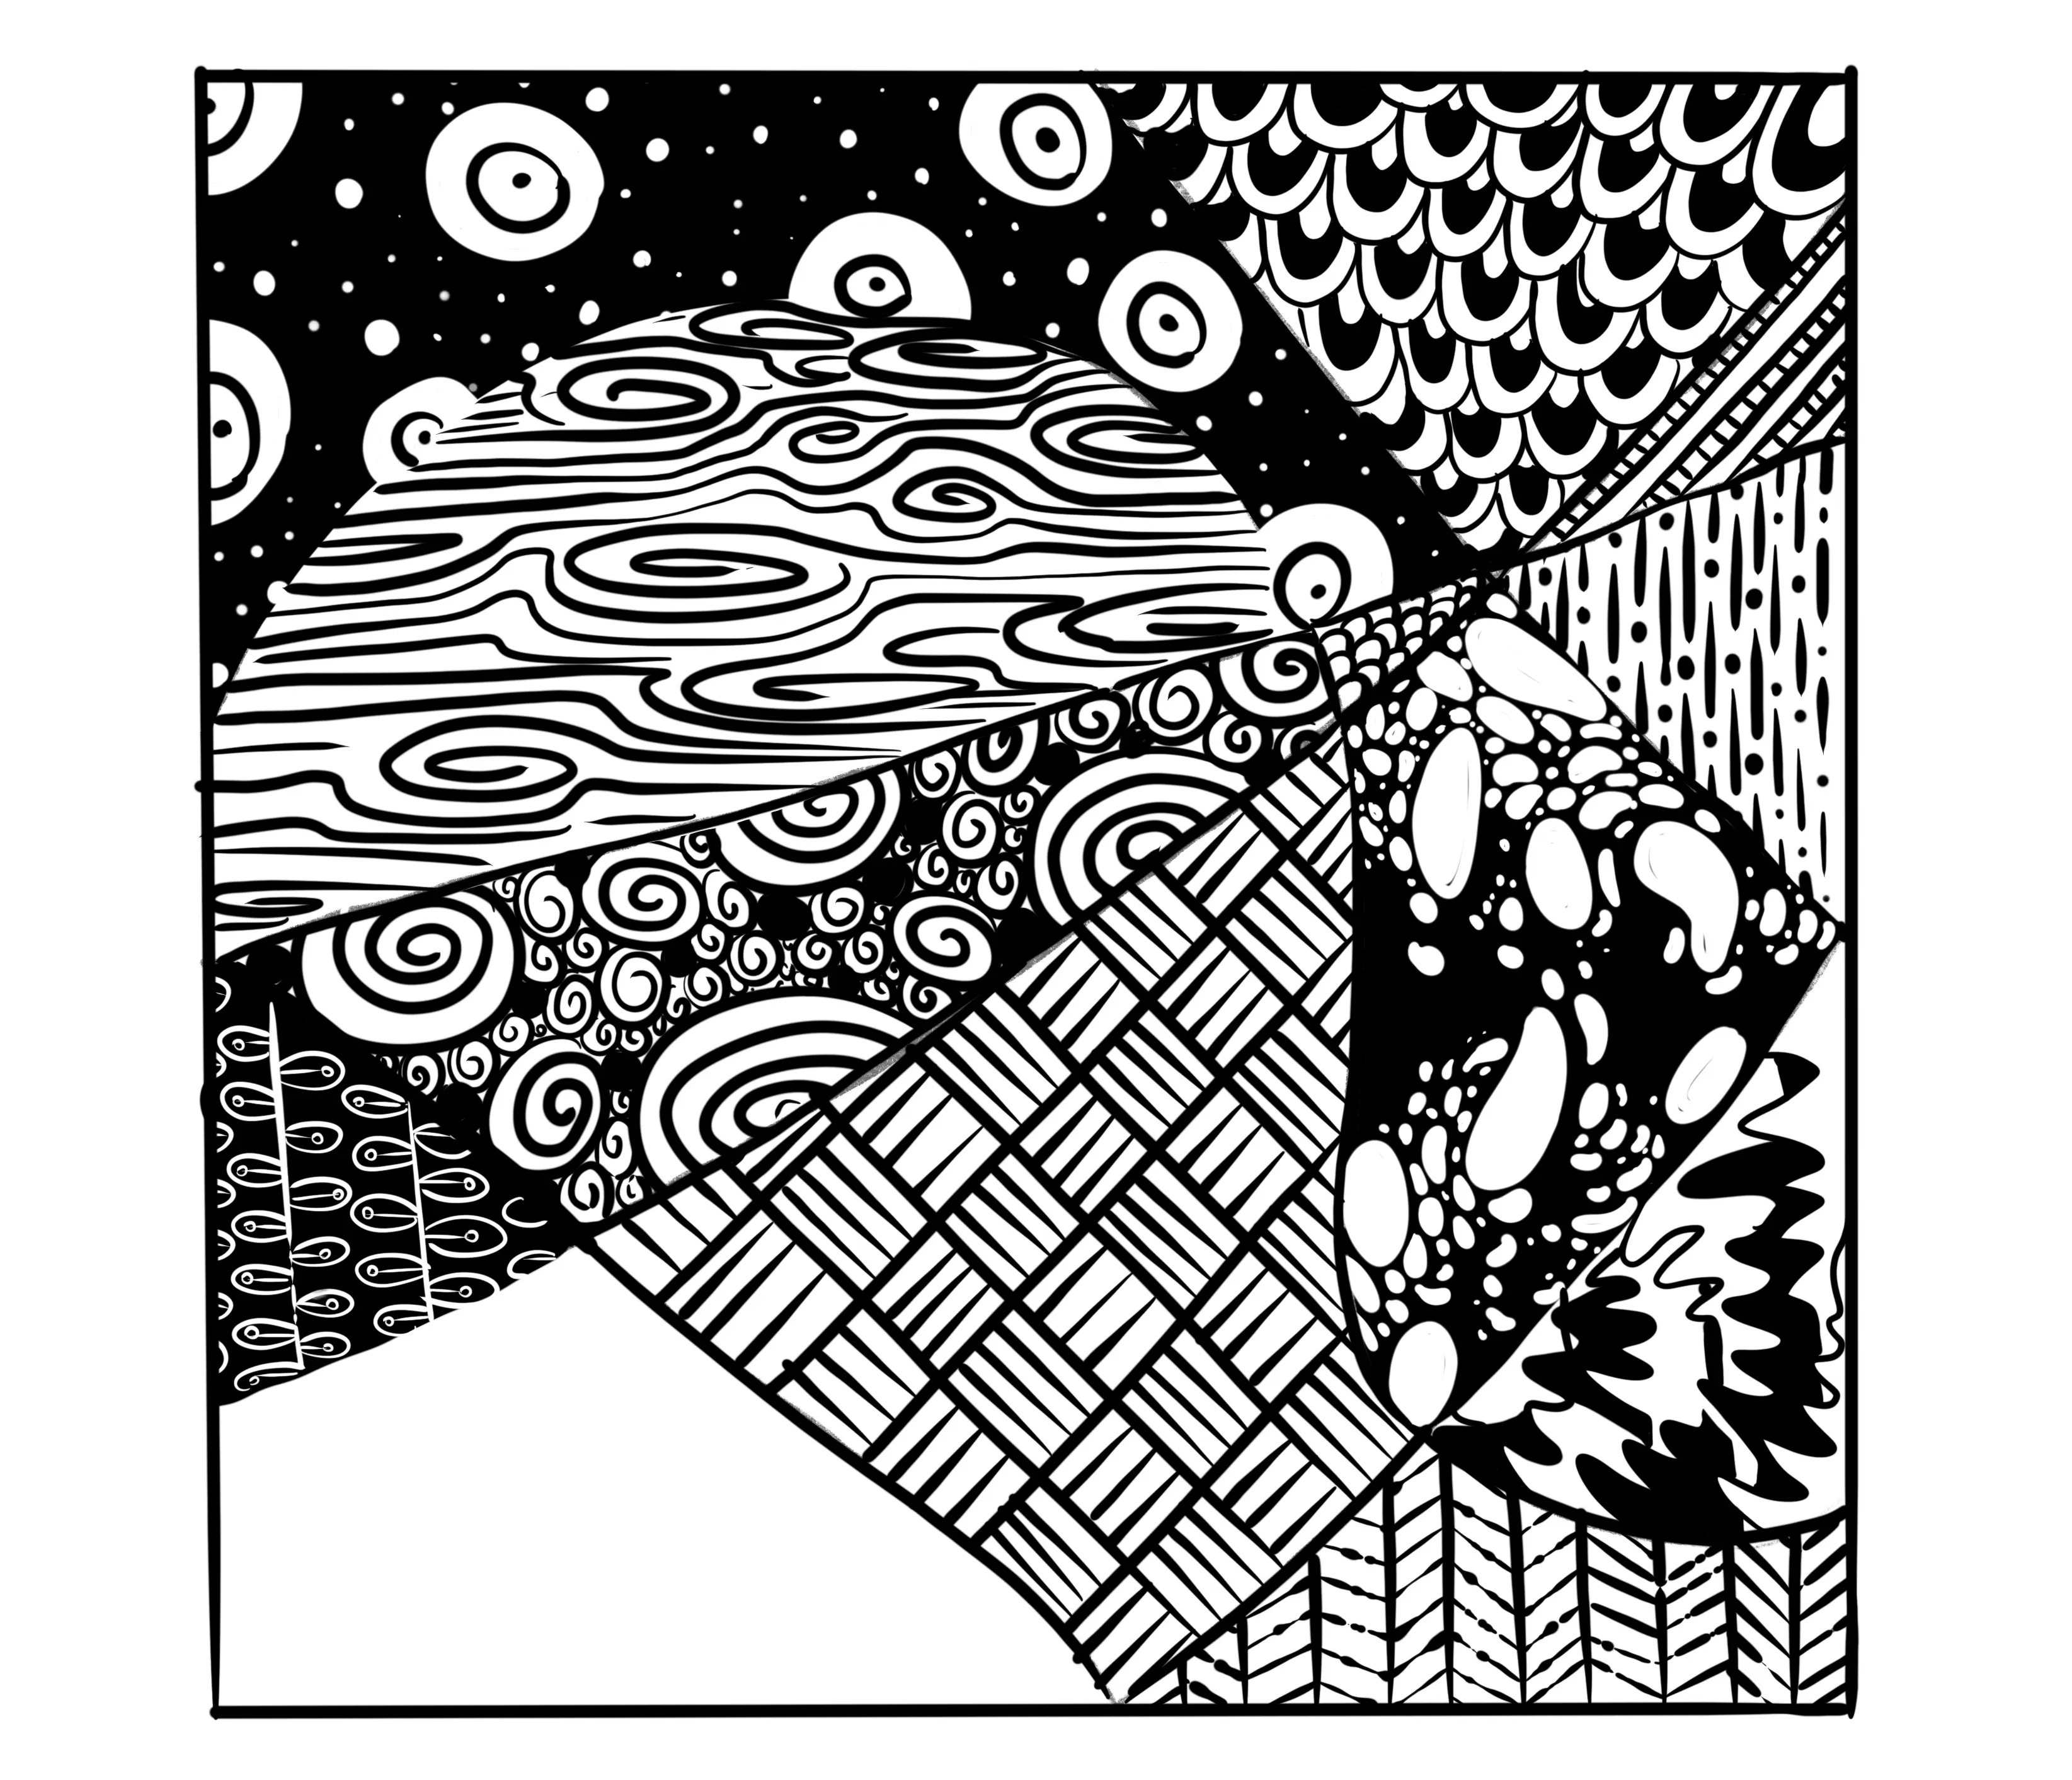
The thirteenth pattern is the most complicated of all. I start by drawing triangles as finely as possible, then I fill the base of each triangle by cutting through the middle with black.
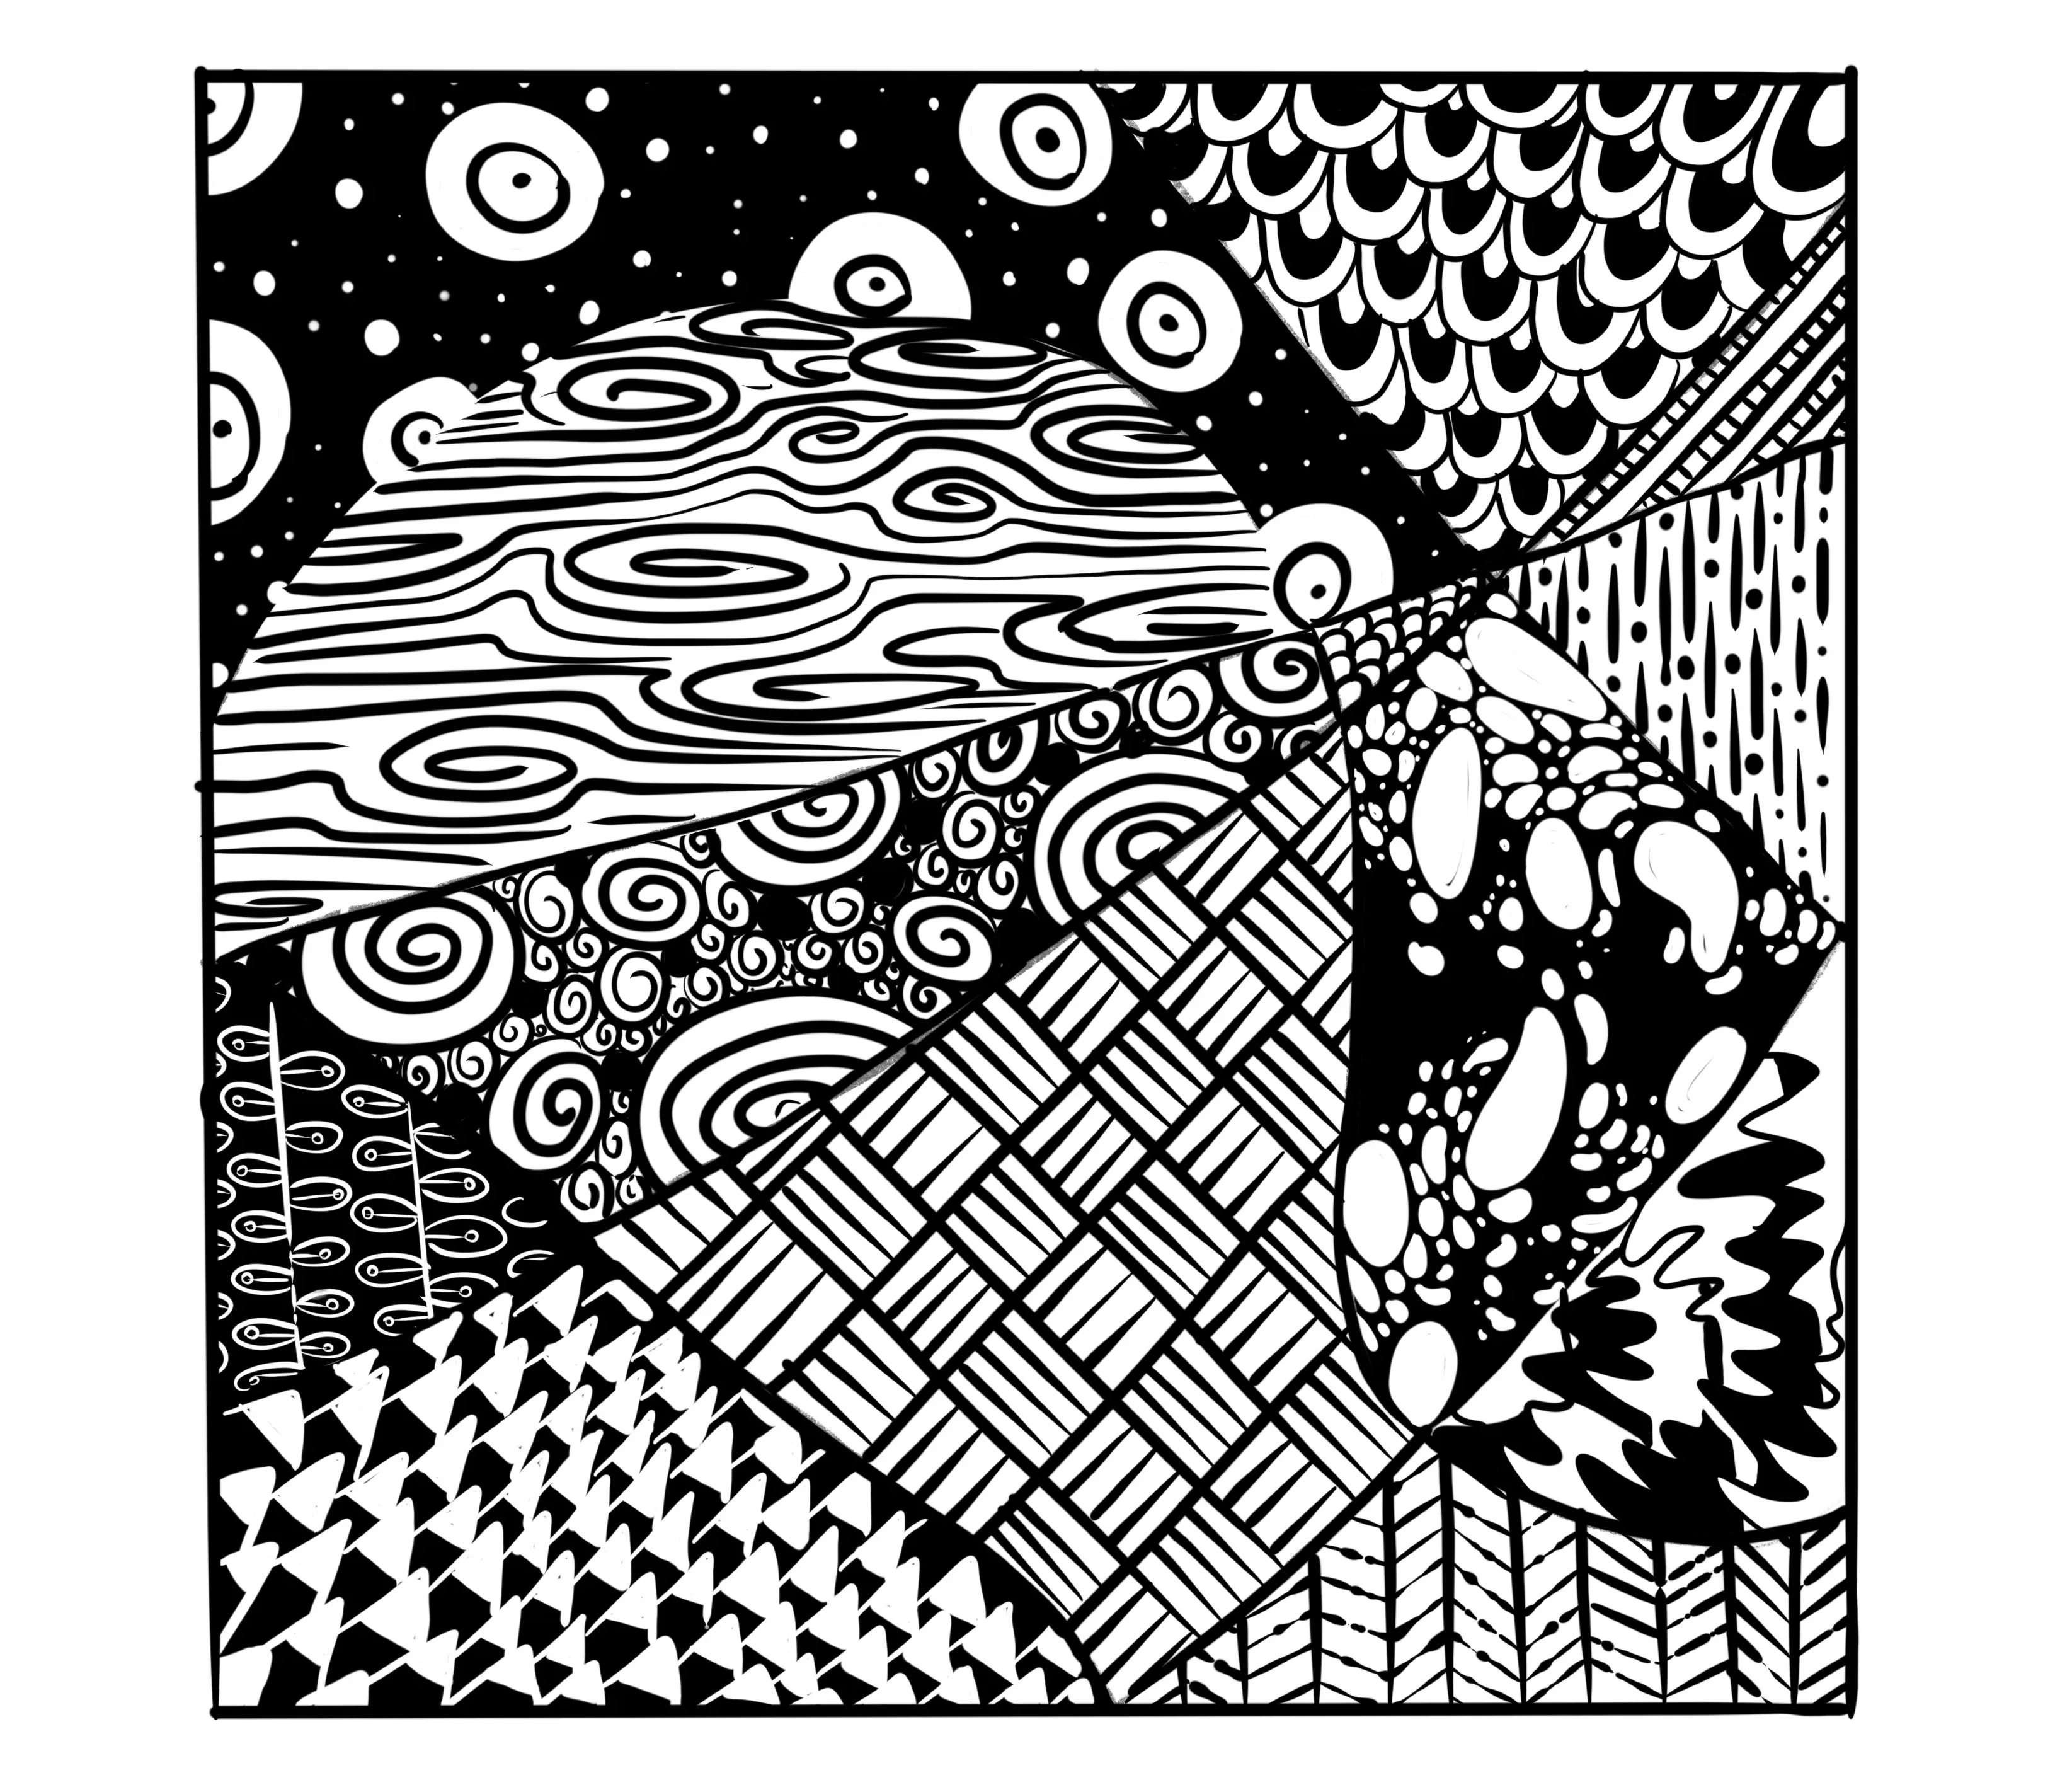
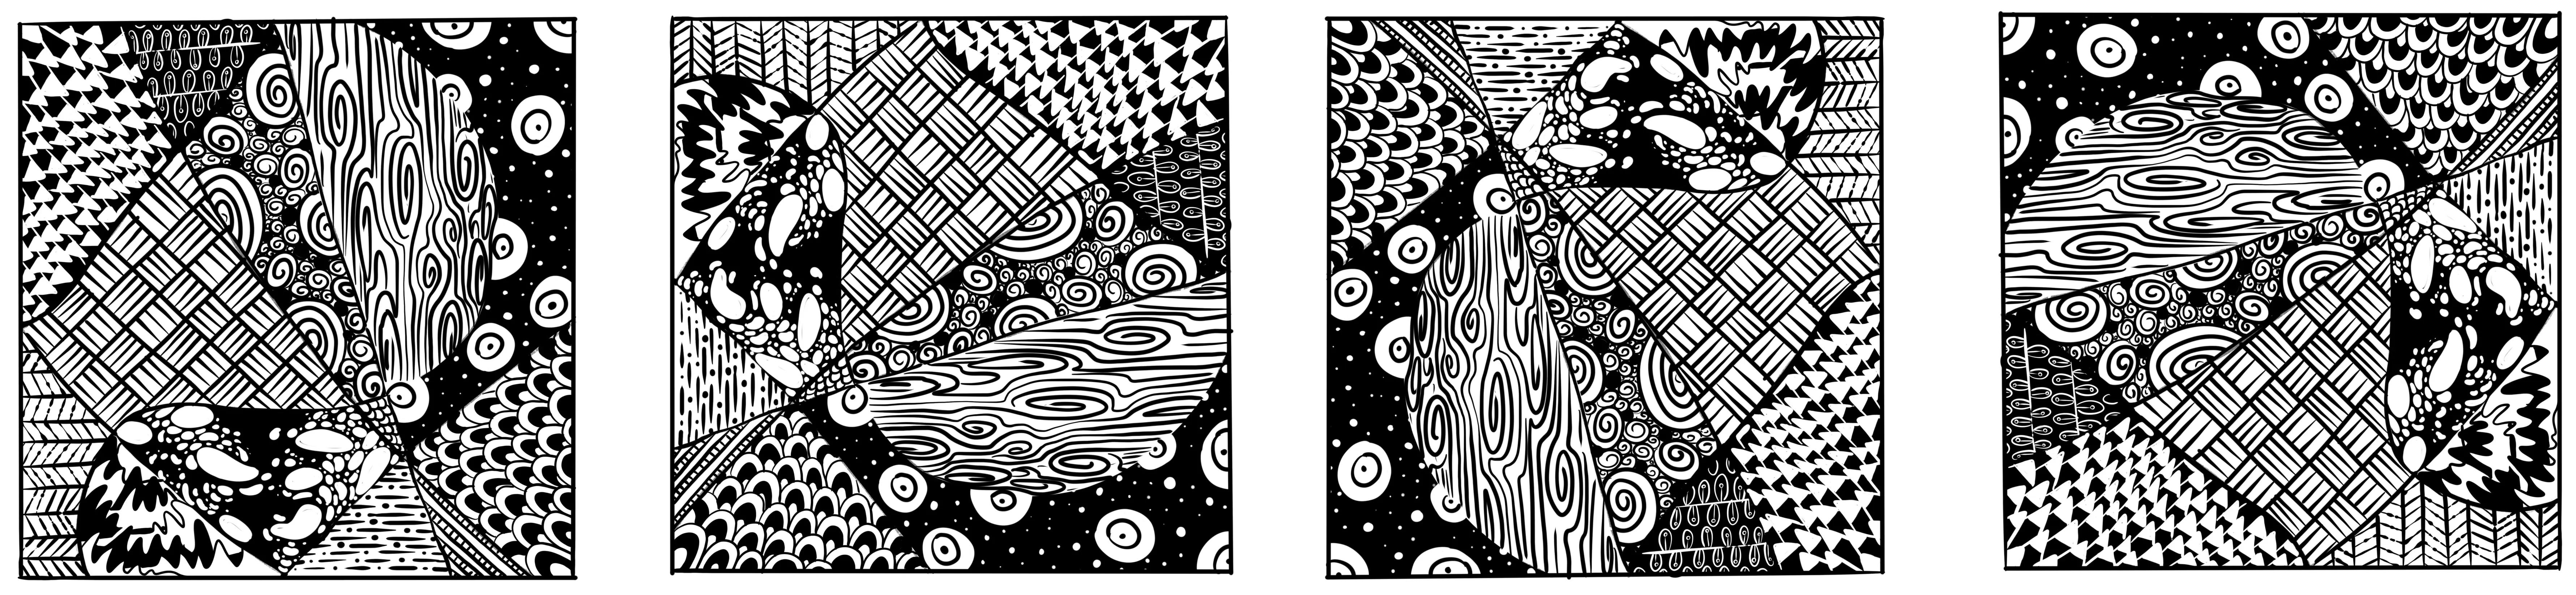
Here it is! All the areas are filled and our zentangle is therefore complete. As you can see, it can be viewed from any angle and meets all the rules we discussed in part 3.

I hope you enjoyed this article about Zentangle drawing and feel inspired to try this relaxing drawing technique 😊
Discussion
Hello,
Thank you. Good idea to change things up a bit, alternating between two Dessindigo lessons 👍