How to Draw Hulk
Hulk is certainly one of the most well-known Marvel superheroes. If you wish to see an article on how to create a superhero drawing, this is available on our blog, for those who are interested ;)
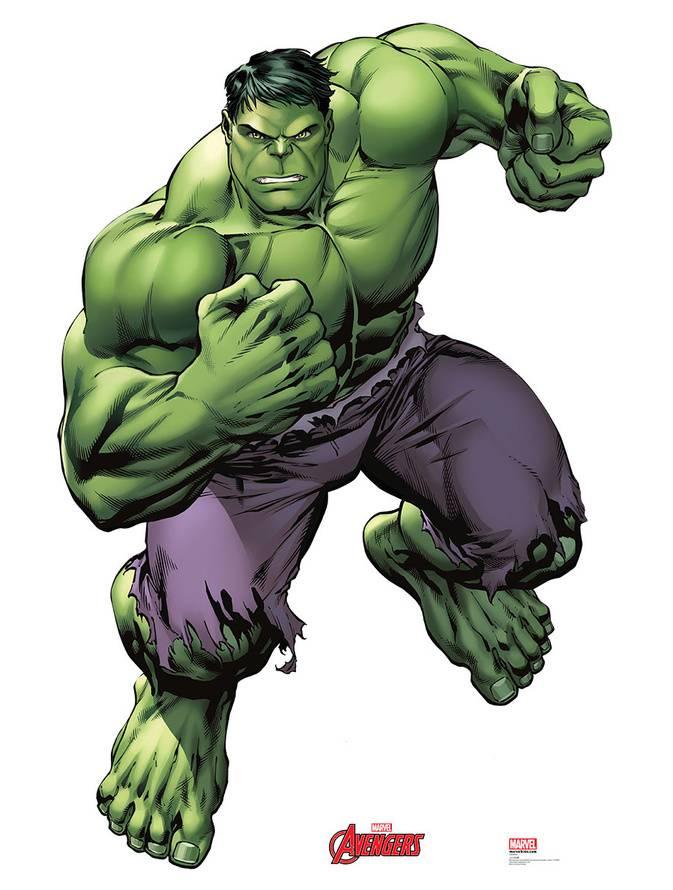
With his impressive build and green body, he has become a Marvel icon. Yet, when he was created in 1962 as the Incredible Hulk, the character had no success. It was by appearing in the famous comic Tales to Astonish in 1964 and then in Avengers that Hulk became more and more popular, eventually becoming a cult figure in the Marvel universe.
In this article, we will learn to draw this green monster, step by step.
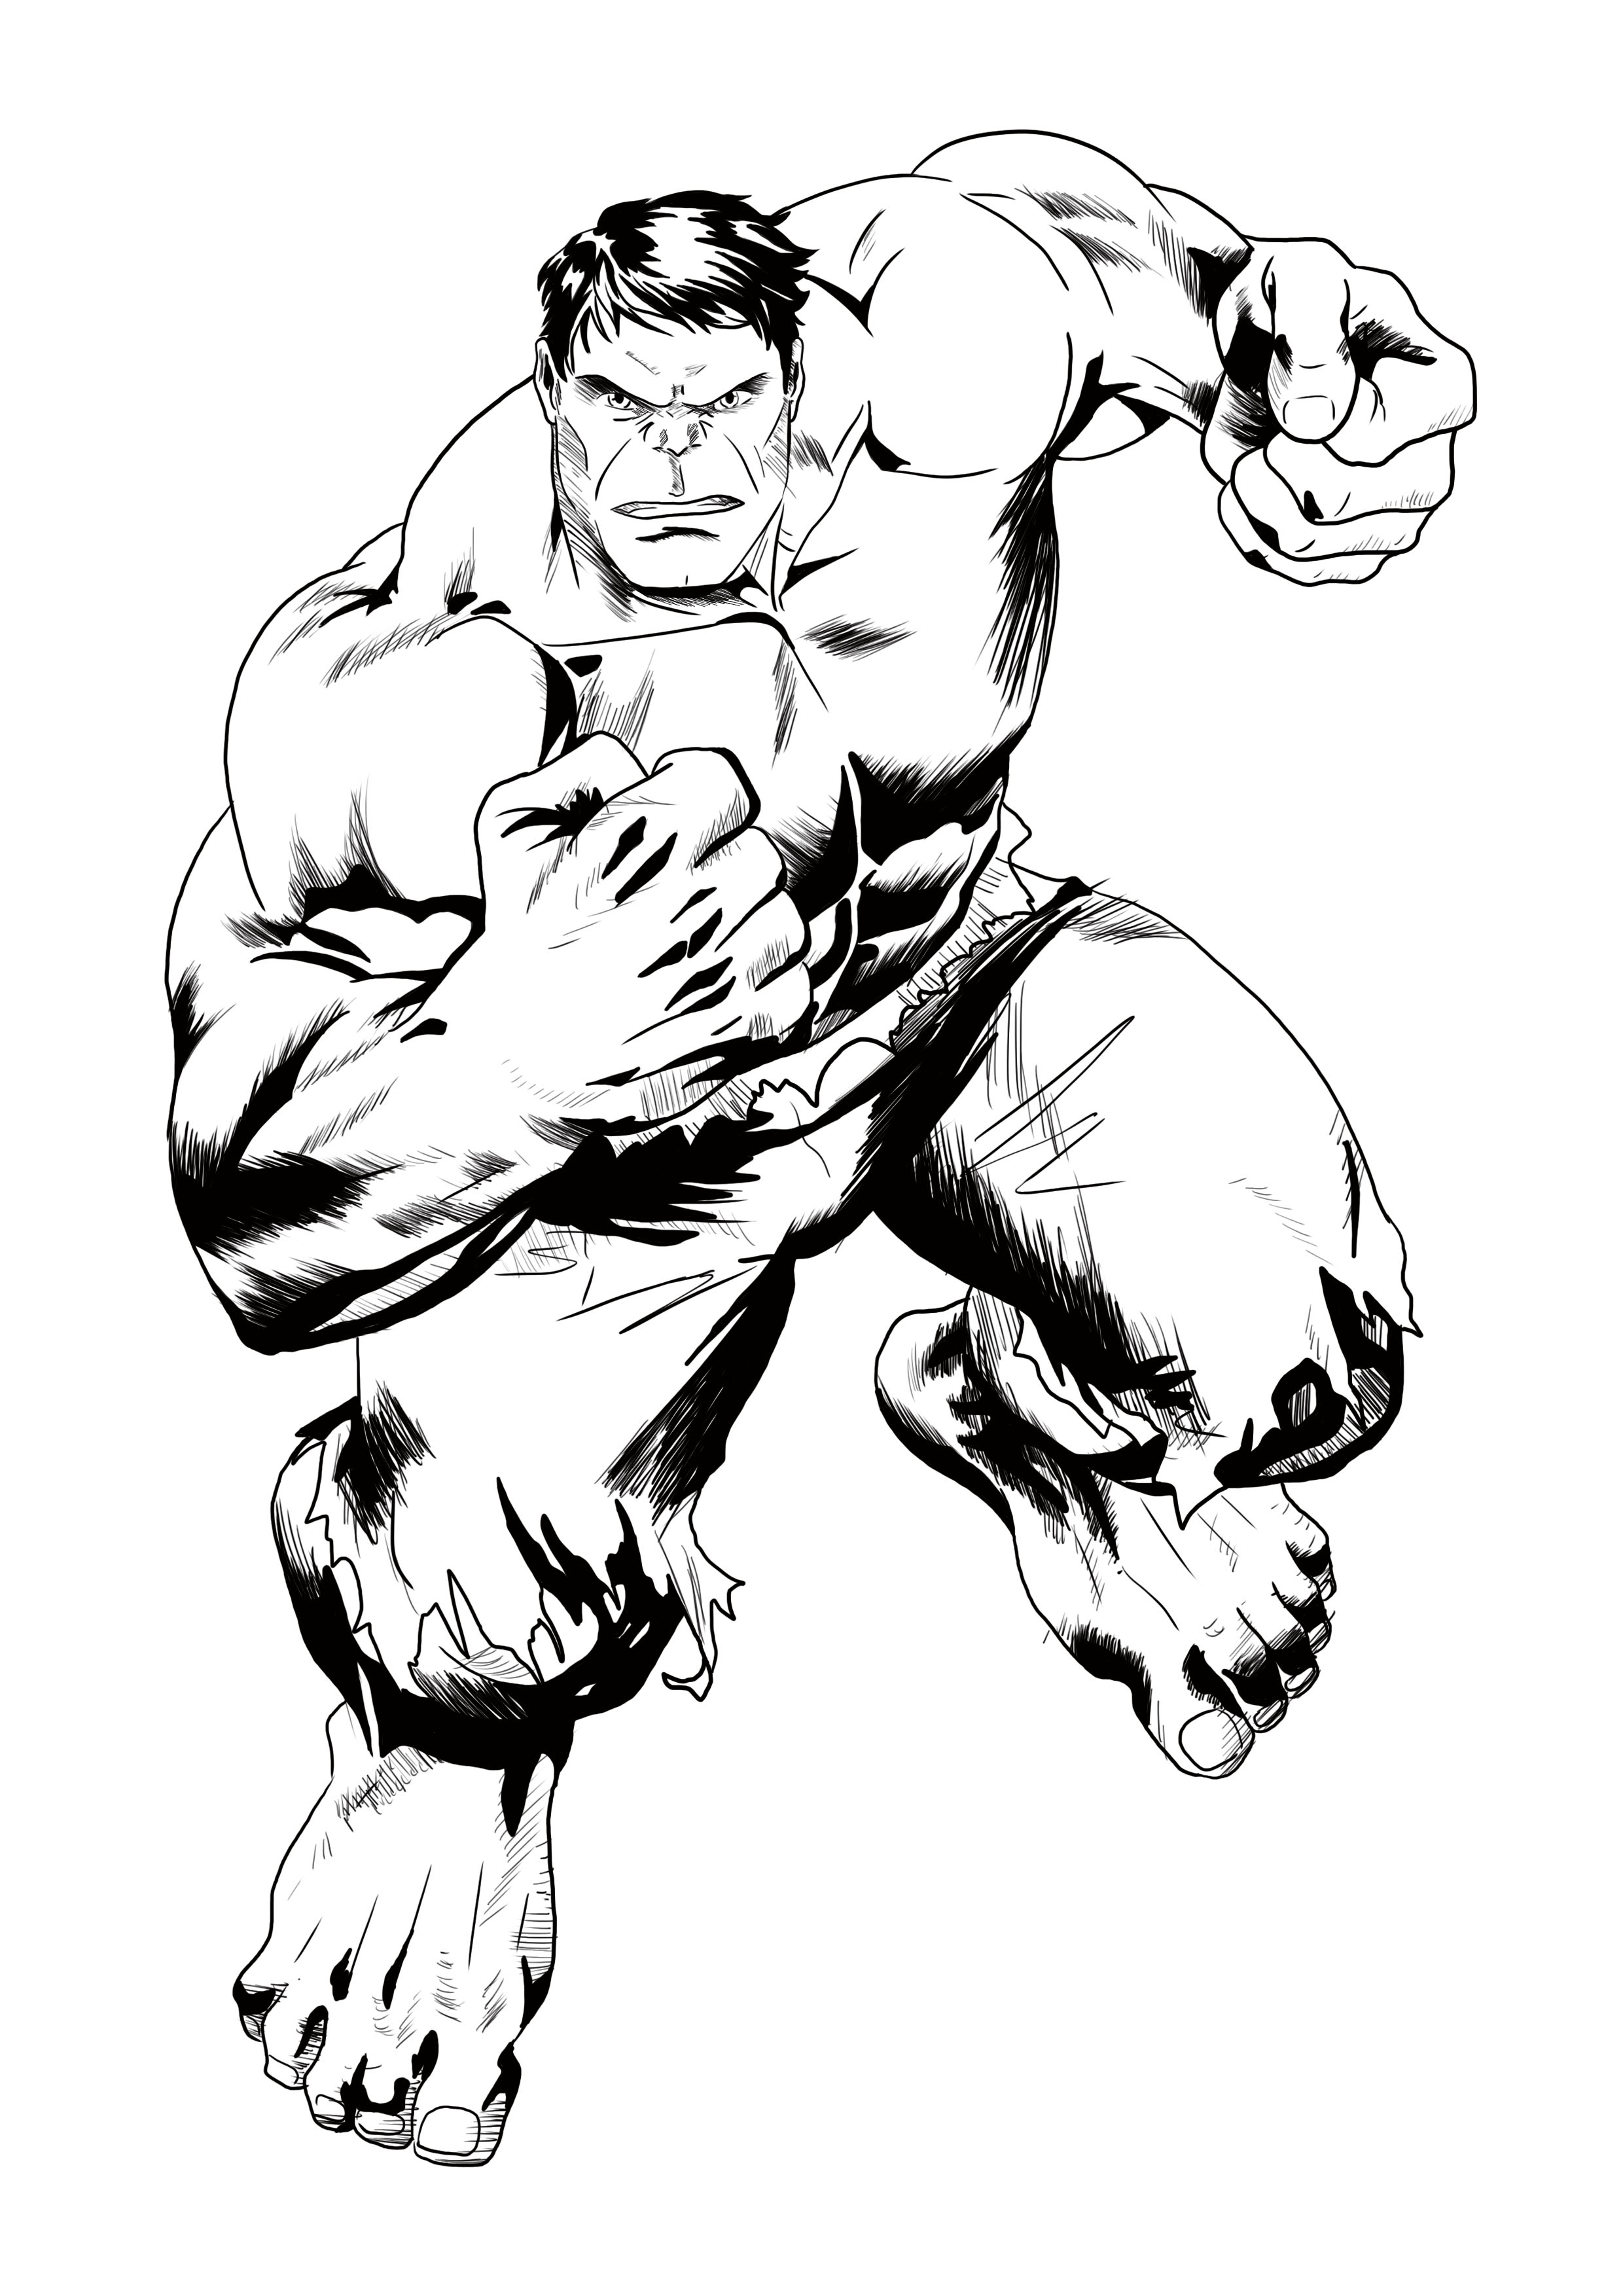
I chose a reference image where Hulk has a dynamic pose that really highlights him.
To draw Hulk or any other character with muscles, it's better to have some knowledge of anatomy.
Why? We do better when we understand what we're drawing rather than when we don't understand.
For this, I recommend the excellent book "Morpho: Anatomy for Artists" by Michel Lauricella.
In this article, I'm going to teach you how to simplify muscles so that you can draw them in detail more easily later. You’ll see that a good foundation makes drawing much easier.
THE BASIS OF DRAWING HULK
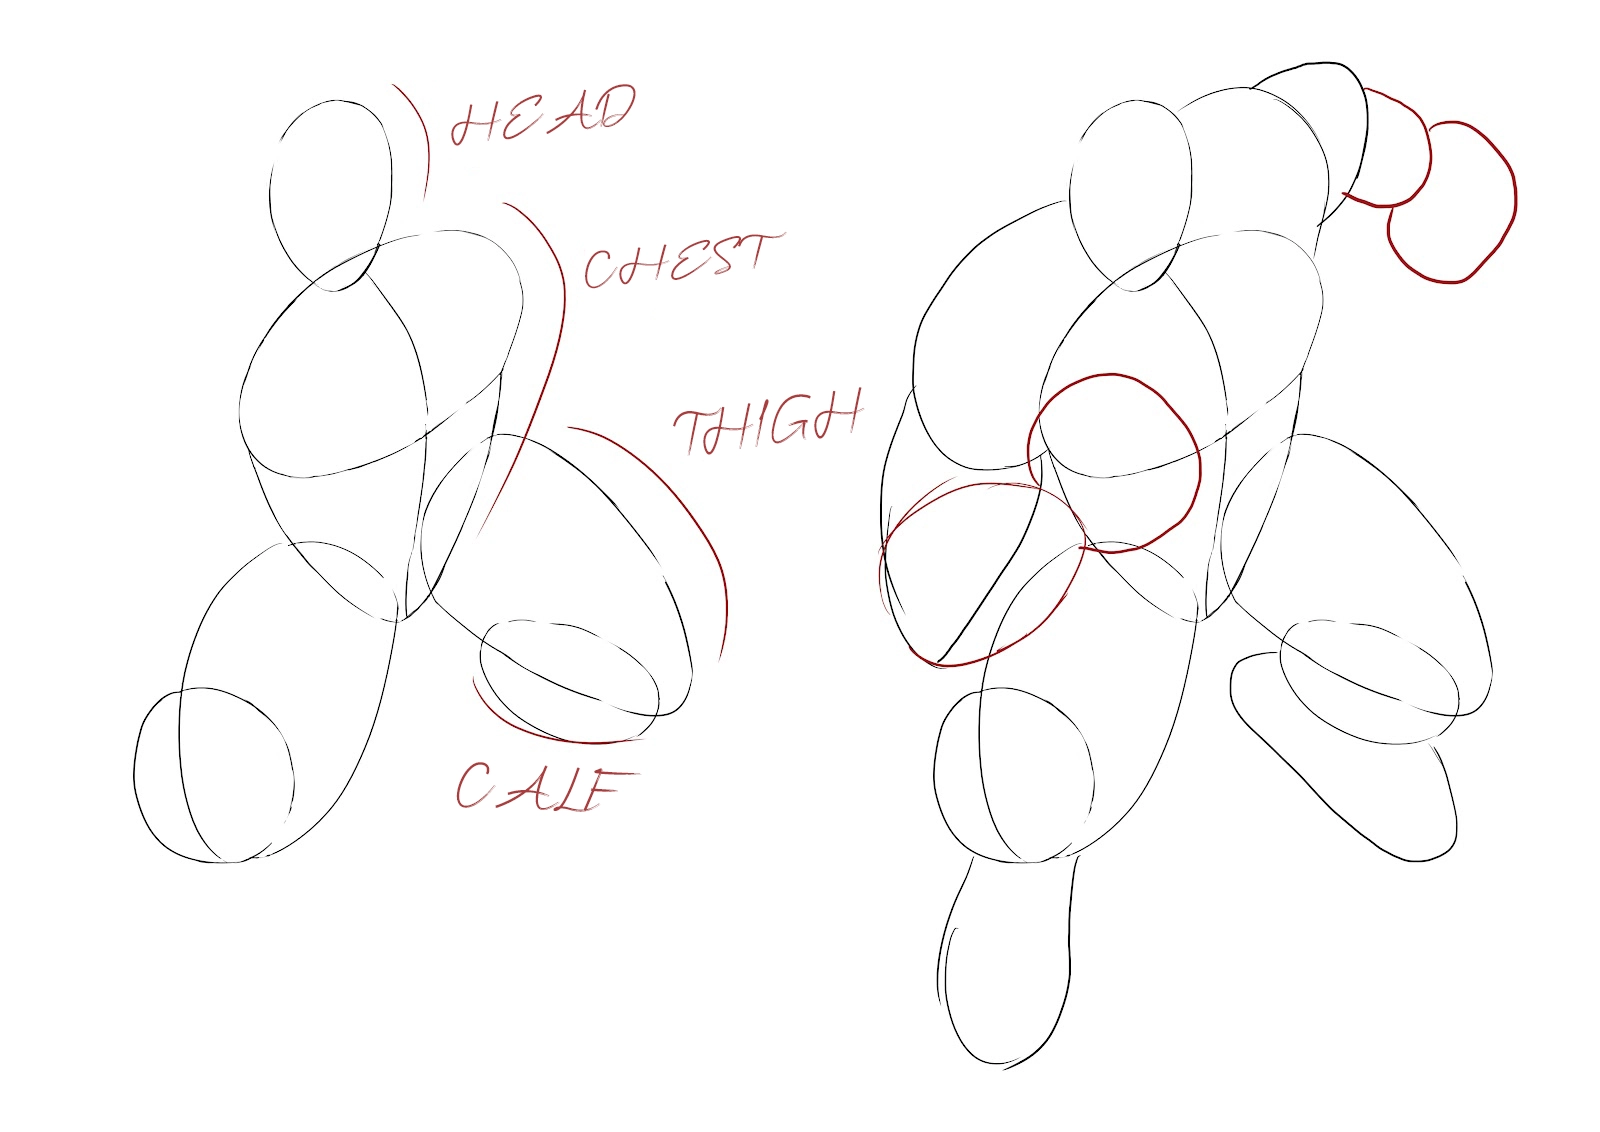
As with every drawing, we'll start by making a base.
This base is very important! If it is done well, the final drawing will just be tracing. We will use this step to place everything correctly and not have to think about the rest of the drawing, which will save a lot of time. So take your time, there's no need to rush.
I drew the different parts of the body in the form of circles to simplify them as much as possible, but still keeping the right proportions.
I took the time to do and redo them until I was satisfied, because these lines will serve as a guide for the final version.
Start with the head which will be your starting point to place the rest of the body elements.
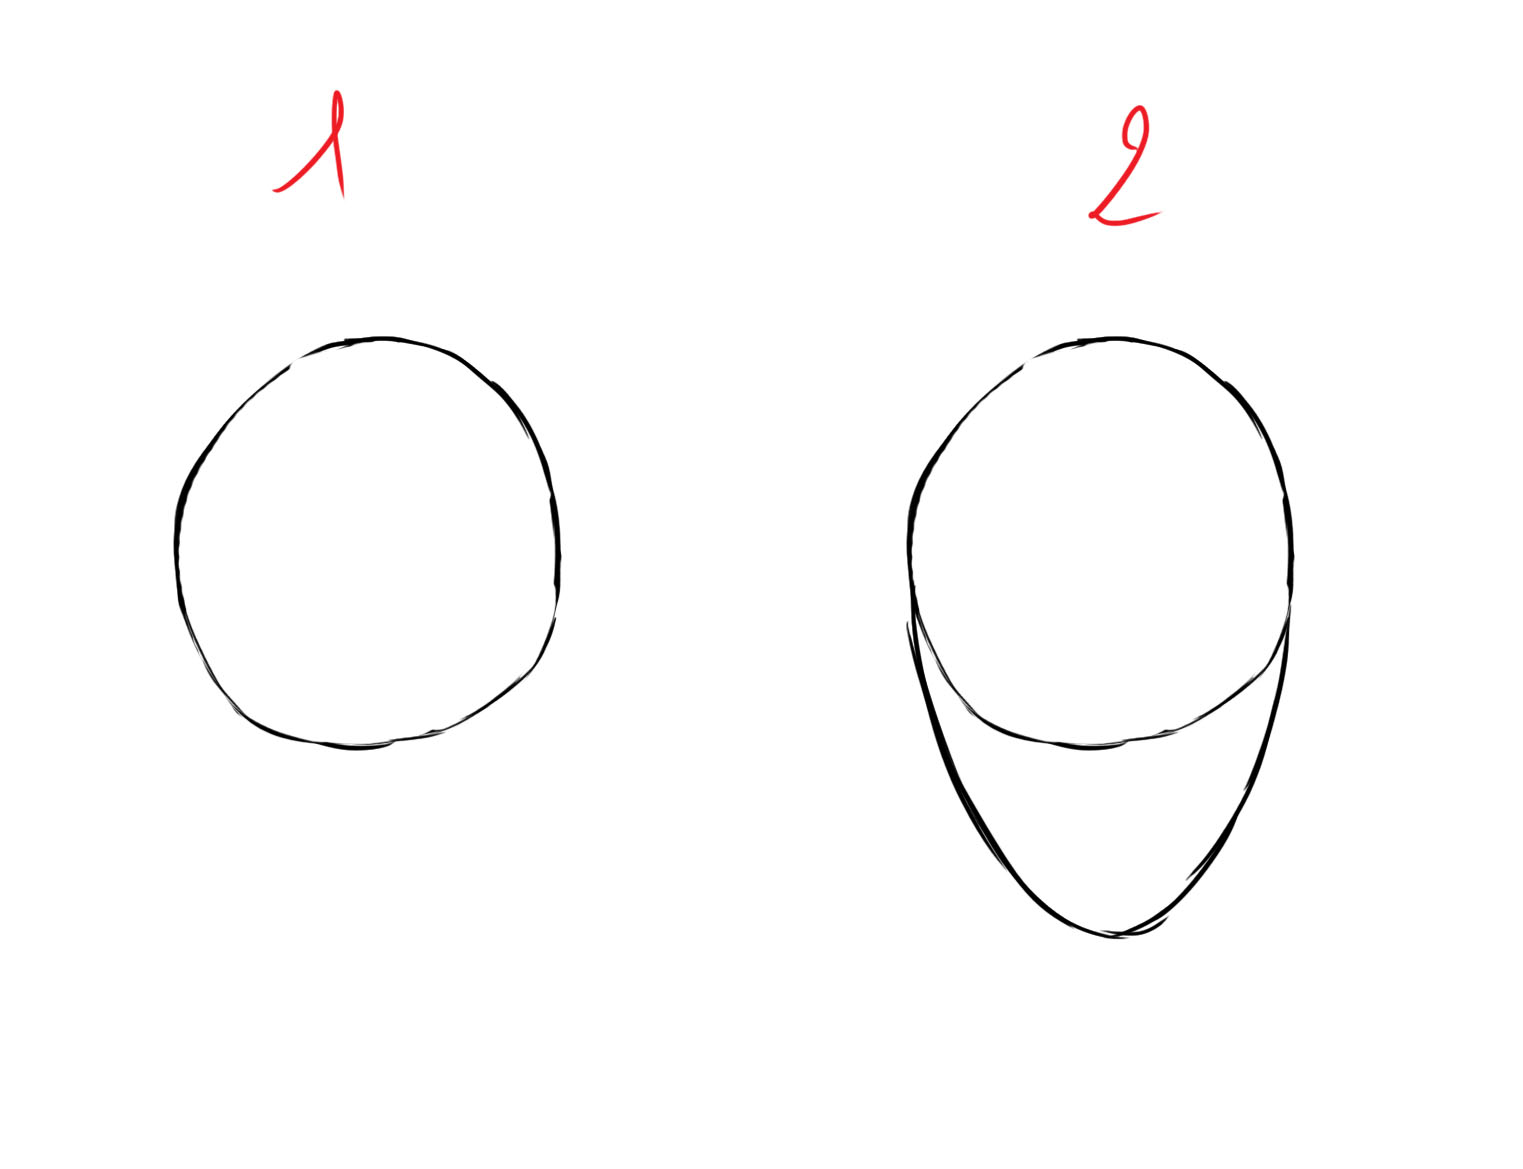
Many beginners draw the head in a round shape. However, a head is not round, but oval. In fact, it consists of two parts.
Start by drawing a circle. The circle is the base of the head: The skull which includes the ears, the eyes, and the nose. To draw the lower part of the head, start from the edges of the circle then move downwards forming a rounded triangle.
There, you just draw the jaw which includes the mouth and chin.
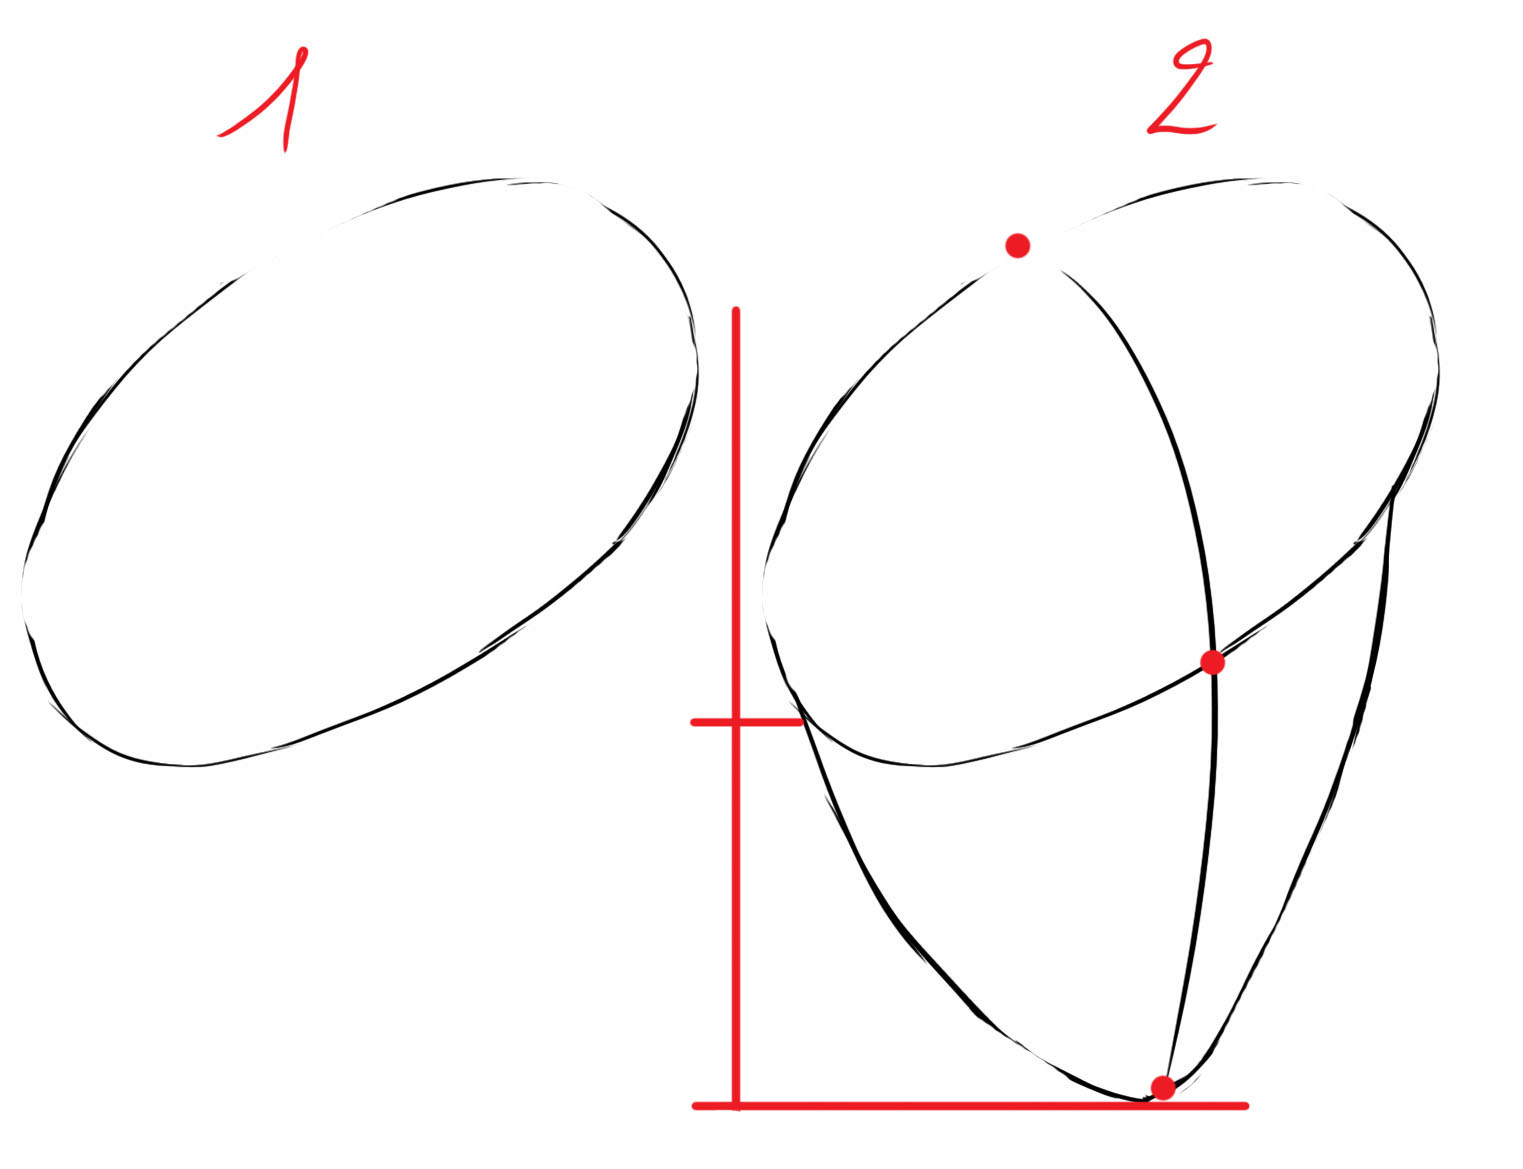
The torso is divided into two main parts: the chest represented by a horizontal oval and a triangle for the abdomen and pelvis.
Begin by drawing the horizontal oval. Tilt it slightly so that it rises on the right side and descends on the left side.
Once the oval is made, divide it in two.
Draw a line that starts from the oval and goes down further. The height of the line is twice the height of the oval.
The line should be slightly curved. It represents the line of gravity or simply the spine. It gives the direction of the character's body.
For the lower torso, draw a triangle that follows the line of gravity. The triangle should be rounded and its center should reach the end of the line of gravity.

The thighs start from the pelvis and end towards the outside of the body.
The left knee/calf is located at the end of the thigh and slightly on the outer side, while the right knee/calf is more compressed and recessed, and will be half hidden by the thigh.
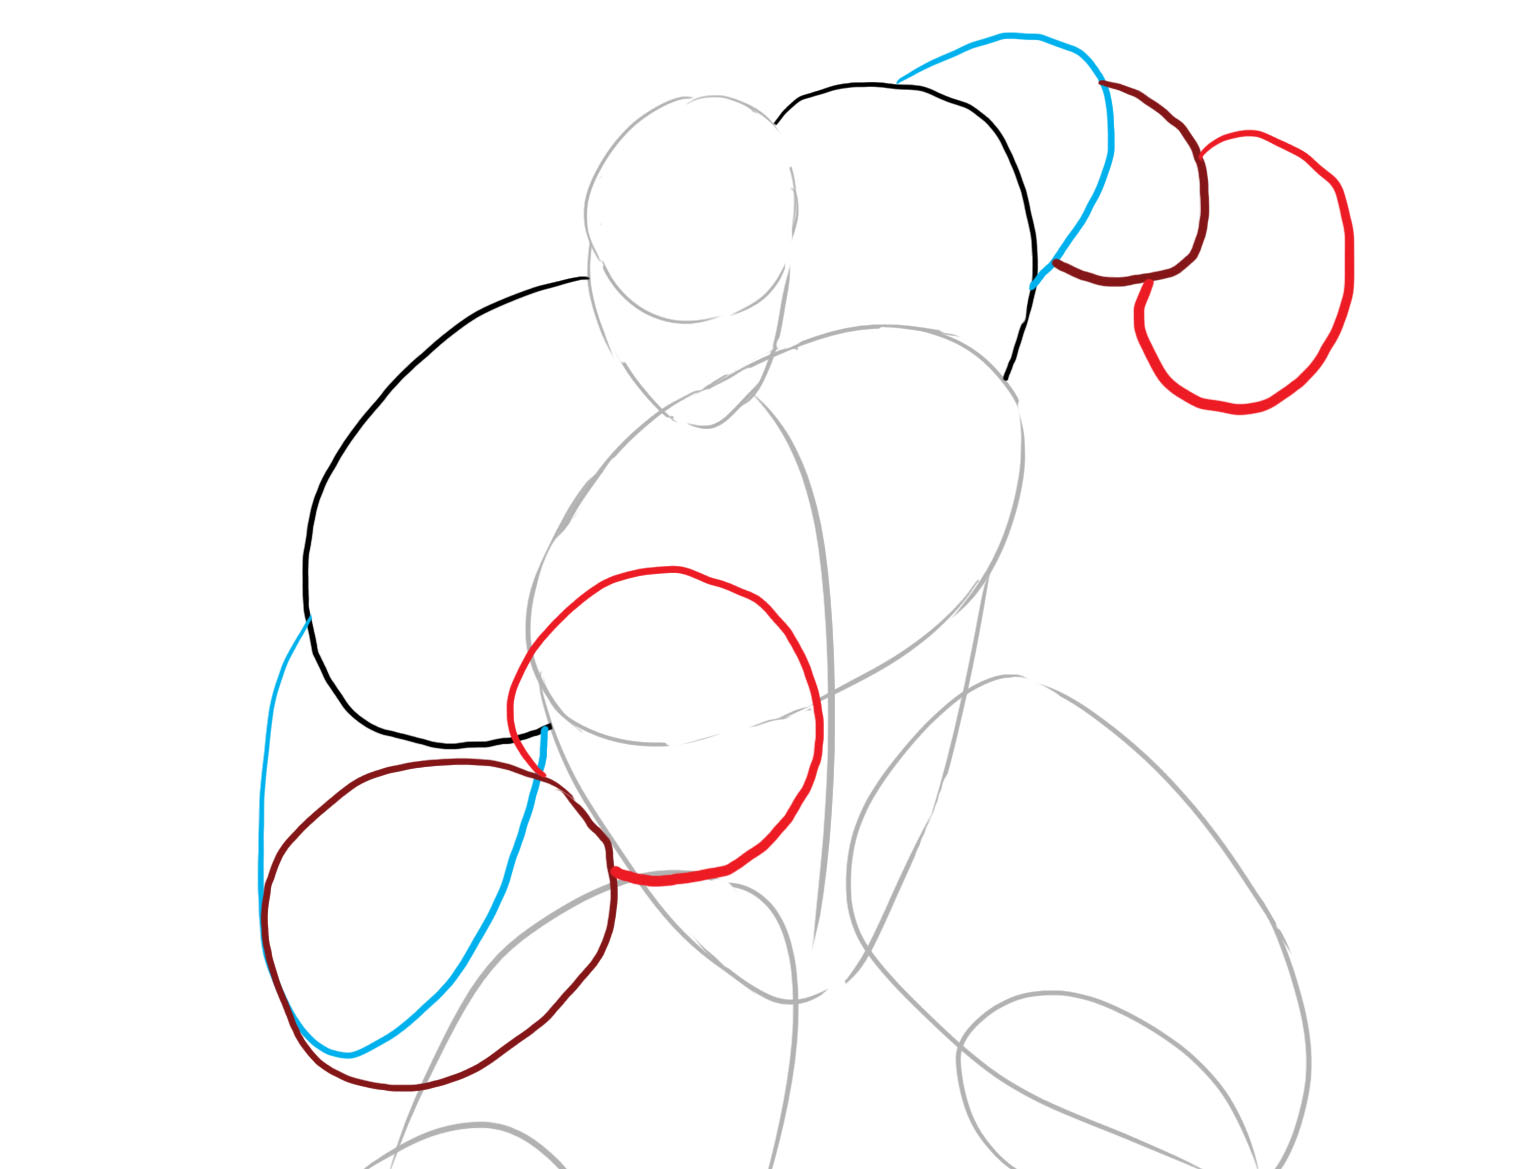
The same for the shoulders, the left one will be put forward while the right one will be back and therefore will have a smaller circle.
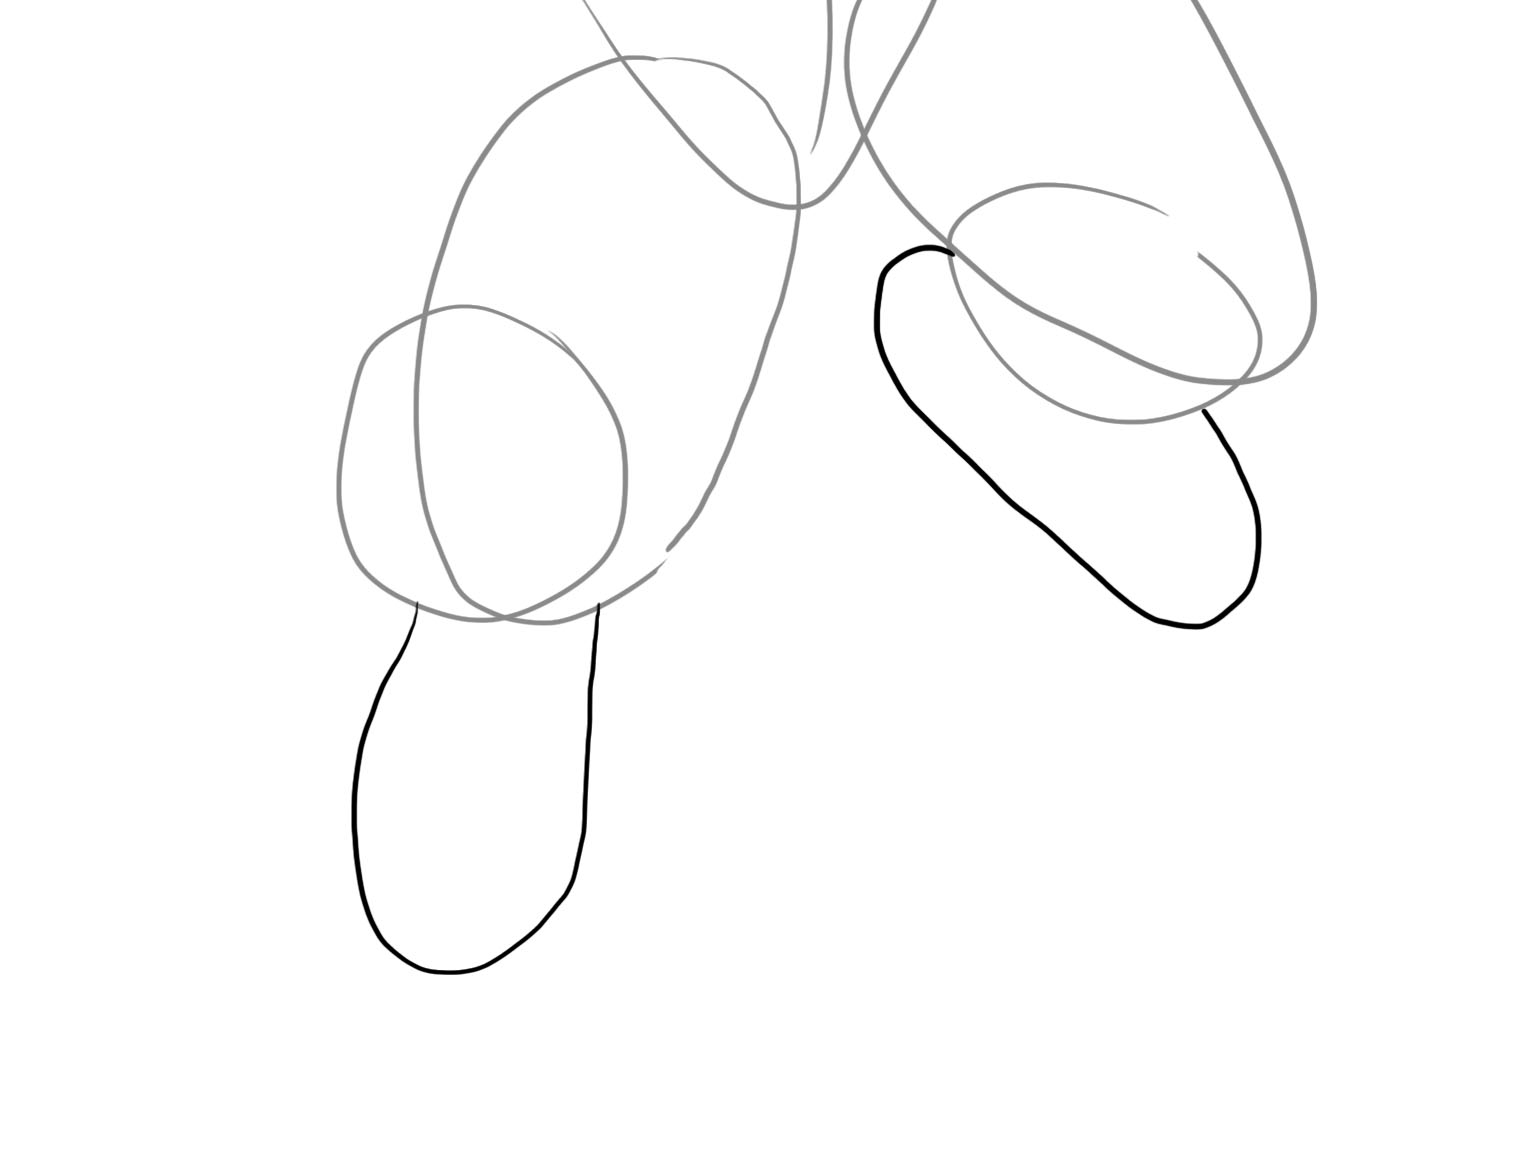
For the arms and hands, the left arm passes in front of the body (so I drew it in red to make it clearer.) and the hand rests across the chest and left abdomen.
The right arm and the right hand, on the other hand, are smaller for depth of field.
PUTTING THE DRAWING TOGETHER STEP BY STEP
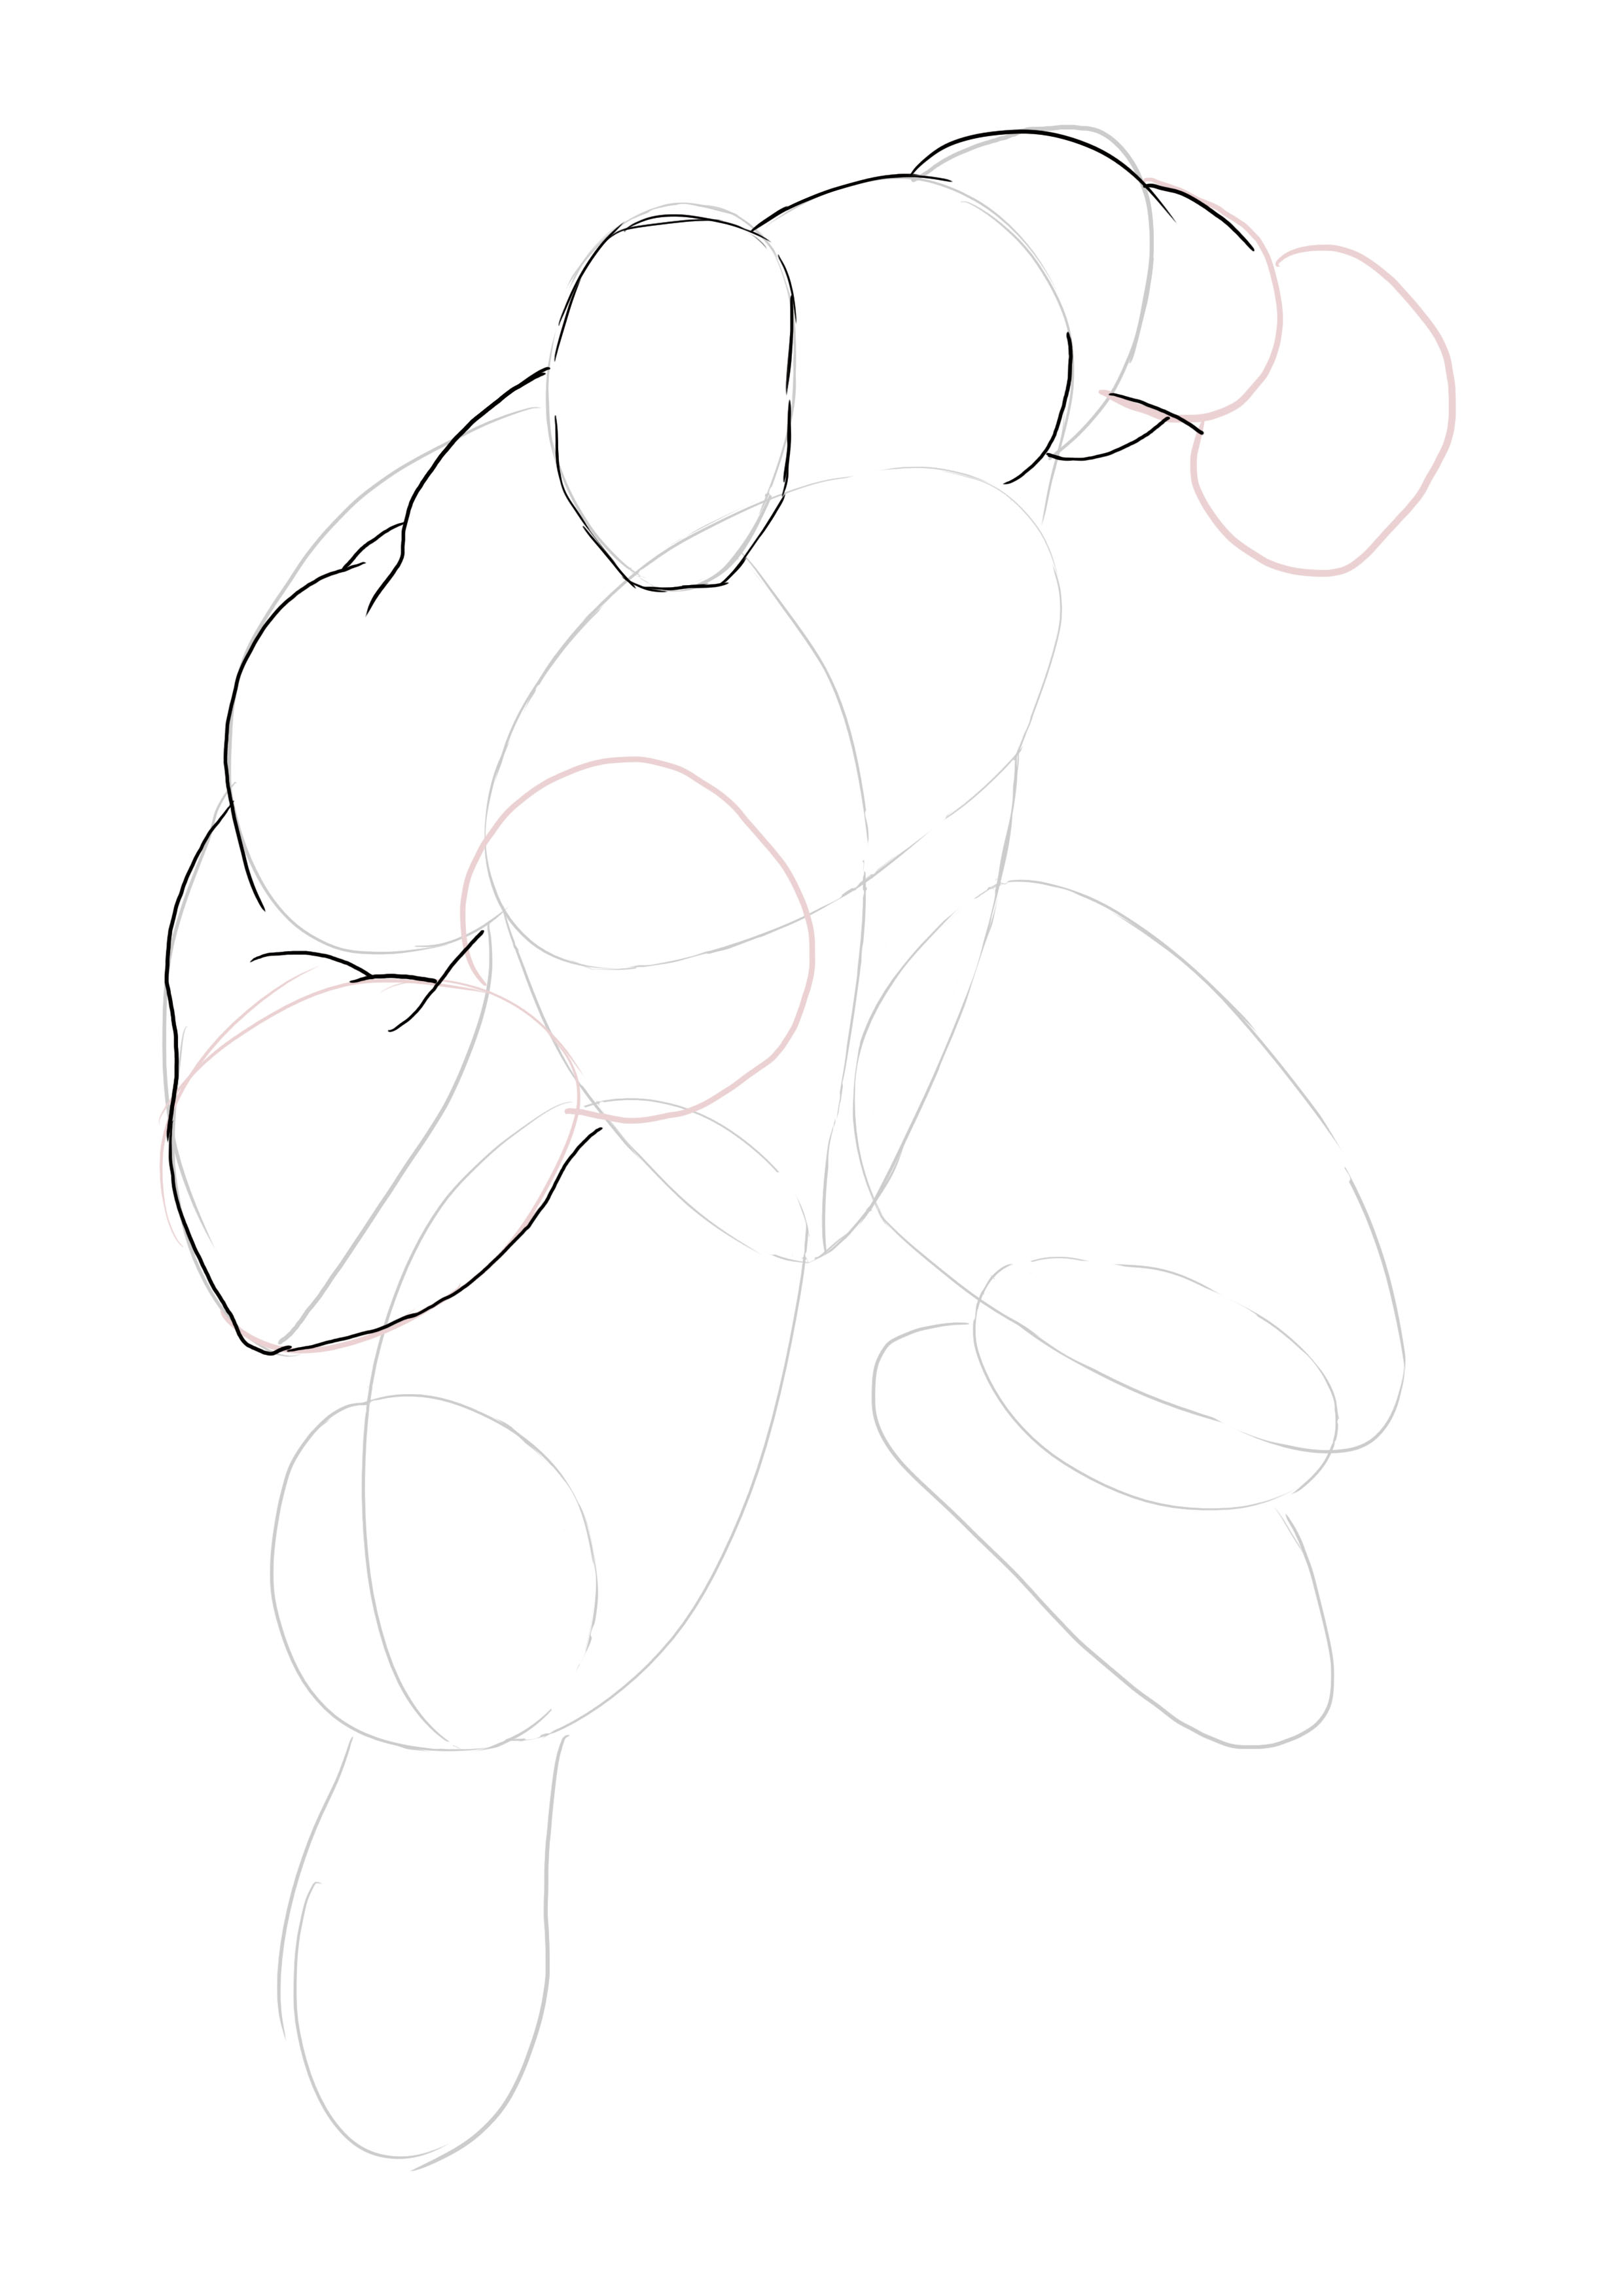
Once you have drawn your base and you are confident about it, you can start making the first proper lines.
We will first draw the silhouette of Hulk and then we will go into the details after.
If your base is done well, you'll see that this step is just a breeze!
To make his head, you just have to follow your oval by making the jaw square.
For the shoulders and arms, if you have taken the time to do your base properly, you don't need to think, just go over your lines leaving some blanks to suggest the muscles.
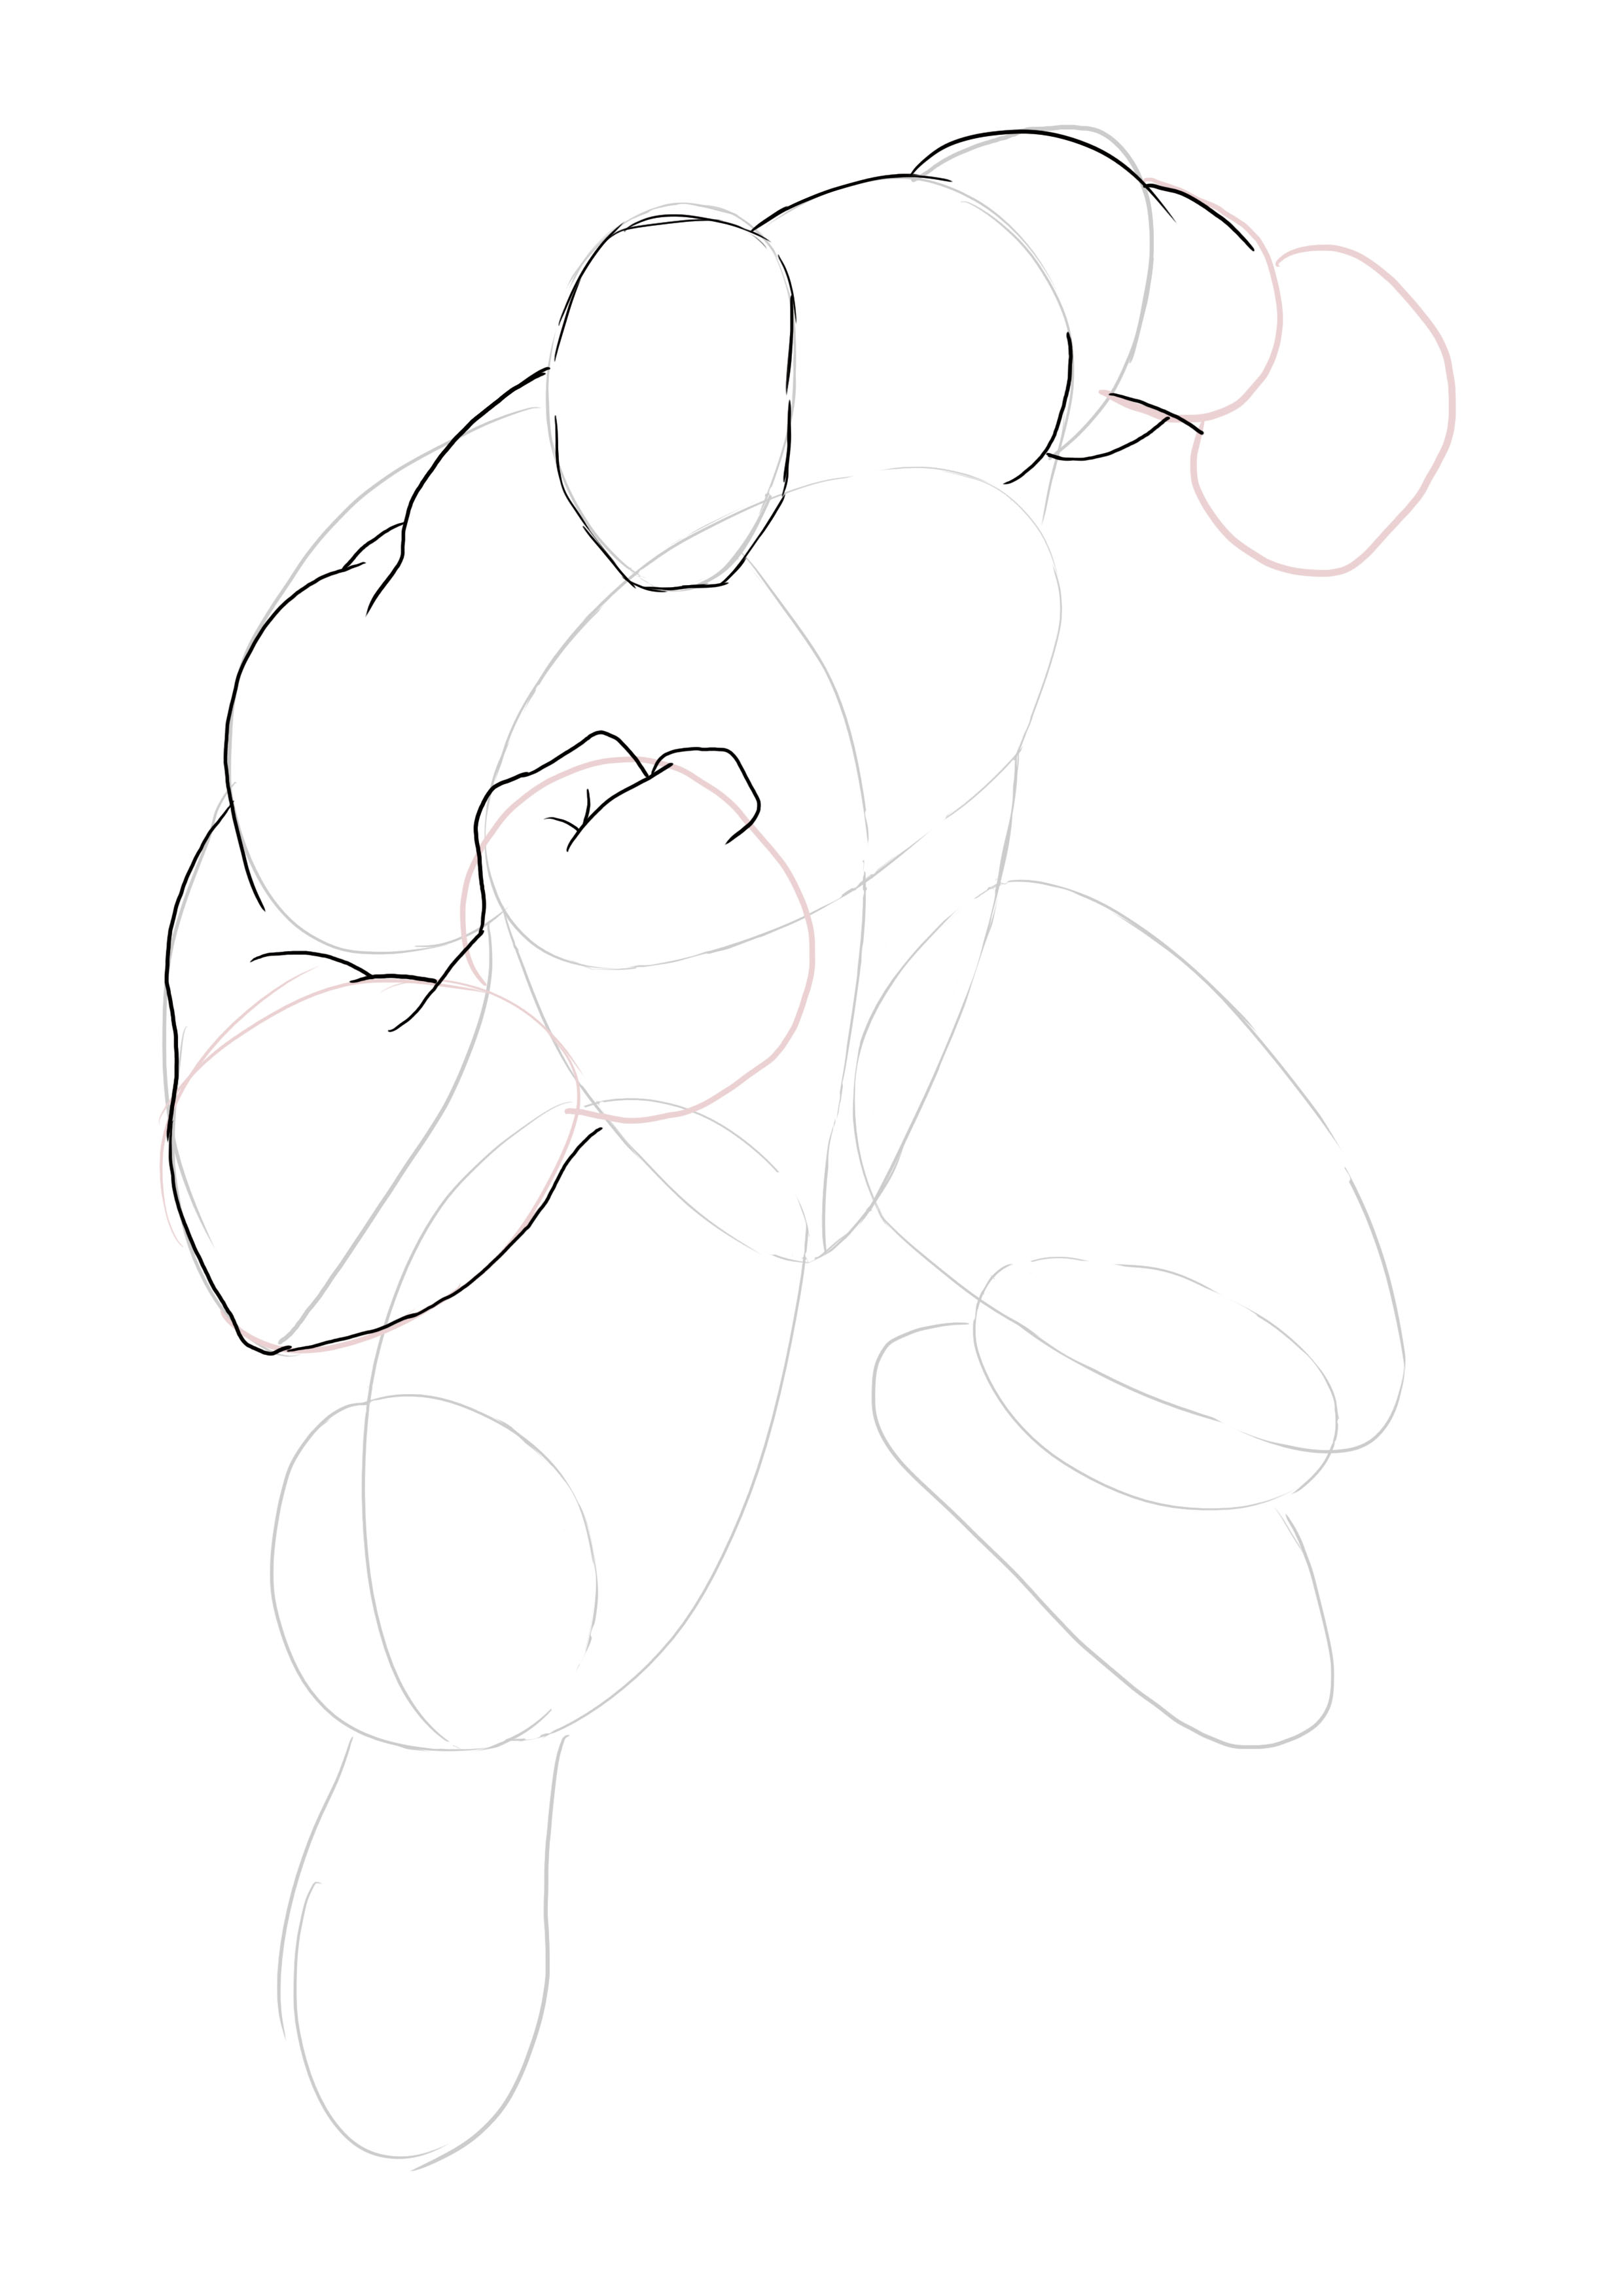
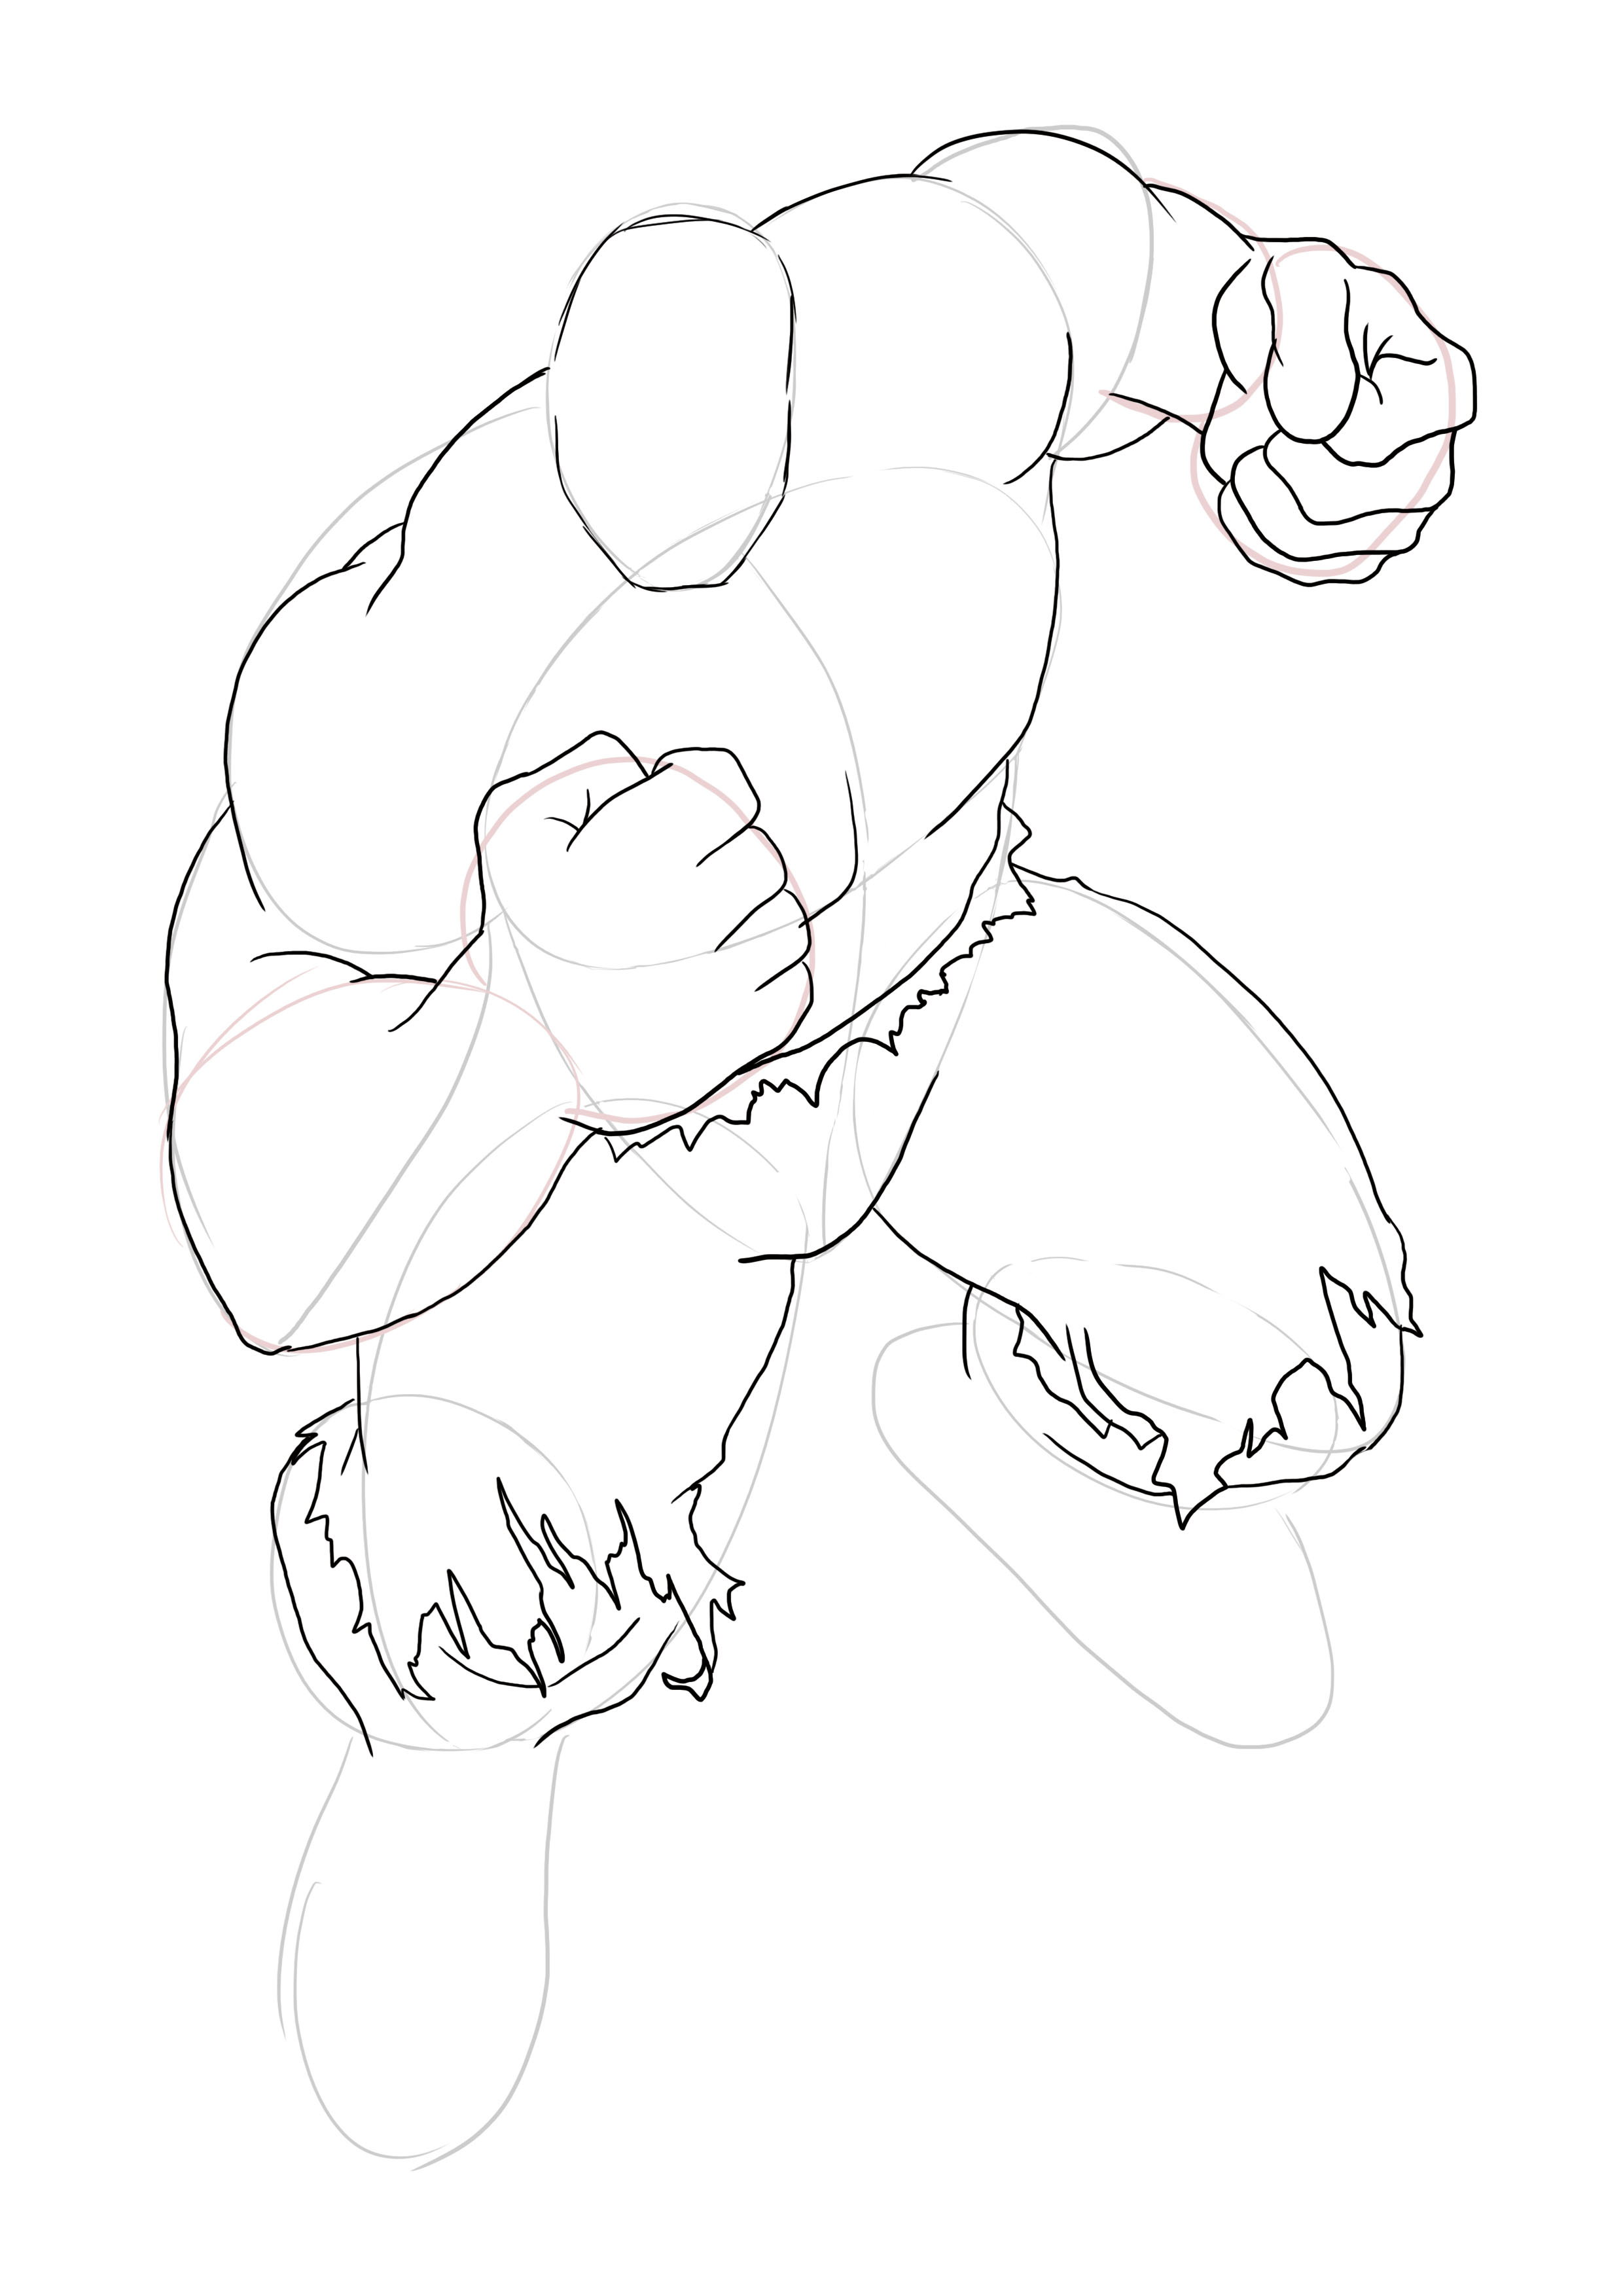
We're going to do the hands.
The left hand is a closed fist seen from the back, while the right hand is also a closed fist, but seen from the inside.
We'll start with the left hand.
Start by drawing the thumb, which is a rounded rectangle. Then move on to drawing the index finger. Since it is bent, it is not entirely visible, so, like the thumb, you will make a rounded rectangle.
You will do the same thing for the remaining 4 fingers and then close the hand by connecting it to the wrist.
For the right hand, it's the same, just from a different perspective.
To do this, you will start by drawing the palm of the hand. To do this, make two half-circles stuck together.
Once done, draw the thumb in an elongated "U" shape, then draw the fingers.
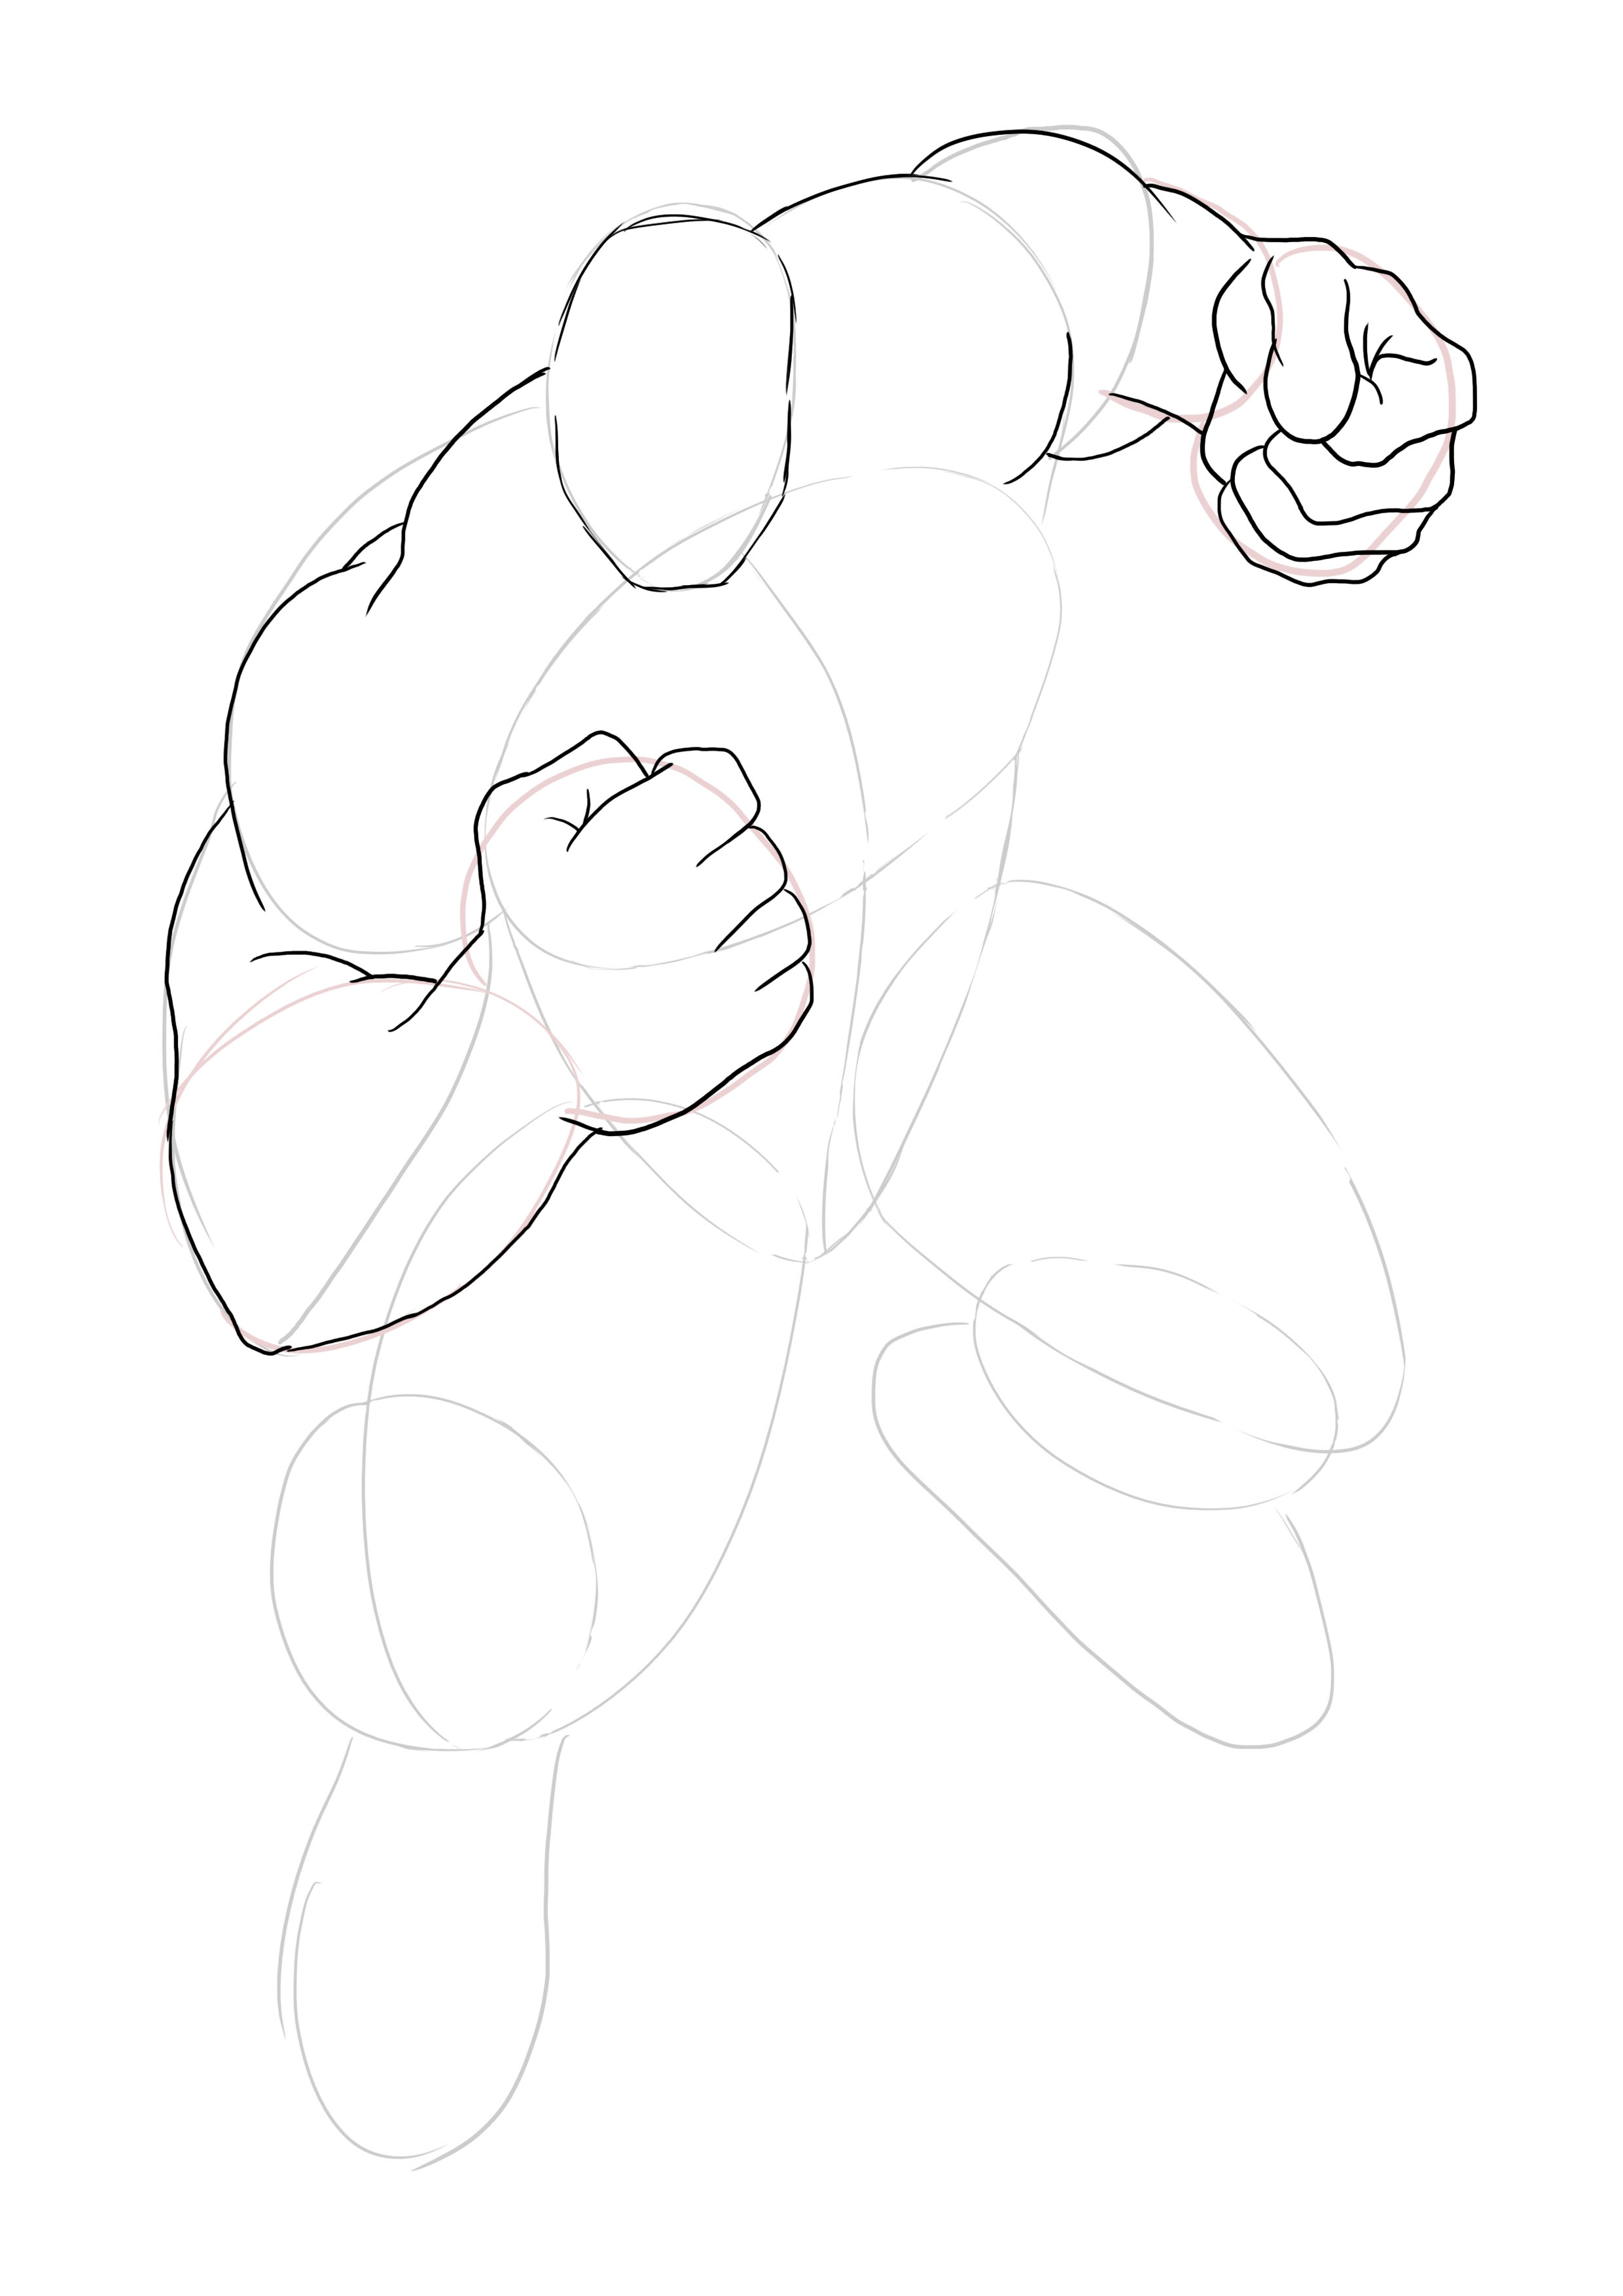
We will now do the torso and pants.
For the torso, you just have to retrace your construction lines.
Make the right chest, then the left with a fairly straight line, not too soft.
Then draw the abdomen by making 3 "waves" to suggest the abs
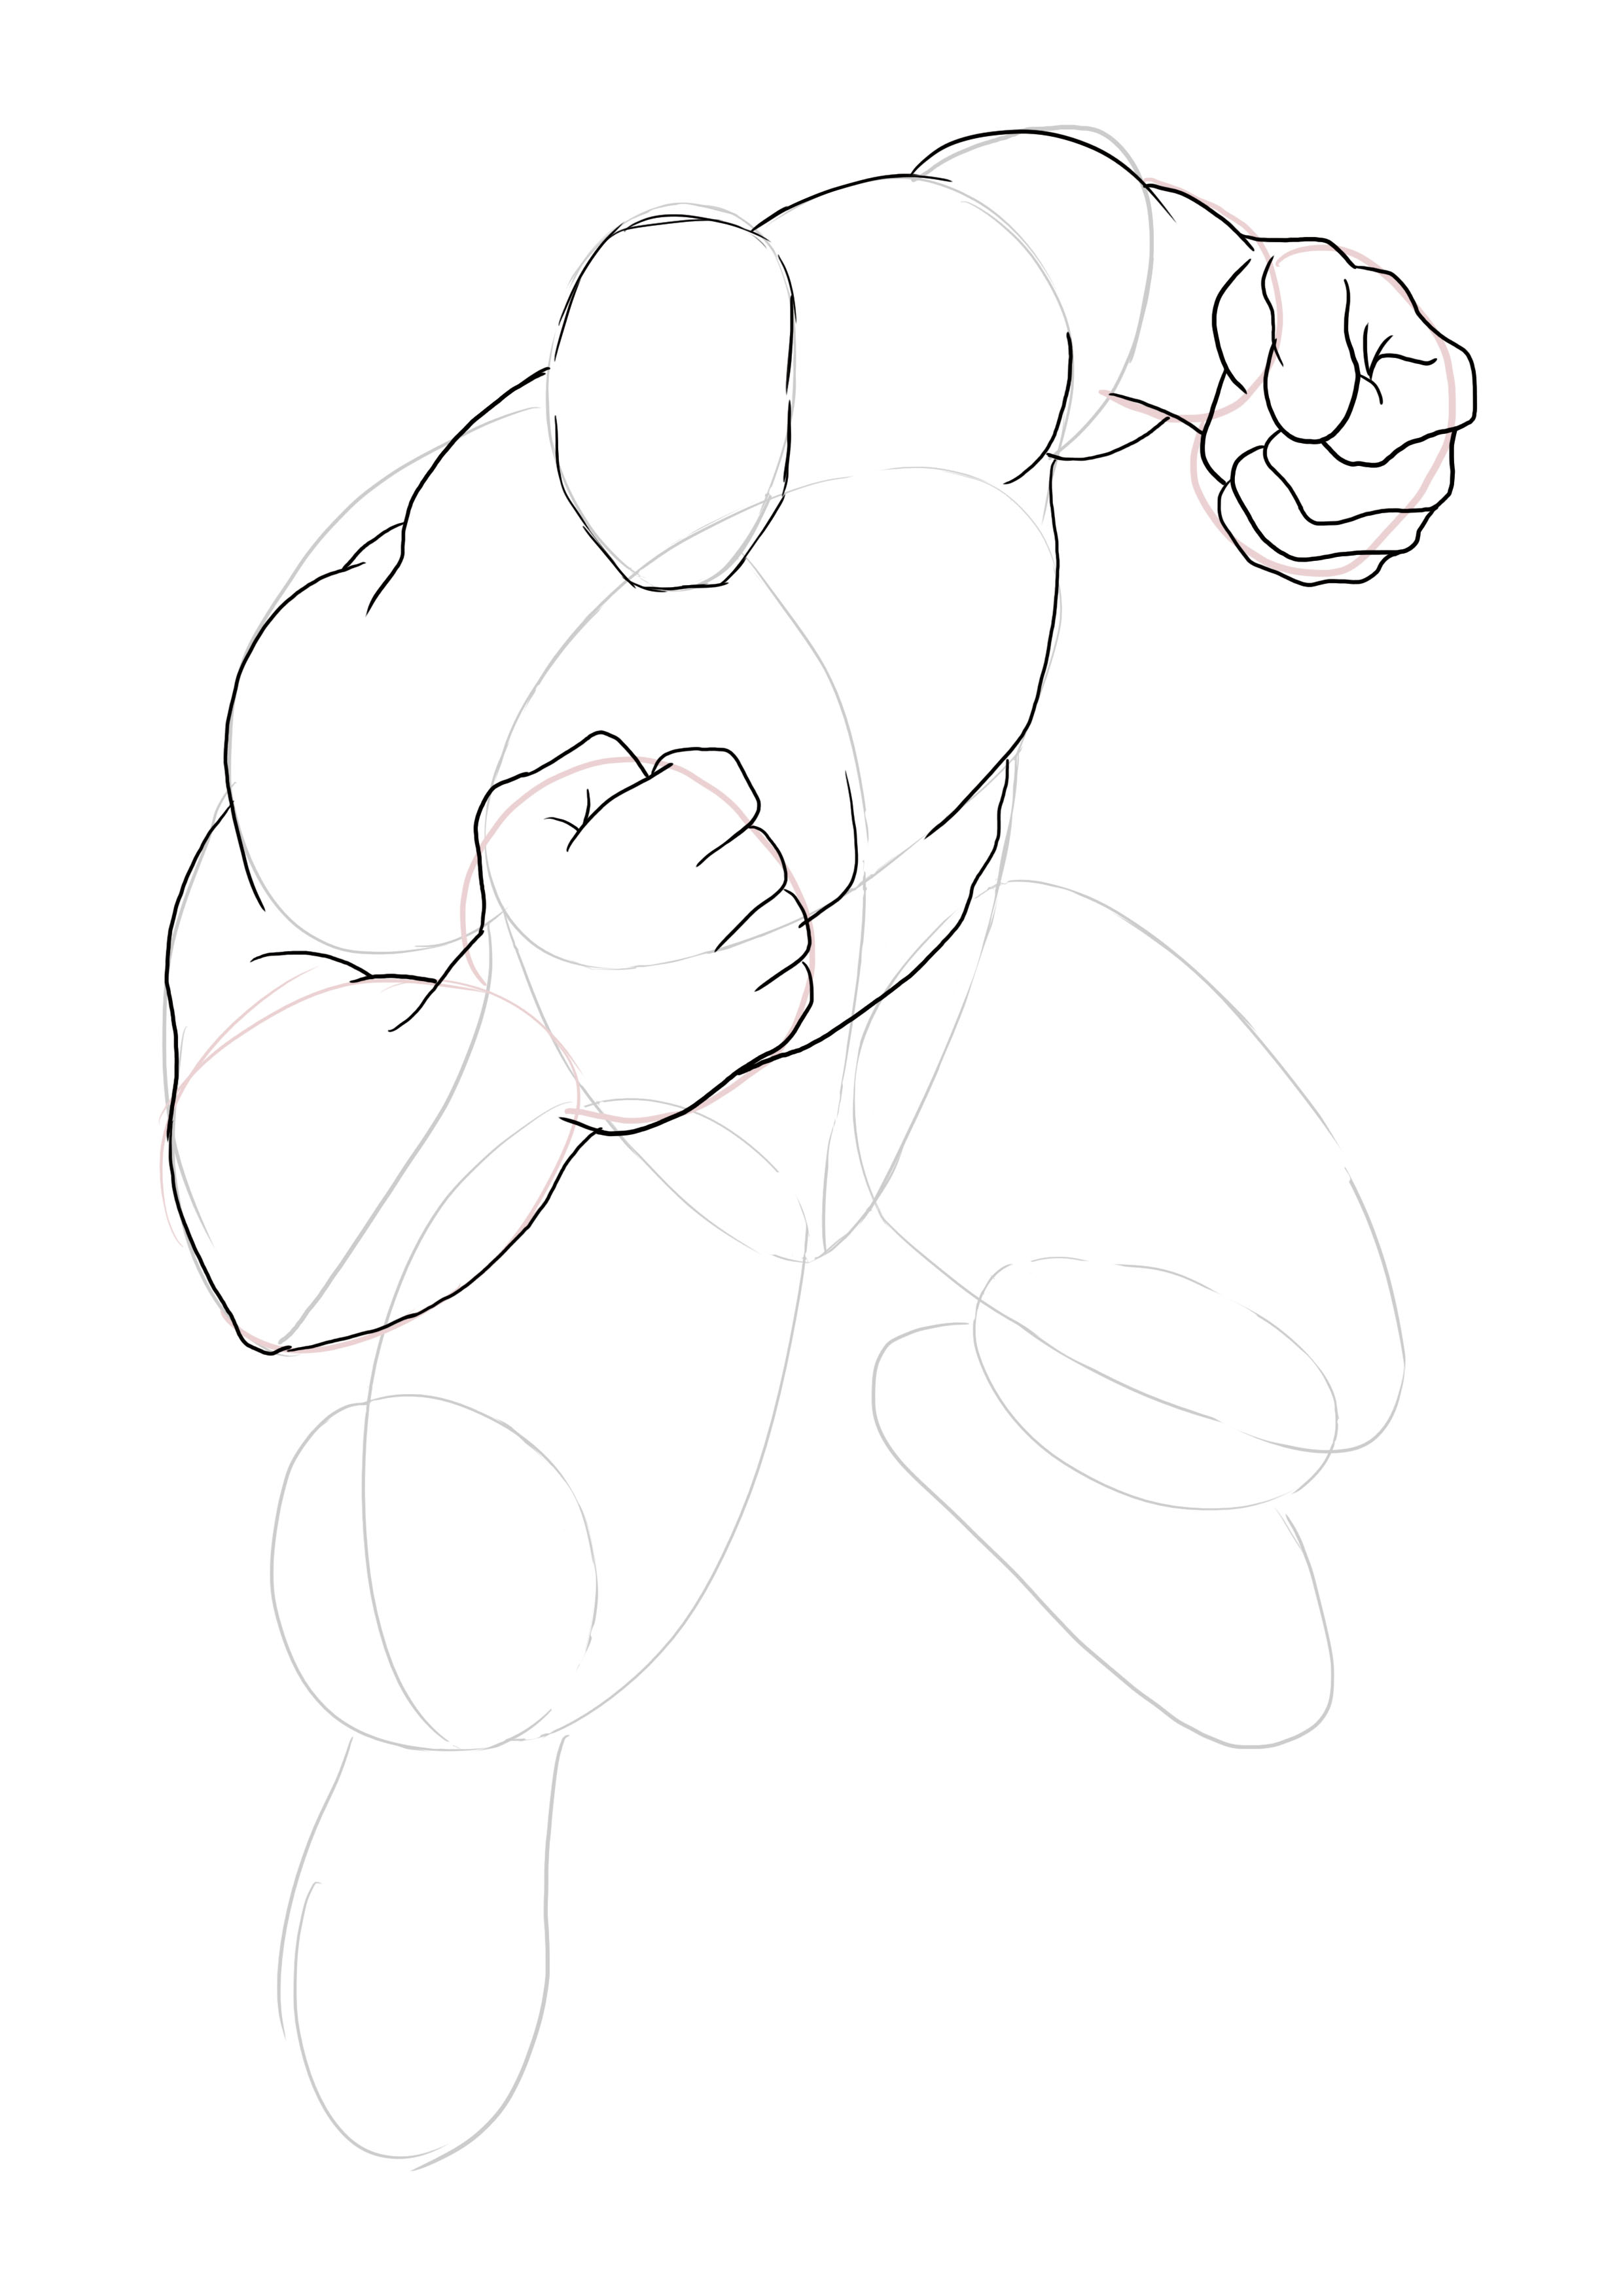
For the pants:
At the belt level, it is torn, so make lots of small spikes and waves of different sizes. Then, the thighs follow your basic lines. The pants stop at the knees and, as with the belt, are torn. So do as with the belt, but with larger and more irregular spikes.
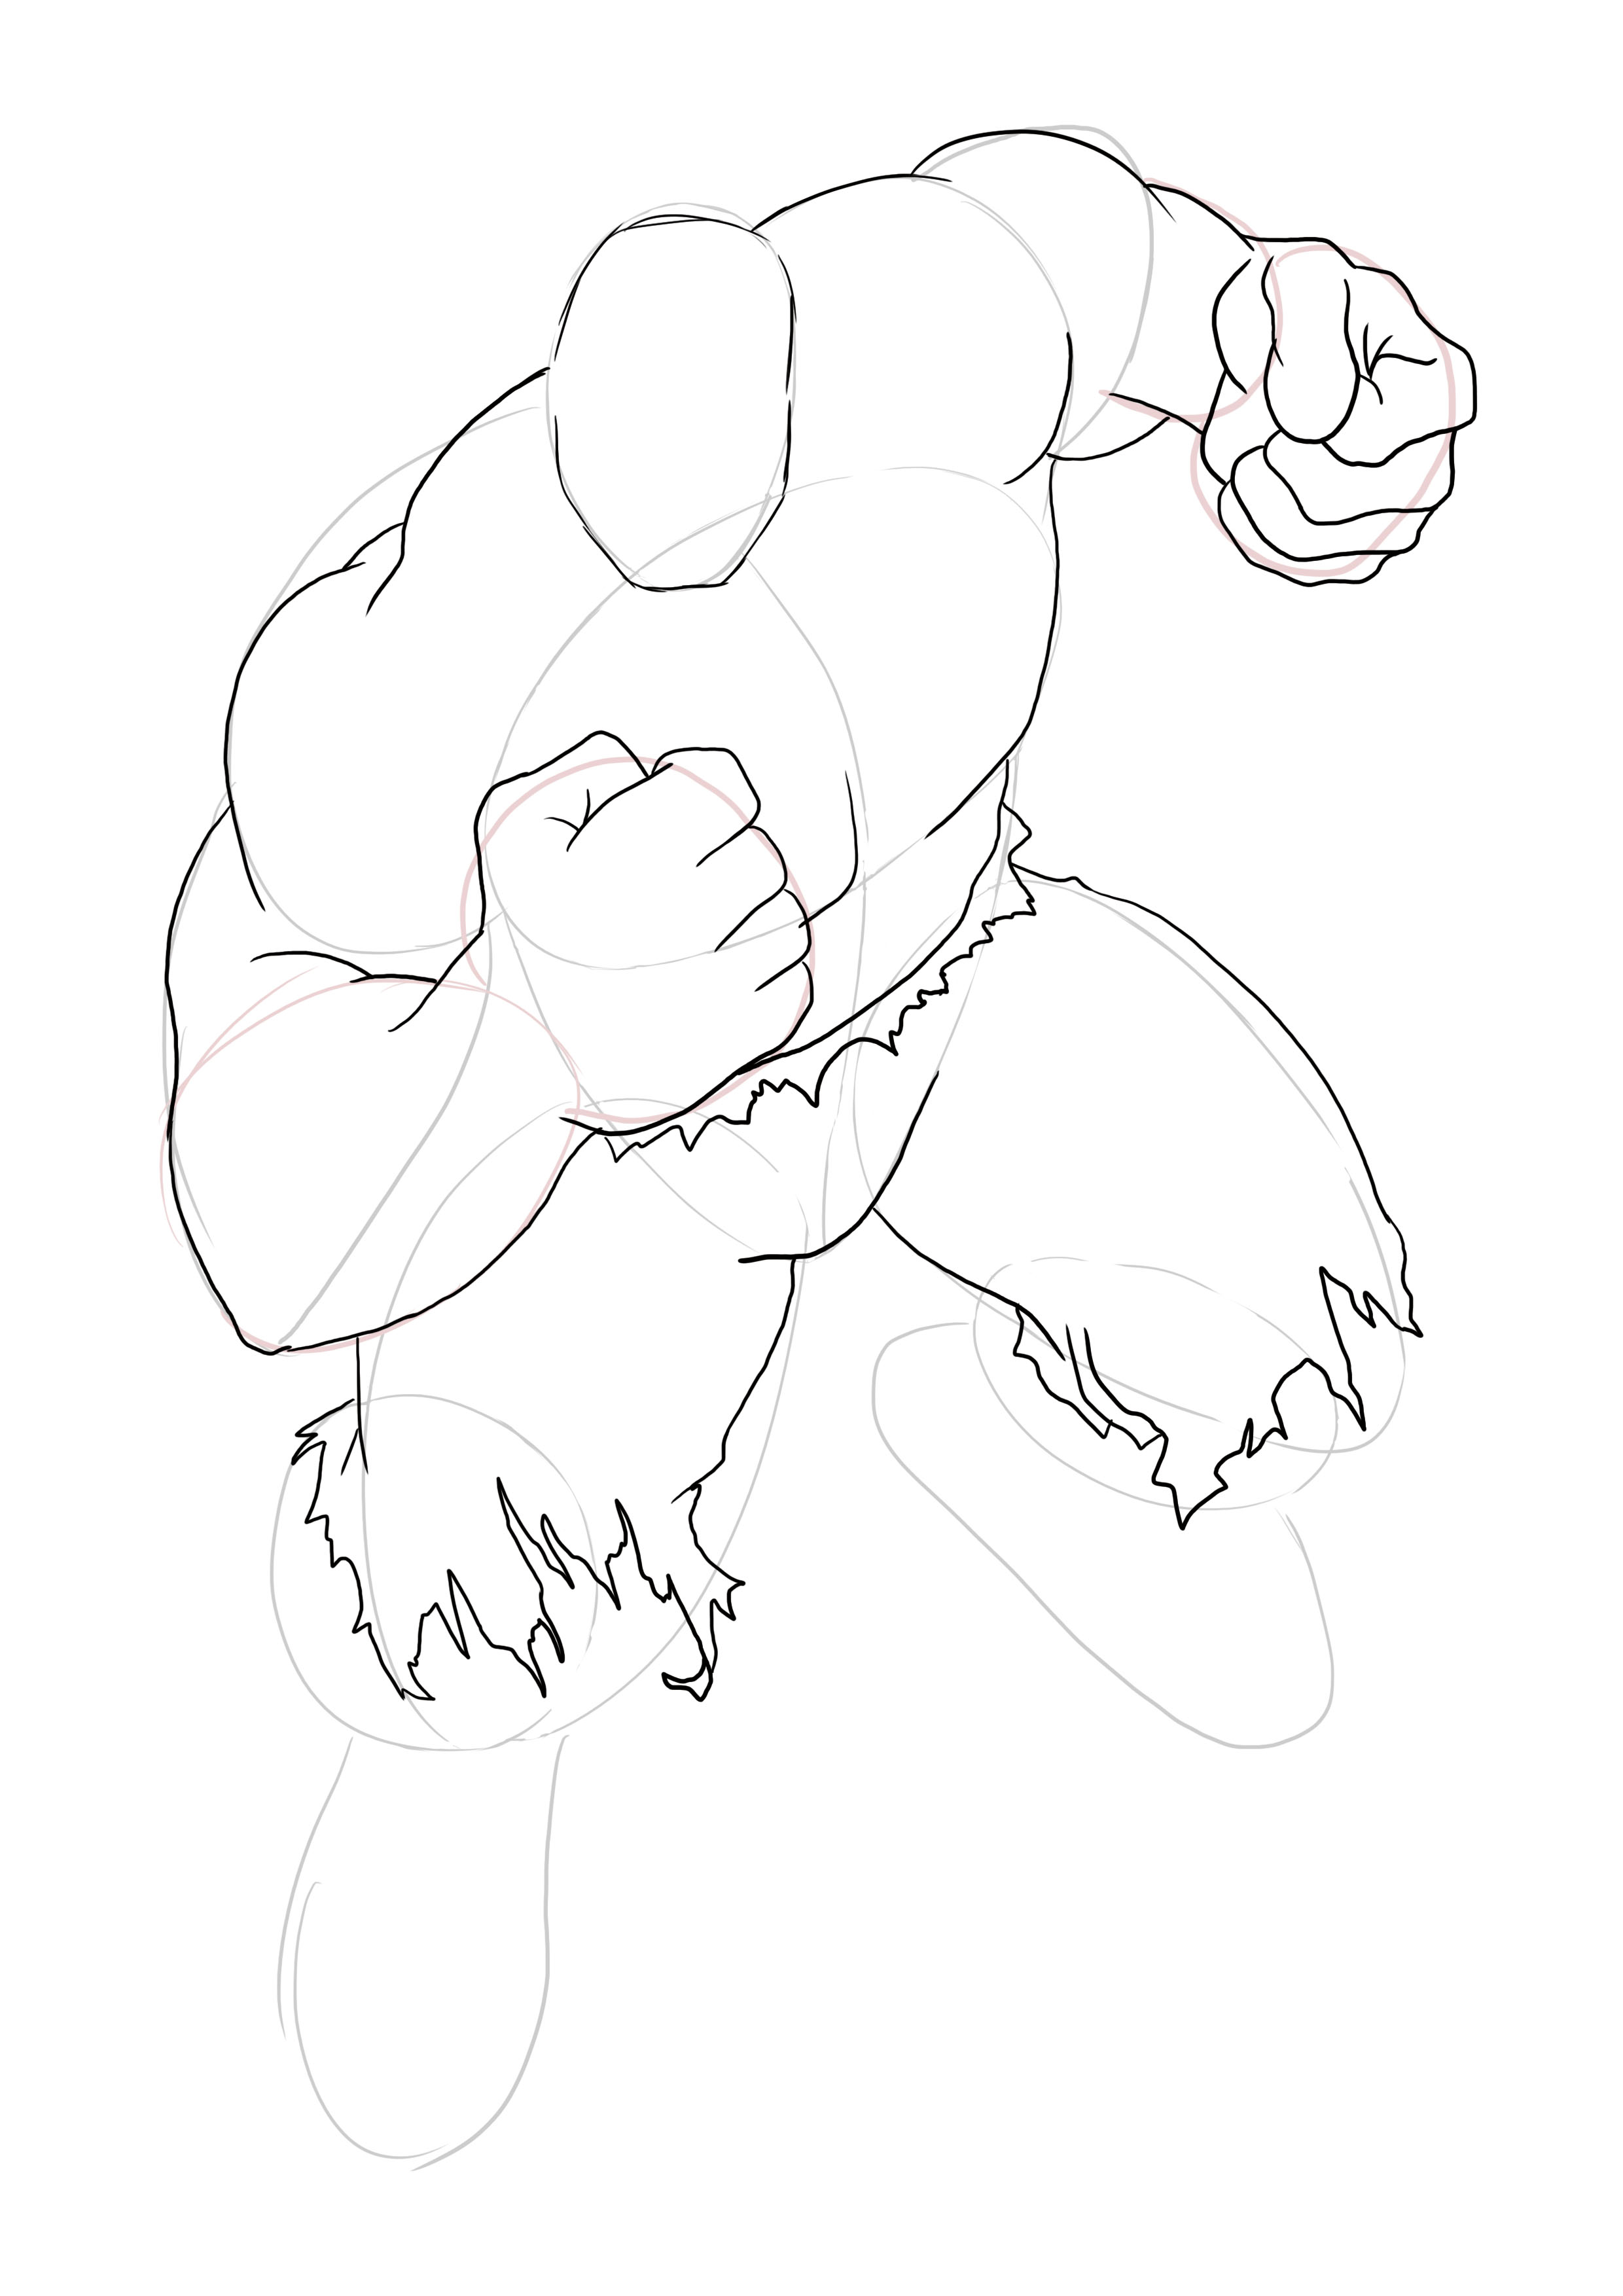
For the calves and knees, you have, once again, to go over your basic lines. (I said that if the base was done well, the rest of the drawing would just be a breeze ;) )
But be careful to have fairly straight and hard lines to show that it's all muscle and not fat.
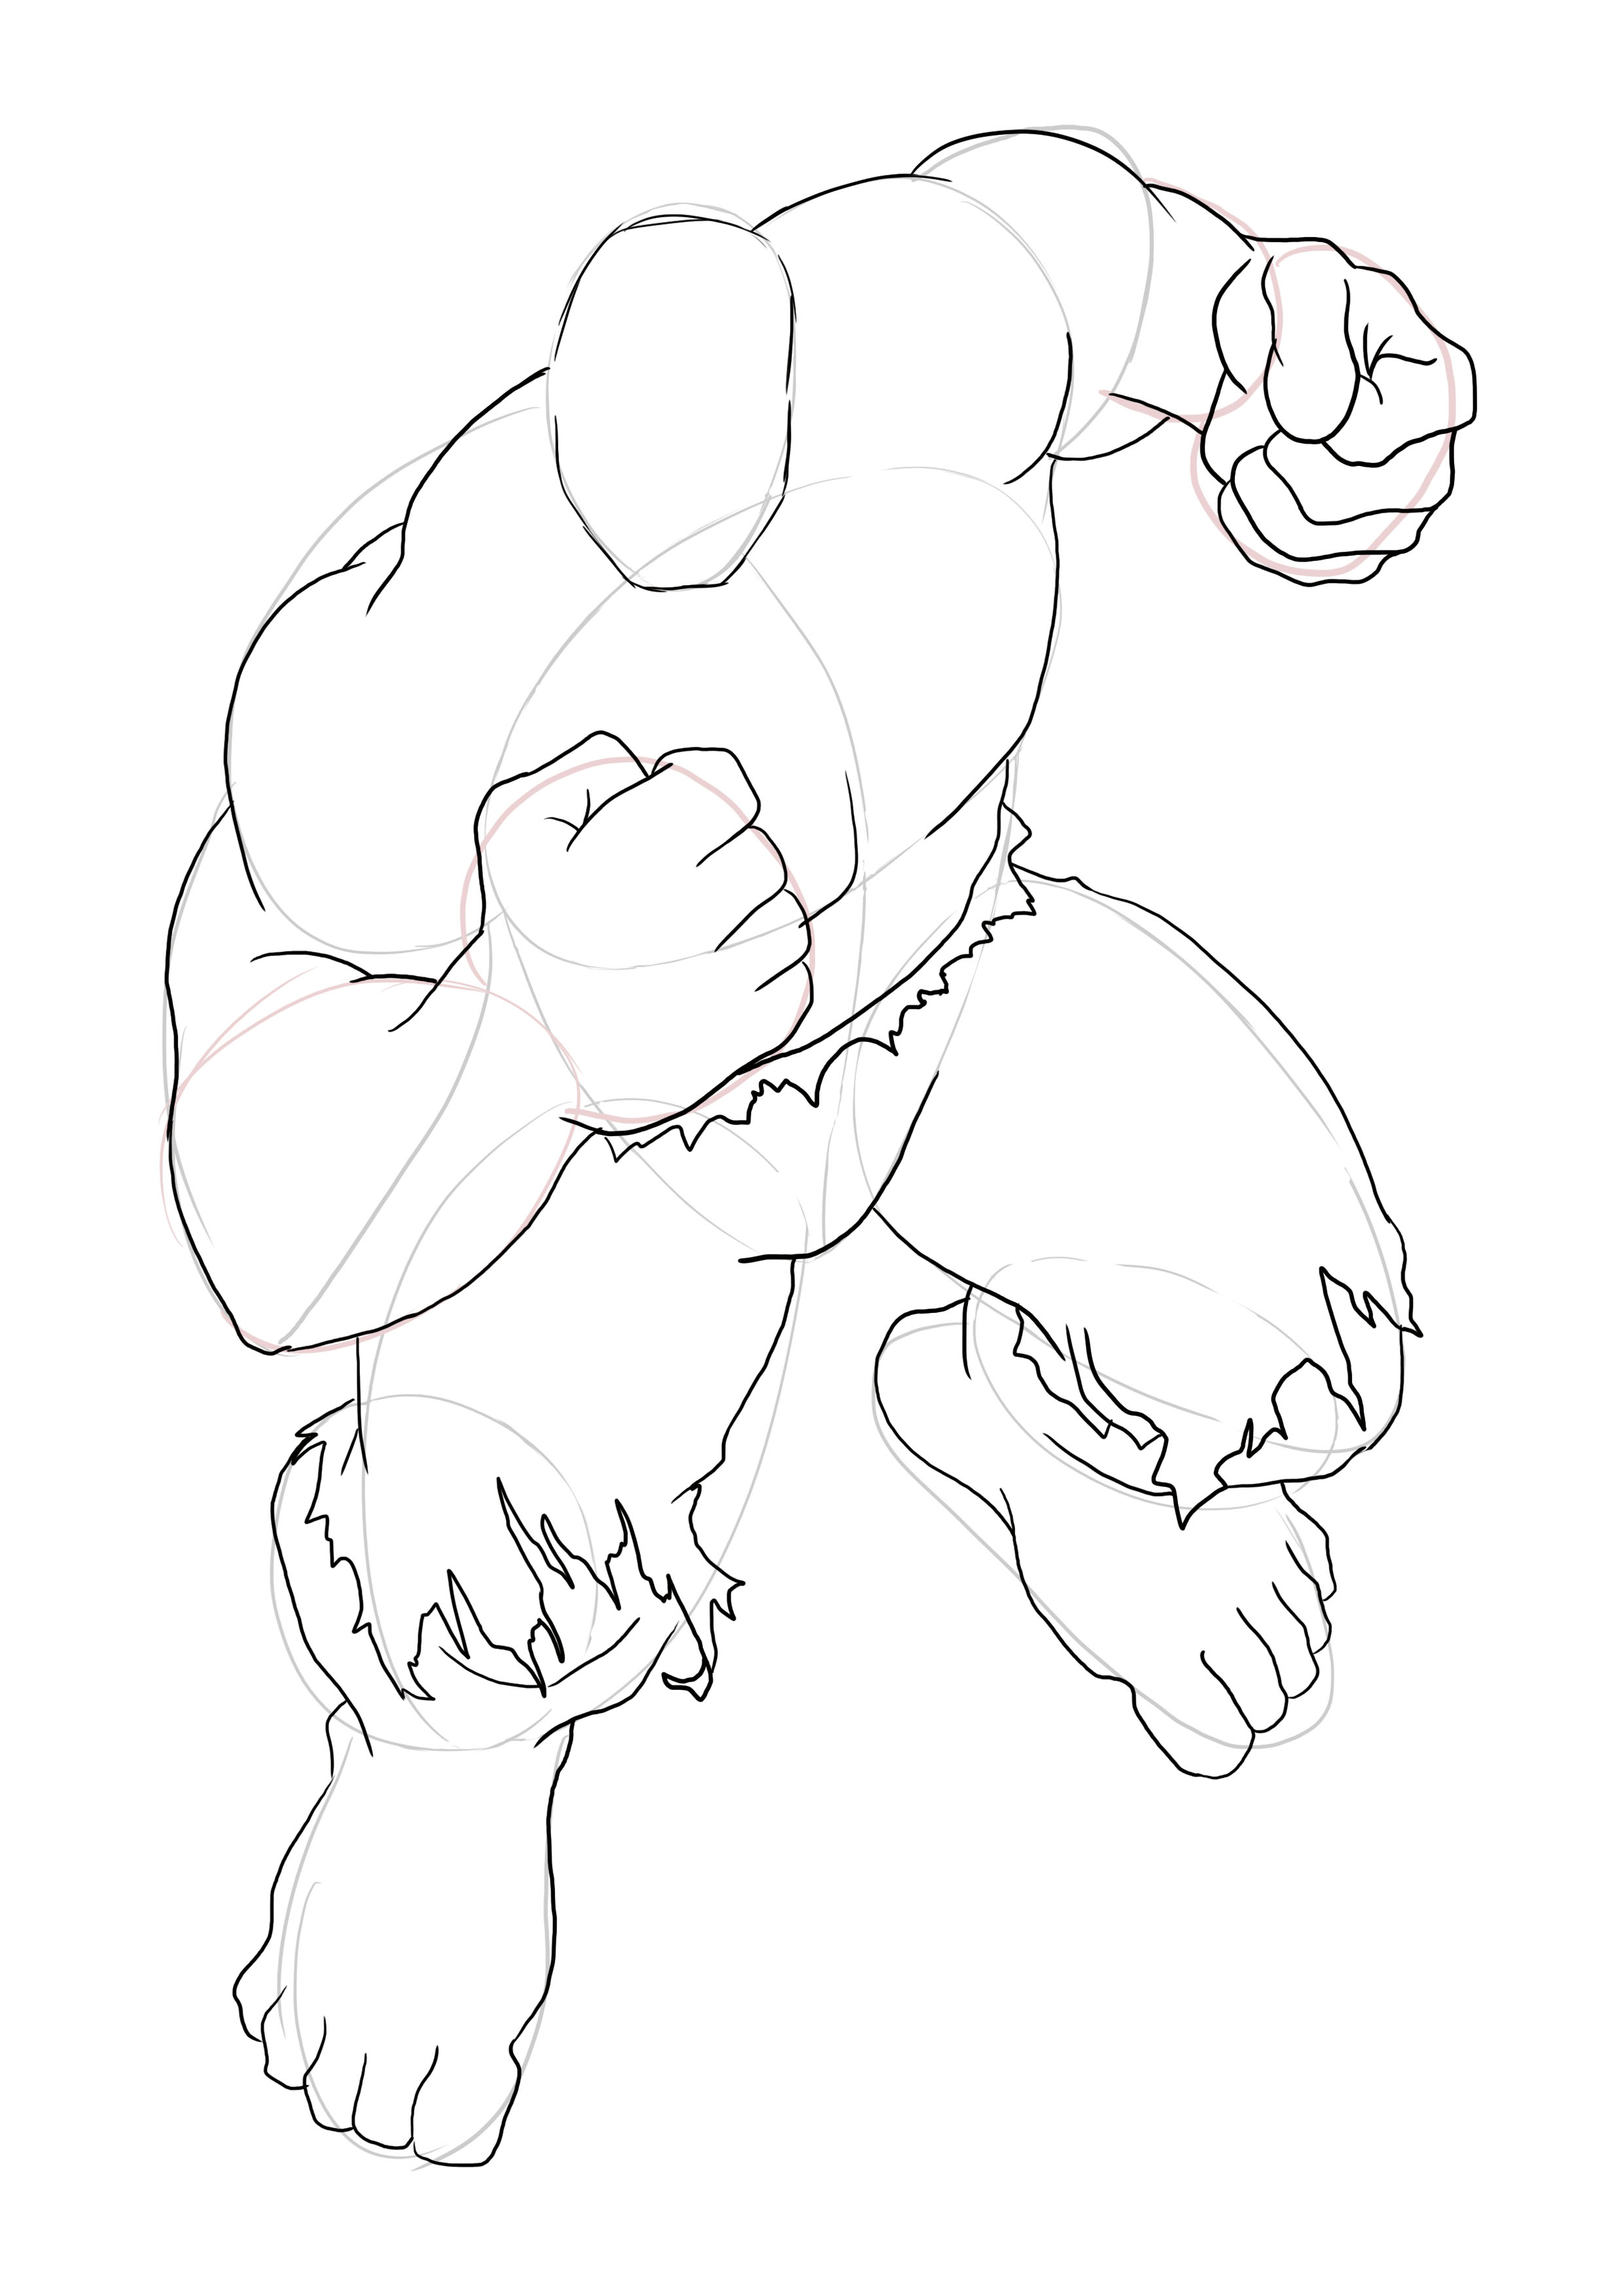
Let's move on to the feet. First, you should know that the toes have names.
The biggest one is called Hallux, then there's Secundus, Tertius, Quartus, and finally the little toe is called Quintus.
The left foot will normally be the simplest to do. It is viewed from the front and does not really have any special perspective. To draw the toes, make rectangles. Be careful to angle them correctly. Indeed, the Hallux is longer than the Quintus.
There may be exceptions where the third toe is the longest, or all the toes are the same size, but Hulk has the most common foot shape.
The right foot, on the other hand, is seen slightly from the side and in its entirety.
You will start by making the heel and then the sole of the foot, finally moving on to the toes. To draw them, it's like for the left foot, beveled, with the Hallux being the longest and the Quintus the smallest, but you will make them thinner, as they are seen from the side, so there is a perspective to respect.
DRAWING HULK'S FACE
We will move on to the face and hair.

Hulk's face is very stern and carries an expression of anger.
You will then draw the furrowed eyebrows. You can add two lines between the eyebrows to accentuate the expression lines.
The eyes are simply made up of two half-circle arcs and a circle inside for the eye. Inside the eye, make a central black circle for the pupil.
The nose is made quite simply. You make a point in the middle of the face and then a small arc on each side of the point.
Finally, make two triangles just above to create the shape of the nostril + the little wrinkle we get on the side of the nose when we scrunch it up.
The mouth is slightly open and reveals a tense jaw.
For hair, start with the bangs.
It is made up of lots of small strands that mainly go towards the right side.
Once the fringe is done, the top hair slightly sticks up, while the parting is on the left.
Finally, make the ears diamond-shaped.
DETAILING THE HULK DRAWING
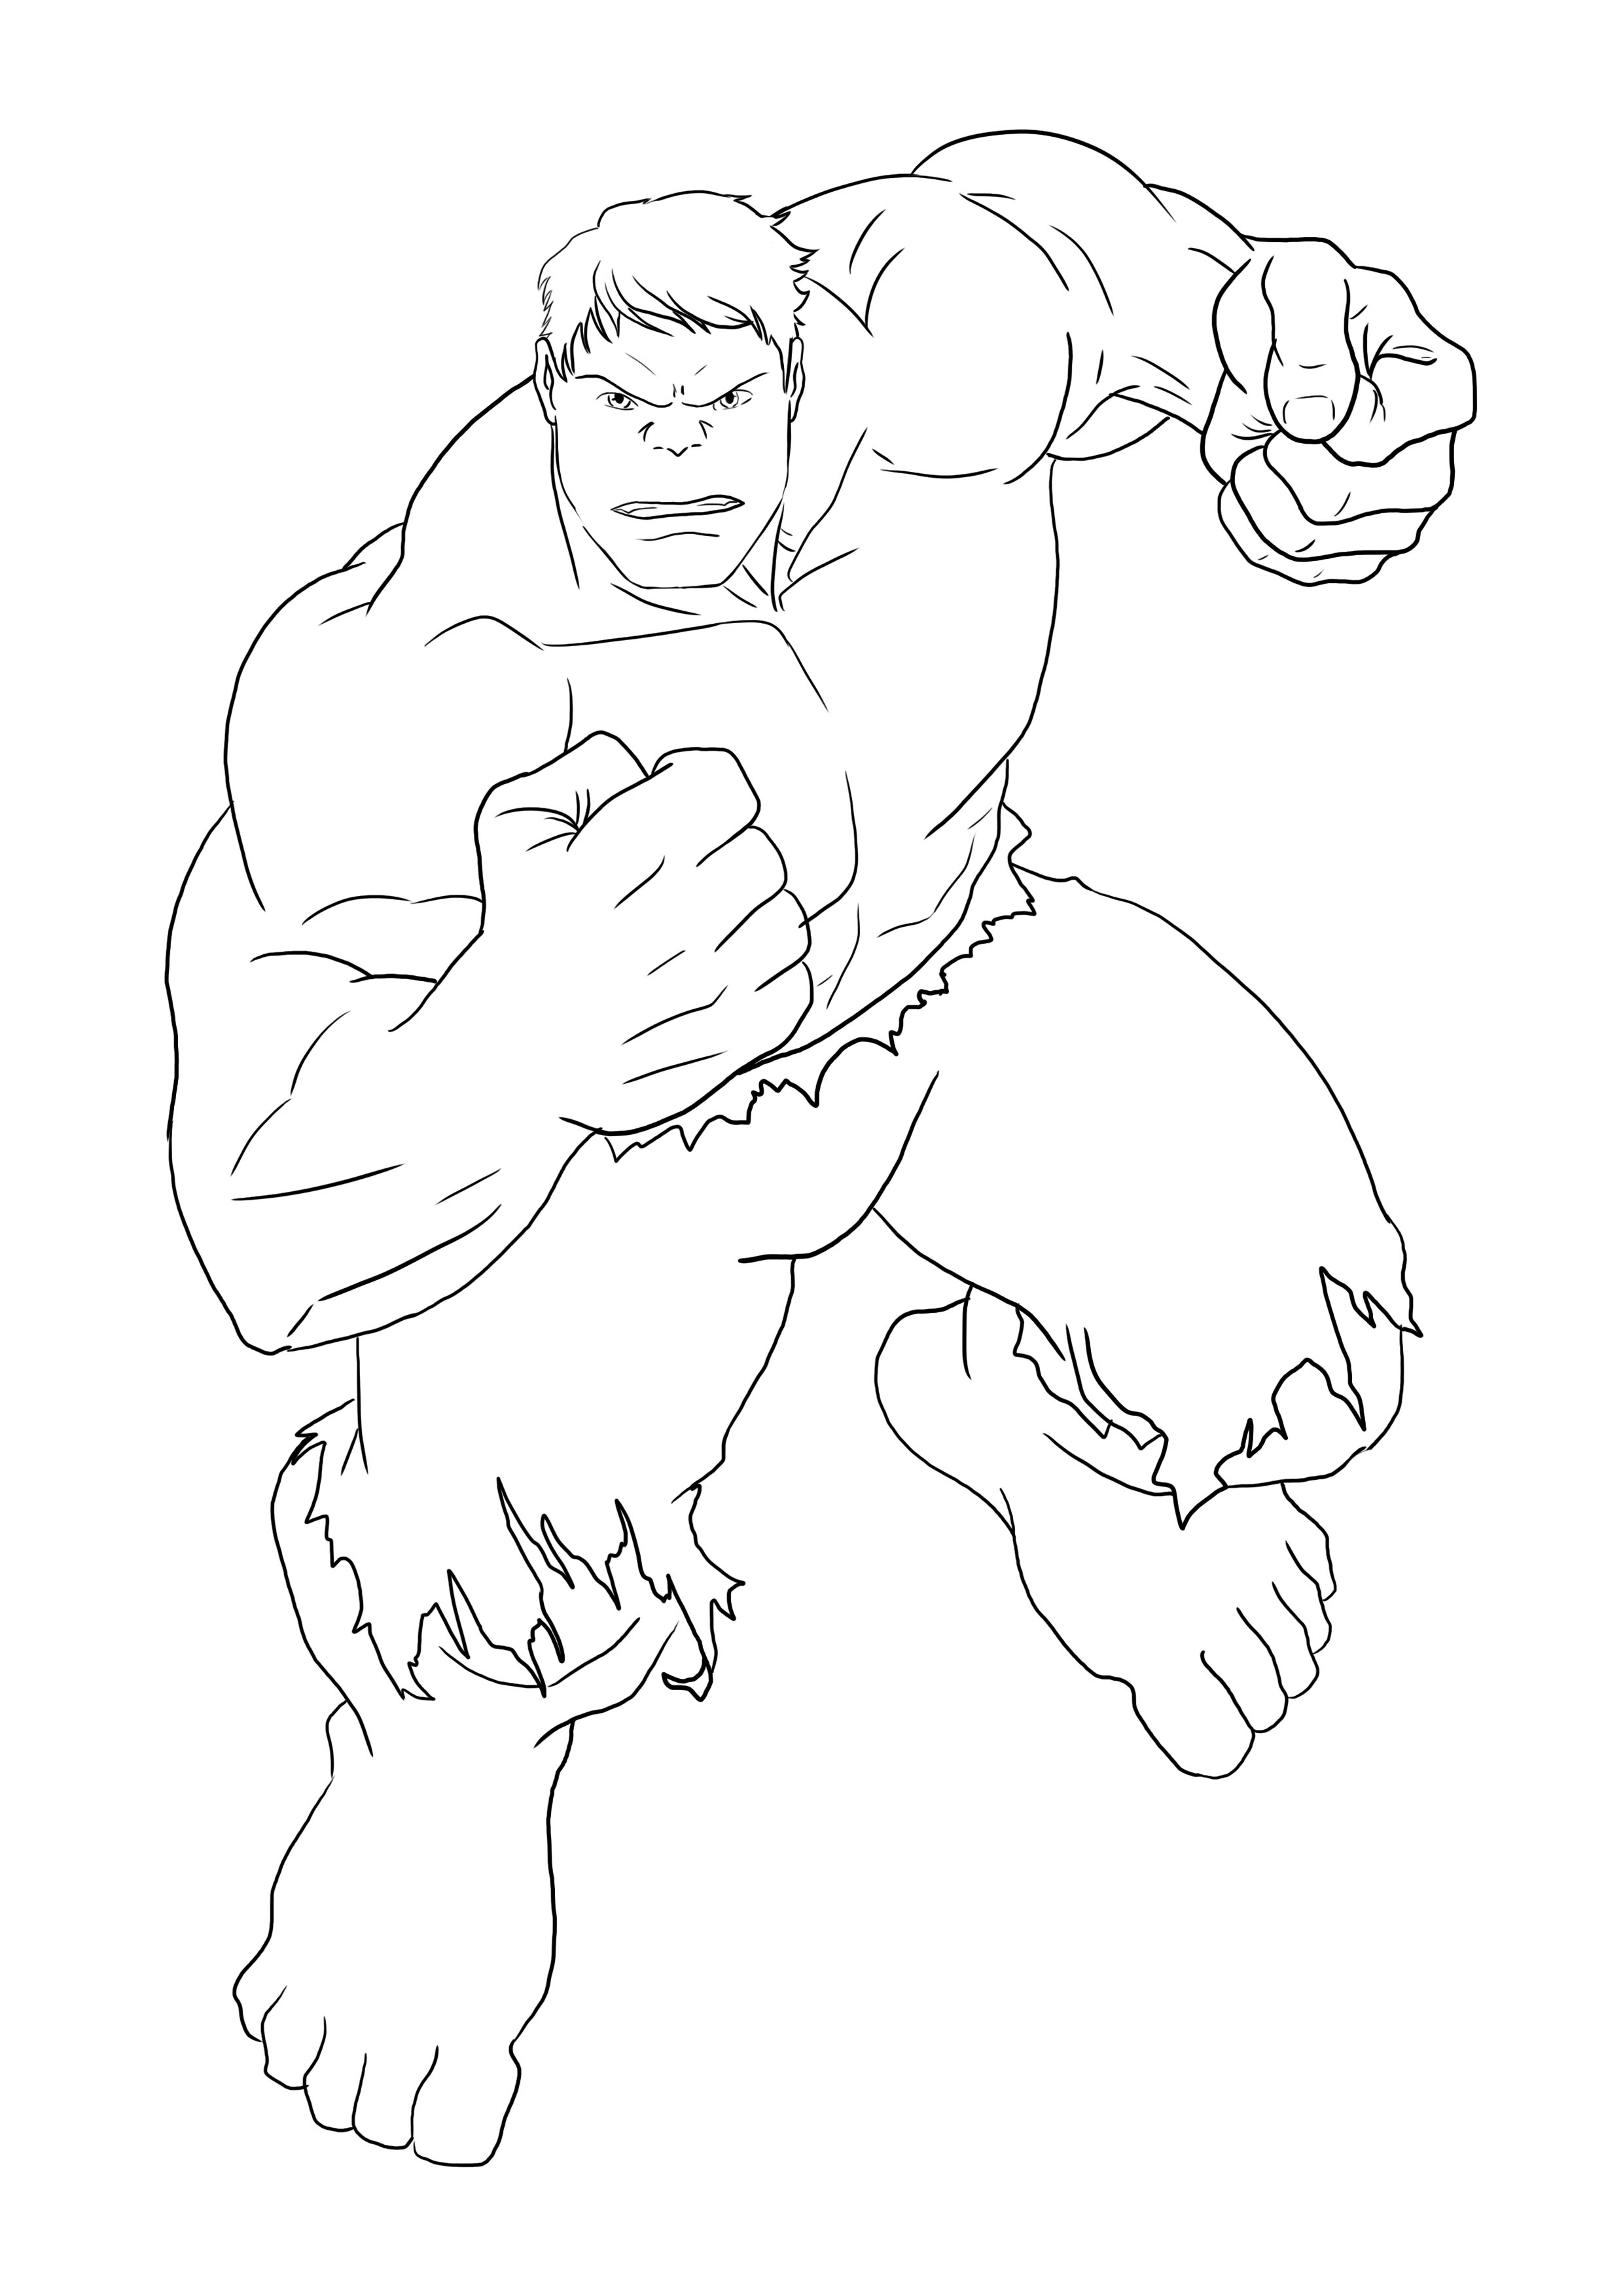
Erase the construction lines.
Add some lines on the body to suggest muscles and bones, some folds on the pants, expression lines on the face as well as the nails, to make a detailed rendering.
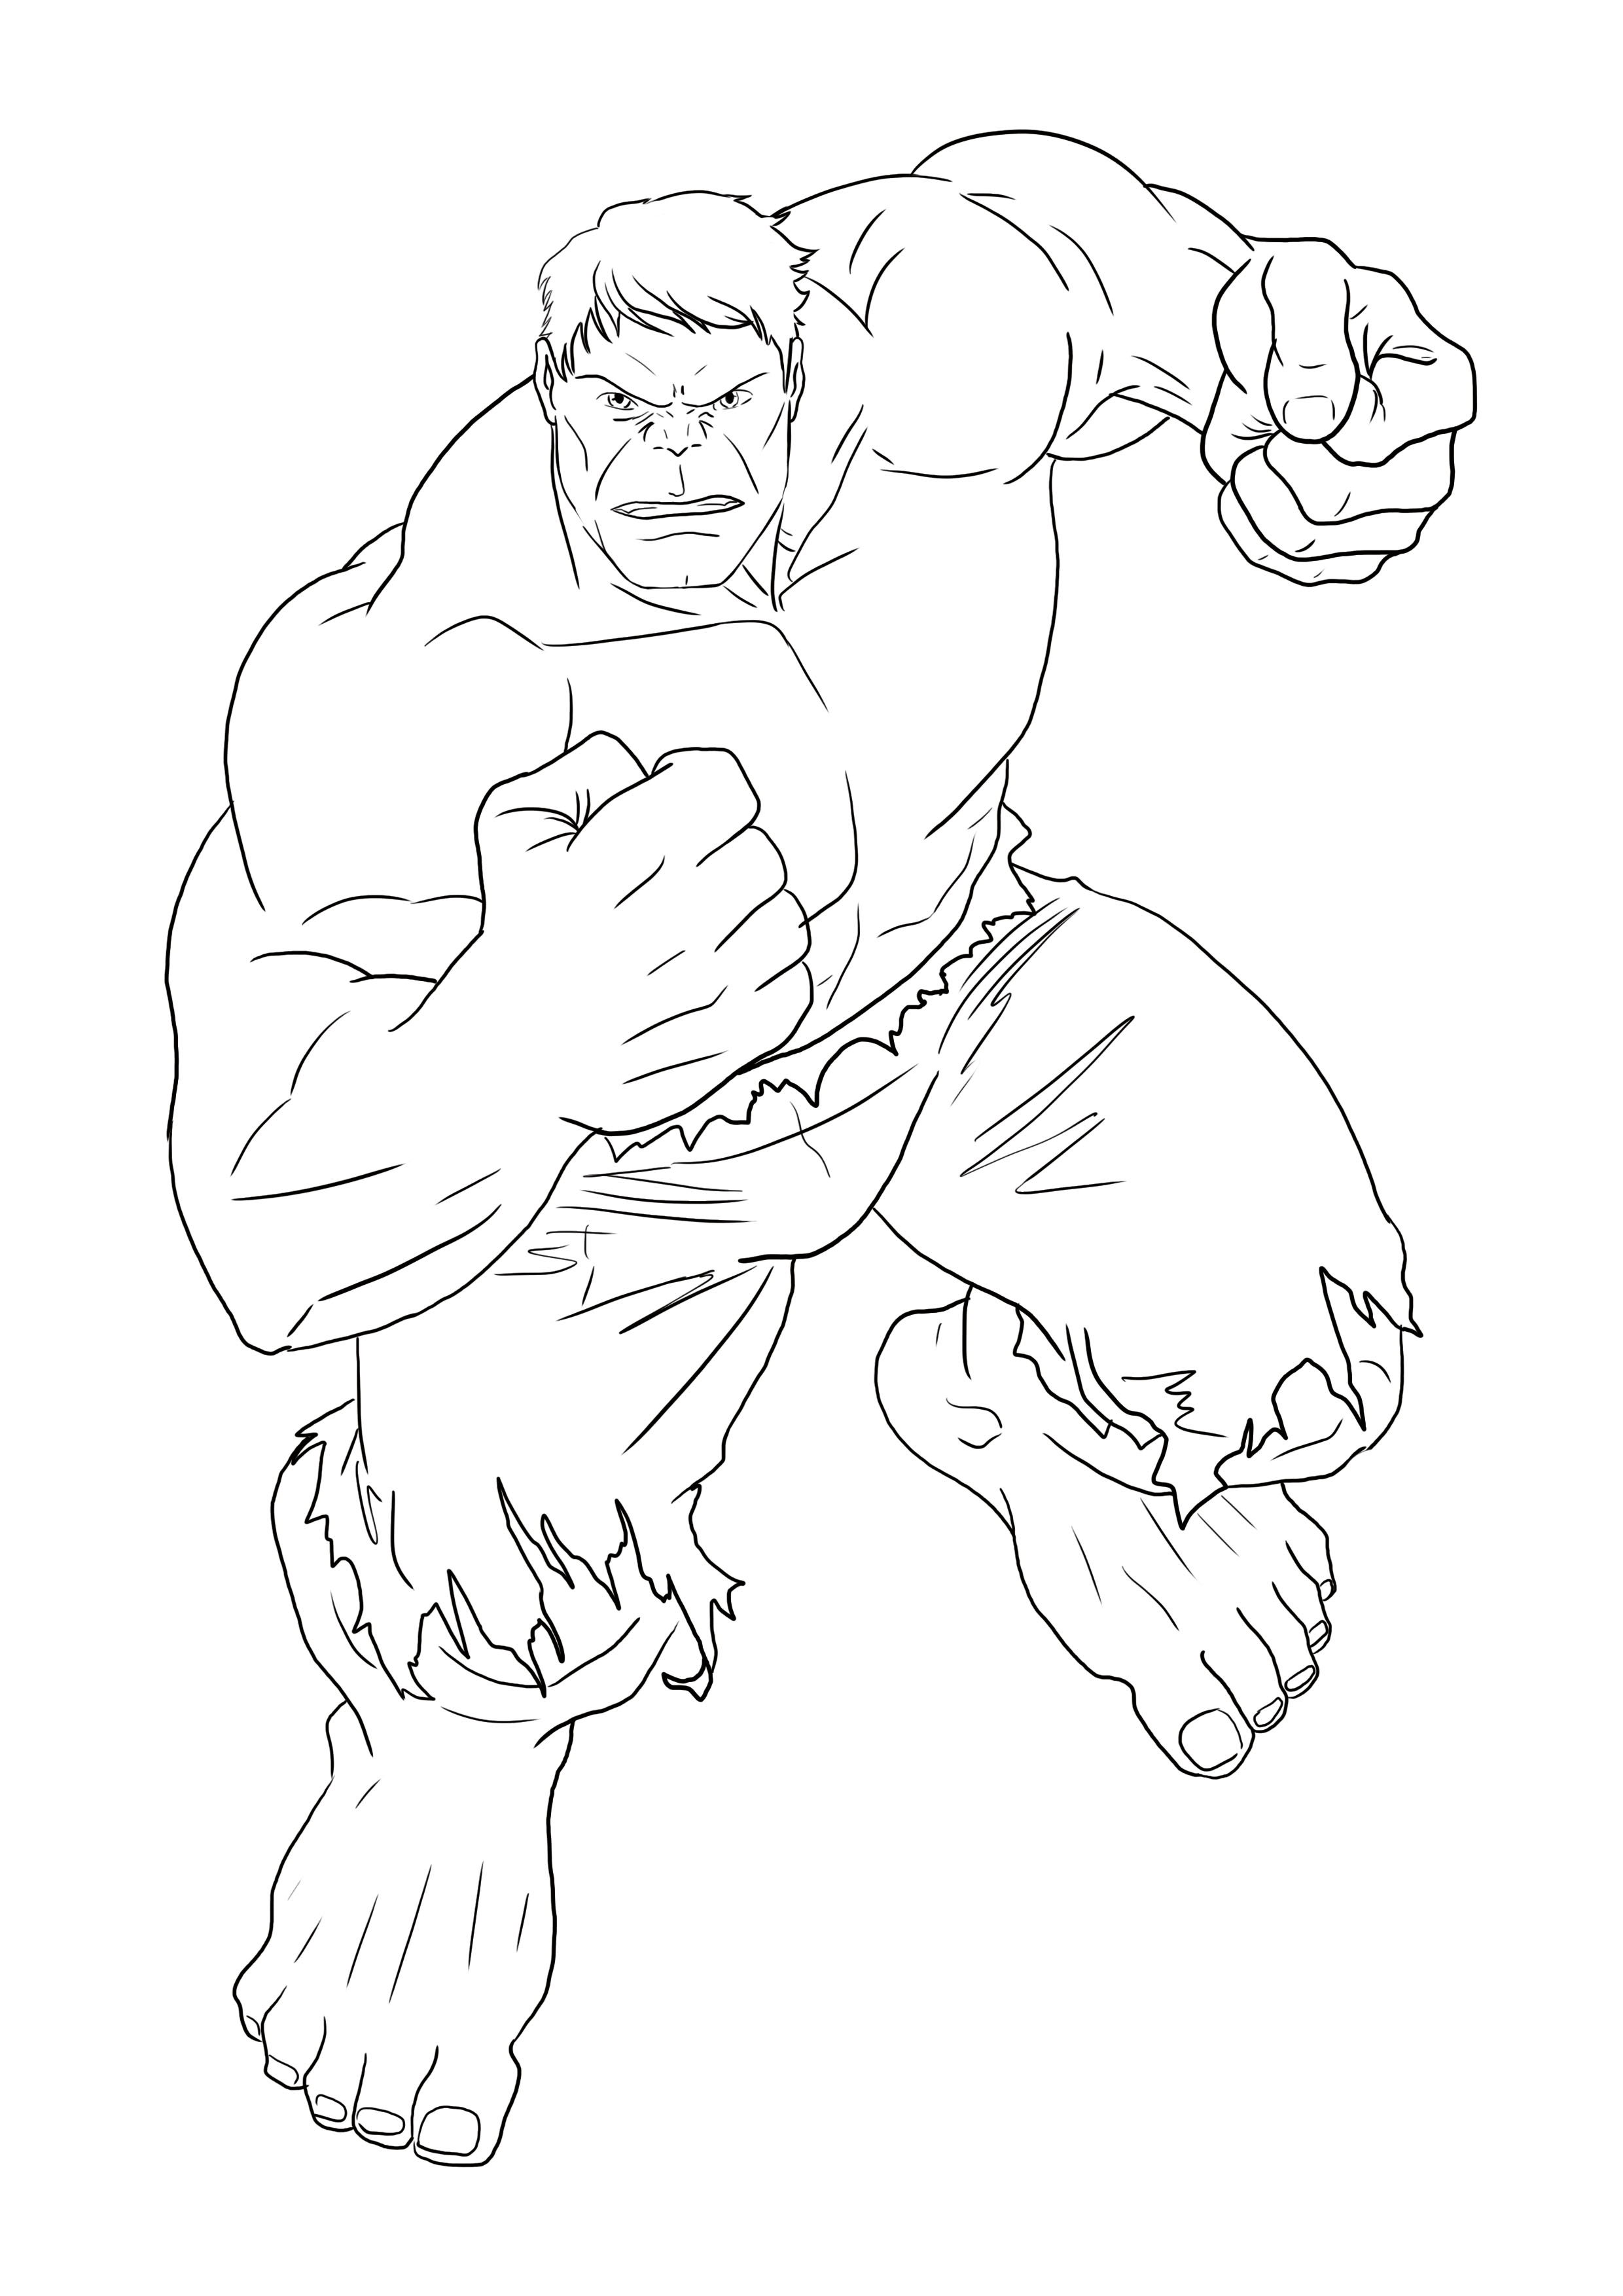
THE SHADOWS OF HULK'S DRAWING
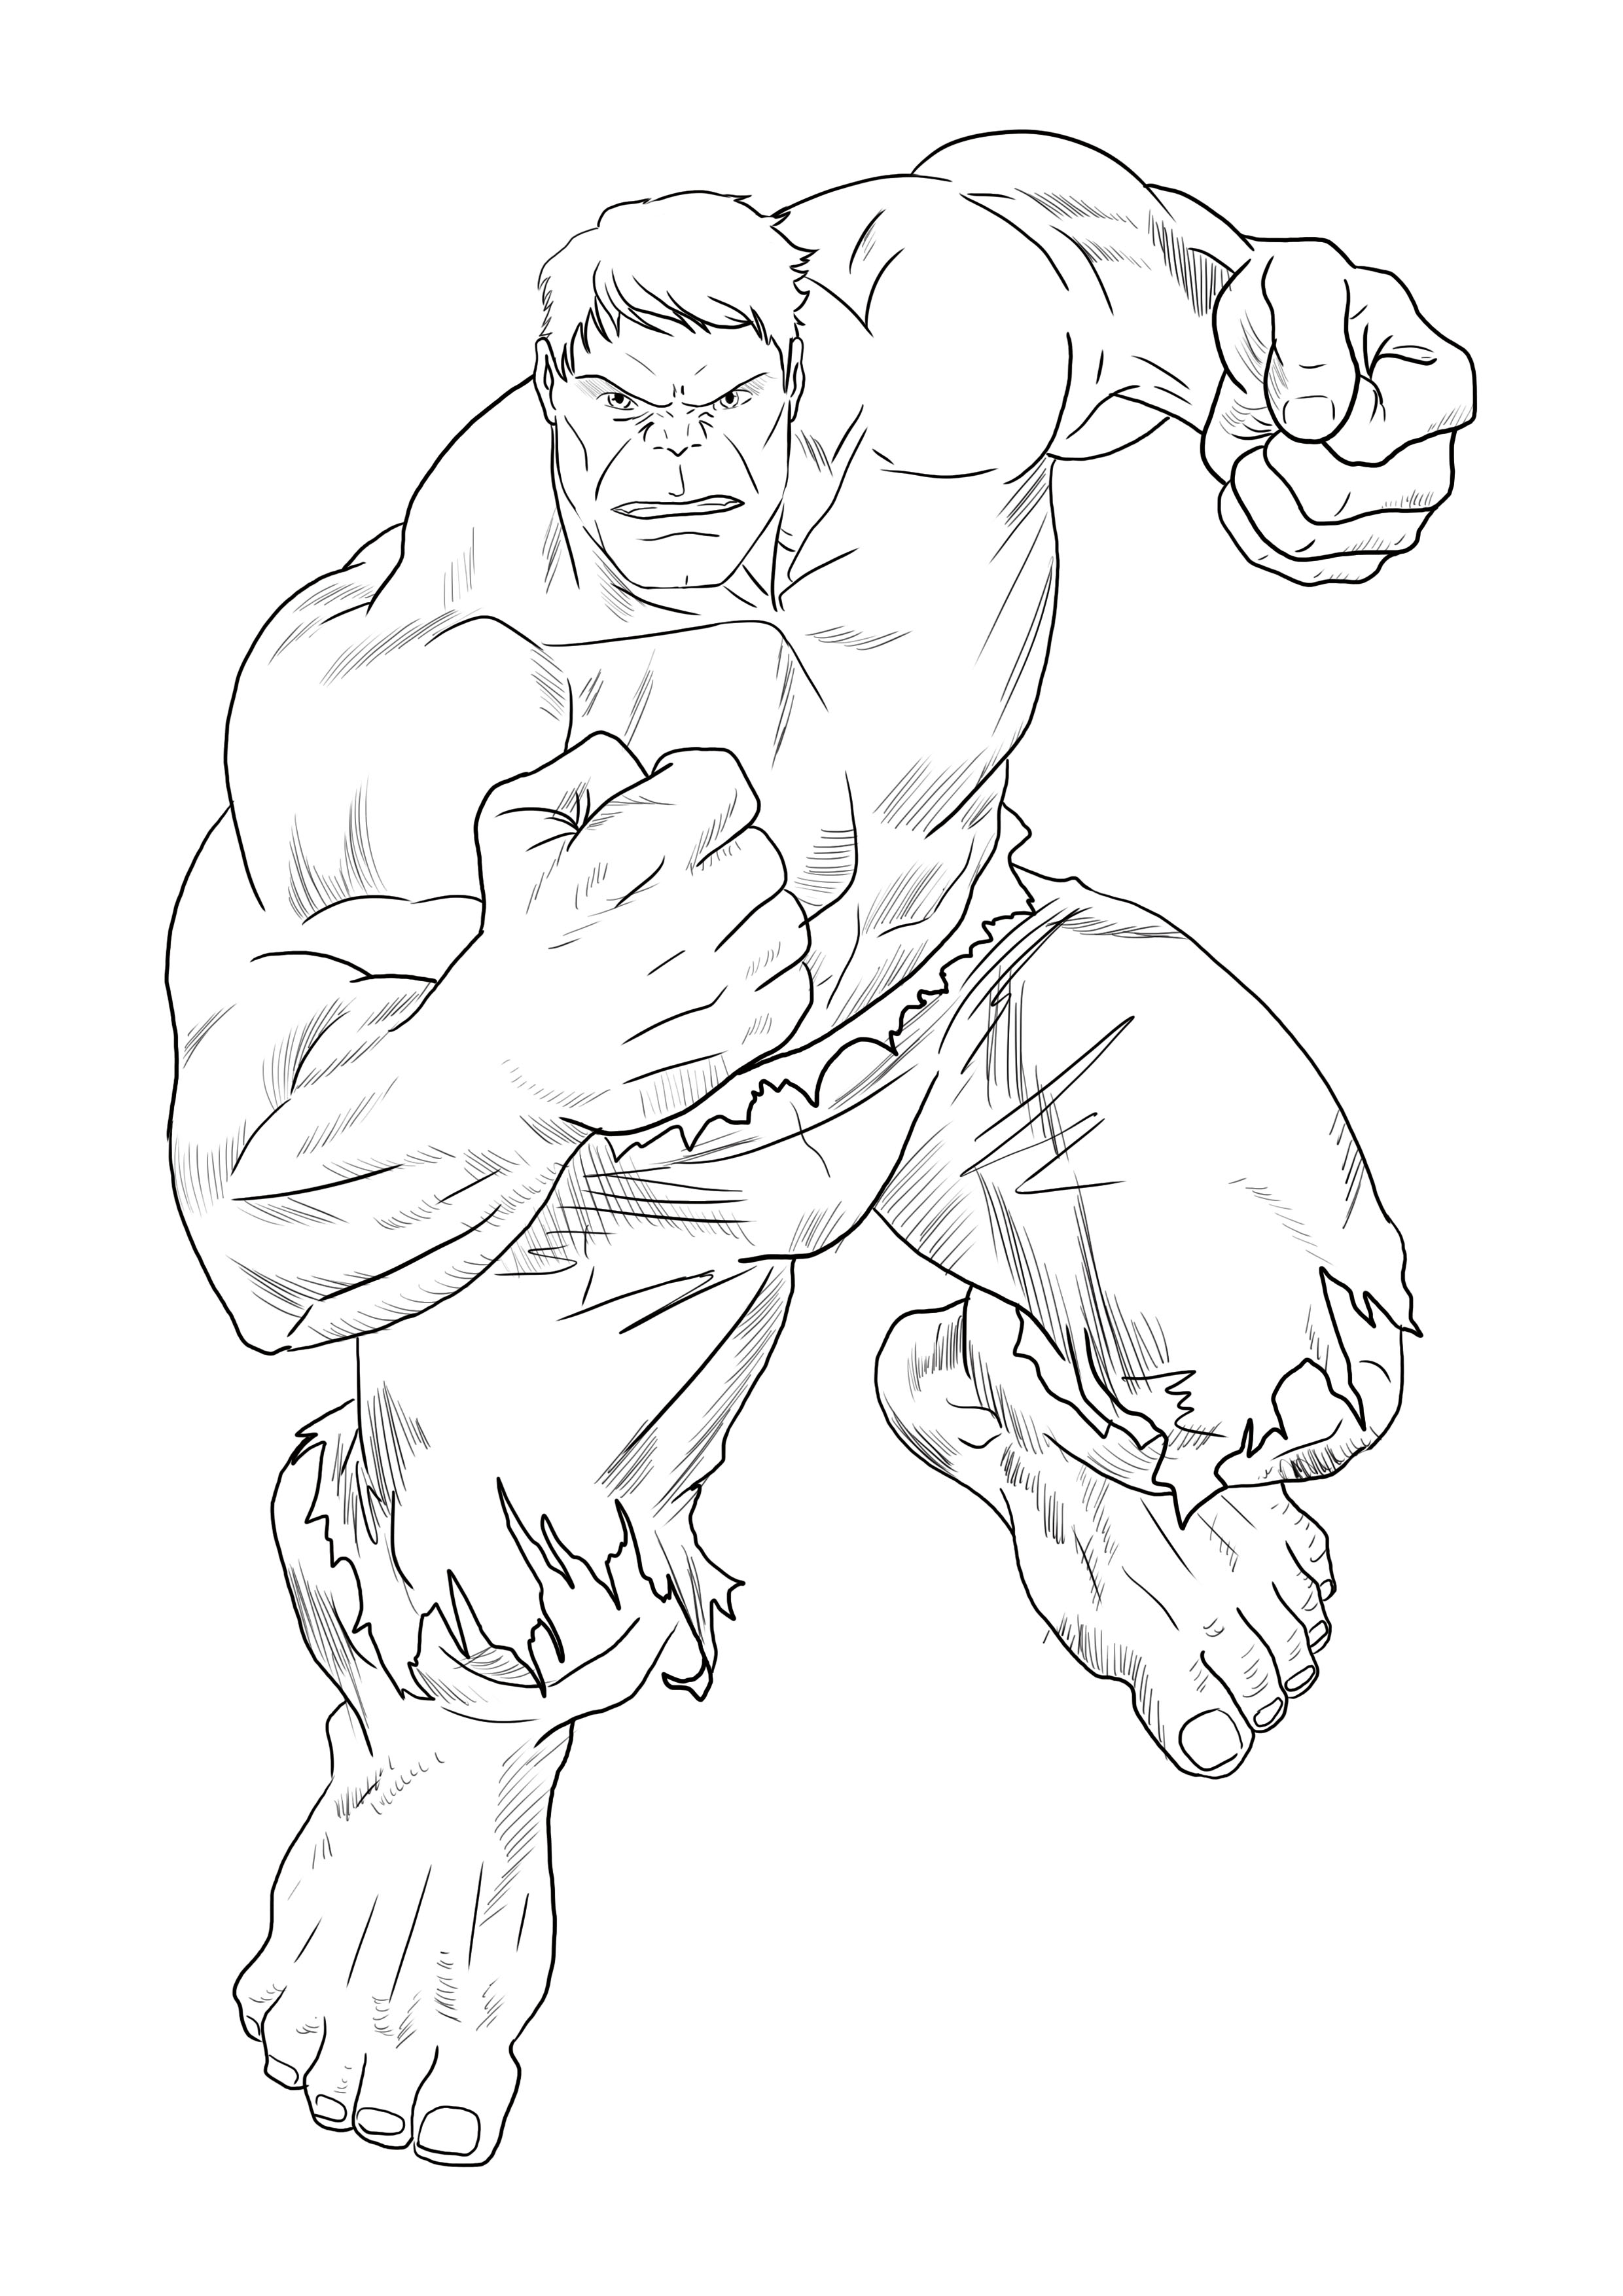
If you wish, you can add some hatching to suggest shadows and give a "comic book" effect to your drawing or even add some black areas to enhance the contrasts.

Conclusion
Don't forget: a well-done drawing base from the start greatly facilitates the clean-up stage.
At the beginning, always simplify your drawings with simple geometric shapes (square, circle, oval, rectangle, triangle, ...) then sculpt your drawing gradually.
You need to see drawing like sculpture. You start with a large mass and you sculpt the mass gradually as a whole until you achieve the desired result. Don't move on to the details until you have completed the entirety of the drawing. Details and shadows come at the end of the drawing.

Discussion
4 comments