How to Draw Pokémon
In this article, I'm going to teach you how to draw Pokémon. I've chosen to teach you how to draw Gastly, Caterpie, and Vaporeon, in that order, starting from the simplest to the most complex.
You will see that overall, they all have the same style with a rather "rounded" base. We will learn how to draw them starting from simple circles.
DRAWING THE POKEMON GASTLY
Gastly is certainly the easiest Pokémon to draw. Indeed, it is simply made up of a sphere and smoke.
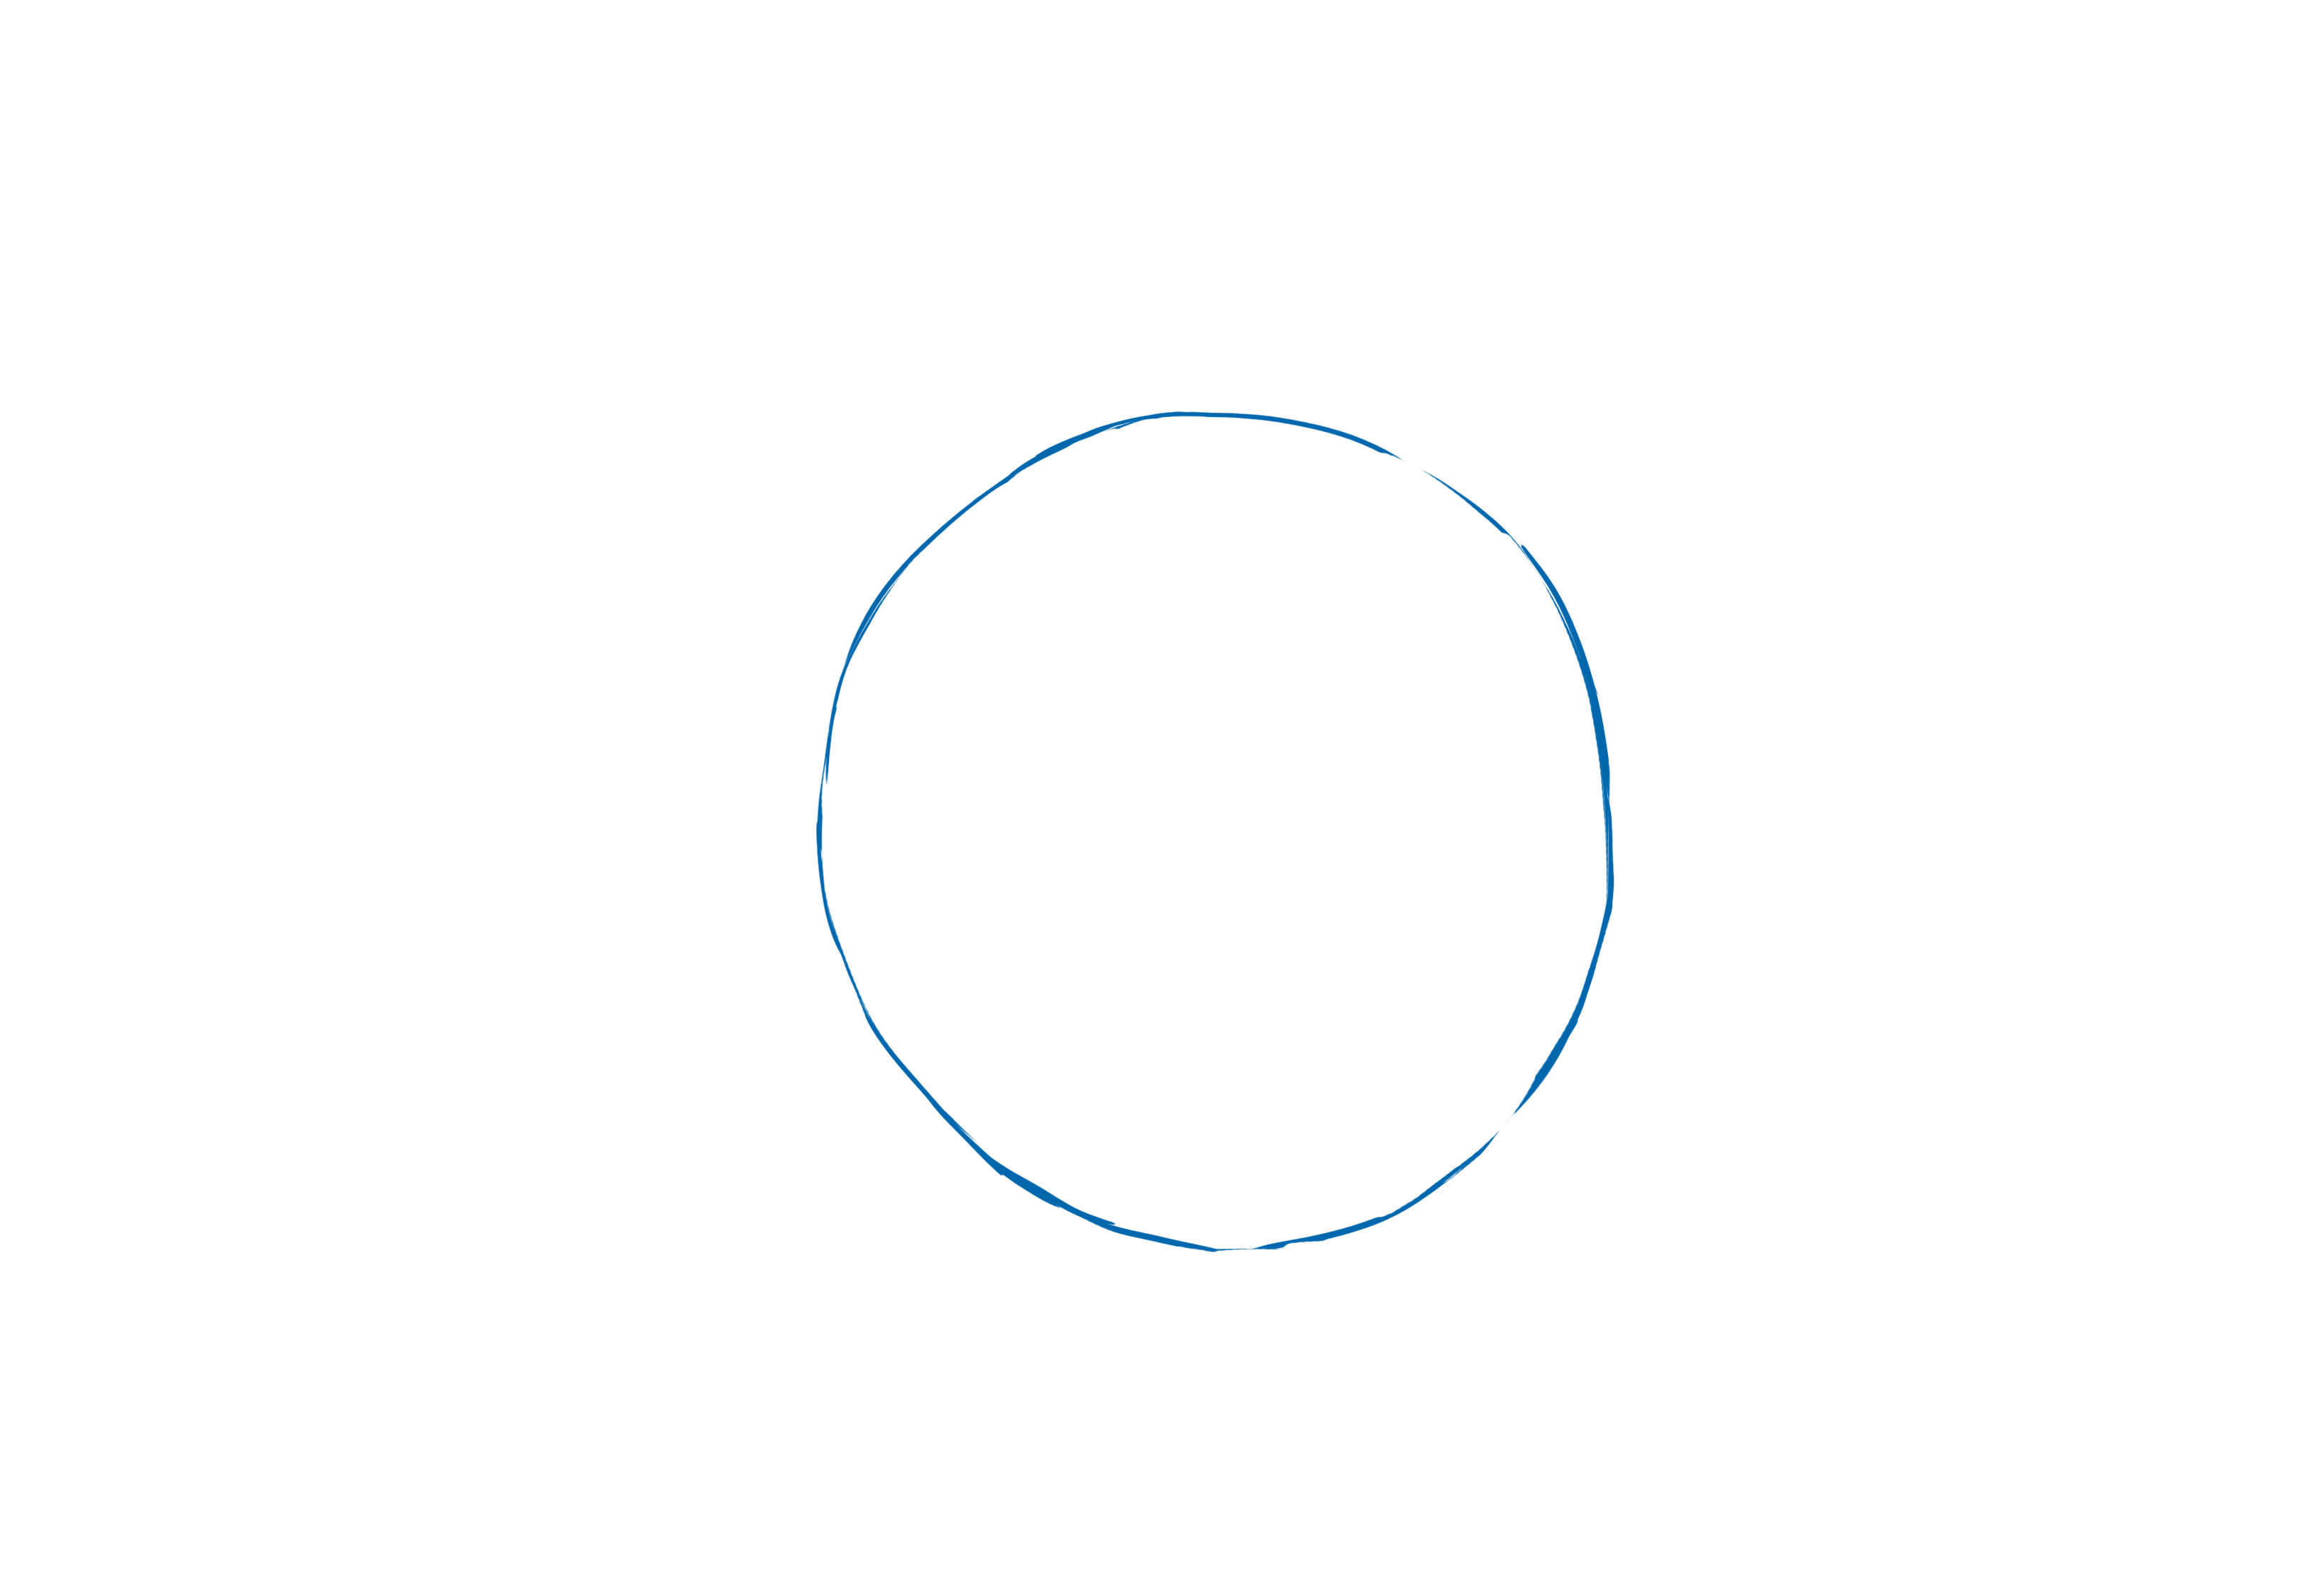
To start, you will draw a very simple circle.
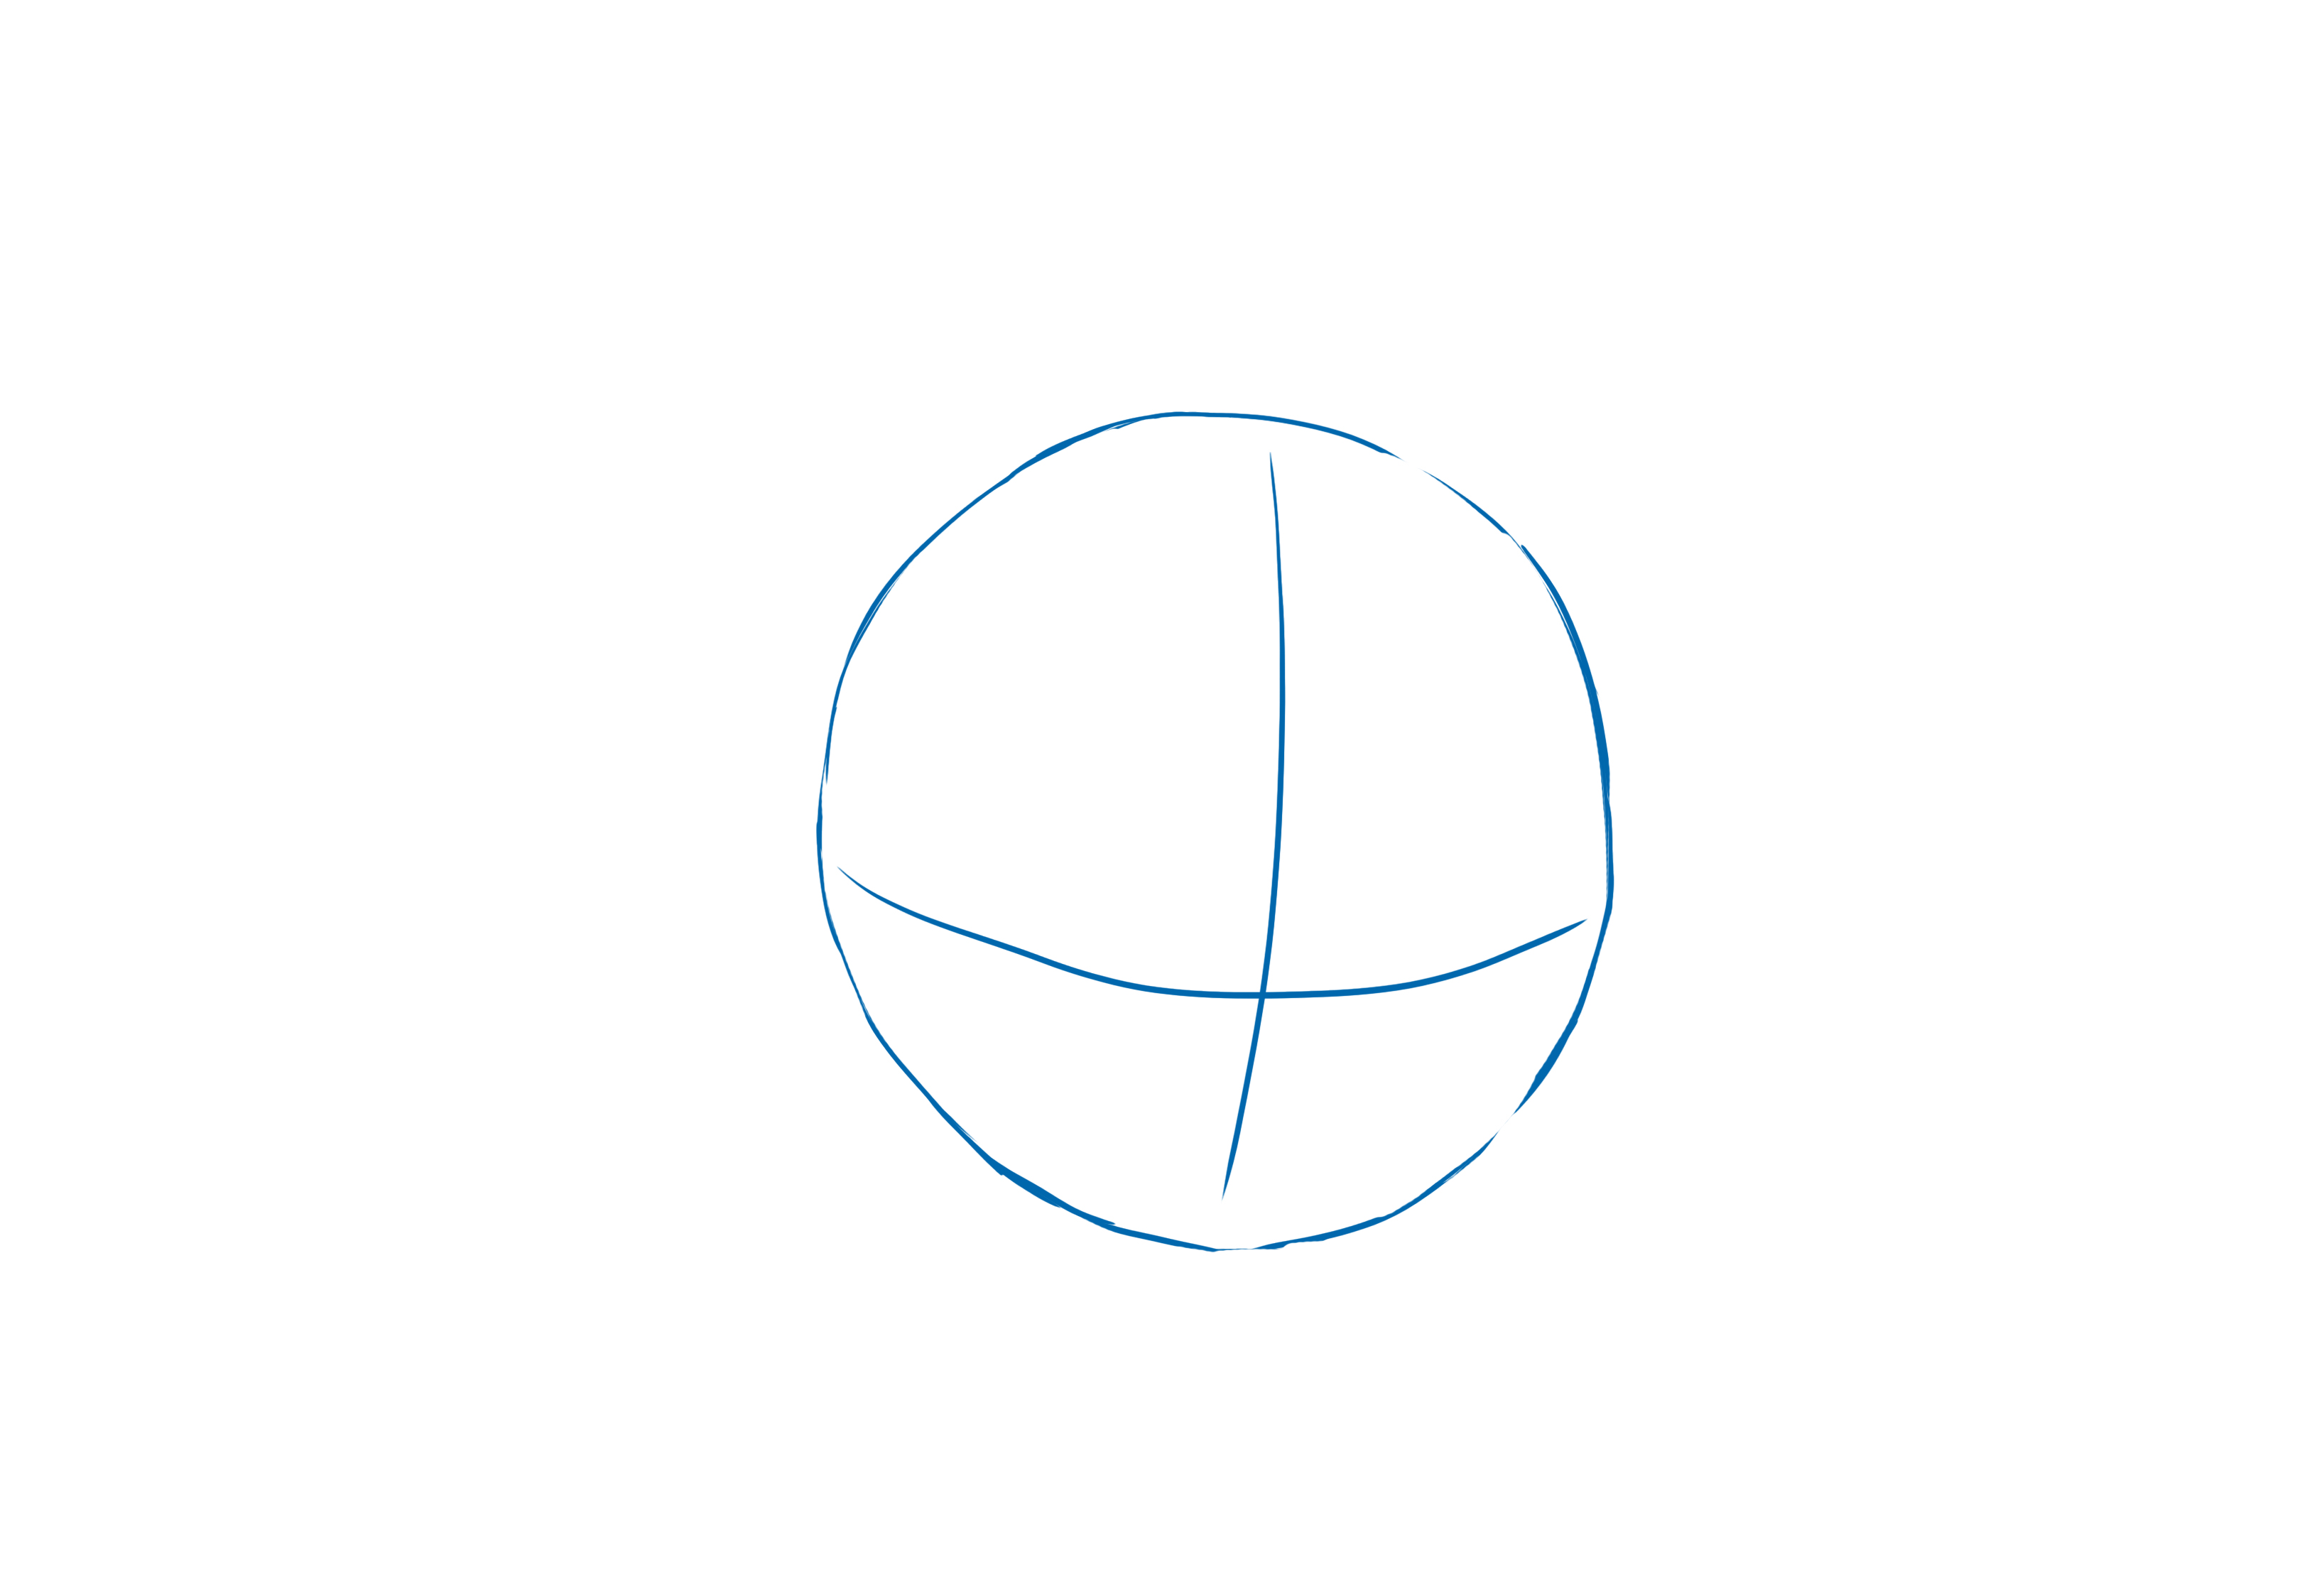
Next, you will divide this circle into 4 parts.
Start by drawing a vertical line and then a horizontal line. With these lines, you will also define the perspective of the head.
If you want to do it from the front, you need to center your features; however, if you want to do it from a 3/4 angle, offset your features. The intersection of the two lines defines the perspective point.
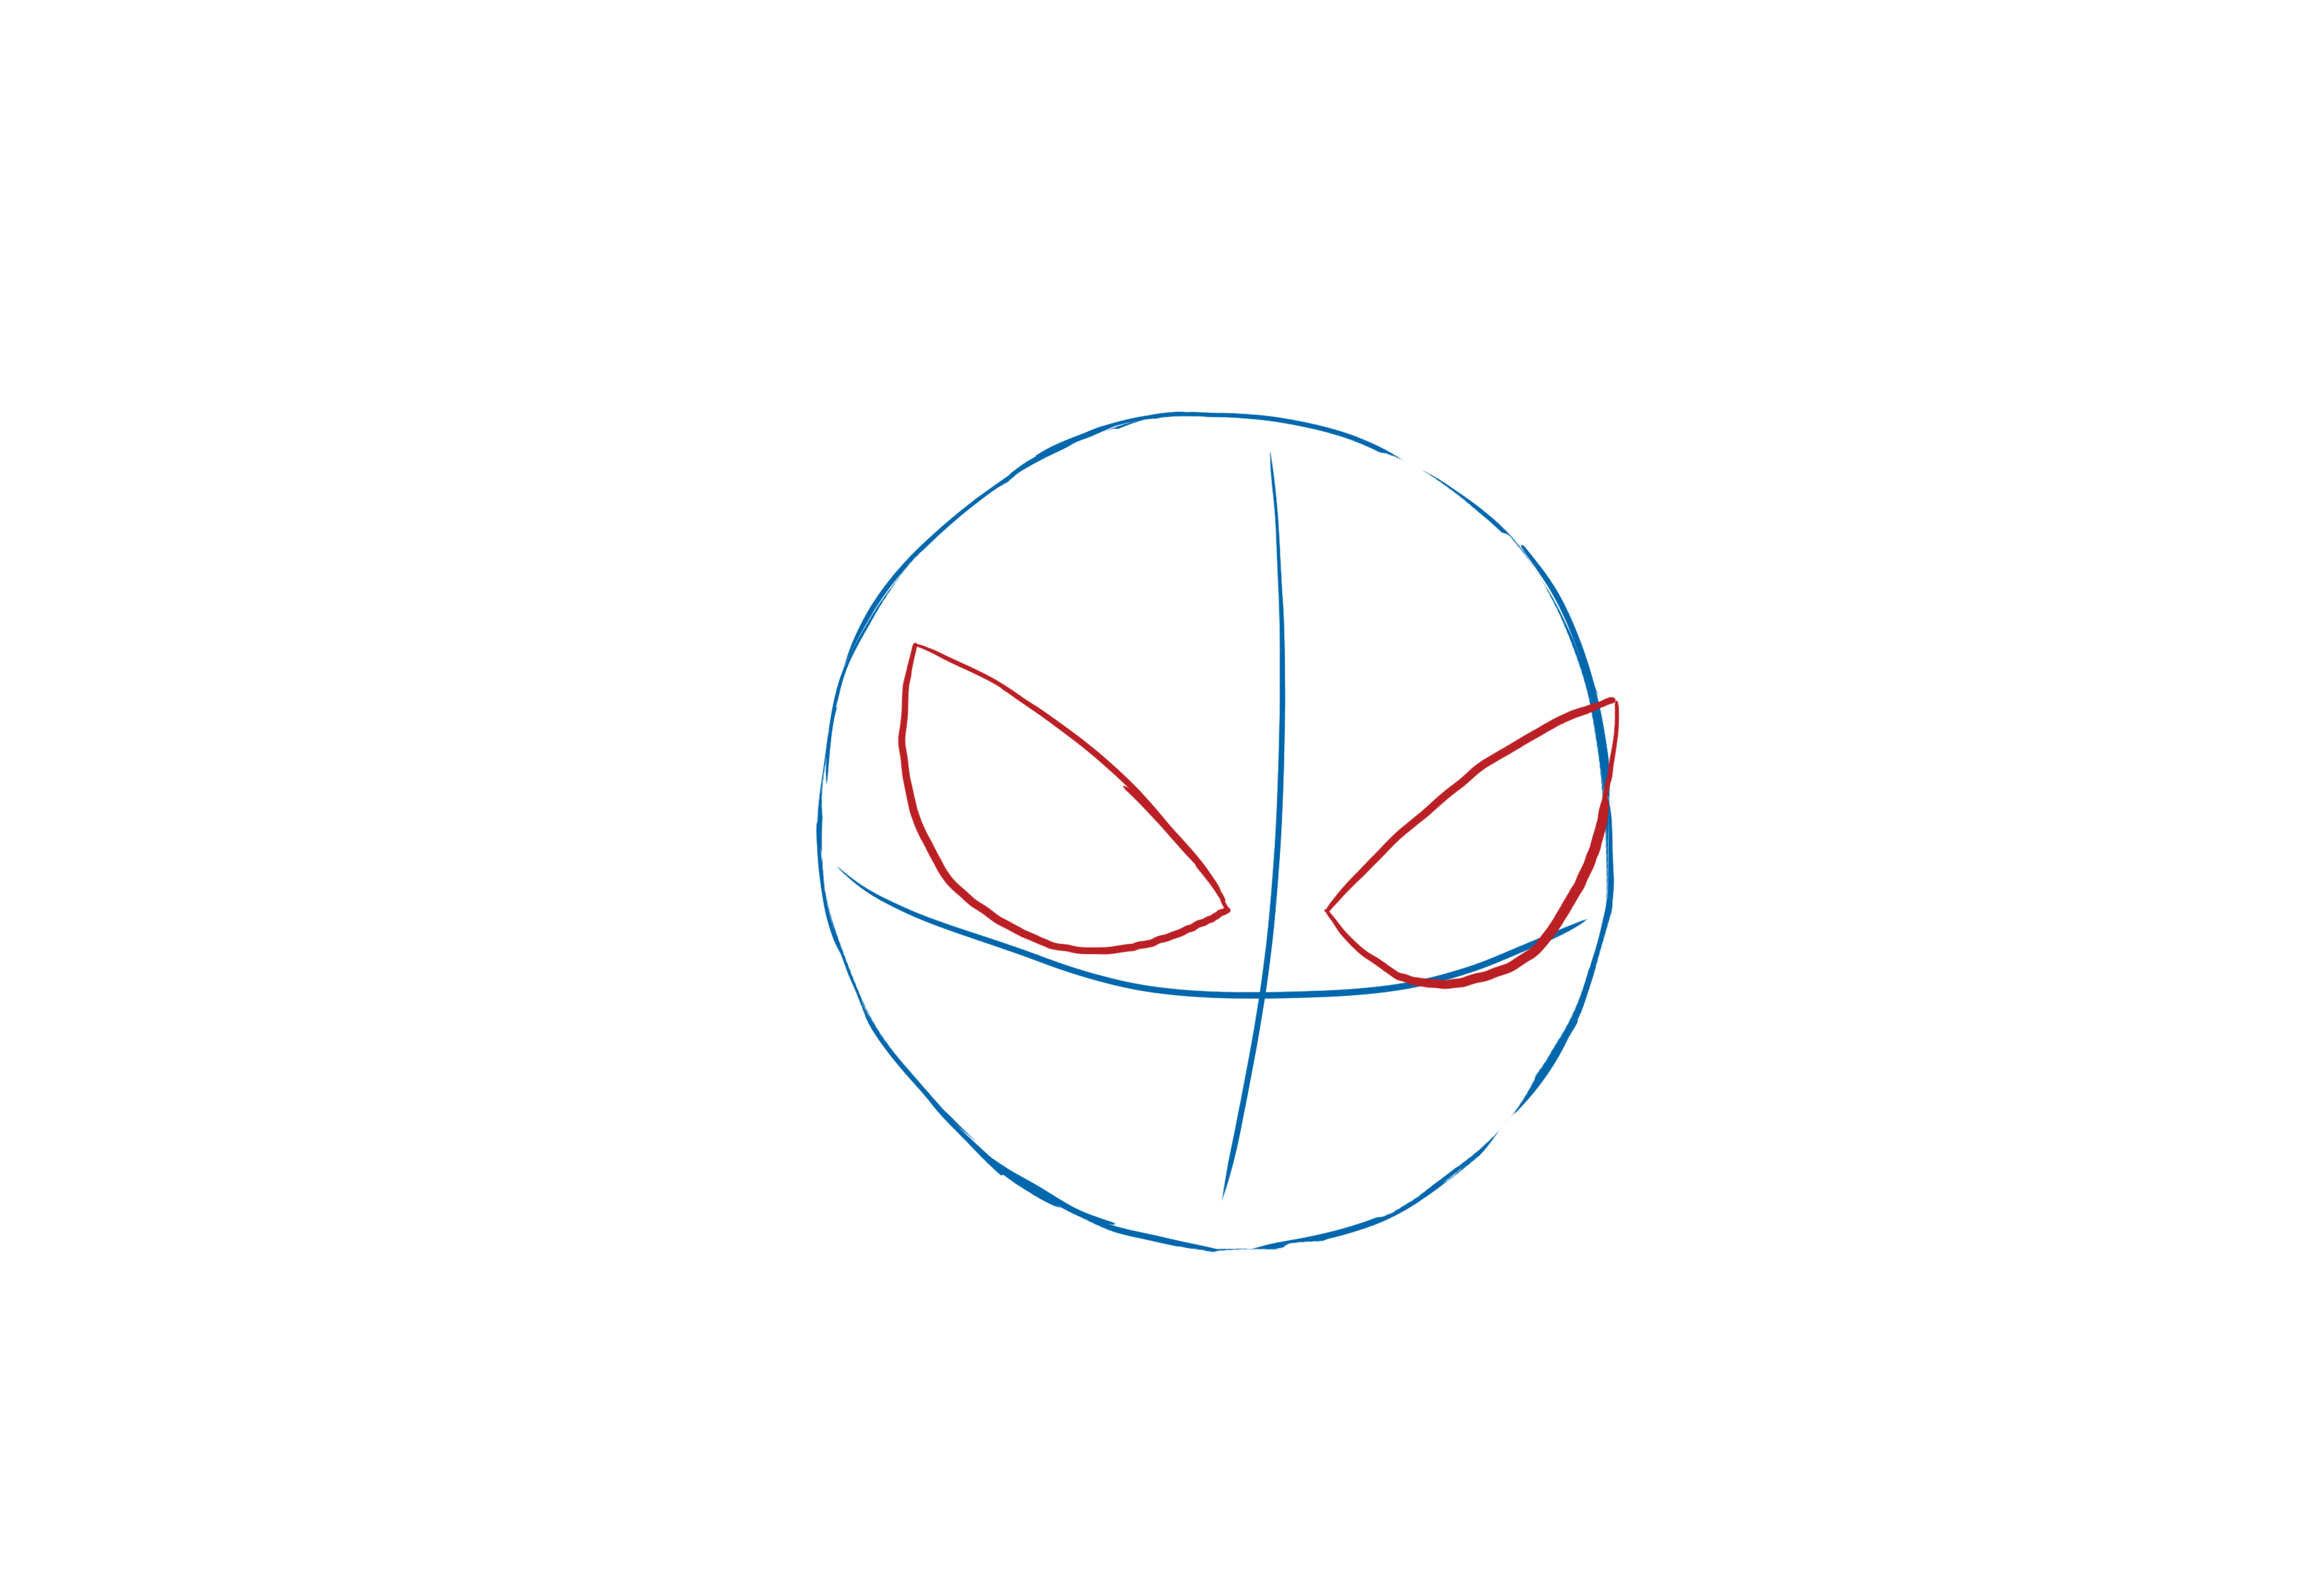
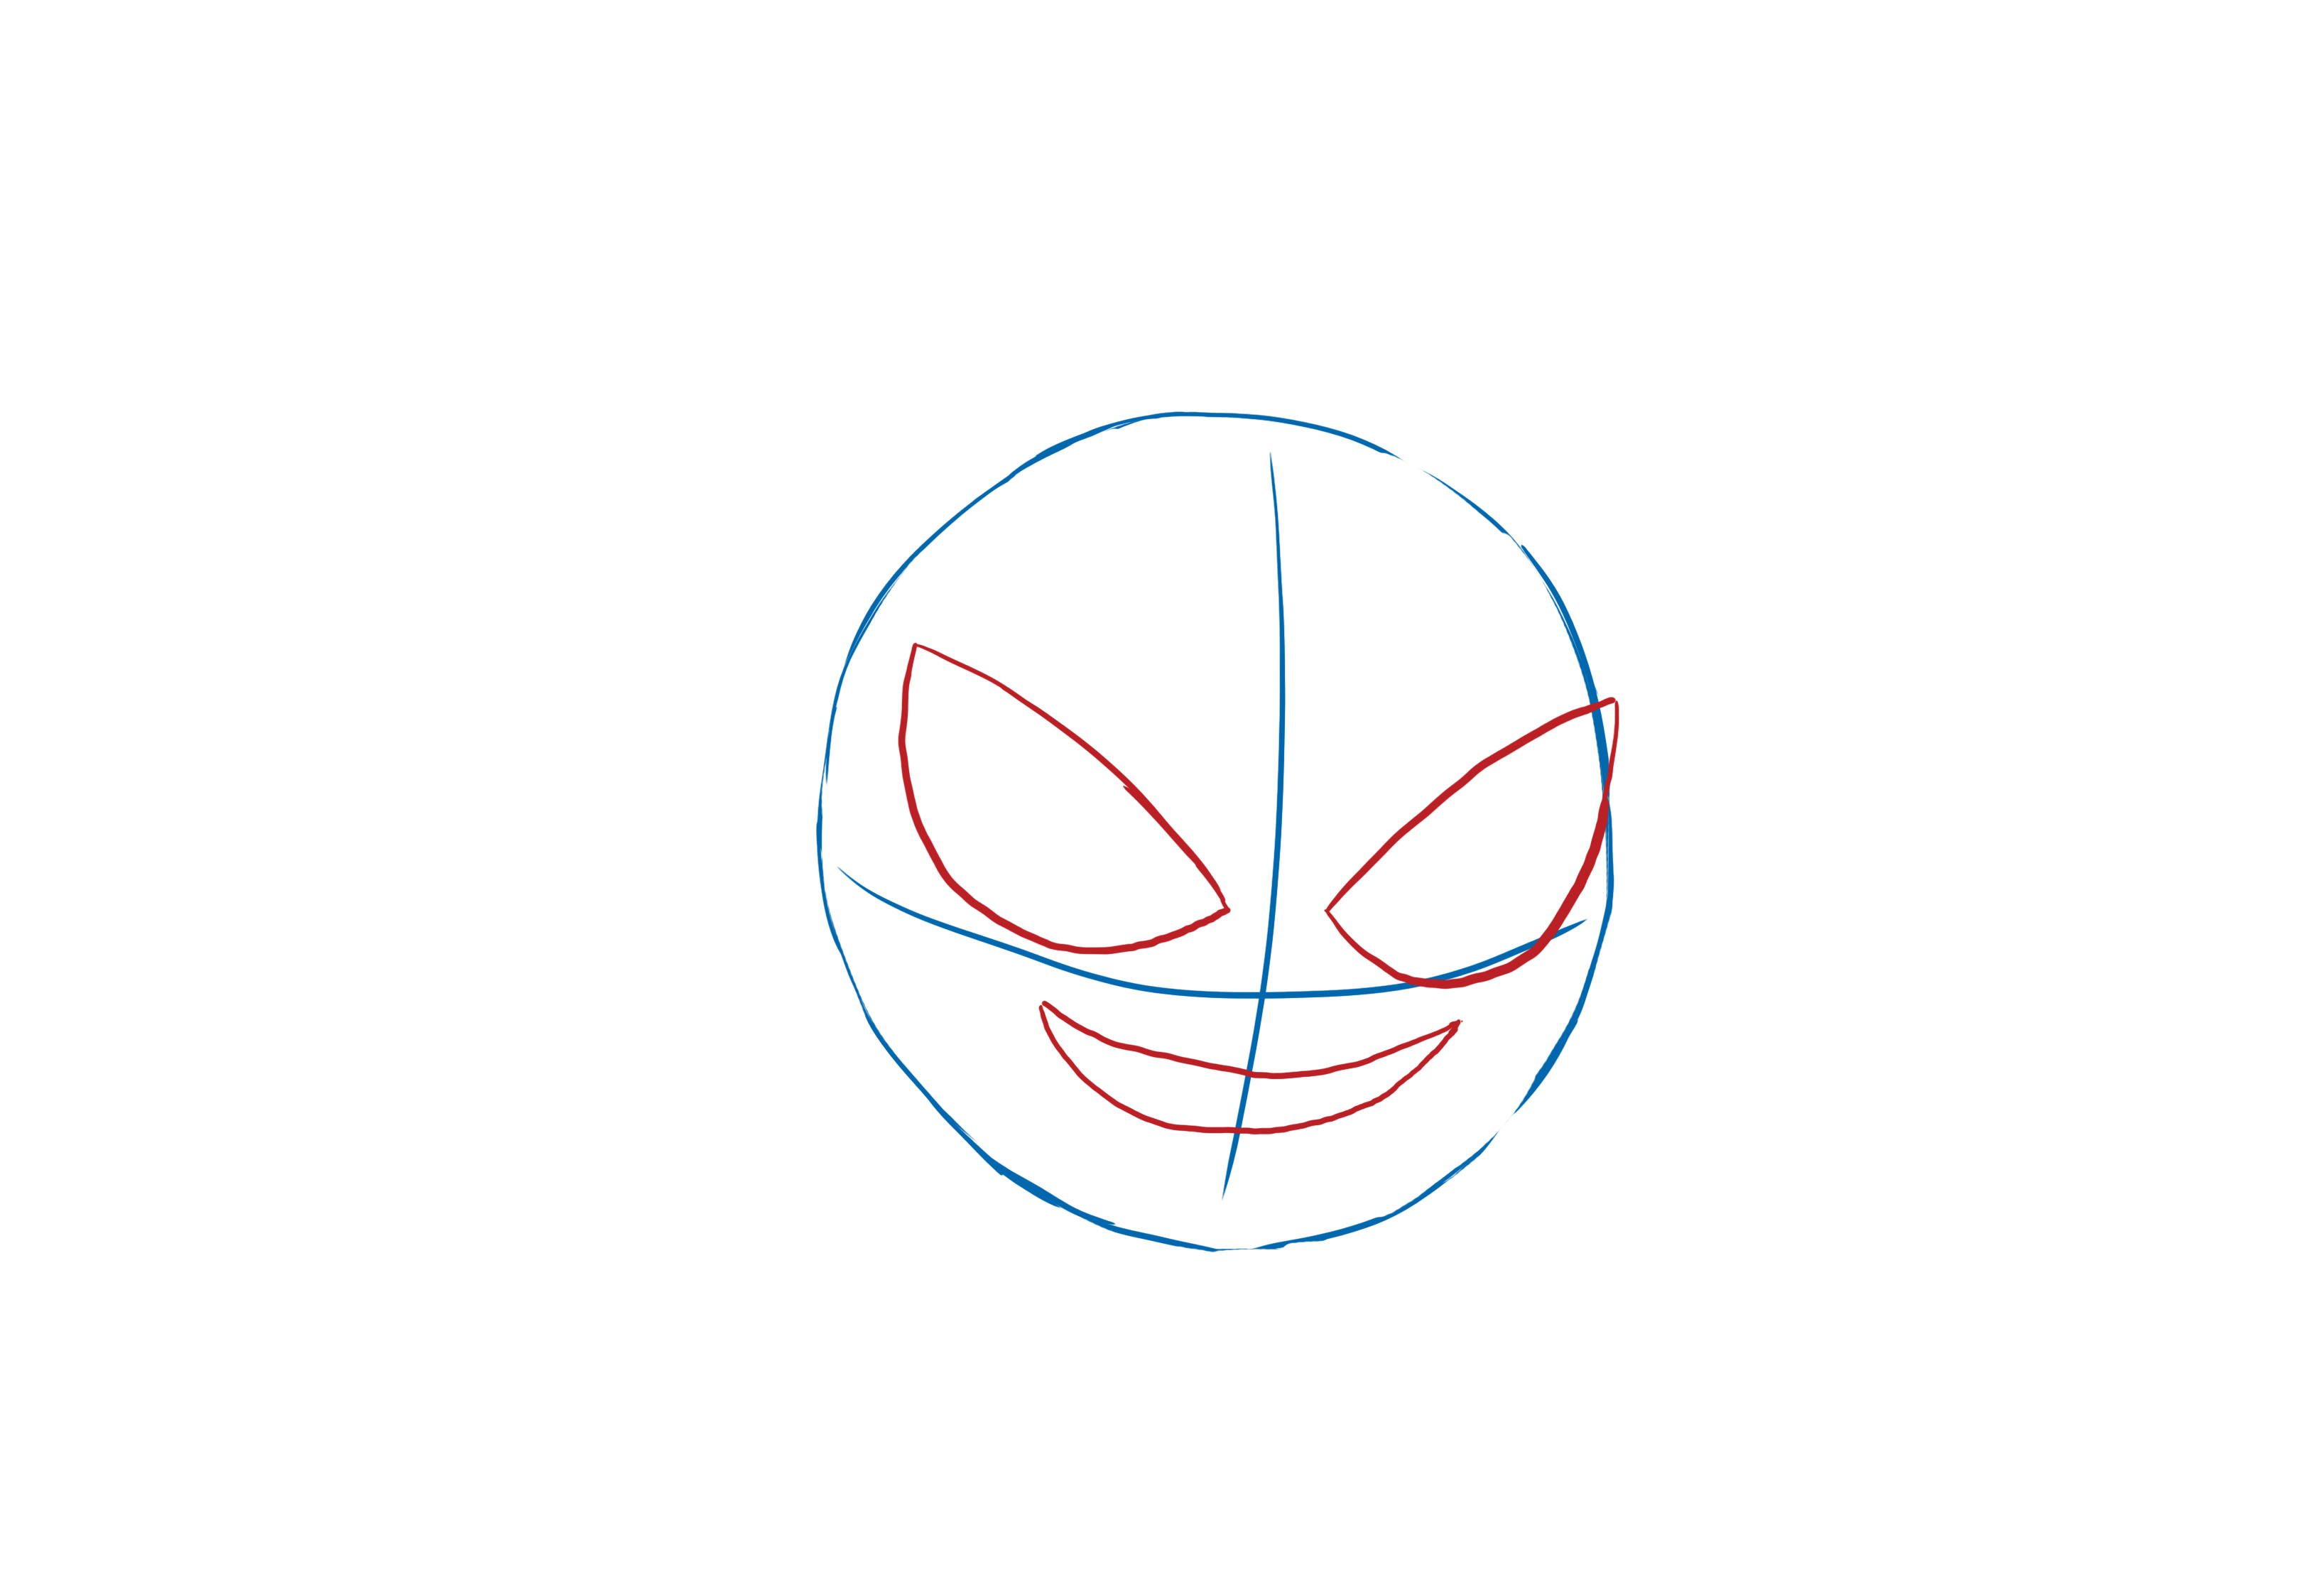
Once the reference points are finished, we will draw the eyes.
To make them, draw a line that starts from the inside of the face and goes outward, moving upwards. Then draw a curve that will close the shape to create a rounded triangle.
Do the same thing on the other side.
Next, draw the mouth. To do this, you will need to draw an elongated moon.
ADDING DETAILS TO THE DRAWING OF GASTLY
Now that the base is finished, we can move on to the details.
Gastly doesn't really have any details. It's just a ball surrounded by smoke. What I consider to be details are the pupils, the teeth, and the smoke.
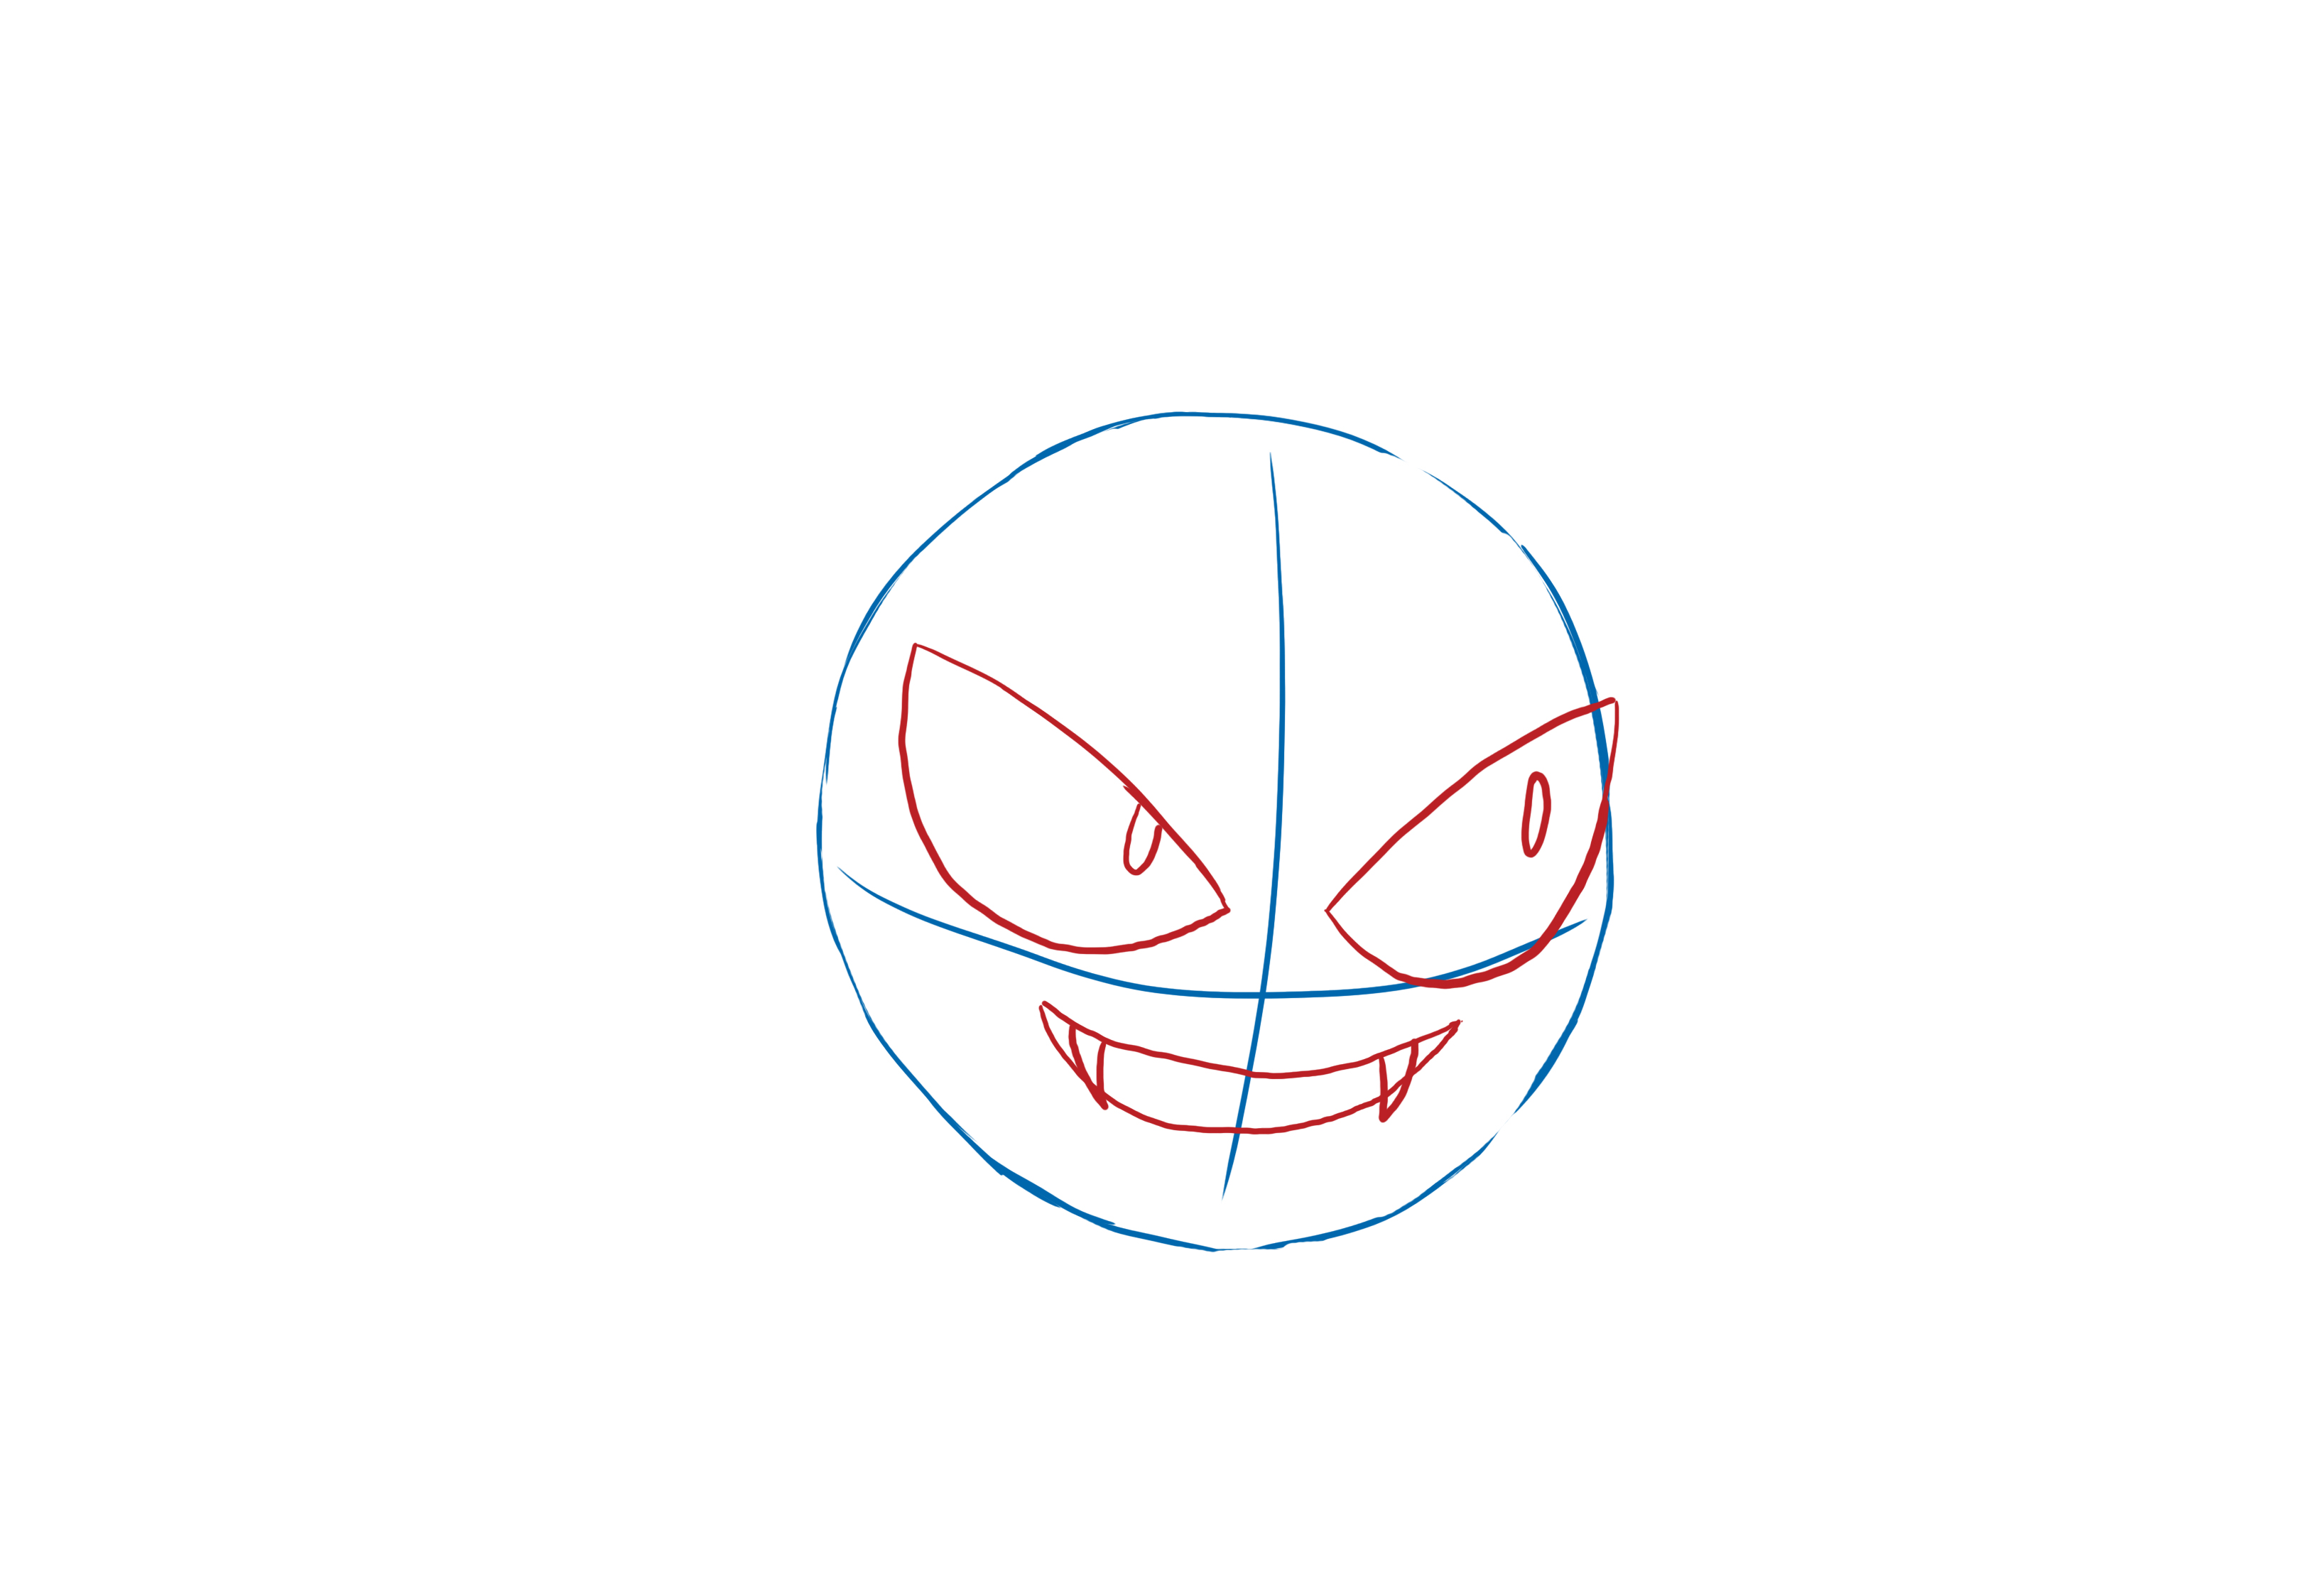
We'll start by adding the pupils and teeth.
To make the pupils, you will create ovals on the right side of the eyes.
For the teeth, they will simply be triangles, like vampire teeth.
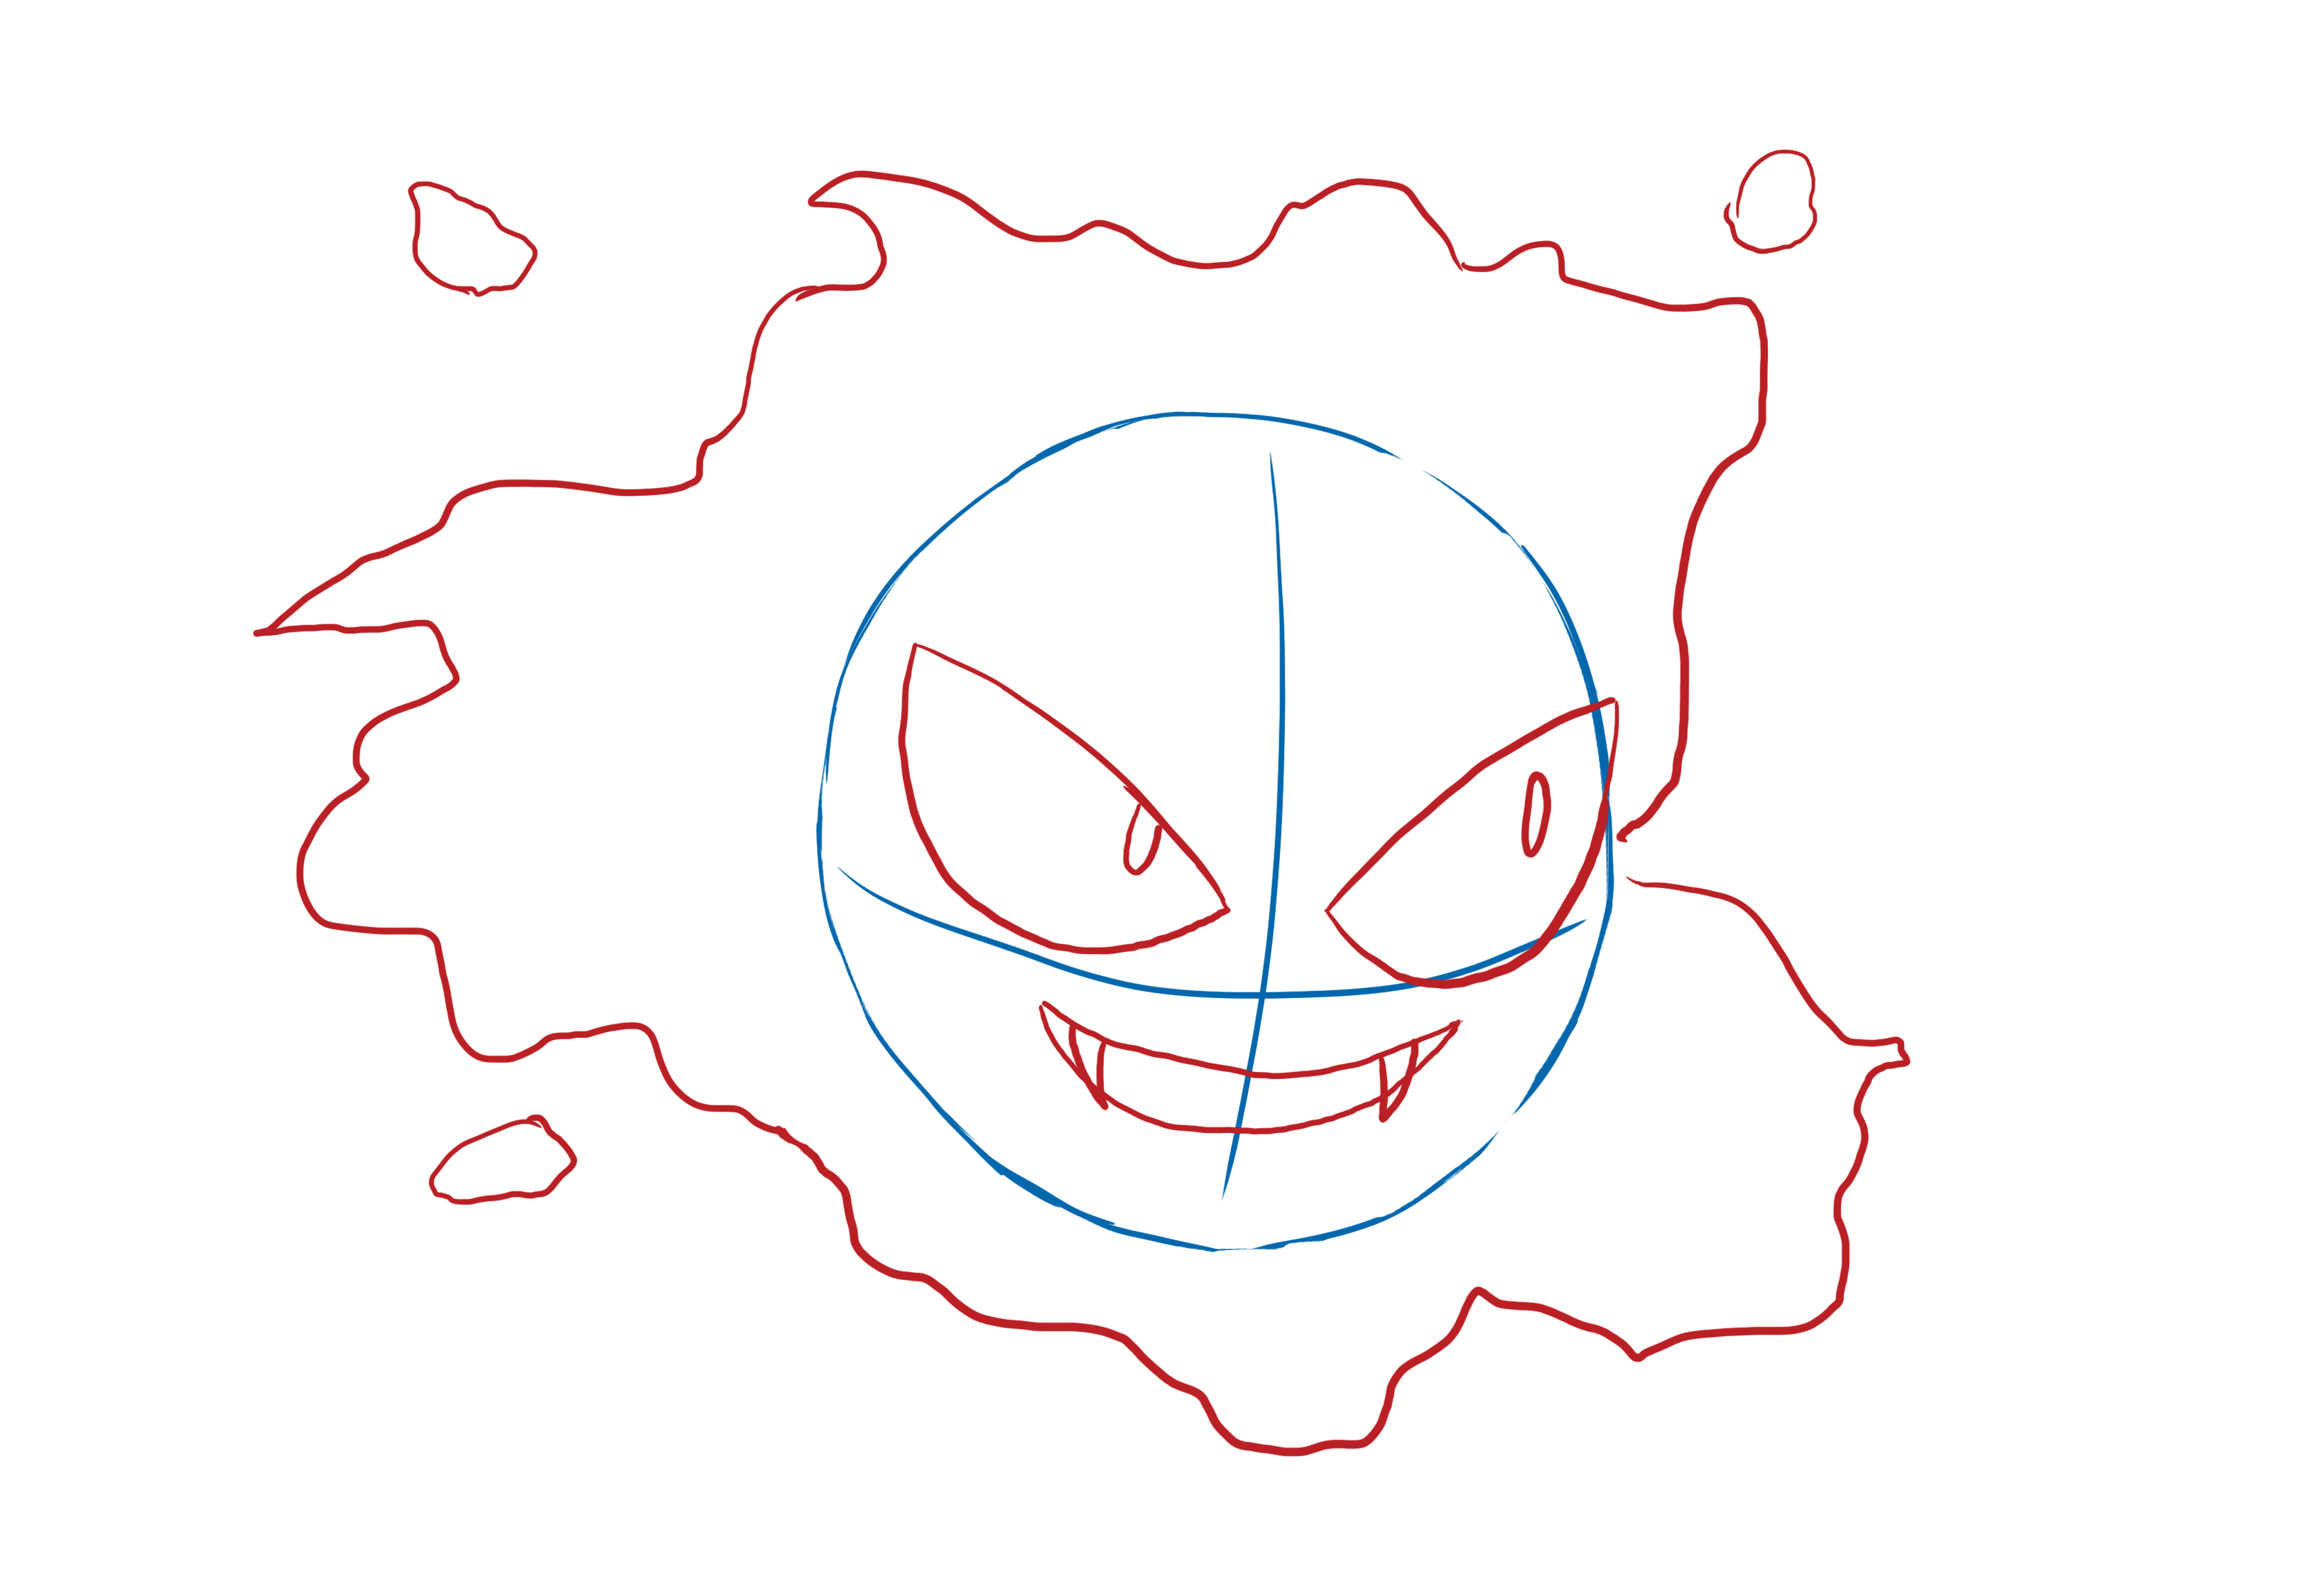
We're going to add the smoke that surrounds Gastly.
For this, I have no instructions to give you, it's up to you to feel it out! Smoke is variable and uncontrollable, so let your hand go and make irregular movements around Gastly.
Now that you have finished applying your base and details, you can go over them in black. Take this opportunity to erase the construction lines.
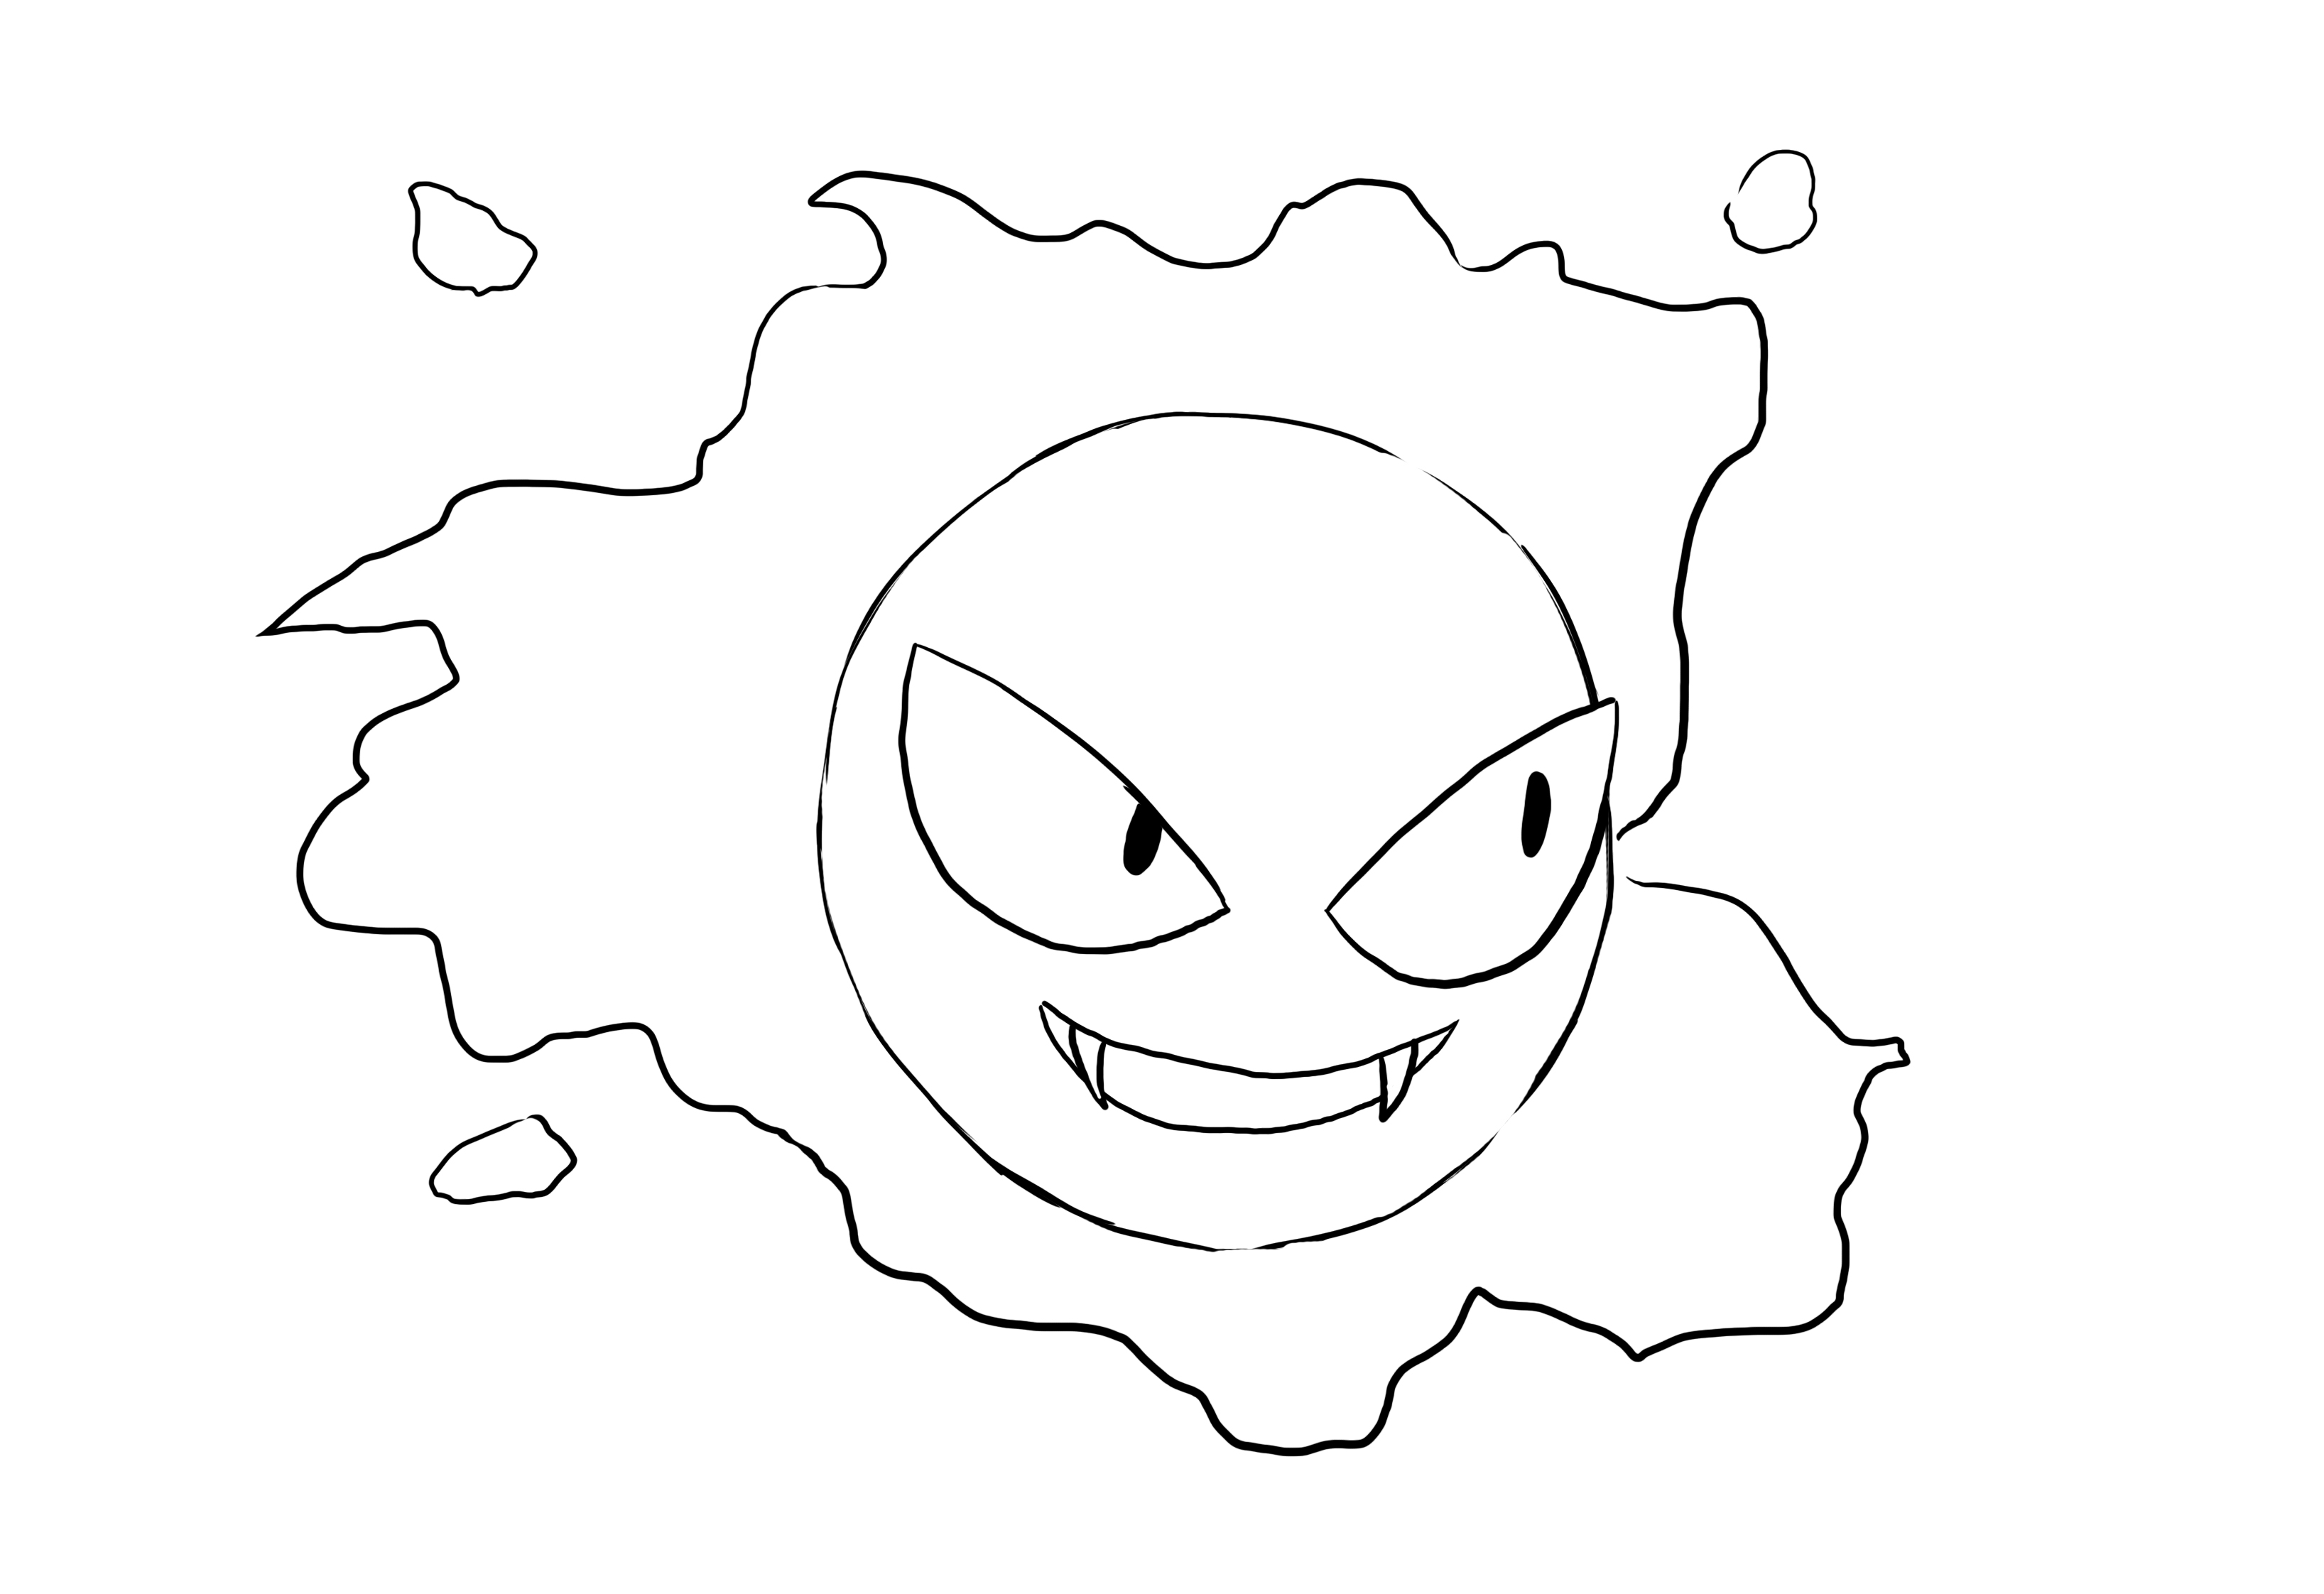
Once the lines are finished, you can proceed with filling them in.
Only the body of Gastly and its pupils need to be darkened. Then, if you wish, you can add hatching on the smoke to create a shading effect.

Your drawing is now finished, we can move on to Caterpie!
DRAWING THE POKEMON CATERPIE
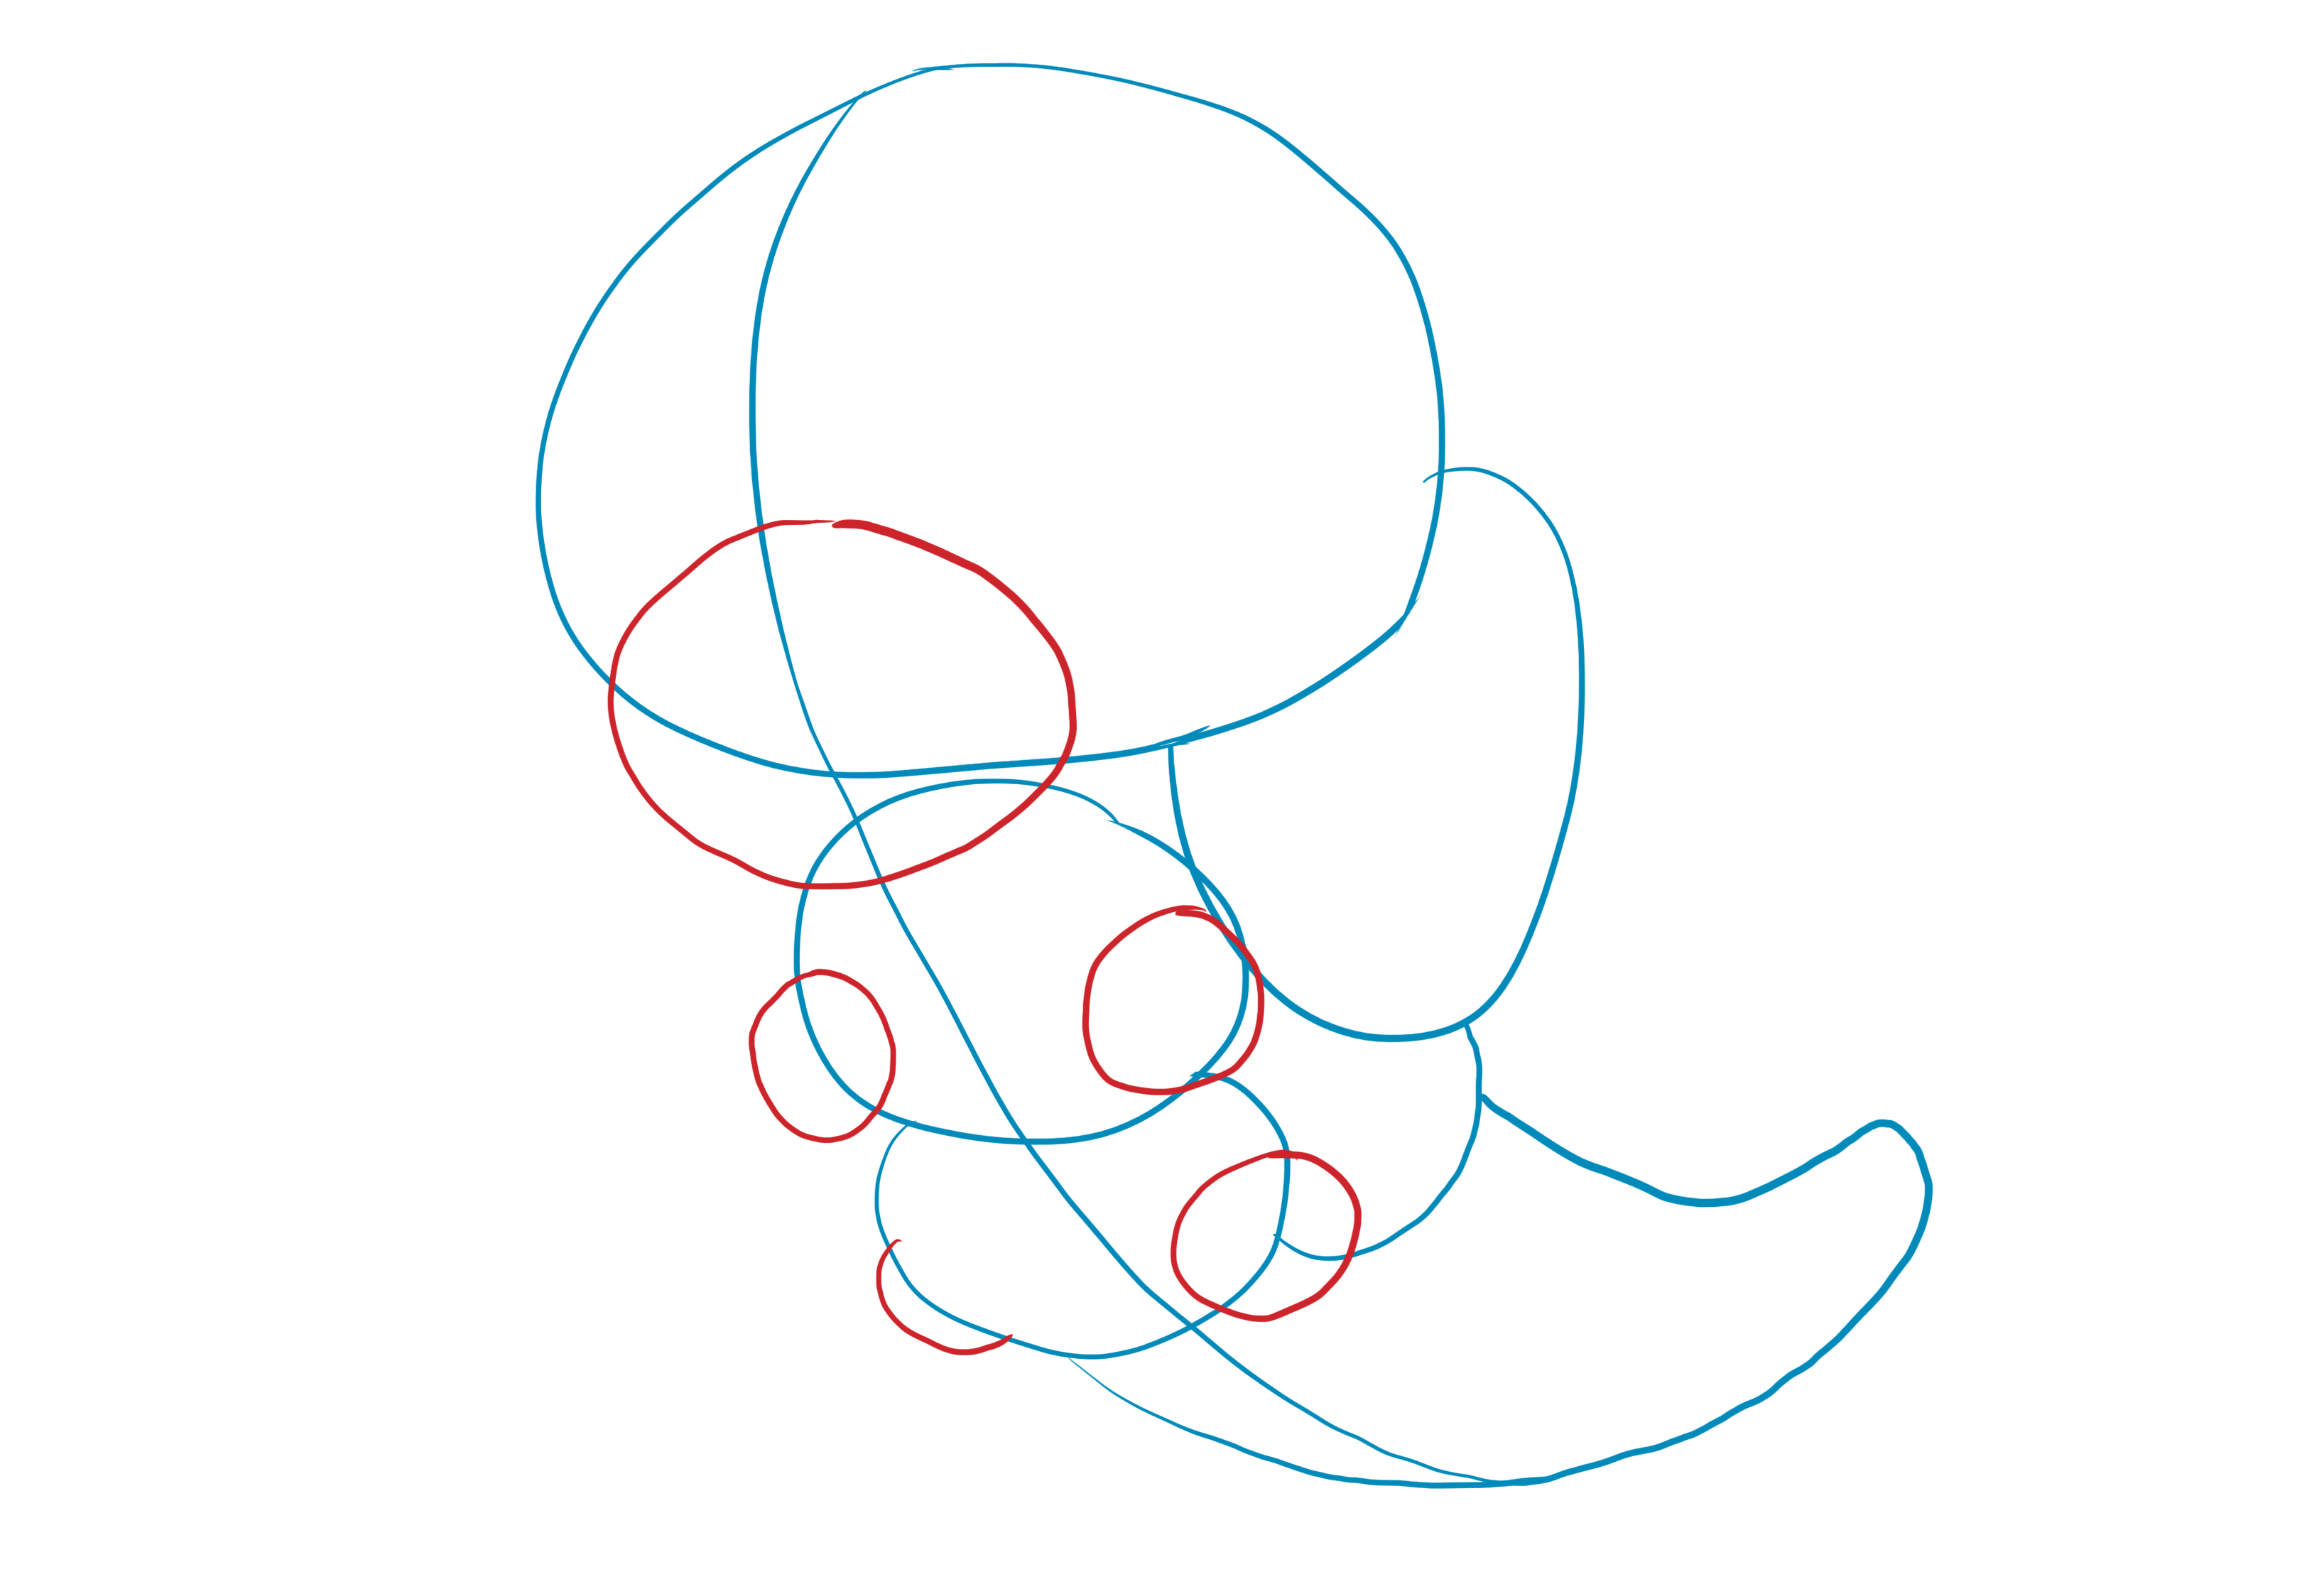
You will start Caterpie by drawing a horizontally stretched circle for the head.
Then you will draw a slightly curved line that separates the circle into two.
Next, you will draw two increasingly smaller circles below the first one, while following the curve.
We will continue with our circles, drawing them on the side.
Draw one close to the head first, then another smaller one just below.
To finish Caterpie's body, you will need to draw a kind of stretched and curved "U" like the end of a banana.
COMPLETE THE DETAILS OF THE CATERPIE DRAWING
Now that the base of the body is done, we can move on to the missing details such as the mouth, legs, eyes, etc.
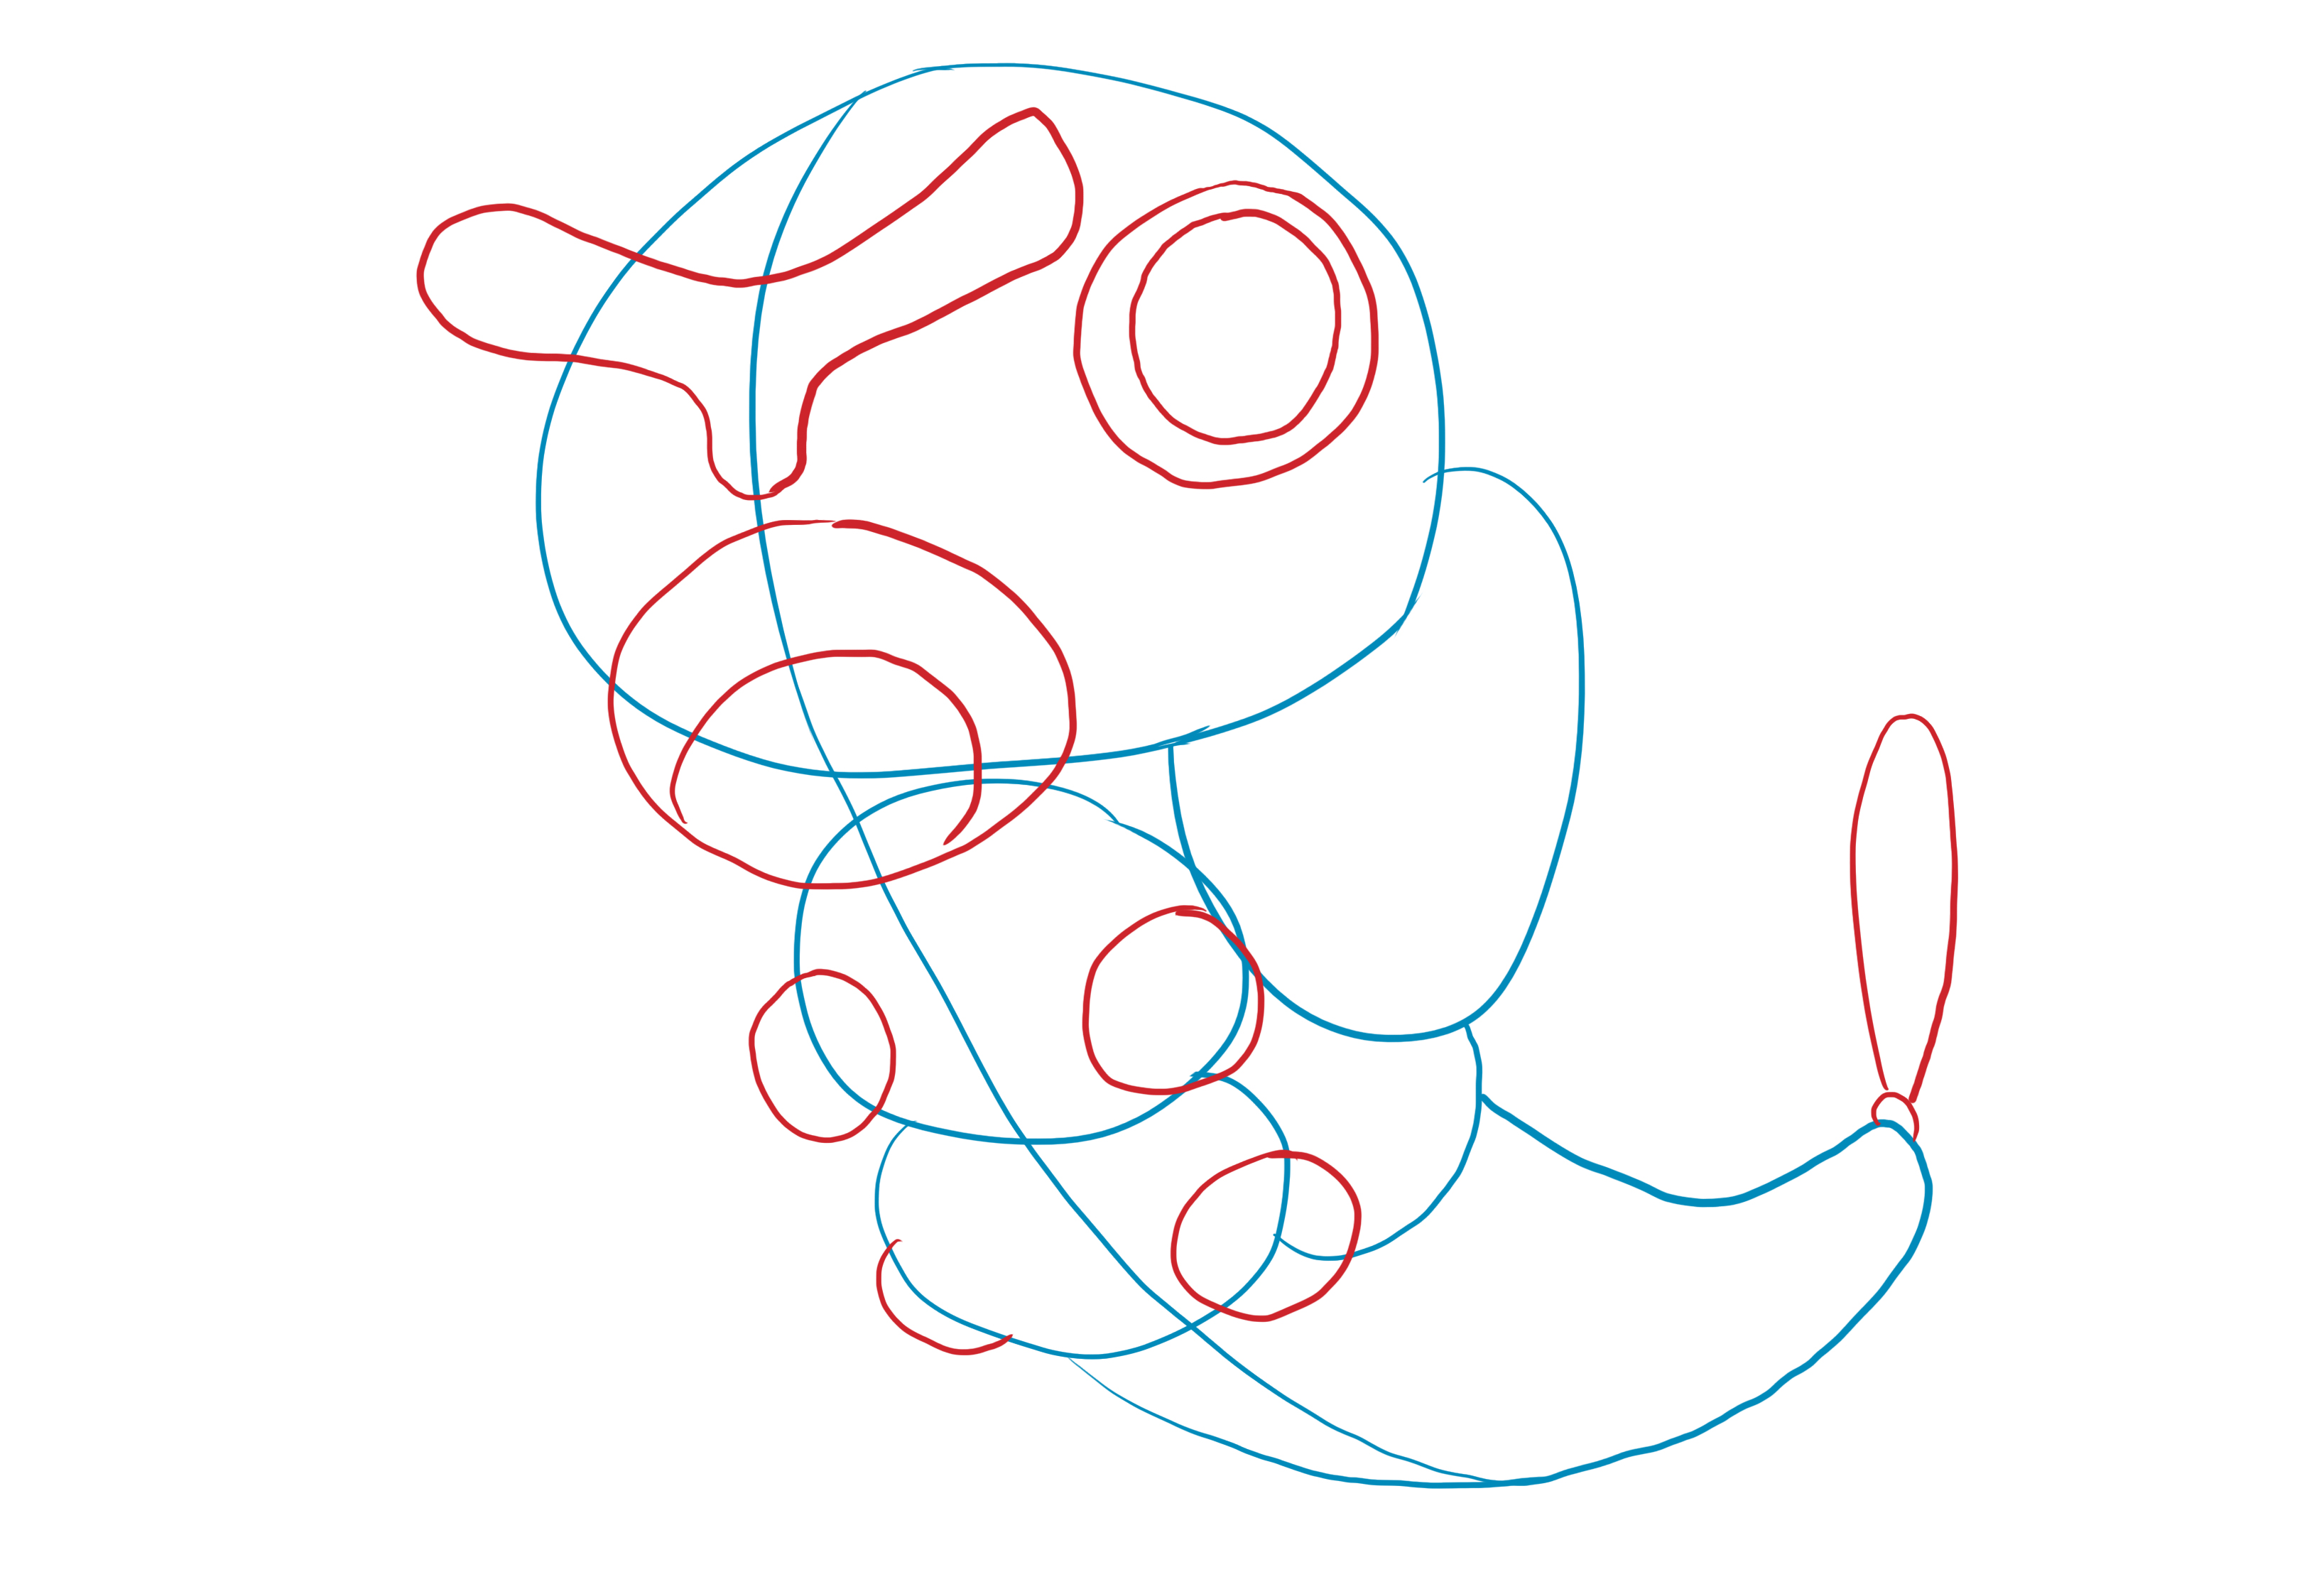
We will start by placing part of the mouth and the legs.
For the mouth, draw a circle that overflows both on the head and on the circle just below.
For the legs, simply make circles at the ends of the body.
Add a smaller circle inside the mouth to finish it.
Draw its antennas, which form a horizontally stretched Y, with rounded angles and curves.
For the eye, draw two circles, one large and one smaller.
And finally, add a well-stretched oval at the end to make the tail.
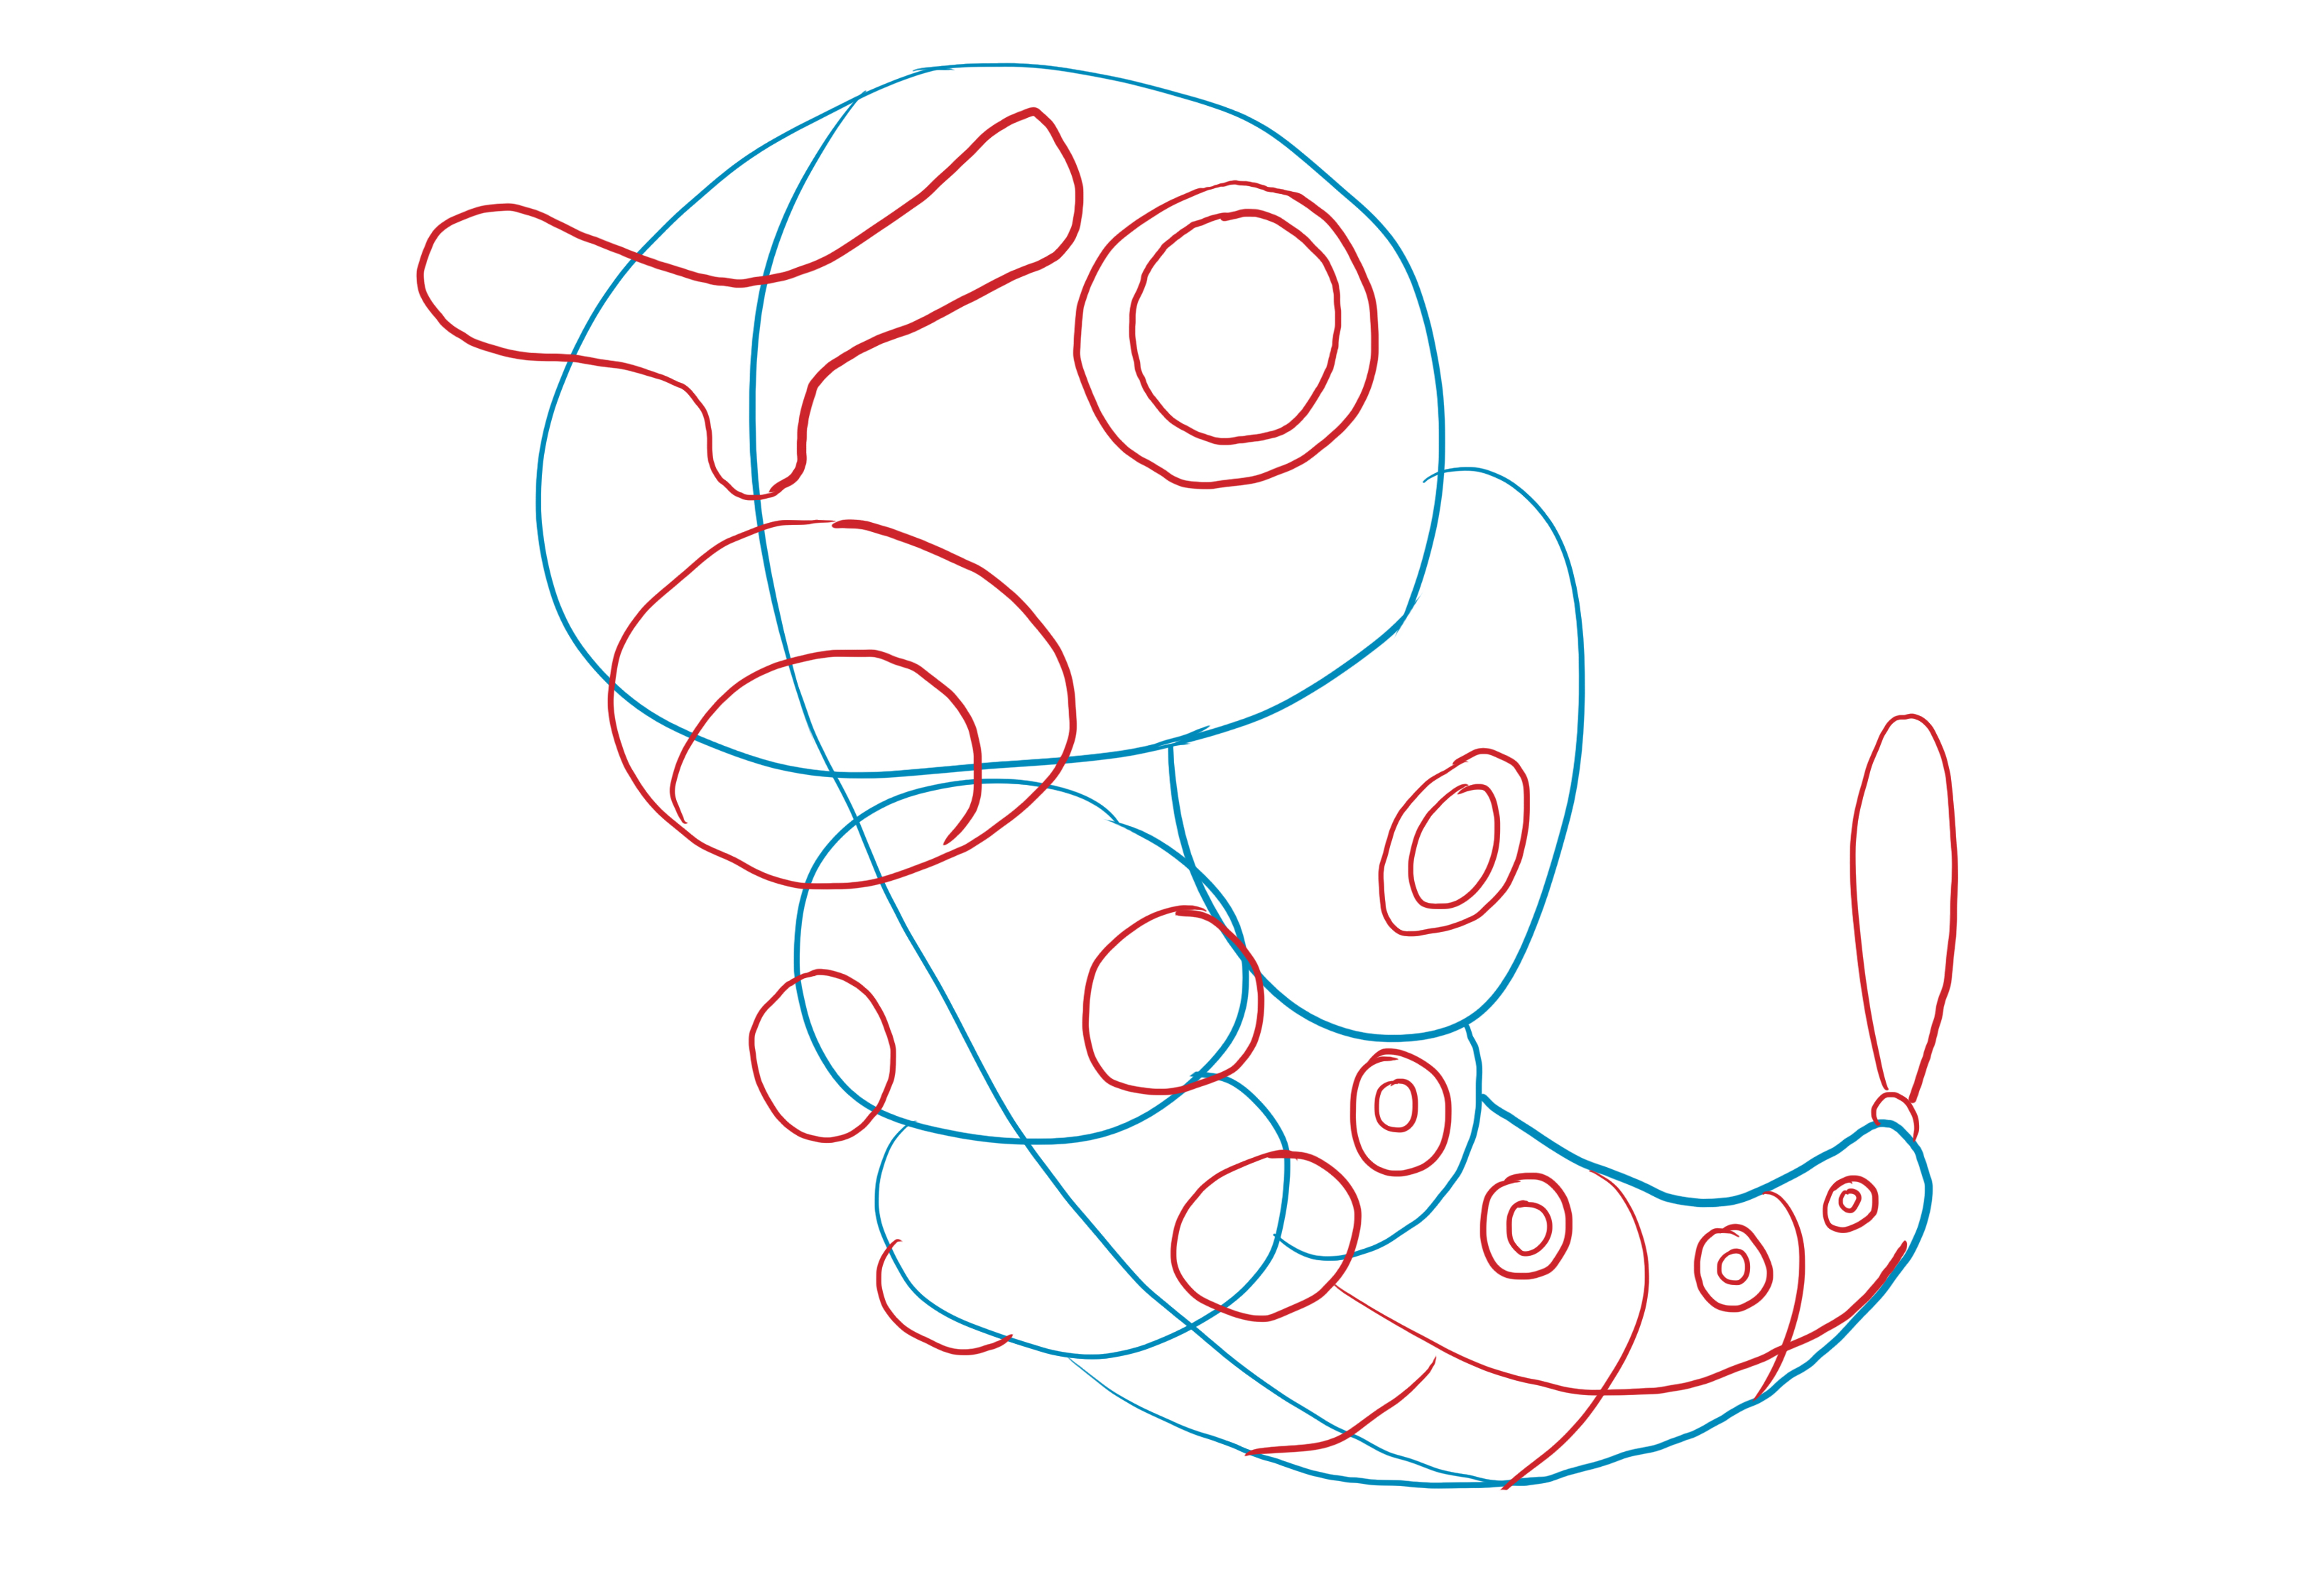
To finish with the details, we will add the belly and the designs on its body.
For the belly, simply add curves to divide it into 4 parts.
The drawings are circles on each piece of the body.
You can now move on to inking. Go over all your lines in black and erase the construction lines.
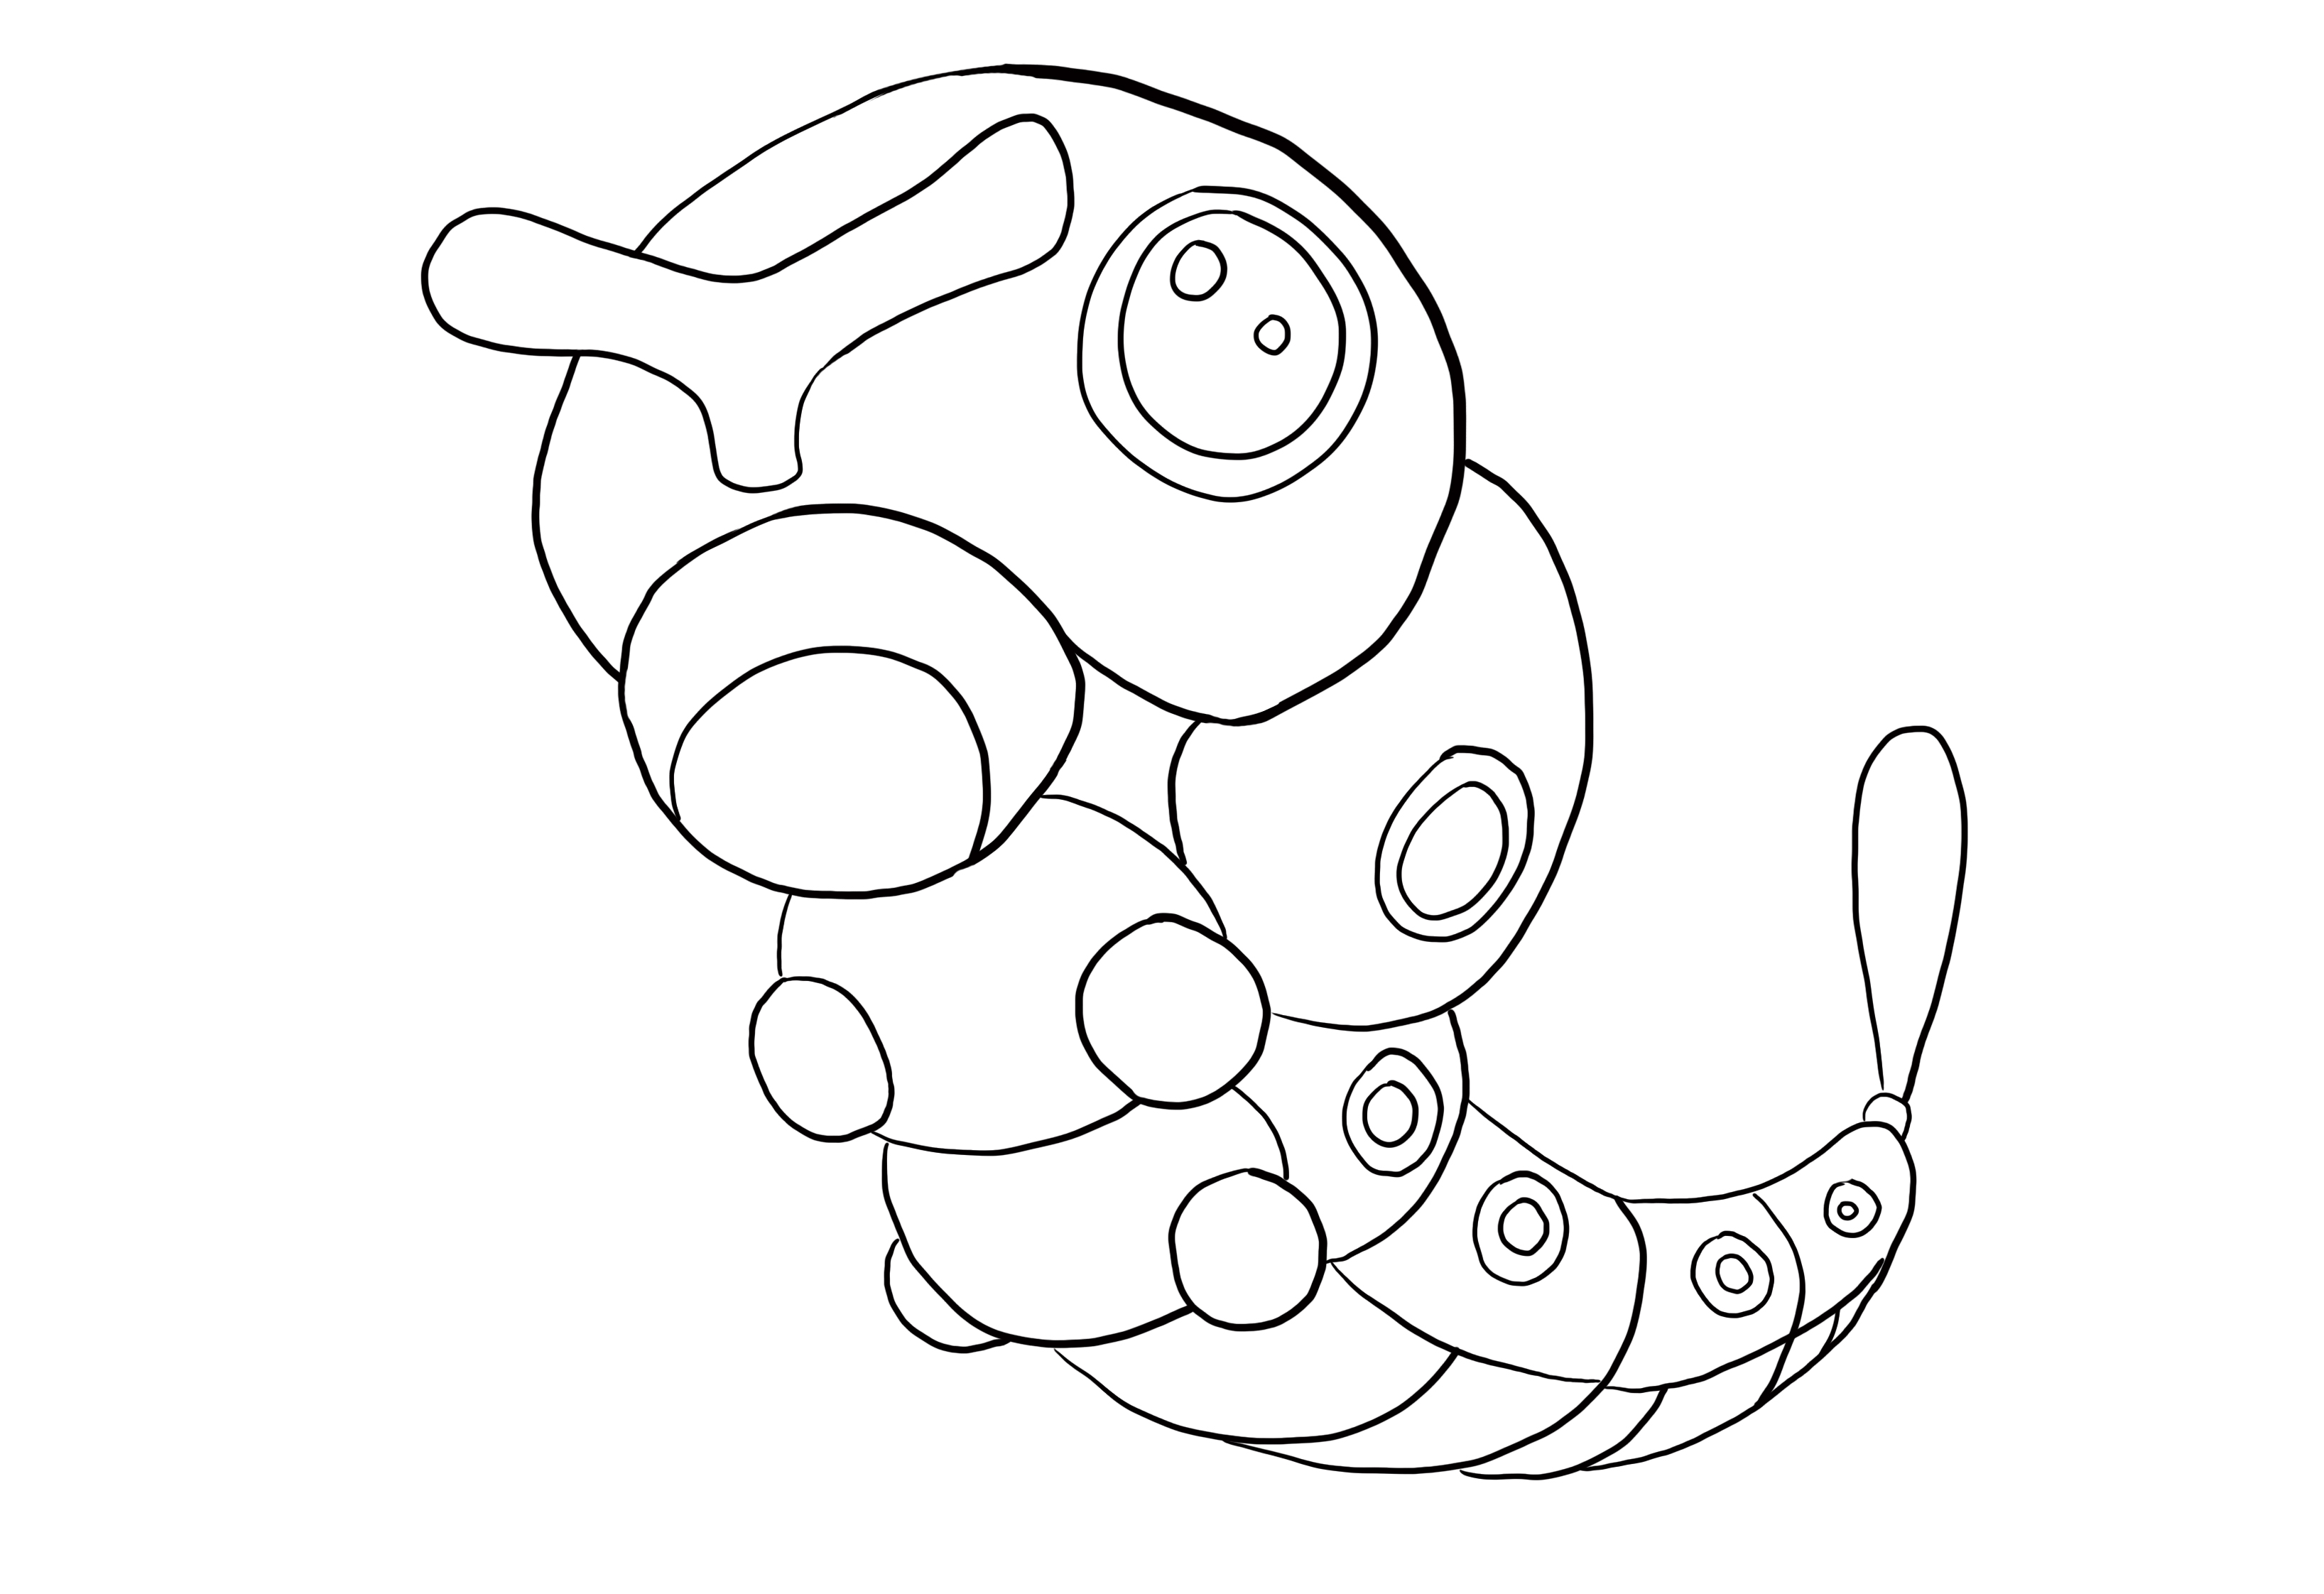
Finally, you can fill in the eye and the diamond underneath the head in black and add hatching to the shaded areas.
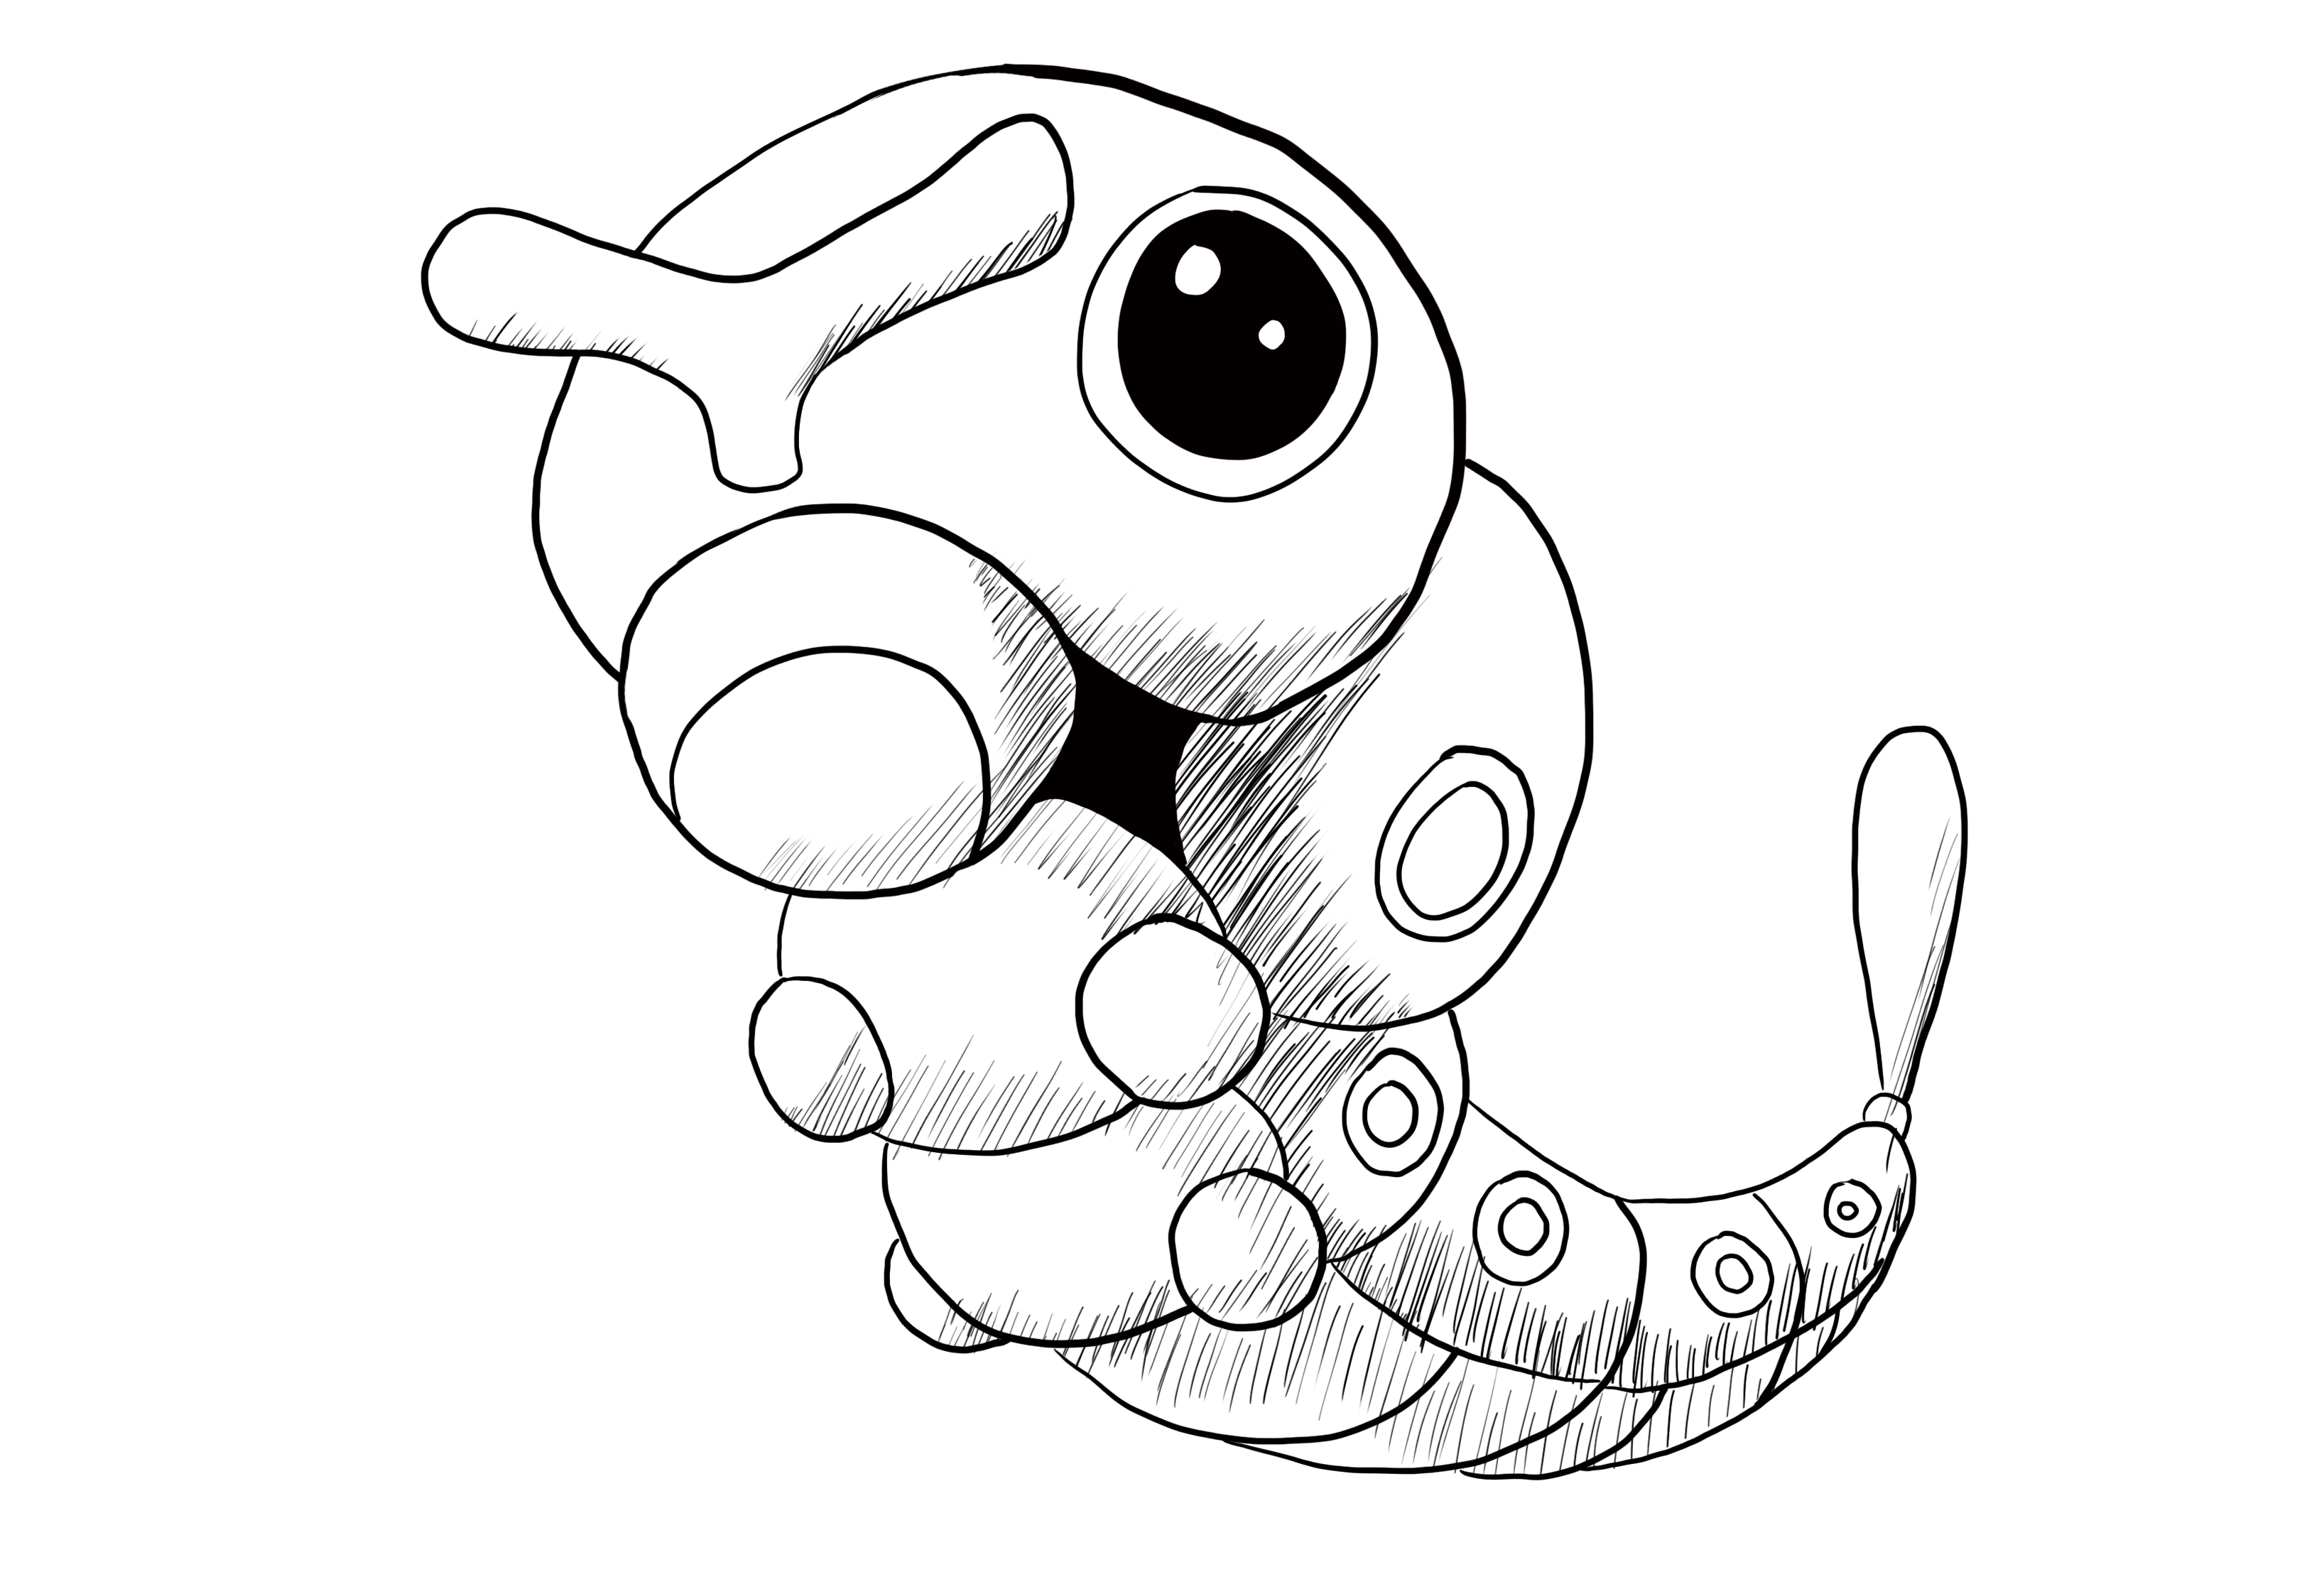
You've finished your Caterpie!
We will now move on to the last and most complicated Pokémon in this article: Vaporeon.
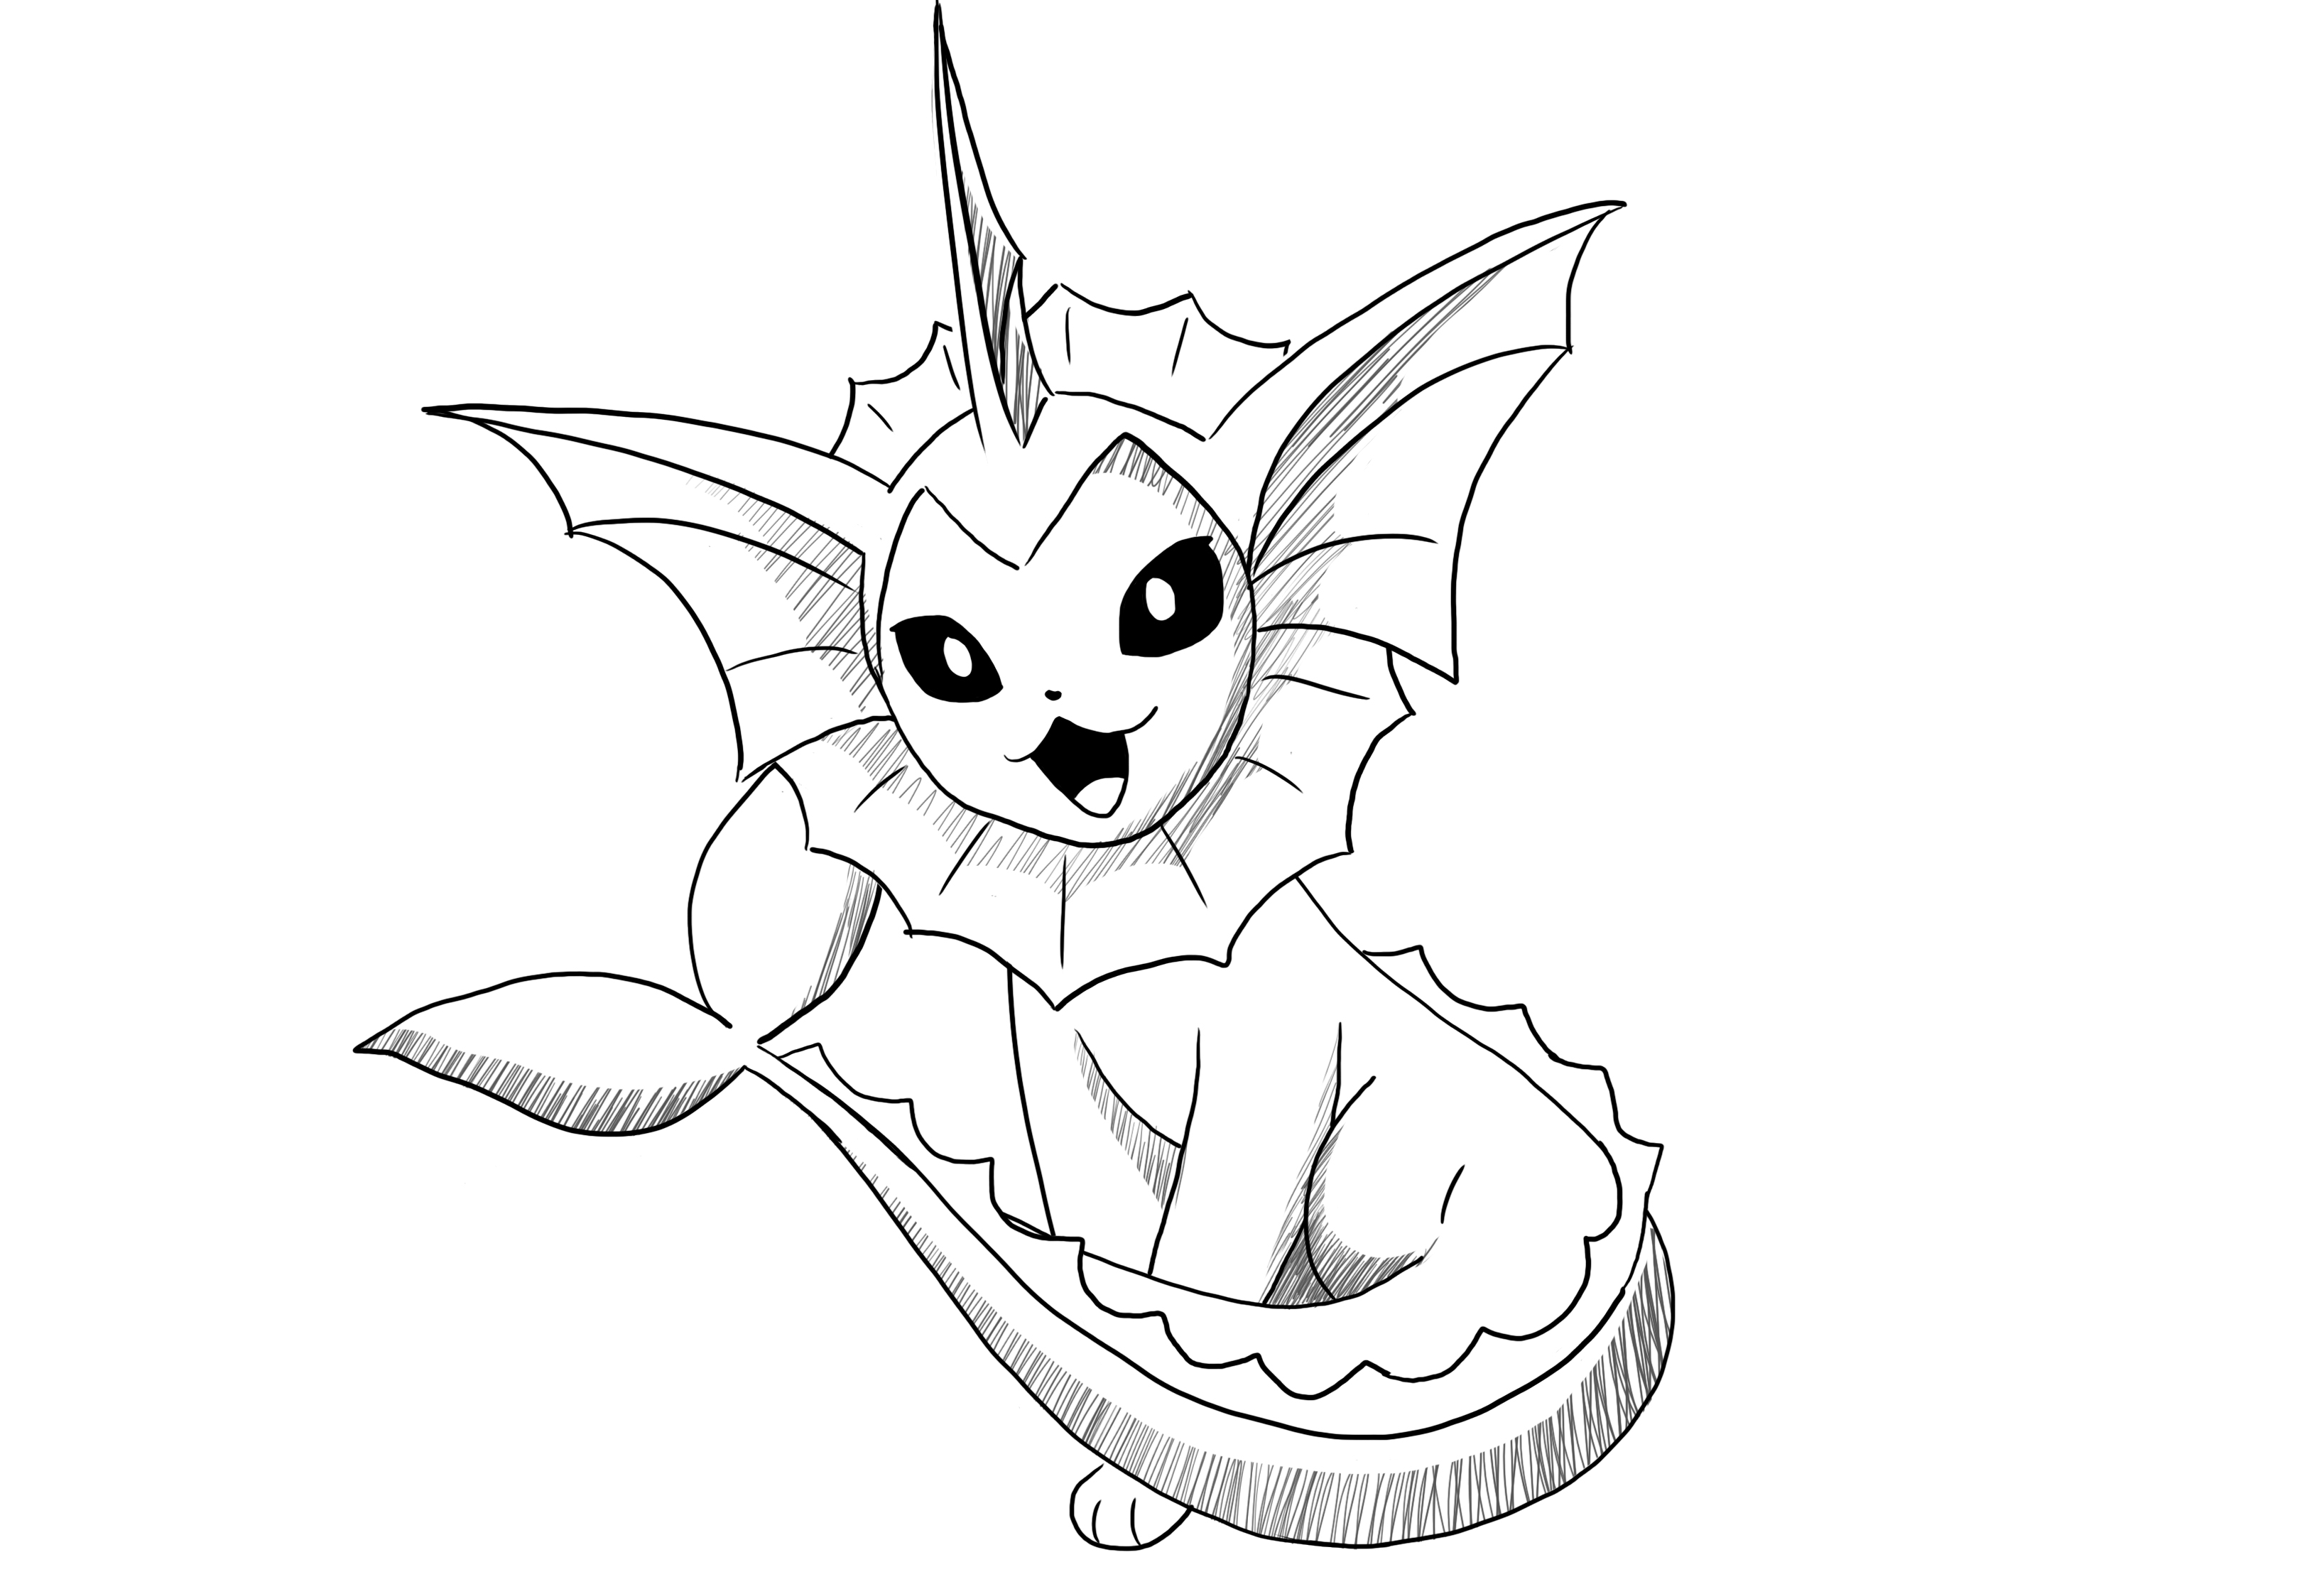
DRAWING THE POKEMON VAPOREON
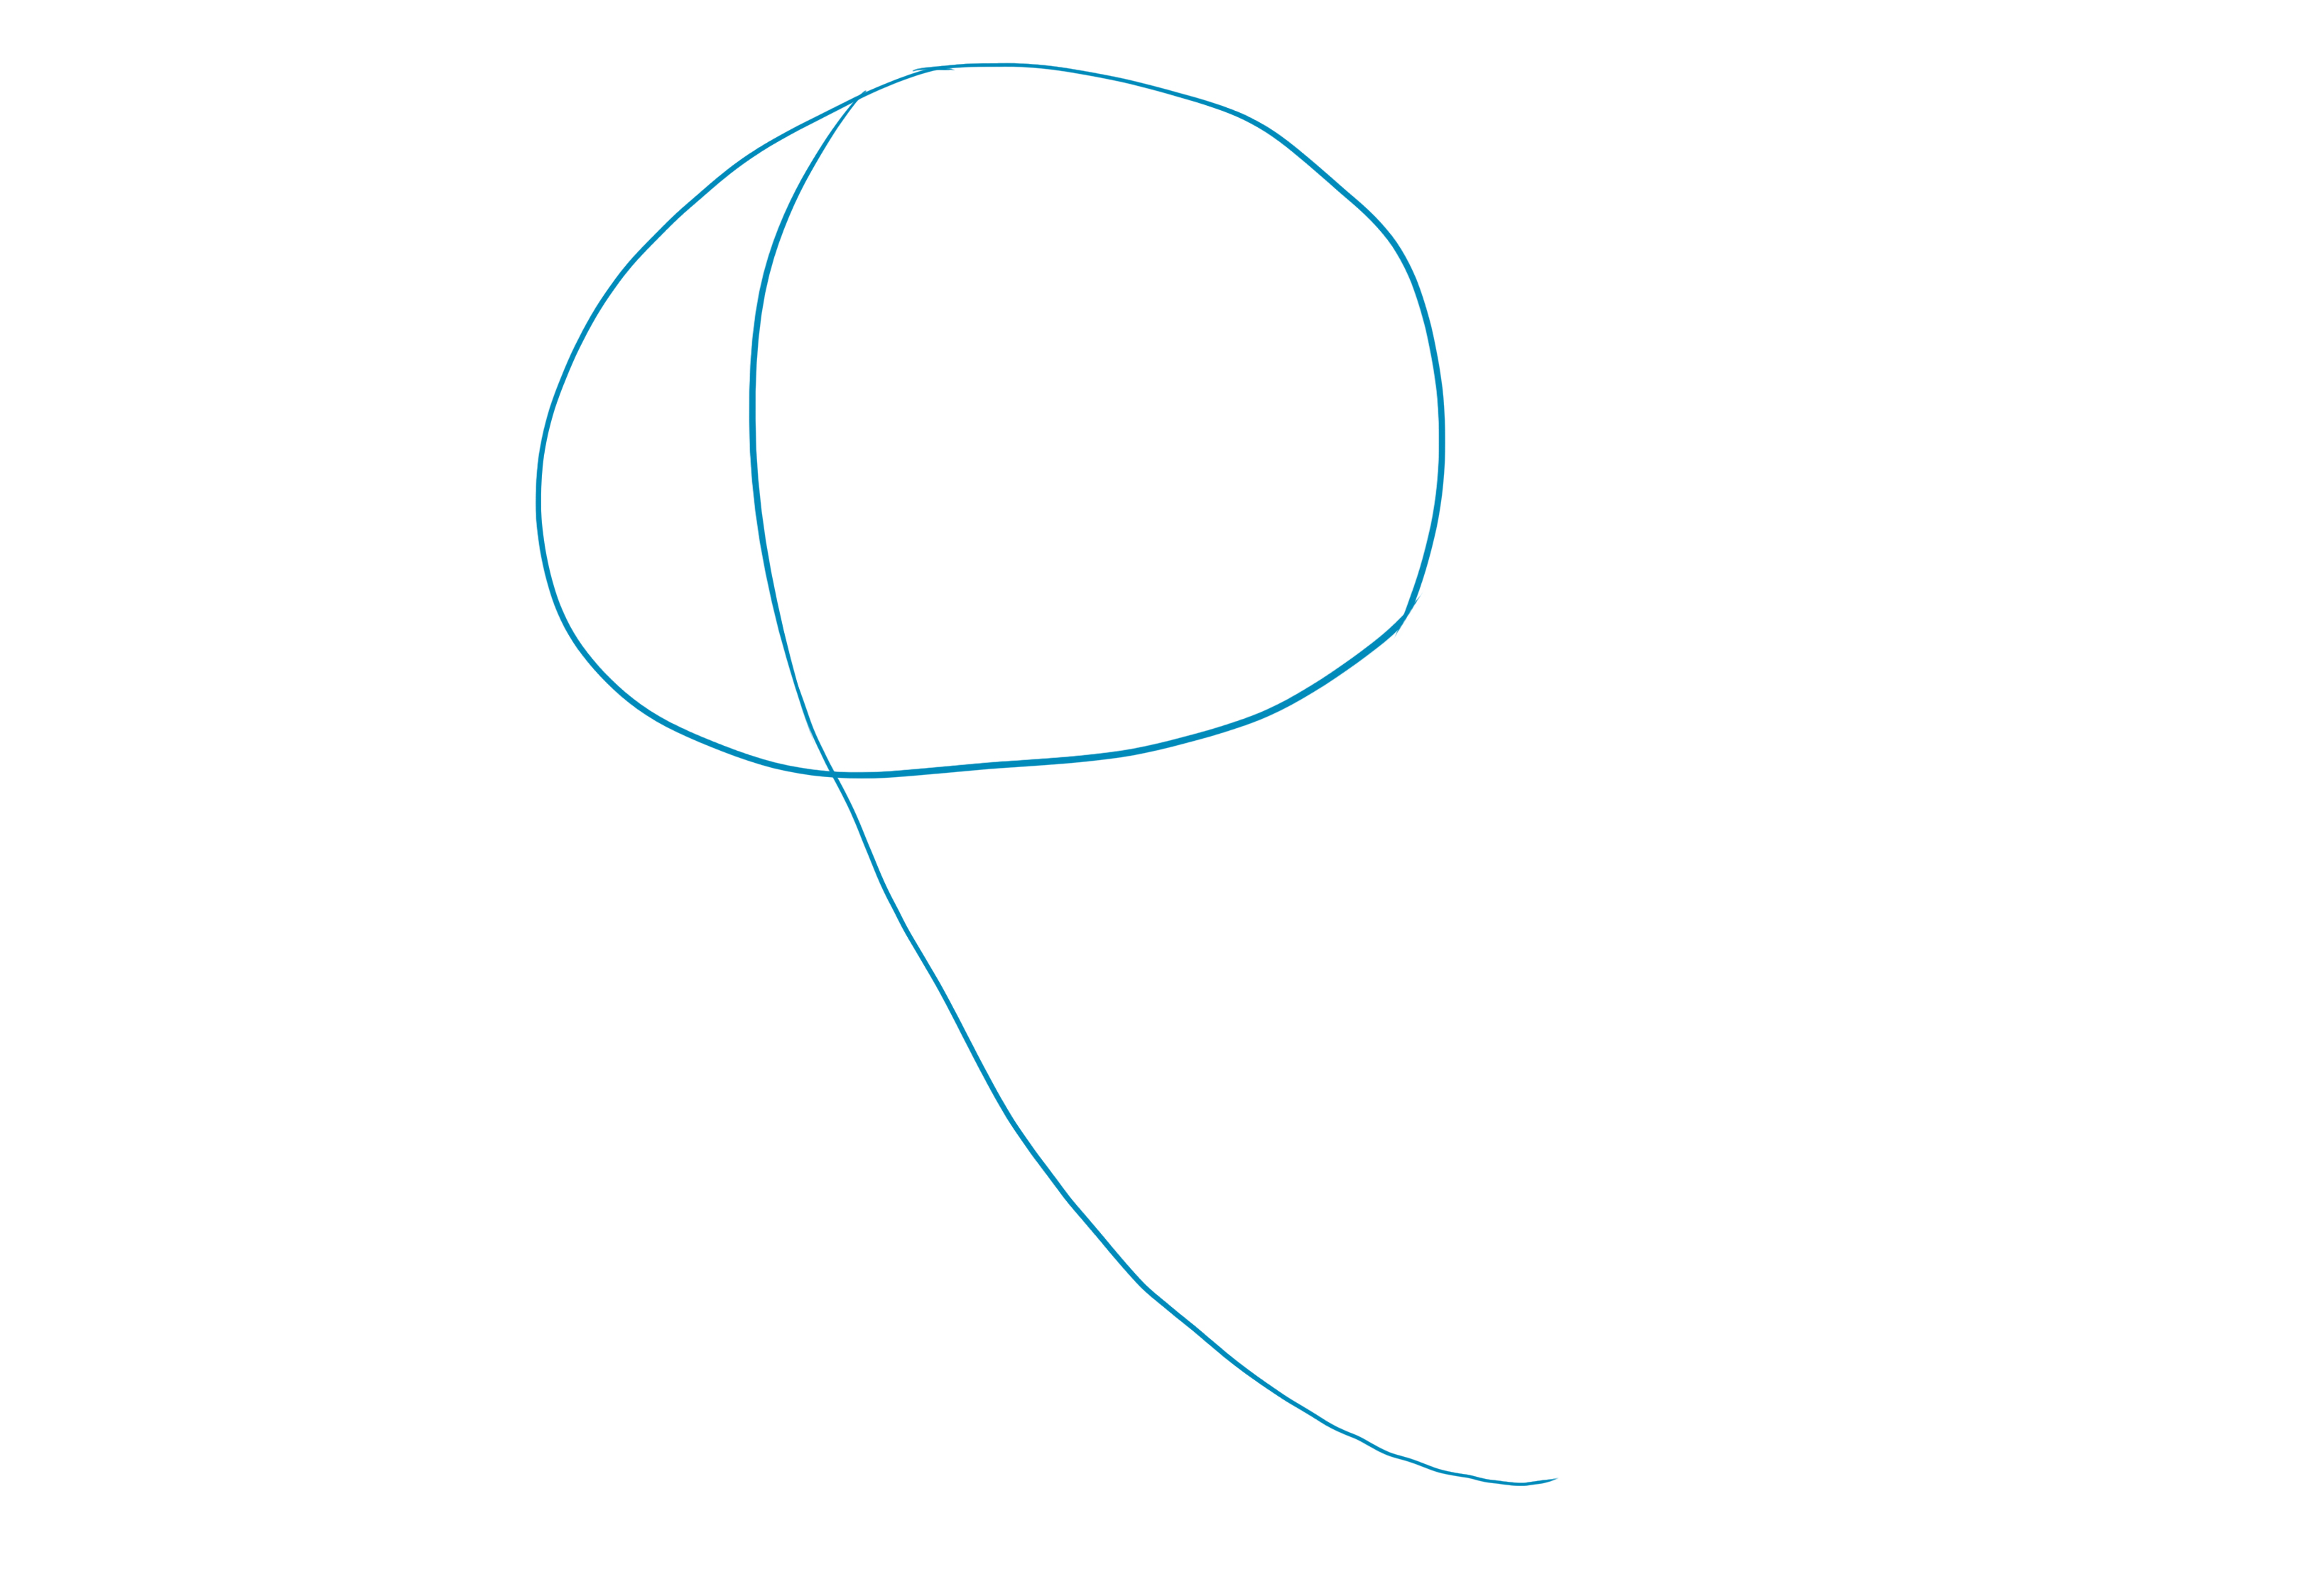
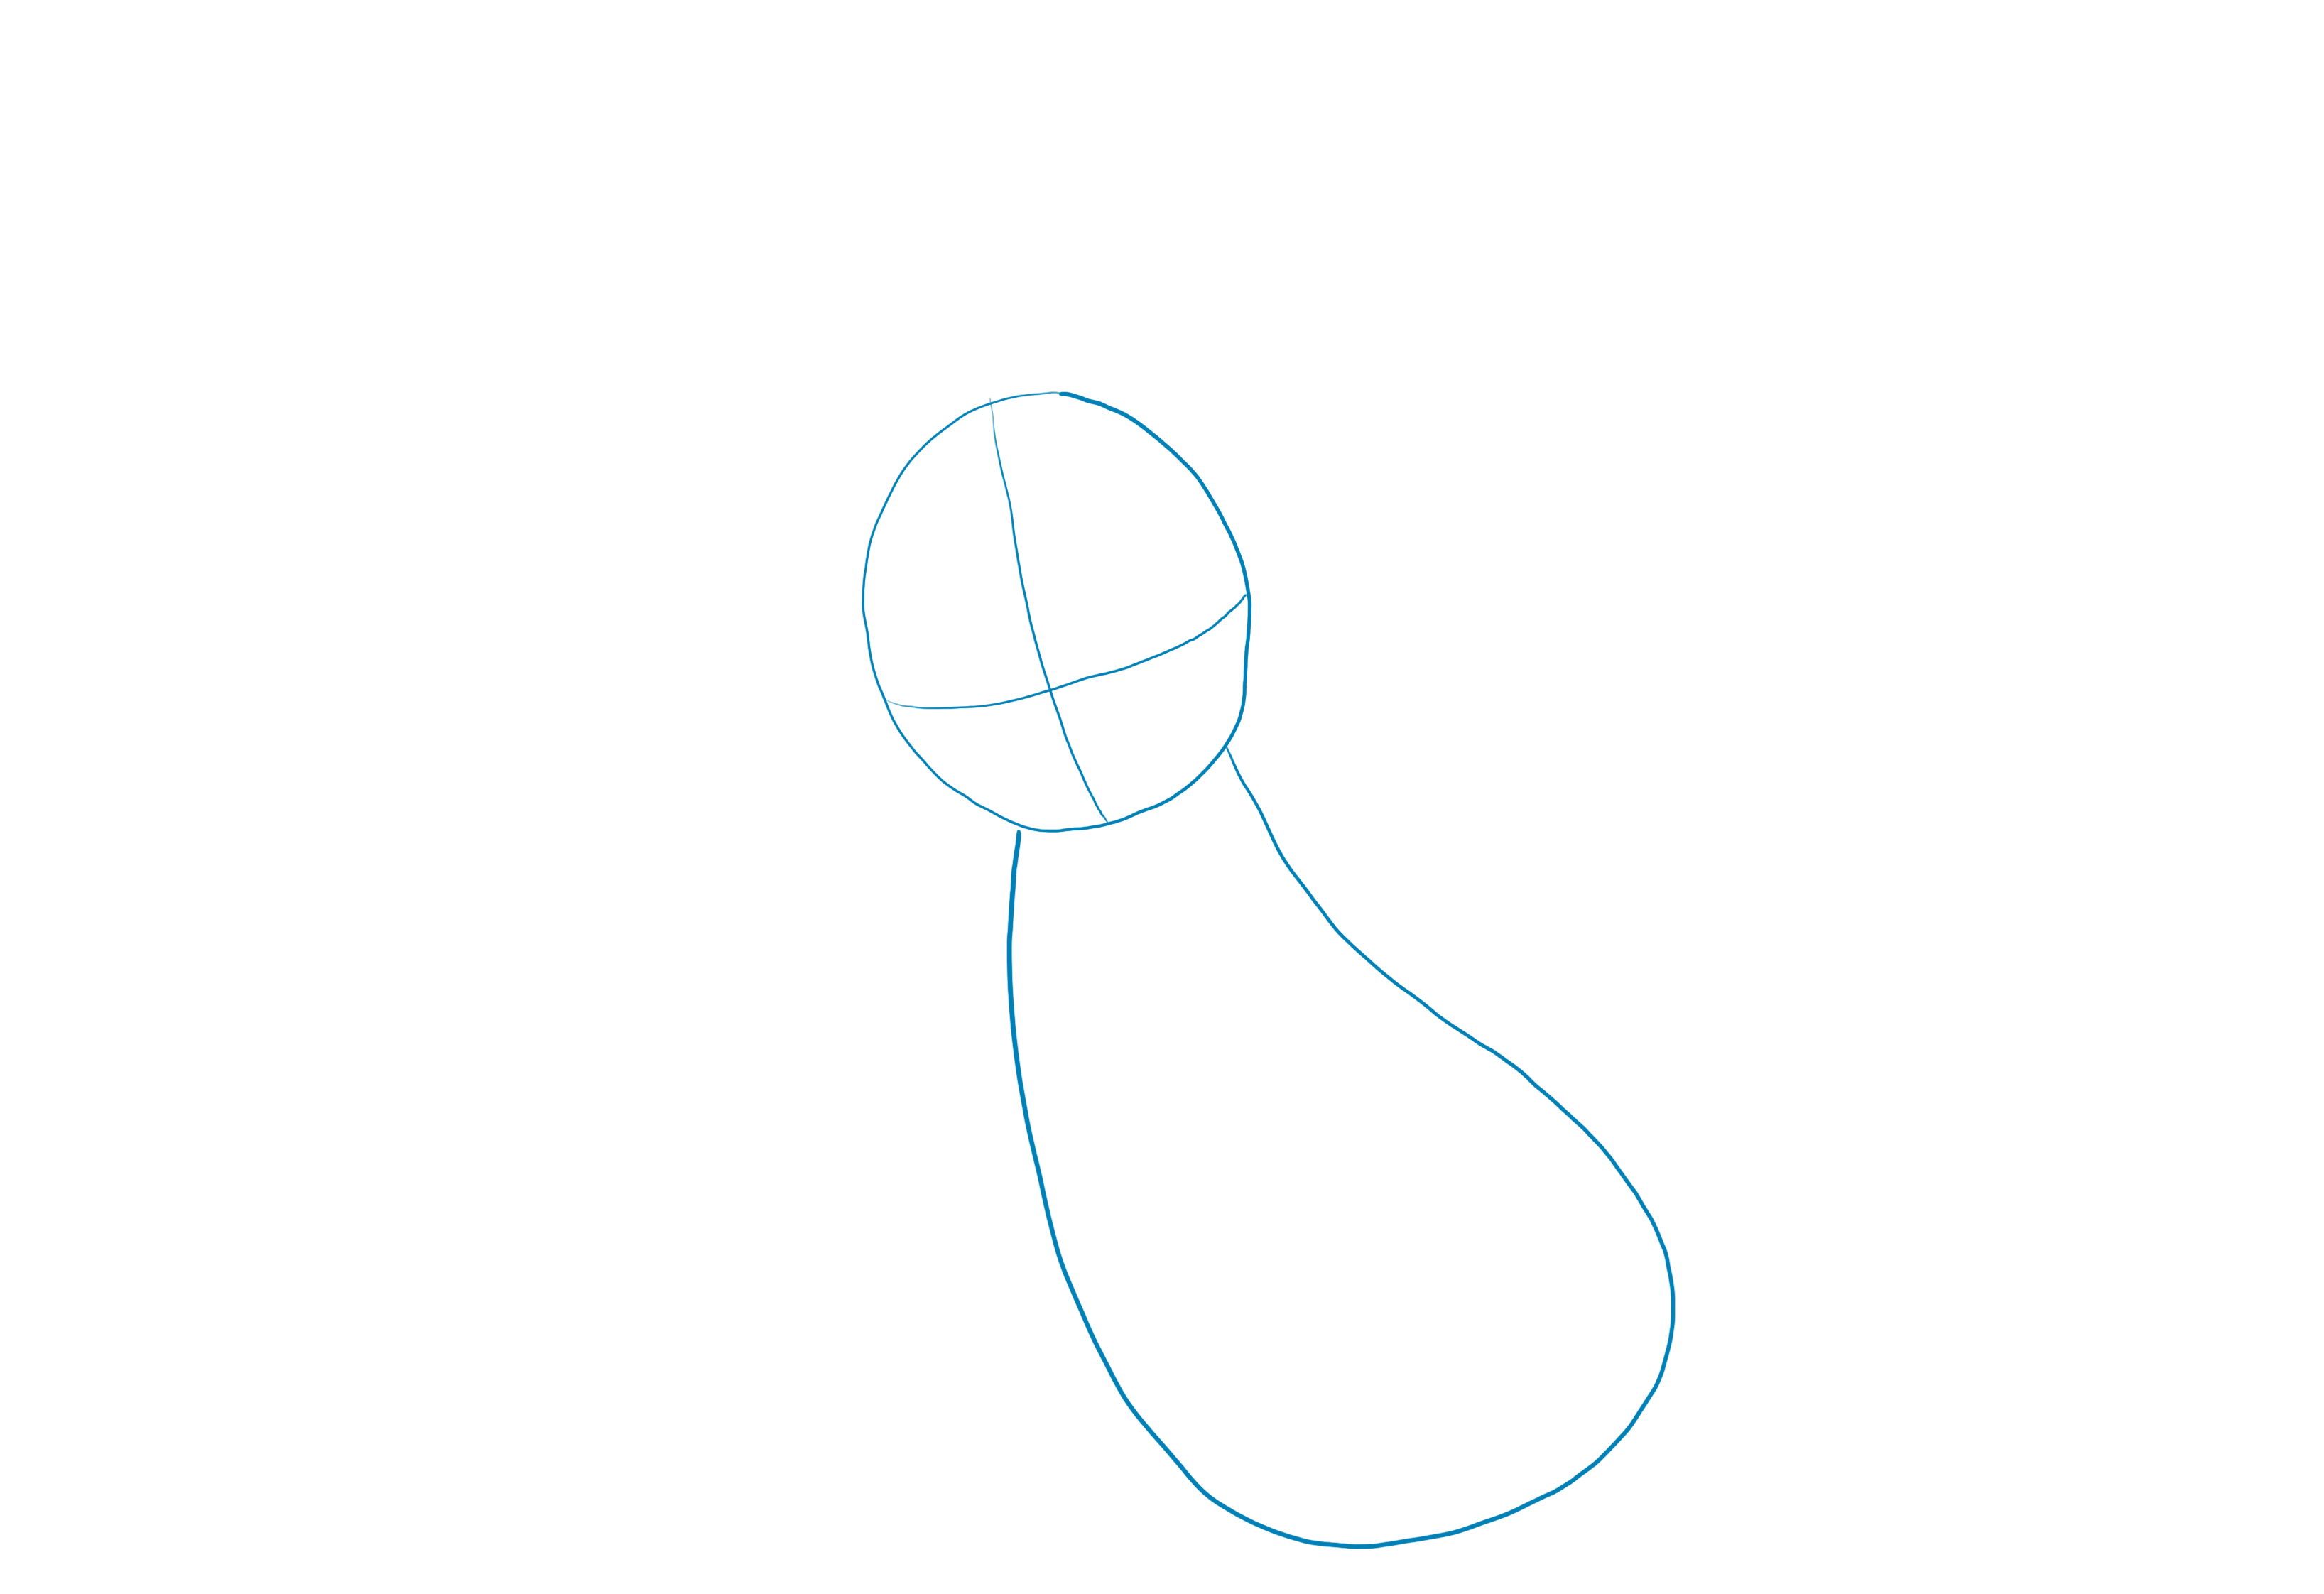
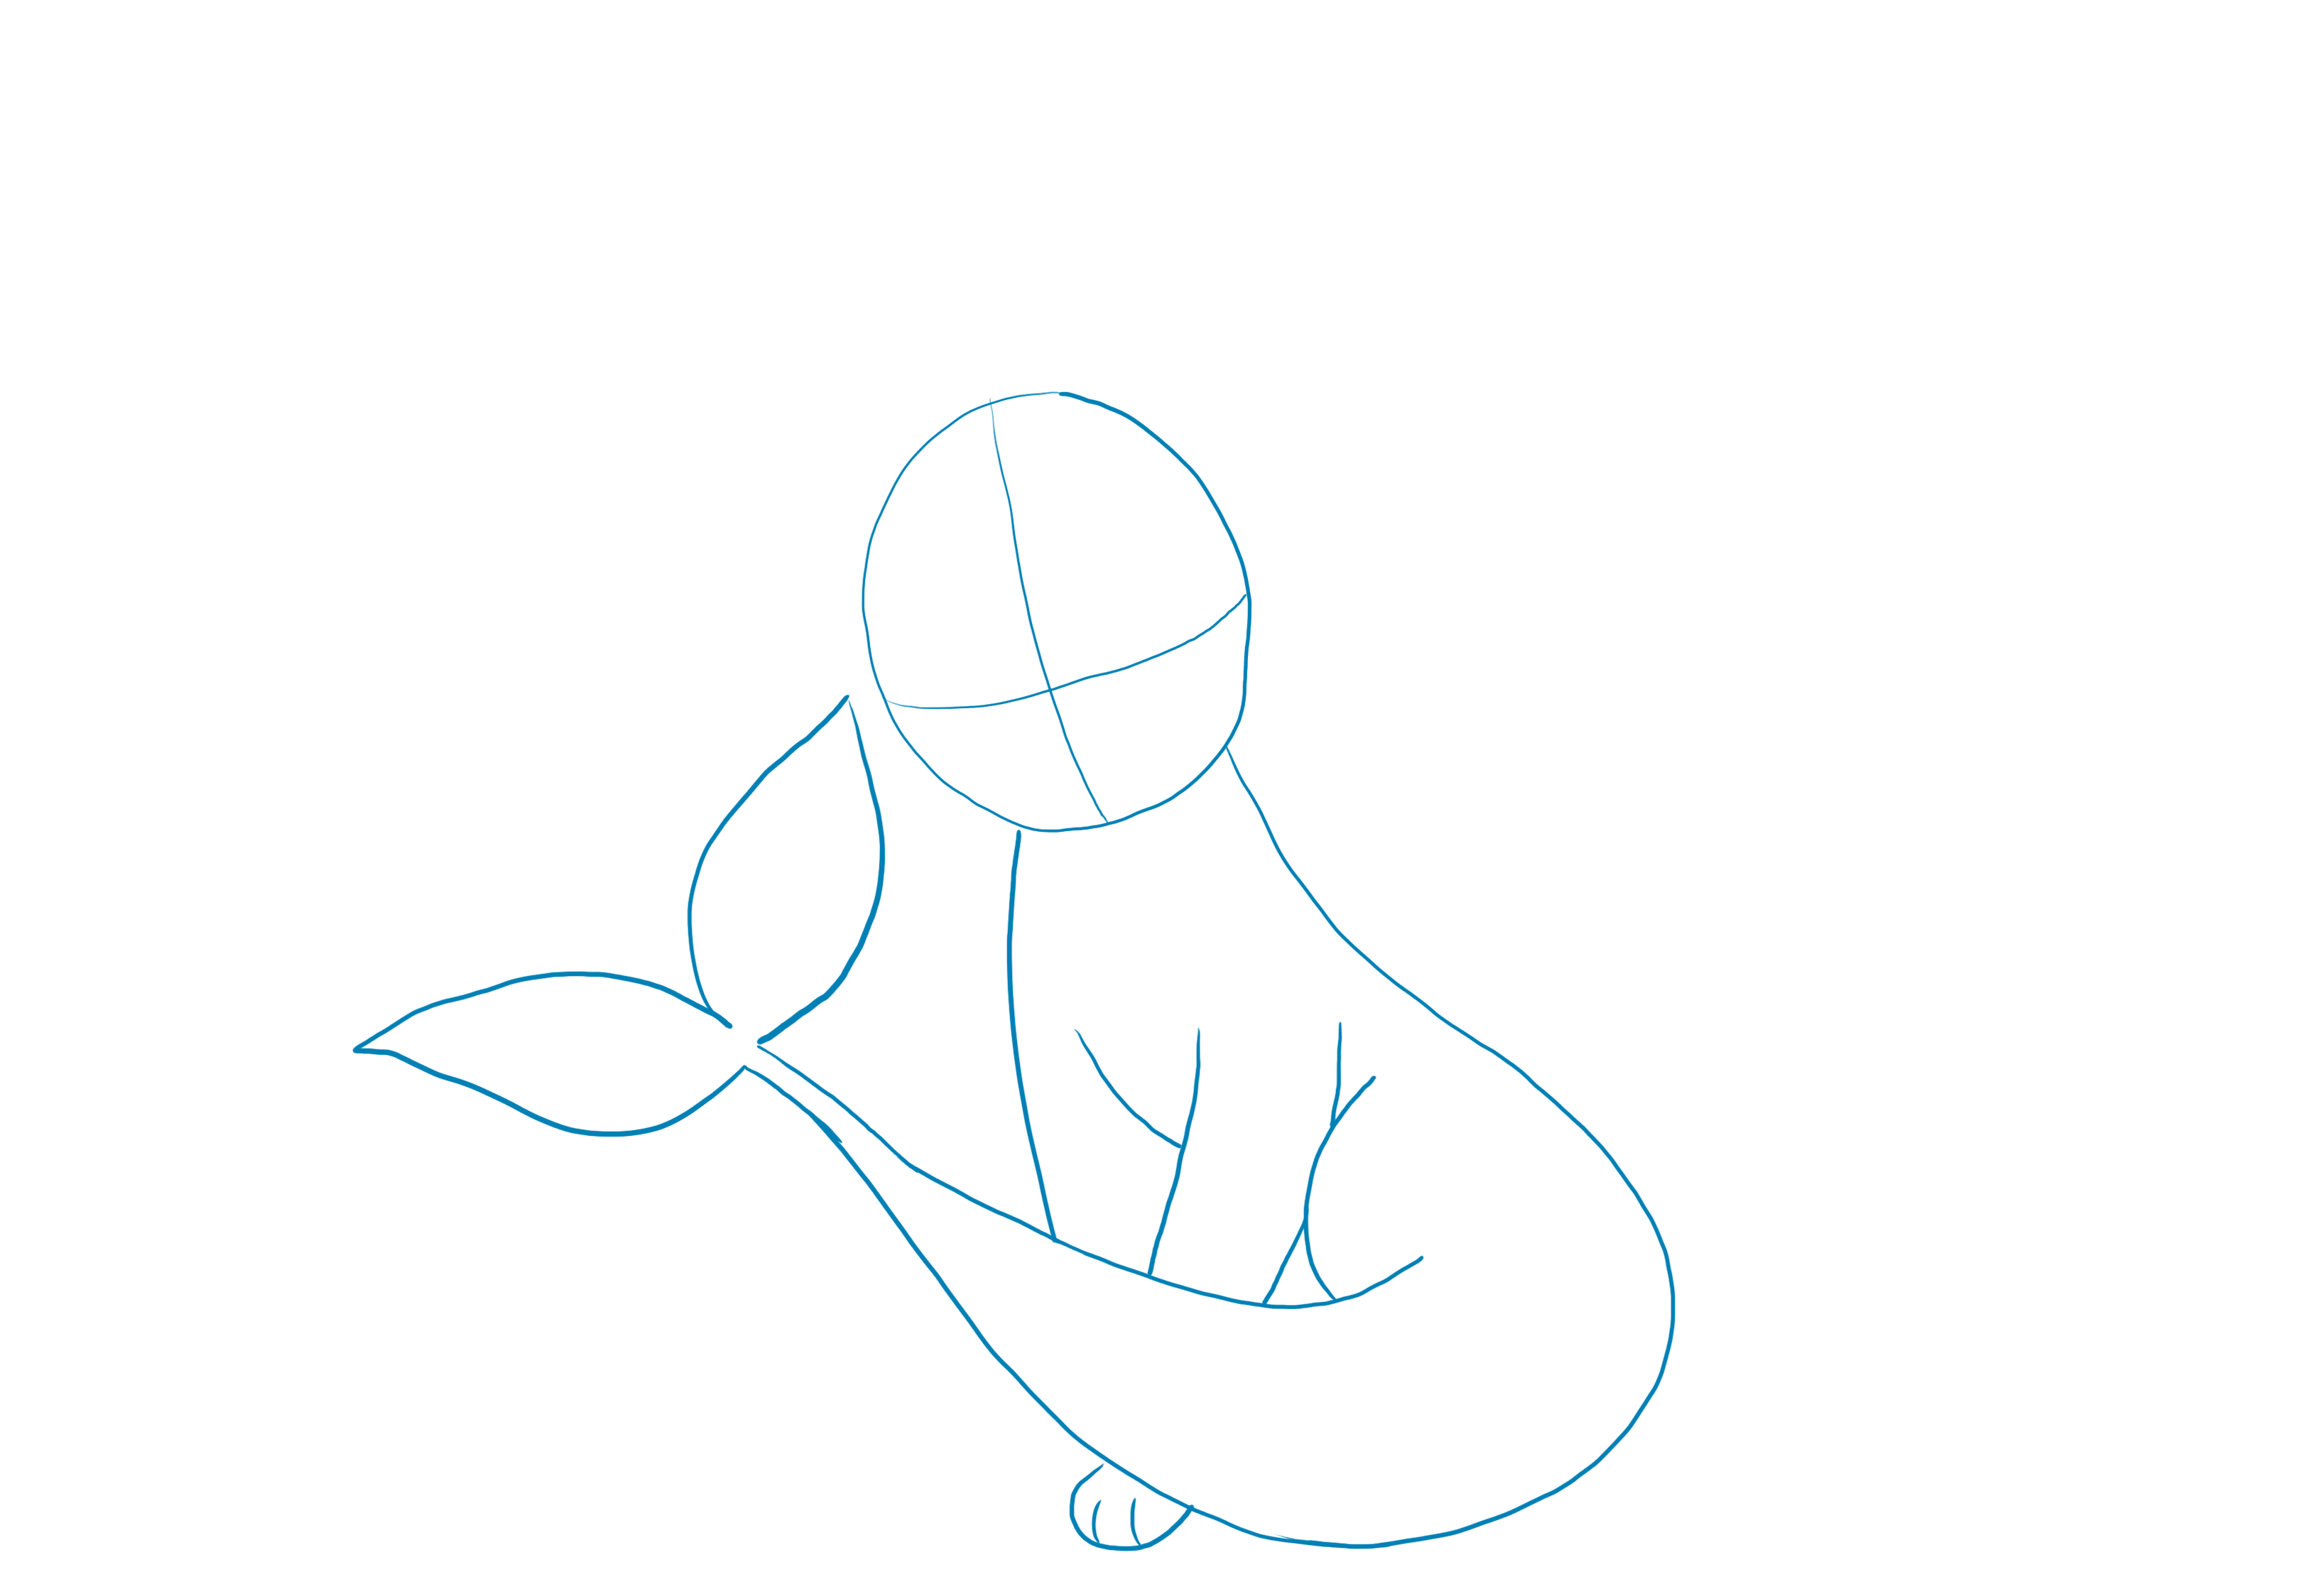
As with the previous Pokémon, you will start by drawing a circle for the head.
Divide it into 4 parts by drawing a horizontal line and another vertical line. The intersection of the two lines should give you the position of the nose.

Once the head is drawn, you will need to draw the base of the body.
To draw it, shape it like a potato.
Start on one side of the head, go down making a rounded shape, arrive at the bottom, round it off, then go back up to connect everything on the other side of the head.
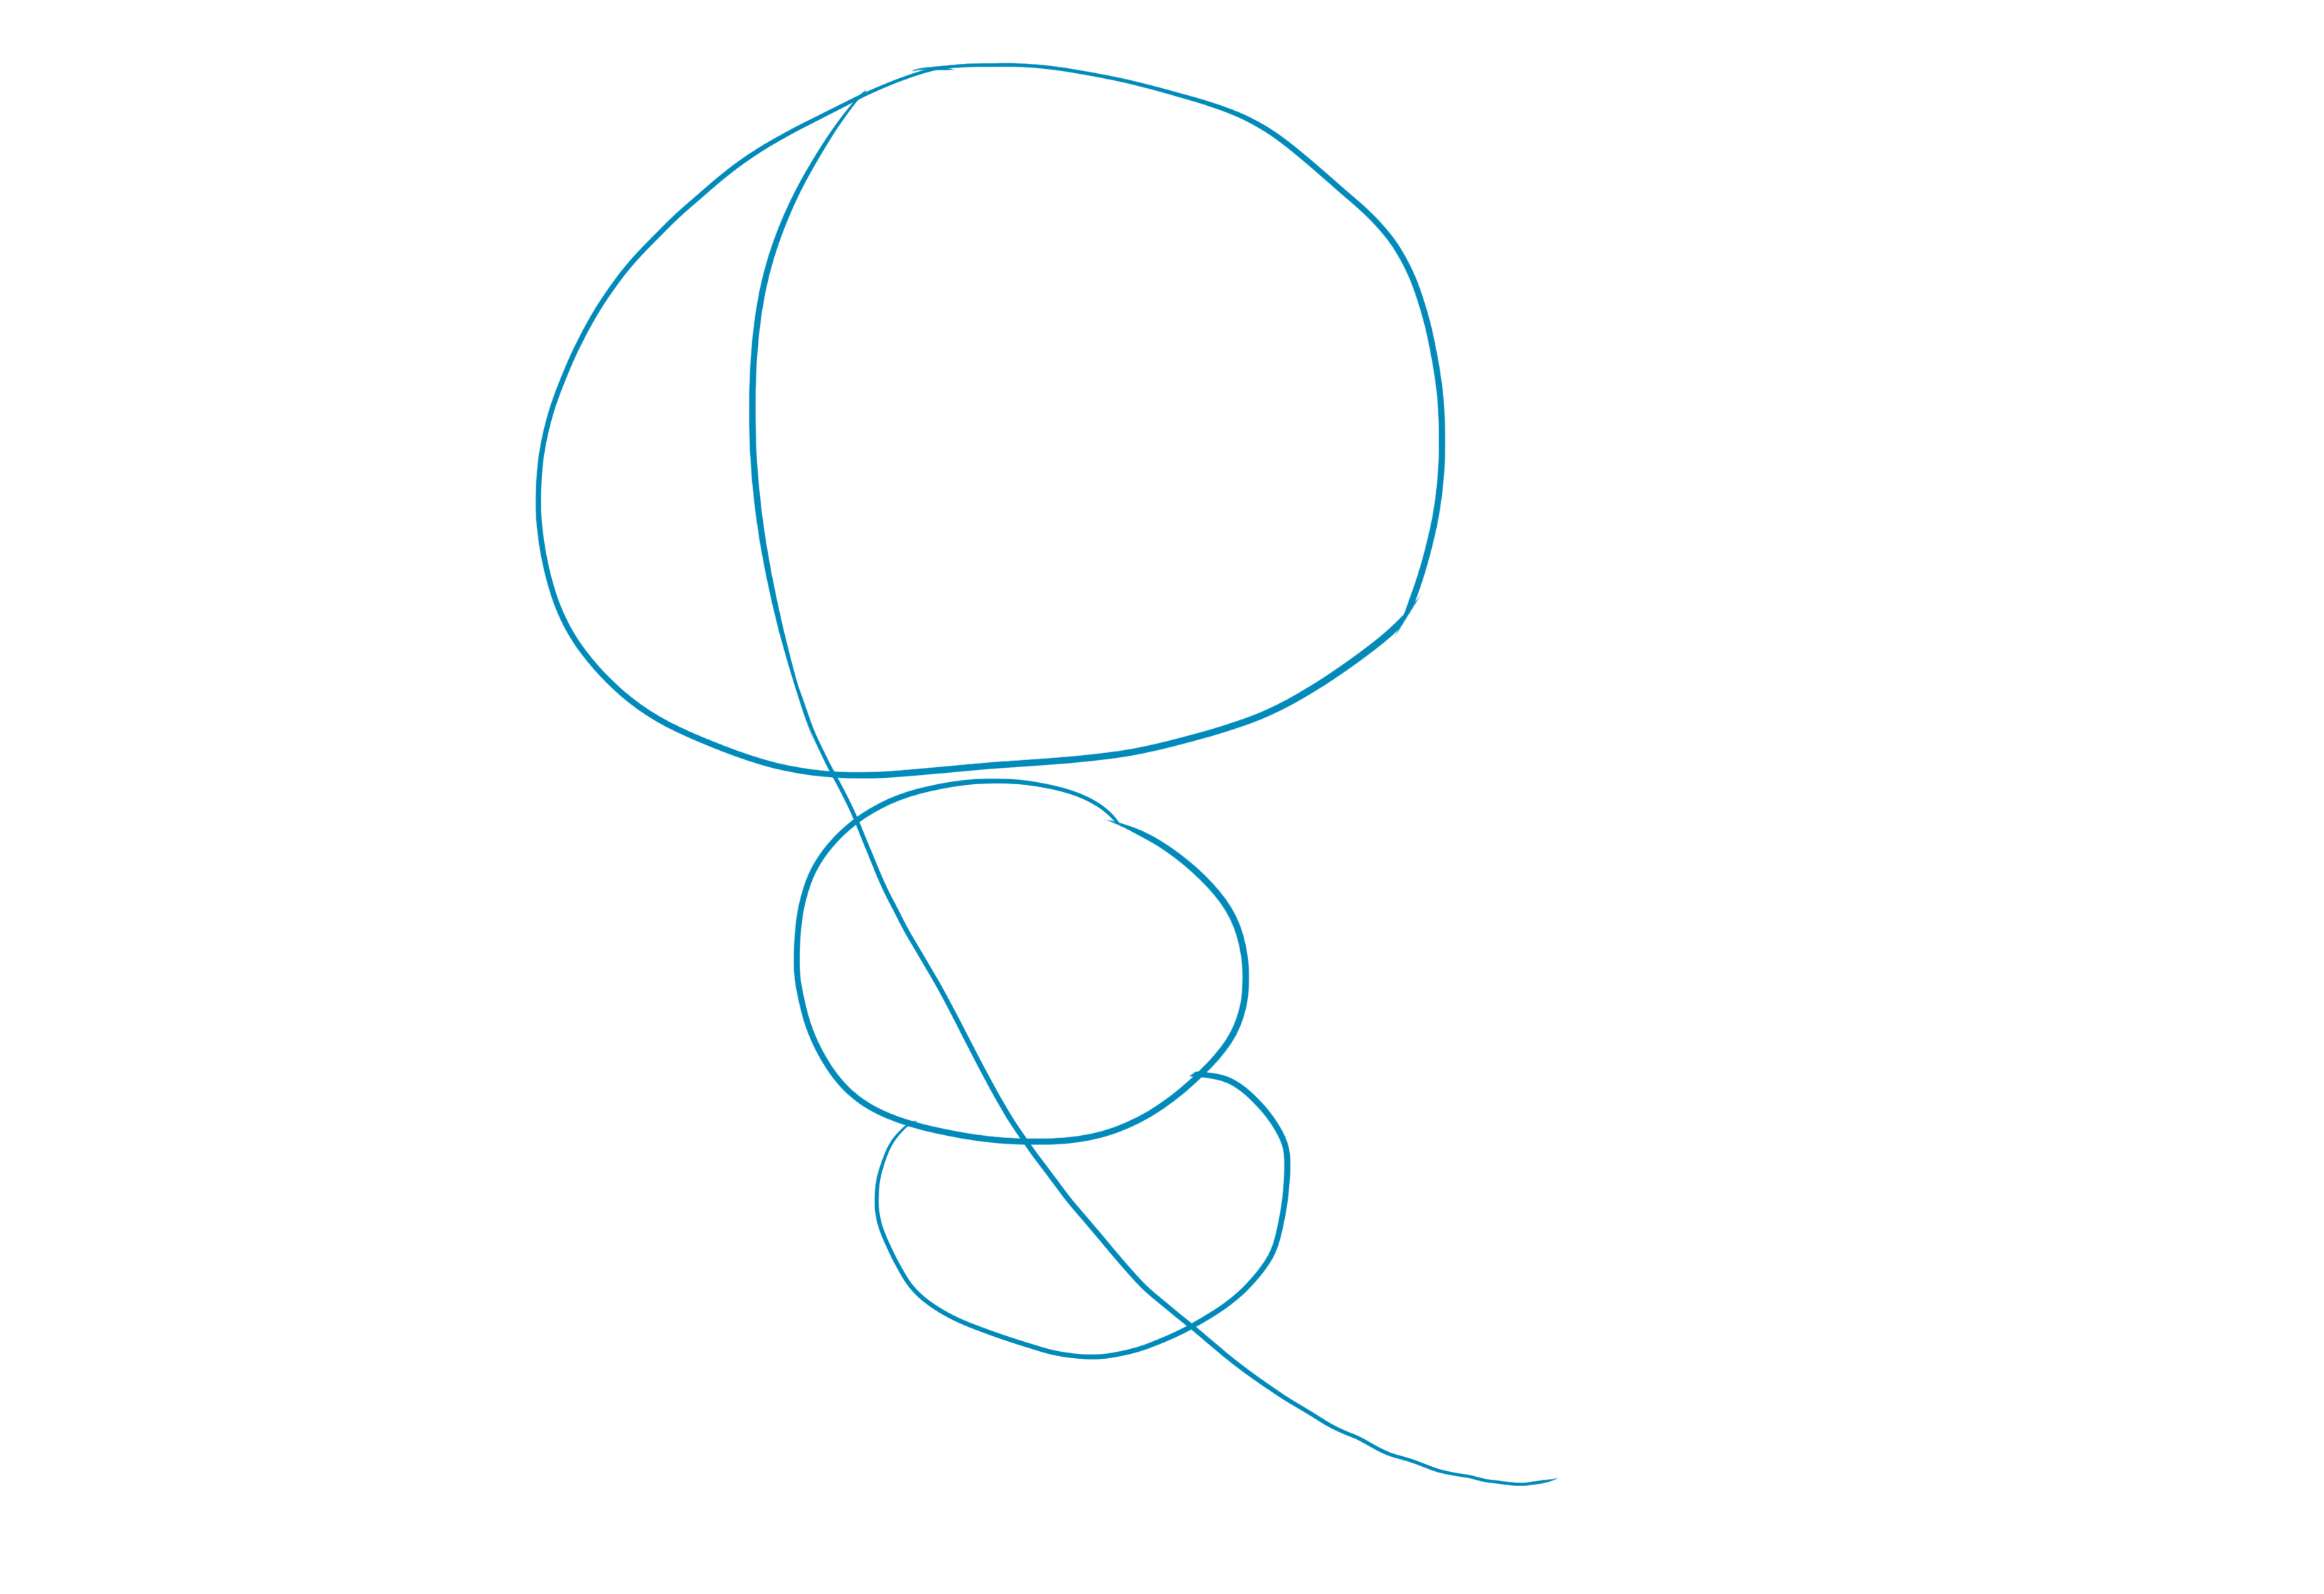
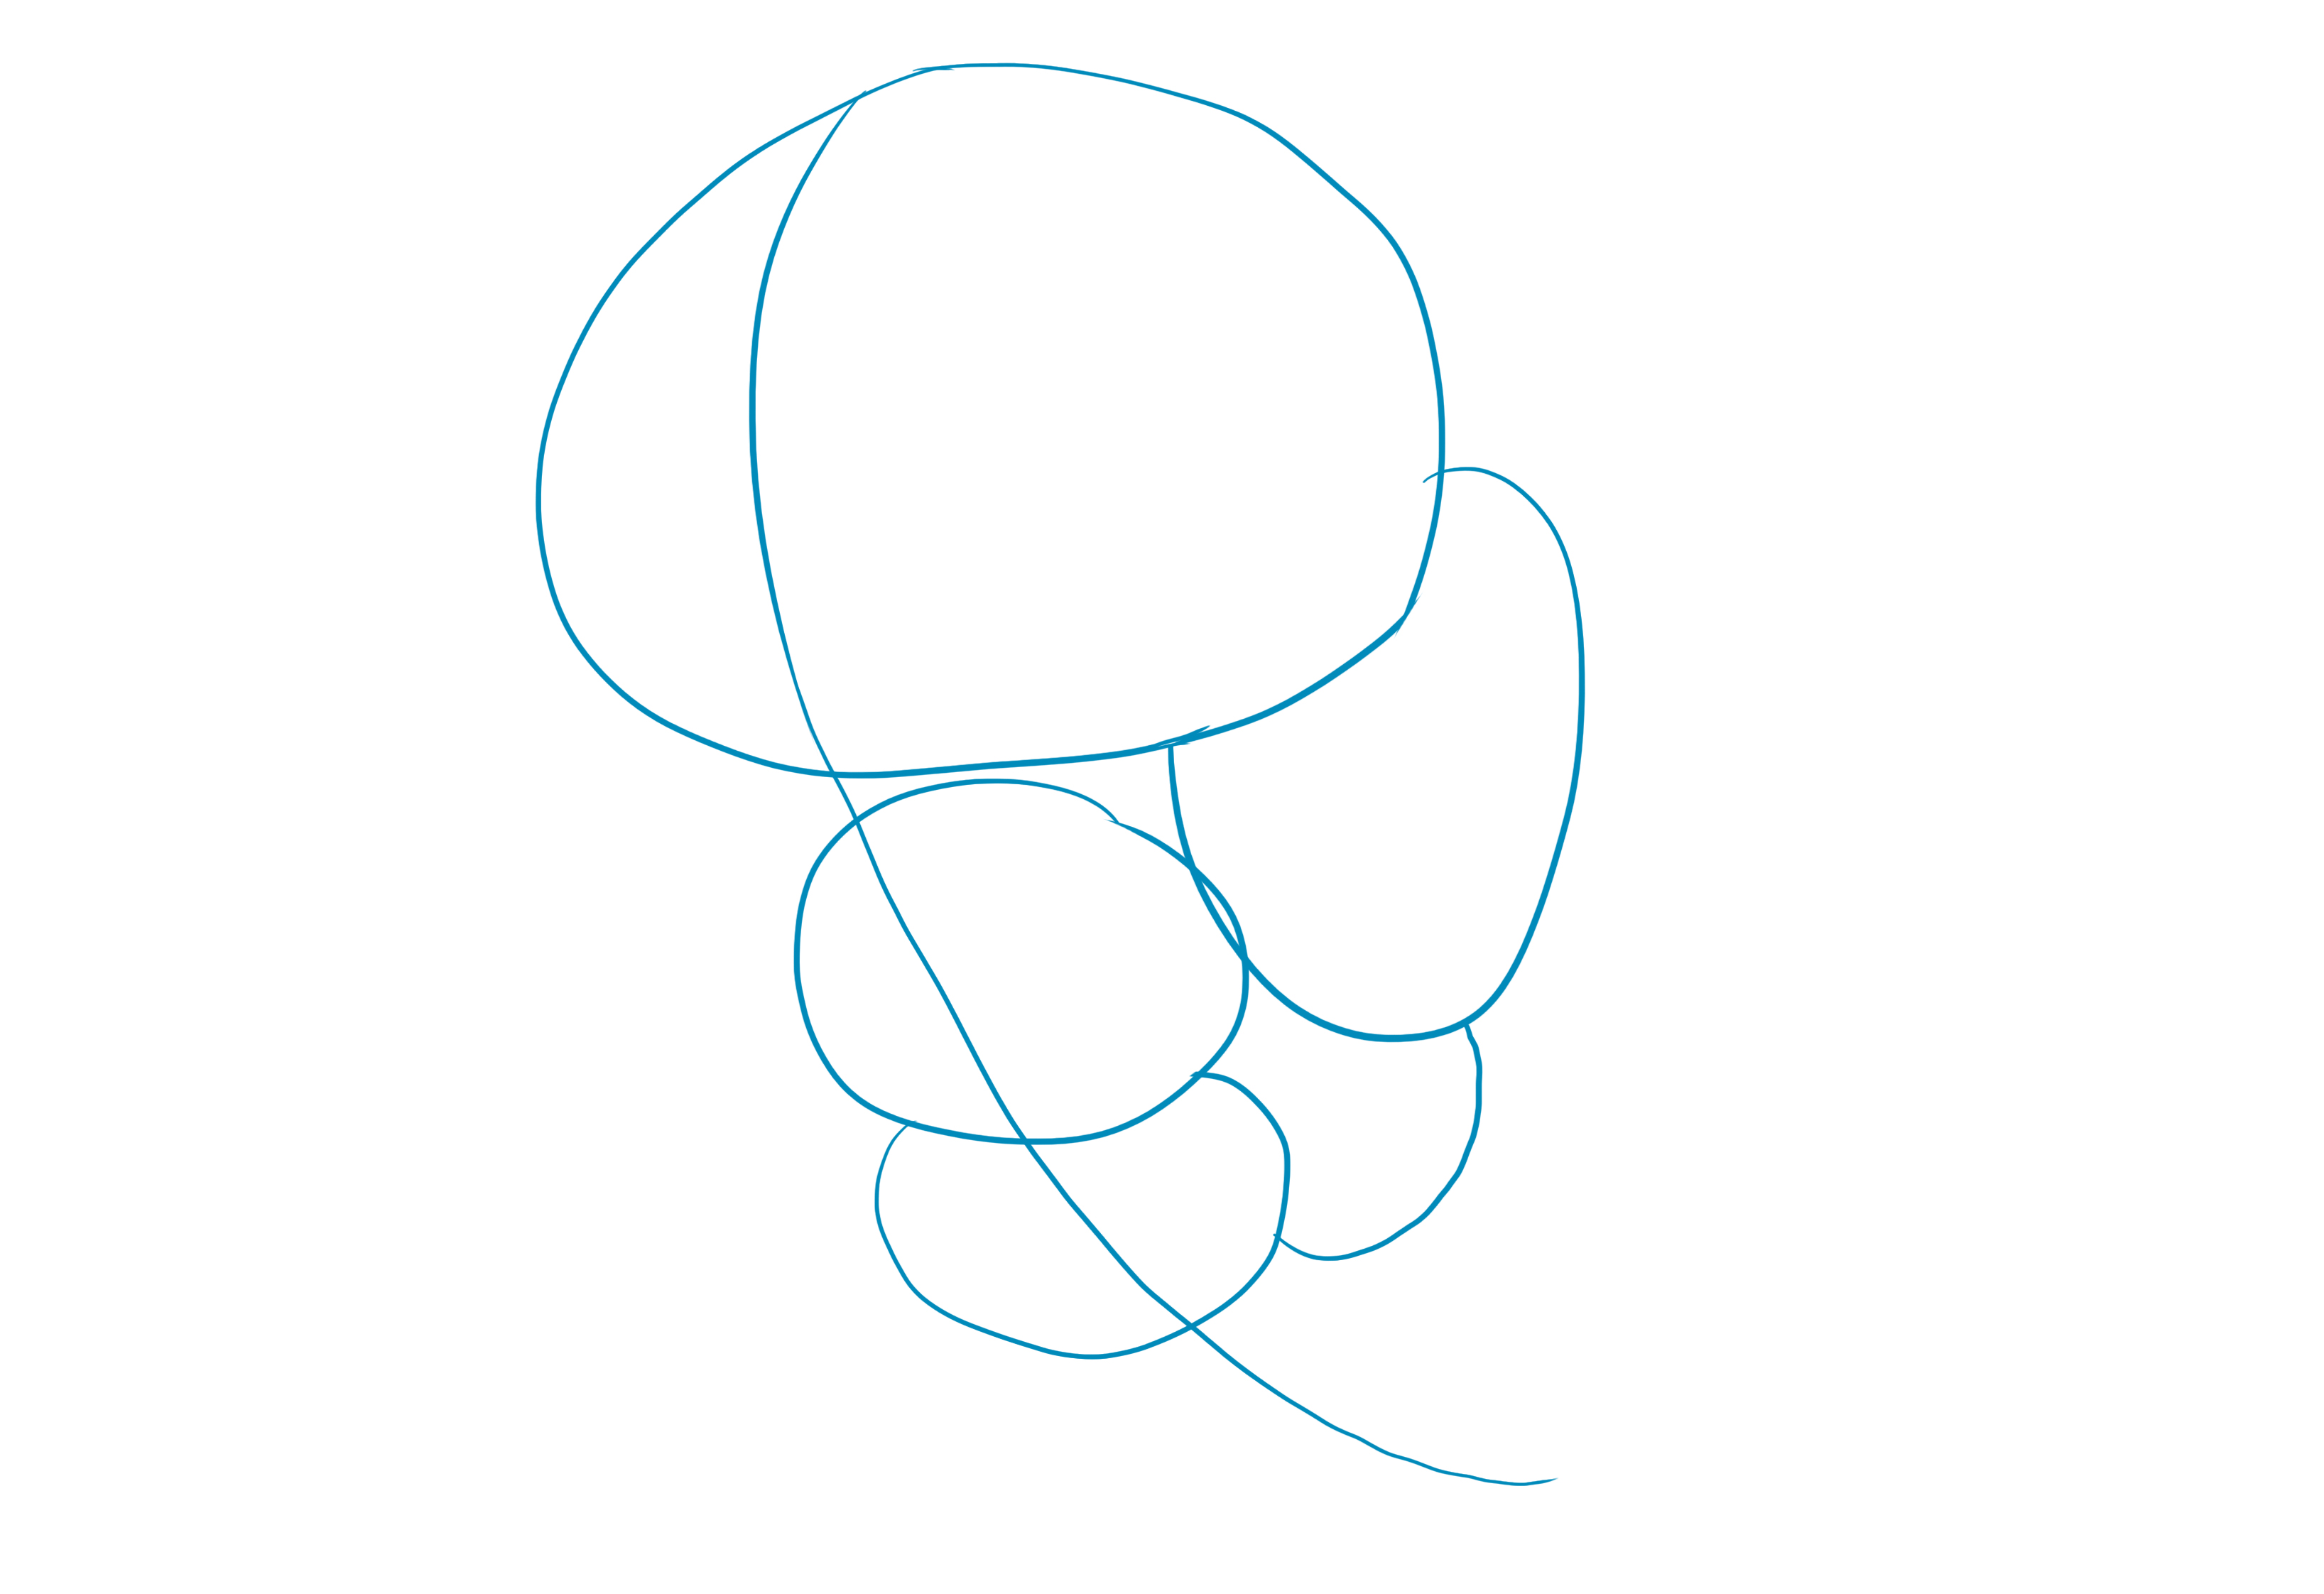
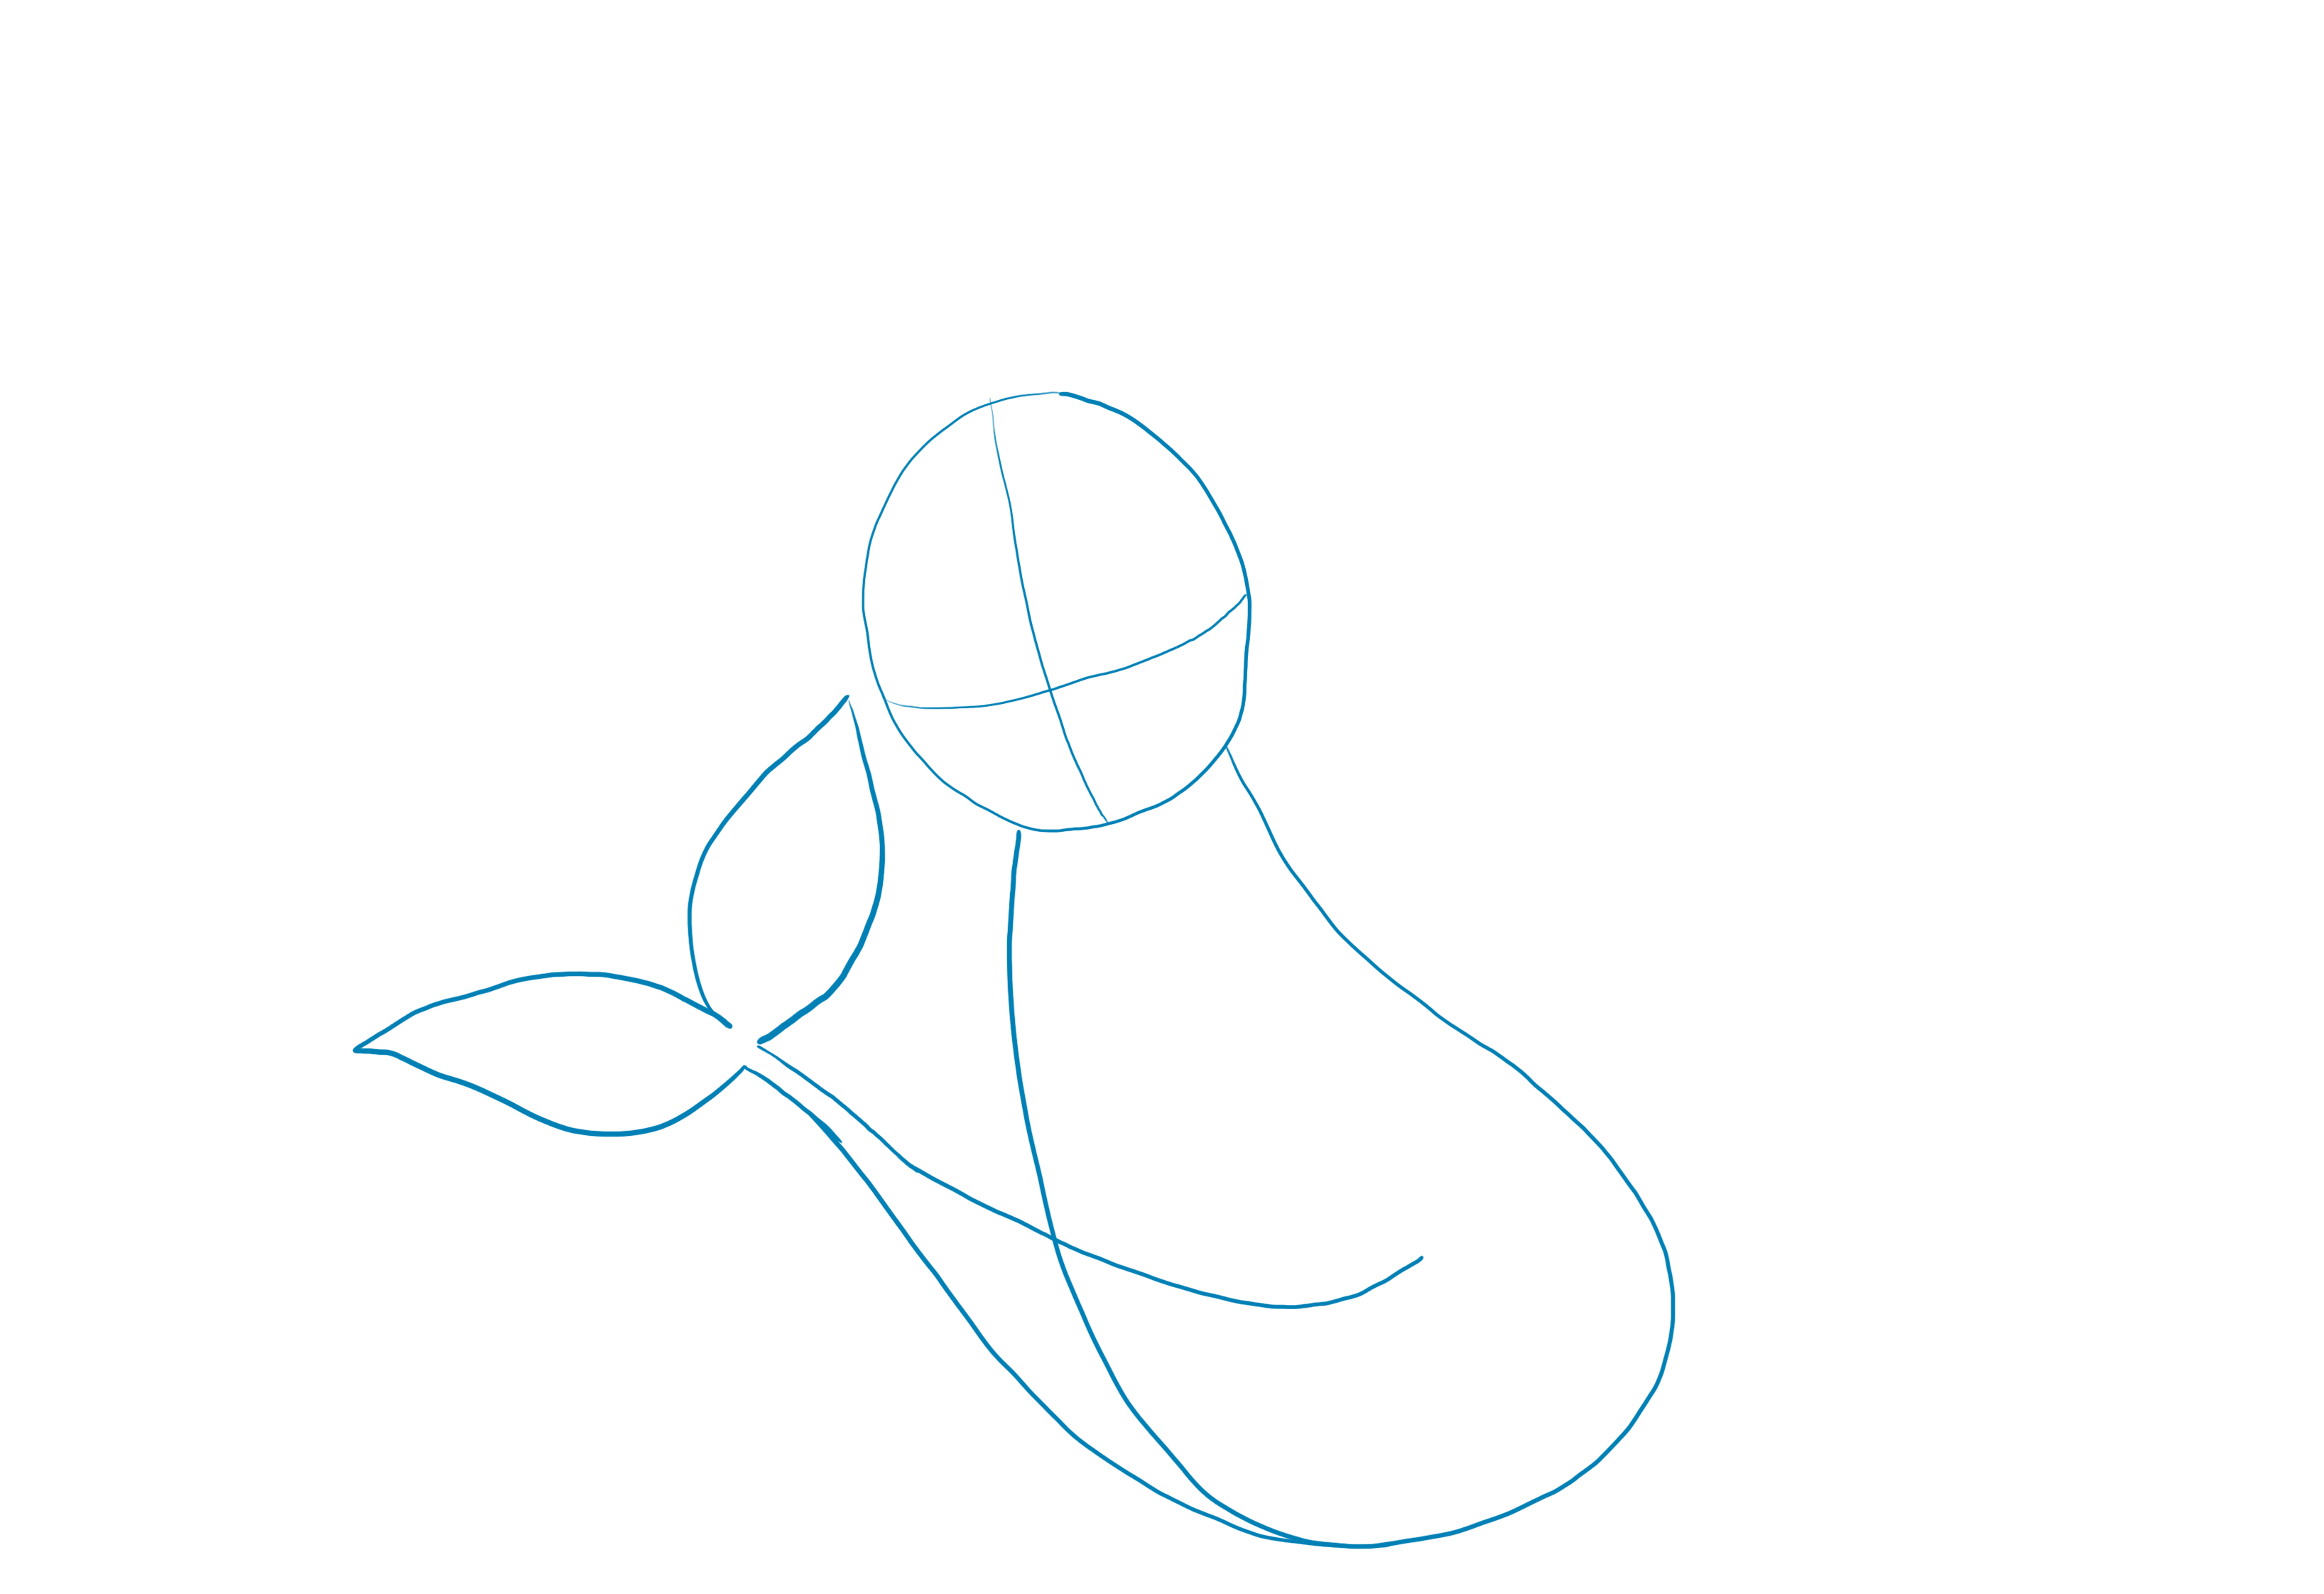
To draw the tail, follow the curve of the lower body then move up towards the left side, and finish the tail with fins a bit like those of a mermaid.
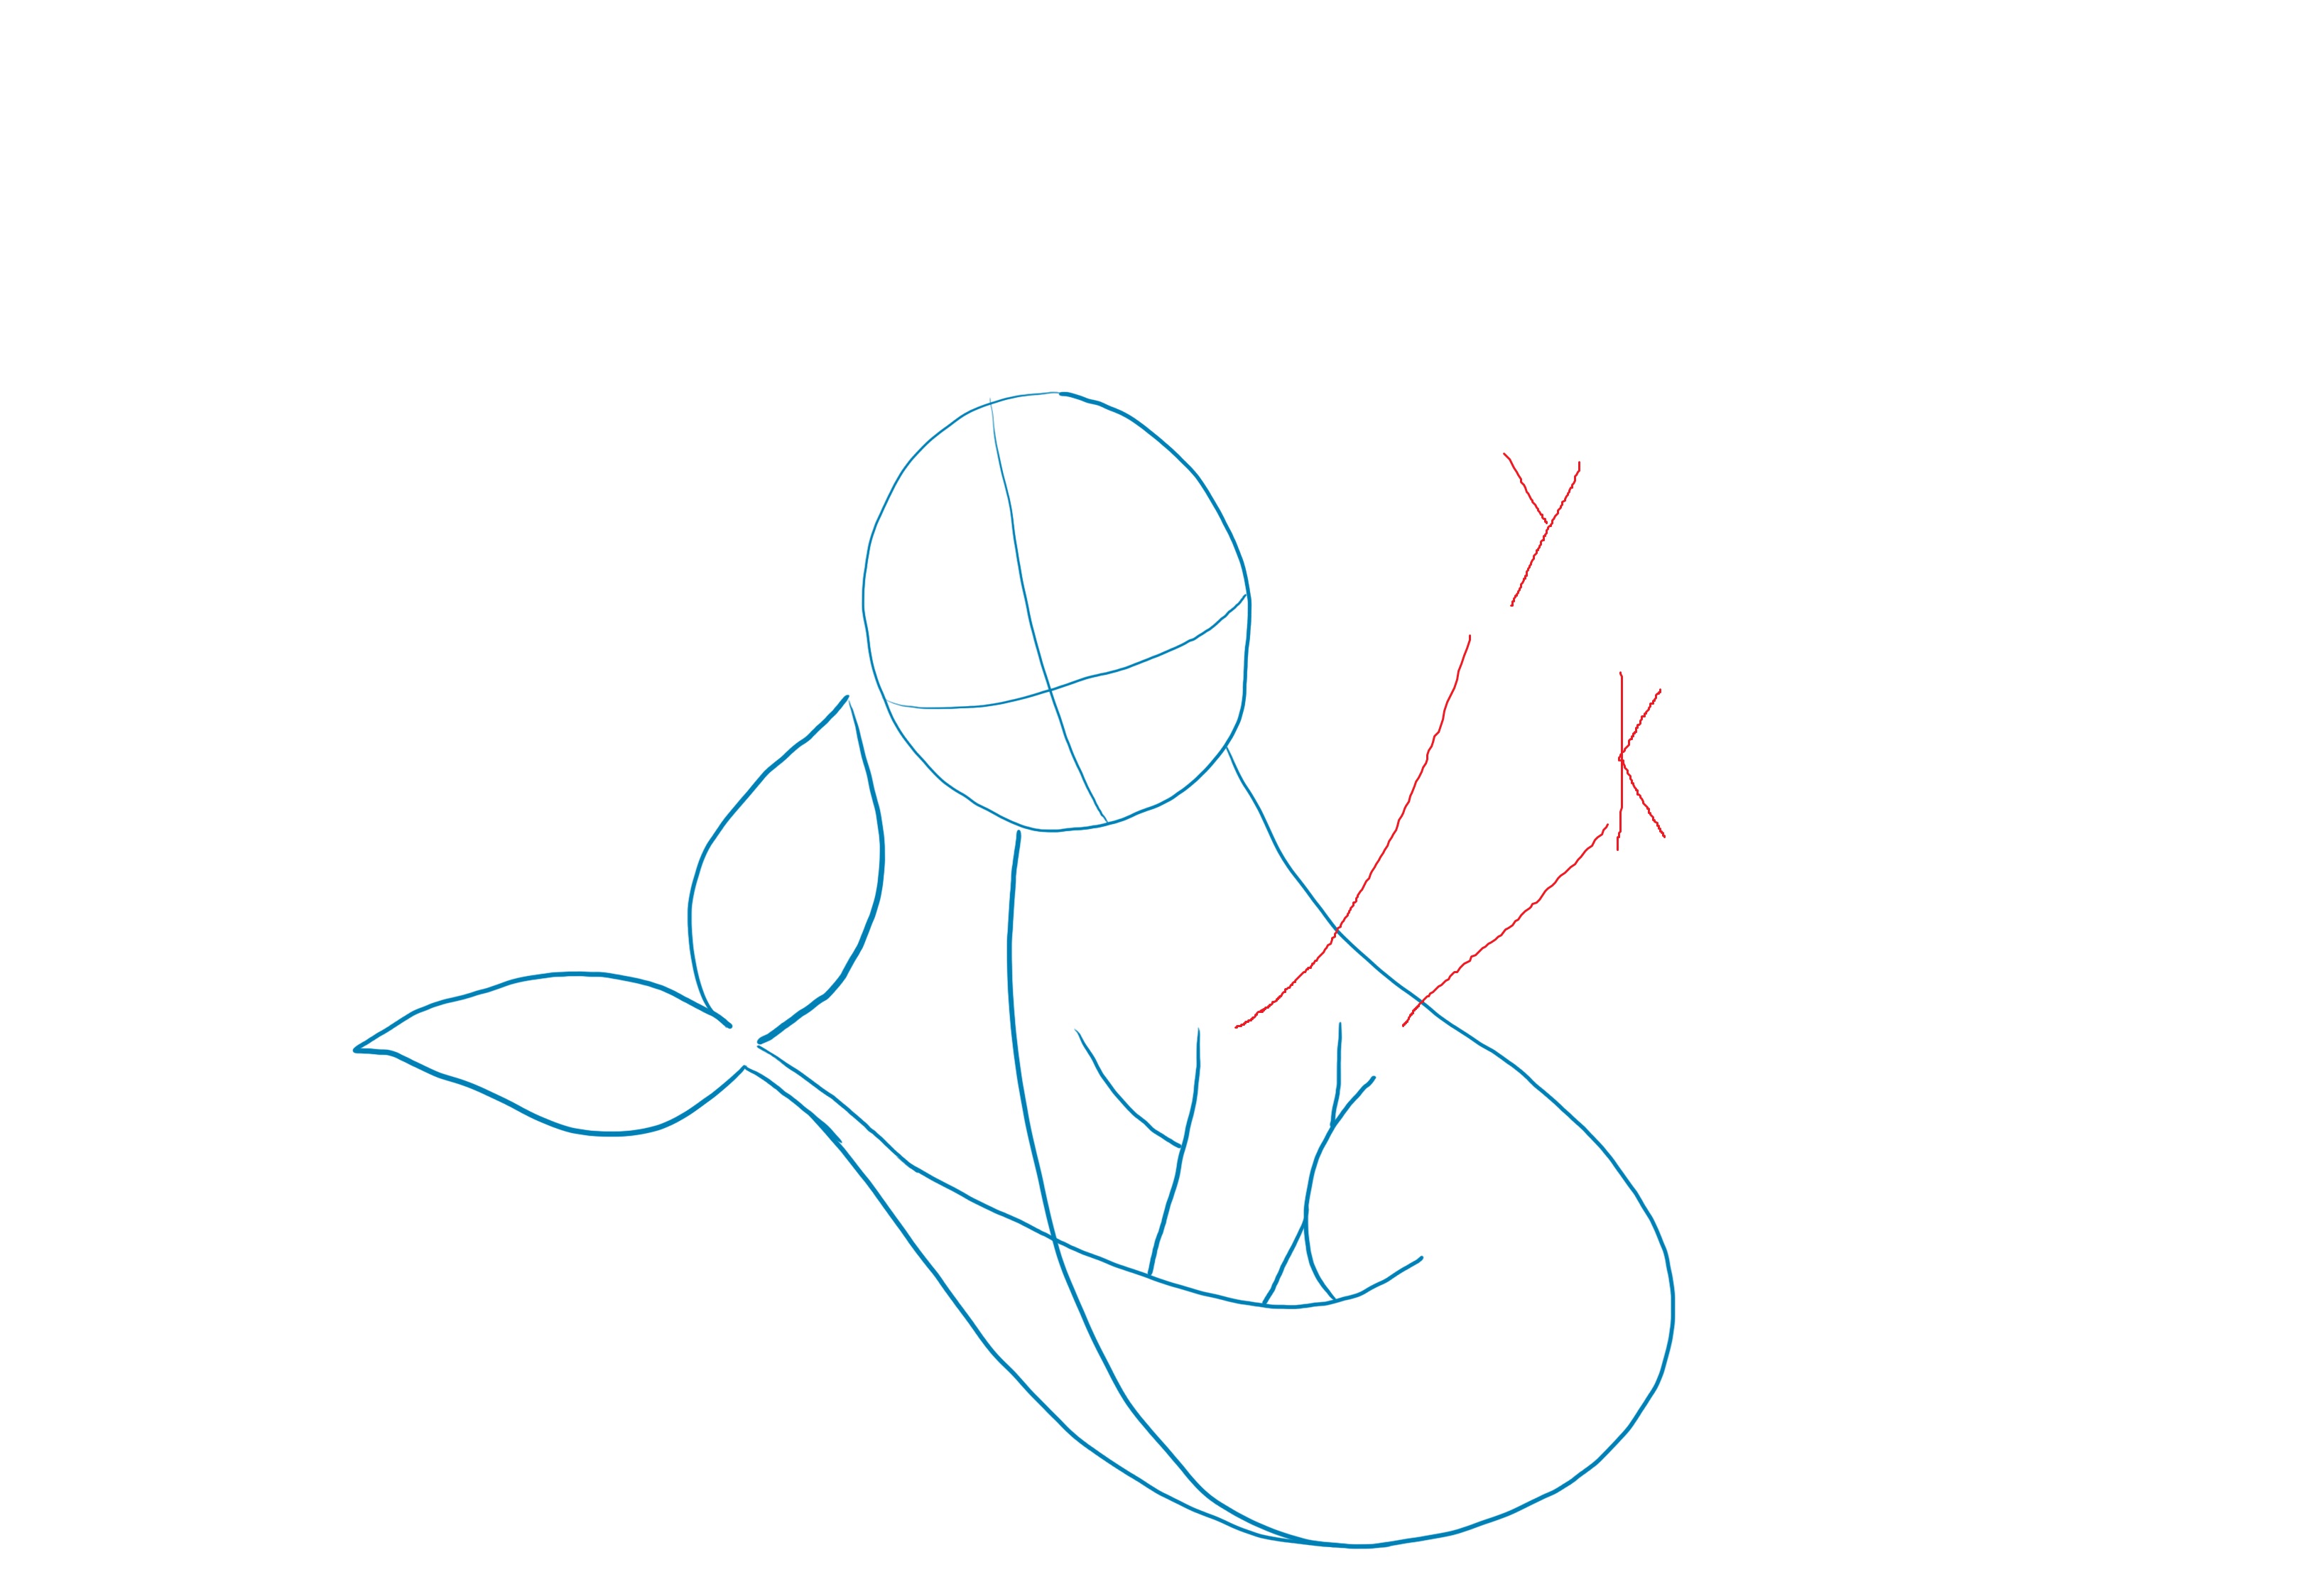
Draw the legs and thigh. To do this, make a Y in the middle of the body and then a K right next to it.
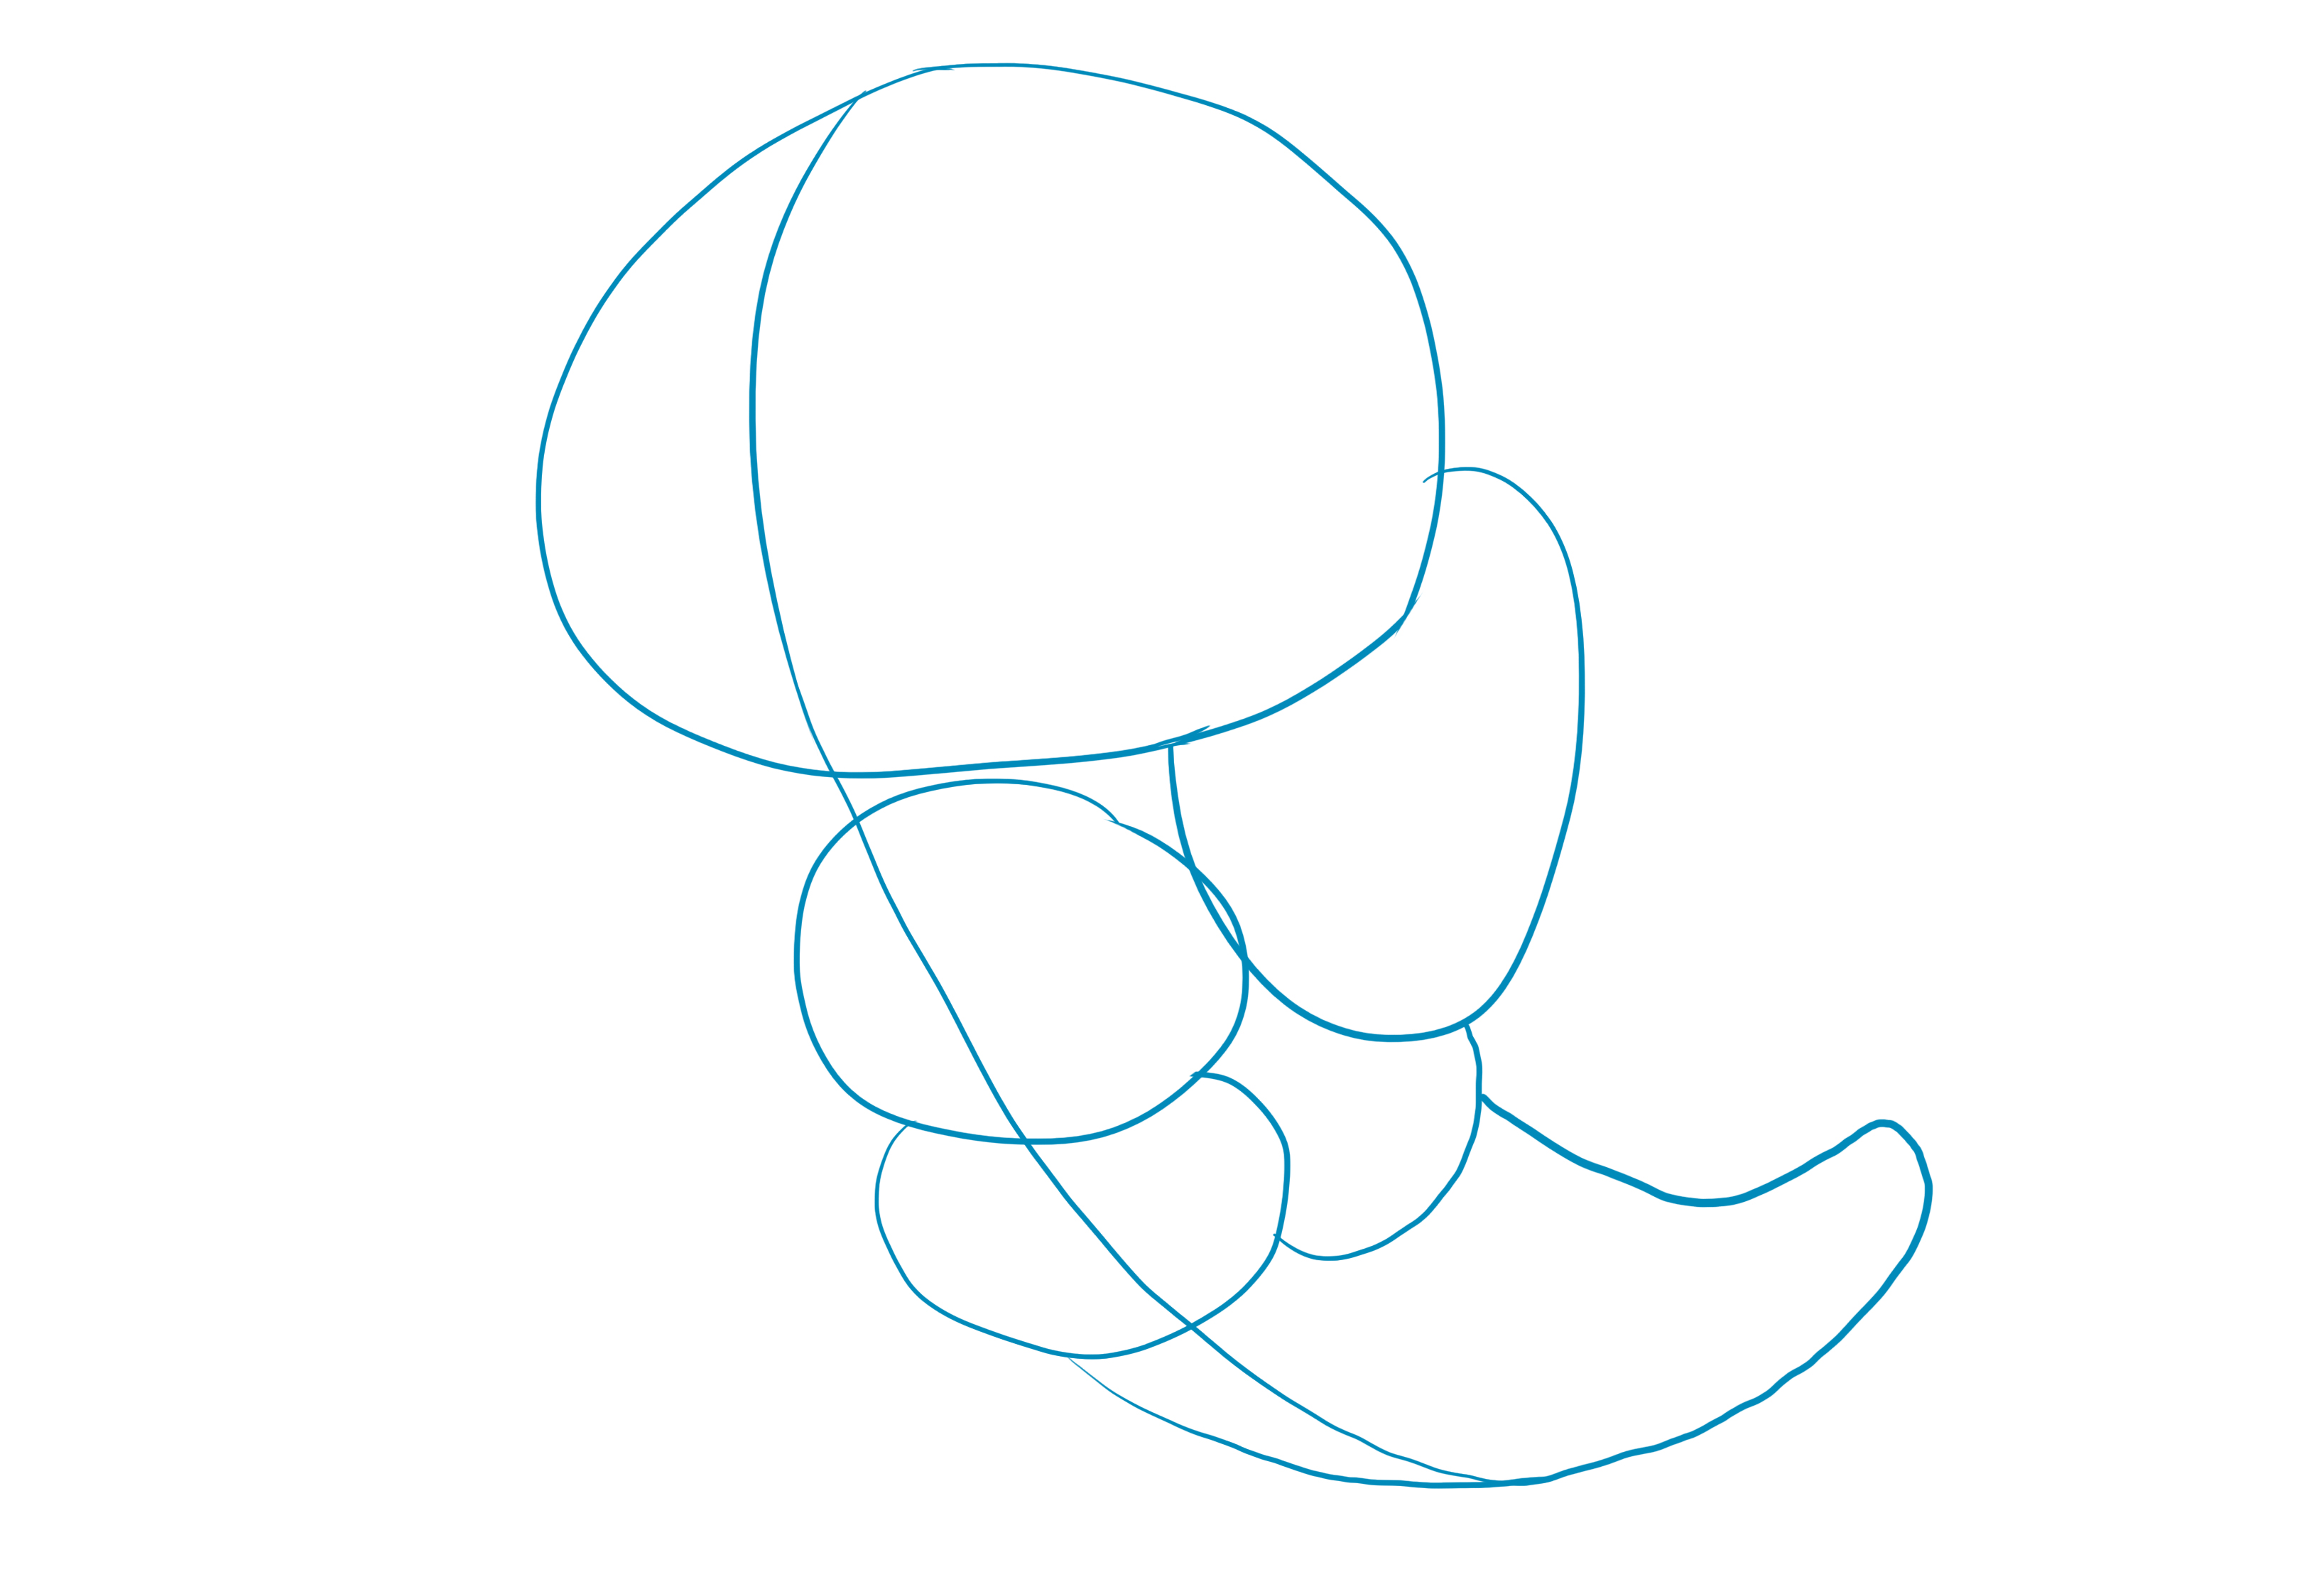
Draw the leg that sticks out beneath the tail and erase any unnecessary lines.
ADDING DETAILS TO THE VAPOREON DRAWING
Vaporeon is one of the first-generation Pokémon that has the most details.
Indeed, it has a ruff, large ears, a fin on the head, and dorsal scales!
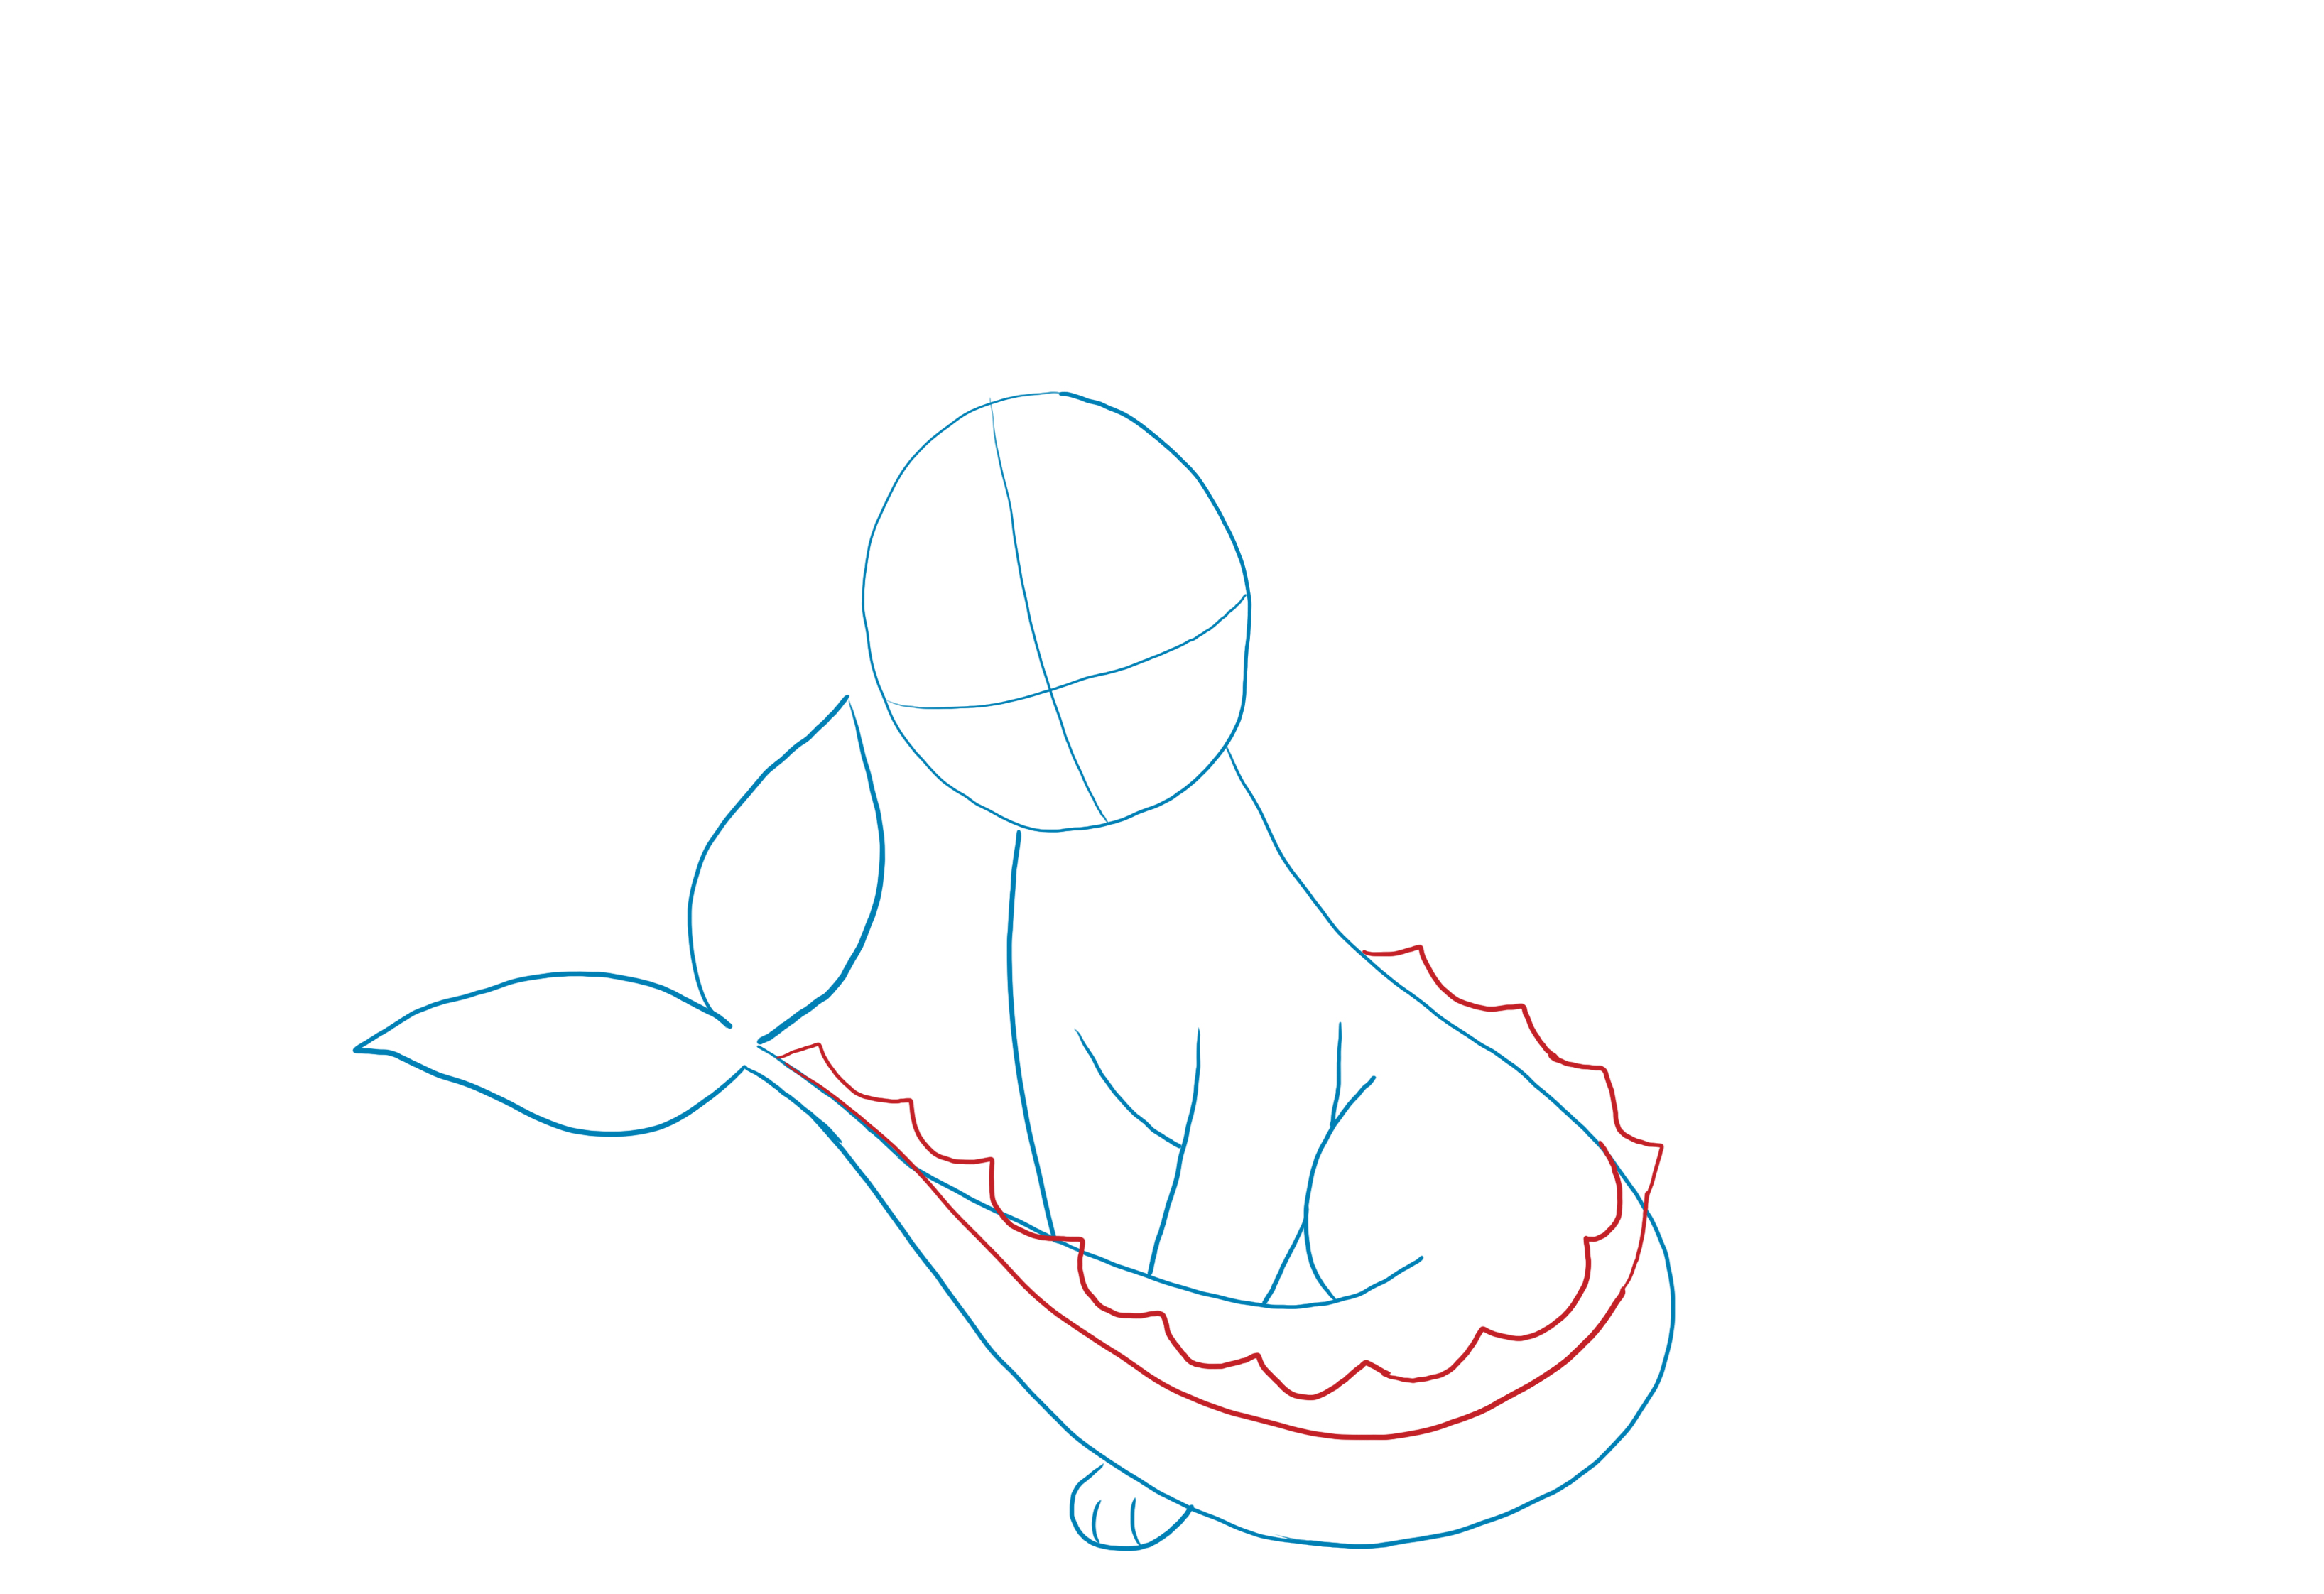
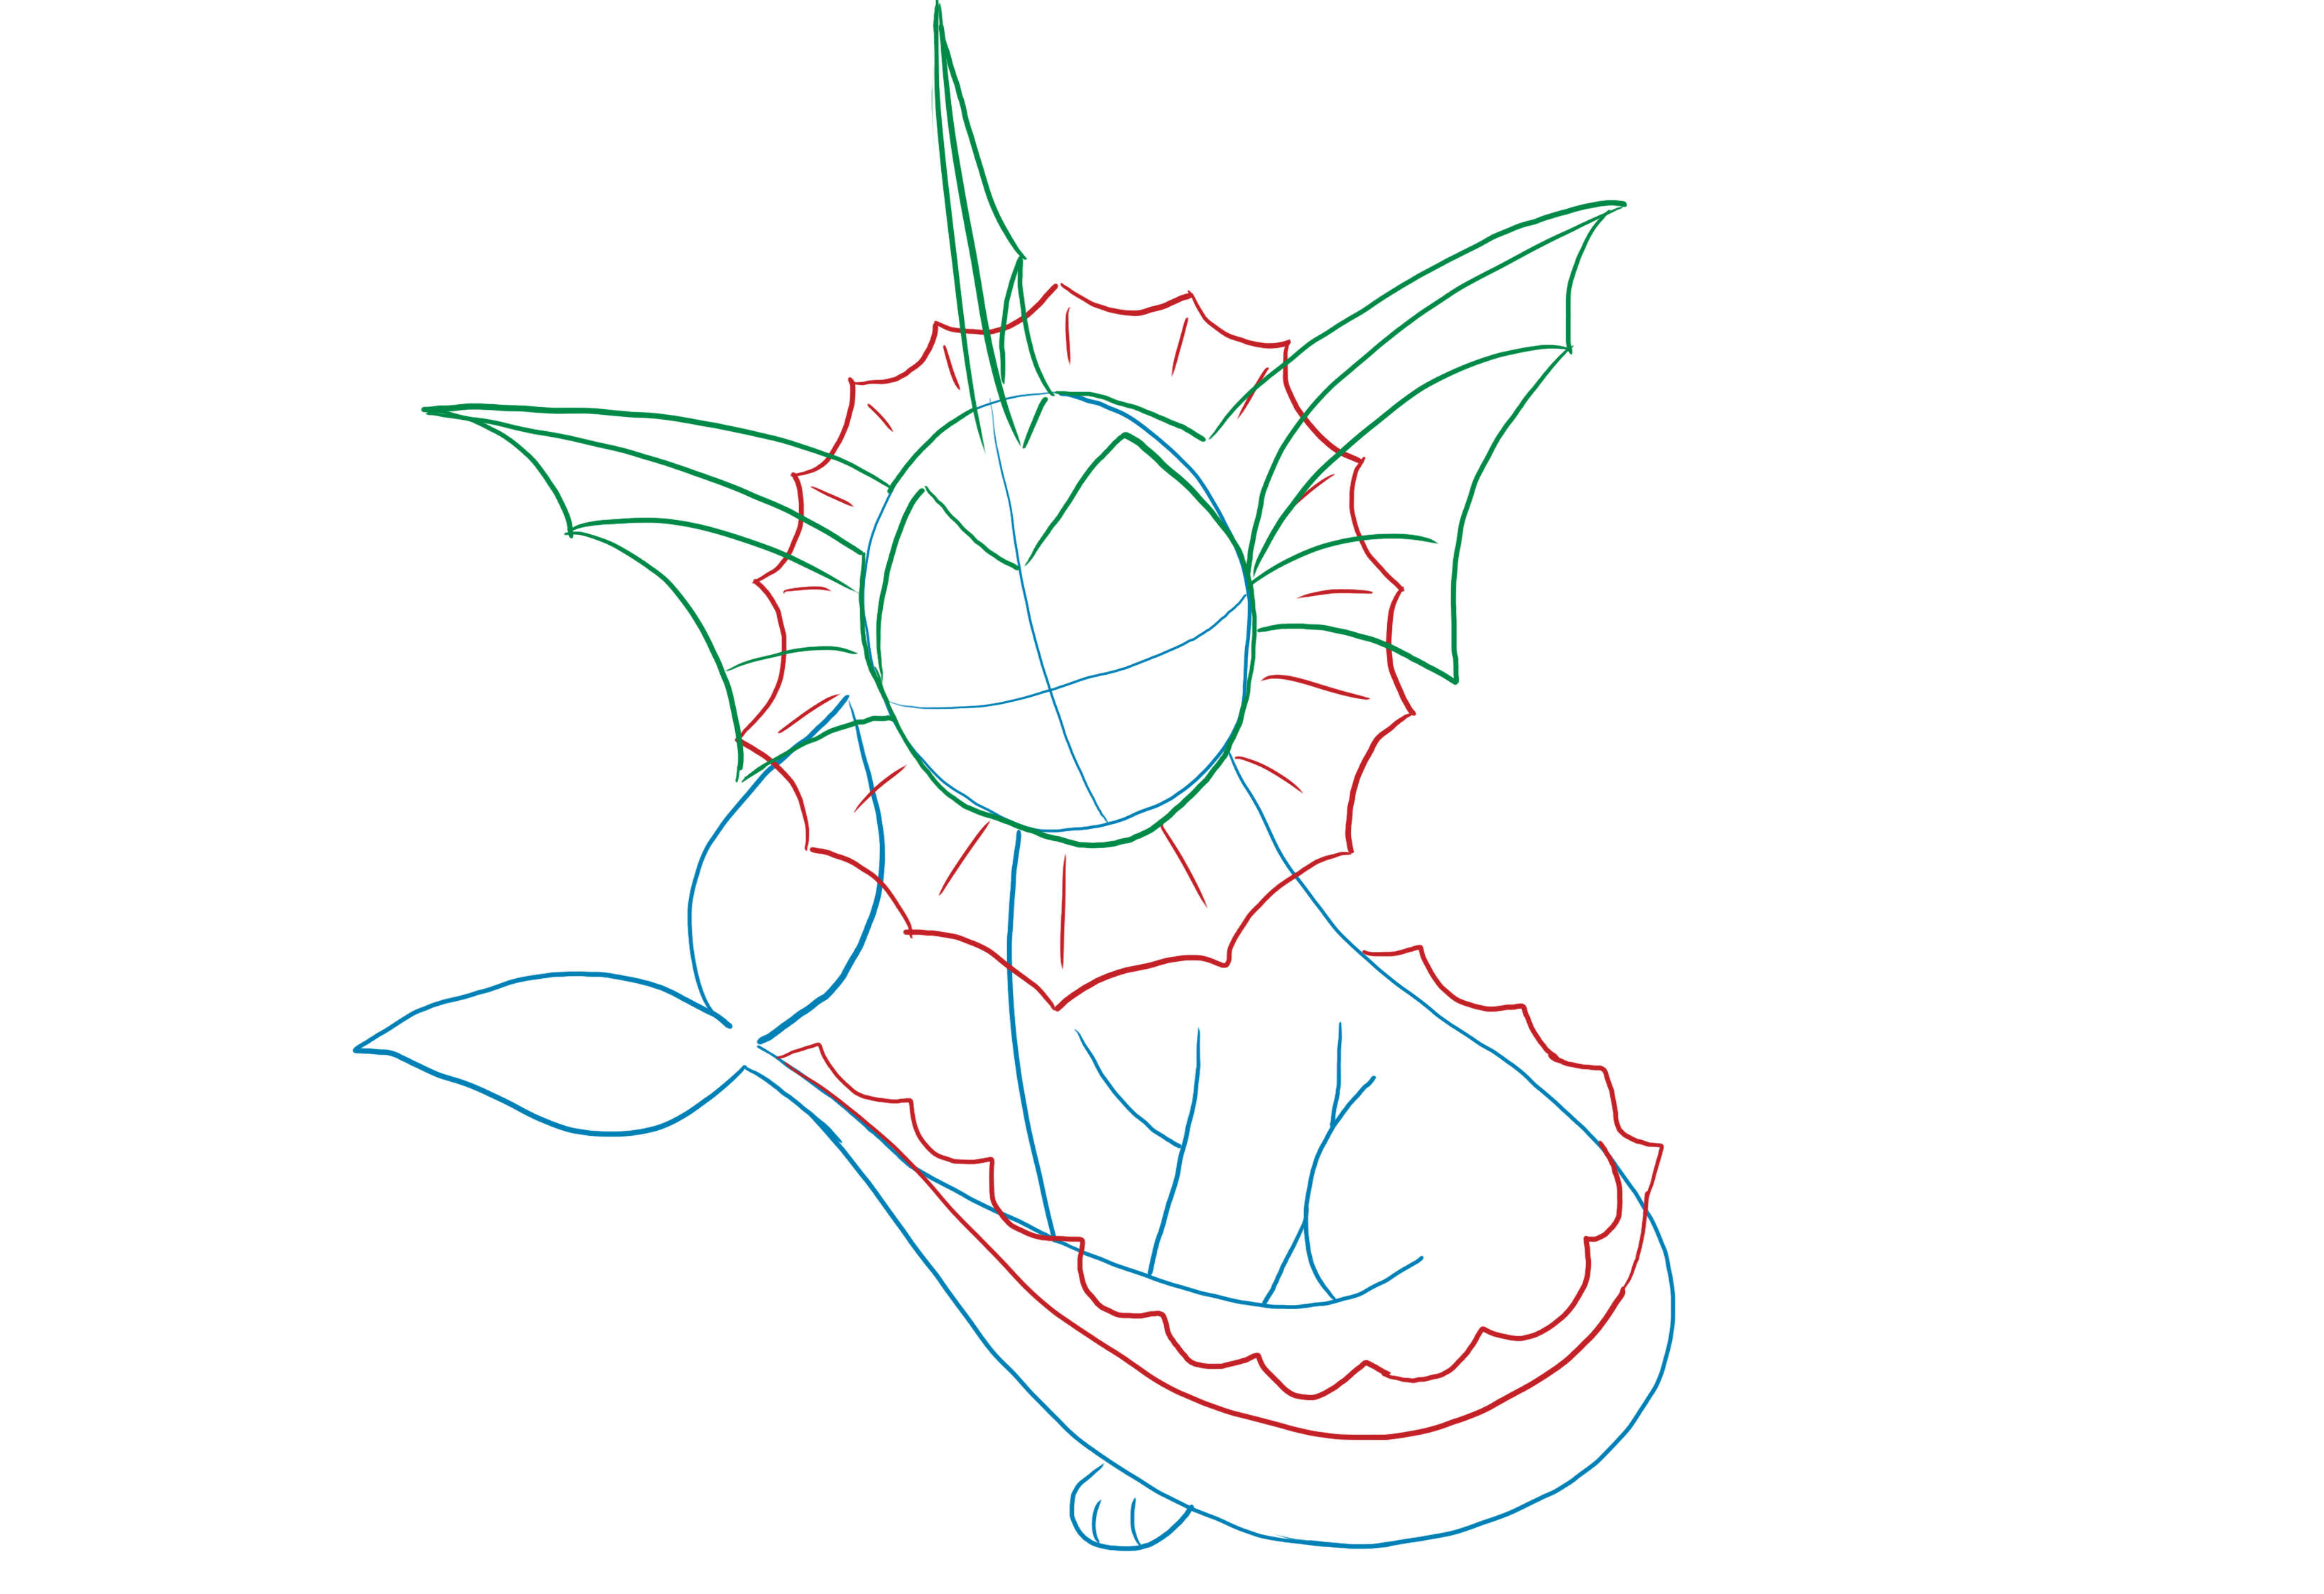
We will start with the dorsal scales.
You will simply draw a lot of small rounded triangles that follow the curve of the tail and then the back.
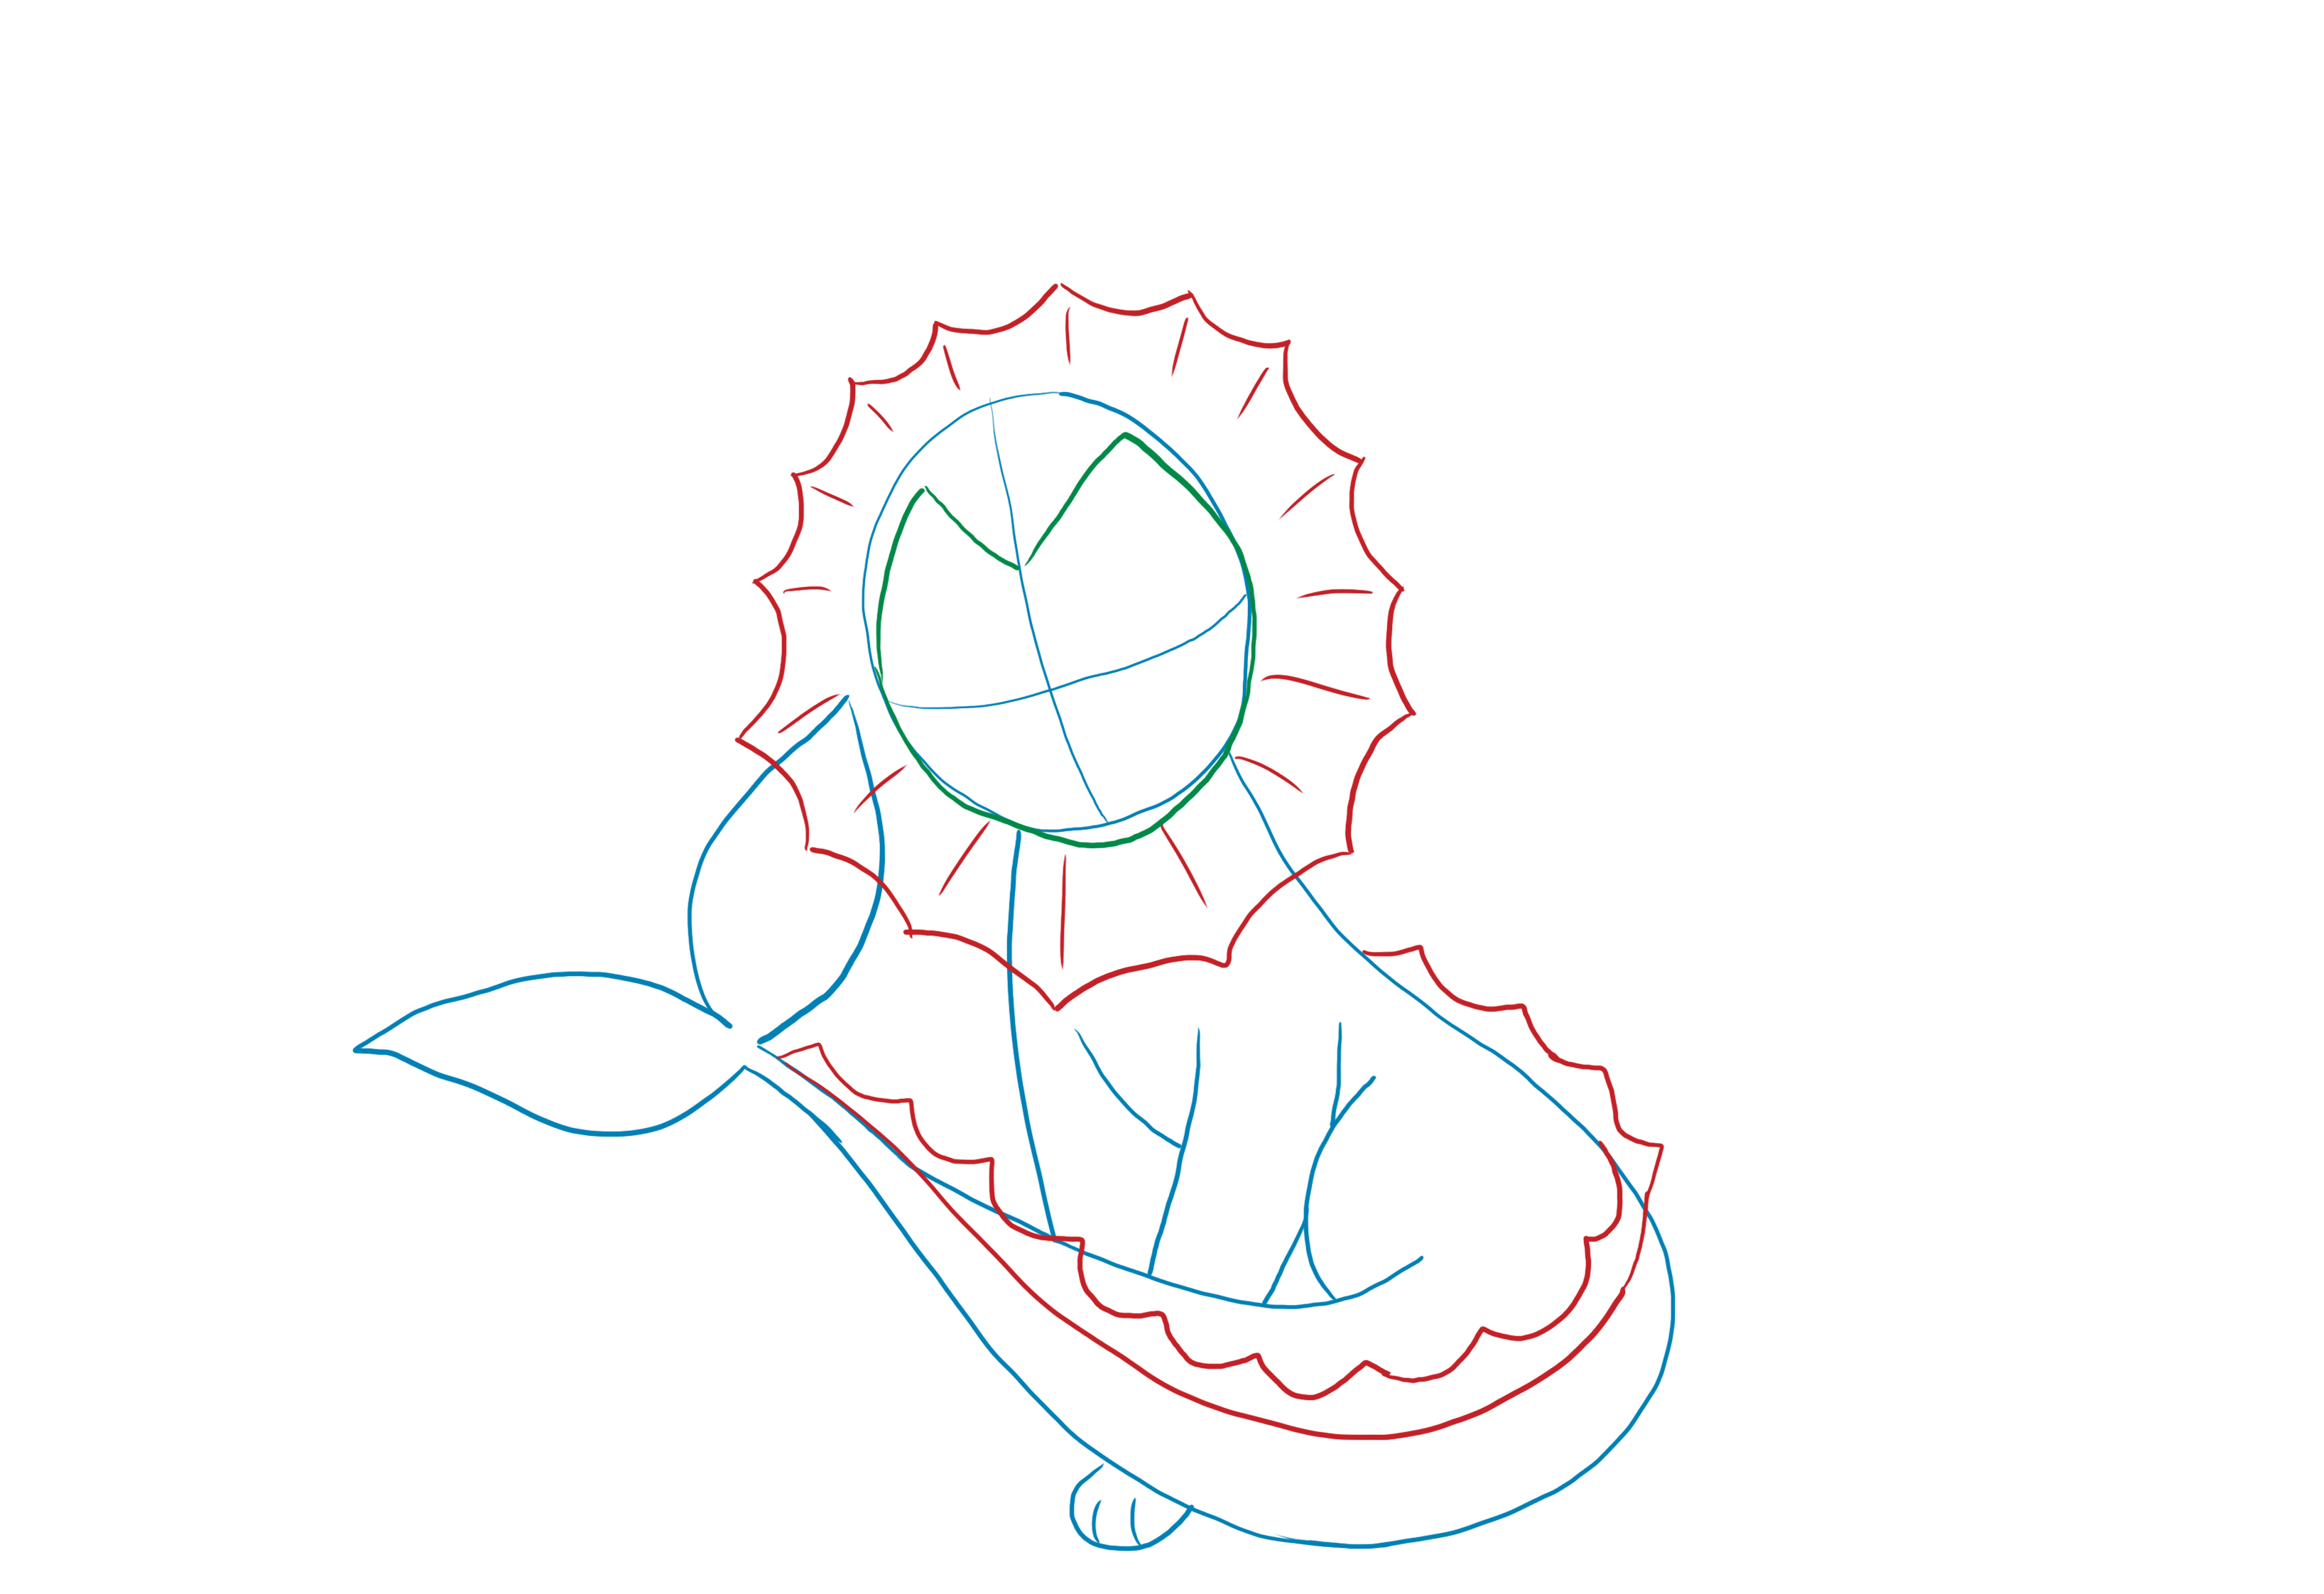
Next, we will draw the ruff. To create it, you will need to go around the head creating curves that meet at points.

First, we drew a circle for Vaporeon's head, but that was just the base.
Vaporeon has a forehead that is formed by two triangles and a squarer chin.
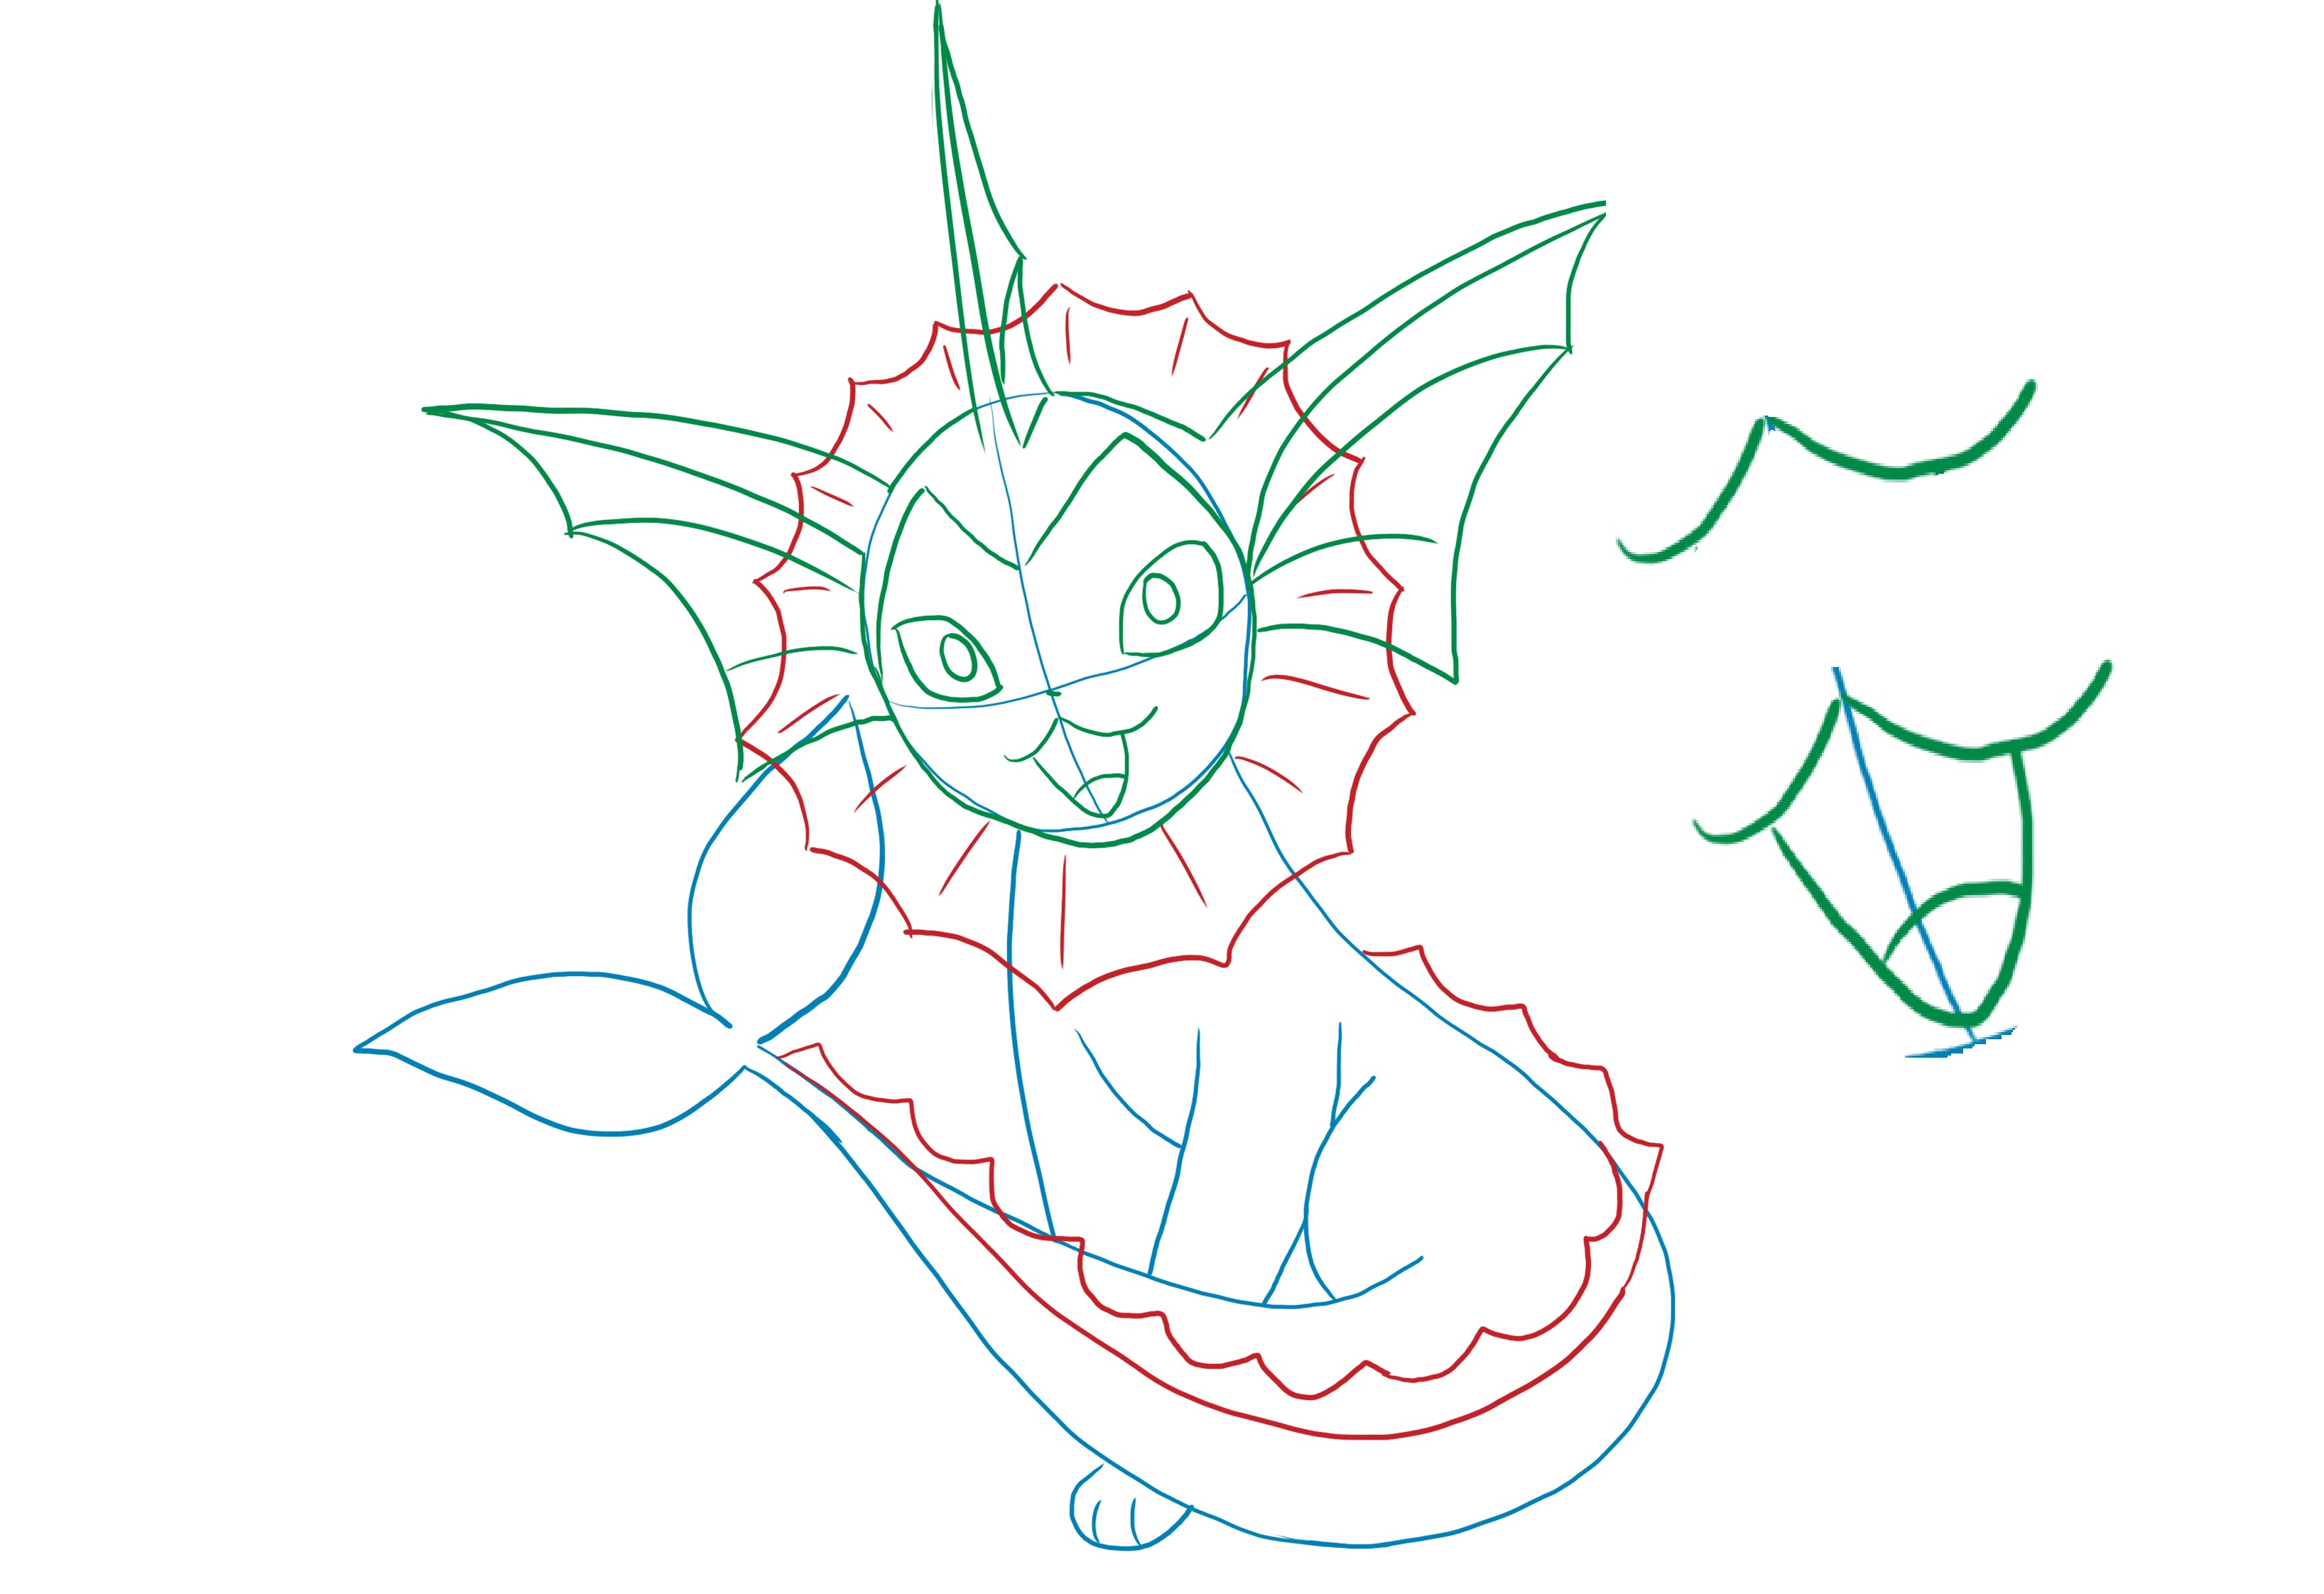
To create the fin on its head, start by drawing a very thin triangle, then connect the tip of the triangle to the top of the skull with two curves to form the fin.
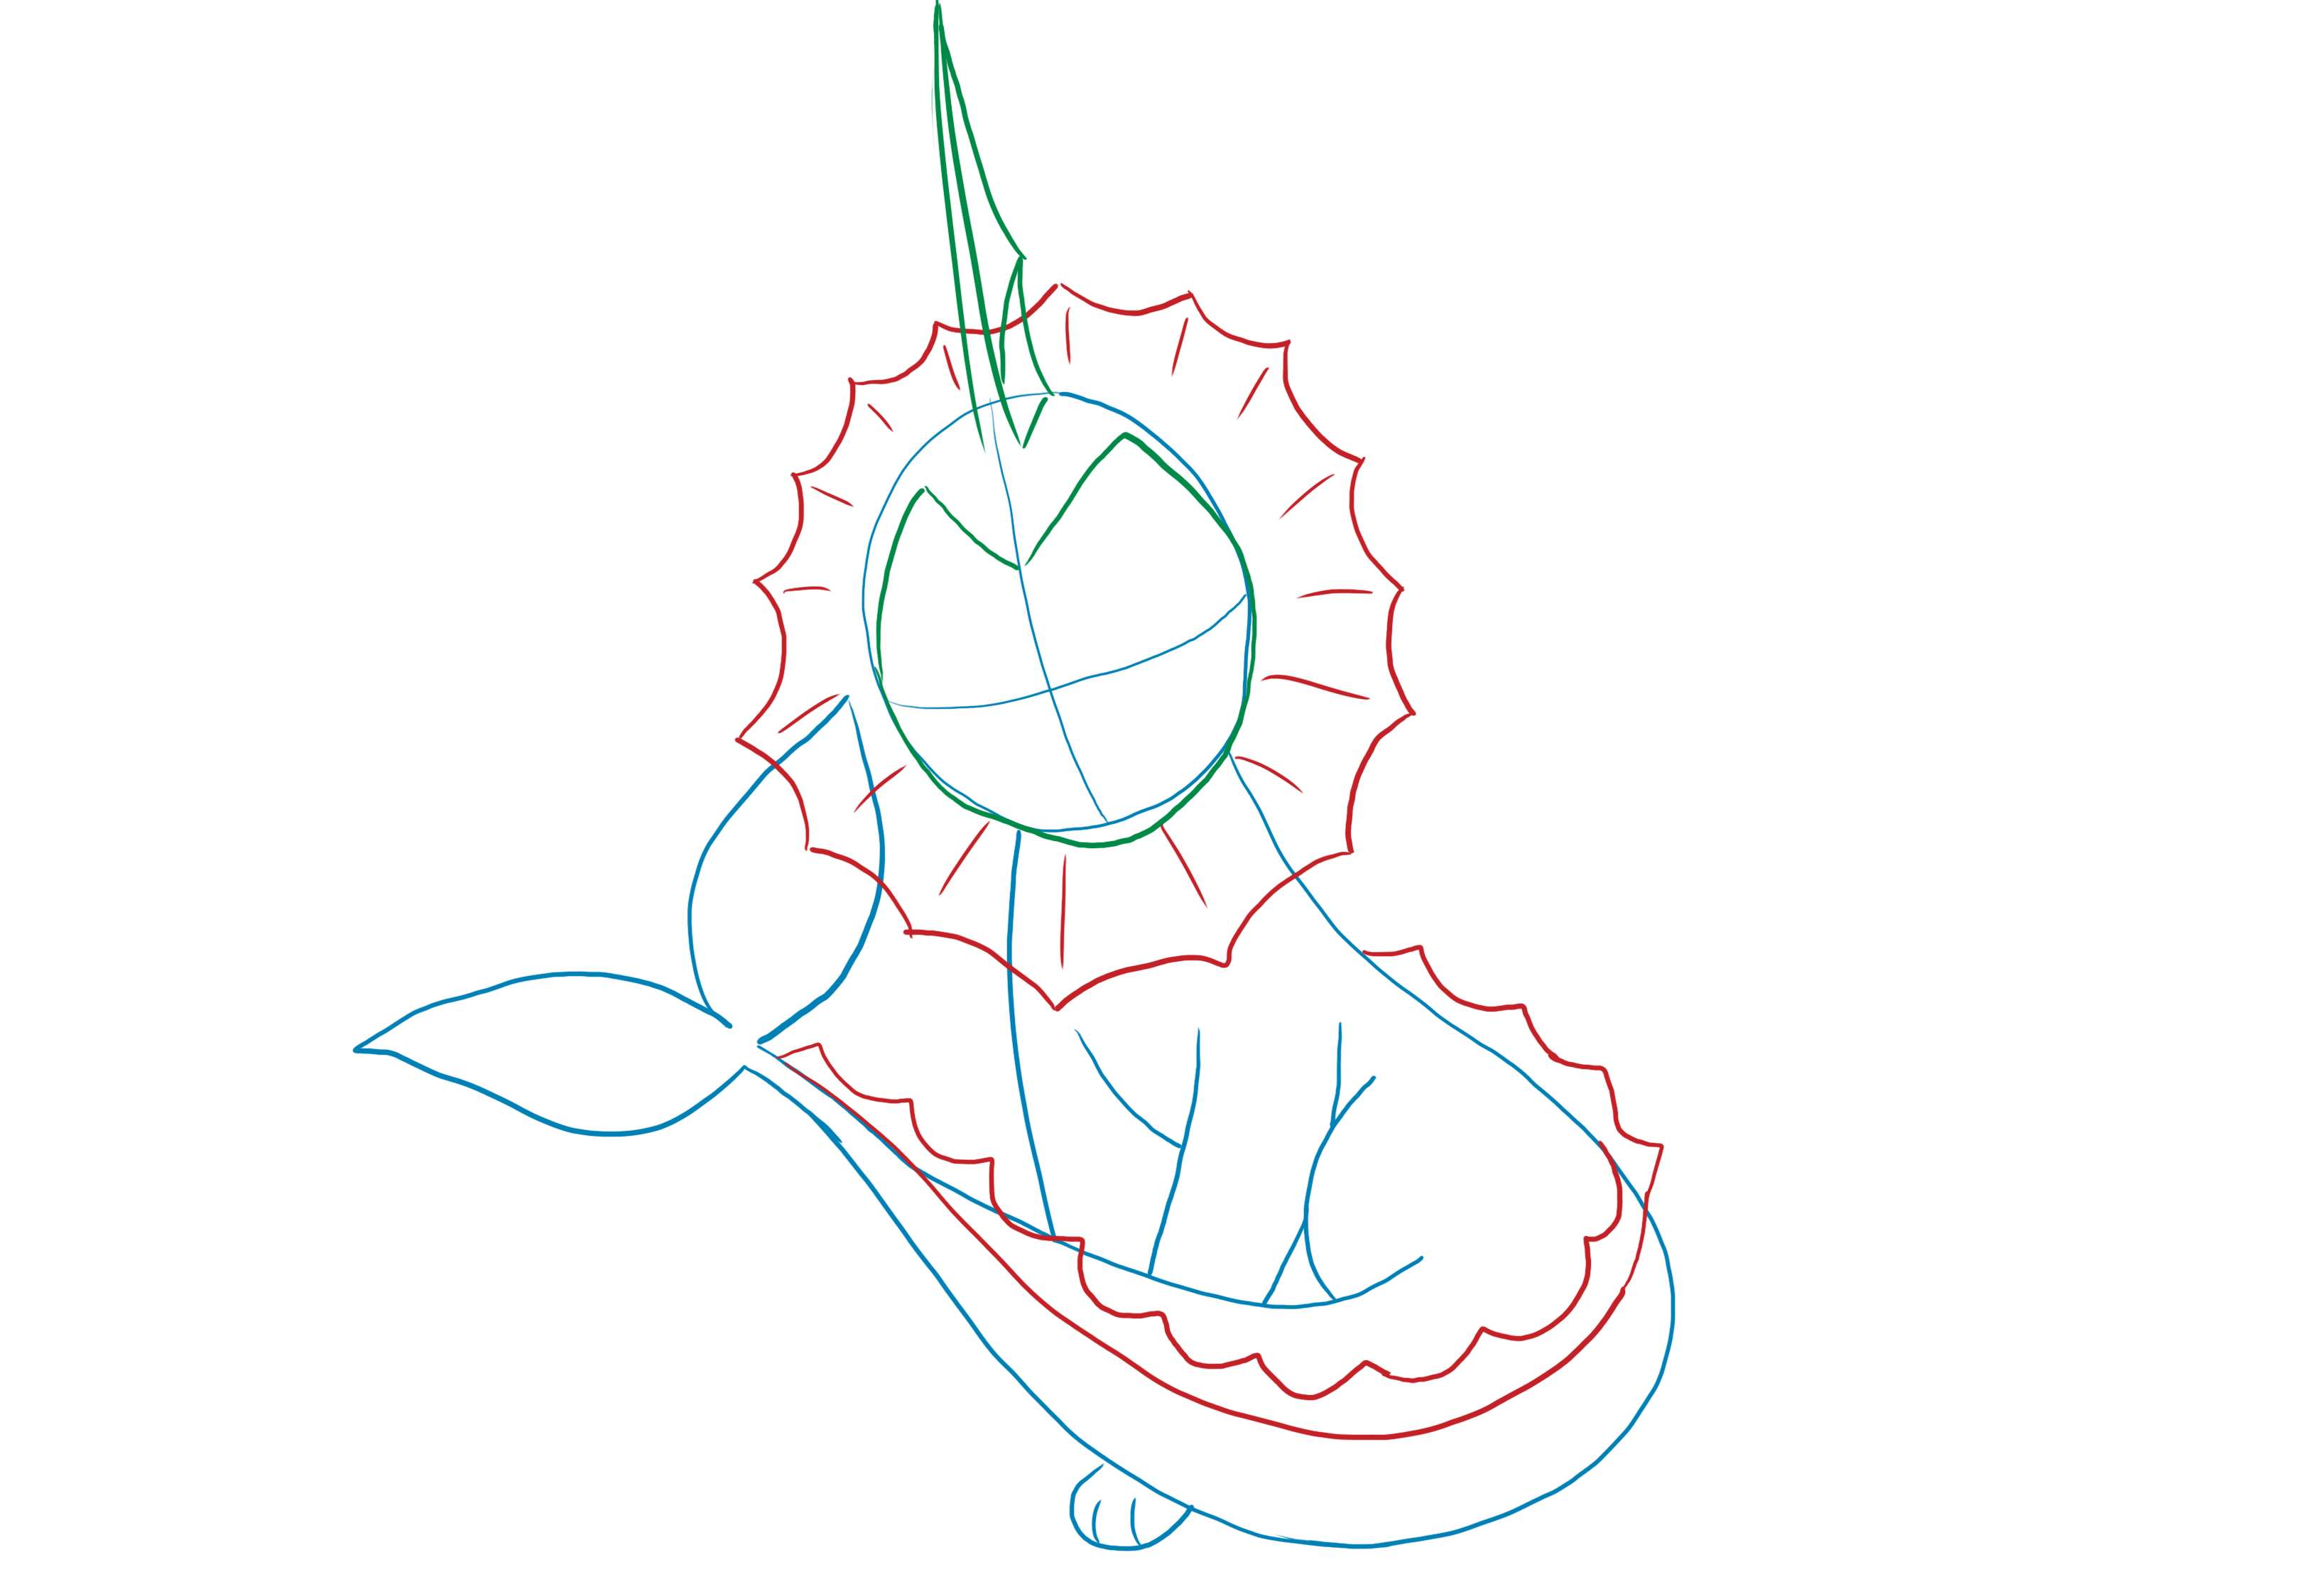
For the ears, it's the same principle as for the fin on the head.
Start by drawing a very thin and curved triangle, then go from the tip of the triangle to the head, making curves.
For the face, draw almond-shaped eyes (inner tip downwards and outer tip upwards) and make an oval inside each eye.
The nose is simply a point and is located at the intersection of our reference frame.
To draw the mouth, start by making two curves that meet and then draw a "U" for the lower lip.
Finally, draw the tongue by making a simple curve.
You can now move on to inking.
As usual, go over your lines in black and erase the construction lines.
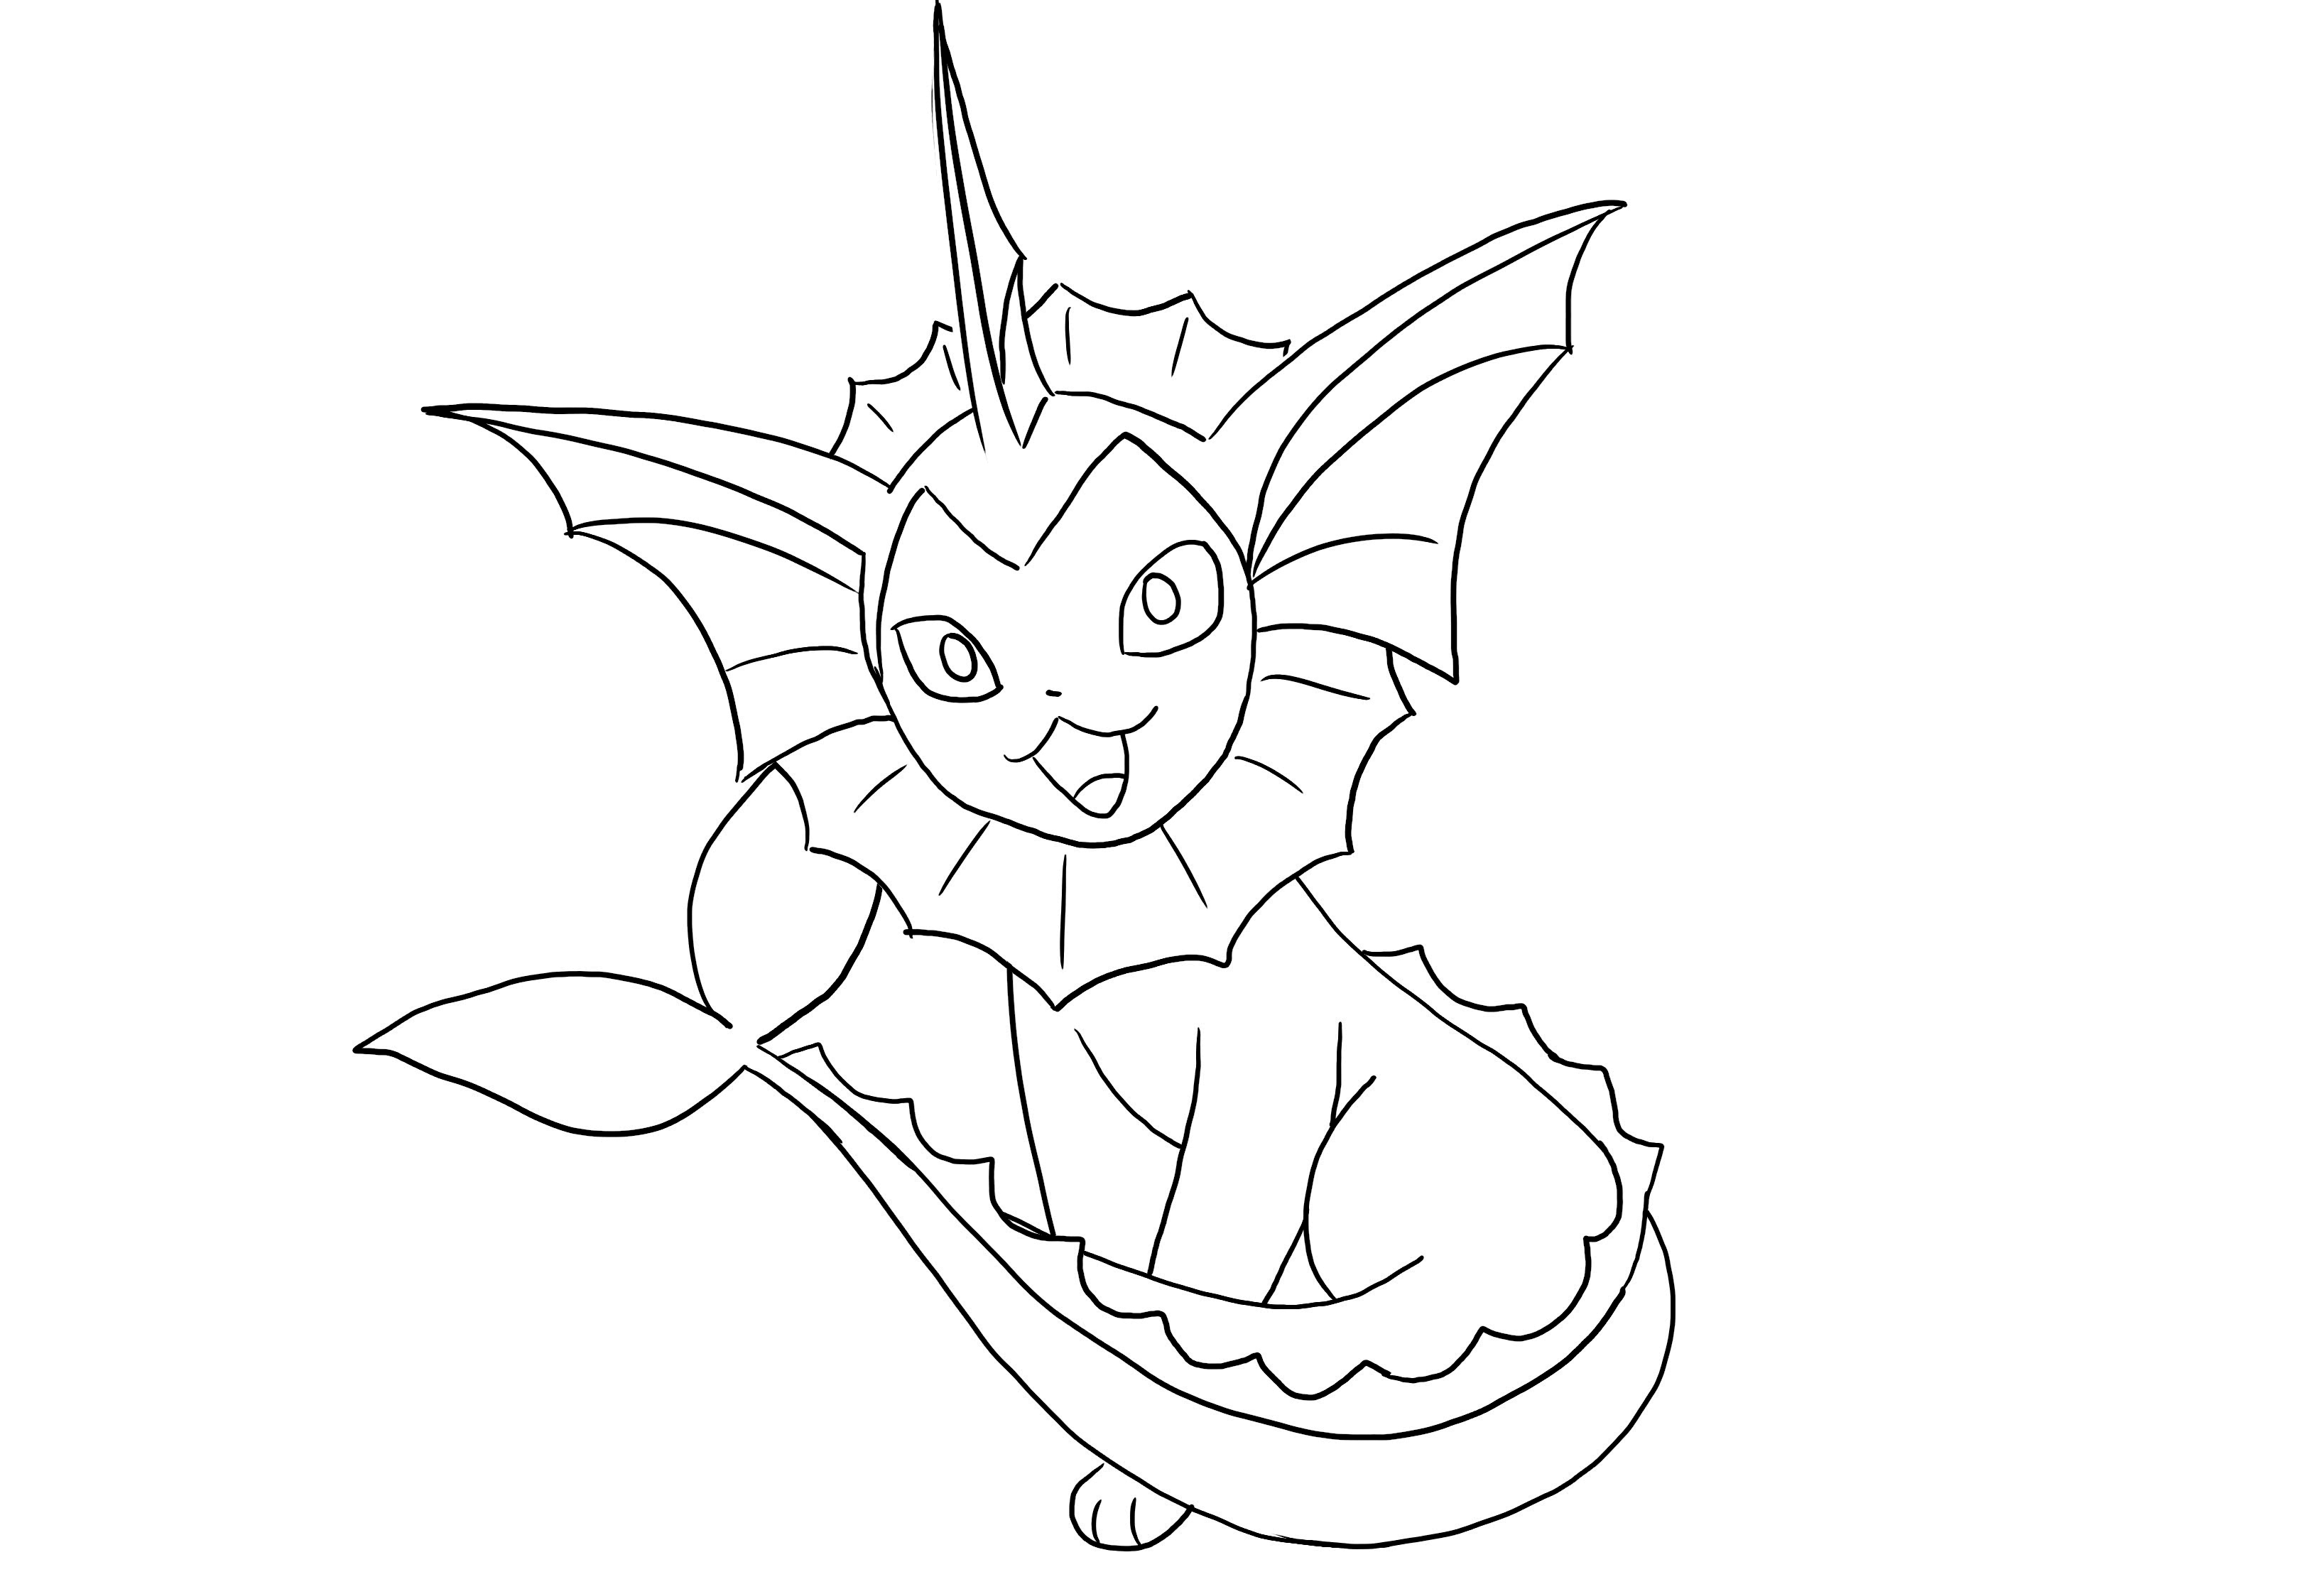
Add black to the eyes and inside the mouth and hatch marks for the shadows.

You've finished drawing Vaporeon!
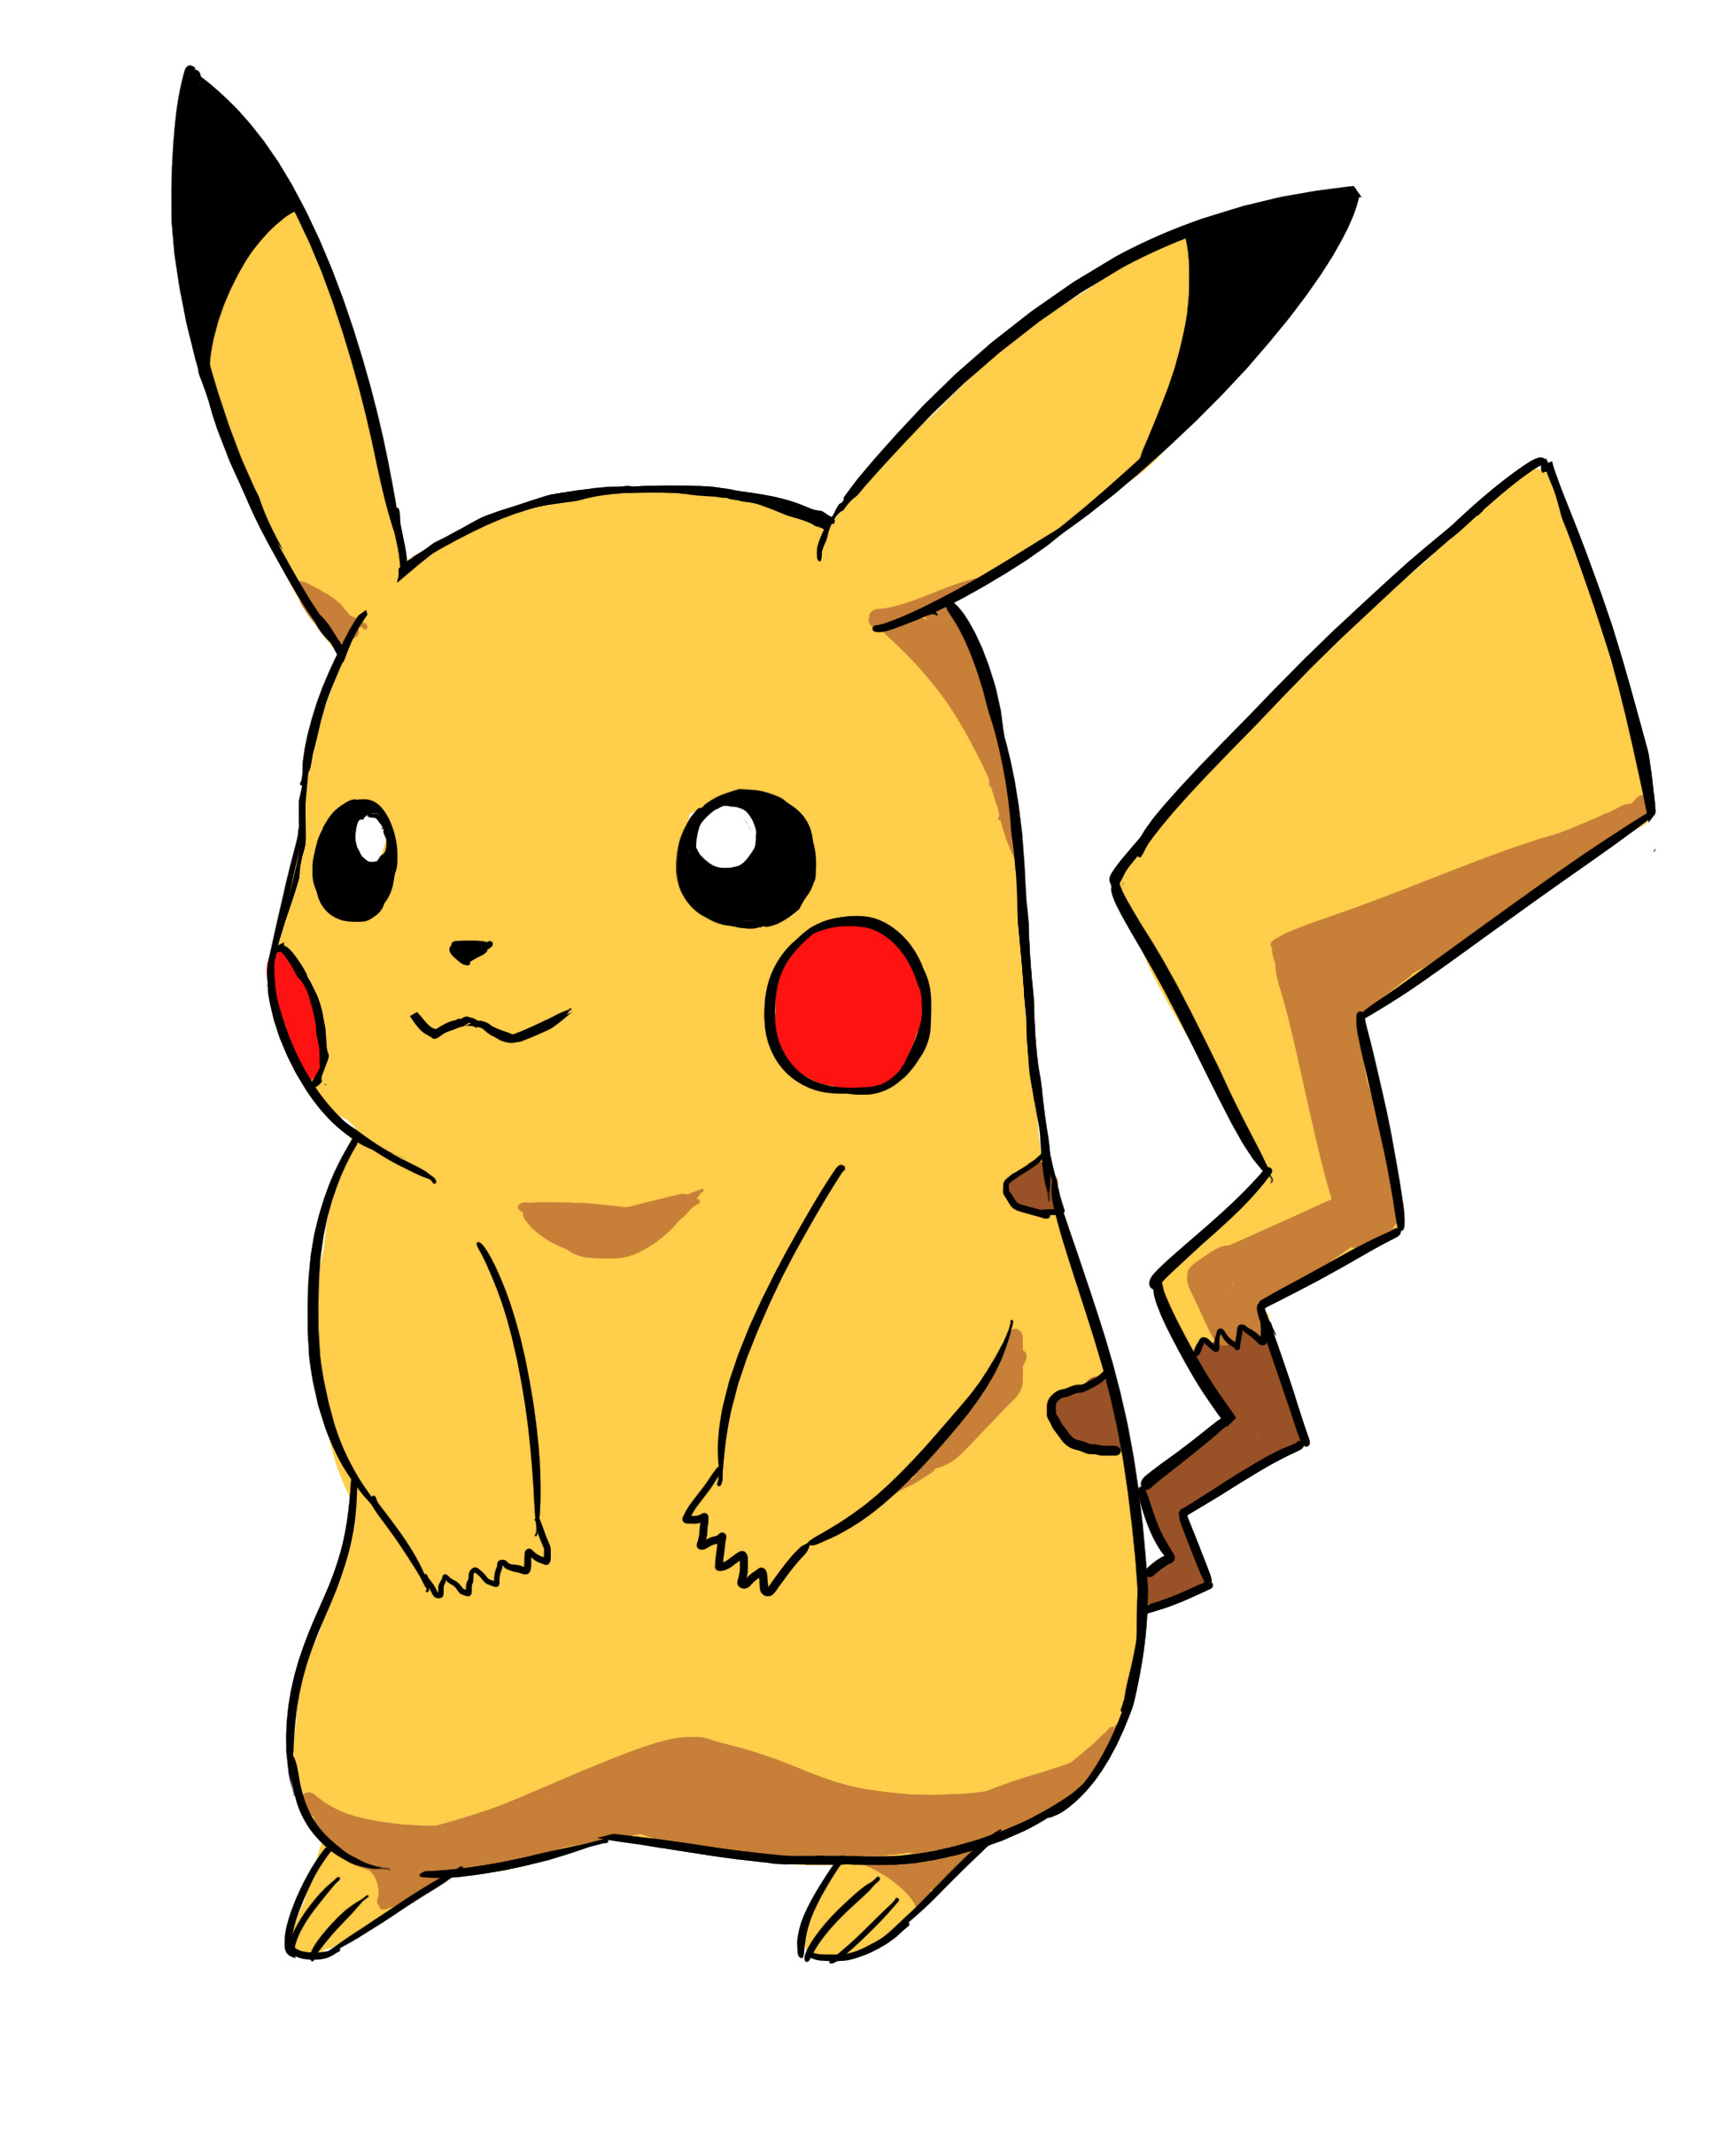
Now you know how to draw 3 Pokémon. In case you would like to learn how to draw another Pokémon, you can find an article on our blog about how to draw Pikachu, feel free to take a look ;)
As you can see from this article, I started with simple shapes (circles) and then gradually sculpted the shape until I achieved the desired design.
Do this for all your drawings, see them as simple shapes like circles, squares, triangles, etc. and draw your base using just these shapes.
Once your base is well established, you can begin to sculpt your design and add details until it is finished.
Have a good drawing session! :)
Discussion
10 comments