How to Draw a Wave
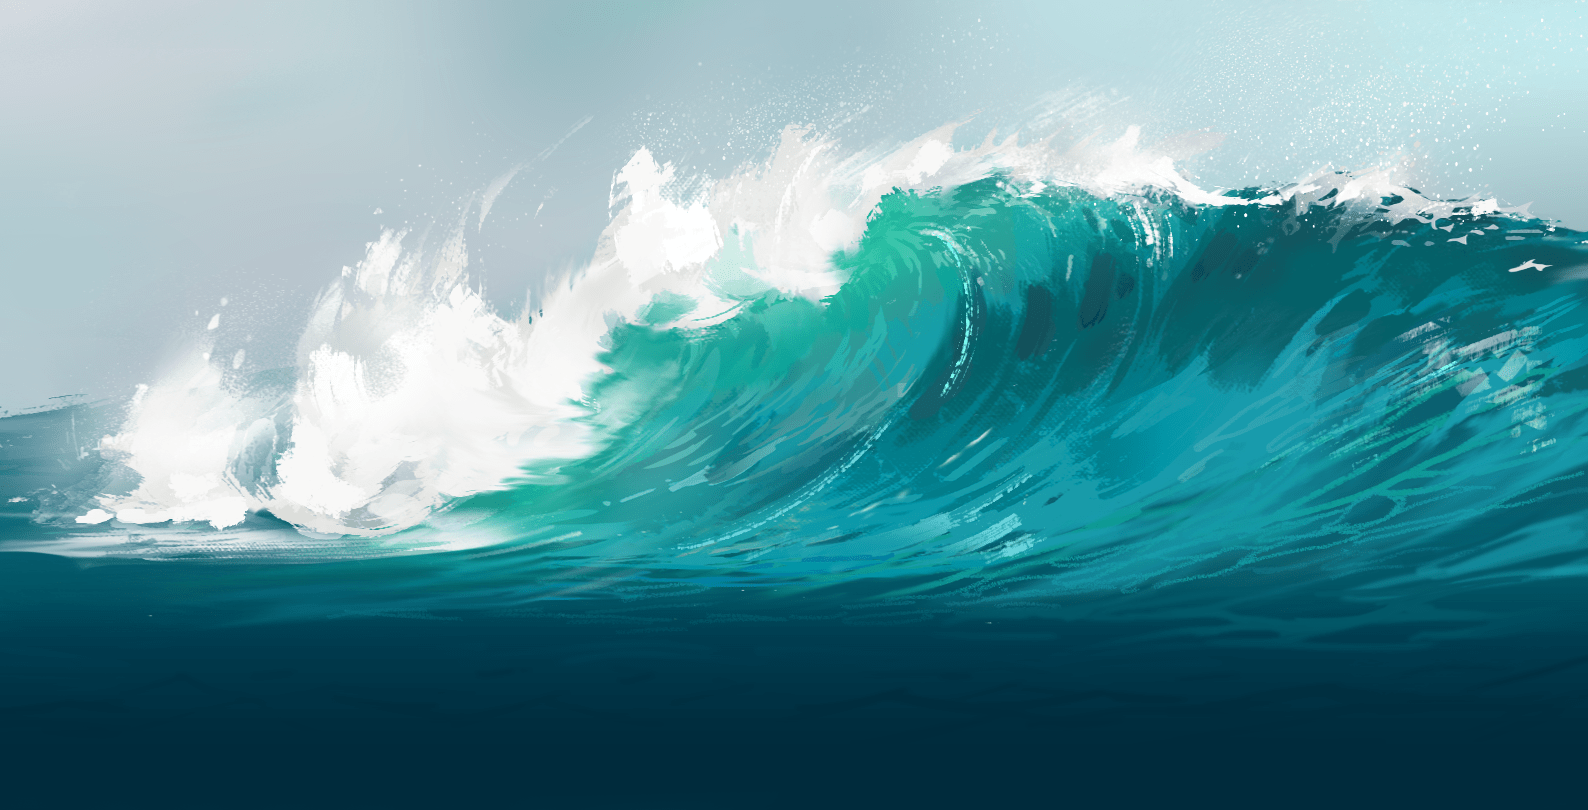
Waves are oscillations generated in the ocean by the wind, but also by tides and earthquakes. The swell propagates them, and they come to break and die on our coasts in a striking spectacle.
Ocean waves captivate our spirit with their beauty and energy, and inspire many artists. The famous "Hokusai wave" that you may know is actually a rogue wave: a rare category that can measure more than 30 meters in height!
Drawing a tube wave step by step
Today, we are going to draw a type of wave that has a quite striking appearance: the plunging wave. As its name suggests, it makes a plunging forward motion and a "tube" is formed at its center.
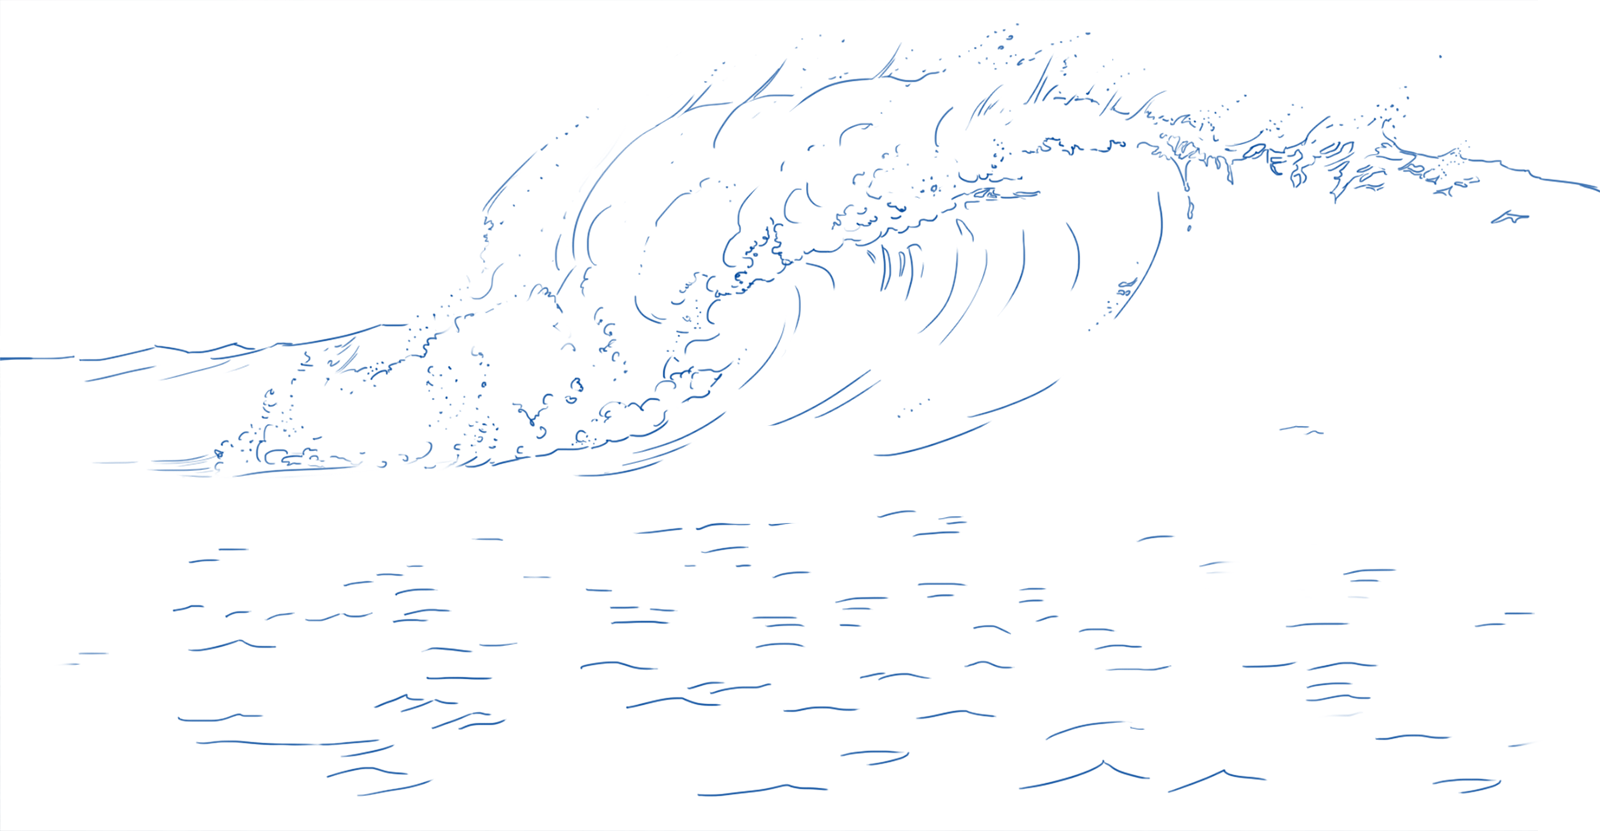
1) Let's start from the horizon line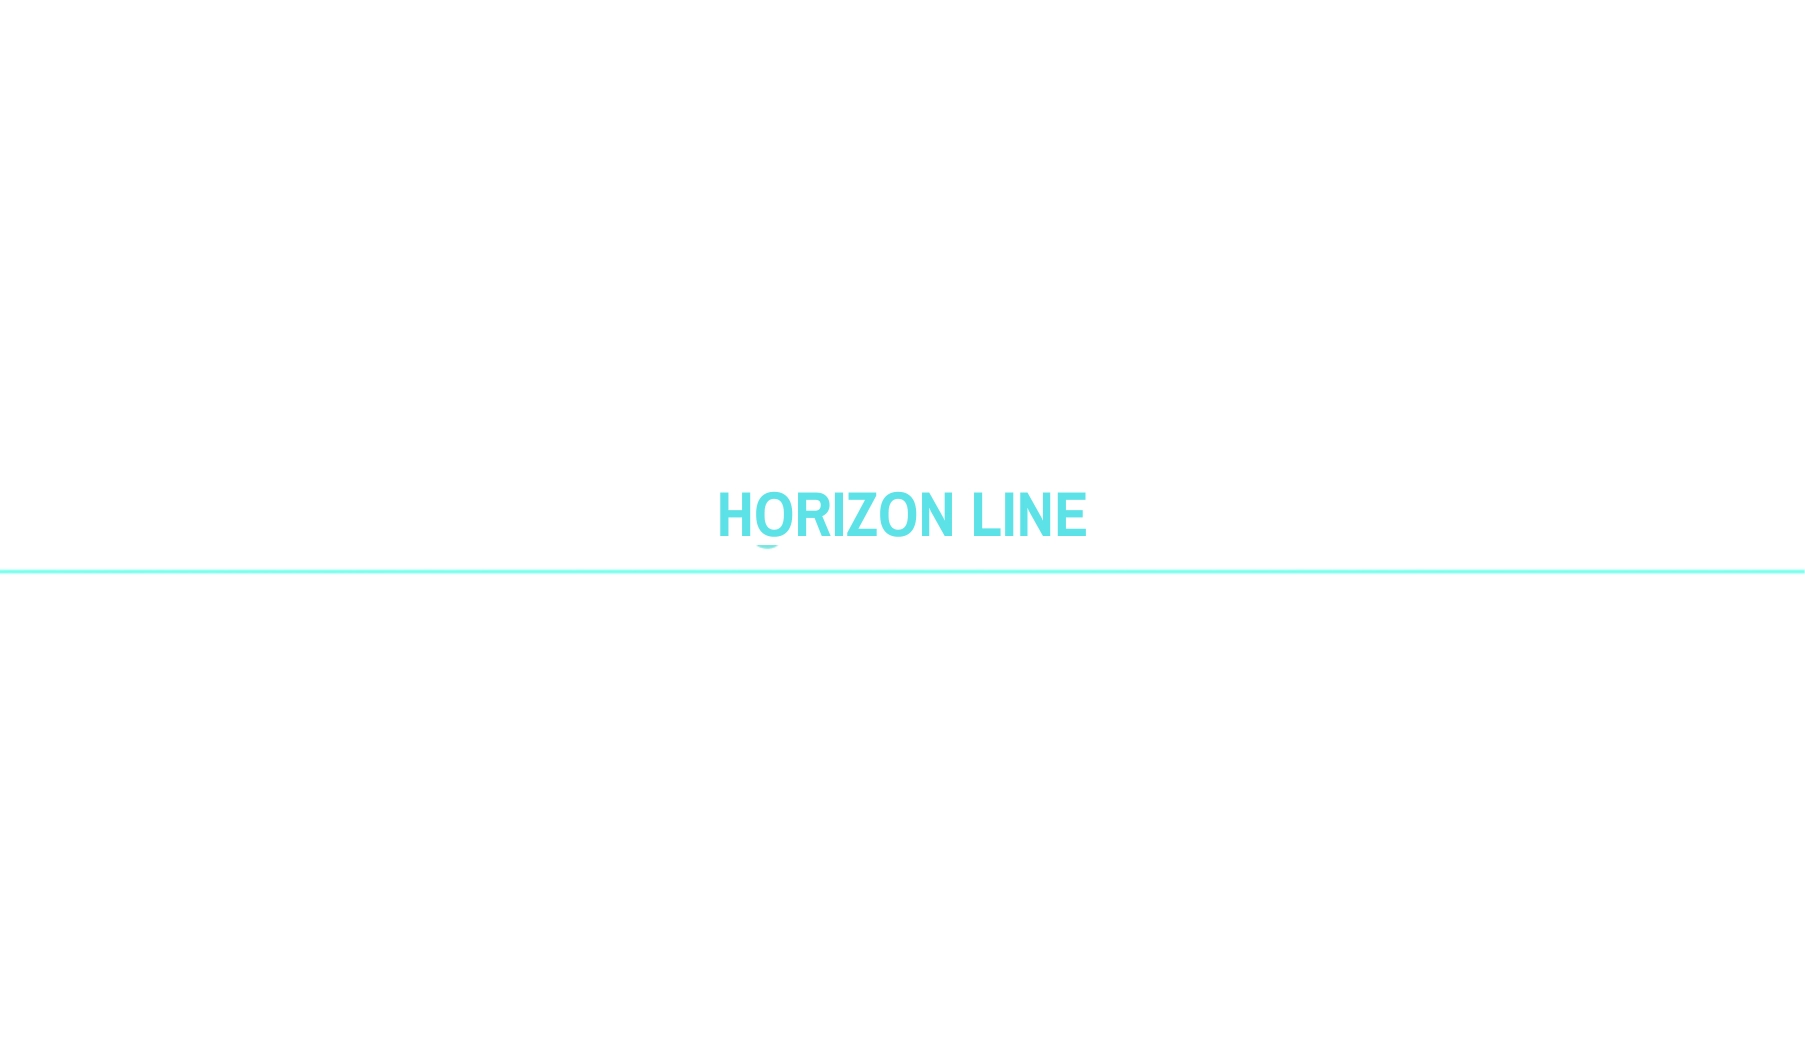
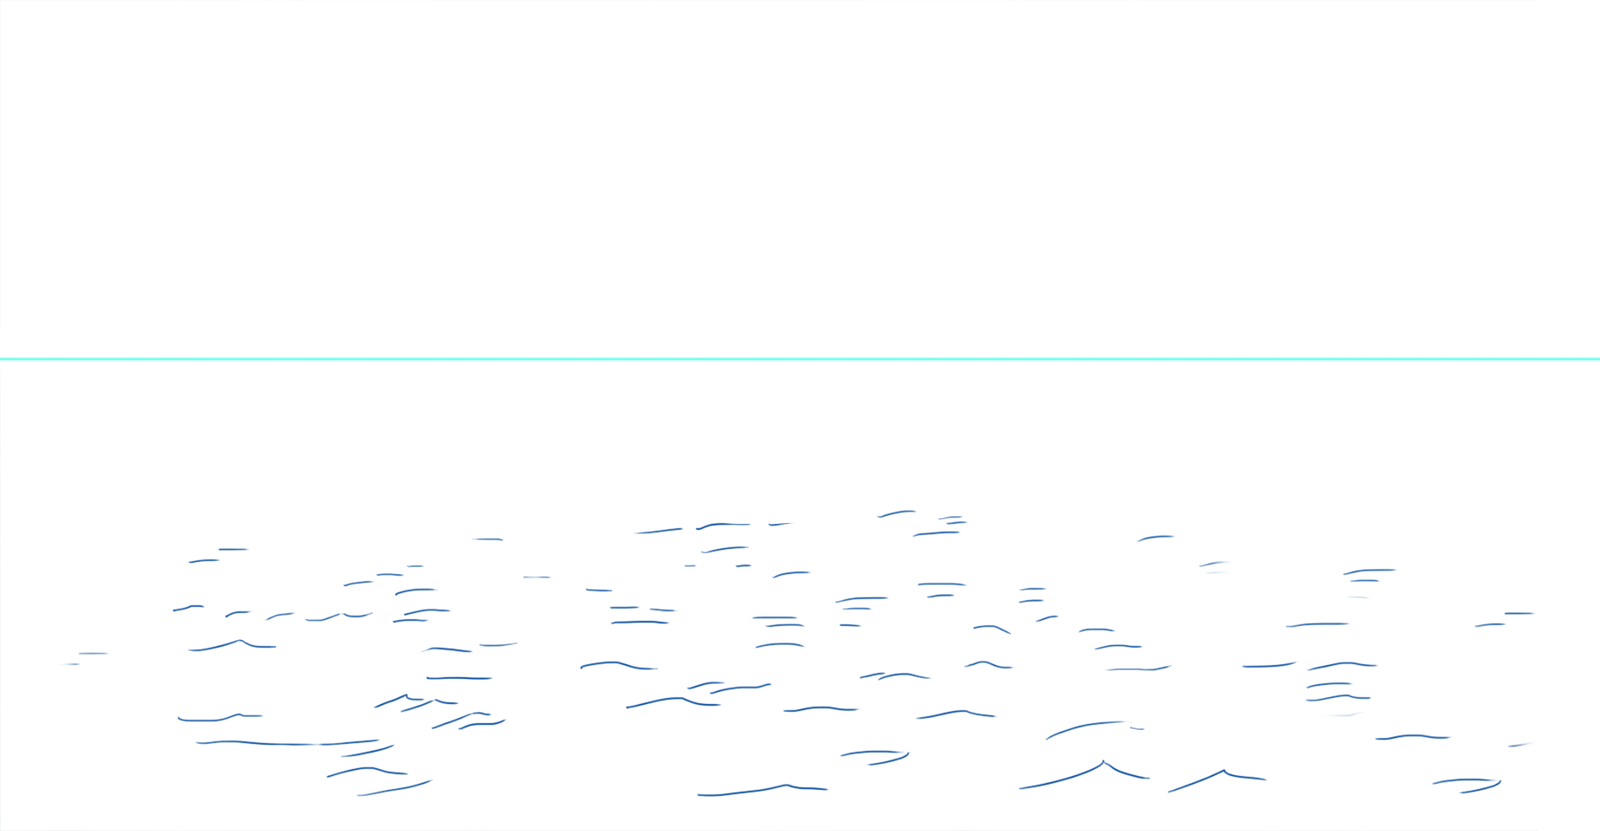
2) To really understand how to draw a wave, I choose to represent it in calm water. It will not be on the coastline but in the middle of the ocean.
I first draw little ripples in the foreground. At the bottom of my drawing, I randomly place a series of small flattened and inverted "v"s. The more you move your gaze away towards the horizon, the less visible and defined these ripples will be. For the farther ones, small lines are enough.
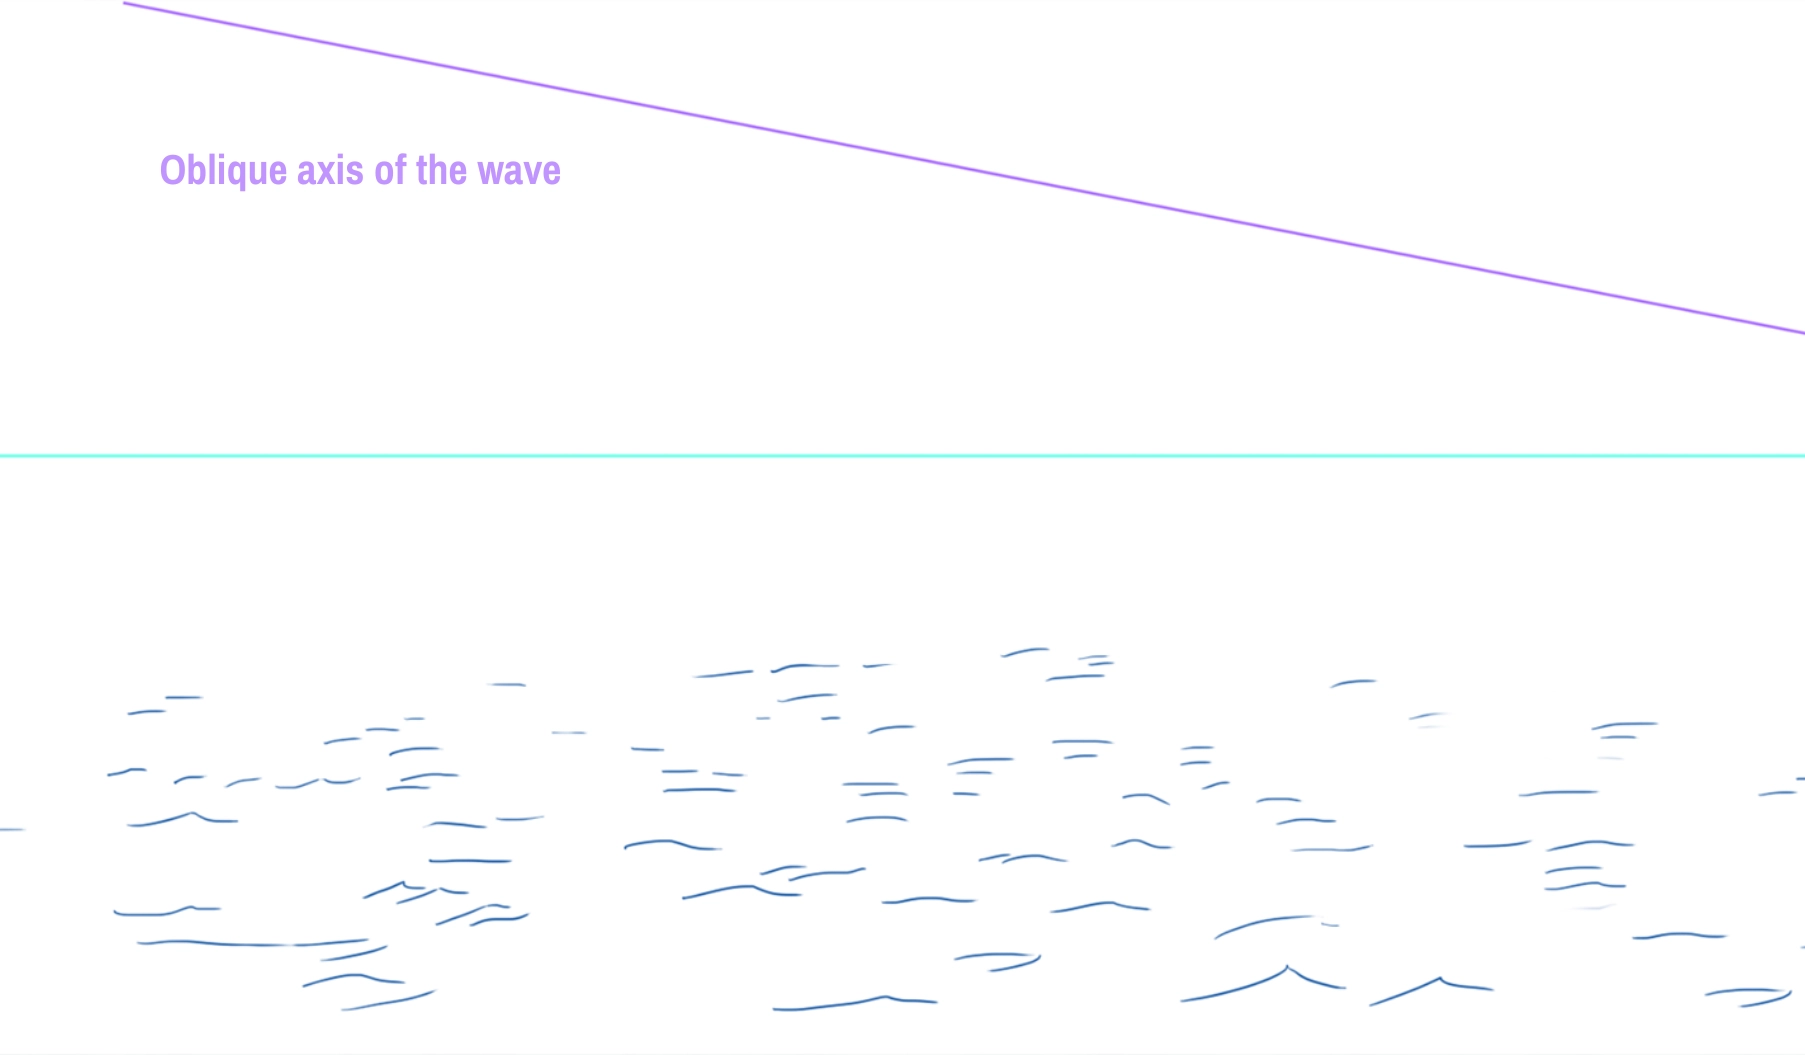
3) The plunging wave is asymmetric. To clarify, I show its axis below with a purple line.
This axis defines the future height of the wave, so you can place it higher or lower depending on the desired outcome: a small wave, or a much more impressive one.
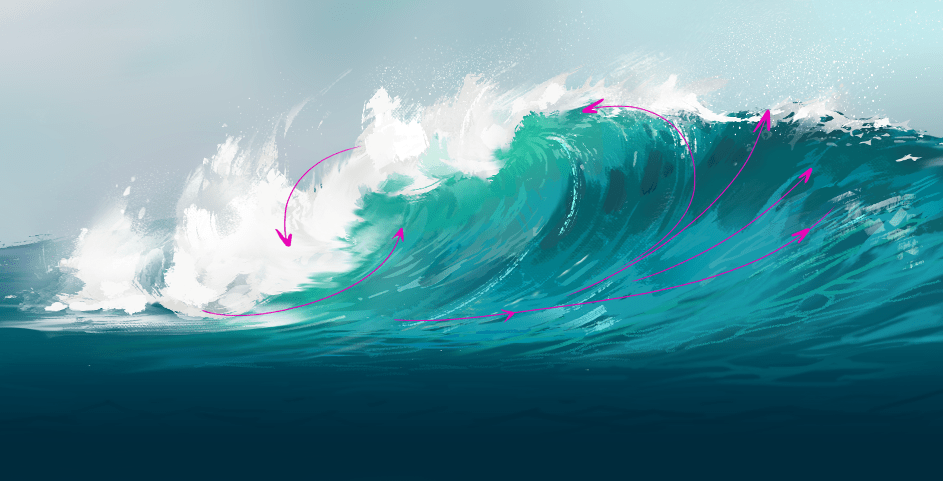
4) The closer we get to the wave, the more water is drawn by its movement. A counter-current rotation is observed in the trough of the wave.
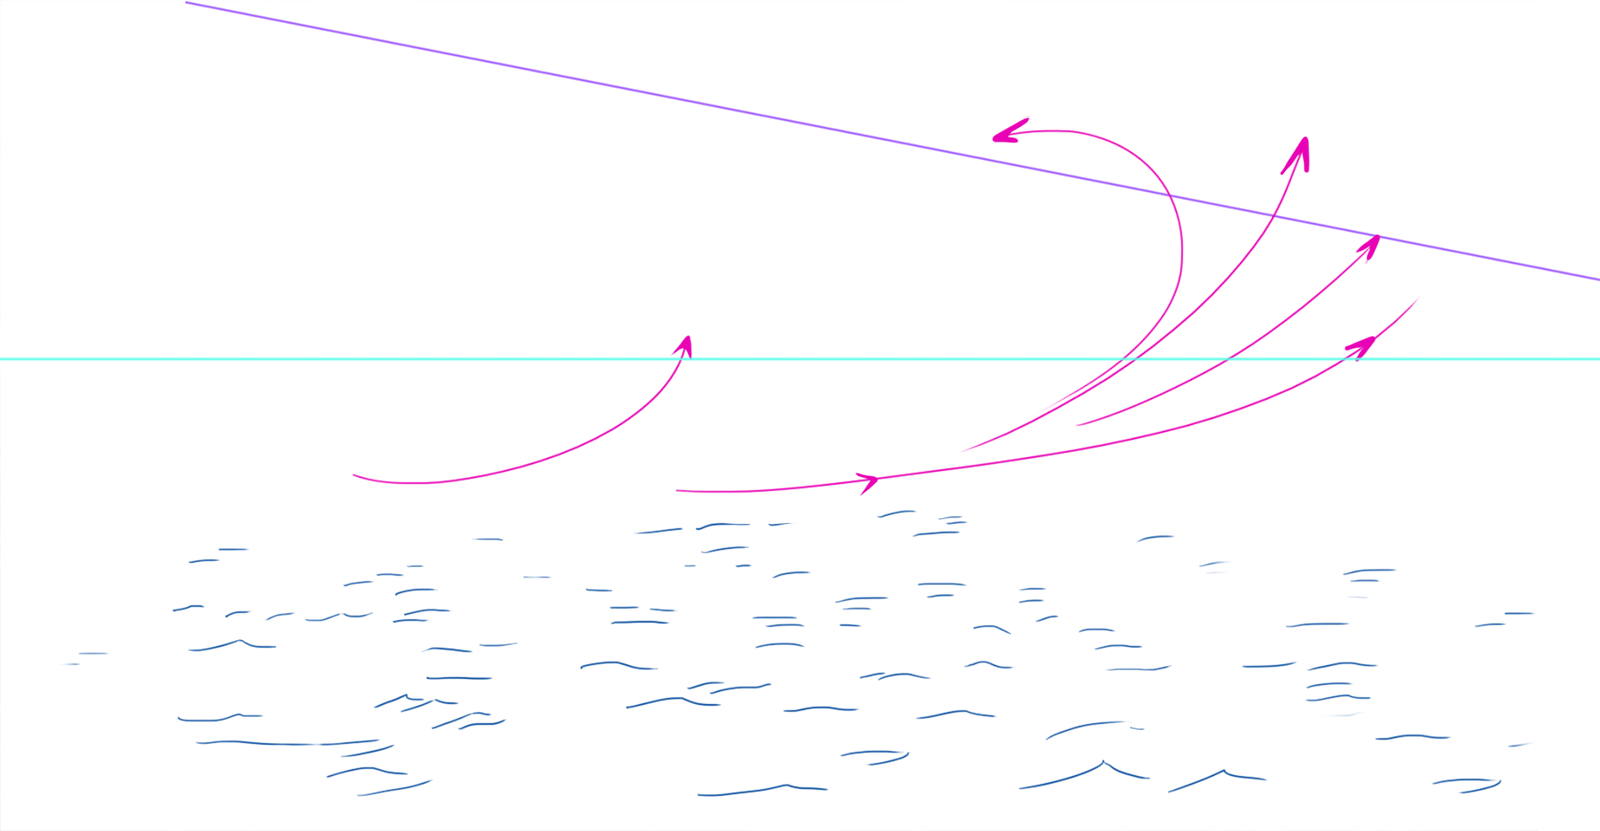
5) With a few fine, curved lines, I represent this hollow by following the movement of the arrows. I draw the reference of the wave crest in sky blue. In the distance, on the horizon line, I start to sketch some waves.
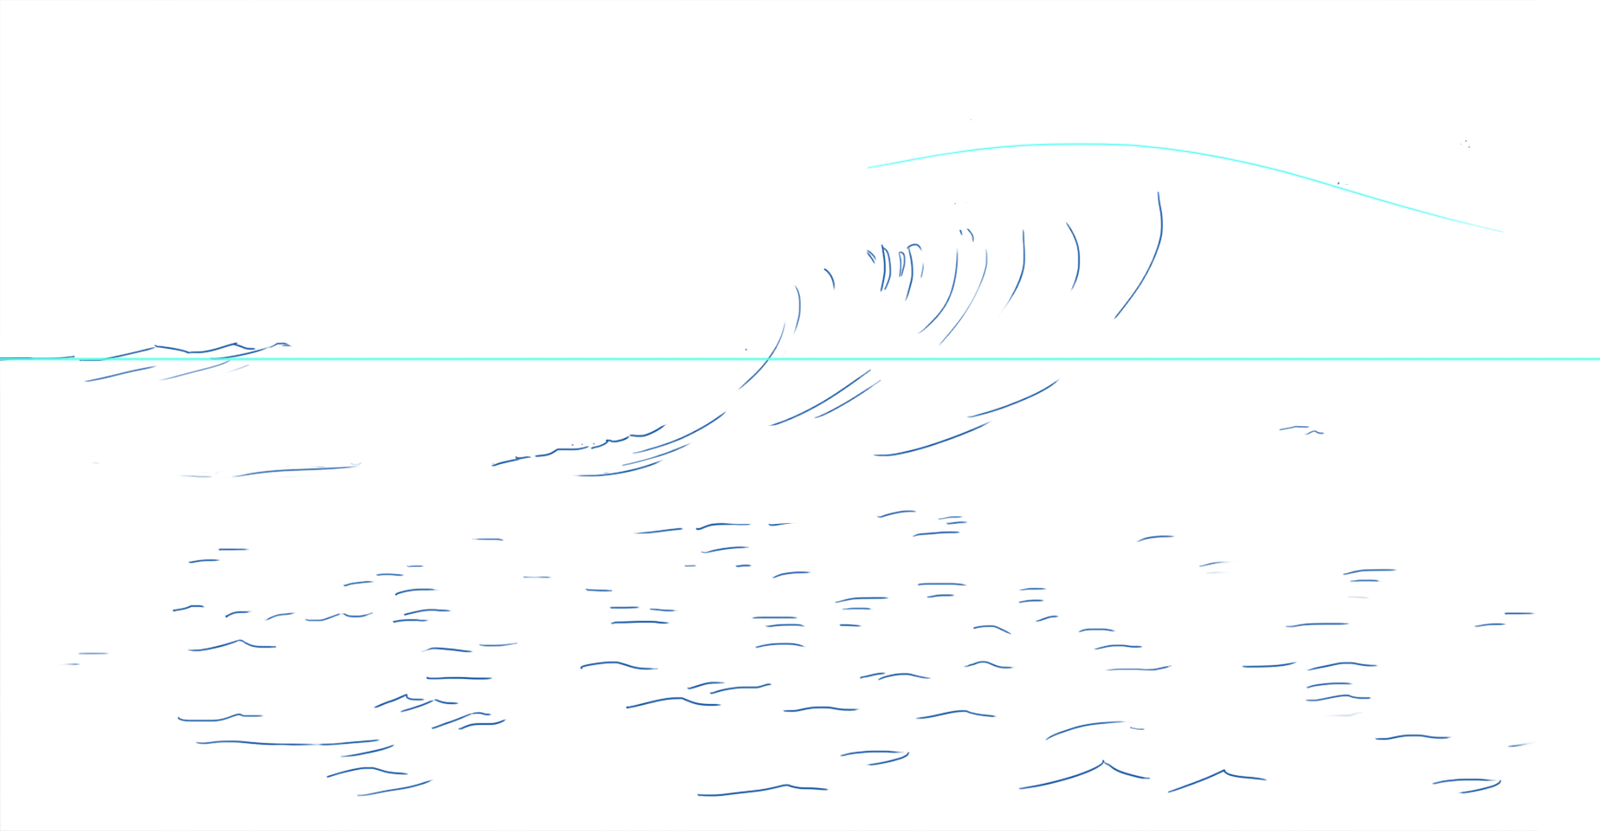
6) For the crest of the wave, I sketch small irregular strokes following my previous mark. We draw the breaking of the wave with increasingly larger rounded shapes that overlap. At the bottom of these rounded shapes, I represent the water's agitation with foam.
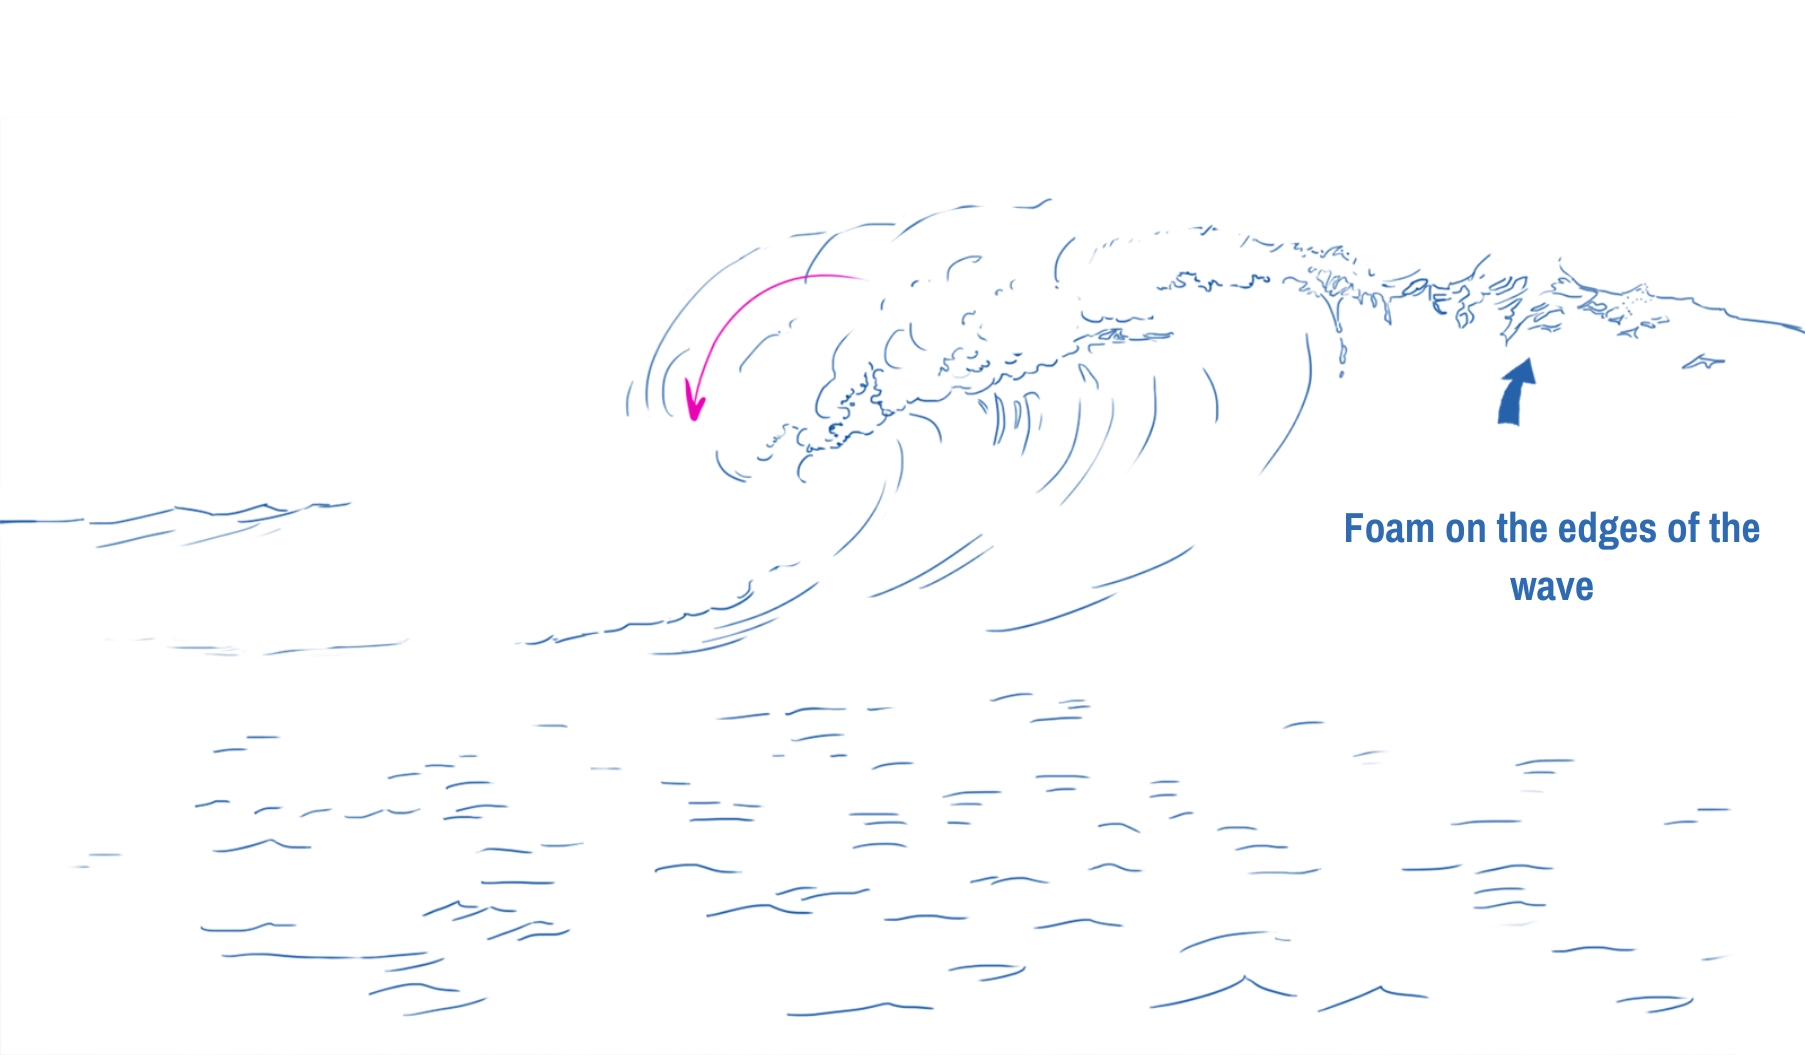
7) The crest crashes onto the ocean surface, forming white foam. For this, I do not draw all the outlines of this mass but only a few points that evoke its general shape.
The higher and more powerful the wave, the more foam we can add.
Then, I connect the small waves of my background to my wave.
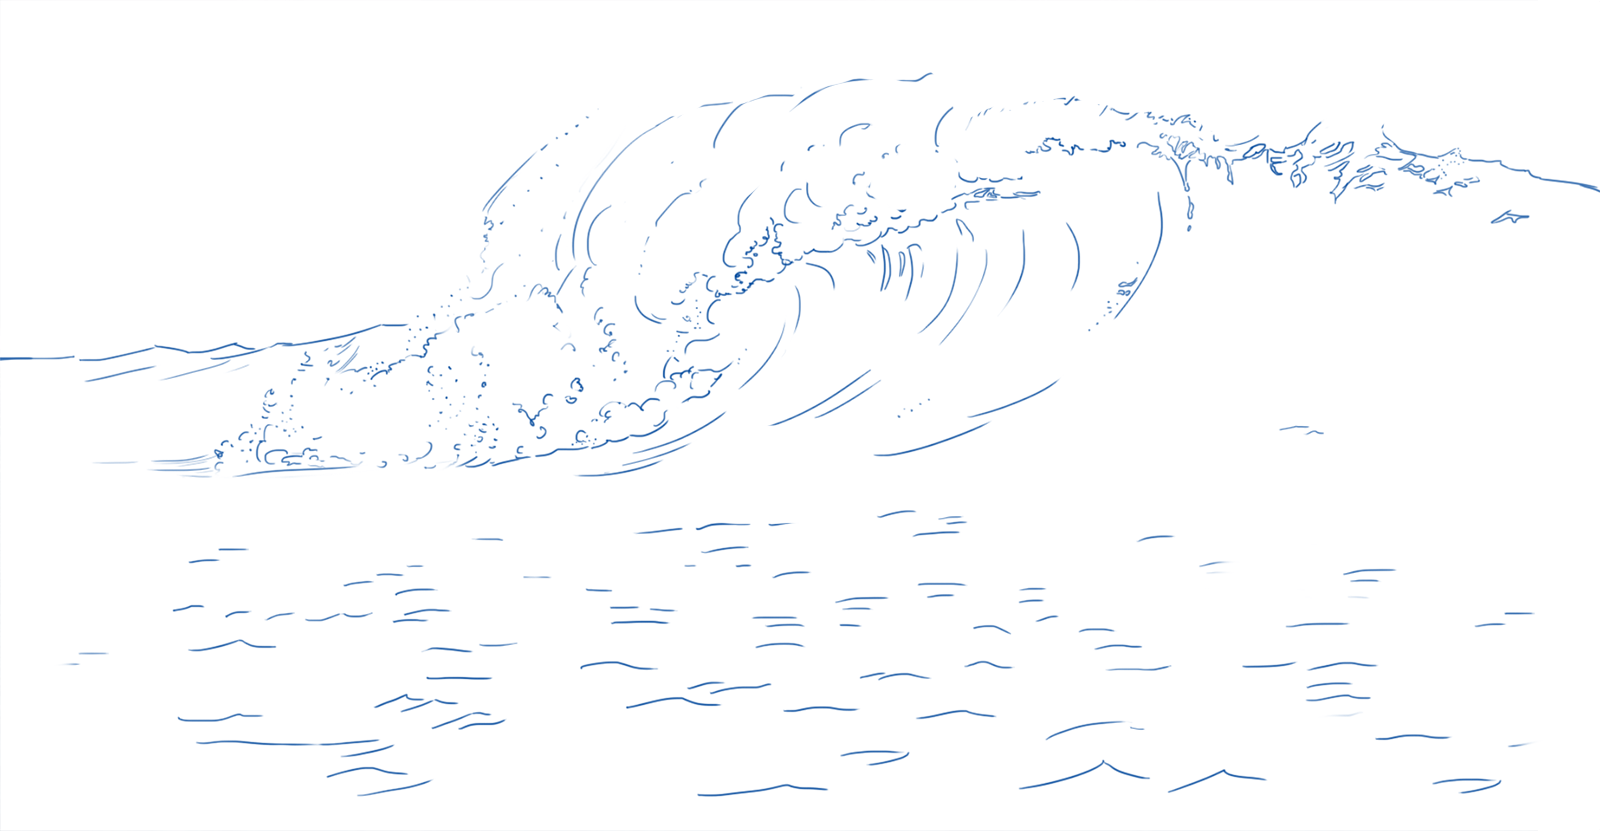
8) To accentuate the wave's crashing effect, long trails of water, splashes, and scattered droplets are added at its crest, with small dots in the opposite direction of the wave.
Coloring the wave drawing
Let's give life to this wave by adding some color!
The shades are quite simple: you can choose any range of blue or dark green, both work perfectly.
1) When adding the details of the wave, I choose a background color for my sky and ensure that my palette always has the color references in mind.
The lines in the drawing can serve as a guide, but they will disappear later.
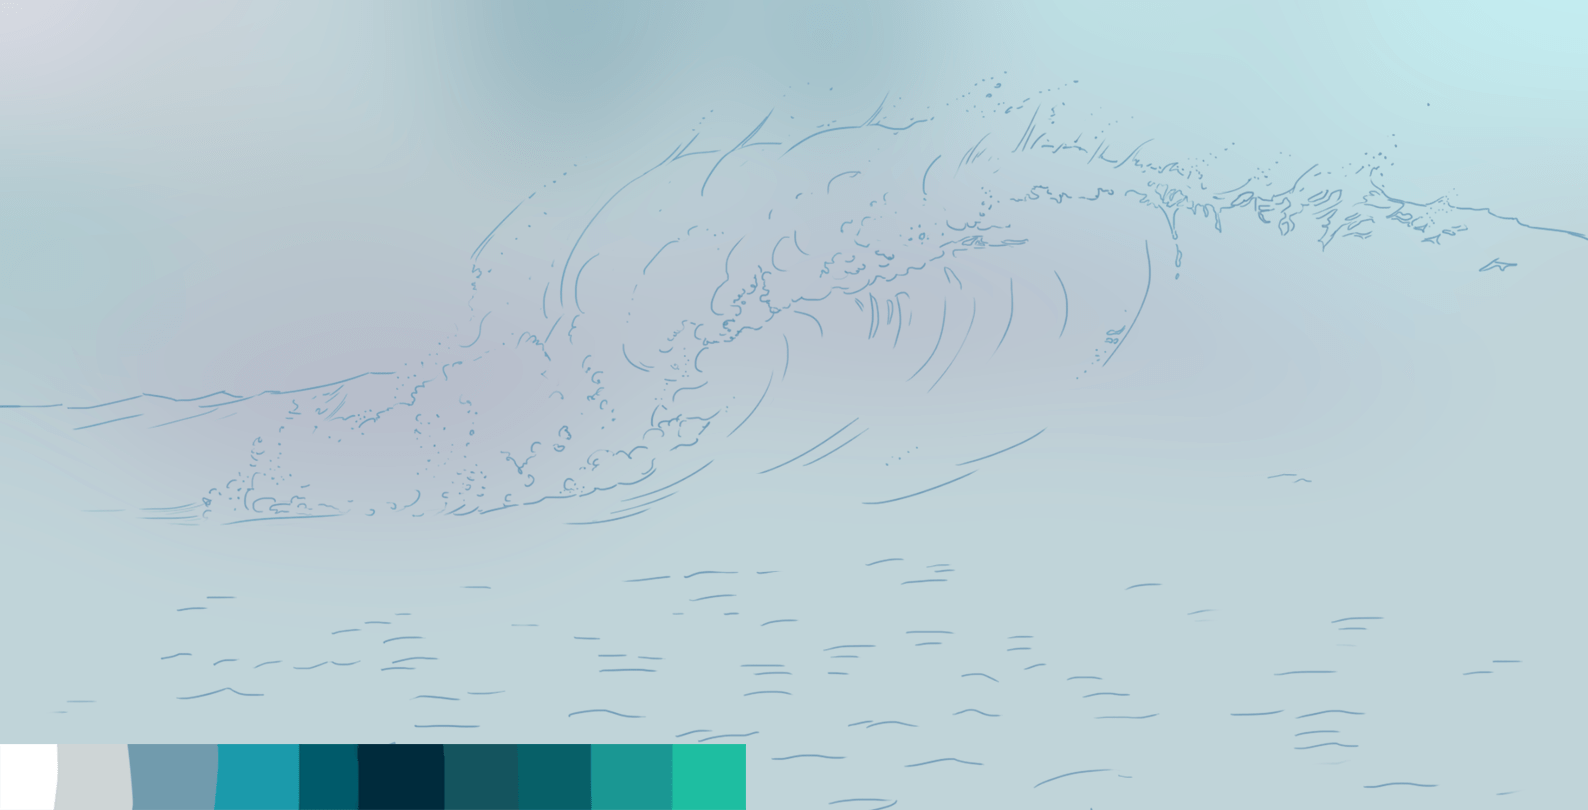
2) We can start with the general mass of water; the water will be darker to convey the depth of the ocean at the bottom of the drawing only, and a bit lighter for the wave. I blend these two shades of blue together.
For the distant waves in the background, I use a desaturated color to express distance: the gray-blue from my palette (the 3rd color). This color should be defined based on your sky, to give the illusion that it is reflecting on the water.
Above the wave, on the crest, I draw the foam that falls following the curve of the wave. The foam is less frequent when the wave forms (to the right of the drawing) and becomes denser as the wave falls (to the left).
To draw the foam, I choose two or three shades of light gray. If you only use white, it will be flat.
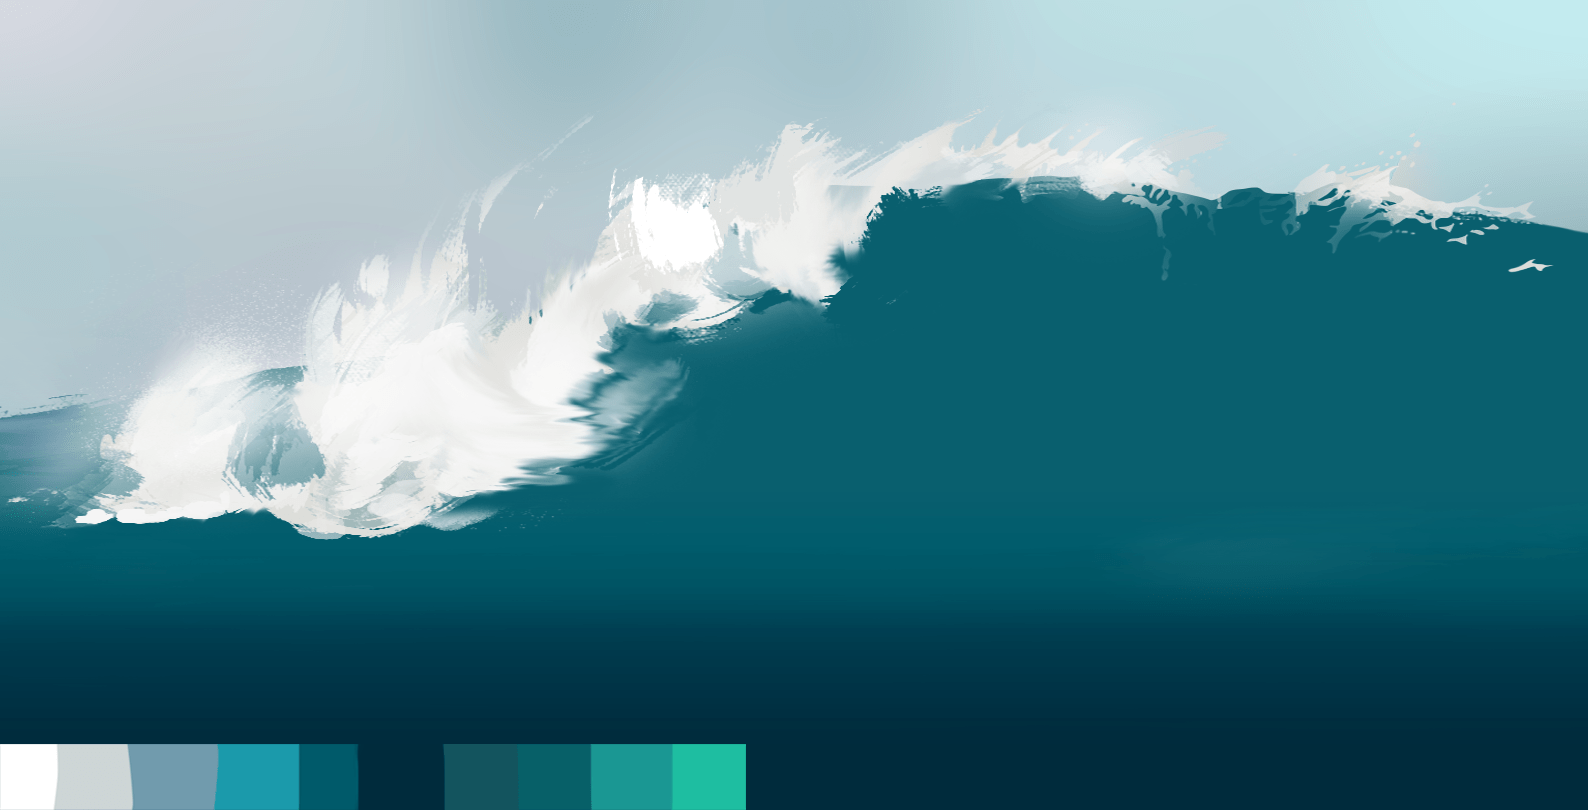
3) When the water of the wave detaches from the surface, its density decreases and lets the sunlight through: we can then choose a beautiful turquoise green. So I lay the second lightest shade from green on the top of the wave:
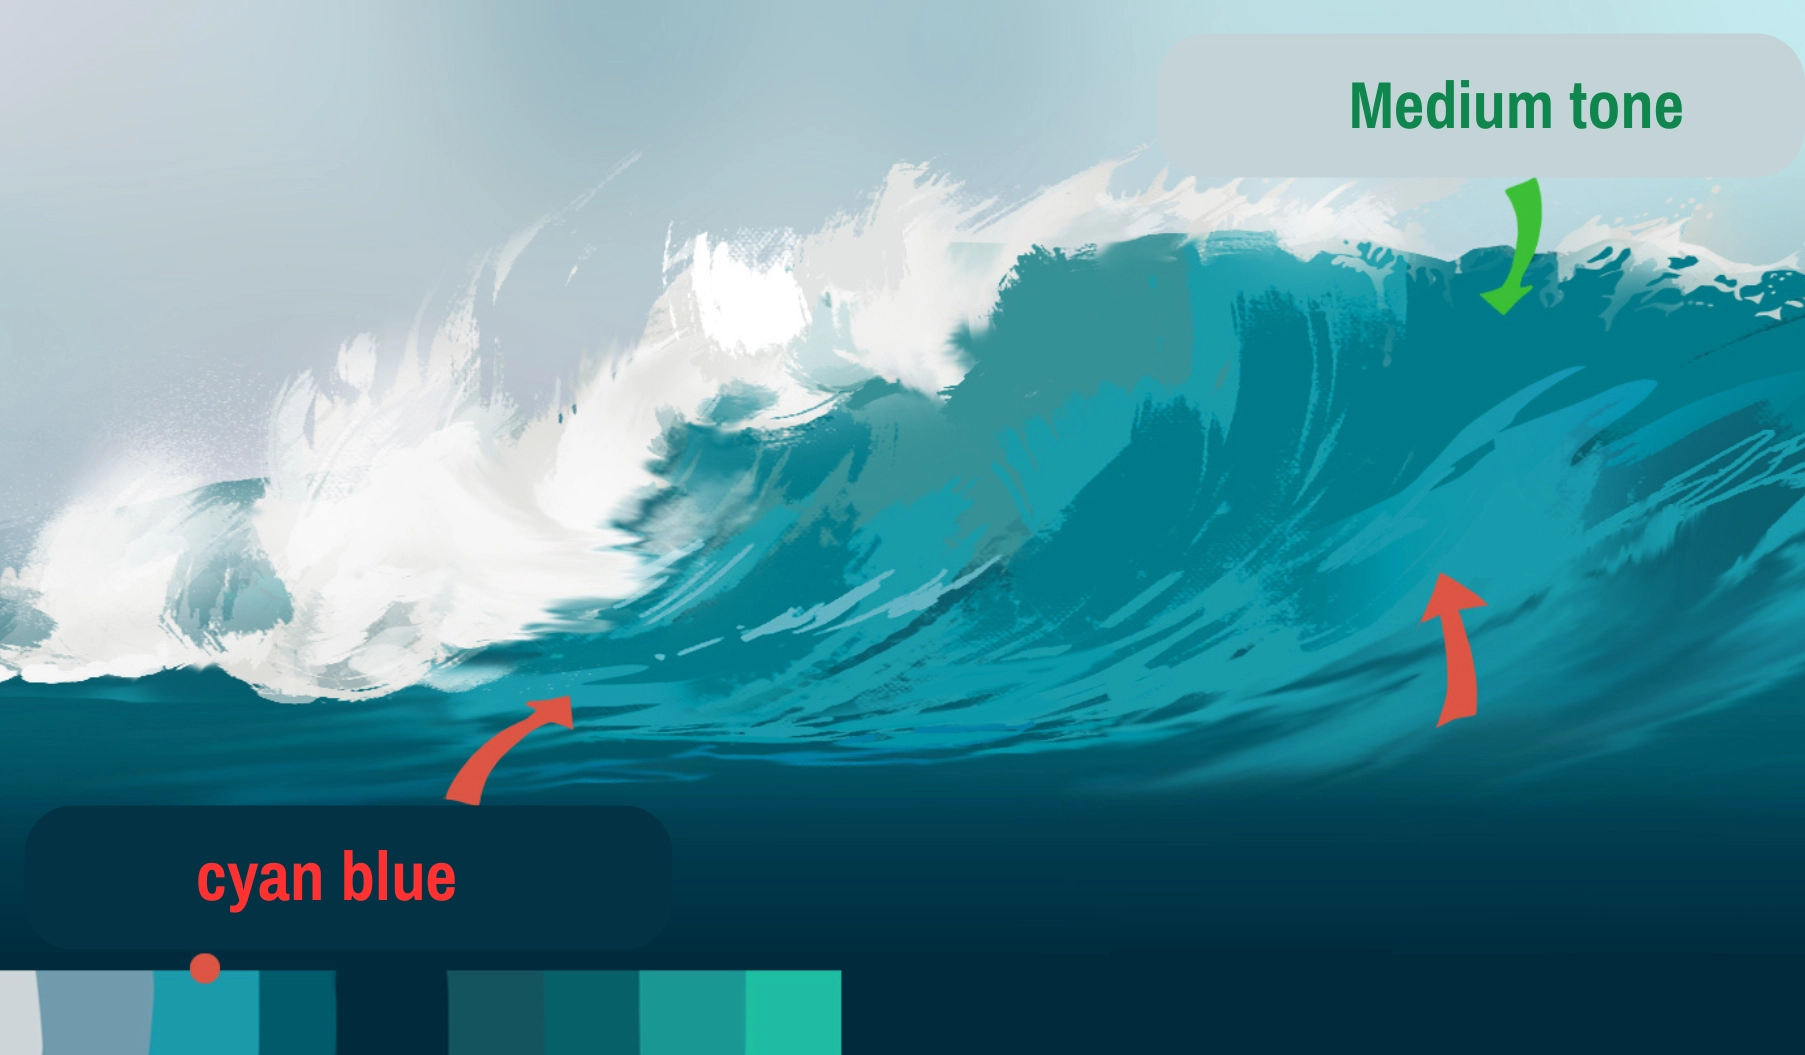
4) On top of that, I add the medium shade from the palette to my wave while dynamically painting and following the movement of the arrows that I placed as markers.
The brush strokes are finer and more defined at the base of the wave, and can be larger for the heart of it.
I use cyan blue to indicate the first reflections of the water:
5) I place the dark shades above the mid-tones; where the wave is densest, to give it body. For this, I sparingly overlay increasingly darker tones following my color palette.
Caution! The darkest blue in the palette is used only for the calm water at the bottom of the drawing.
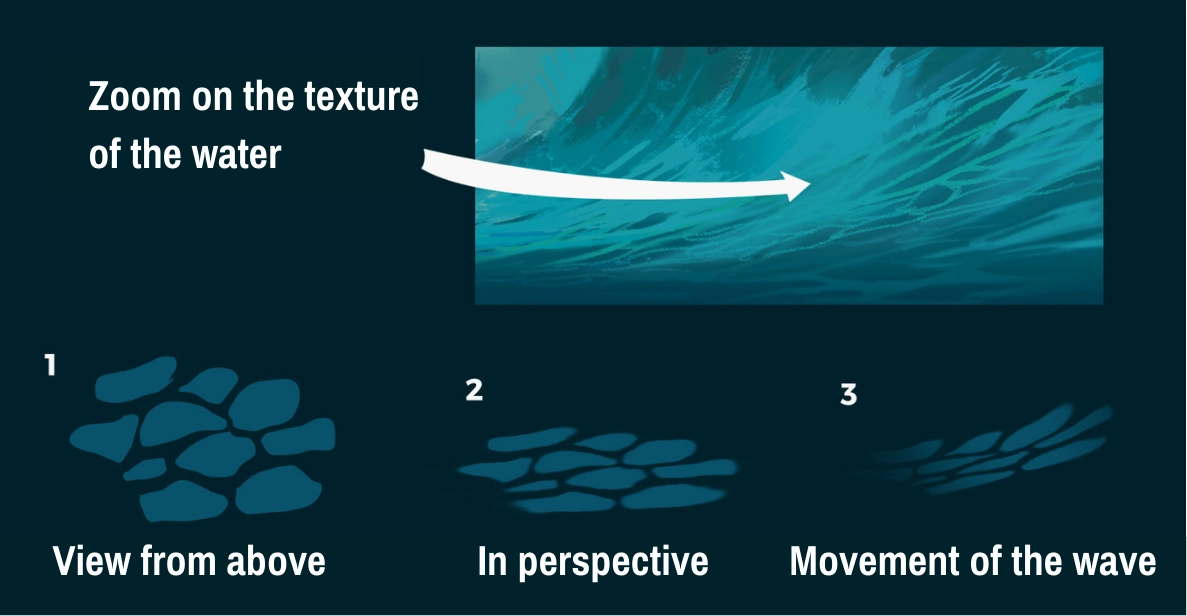
6) I specify the texture of the water based on the wave and to the right, and at these few places only so as not to flood the drawing with details.
Here is how to proceed:
It's like drawing rounded honeycombs: you can either draw the outlines or the inside. For this texture, I've chosen to use a turquoise that subtly contrasts with the cyan.
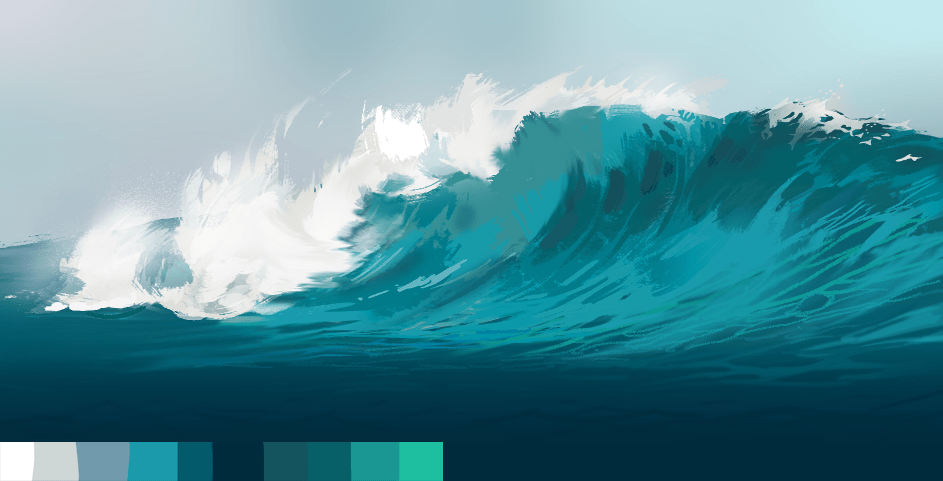
7) I emphasize the transparency of the wave by degrading the shade of turquoise that's the clearest under the foam.
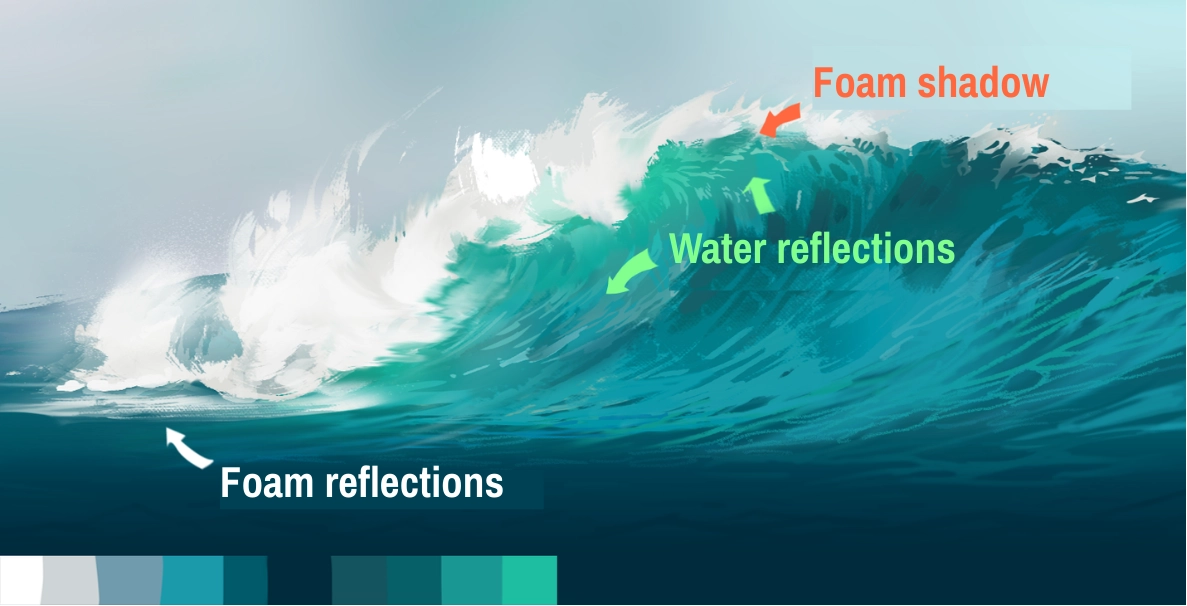
8) I connect all the elements of the drawing together by placing:
- the shadows of the foam on the water (a medium green),
- the reflections of the water (a pale turquoise),
- the reflections of the foam on the surface (a transparent white).
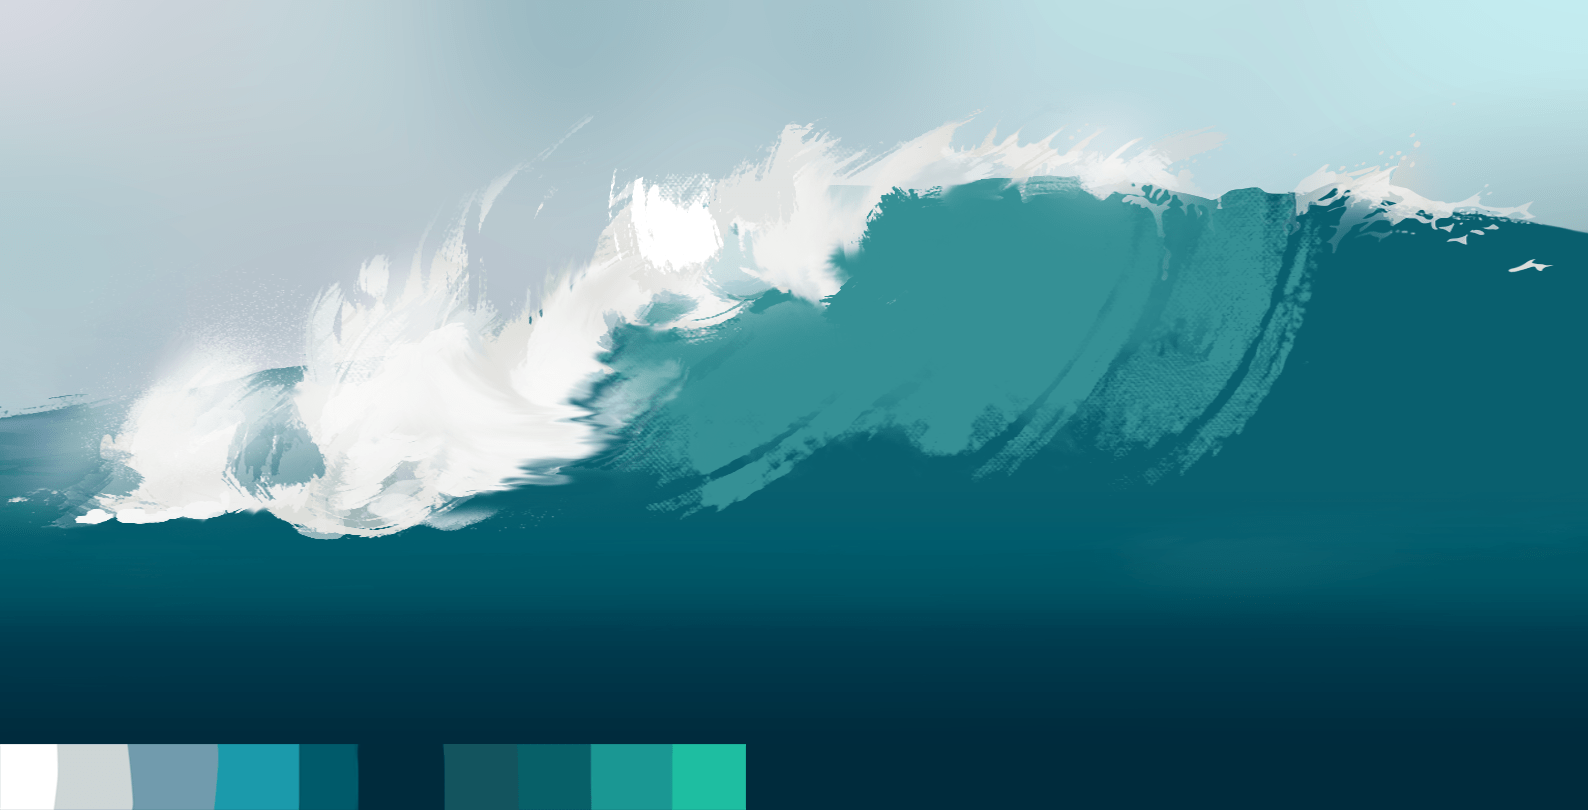
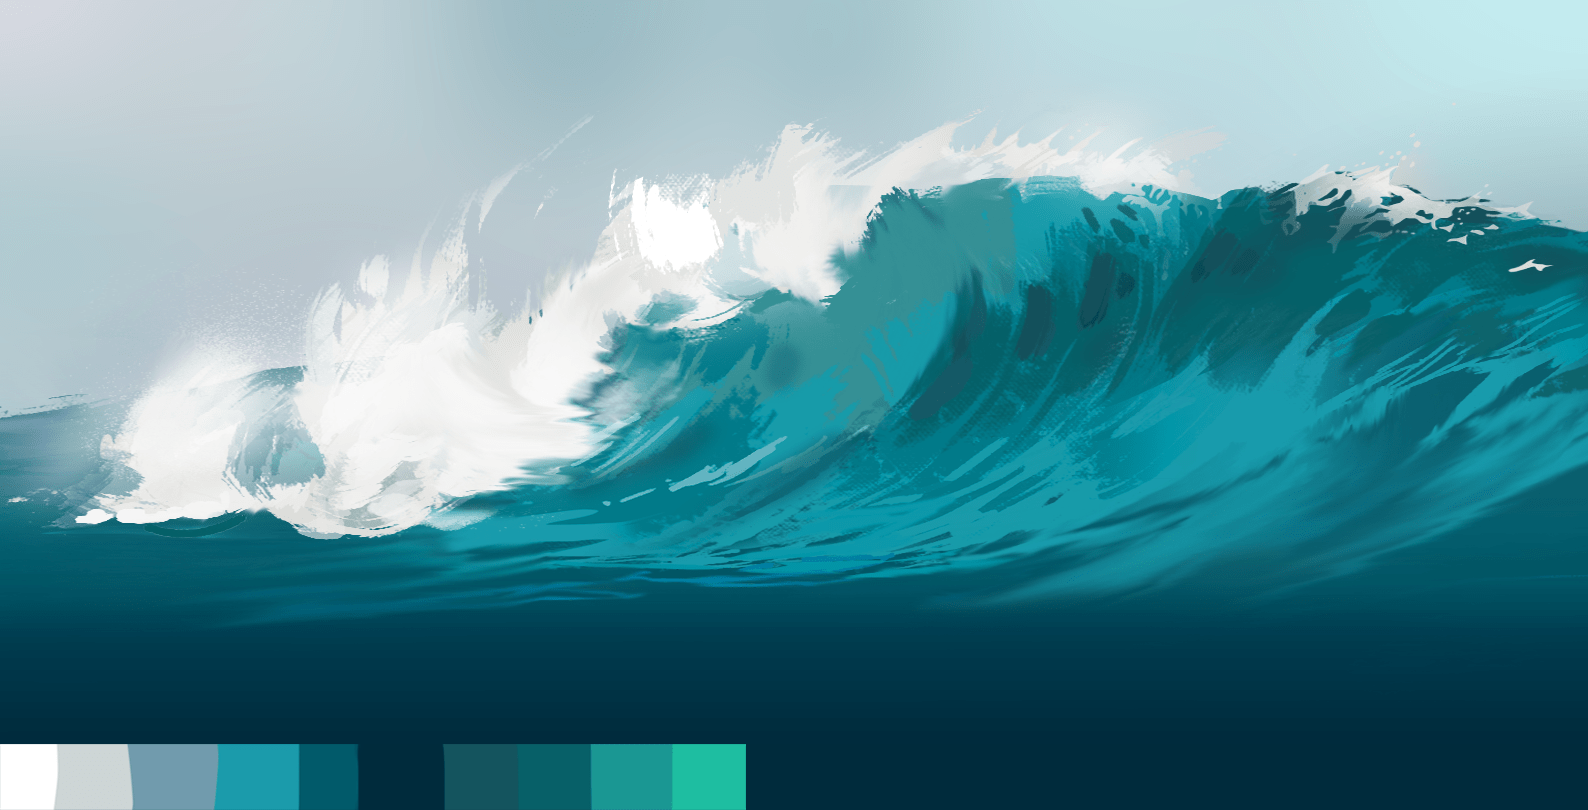
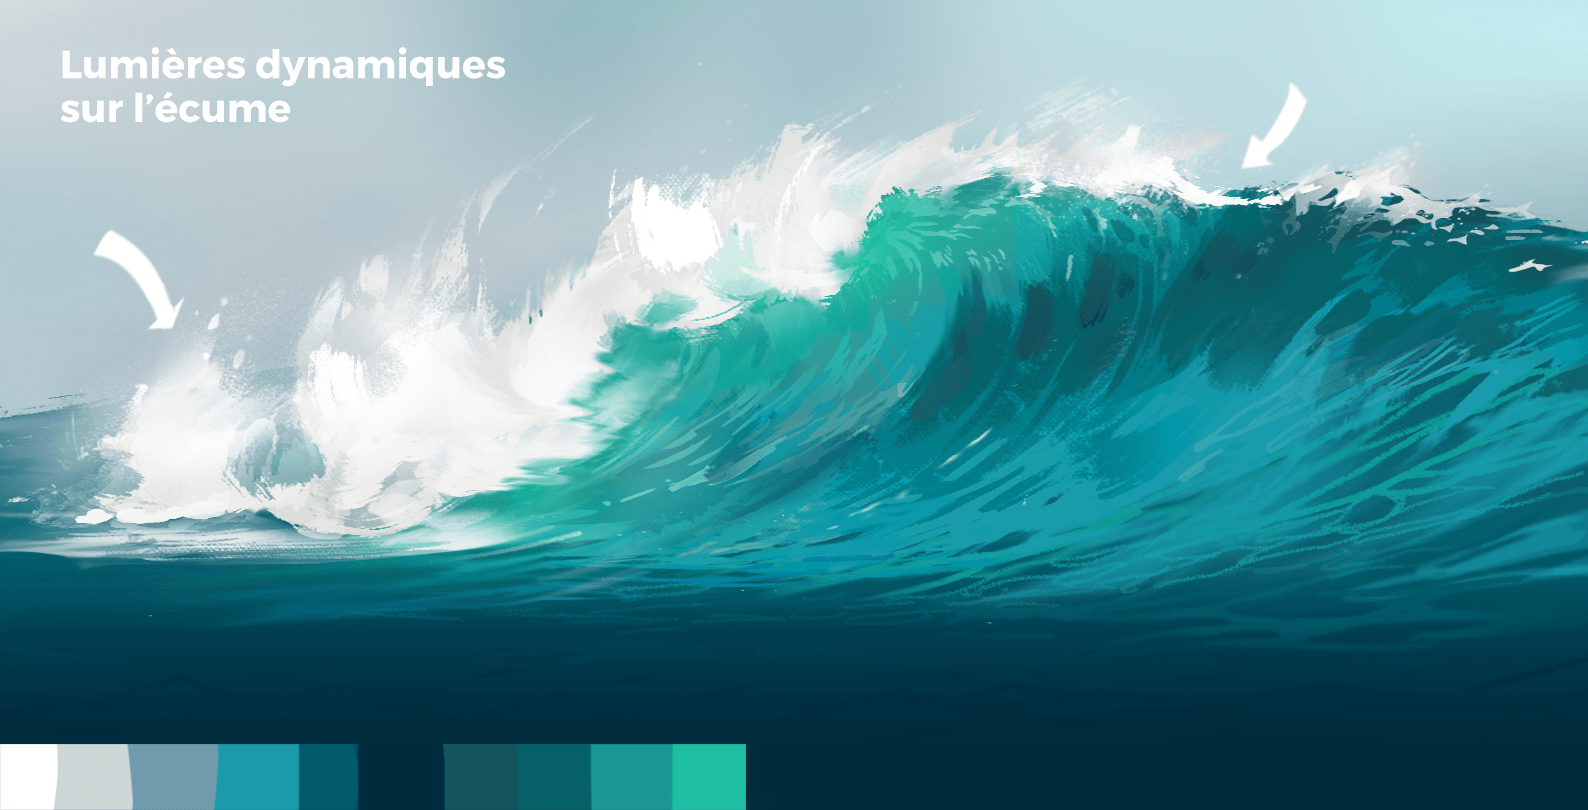
9) We're almost there! It's time to add dynamic details and definition, like stronger highlights on the foam and very clear foam trails.
10) If I want my water to be more reflective, I can add some white highlights here and there.
11) For greater realism and to accentuate the illusion of the wave's speed, I draw splashes and water droplets that detach in the opposite direction.
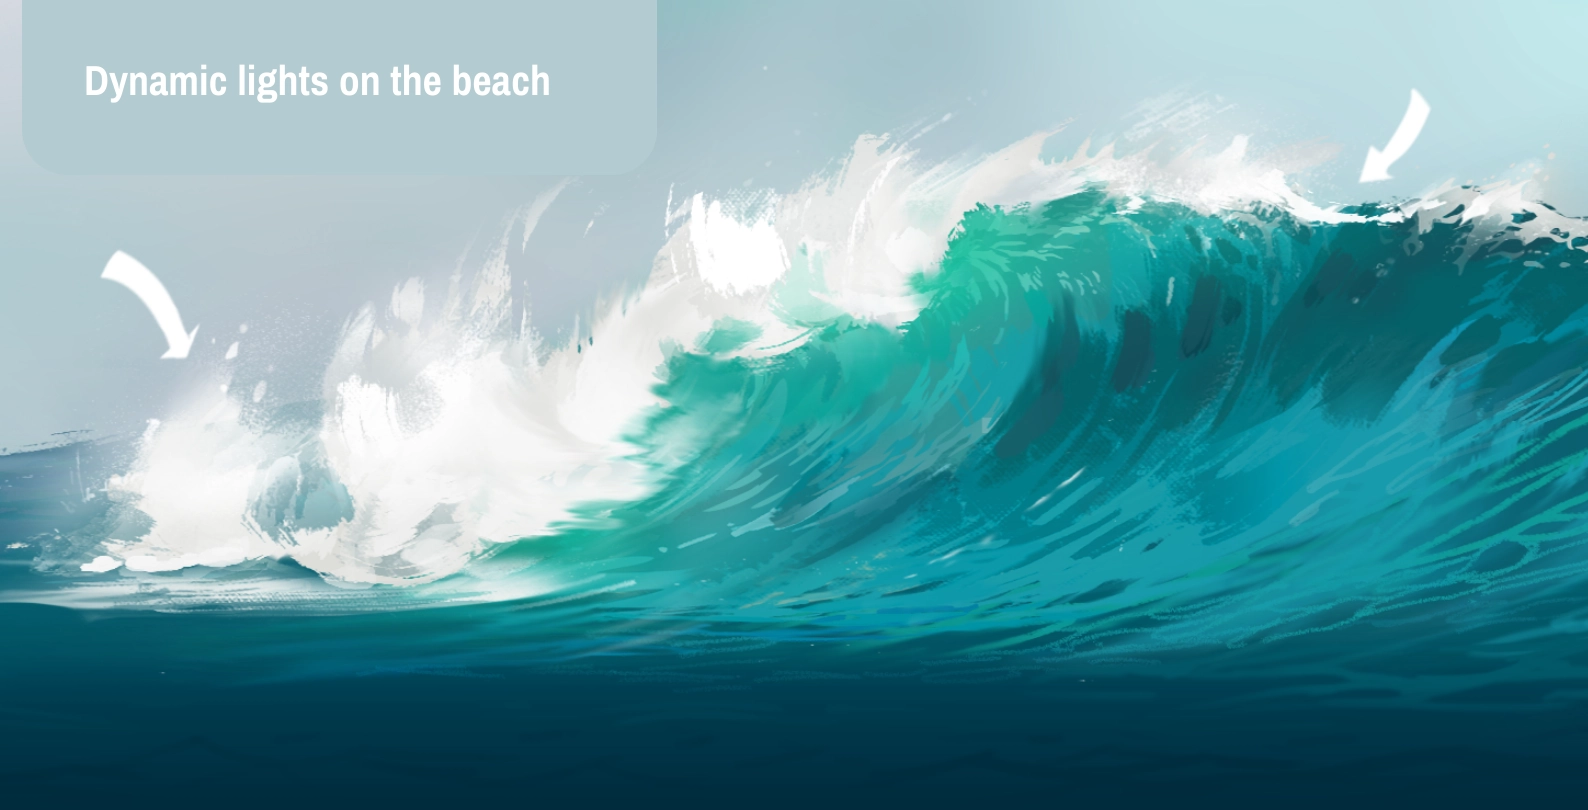
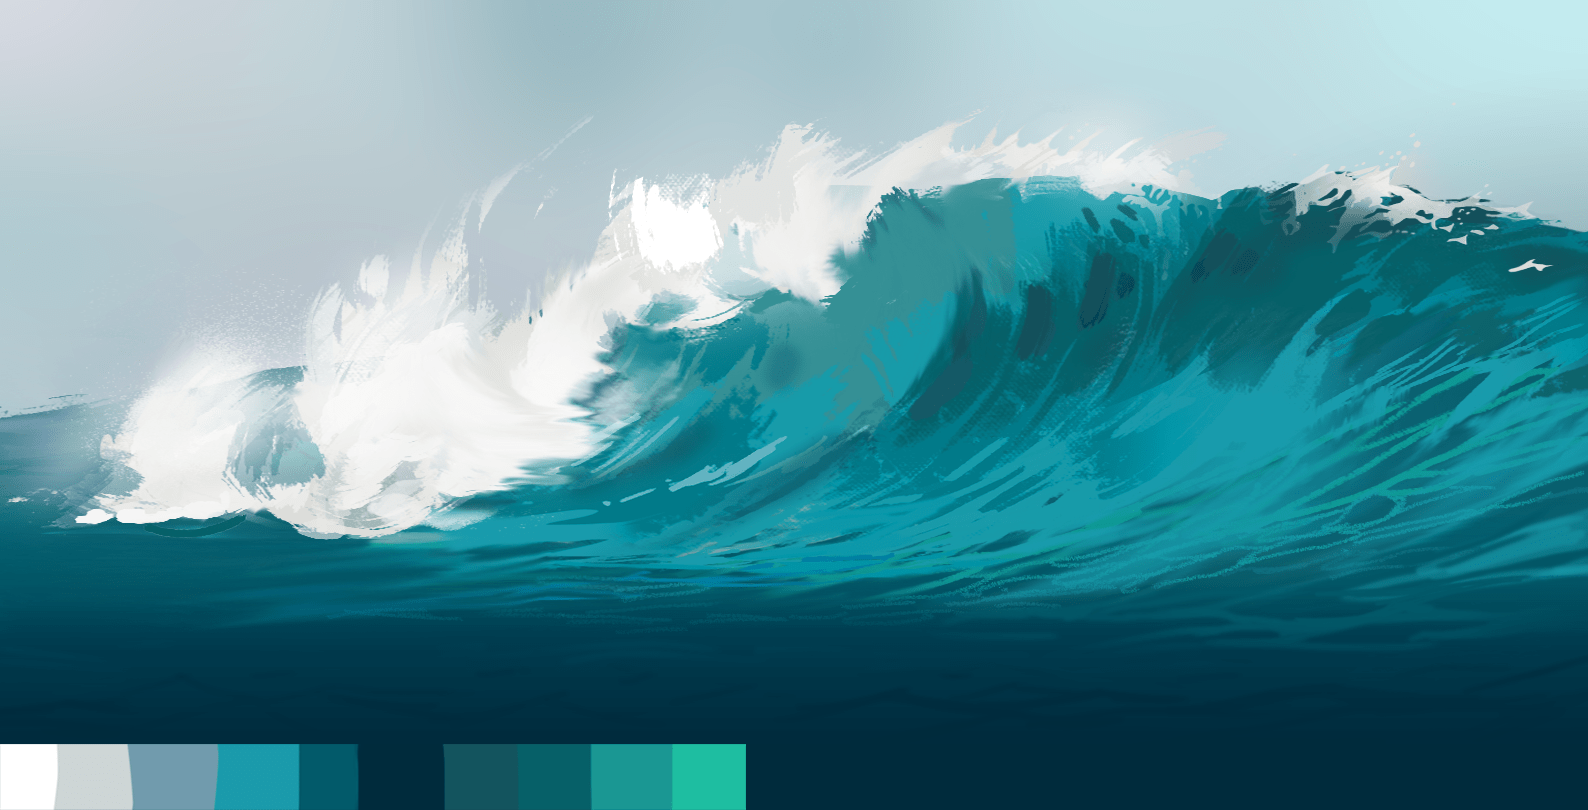
12) The wave is done! I check that each brush stroke retains the movement of the arrows determined earlier.
And so here is the final result:

You can always add more foam, more splash effects or highlights depending on the chosen background or the size of the wave.
I hope you enjoyed this tutorial and it inspired you to try drawing waves, which, when approached step-by-step, is not as difficult as it might seem.
Get your pencils ready! :D
Illustrator and writer: Vincyane
Discussion
Thanks for the tutorial :)
The exercise is impossible for a complete beginner, but I still had a lot of fun doing it.
And even though my result doesn't really match what was proposed, I think I will try it again in a while, when my drawing is more fluid.
Anyway, great tutorial
Hello Jerome,
Thank you for your comment, if you enjoyed following our tutorial then we can only be delighted at Dessindigo 😁! The most important thing is to have fun while drawing 😉.
I wish you good drawings and a good day!
Thank you for the tutorial!
I noticed that there are two illustrations that are not displaying correctly, one in the section "Drawing a tube wave step by step", point number 1). The image is not found (I tried to display it and it returns a 404).
The second image is in the section "Coloring the wave drawing", the image at point 7) is also not found, and if you try to display it directly, it also results in a 404 error.
I think the problem comes from the fact that the names of both images contain an acute accent (é), and there is a problem between the coding of the web page and what is saved on the server. Probably it would be more prudent to save the two images without the 'é', but replace it with a simple 'e'!
Other than these issues, THANK YOU!!!!
Hello Ptitvert,
Glad you enjoyed this tutorial! The images should now display normally, but I've taken note of your comment 😉.
Have a great day and happy drawing!
Thank you so much for this tutorial! Your illustration is beautiful!! 🥰
Gazelle Feather
Hello Plume de Gazelle,
Thank you for your comment and appreciation 😊 it's a pleasure.
I wish you good drawings!
Thank you for this tutorial! I've never dared to draw a wave before but now it really makes me want to give it a try! And congratulations on the illustration, it's magnificent 🤩
Thank you for this tutorial, I thought it was one of the most difficult things to draw but the final result is great 😁