How to Draw Goku

Whether we like mangas or not, we all know Dragon Ball. This manga that grew up with an entire generation and still continues to draw crowds. This manga, created by Akira Toriyama, is certainly the most famous manga in the world, with its hero recognizable among thousands: Goku. I don't know if you are aware, but there are somemanga drawing classon our site, for those interested ;)
I'm going to show you how to draw it ...
As a base image, I chose Goku in a front-facing and relatively simple pose.
DRAW GOKU STEP BY STEP
To begin, we will cover the basics ...
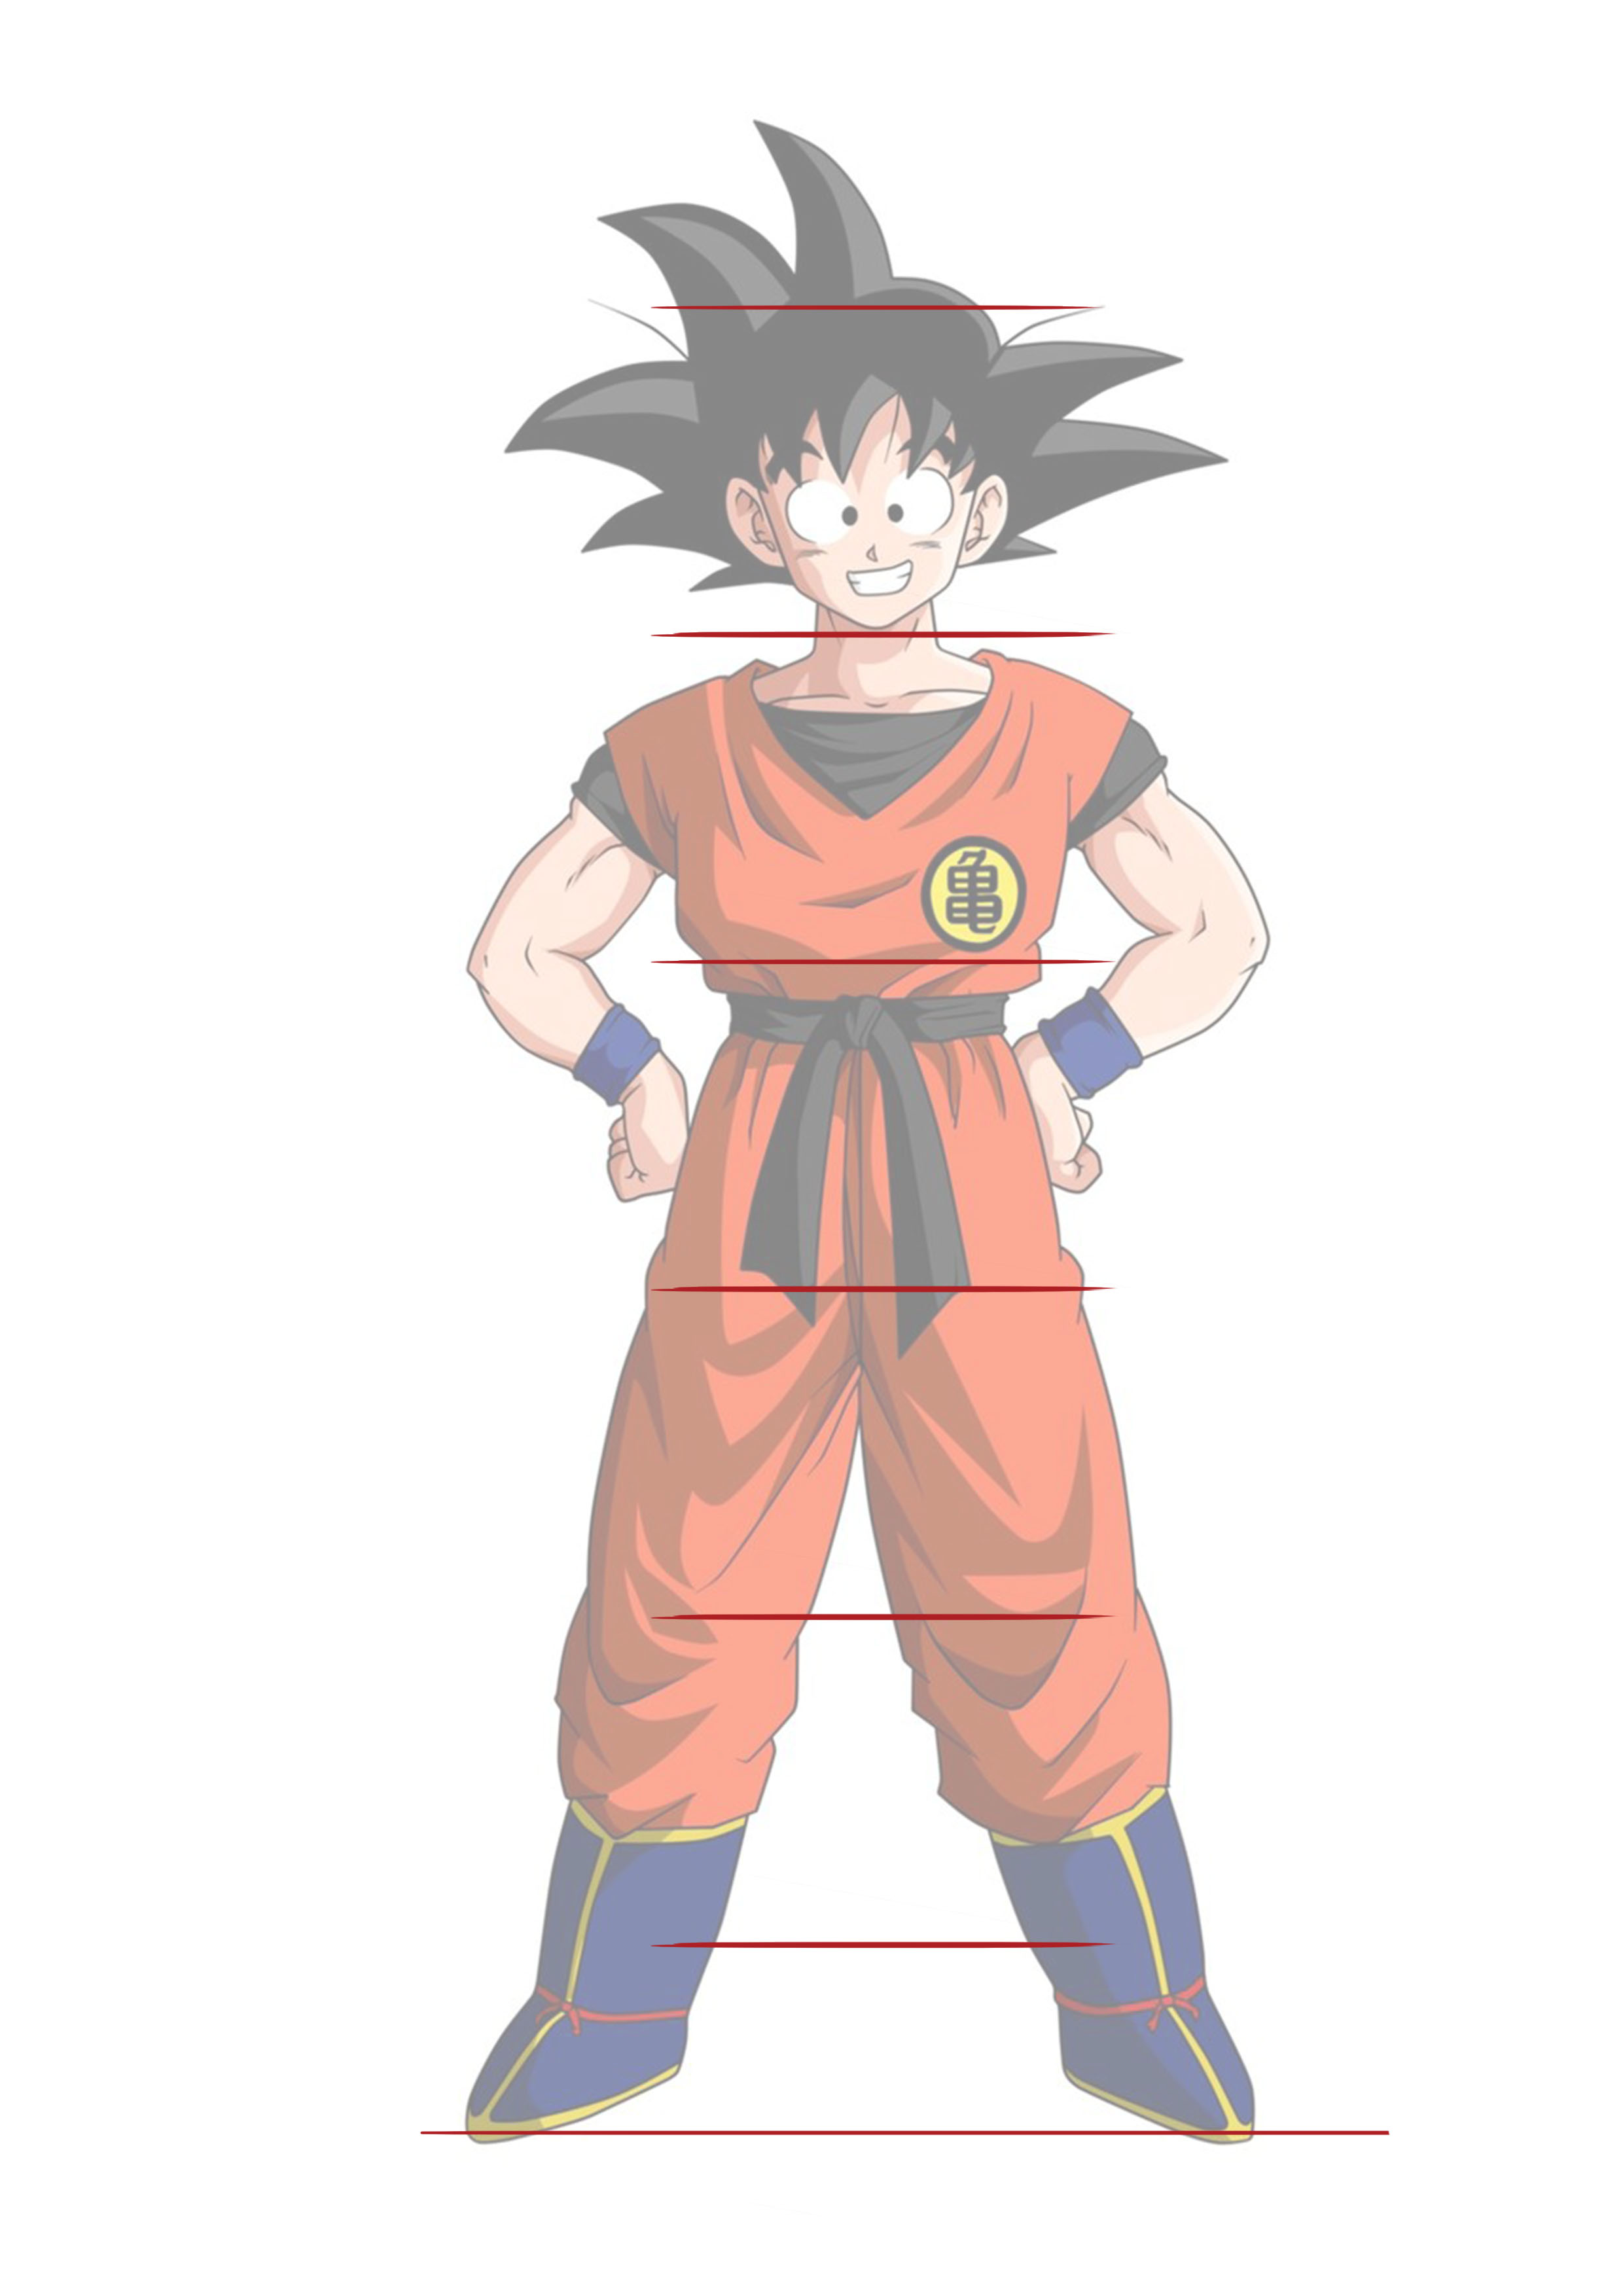
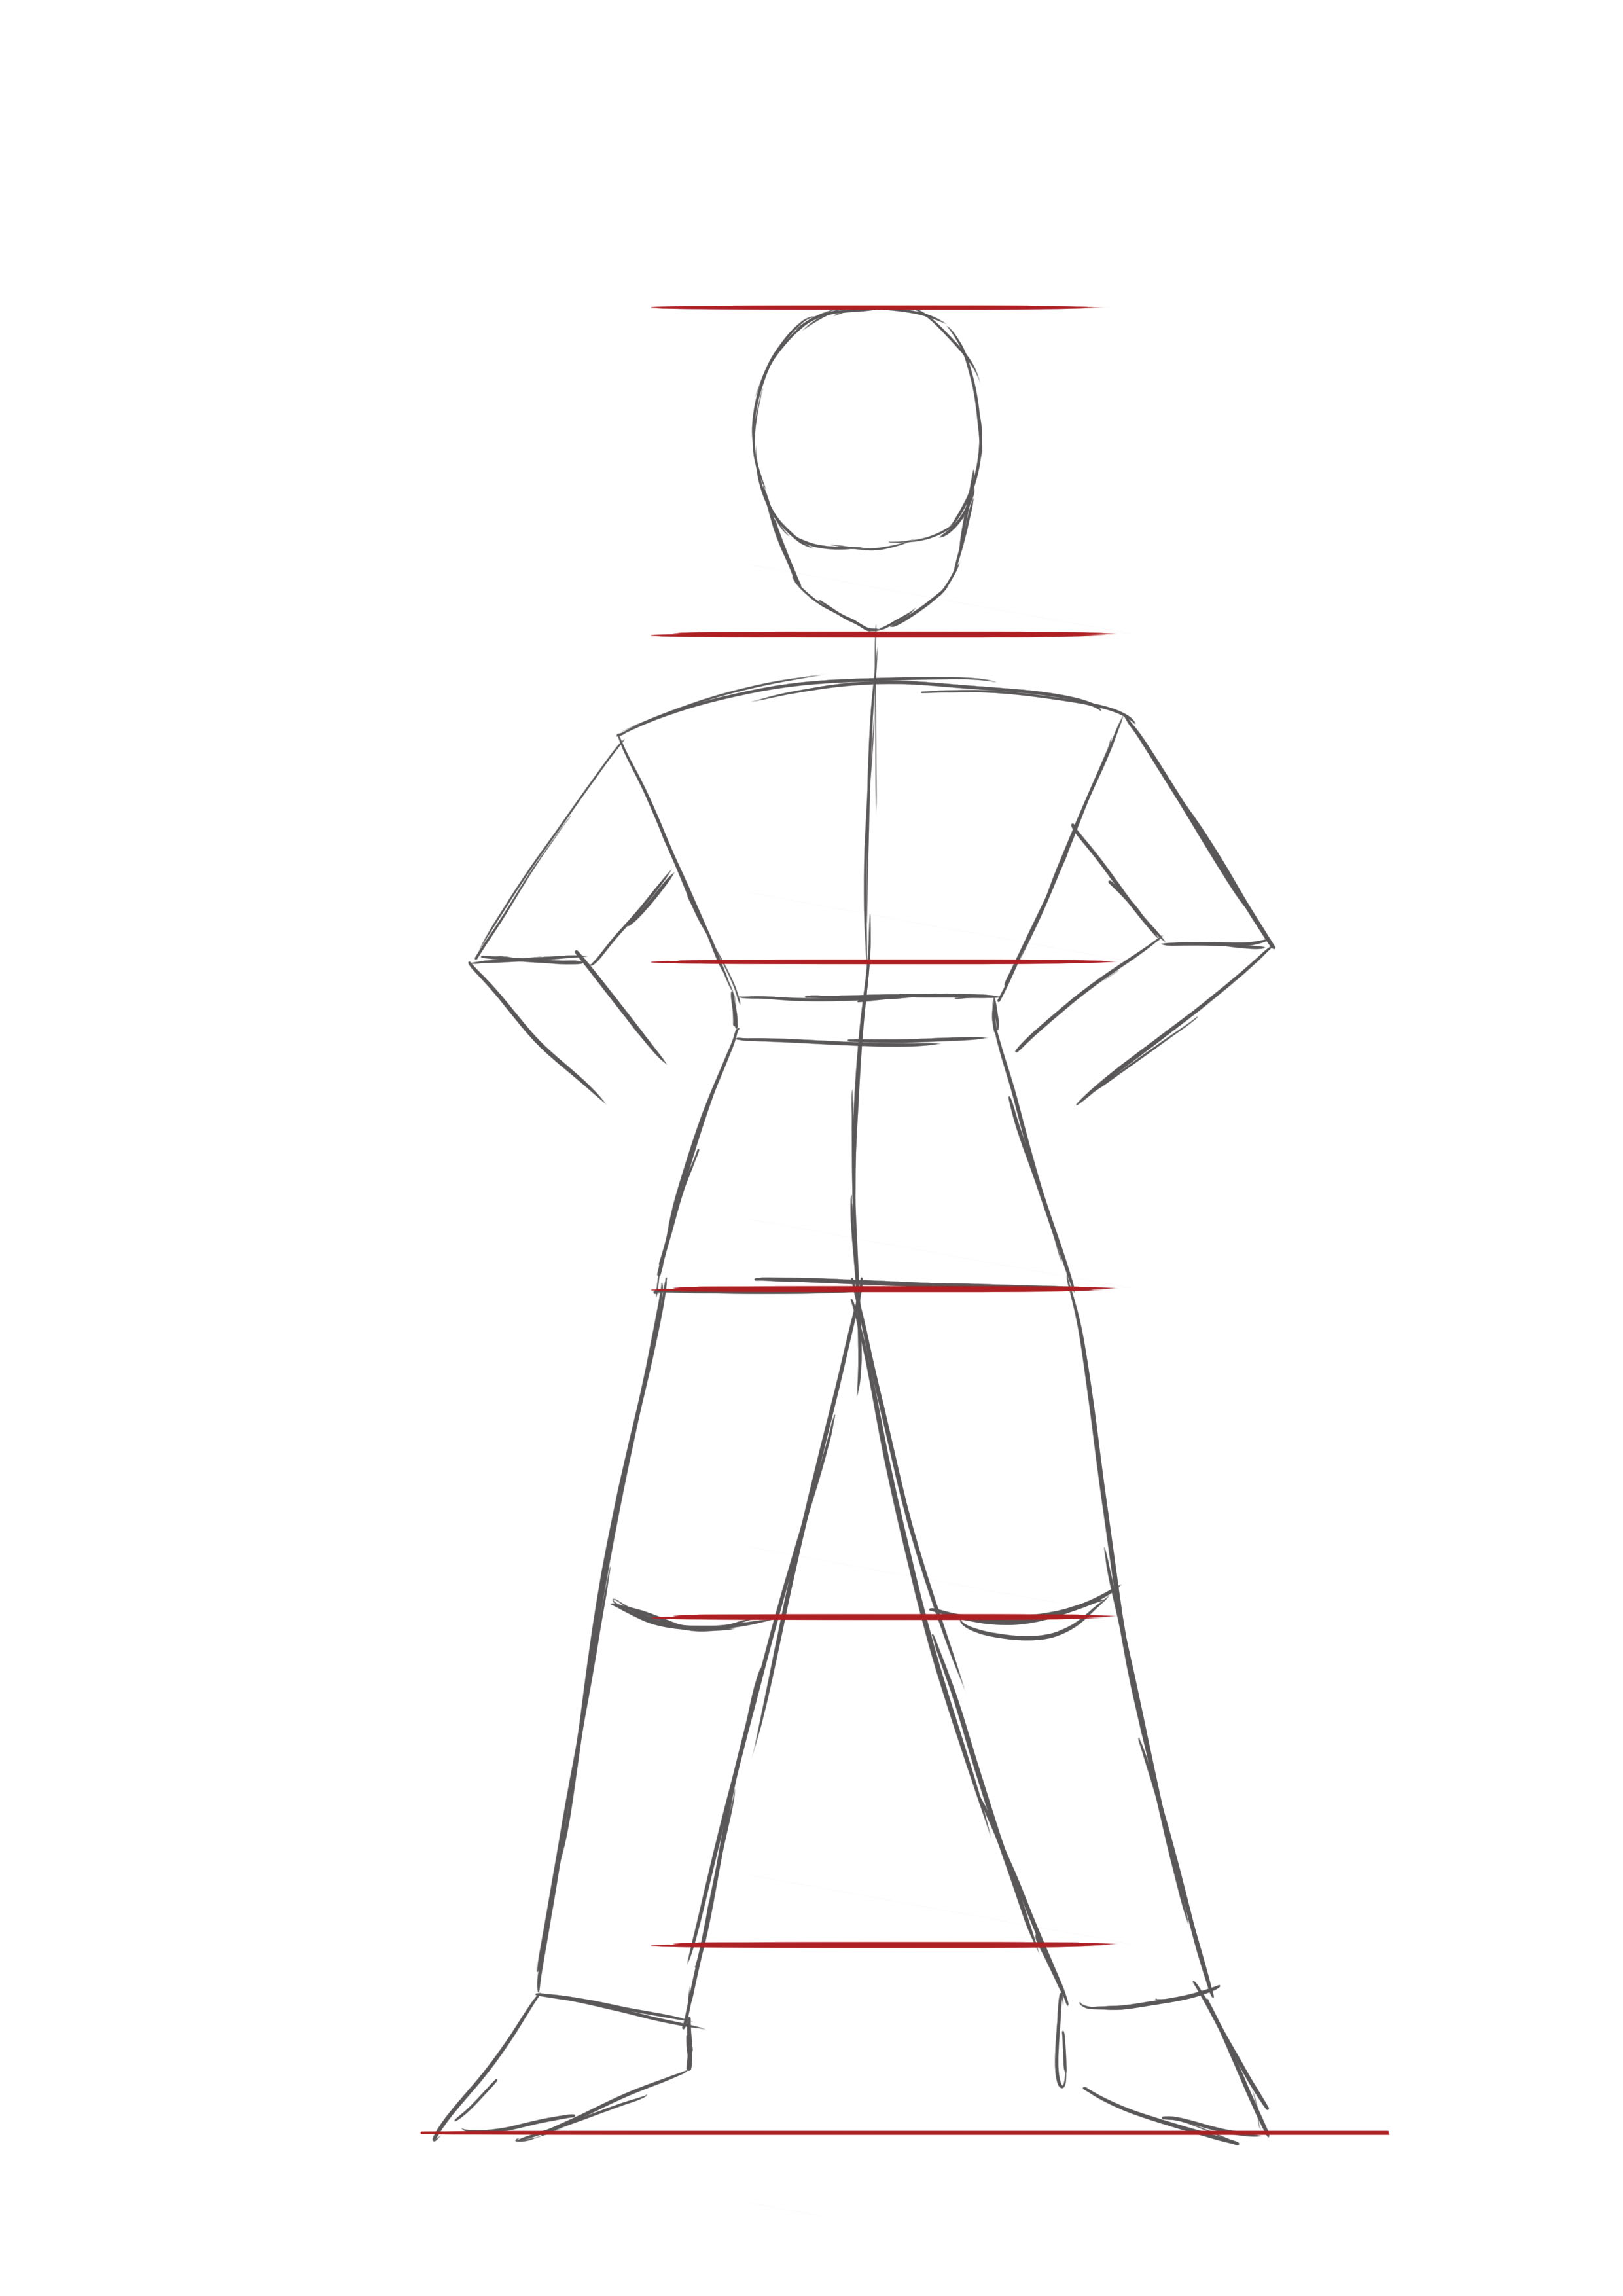
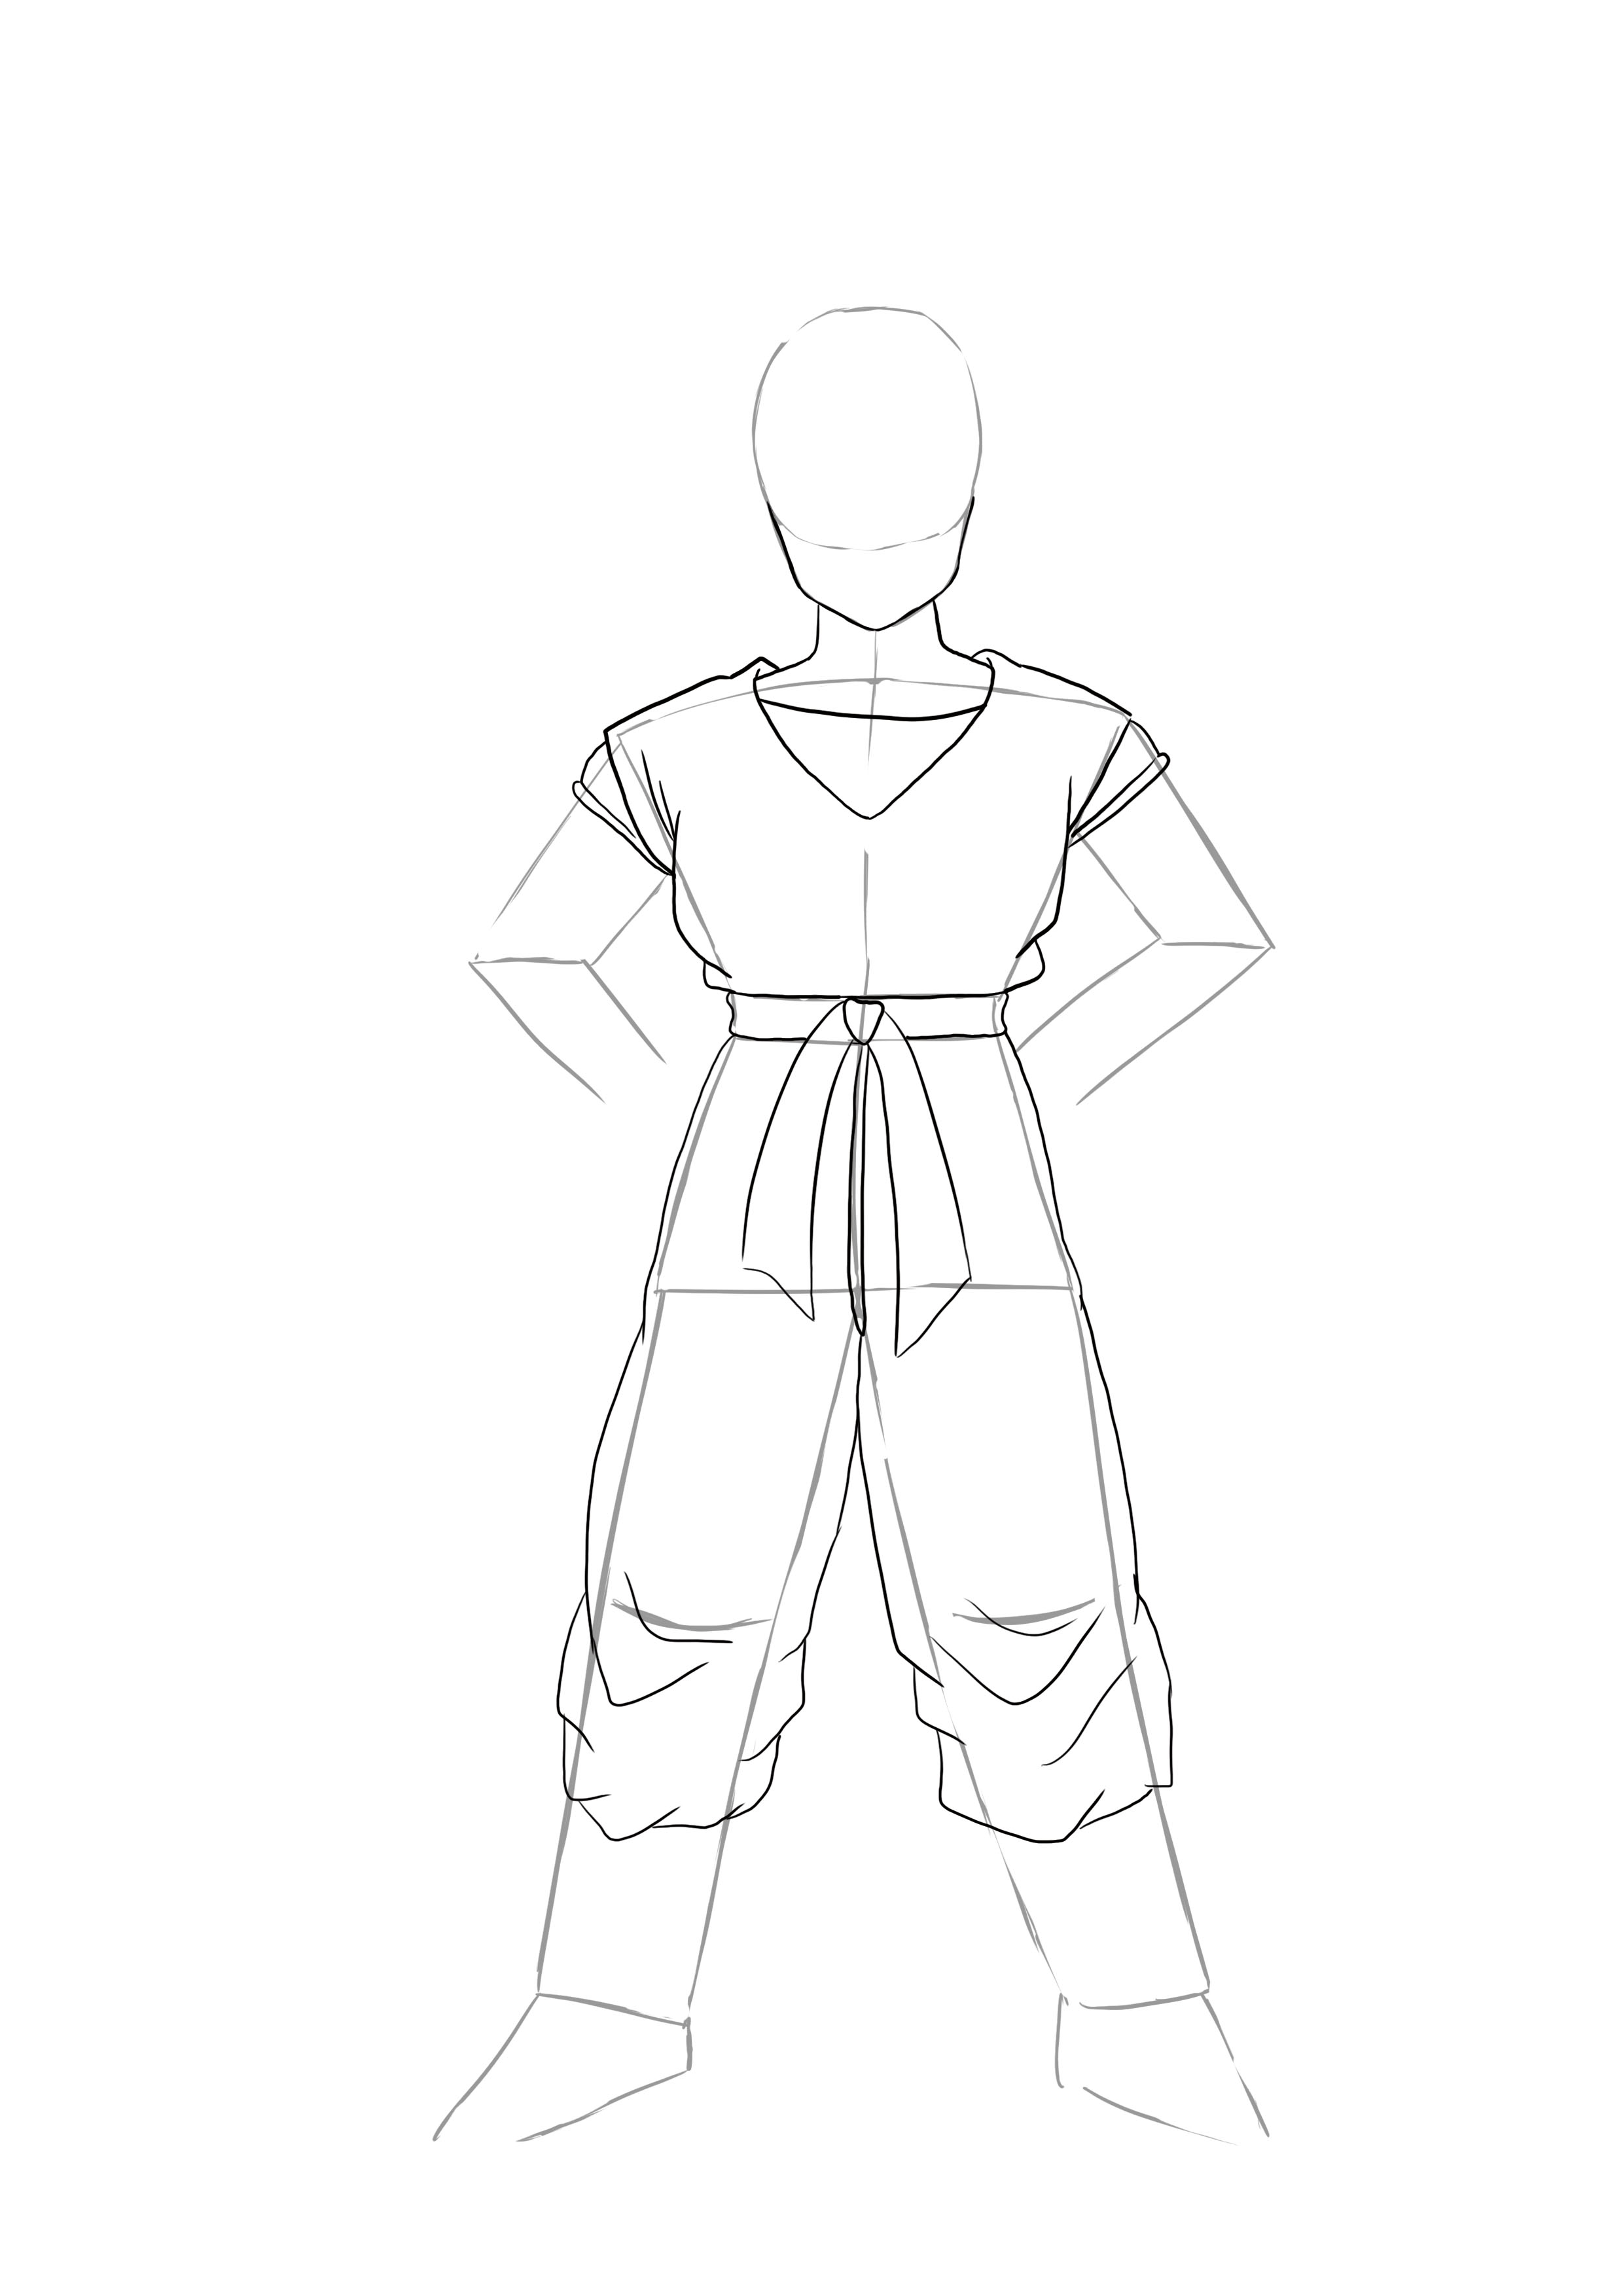
First, we will count the number of "heads" he is tall. He is 5 and a half heads tall. The 5th head reaches up to the ankle, and the remaining half is for the foot. Therefore, we will draw the base of the body using very simple geometric shapes. This is the most important step of the drawing, so take your time to do it correctly, and if you're not satisfied, don't hesitate to start over again and again until you are pleased with the result. Make sure to draw lightly, without pressing too hard on the pencil, it will be easier to erase...
For the head, make a round base then go into a triangle shape downwards to form the chin. Leave a small space for the neck; the torso is shaped like an inverted trapezium: wide at the shoulders and narrower at the waist.
Then a fairly thin rectangle to mark the waist, this rectangle is also the location of Sangoku's belt.
For the basin, you need to make a trapeze, narrow at the waist and wide at the hips.
The legs will be well hidden by the wide pants, so you can just make two tubes.
The feet are shaped like a triangle, the tip points to the side to give them a wide stance.
For the arms, start with a rectangle that stops at the third red line, then another that extends towards the inside of the body to form a sort of triangle. We will make the hands later.
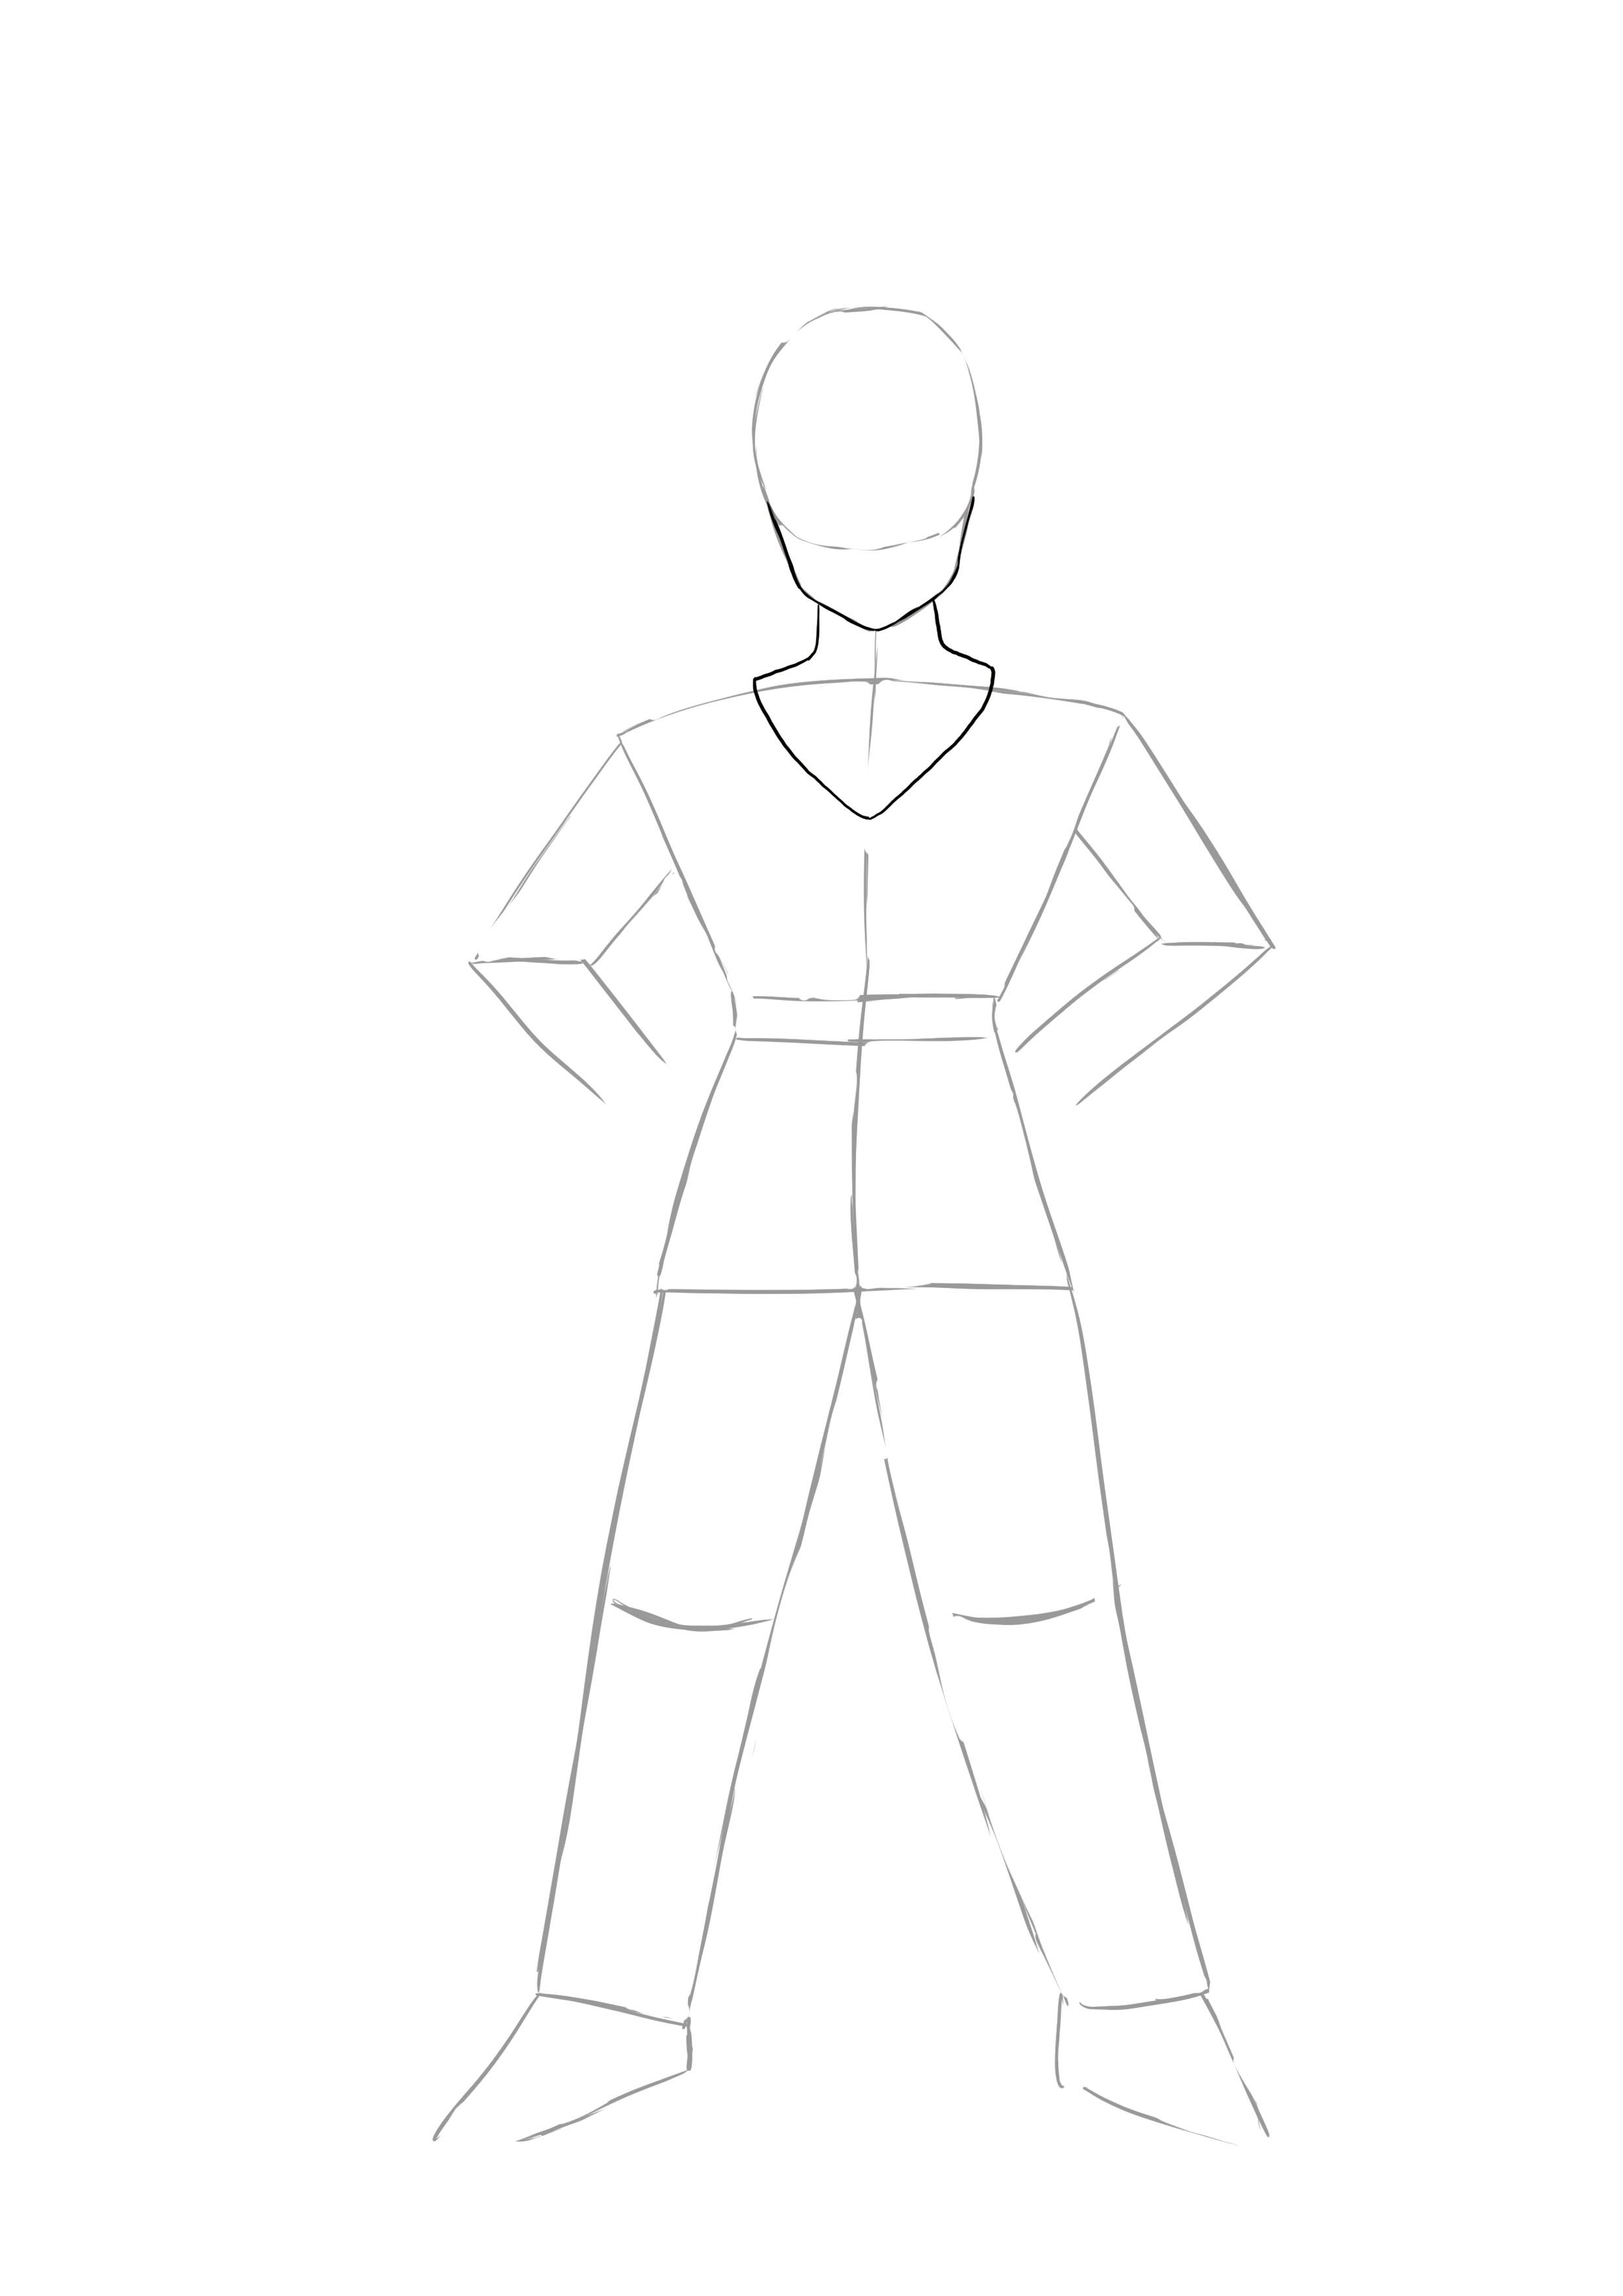
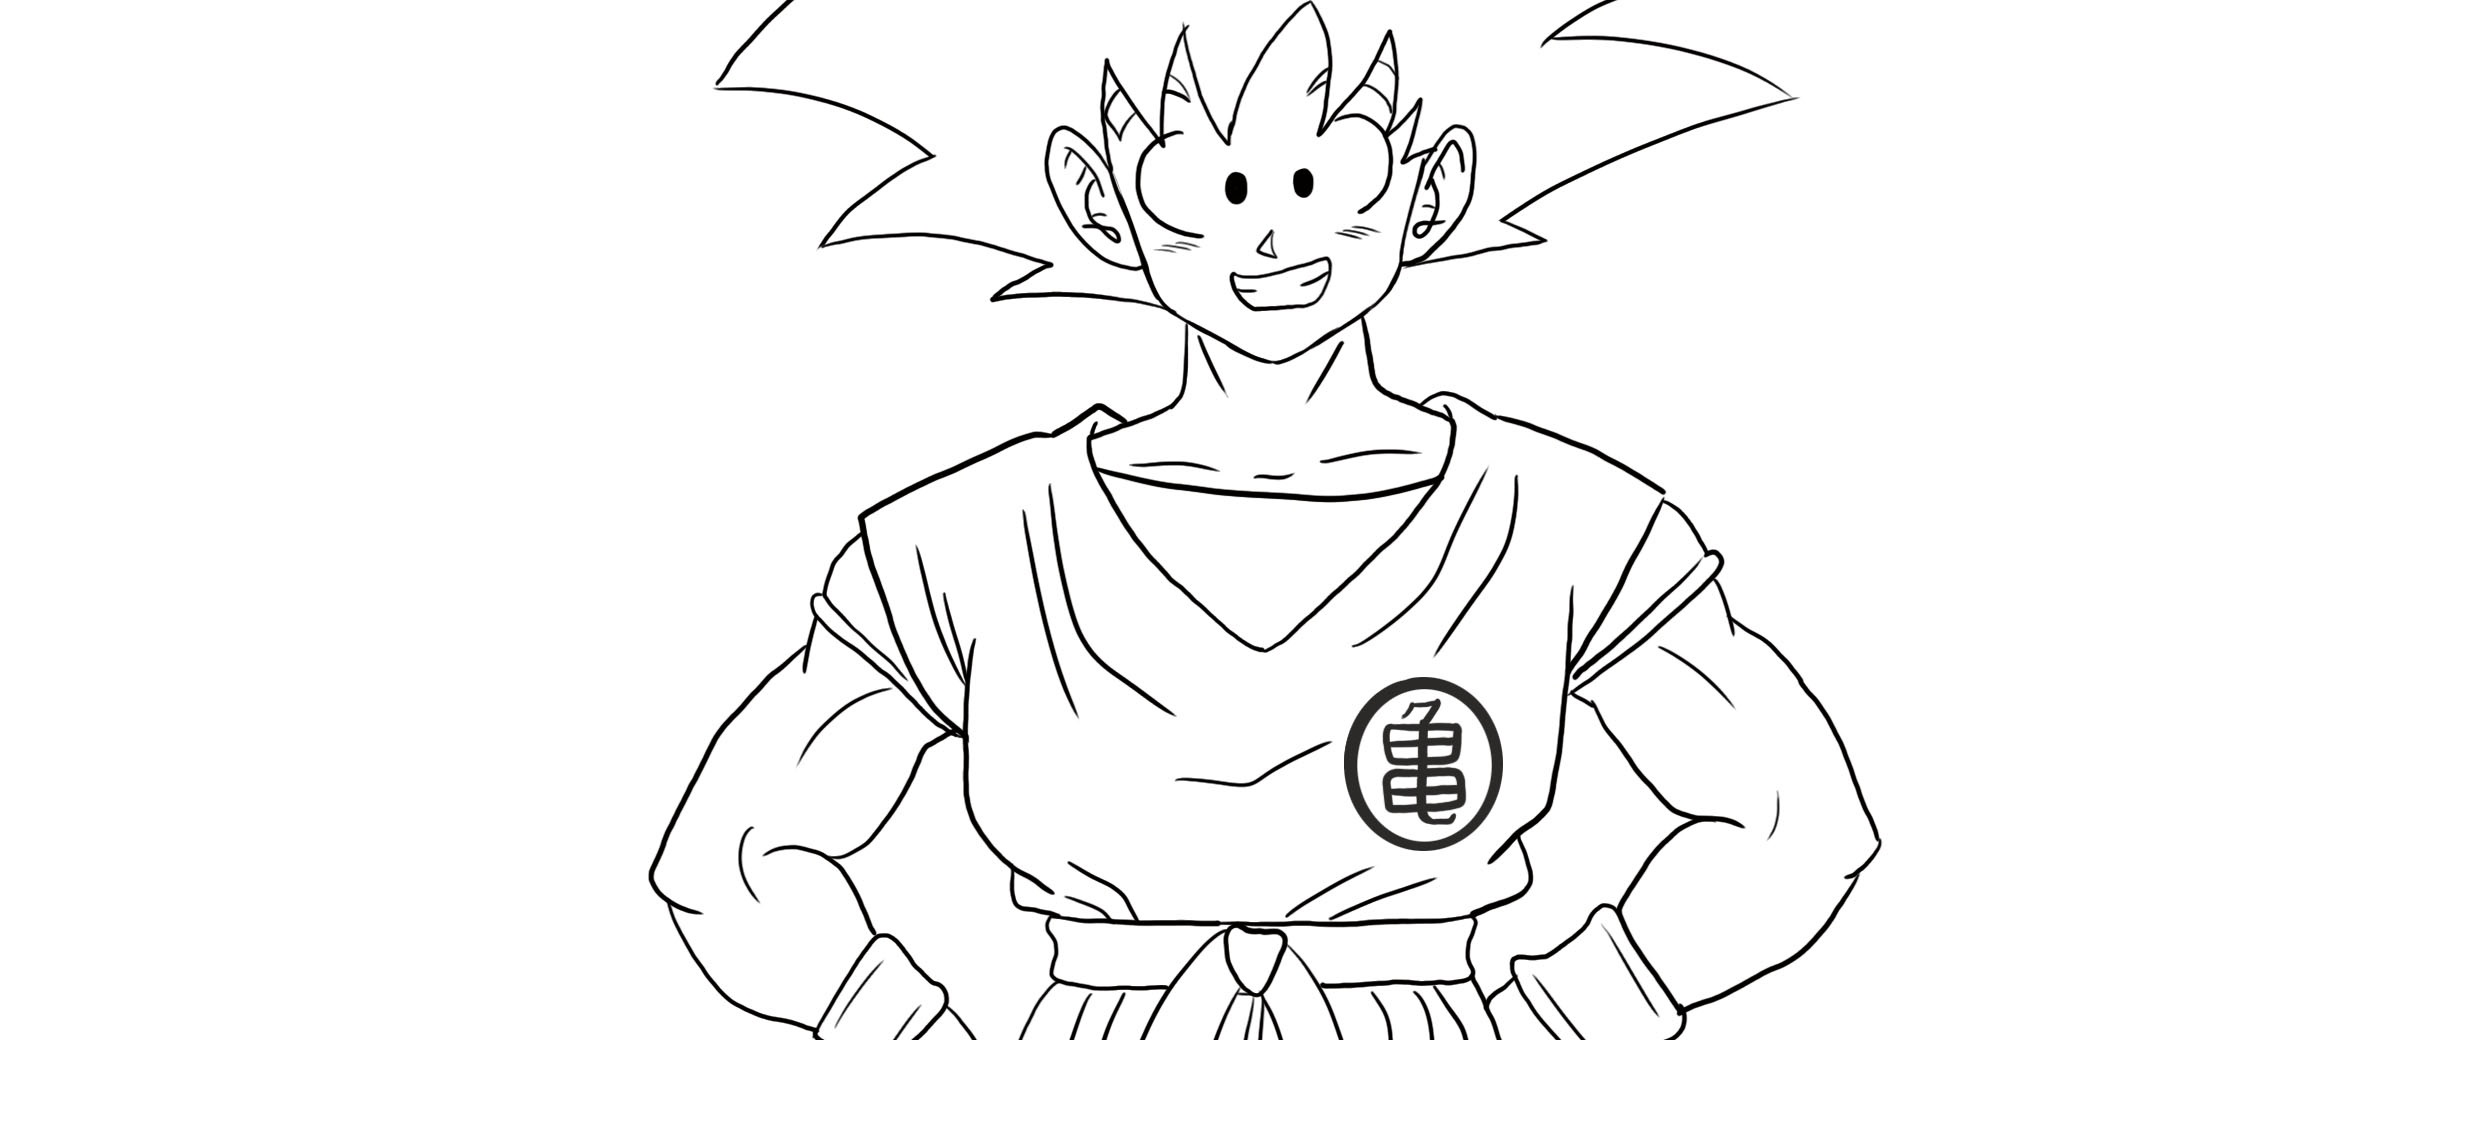
We'll start the cleanup. Start this step only if your base is good. You can go over the chin that already has the right shape. Then you will make an arrow. The shaft of the arrow represents the neck which is quite thick, and the tip of the arrow is the neckline of his orange suit.
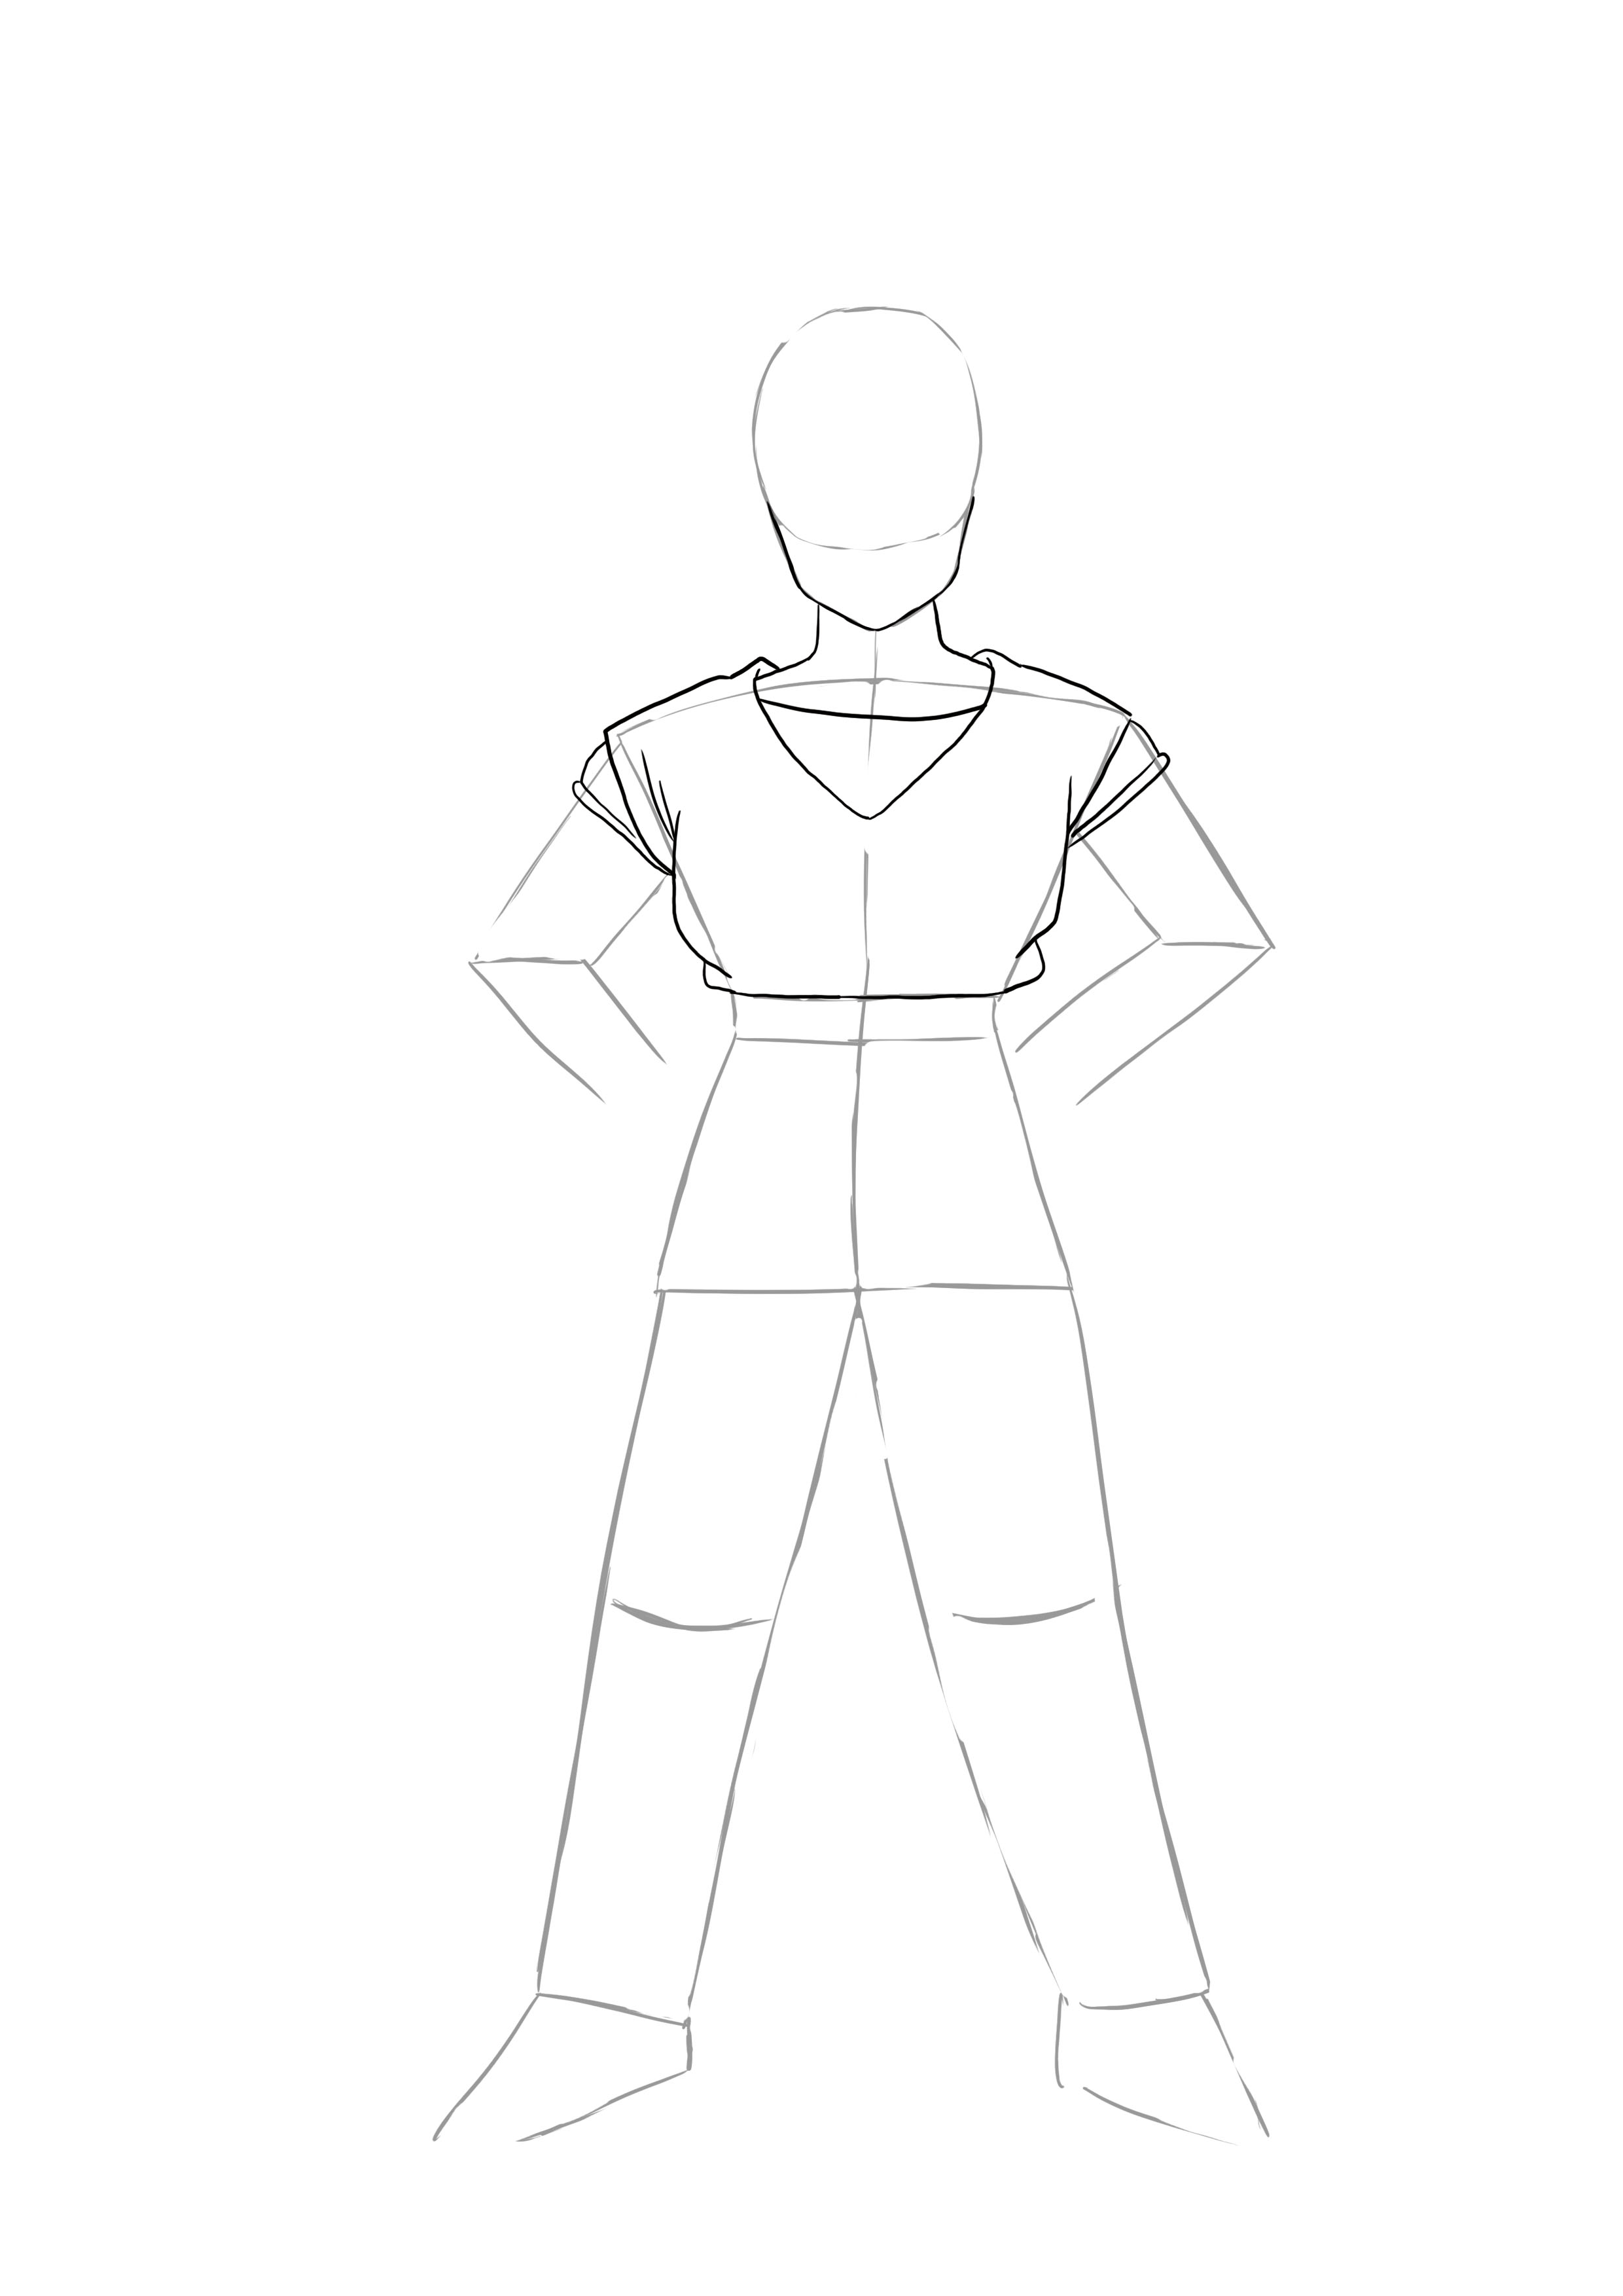
For the top of the outfit, we can see that Goku wears very short sleeves and wears a black t-shirt underneath his orange suit. Draw a semicircle at the neckline to divide it in two. The top of the suit will follow our shoulder base, it is going towards the torso that there will be folds and slack. For the sleeves, once those of the suit are done, add some that protrude a little to make those of his t-shirt. Finally, close the t-shirt at the rectangle that serves as a belt.
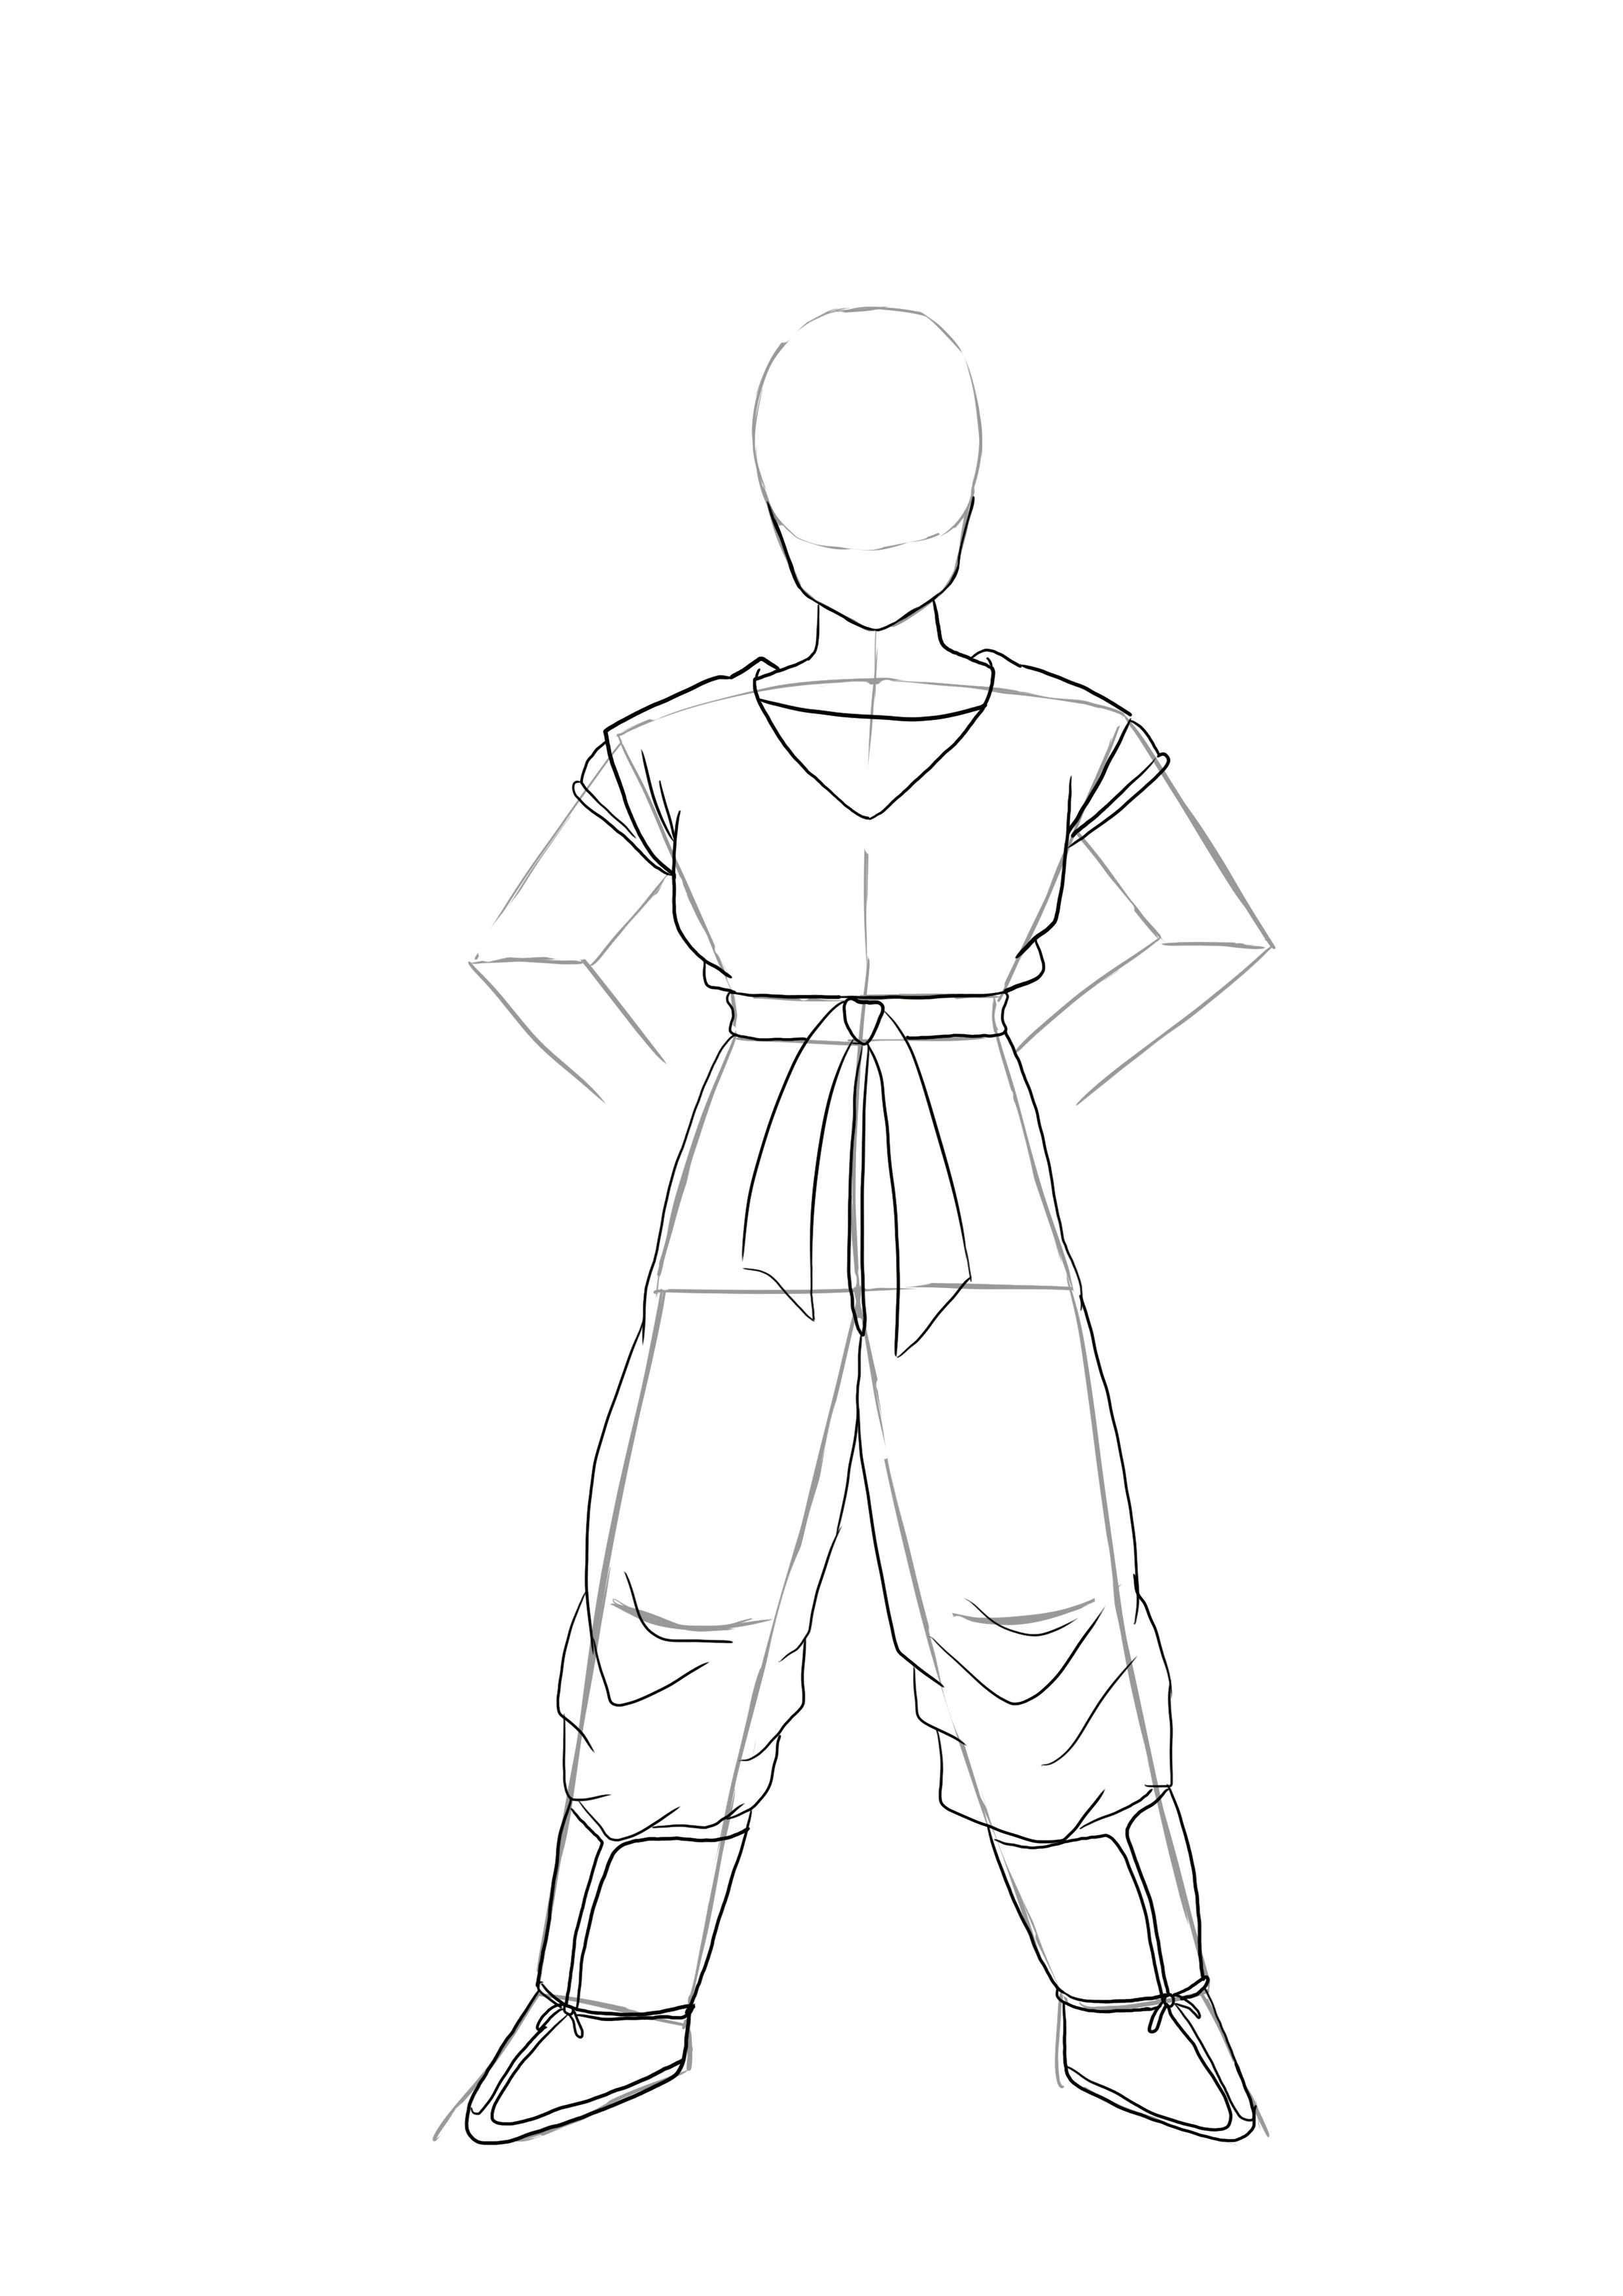
For the belt, simply follow the rectangle already placed, and draw some light folds on the sides. In the middle, draw an imperfect circle and make the two ribbons that hang down to the top of the thighs. For the pants, it's like the top, follow the basic outlines while adding slack and folds to give a billowing effect. Don't be shy with the folds, as they will give the fabric this light effect.
The boots don't really have any details except for a pattern and a lace that keeps them secure. To draw them, follow the basic line while taking care to make curves. Then make a border at the top of the boot that goes down the middle to split it in two and goes around the sole at the bottom. Add the lace, a simple cord with a knot the same as the belt, but smaller.
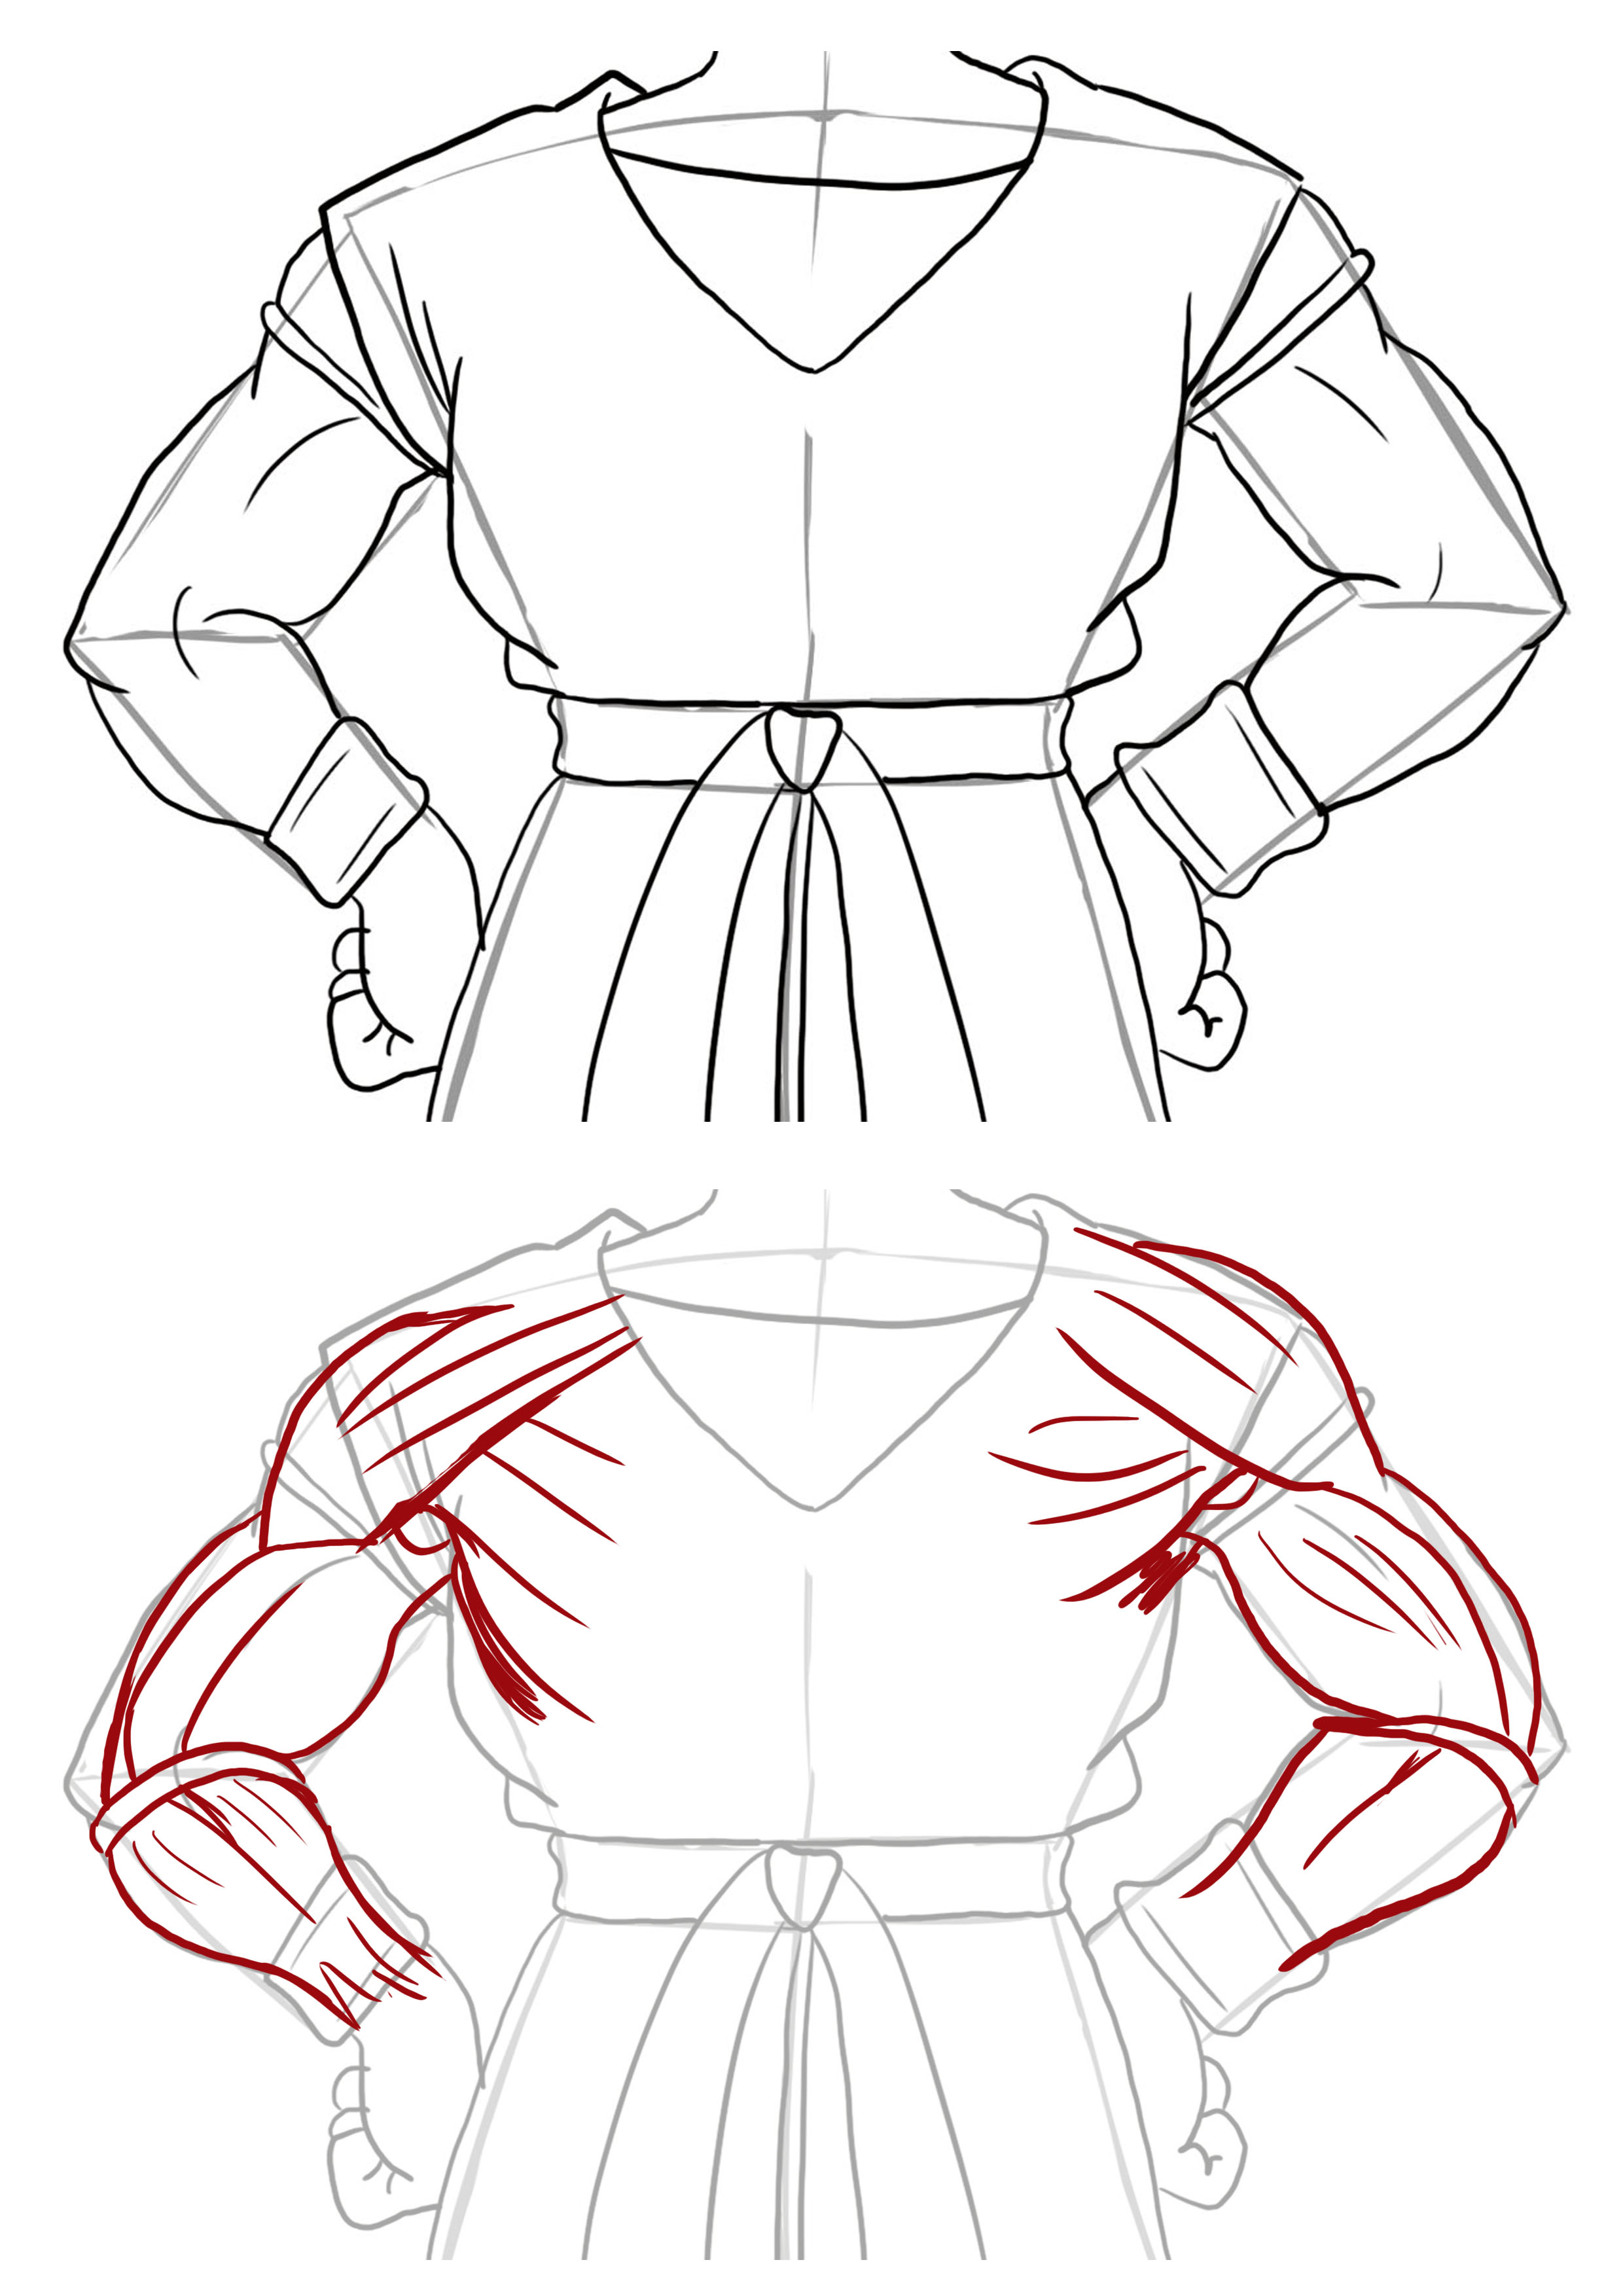
It's time for the arms. This is surely the most delicate part to do for Goku, because arms that are too big would deform his body and arms that are too thin wouldn't fit with the Dragon Ball universe. I'm not going to give you an anatomy lesson, that's not the subject, but I have made a simplified drawing of the muscles so that you understand what you need to draw. If you want to know more abouthow to draw a man's body, do not hesitate to check out the article available on our blog, which addresses this topic.
So, we can see that the arms are forming circular arcs. There are two inside the arm and three outside. Once you get to the wrist, make a fabric bracelet. For the hands, it’s going to be simple, because they are clenched and hidden. You will make an outer bump that is the palm of the hand. It is swollen, as the fingers are bent and curled against it. The fingers might resemble a "B", but the "loops of the B" are hidden by the palm of the hand.
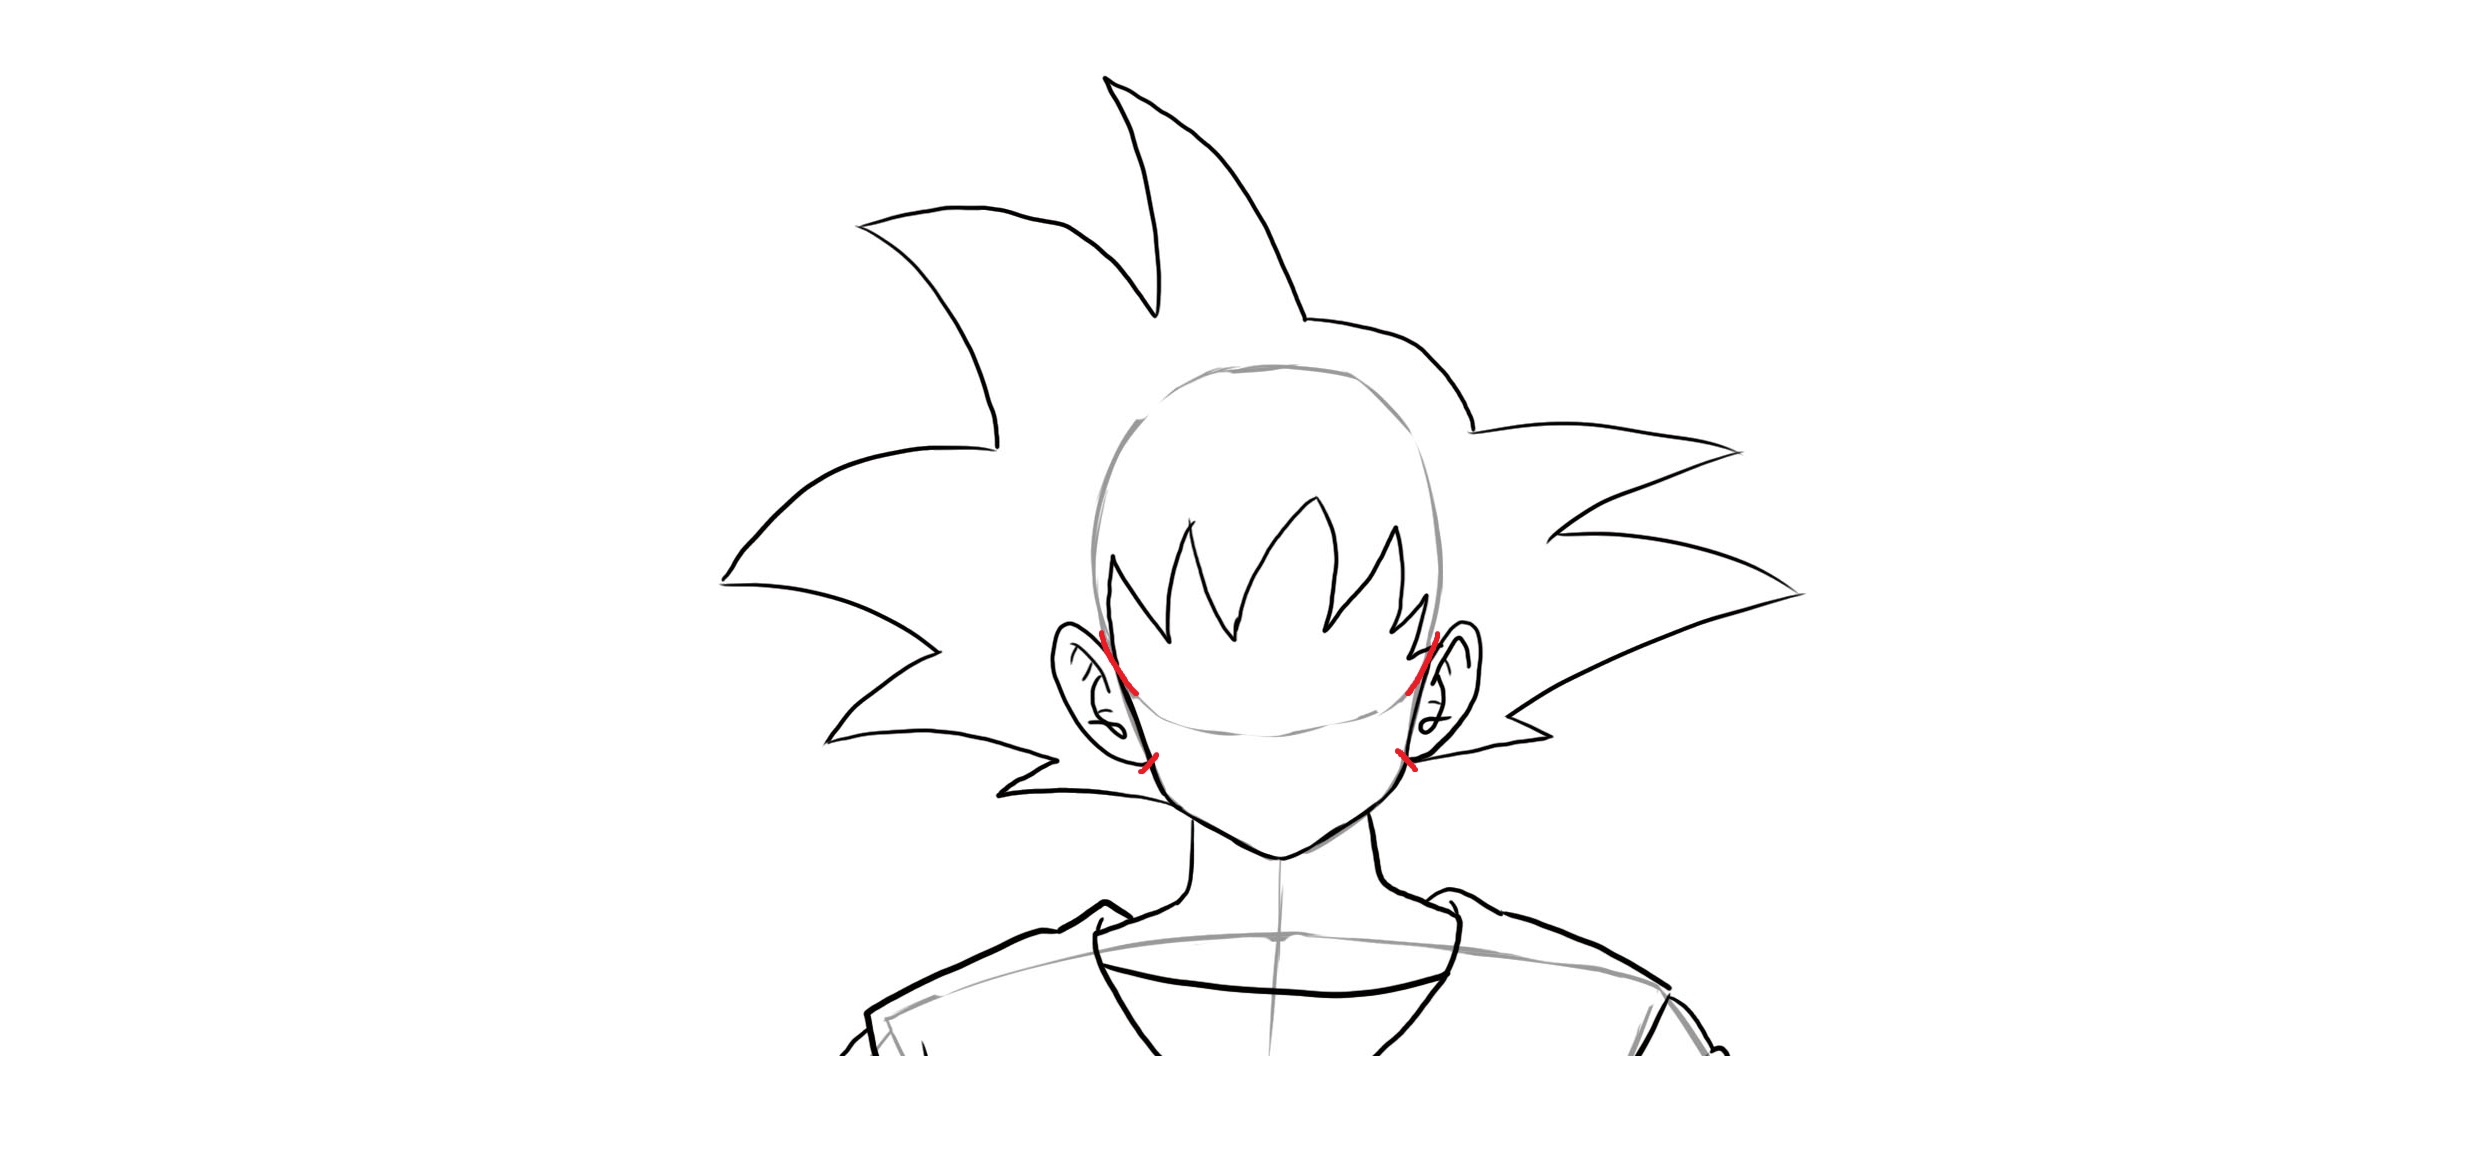
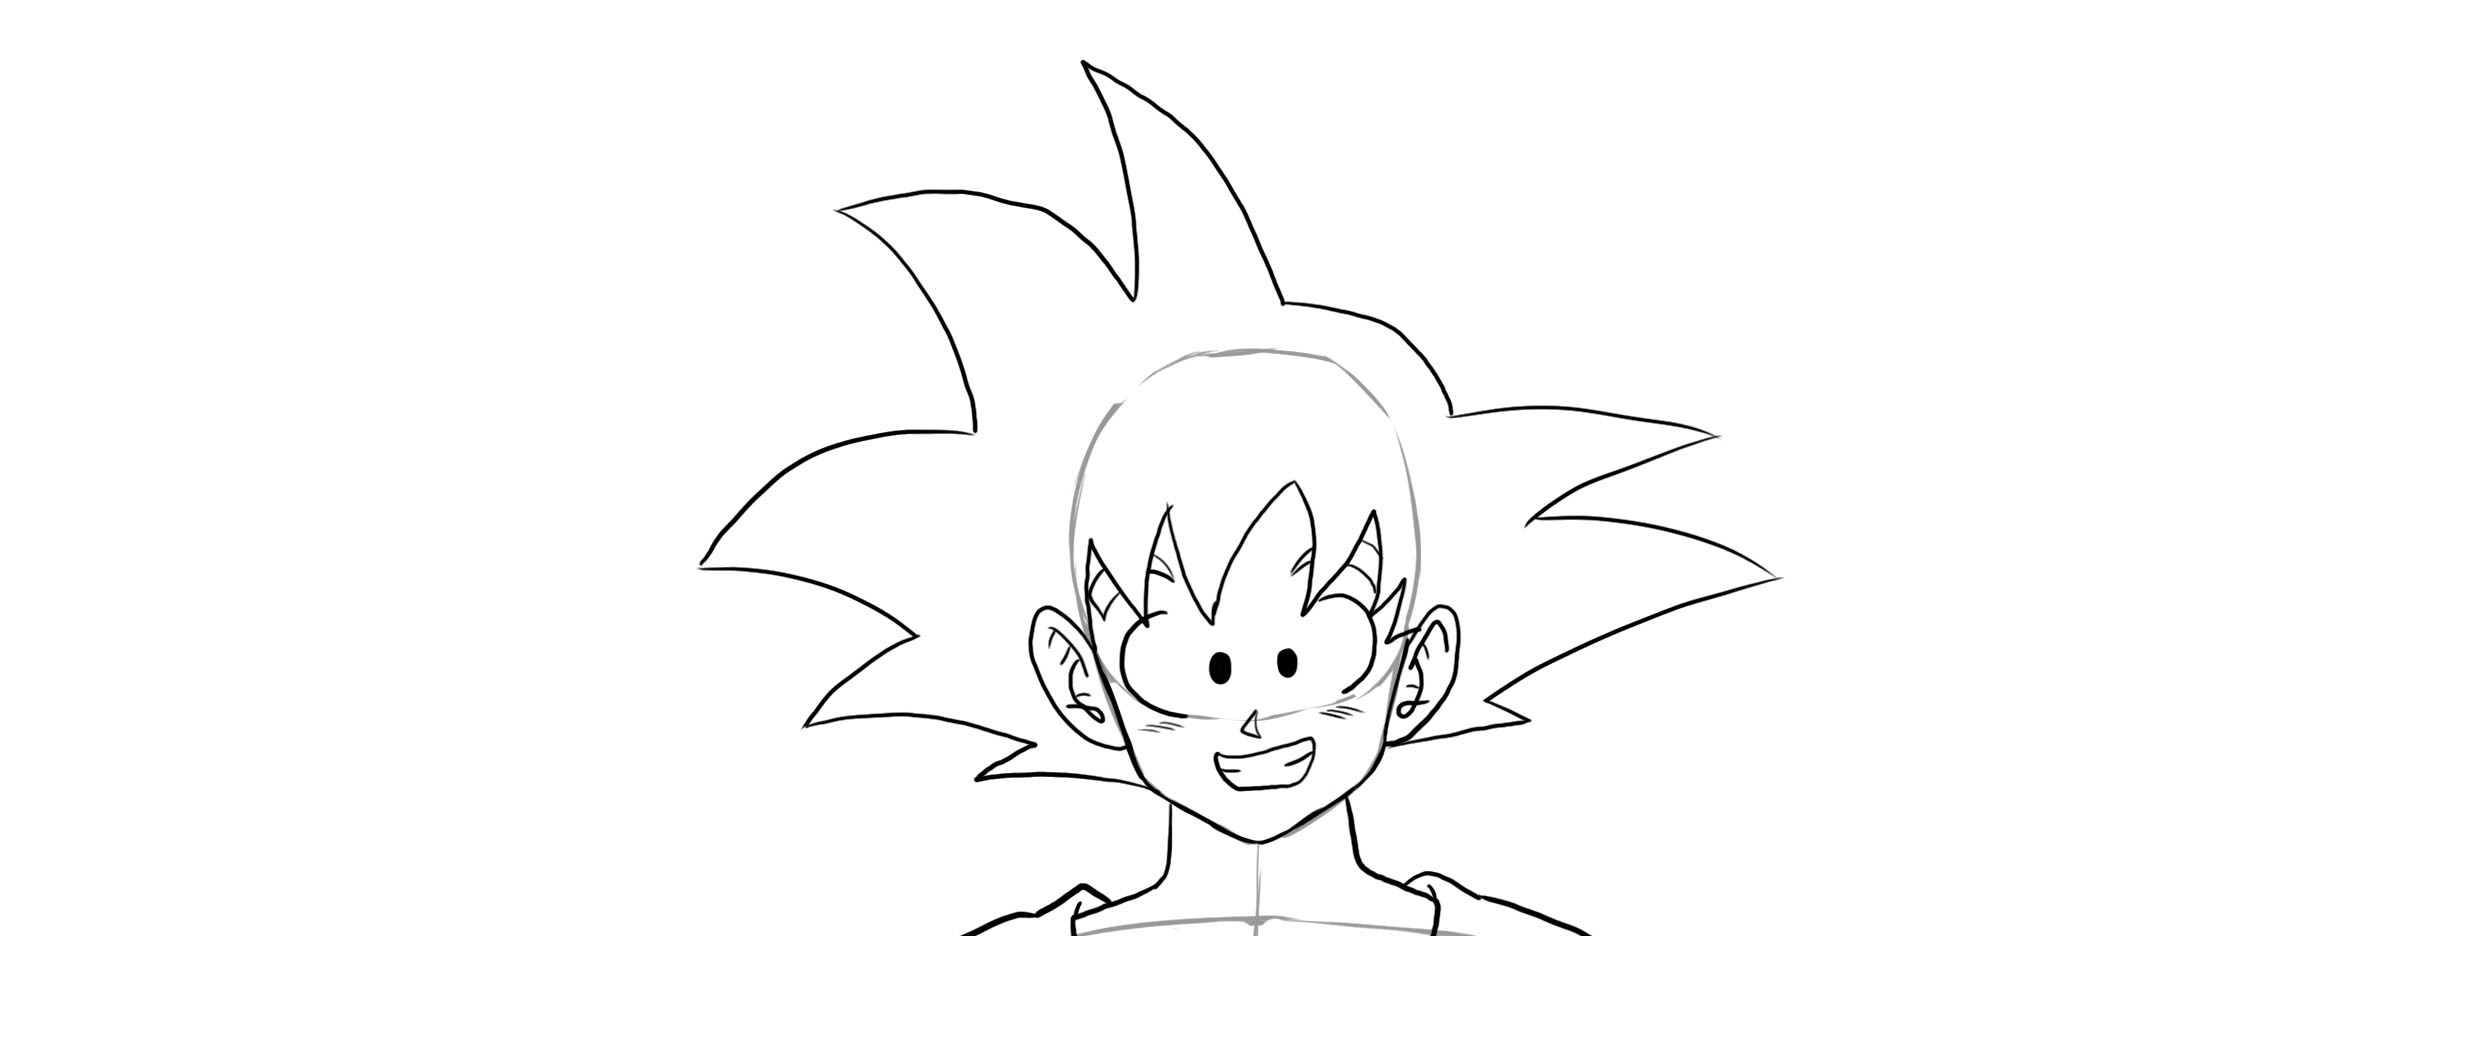
Before attacking the hair, you must do the ears. The top of the ear starts at the intersection of the head's markers and stops just above the jaw. (see the red markers) As for the hair, it is spiky. The right side of Goku has a total of 5 spikes. The longest are on the top of the skull and the closer one gets to the nape, the shorter they become. The left side contains a rounded part that follows the shape of the skull and then 3 spikes. If you want to know more about themanga hair drawingIn general, I invite you to read the article on our blog that discusses this topic!
Goku's face is in a classic manga style. The eyebrows are quite thick and pass behind the fringe. His eyes are very large and round. To make them, draw a half-circle on the outer side of the face, then a black circle towards the center of the face. The nose is a classic pointed nose, shaped like a triangle, right in the middle of the face. As for the mouth, you can make it however you want, either a simple arc for a smile, an "O" shape for surprise, or even a rounded rectangle like I did to show his teeth.
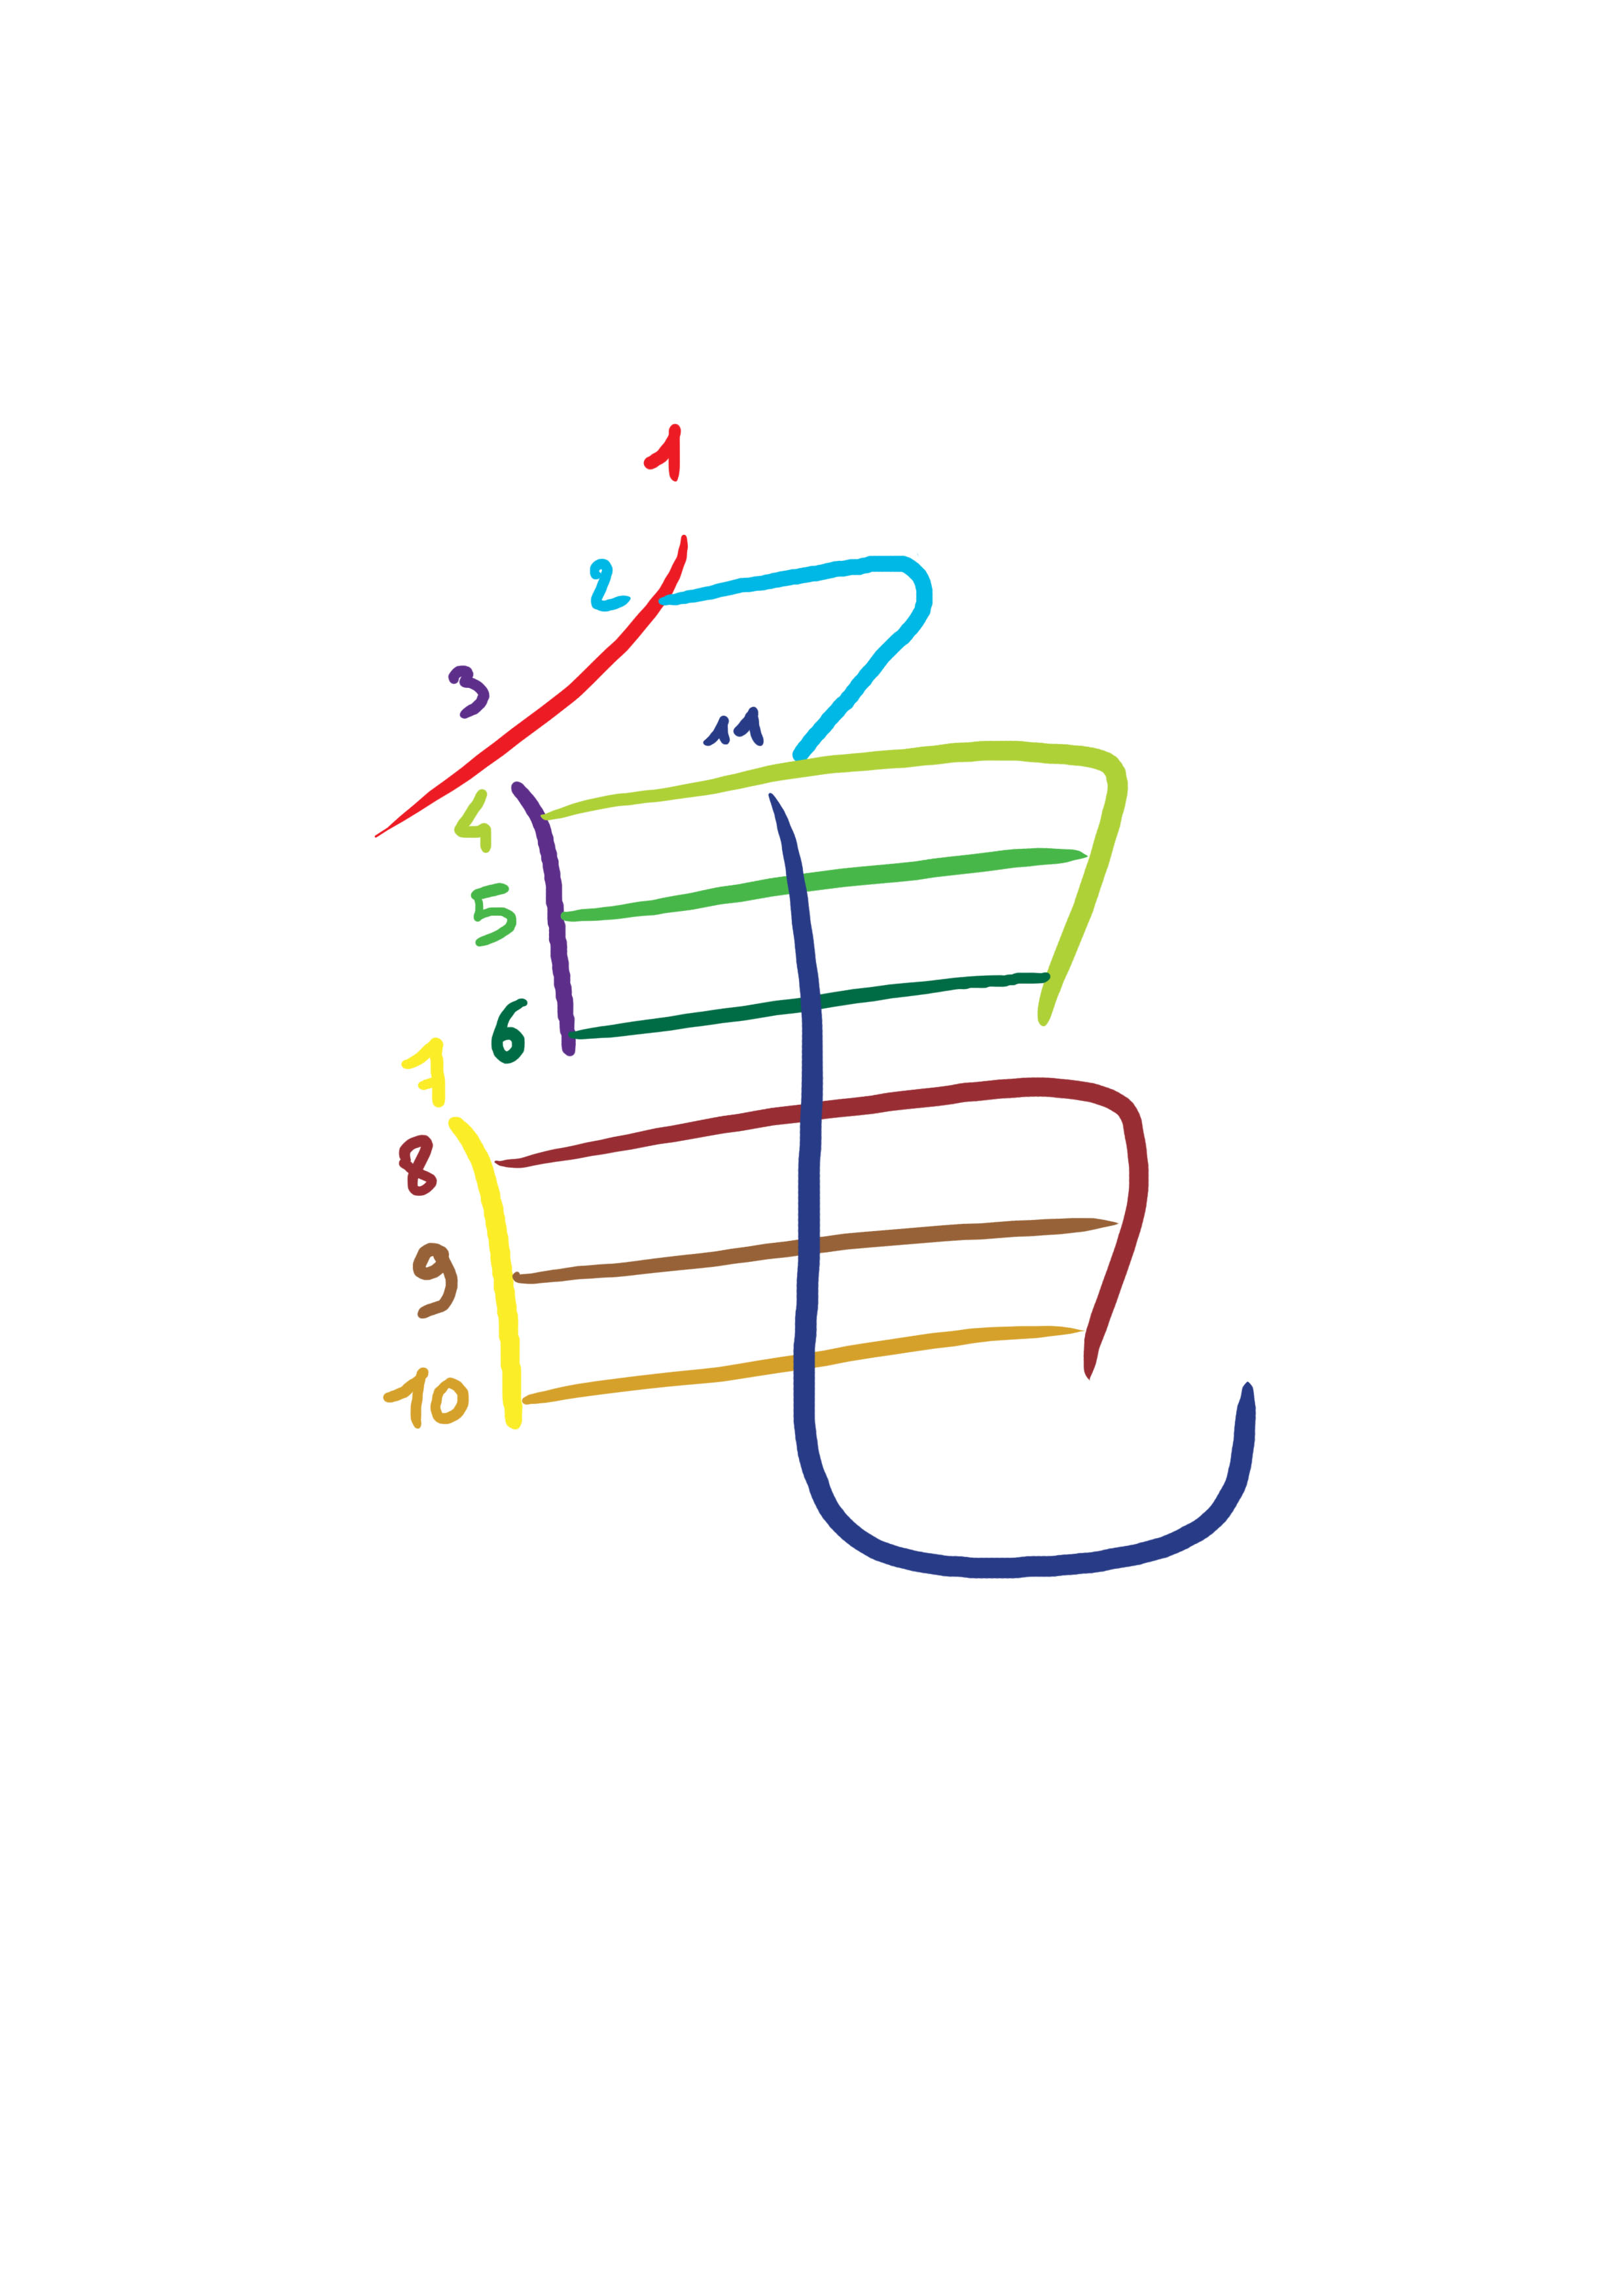
Before celebrating too quickly, the Kanji written on his suit is missing. By the way, do you know what it means? This kanji is read "Kame" (pronounced kah-meh) and literally means "Turtle" in Japanese. The Japanese are very meticulous about writing and they have a specific meaning and order for writing each kanji. I've put the order in which the strokes need to be made. The numbers are placed at the beginning of each stroke. If you ever learn Japanese, know that this kanji is commonly used in Japanese writing, as it is frequently used in kanji combinations, so don't hesitate to practice writing it. In total, there are 11 strokes...
Good luck!
COLORING THE DRAWING OF GOKU
Here is the result in color.

Discussion
9 comments