How to Start with Sanguine Drawing?
Do you feel like starting to draw with red chalk but don't know where to begin? Don't panic! In this article, we start with simple basics. We will see together how to choose the right materials, how to use this particular technique, and most importantly how to start well without getting discouraged.
After this, you will be ready to make your first sketches in red chalk, with confidence!
Brief History of Red Chalk
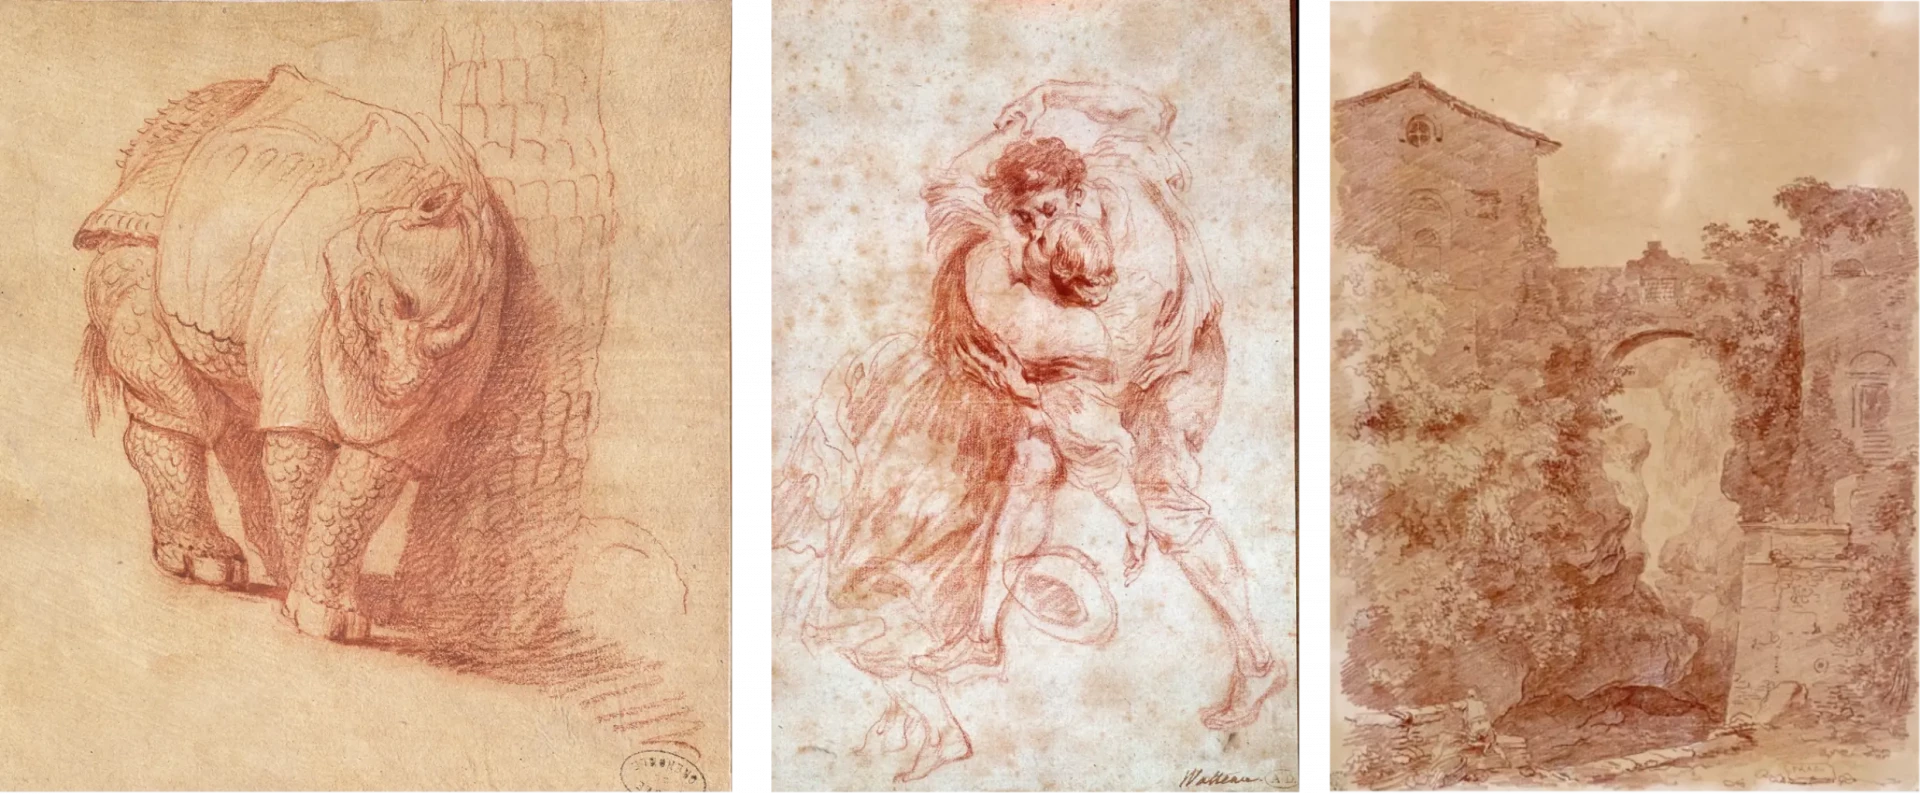
(from left to right: Johann Elias RIDINGER, Jean Antoine Watteau, Fragonard)
Sanguine is an ancient drawing technique that appeared before or during the Renaissance. It owes its name to its reddish-brown color, similar to that of blood, obtained from natural pigments rich in iron oxide, such as hematite. This warm, earthy shade was widely adopted by numerous artists over the centuries. Painters like Leonardo da Vinci, Michelangelo, Rubens, and Watteau used it to make sketches, studies, or more elaborate drawings.
Its soft and slightly powdery finish makes it a good tool for representing volumes, shadows, and shapes of the human body. This is why it has often been used for drawing nudes, portraits, or anatomy studies. It allows for both precise line drawing and creating gradients.
It was often used on lightly colored paper, with sometimes touches of white chalk to bring out the lights, or charcoal to reinforce the shadows. It's a simple, expressive, and effective technique, which has stood the test of time without losing its power.
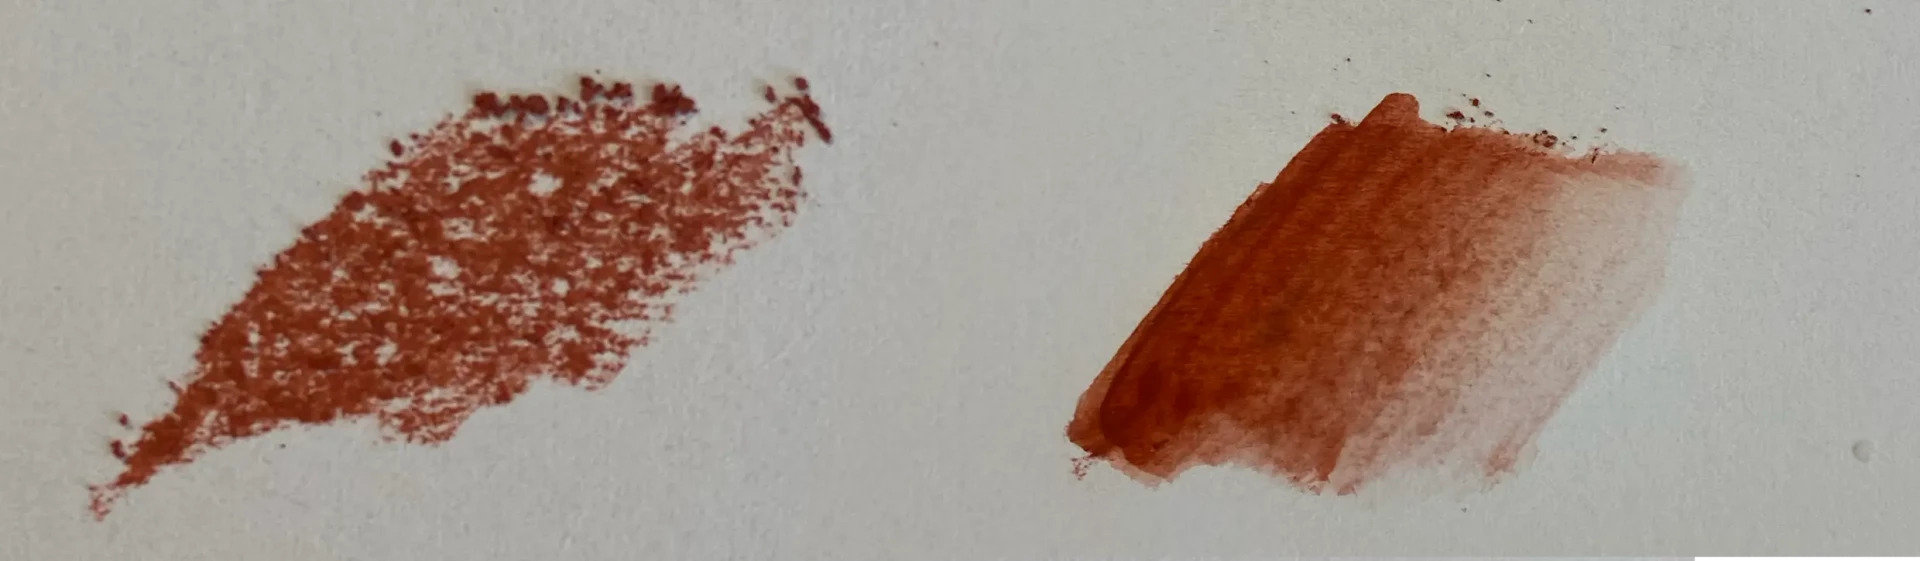
Sanguine is a technique that can be used dry or wet. When dry, it allows for precise, granule-like textured tracing. When wet, it produces soft washes and gradients.
This dual use offers different possibilities to create varied effects in a drawing. I advise you to test both techniques to see with which one you feel most free to express yourself.
The equipment
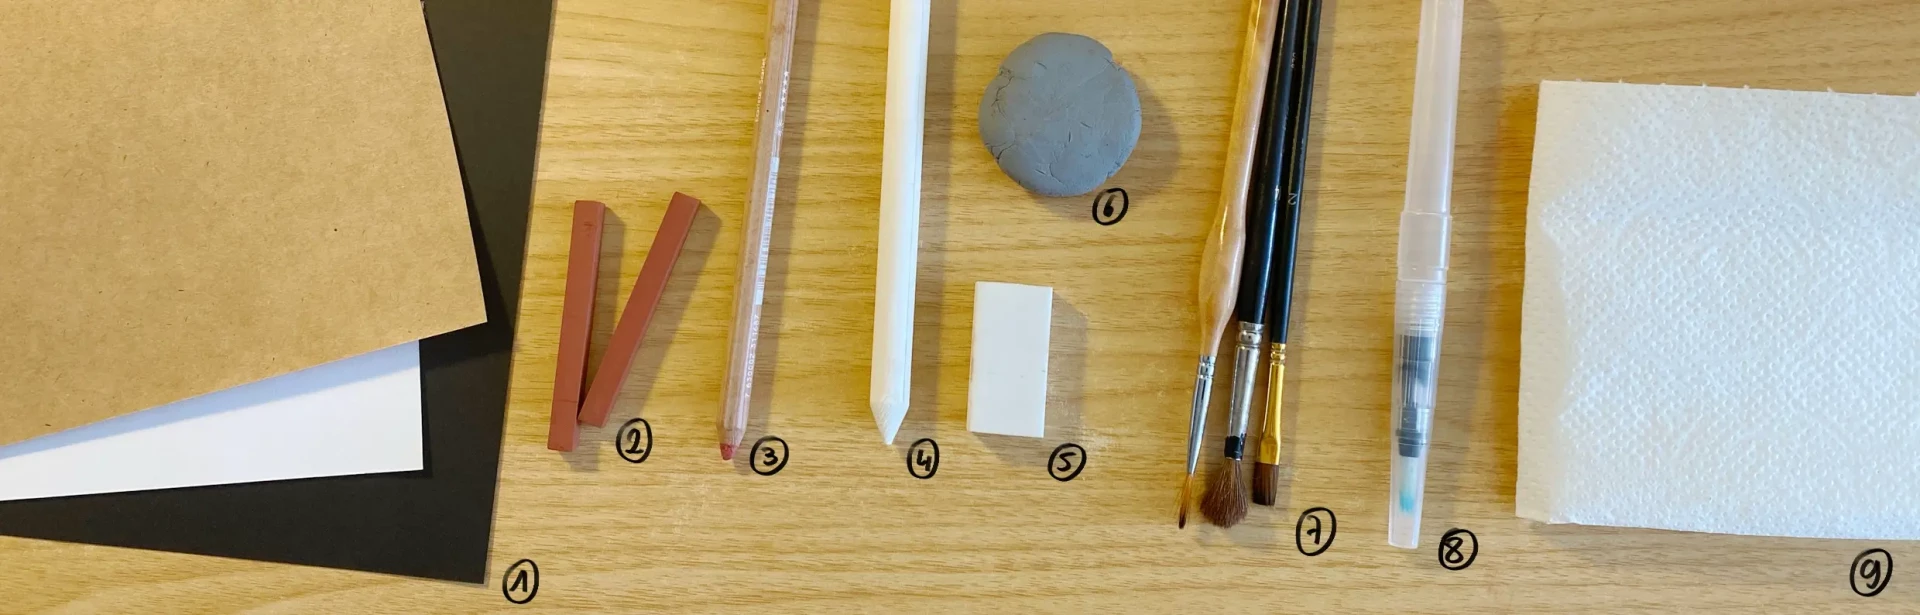
Now that you know a bit more about the history of red chalk, let's see what you need to get started. Good news: it's a fairly accessible technique that doesn't require a lot of equipment.
Here are the basic elements you will need:
1. Paper: I recommend choosing slightly textured paper to better hold the pigments. It doesn't need to be too thick, unless you choose to work with your sanguine in a wet manner.
2 and 3. Red chalk drawings: you can choose the chalk format (2) or pencil format (3), depending on your drawing style. We'll discuss this just after.
4. A blending stump: it will be an excellent ally for blending pigments and achieving a smoother finish.
5. A white eraser: useful for precise erasing.
6. A kneaded eraser: perfect for lightening or attenuating certain areas without erasing everything
7 and 8. Brushes: to be planned if you want to experiment with wet red chalk.
9. A paper towel: useful for blending pigments more broadly and diffusely.
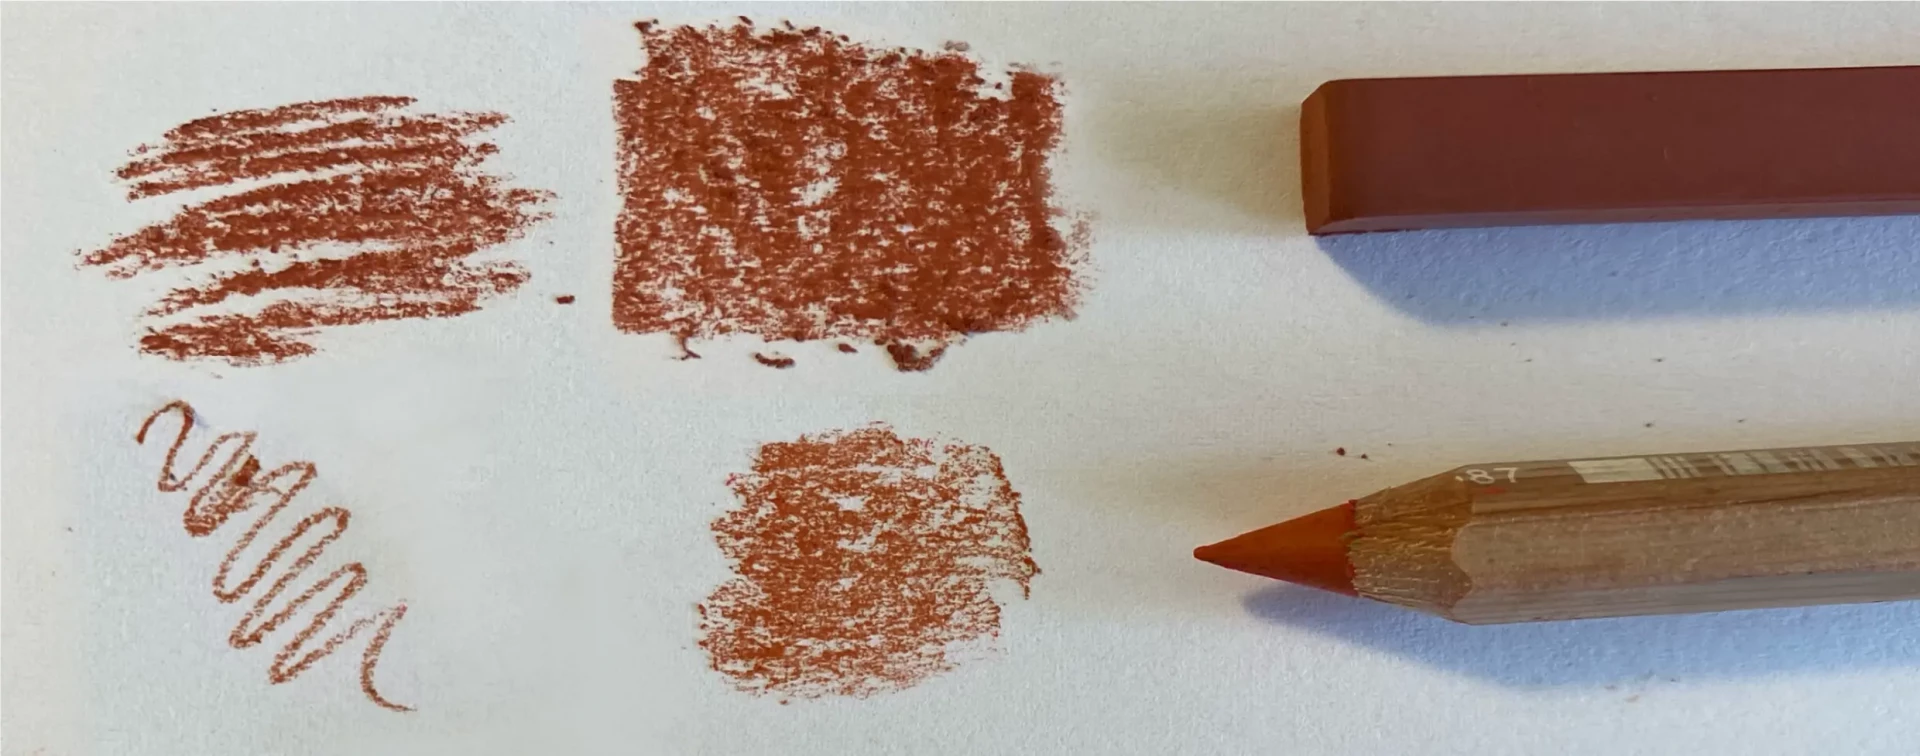
Red chalk drawing can be done with a pencil or chalk, each with its advantages and disadvantages. The red chalk pencil allows precise and controlled lines, ideal for details and fine lines. It is easy to carry and less messy, making it practical for quick sketches or outdoor drawing.
On the other hand, it offers a more uniform and less rich texture than chalk. Sanguine chalk, however, is thicker and powdery, which allows for more varied material effects and soft gradients. It is perfect for large formats and more expressive drawings.
However, it can be more difficult to master, messier, and often requires specific paper to adhere well. The choice between pencil and chalk thus depends on the desired style and the working context: pencil for precision and mobility, chalk for the richness of textures and large effects.
To draw with red chalk, it is best to use a medium grain paper, like drawing paper or watercolor paper. This type of paper allows the red chalk to catch and give texture. Conversely, paper that is too smooth will make the line less pronounced.
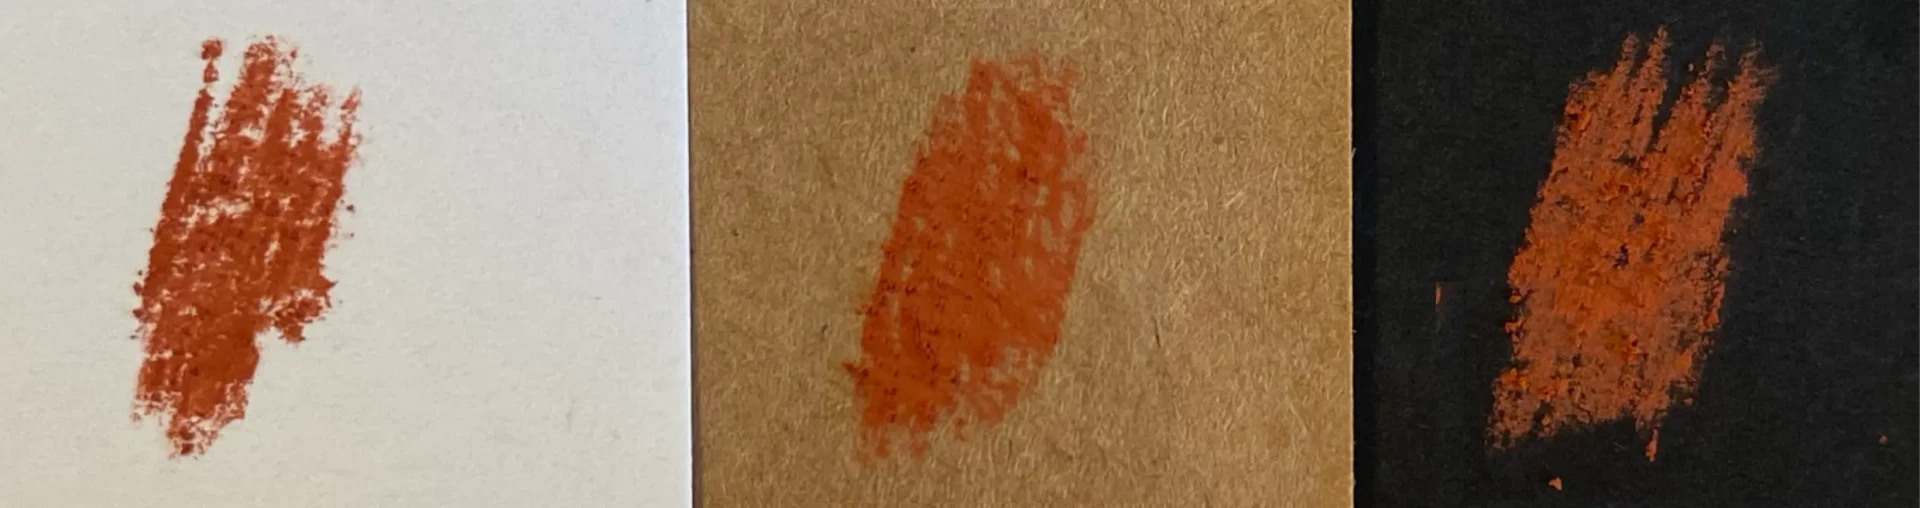
Colored papers, like beige, ochre, or gray, highlight the red tones of the red chalk. You can even use black paper. If you work on white, the red chalk will be a source of shadow, but if you work on black, it becomes a source of light. It's a very different way of approaching drawing, which can be quite fun.
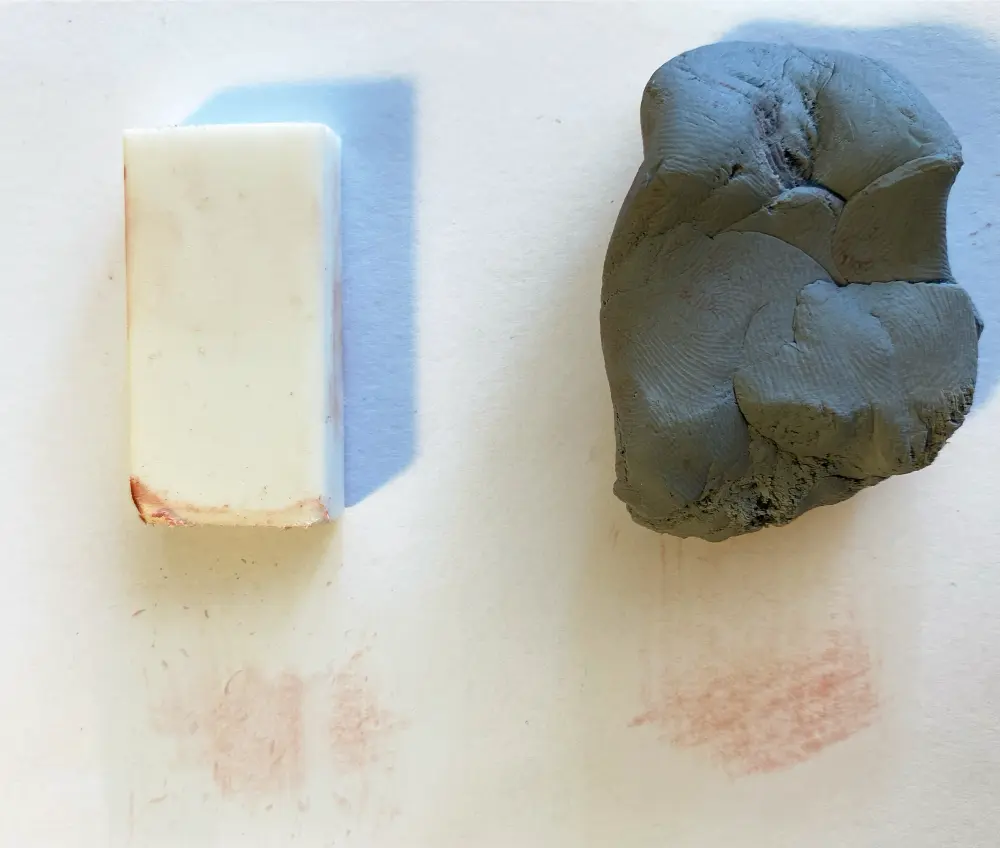
Regarding erasers, the white eraser allows for clean removal of pigment, provided it is used gently and on good quality paper.
Bread crumb eraser remains ideal. It allows the removal of pigment without damaging the paper.
In this type of technique, I advise you not to rely too much on the eraser. Instead, take the time to think before you make your marks.
Basic techniques in sanguine
Let's now talk about the different types of blending. Overall, all methods work, the main question to ask yourself is what effect you want to achieve.
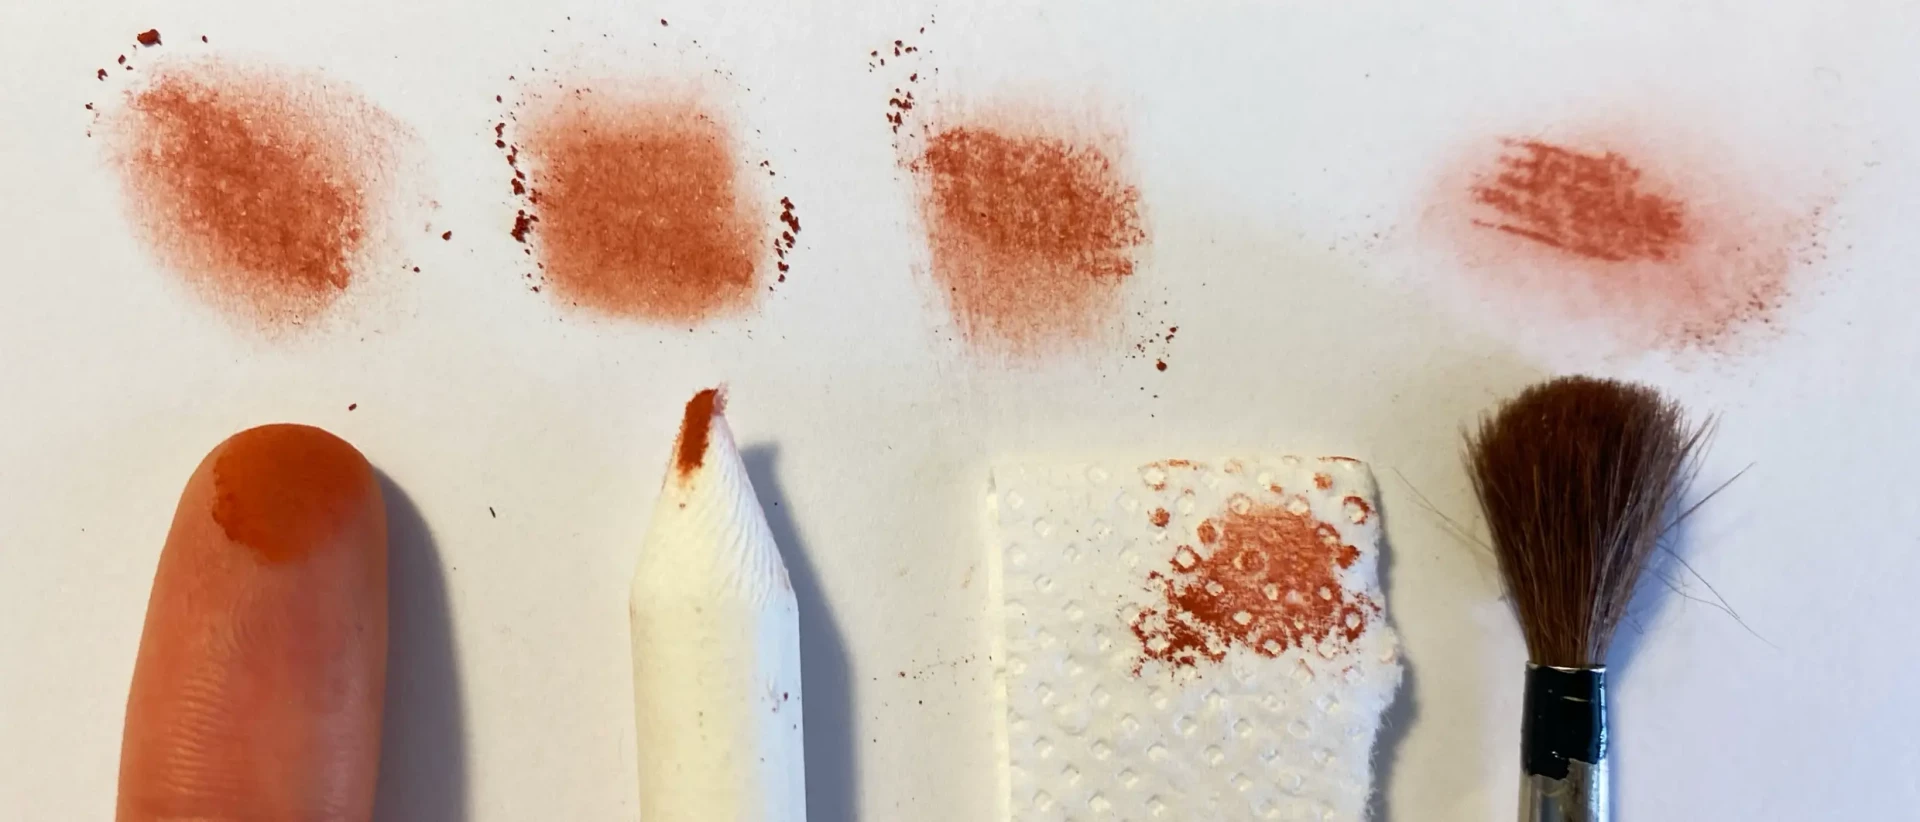
Blending with a finger gives a fairly even finish. The skin's natural oils distribute the pigment on the paper, creating a rather mixed effect. The challenge is to properly dose the pressure to avoid unintentional marks.
Blending remains the most classic method. It allows for a very smooth finish, but can also create small deposits of material. Remember to regularly blow on your drawing to remove them.
The paper towel works very well and is a good alternative to the finger method. However, the result will be a little less blended.
Finally, you can also blur with a brush. This allows you to spread the pigment while keeping a visible trace underneath. It's practical if you want to create a somewhat diffuse atmosphere.
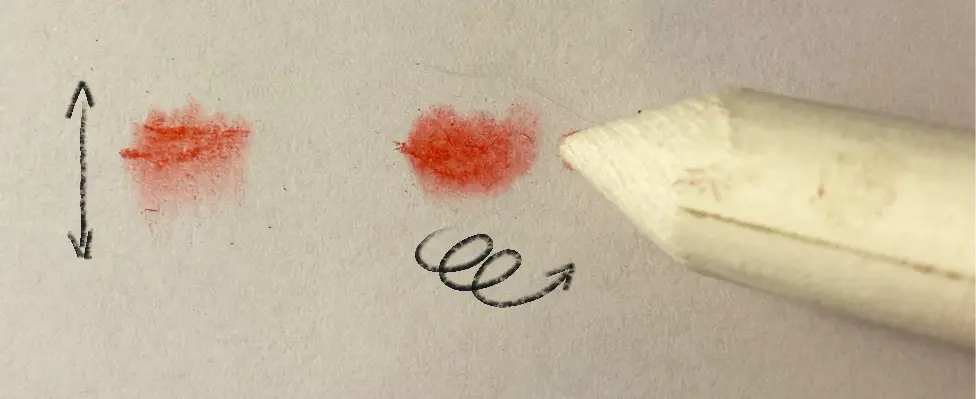
Tip: when you blend, I recommend making small circular motions. The result will be even more uniform and blended.
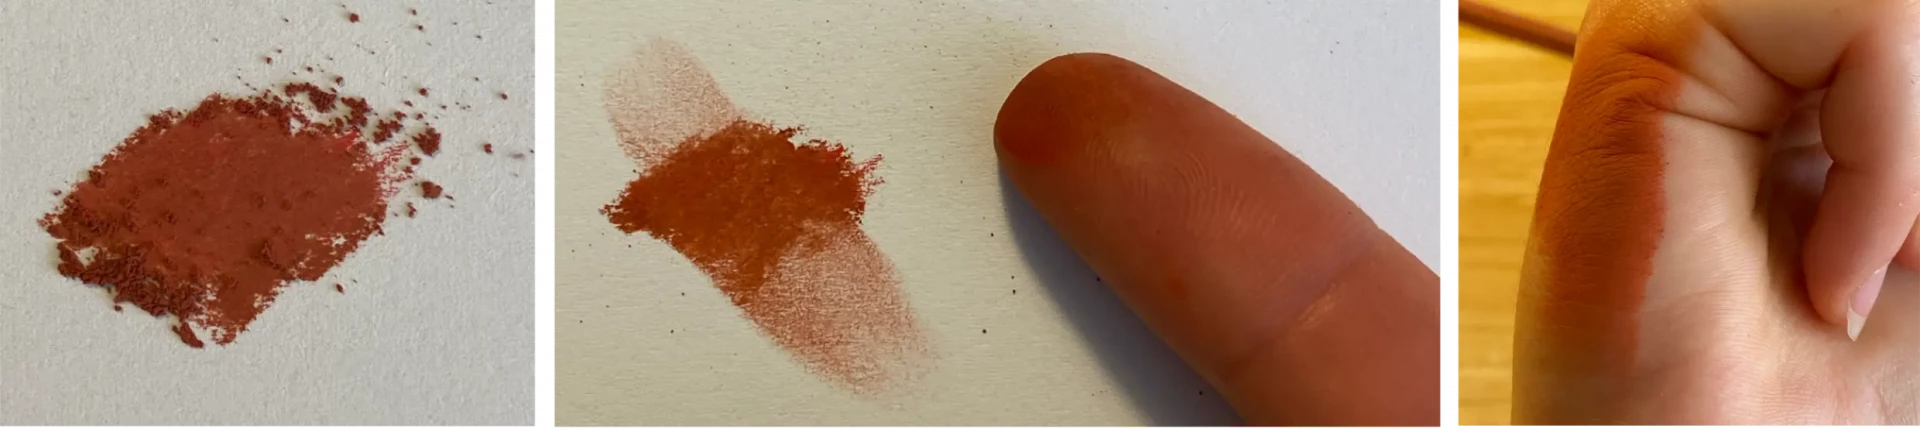
Finally, as you will have understood, red chalk leaves a lot of deposits, especially if you want to create an intense, solid layer by pressing hard. Therefore, it is not uncommon for fingers or hands to get stained unintentionally.
The pigment is water-soluble, which isn’t a problem on this front, but you might accidentally stain your paper.
Remember to regularly blow on the deposited pigments and to use a white sheet as a protective pad, especially if you are drawing on an area that has already been worked on.
Exercise to Draw a Sphere in Red Chalk
Let's now look at the basics of how to work with red chalk by making a sphere.
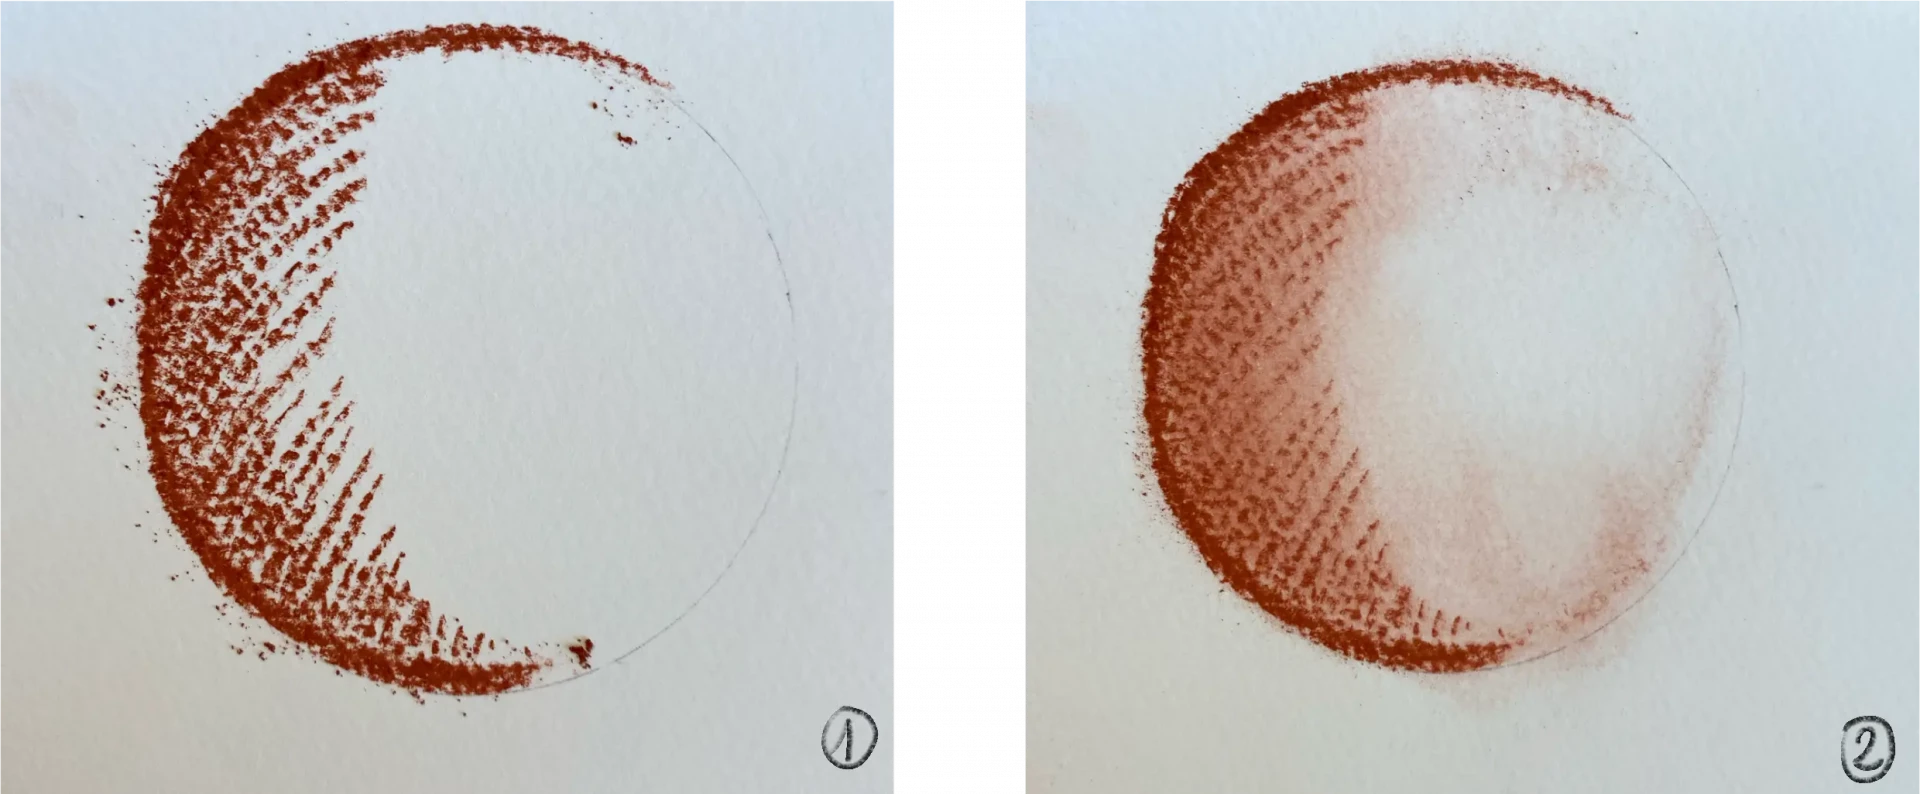
1. Sanguine will be used solely for shadows. Therefore, you have to plan for preserving the whites. Here, we start by applying a first shadow. Hatching is often used, as it allows for better control of the amount of pigment deposited.
2. Then, we blend this shadow. A rough blending using a paper towel works very well. Remember to keep a white area in the center to represent the light.
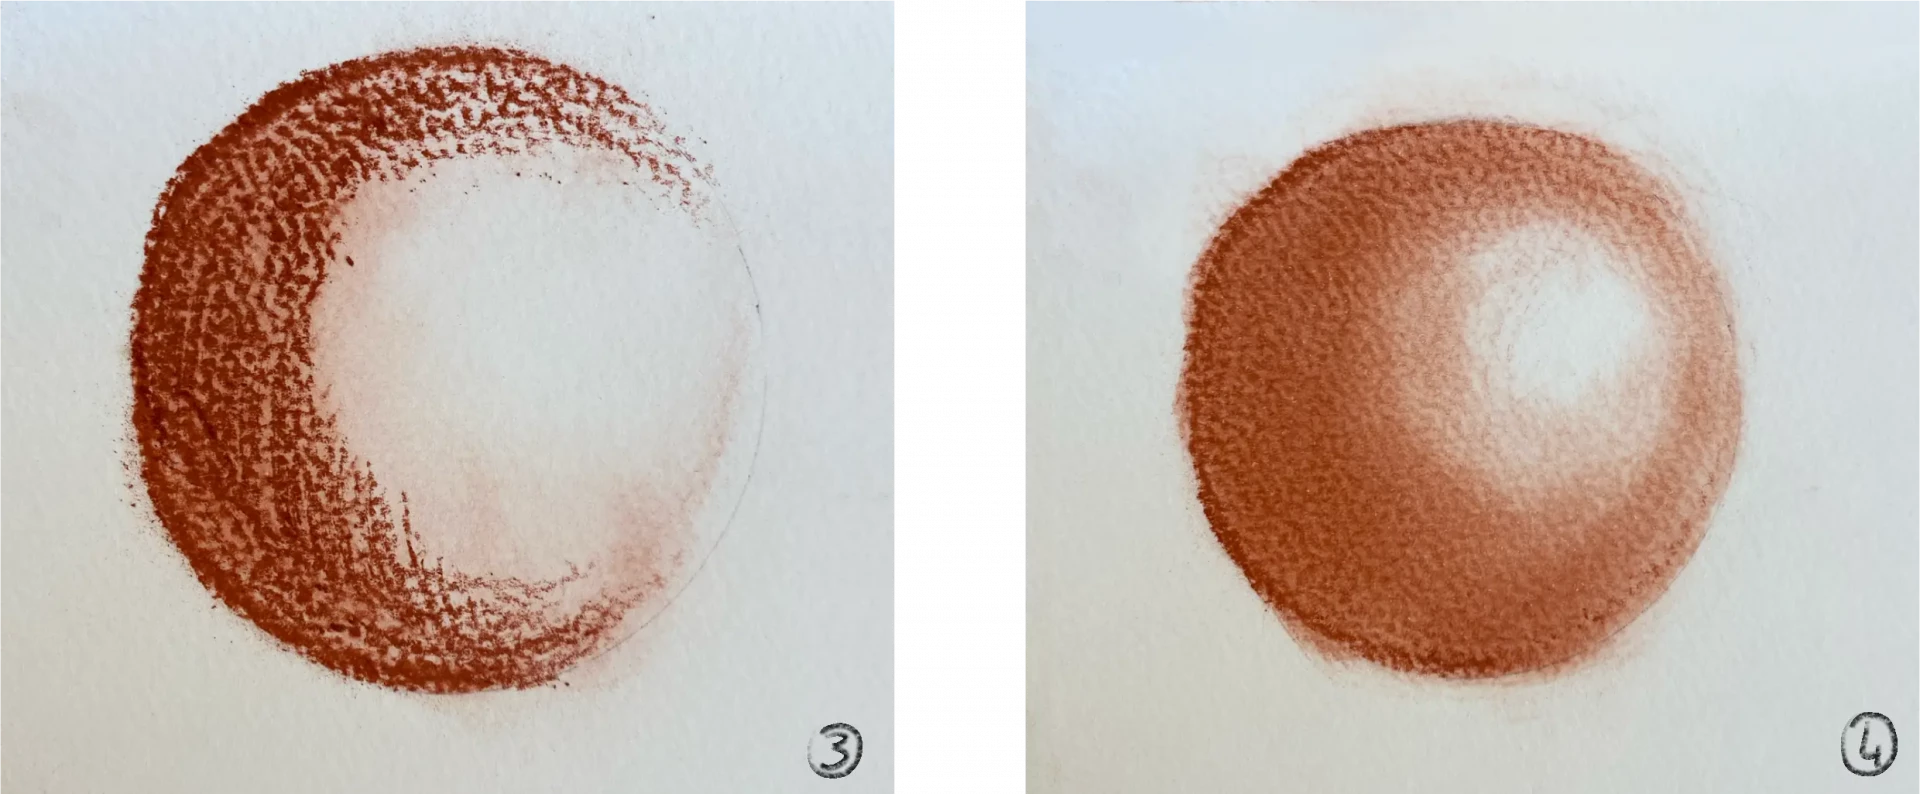
3. We intensify the shadow next. For a pleasing result, I advise you to work according to the volume: here, for a sphere, work in circular arcs.
4. You can blur again, here using a paper towel. Leave a circle of light slightly larger than the previous one to enhance the volumetric effect.
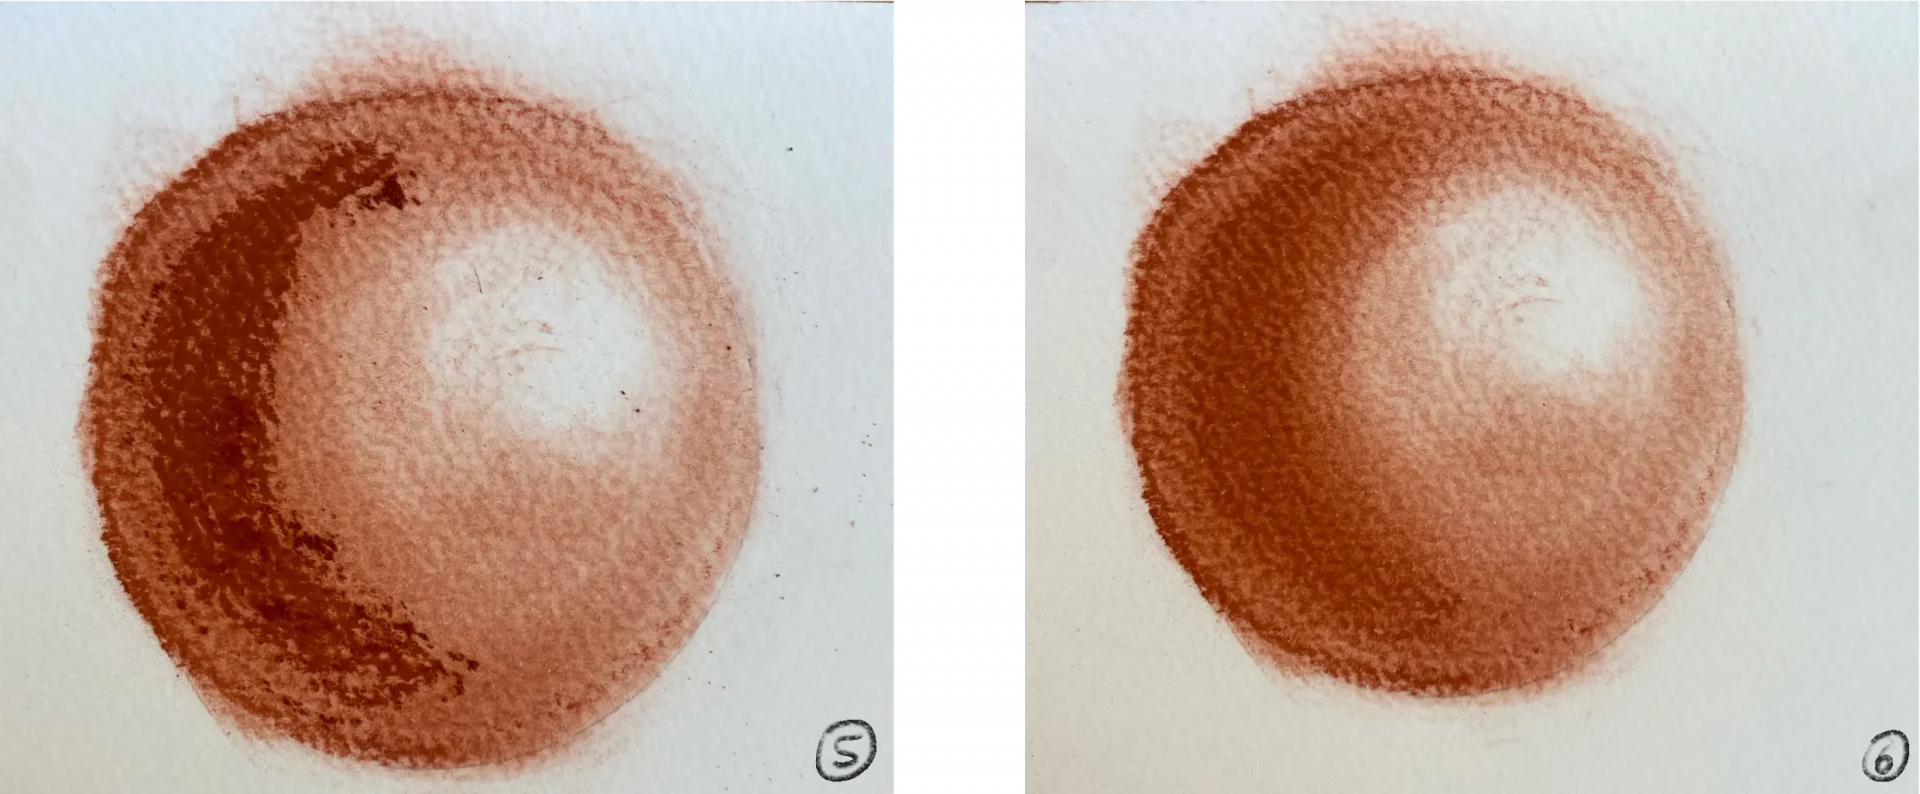
5. We intensify the shadows once again.
6. Then we blend again.
You will understand that red chalk works mainly by alternating between pigment deposit and smudging. I advise you to gradually build up your values to achieve a more precise and visually pleasing result.
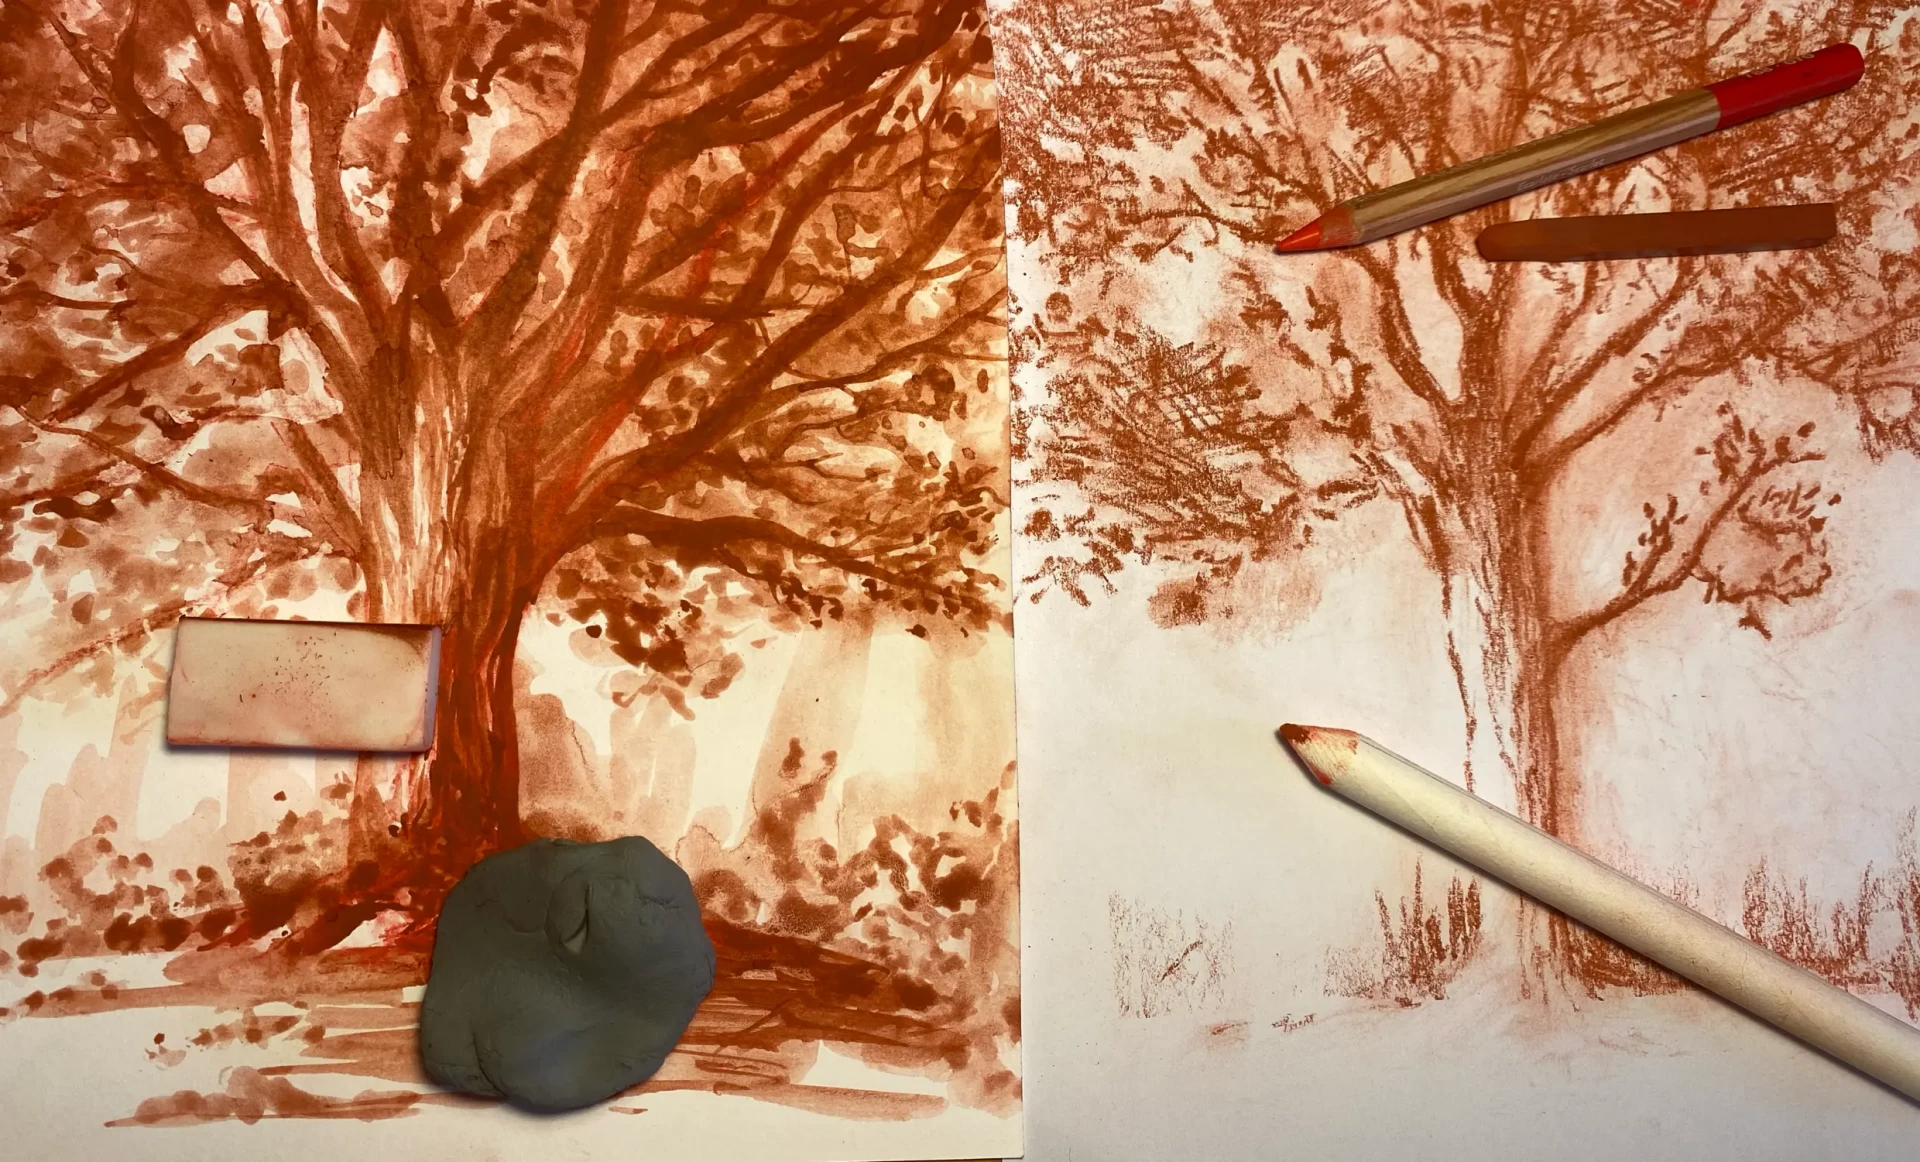
Drawing with dry sanguine step by step
Now that we've covered the basics, I propose a first drawing with dry red chalk, step by step. I've chosen a tree because when drawing organic forms you can really not go wrong, so it's the best way to discover a new technique.

1. I start by drawing the trunk. I alternate between the tip and the flat side of the chalk, depending on the desired thickness.
2. I add the branches. They are mostly dark, as they will be largely in the shadow.
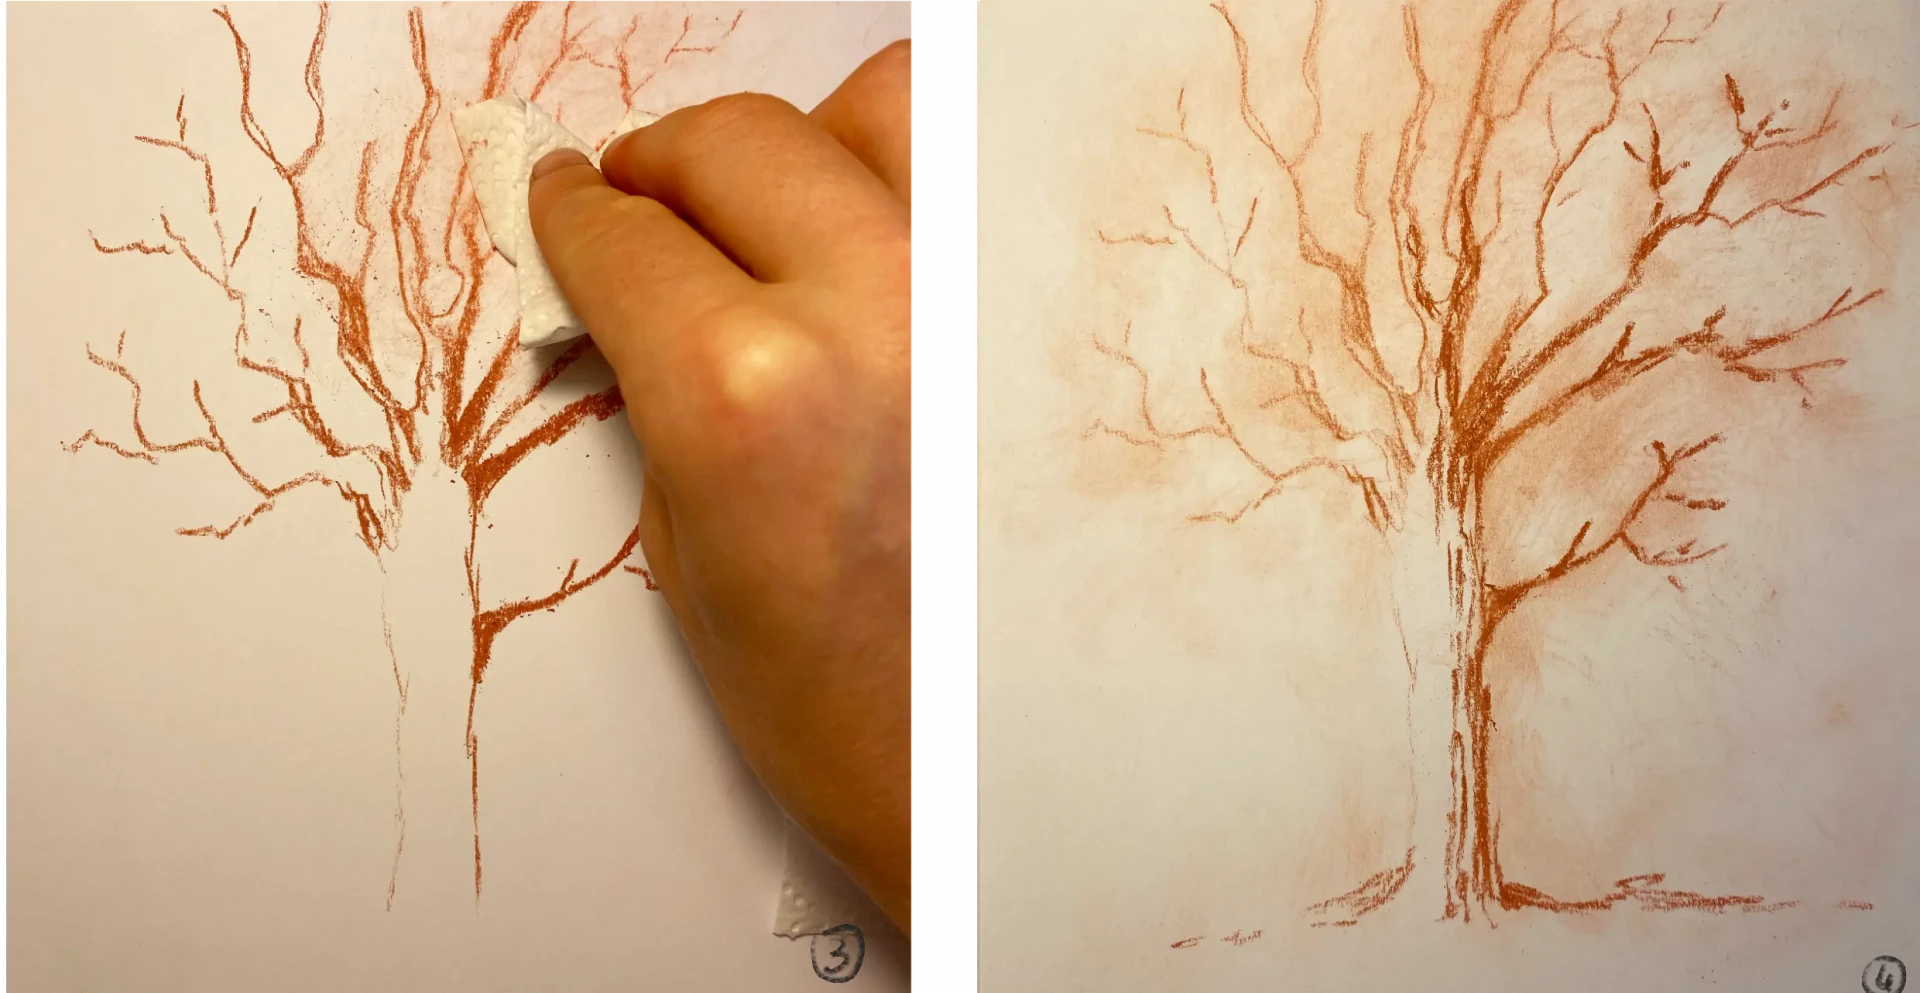
3. I blur the branches with the paper towel. This creates some visual "noise" in the background and starts to suggest foliage.
4. I add details to the trunk by drawing a few lines, while leaving white reserves for the light areas.
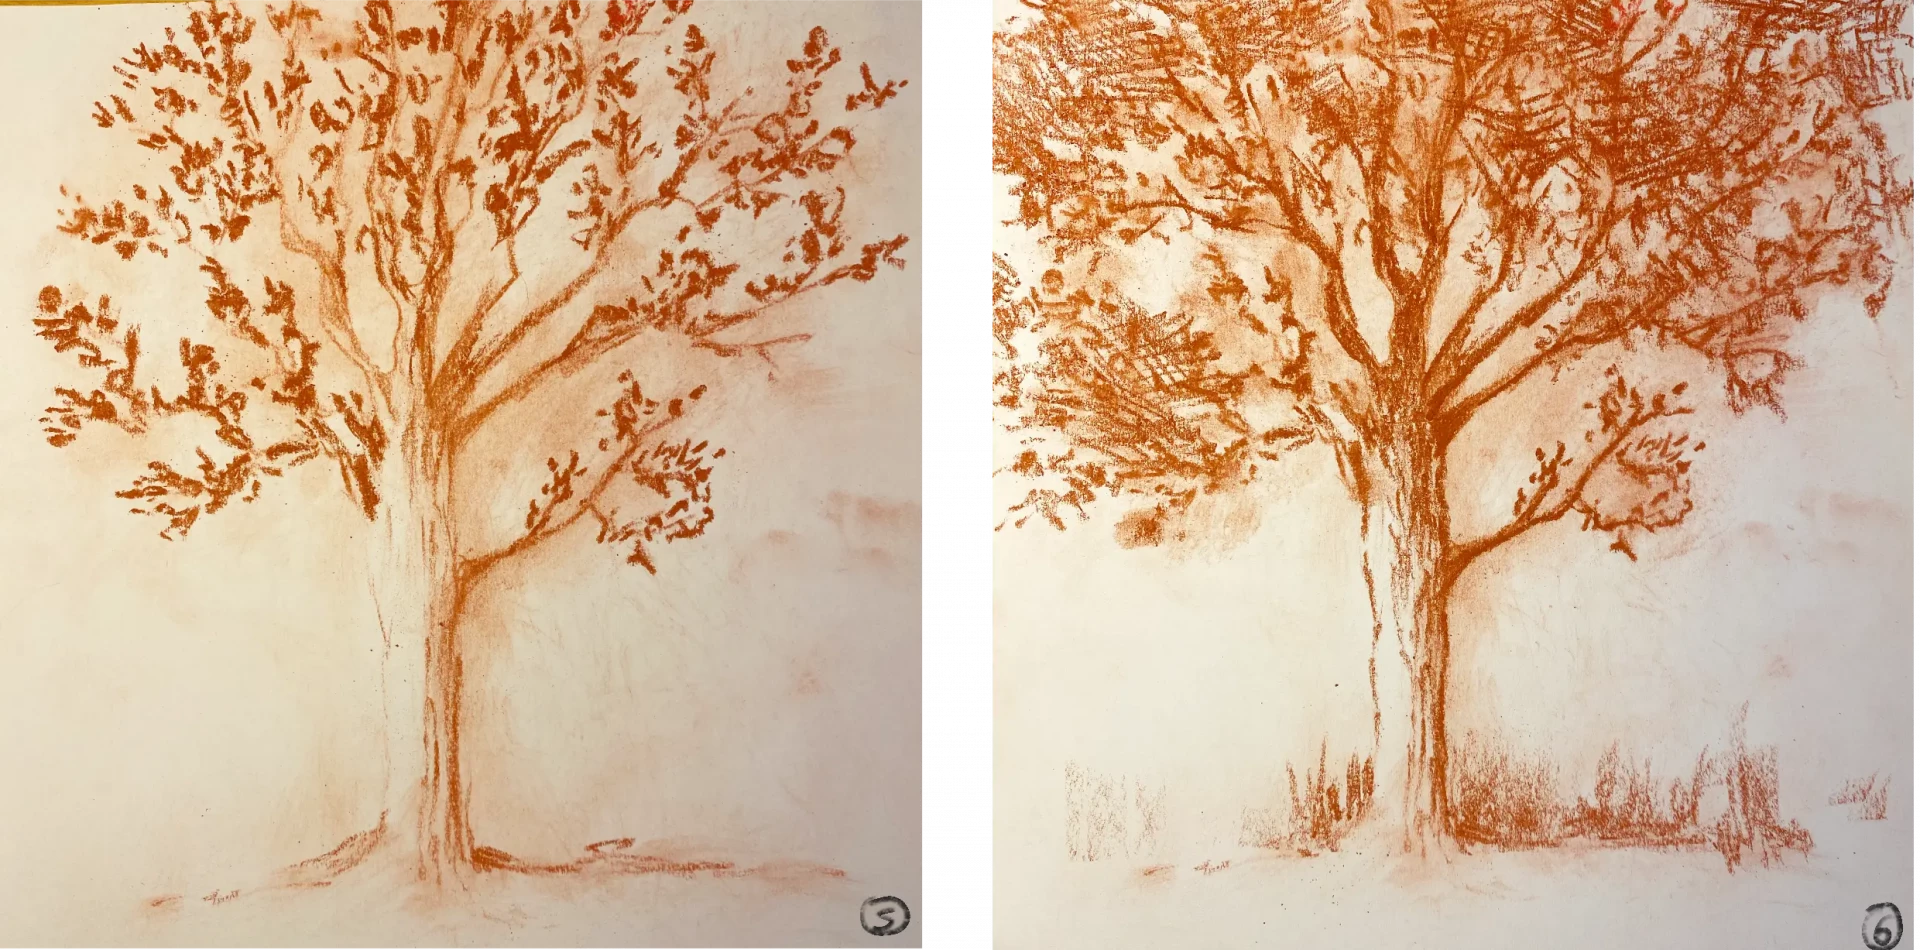
5. I add leaves by making small strokes at the ends of the branches. You can stop here if you just want to suggest a young tree.
6. For a denser tree, you can add hatching: this helps suggest mass without drawing everything. You can also draw some lines on the ground to suggest vegetation.
First wet red chalk drawing step by step
I now suggest you explore the use of wet sanguine, by drawing a tree again. This will allow you to see which technique you are most comfortable with.

1. I am creating the tree structure.
2. I start working on the trunk by drawing lines and small curves.
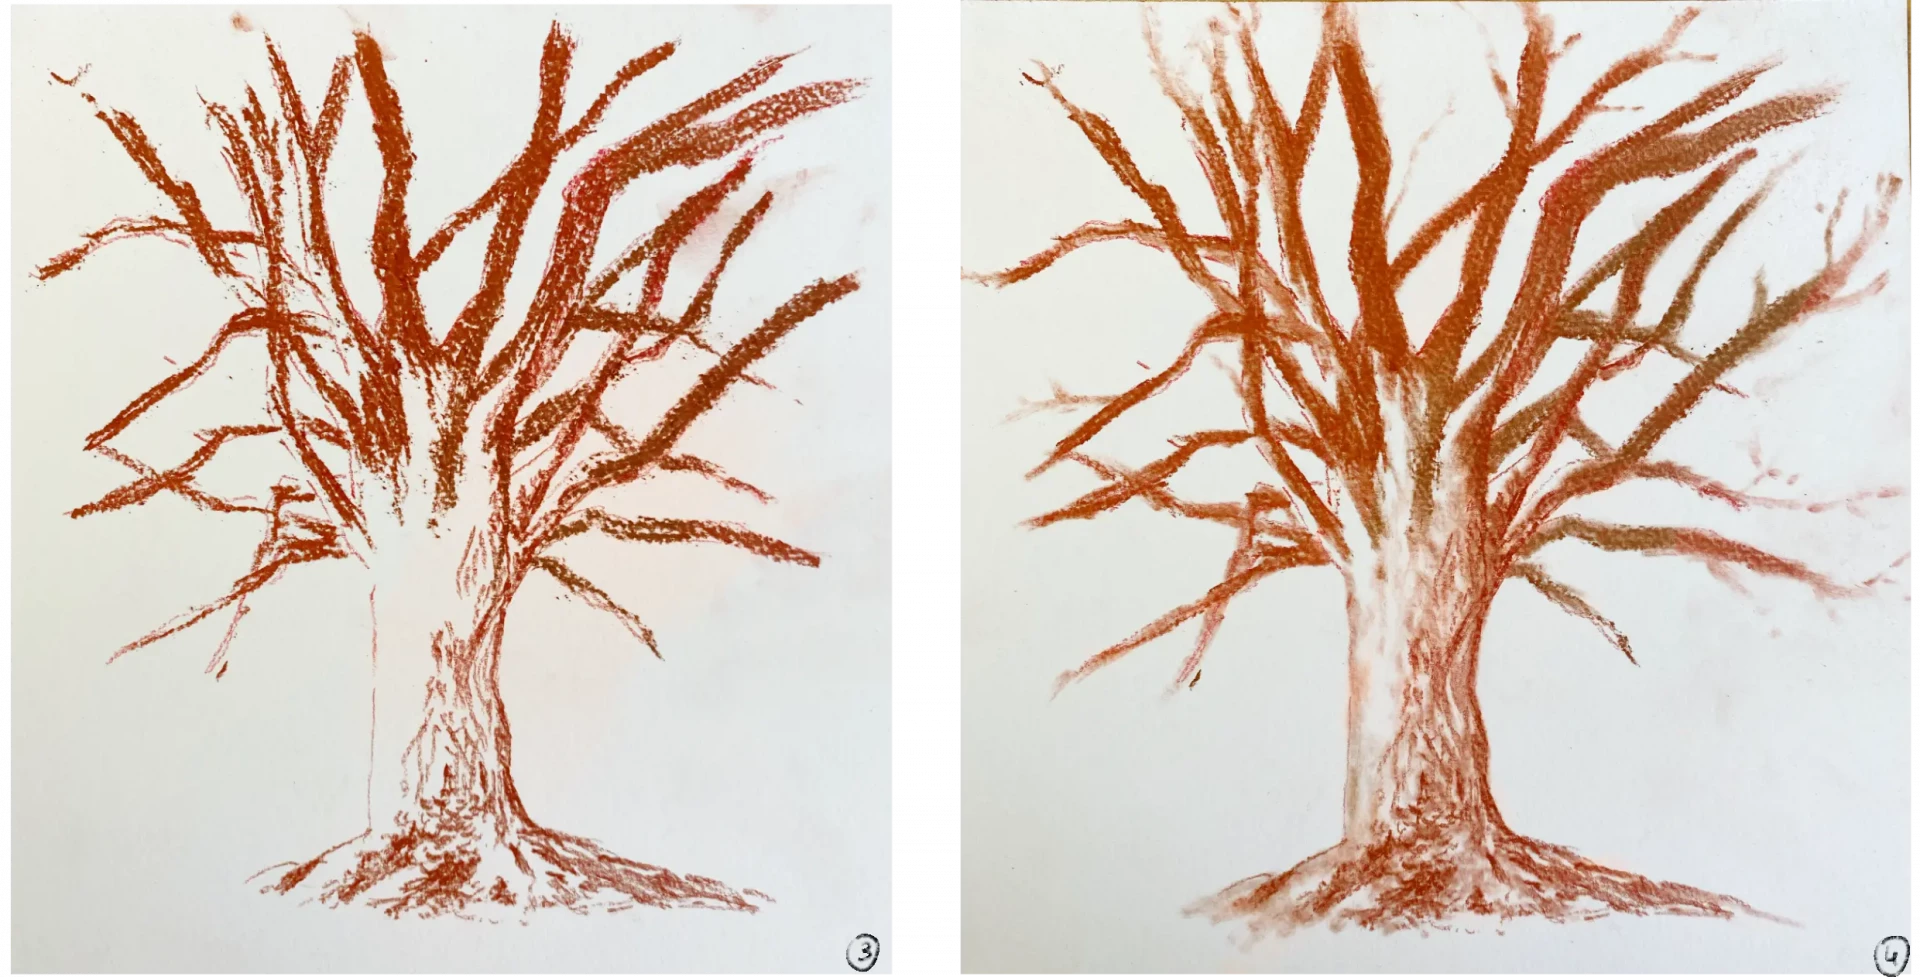
3. Using the edge of the chalk, I mark the branches.
4. With a stump, I blend all the features slightly.
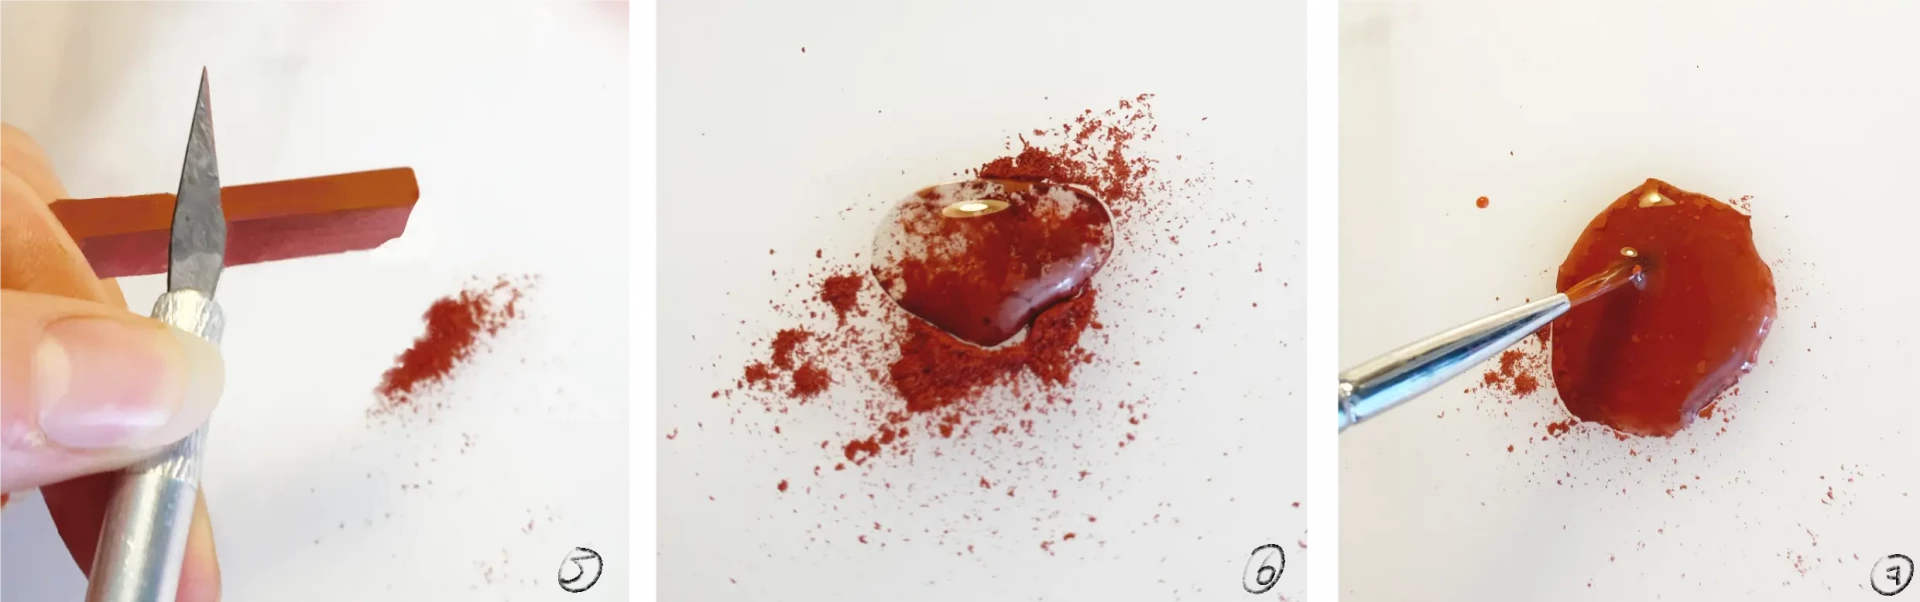
5. It's time to move on to wet red chalk: I gently grate the red chalk with a scalpel.
6. I add a few drops of water.
7. I mix well to obtain a homogeneous paste.
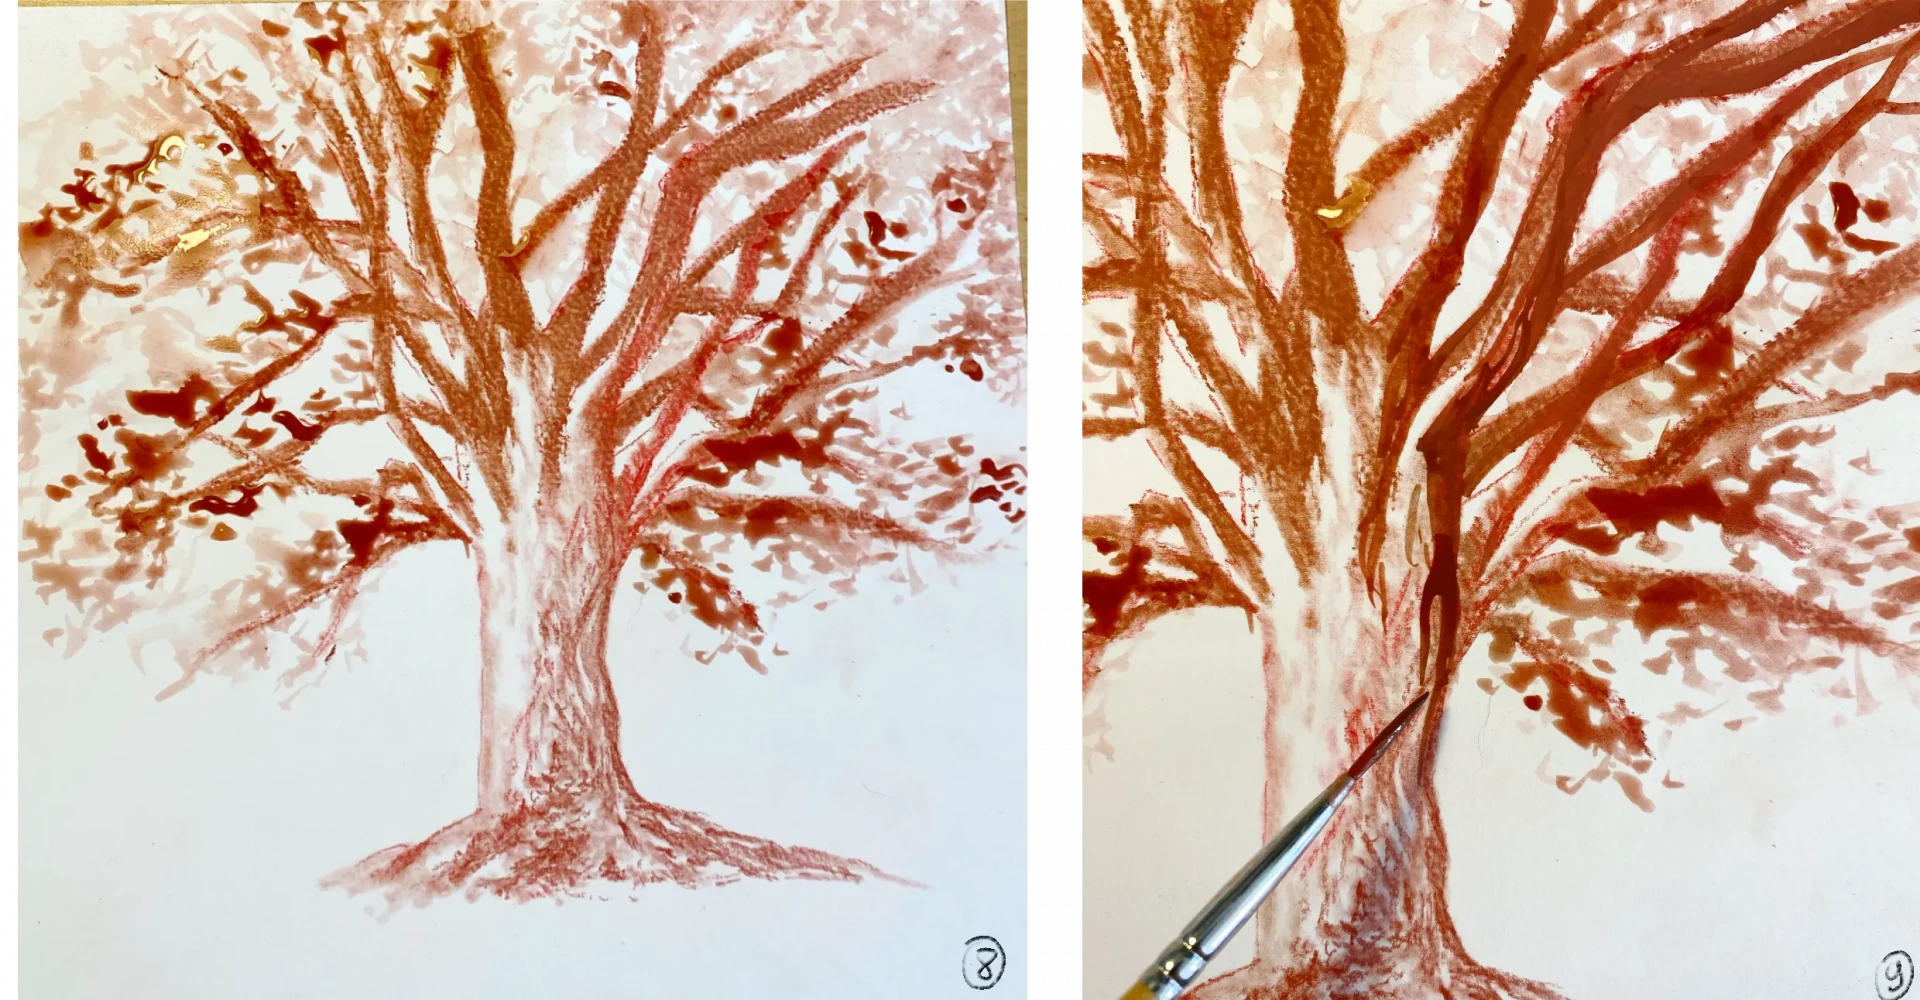
8. I create the foliage by making small spots at the ends of the branches. Some are very diluted to mark the background, others more intense for the foreground.
9. With a clean brush, I blend the red chalk already laid on the branches. I make sure to work in lines to suggest the bark.
10. I continue with the branches and, using the mix of wet red chalk, I add some very fine ones for more detail.
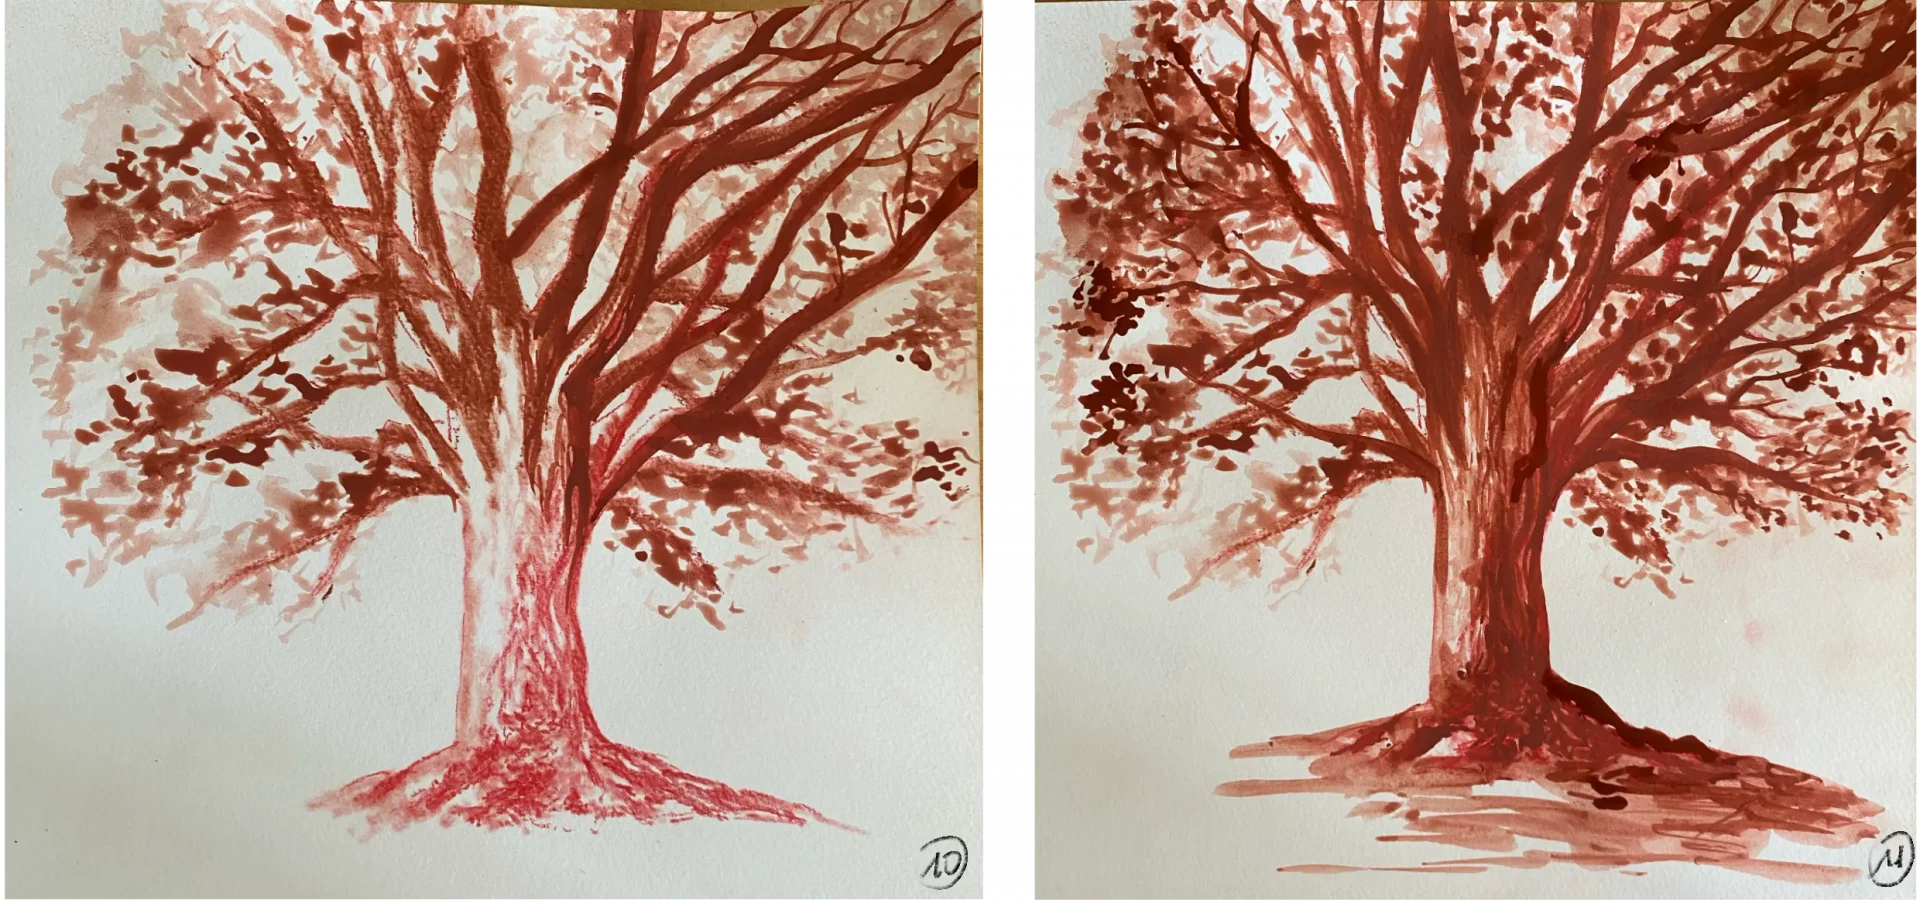
11. I follow the same procedure to create the entire tree.
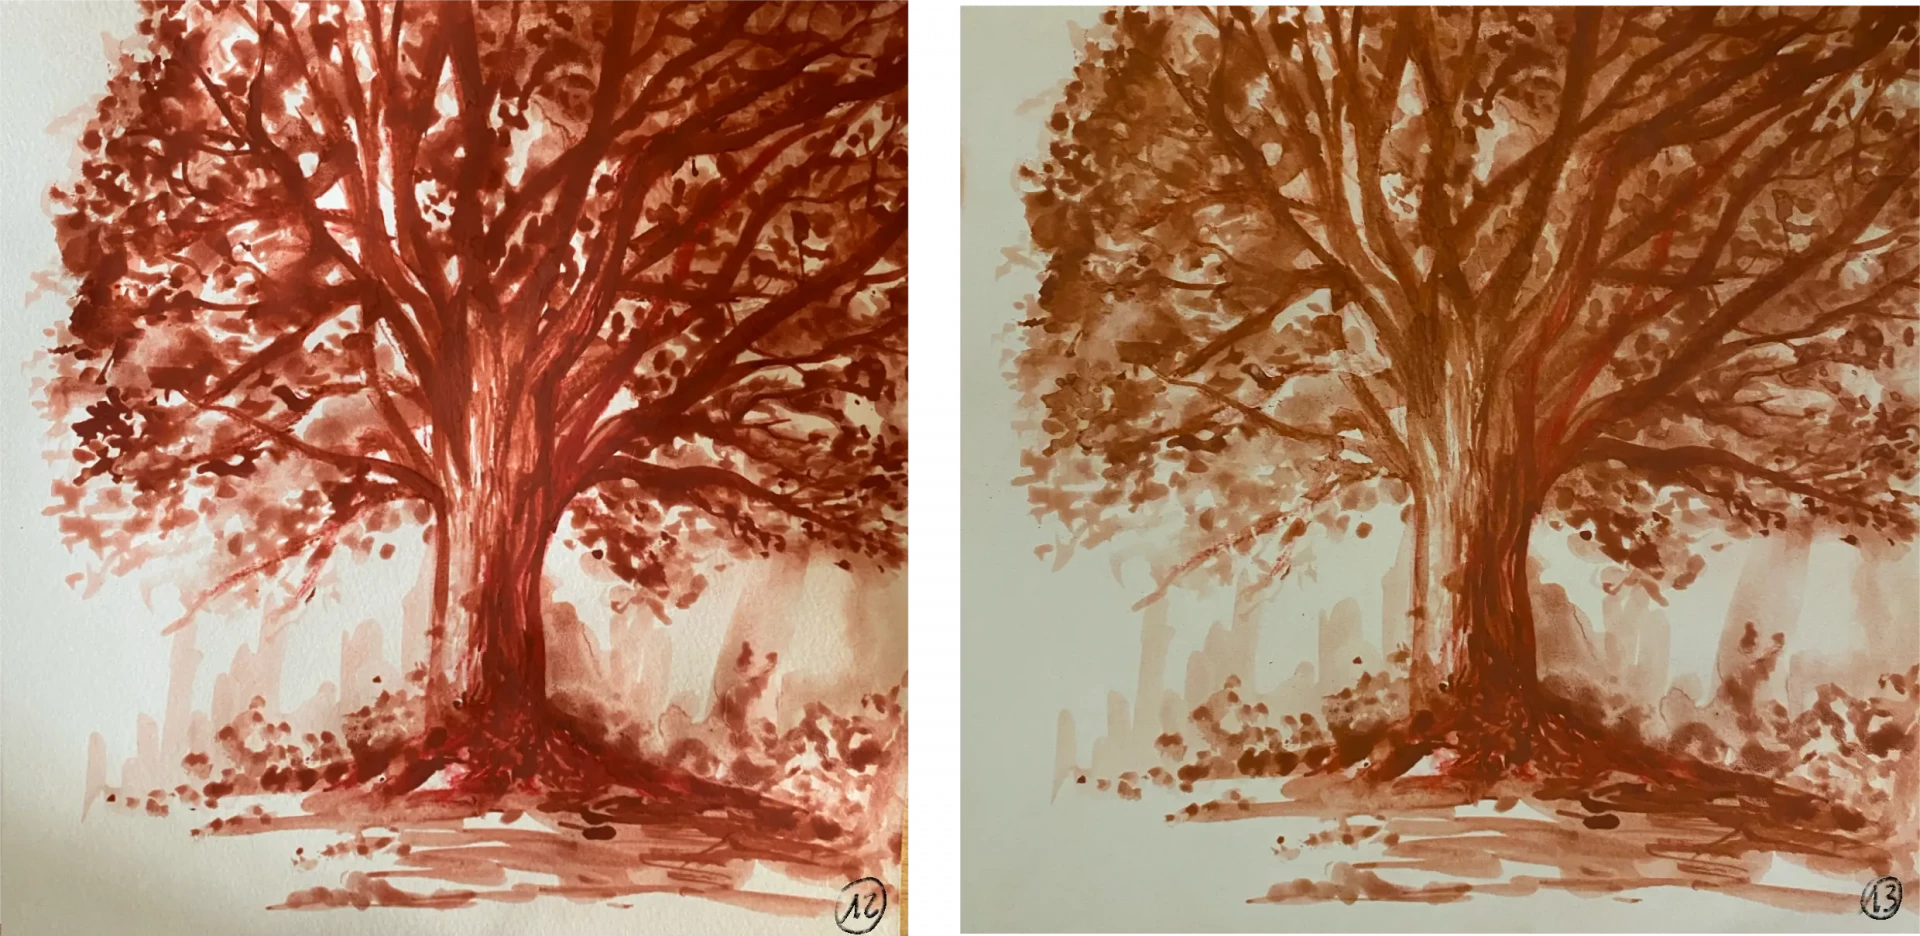
12. With a mix of wet sanguin, I suggest a background.
13. Once dry, the red chalk slightly changes color and becomes more sepia.
And there you have it, that concludes this article on the basics of sanguine drawing. As you can see, the results this little chalk provides are truly astonishing. Don't hesitate to practice with the different techniques to find the one that suits you best.
I hope you enjoyed this article! 😊
Editor and illustrator: Chloé Pouteau
c'est jolie.
c'est jolie.