How to Draw Feet?
Hello everyone, today we will learn how to draw feet. Like hands, they can seem quite tedious. When starting out, we often look for ways to simplify or hide them, often in a somewhat awkward manner. But don't panic, with a few tips, they aren't that complicated to draw.
Prepare your pencils, your paper or your tablet, and most importantly, your creativity! Let's go!
Observation is the key
And yes, we always start with this great classic, but we can never repeat it enough: observation is the key! Look at your feet, note the way they change when you make movements, the places where they bend, the movements they cannot make... In short, get to know them down to the tips of your toes.
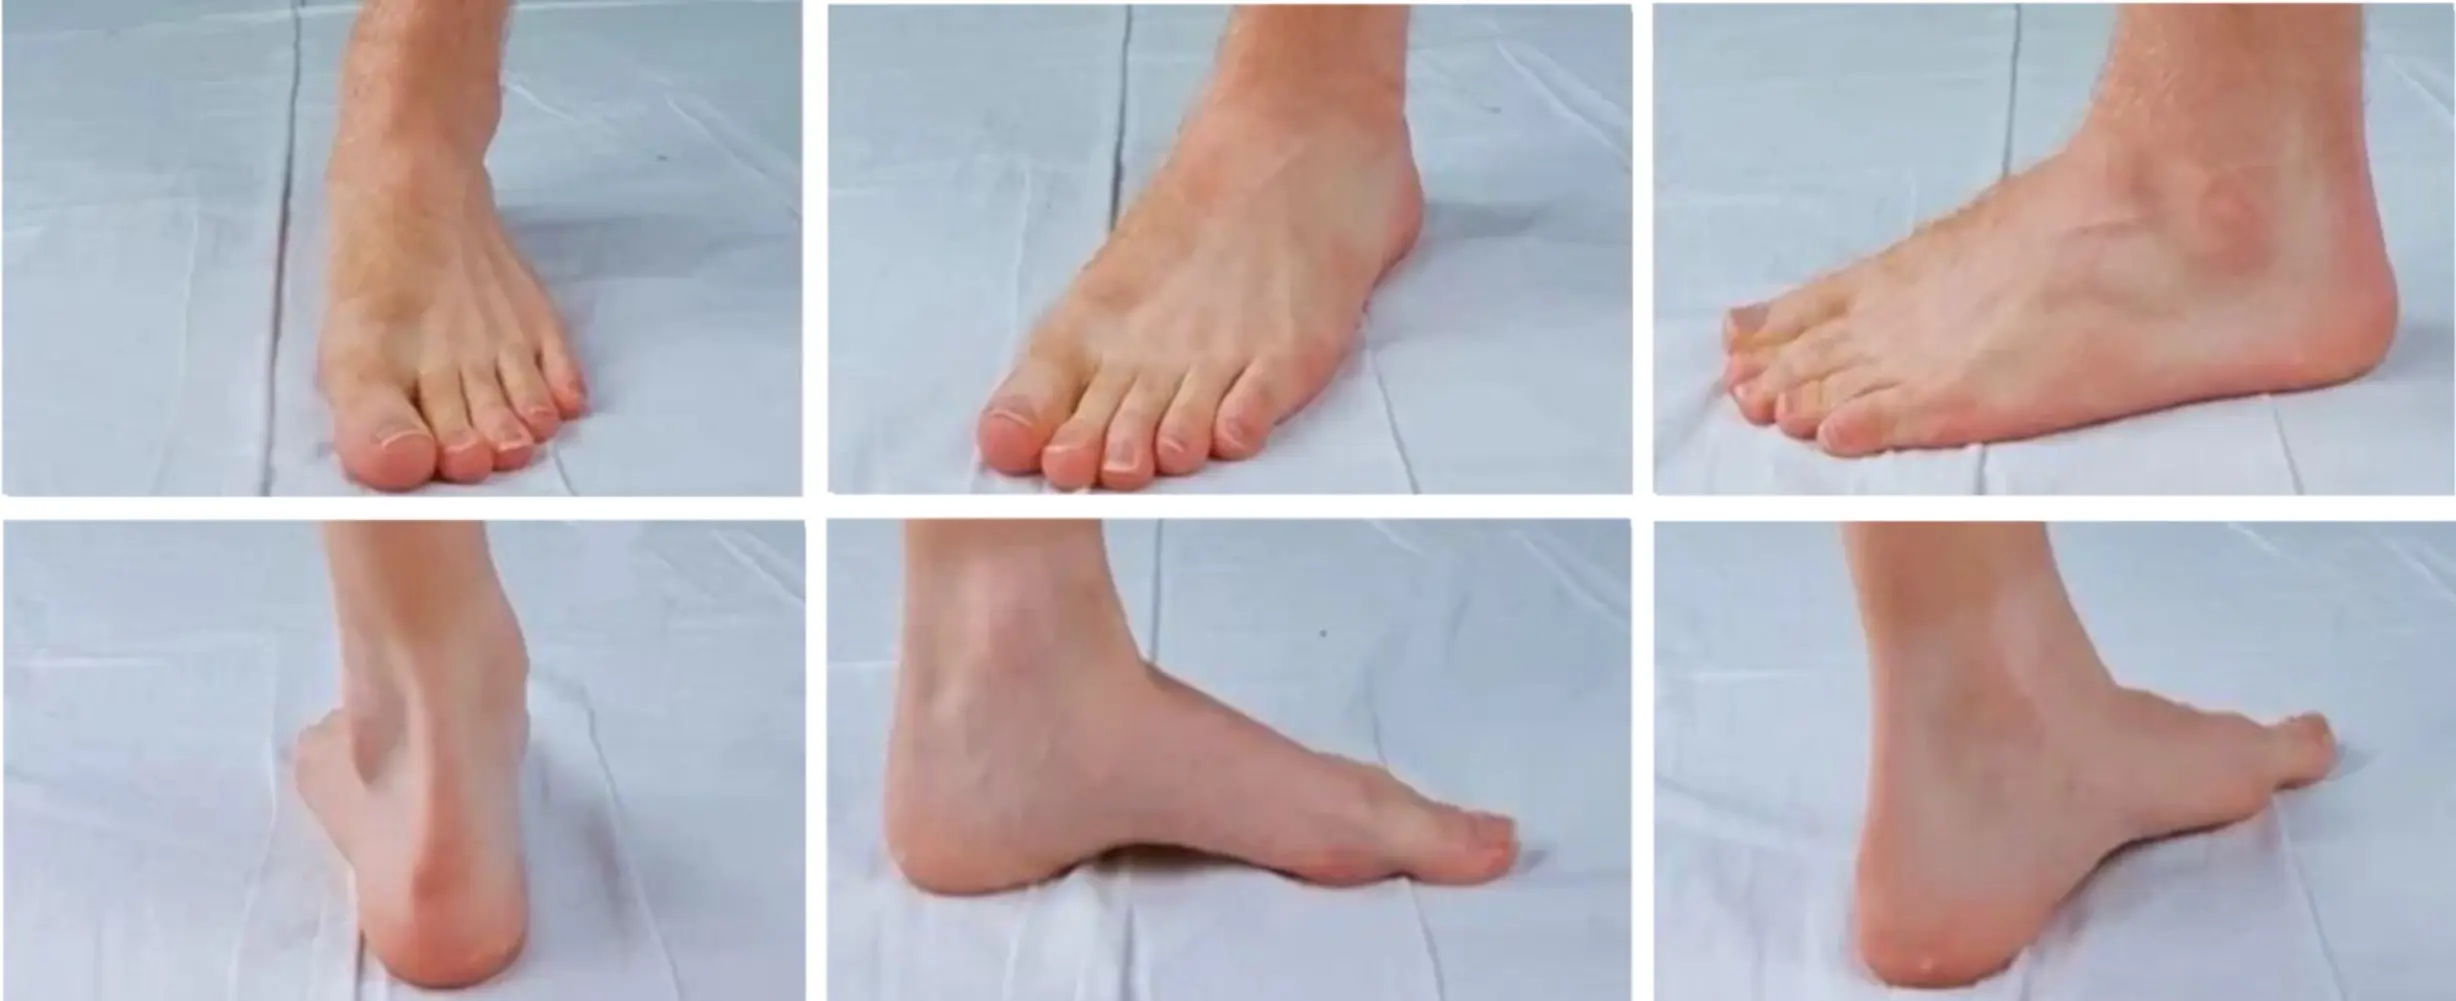
You can also search for pictures of feet on the Internet to use as references. Here are some that showcase "classic" foot positions, which are often needed in drawing.
The more you observe, the more your mental library will fill up with reference images. So, it will be easier for you to find solutions to your problems related to drawing feet.
Drawing Feet from a 3/4 Perspective
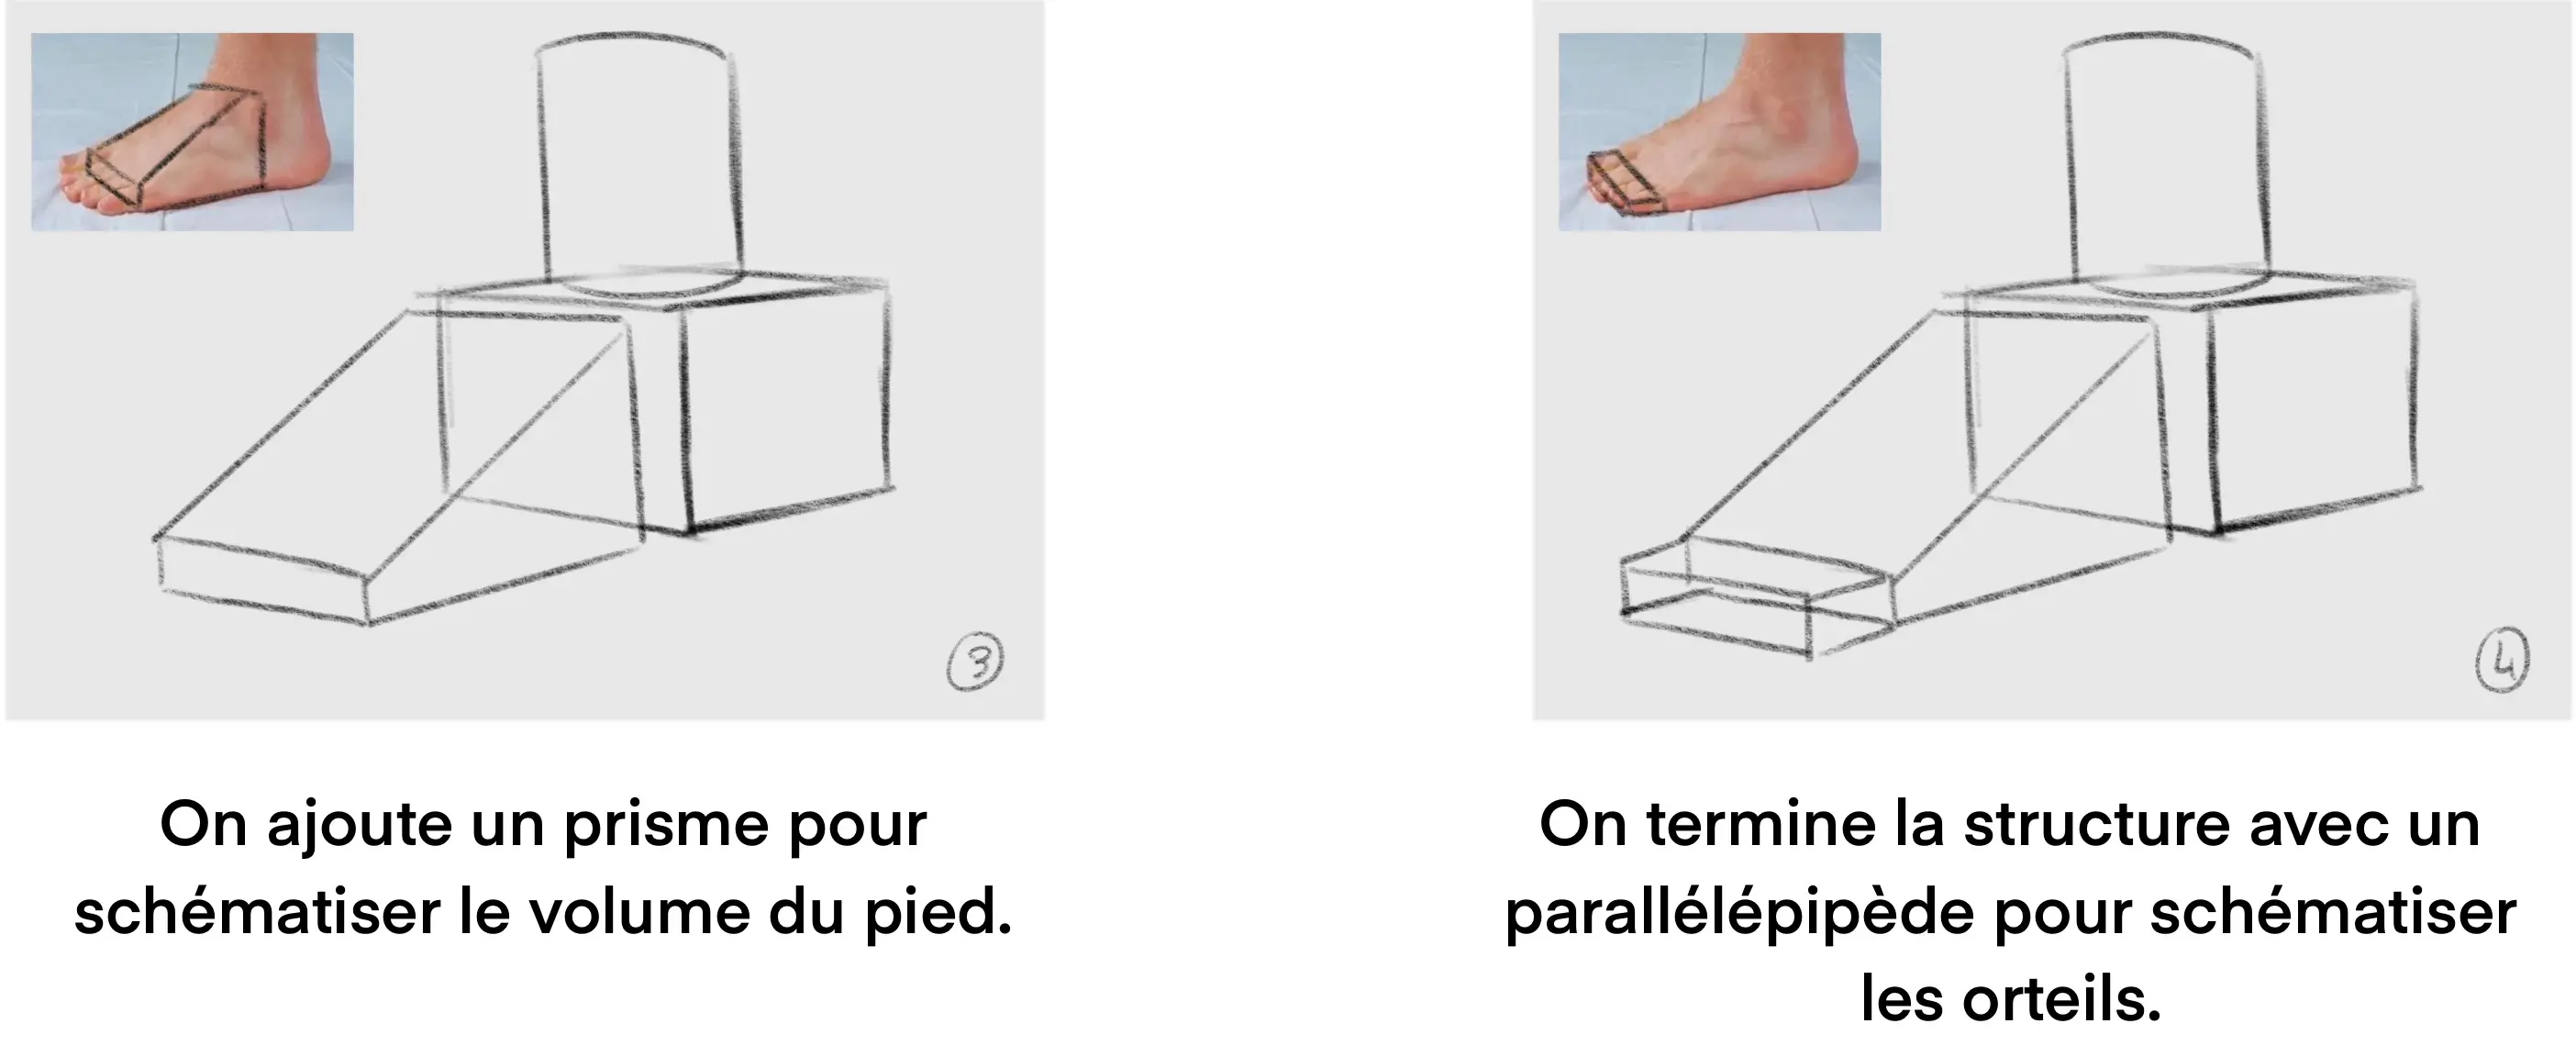
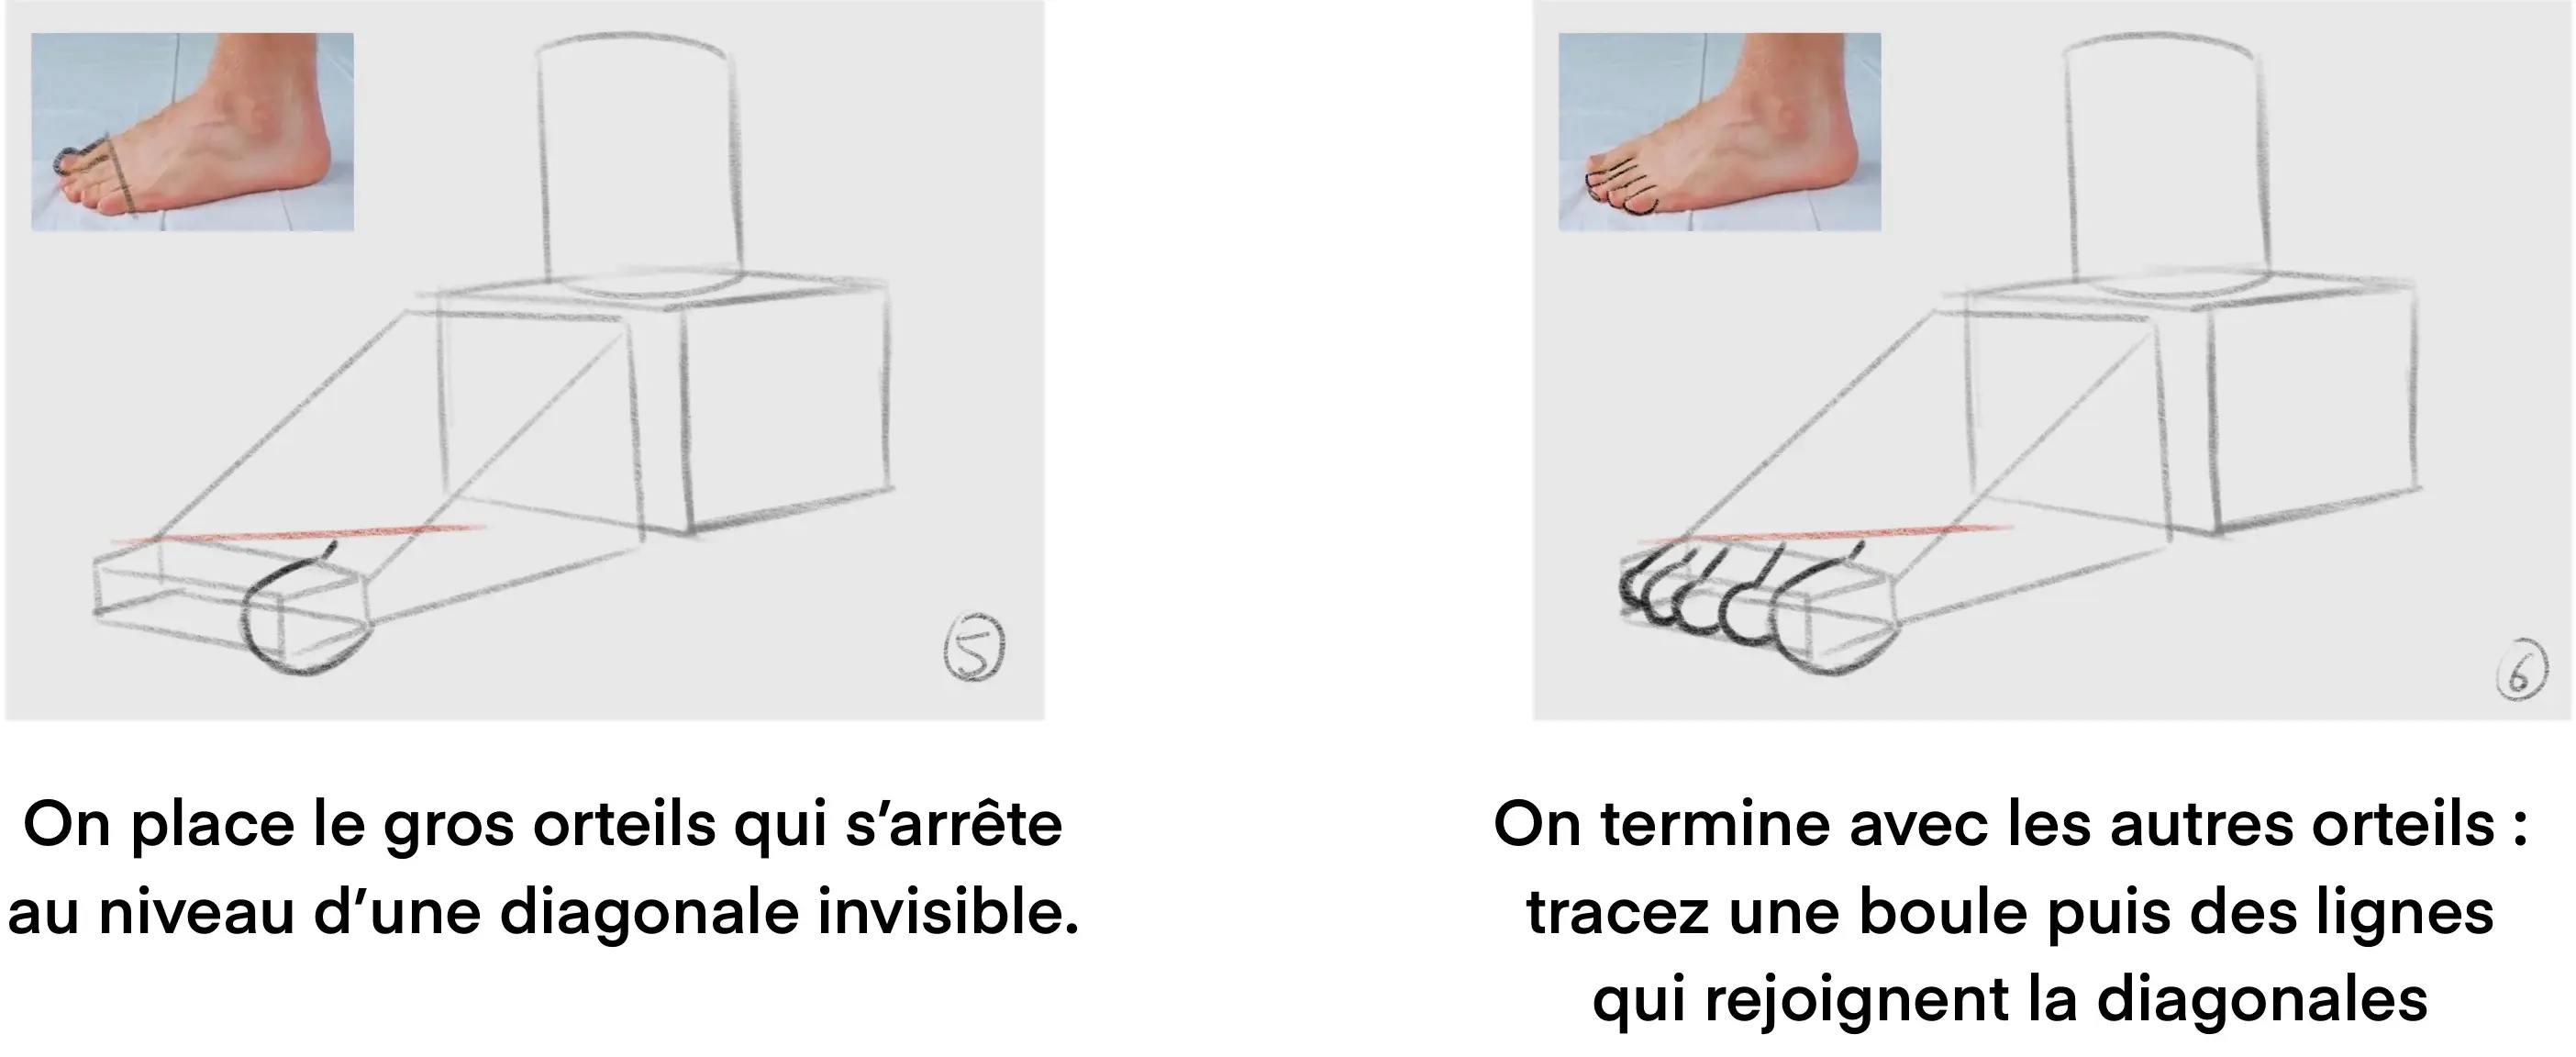
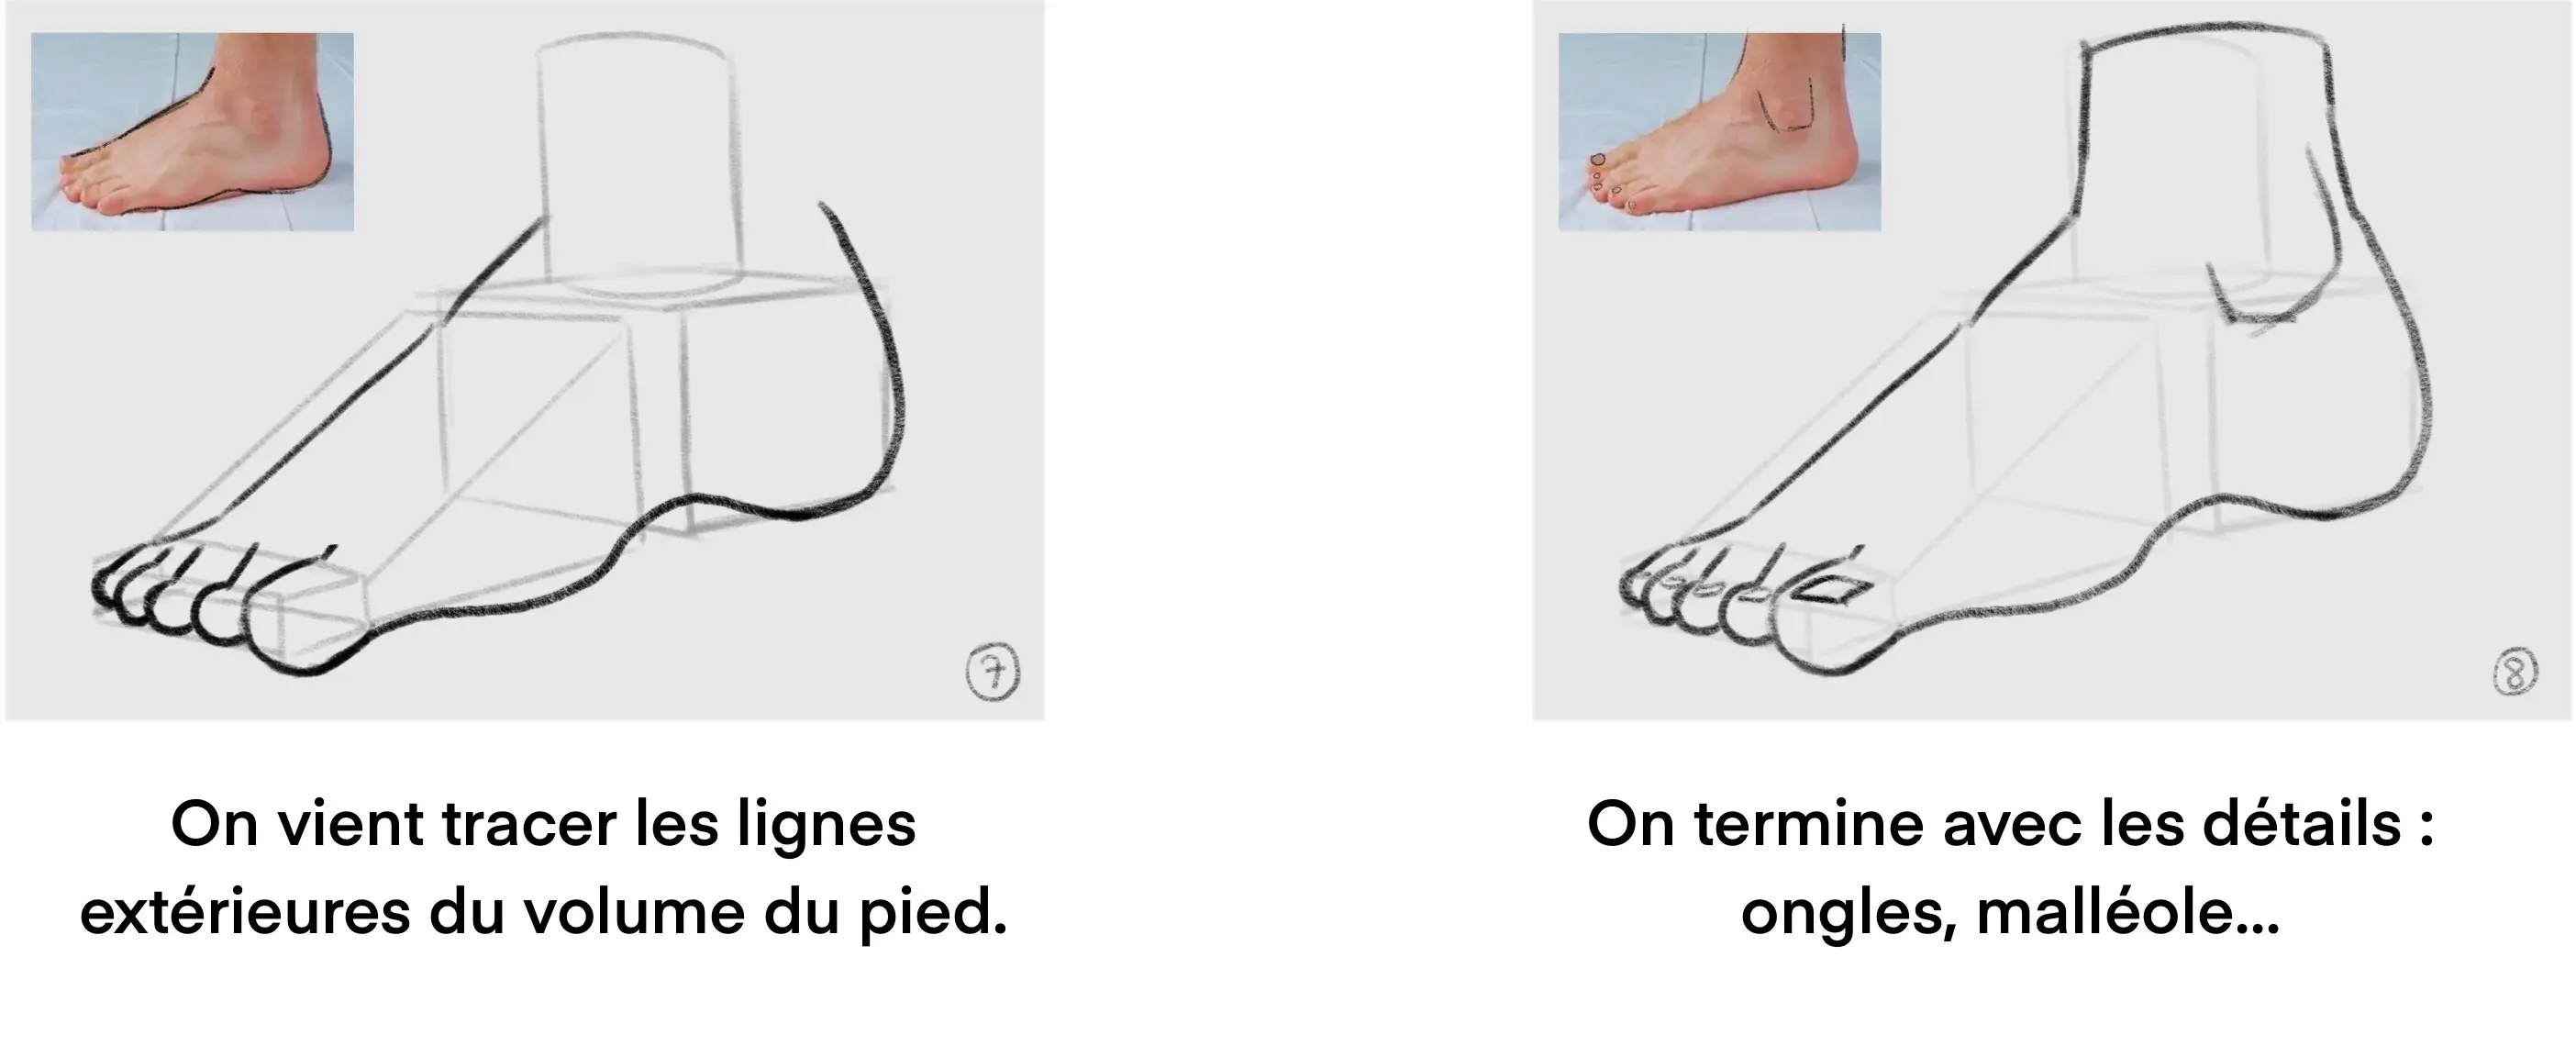
We will start by looking at how to draw feet from a ¾ angle. This is one of the most commonly drawn positions, but it is primarily the one that allows for a better understanding of the general volume of the foot, making it easier to incorporate into your drawings.
(Note that this is the same for the entire human body: side and front views are often more "flat" in comparison.)
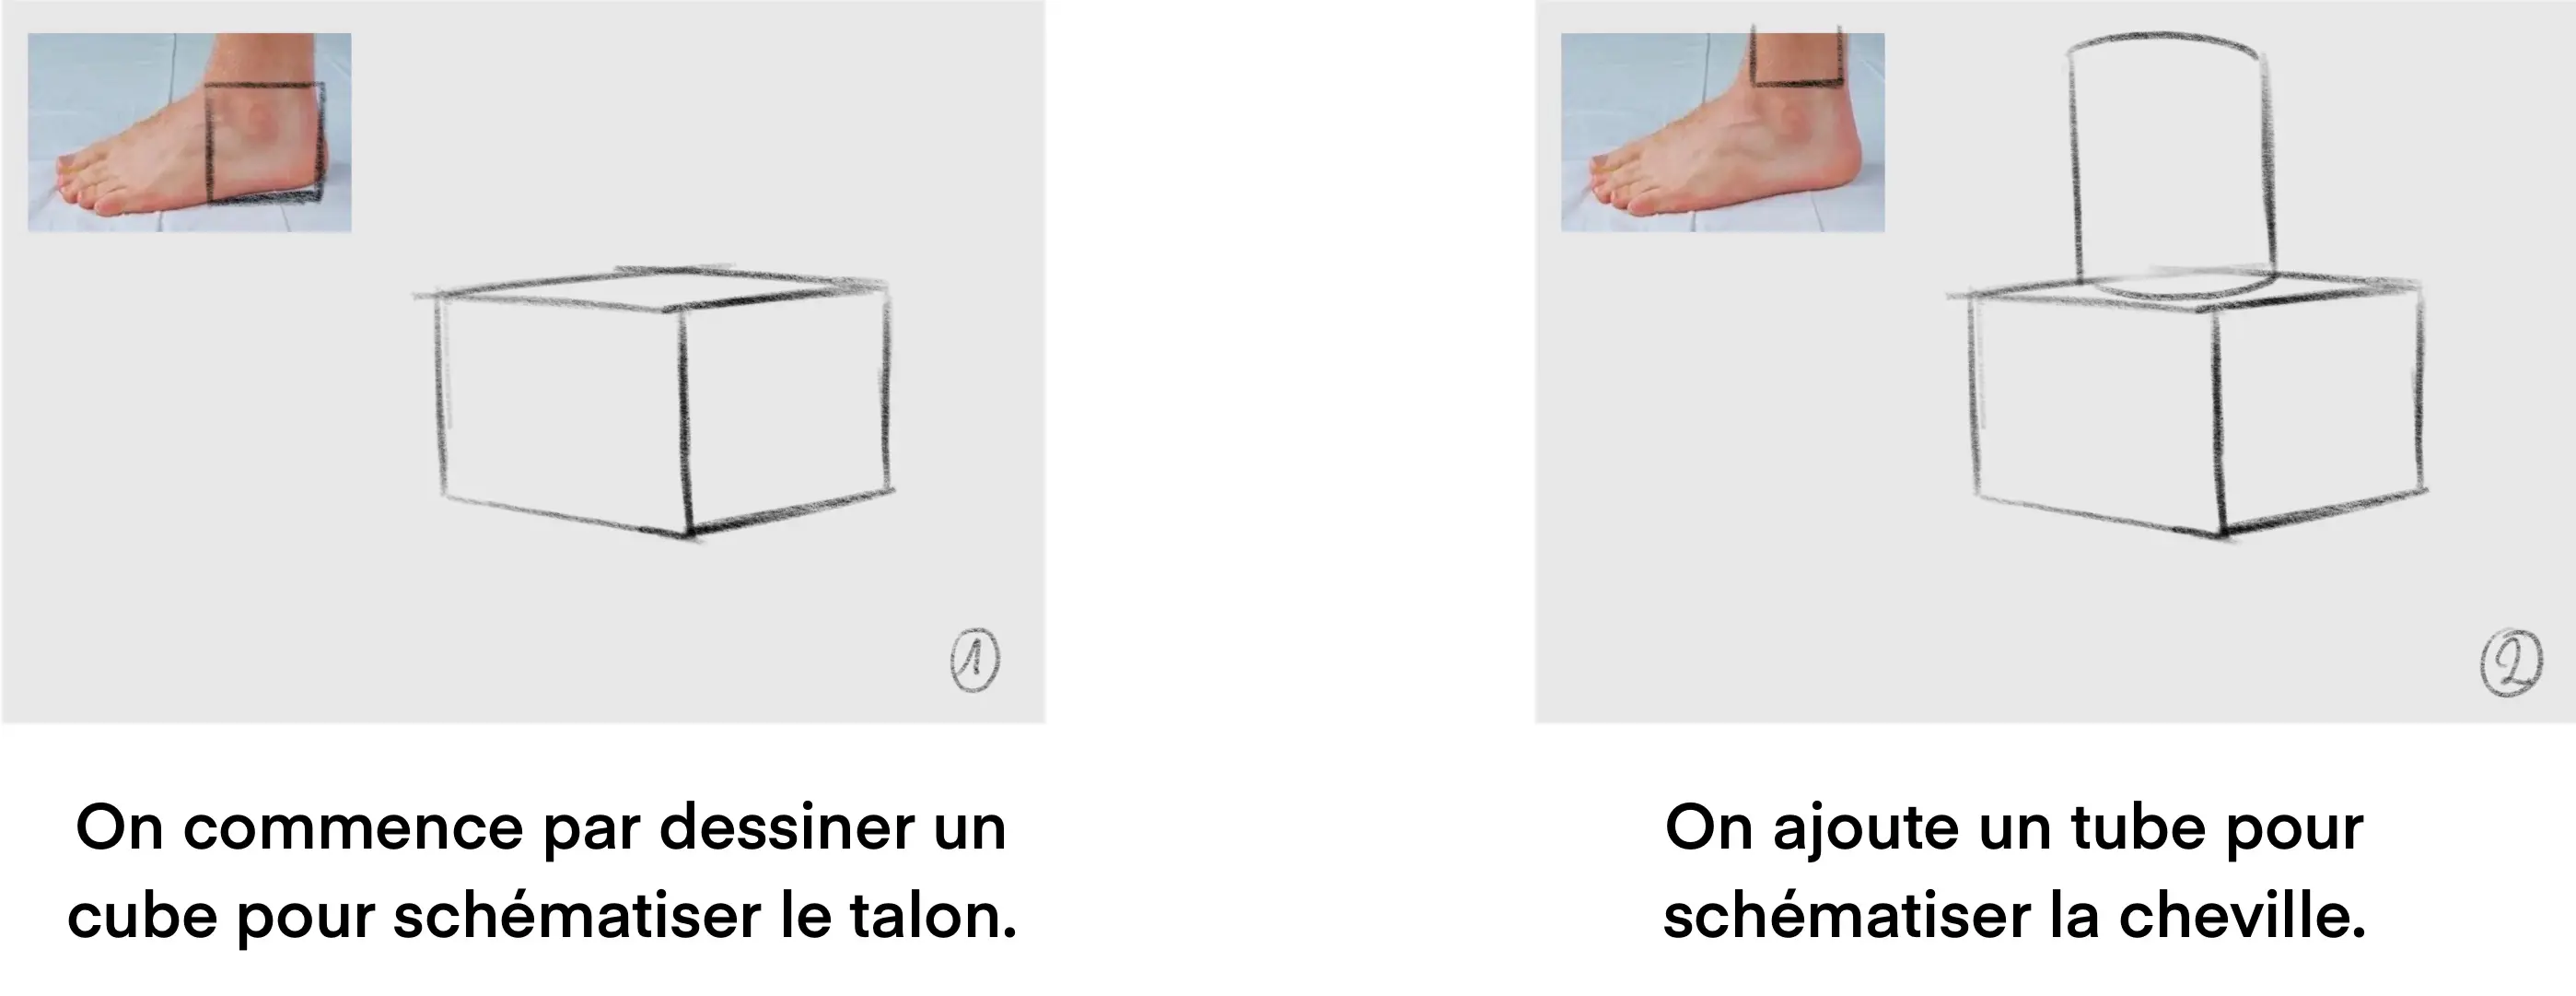
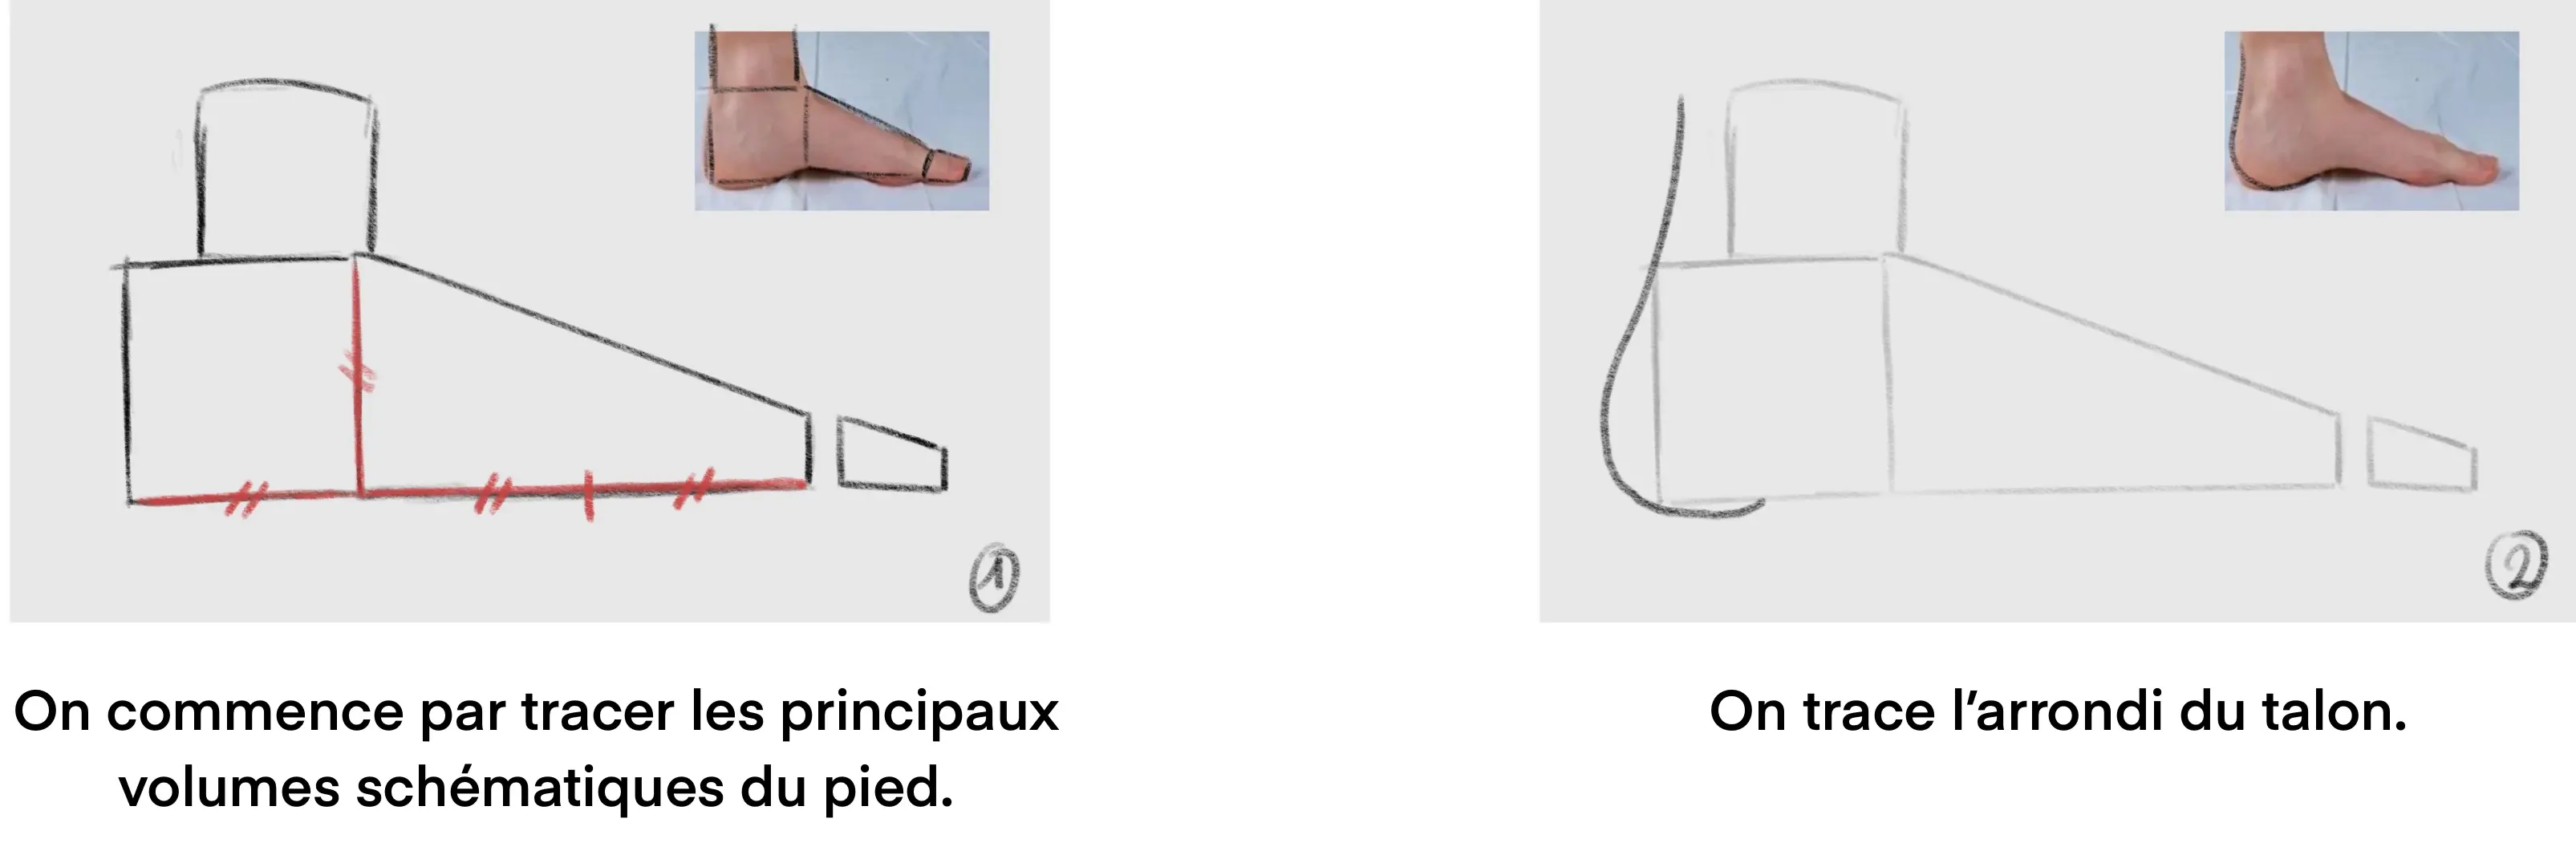
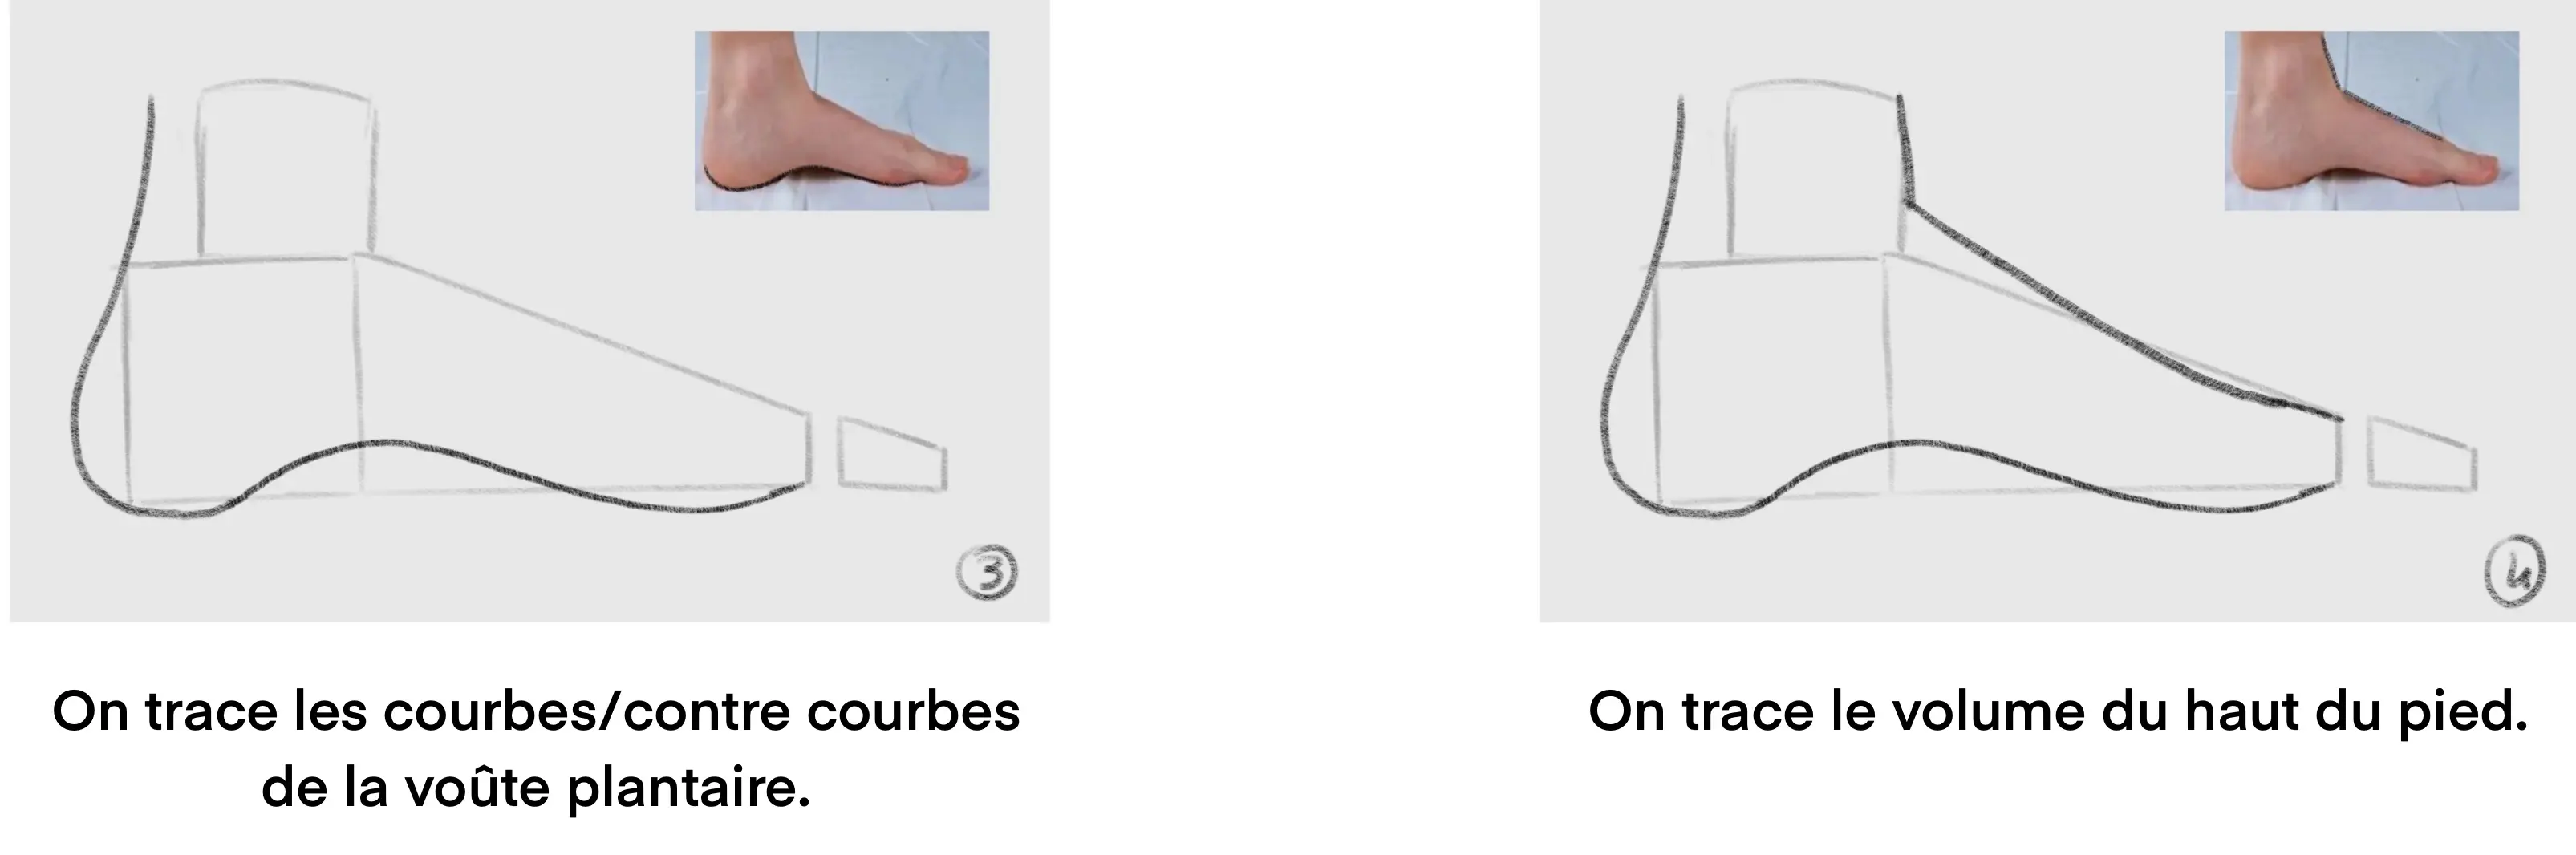
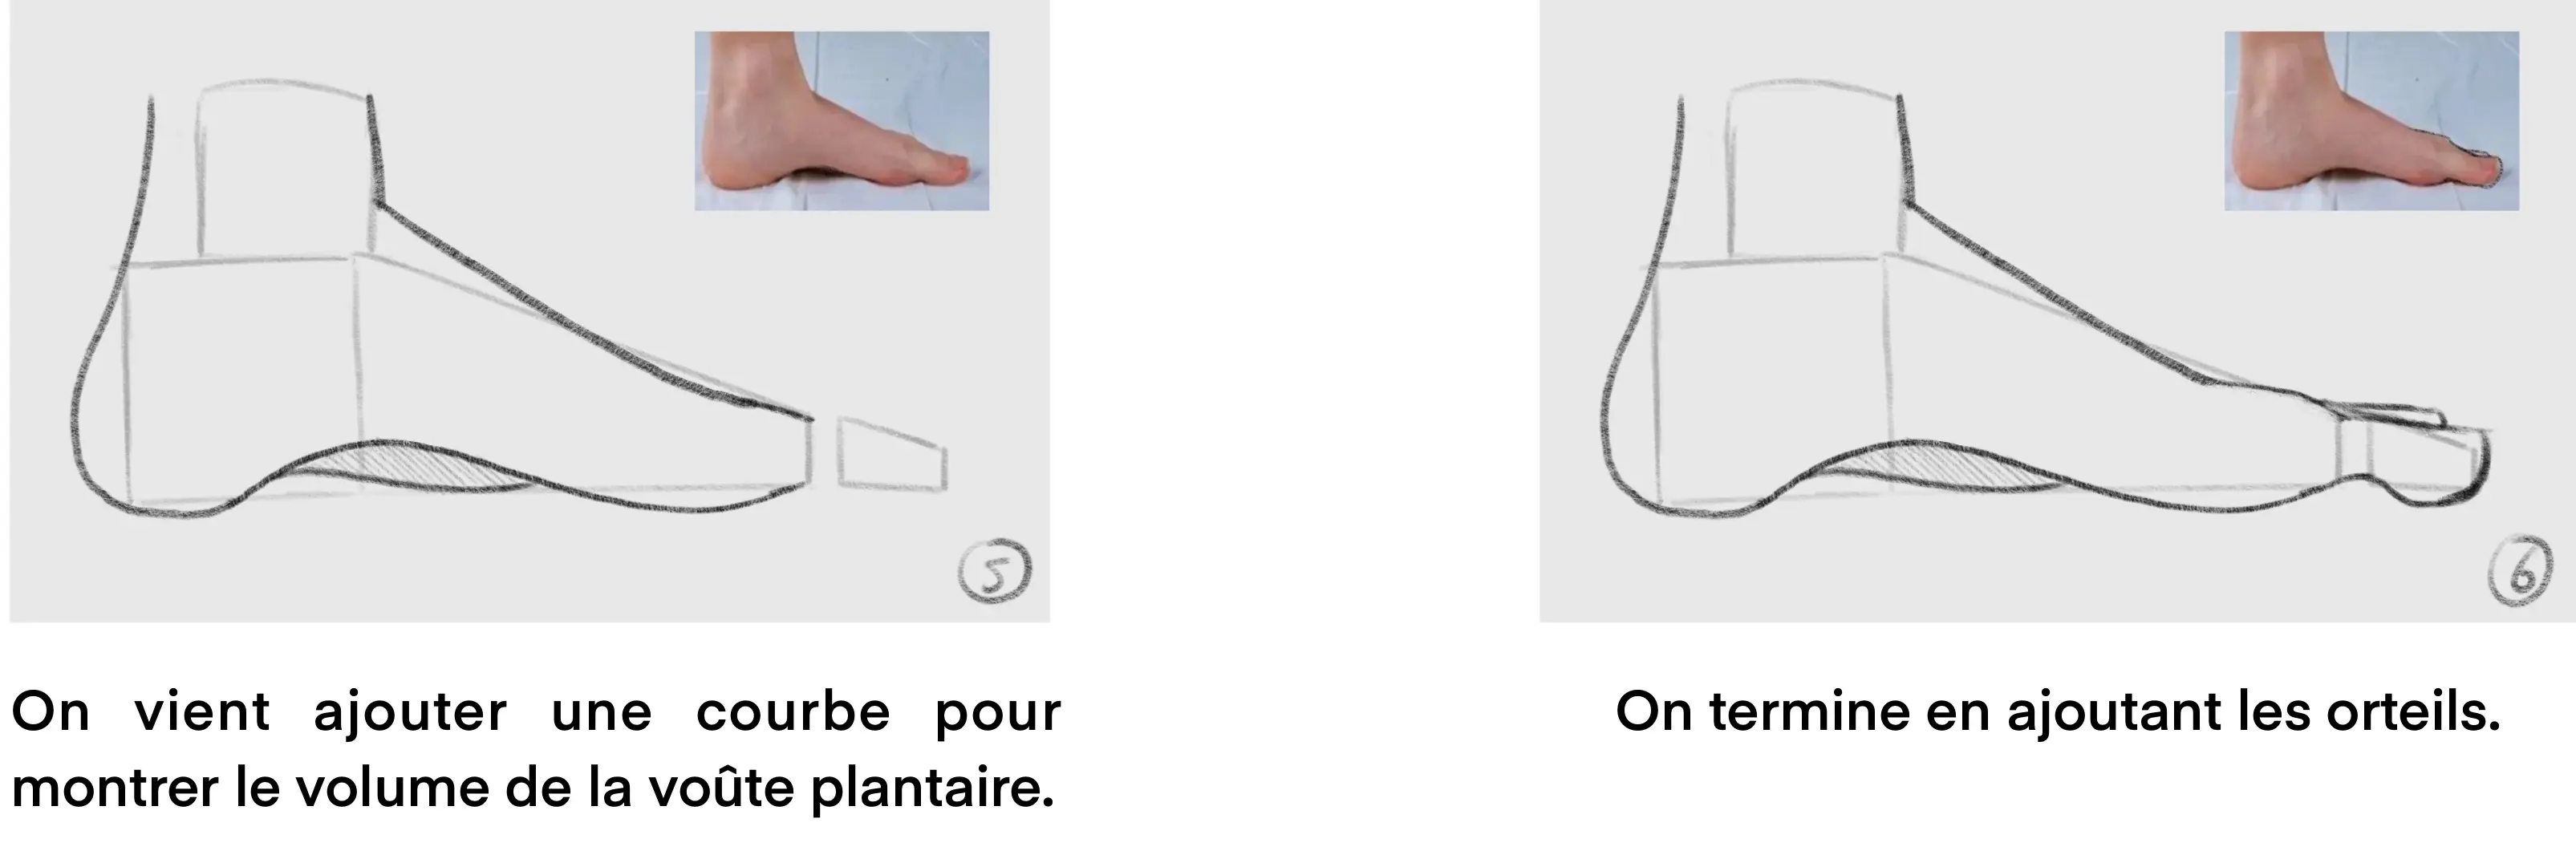
Drawing feet in profile
If you've understood how to draw a foot from a ¾ angle, then drawing it from a side view will be a piece of cake.
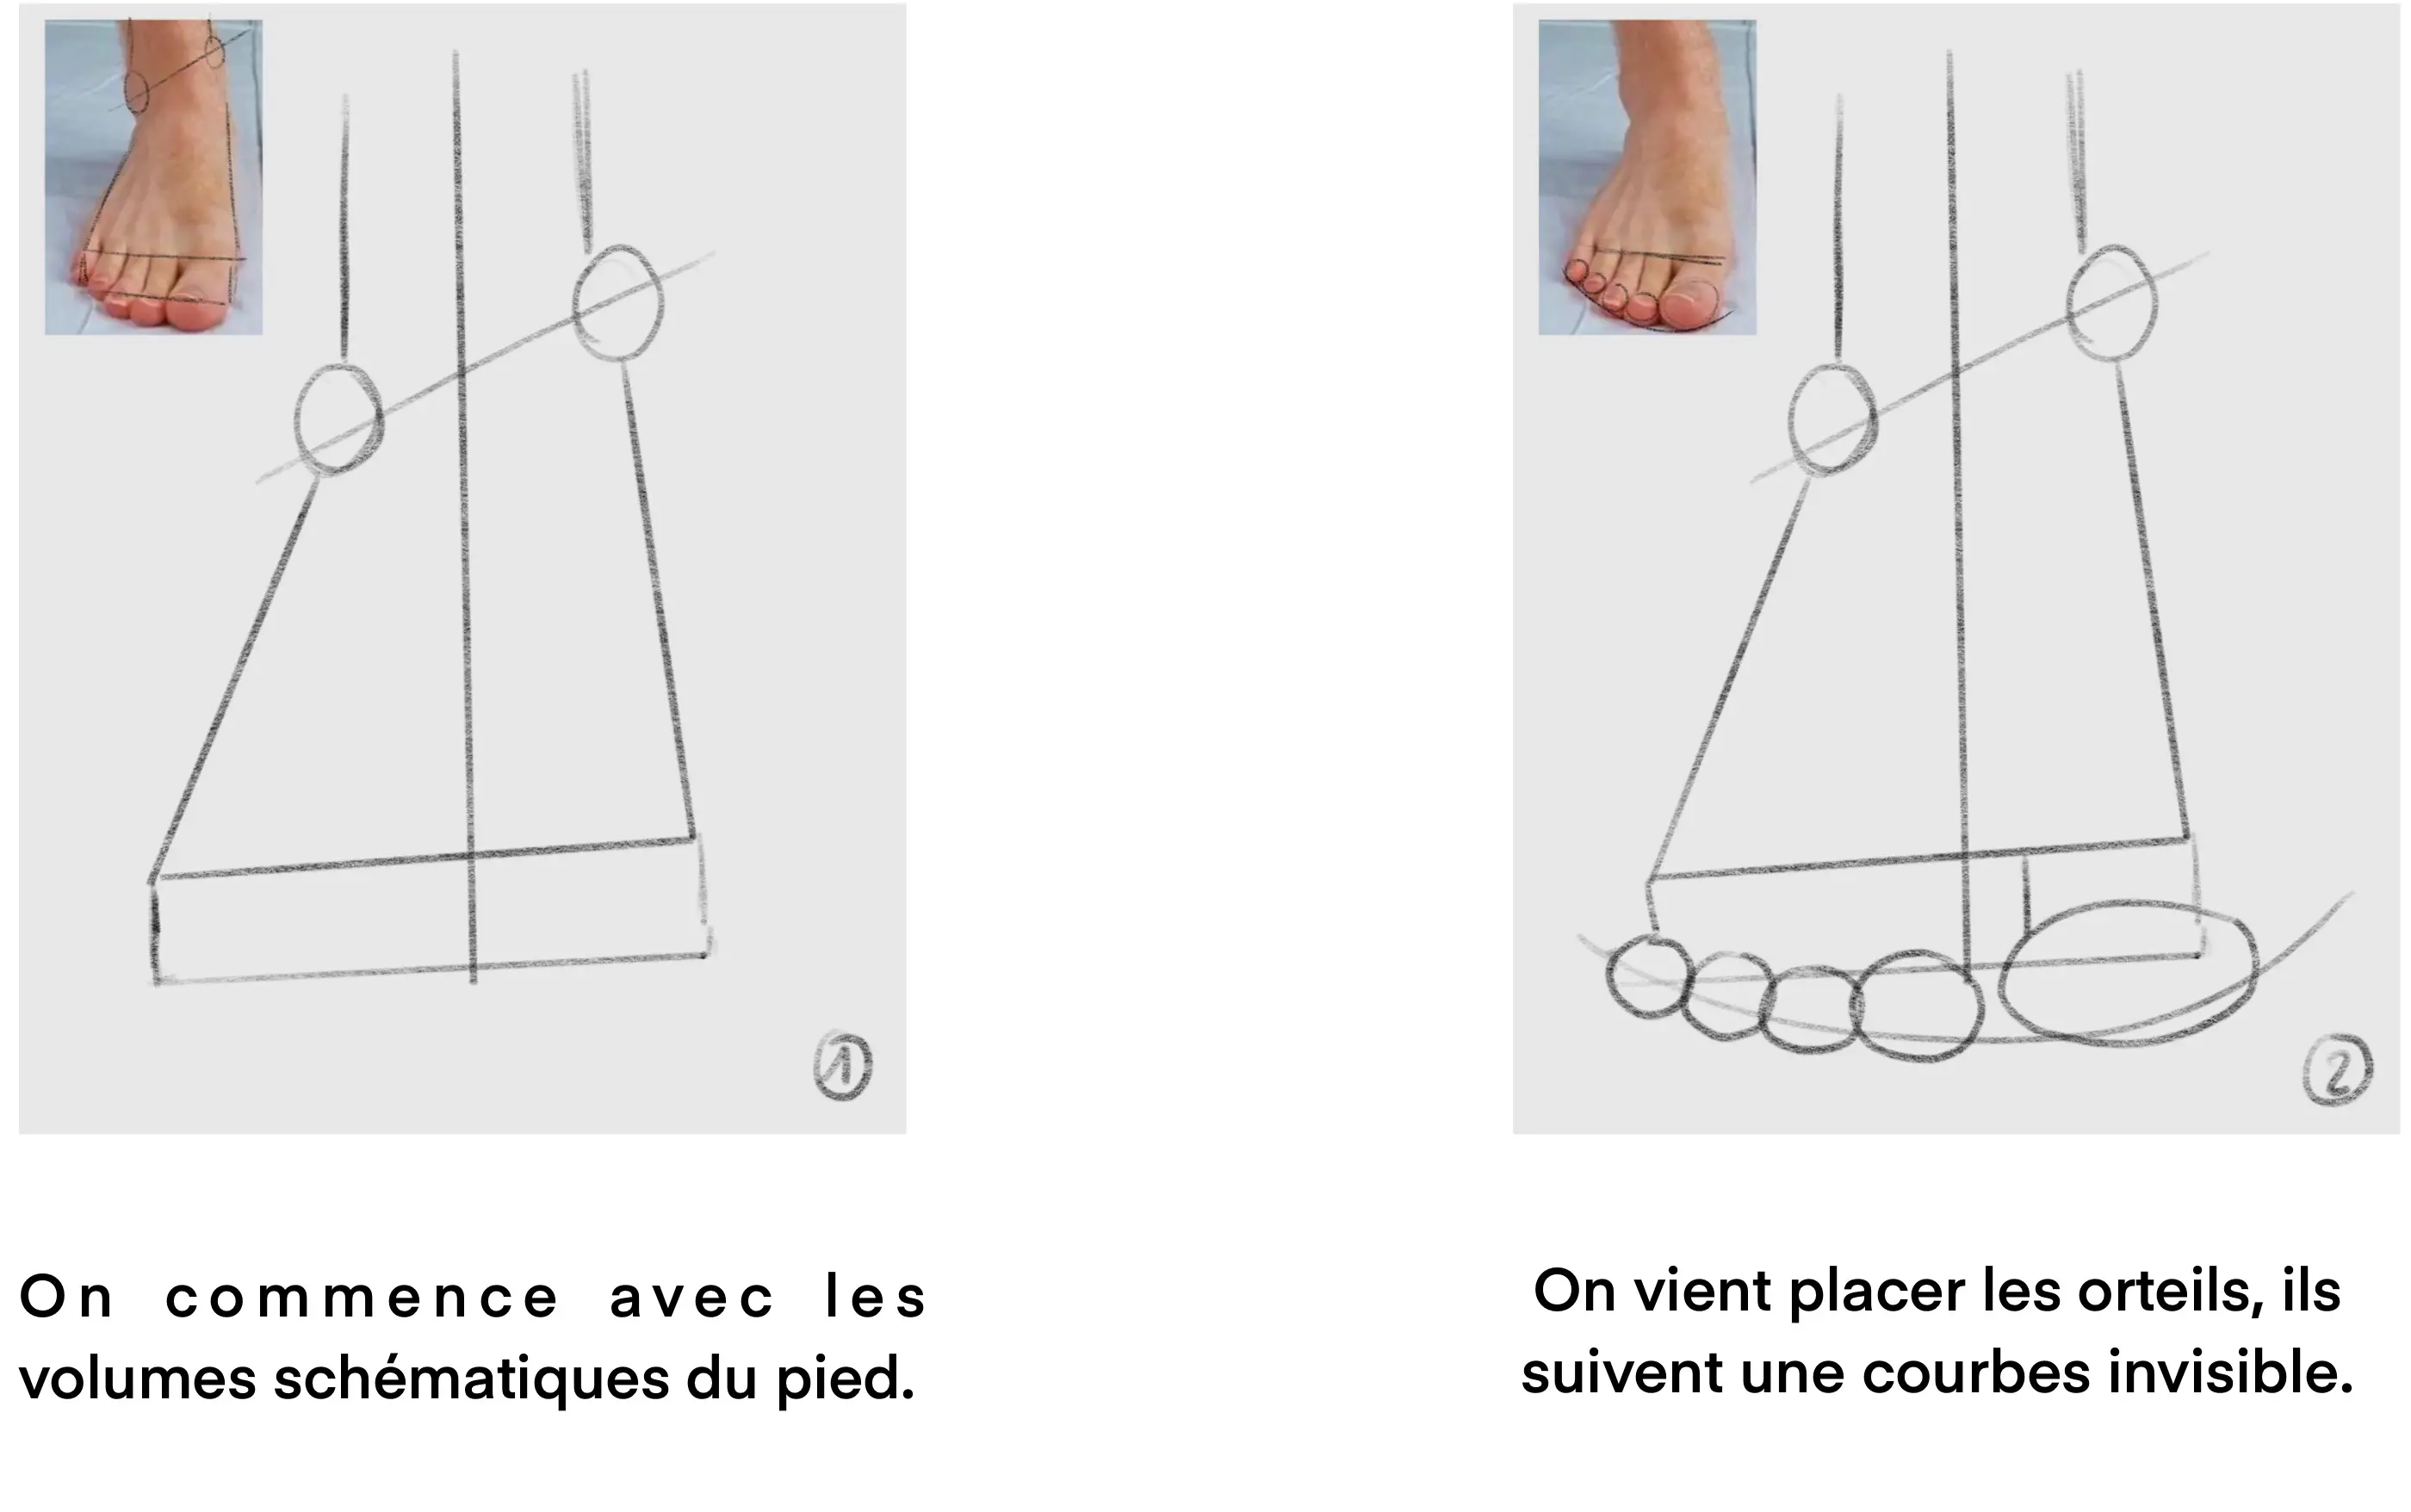
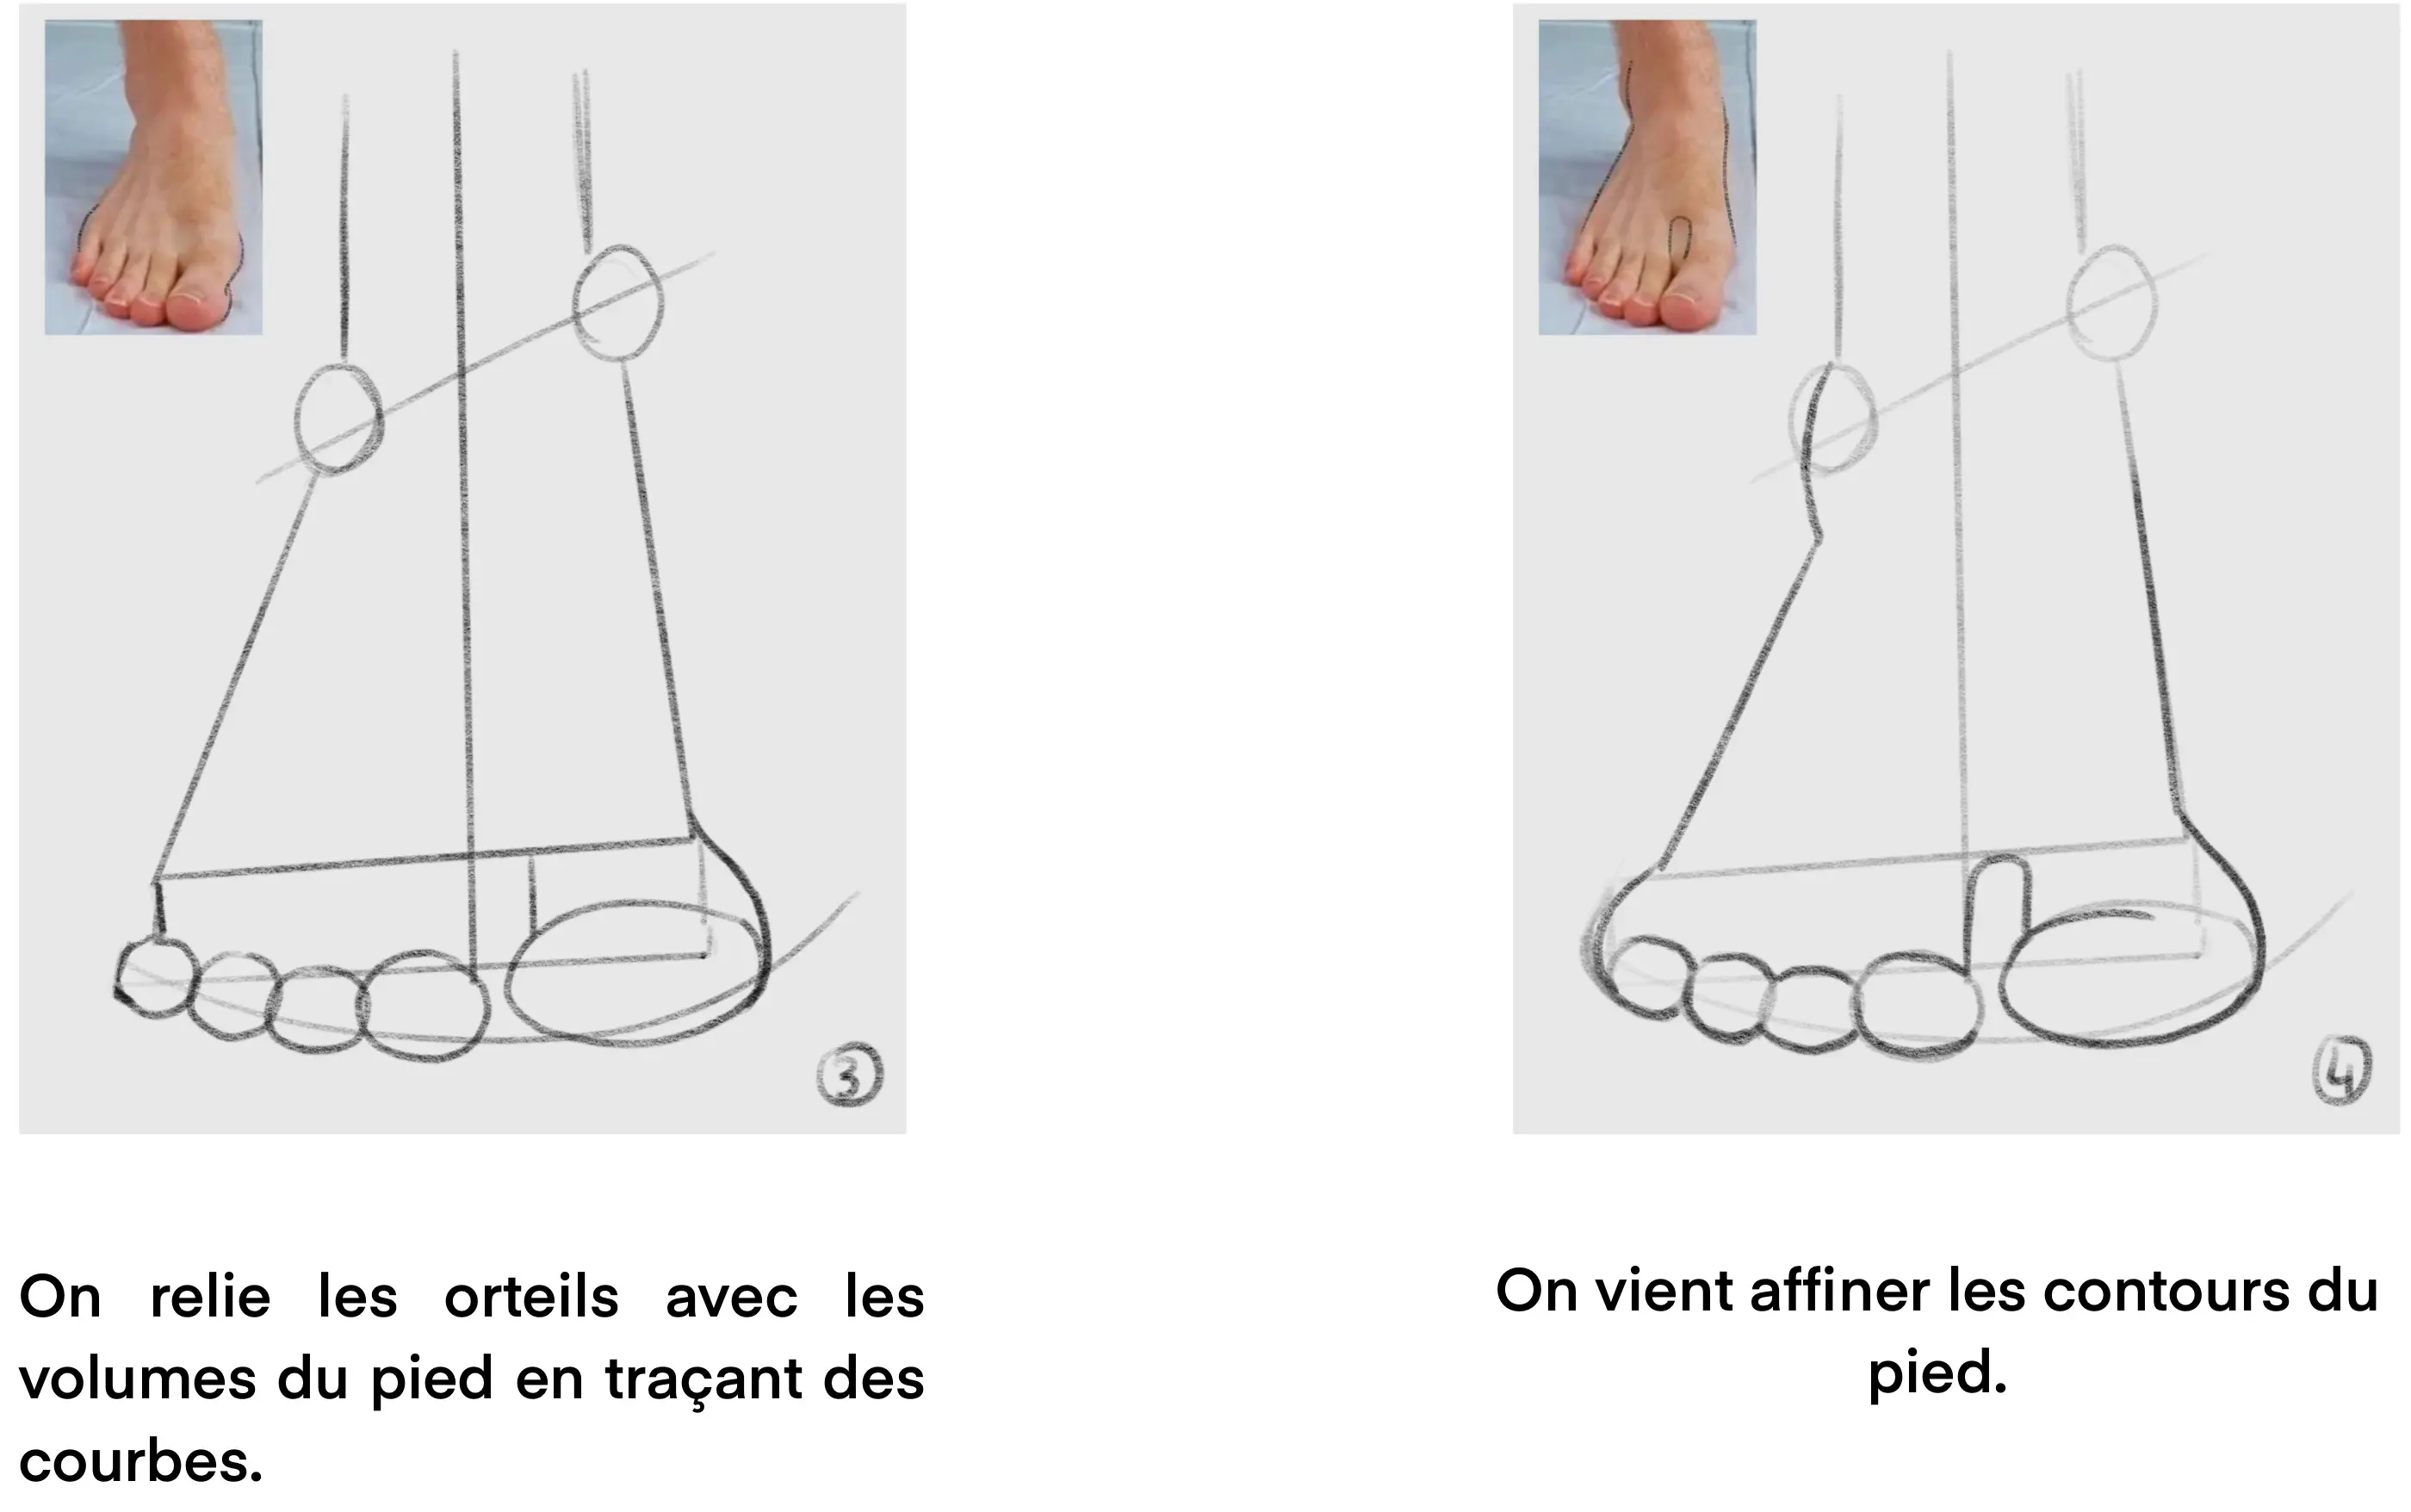
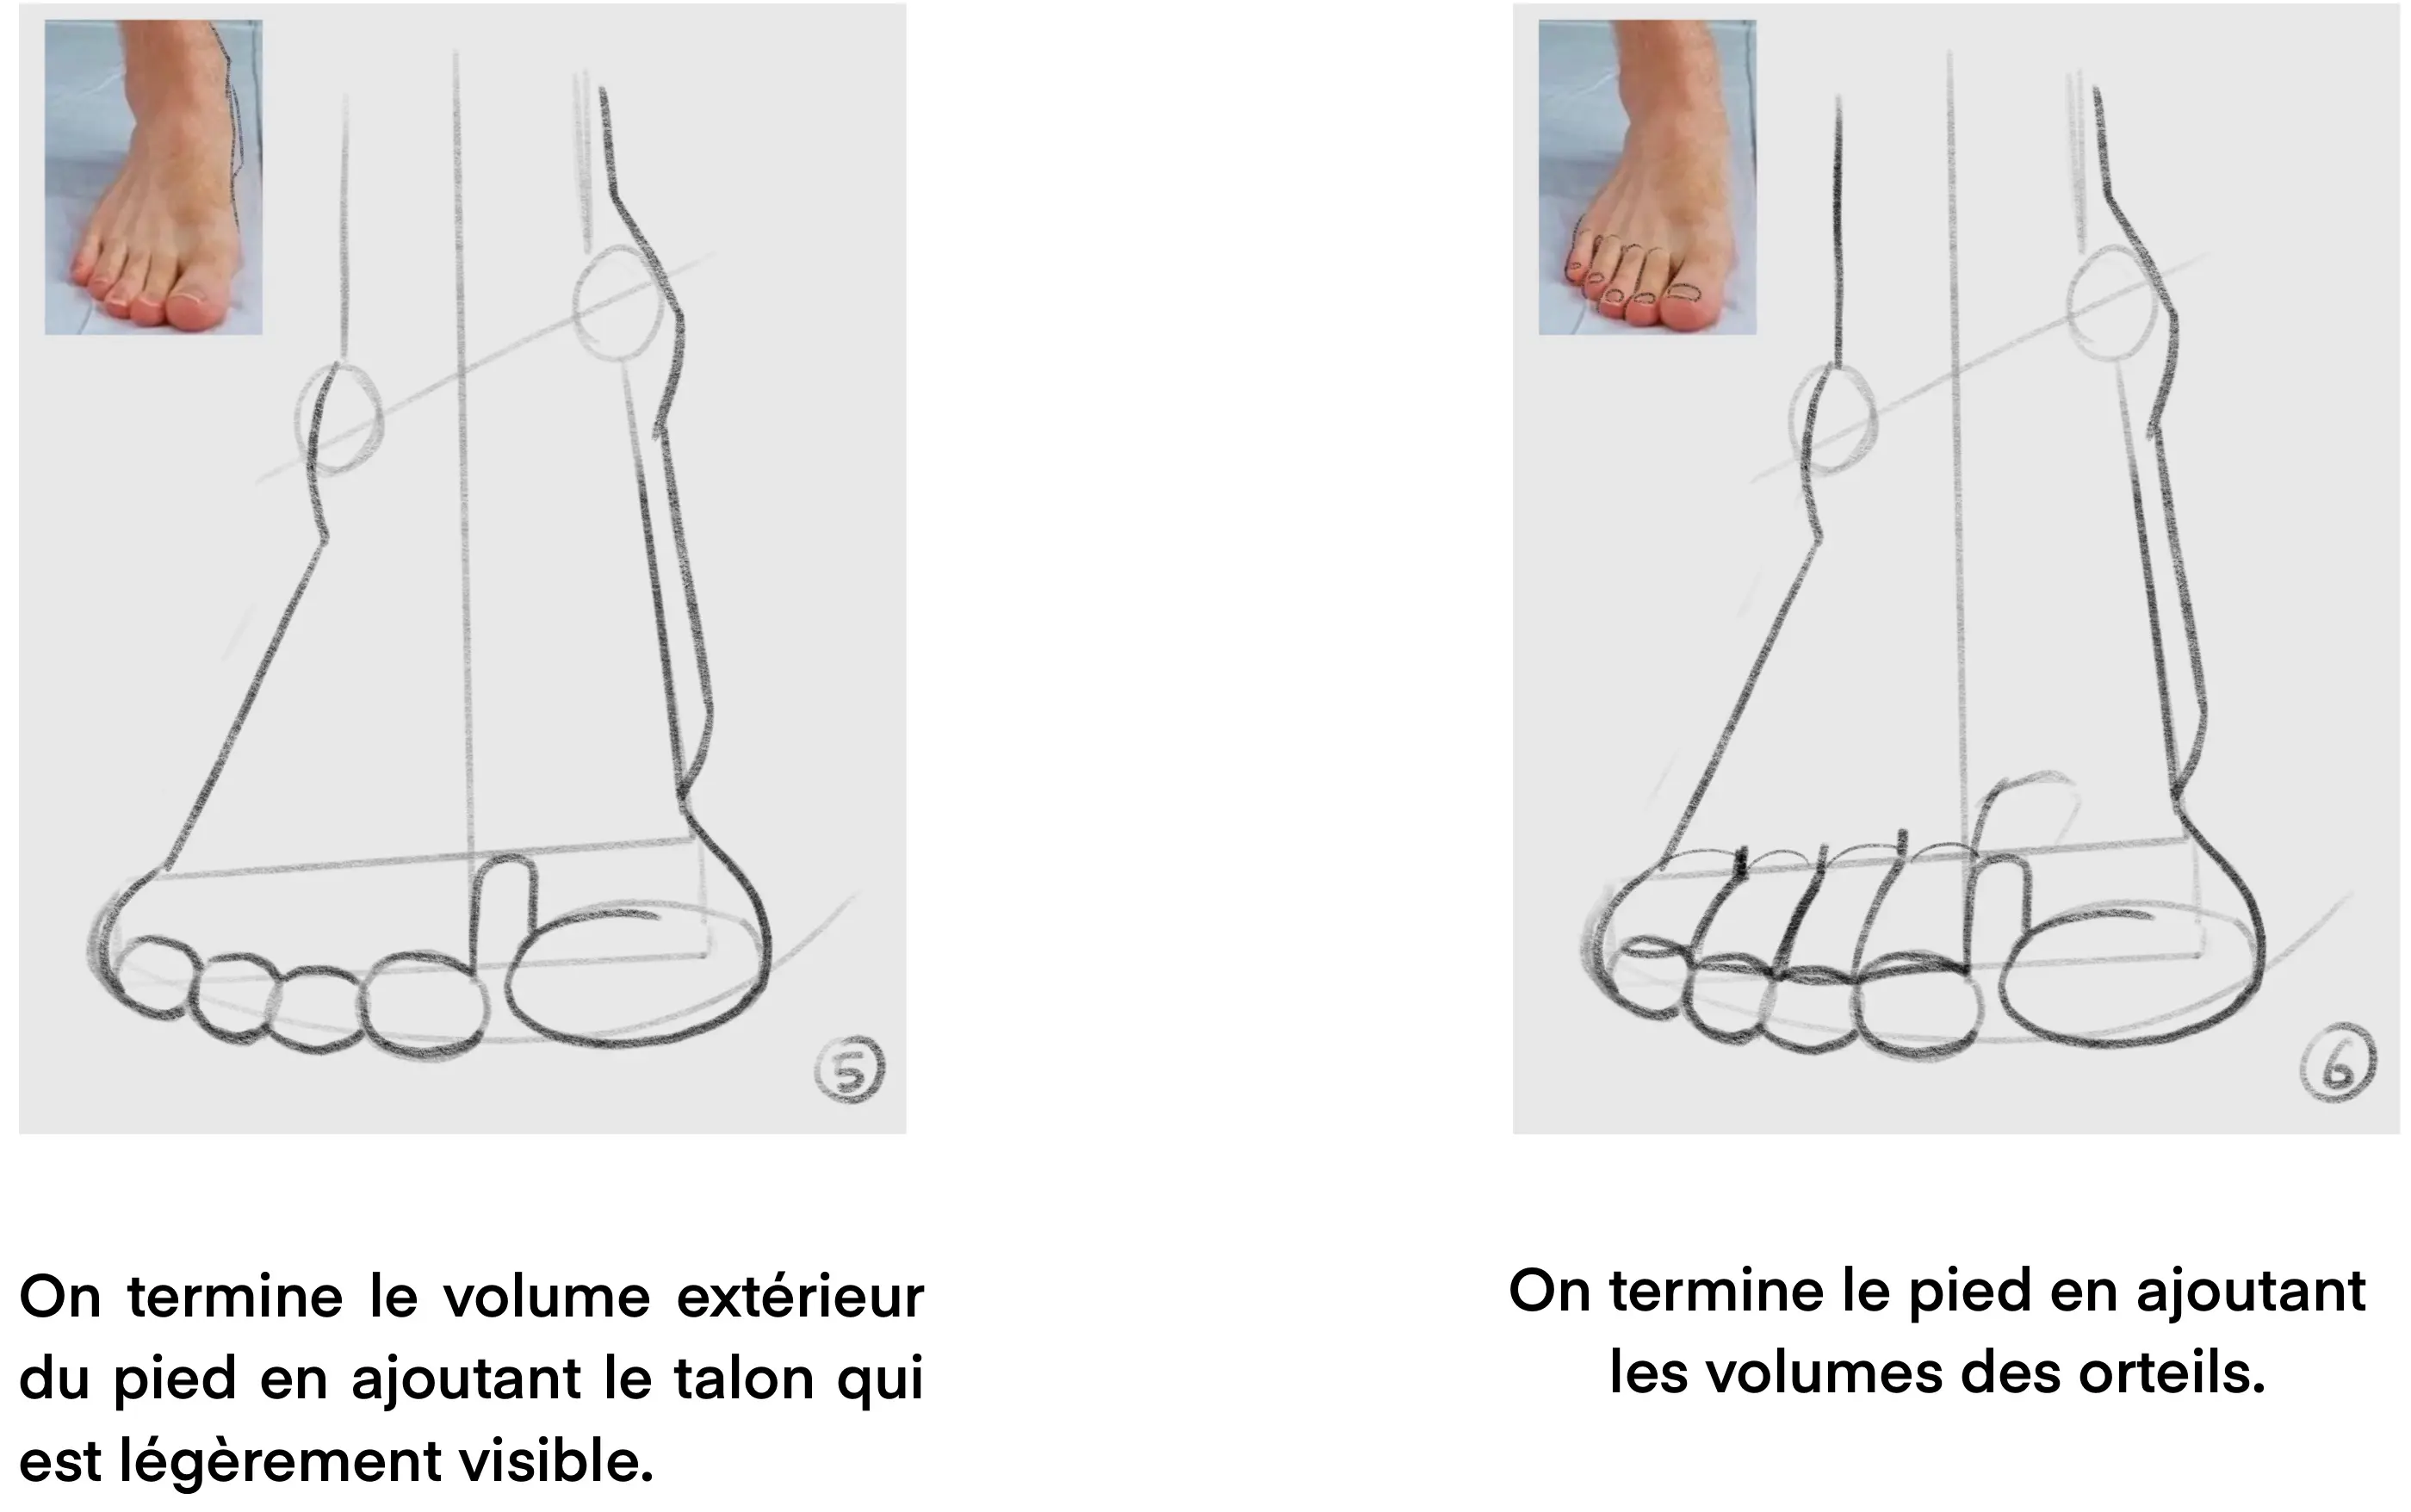
Drawing feet from the front
The front view is undoubtedly the most complex, as it requires us to convey depth while our eyes naturally tend to flatten. Don't panic! By using the same guides as for the previous views, you should be able to do it without any trouble.
Drawing the other poses
To start with other poses, I recommend using reference photos. It's the best solution for achieving volumetric positions that will work.
To simplify the method, in the example below, I drew directly on the photo. You can practice doing this if it reassures you at first. However, the goal is to be able to draw feet just by observing a photo.
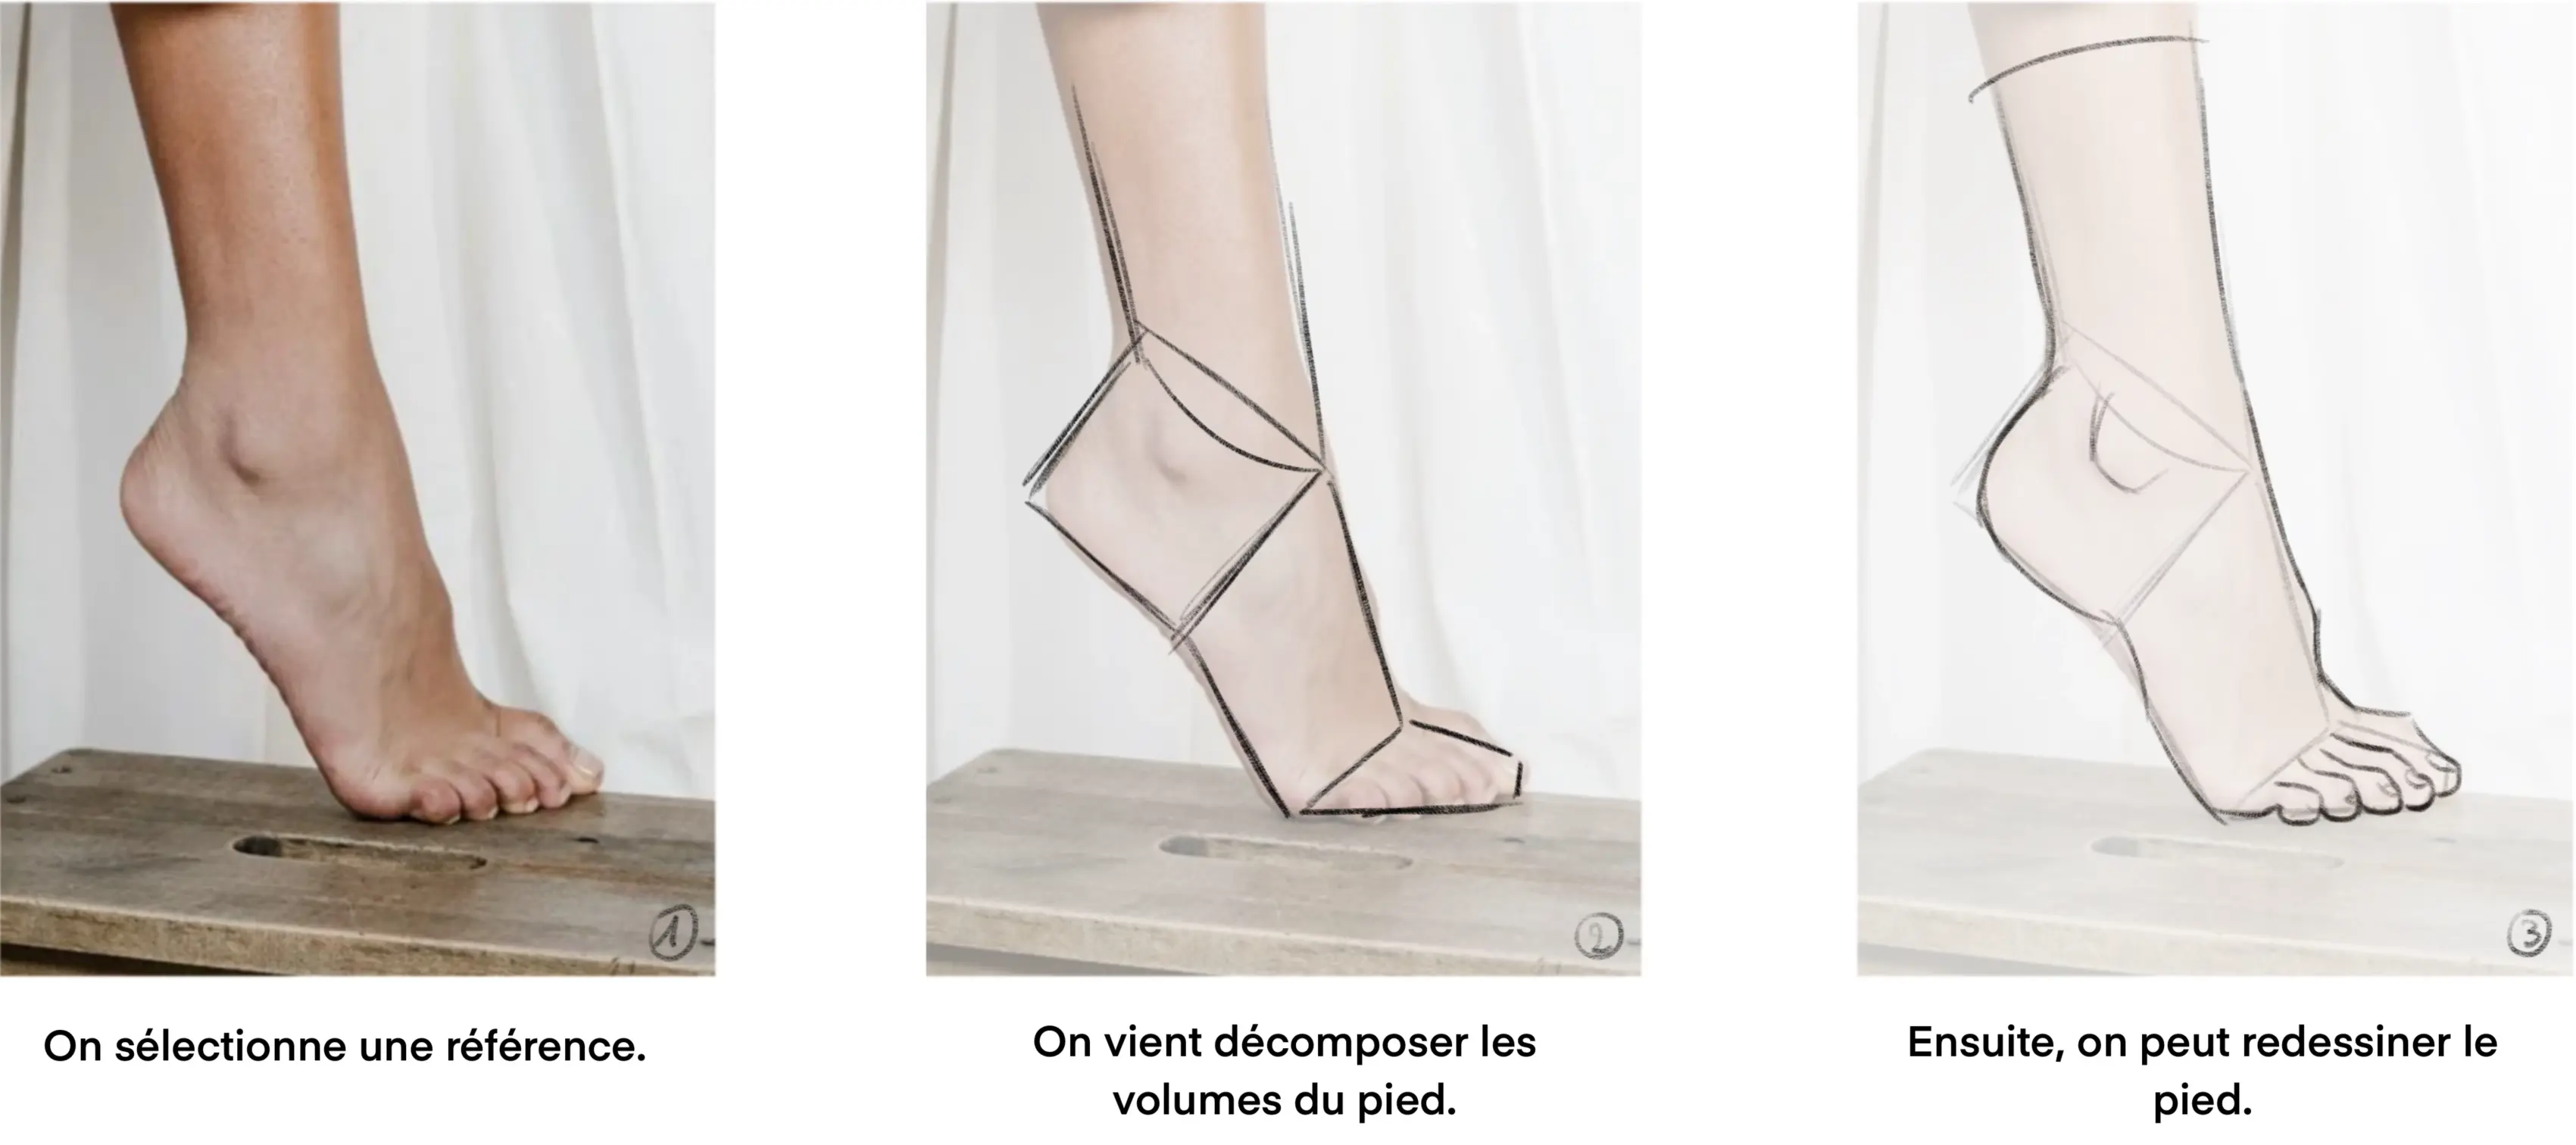
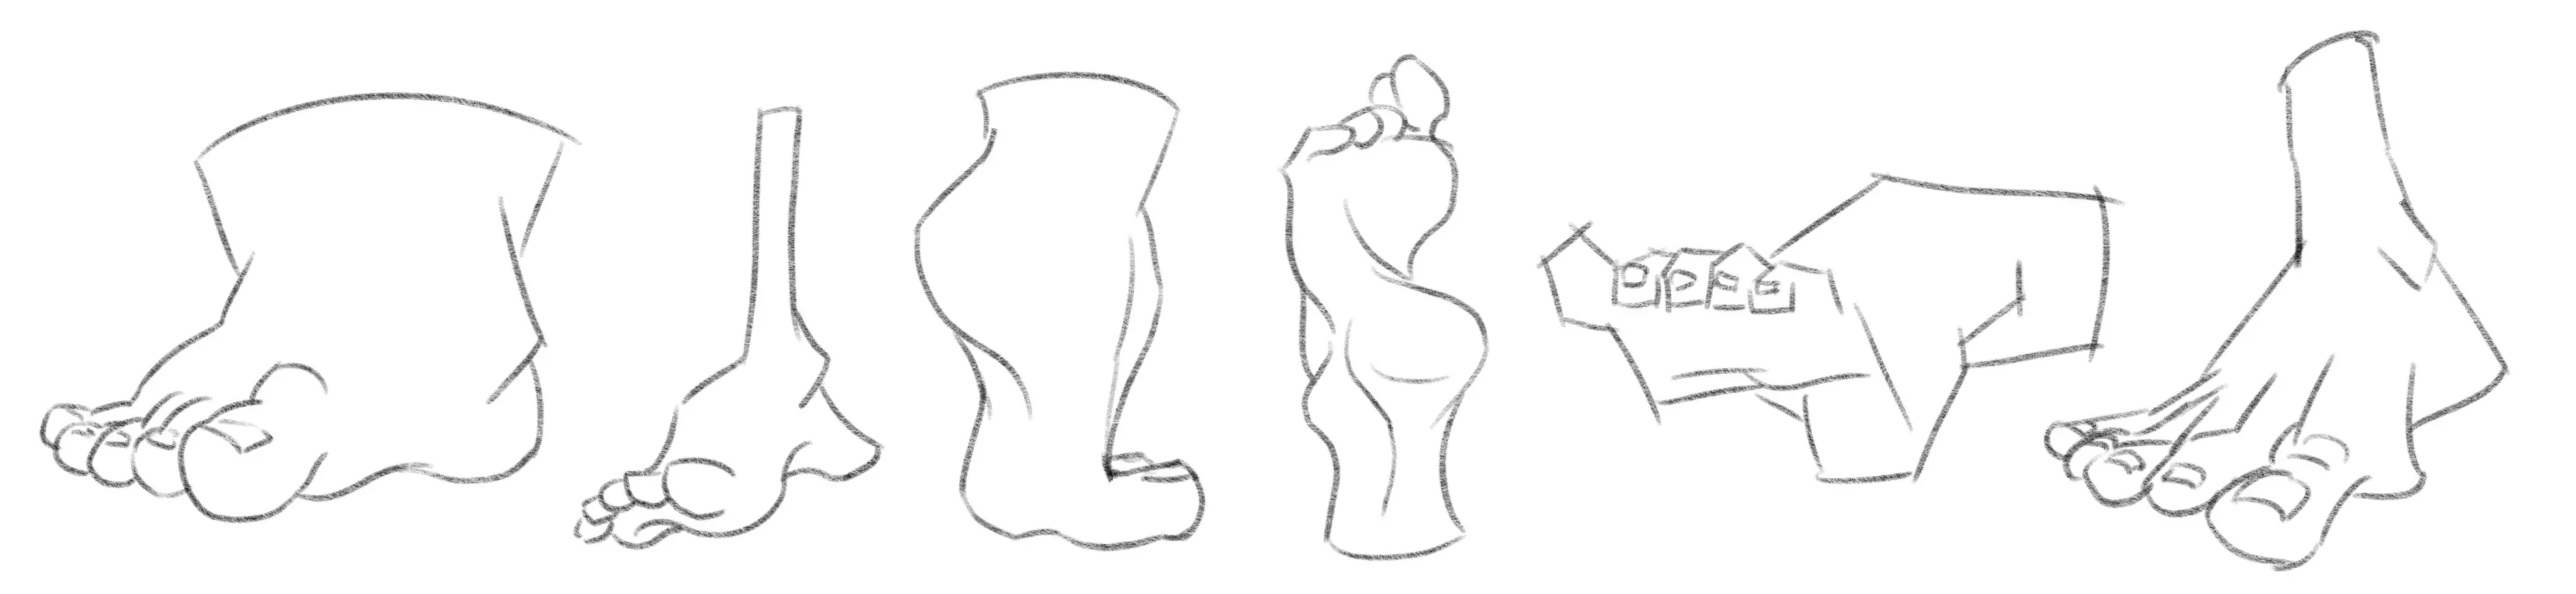
Now that you understand the principle of drawing feet, you should be able to draw just about any pose. Always use simple shapes to deconstruct the volumes: this is the secret to successfully reproducing realistic-looking anatomy.
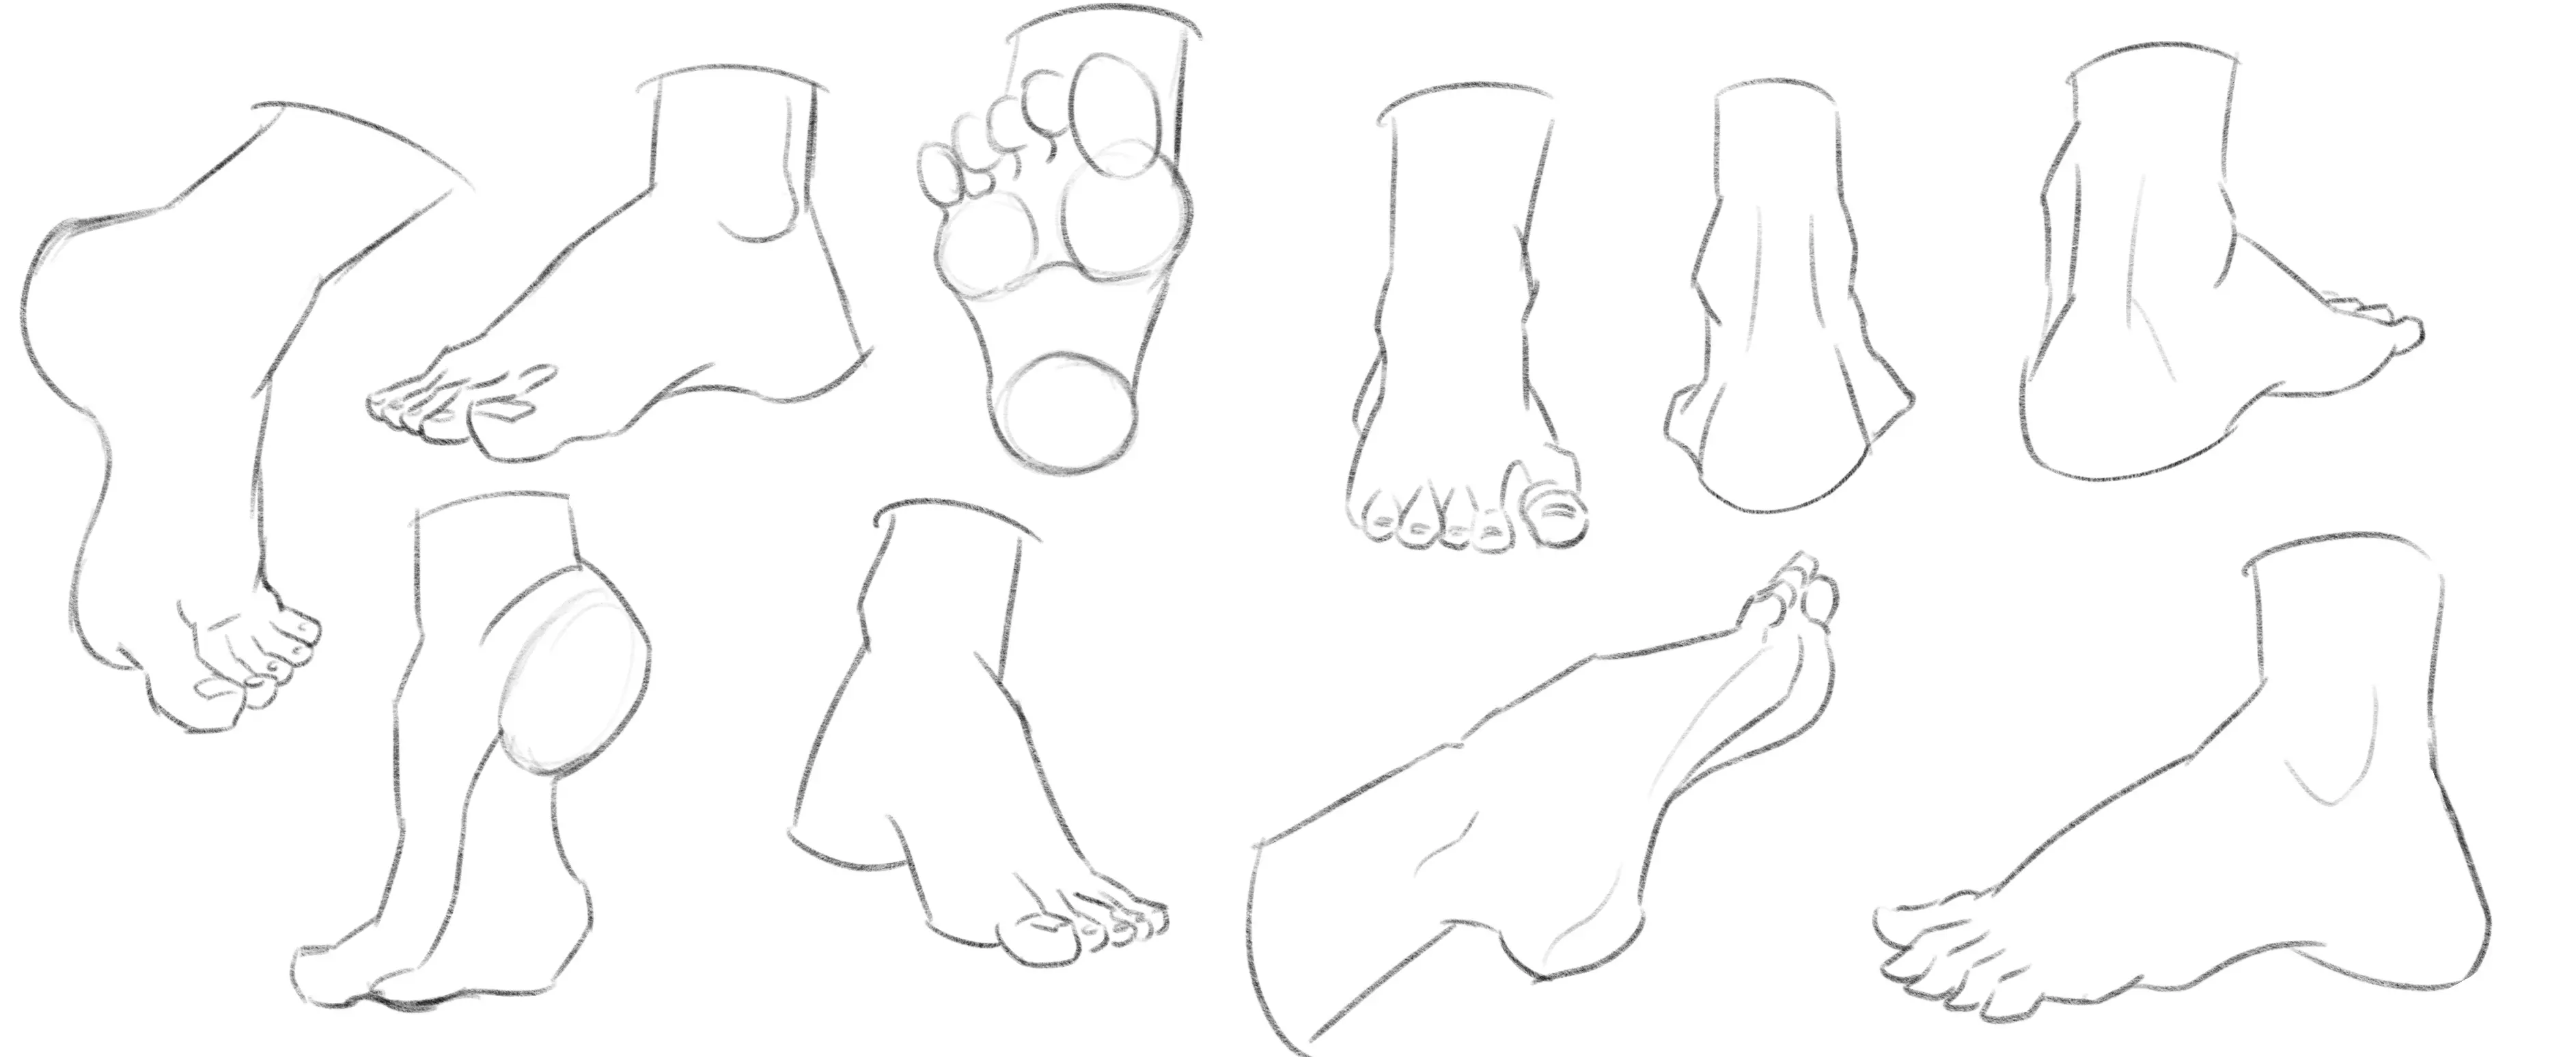
Once the structure is established, you can then add all the details. Here are a few examples of drawings of feet.
Don't forget: if you don't know how to draw a pose, observe and simplify the volumes!
Drawing stylized feet
If you want to draw feet, but your drawing style is not realism or semi-realism, the technique remains exactly the same! Well, almost. The only difference is in the stylization.
For example, you can choose to exaggerate certain shapes or volumes. In this case, you will need to work on exaggerating the basic shapes during construction. You can also decide to stylize your lines by drawing feet that are much more rounded or, conversely, much more square. The possibilities are endless!
At the risk of repeating myself, the only thing that guarantees the success of your styling is to start with a solid foundation, then style it by playing with size ratios, lines, and proportions.
Here you go! Now you have all the tools you need to draw feet from every angle and in every style. As with any anatomical drawing, it might take some time before you feel comfortable. Don't hesitate to always go back to the basics: structure and volume.
The more you practice, the easier it will become. And then, if all else fails… put shoes on your characters! :)
Writer and Illustrator: Chloé Pouteau