
How to Create a Relief Effect in Drawing
When drawing, we always try to deceive the viewer’s eye, making them believe that these lines and spots on a flat sheet of paper represent something real. It is this pursuit of visual illusion that gave rise to concepts such as perspective, foreshortening, or kinetic art, but also to techniques that give an image a real sense of three-dimensionality. In this article, we explore several ways to achieve this.
Between drawing and sculpture: inspiration from Mantegna
A few centuries ago, the master Andrea Mantegna asked himself the same question. In this remarkable work, he imitates a bas-relief sculpture through painting, similar to Greek friezes. By observing it carefully, one can identify several characteristics that produce a powerful sense of depth: a monochrome composition where the figures are constructed solely from volumes, and very pronounced occlusion shadows that make the shapes stand out on the surface of the painting.
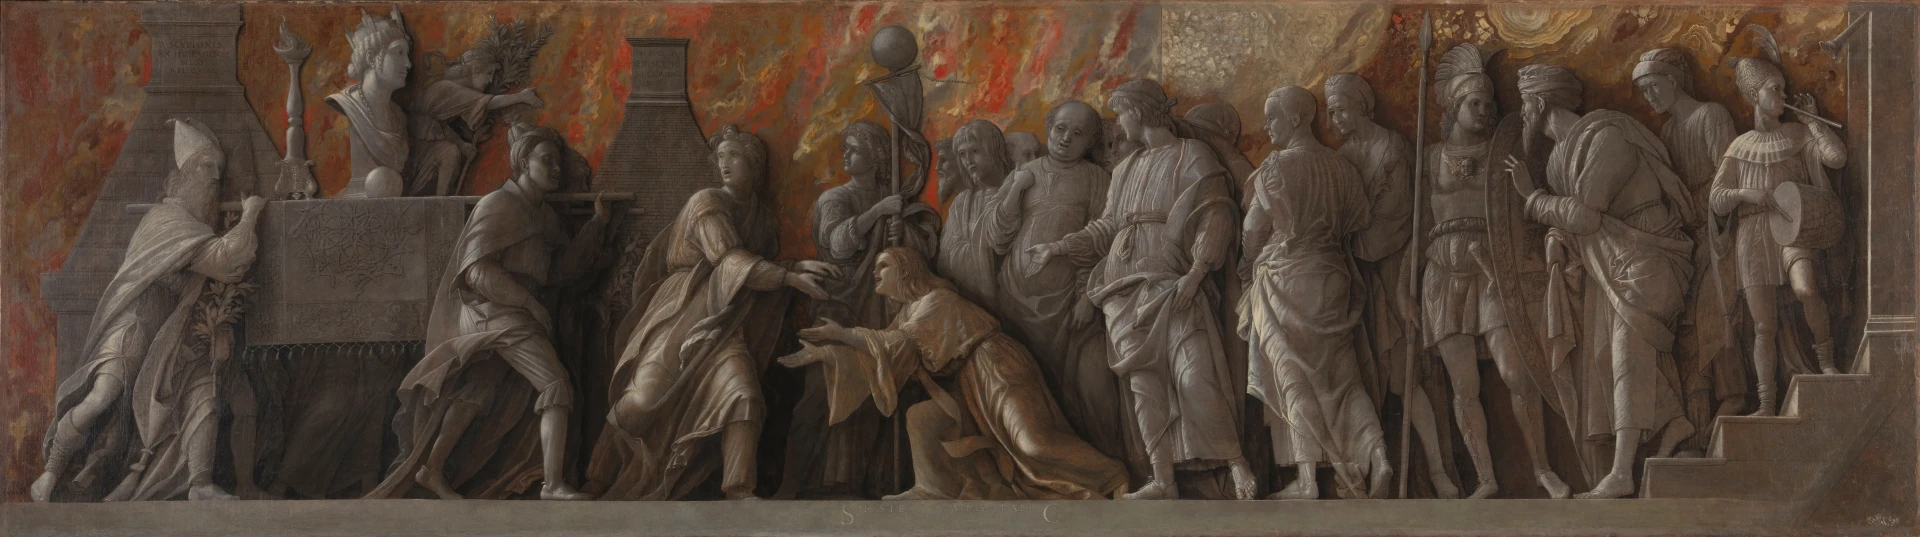
The Introduction of the Cult of Cybele in Rome, Andrea Mantegna.
In reality, we could dedicate the entire article to this work, as it is so full of lessons. But here, it mainly serves as a starting point to understand the principles that enable us to create a relief effect in a drawing, principles that we will now apply in practice.
Lateral shadows: how to create a sculptural effect
How is this sculptural effect achieved? What are the principles that cause our brain to interpret the image as a three-dimensional object? Here is what you need to remember:
- Imagine that all the objects and characters are on a flat background, with no scenery or depth planes.
- Each element casts a shadow onto the wall behind it, creating a contour on the same side for all the characters and objects.
- The artist only paints the volumes, omitting the color and texture values, which brings the image closer to the idea of sculpted marble than to a monochrome painting.
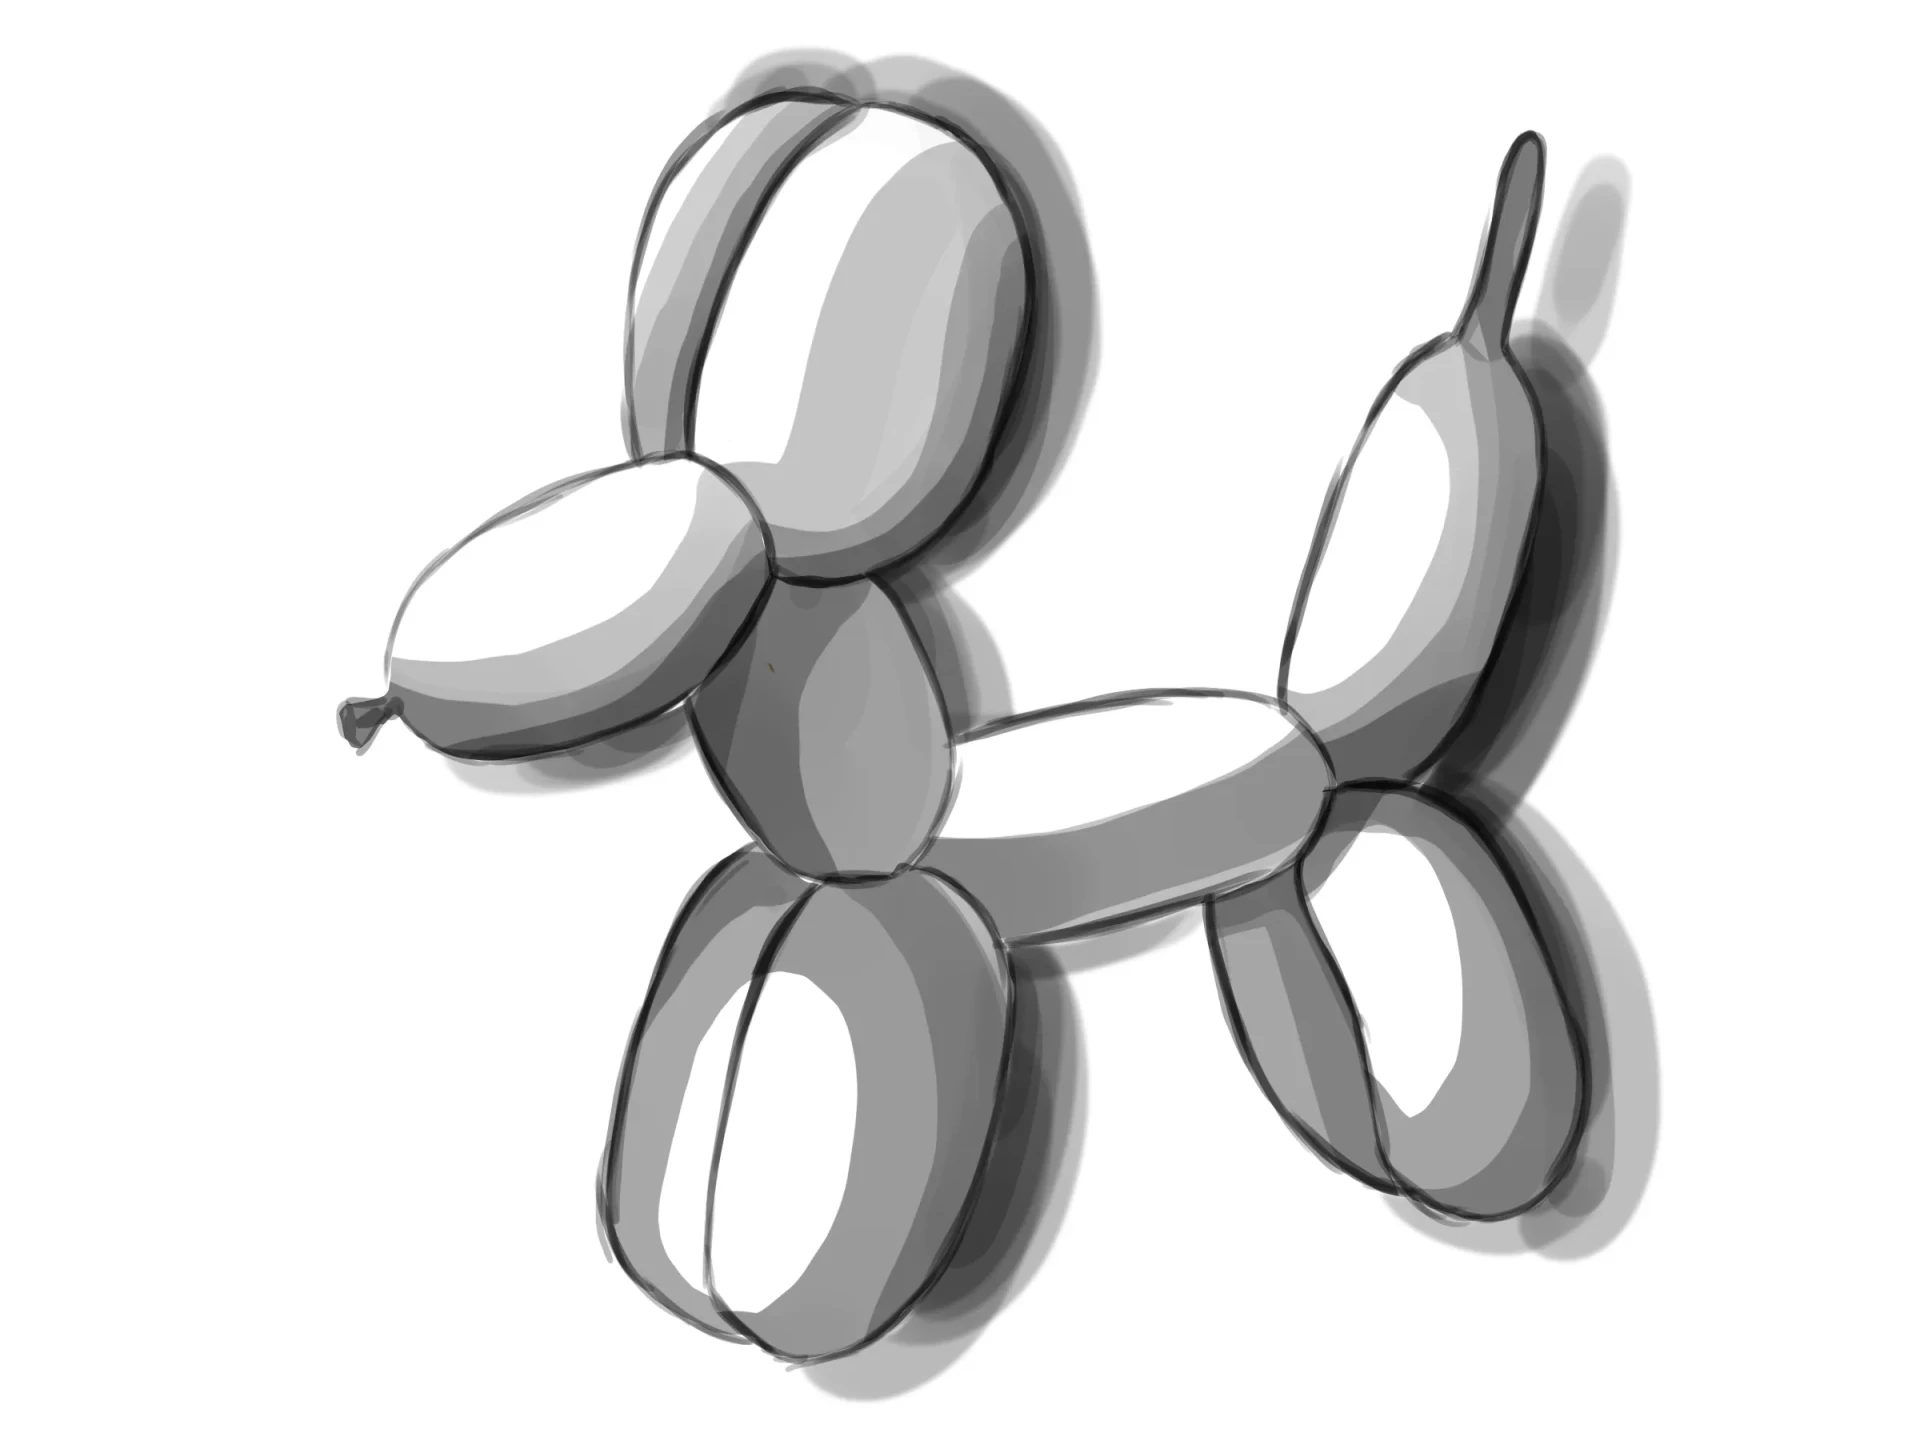
To put these principles into practice, we will use a balloon dog as a model. Its simple shape, composed of inflated cylinders, makes it possible to apply the effects in sections using the typical shadows of a sphere.
How to draw a 3D dog using lateral shadows
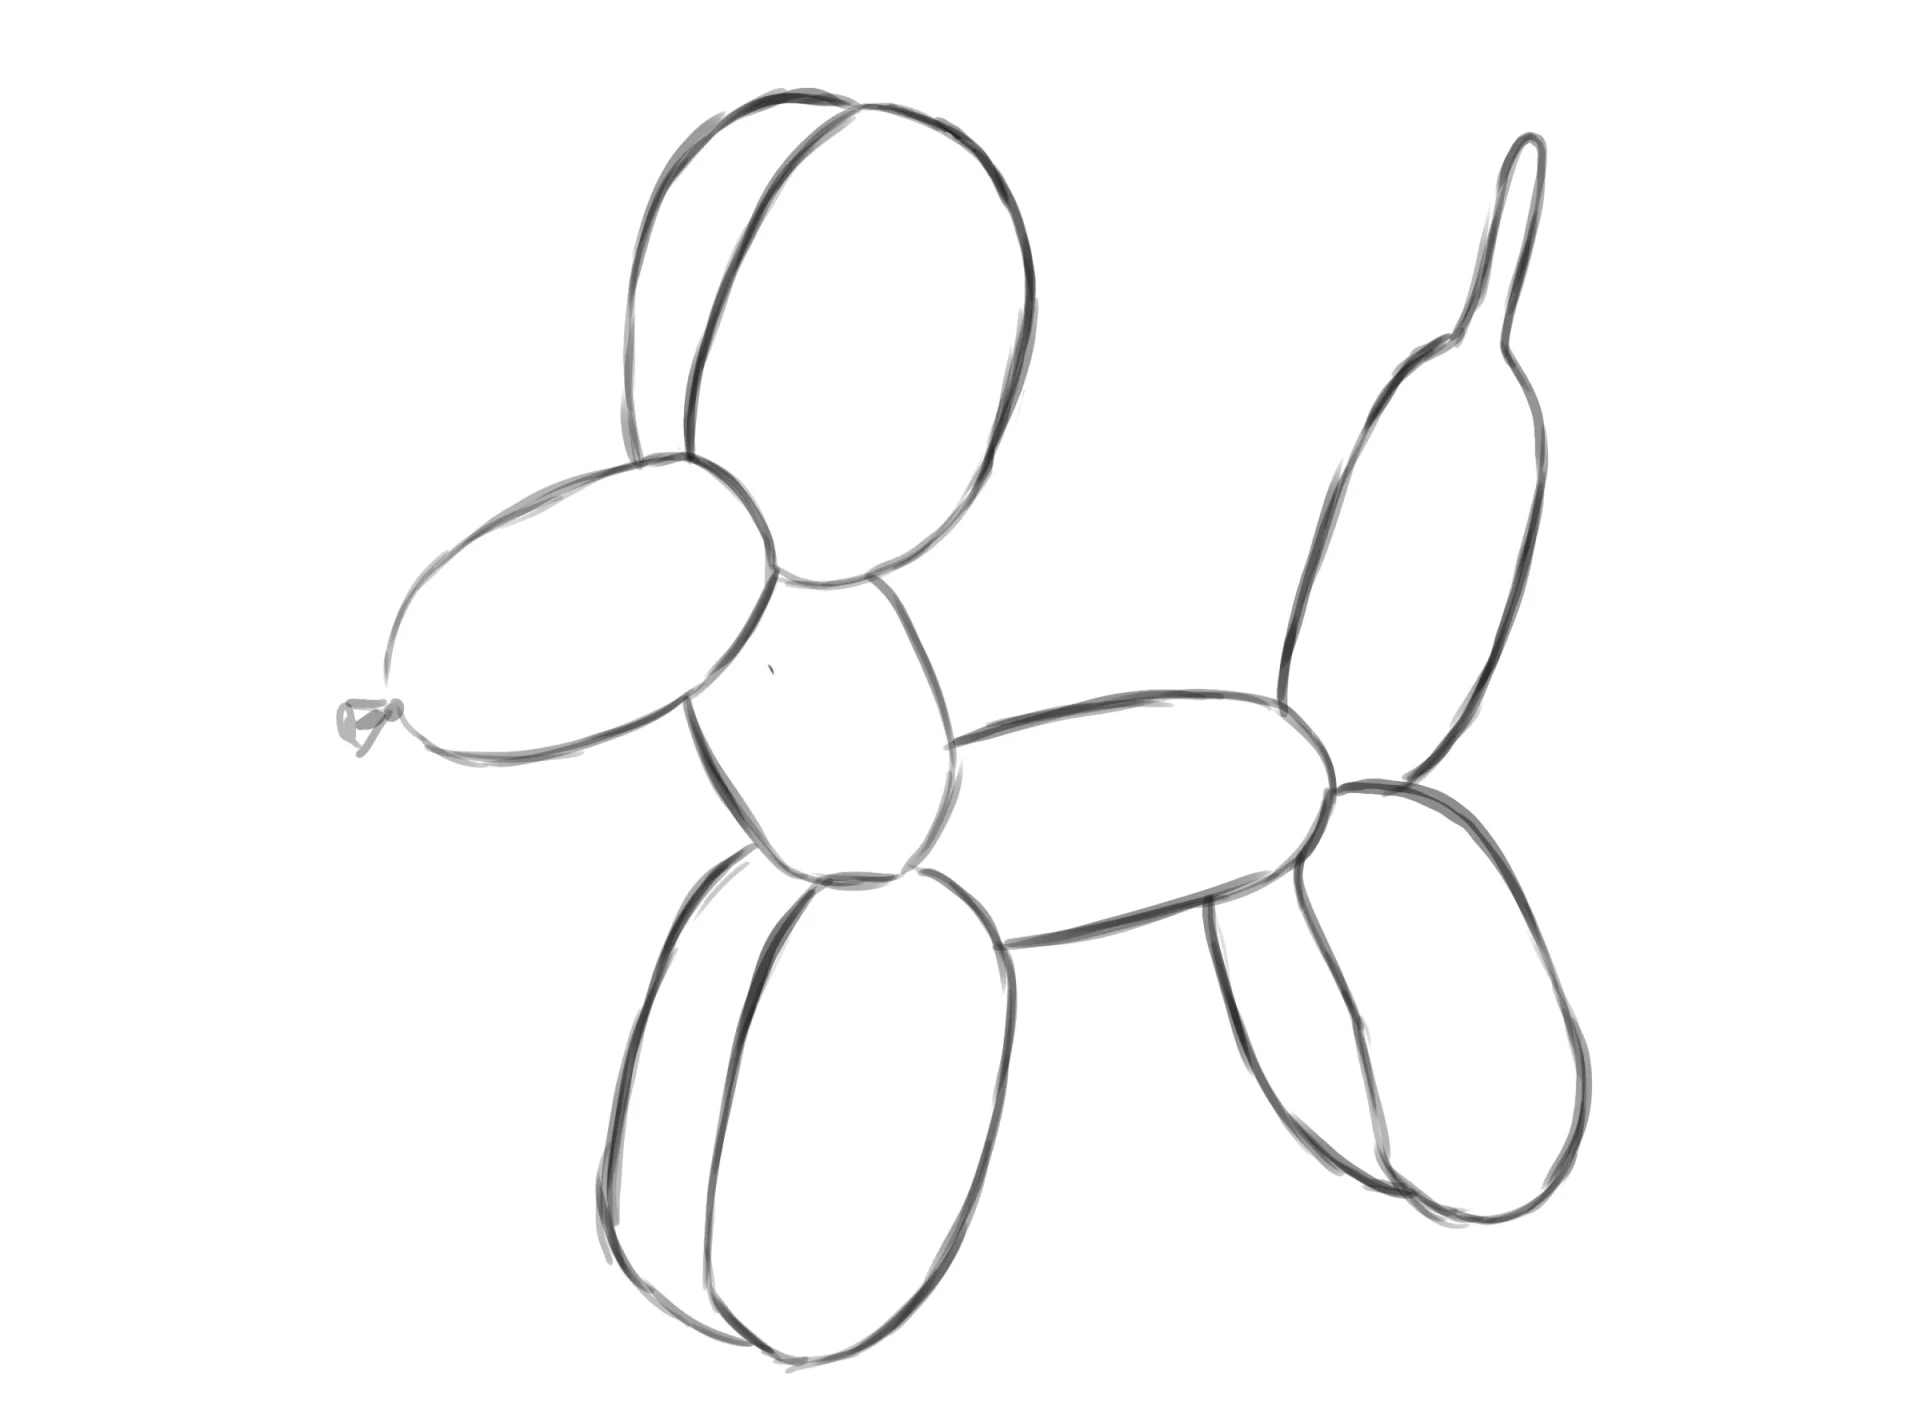
Draw the chosen subject, focusing only on the outlines. The background should be non-existent or very flat. Reserve the shadows and highlights for the next step.
Define a light source, such as the upper left corner, and create shadows that correspond to the impact of the light. The surfaces facing the light source remain light, and then gradually transition to a darker shadow on the opposite side.
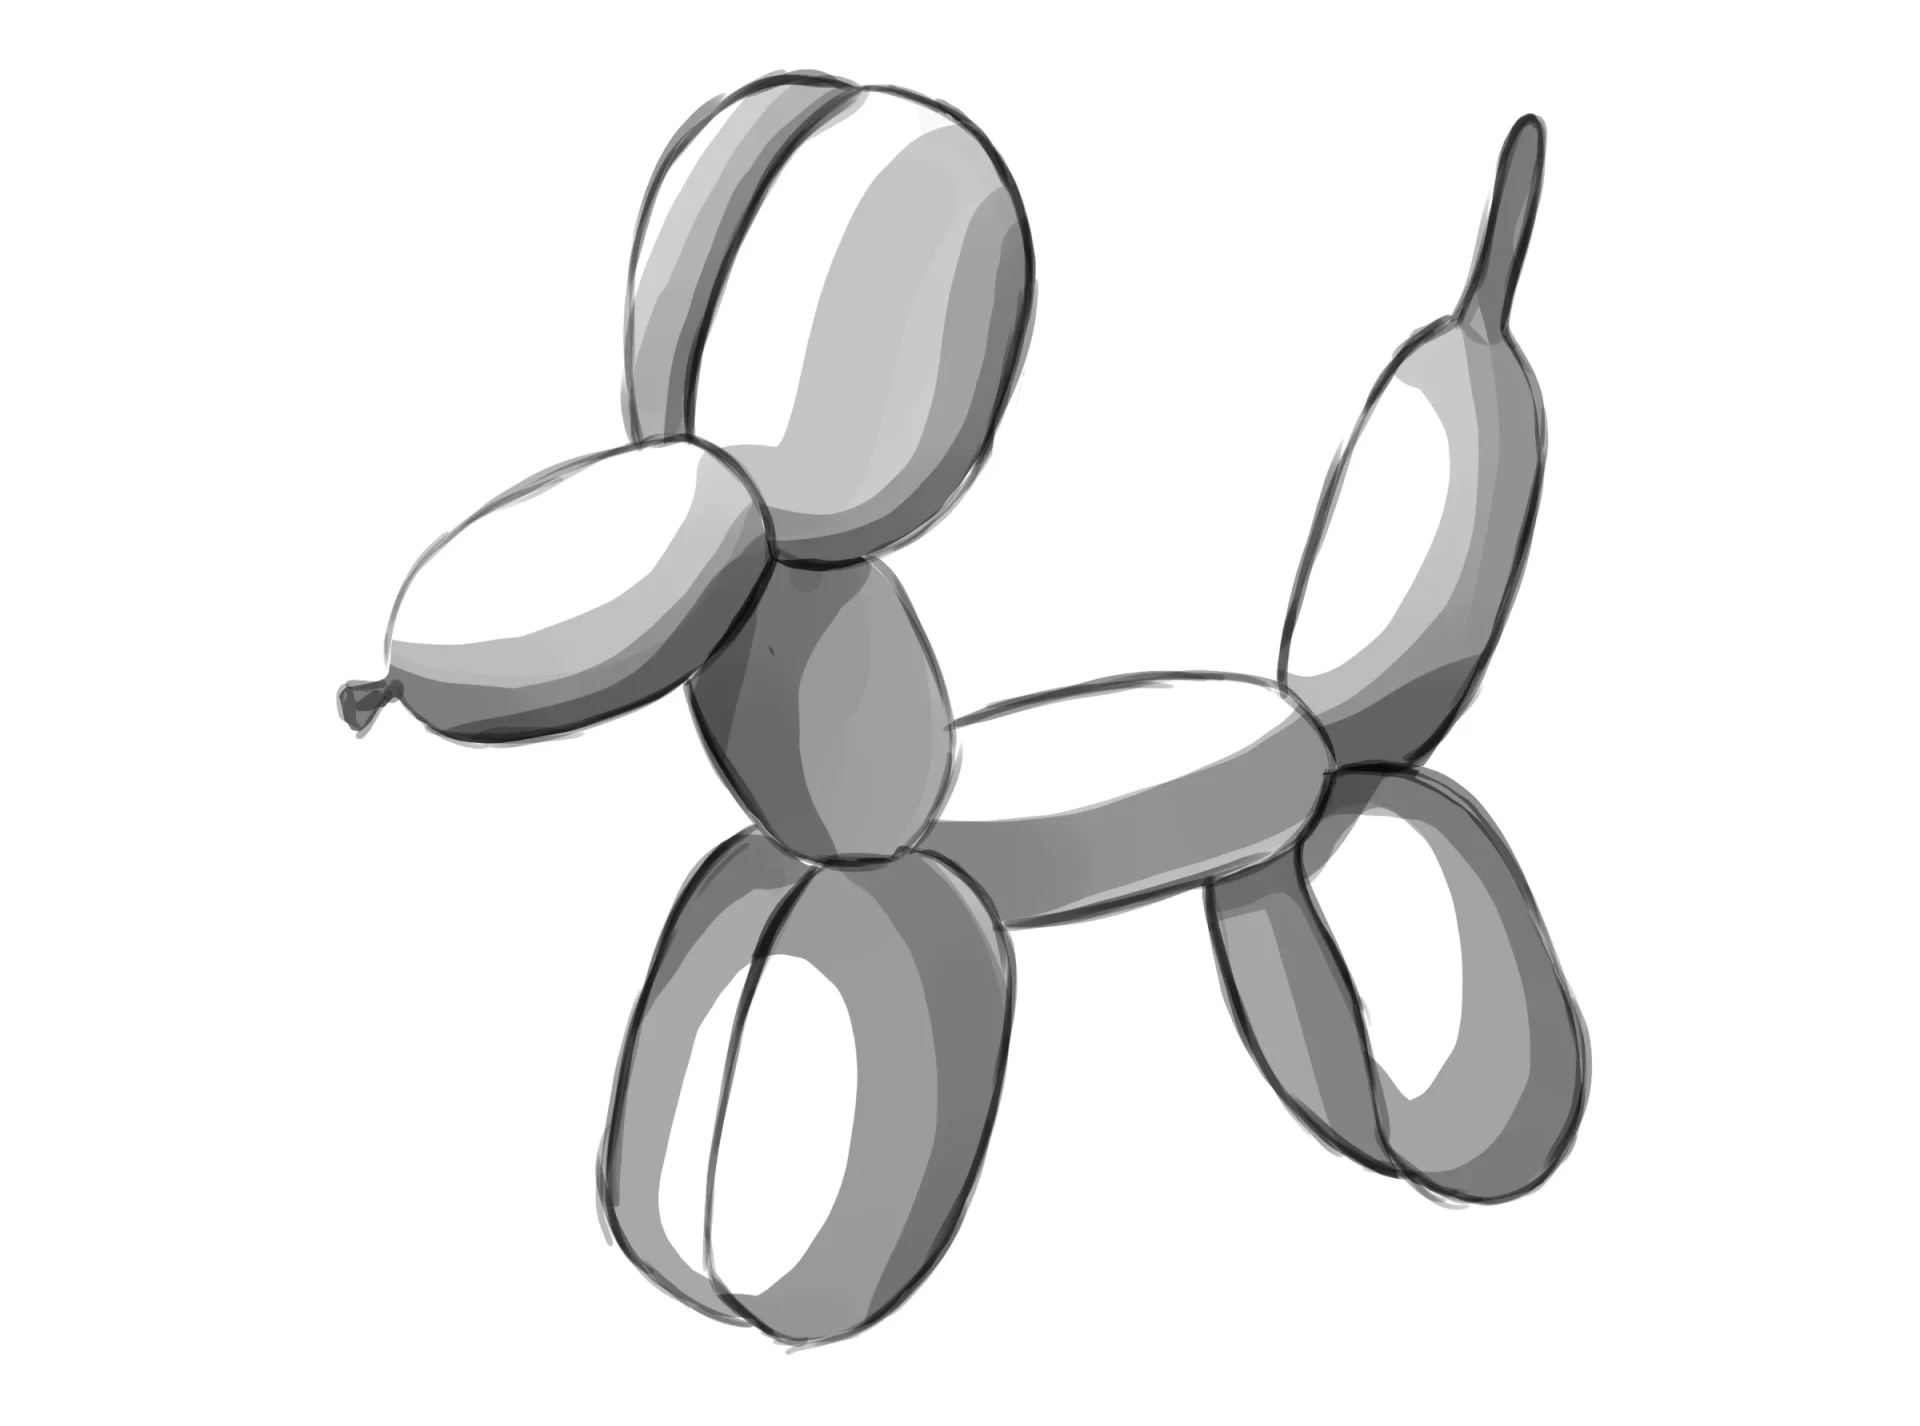
Project a cast shadow to the side, respecting the direction of the light. From the dark outline, extend the shadow by a few centimeters in the same direction, mimicking the silhouette of the model.
Create a real bas-relief
Another option is to use a modeling material, such as modeling clay or clay, to create the volumes of your composition on a flat surface. To create volume without wasting material, use balls of newspaper or aluminum foil attached to the surface with glue or tape, and then cover them with the modeling material.
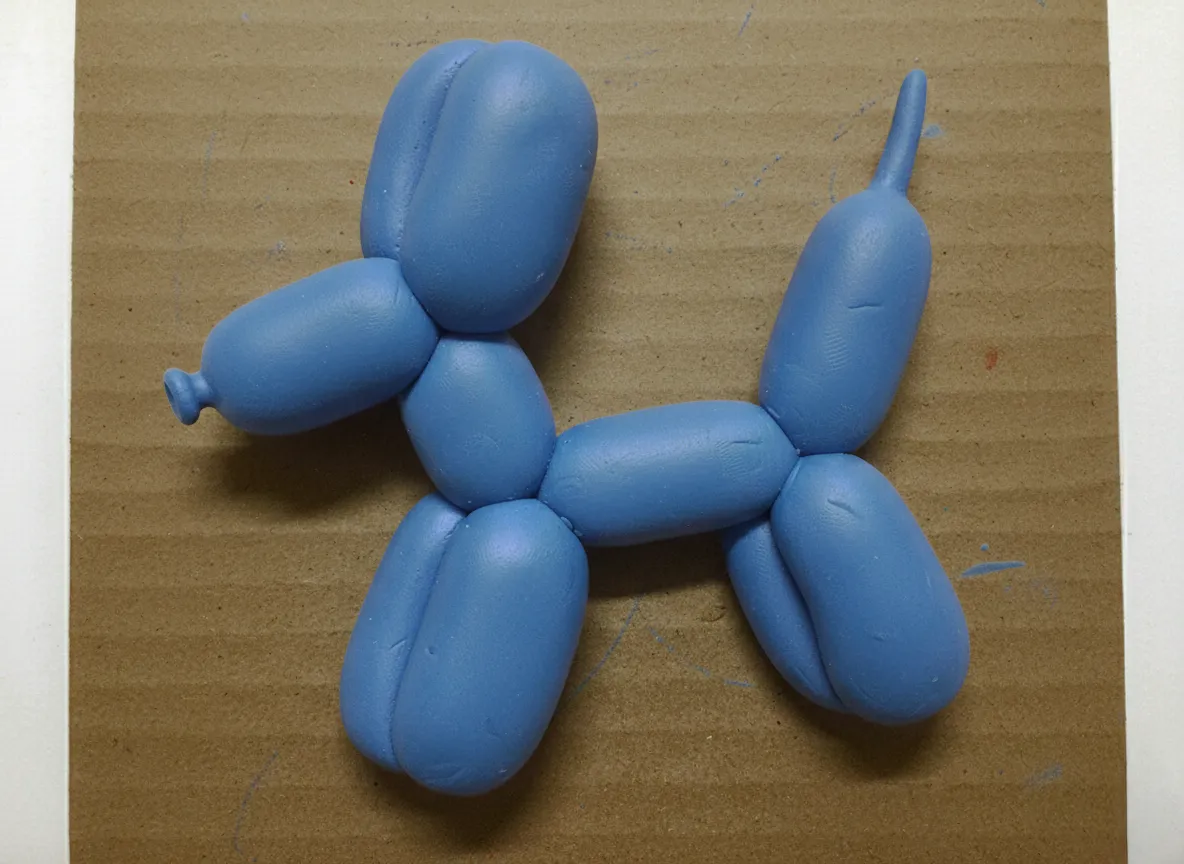
Once the three-dimensional object is created, you can see for yourself the effect obtained in the previous example.
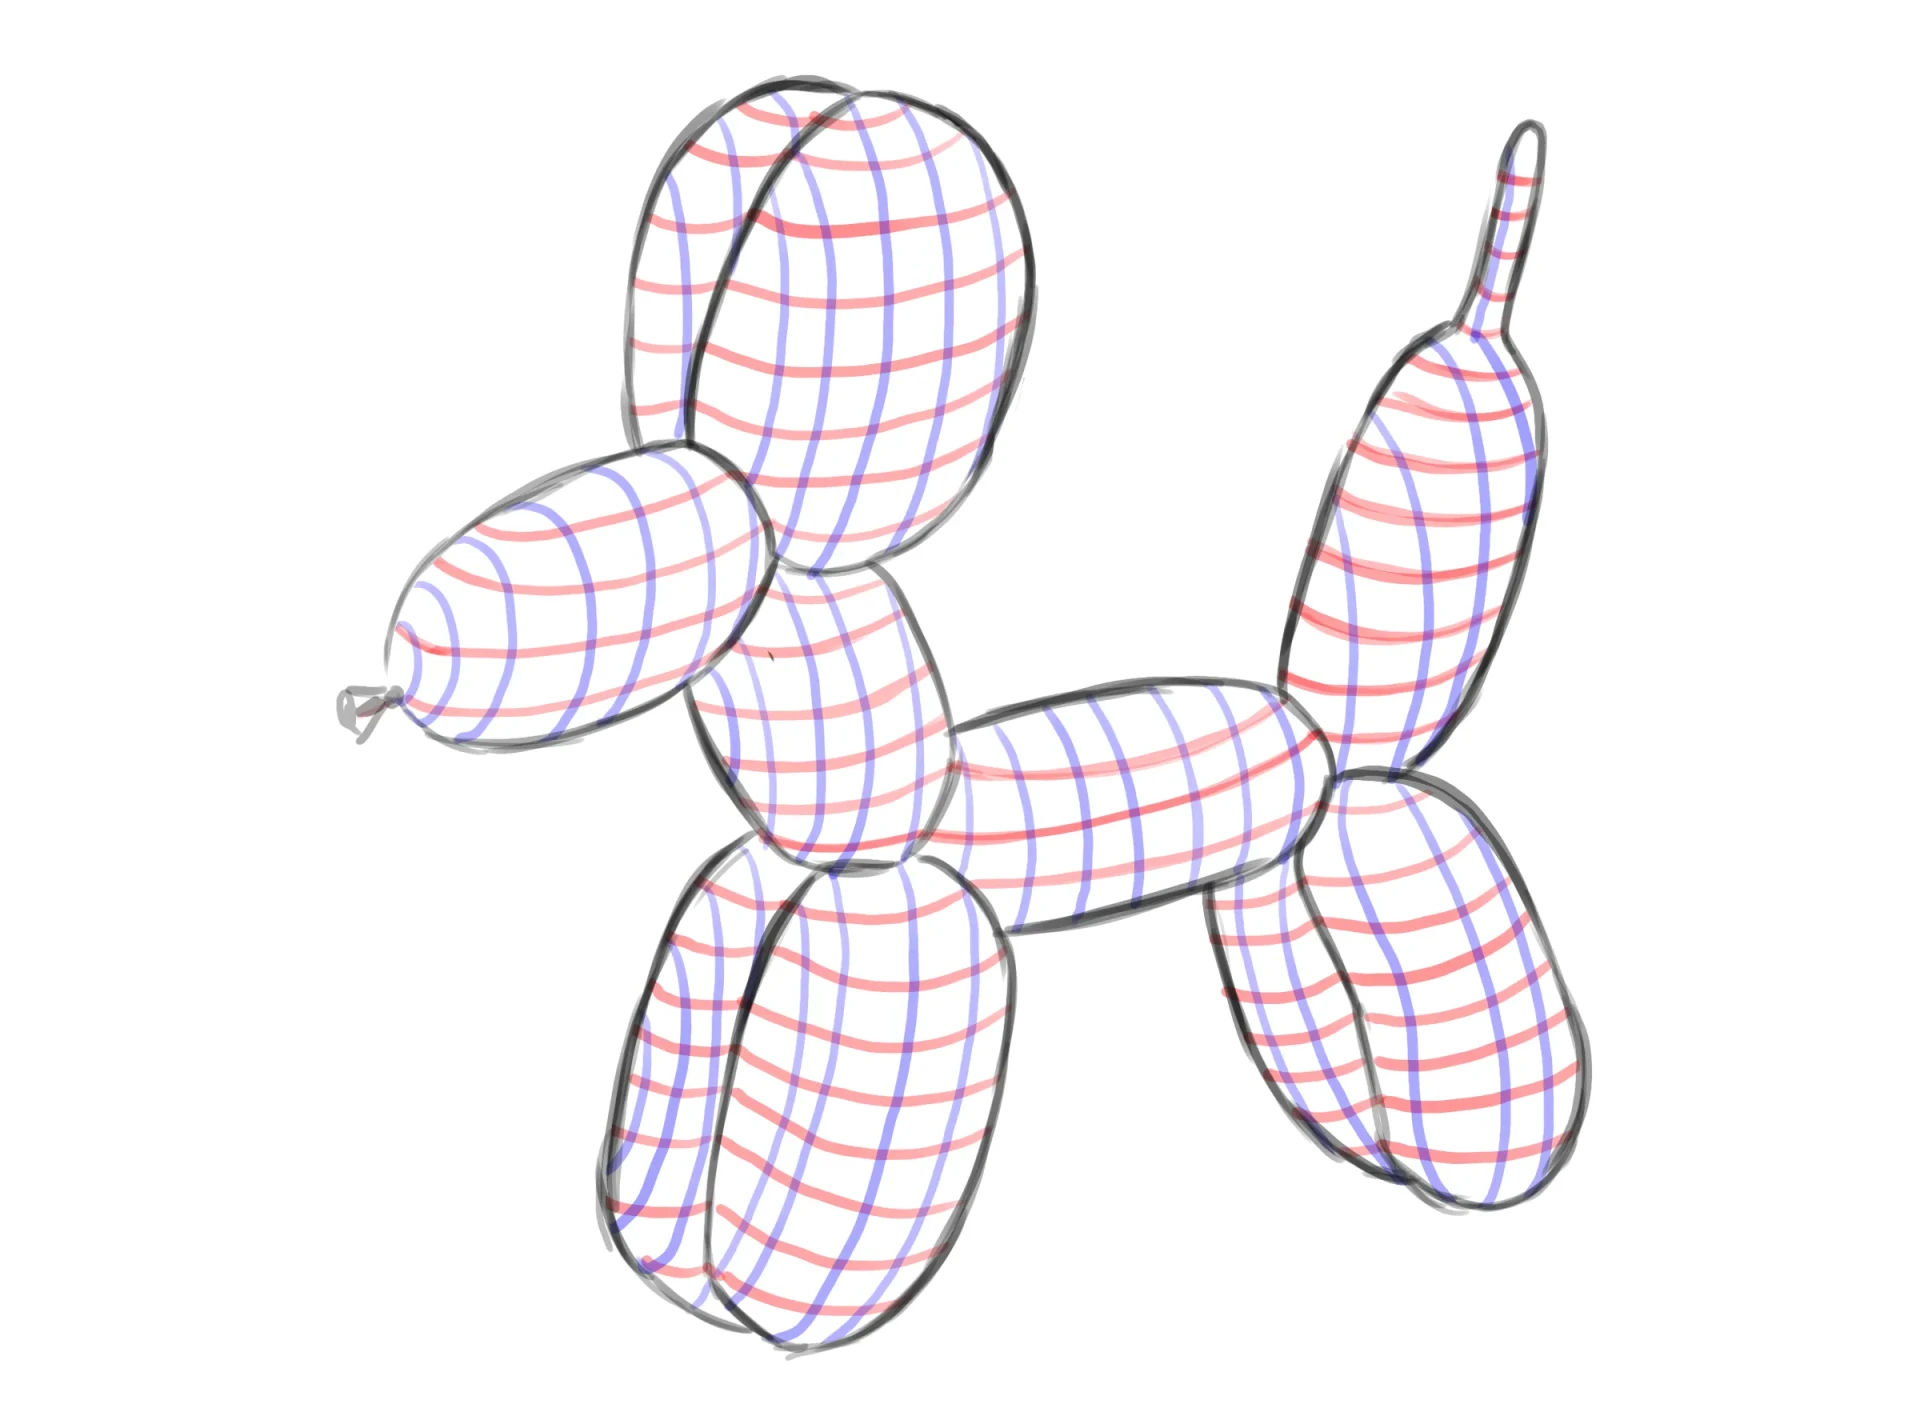
Cross contour lines
This technique is based on lines that define visual paths, enabling the brain to interpret dimensions on a flat surface.
To determine how pronounced the curvature of each section should be, you can use the contour lines themselves as a guide: if it were more pronounced, the result would look strange, and if it were flatter, it would actually diminish the volume we are looking for. Use observation and practice to achieve a balance.
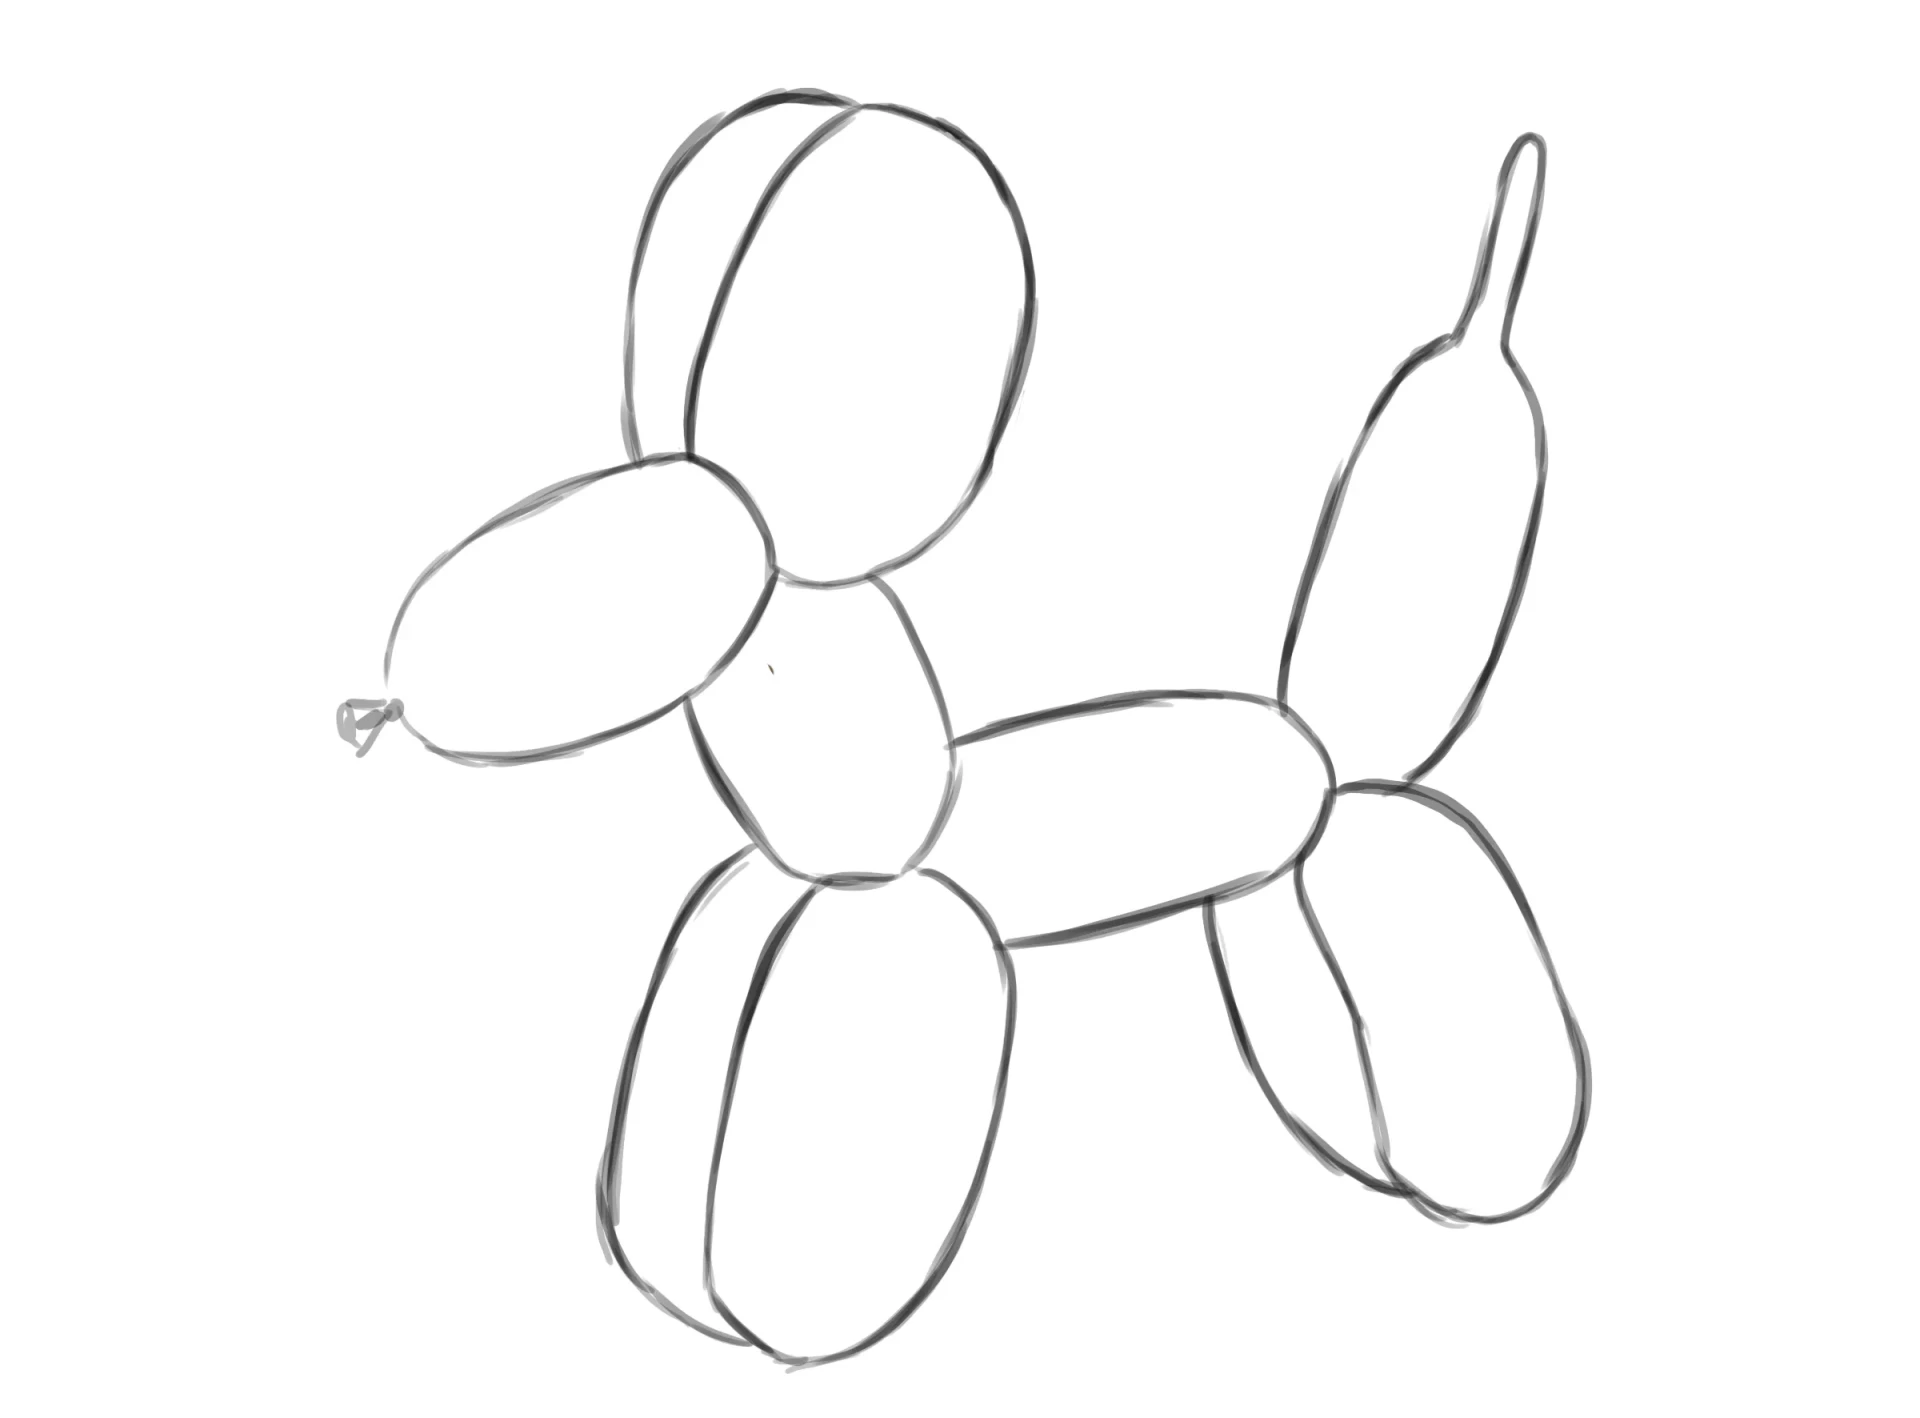
Start by drawing the outline of your object; the balloon dog works very well here too.
Next, draw a horizontal line in the middle, following each curve, fold, or indentation of the volume. The curvature must be just right: if it is too pronounced, the result will look strange; if it is too flat, you will lose the desired volume.
Draw an identical line a few centimeters higher, then another below, with similar spacing. Continue in both directions, maintaining regular spacing between the lines.
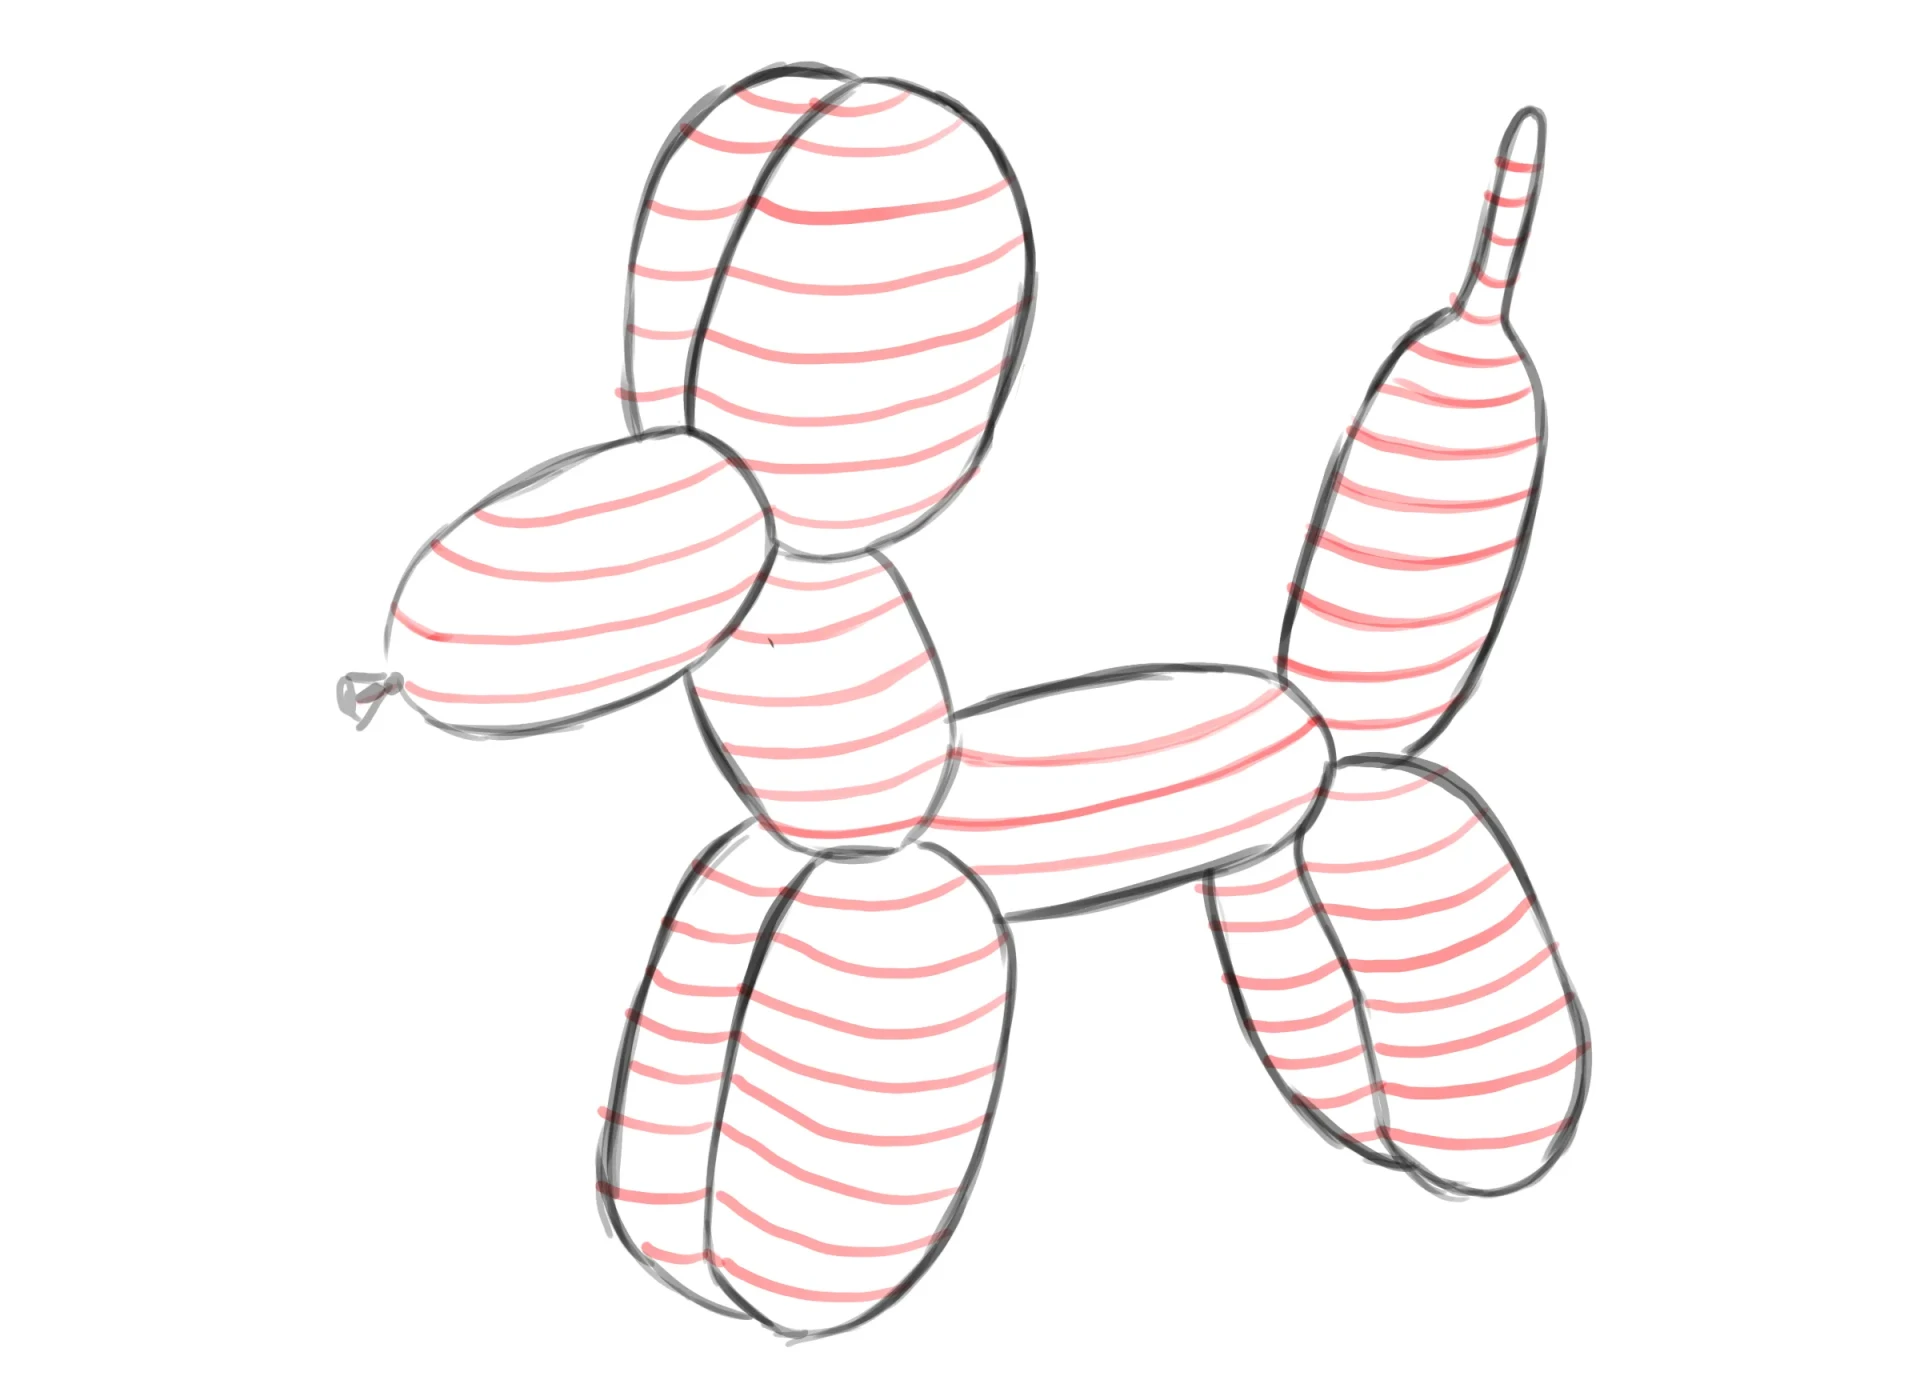
Then repeat the same procedure in the vertical direction.
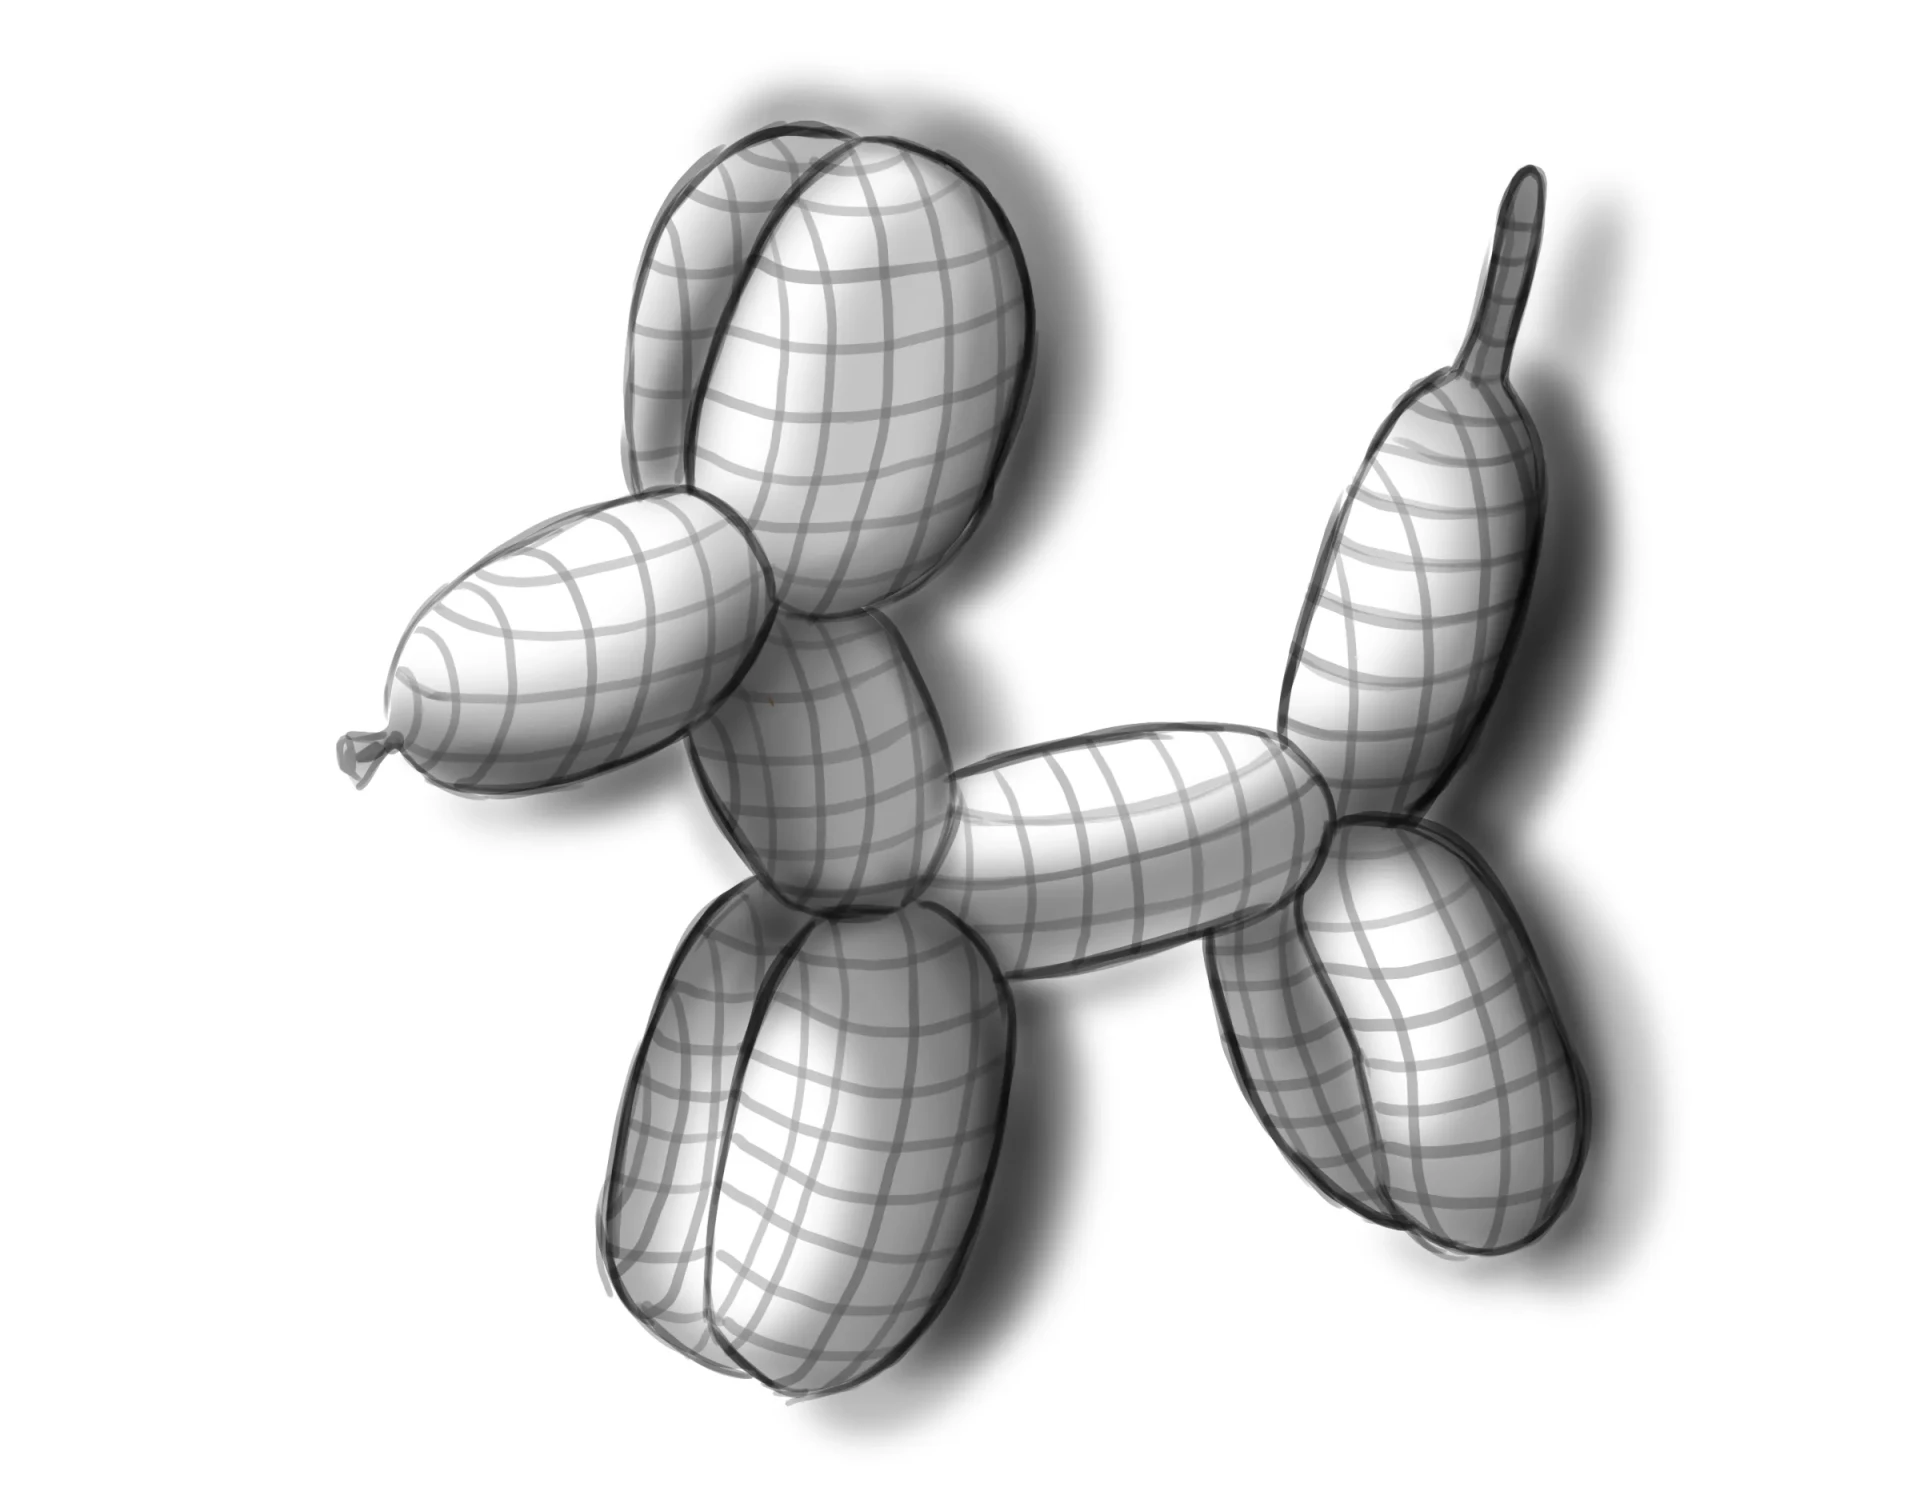
Combine the two techniques
A final suggestion is to combine lateral shadows with cross contour lines. The result is similar to the polygonal renderings of 3D applications, a particularly striking visual effect.
And that’s it for this tutorial! These three approaches are easy to use and fun to experiment with. Whether you choose lateral shadows, bas-relief, or cross contour lines, each will give you a different way to trick the eye and bring your drawings to life.
See you soon!
Discussion
No comments yet.