
How to Draw a Japanese Temple

Have you ever looked at a photo of a Japanese temple and thought, "I'll never be able to draw that"? That's exactly what we're going to demystify today. The Japanese temple, with its curved roofs and its very distinctive wooden structures, is one of the most beautiful architectural subjects to draw. With the right guidelines, you'll see that it's perfectly achievable. Let's get started!
Temples and shrines: what is the difference?
When we talk about Japanese temples, we can establish a classification into two main groups. Shintoism, the official religion of the Land of the Rising Sun for many years, brings together a pantheon of gods and spirits called "kami," as well as rites that still exist today. The buildings dedicated to it are technically shrines.
On the other hand, temples preserve the Buddhist tradition, which came from China and spread throughout the archipelago. They are particularly distinguished by the famous pagodas, buildings that rise vertically over several floors. These two types of structures, and the religions they represent, coexist in the cities and life of modern Japan.
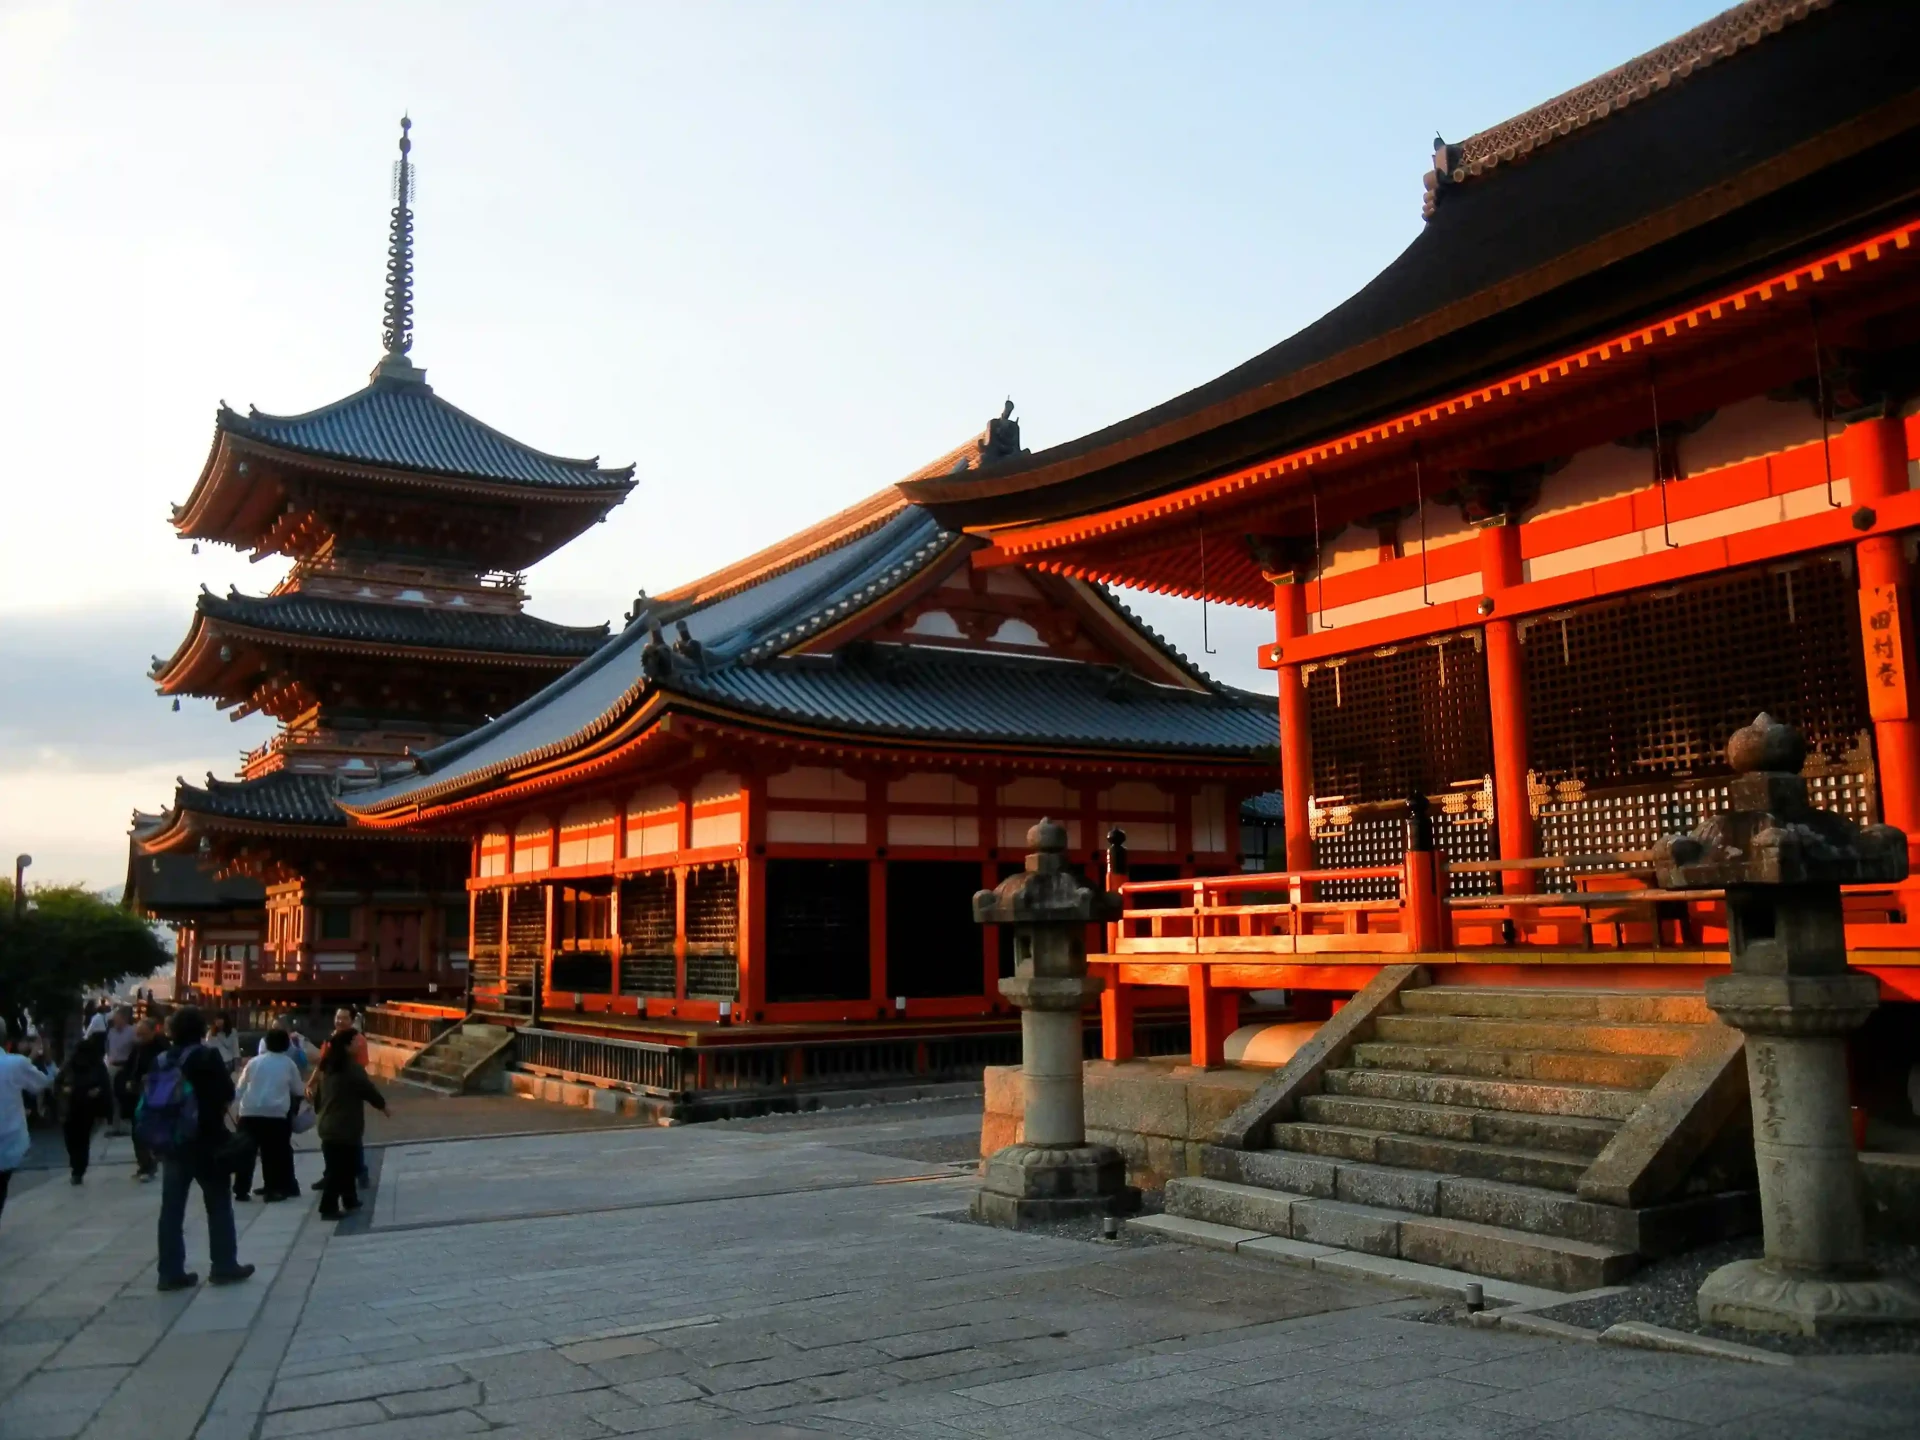
Architectural details to be aware of before you start drawing
Japanese monumental architecture uses wood as its basic material, assembled using a centuries-old technique that is characterized by the complete absence of nails. The shapes interlock perfectly, making the buildings flexible and capable of withstanding earthquakes without collapsing.
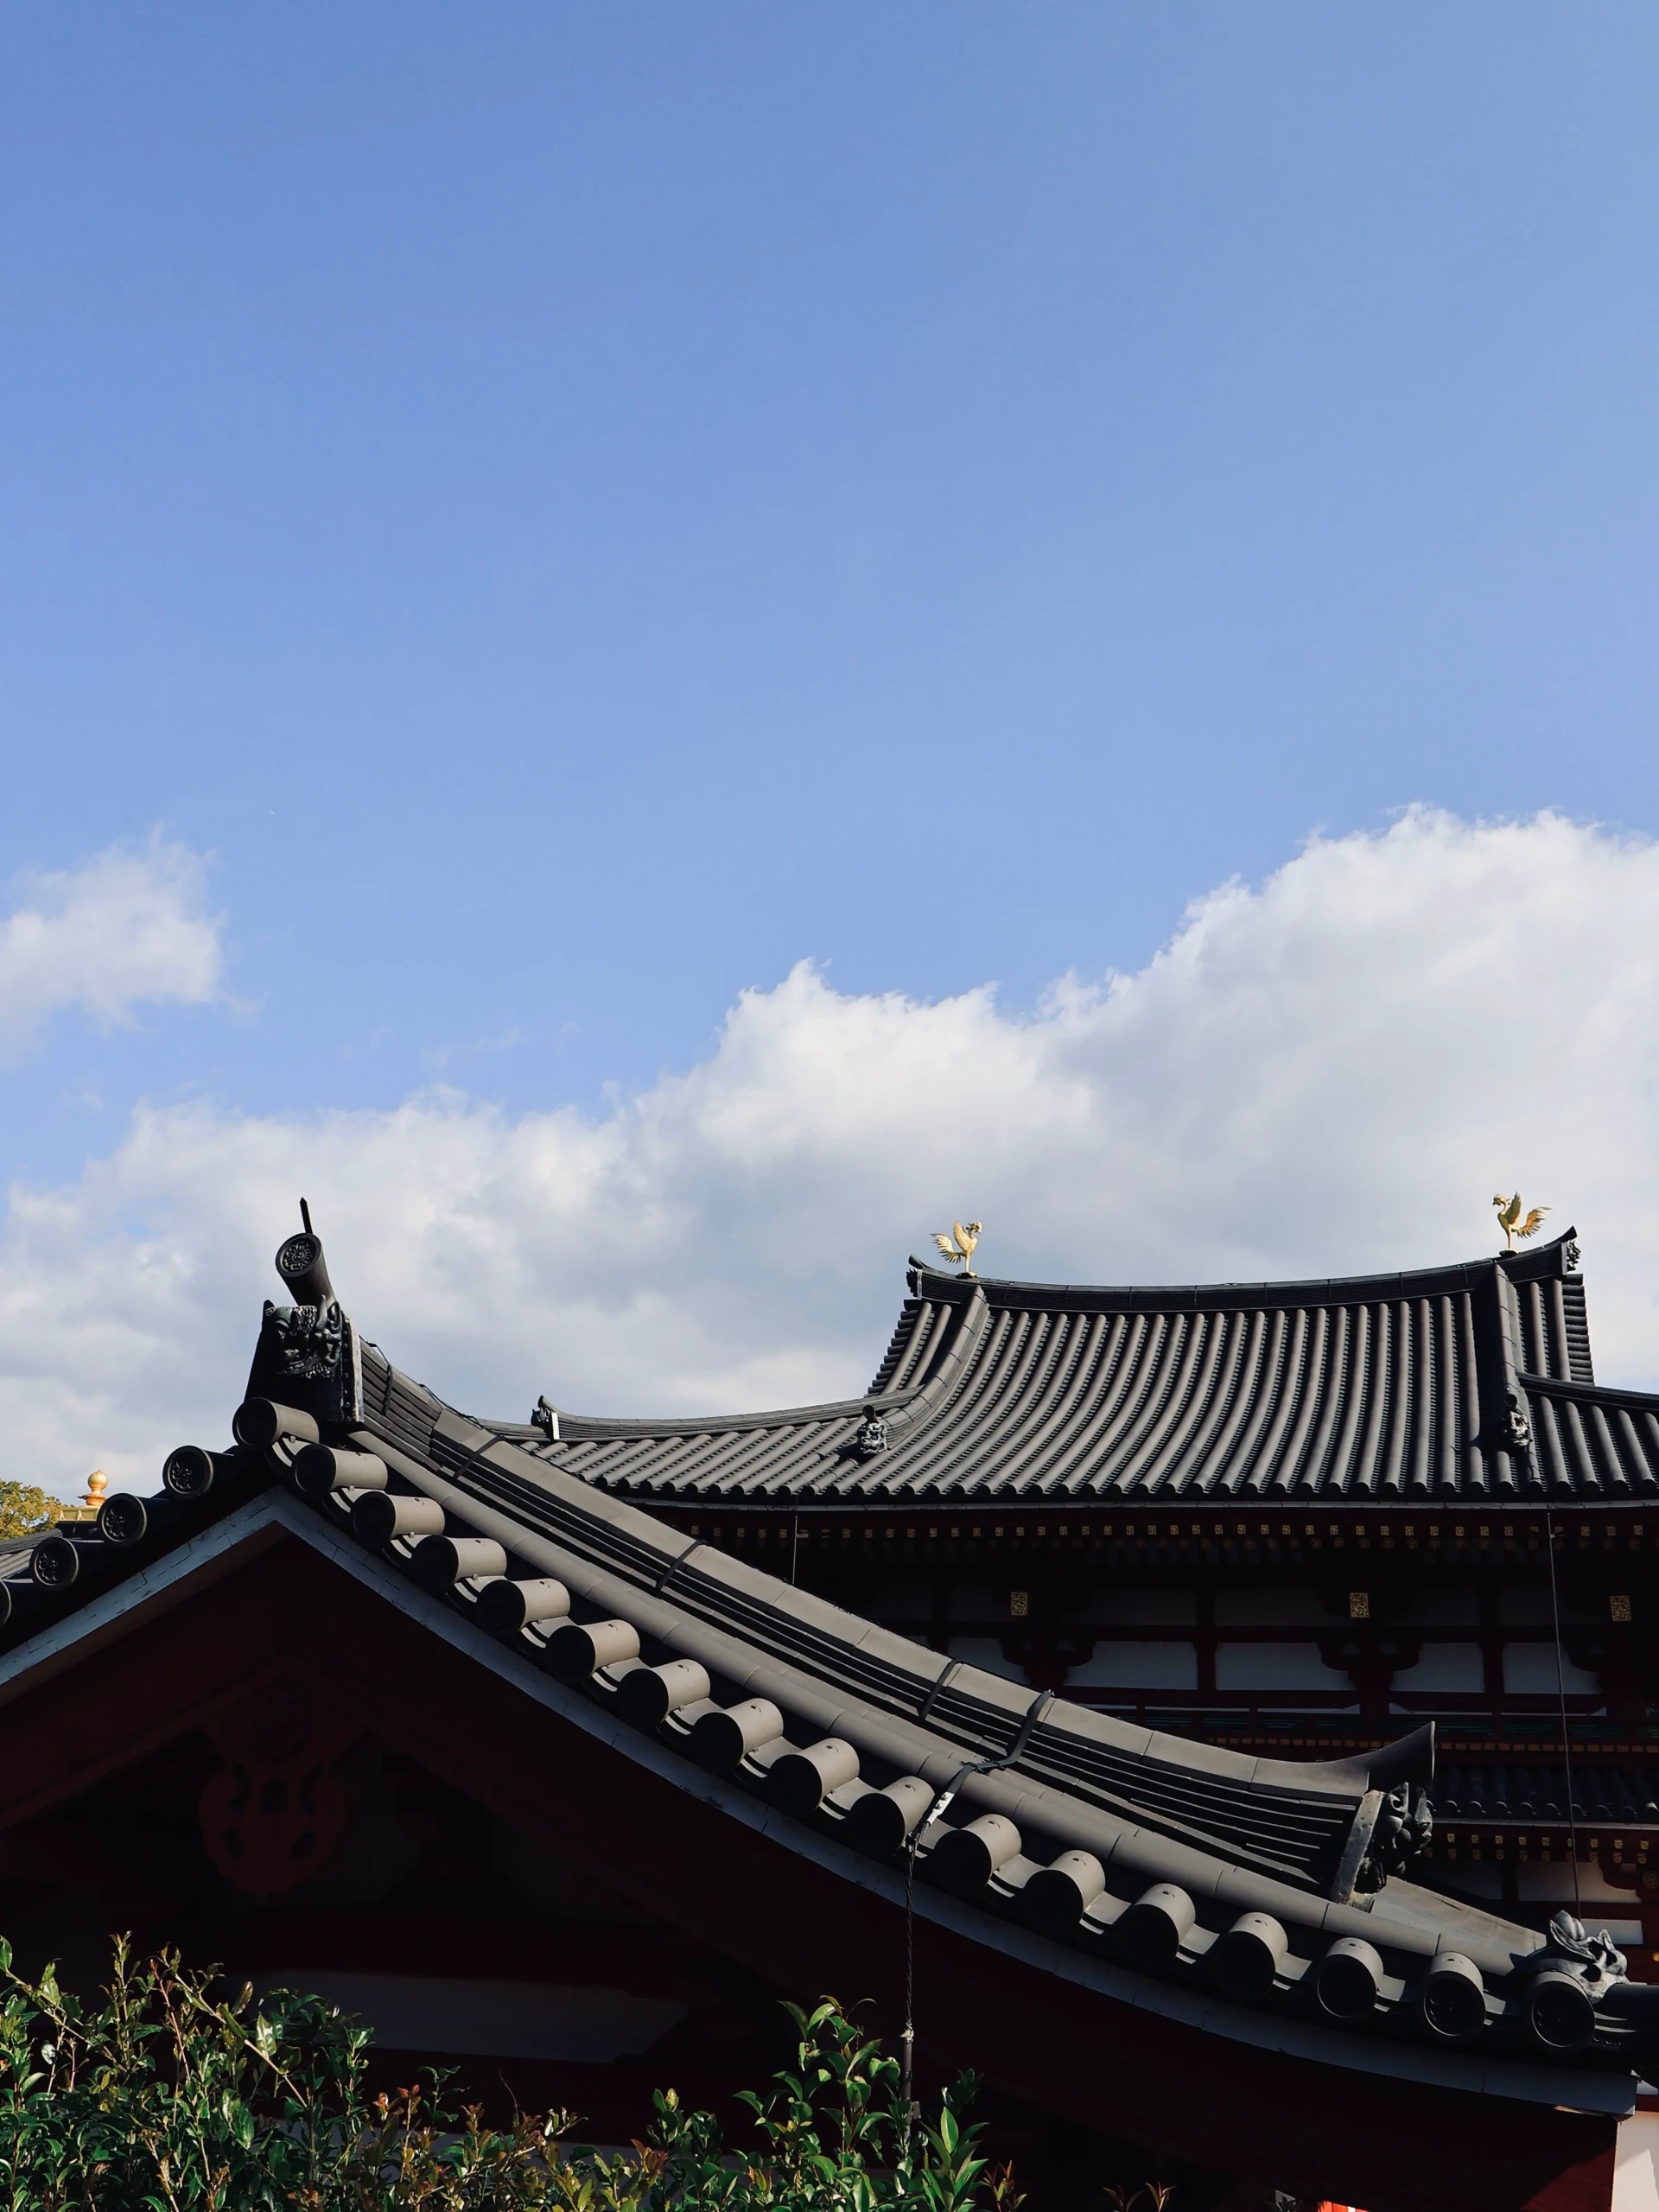
The iconic roofs
Inspired by pine trees, Japanese roofs are recognizable by their slightly curved slope that extends outward. The tiles, which are cylindrical in shape, are arranged in rows that run down the roof, creating an immediately recognizable silhouette.
Console supports
Also known as the tokyo system, this complex network of wooden pieces beneath the roof intelligently distributes the enormous weight of the roof while also giving the building its distinctive stylistic identity. It is also one of the most challenging elements for an artist to depict.
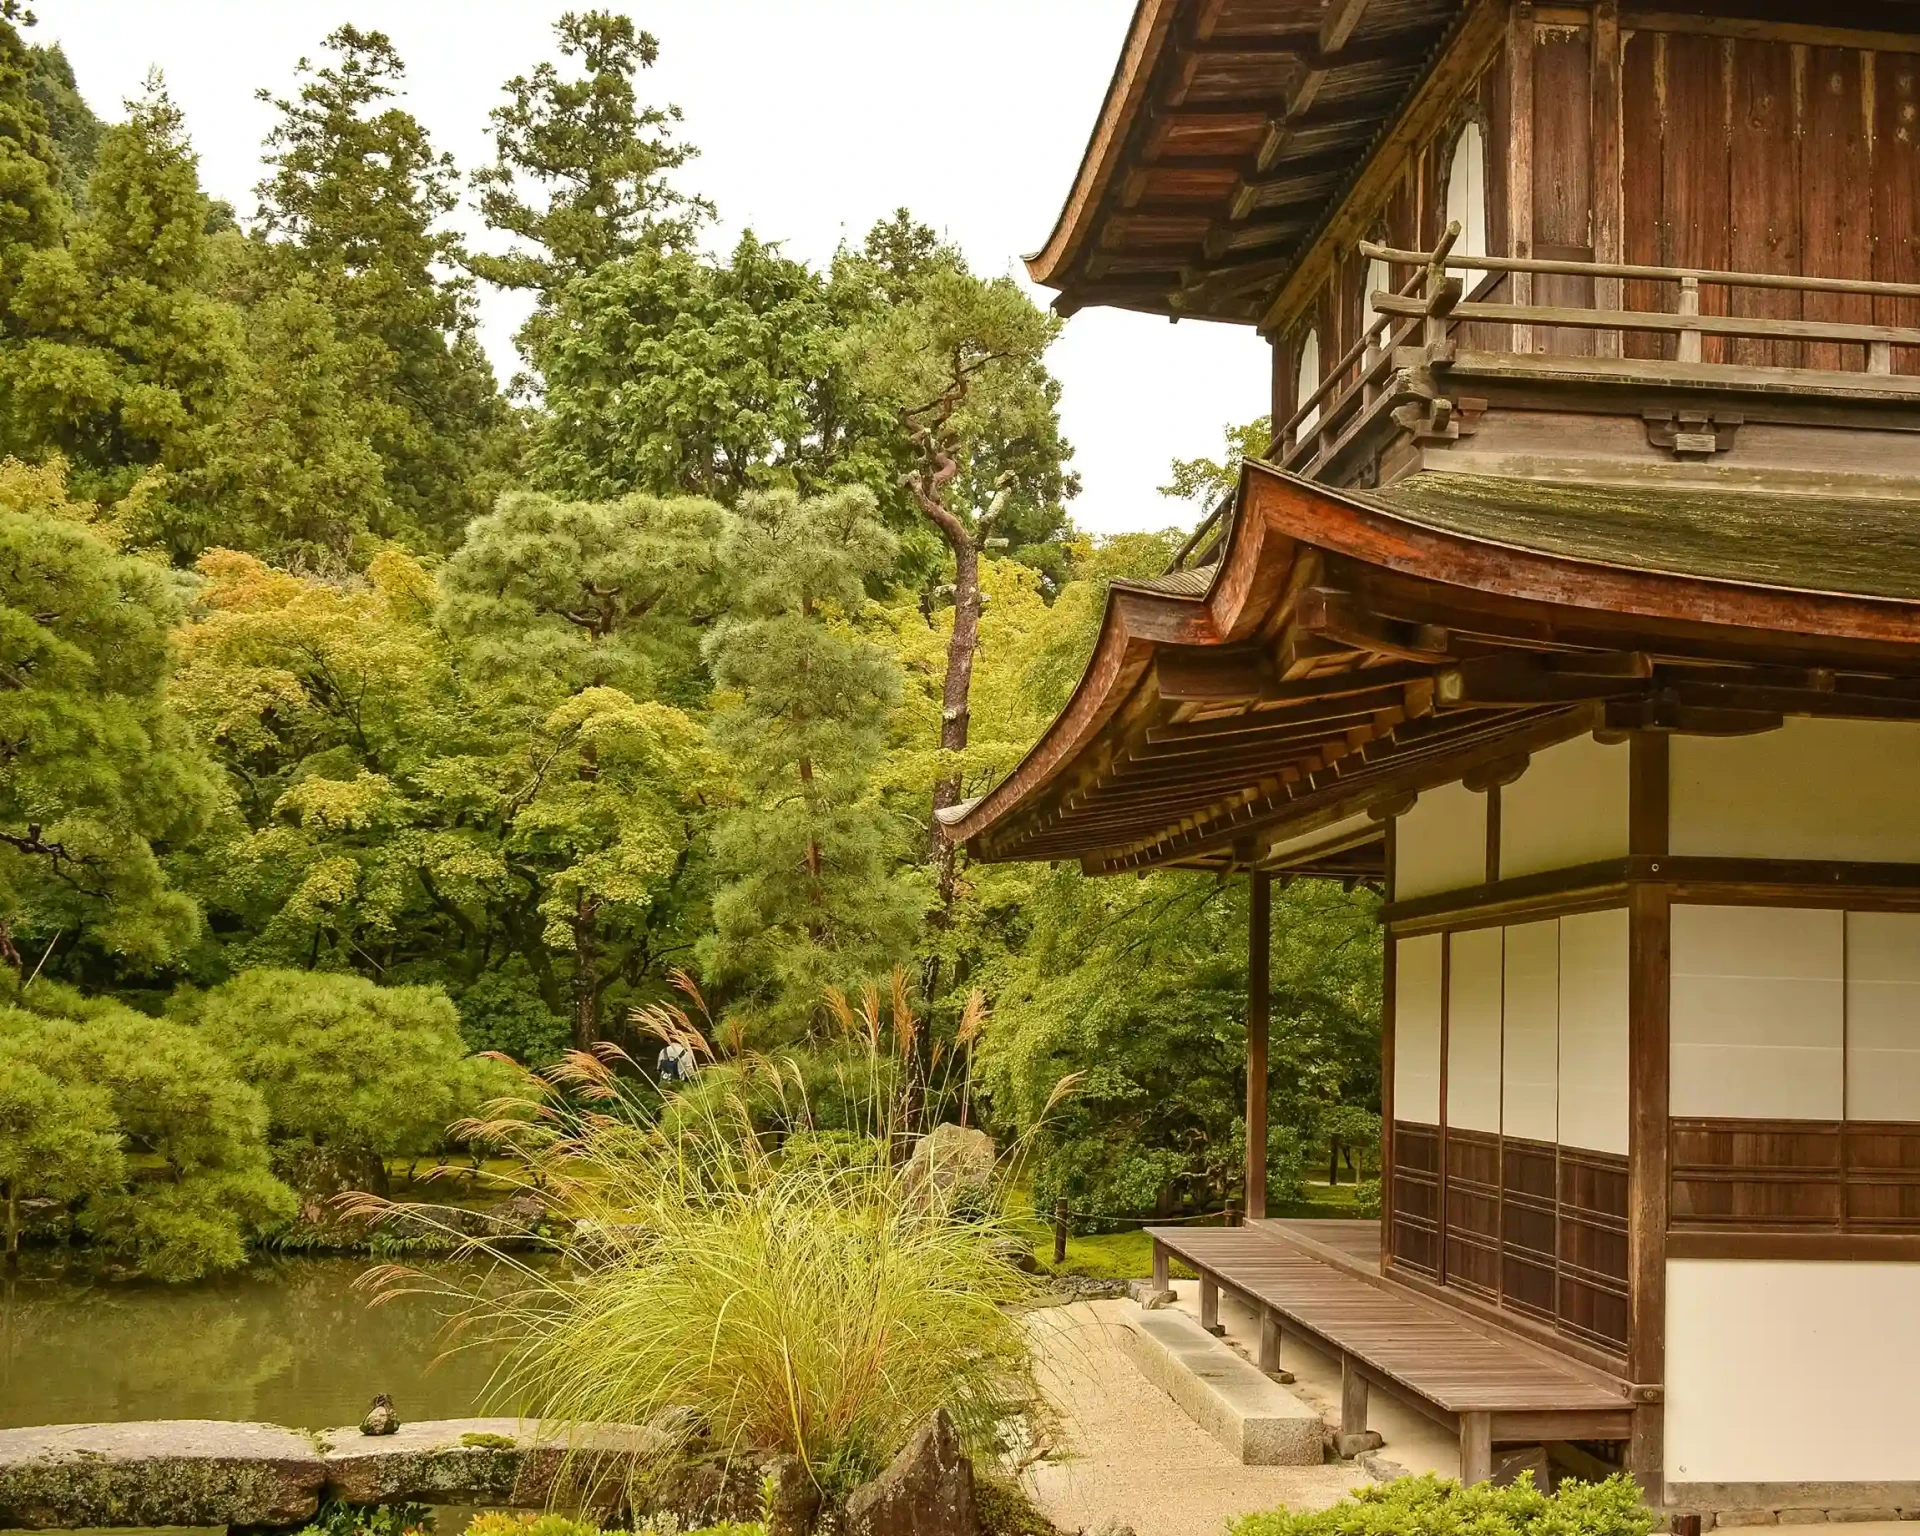
Projecting eaves
Japanese temples have a “noki,” an edge that extends even further beyond the already very wide roof. Its function is to protect the wooden walls from sometimes very heavy rains.
Some artistic references
Many examples of Japanese temples have been depicted in sumi-e (ink and brush) or in ukiyo-e, the traditional printmaking technique widely used in Japan. These works show how apparently complex structures can be rendered in a simple and effective way.
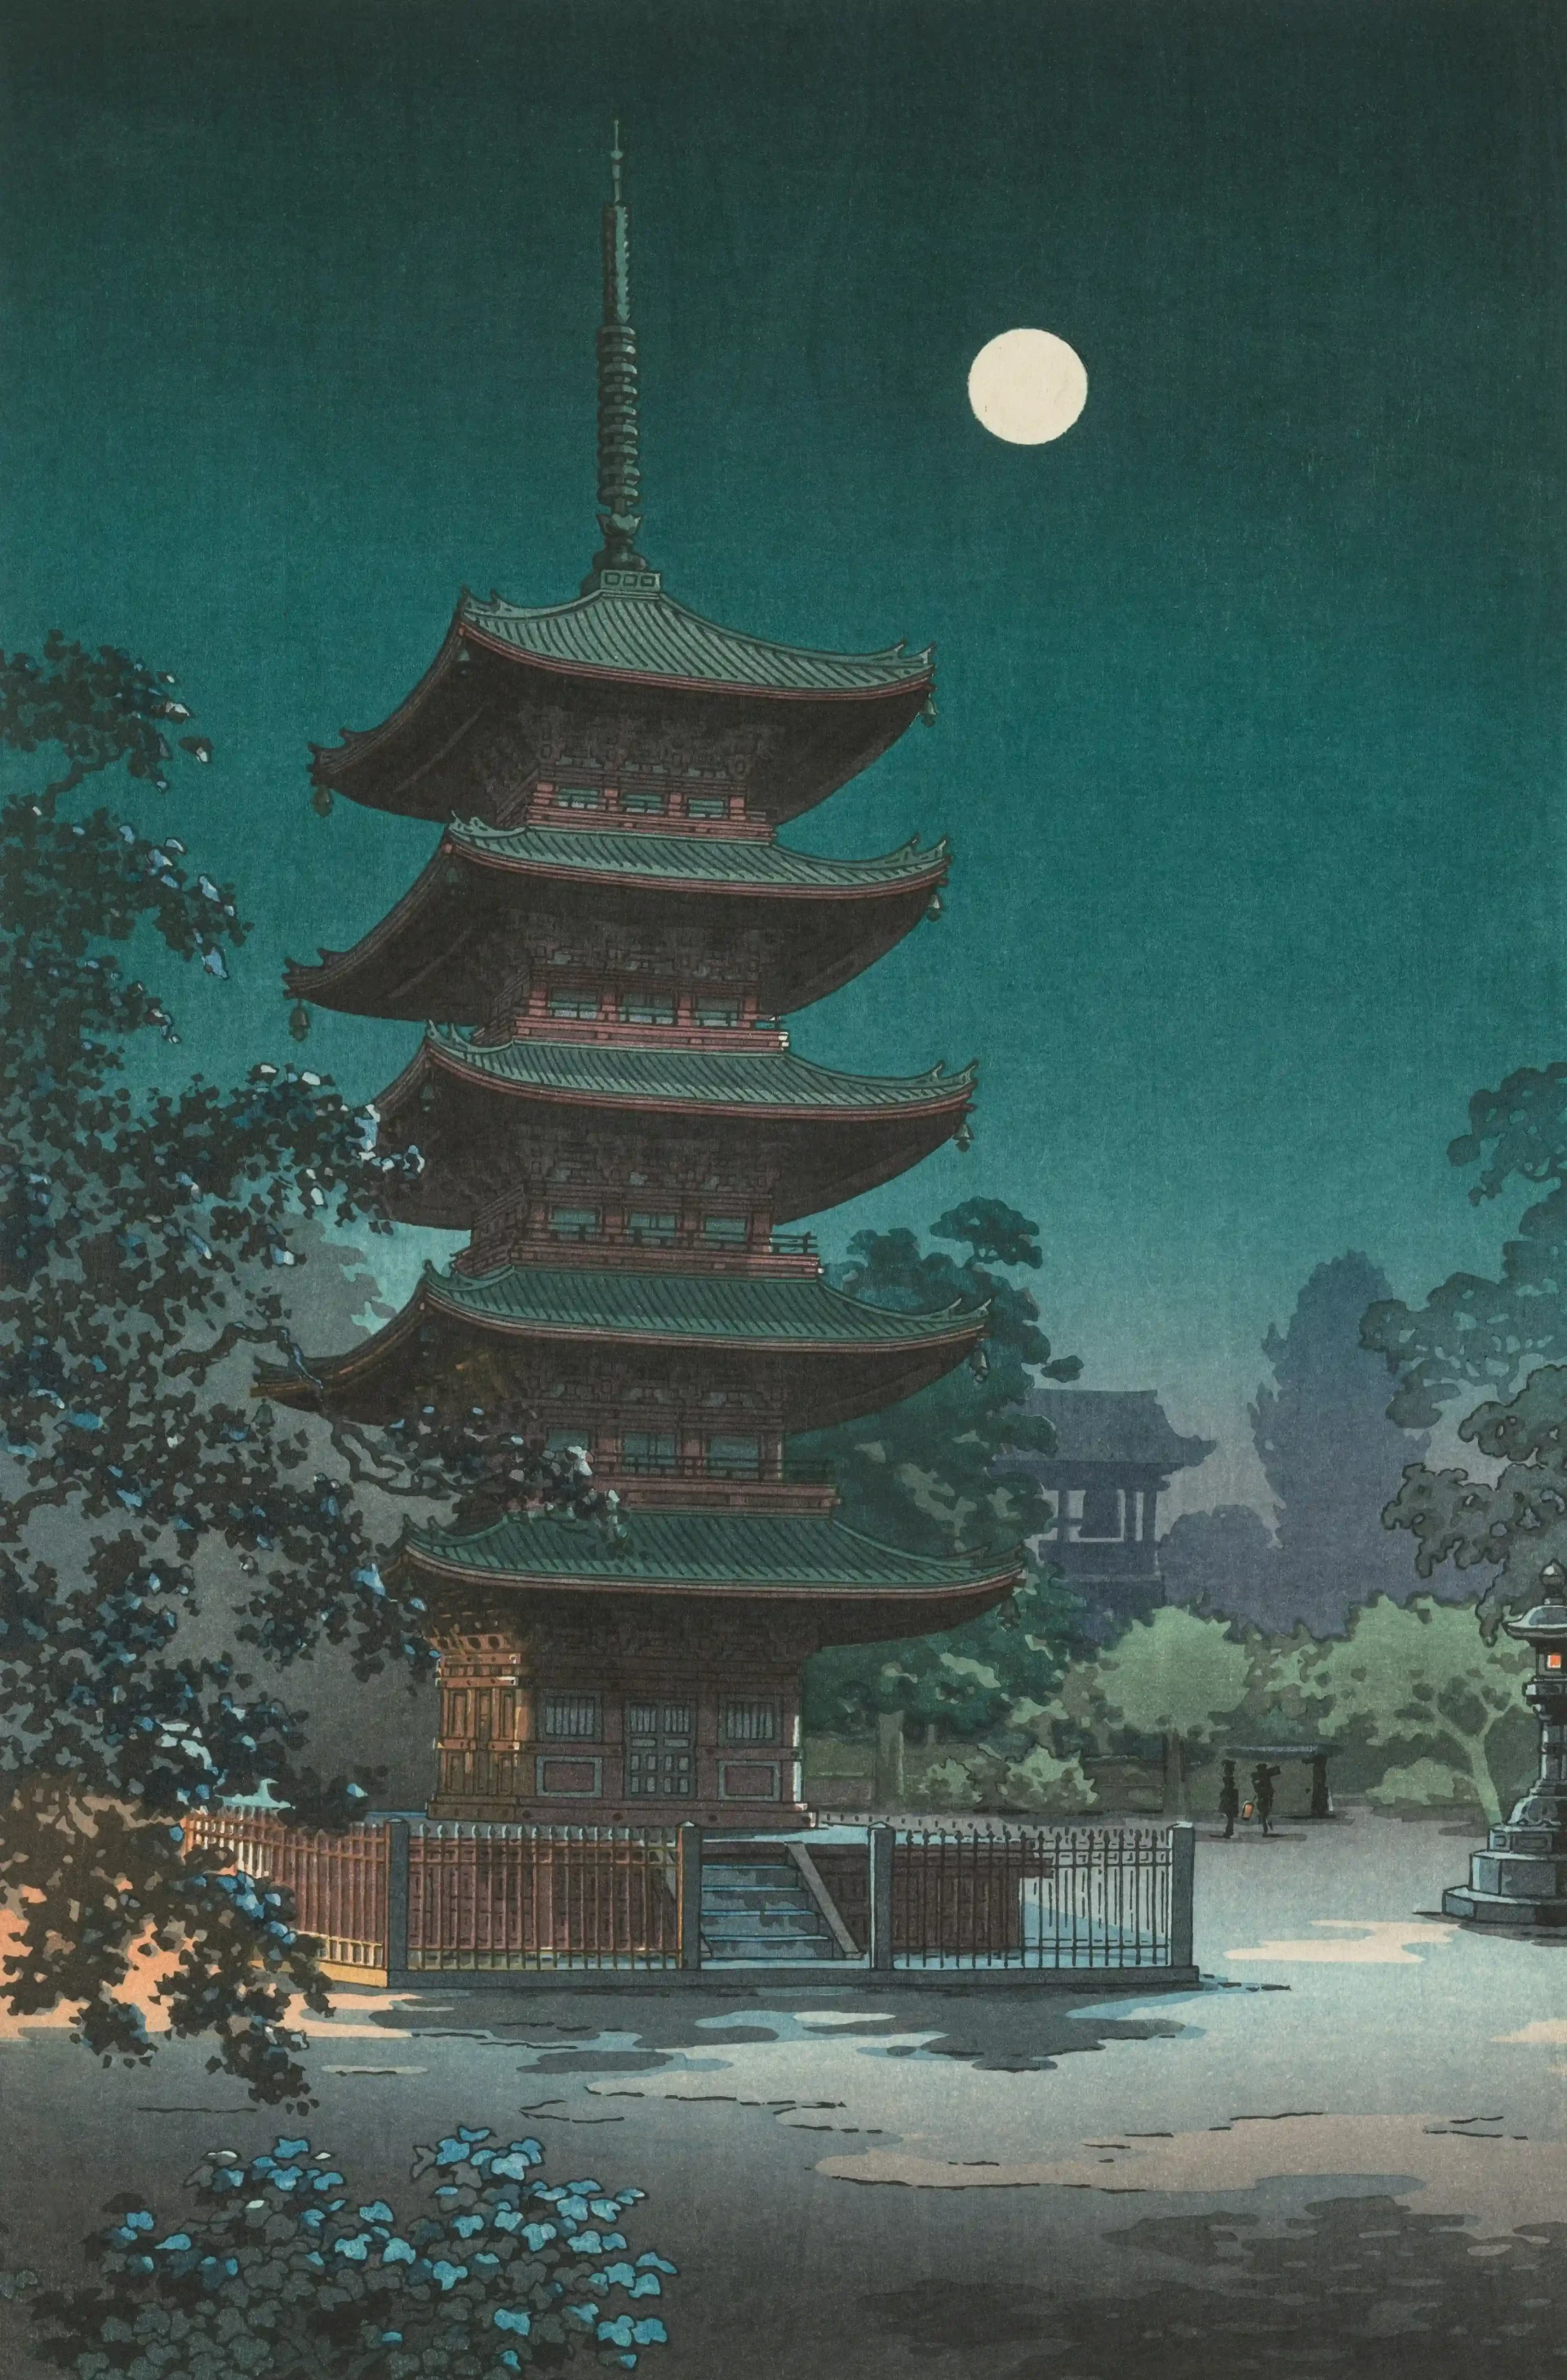
Kinryuzan Temple in Asakusa (1938), Tsuchiya Koitsu.
Materials before drawing
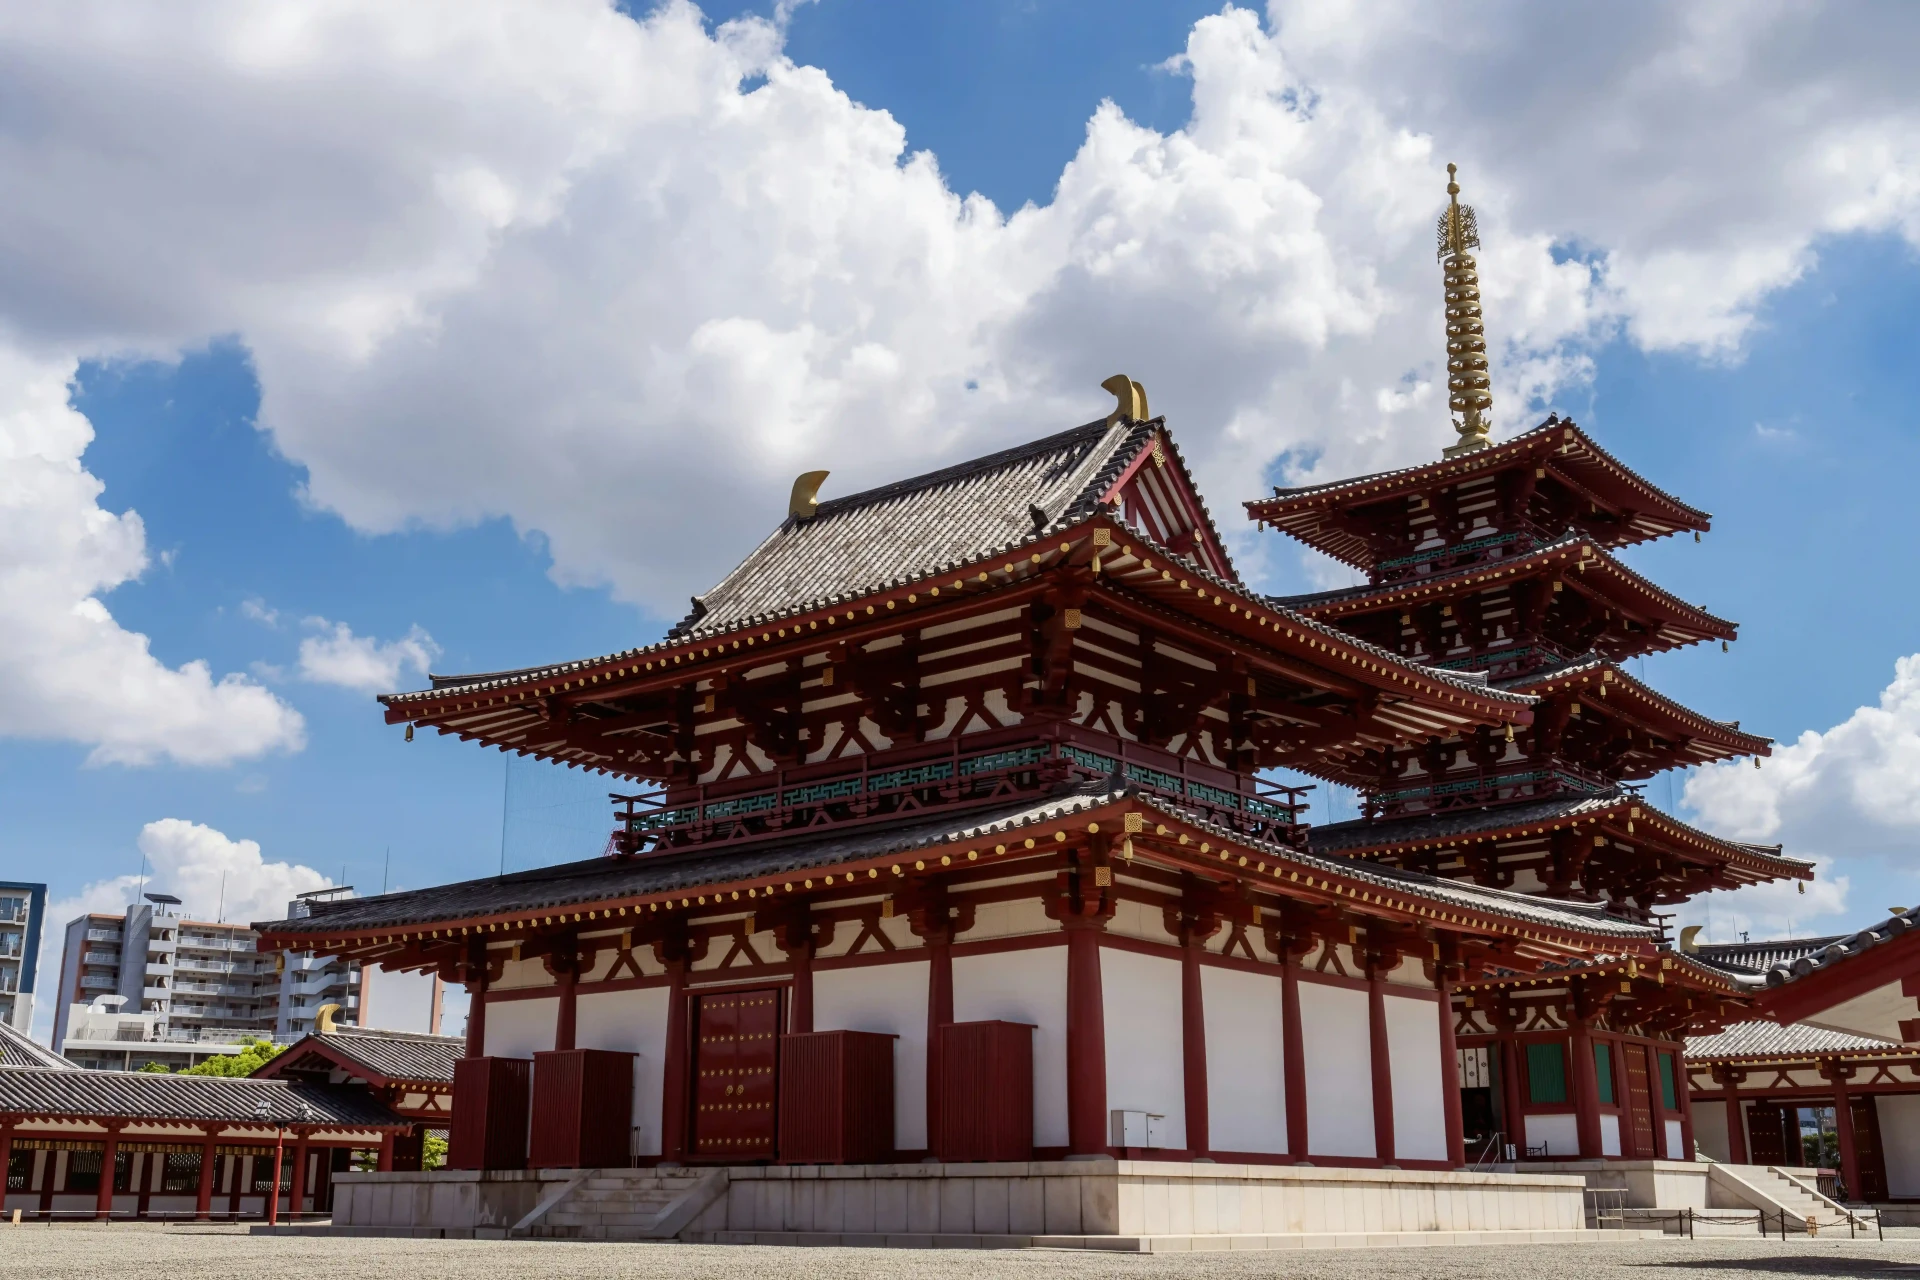
For this tutorial, we will use the Shitennō-ji temple, located in Osaka. Founded around 590 AD, it is one of the oldest temples in Japan.
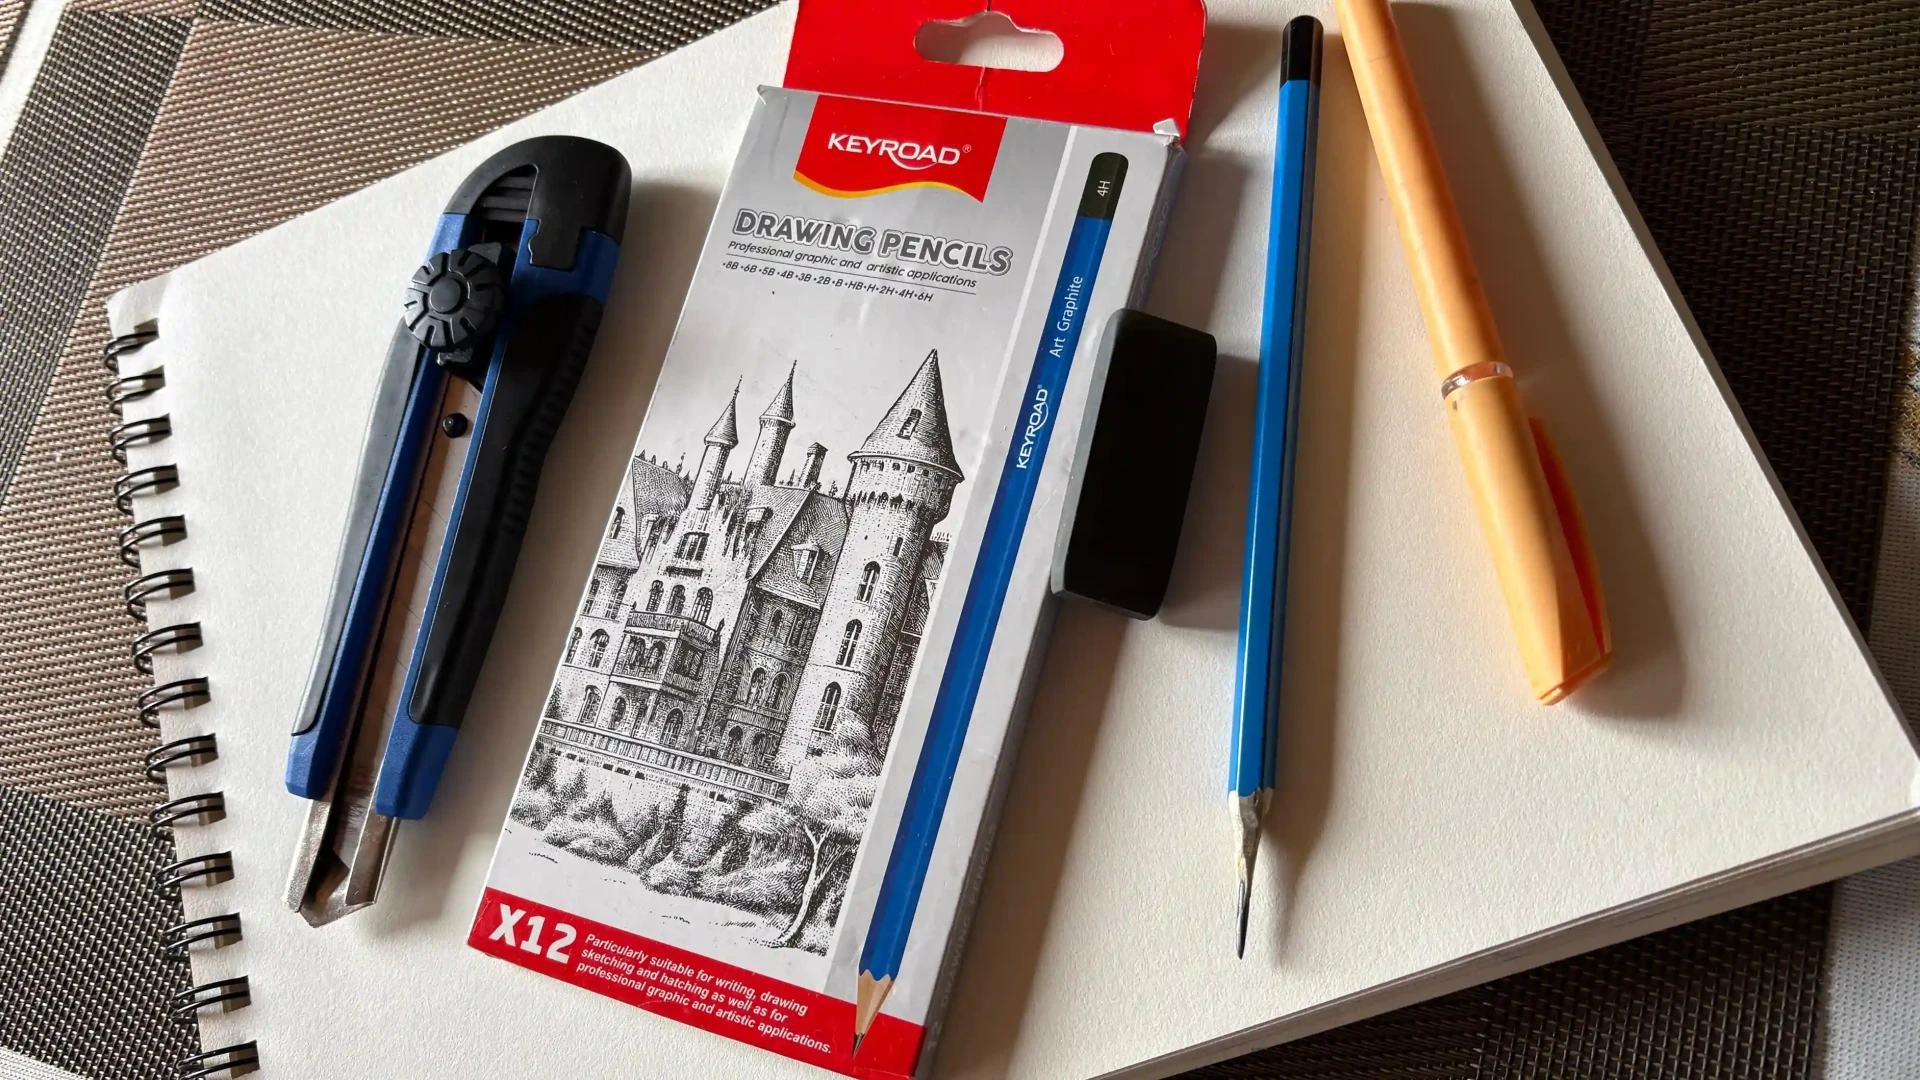
Regarding materials, prepare your sketchbook, a graphite pencil, an eraser, a ruler or set square, and a pen or marker for inking.
How to draw a Japanese temple step by step
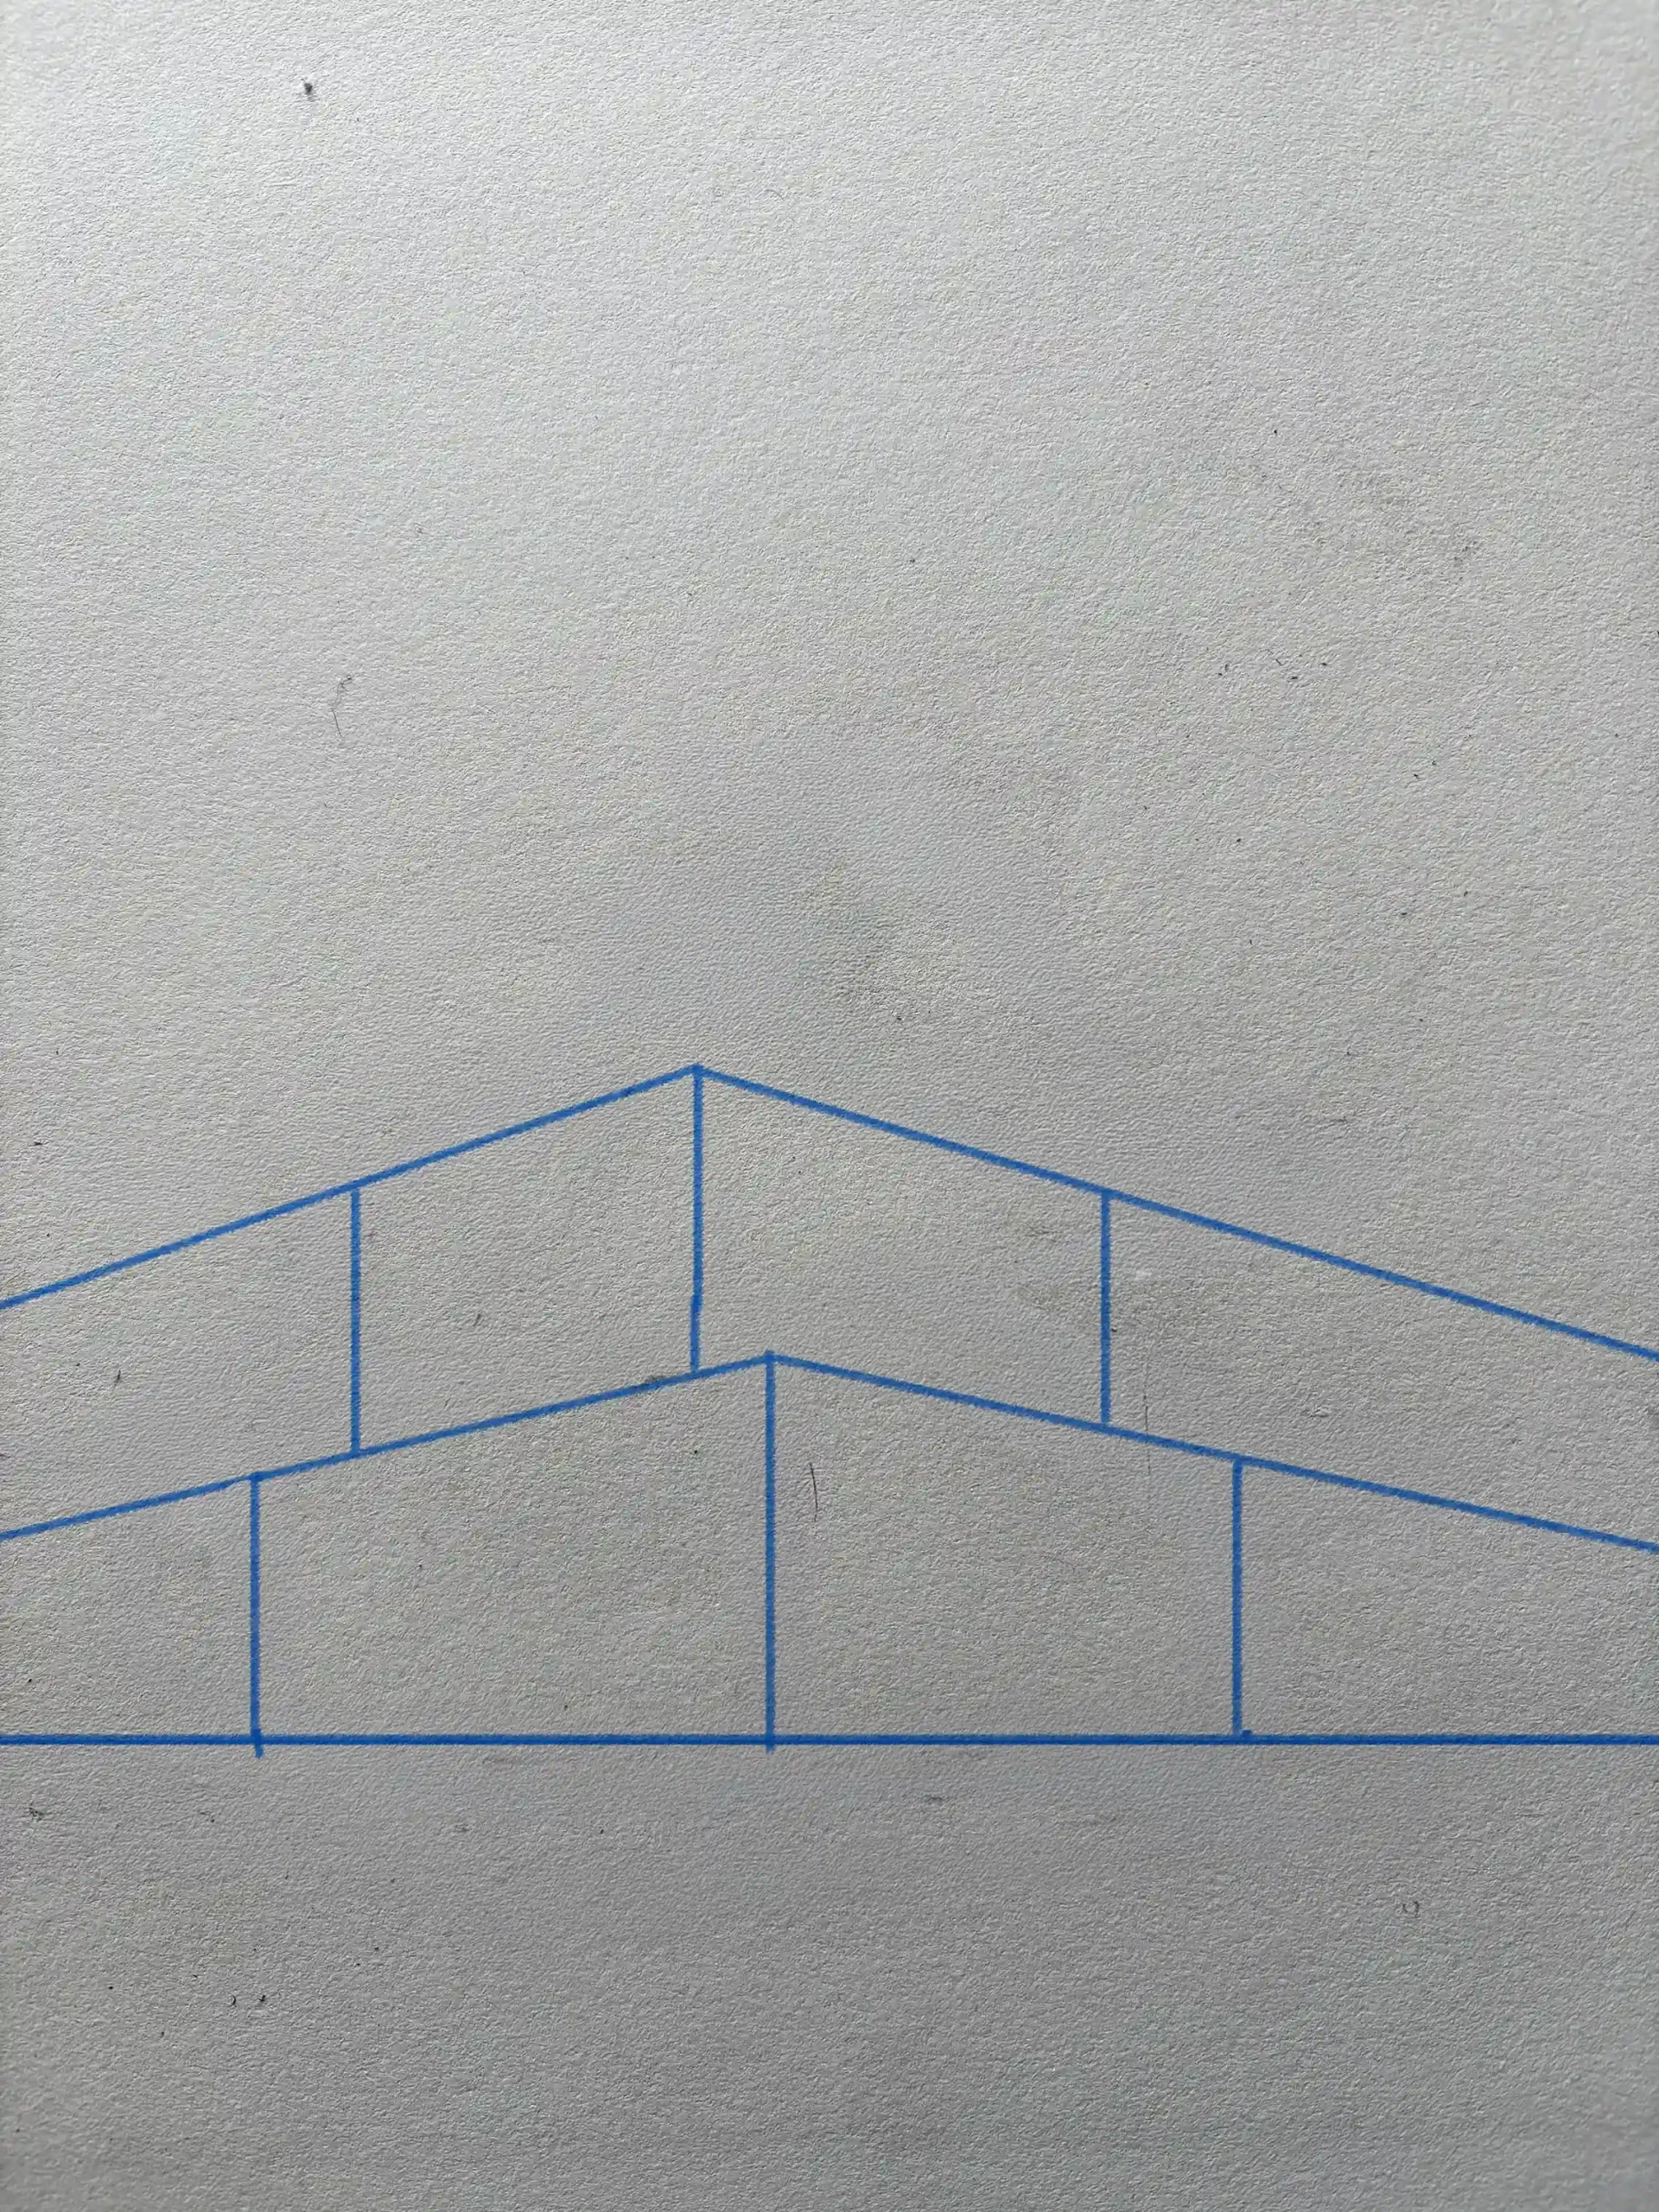
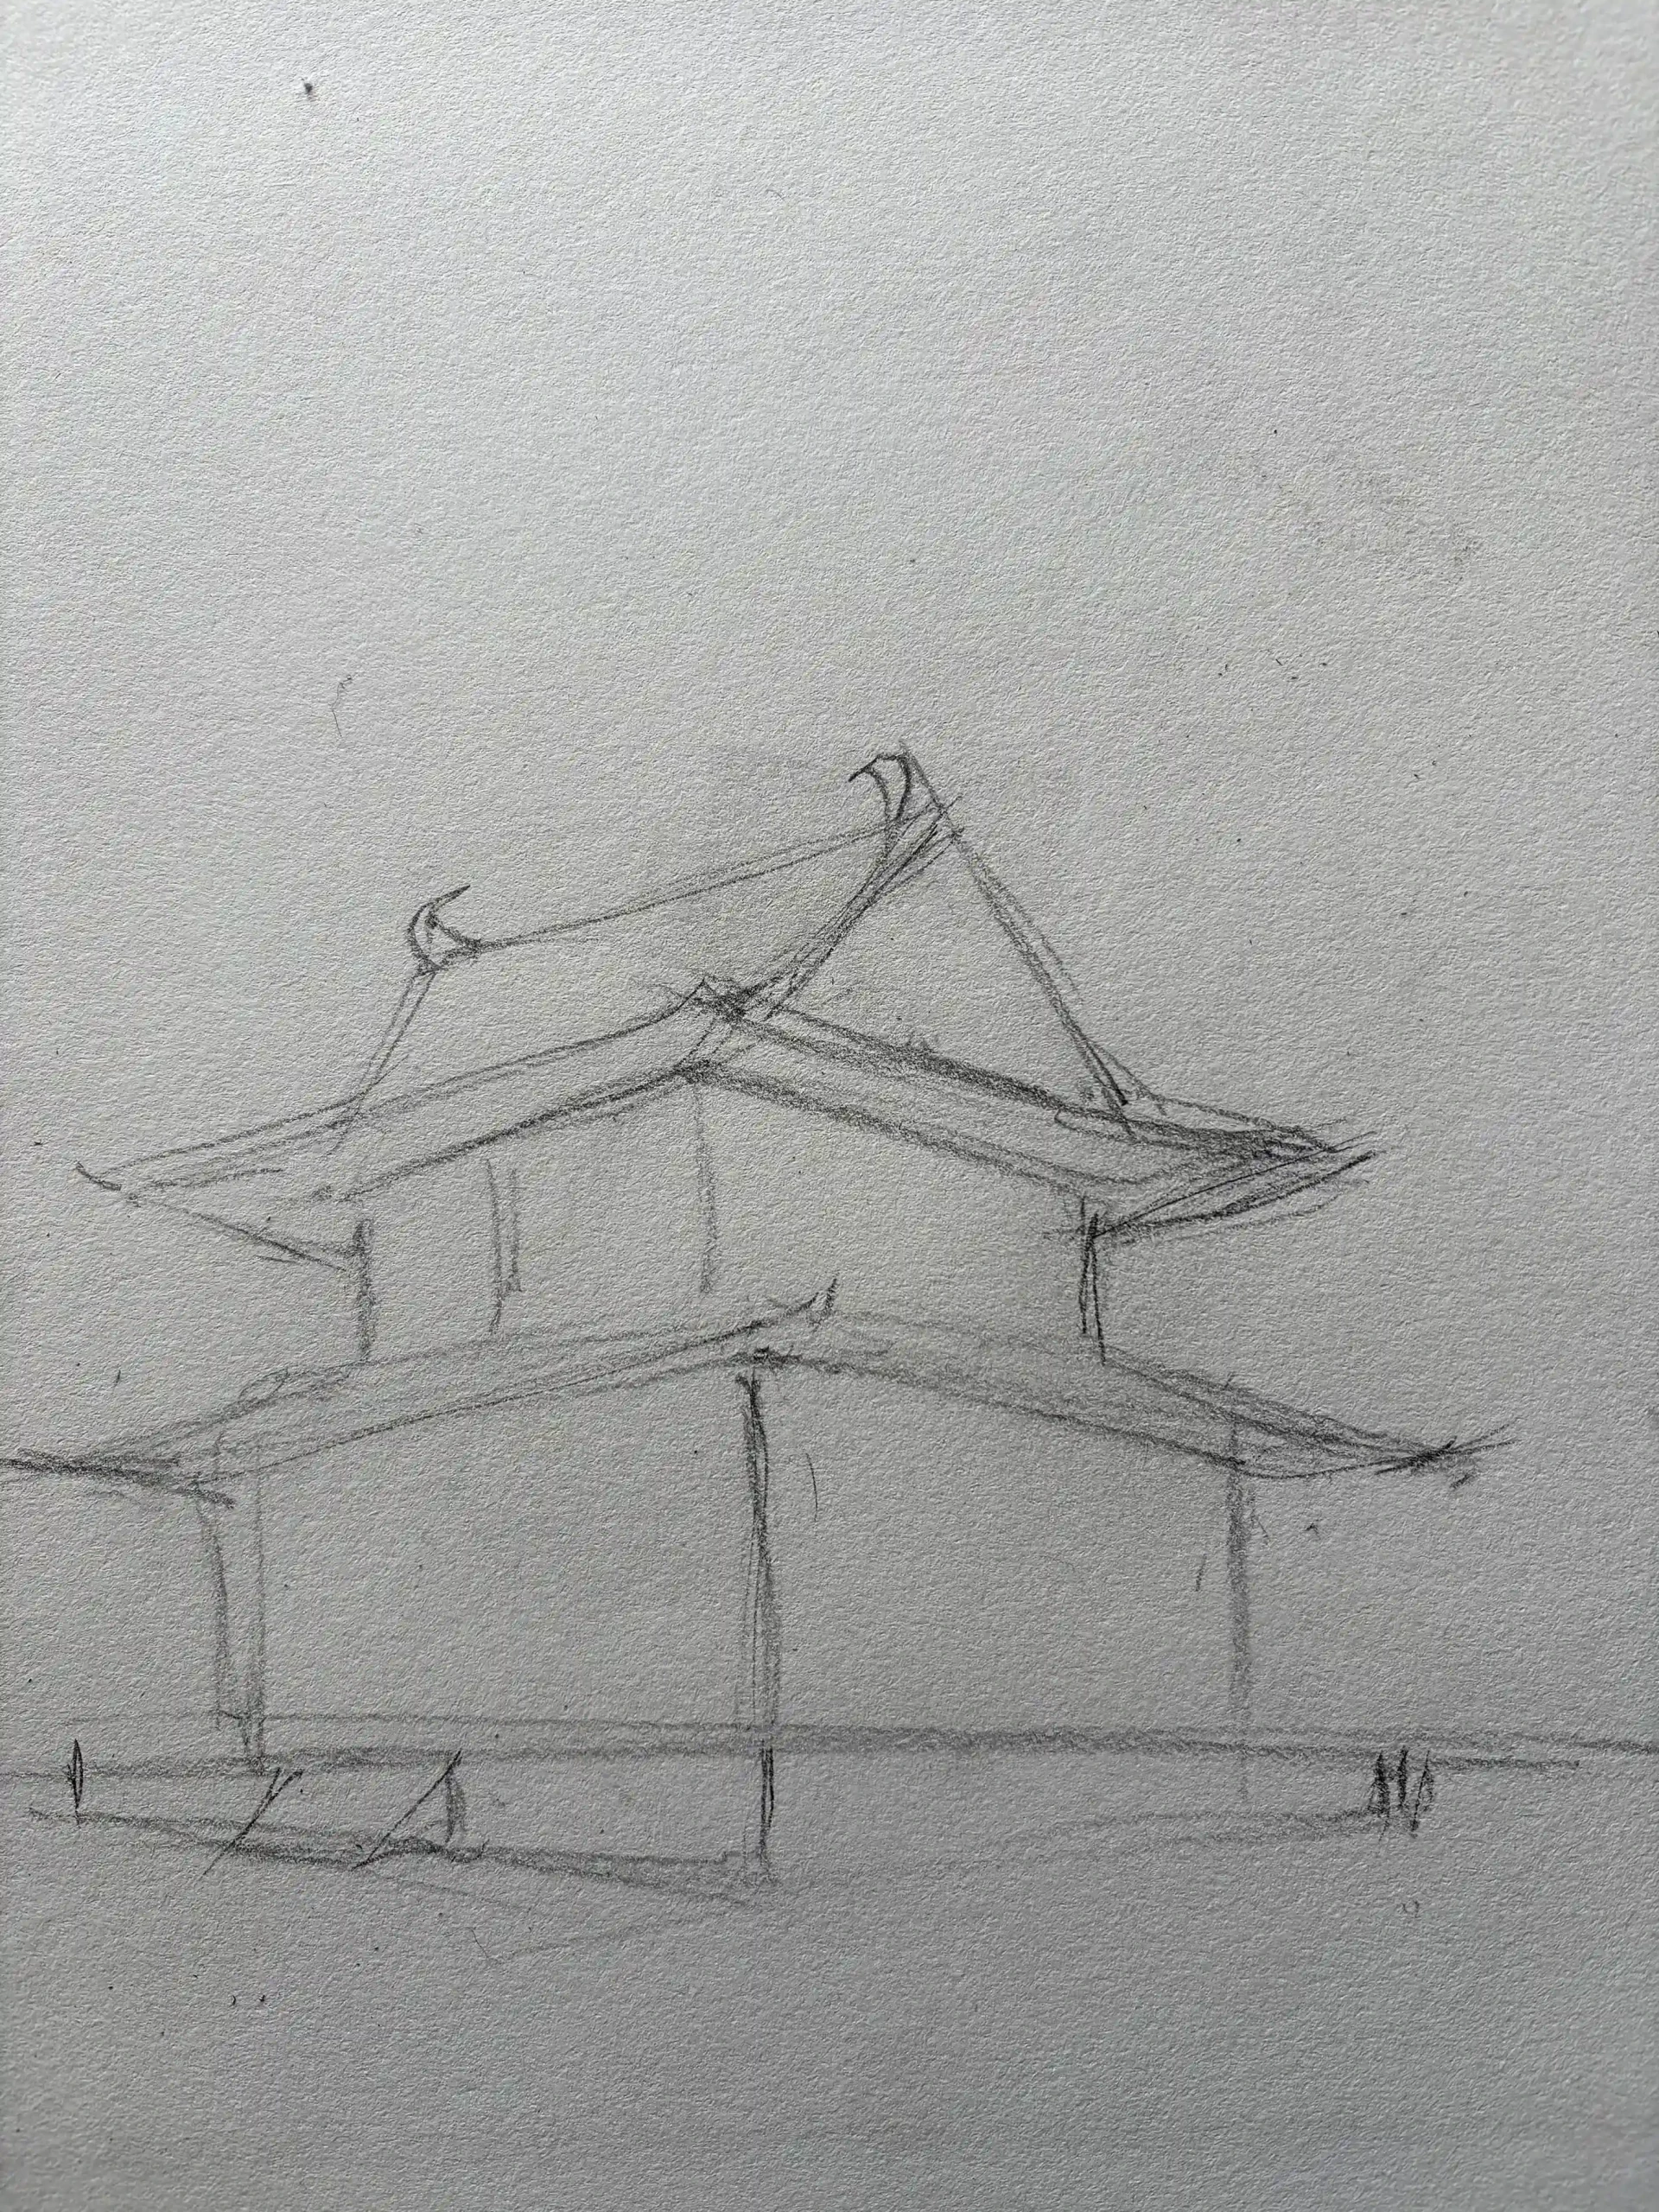
Start by drawing a box in two-point perspective, then draw a slightly smaller box inside.
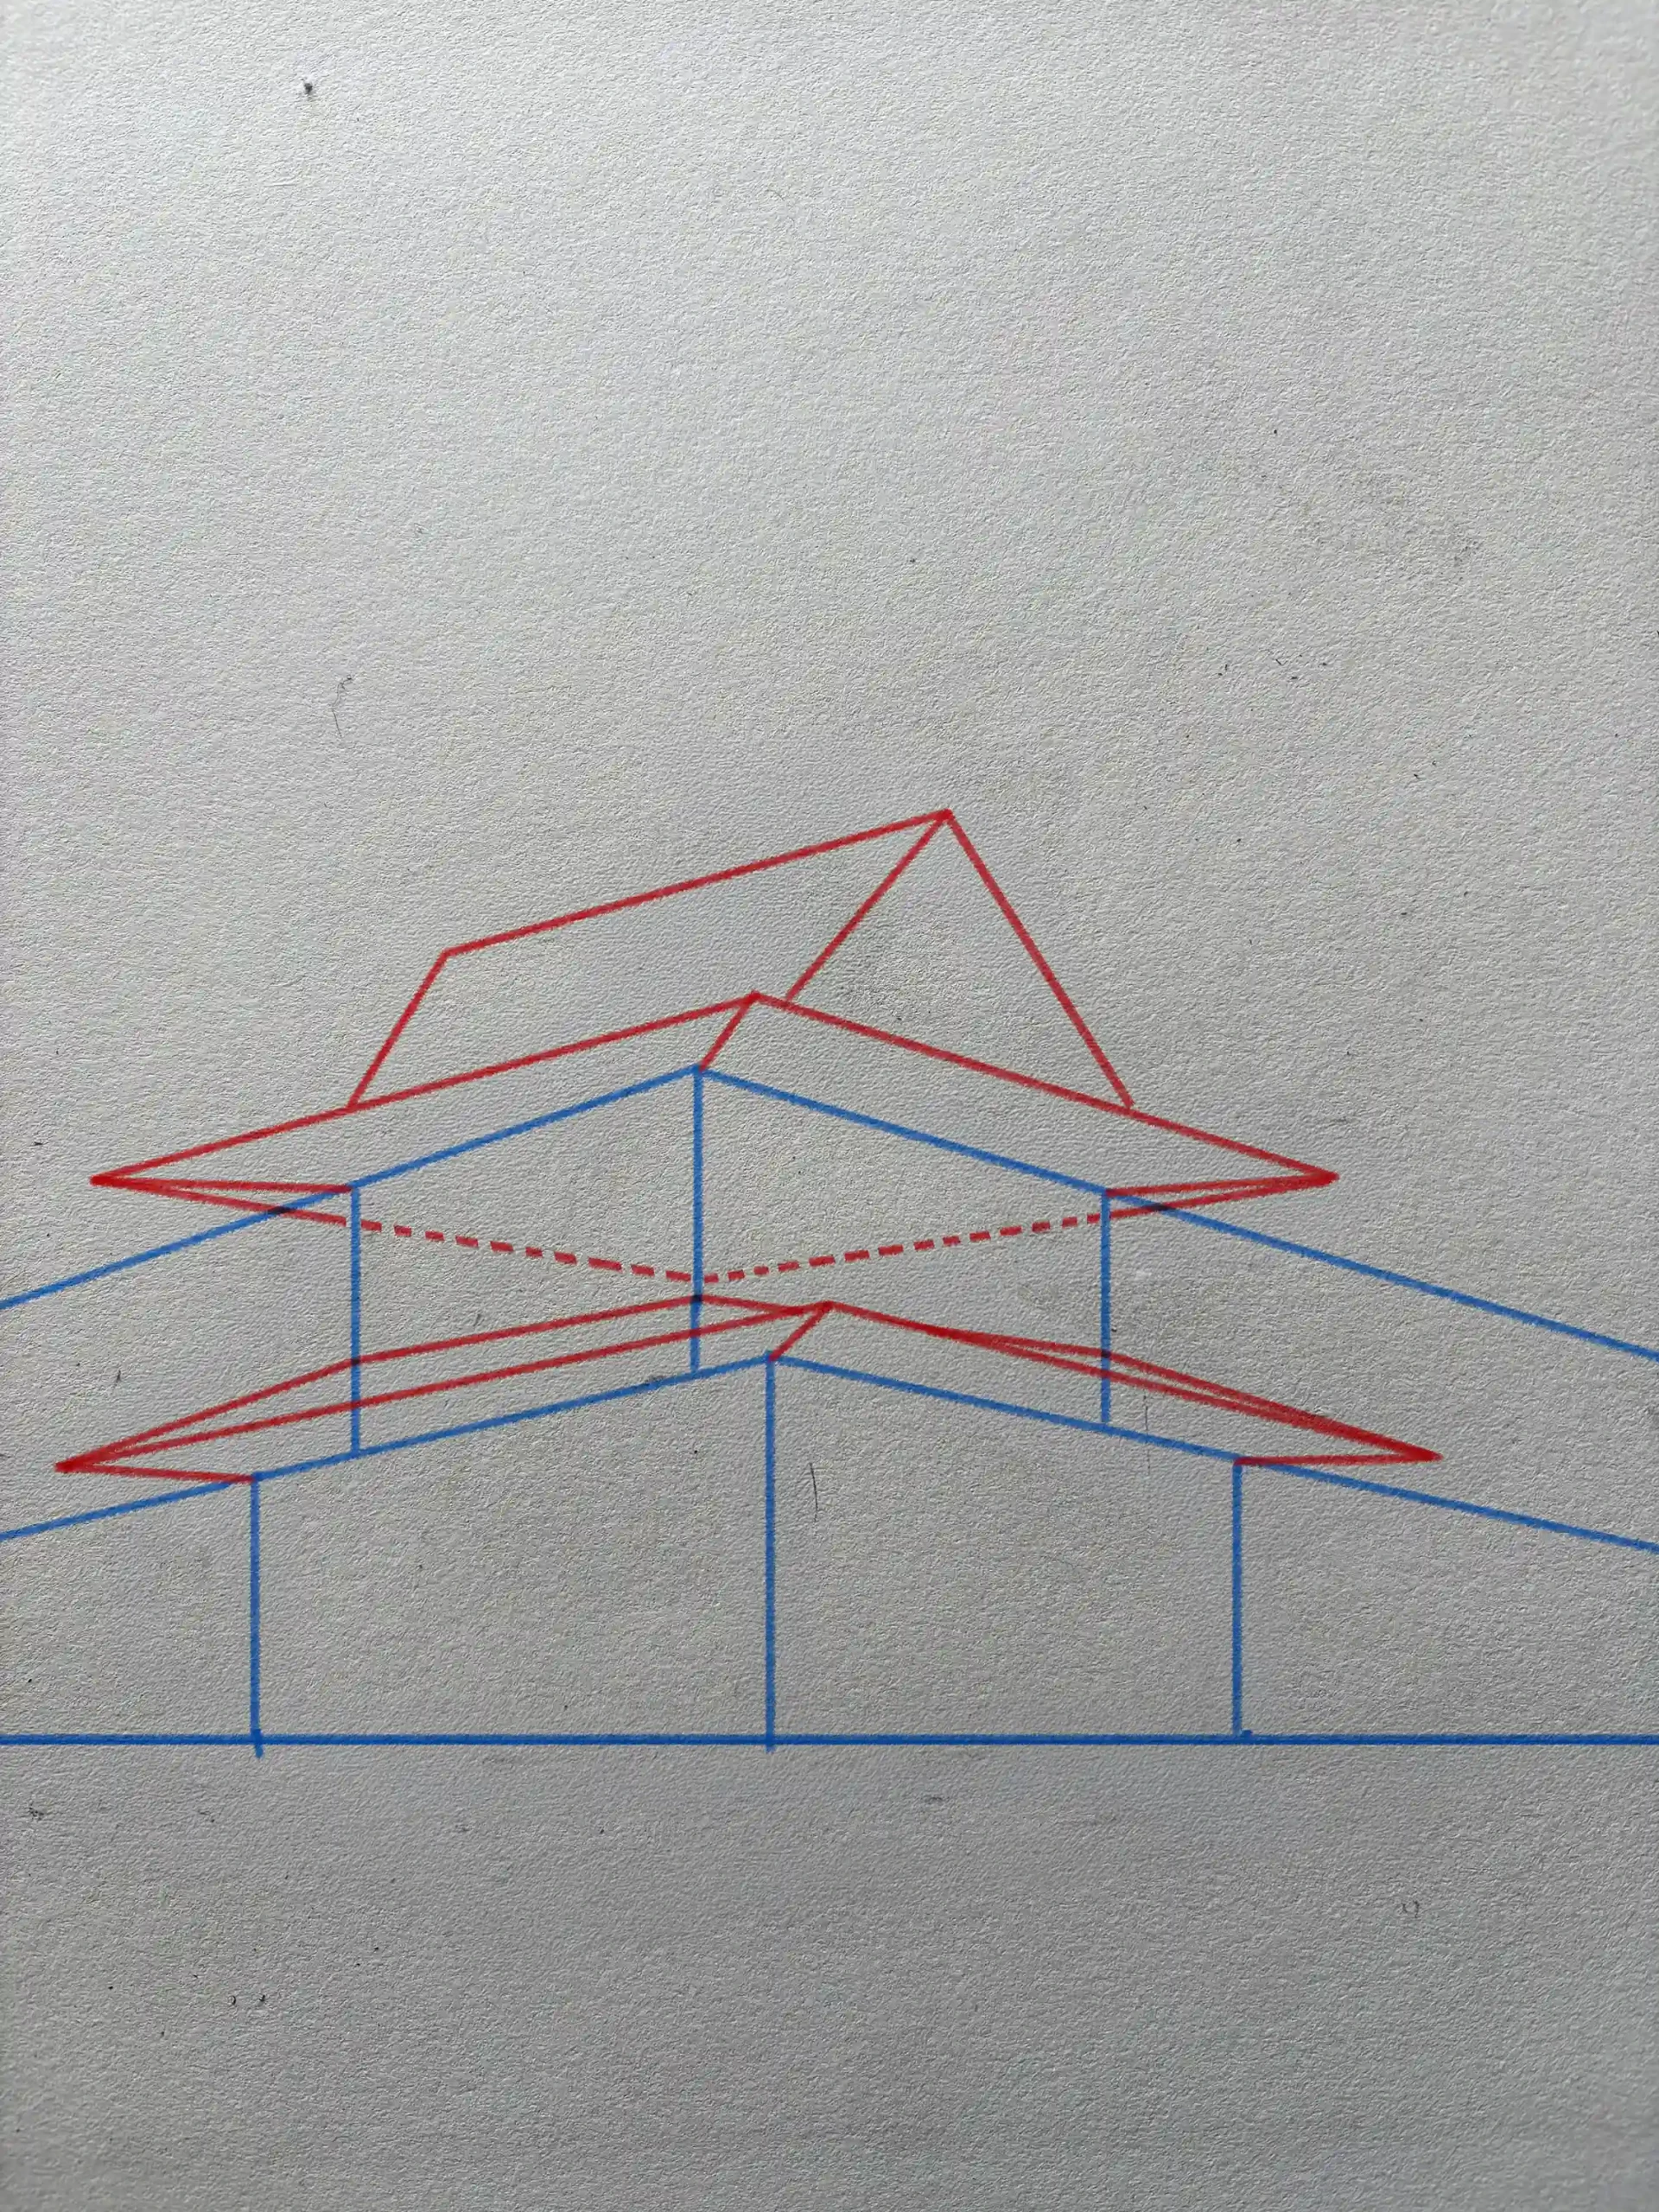
From each corner, draw a line angled slightly upwards to achieve the curved effect characteristic of the roofs. Then, connect these lines to each other and to the walls of the base boxes.
Sketch the main structure of the temple, positioning yourself a good distance from the paper so you can observe the whole picture.
For the pagoda in the background, use even looser and less defined strokes; this will naturally place it in the background.
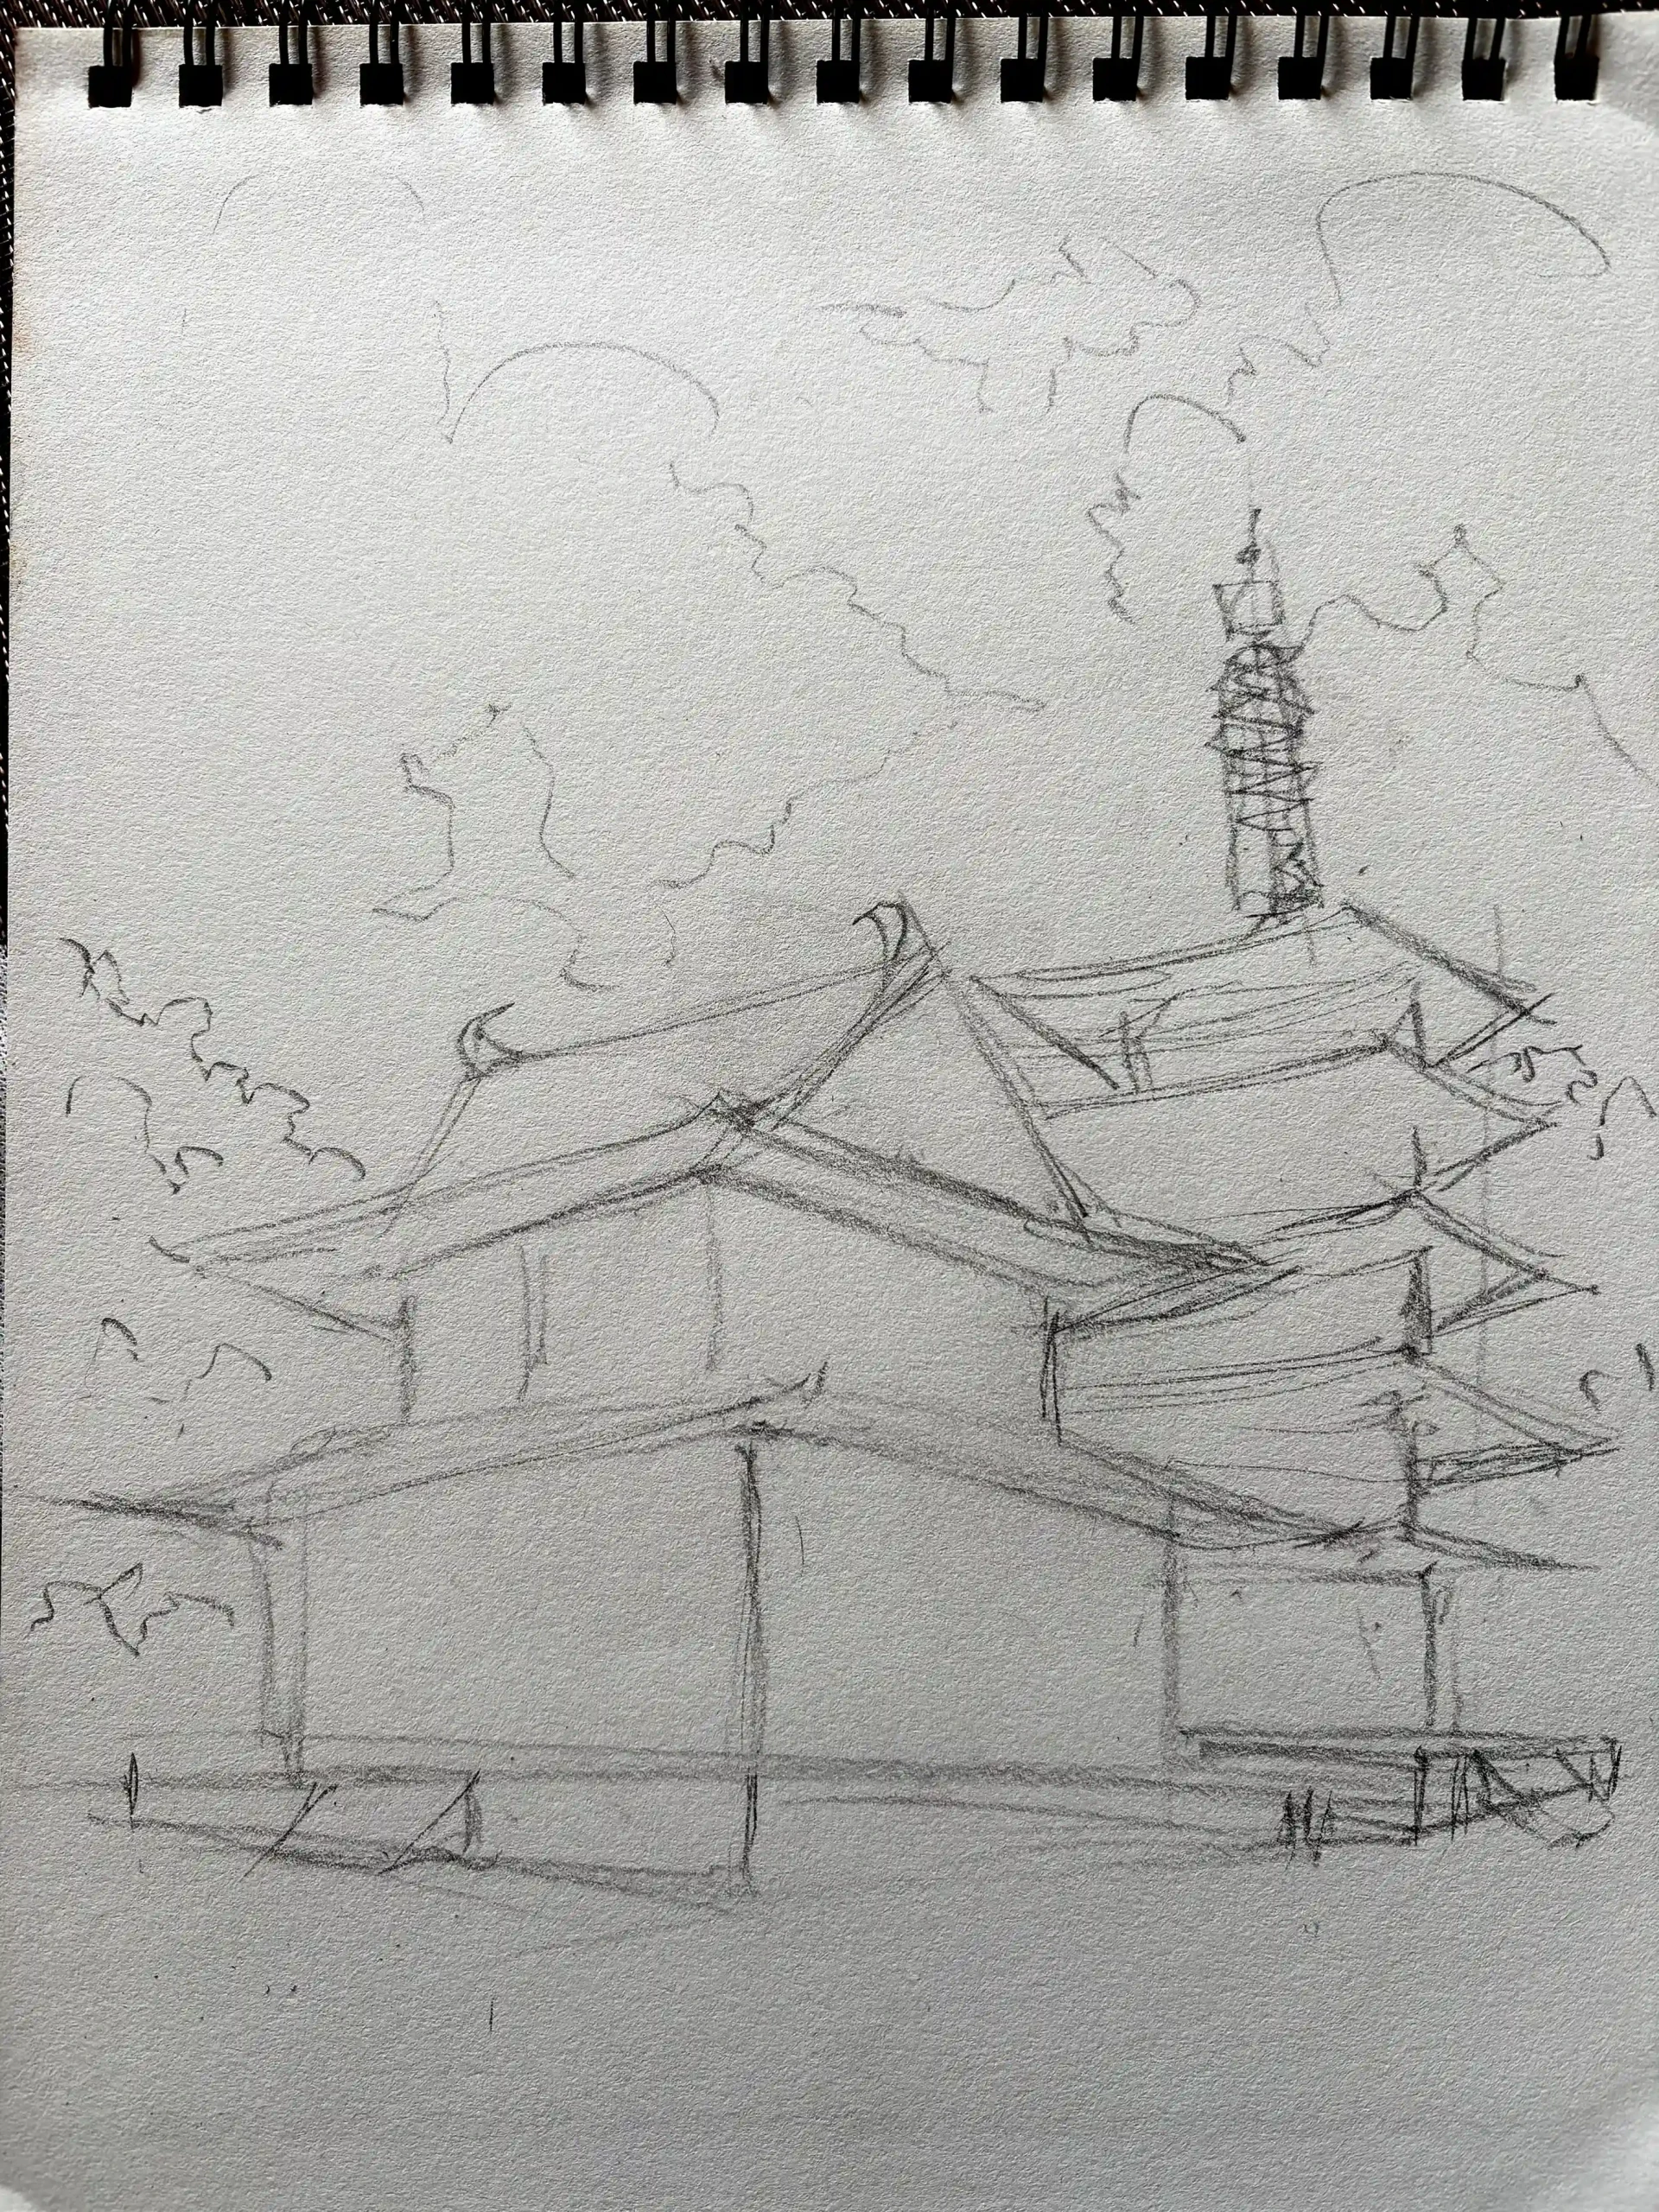
Line drawing with a pen or pencil
Start with the stone base: first, draw the horizontal lines for the different levels, then divide them into blocks or slabs.
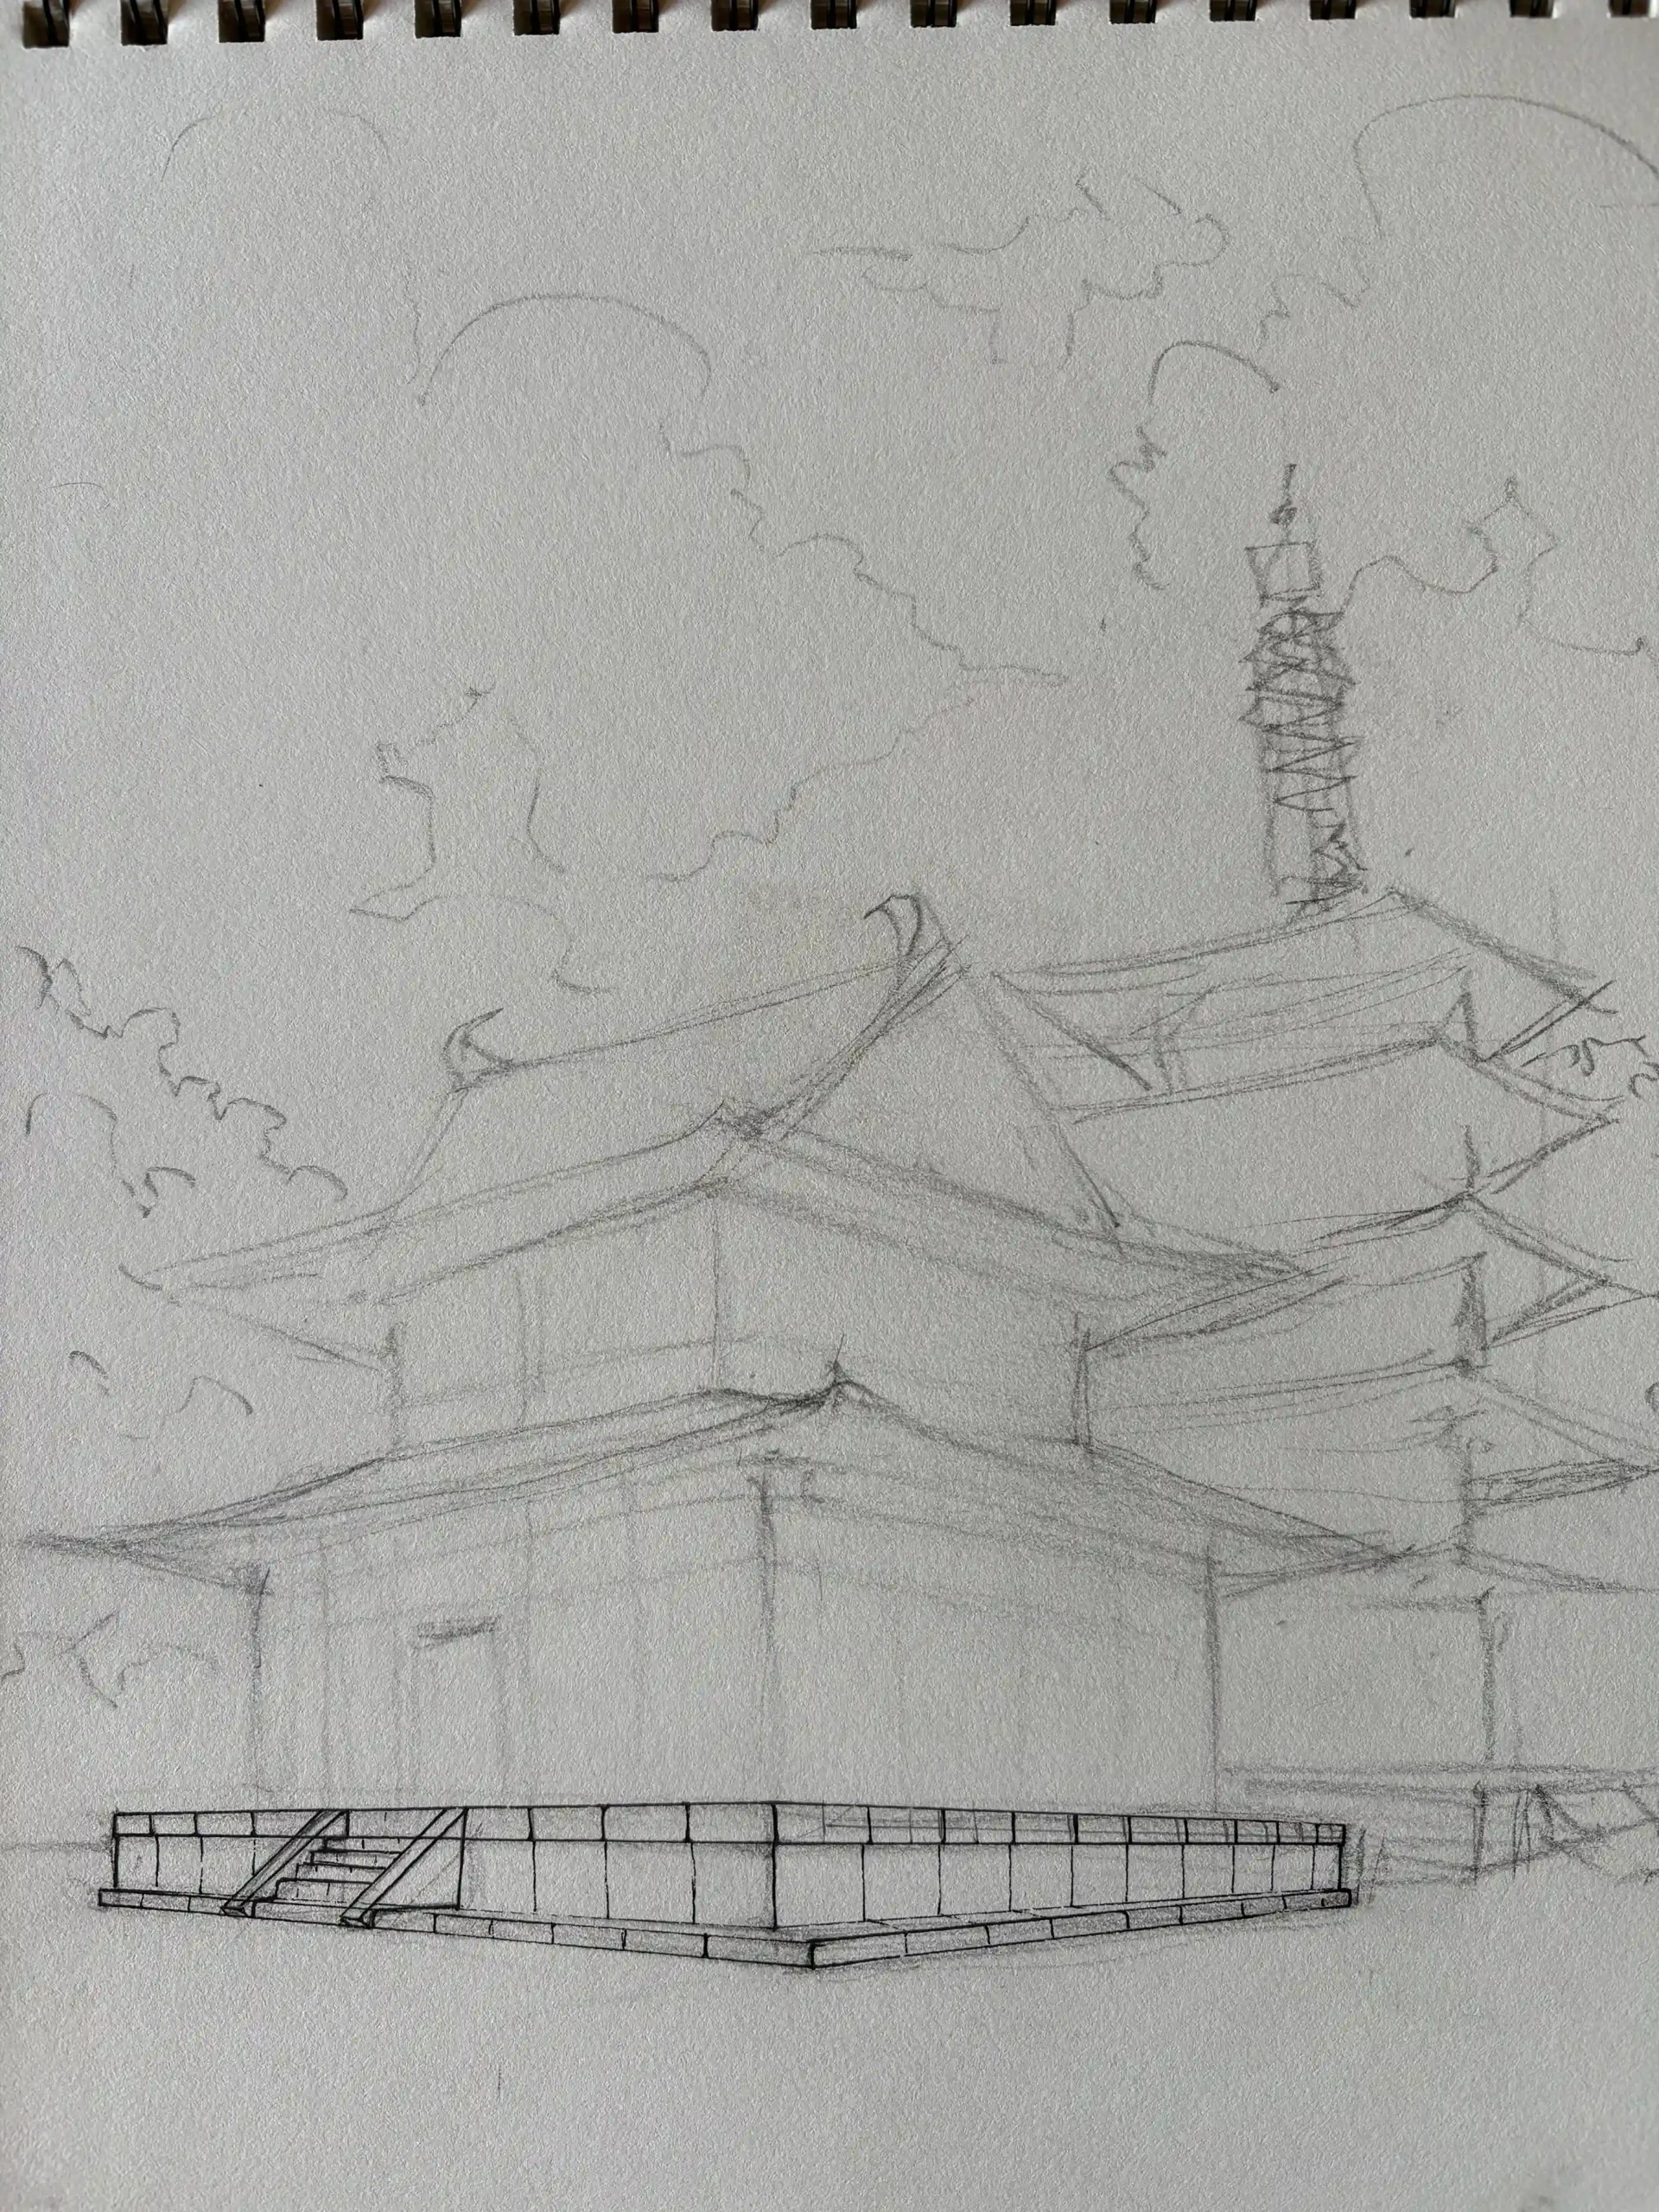
Next, move on to the walls of the first level, decorated with curved columns that support a pattern of wooden beams. Place the entrance at the front.
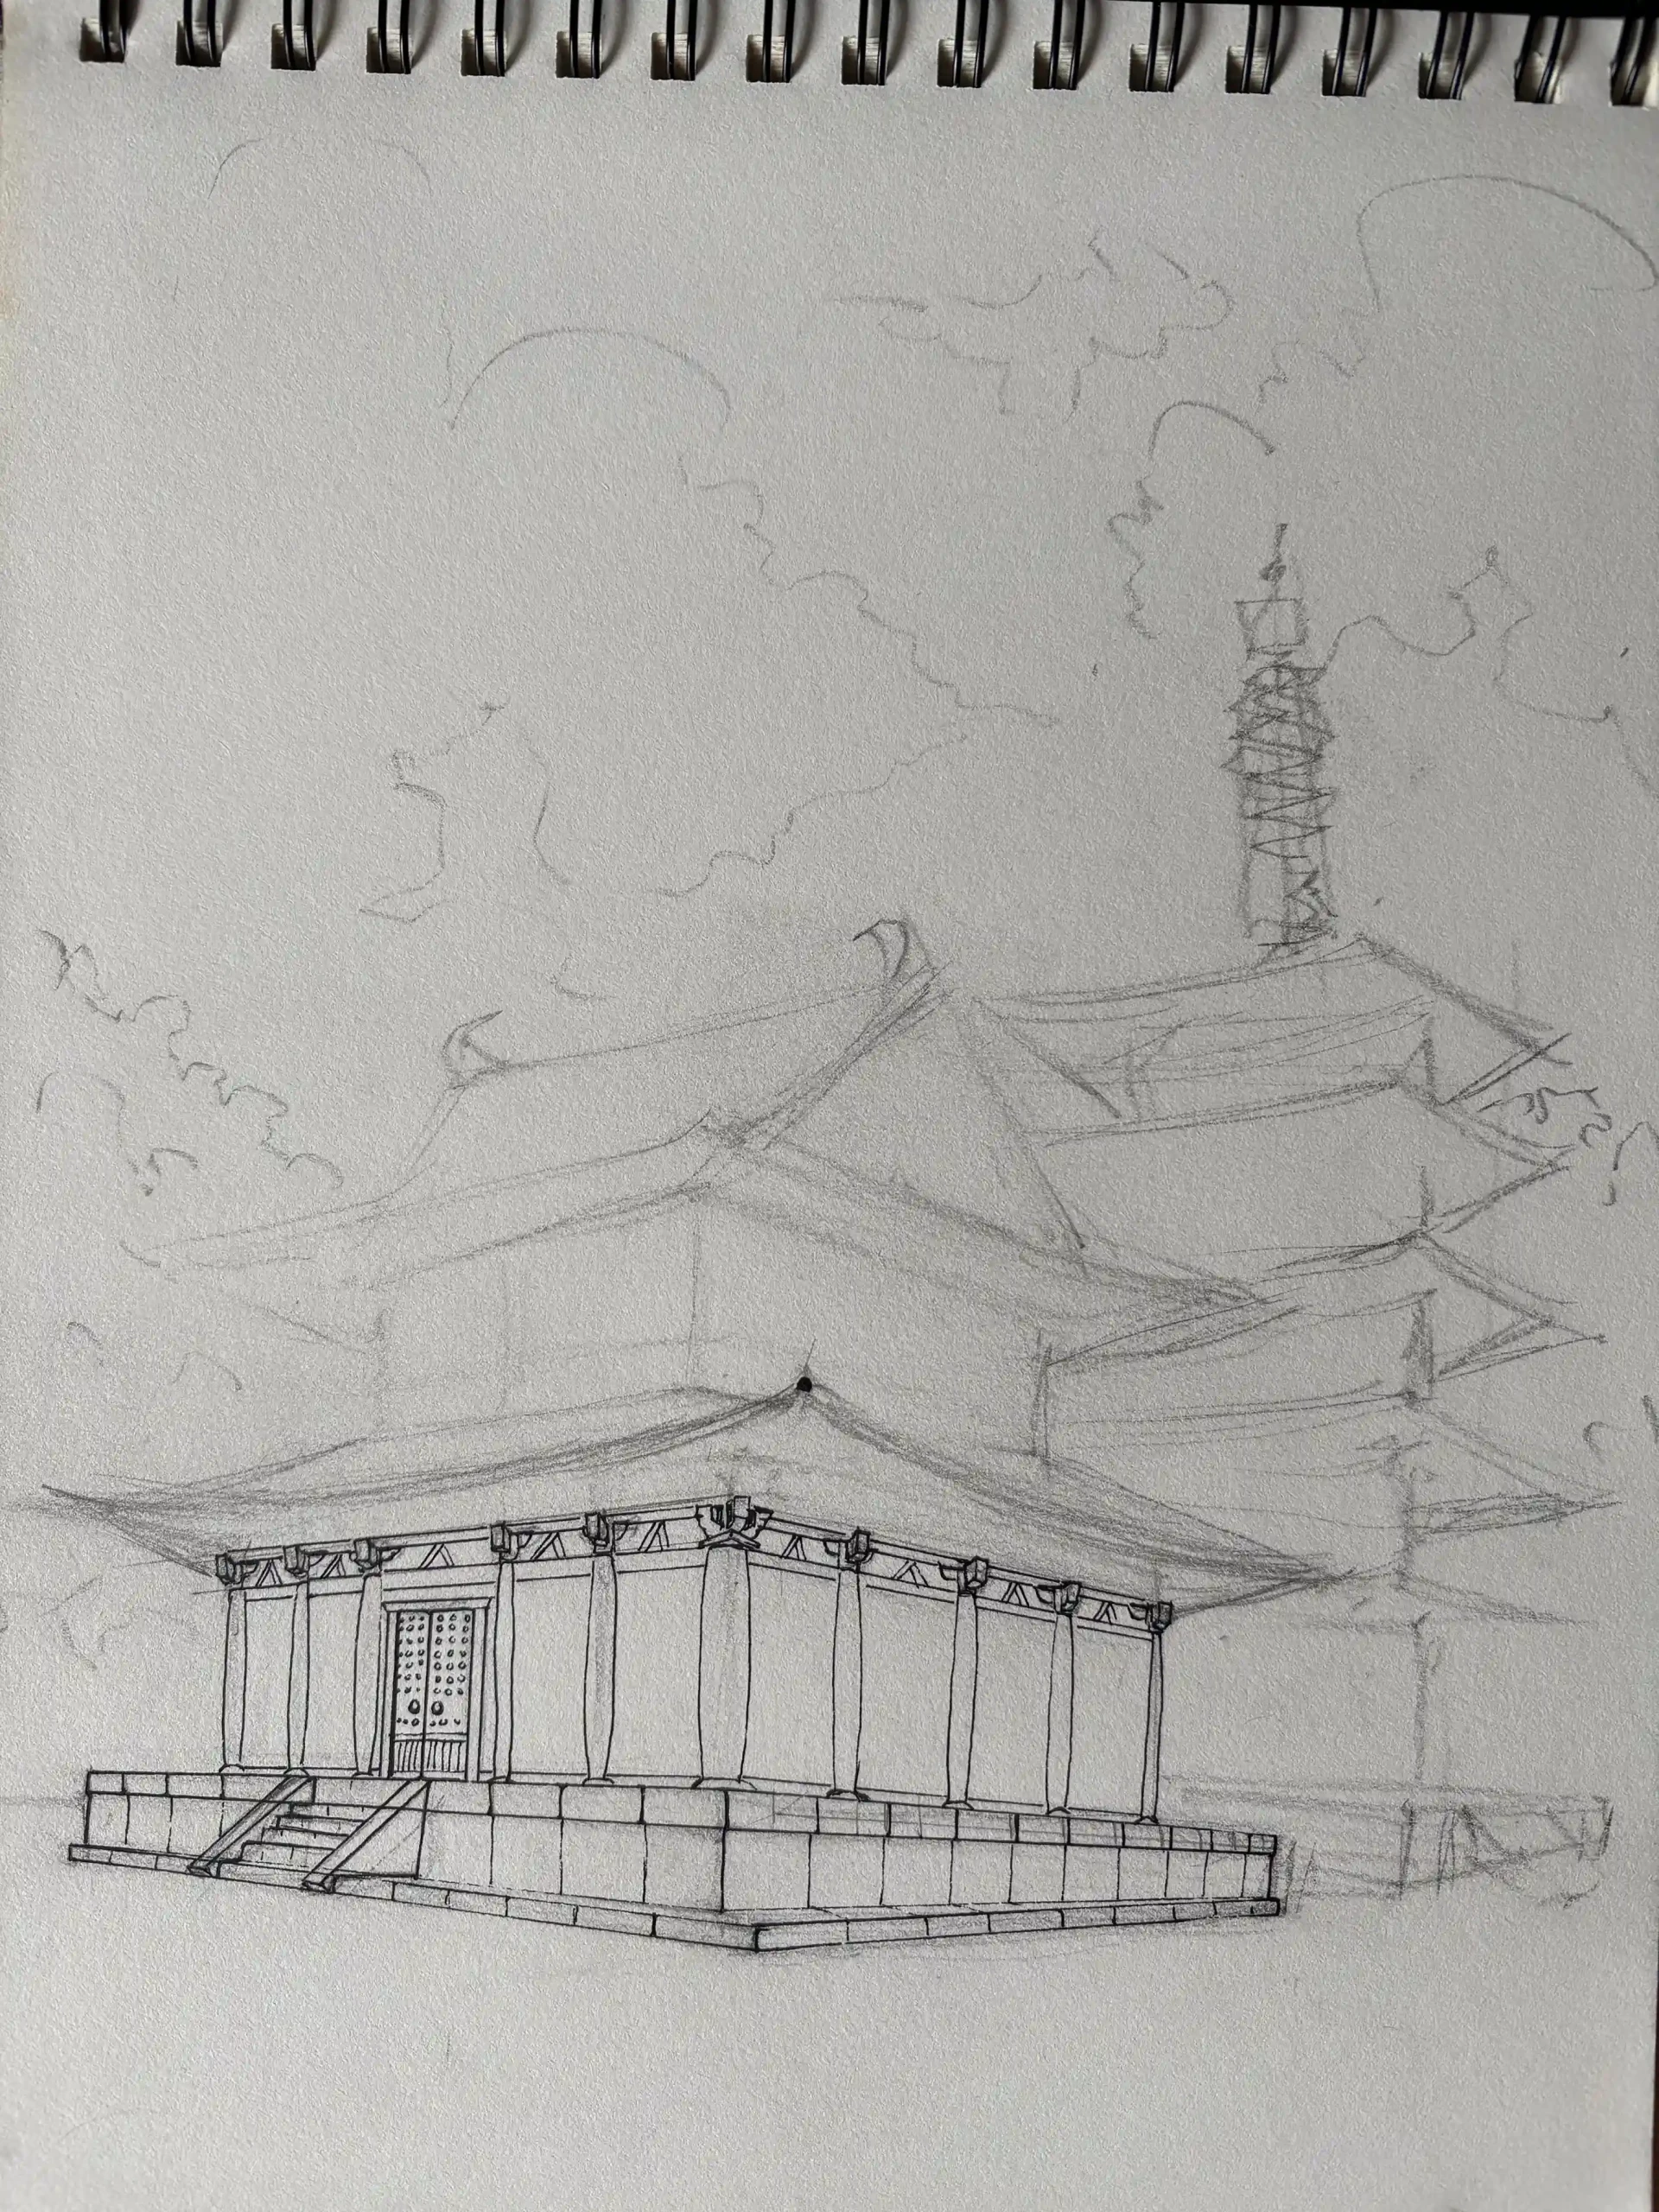
For the first roof, work from bottom to top: the golden circles of the cantilever support system, then the curved beam that supports the roof, and finally the curve that connects this level to the next.
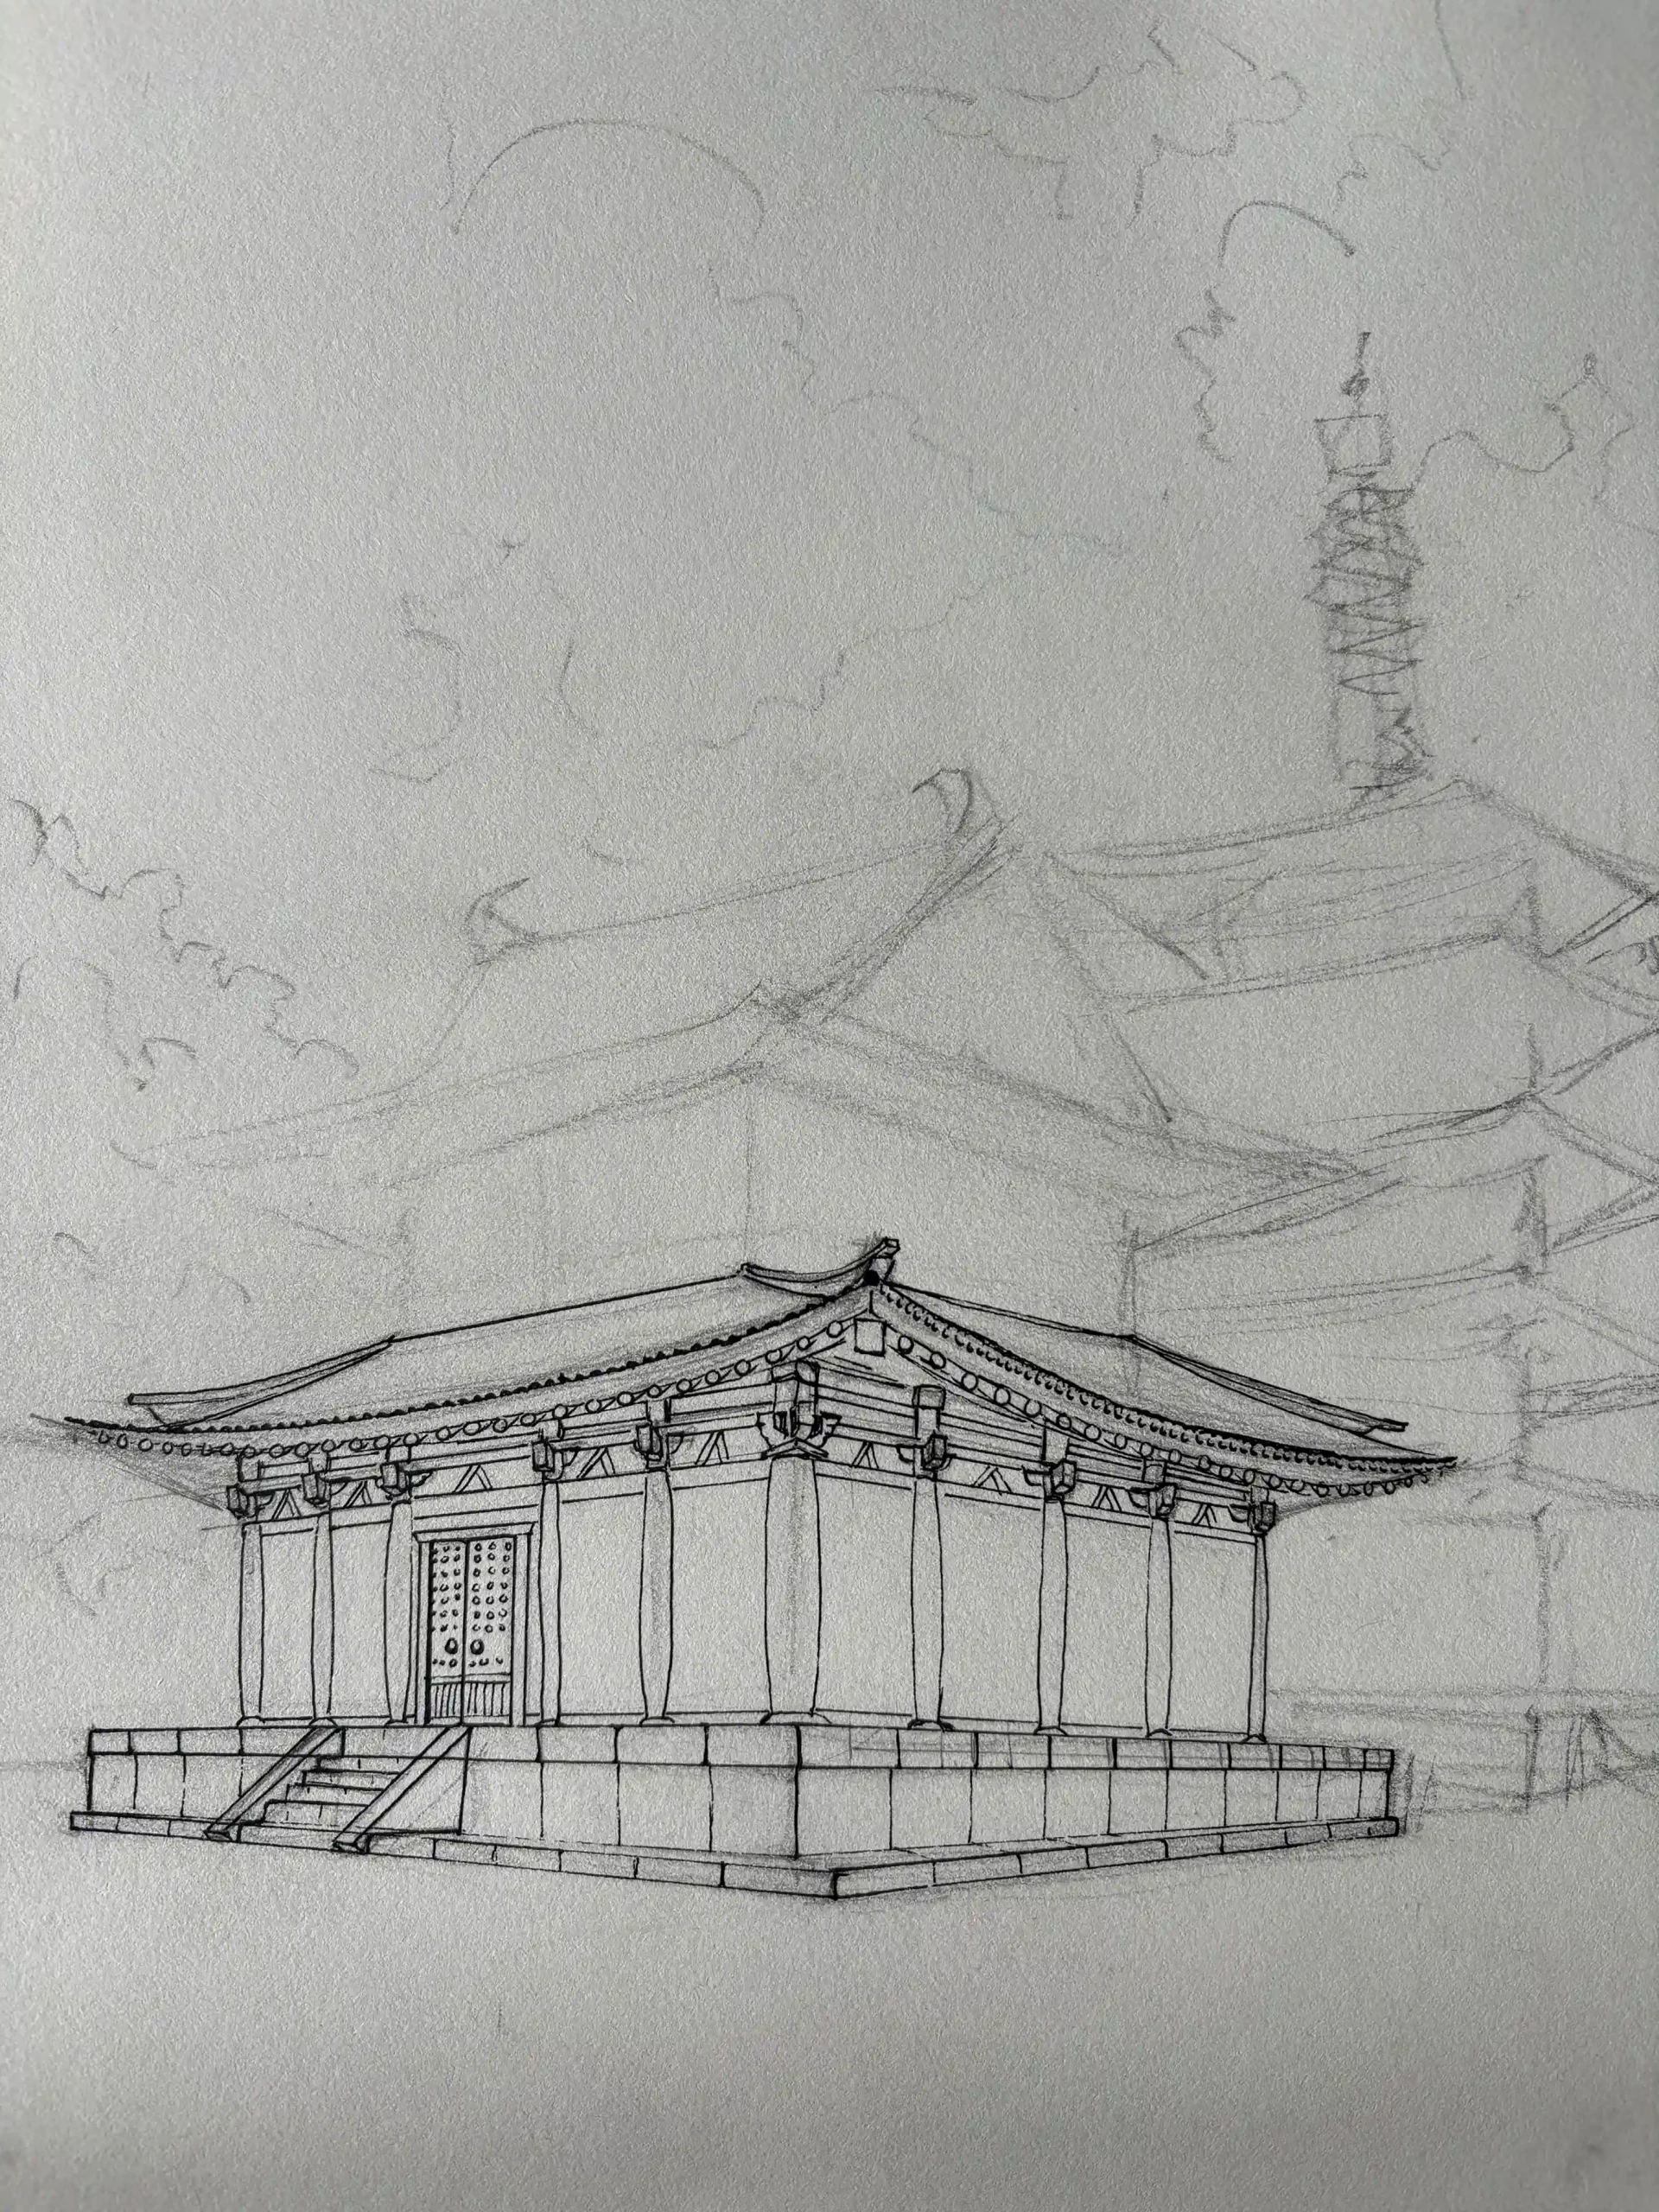
The second level contains many details; subdivide it by zones to distinguish the two patterns of the base, the balustrade, columns, and beams, before finishing with the upper grid pattern.
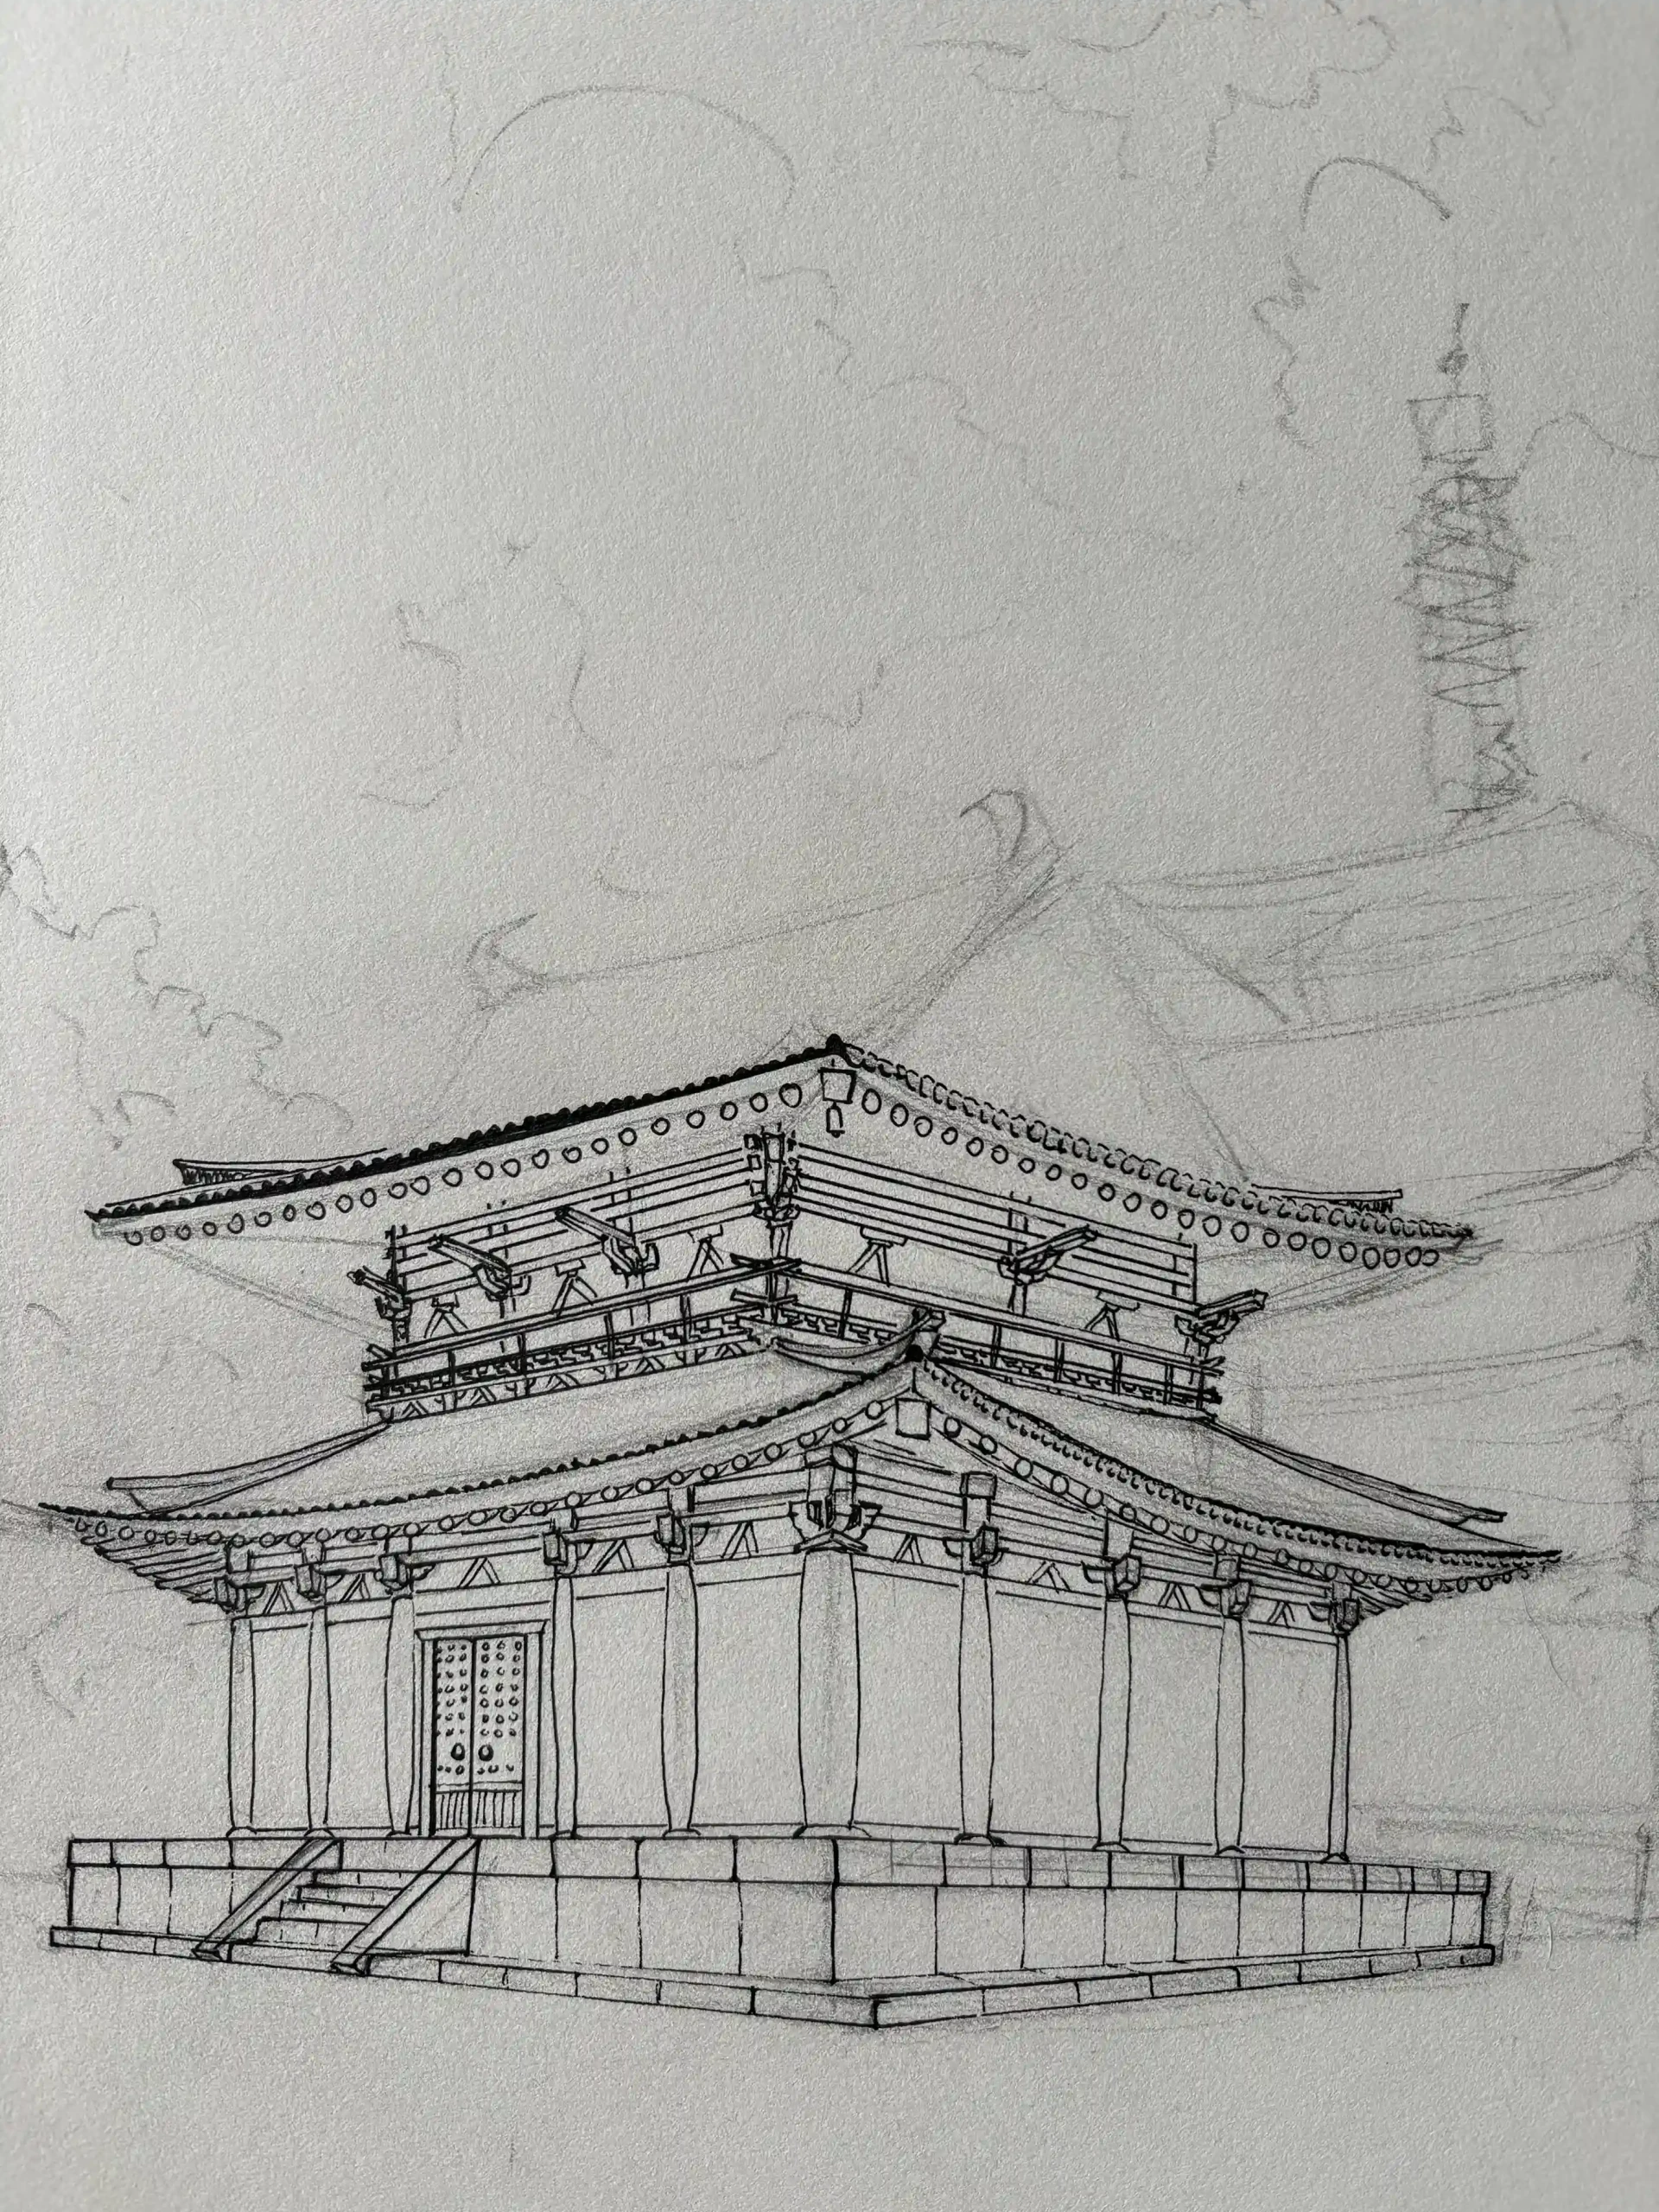
For the roof, start with the top structure, then the side profiles, and finish with the tiles using a simple pattern of parallel lines.
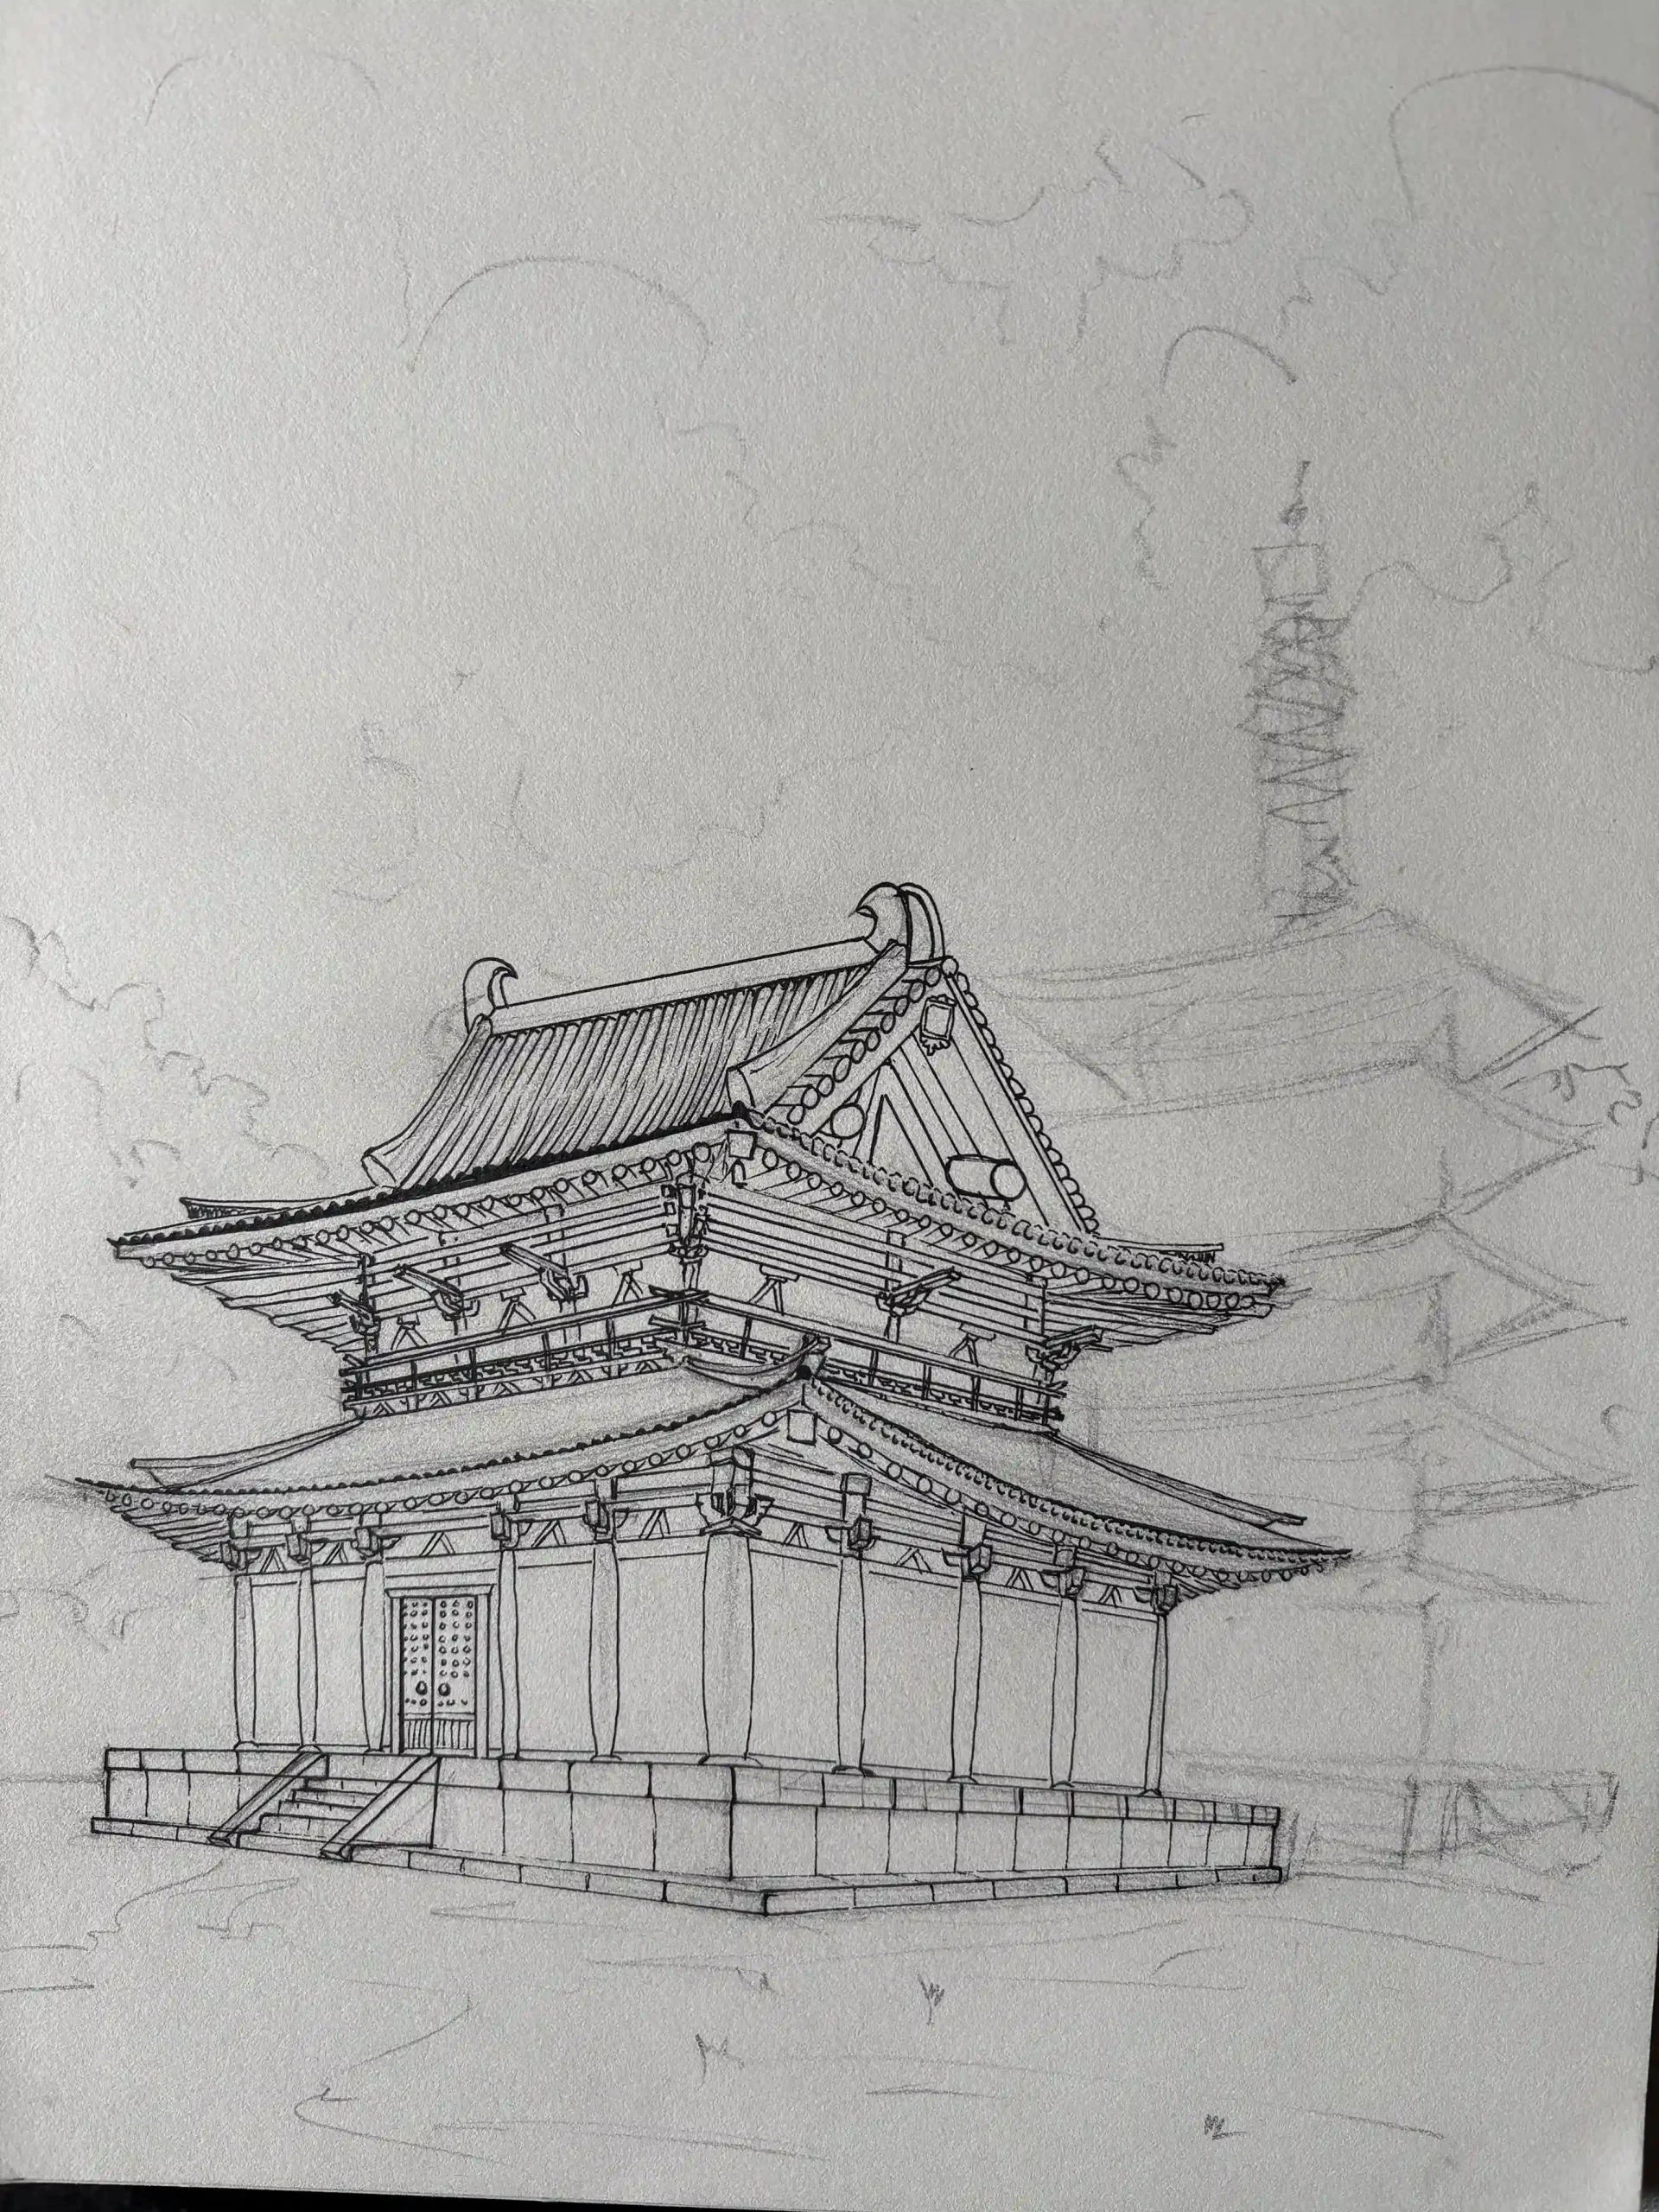
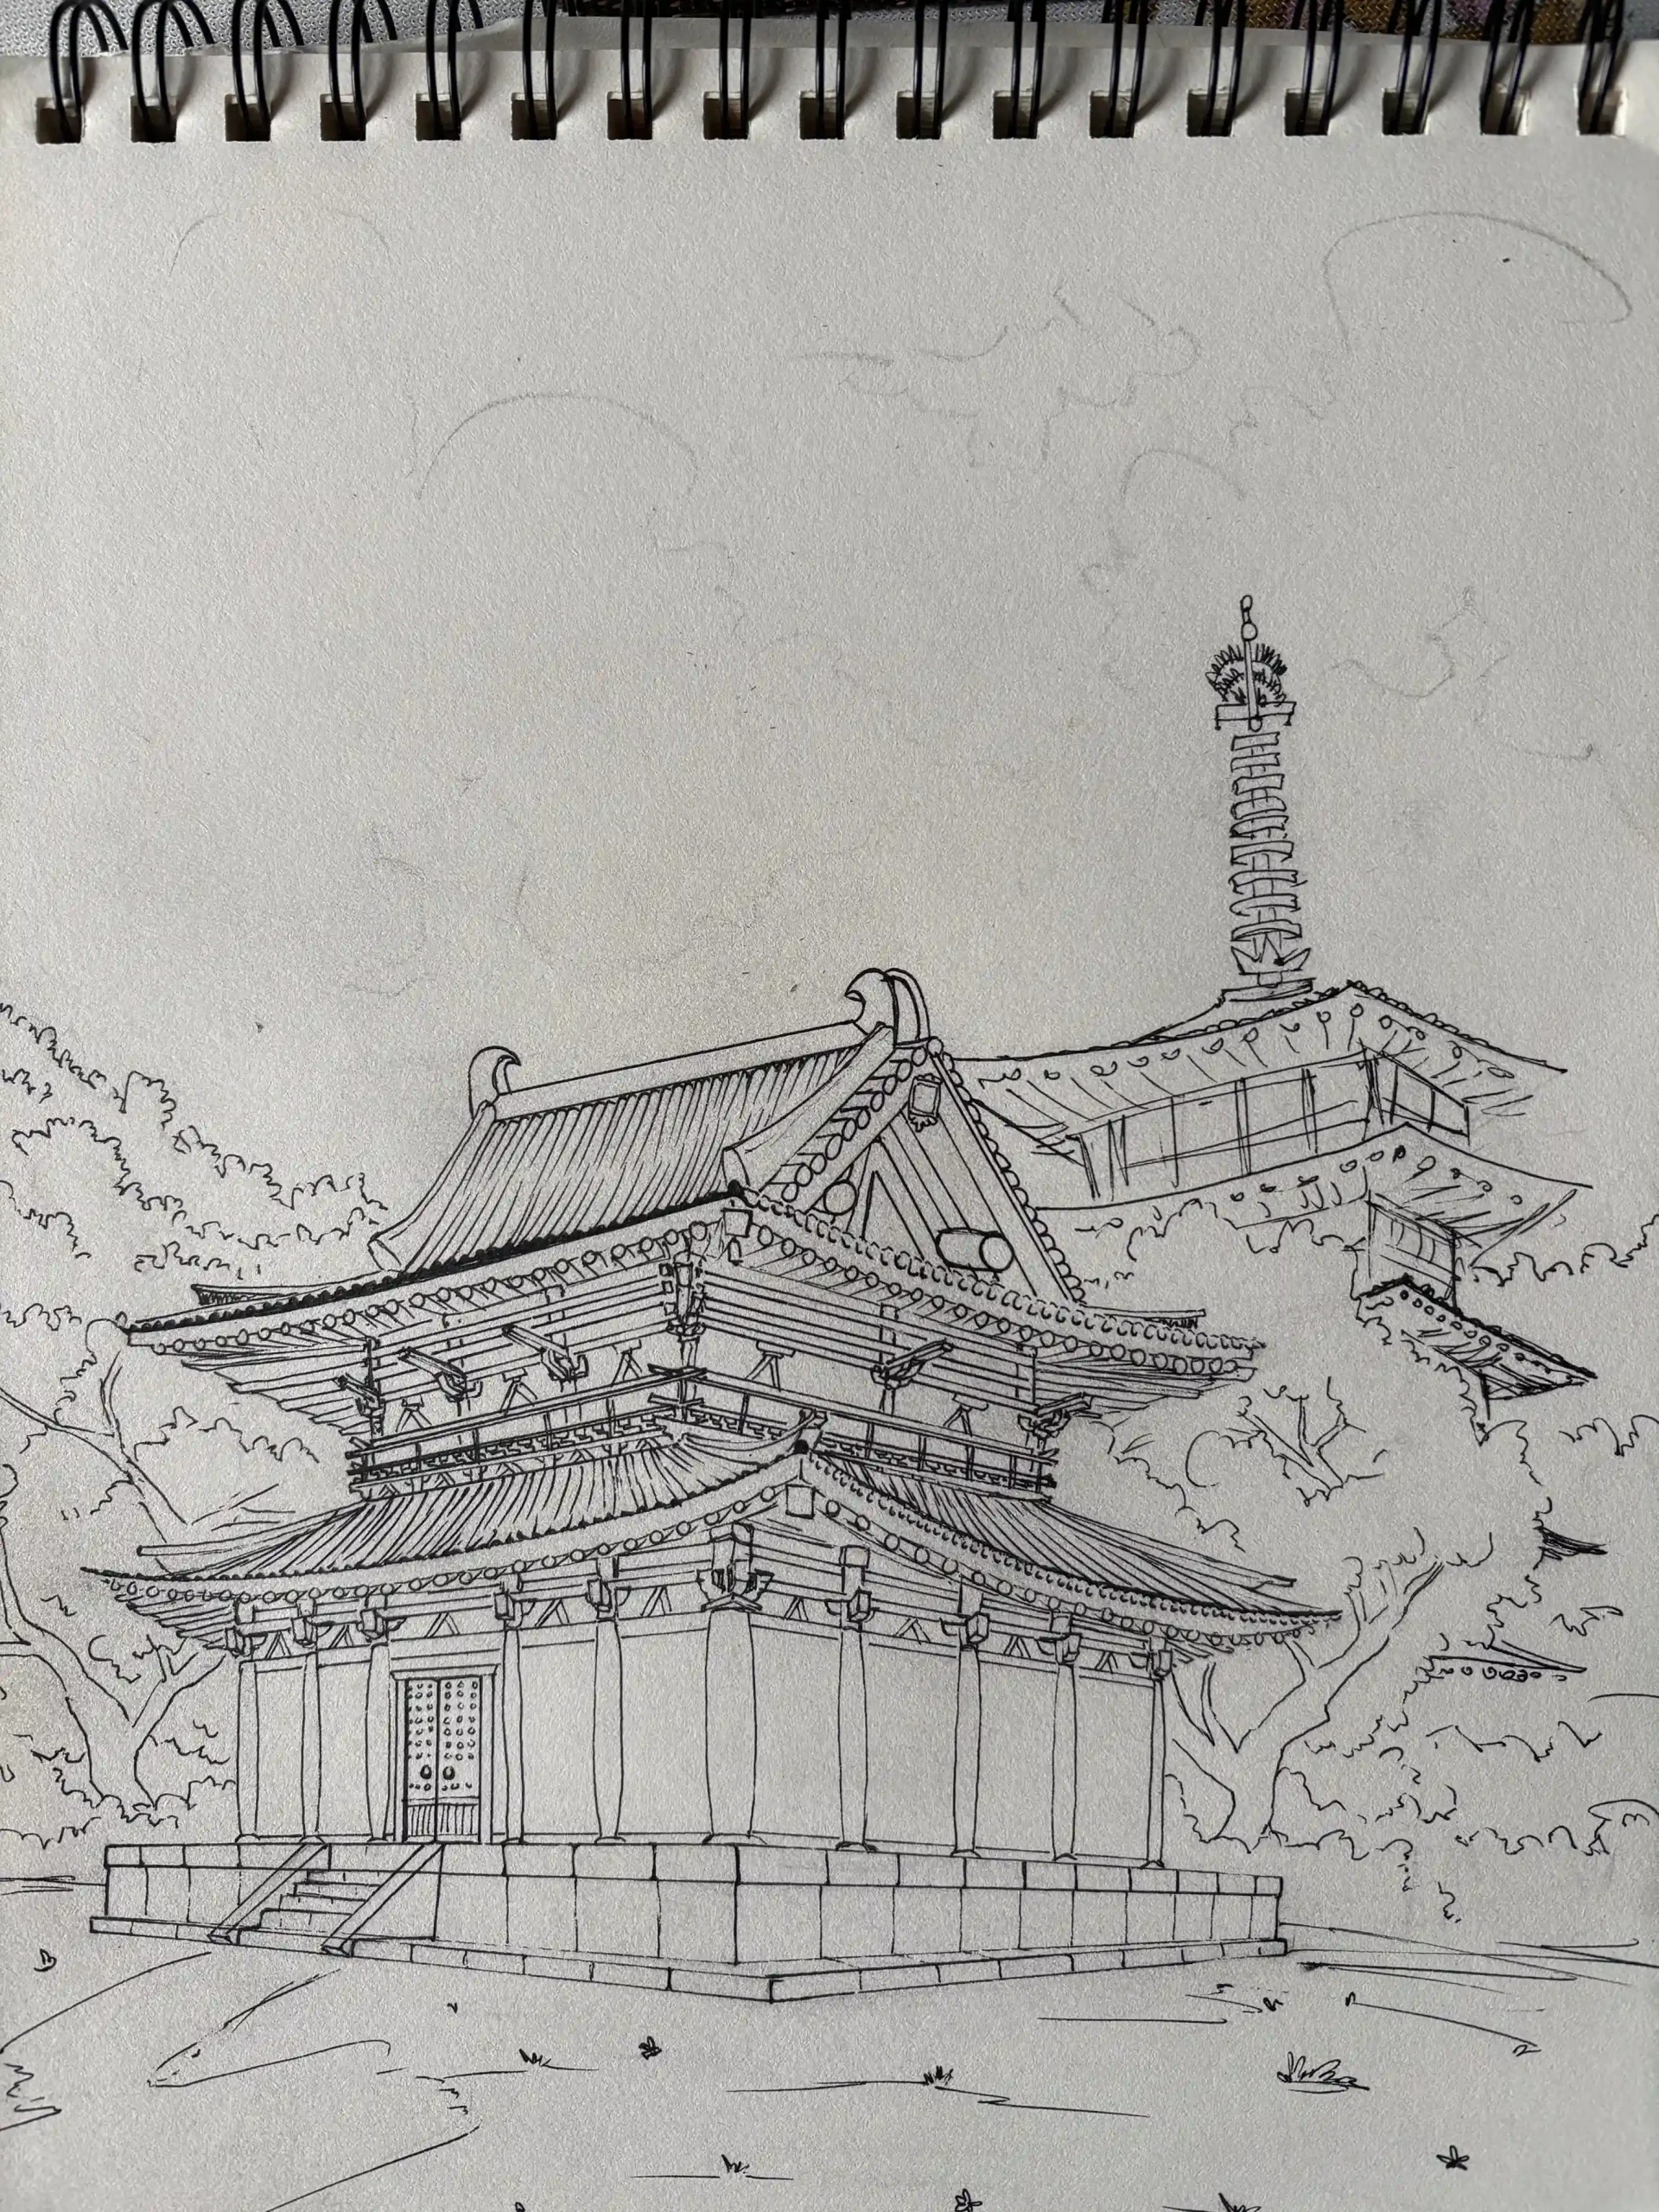
The pagoda in the background does not need the same level of detail; loose, undefined lines will suffice, almost like a sketch. Complete your drawing with a few trees or a garden.
Add color to the drawing
Start with the sky, using a gradient that fades from dark blue to an almost white tone, while preserving white spaces for the clouds.
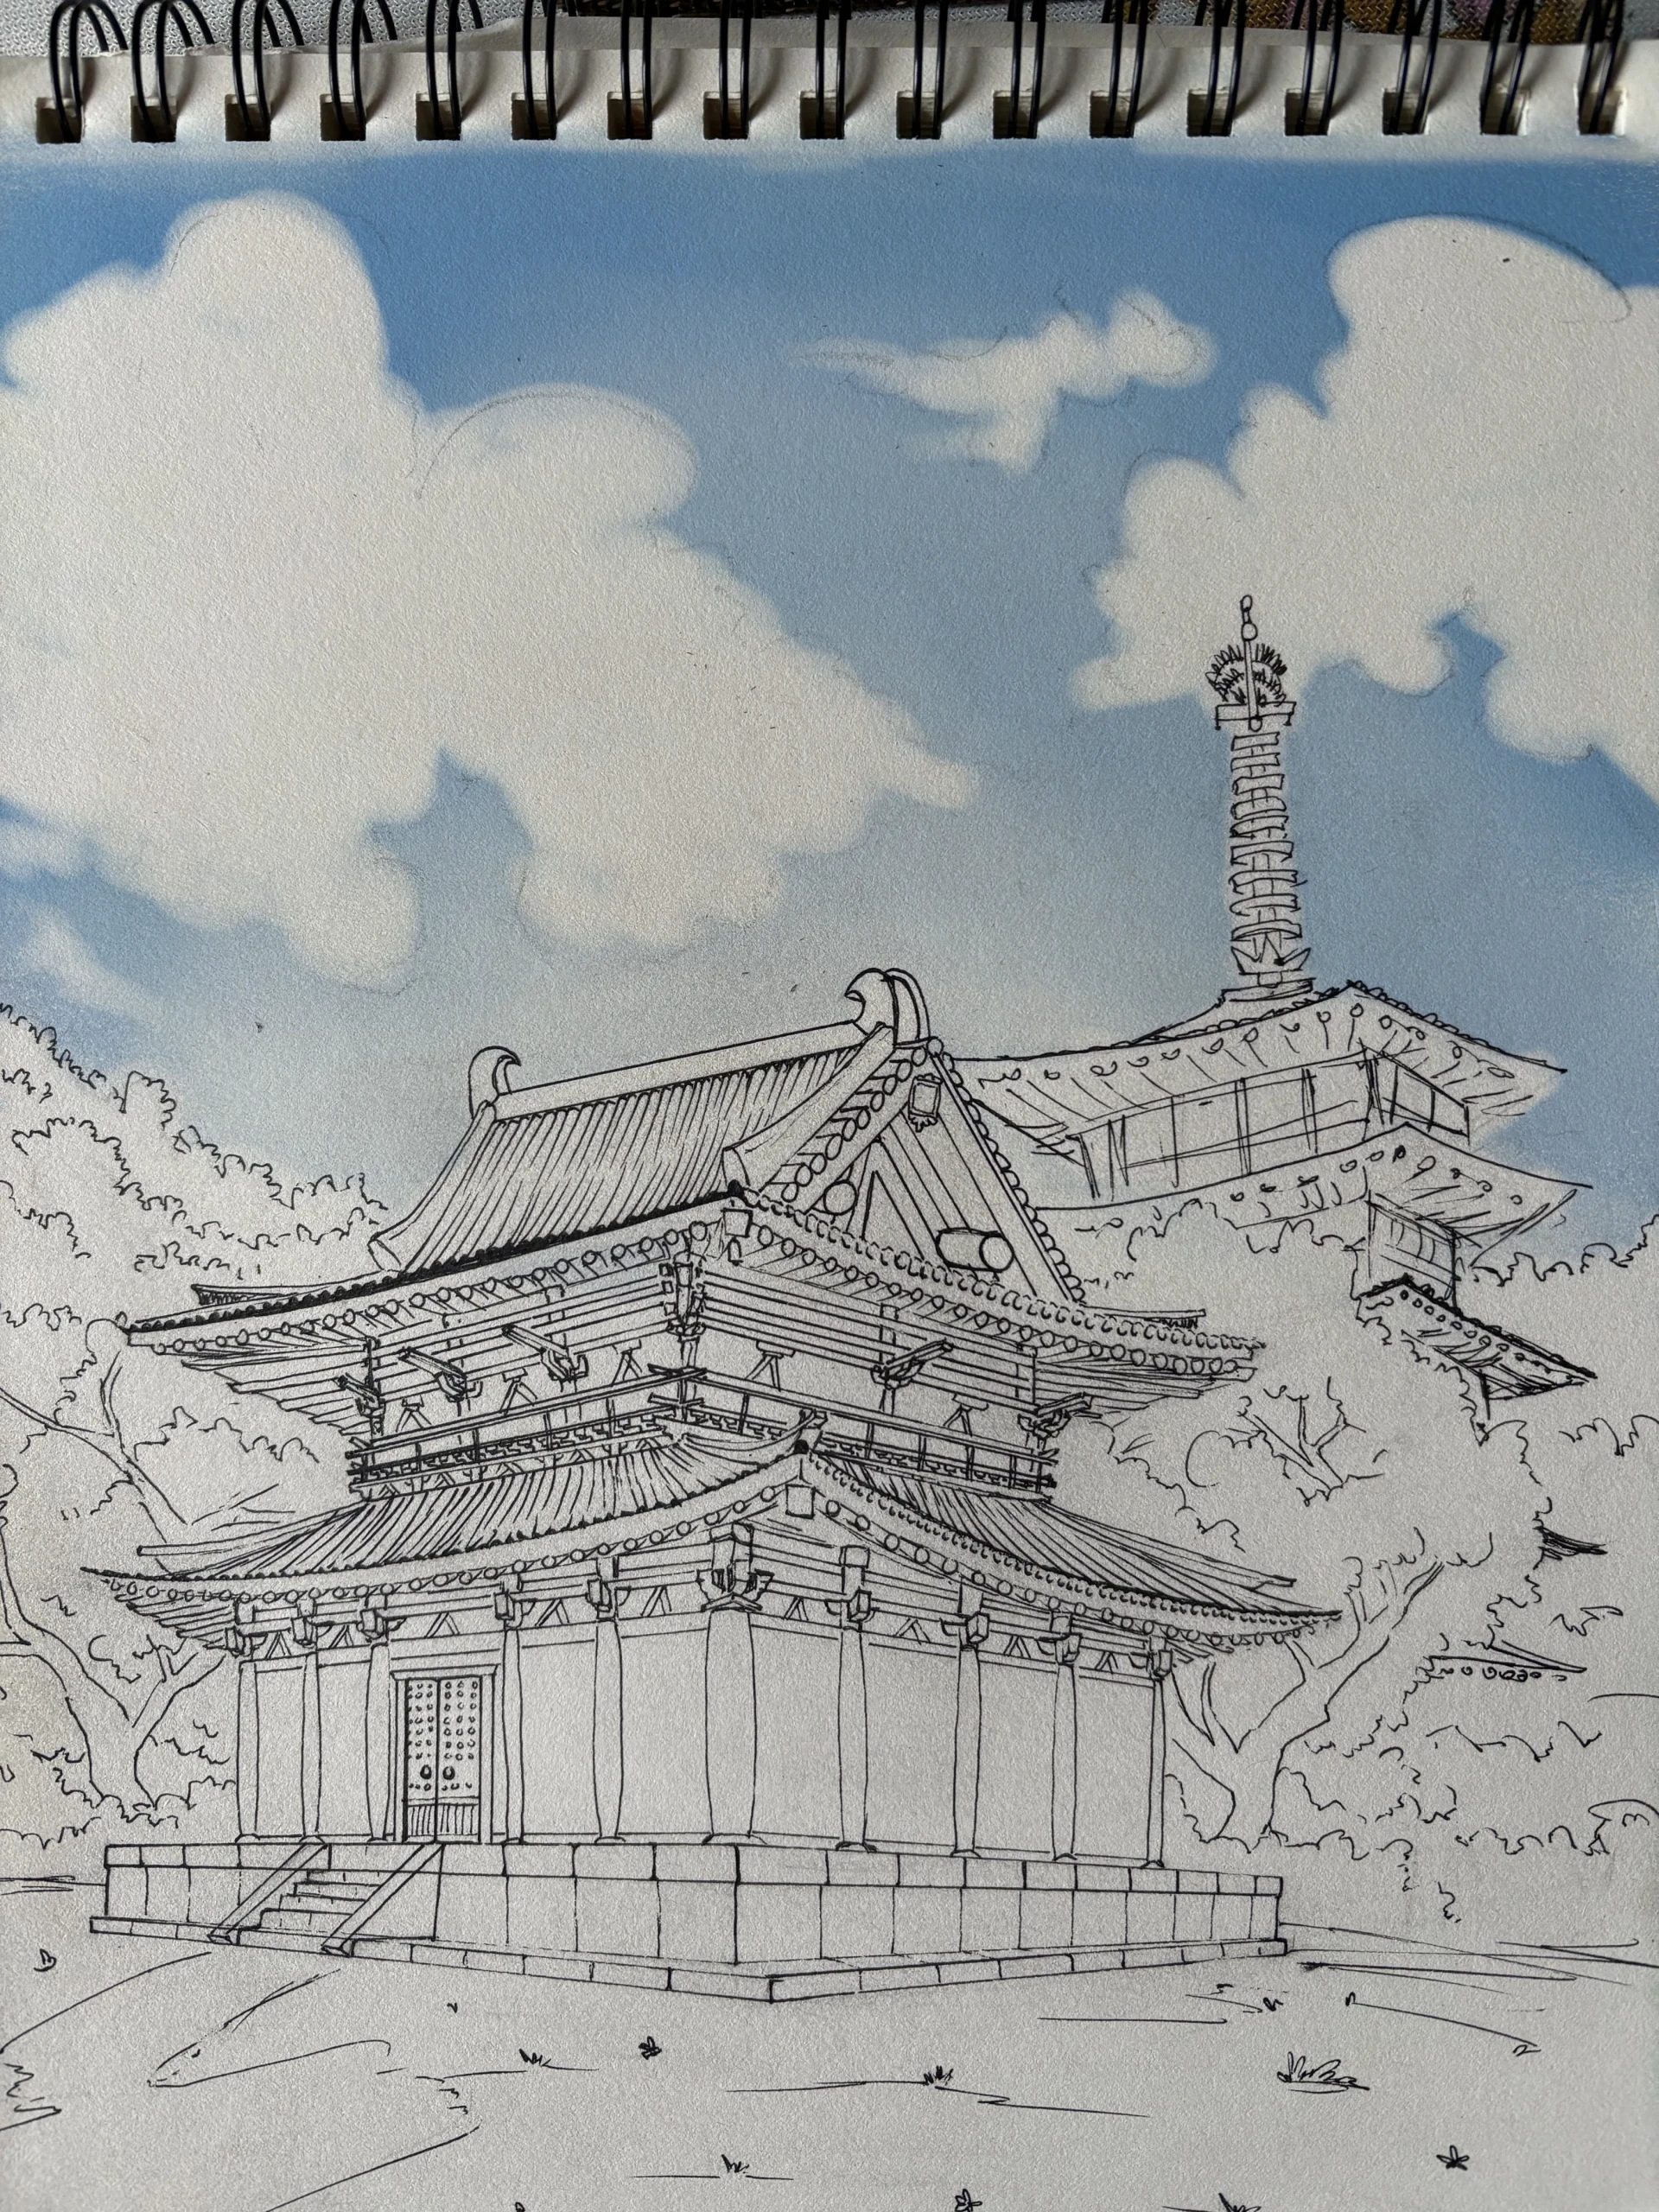
For the garden, use a dark green to create silhouettes, while preserving some areas of light to enhance volume and texture. The clearing in front of the temple will be treated with much brighter tones.
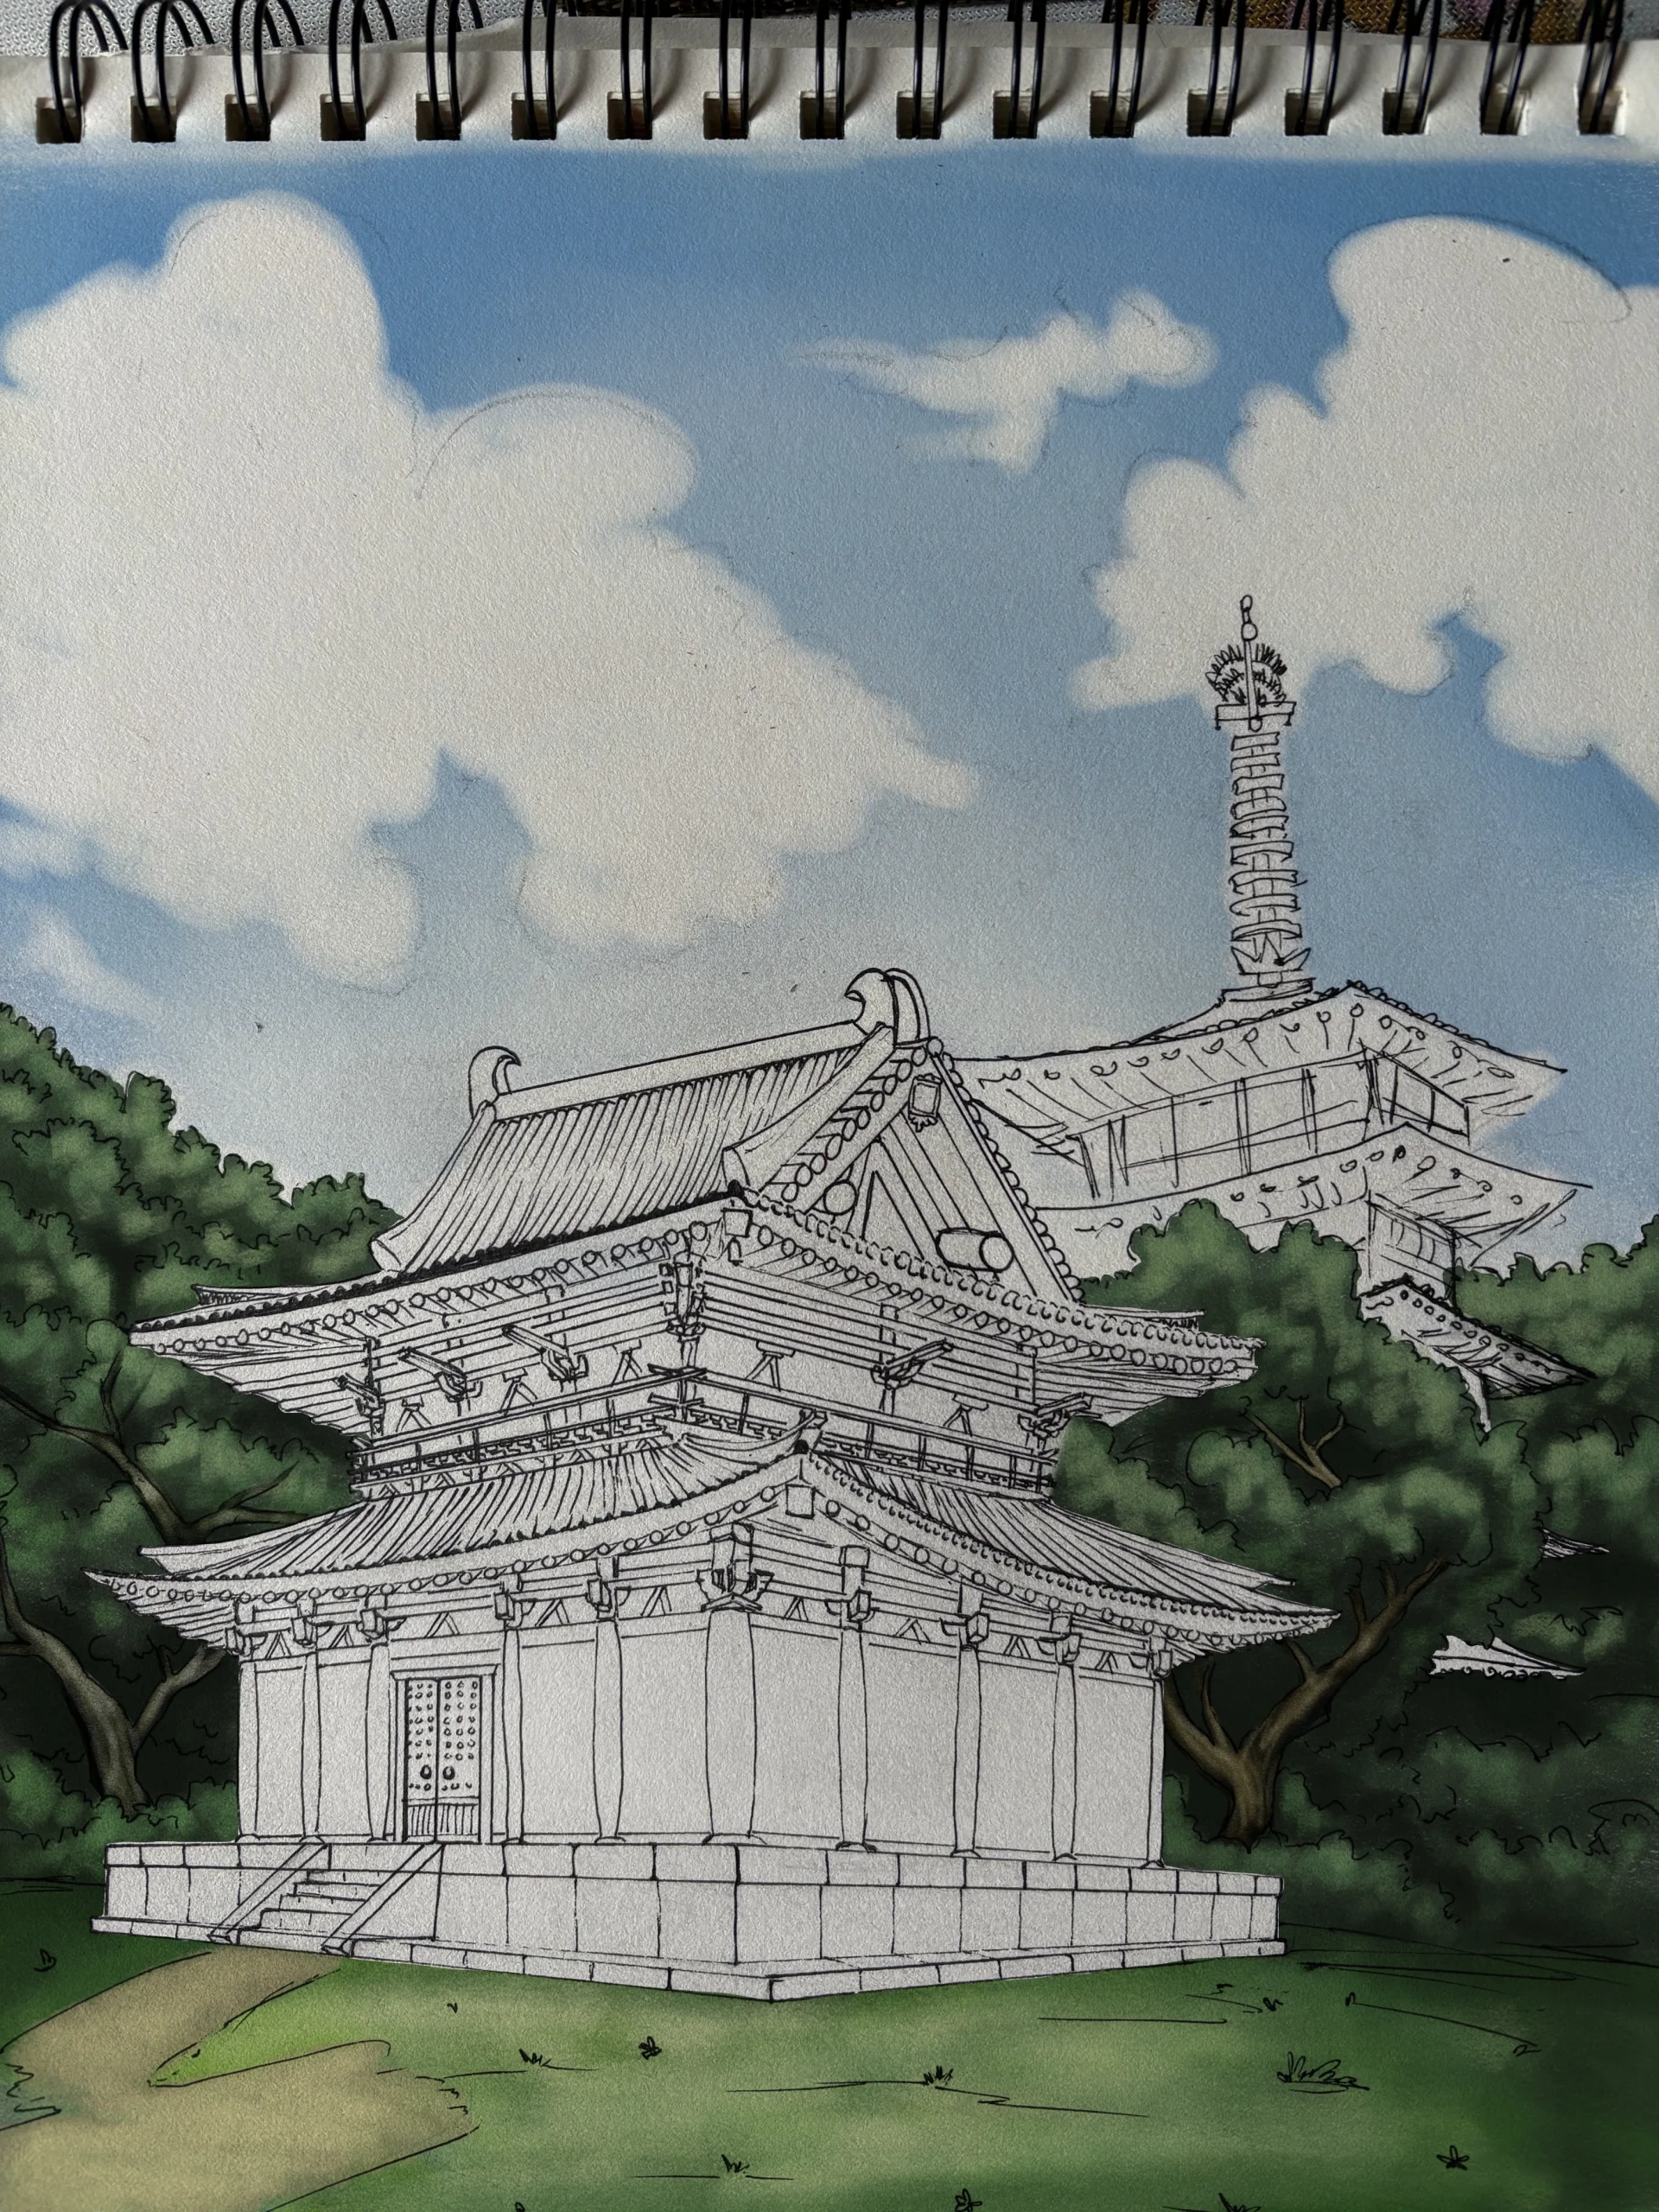
Next, draw all the wooden beams in a red color as close as possible to the model.
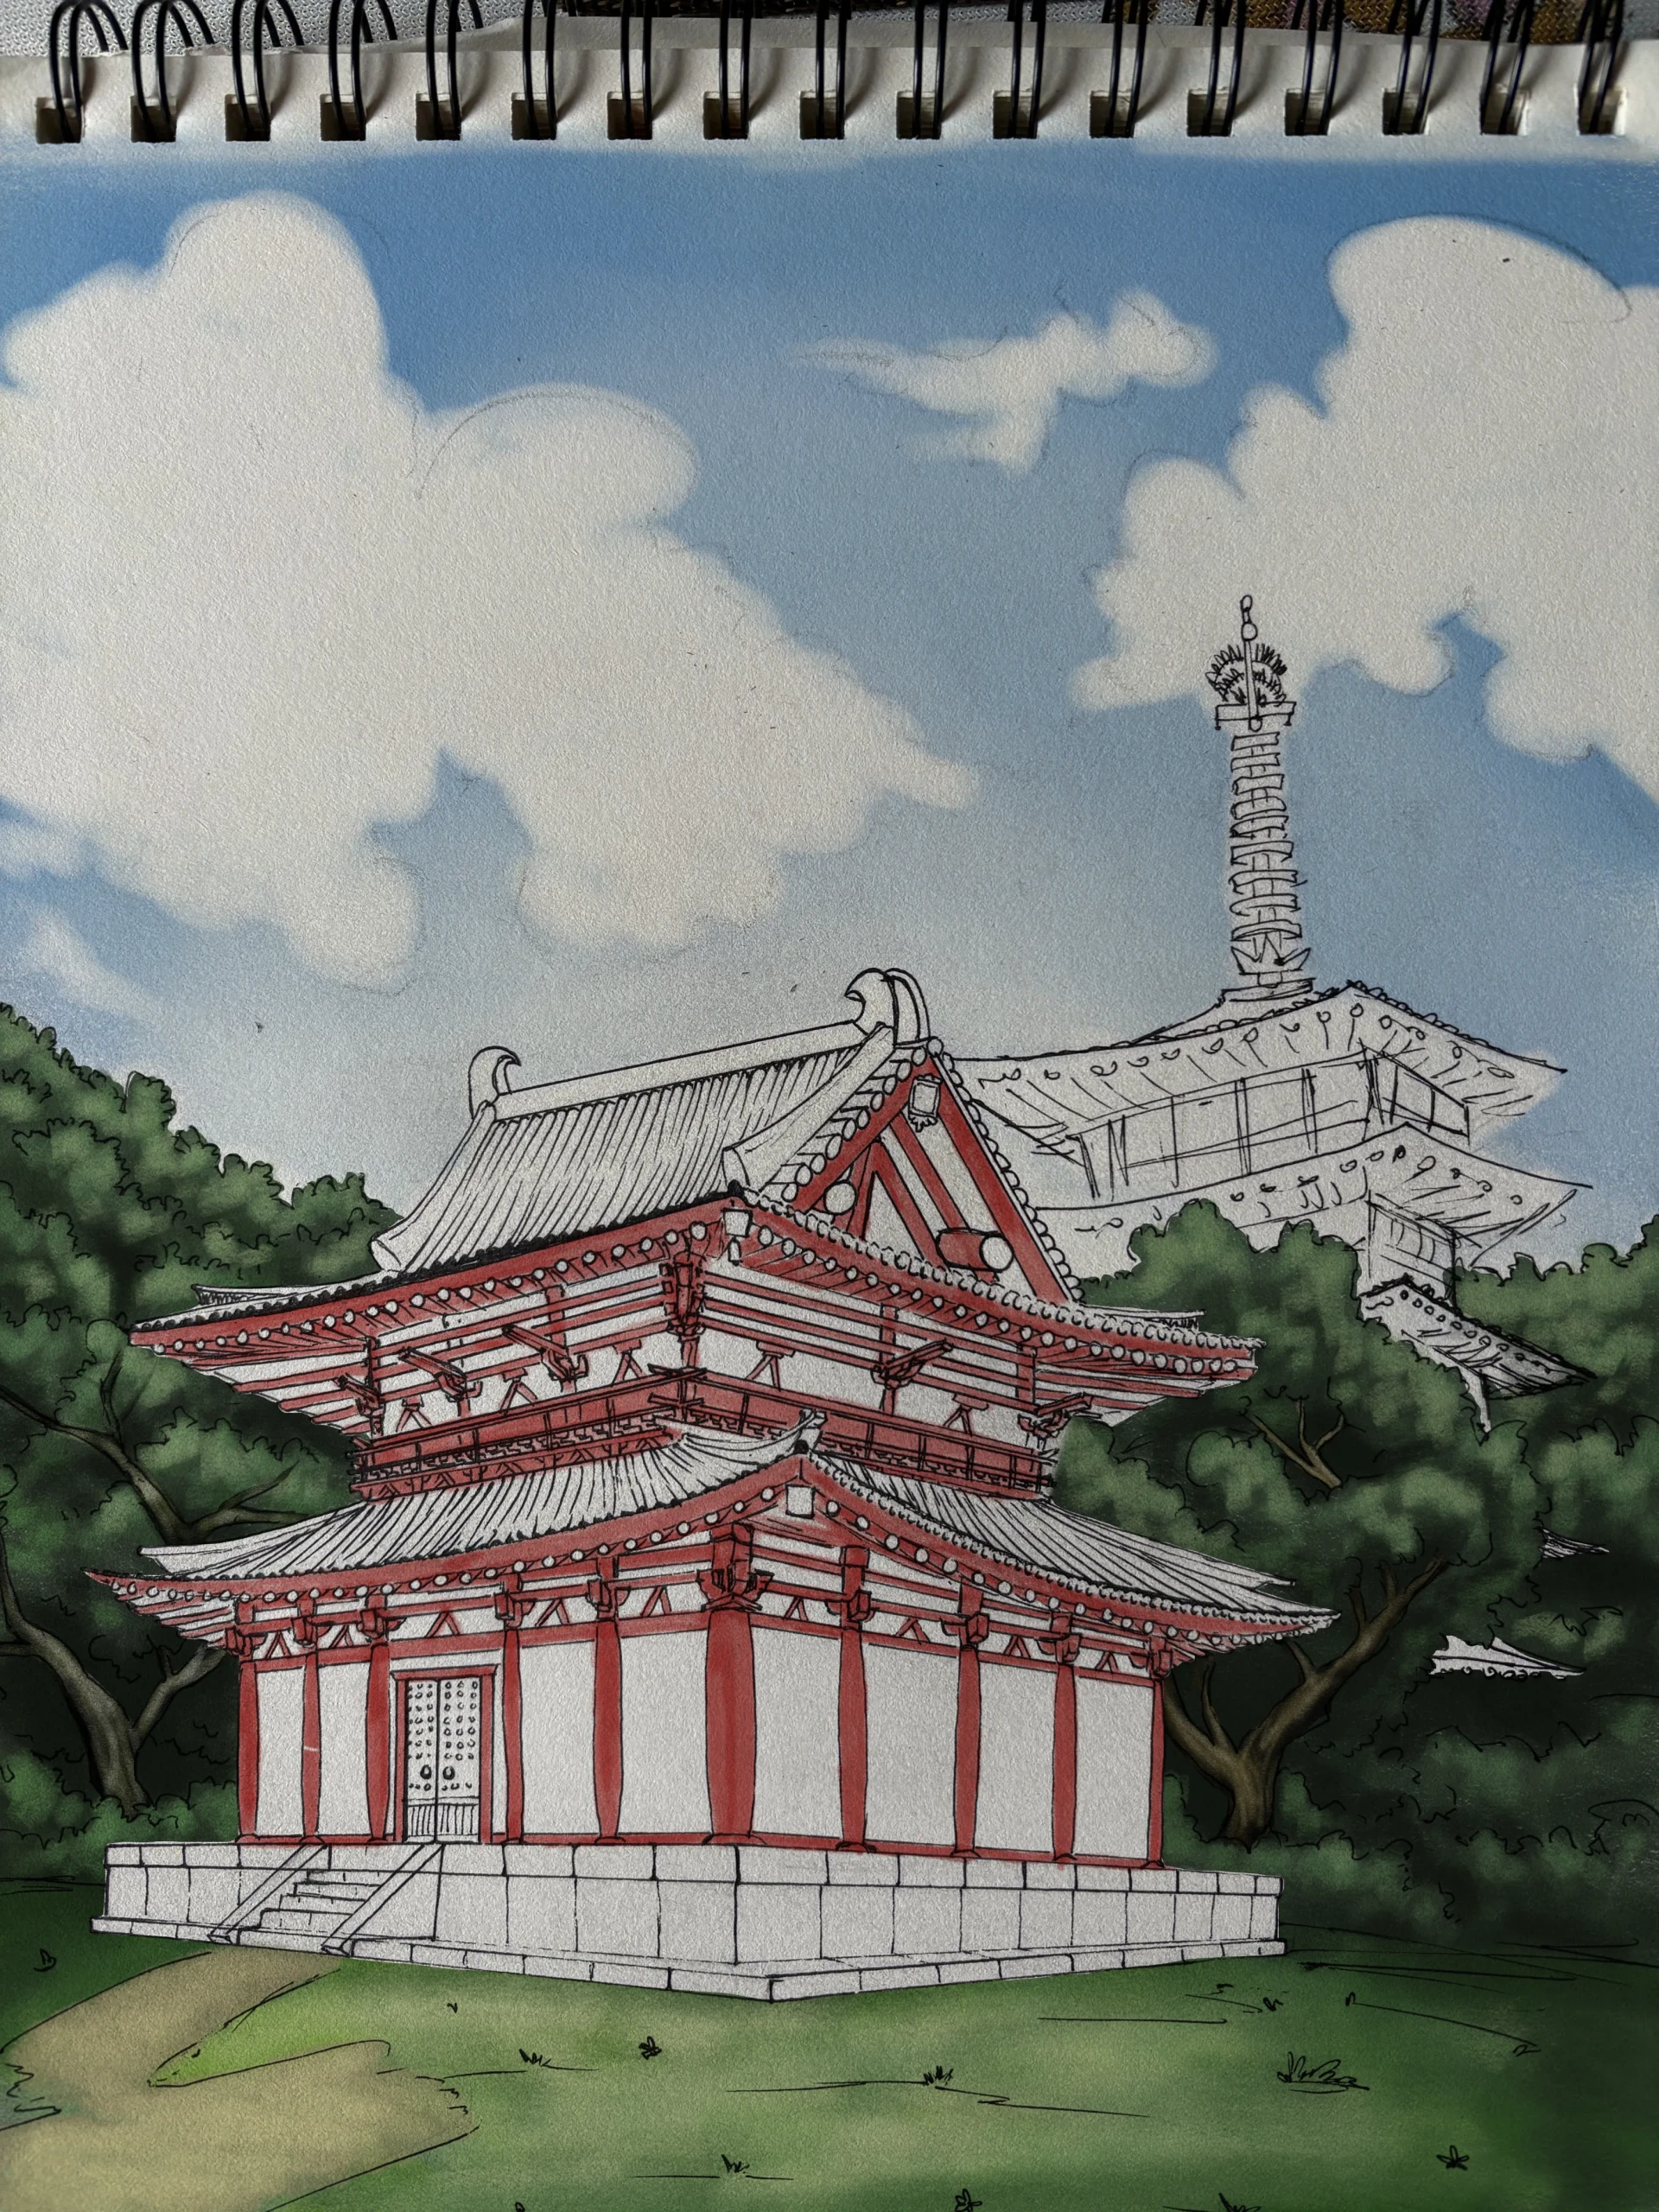
Finally, add some color to the roof tiles with a bluish-gray. If you are using colored pencils, gently apply a layer of gray, then a layer of dark blue on top. If the result is too dark, you can add a layer of white.
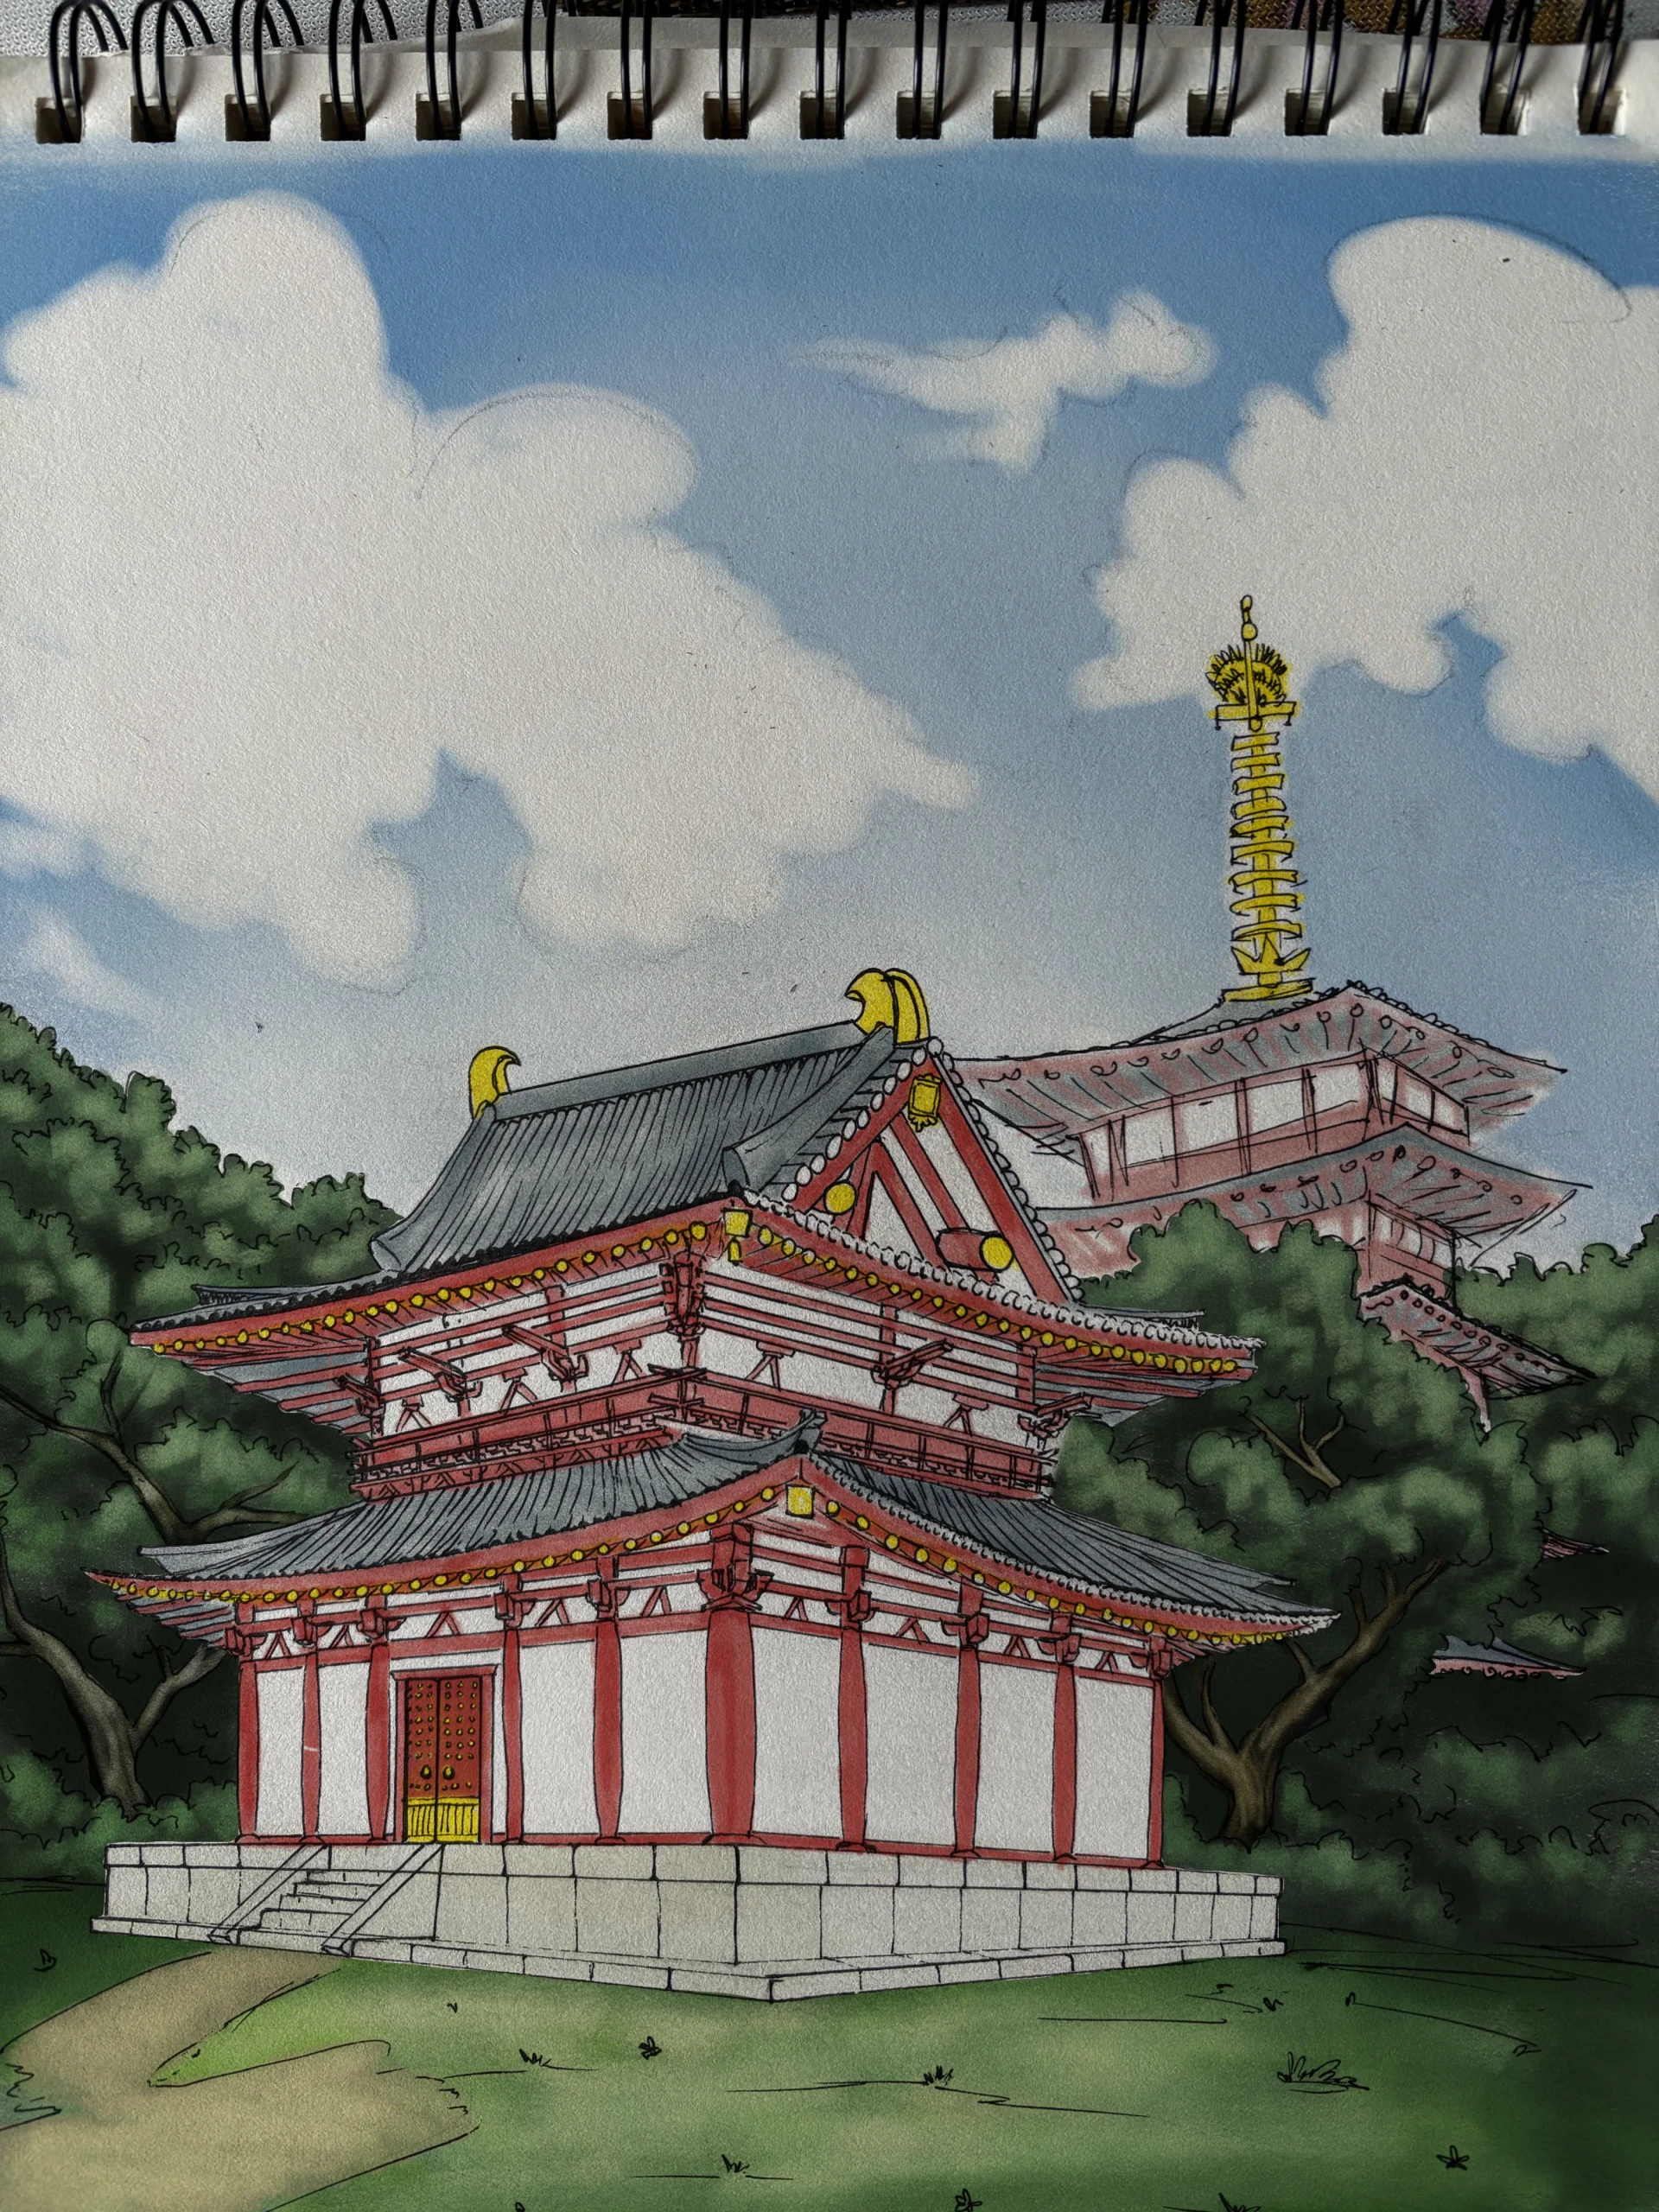
Finish drawing the Japanese temple by adding shadows
If the result still seems flat, add a layer of shadow with a light glaze, a layer of gray or dark blue pencil, depending on the technique used. It is often this final step that gives depth to the drawing as a whole.
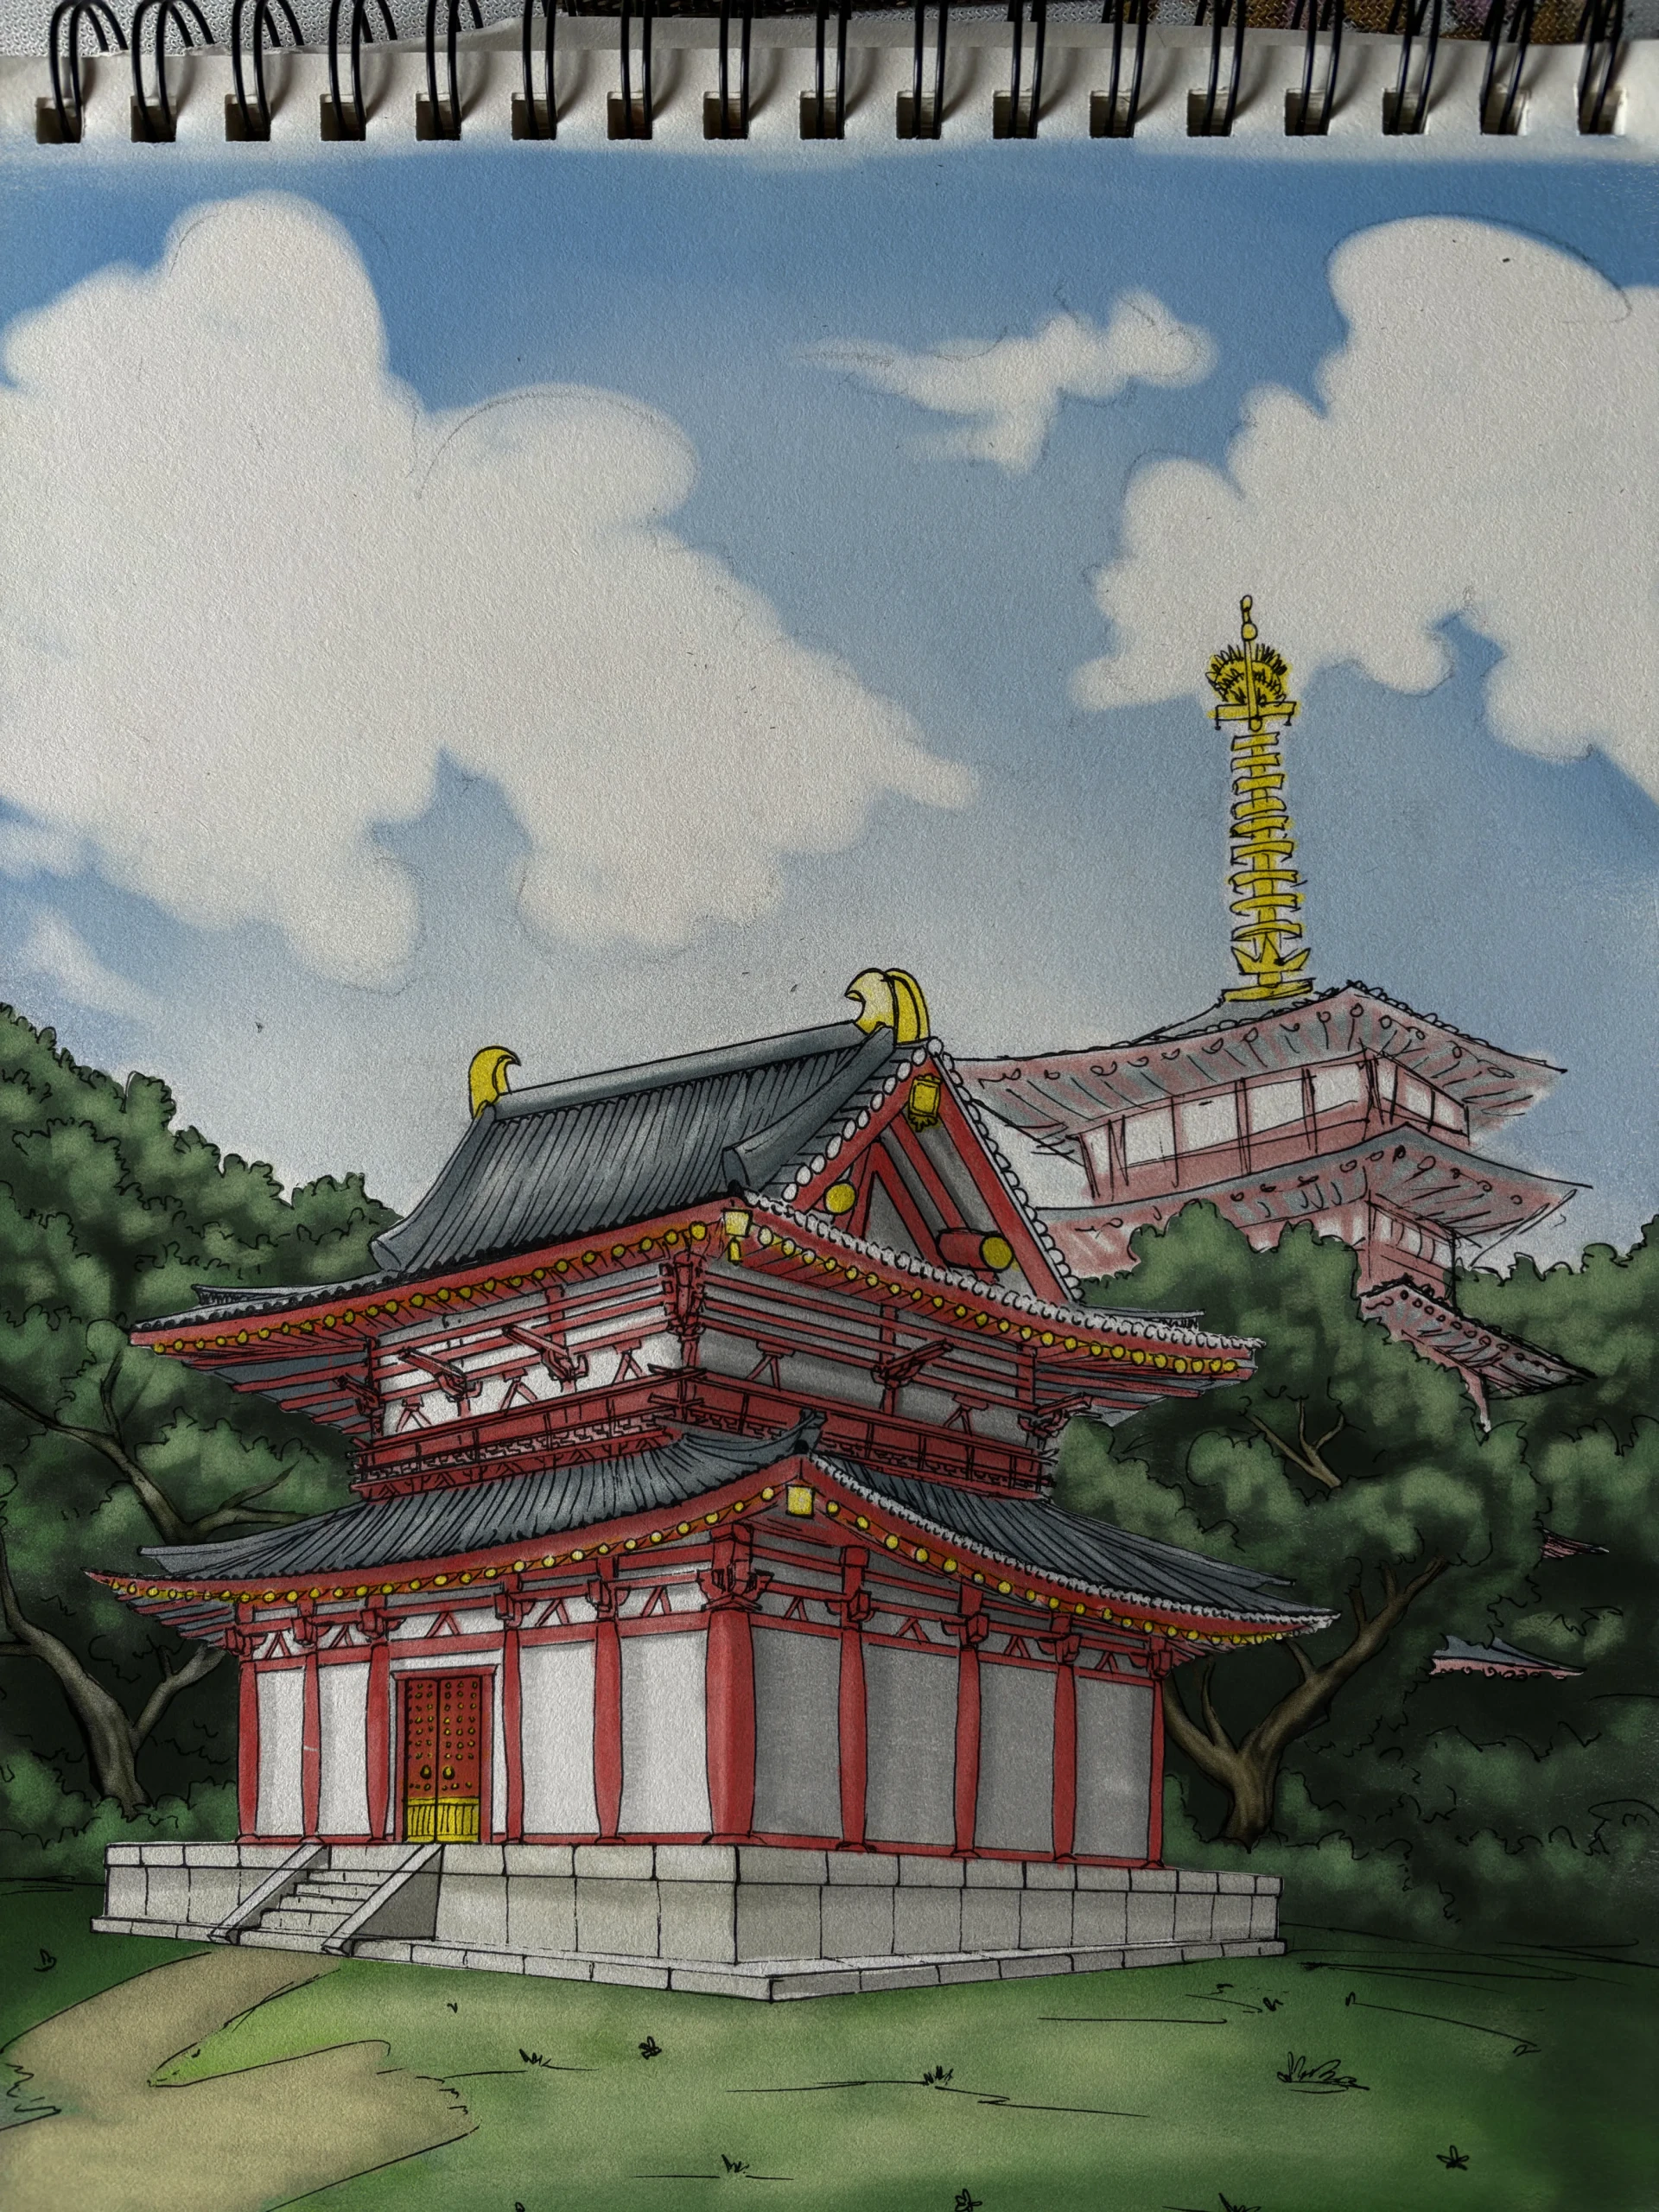
And there you have it, our Japanese temple is finished! I hope you enjoyed this tutorial and that it inspired you to try your hand at architectural drawing.
See you soon for a new tutorial!
Discussion
No comments yet.