How to Draw a Landscape
The sight of landscapes invites us to escape and also reminds us of our connection and love for nature. Landscapes are often represented (in photos, paintings, drawings) in a horizontal format for these reasons: it helps to contemplate and admire the largest possible portion of the image. For this reason, it is not surprising that this type of horizontal format is called “landscape”, as opposed to the vertical format “portrait”.
WHAT ARE THE ELEMENTS OF A LANDSCAPE?
To create a landscape, there is a whole list of natural elements that one can choose to illustrate:
🏔 mountains, hills or plains: the element of earth is predominant in defining the location and type of vegetation;
🌊 water: a lake, a river, a waterfall or a larger body of water such as a beach;
🌦 a sky that will define the environment and time of day and thus the lights; clear or cloudy, dark or bright. It plays an essential role in vision.
🌁 atmosphere and weather: aided by the sky but also by the climate of the place depicted, the atmosphere gives the final touch to the image.
When depicting such a large space, the further you move away from the foreground, the more the tones merge with the sky and generally become bluer and blurrier. A well-known example is the sfumato technique used by Leonardo da Vinci with the landscape painted in the background of the Mona Lisa.
Feel free to embroider around to make the landscape more personal :)
If the topic of landscape and atmosphere drawing speaks to you, I invite you to check out the wonderful course by Camille Raveau that covers the subject. >I ESCAPE WITH STROKES OF PENCILS!
USING GUIDELINES FOR YOUR DRAWING
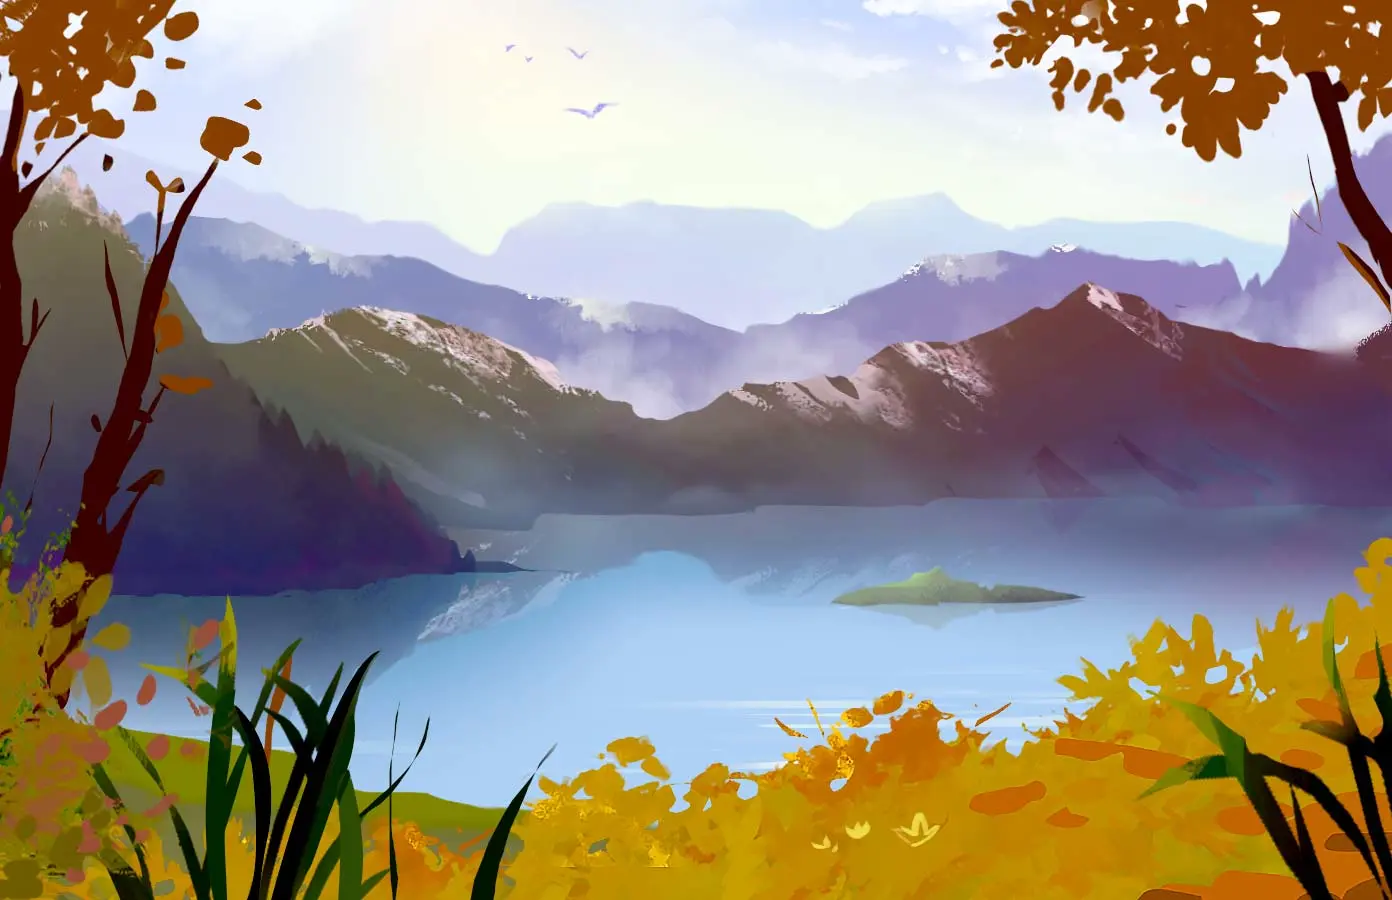
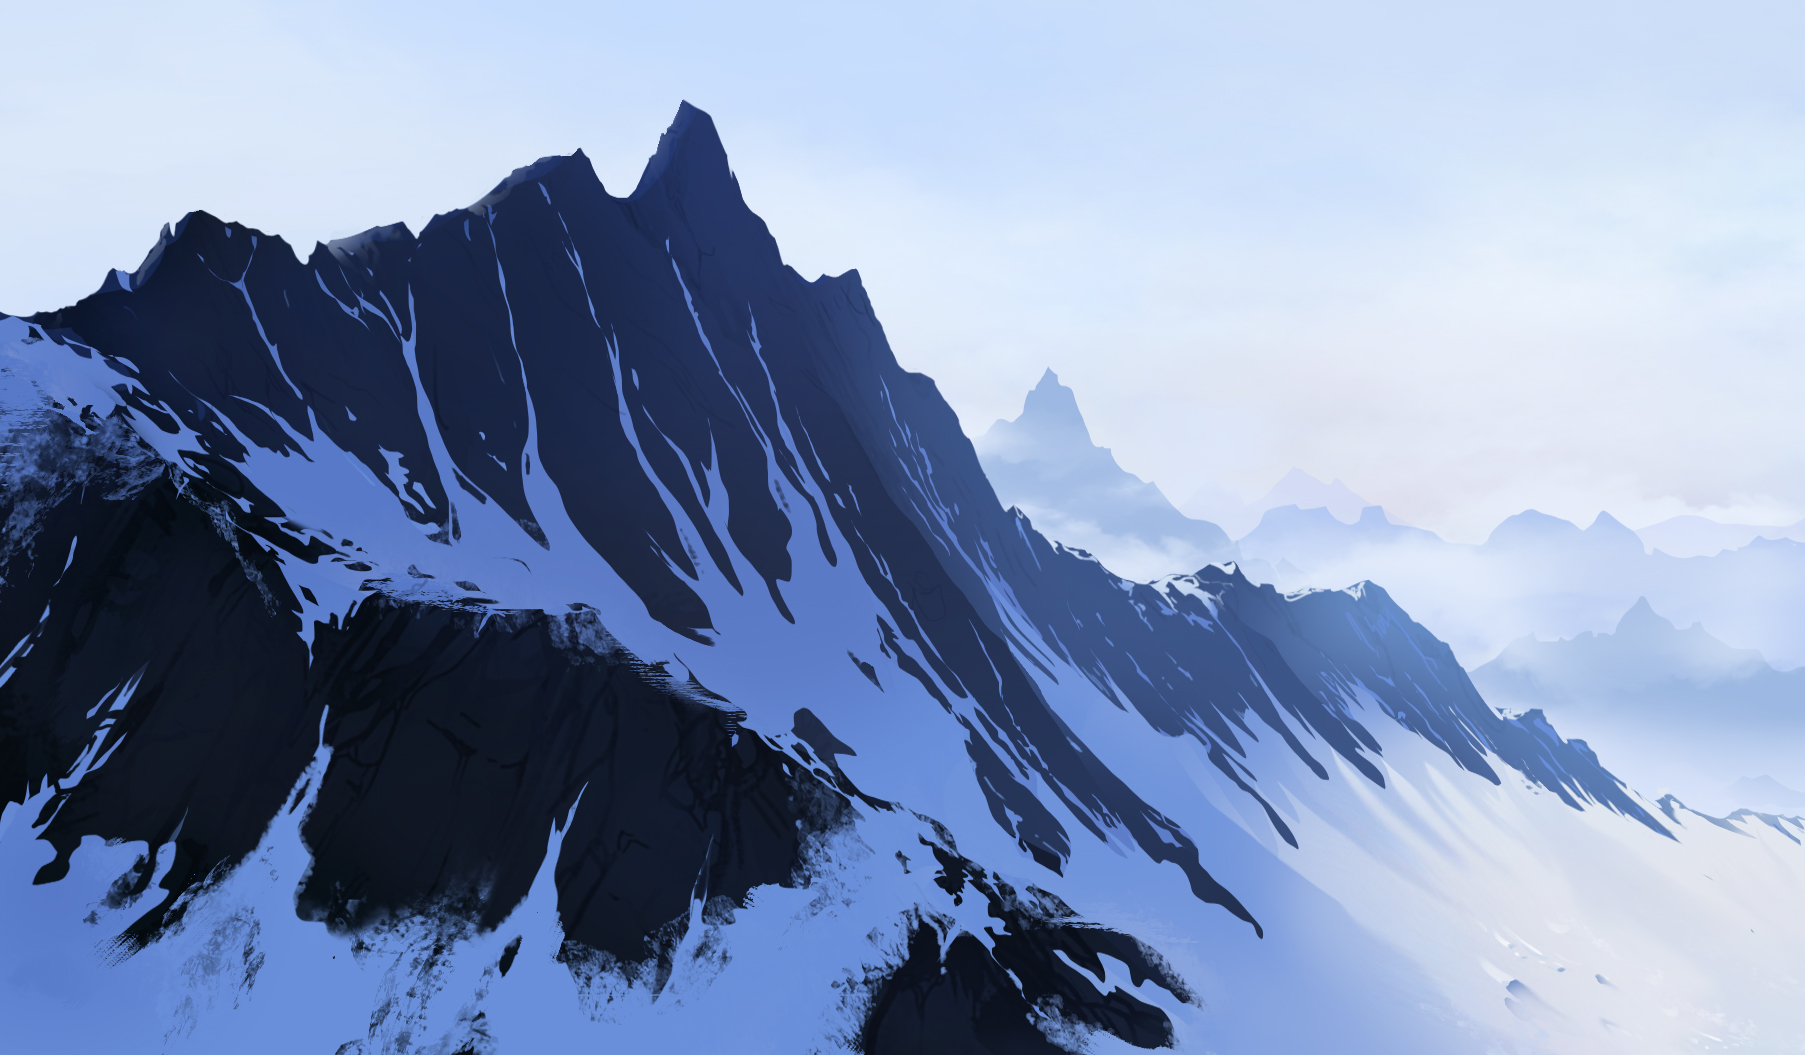
In these 2 photos, we can list the most important points:
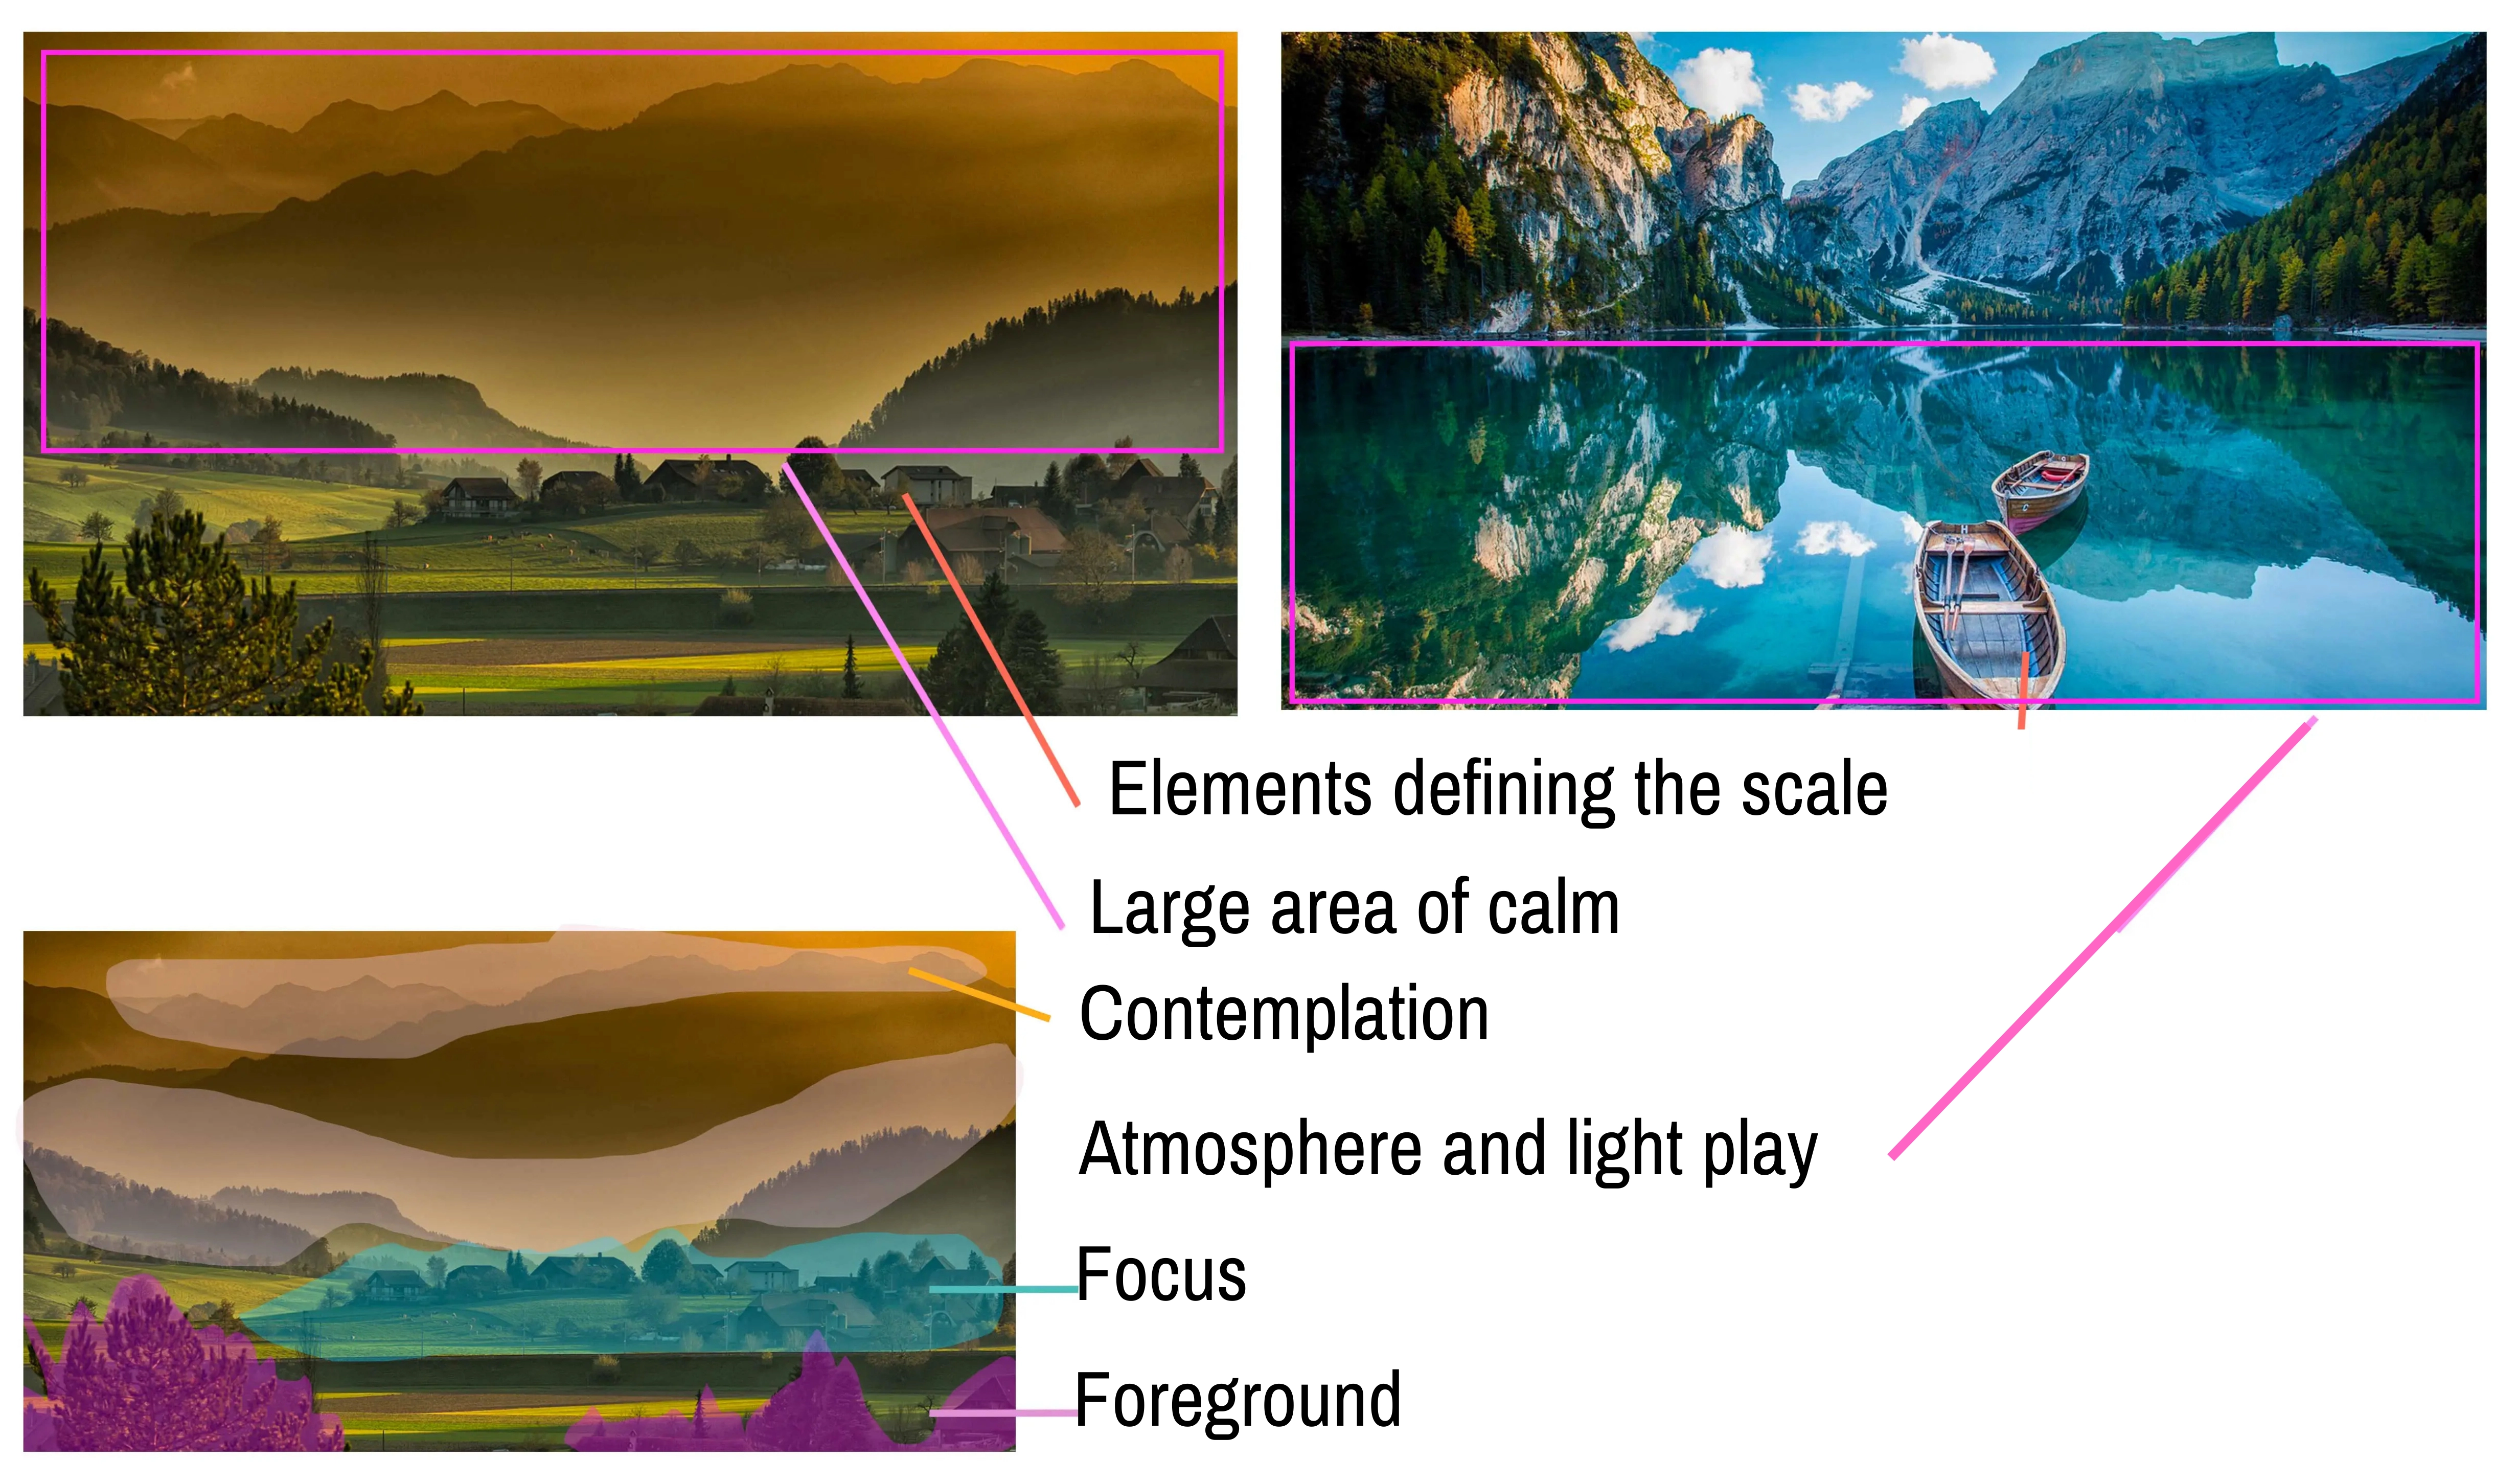
A landscape is such a large subject that it can be useful to add scale reference points to estimate surrounding distances, dimensions and perspective. How can this be helped then?
By using foreground elements, or even scale markers. In the examples above, houses and boats play this role. One can also draw a sign, electric poles, a character, an animal... anything that is a reference in our mind.
❤️ The 3-storey number is a good minimum to represent the depth of the landscape: in the image with the boat, the water and the boats are in the foreground, the mountainsides are in the centre and the whole mountain is in the background. In the image on the left, the succession of mountains with a strong wet atmosphere contributes to a sense of depth.
❤️ It is also noticeable that a limited number of elements are very sharp, while the others are more blurred depending on depth or focal length.
PLAY WITH SHAPES AND MASSES
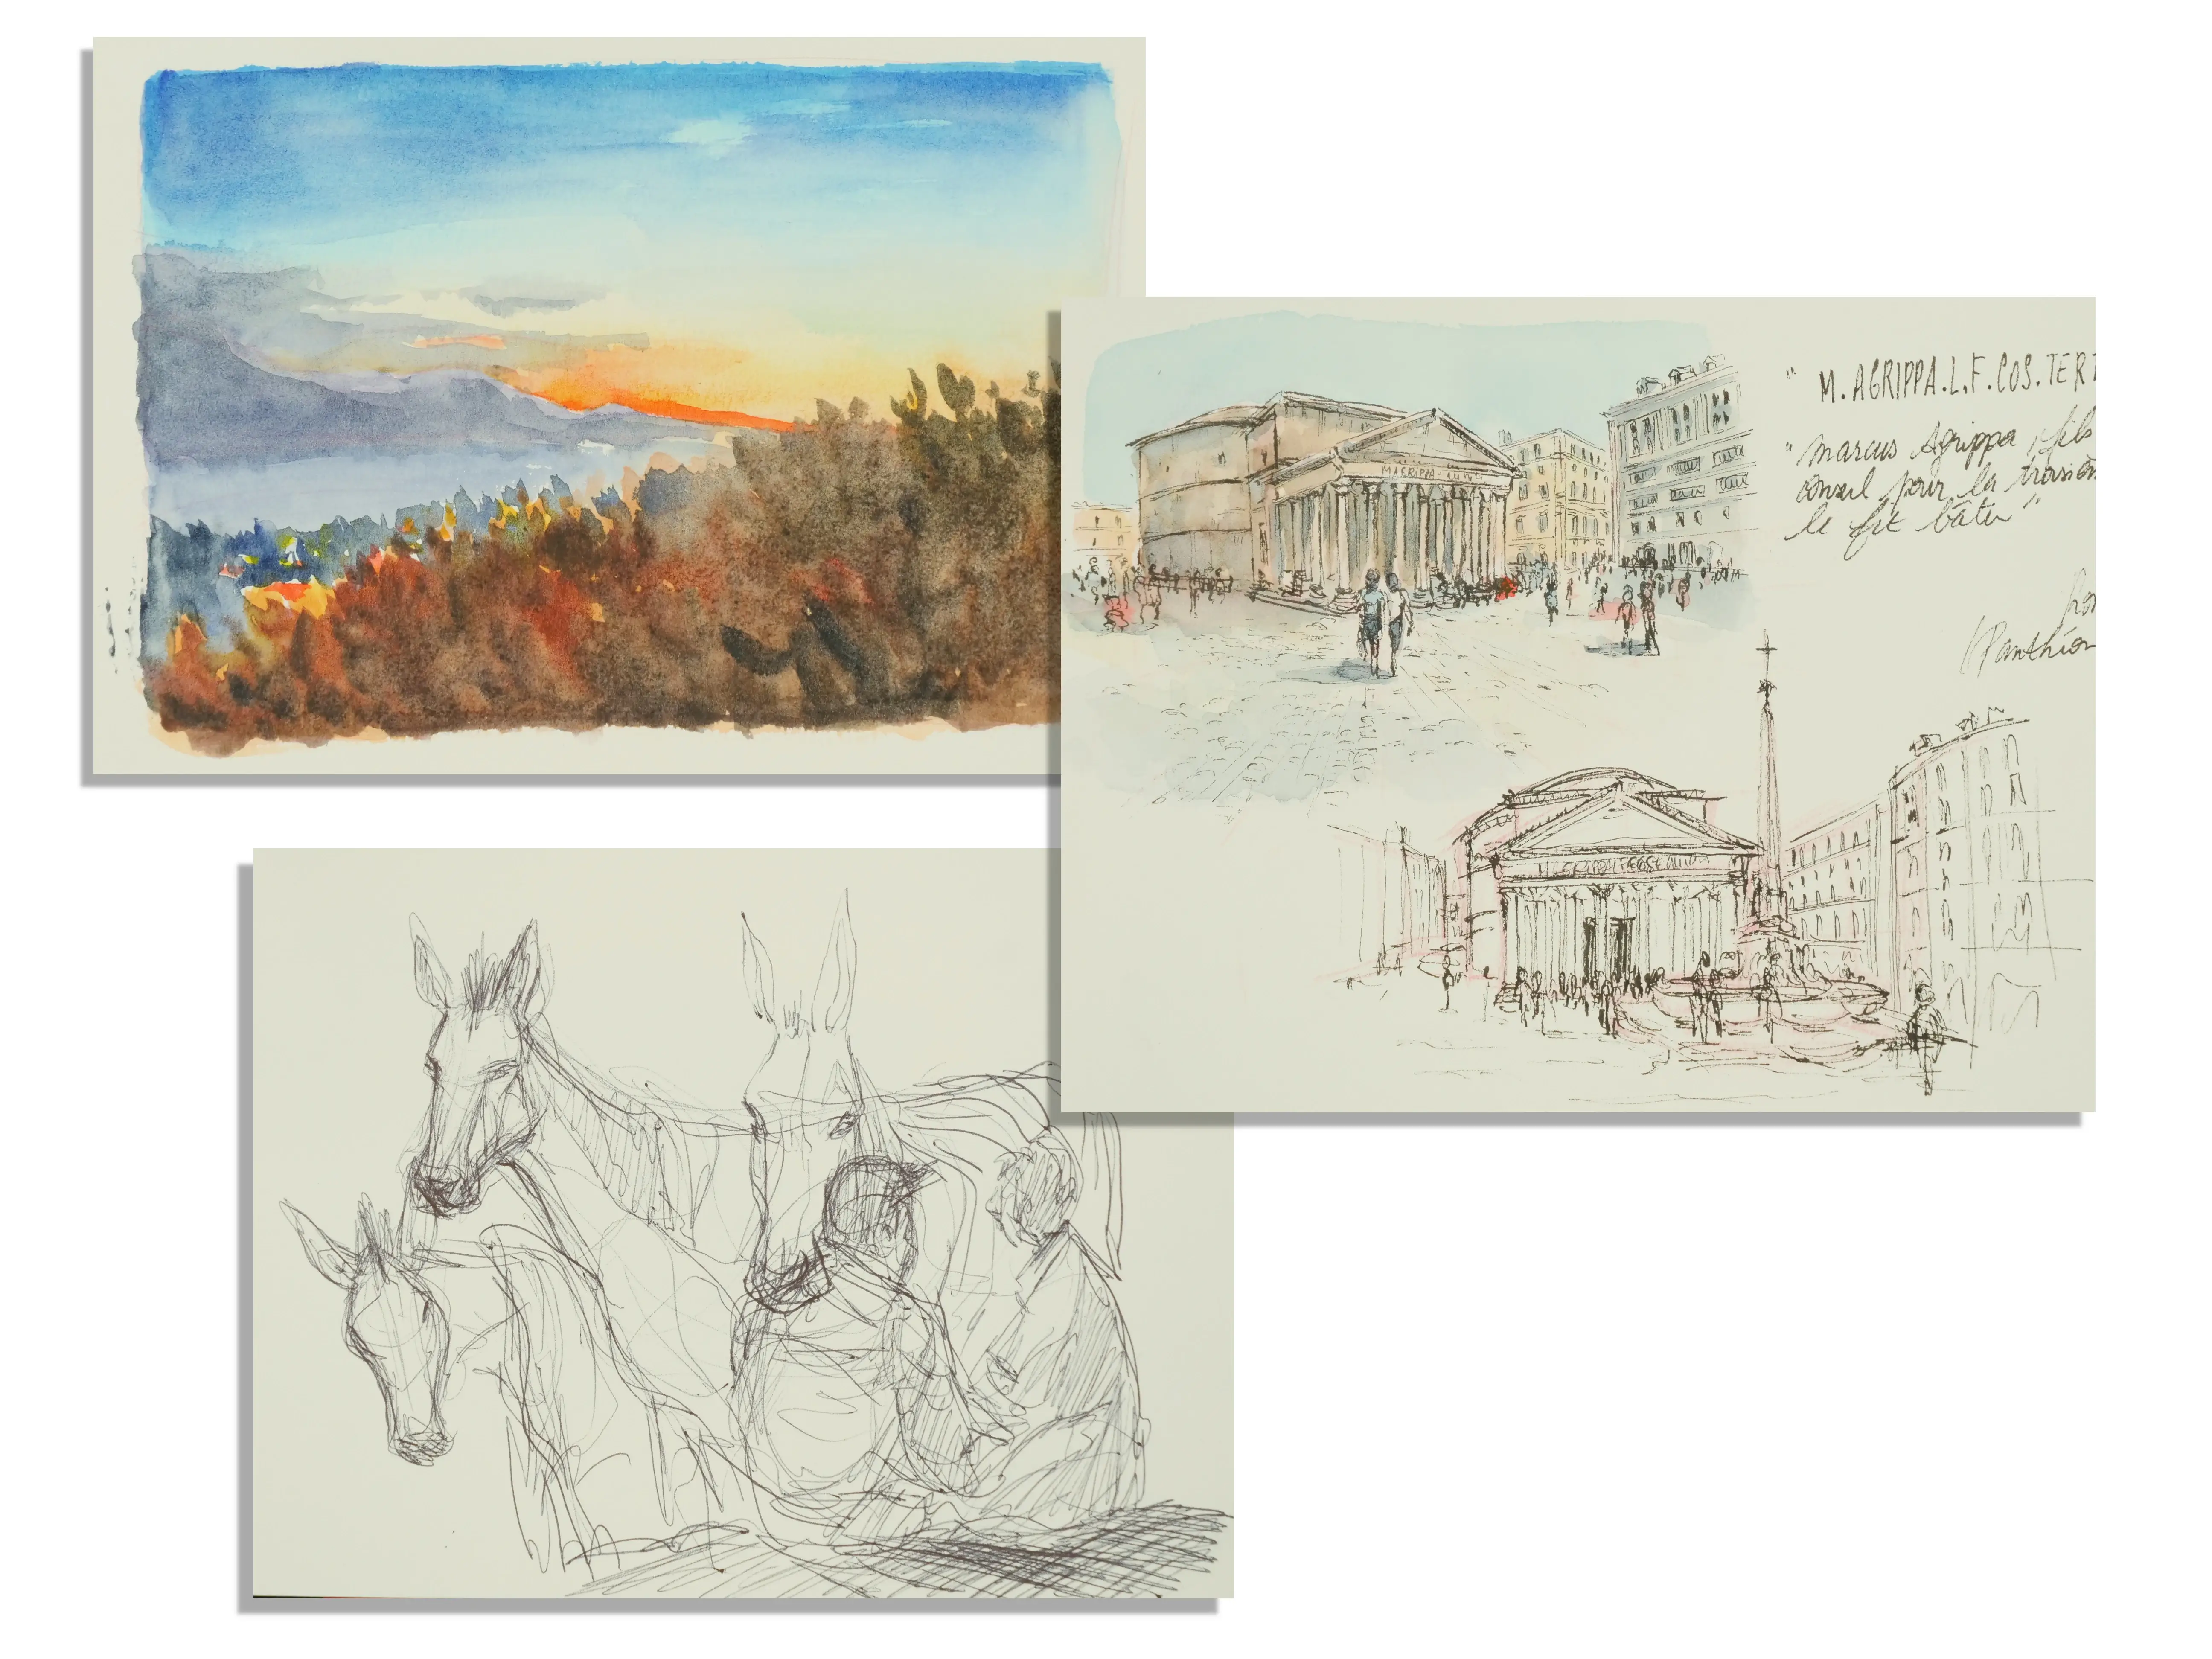
Before moving on to the final drawing, making small sketches helps to find an interesting composition and to make choices about the type of elements (beach or lake, mountains or plains?). Working in black and white allows you to focus on the essentials and establish the main contrasts. I recommend that you choose a neutral but not white background color so that you can easily place the lights, which will then stand out. You lose this advantage if you draw on a white background.
For composition, one can play with shapes (rectangular, round, triangular...) and the form of lines (curved, vertical, horizontal). The choice of shapes is significant and contributes to the feeling experienced by the viewer. For example, in my sketch at the top right, the atmosphere seems more urban and cold with the use of vertical and angular shapes, contrary to the sketch just to its left.
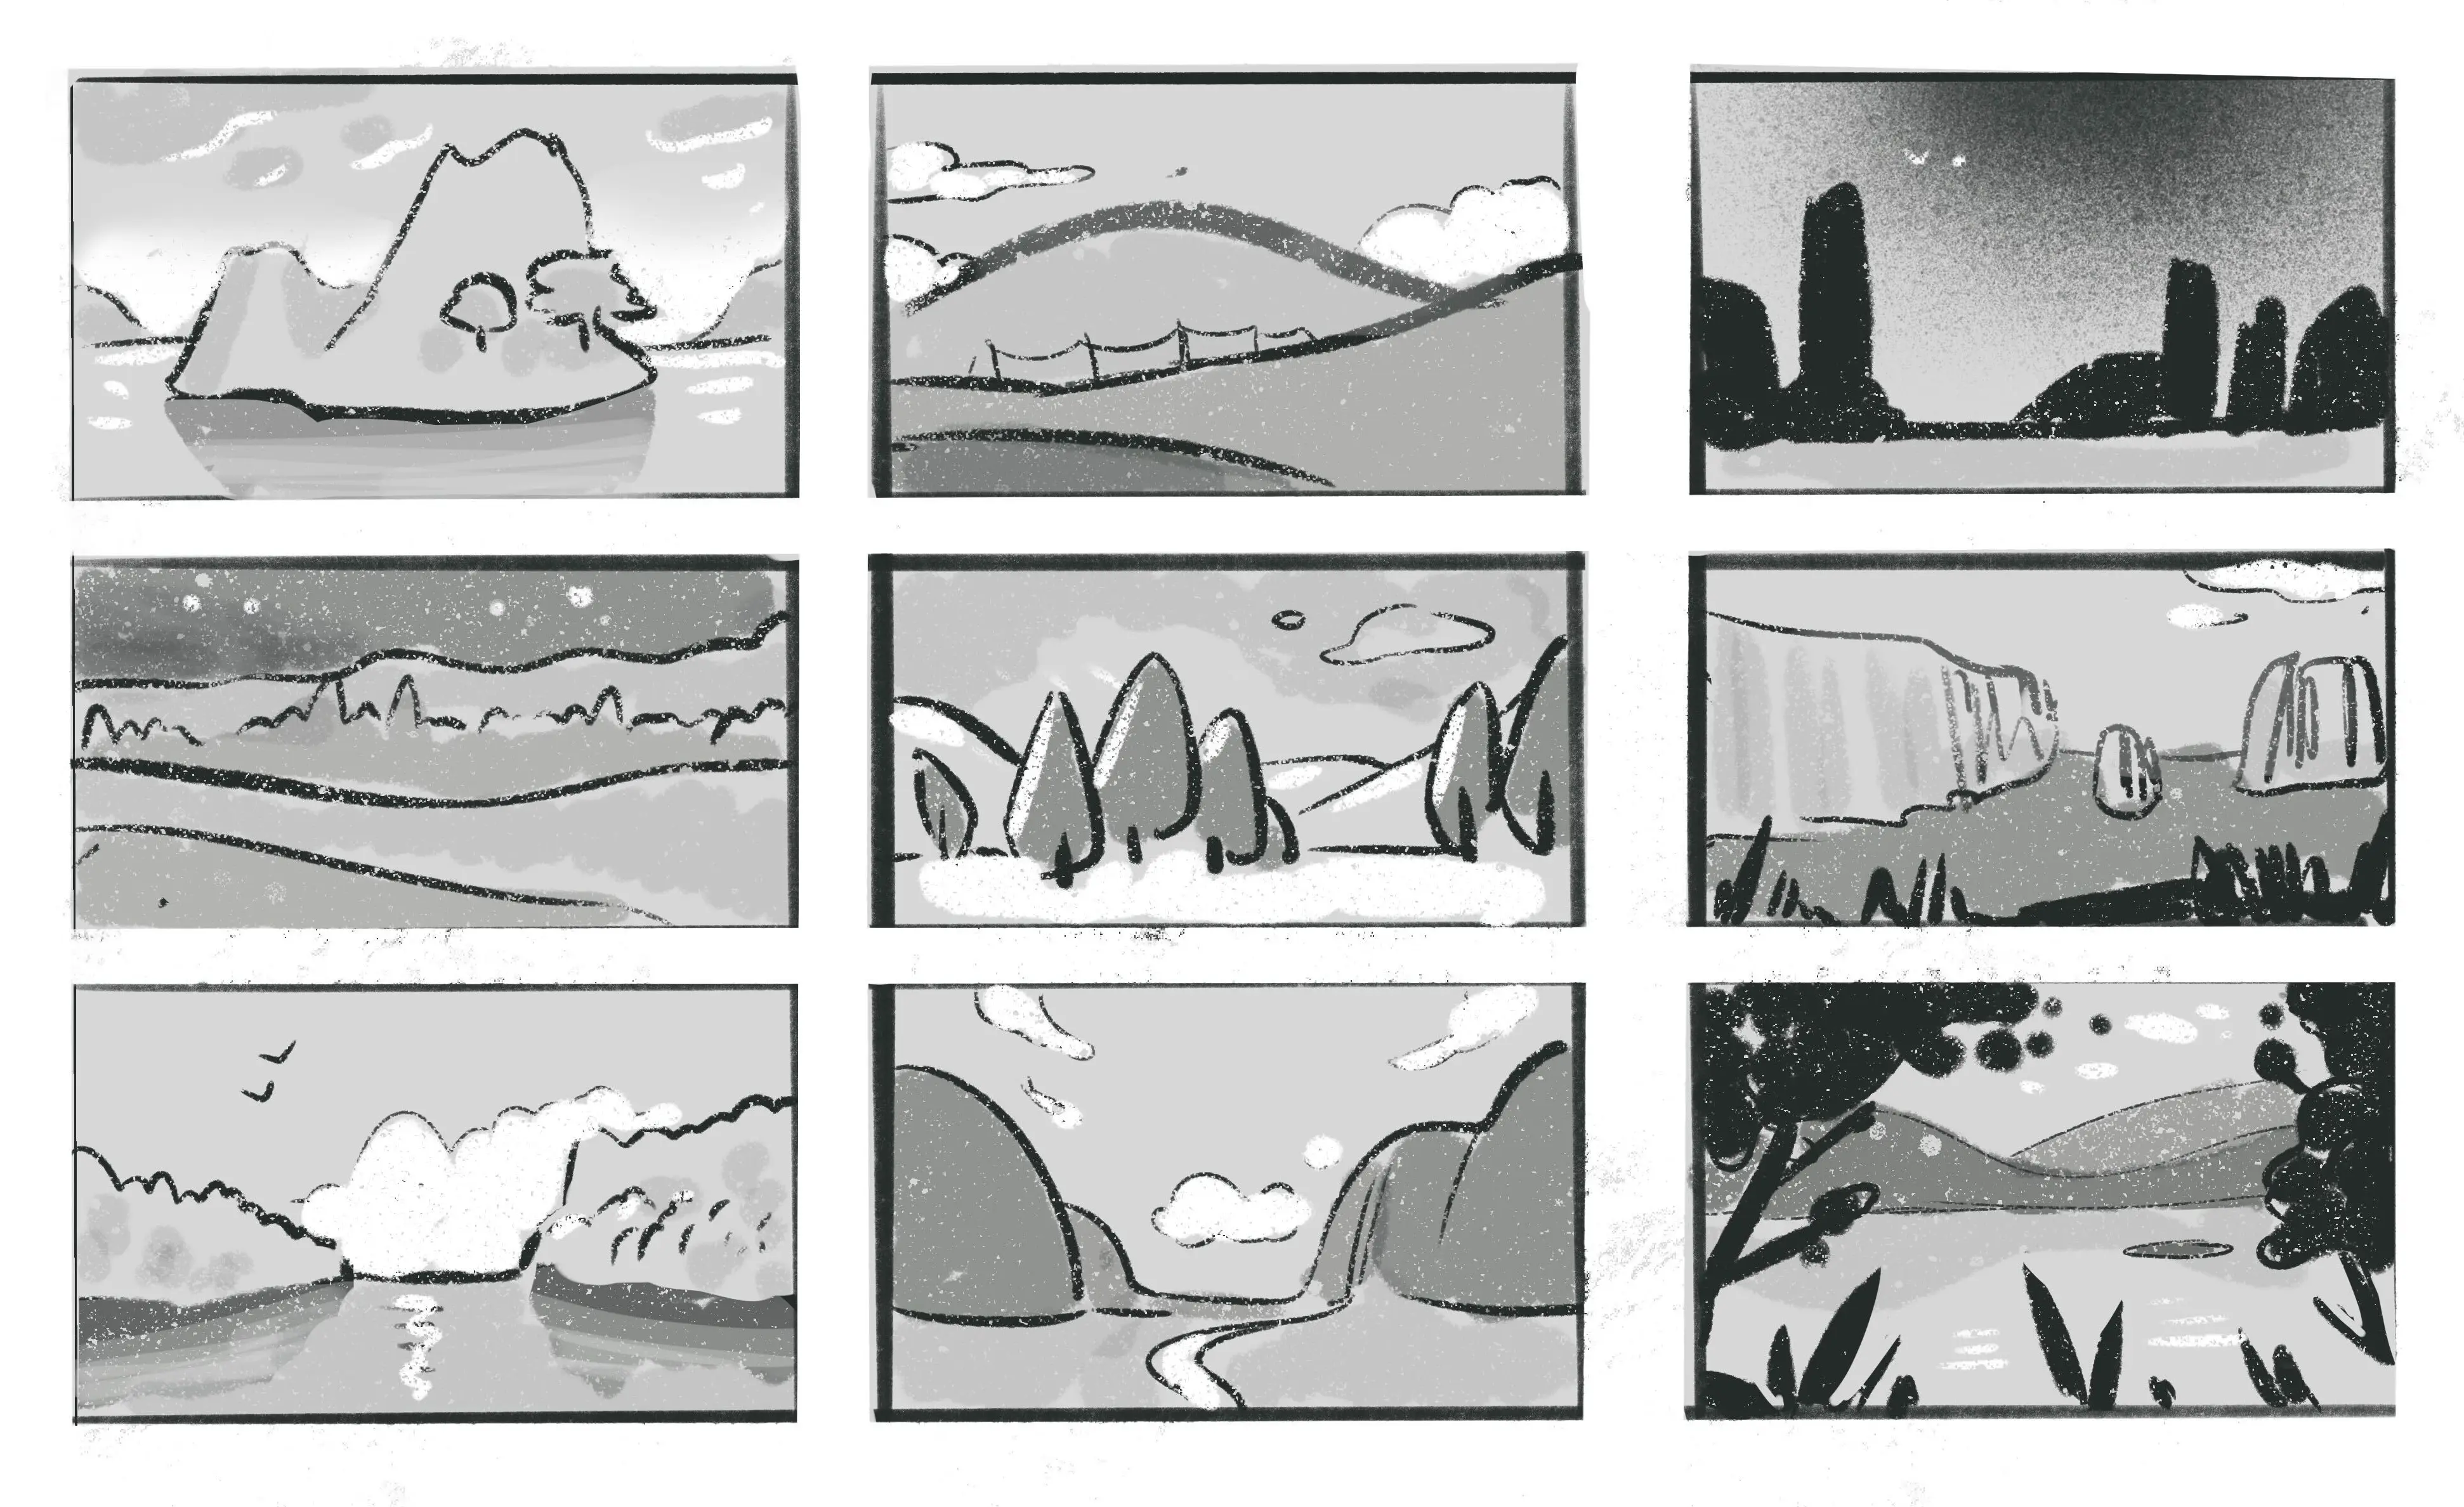
When you have a thumbnail that you like, you can create the larger design with much of the work already done!
DRAWING A LANDSCAPE STEP BY STEP
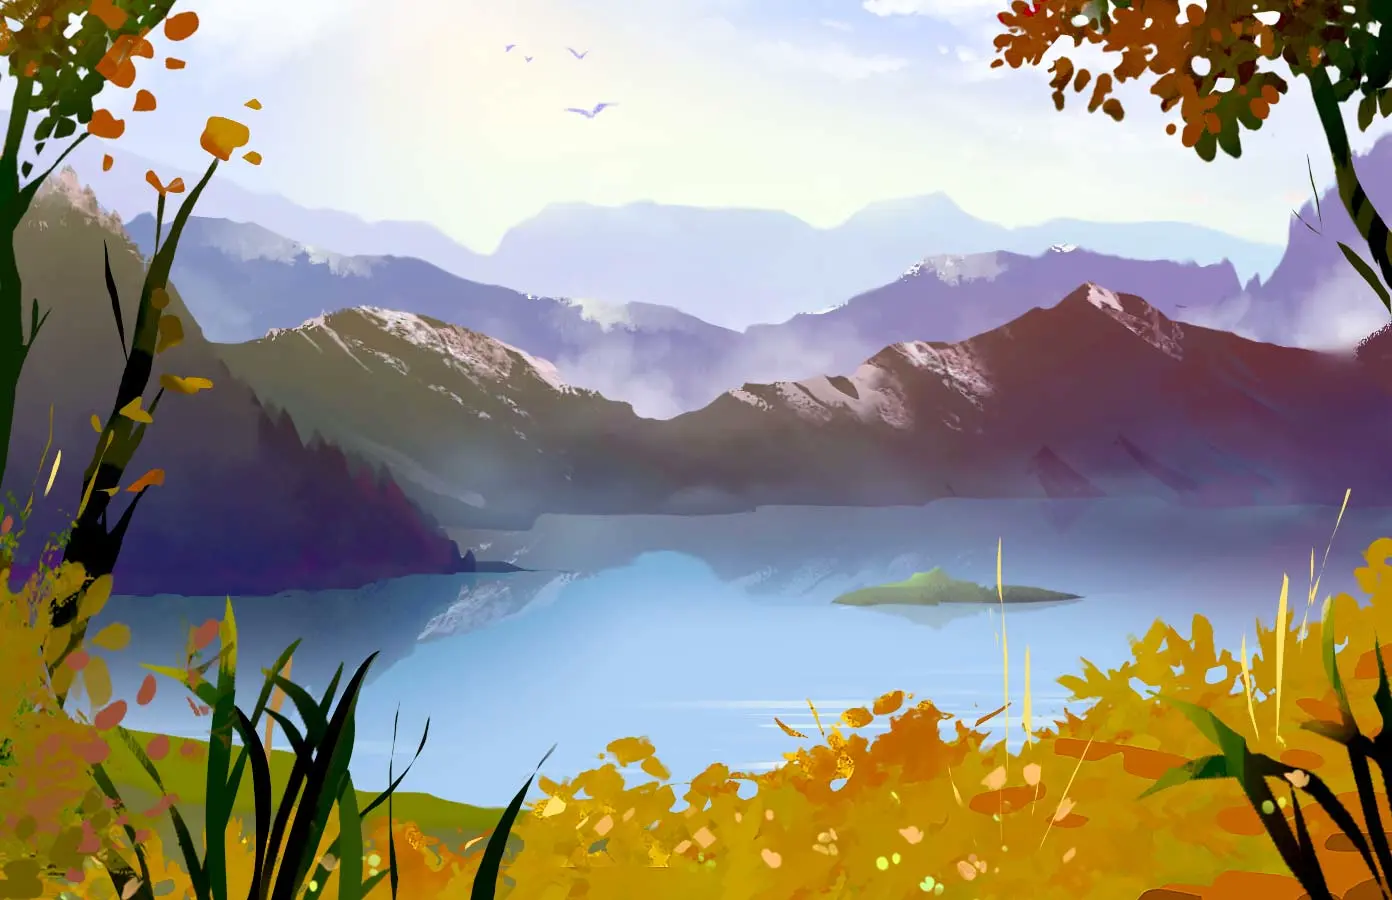
For the drawing we are going to create, I will base it on the last thumbnail on the bottom right. Now is the time to decide on the desired atmosphere and colours. I want to illustrate mountains in autumn at the foot of a large lake. Vegetation borders the lake and it is there that I position my viewpoint to add depth to the landscape, creating several layers.
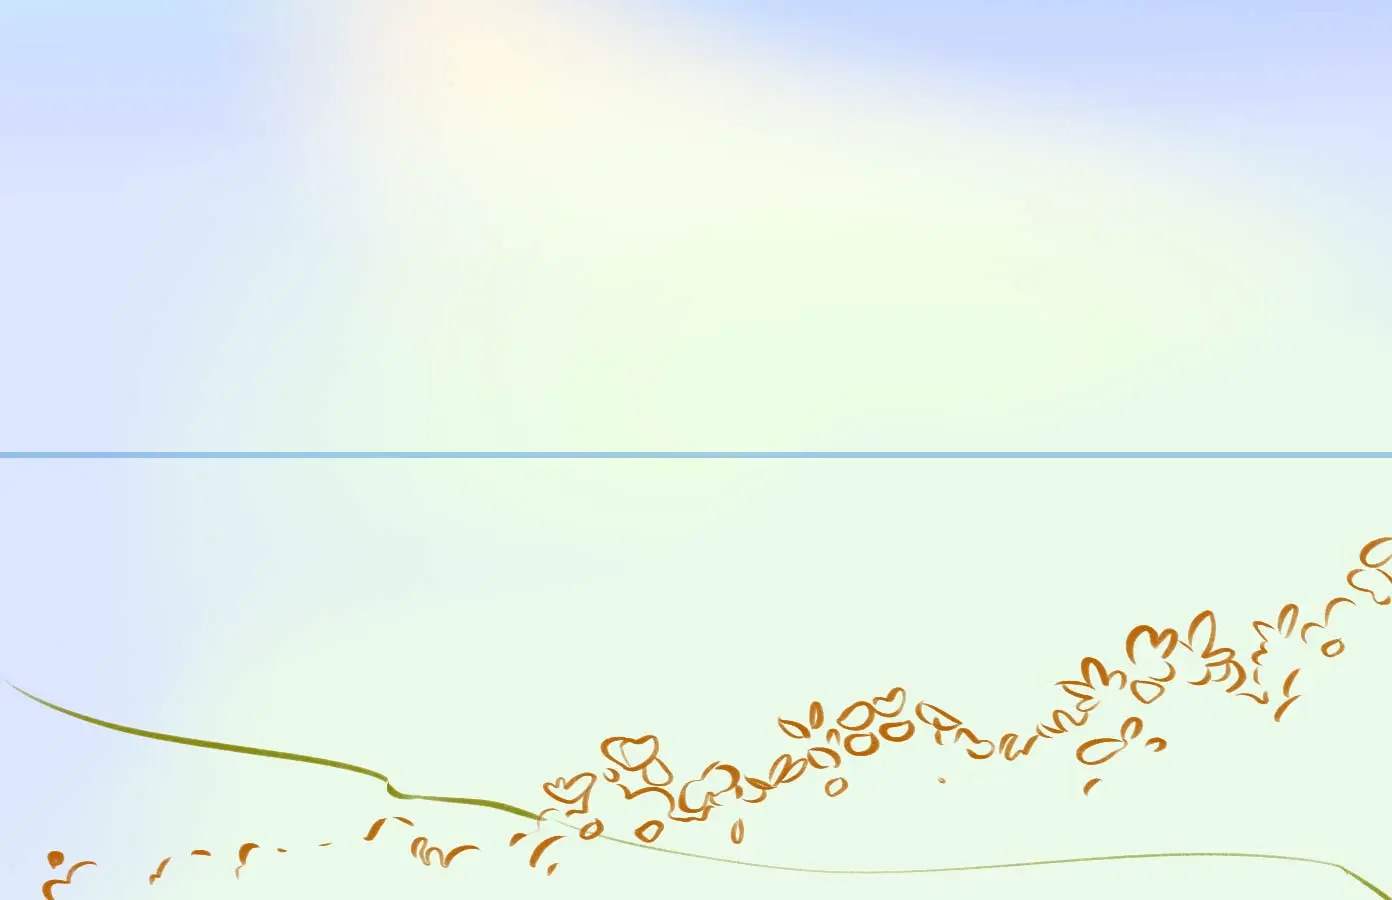
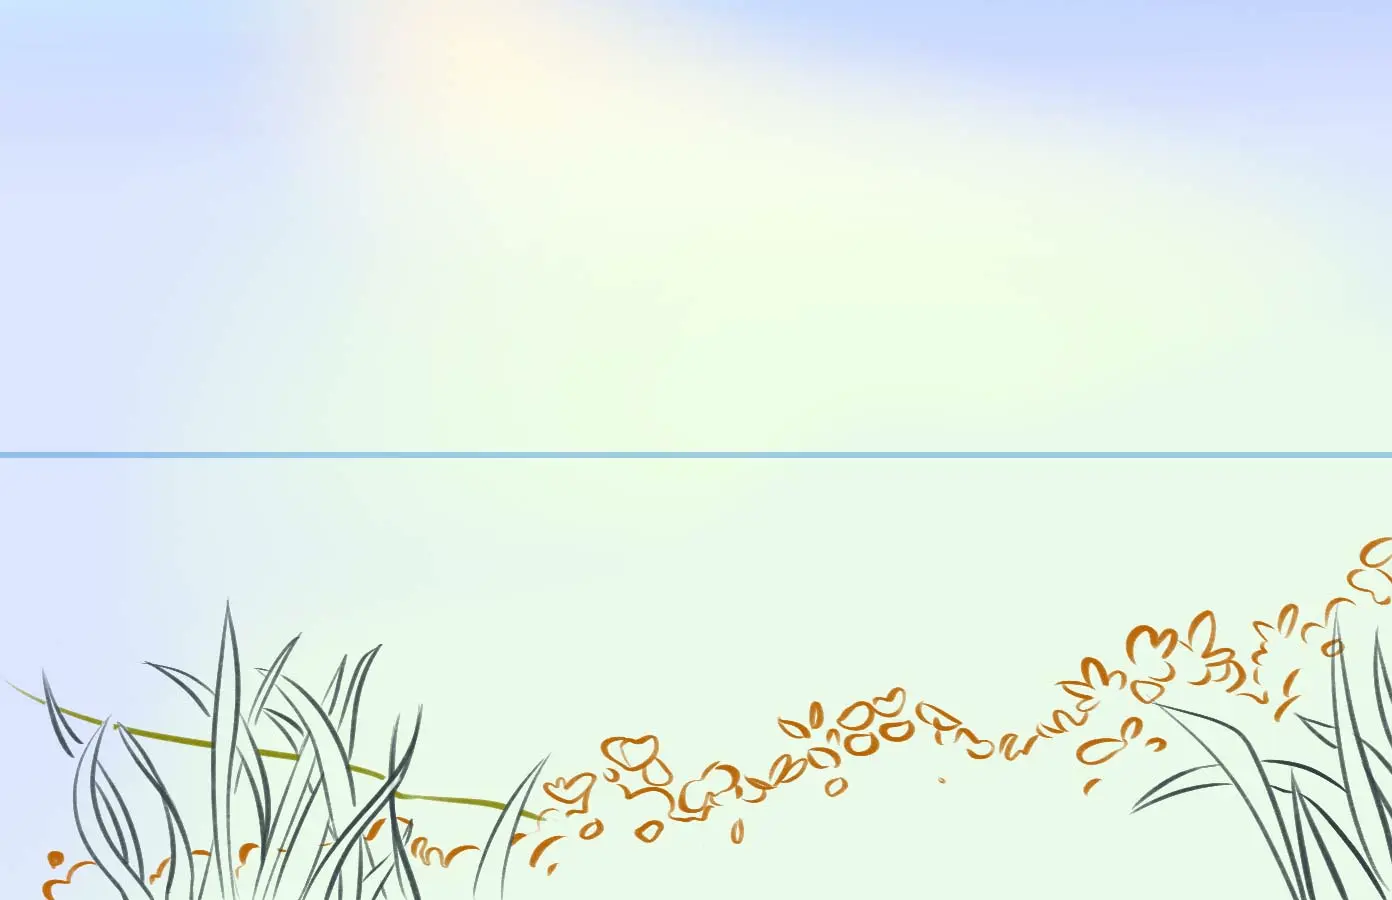
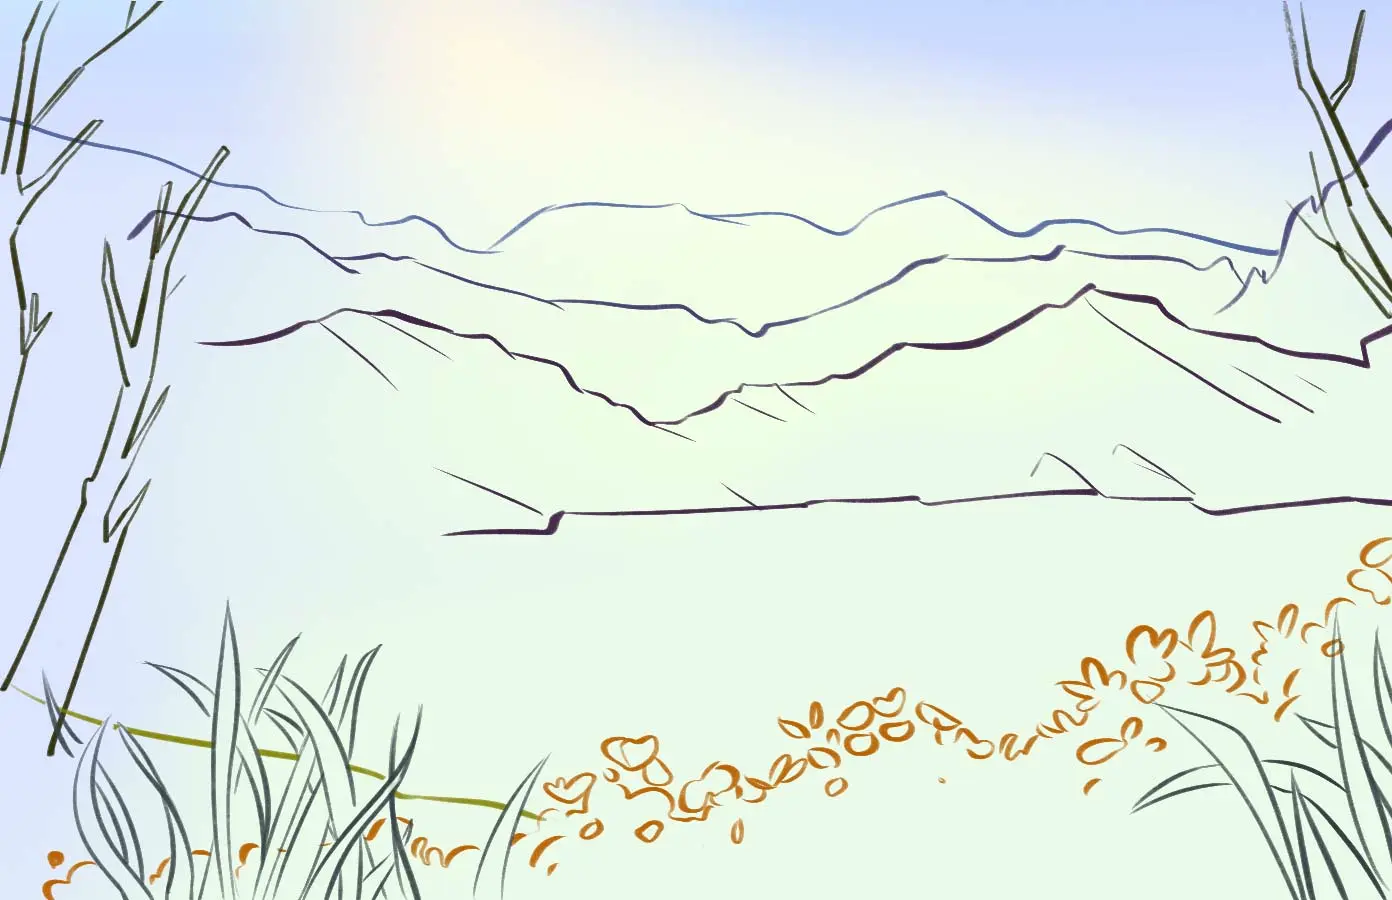
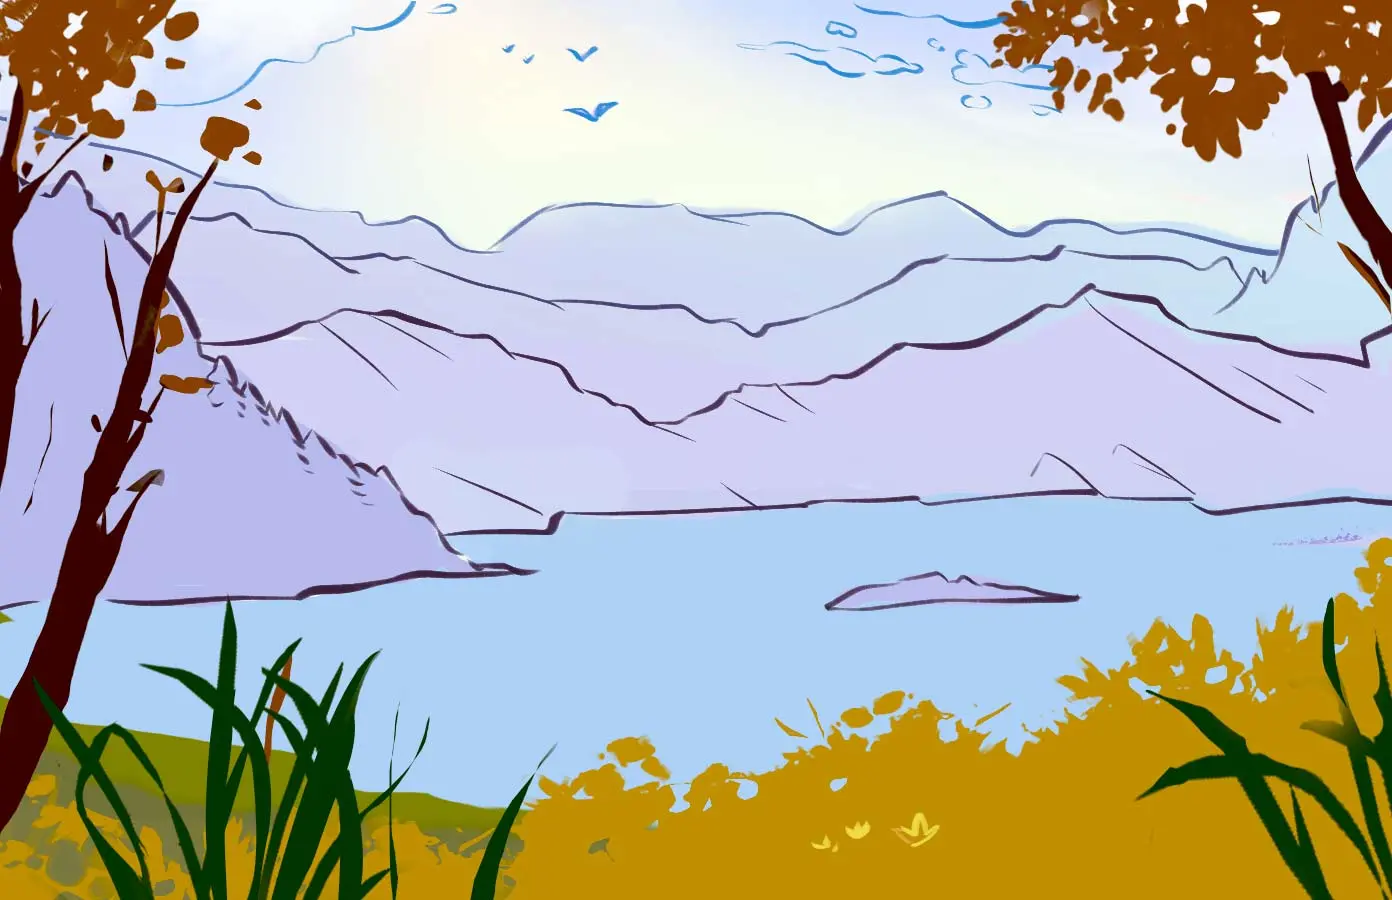
1/ I set the horizon line (the blue reference that I'll erase later).
From now on, I choose the ambiance and the time of day for the visual by coloring the sky. I opt for a pastel-colored base with a very pale yellow bright glow at the center, slightly at an angle for a bit more dynamism.
At the bottom of the image, I draw the ground in the foreground, where there will be grass and detailed vegetation.

2/ I sketch the shape of the leaves of the bushes with ochre.
3/ I draw tall grasses. Thus, I play with shapes to contrast with the more rounded forms of the bush leaves.
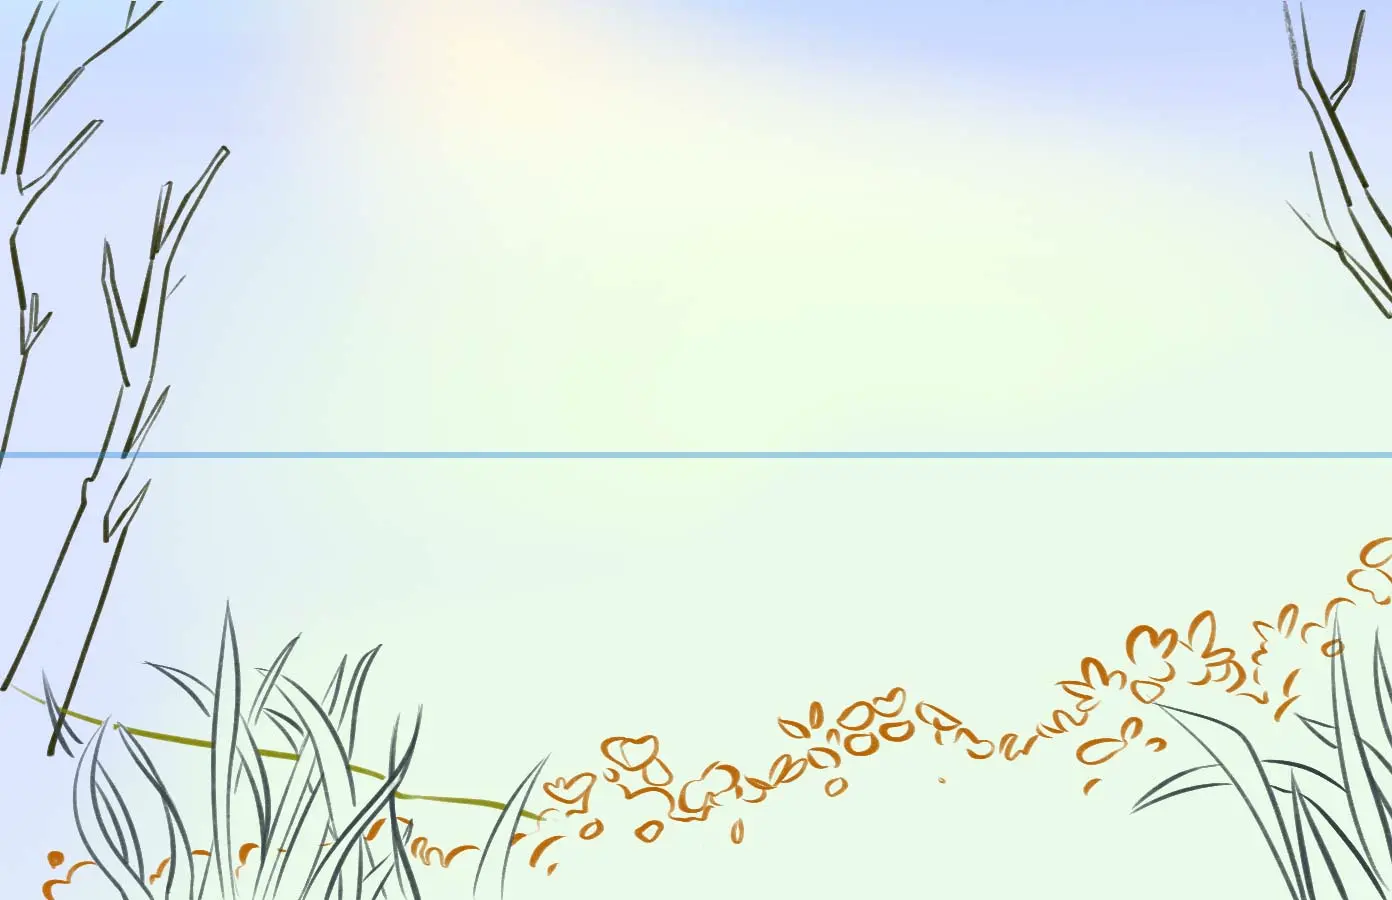
4/4 With straight lines, I sketch the trunks of the trees that will line the bank. They frame the landscape on both sides.
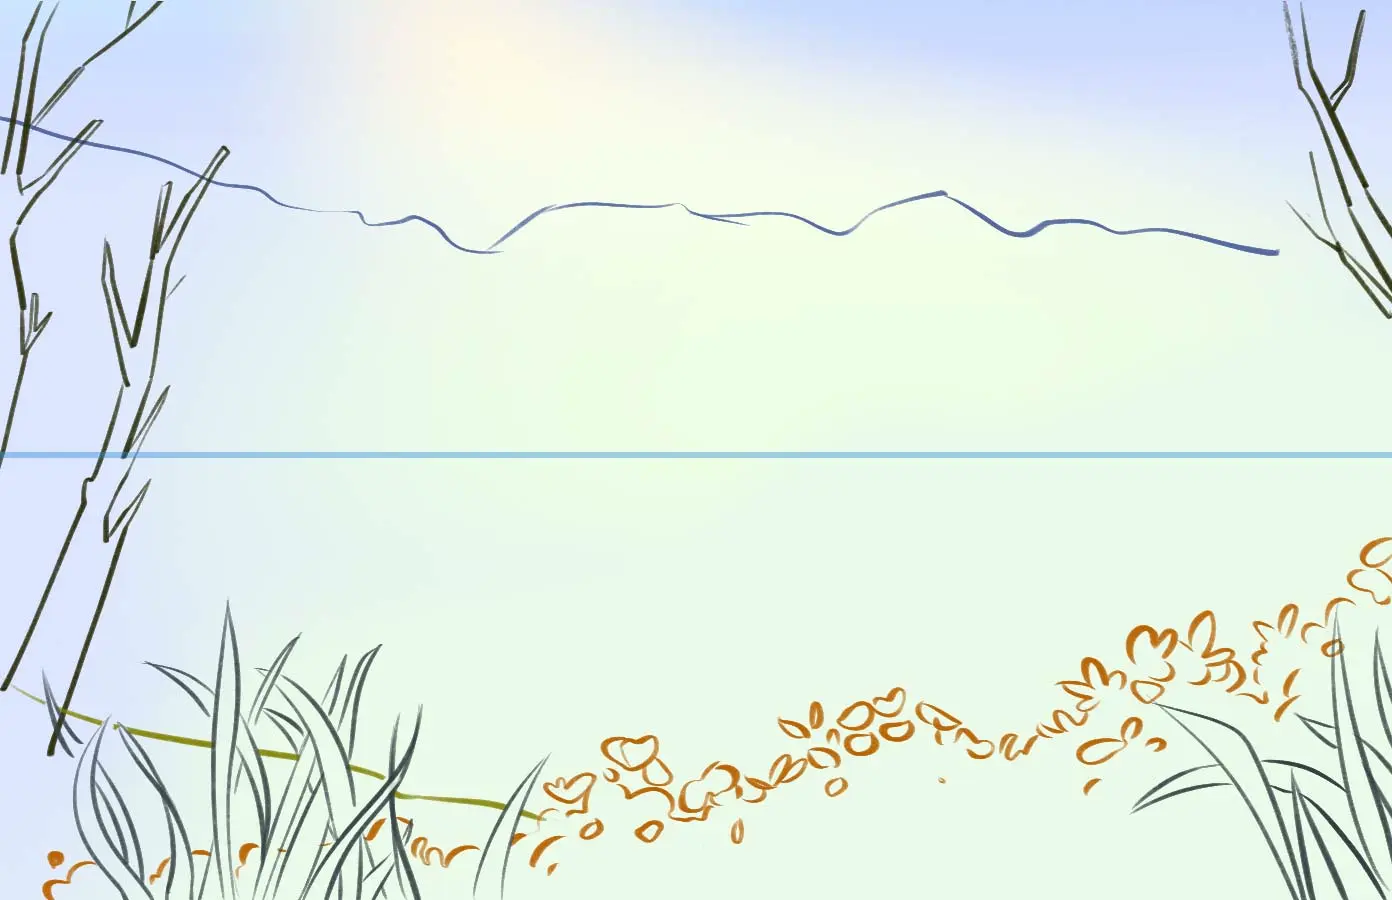
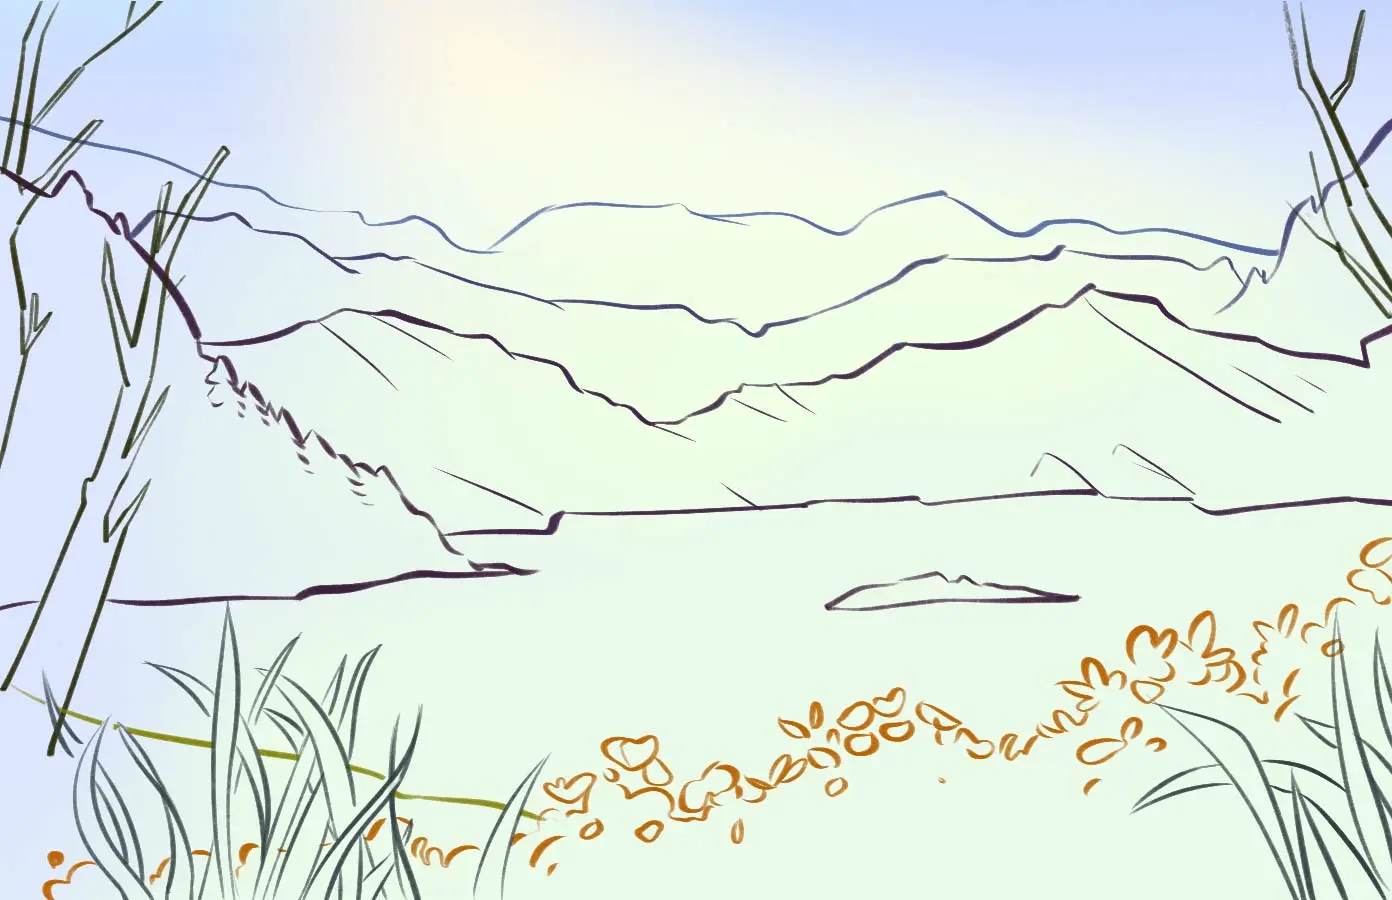
5/5 I draw the mountain chain that will be in the background of my drawing. Have fun with this outline by creating irregularities, dips, and peaks... remembering that the farther away the mountains are, the blurrier the line will be and the curves (add as few details as possible).
6/6 I trace the vertices that are in front of the previous ones.
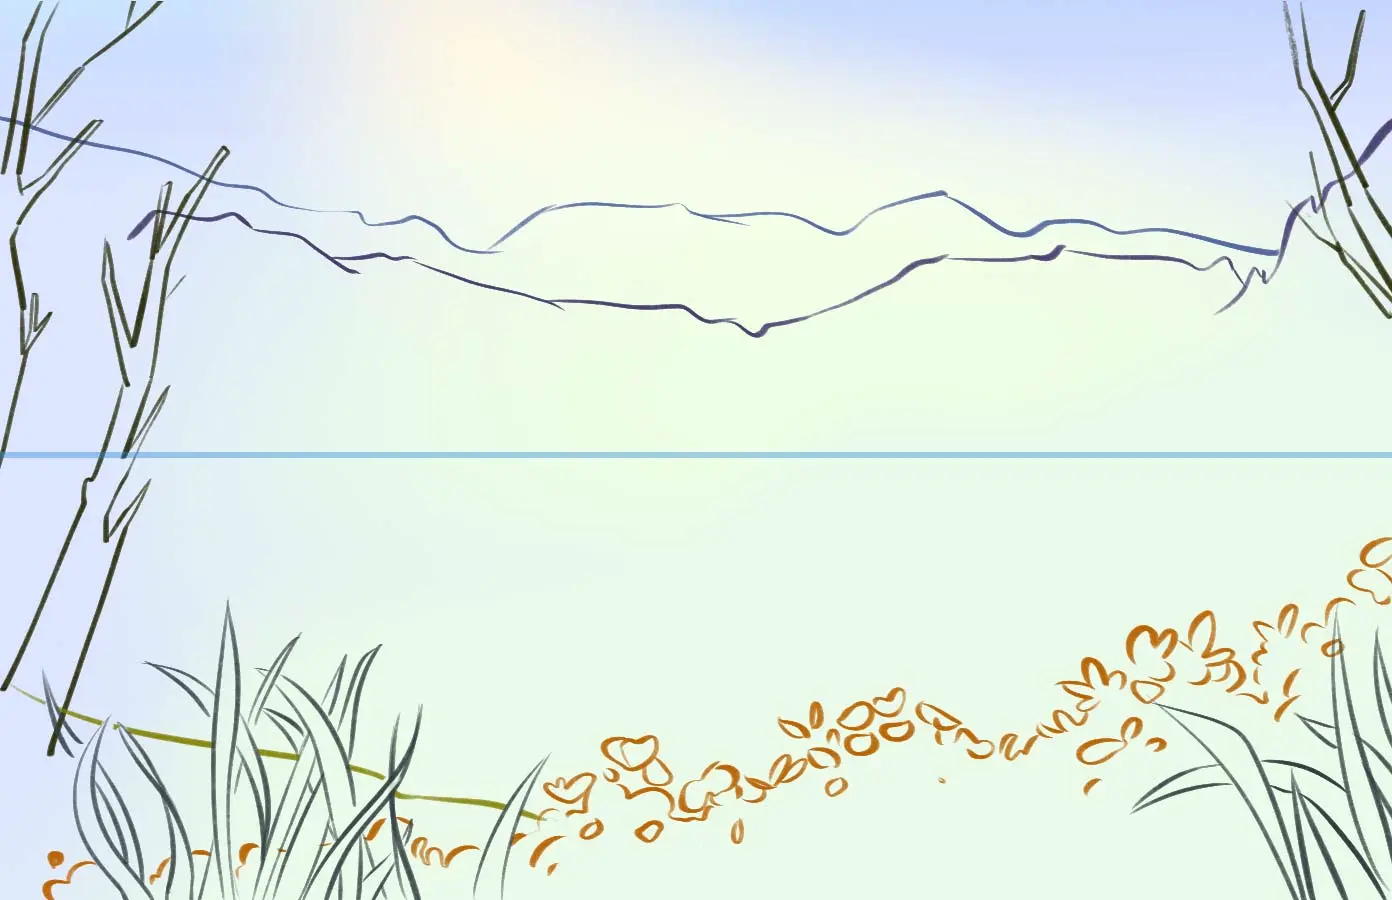
7/7And so on.
As these mountains are closer to the observer, I start adding details: I sketch the sides of the mountains and the peaks are more detailed and angular.
8/8 This last mountainside is even closer and has pine trees whose upper silhouette I detail. I also add an island in the middle of the lake.
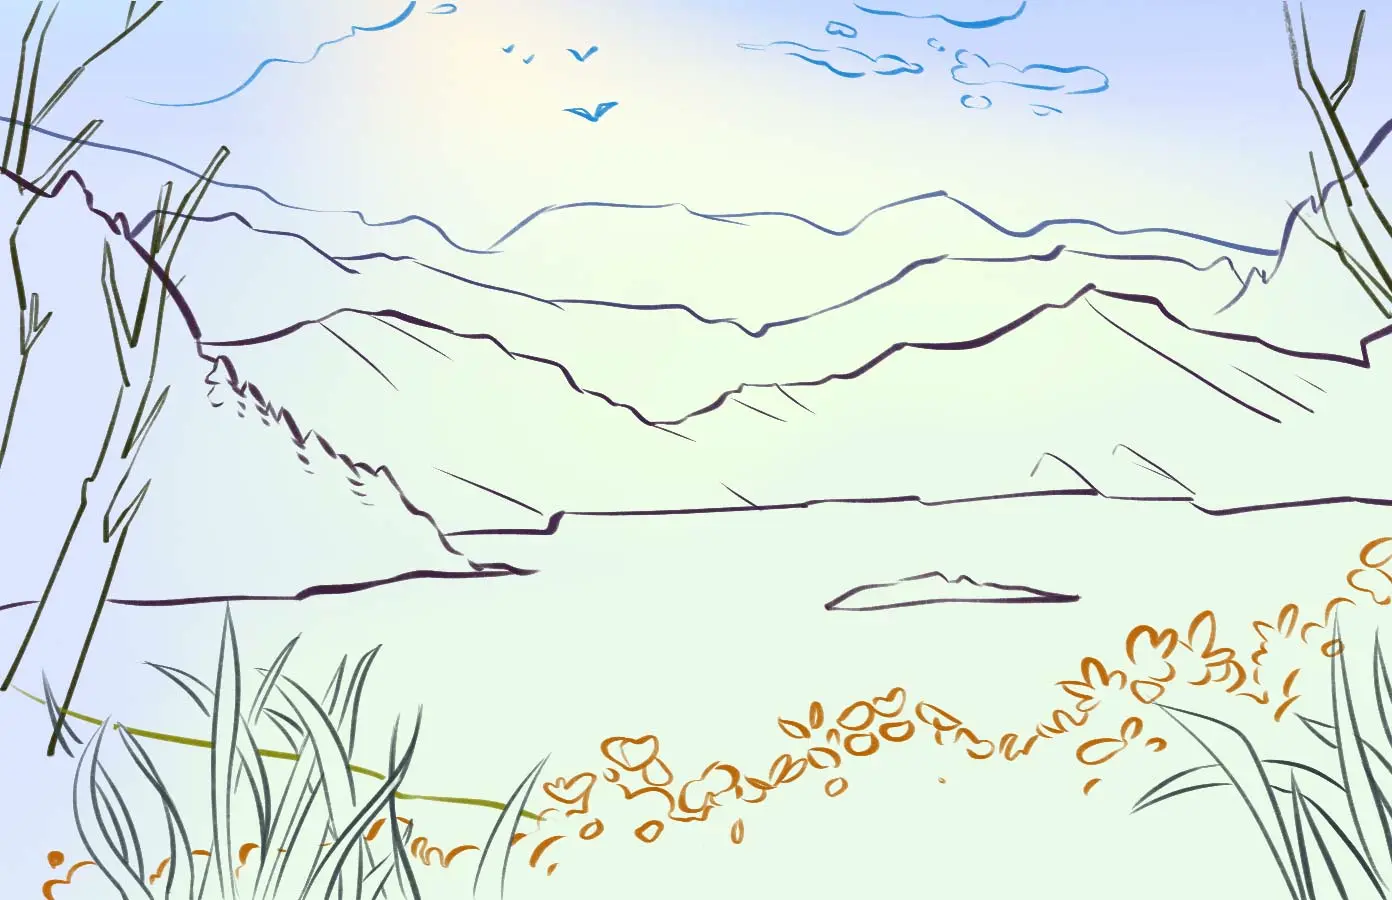
9/9 Here, I define the elements of the sky with a few clouds. Birds are elements that add depth to the drawing. The smaller they are, the bigger the mountains appear.
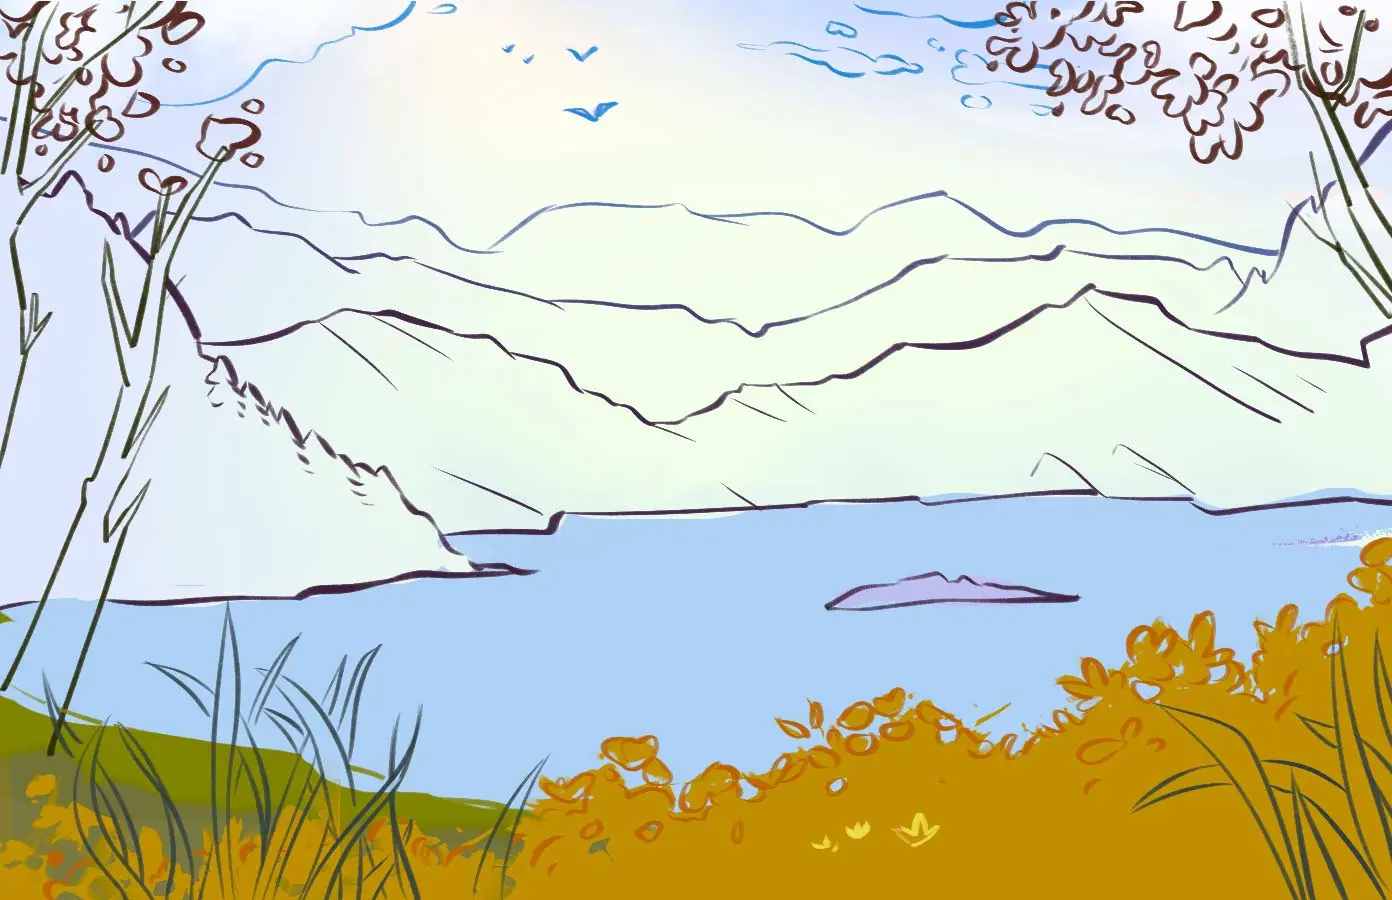
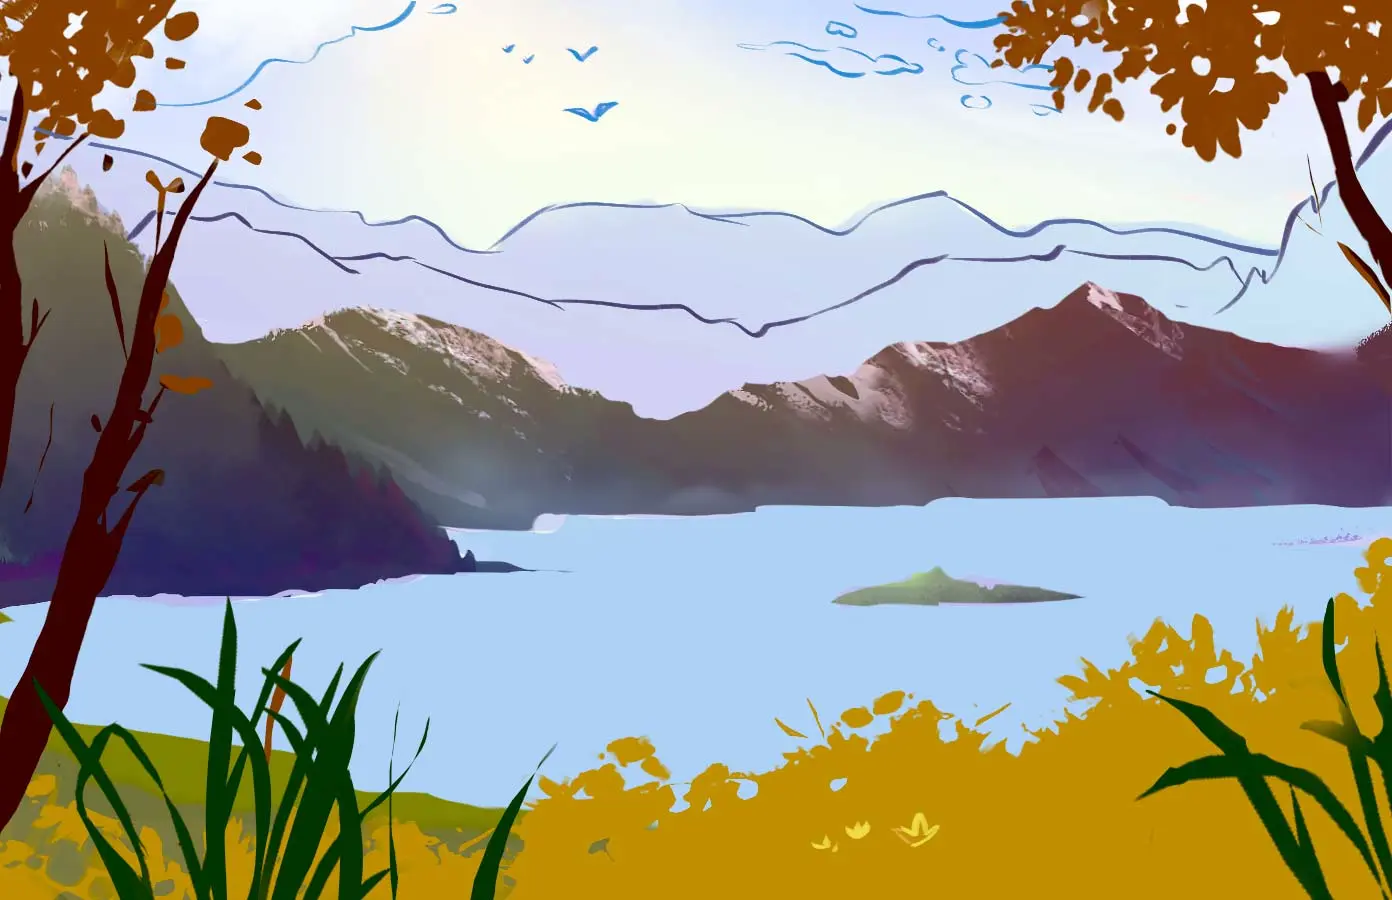
10/10 I define the vegetation of the trees in the foreground and choose a coloured palette for the autumnal atmosphere of the drawing: I want to contrast the warm orange tones of the leaves with the bluish purple of the distant mountains.
Choosing such complementary colors helps to create a more impactful and appealing visual.

11/11 I first roughly define the colour zones of the design. For the autumn vegetation, I choose a yellowish green for the grass and an ochre for the leaves of the bushes. At the moment, I am colouring the water of the lake with a light blue.
12/12 I do the same for the trees, the grass, and the mountains by separating each area: one for the mountains in the background, another for those in the foreground, etc. I will detail each area later.
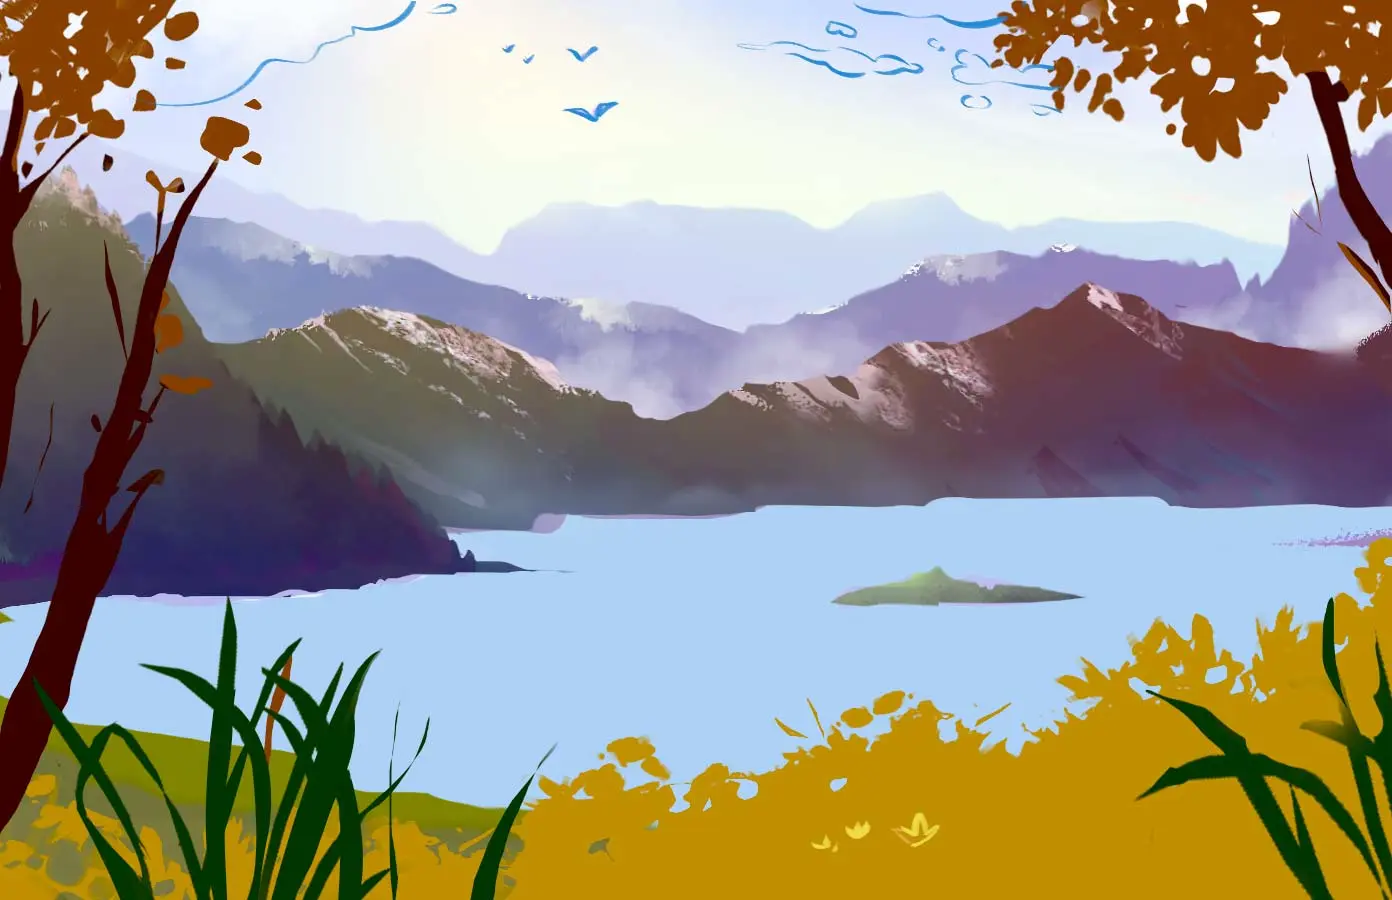
13/13 I erase the sketch lines and create a gradient from ochre green to purple for the nearest mountains. The colours of these mountains will be more vivid and contrasting than those of the background because of the perspective.
I detail the peaks with a textured brush to imitate snow/rock. Each brush stroke maintains the same angle to create areas of light and shadow and thus volume on the mountains.
At the base of the slope I want more detail, I paint the shapes of the pine trees in triangular shapes and choose a deep blue/purple to emphasise the cold atmosphere around the lake. Finally, I add a light white mist at the base of the mountains.
14/14 erase the remaining drawing lines for the mountains.
For these, the level of detail will be lesser: I no longer use green but a bluish violet because the details get lost in the distance.
A few textured brush strokes of pale yellow on the peaks to sketch the snow on the penultimate mountain chain, and, for the very last one, the color will be even lighter and the edges of its design blurred; as if the sky light was blending with the peaks. Between each mountain, I paint a white mist.
15/15 With the same light purple as the last mountain chain, I delicately paint the birds.
I erase the last lines of the drawing and refine the slightly transparent white clouds in the sky, subtly with rounded and textured shapes, like cotton. For the water, I create a light gradient from a deeper blue to a pale blue from top to bottom. Then, I add the reflection of the mountains and the islet on the water, lowering the opacity considerably and erasing the background a bit.
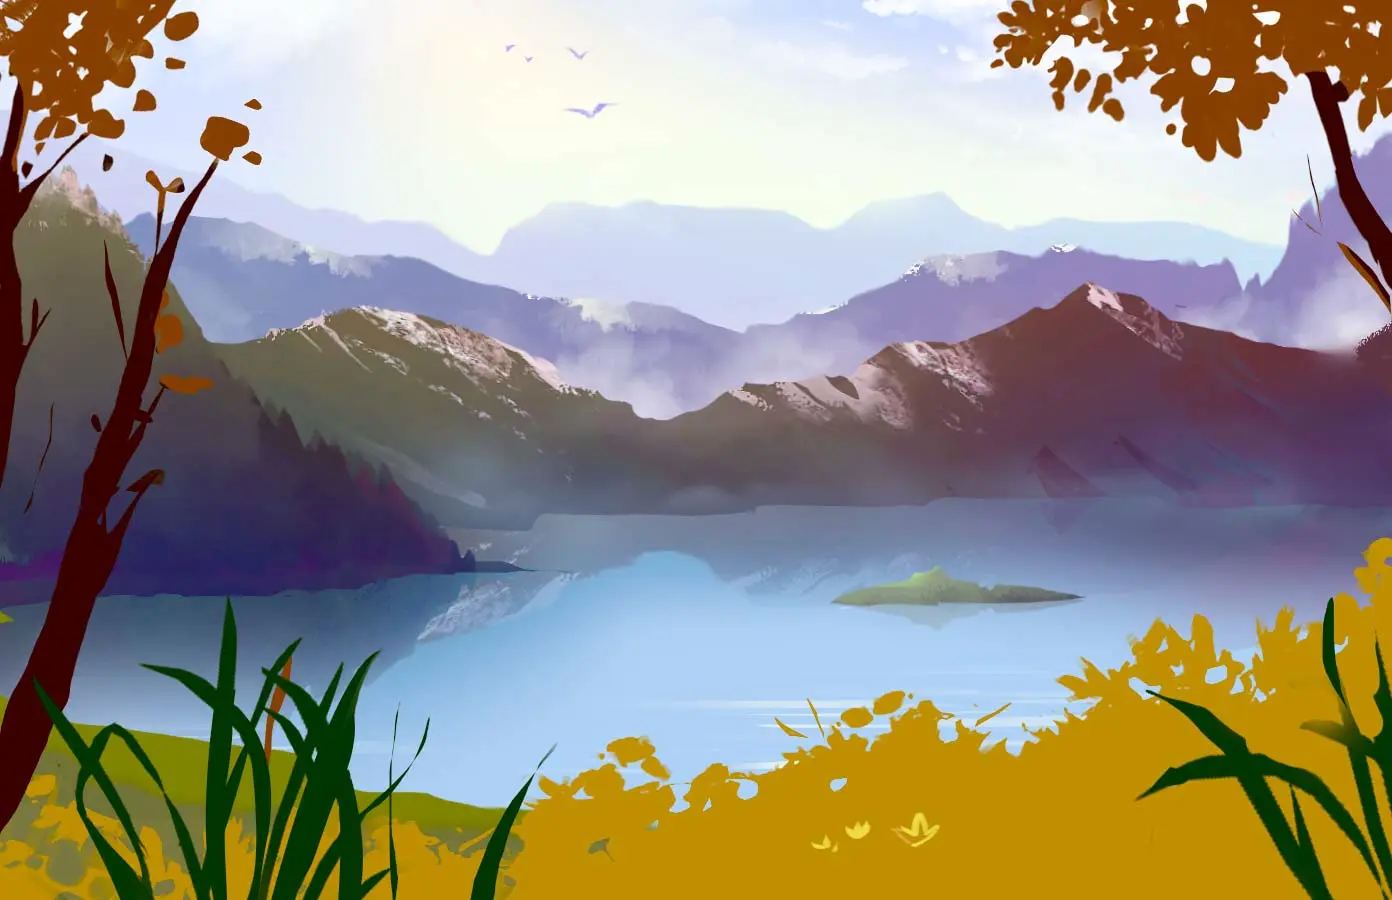
16/16 Finished with the mountains, I move on to the foreground. I detail the mass of vegetation by alternating ovoid shapes with orange tones to bring it to life.

17/17 I add a bush on the lower left with the same shades, but a little darker to differentiate it from the rest.
I paint the shadows and lights on the tall grass. The light touches the tips of the grass.
18/18 As for the bushes, I paint the leaves of the trees starting with the dark green of my palette, then adding touches of burgundy and orange for the leaves most exposed to light.

19/ To finish, I draw the tall grass in pale yellow with very thin lines. I also insert small yellow flowers with a mix of geometric shapes.
These details are interesting to support the perspective: in the foreground we find a swarm of sharp elements and the further we move away, the more the details diminish.

The drawing is finished, thank you for following this tutorial!
Discussion
No comments yet.