How to Draw a Snowy Mountain
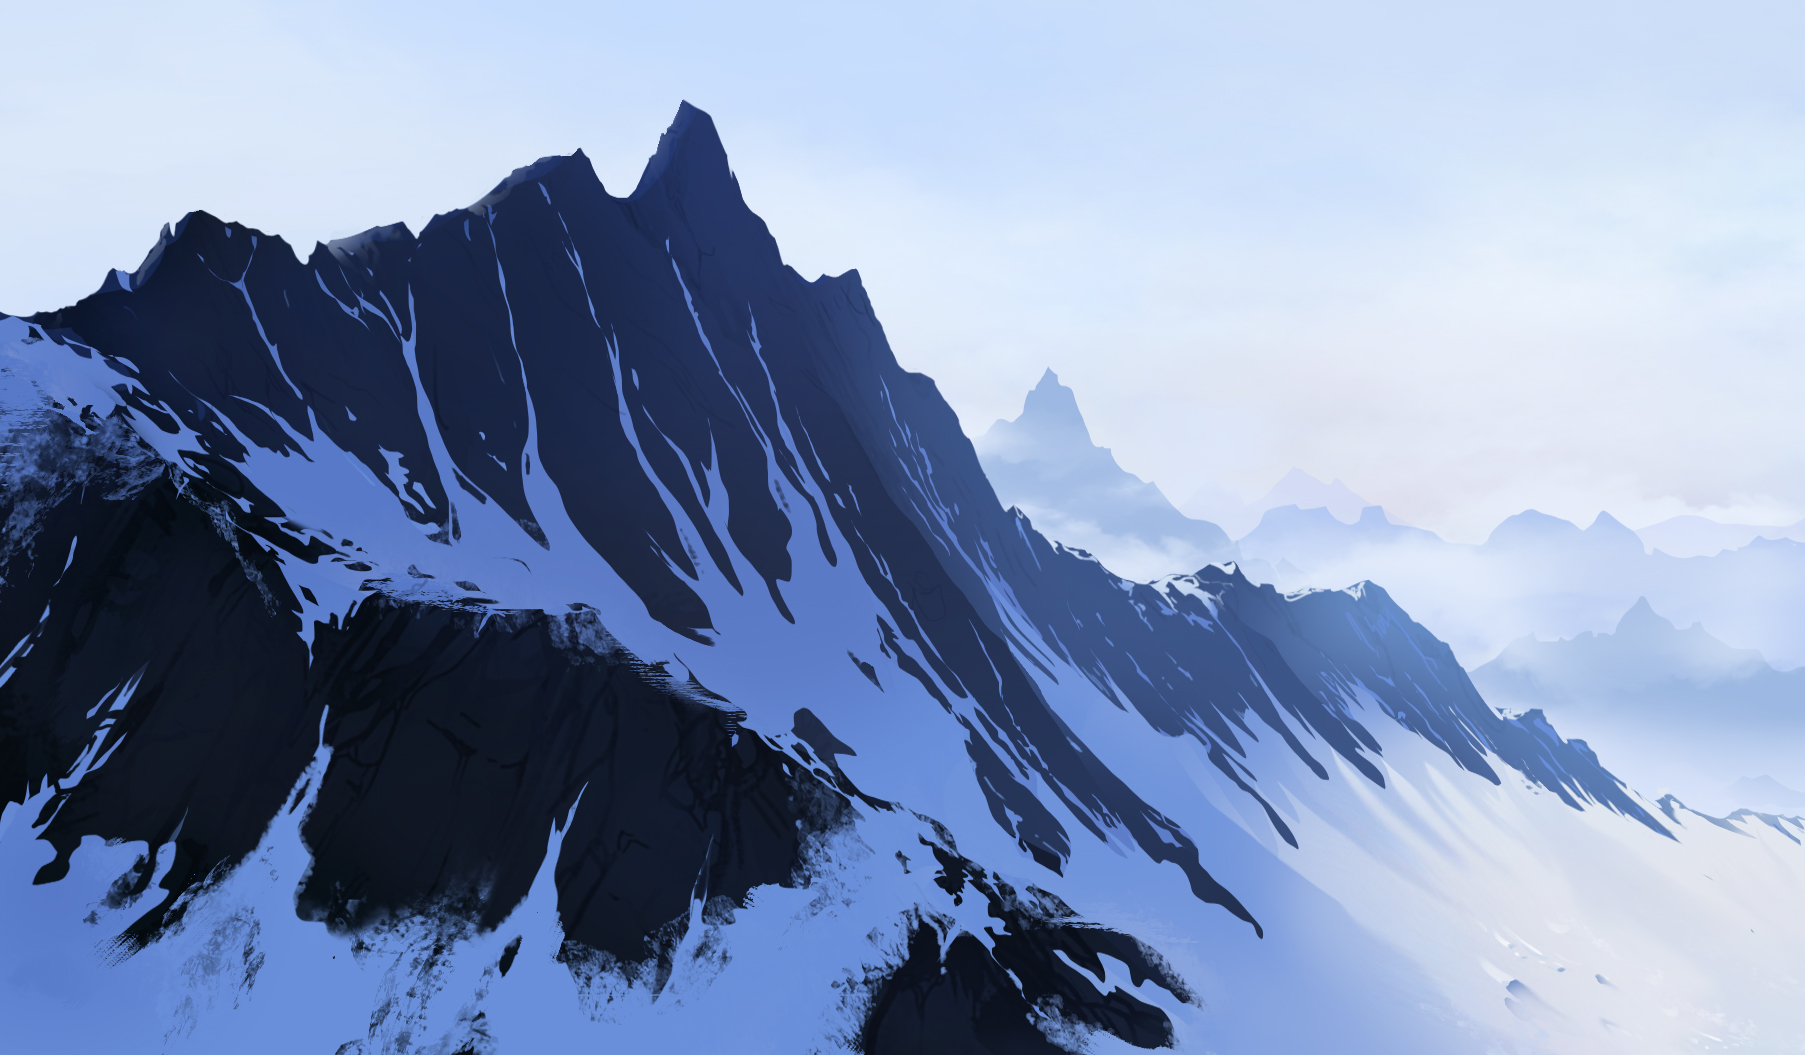
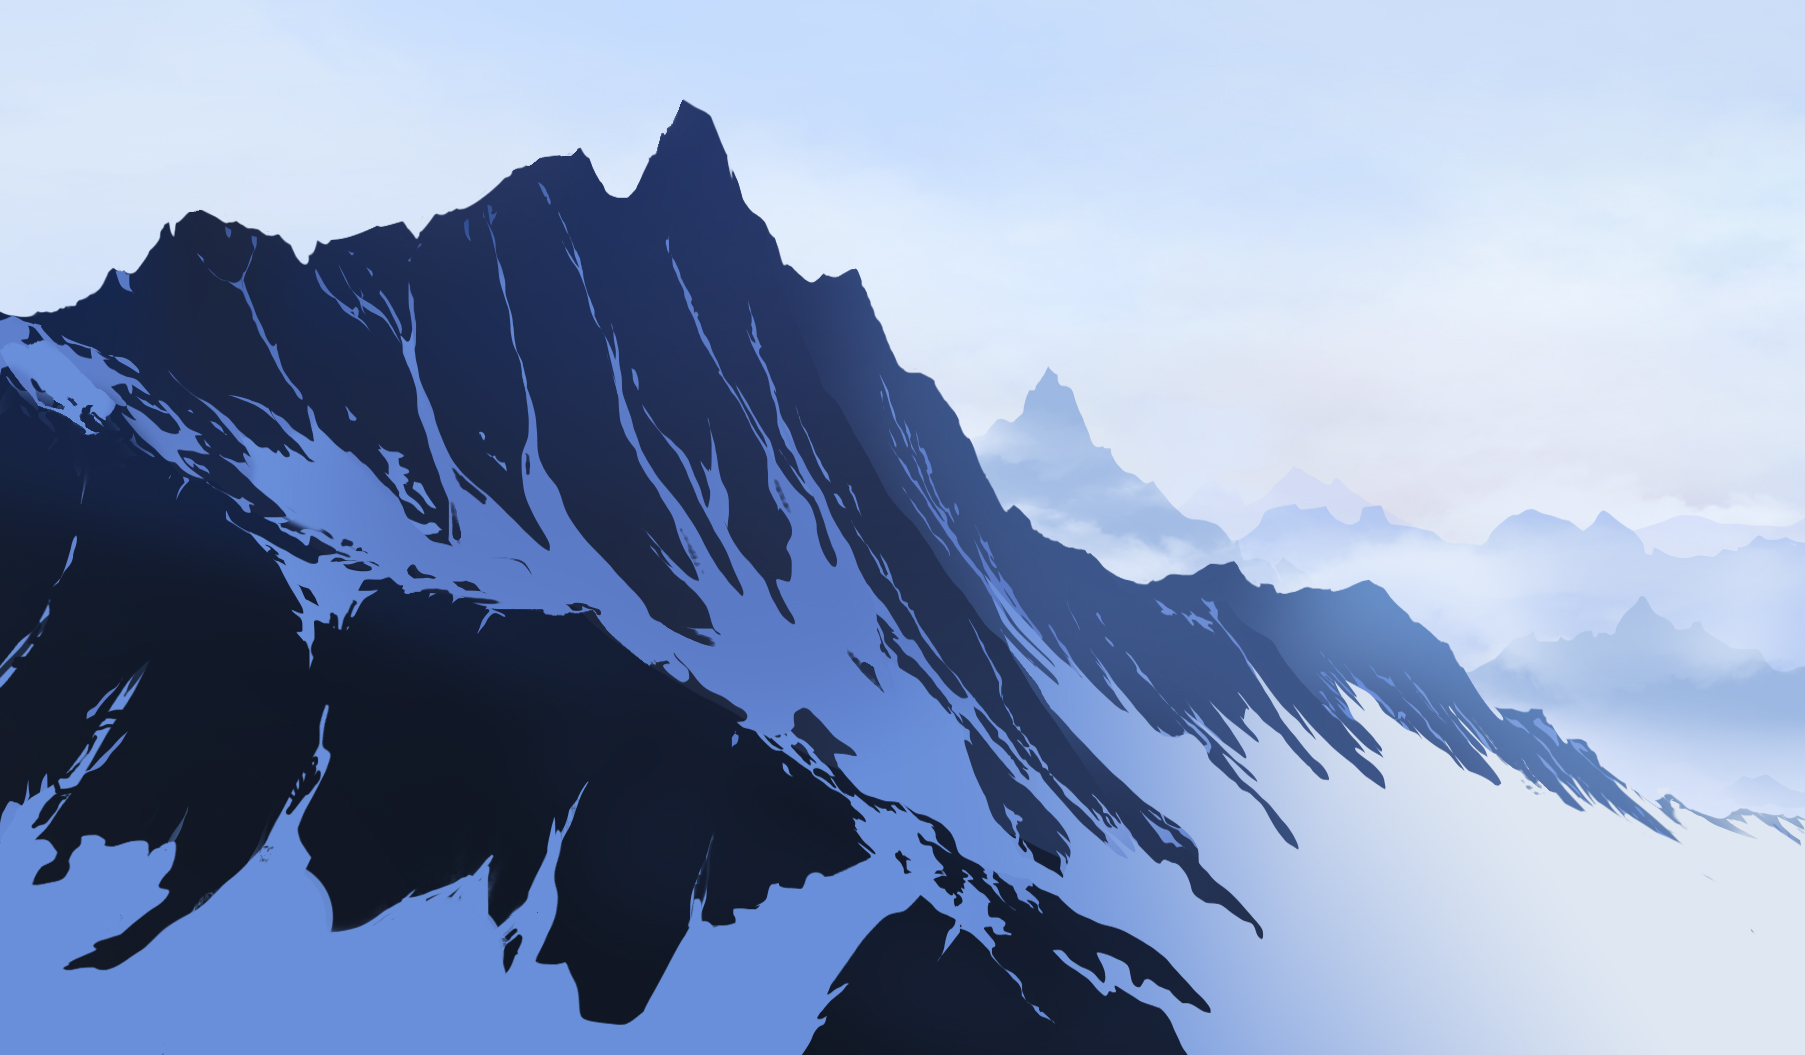
Today, we are going to draw snow-covered peaks. They must have a mystical look and the drawing should convey an impression of raw grandeur. We can only remain contemplative in front of such a vision of nature.
THE GRAPHIC ELEMENTS OF A MOUNTAIN
These peaks are impassable for most people. This kind of landscape is found in a very particular climate where the atmospheric pressure is very low because it drops as the altitude increases. So, it's very cold there and consequently life struggles to develop. You won't find trees or bushes on these mountains. It's a predominantly rocky land, covered with a thick blanket of snow.
THE COLOR PALETTE OF OUR DRAWING
The color palette I derived from it is unsurprisingly made up of cool tones. It approaches blue or violet. If you wish, you can also use a palette in cyan blue tones (leaning towards turquoise), similar to glaciers.
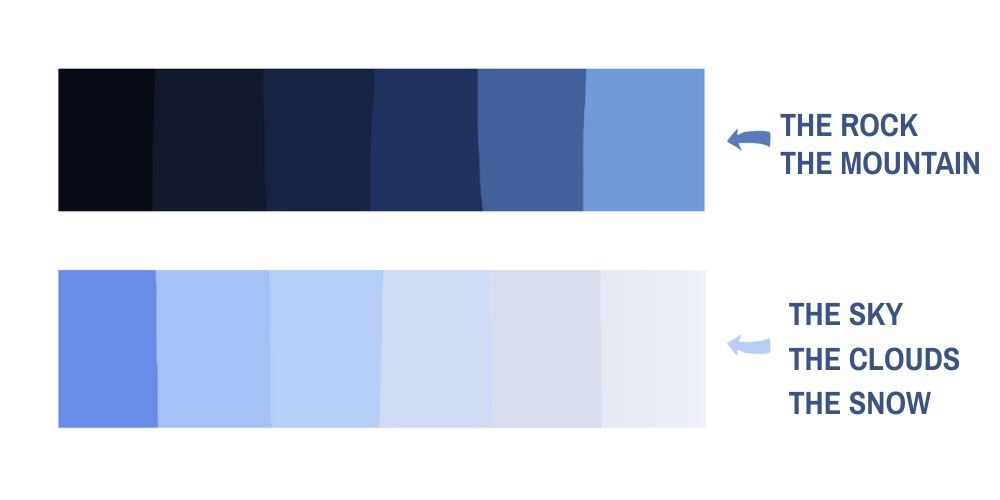
Even when drawing mountains, and especially their peaks, it is advisable to avoid distinctly green tones, which suggest abundant vegetation.
For the rocks, we will use the darkest blues. The sky and clouds can have the same shades as ice, ranging from slightly tinted white to a pale blue.
Let's get started!
DRAWING A MOUNTAIN LANDSCAPE STEP BY STEP
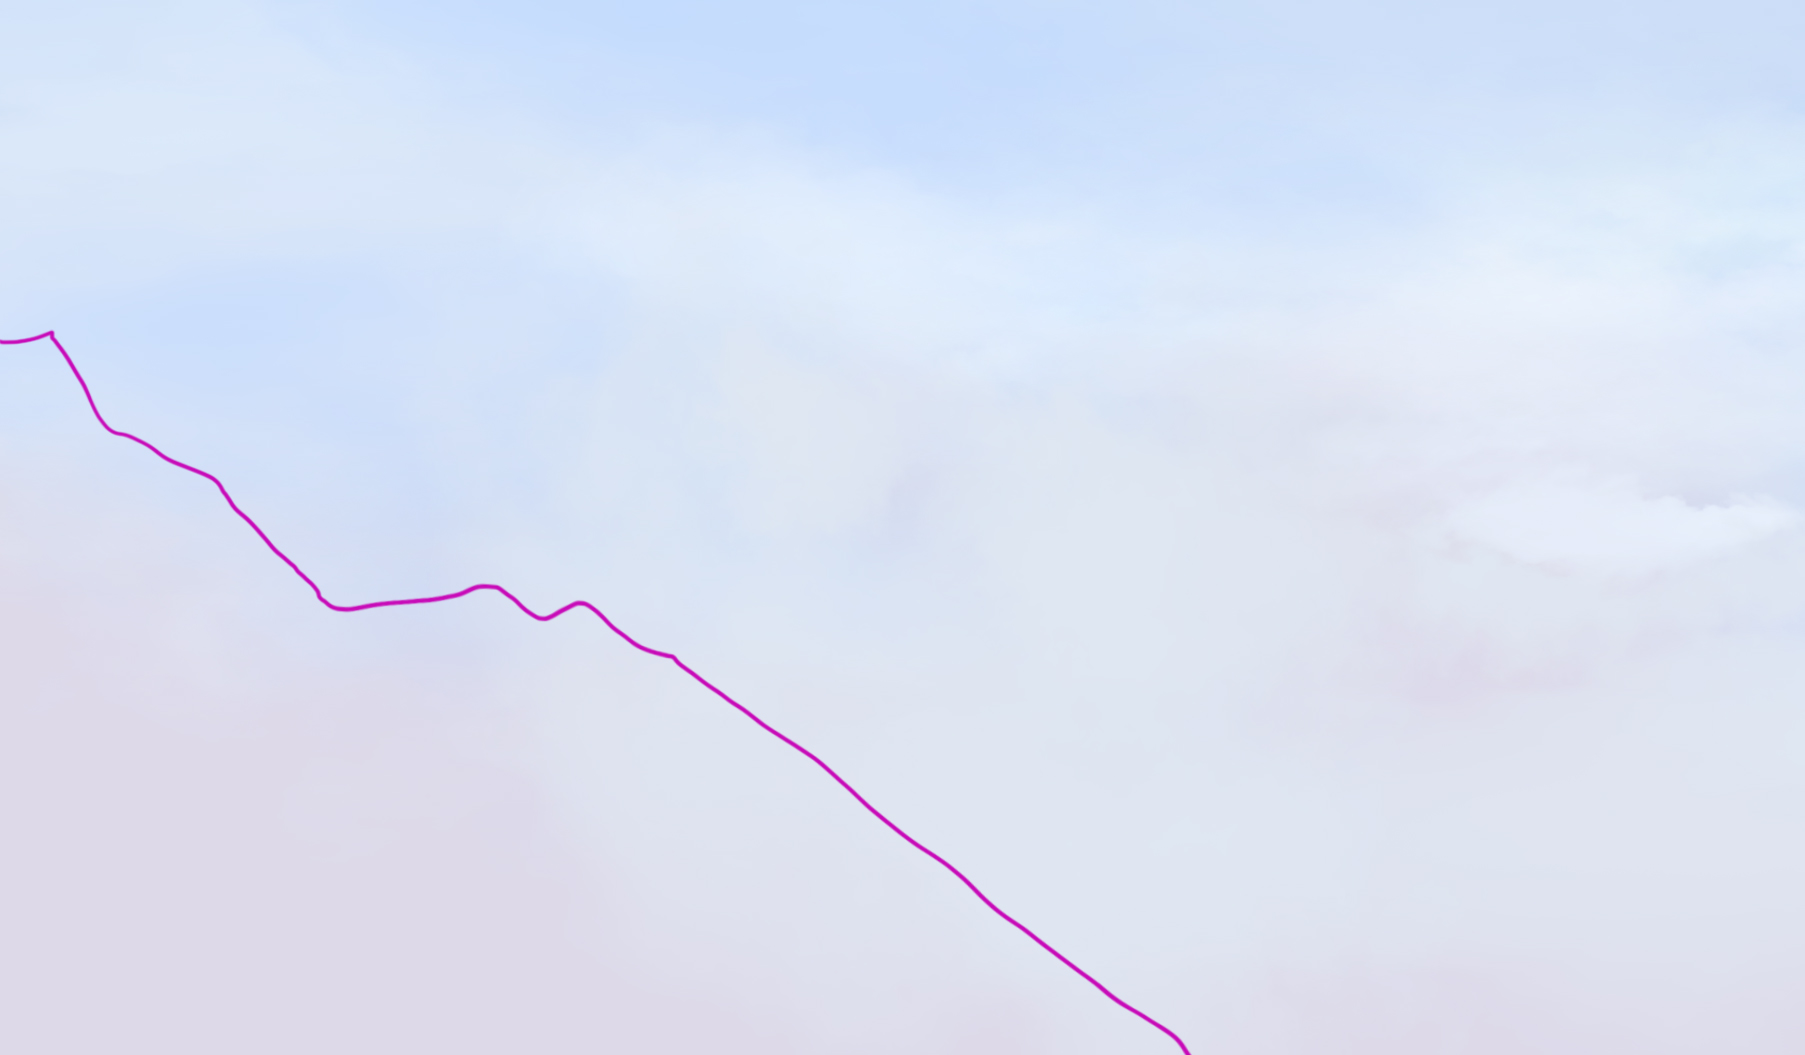
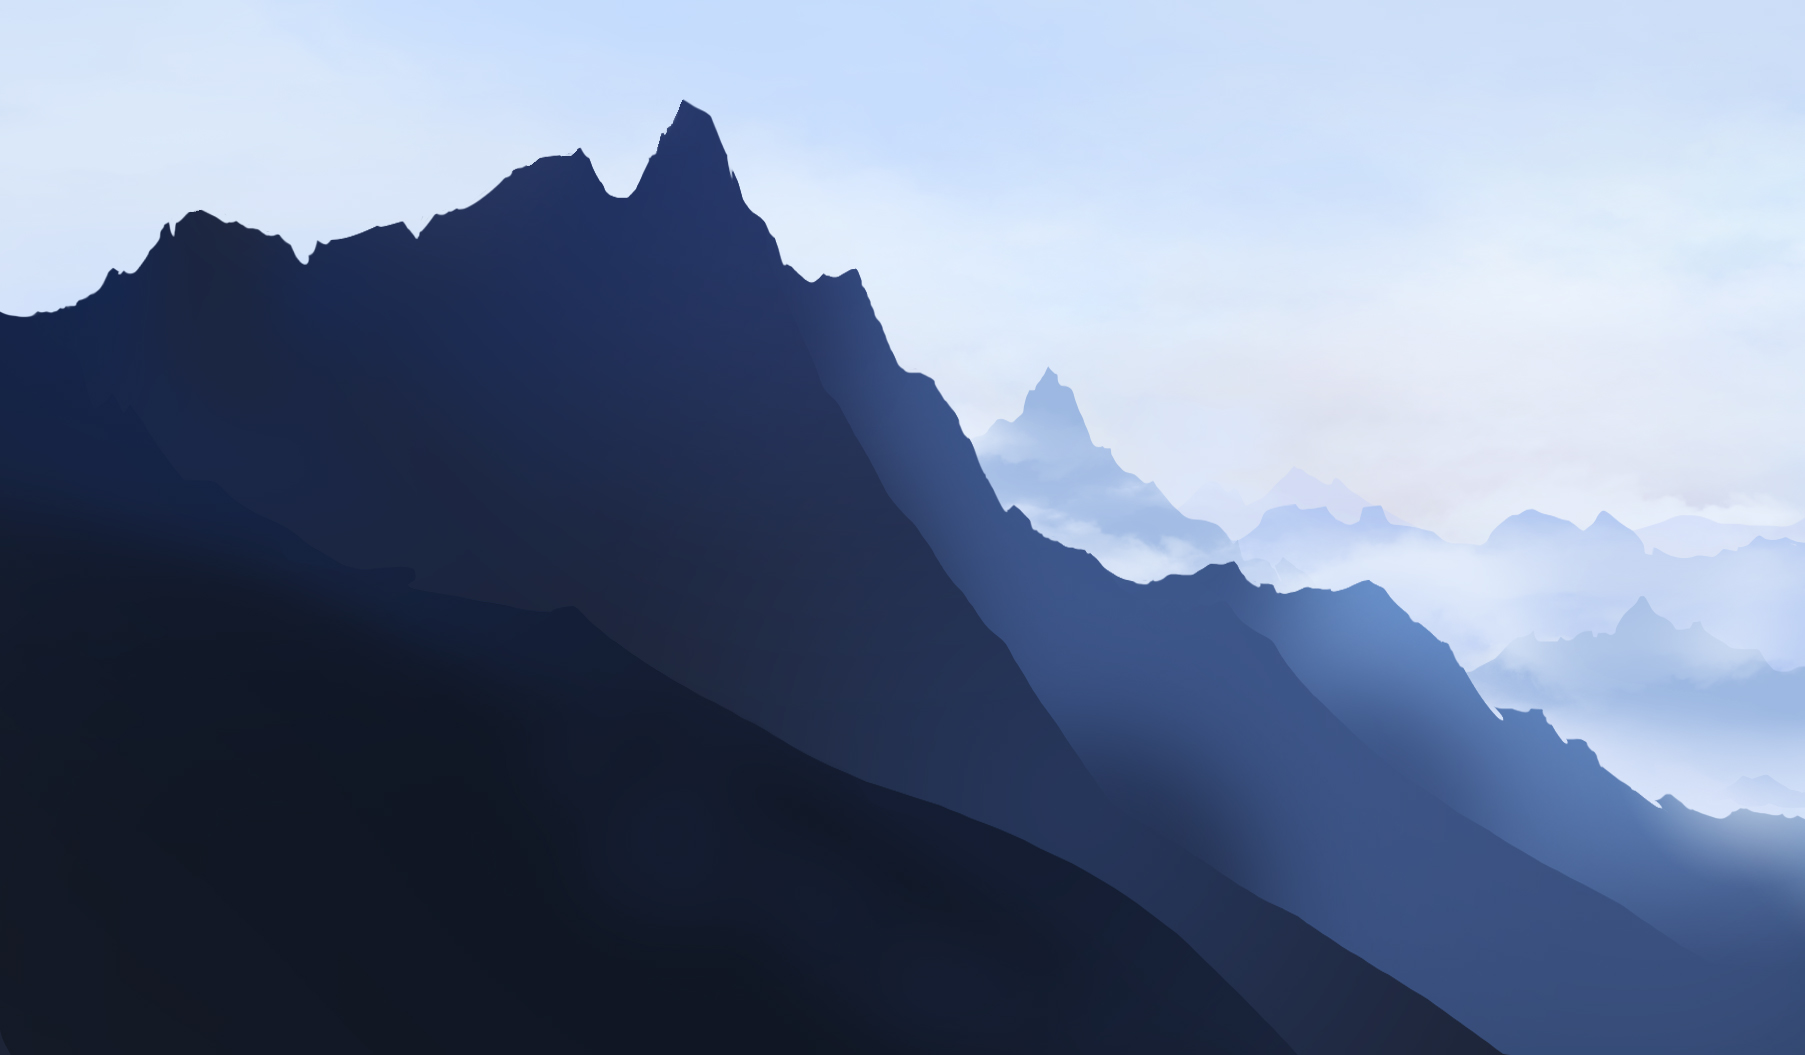
1) On a background representing the blue sky, I lightly texture the background of the image to suggest the atmosphere of the drawing and emerging clouds. You can create a gradient with an extremely pale color to transition with the blue to add depth. Here I chose a soft pink.

Generally, mountains form ranges, that is, they follow one after the other. Their summits then seem continuous. For this, we will start by drawing a random guideline that will represent it. Have fun with the shapes; create peaks, dips, curves, etc.
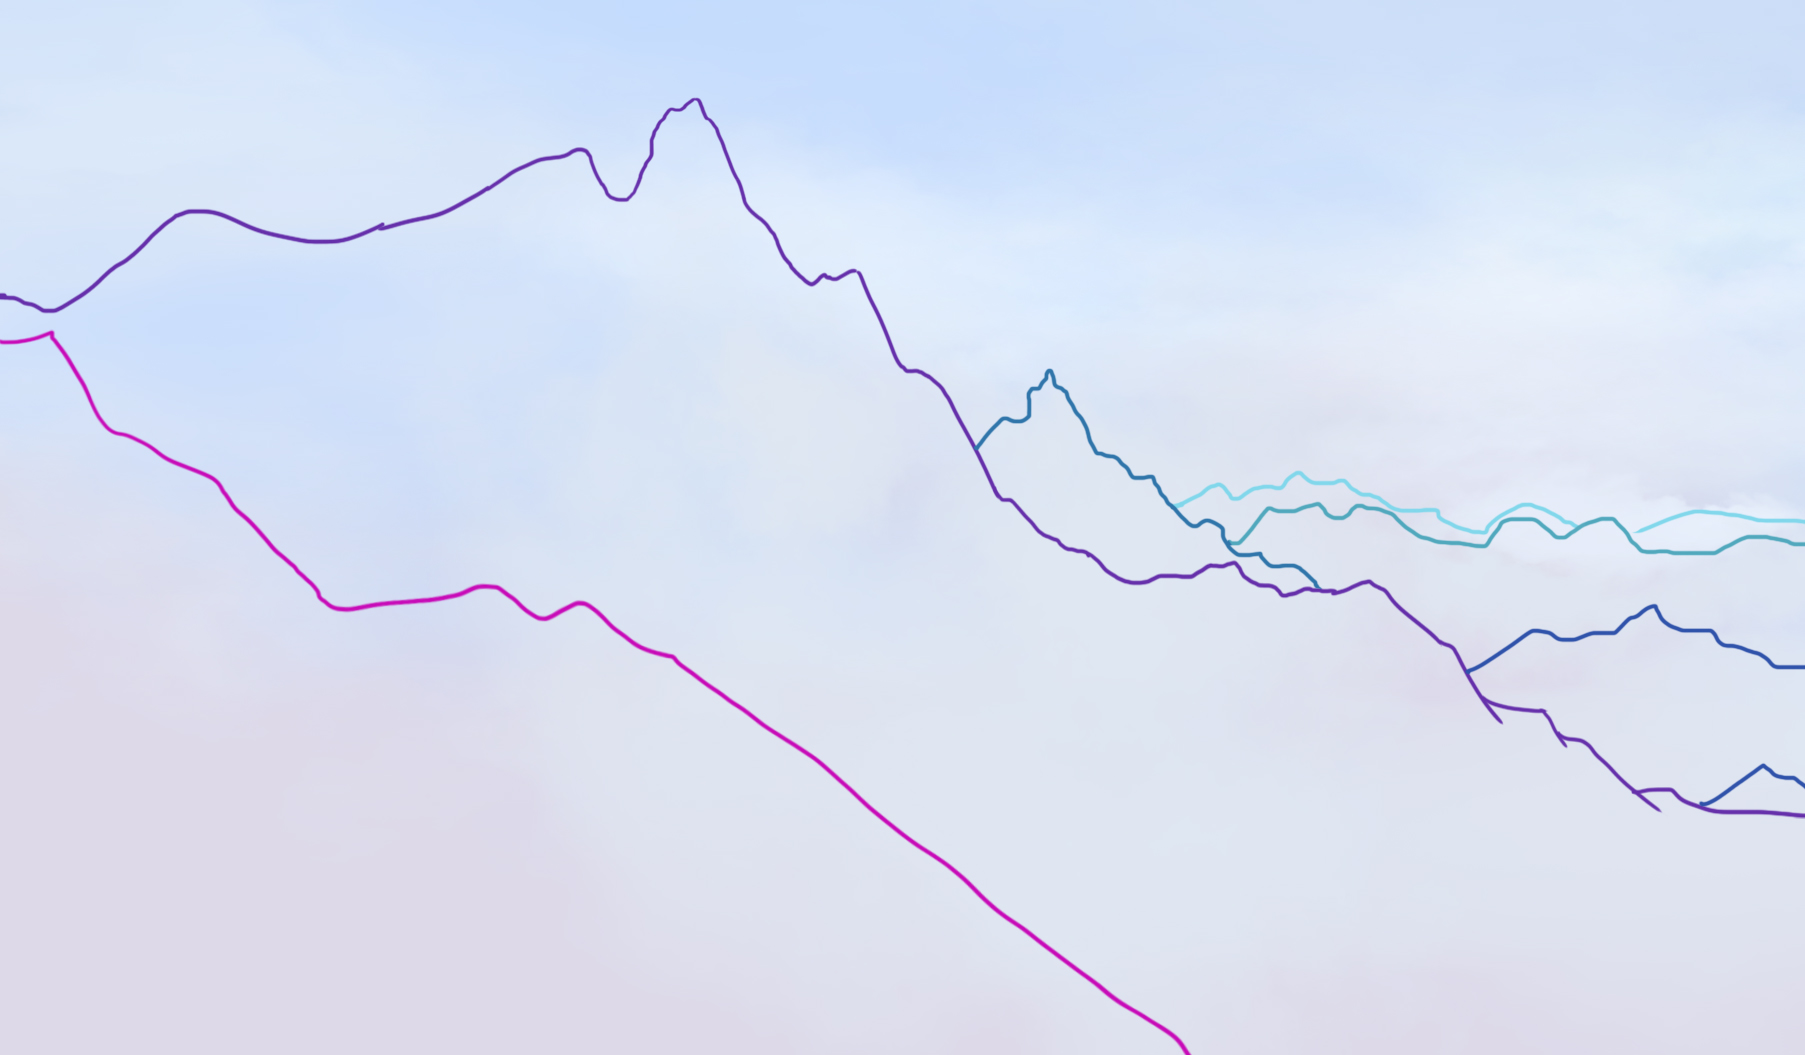
2) Draw the line of the summit that is in the foreground, in fuchsia.
3) Then add a second line for the background, in purple.
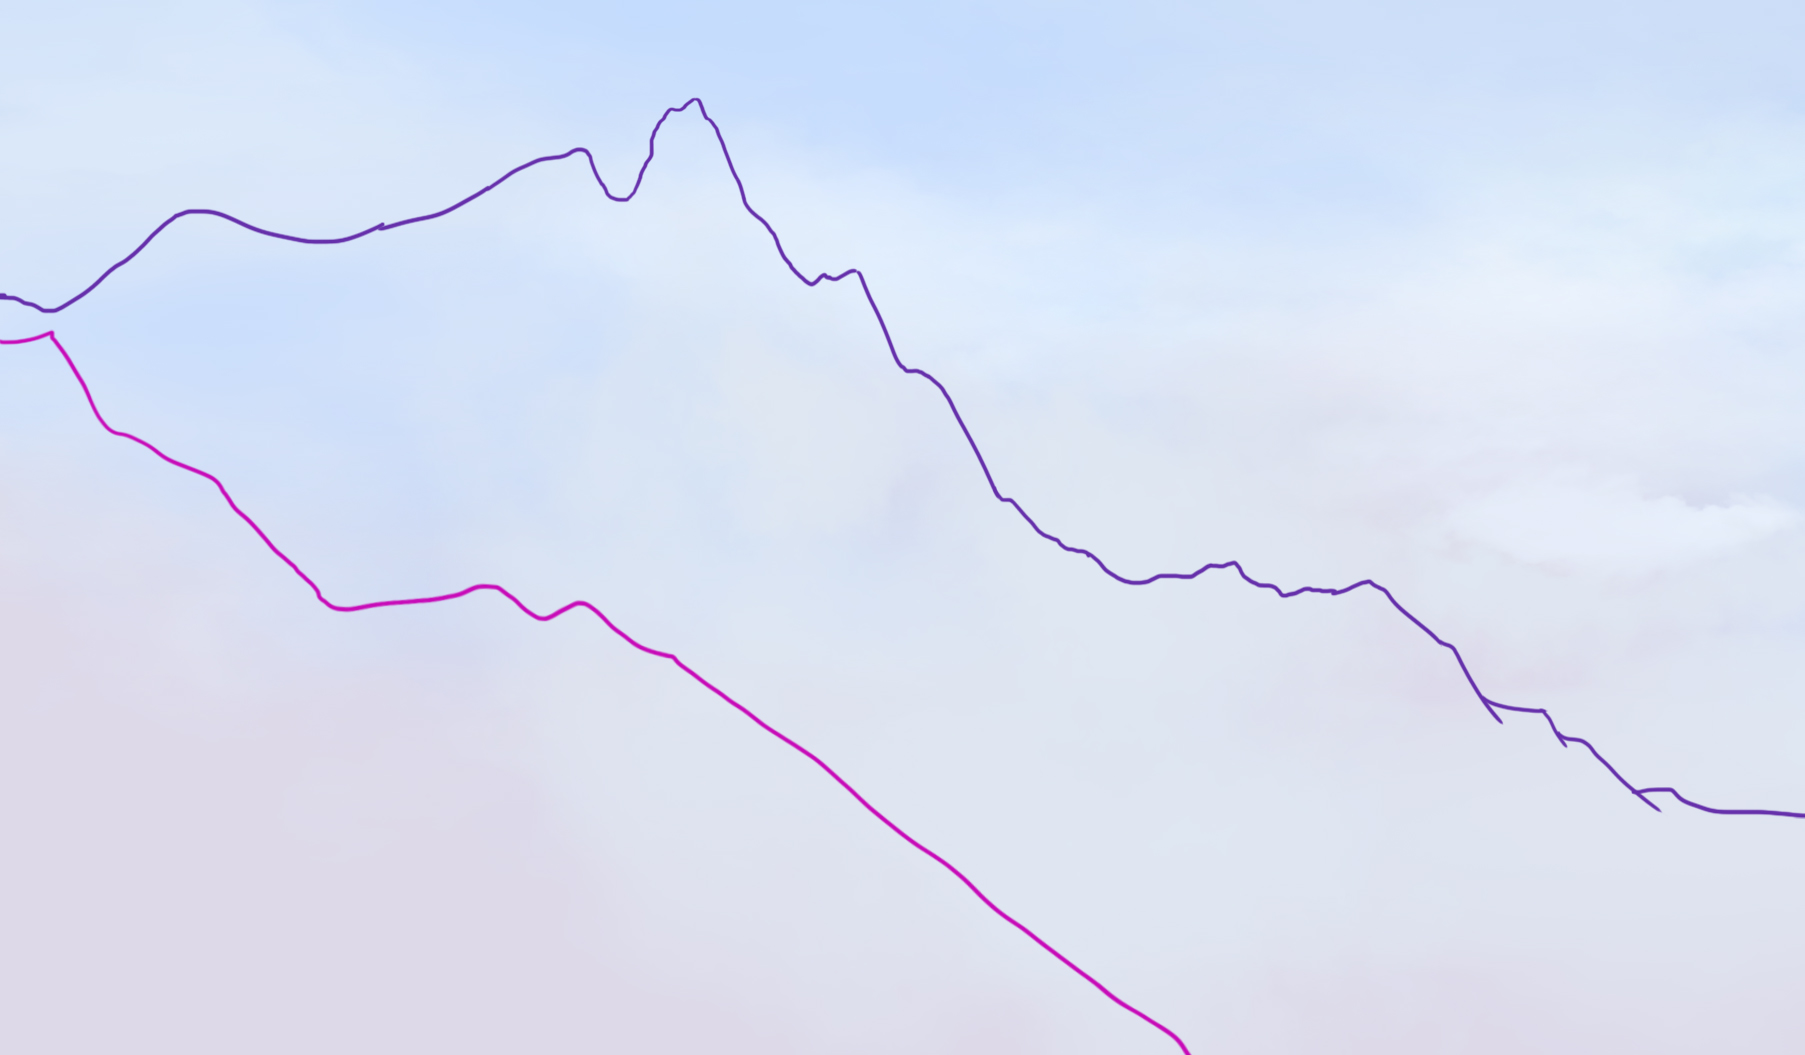
4) Finally, draw the lines of the background in blue. These distant mountains will hardly be in focus and will be barely visible in the blur of the clouds.
For this drawing, it's going to be necessary to play with the atmosphere, so that we can feel the chilling cold, but also the enchanting beauty of the snow.
Let's move on to adding color.
ADDING COLOR TO THE DRAWING
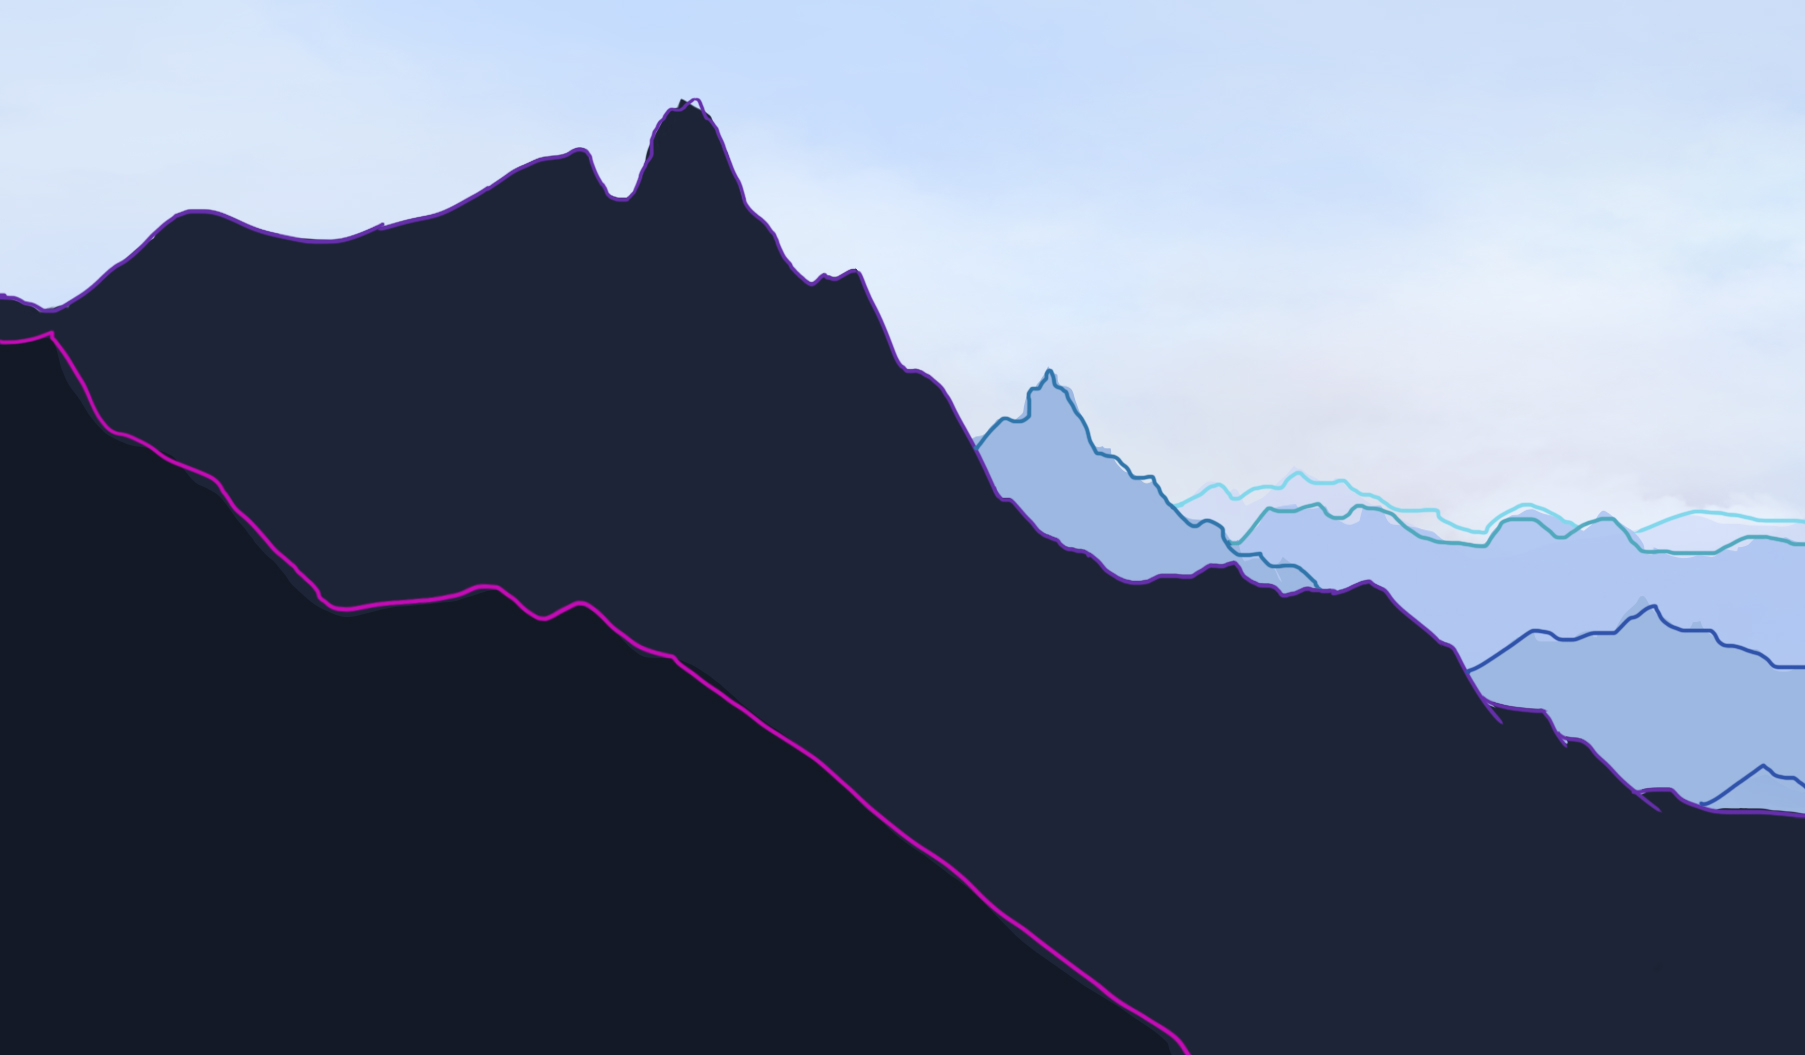
1) Each area being well defined, I apply a solid color to each of them following the color palette chosen above.
I take the darkest and most intense color for the foreground and a less saturated blue for my background. Finally, I use several pale blues for my background because I want to demonstrate the distance from these mountains: the farther away they are, the smaller and more desaturated they should appear.
2) I create irregularities on the vertices and detail the appearance of the background plan, which will be the most important part of the drawing. Here is the result when the guidelines are removed:
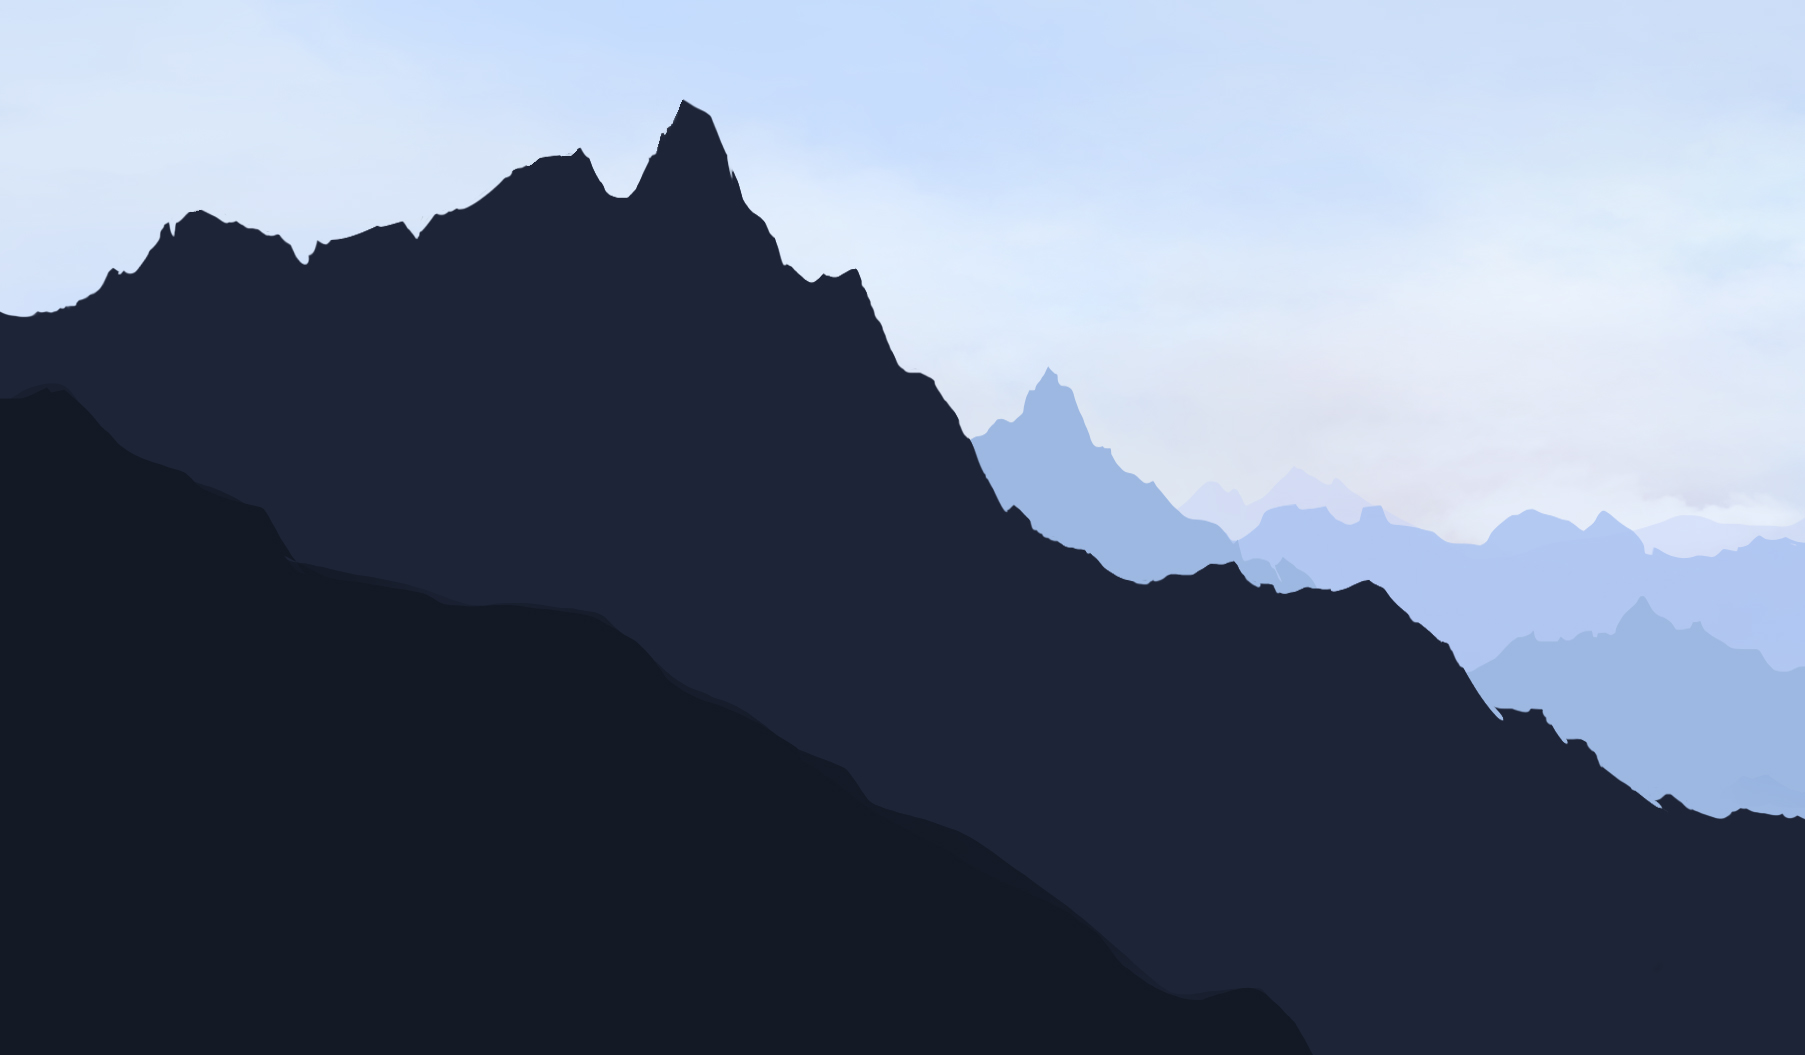
3) I add clouds between each mountain chain in the background, barely making them visible in their blur. This enhances the atmosphere and anchors the drawing in a humid and cold climate.

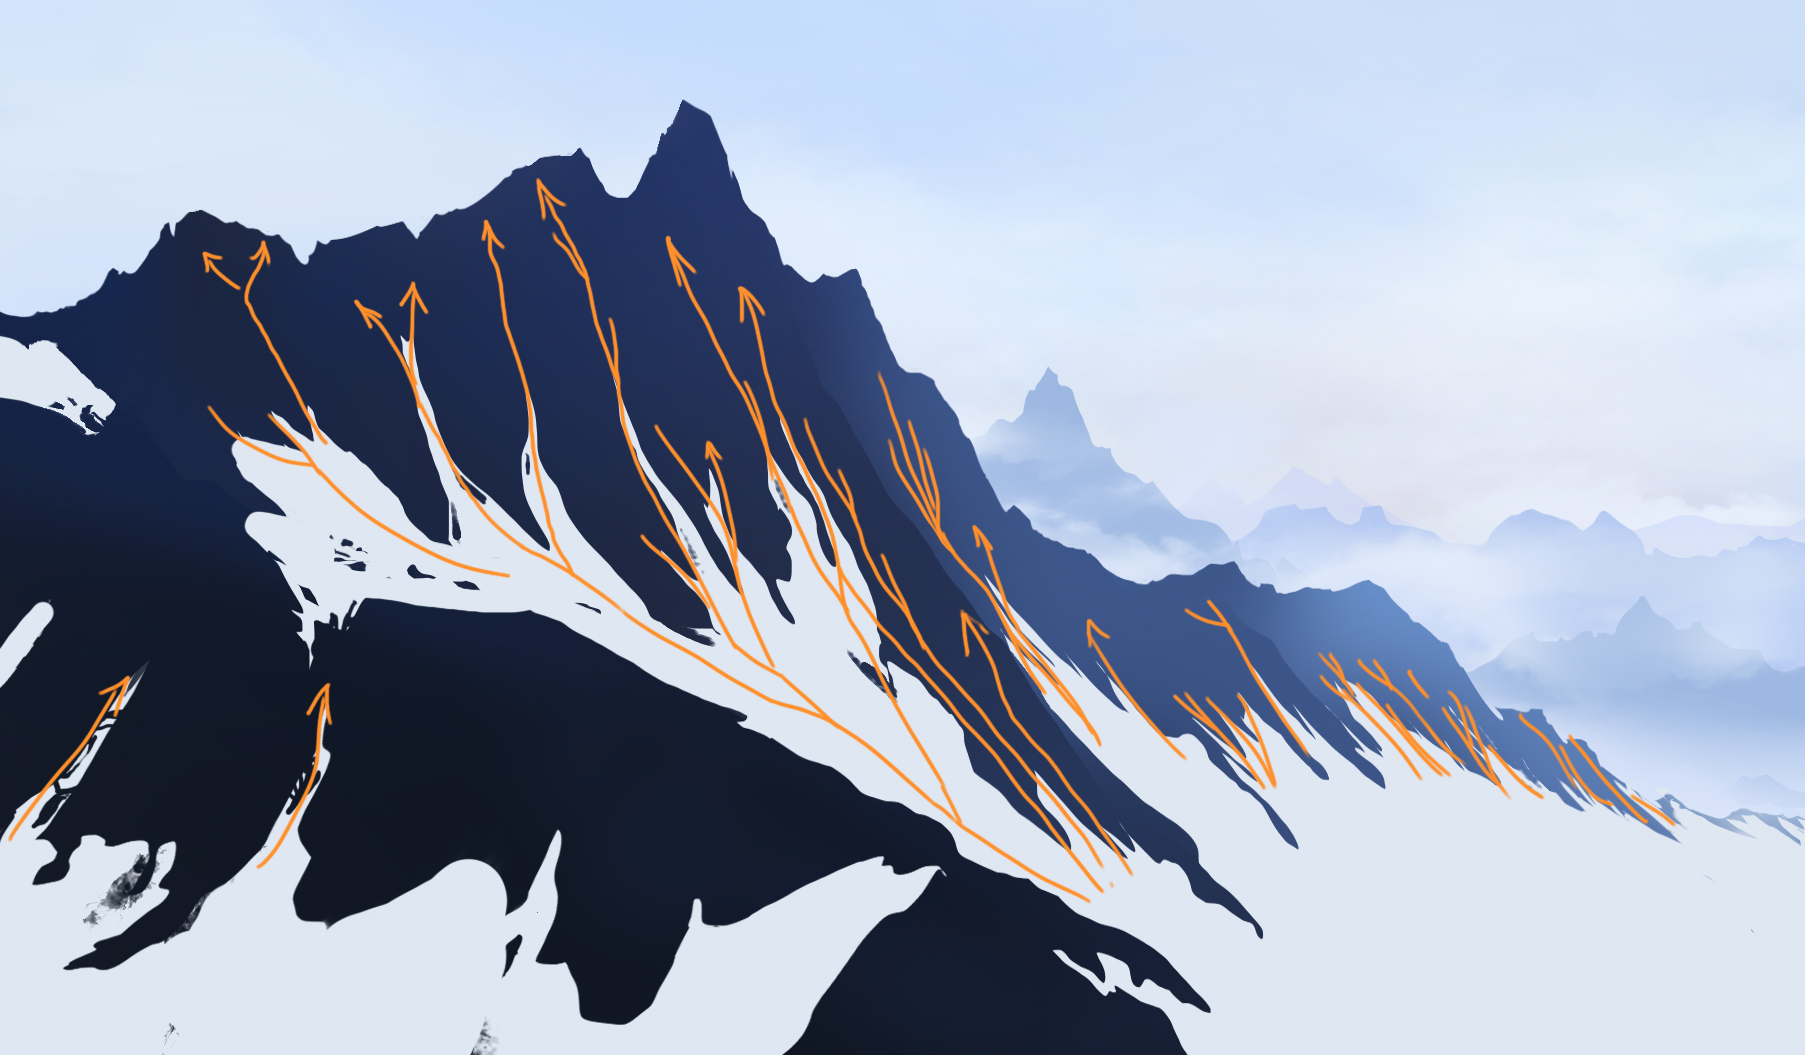
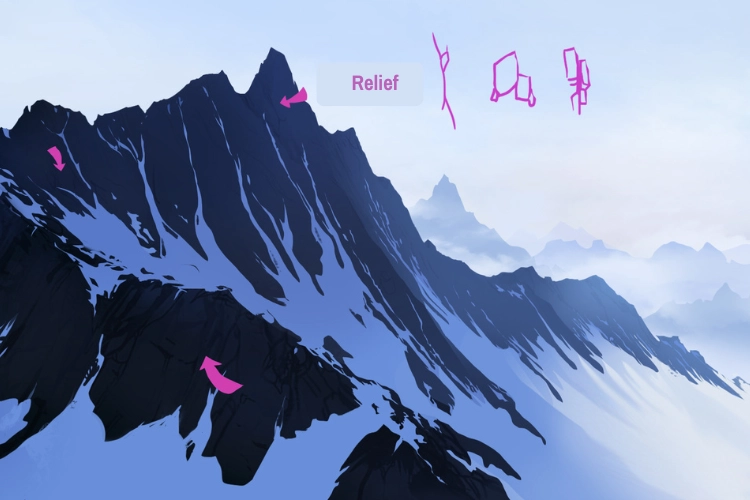
4) By following the movement of the arrows, I divide my mountain to add more relief to the different mountains that are in focus in the foreground and middle ground. They will be very steep.
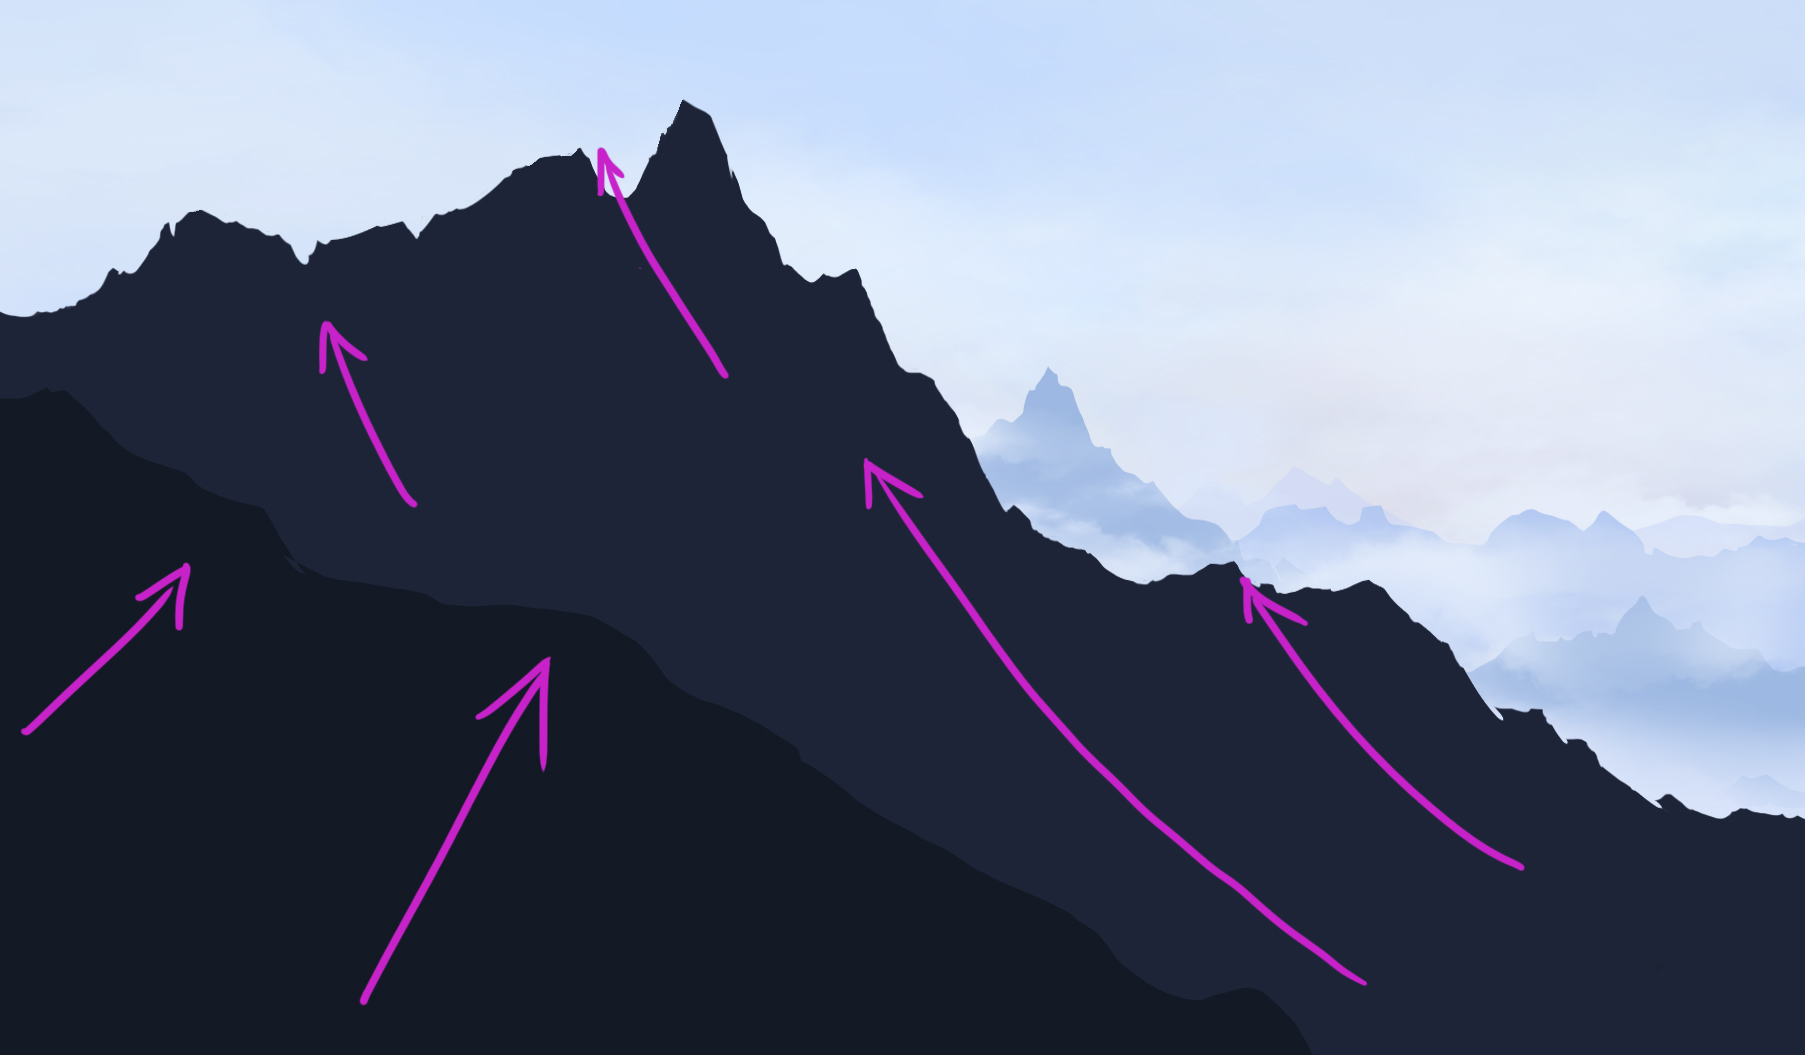
5) I apply a gradient to each division according to my color palette. The farther I go, the lighter the mountain sides become. I use a saturated blue to add a bit more life to the highest point of this range.
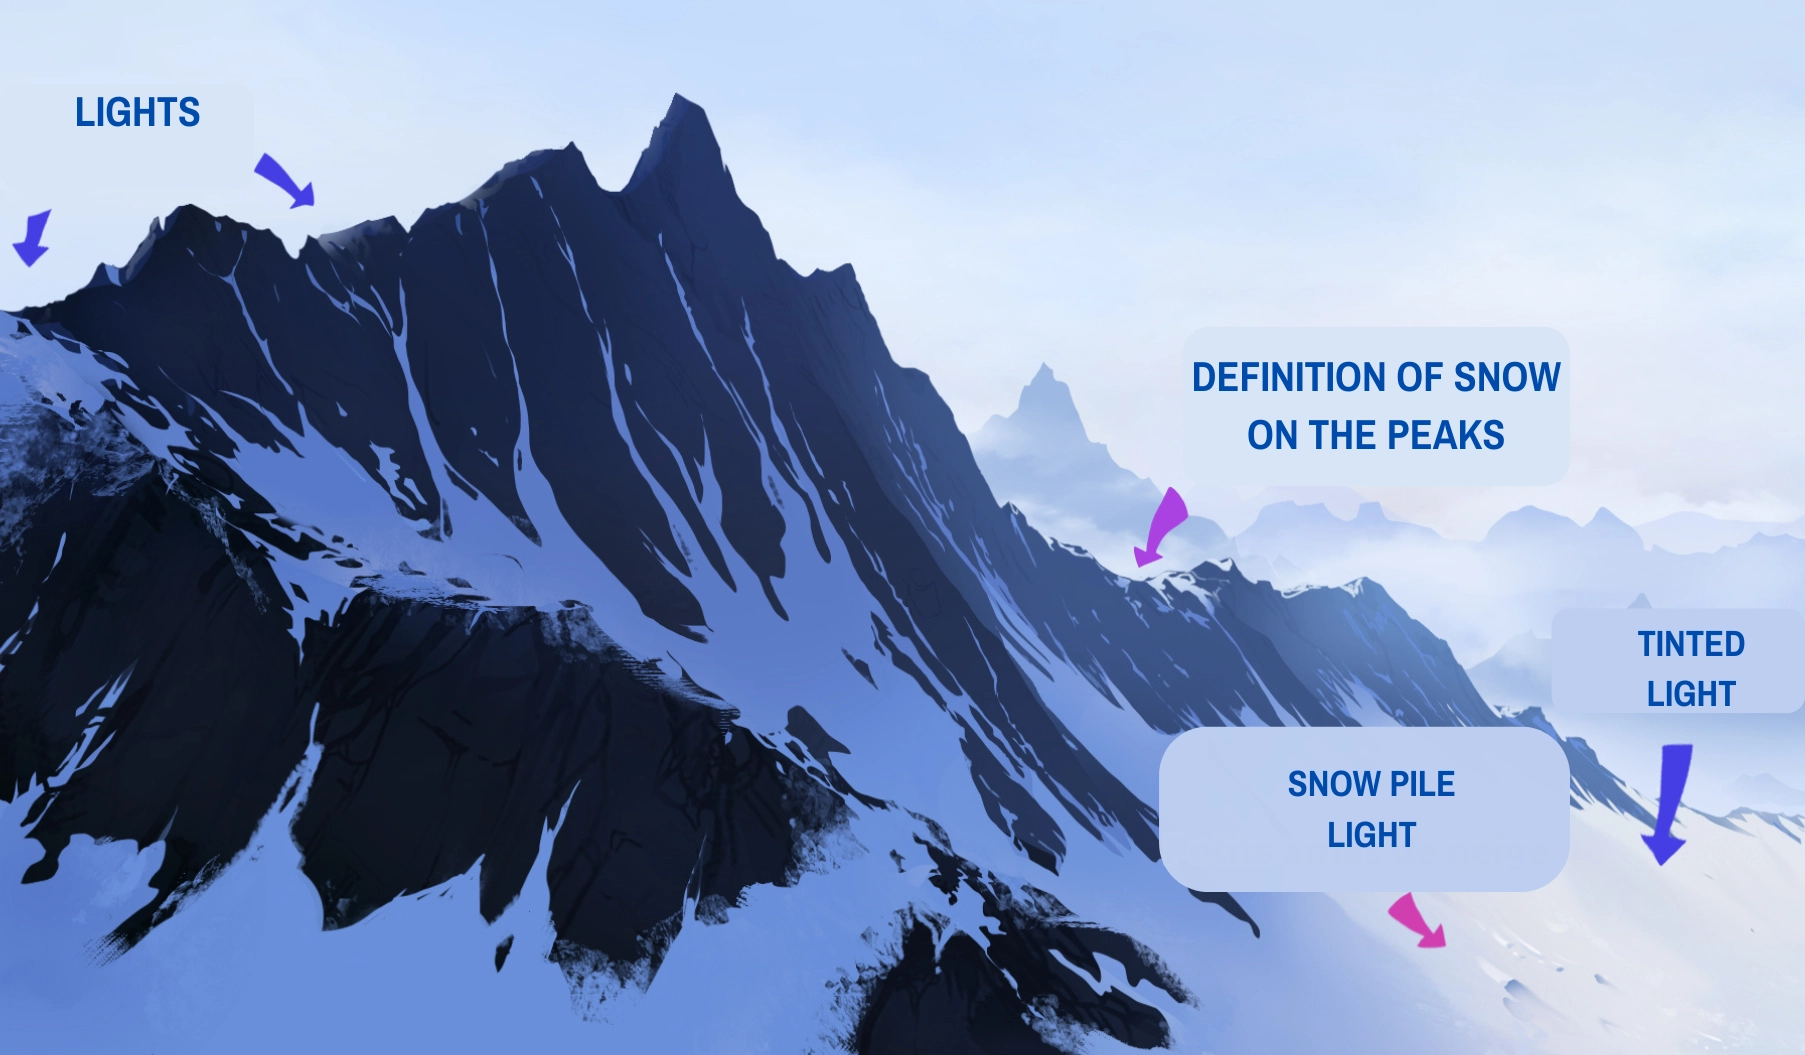
6) In a still crude manner, I place the main areas of snow (in the lightest shade, without using white). They cluster at the base of the peaks, where their slopes soften, and also seem to want to climb towards the top of the peaks with a few branches of snow.
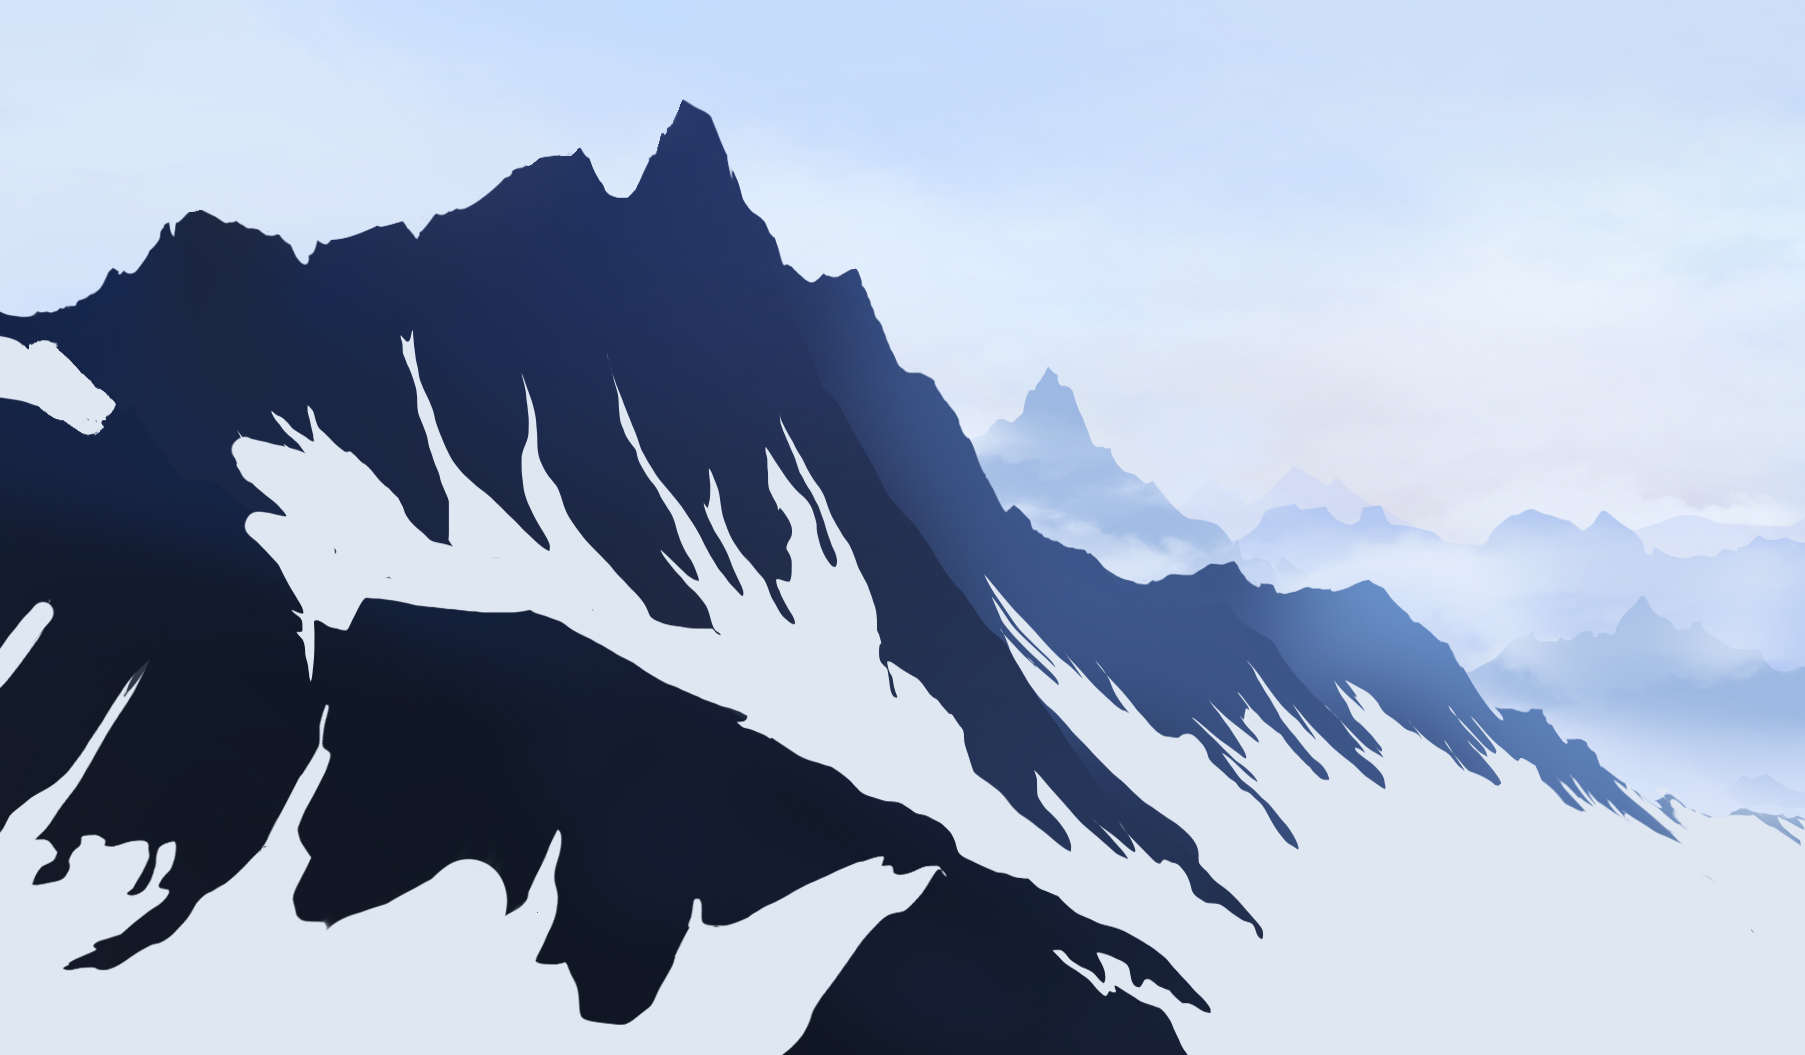
Then, other smaller branches will settle on the first ones, going from the bottom to the top of the mountains, concentrating in the hollows:
7) I am drawing the details of the branches and refining the edges of the already present snow. You can add small strokes of snow here and there, but they should always be in the direction of the slope.
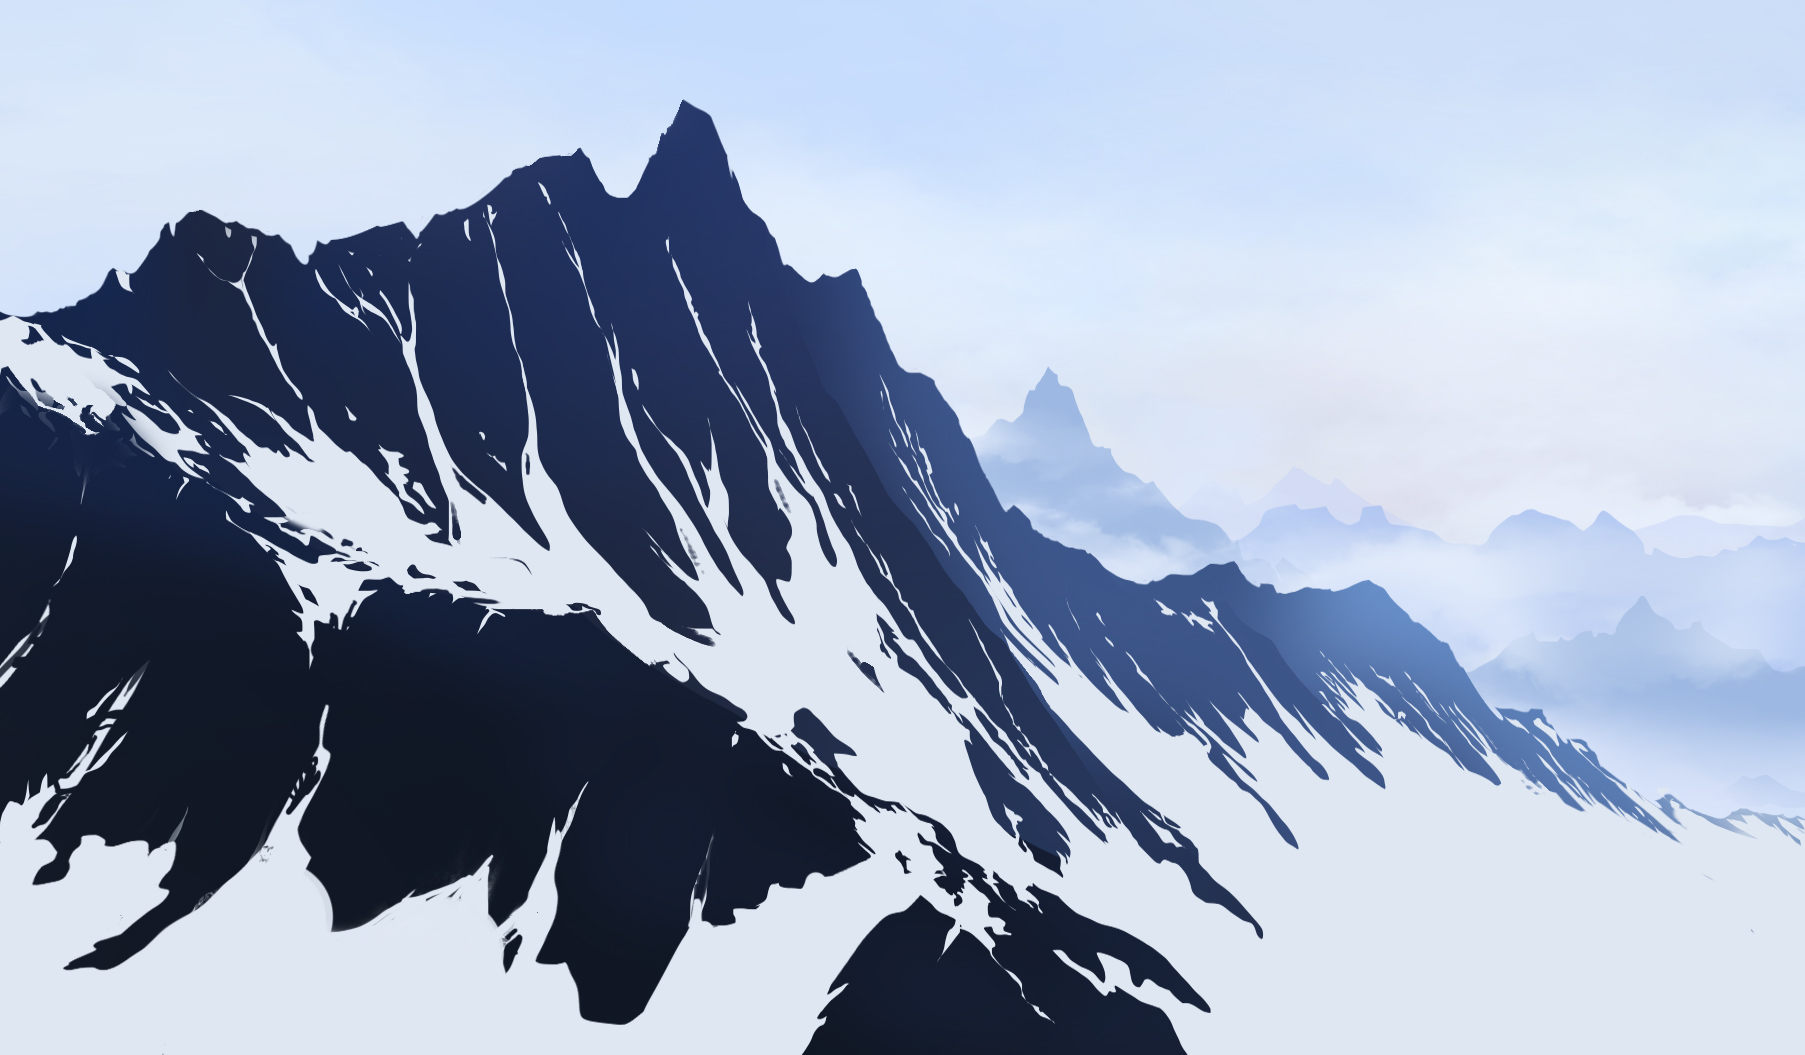
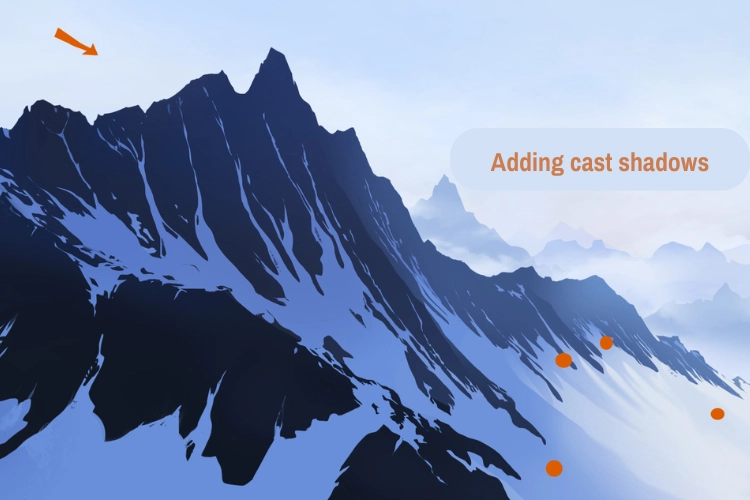
8) To start shading the snow, I place a large blue gradient starting from the left side of the drawing.
9) The light comes from the left (see the orange arrow below). So, we can deduce the direction and length of the mountain shadows. The shadow I emphasize the most is that of the main peak, at the lowest point.
ADDING REALISM TO THE MOUNTAIN LANDSCAPE
In order to add depth and greater realism to my image, the time has come to add texture and detail.
10) I'm adding the texture of the rock, emphasizing the width of the strokes in the foreground. They will be more subtle in the background.
In fuchsia, I've drawn you some examples of textures.
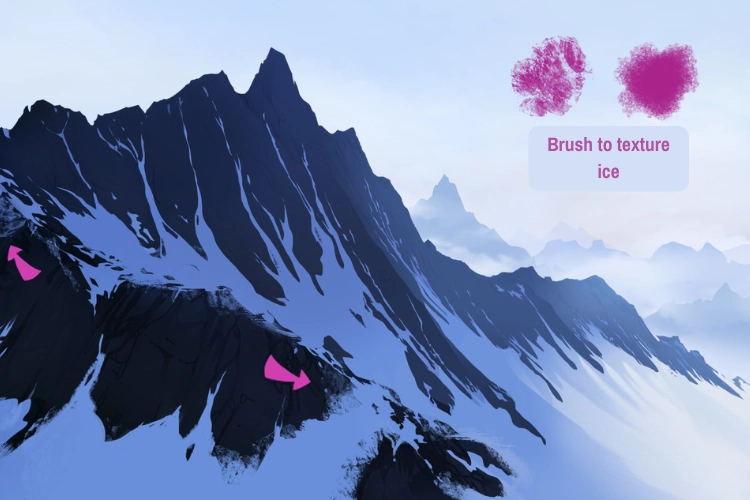
11) I begin to texture the snow in places (only in the foreground).
Here are some examples of brushes for this:
12) The final details are added: highlights, definitions, etc. We can make the slightly pinkish color of the sky reflect on the snow.
13) I finish the drawing by stepping back a bit and making adjustments if necessary. I texture the snow in the foreground a bit more to make a clear distinction between the foreground and the background.
Well done! The drawing of the snow-capped peak is complete!

If you want to simplify this tutorial, you can summarize each step as a series of flat areas (which will still look just as good since the scale of the drawing is very small compared to a real mountain). We can afford to lose some details, keeping the essence of the shapes. Snow against rock is the contrast to keep!
Illustrator and writer: Vincyane Belin
Discussion
2 comments