How to Draw a Man's Portrait
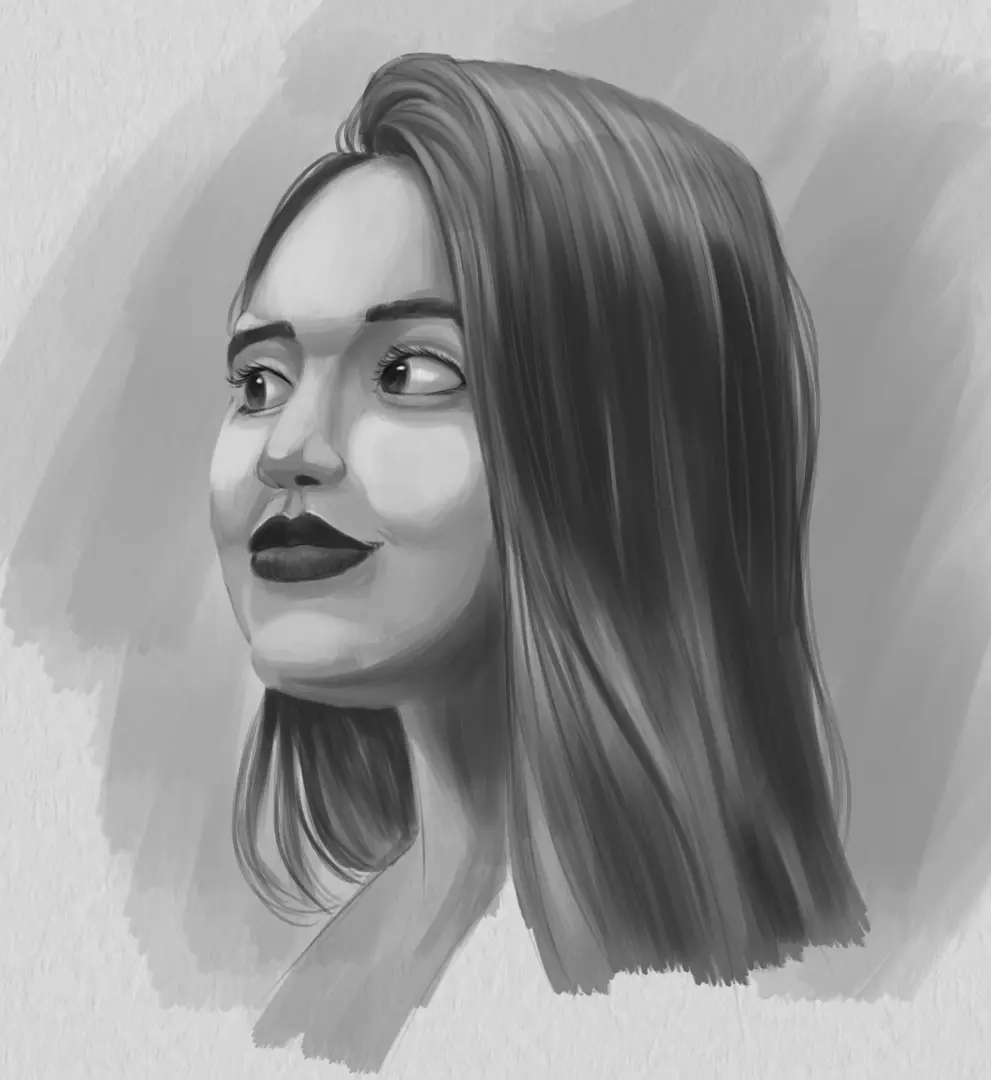
Recently, we provided you with an article on drawing a female portrait. Today, we will teach you how to draw a man's portrait. Although the basics are common, the two types of portraits have subtle differences. Thus, the first steps will certainly seem familiar to you if you have already read our previous article on the female portrait.
CHOOSING THE RIGHT MODEL
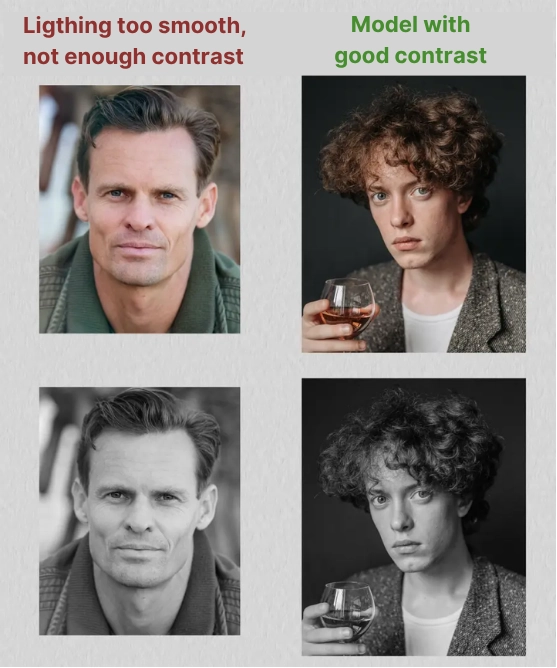
Before we begin, we will need a model. A good model for a portrait is one where the contours of the facial features are easy to distinguish, meaning with clear shadows. Therefore, avoid fashion or cinema magazine photos, which usually have lighting designed to smooth out features, and choose photos by photographers with well-defined shadows and light. If possible, opt for black and white photos: it will be easier to distinguish the contours of the features this way.
You can also start from a real model. A person who poses for you is indeed the ideal model, as this enables you to view your portrait from various angles and thus better understand the volume of the features. However, remember to apply the same advice as for a photo model: clear lighting to create nice shadows and make it easier to render the contours on paper.
DRAWING THE BASICS OF MY PORTRAIT
Now that we have our model, we can start our portrait. This part is quite similar to the female portrait since it involves placing the main bulk of the head. However, there are still some shape subtleties that are more specific to the male face.
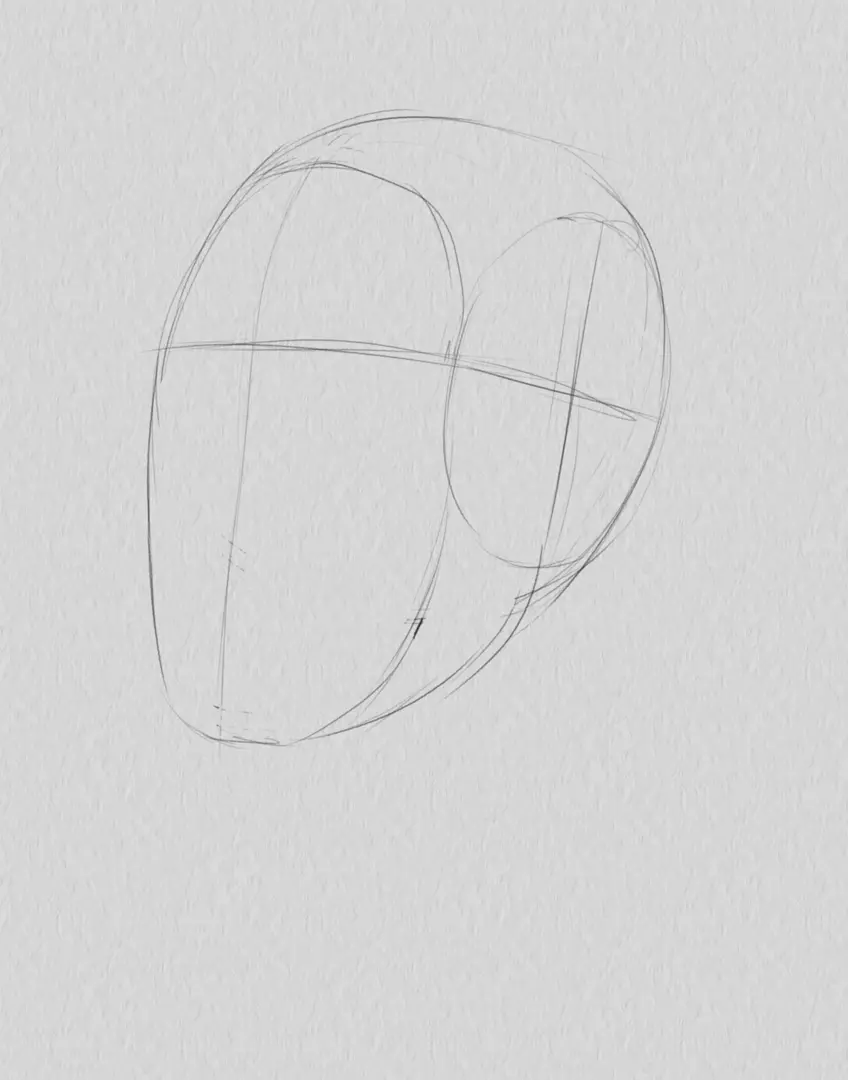
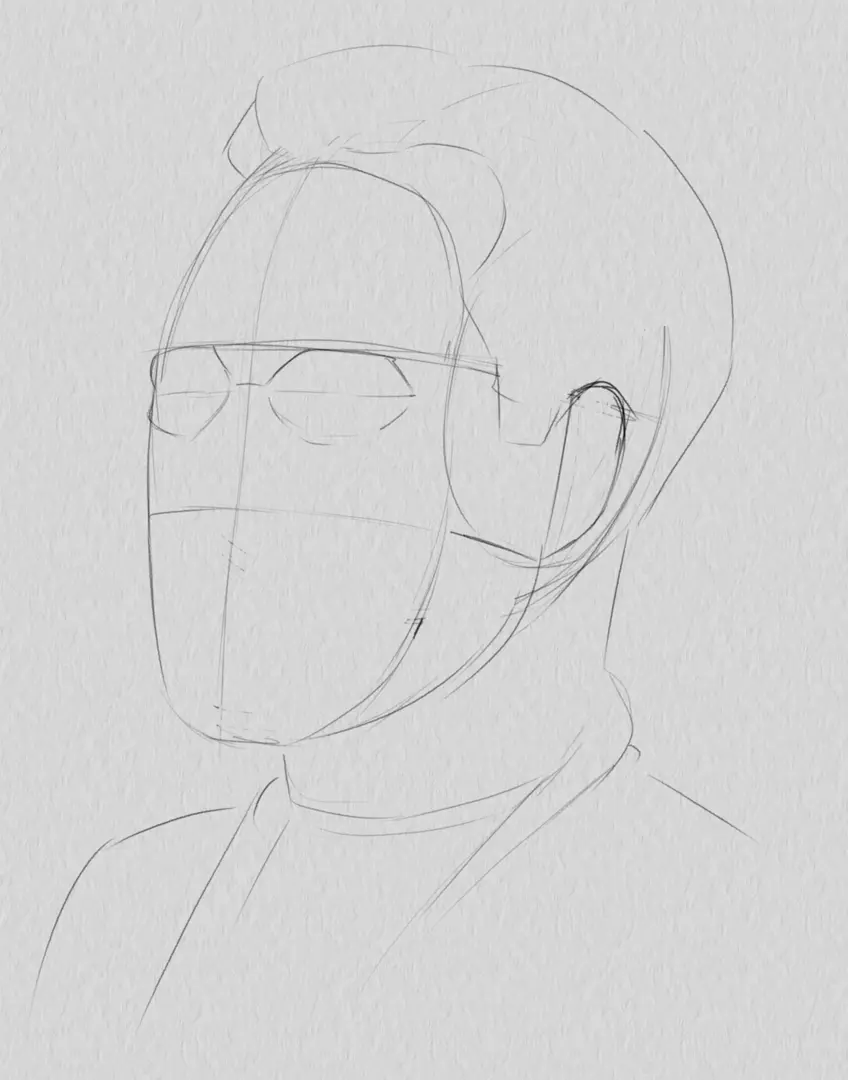
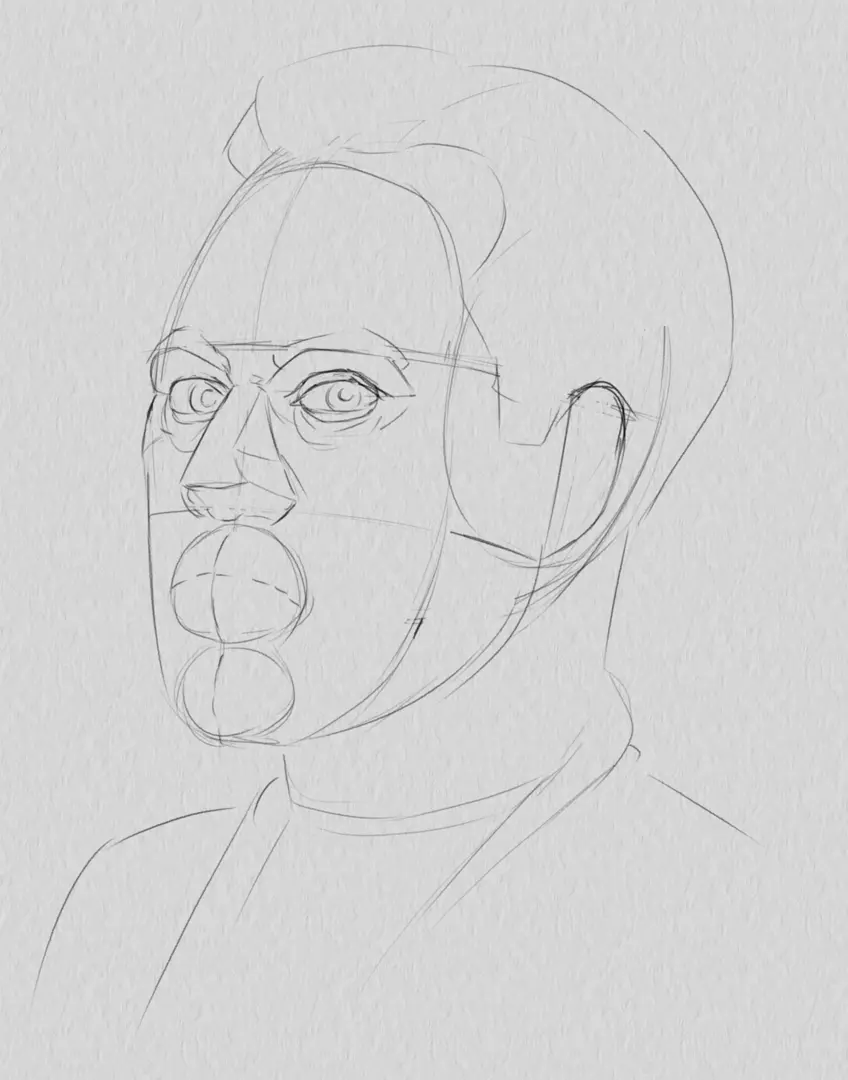
I will start by placing my main mass, namely my skull. For now, I can compare it to a sphere. Since a sphere is a volume that is identical from all angles, I need to orient it in order to continue placing the rest of my head.
For this, I place the first vertical line: my guide line. Then, I draw a horizontal line across the middle of my sphere to represent the level of the browline in my portrait. These two lines form the cross of vision. It's a cross widely used to orient the head in space.
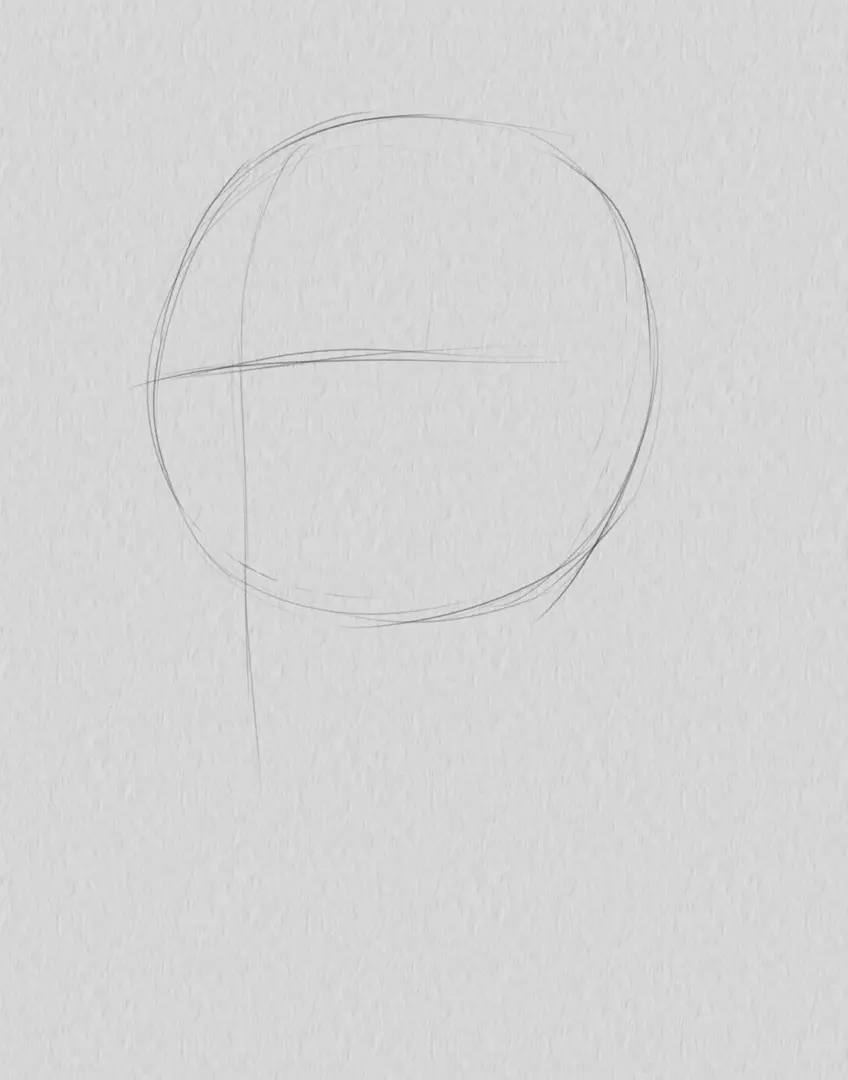
The skull is not a perfectly spherical volume. In fact, it is flat on the sides. To represent this flatness, I will draw an ellipse on the side of my sphere. It is aligned with my reference for the browline.
I place a cross inside my ellipse that helps me better visualize my orientation and also to latch my lower jaw. The latter is usually longer in men than in women.
I then isolate the different planes of the head: the top of the skull, the face, and the side of the jaw. These planes will be useful later for placing my details and shadows.
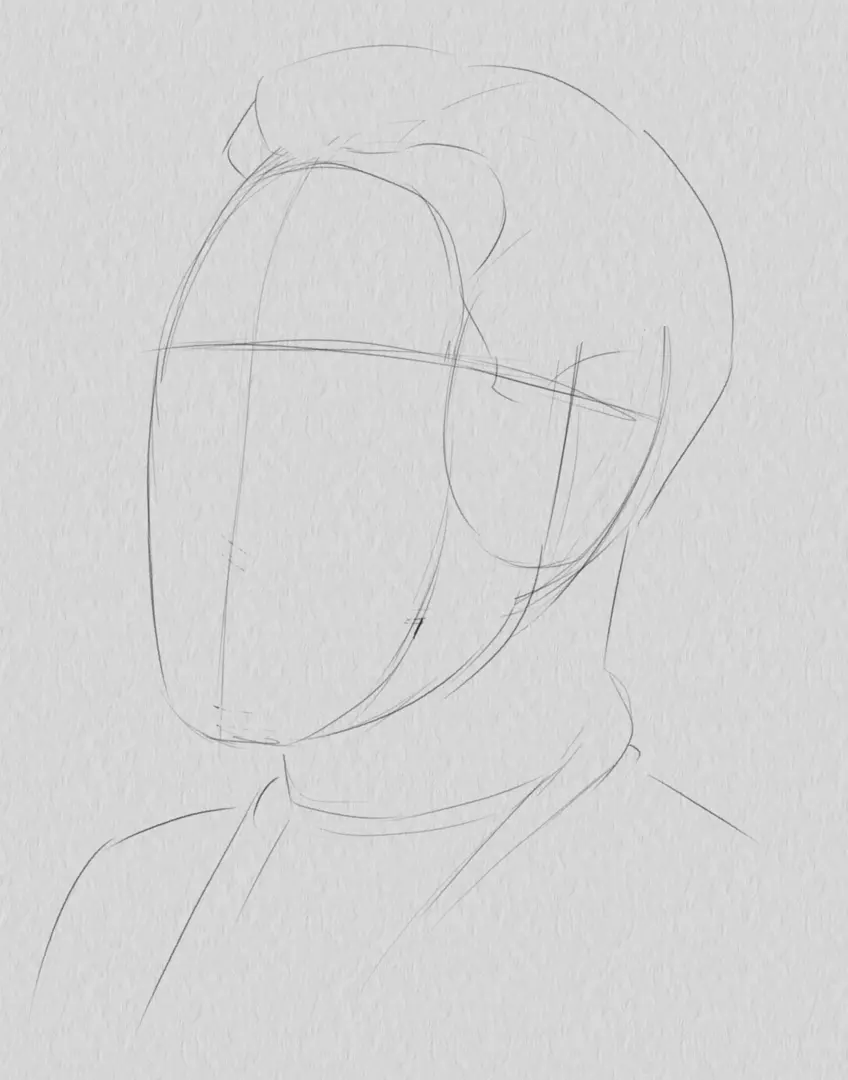
Finally, I place a large mass for the hair, and another for the neck and upper chest.
DETAILED SKETCH
With the main masses in place, it's time to add detail. Somewhat like a sculptor, I will carve and add material to define the shapes of my face.
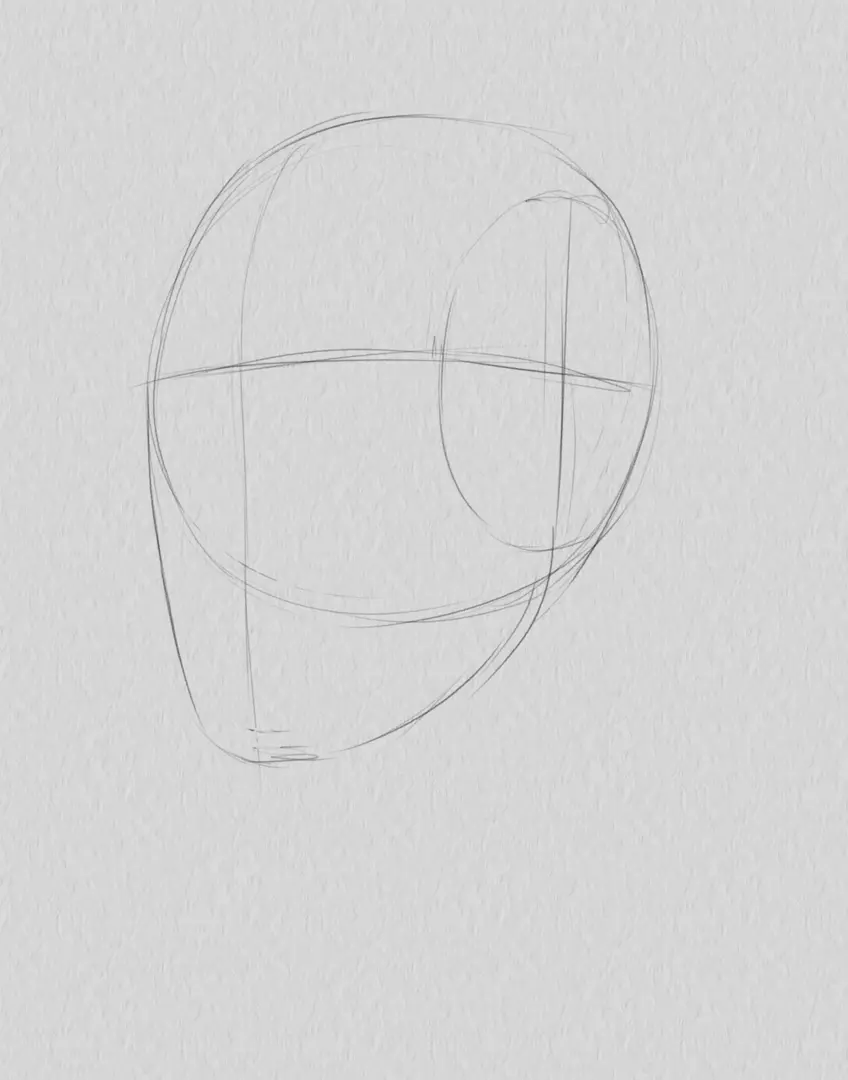
I start by carving out the eye sockets. They start below the browline and are generally smaller and more angular than in women.
I then place my ear. It is located in the outer lower quarter on the side of my head. It is often quite large in men and goes up to the level of the browline.
The ear has the advantage of giving me a new useful reference point: the bottom line of the nose. I start from the bottom of the ear and draw a reference on the face to find the location of the bottom of my nose.
Be careful to follow the volume of the different planes of your head: the side of the head is relatively flat so the landmark will be straight here, but the face is rather curved and the landmark will be more or less arched depending on the orientation of your head.
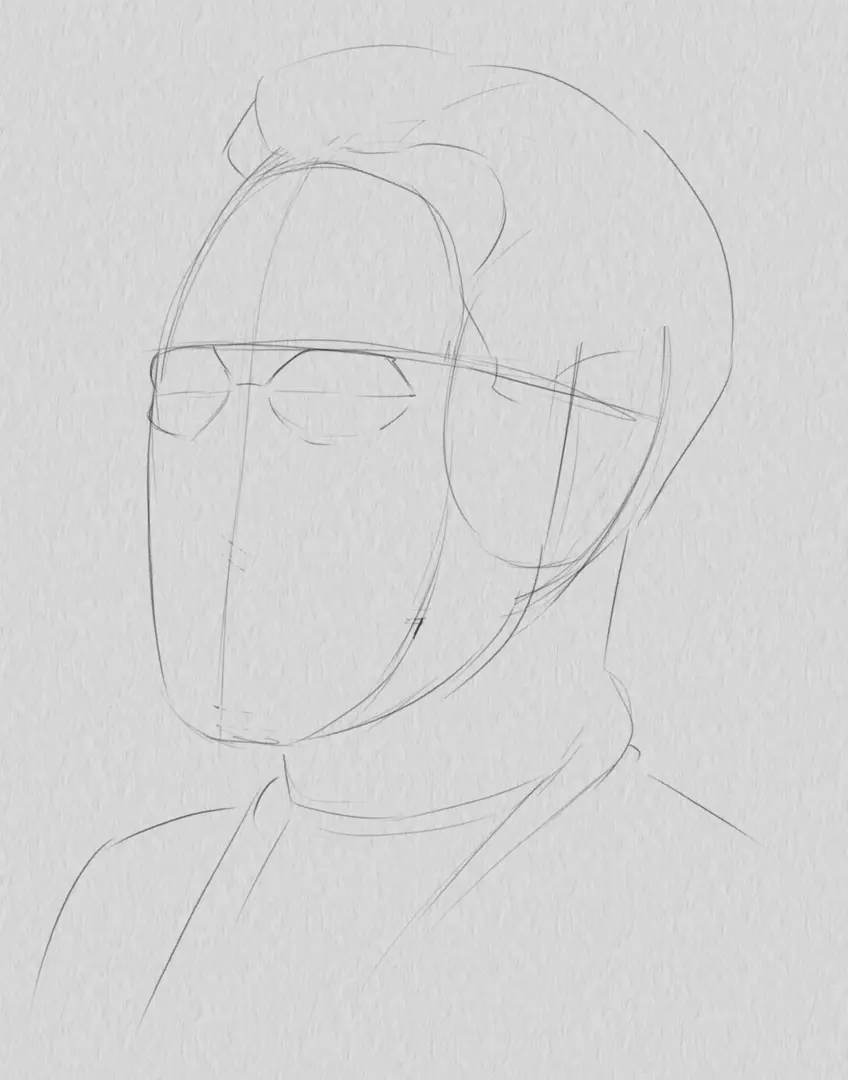
I can now add my nose. There too, I stick to very simple shapes reminiscent of a pyramid. The nose is generally wider in men than in women. It can also be longer depending on your model.

Under my nose, I can add two hemispheres on top of each other, serving to isolate the area of my mouth as well as that of my chin. The male chin is generally more pronounced than its female counterpart. Conversely, the mouth tends to be thinner and less pronounced.
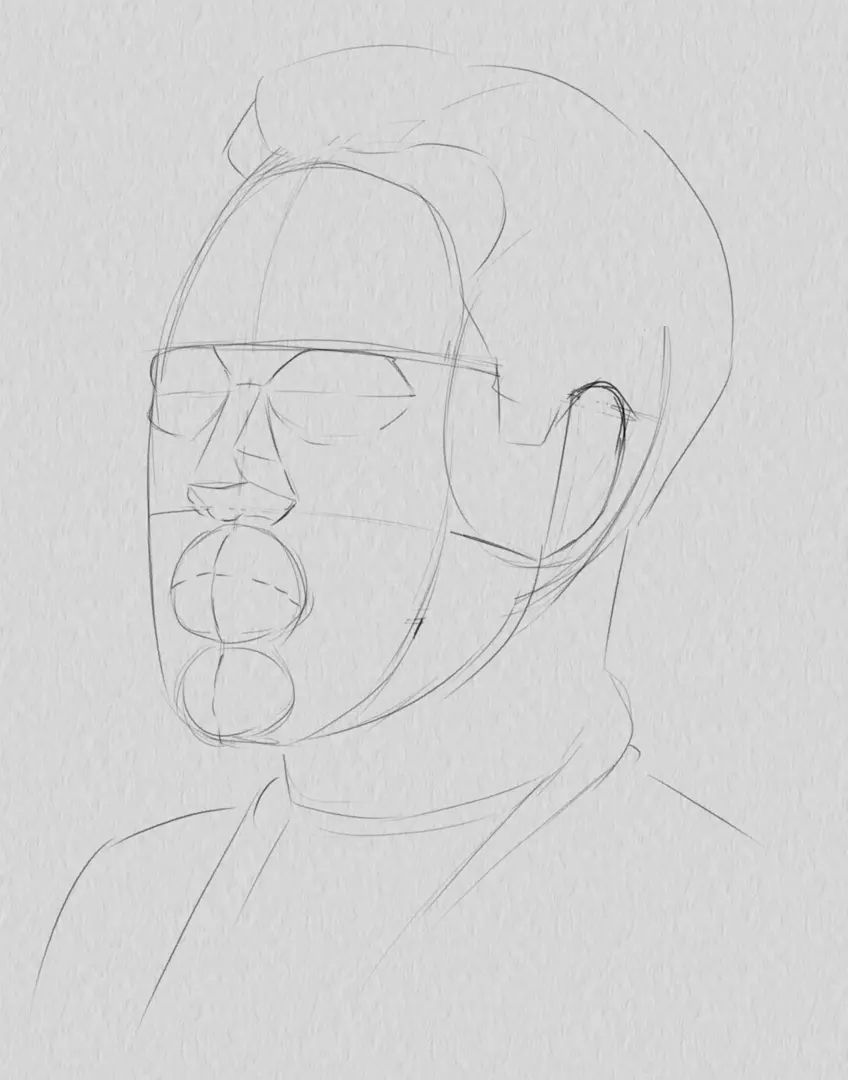
To finish up with my large areas of detail, I will add two hemispheres in my eye sockets to represent my eyes. Note that one of my eyes is slightly hidden by the nose.
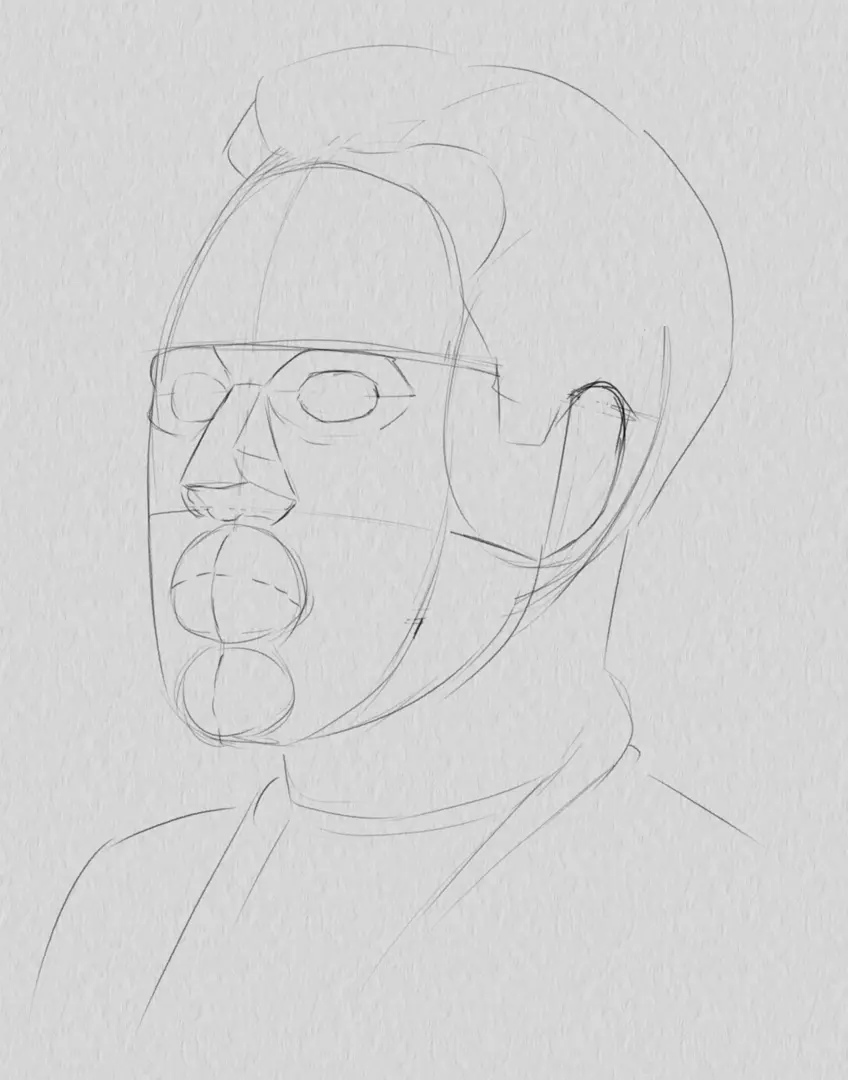
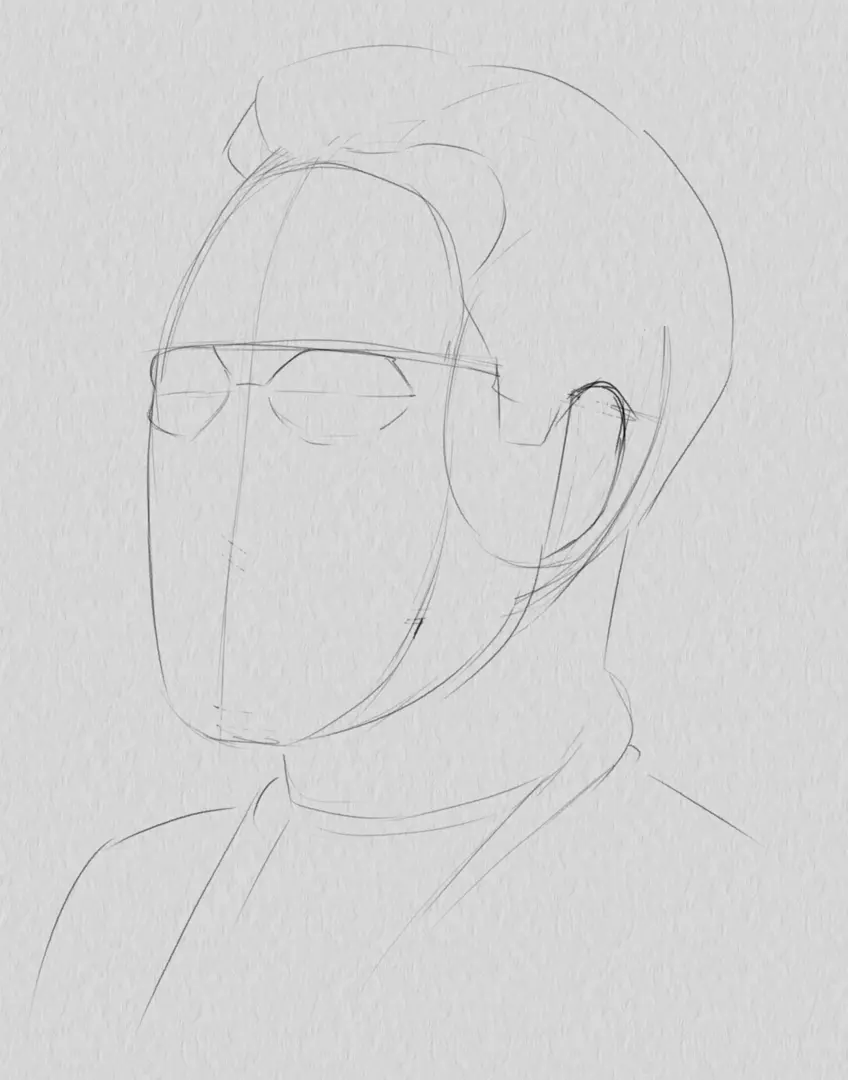
The placement of my large detail areas is now complete. I can therefore delve a little deeper into defining my face. I continue to apply the same principle as before, that is to say, start with simple shapes and gradually make them more complex. If we take the example of the eyes, I start by adding my eyelids…
Then I define the inside of the eyes...

And why not start by pointing out some wrinkles as well.
I will then do the same with the rest of the face: ear, nose, mouth... I also take the opportunity to refine my face, correct some proportions, and position the major areas of my model's facial hair.
I'll also add more markers to better visualize the different shapes on my face: cheekbones, cheeks, forehead... Feel free to add more markers yourself if it helps you. Conversely, if you get lost among all these lines, don't hesitate to remove some. The sketch is primarily a tool that should help you and be useful to construct your final drawing.
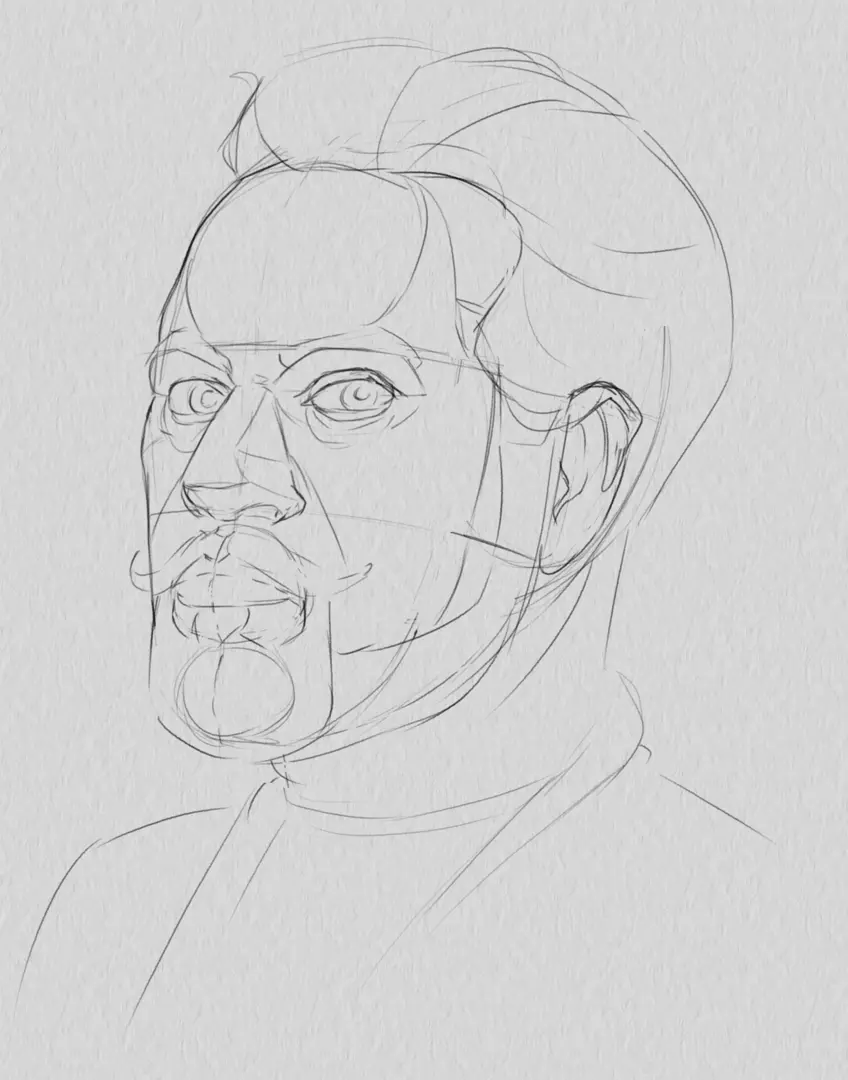
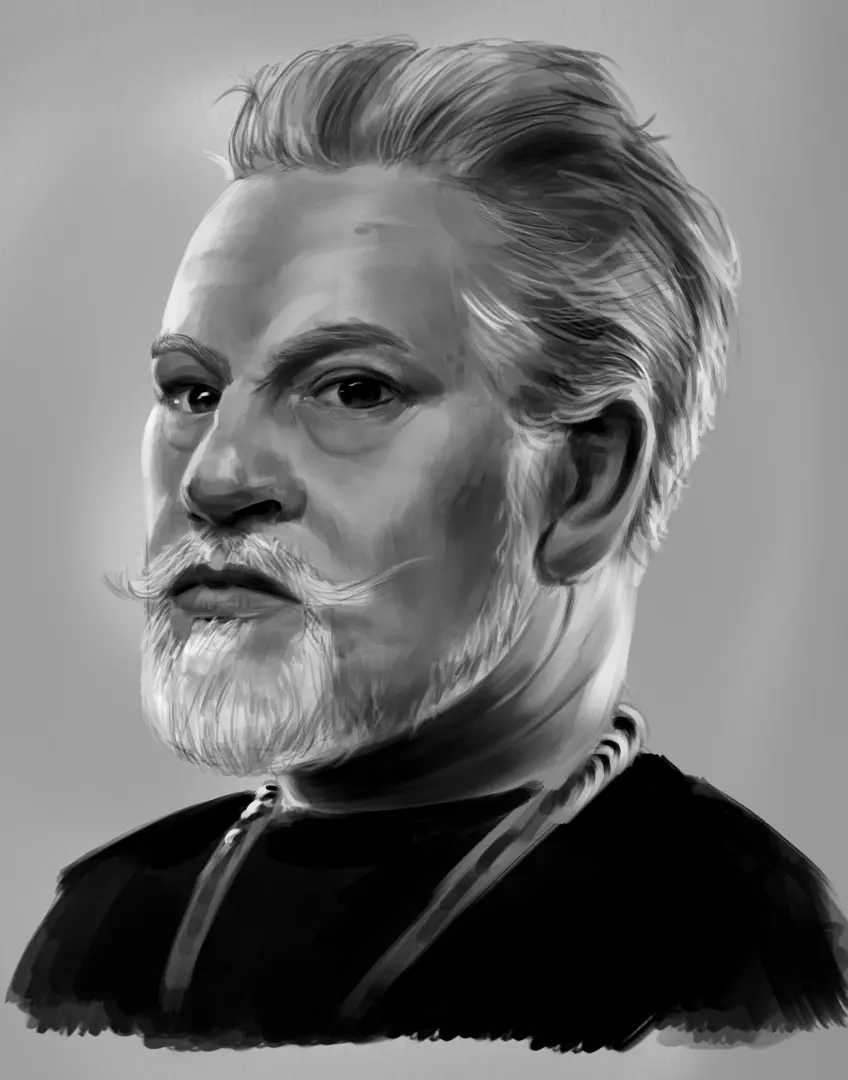
My sketch is now finished! I can now move on to creating volume.
ADDING VOLUME TO YOUR PORTRAIT
To begin shaping my volume, I first apply an average value to the different parts of my head. On my model, the beard and mustache are lighter than my face, and conversely, the hair is slightly darker. I apply the same approach to the details (eyes, mouth) which do not necessarily have the same average value as the skin.
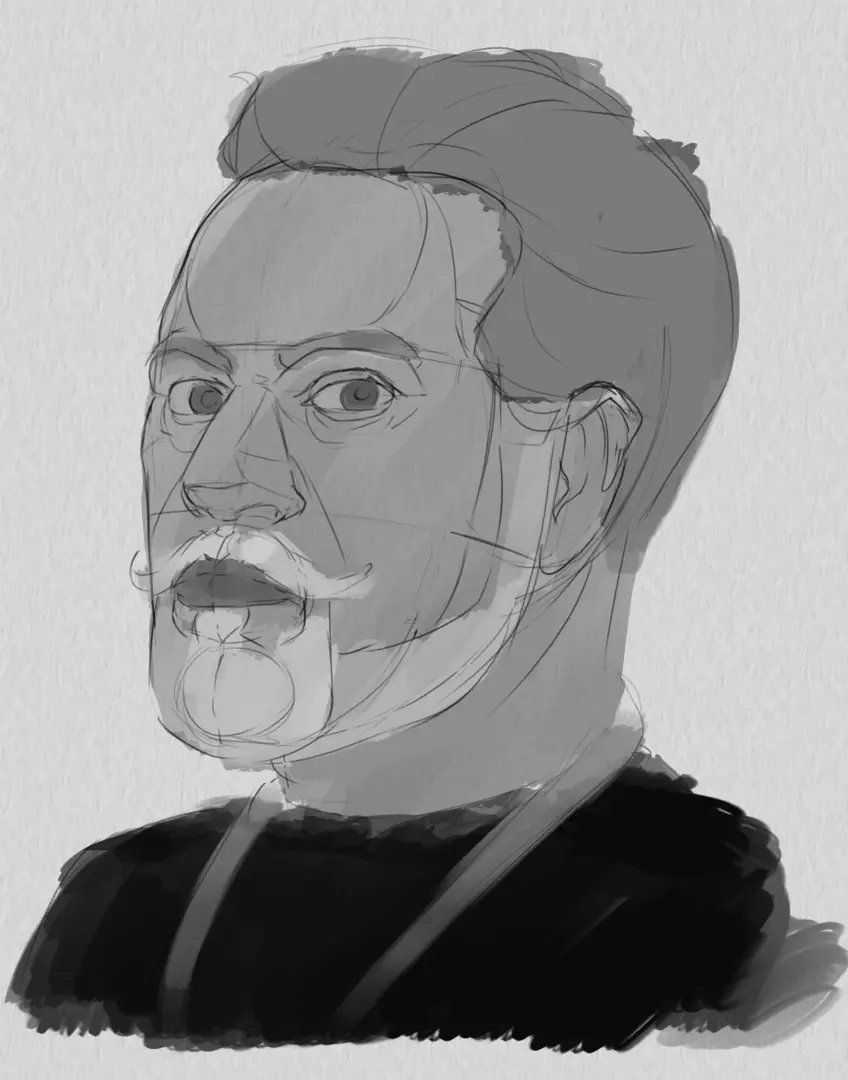
I will then place my large areas of shadow and light. My sketch will help me to clearly visualize the parts of my head that fall into shadow or are highlighted. I'm still quite vague on this part, because the goal is not to have precise definition but an idea of my large areas of shadow and light.
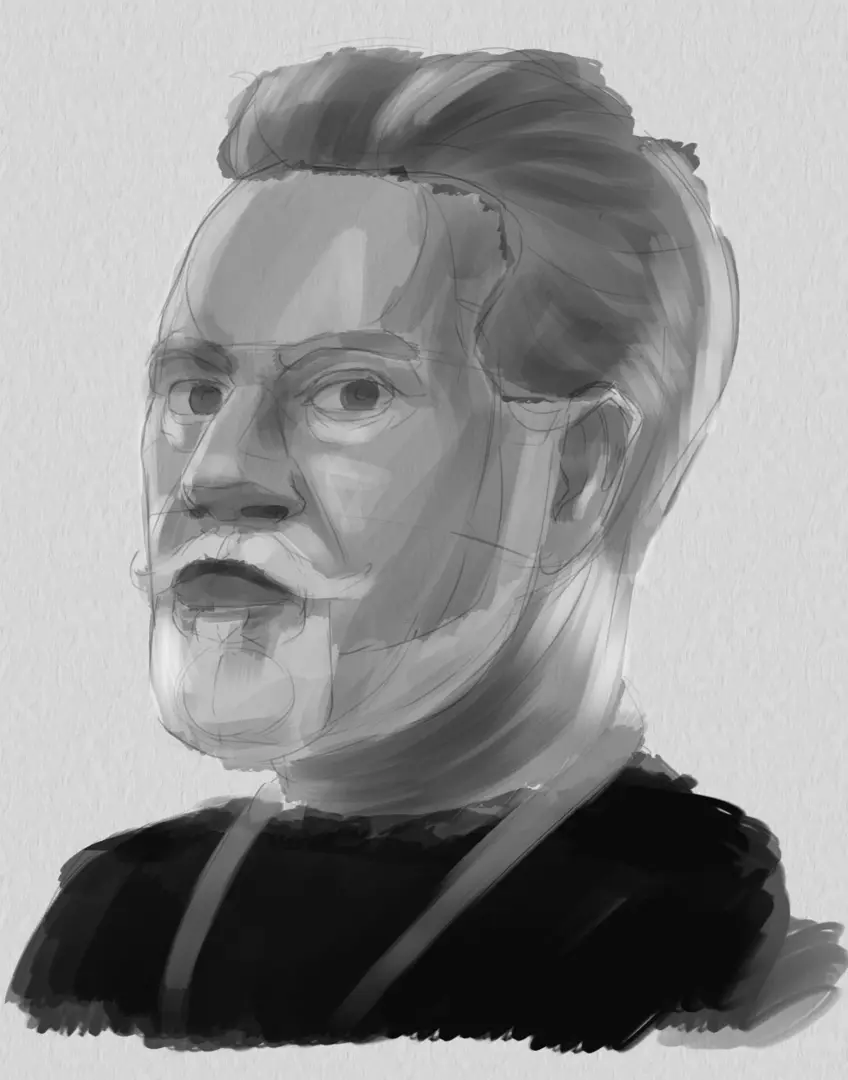
Finally, I will be able to sculpt my areas of shadows and lights in the same way as on my sketch: I refine my areas gradually, detailing their borders and accentuating the shadows in the hollows and the light on the bright parts of the face. In men, the facial features are more angular and distinct, so I avoid blurring my drawing too much. Try to keep angular and sharp areas to give a harsher look to your portrait.

Explore further
This tutorial on the male face is now complete. Feel free to explore the same construction principle for more stylized faces or to test the method on men of different age groups. A good complement to this article is our article on the female portrait - check it out!
Discussion
No comments yet.