Painting Birds with Watercolor
Hello everyone, today in this article, we will look at how to paint a bird using watercolors. Whether you are a complete beginner or more experienced, we will cover different methods so that you can have fun and improve.
Prepare your watercolors, your paper, and most importantly, your creativity! Let's start!
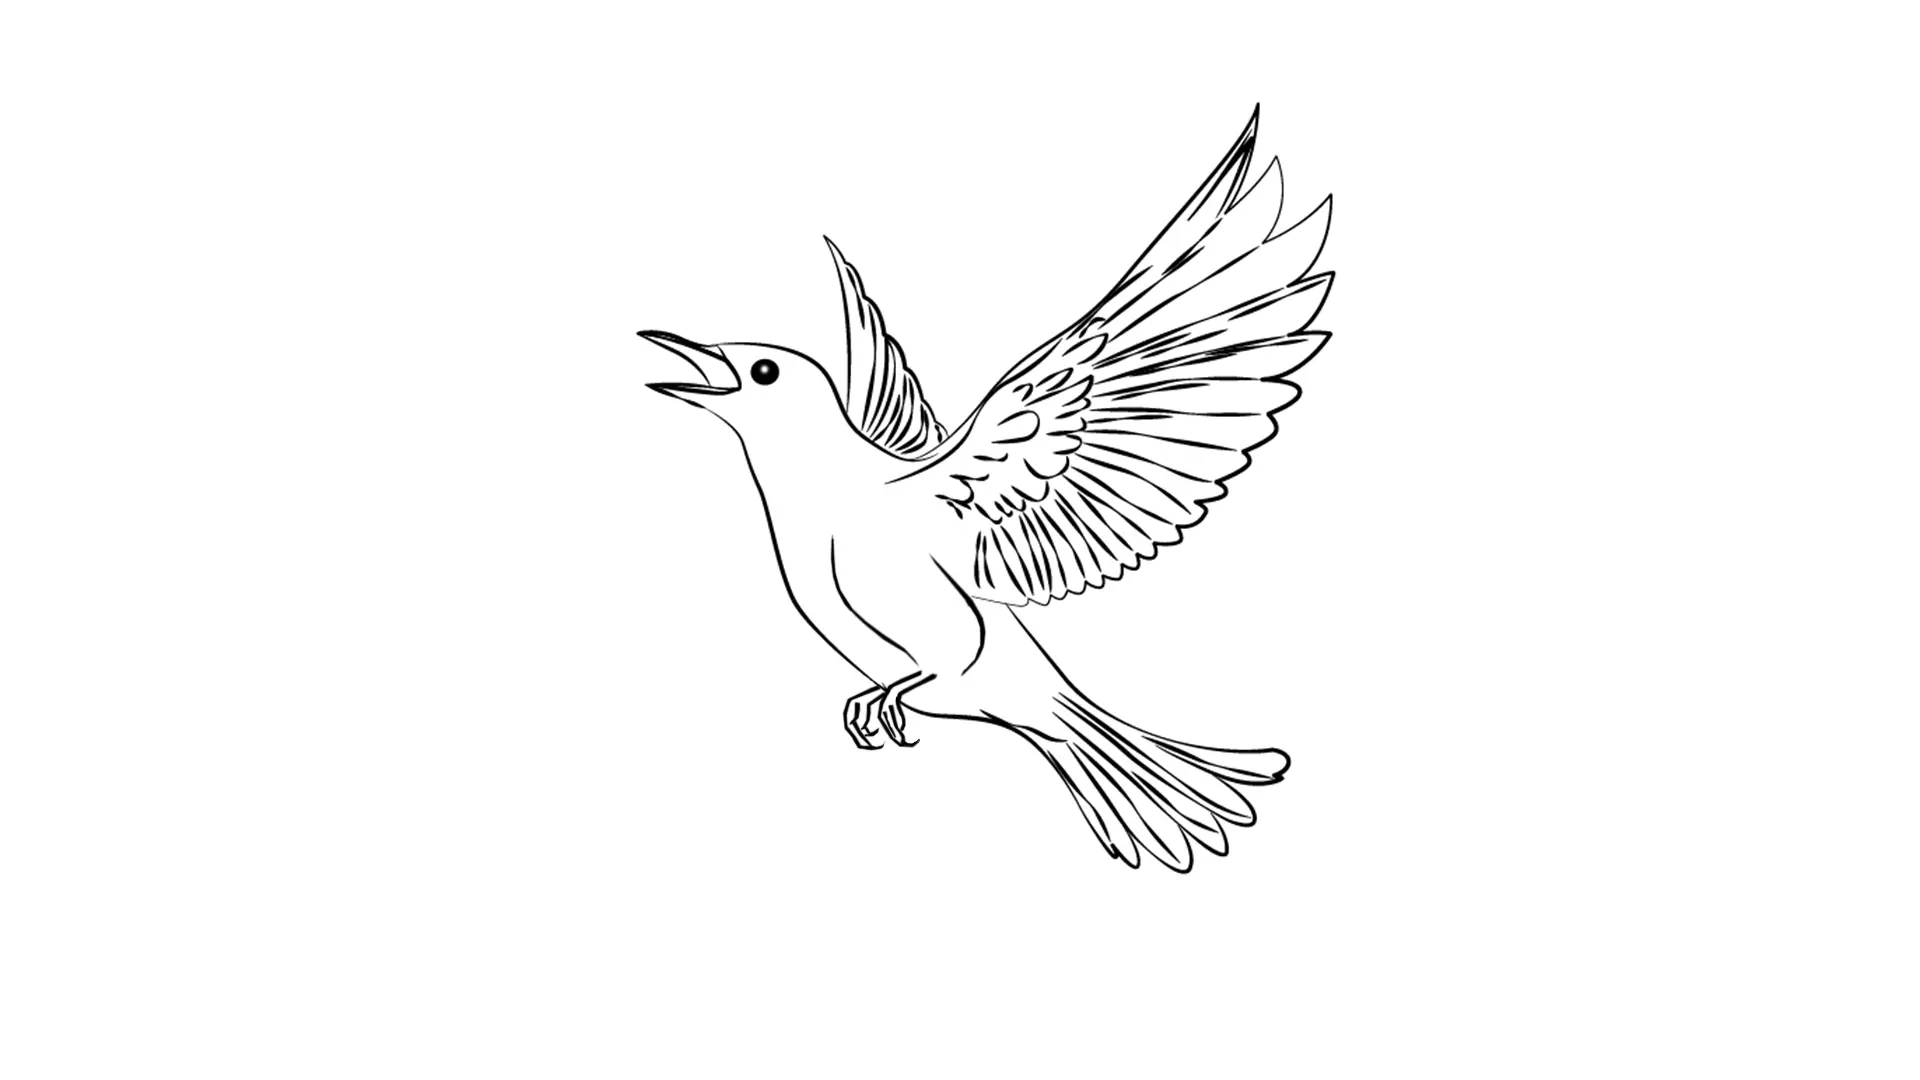
Understanding the anatomy of a bird
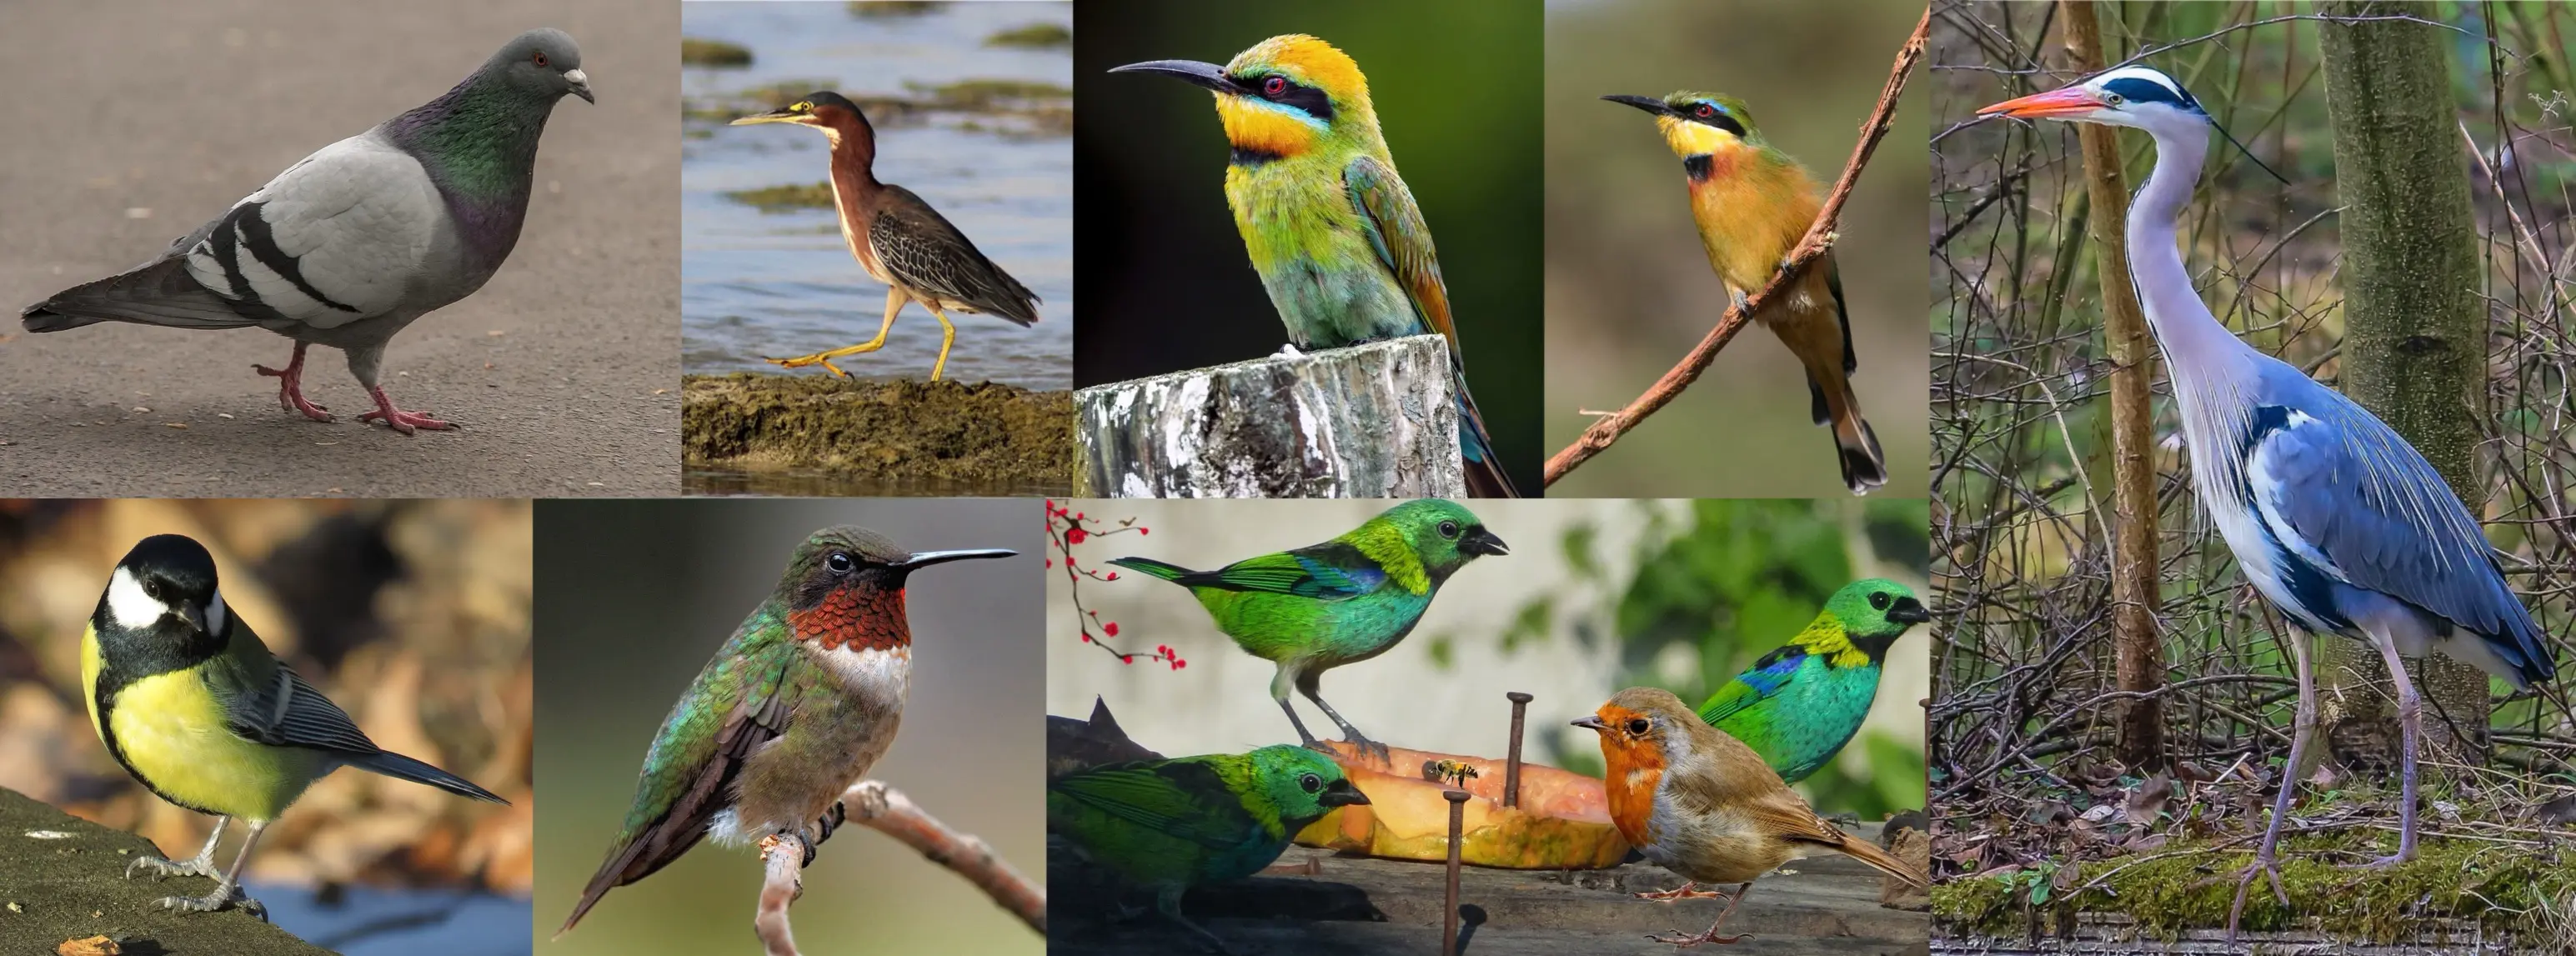
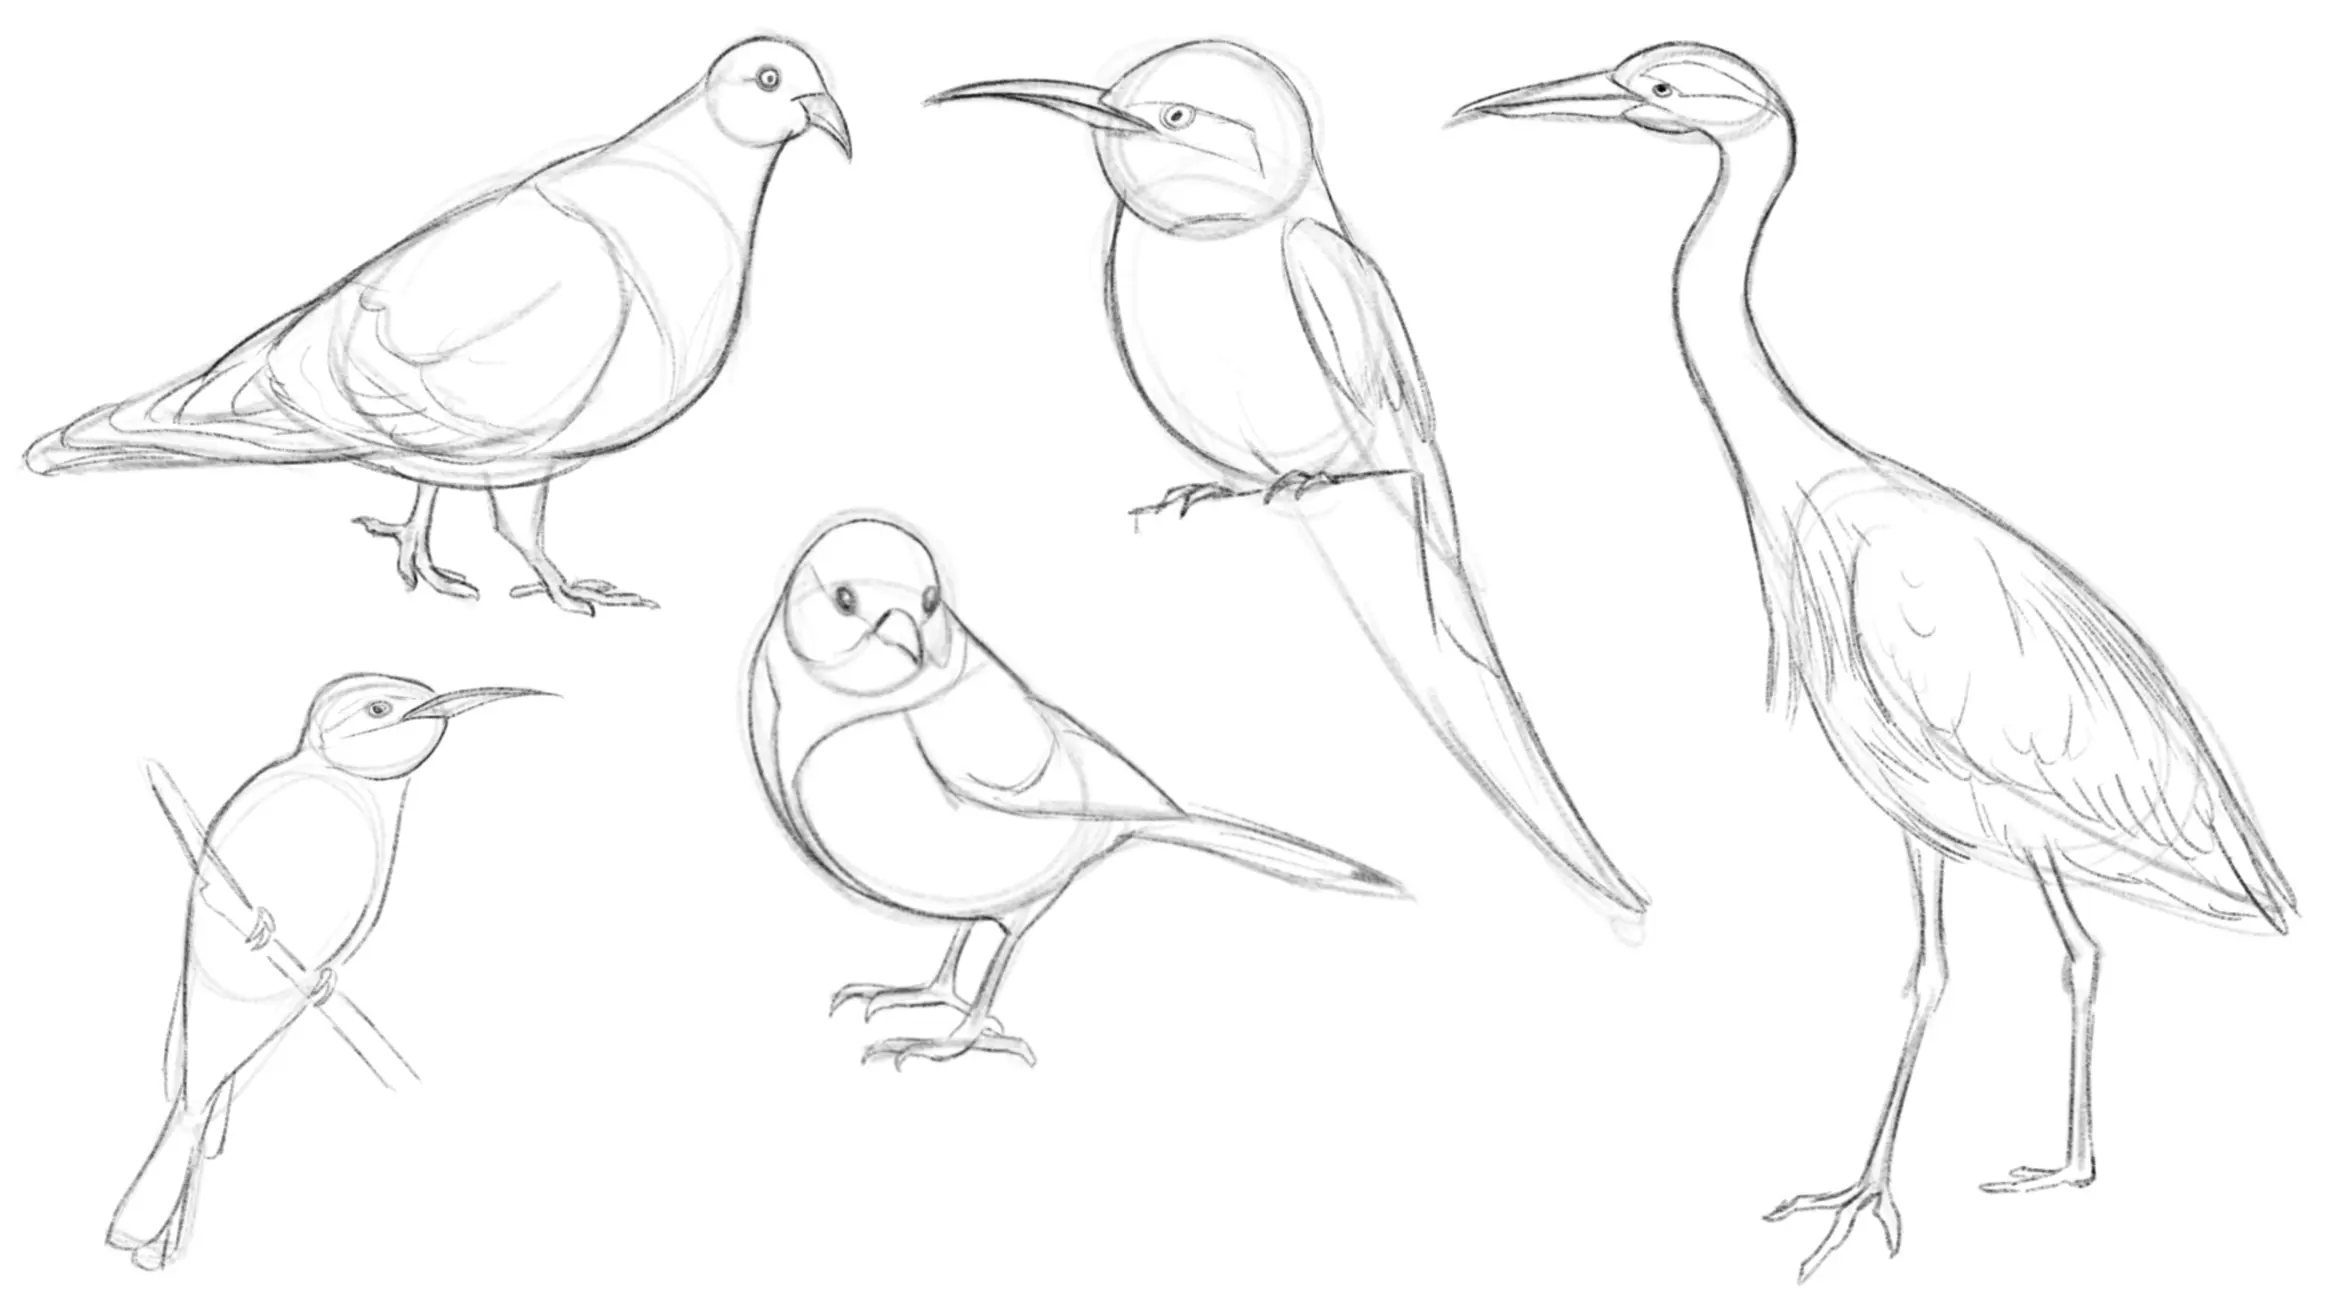
To begin, we will quickly review the basics of drawing a bird. As you can see from the various photos below, there are many birds, yet the way to draw them is very often similar.
Indeed, birds can almost always be very succinctly simplified with an oval for the body, one for the head, a pointed oval for the wings, and a triangle for the beak. The only difference will lie in the proportional relationships between these different elements.
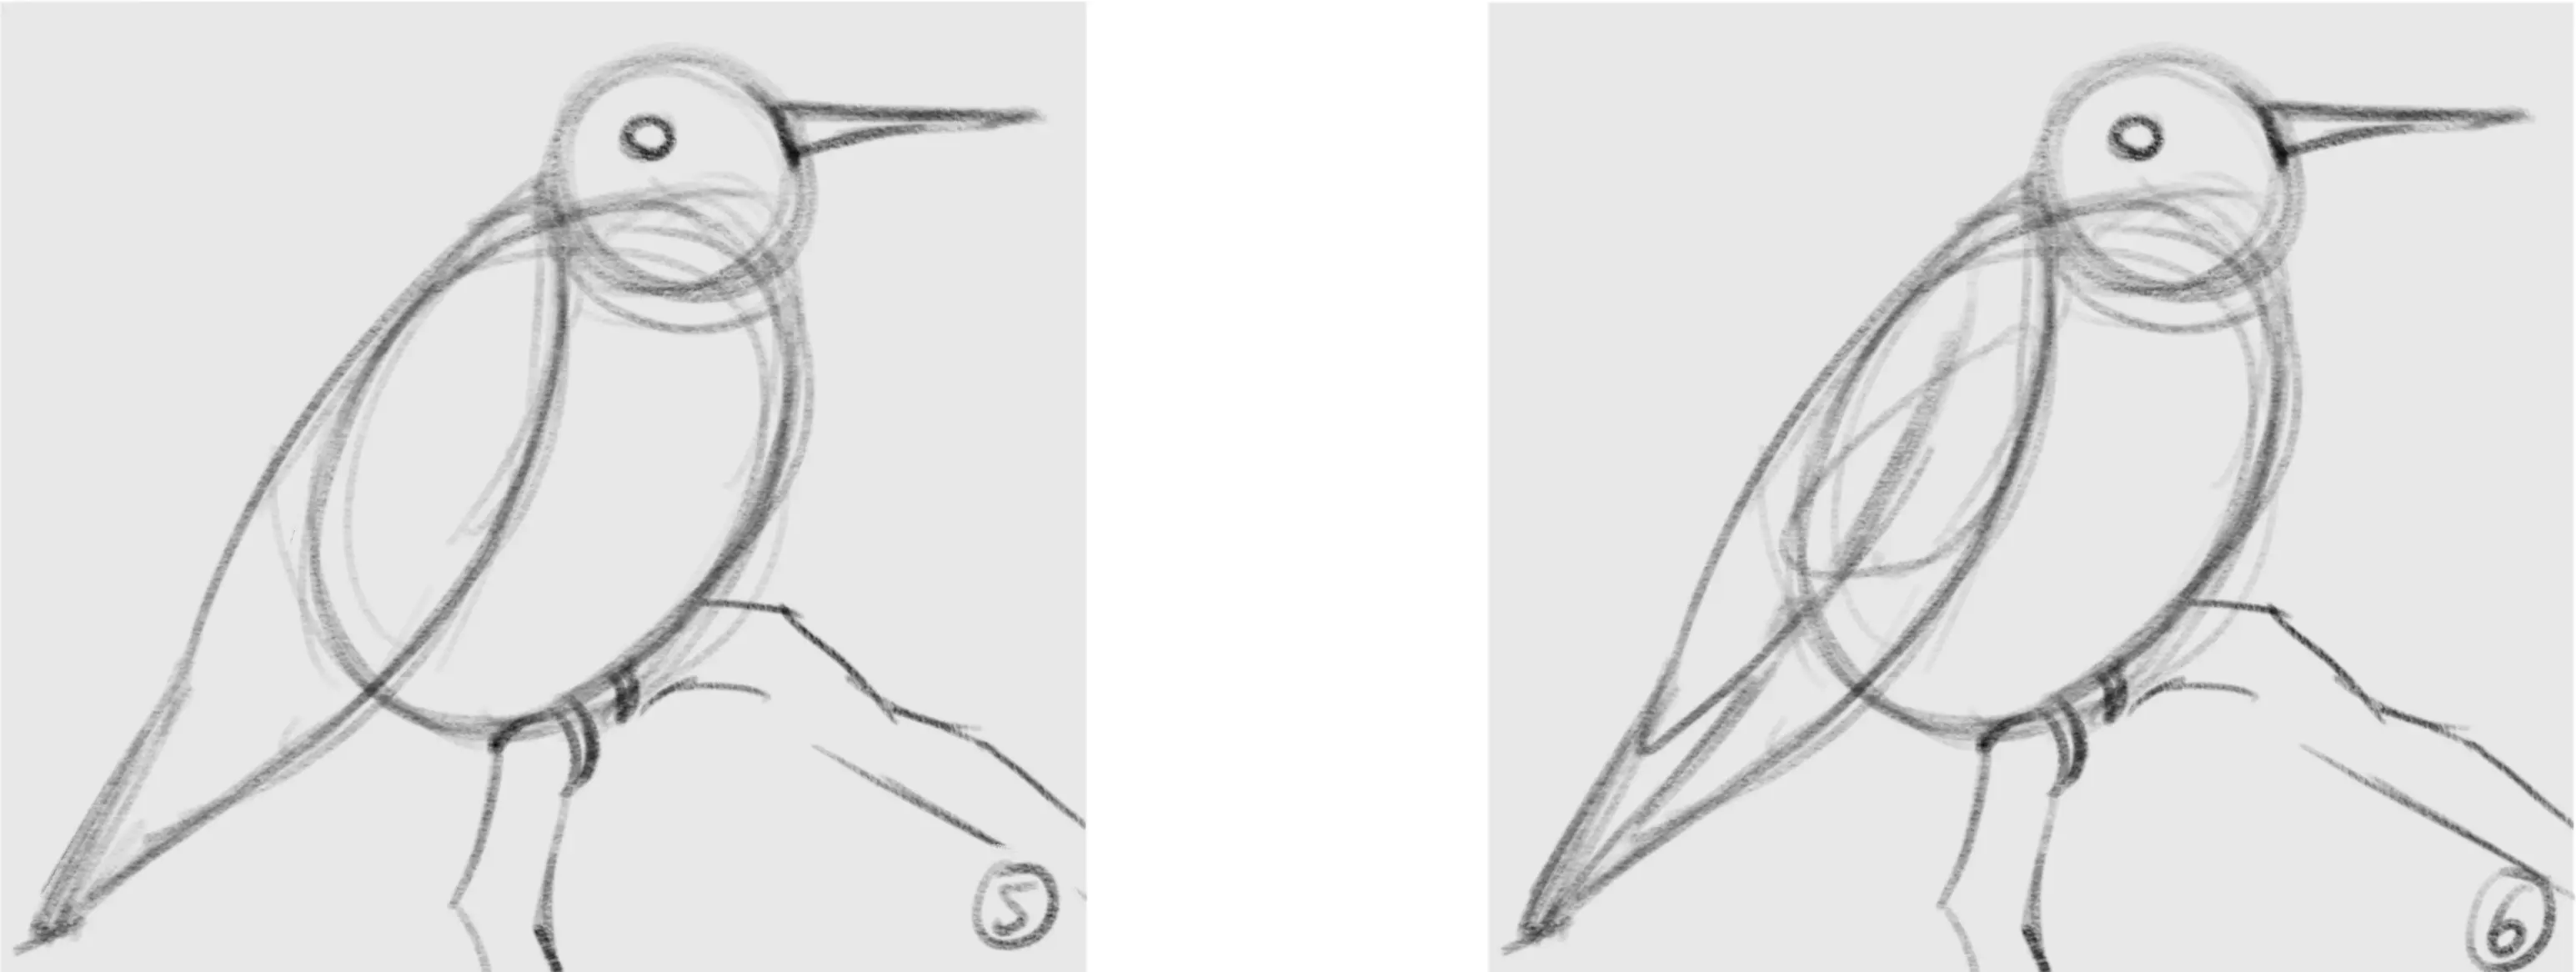
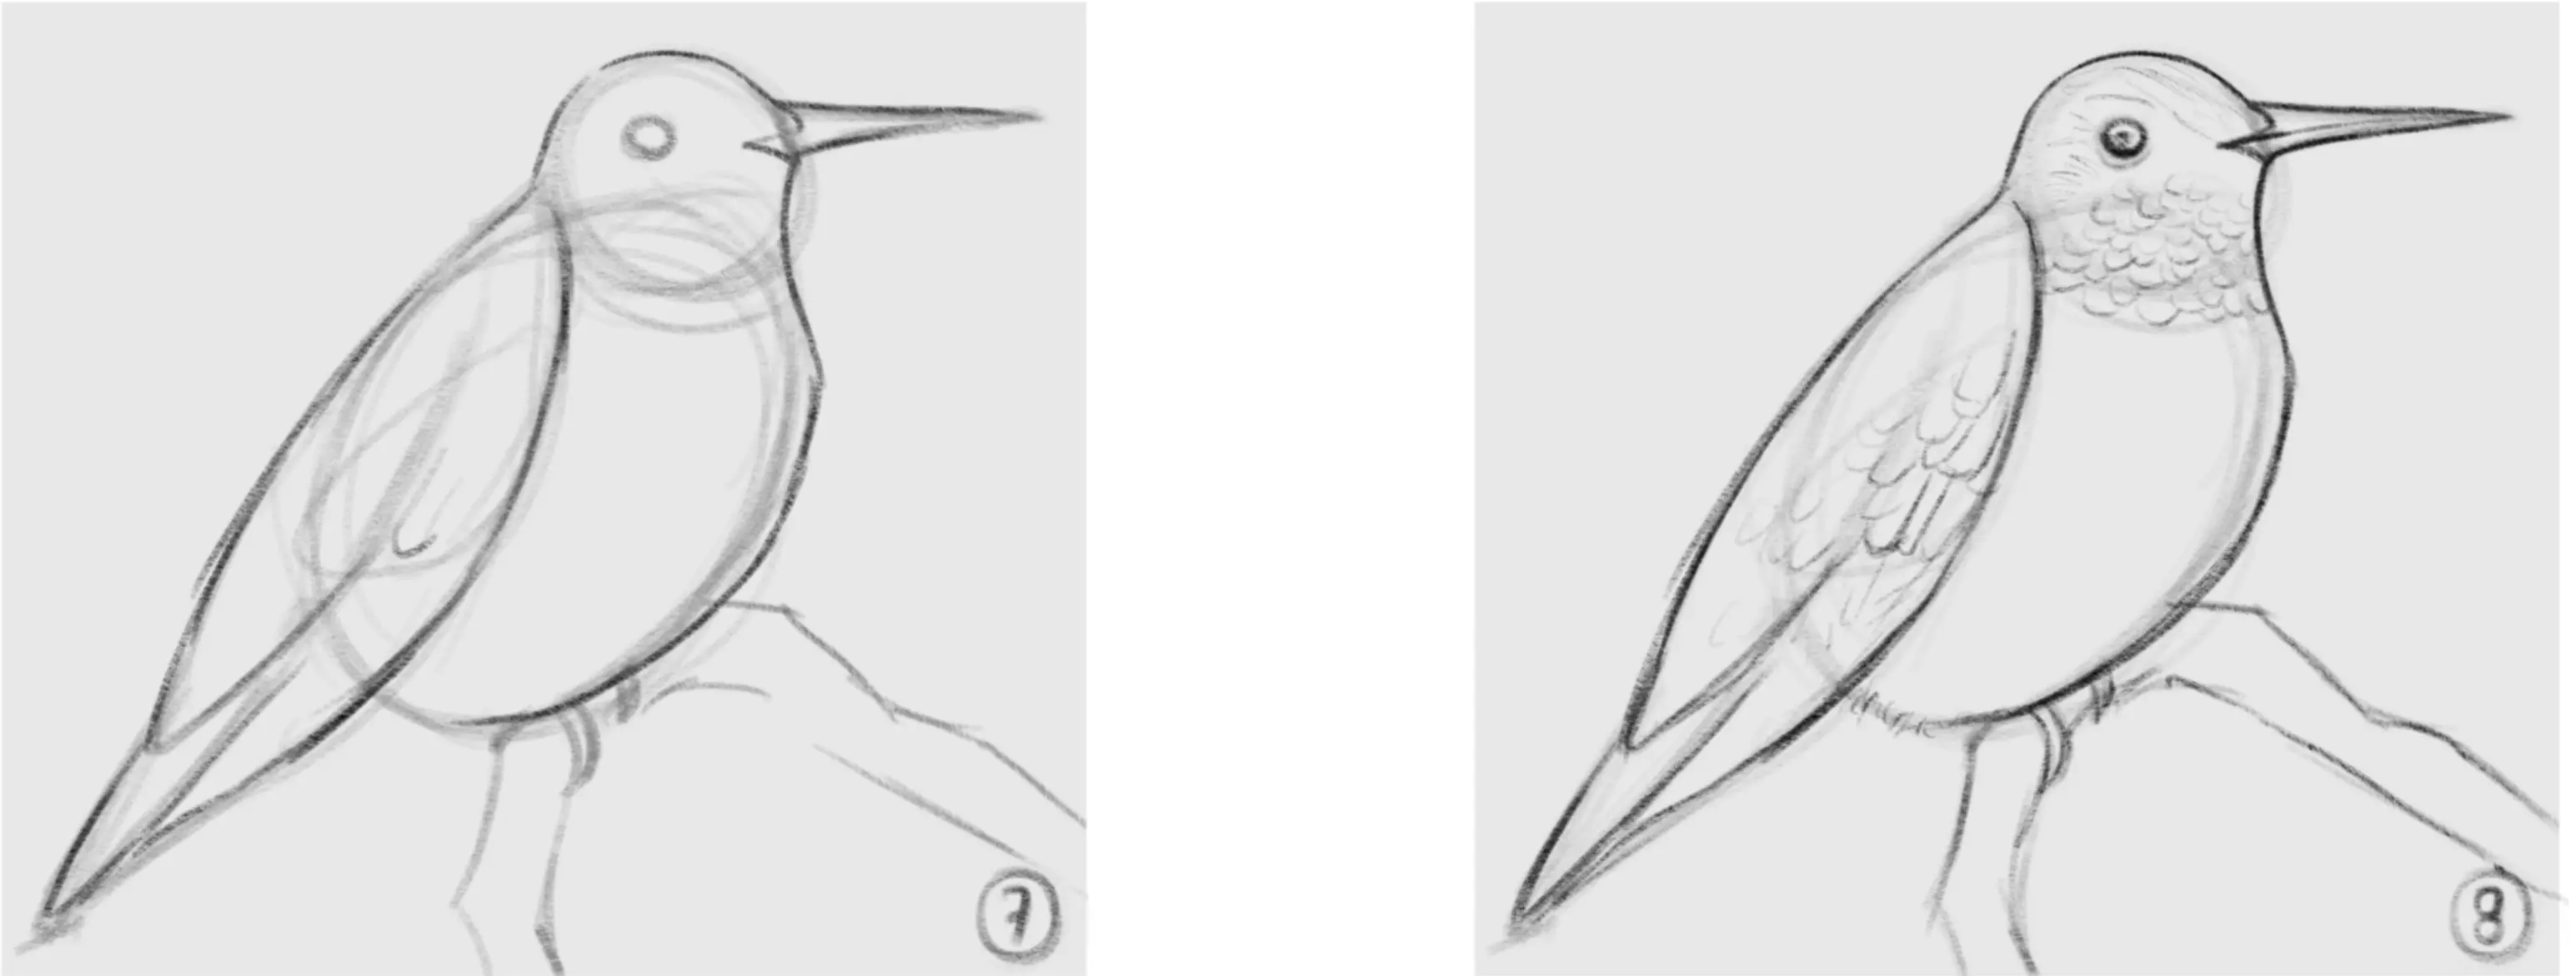
Drawing a bird step by step
Here's a step-by-step example of how to draw a bird.
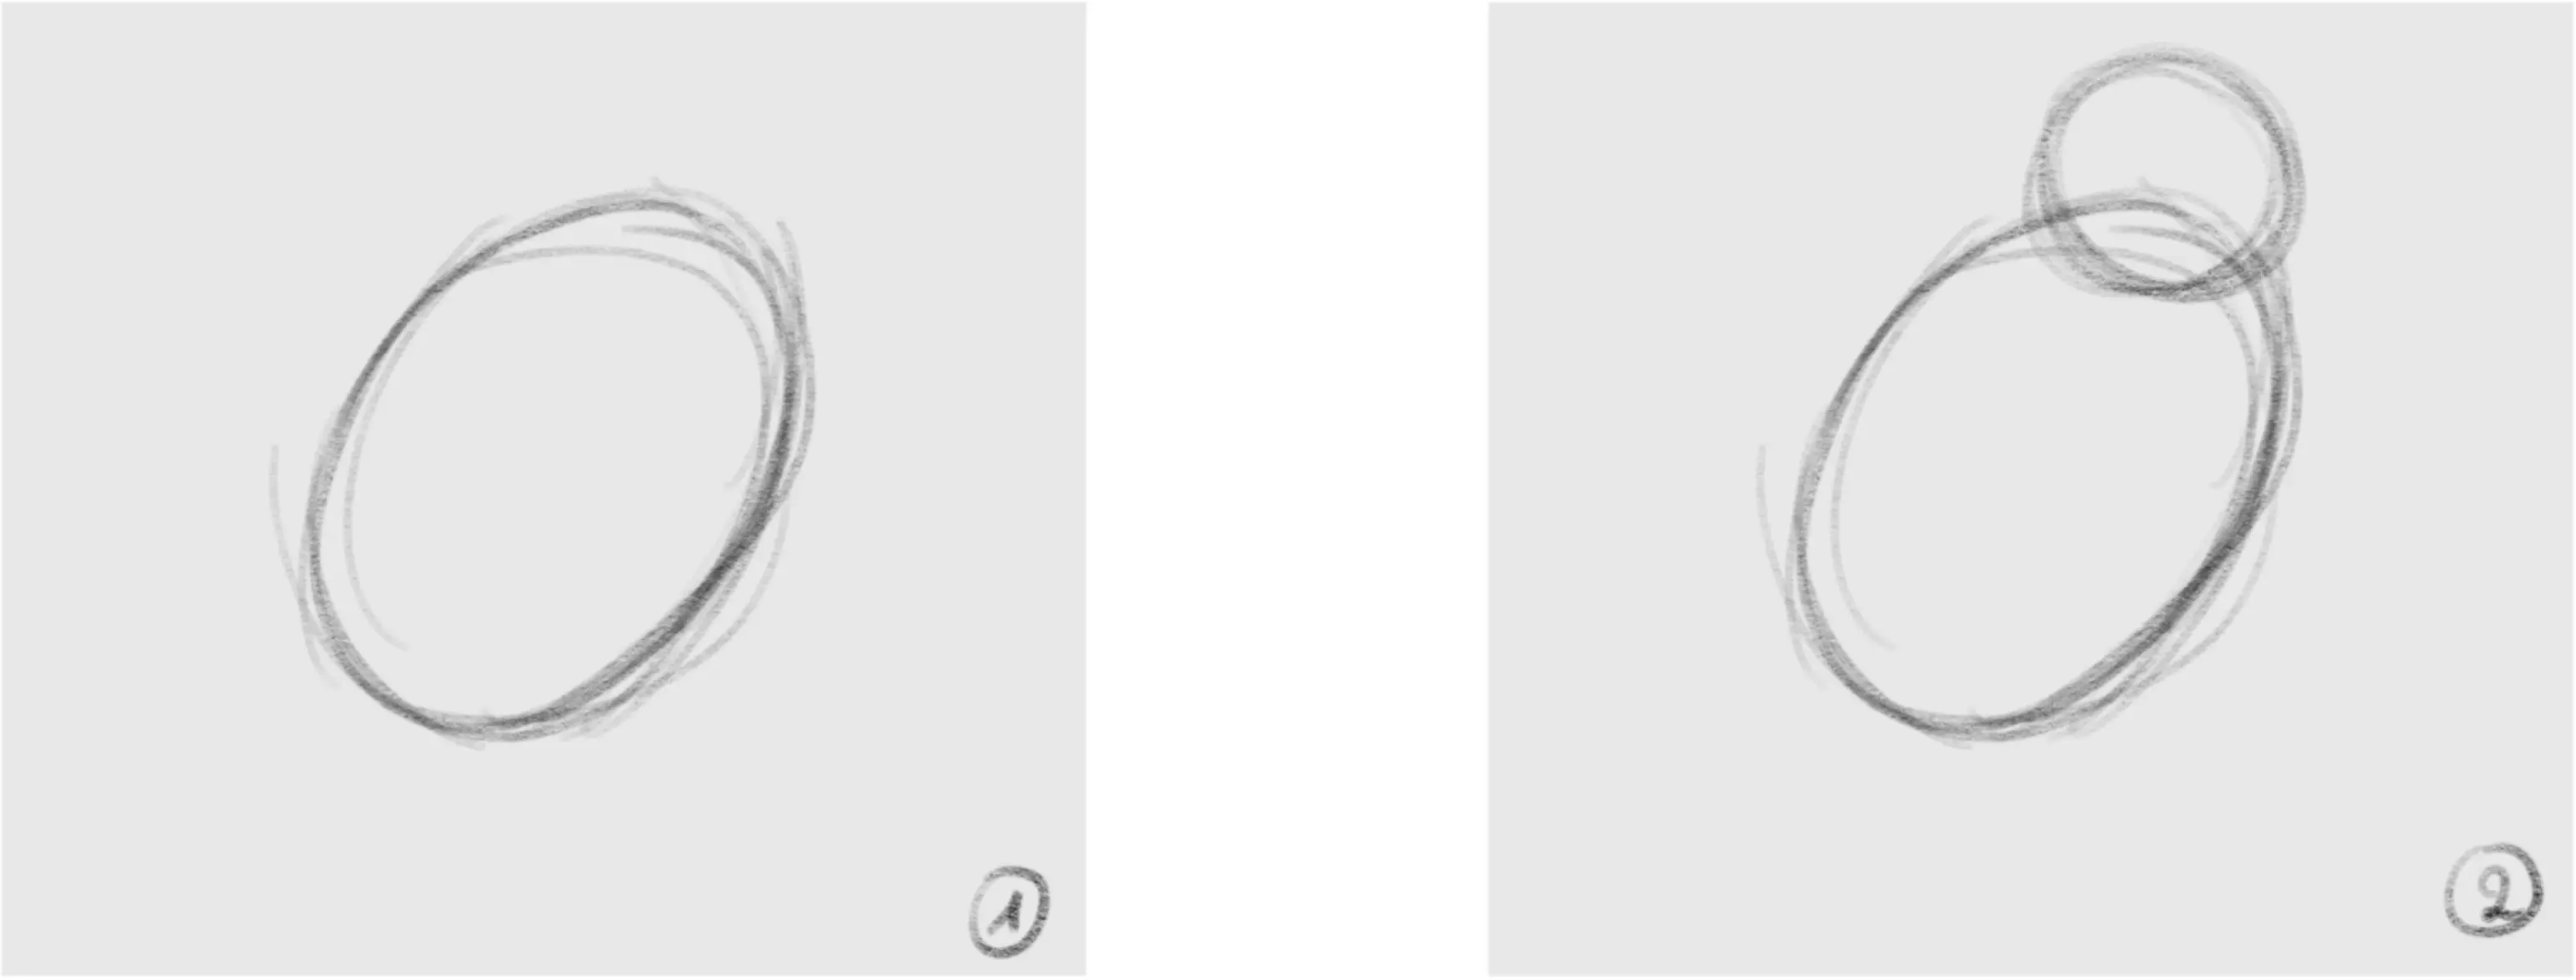
1 - Start with an oval for the body
2 - Add a circle for the head
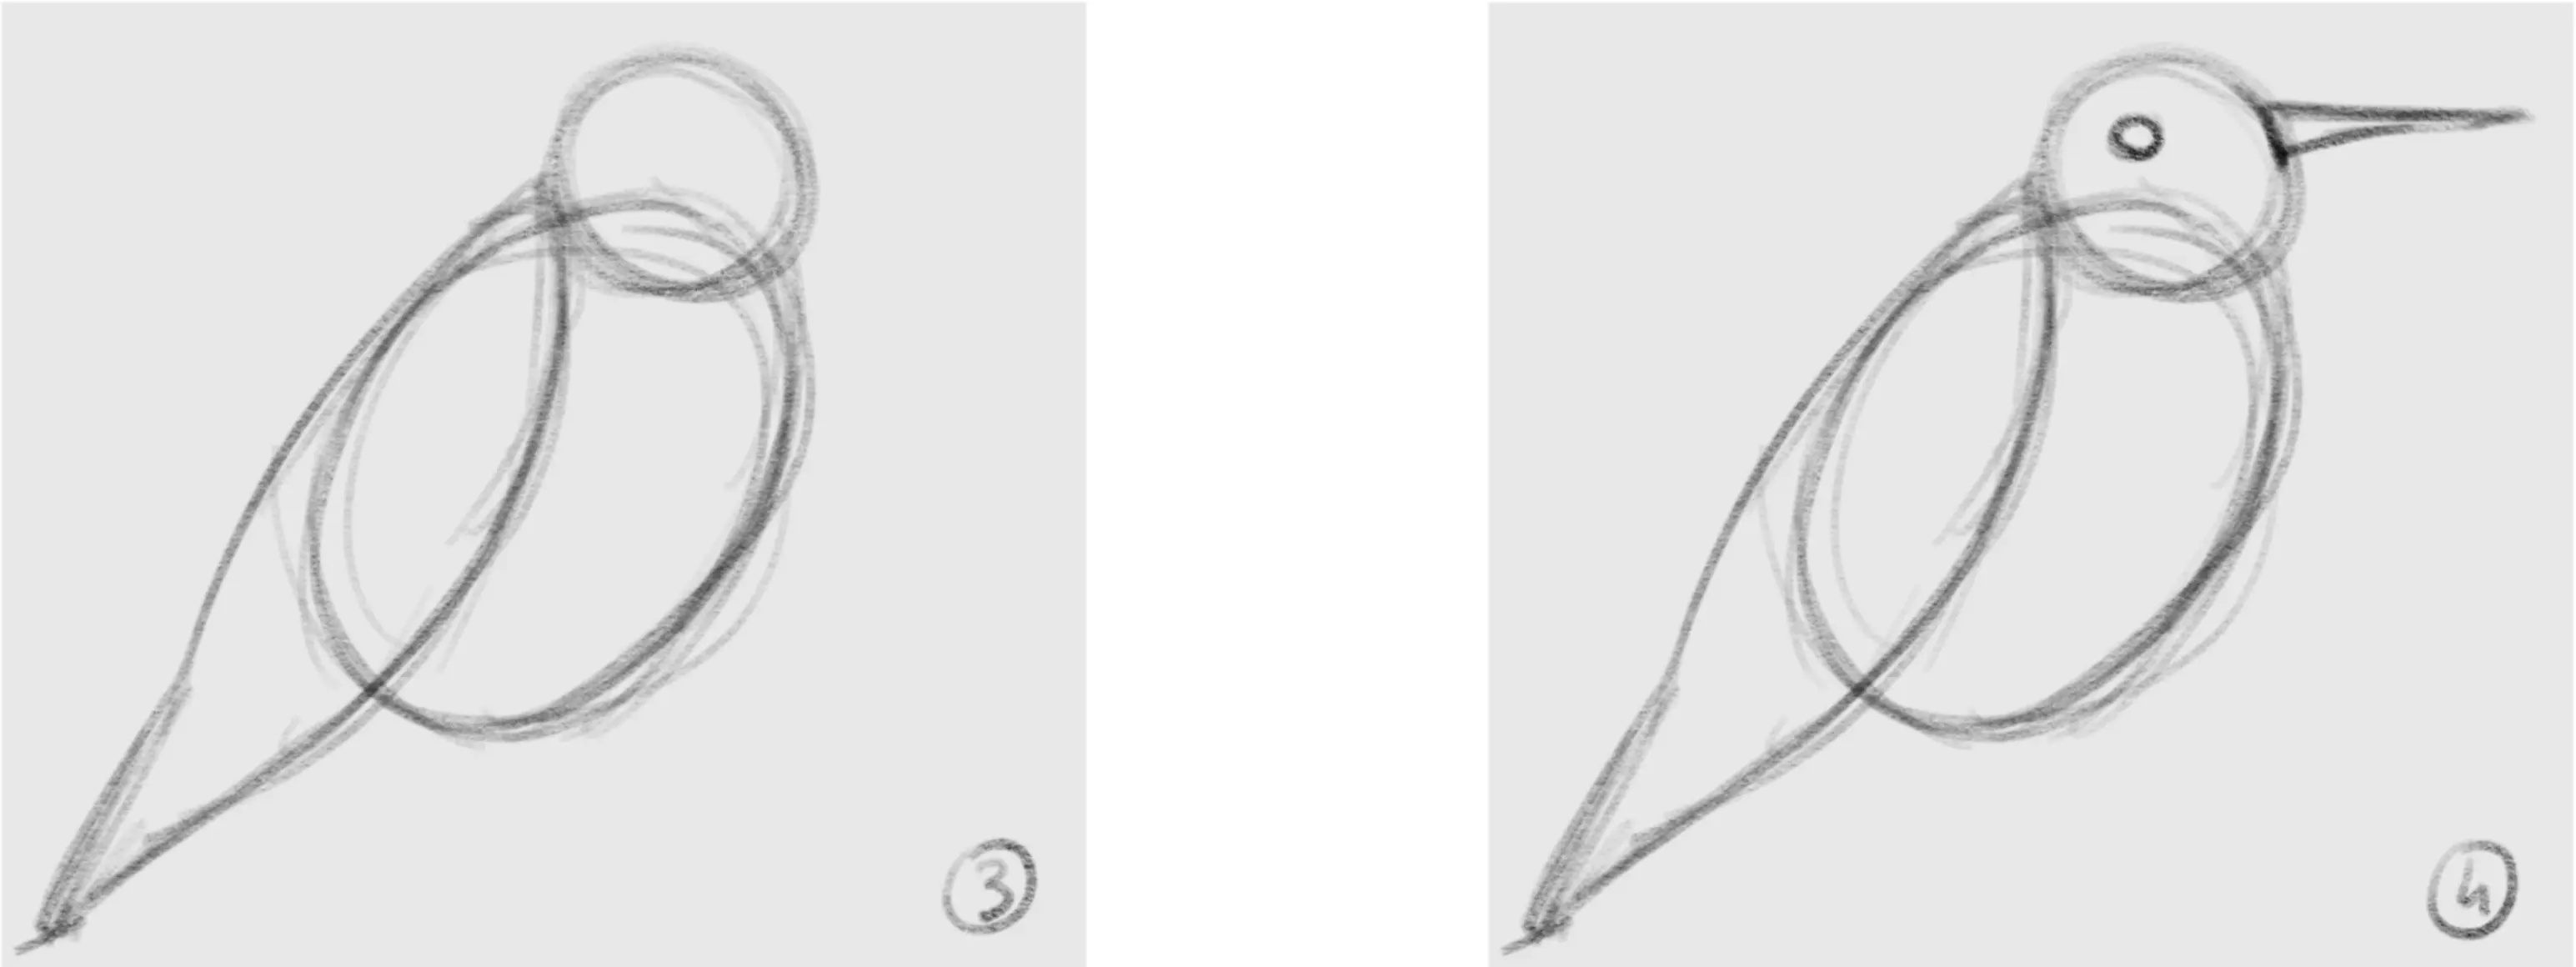
3 - Roughly sketch the shape of the wings.
4 - Start drawing the first details.
5 - Add the legs and a branch.
6 - Identify the different areas of the plumage and wings.
7. Refine the sketch.
8. Finish by adding the details of the plumage.
By following these steps, you will be able to draw any bird you want! I recommend using references to see the relationships between the different elements. Here are some examples of bird drawings to inspire you.
Painting a stylized bird in watercolor
We've just seen how to draw fairly realistic birds. However, you don't need to perfectly master drawing birds in order to paint them in watercolor. This medium primarily allows for creativity and letting go. So, you can easily paint stylized birds without even making a preliminary drawing. Just keep the main elements of the bird in mind, as this will help you stylize them more consistently.
If you are completely new to watercolor, I encourage you to first check out how to get started with watercolor.
1 - Start with a rounded shape on the left that you stretch to the right, don't forget to stop your brush, making distinct lines as if to suggest feathers.
2 - Stretch one piece over another on the side to create a wing shape.
3 - Create the shape of the body, and simply close the shape of the circle.
4 - Paint the tail by drawing rounded and curved lines.
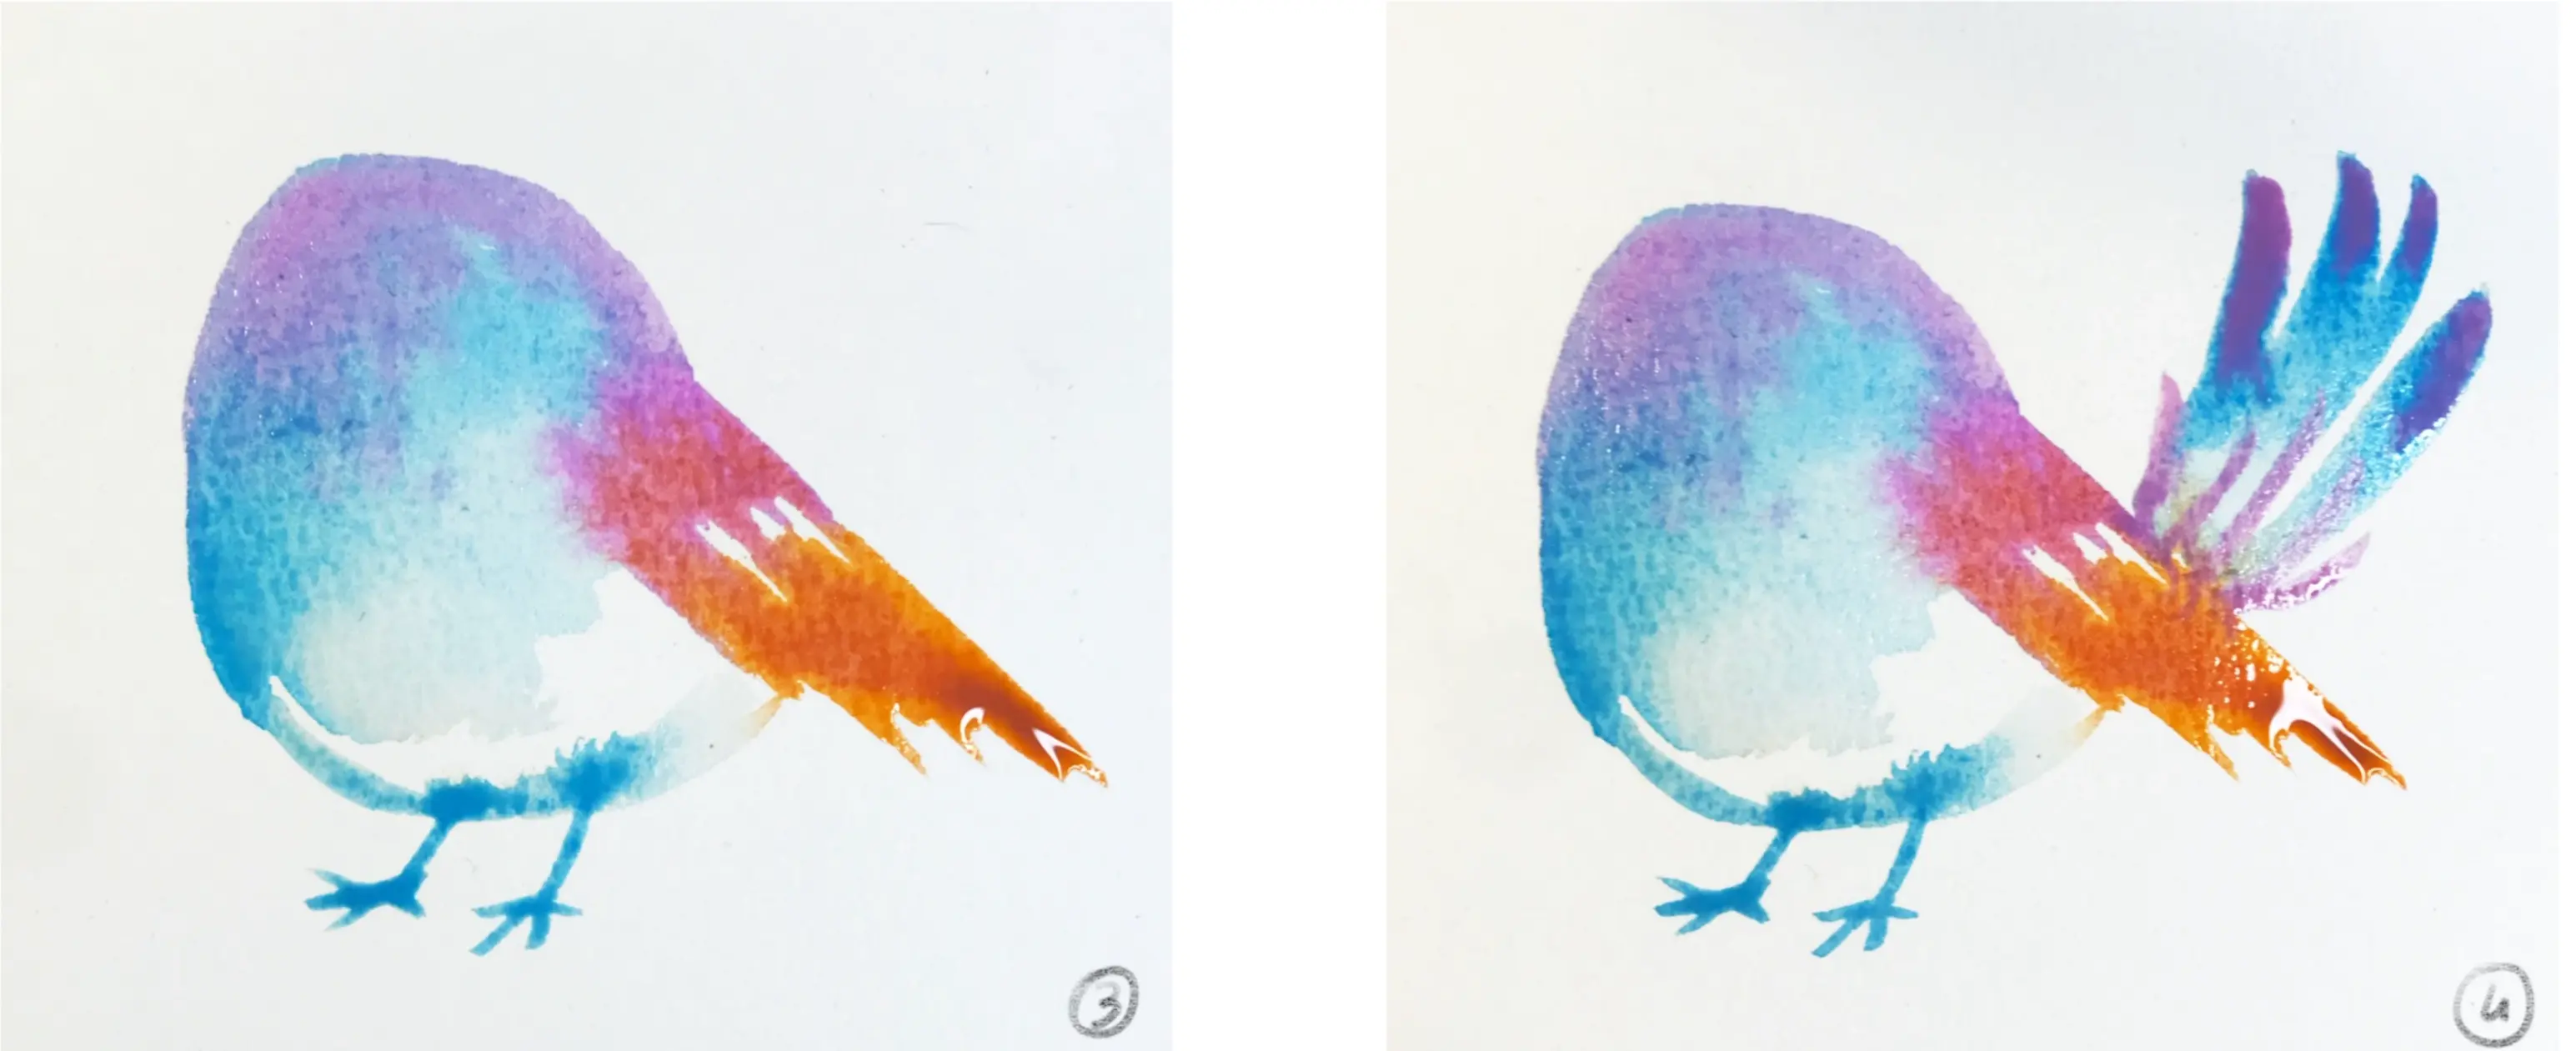
5 - Add the beak and let it dry before adding the details
6 - Once dry, add the final details to bring intensity.
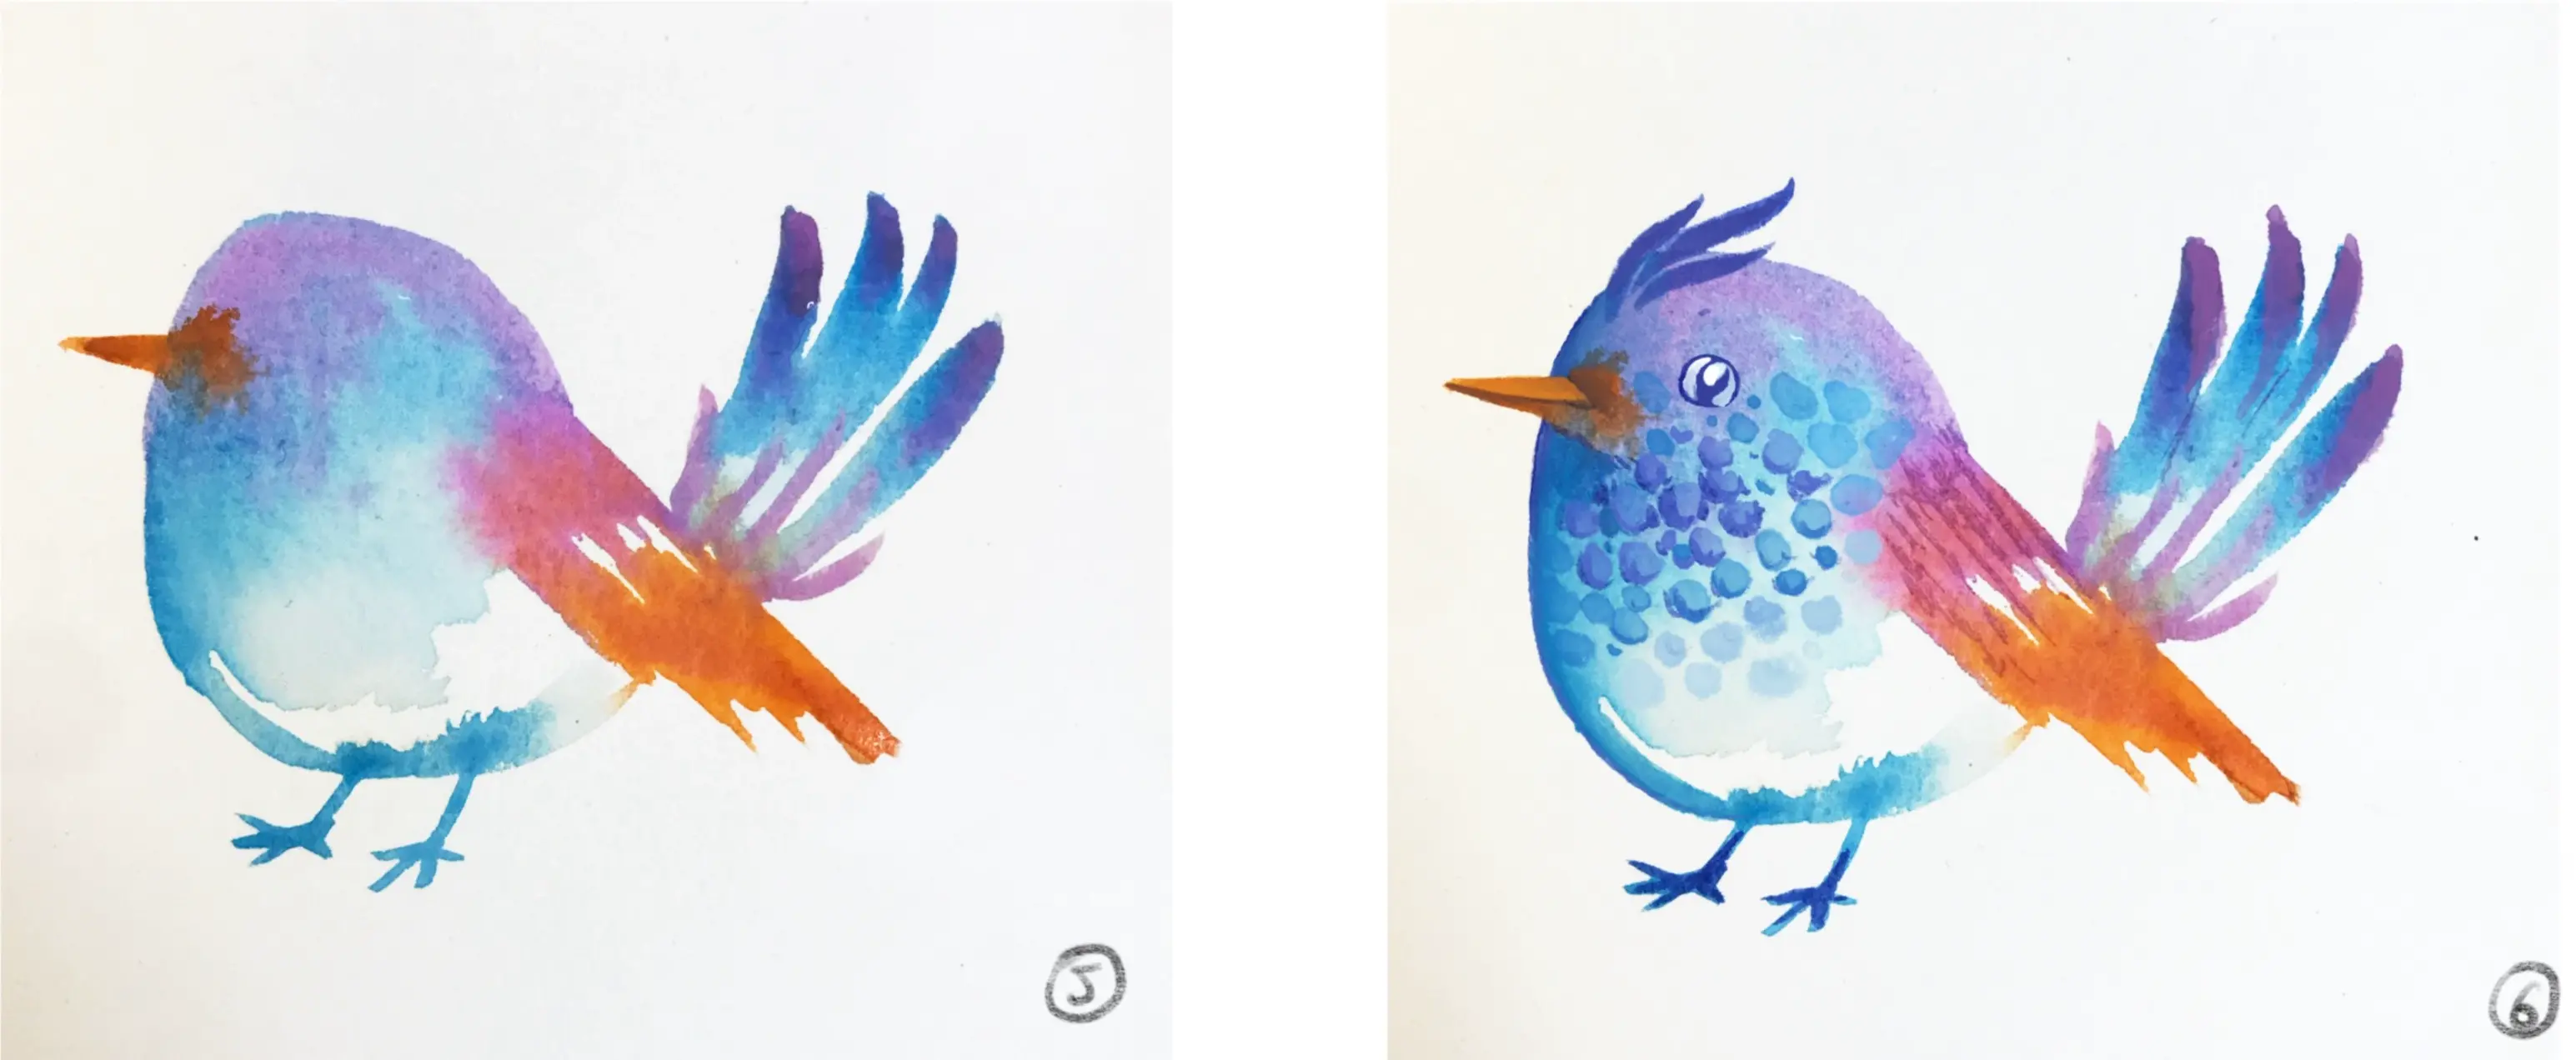
The method we just saw enables you to easily create birds in a very spontaneous way. The following example uses exactly the same principle. As you can see, it is therefore easy to paint birds in watercolor without really working on their anatomy in a more realistic and detailed way. These methods are perfect if you are a beginner!
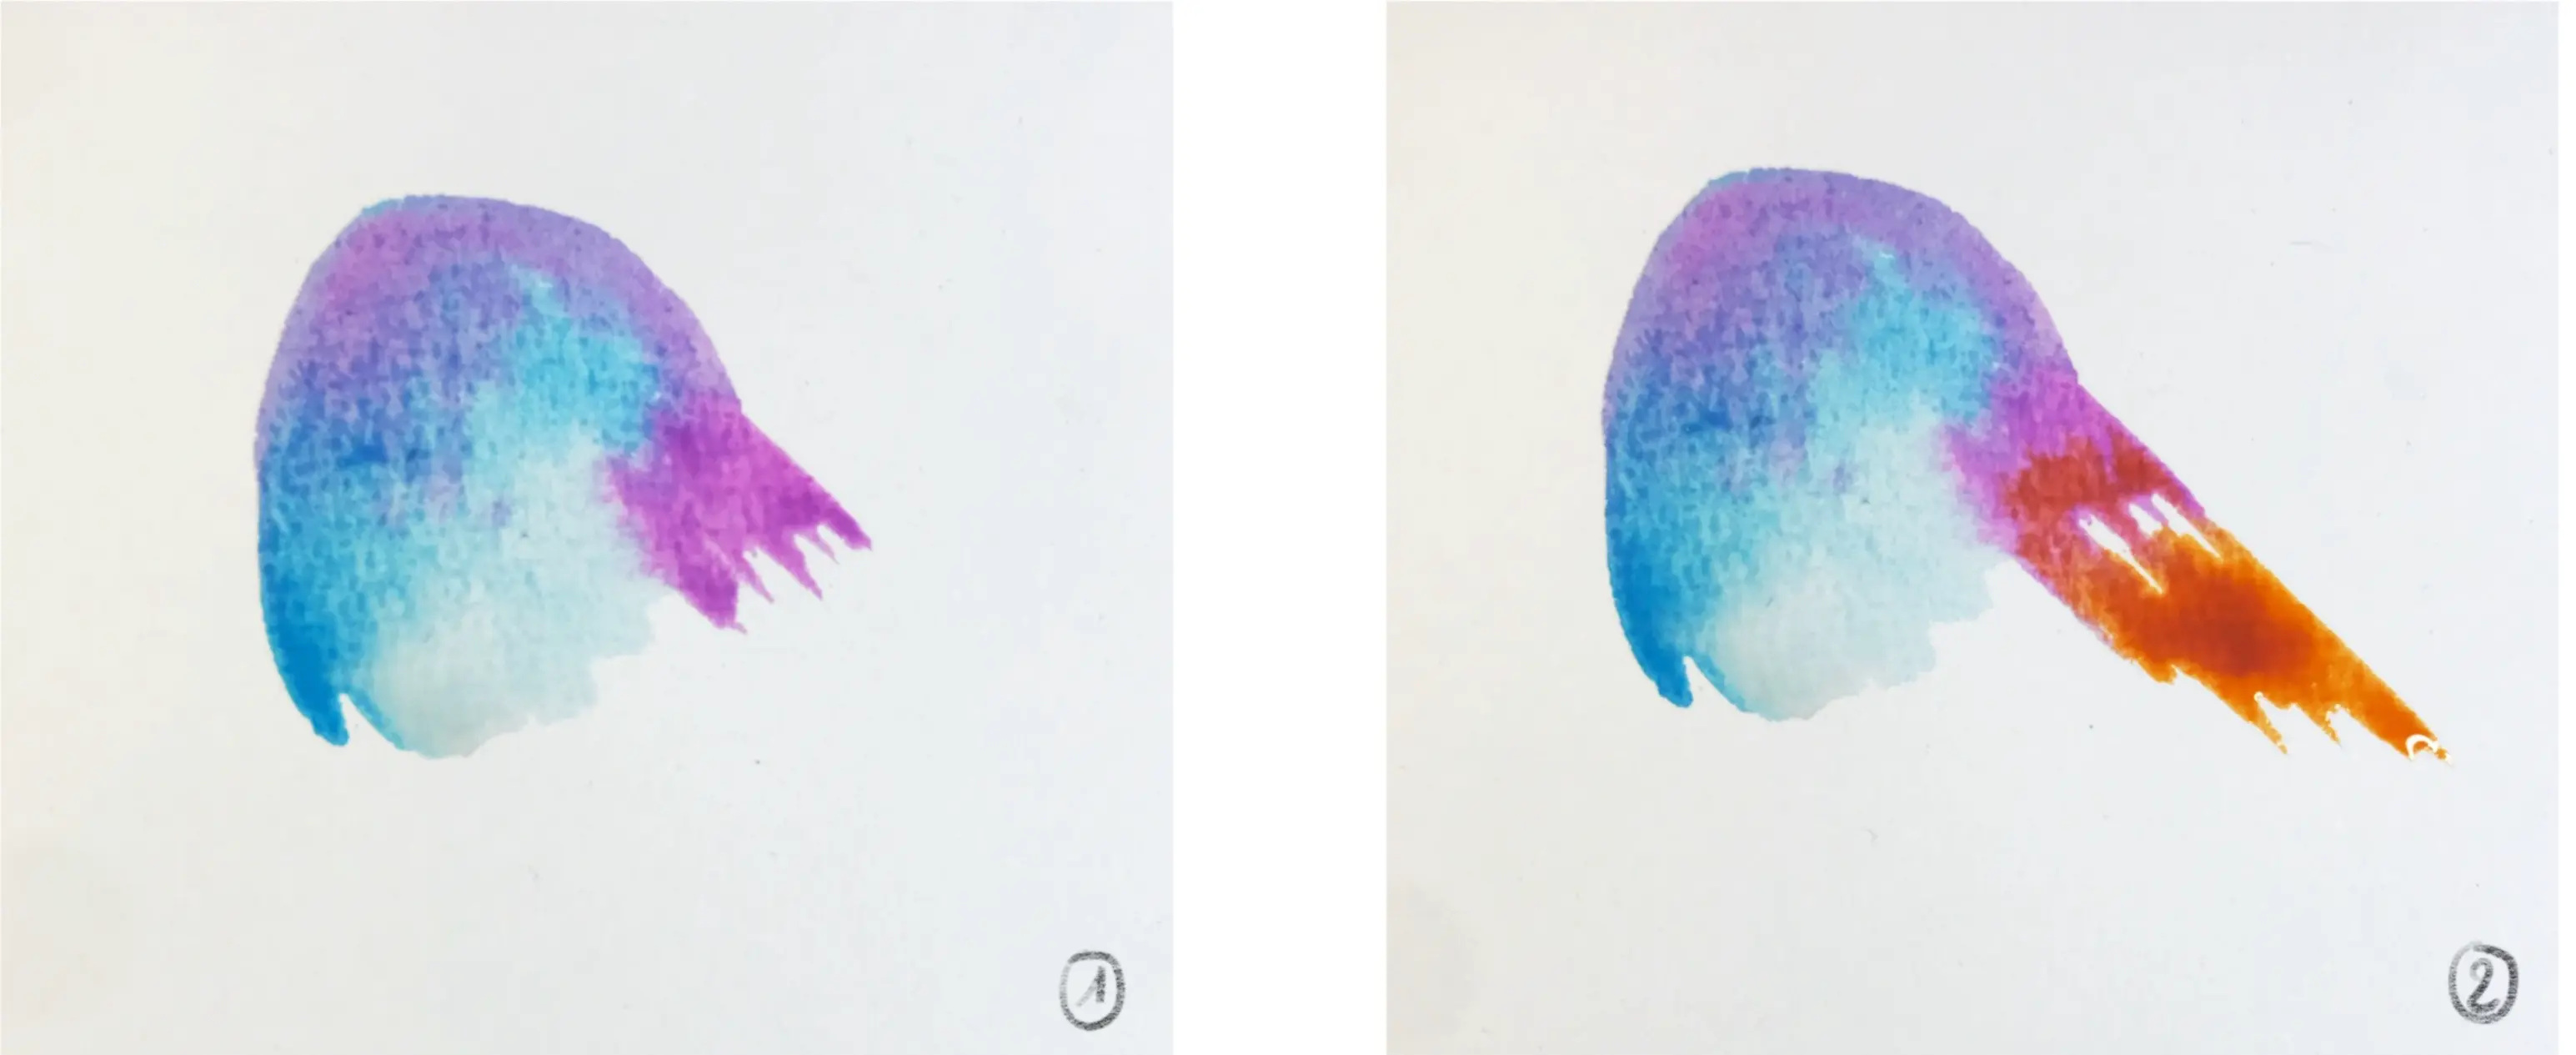
1 - Start by creating the shape of the body, think of a kind of comma that you then fill in.
2 - Create a tail shape by applying a color that you pull to connect to the body. Don't forget to work wet on wet!
3 - Paint the wings using the same method as the tail.
4 - Let it dry and add the final details.
Painting a realistic bird in watercolor
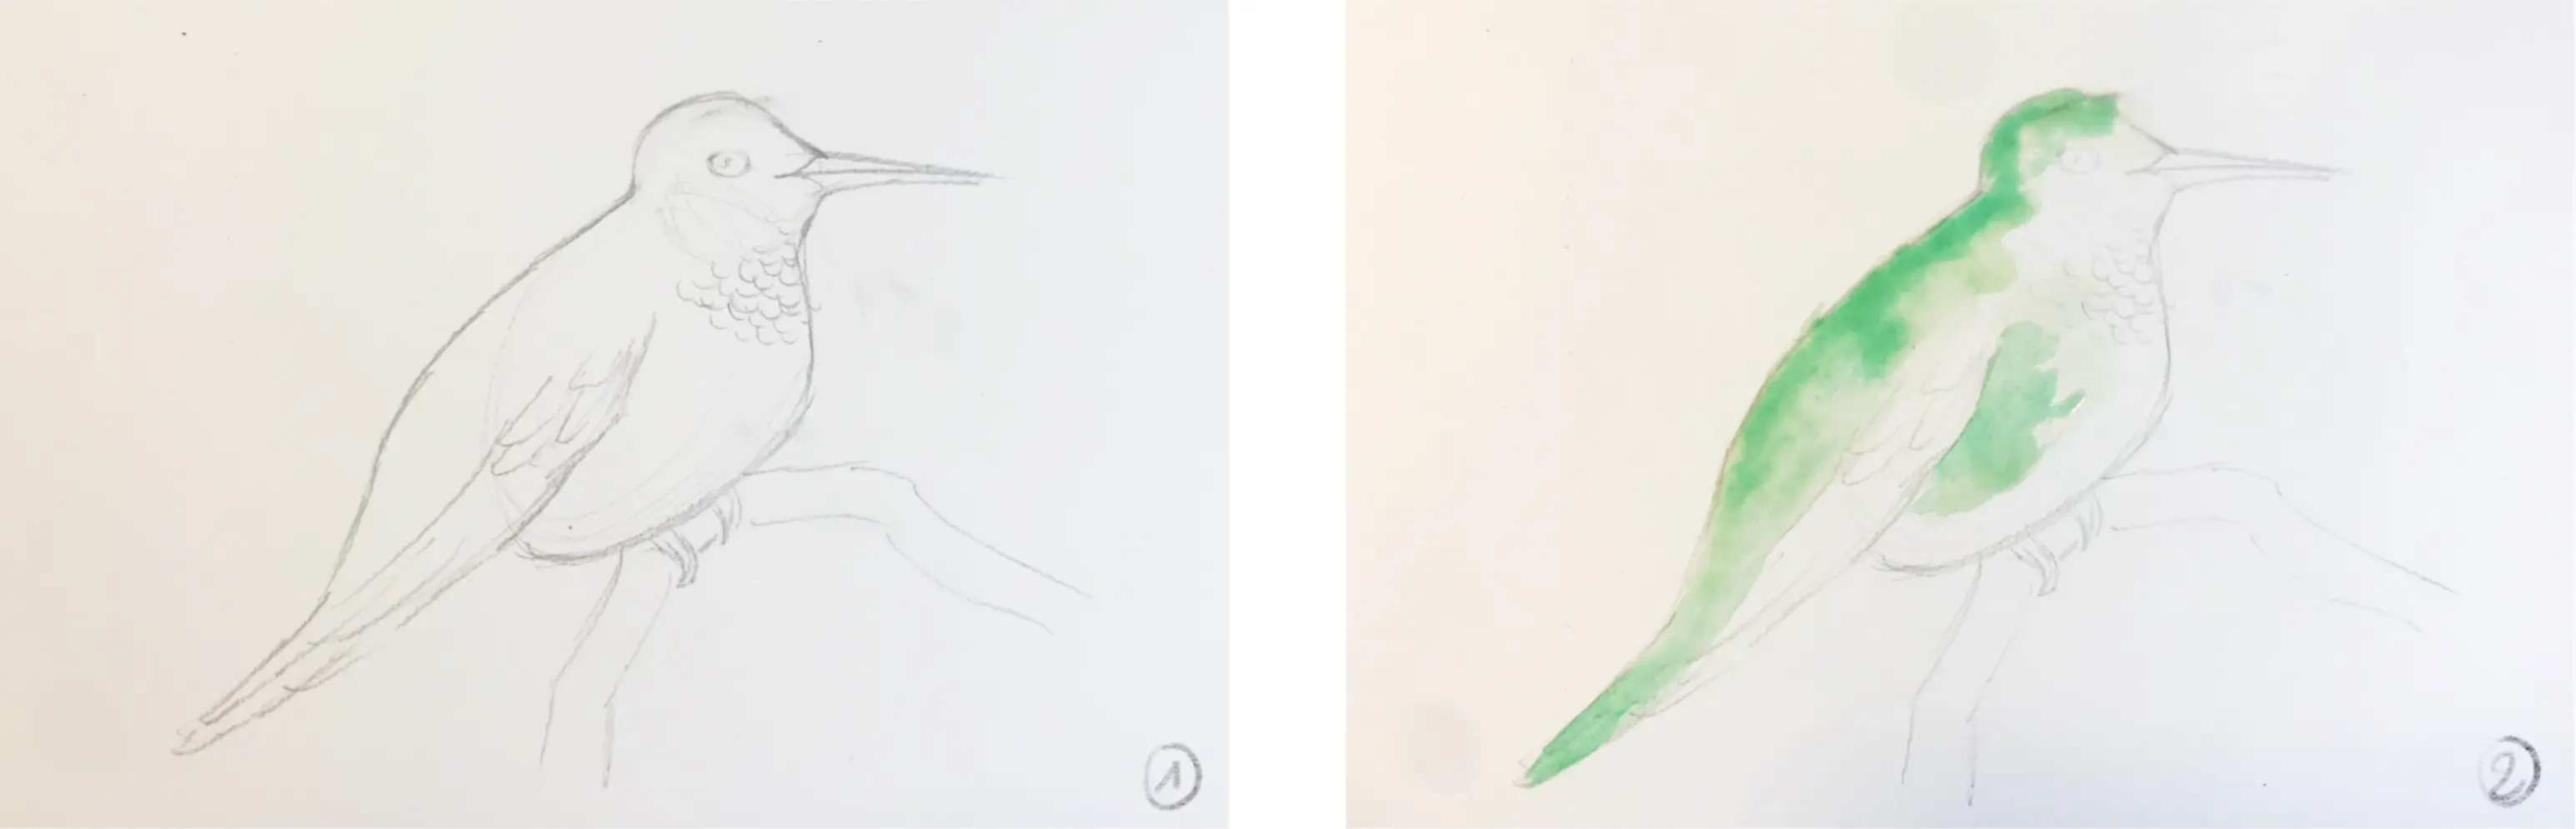
If you would rather paint realistic birds in watercolor, I recommend you first practice drawing bird sketches in order to have the right proportions in mind. In the example below, we will revisit the same bird we saw earlier, so you can more easily replicate the example.
1 - Start by making a sketch
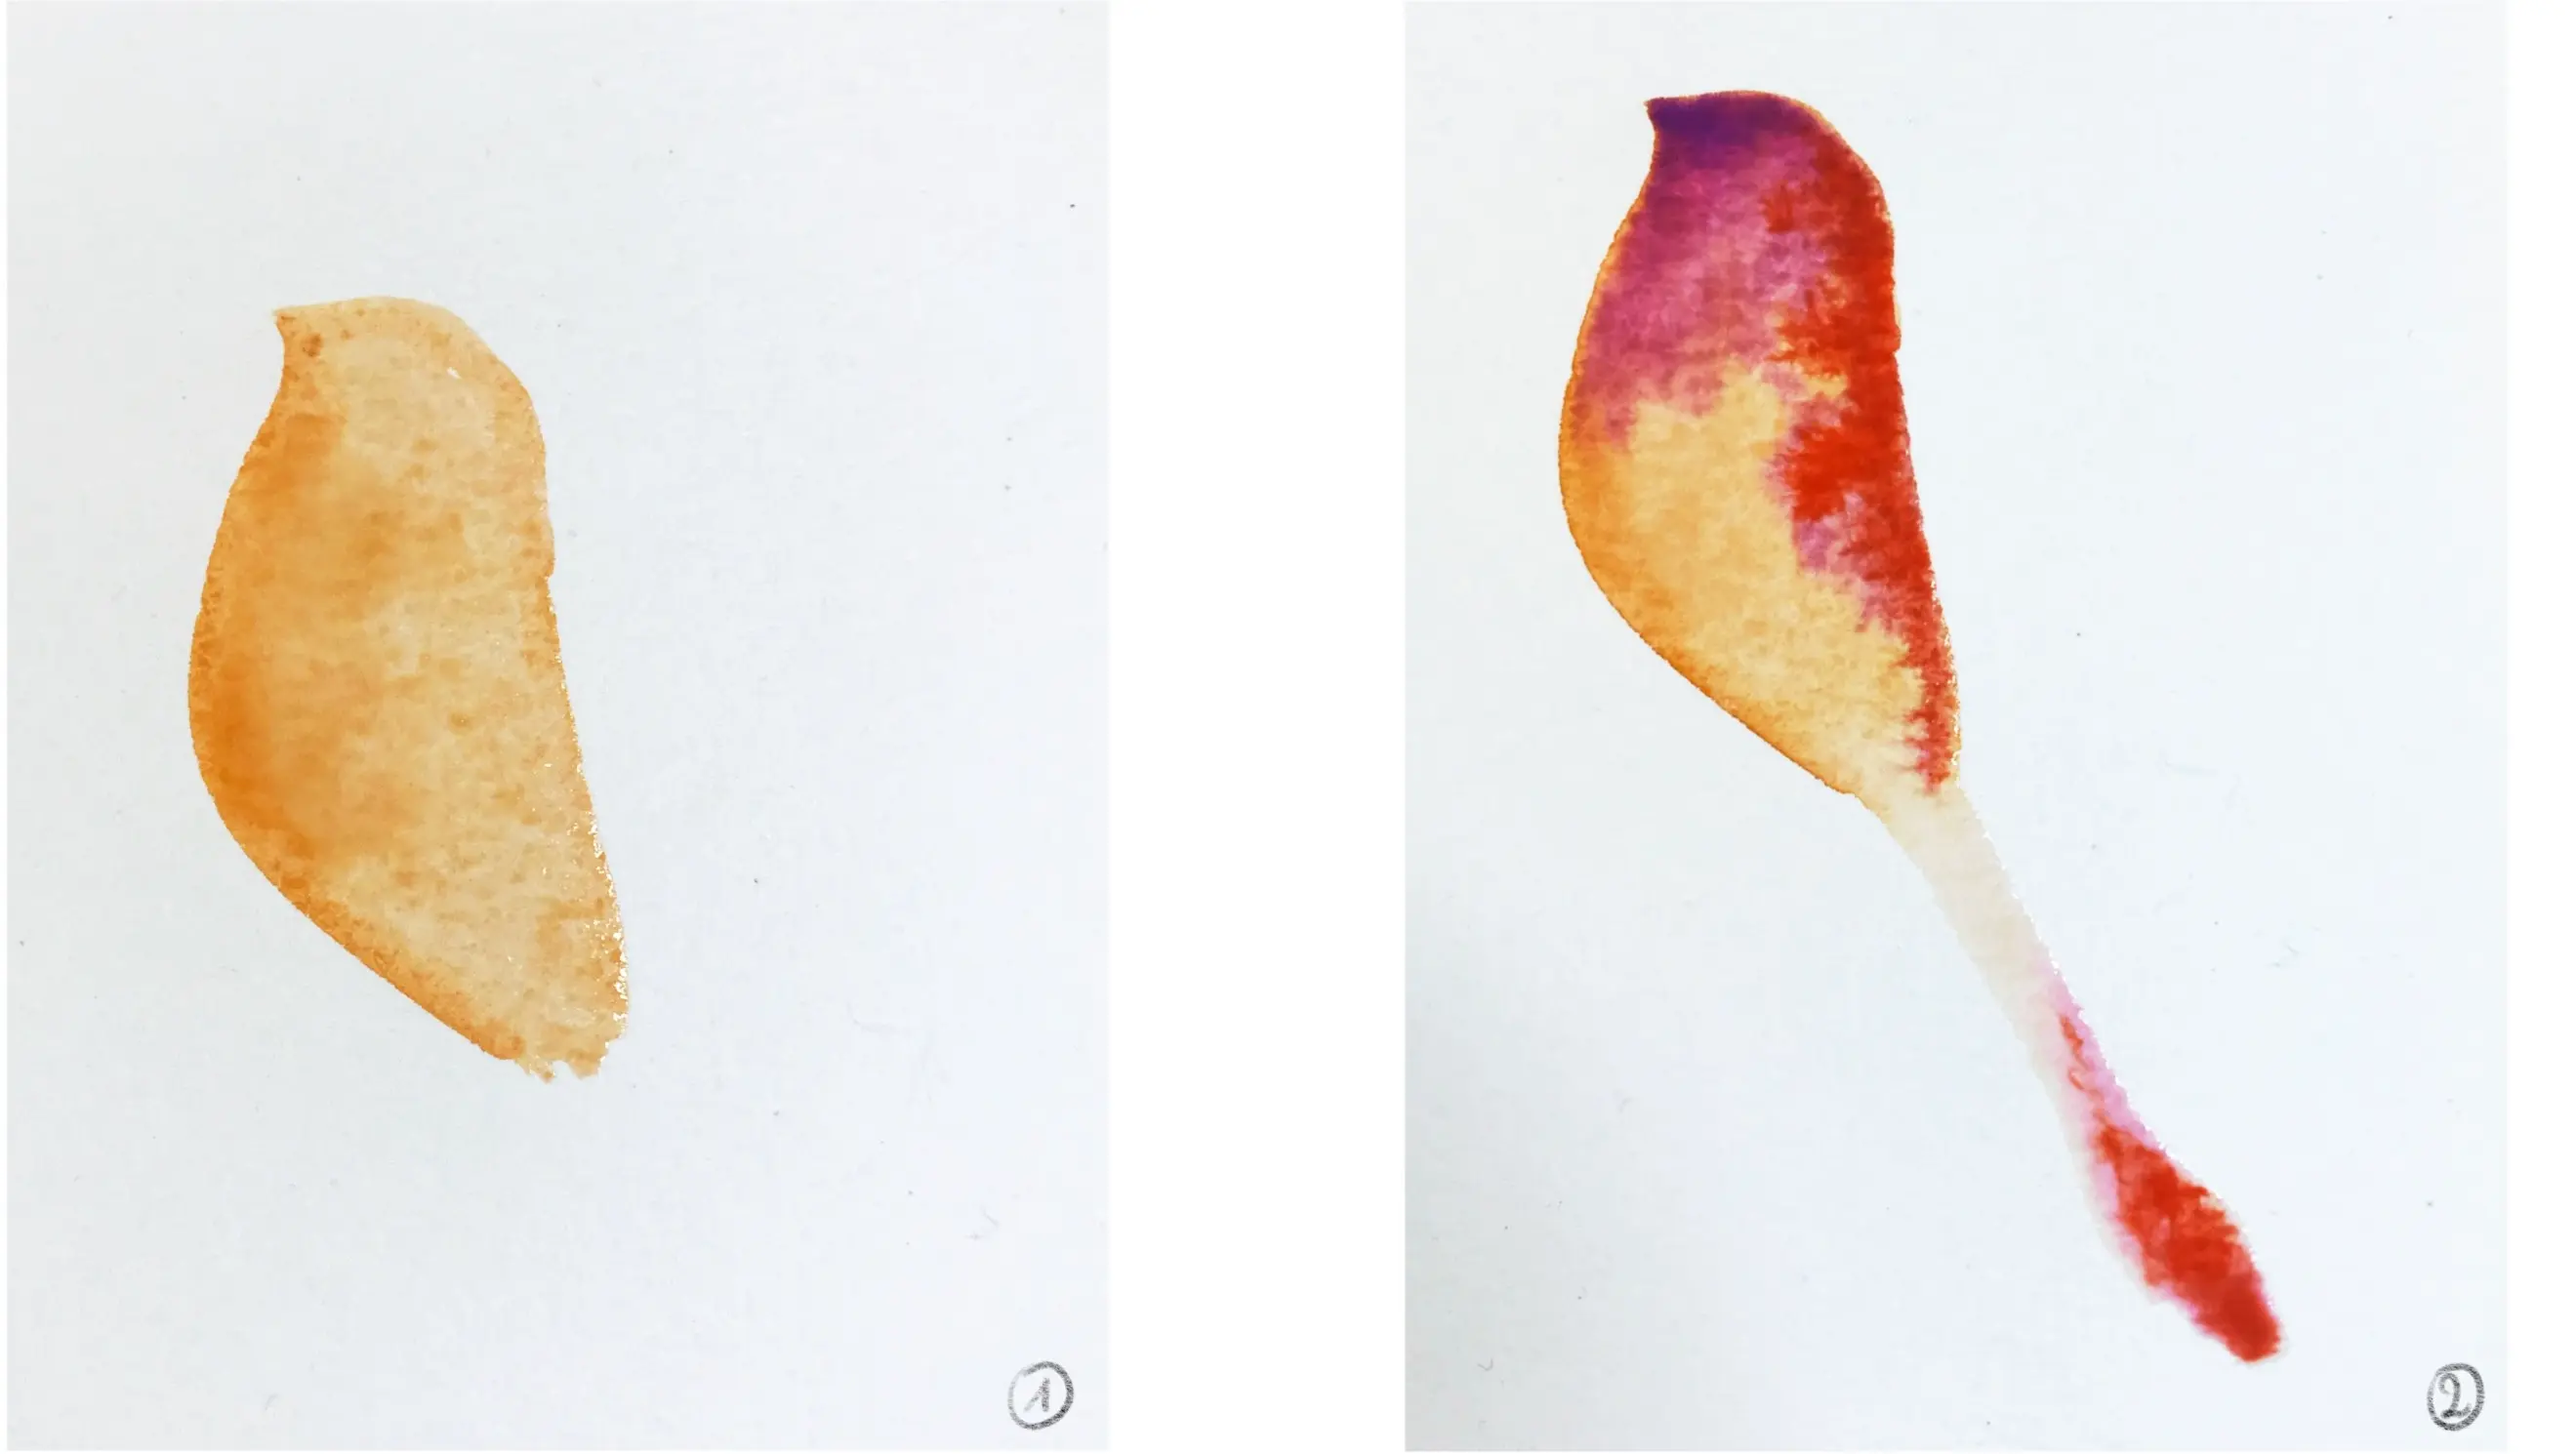
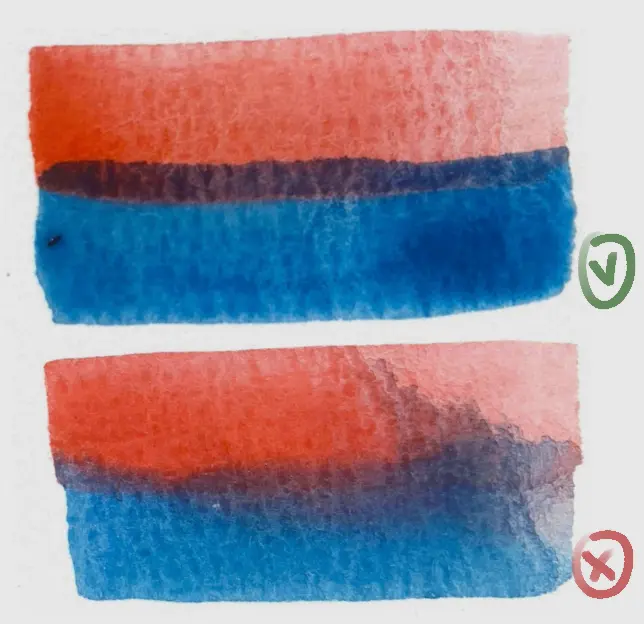
2 - After wetting the paper only on the bird area, apply the first color.
3 - Add more color nuances for increased intensity and realism
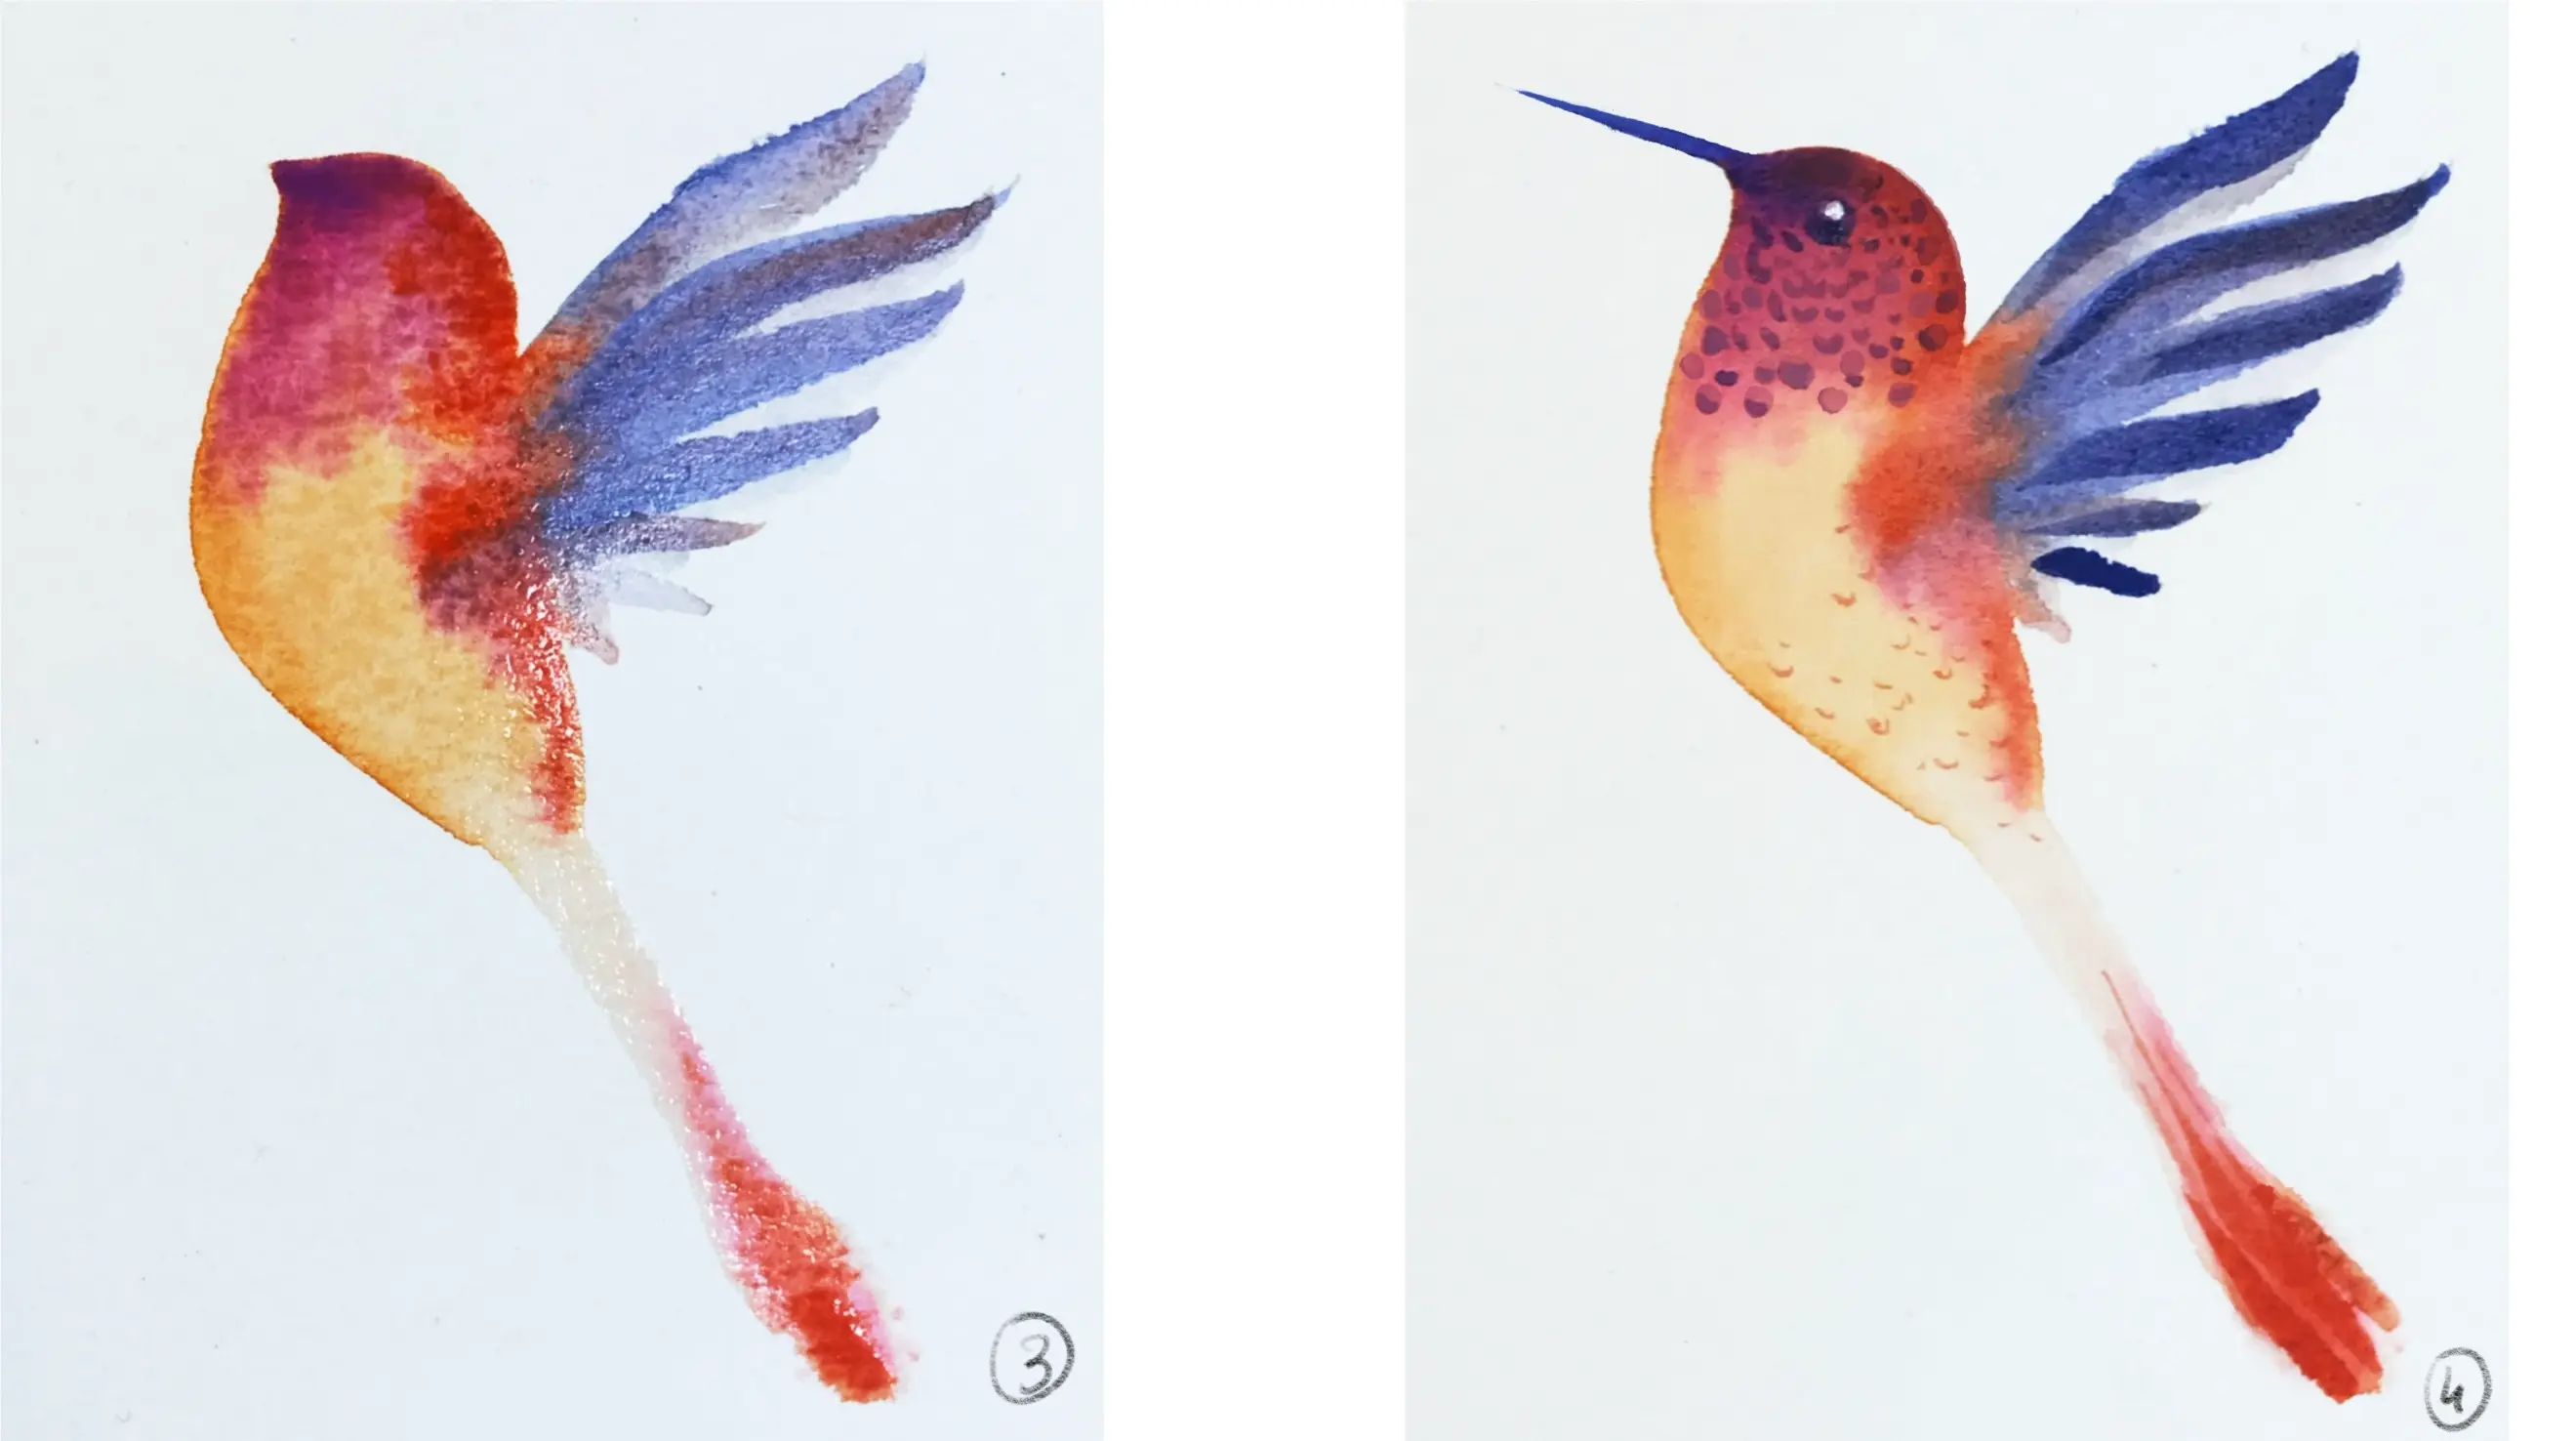
4 - Apply a second color (I recommend a complementary one as it stands out better) by placing the brush to make small ovals. This will suggest feathers.
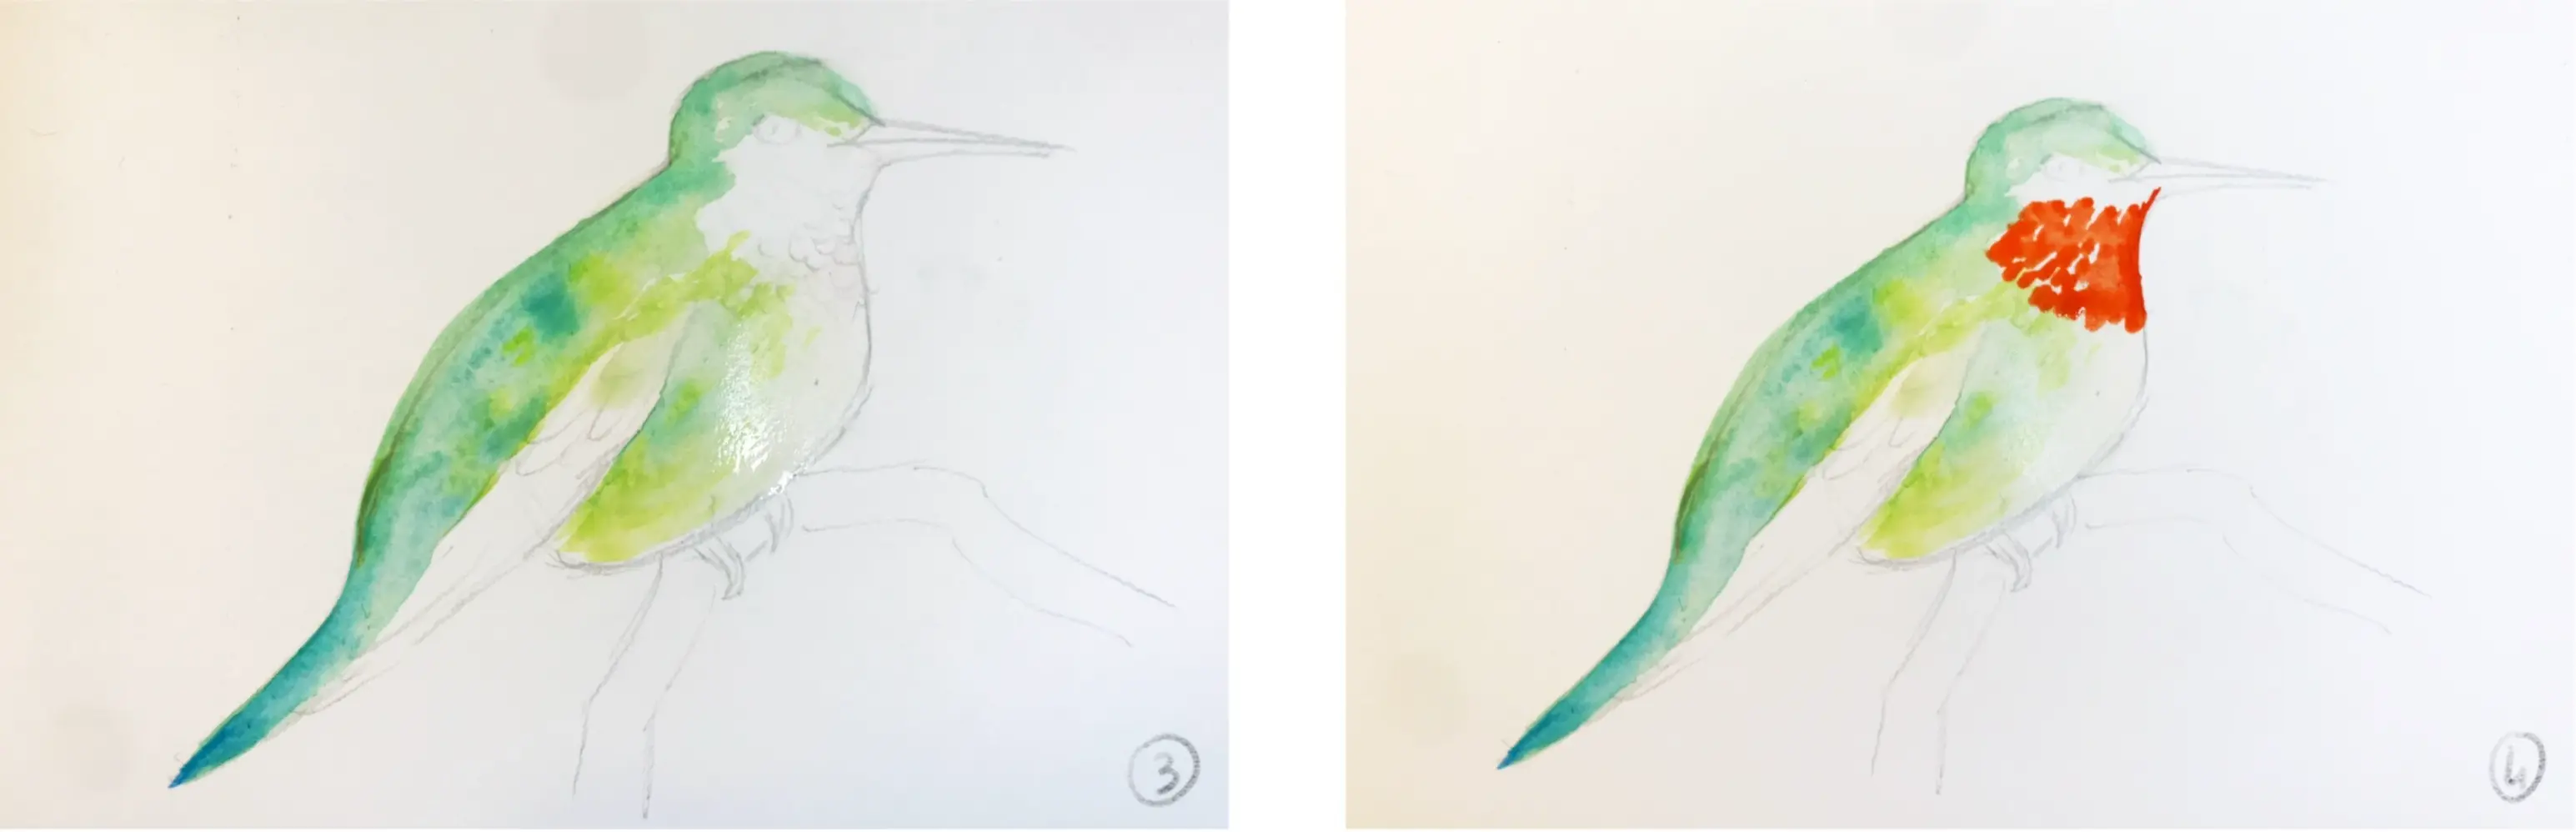
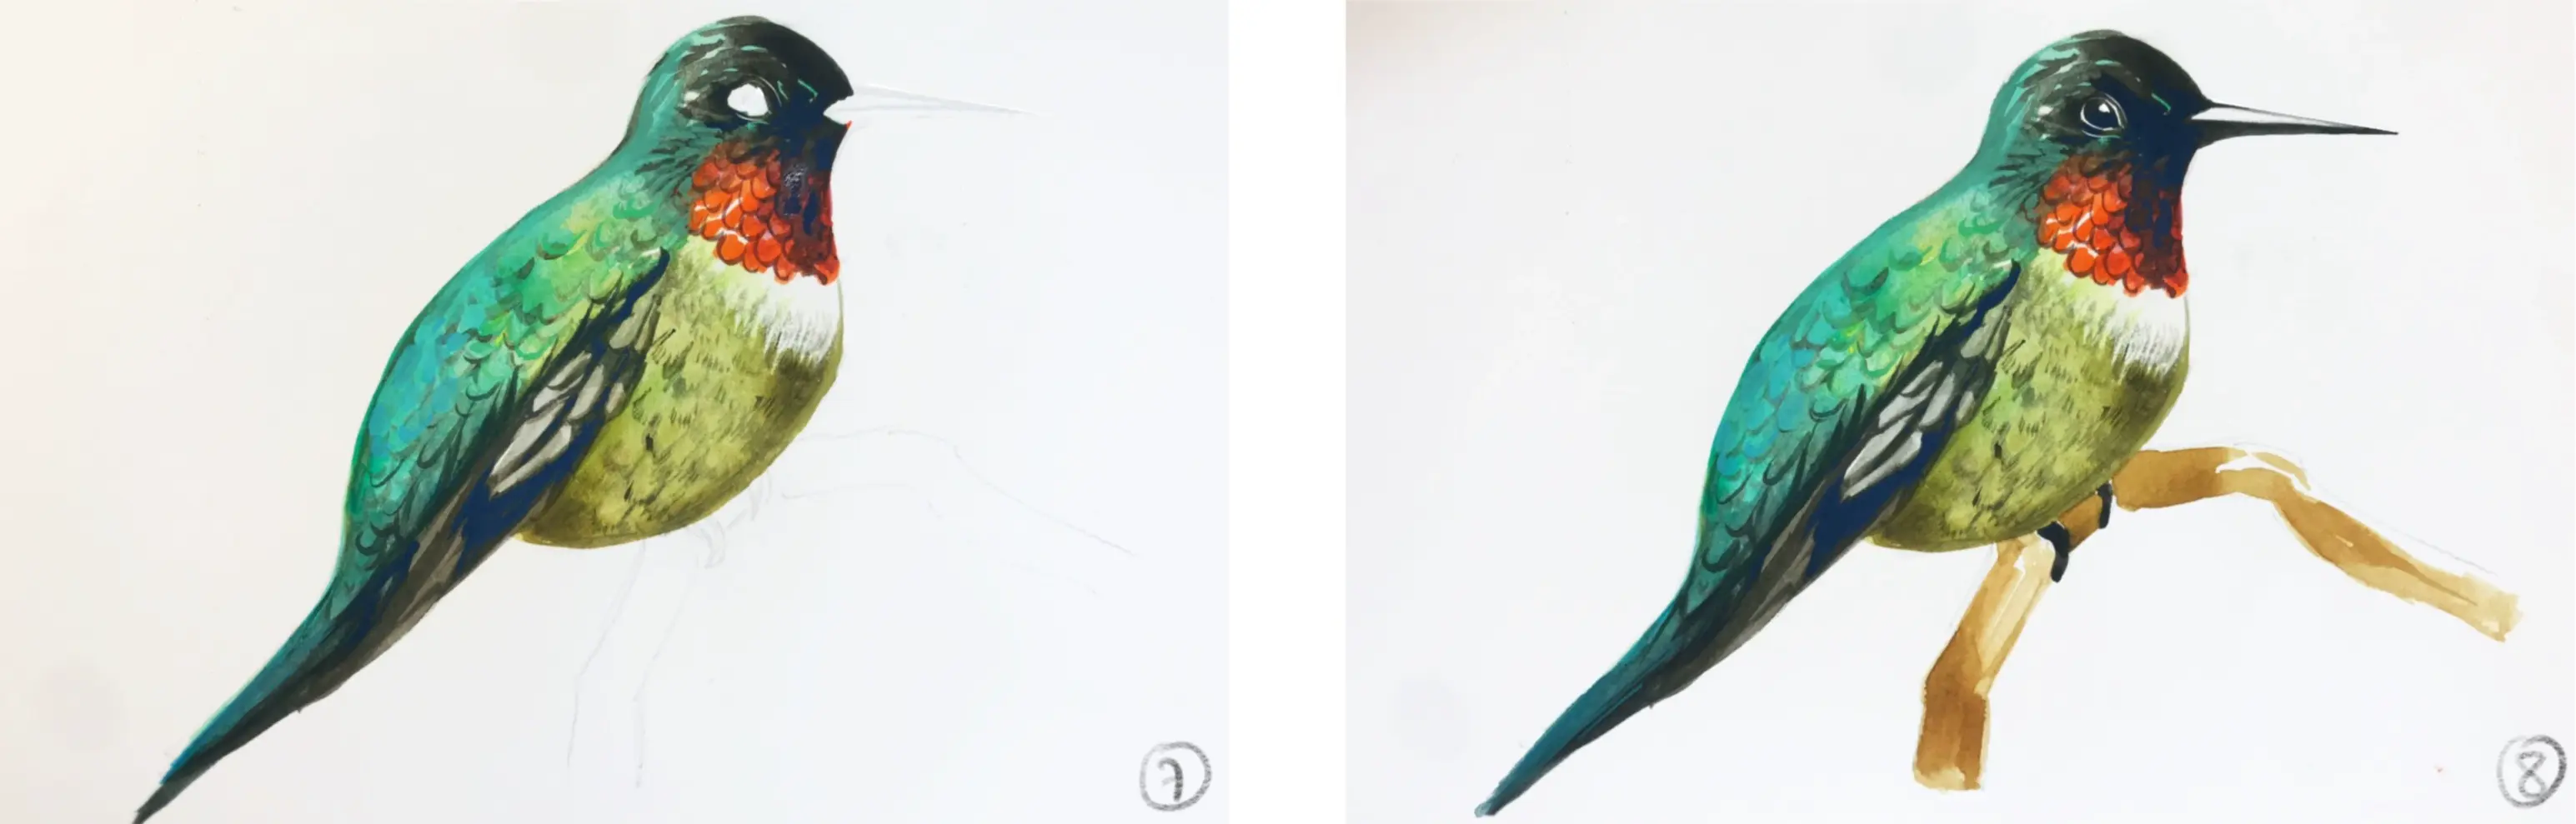
5 - Now intensify the chest color.
6 - By using a dark blue and dark khaki, start adding details to the plumage. I recommend working wet on dry.
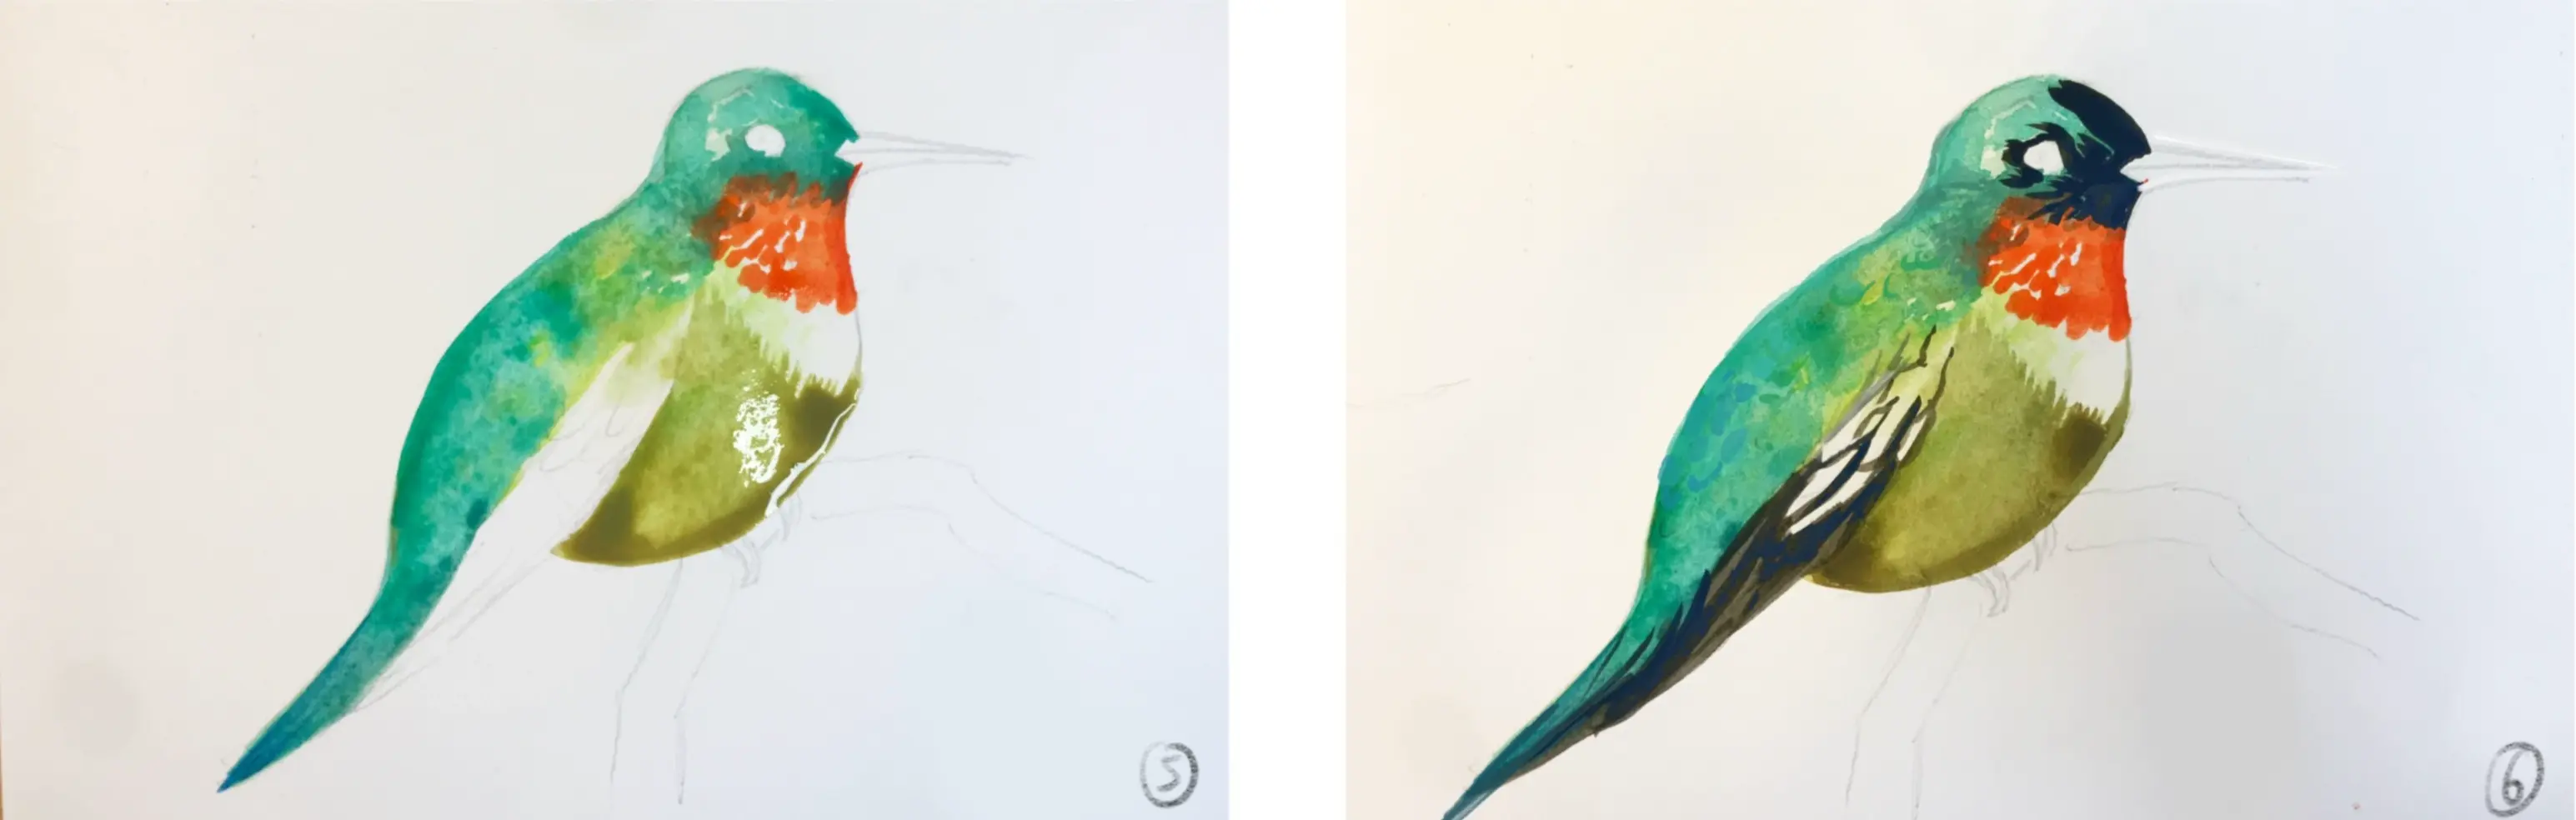
7 - Continue to add details by diluting the colors, making U shapes, always with the goal of suggesting feathers.
8 - Finish by adding the final details.

There you go! Now, you can paint birds using watercolors, whether suggestively or more realistically. Watercolors offer many possibilities, so have fun and don't hold back! The best results sometimes come when you thought you were making a mistake.
Popular Articles
Discussion
No comments yet.