How to Draw a Butterfly
Insects aren't necessarily creatures we spontaneously feel affection for... But some stand out with such elegance that it's hard not to be charmed by them! Butterflies are among these, with stunning bursts of luminous color!
In this article we will only deal with the last life stage of the insect, when it is a butterfly. For the caterpillar and chrysalis phase, you will need to either do the research yourself or ask on the forum!
ANATOMY OF THE BUTTERFLY FOR OUR DRAWING
First, let's go over the basics about the animal. The butterfly is an insect and like all insects, its body consists of three parts:
- the head, where the eyes, antennae and proboscis are positioned.
- the thorax, where three pairs of legs (whose structure we will see later) and two pairs of wings are attached.
- the abdomen, which is segmented.
You might think that the task would therefore be easy, but in reality butterflies can be so different from one another, even just in terms of their wings, that you would need to know the characteristics of each one.
We will mainly learn the shapes and basic structure that you can use for most butterflies.
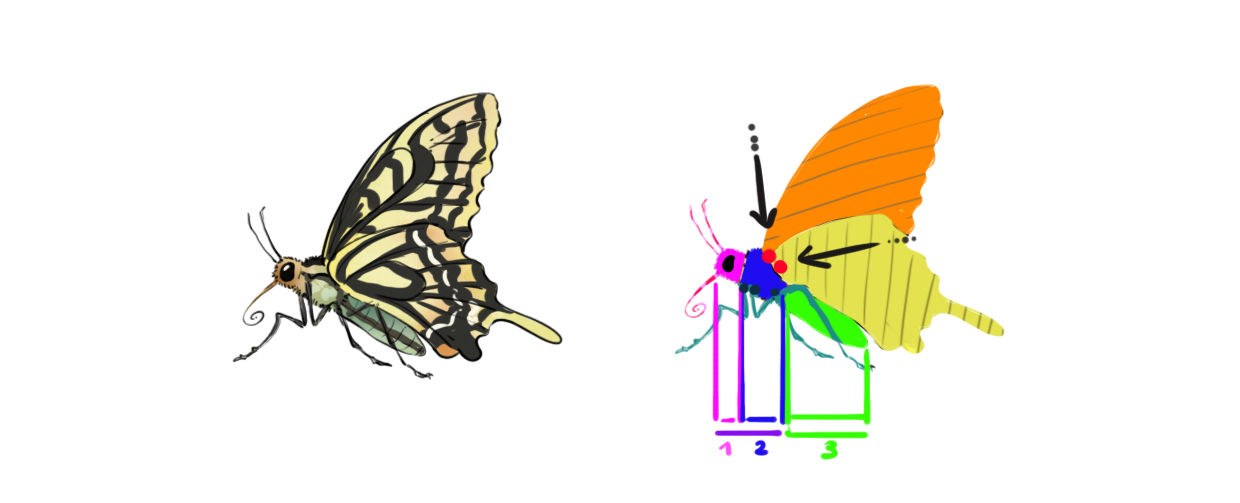
Thus, all butterflies have the head/thorax/abdomen structure, shown in the following drawing respectively in pink/blue/green. The abdomen is very long, and it will often be a bit longer than the combined lengths of the head and thorax.
The head is round, the eyes are positioned on the sides and quite large. They are fairly rounded, however, avoid a perfect circle, it is slightly flattened. The antennae are attached high up on the head, at the level of the top of the eyes. The proboscis may be visible, partly unfurling, starting from under the eyes.
Depending on the species, the head and thorax will be covered with some hair.
The abdomen will be thinner or wider, rarely covered with hair, and one detail to note, avoid ending it with a too sharp point, favor a softer rounded end.
Make sure to properly attach the legs to the thorax and not to the abdomen. The wing attachments (red dots) are also on the thorax, on the top side. The two pairs of wings are attached one behind the other at the beginning of the thorax. From a top view, it is noticeable that the rear wings (in yellow) are "under" the front wings (in orange). It is only when they are fully deployed that the front and rear wings will not overlap.
THE BUTTERFLY'S LEGS
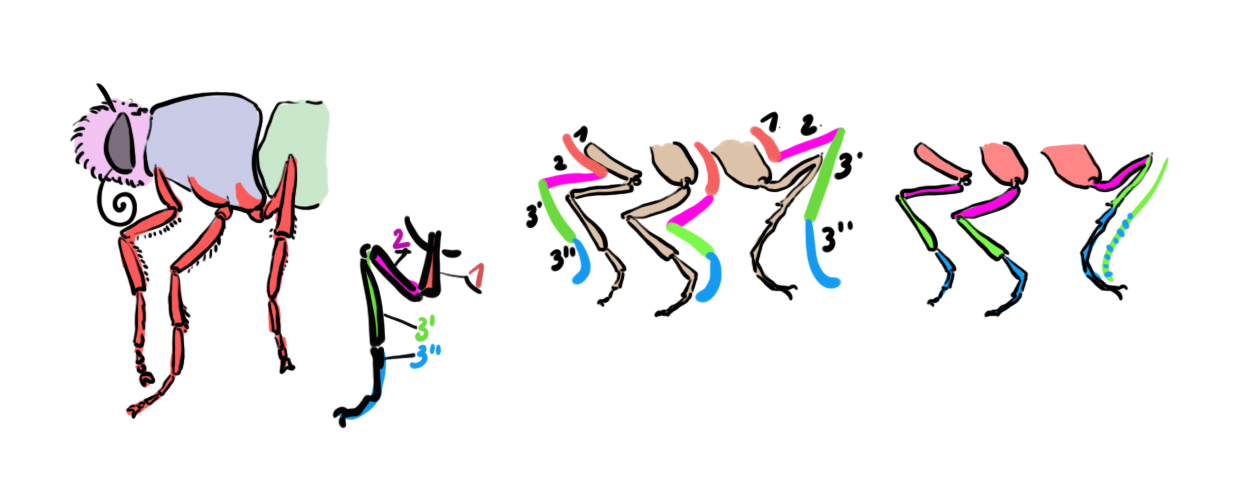
All species will have the same leg structure. Sometimes they will just be a bit thinner or thicker, or more or less "hairy".
We can simplify the legs into three segments, segment 1, connected to the thorax, segment 2, about the same length, and segment 3 as long as 1&2 combined. For segment 3, it can be divided into two parts, part 3', a uniform segment like 1&2, and part 3², a segmented segment that ends in a "V" claw.
The hind leg will sometimes tend to be slightly thicker than the others.
THE BUTTERFLY'S HEAD
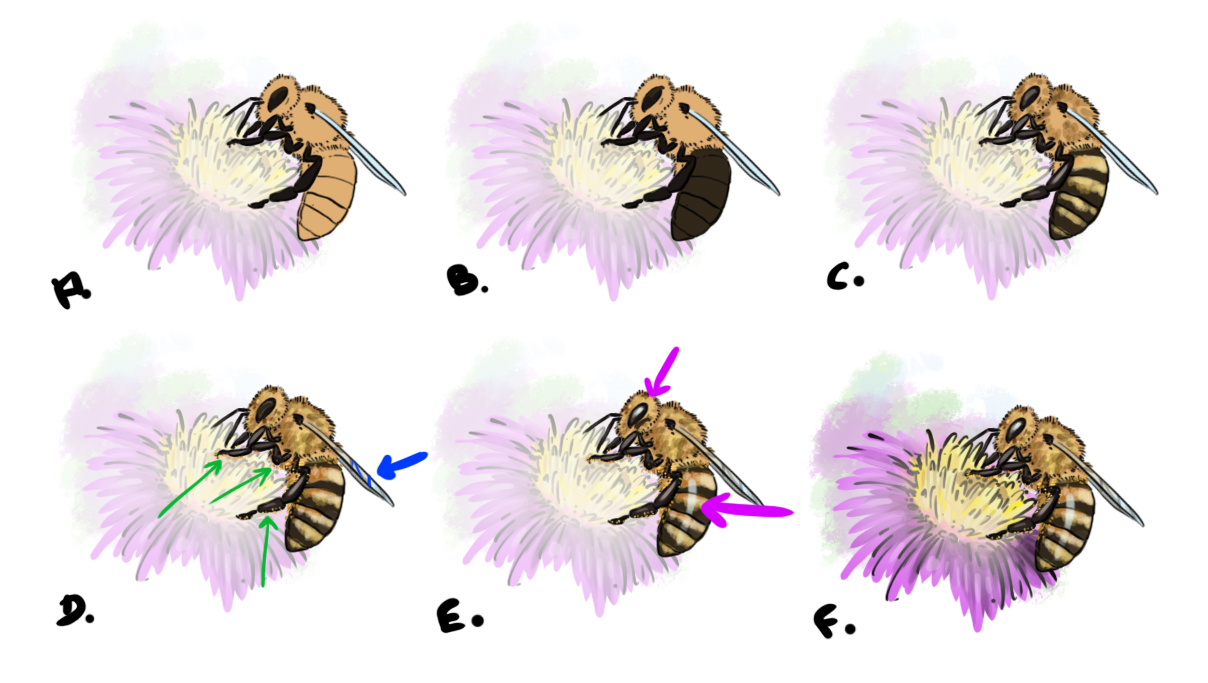
We will take a closer look at the butterfly's head. In close-up, we can notice the relatively fuzzy aspect of the insect. In both drawings, we see the large rounded eyes.
On the right one, you can make out the proboscis, and it is clearly protruding between the bottom of the eyes.
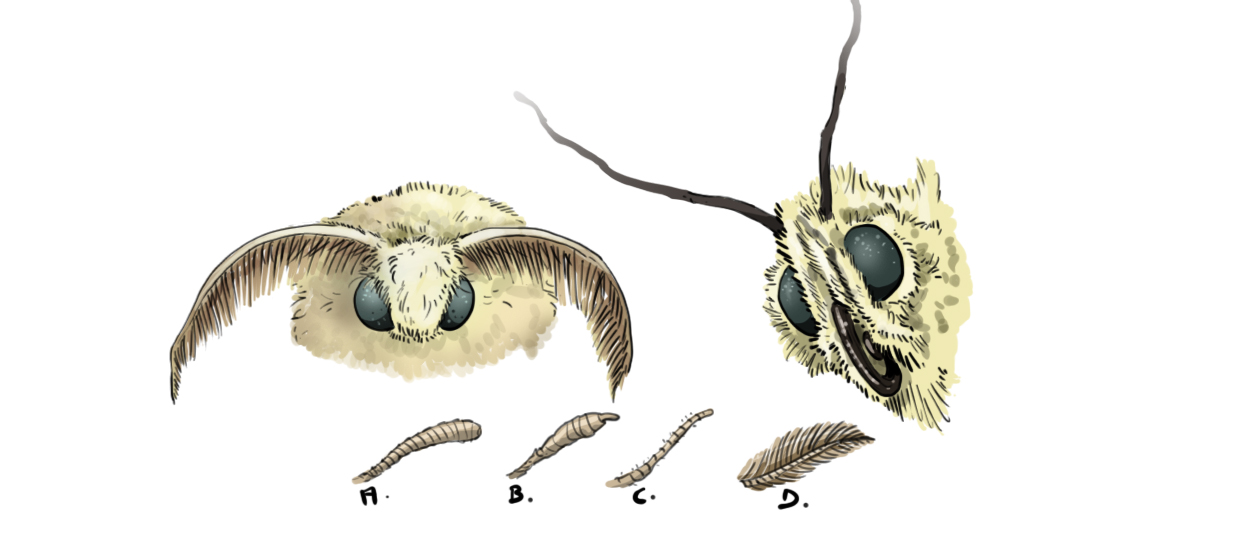
Underneath the two butterflies are examples of antennae. The shapes of antennae are varied, here in [A] a club-shaped form, in [B] a form that widens and narrows with a tip, in [C] a thinner and more elongated antenna, and in [D] a more elaborate version.
The segmented structure of the antennae can only be observed in close-up.
DRAWING THE OPEN WINGS OF A BUTTERFLY
Now we address a crucial point of the butterfly, the wings. Beyond just the colors and shapes, depending on the varieties, the forewings and hindwings will not be the same size. Sometimes the forewings will be more developed, sometimes they will be about the same size as the hindwings...
Beyond the differences that jump out at us, we can nevertheless find a common point among these different butterflies.
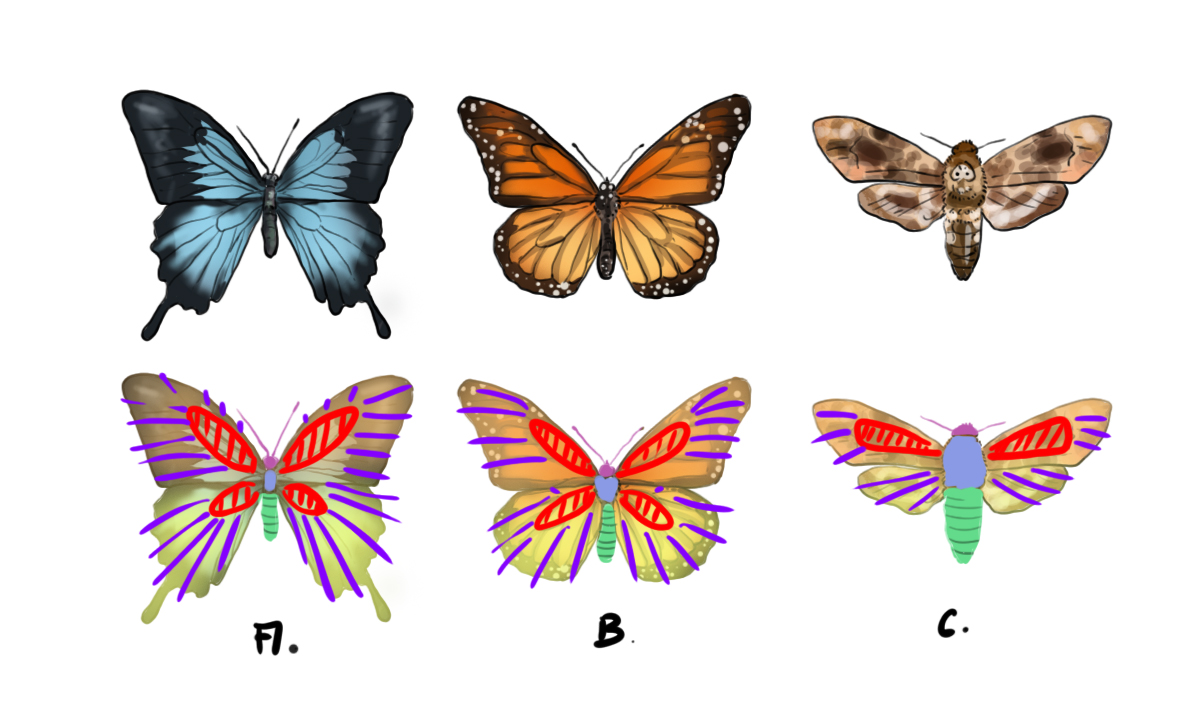
Whether or not it is emphasized by the wing pattern, you will find a "base" area on all of the butterflies' front wings, areas in red, and often on the rear wings. Then we observe that the wing grows with veins (purple lines) that open towards the edges. Often the wing patterns will align with this grid (as is the case here in [A] and [B]).
The butterfly [C] is a very good example of "The species are varied and can be quite different from each other"! And even on this butterfly, we can see the basic structure common in butterflies [A] and [B].
DRAWING THE FOLDED WINGS OF A BUTTERFLY
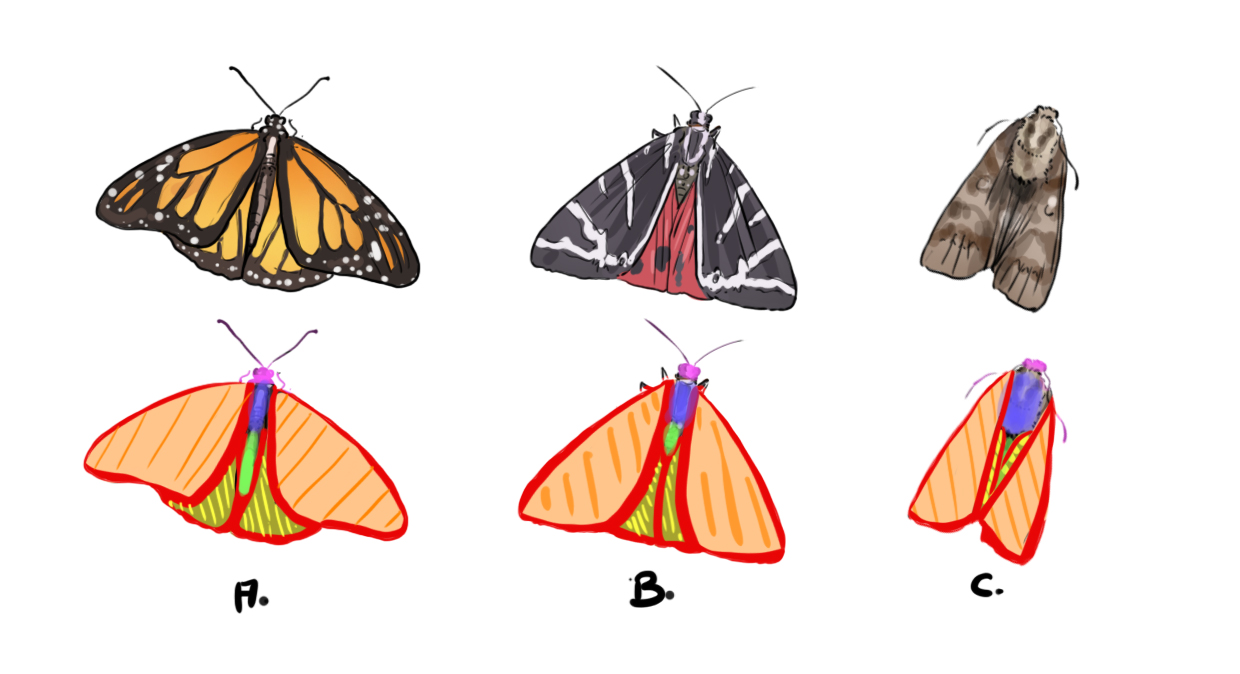
In the following drawings, we will observe butterflies with their wings in different folded positions. We should not forget in these cases that the wings are attached high up on the thorax.
In [A] the wings are barely folded, in [B] they are a bit more, and in [C] they are completely folded.
As previously mentioned, the rear wings are below the front wings, and this is clearly reflected in the various drawings.
DRAWING THE BUTTERFLY STEP BY STEP
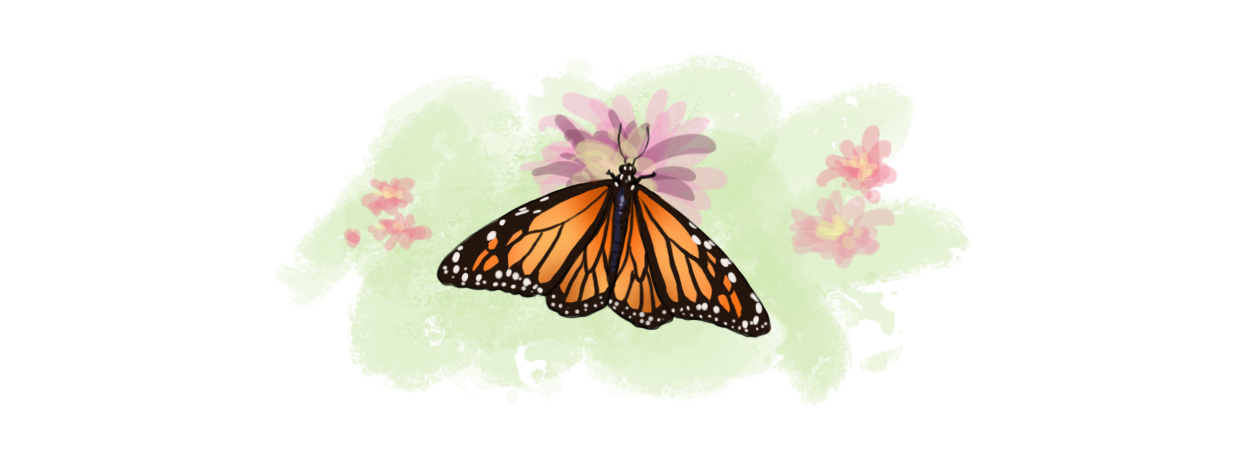
We will draw a monarch butterfly, already used in the illustrations of the article, whose pattern you may have already observed.
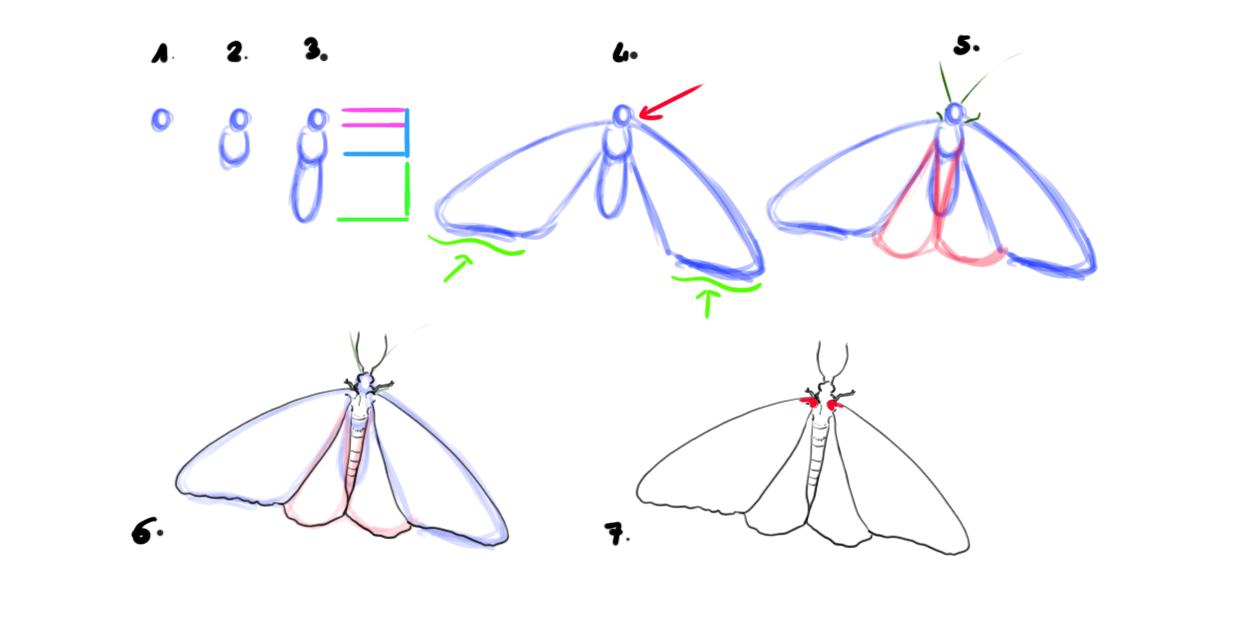
Step 1: A small circle for the head.
Step 2: An elongated circle for the thorax.
Stage 3: The abdomen, at least as long as the combined lengths of the head and thorax.
Step 4: I draw the wings. Let's not forget they are attached at the top of the thorax (red arrow). I draw the wings as triangles with a small wave on the lower edge (green line).
Step 5: I shape the rear wings, add the antennae and two slightly visible legs under the butterfly.
Step 6 and 7: I draw the outline over the sketch line. I mark the wing attachments (in red/image 7).
ADDING COLOR TO THE BUTTERFLY DRAWING
In B, I lay out the previously seen structure with red areas around which the wing veins spread out. On this butterfly, orange areas will fit between the lines of the veins.
I choose an orange as the base in [C] and I am drawing the wing pattern with a very dark brown in [D] following the construction lines of the drawing [B].
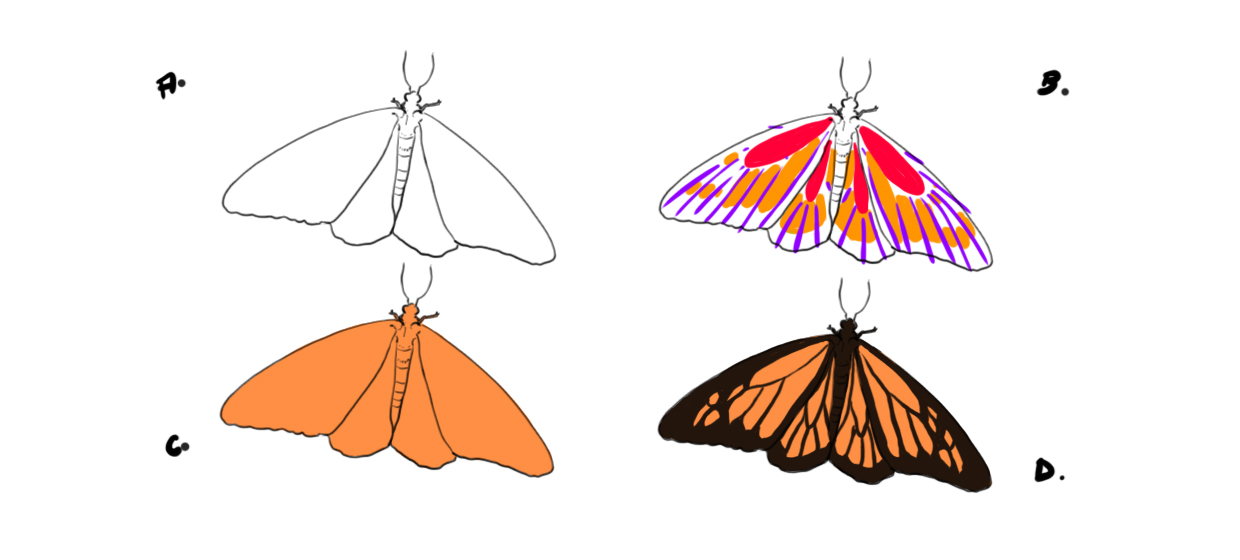
To finish, I adjust the solid orange by lightening the center of the wings with a bit of yellow, and darkening the shade around the attachments and edges. I add a few white dots to the dark perimeter of the wings.

It is known that nature appreciates symmetry and that the wings of a butterfly from the same pair are identical. As our eyes are not very demanding, you can settle (except in a very realistic drawing) for imperfect symmetry. For example, here I have not perfectly positioned the white dots on the wings.
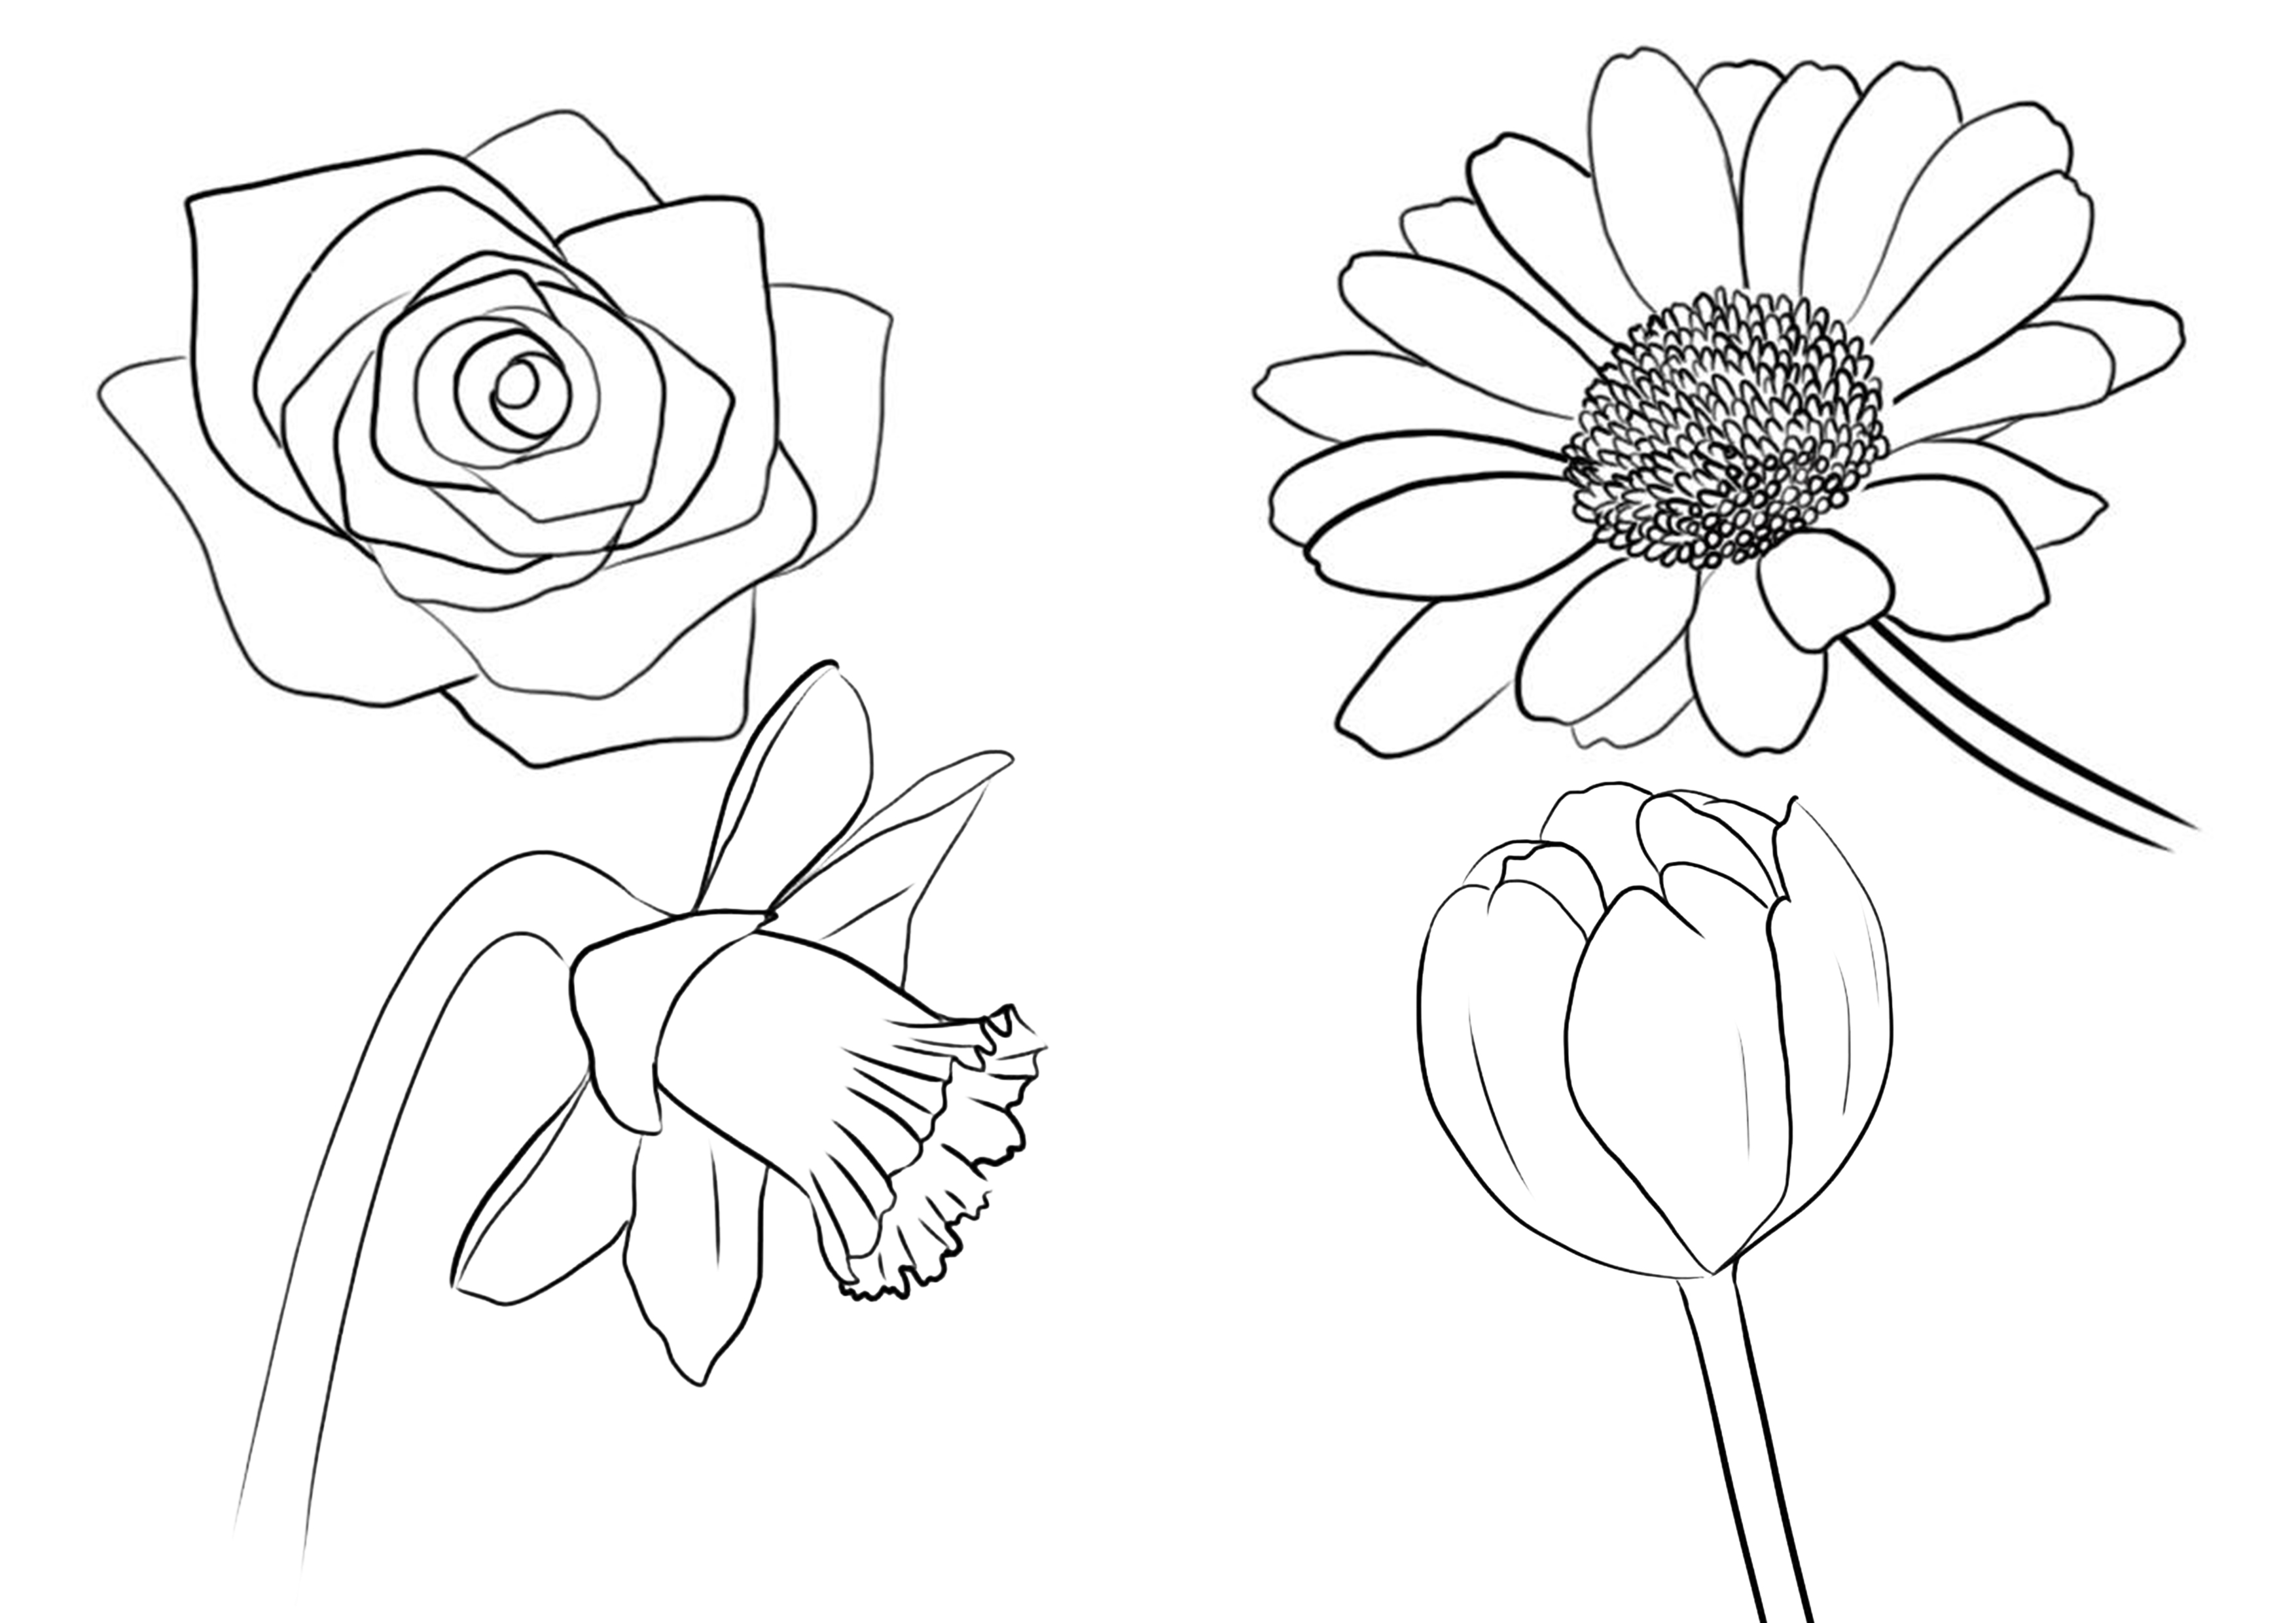
Given its small size, the butterfly will often be seen "from a distance" and ultimately it will be its wings that define it. The monarch butterfly that we drew is an excellent base from which you can create many butterflies. I have also added flowers to accompany the butterfly, if you want to know how to draw a flower, feel free to check out the article on our blog about this!
Discussion
5 comments