How to Draw a Frog
Today we will draw a frog together. These wonderful little amphibians who jump everywhere. It's a small animal that's quite easy to depict and understand. Once again, the first essential thing to do before you start drawing it is to observe it thoroughly and understand the key features that make up the frog.
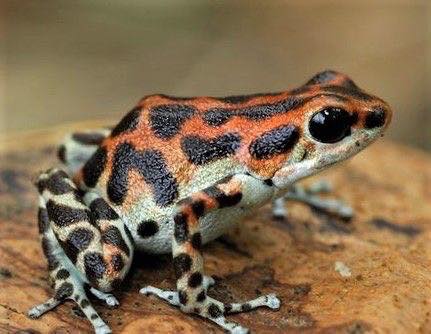
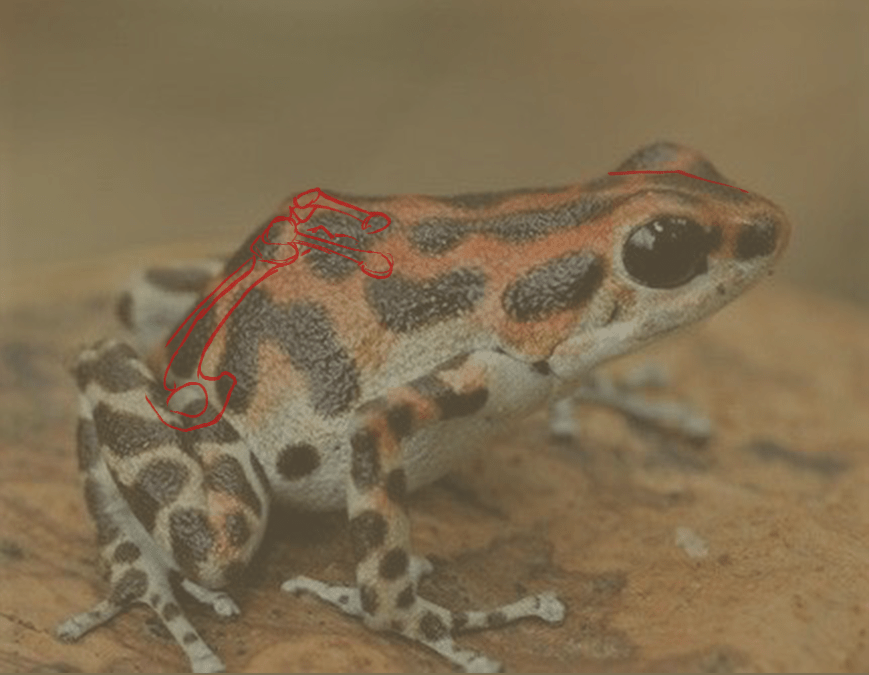
Here is the image that we will use throughout this tutorial.
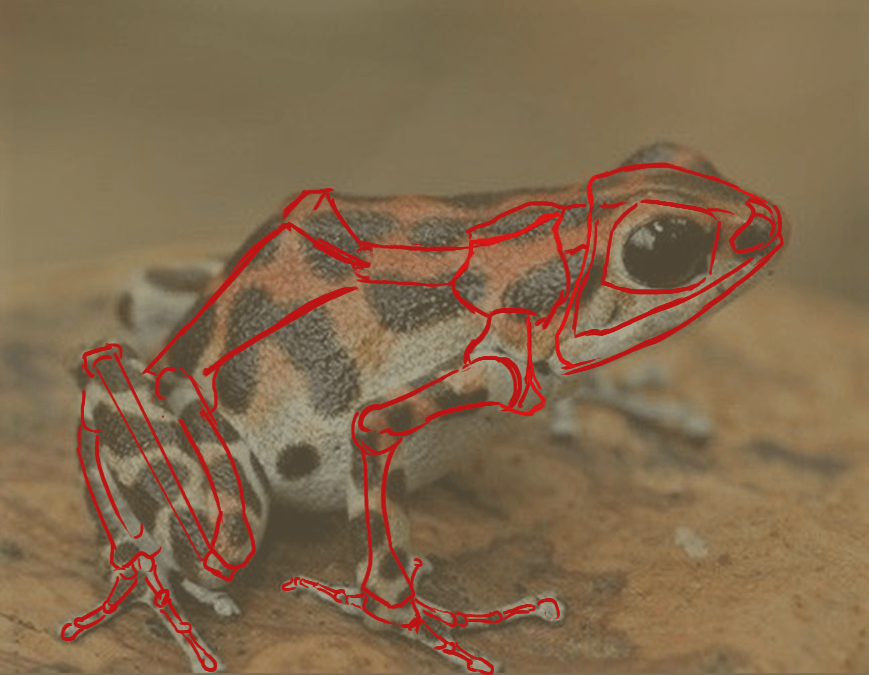
We are going to look at the structure of a frog together. Here is a good example of a simplified frog skeleton, which allows us to locate the different important bones of it.
To simplify its construction, we are going to use simple shapes such as circles, cylinders, triangles, and rectangles.
DRAWING A FROG USING SIMPLE SHAPES
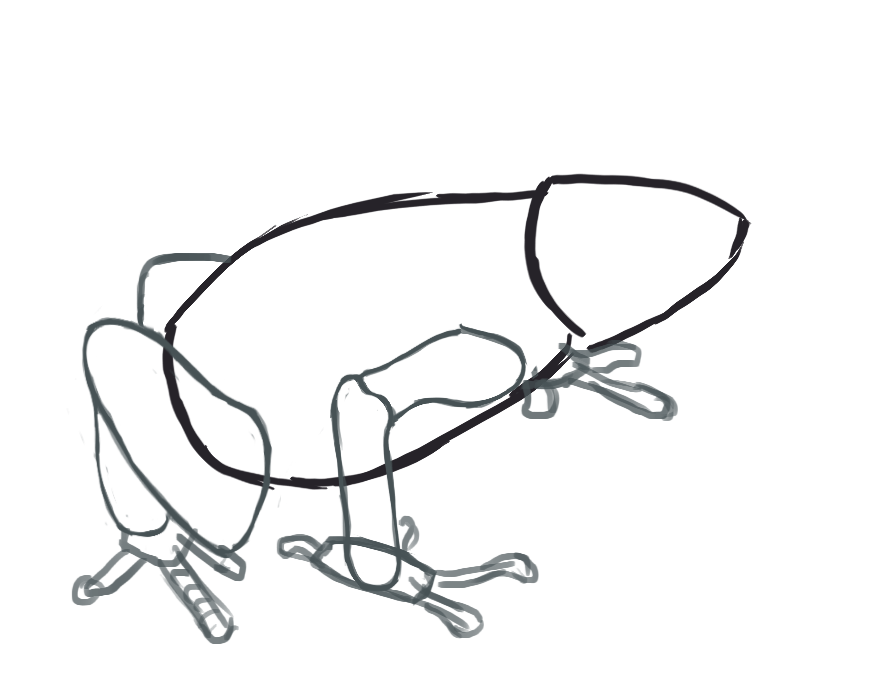
To start, we will draw a triangle for the head and an oval for the body.

DRAWING THE FROG'S LEGS
We continue with the forelimbs (front legs) and hindlimbs (back legs) of our frog. Draw them at the ends of the frog's body.
For the front legs: they should be placed quite close to the head.
For the hind legs: they need to be positioned under the pelvis.
To do this, you draw two lines perpendicular to the pelvis and two other lines to guide the position of the limbs on the body.
To draw the forelimbs, use long, thin cylinders.
To draw the hind limbs: use wider cylinders
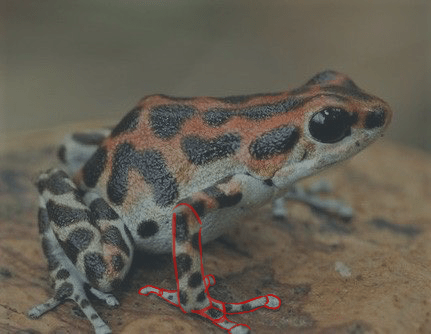
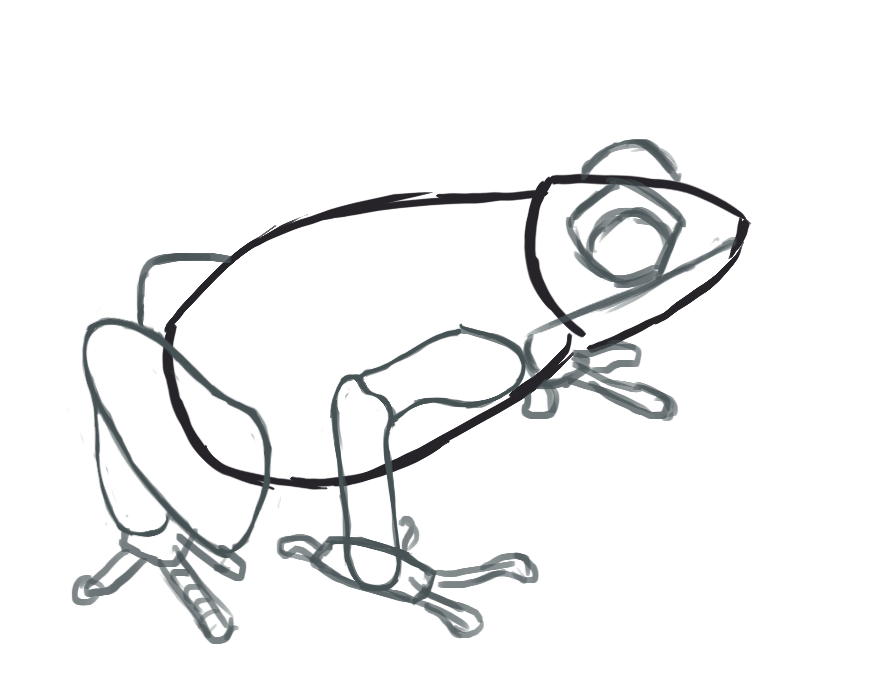
To draw the "hands" of the frog, let's take a closer look at the reference photo.
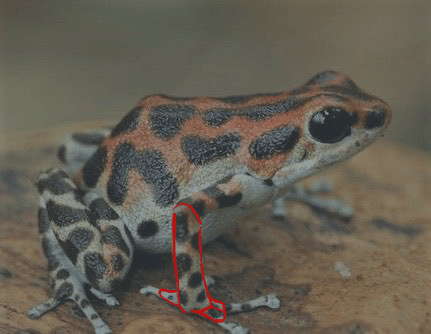
We can see that the forearm of the frog is formed here in red, in triangles. We can count four. Then we move on to the "hands," which will be represented by long cylinders and spheres for the fingertips. Here is an example in the same photo.
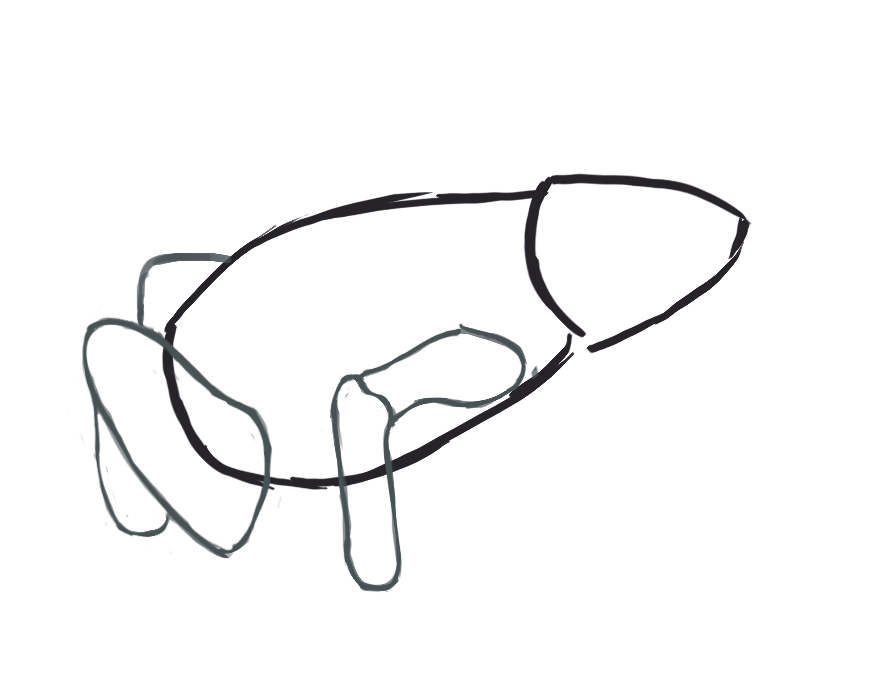
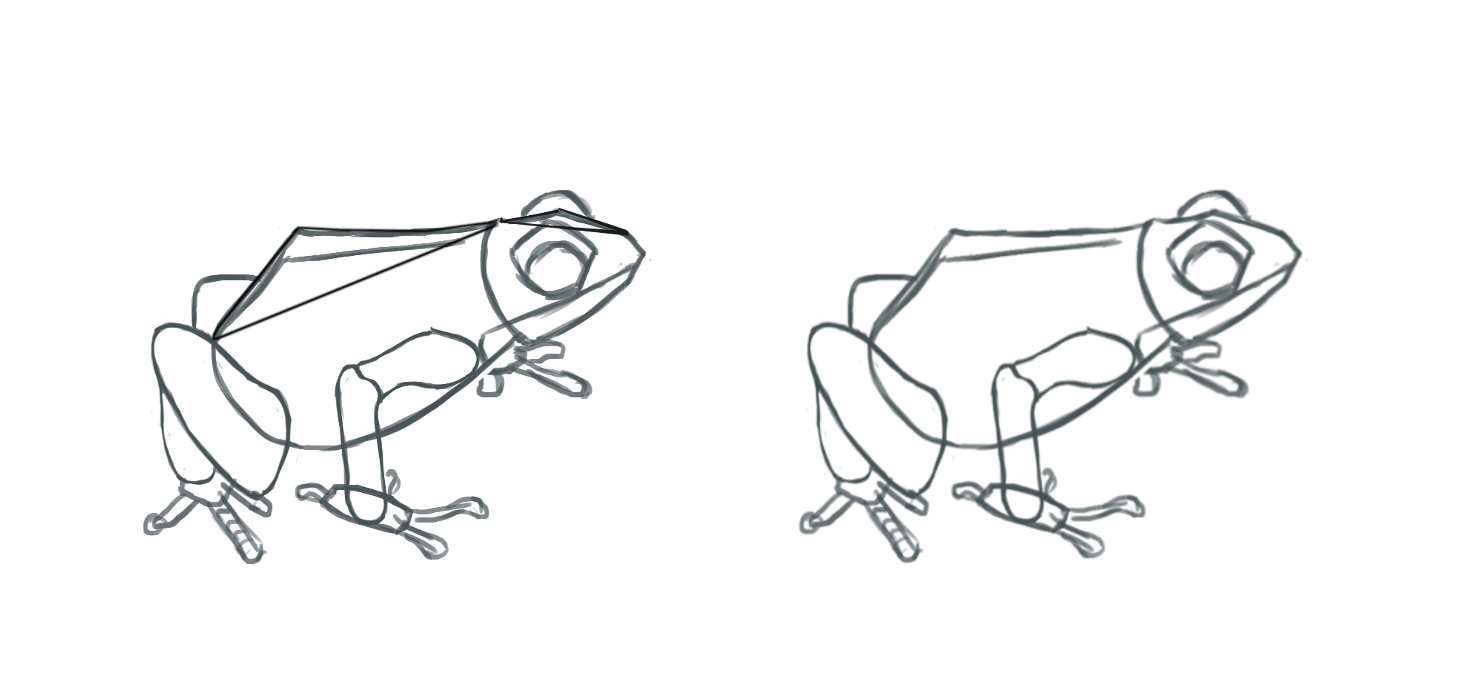
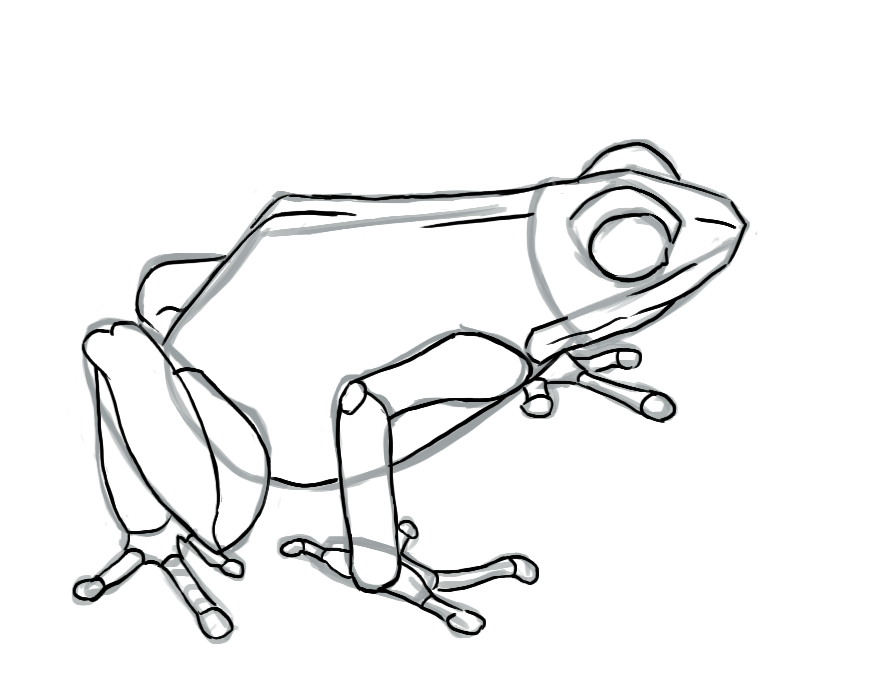
Let's go back to our drawing by positioning the different limbs we just saw. So, draw the frog's hands by sketching a large rectangle for the forelimbs and, for the feet, a small triangle for the hind limb.
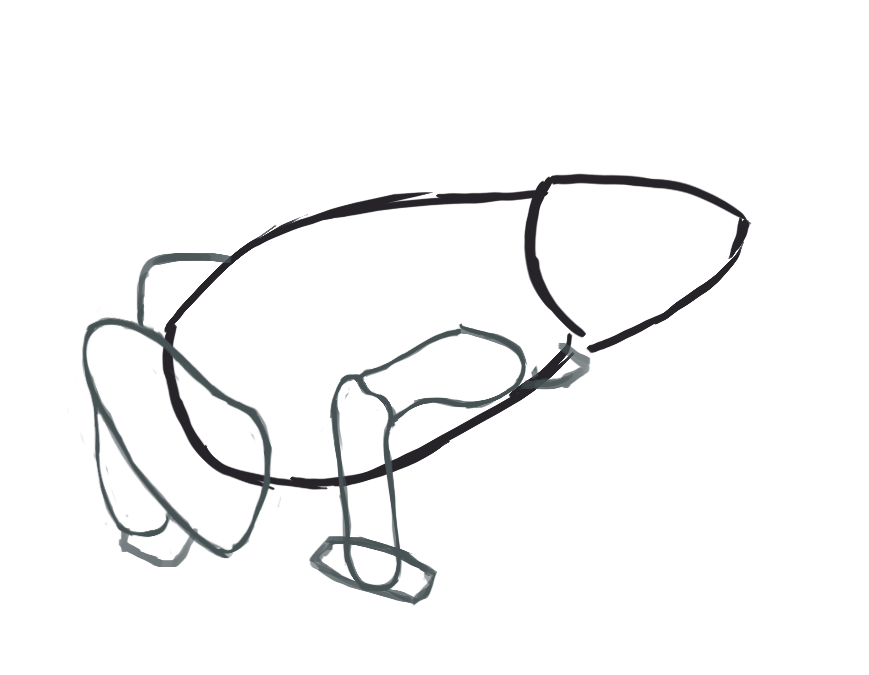 We continue with the frog's "fingers" and "toes" by drawing small cylinders for the joints and circles for the tips.
DRAWING EYES
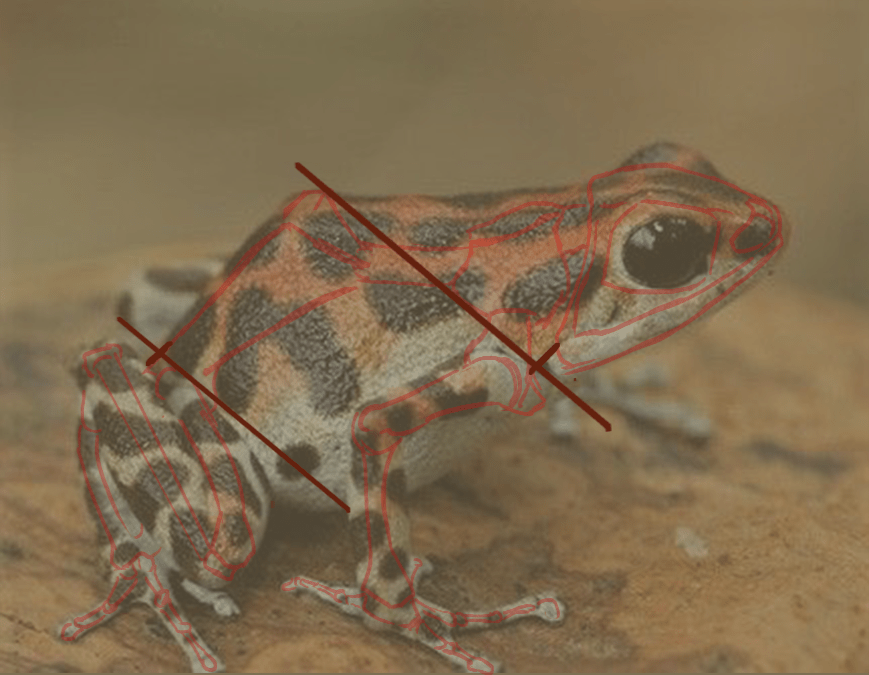
For the eyes, we will add a pentagon and inside it a circle that will define the actual eye of the frog. For the jaw, we will draw a rectangle that extends from the base of the head. In the reference photo, at the beginning of the article, we can see that the eyes take up a significant space: three-quarters of the head. Let's go back to the base of the head and add the elements described above.


The result with the rest of the body:
FINALIZING THE FROG DRAWING WITH COMPLEX SHAPES
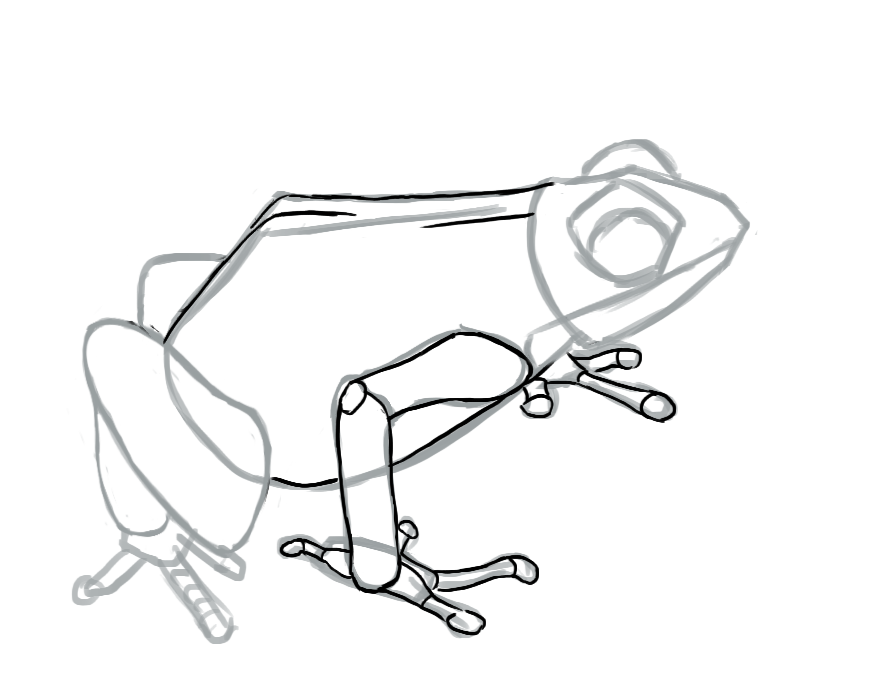
Now that the base is drawn, we can start detailing our little frog to make it more realistic. In our reference photo, we can see that the frog has two bumps which represent the "sacral vertebrae". They are perpendicular to the vertebrae (spine). That is what we are going to draw now.
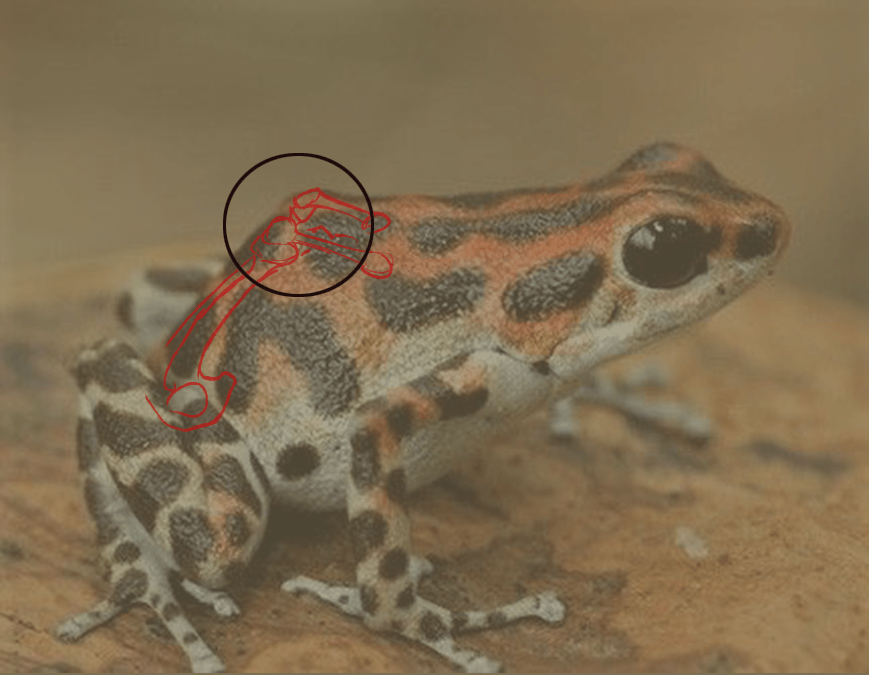
Using a triangle, we place the tips of the vertebrae, and then with a simple straight line, follow the curve. Repeat this action for the second vertebra.
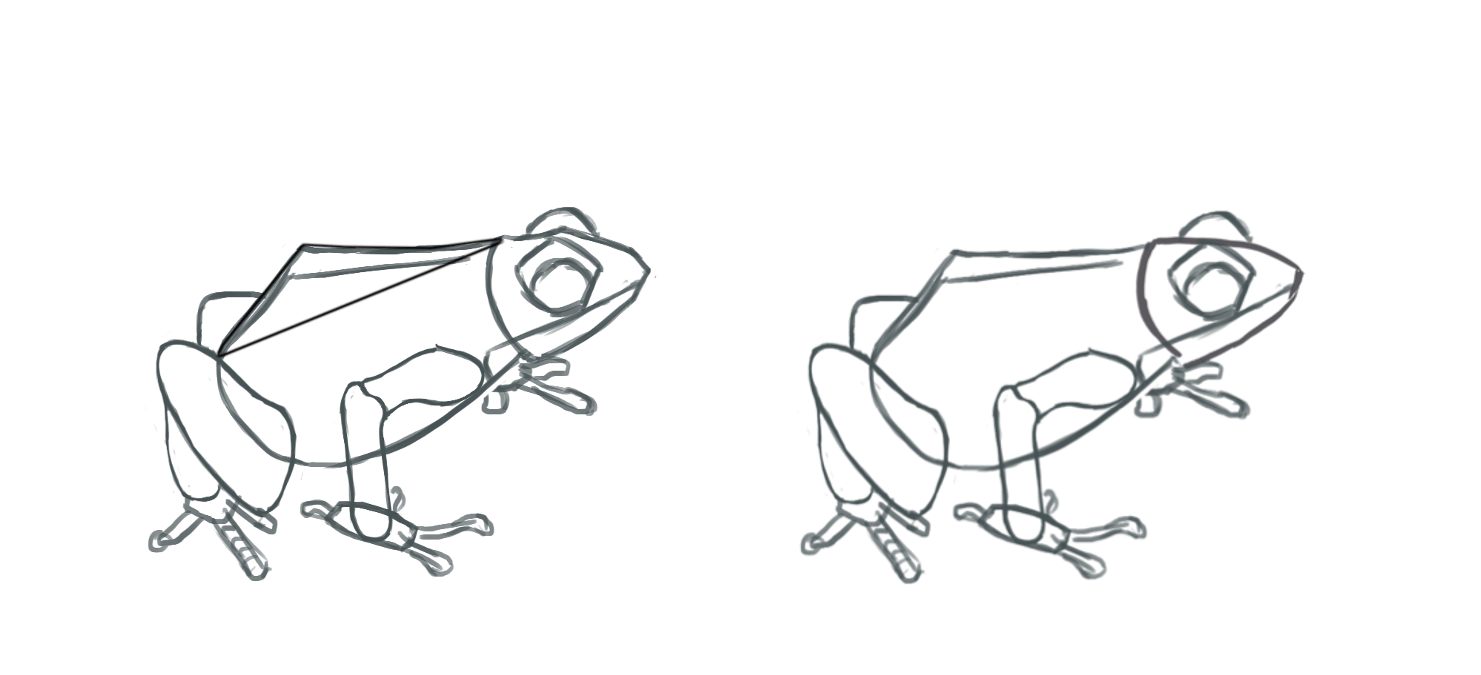
THE DETAILS OF THE FROG'S HEAD
Similarly for the head, we have a bump but much less pronounced than the one on the pelvis. In this photo, we will mark it with two red lines.
Draw a triangle at this location to specify the head of the frog. This results in the following on the drawing.
DRAWING THE DETAILS OF THE FEET
For the front limbs: simply round off the limbs.
For the lower limbs: make semi-circles to represent the joints of the frog's lower limbs. This also applies to the feet and hands. Round off the ends.
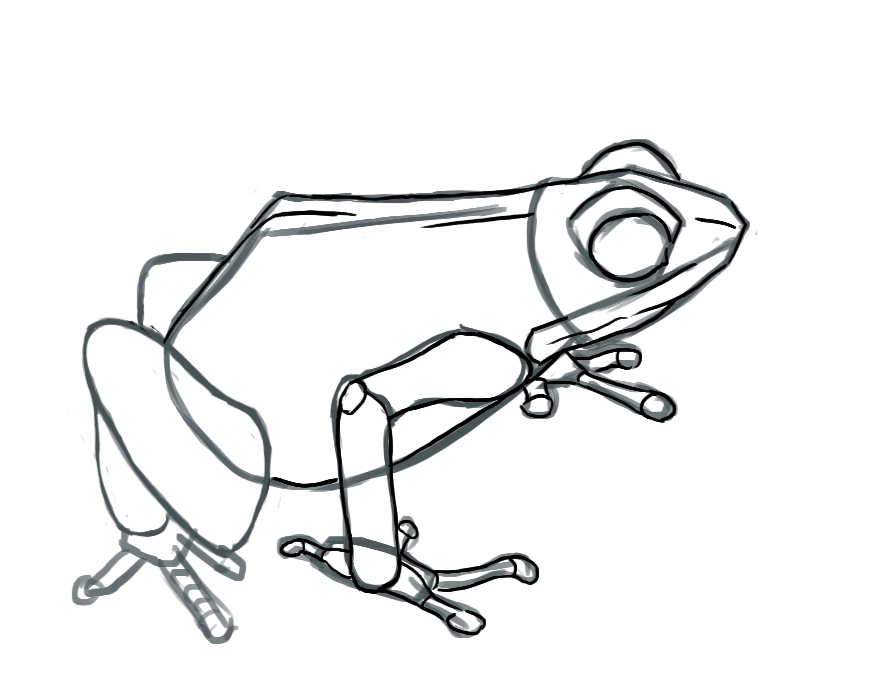
The same method is applied to the face. To add volume to the head, we will draw a line from its eye to the tip of its snout.
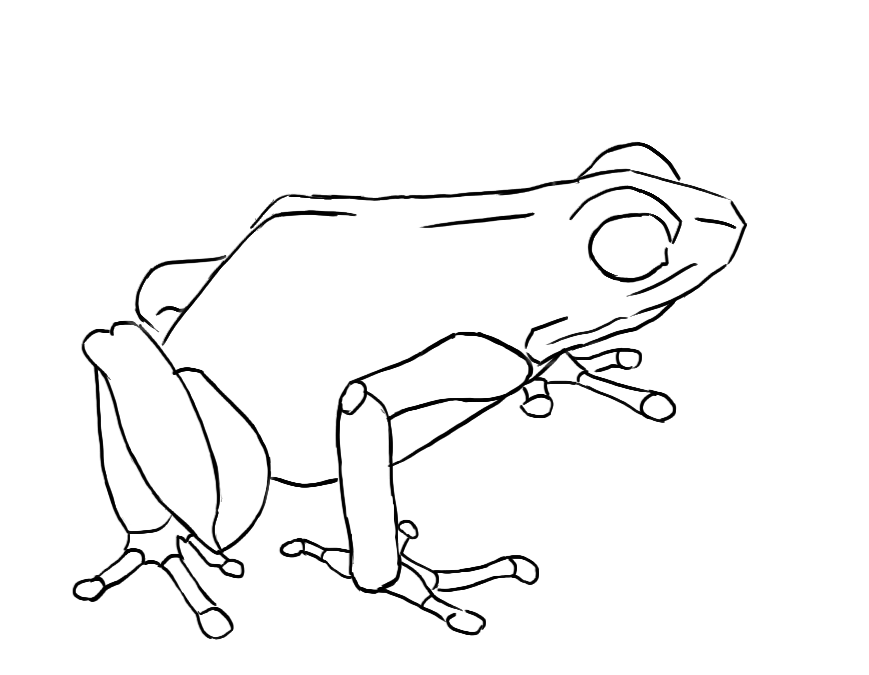
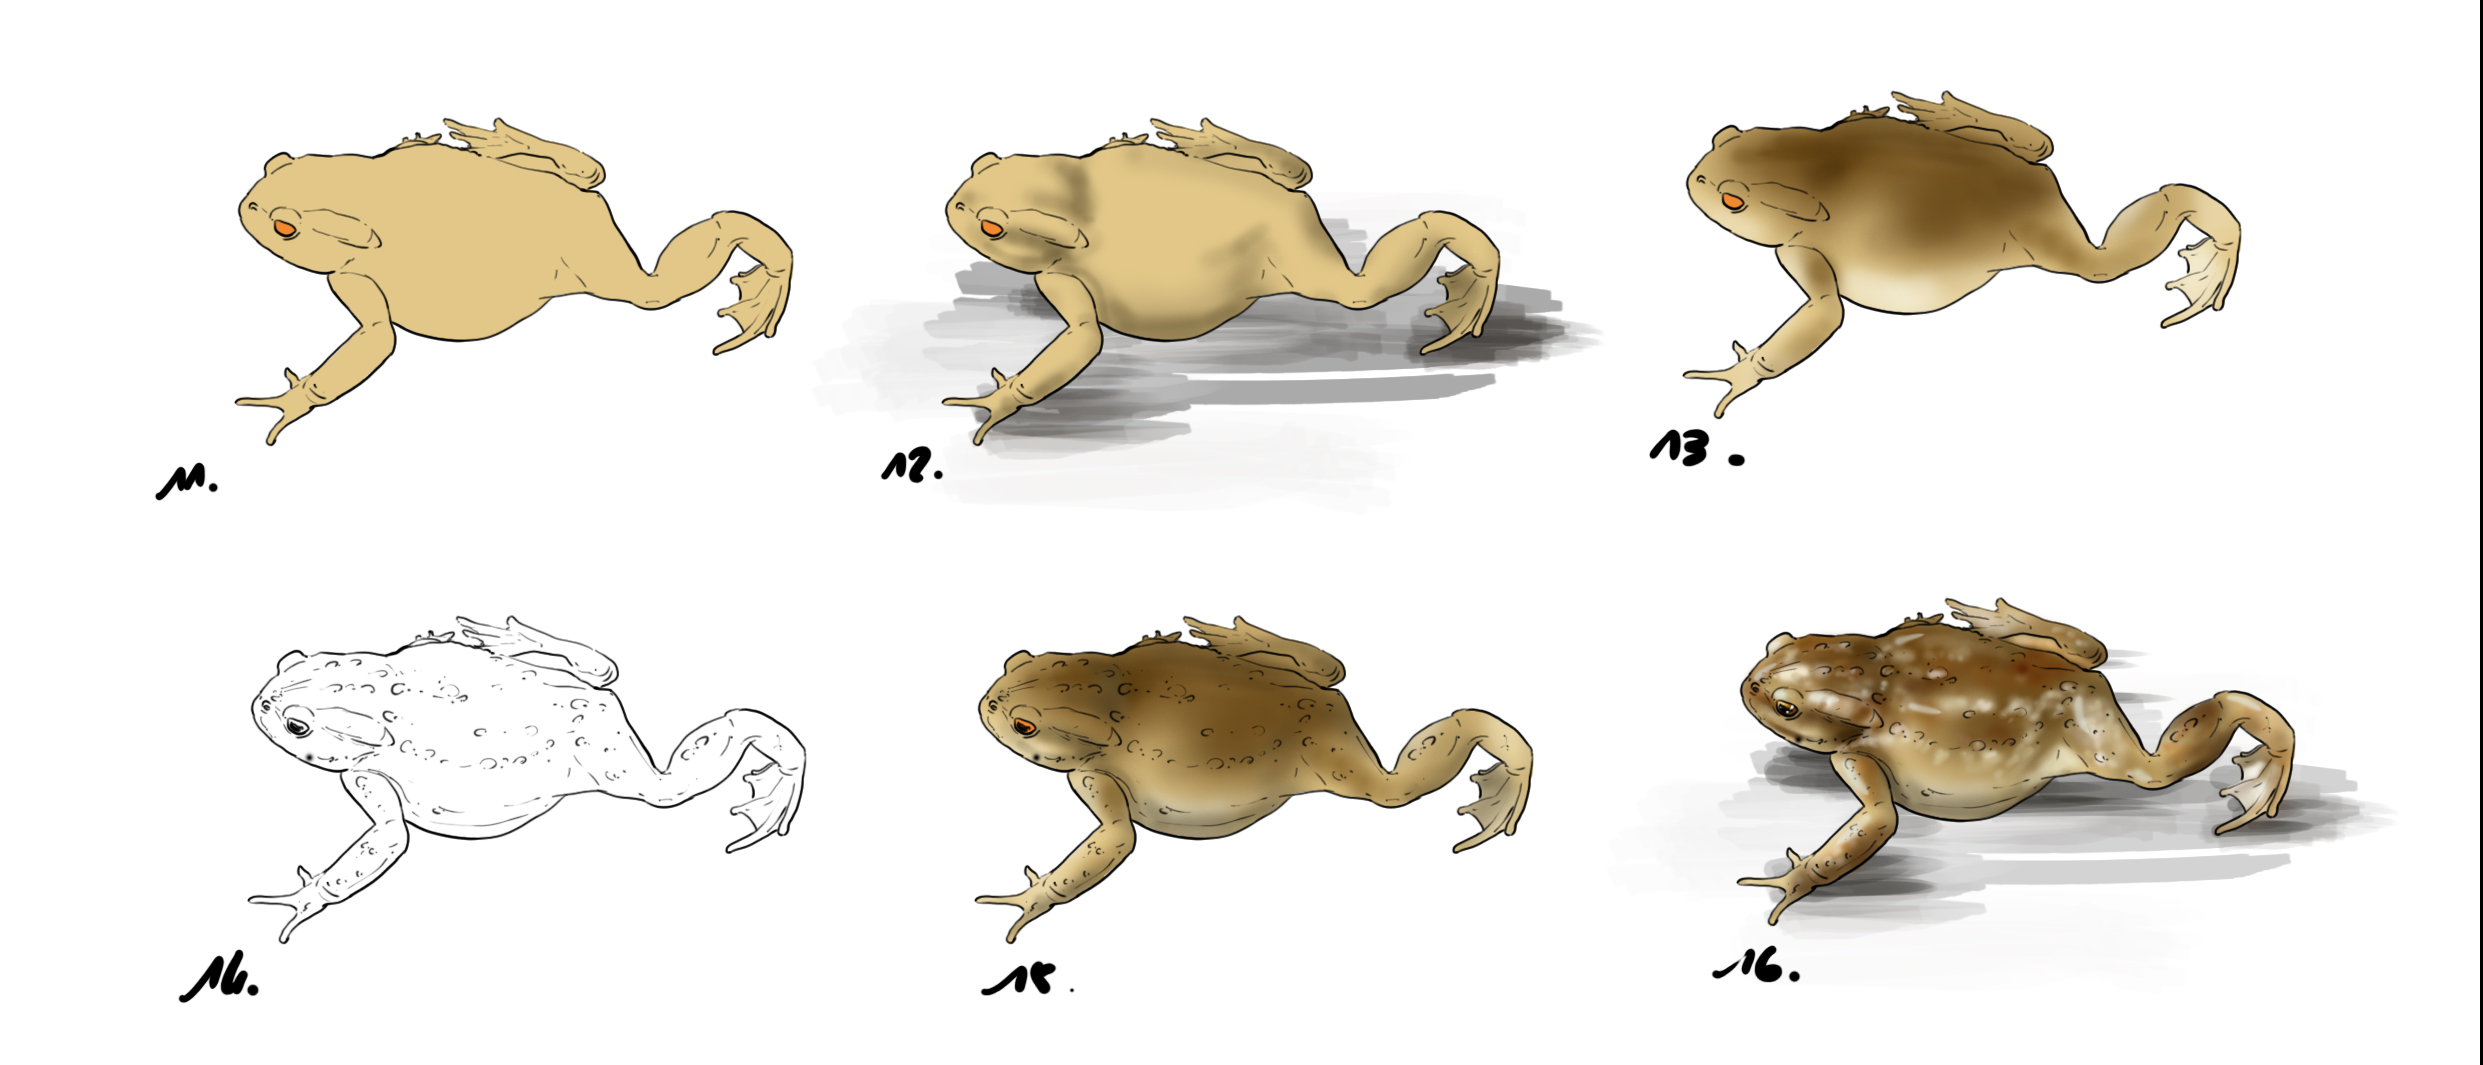
Here is the final result of our frog

Regarding color and textures, have a bit of fun. There are thousands of different species with varying intensity of colors, complexity of textures, etc. It's up to you to look for your references either directly—if you have the opportunity—in nature, or with online research.
Because yes, the frog is not necessarily green ;)
CONCLUSION
To conclude this article, we have learned how to draw a frog with ease. Once again, observation is a crucial aspect in order to understand and reproduce what you see.
Take your time to represent what you see as accurately as possible. Because there is nothing more effective than dissecting what you see, to proceed step by step. The rest is just trial and observation, correction, retouching, etc.
Get your pencils ready!
Editor and illustrator: Laure-Hélène
Discussion
3 comments