How to Draw a Panda
Today we're going to talk about a big ball of fur, or should I say, a big teddy bear. I'm referring to: the panda. It's big, it's round, it's a bit sluggish, and it's pretty easy to draw :D
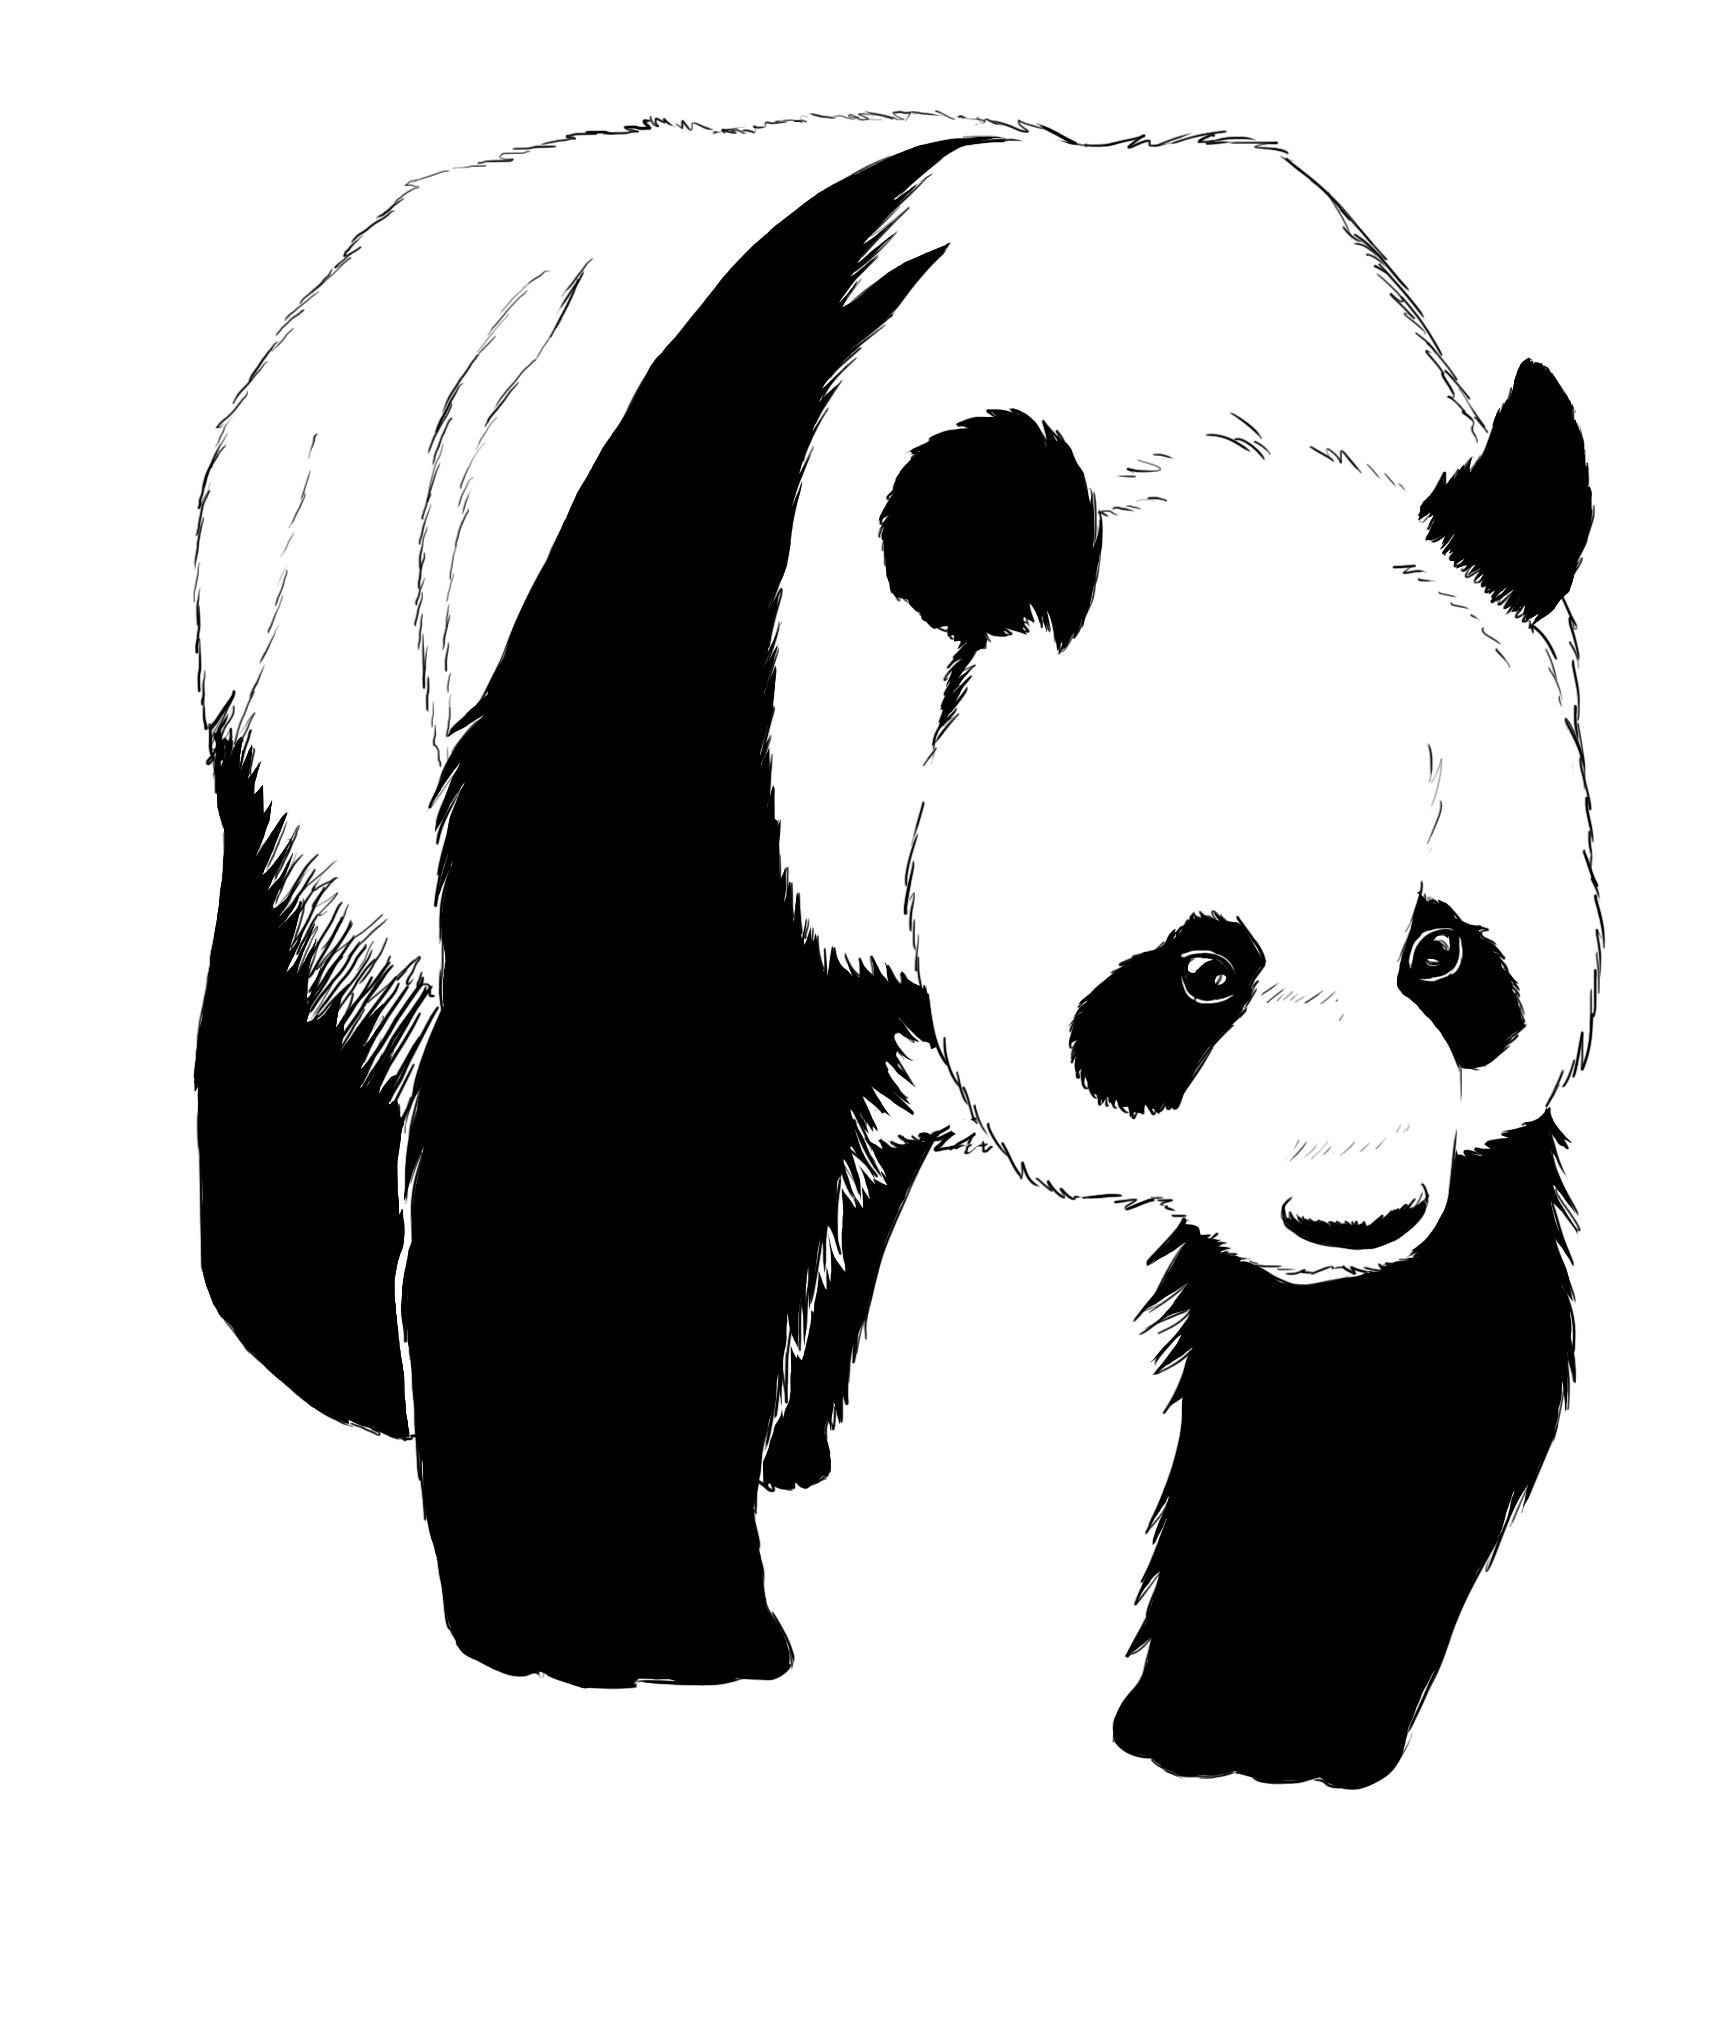
So today we're going to make the exercise a bit more complicated, as we're going to try to reproduce this photo:
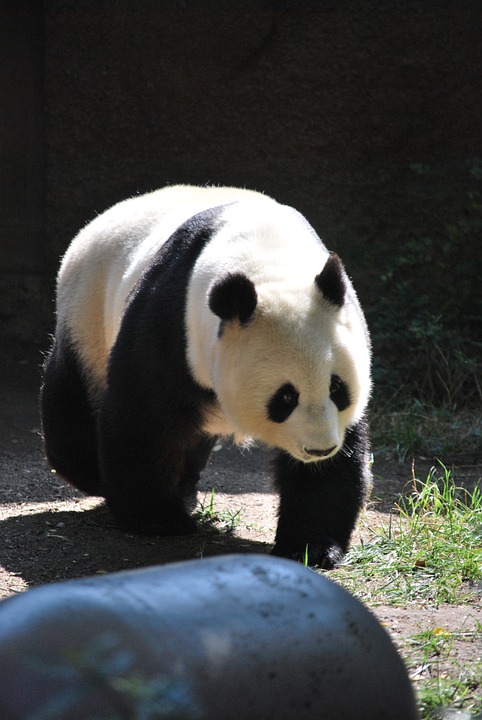
And this photo shows a very strong emphasis on the body of the panda. I've heard that some people sometimes have issues with this on other animals. So I'm taking this opportunity to tell you what to do :)
PANDA OBSERVATION
It is quite difficult to clearly understand the anatomy of the panda because its fur almost completely masks everything. This gives it the appearance of a big fluffy ball, which can be both an advantage and a disadvantage.
However, certain elements can be noted. The panda is massive. It is bulky from any angle you look at it. It has big paws and a big head. In short, it is imposing. Its ears are located high on its head (like most bears), it has a small snout, small eyes situated roughly in the middle of its head.
A broad, flat nose, legs that are almost straight in shape (by which I mean they don't seem to taper much towards the toes and wrist).
DRAWING THE PANDA WITH SIMPLE SHAPES
Our favorite part!
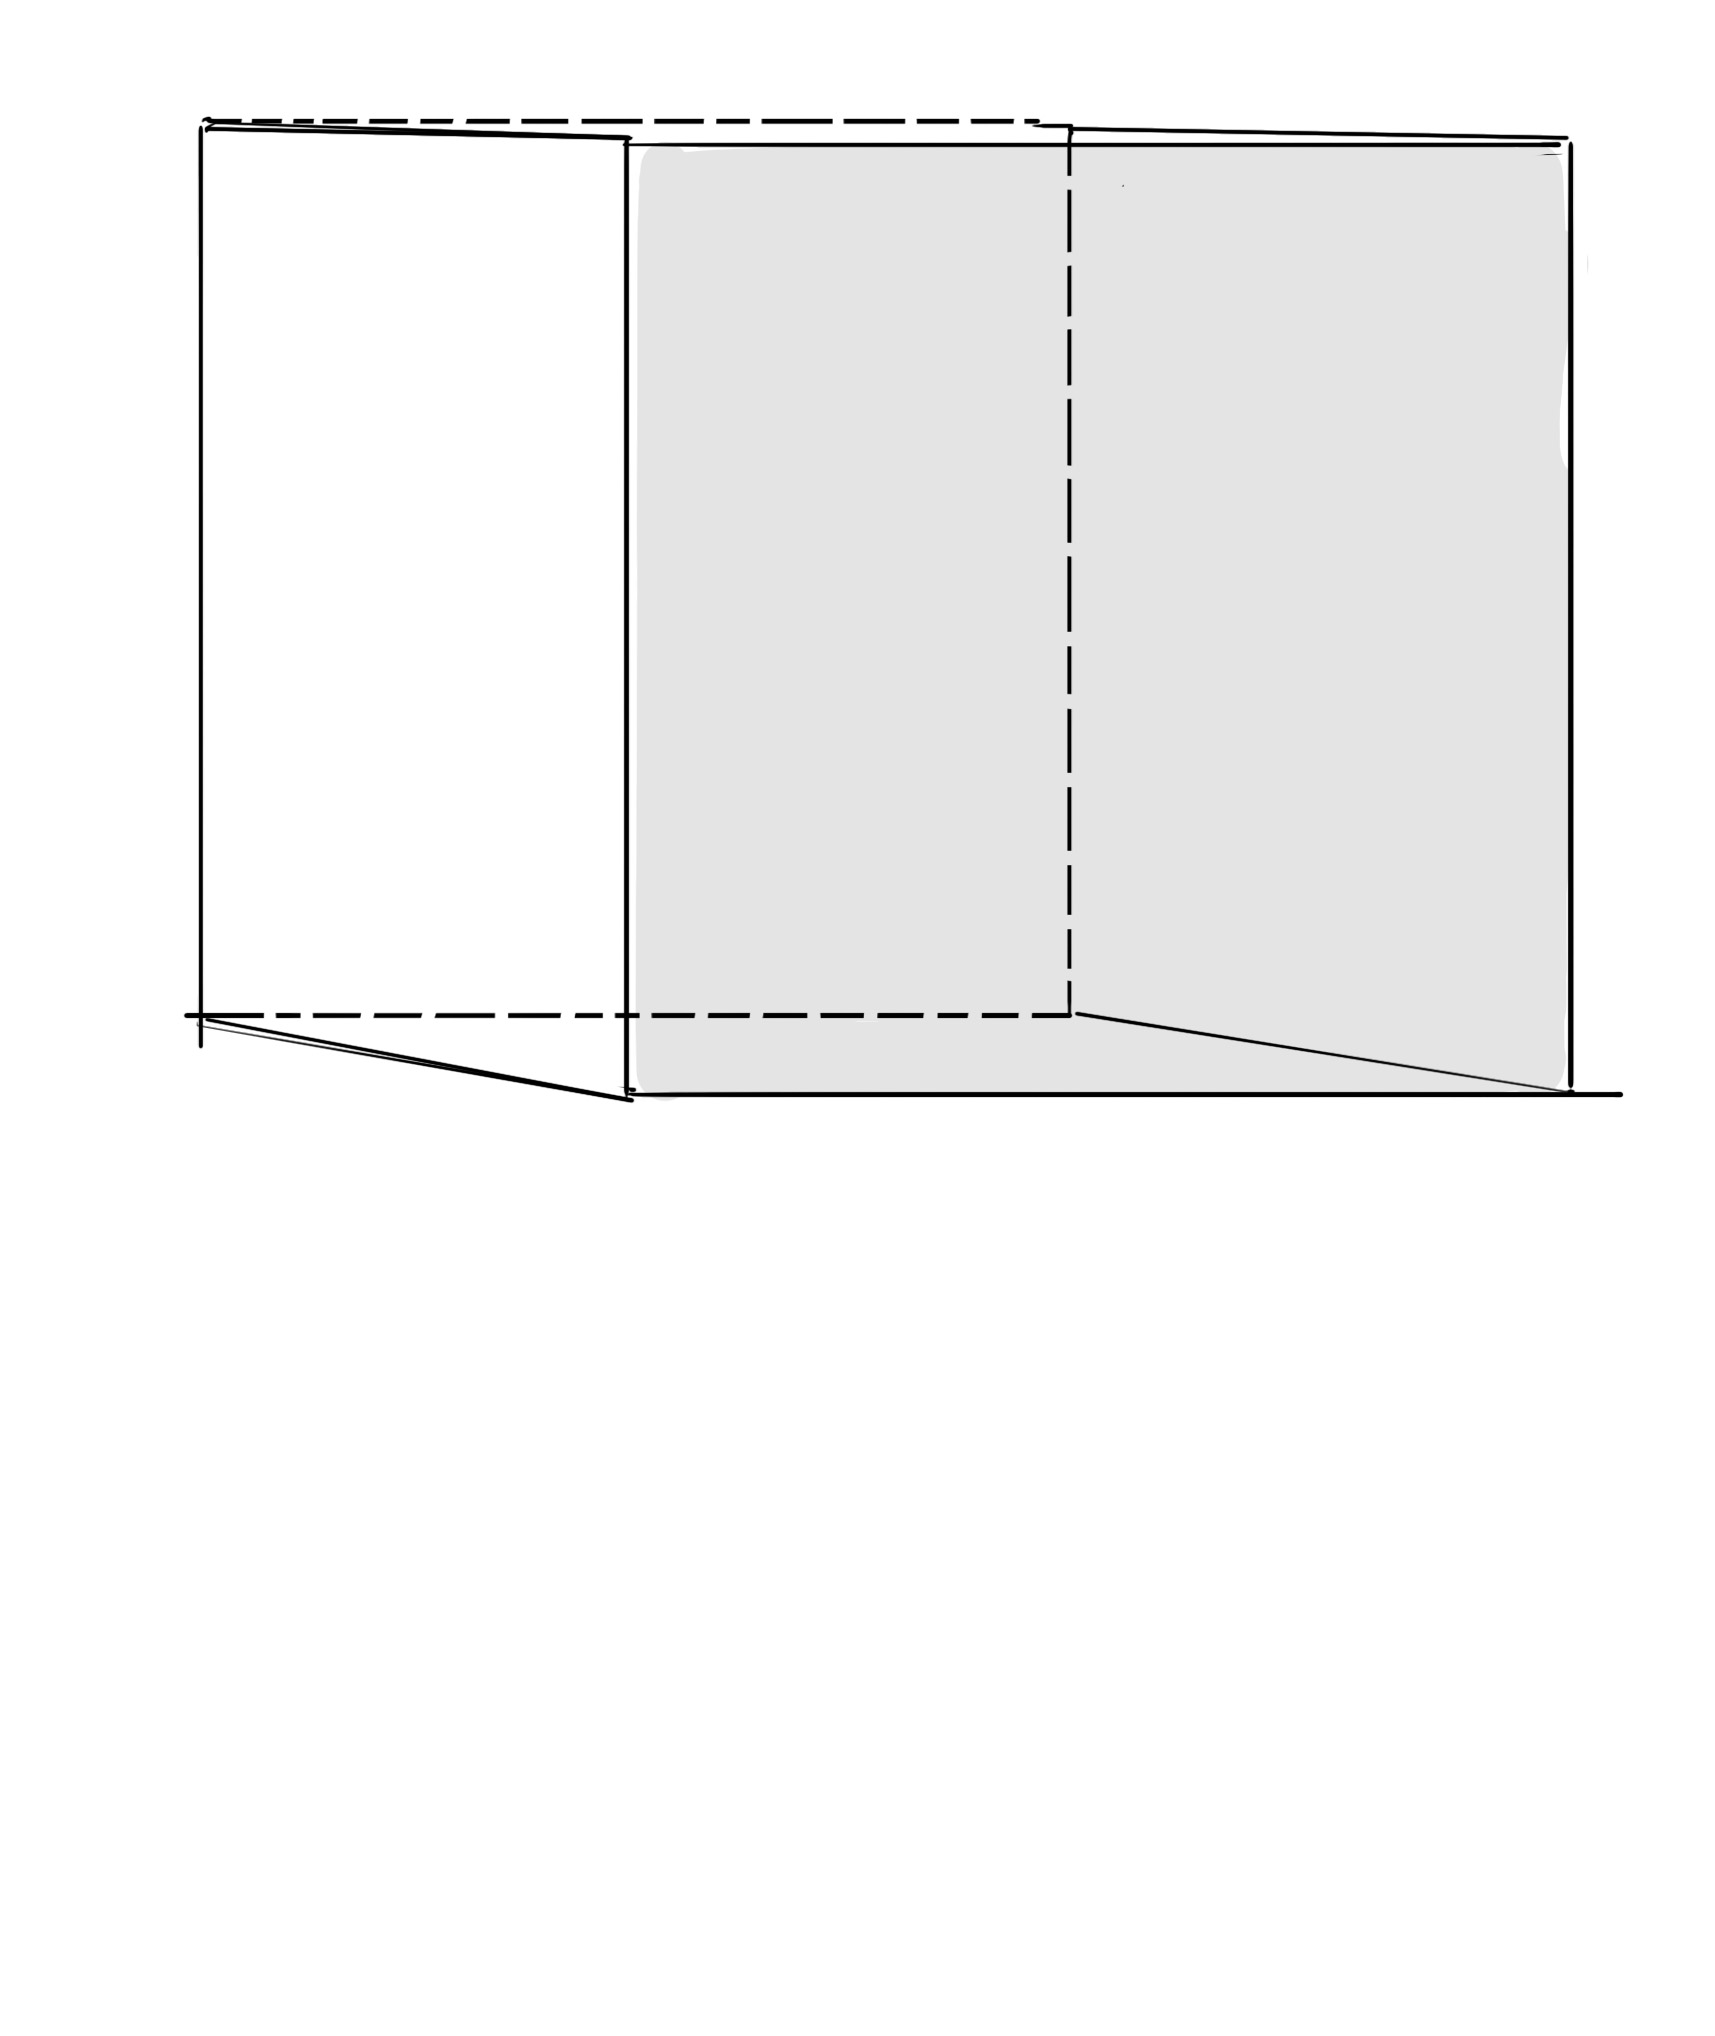
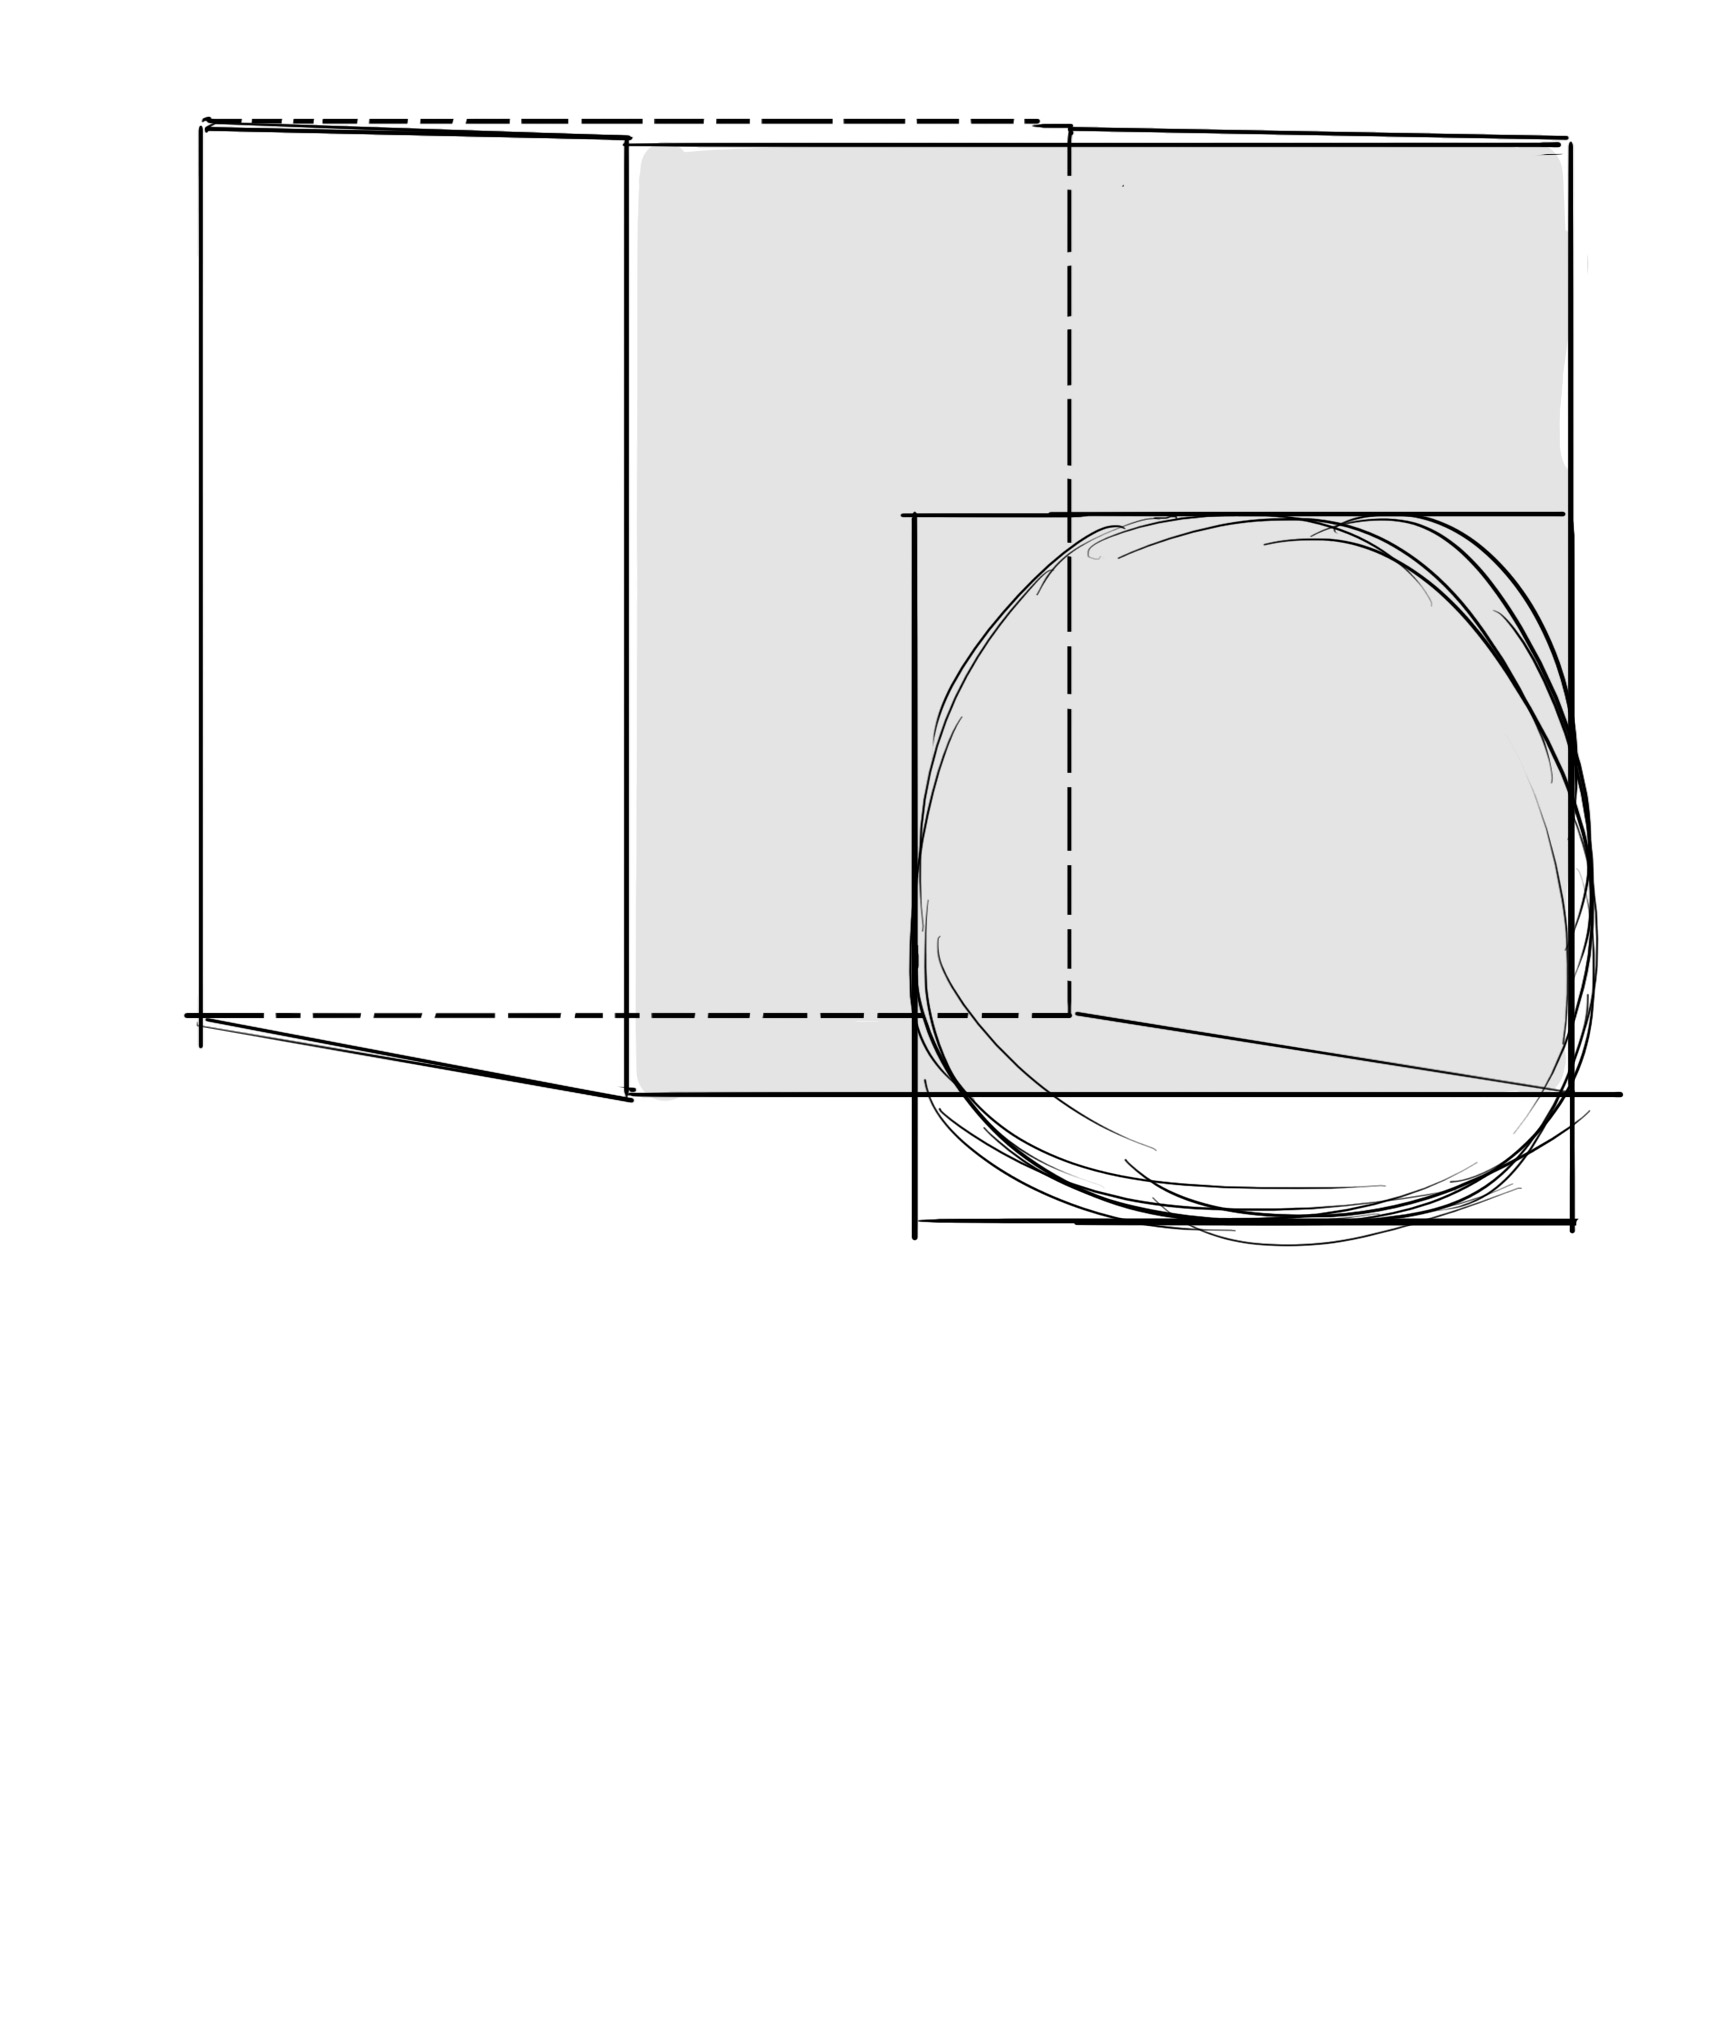
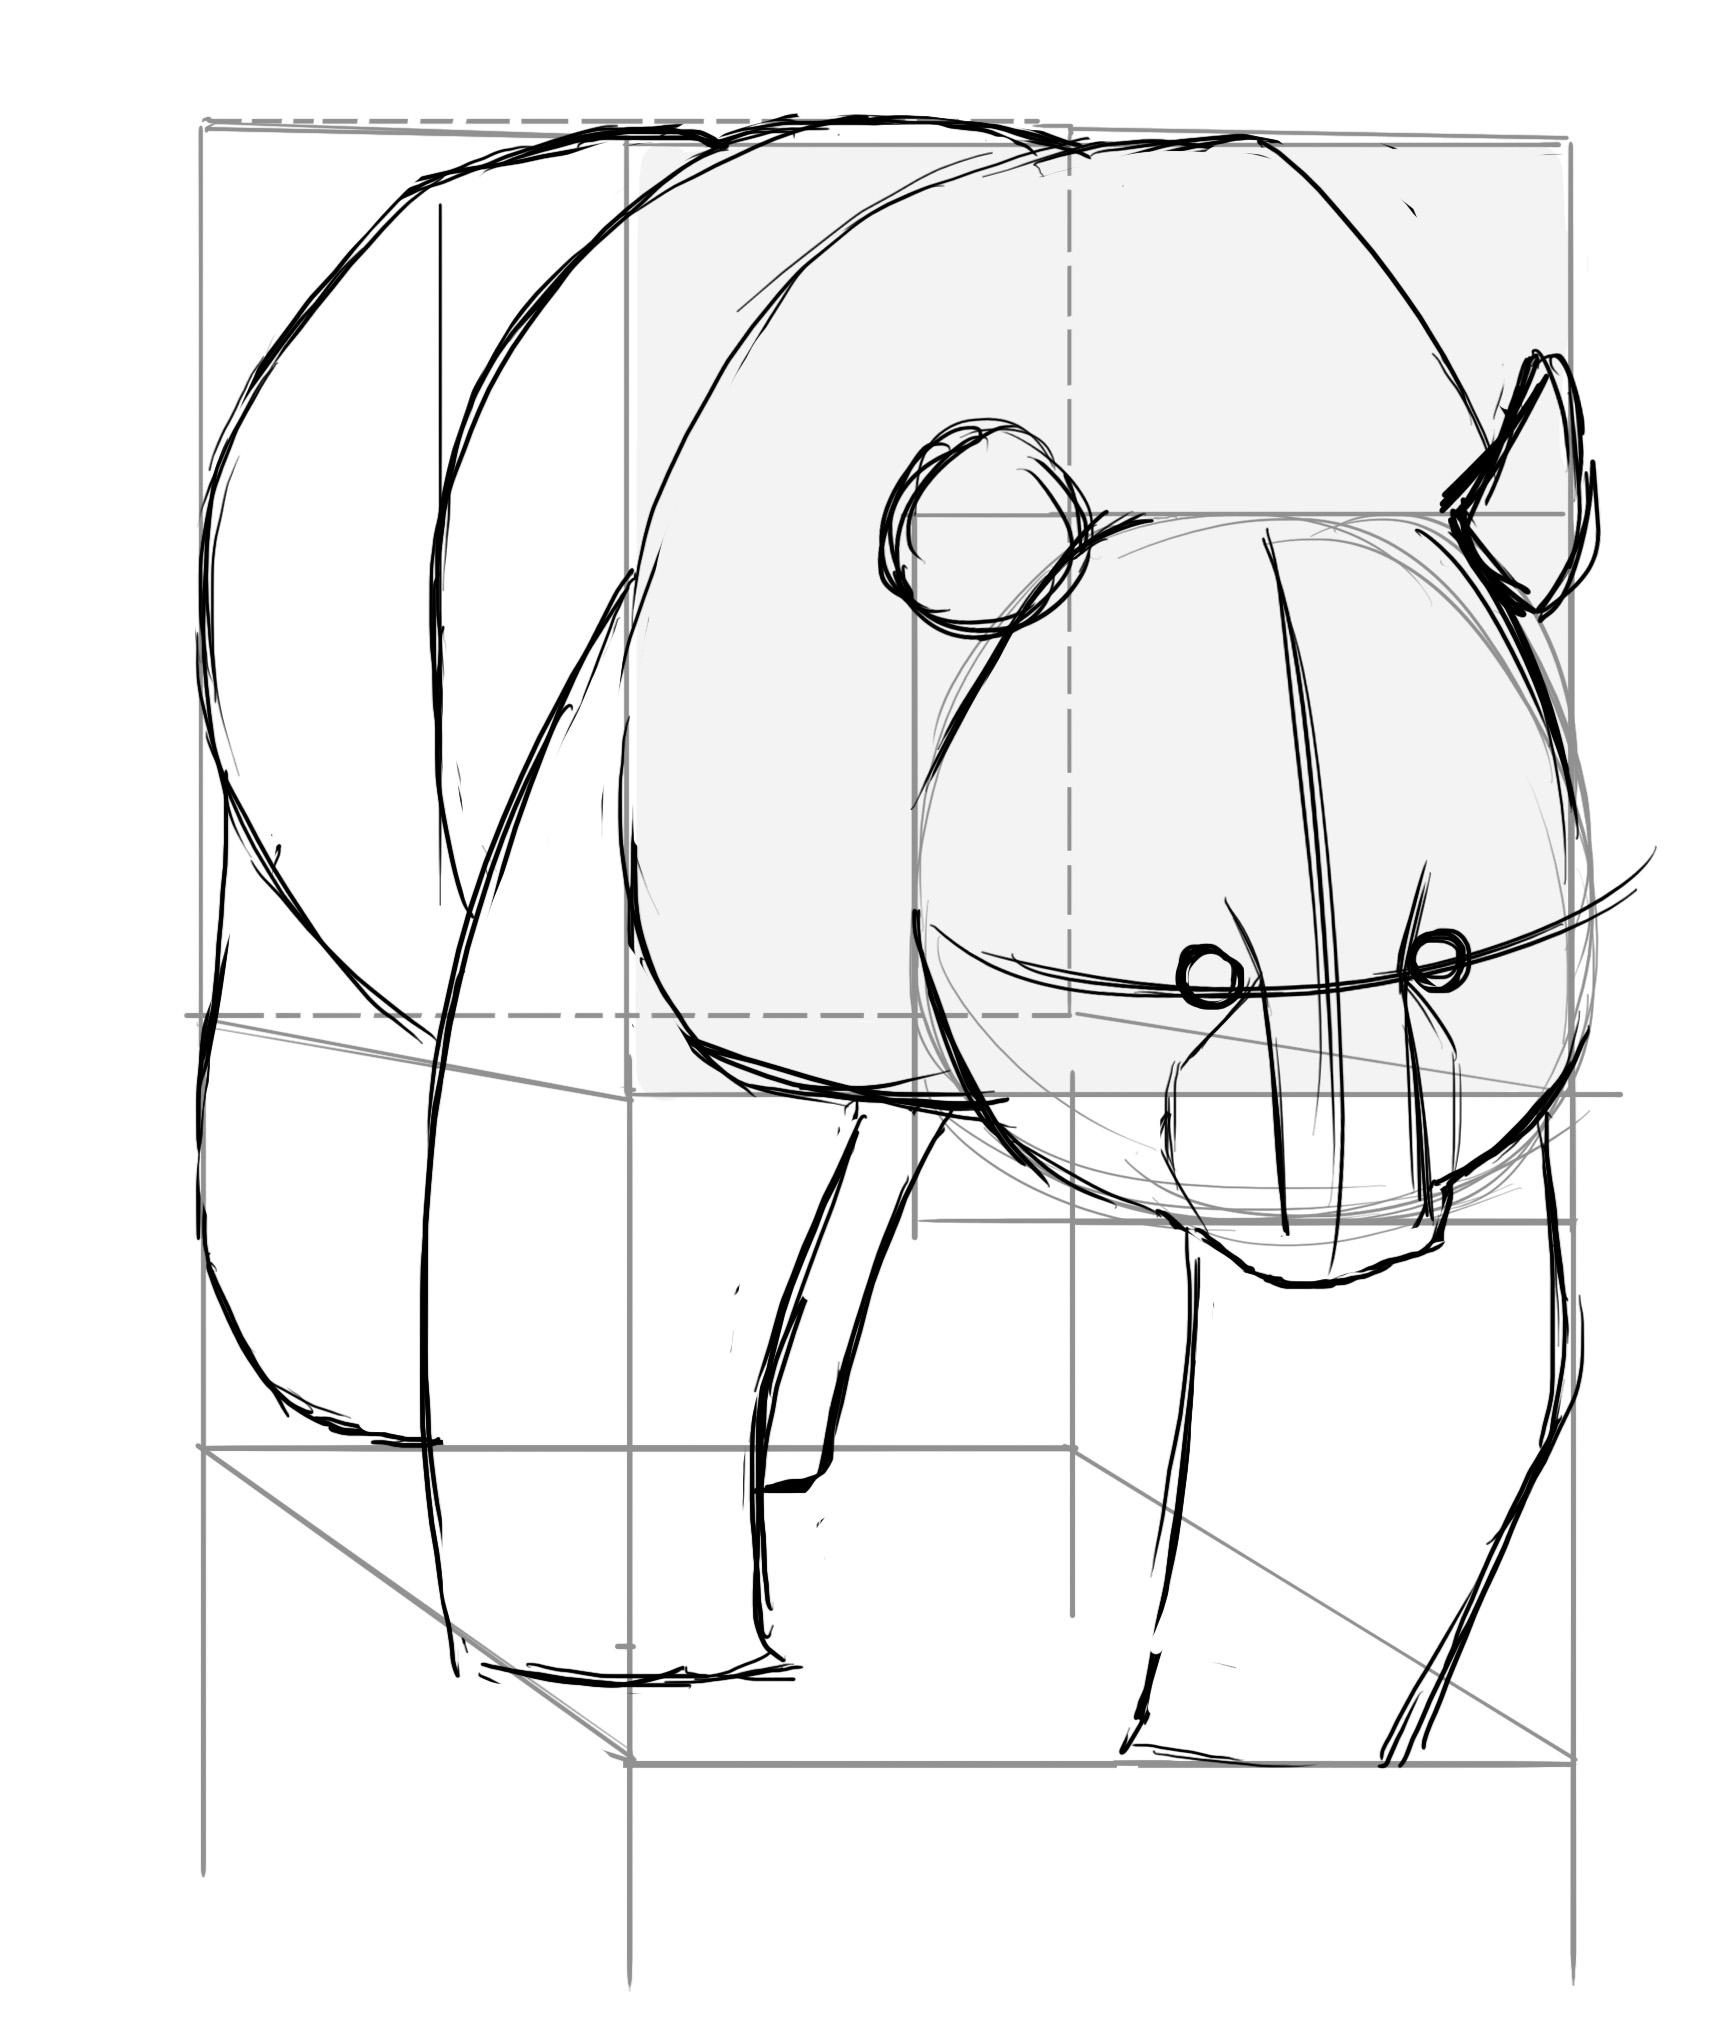
So, as you know, usually I start with the head. Well, not today. It seems more logical to start with the body this time. We are going to draw one of our crazy parallelepipeds. We will draw a first square which will correspond to the chest of our panda. This square should be a bit taller than wide (just a tiny bit).
Once that's done, we will draw another square that will correspond to the hindquarters. This square will be just a little smaller than the one for the chest because it’s further away and we are in perspective. In short, you know the drill: when it's further away, it's smaller. To properly position our hindquarters, we will shift it to the left.
Take the chest square and imagine that you add half of this square on the left (a little bit less if possible). That will give you roughly the position of the left edge of the hindquarters square.
And we connect the edges of this square if we need to. This gives us our parallelepiped that contains the body of the panda.
We will also position the head. It is a tiny bit less tall than the width of the chest and as wide as 3/4 of it. To place it correctly, you can place half the height of the head above the top of the skull. Or if you want a simpler reference point, just above the middle of the chest. And located fully towards the right.
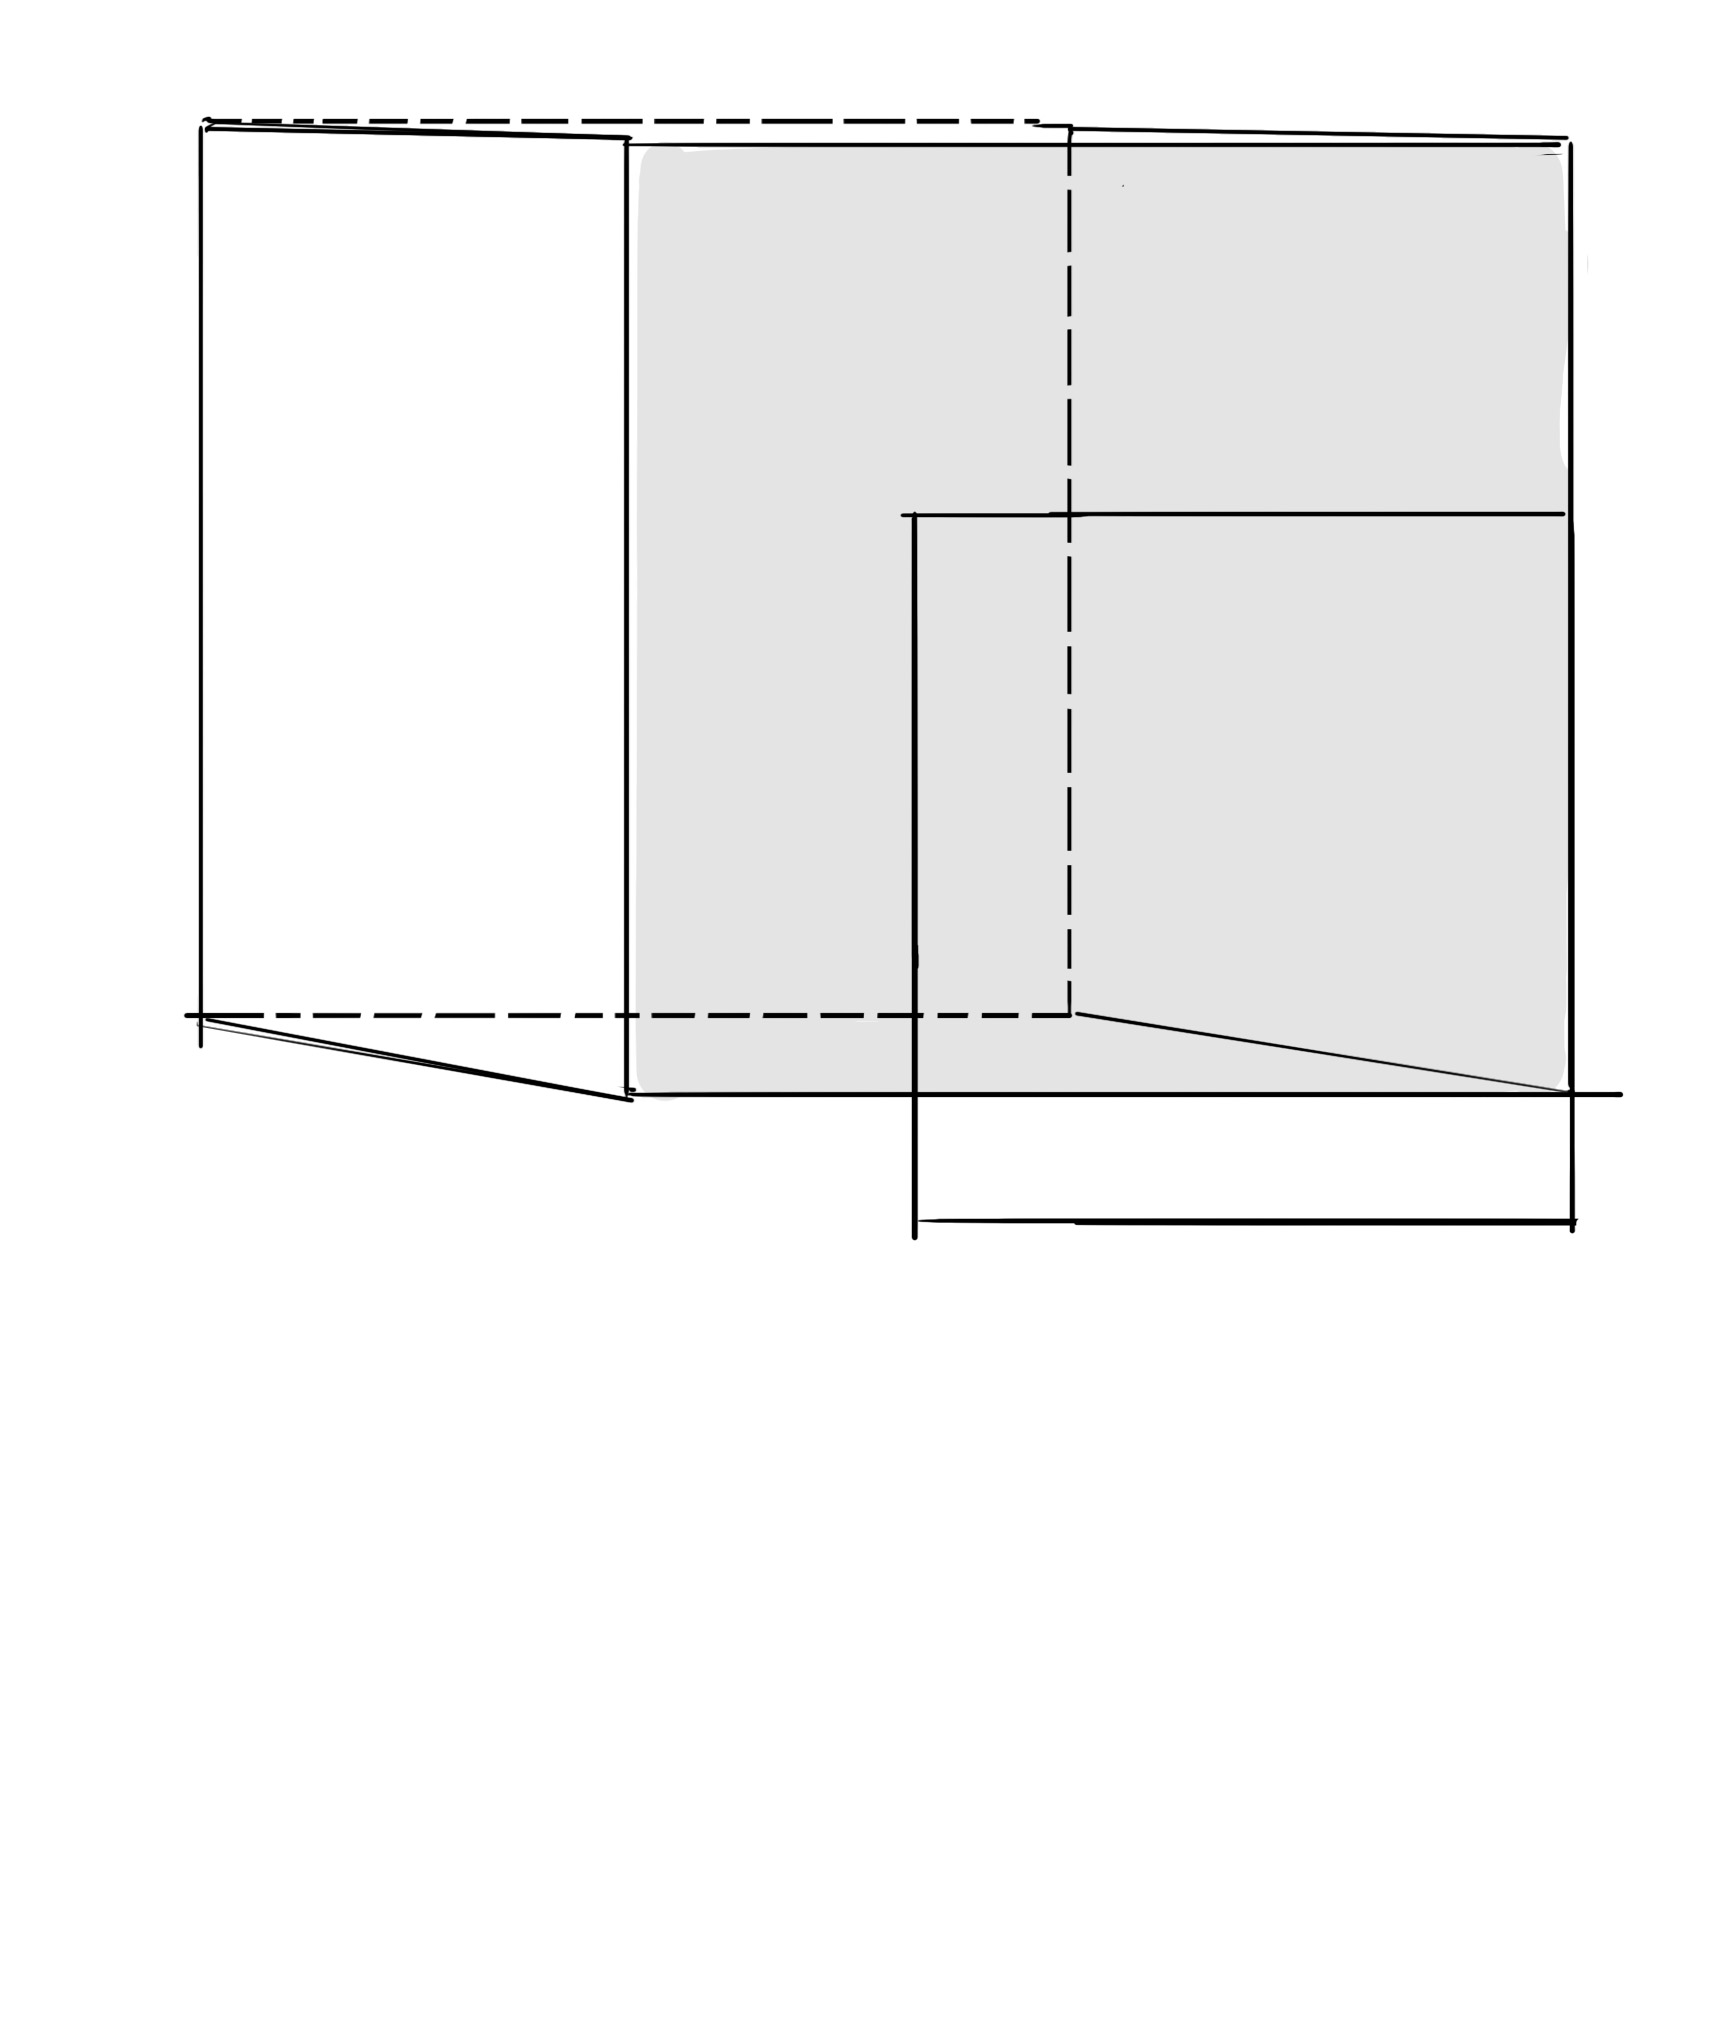
We're now going to draw the ground. We can clearly see that there is perspective on it. We will therefore extend the vertical lines of our parallelepiped. We assume that we can draw half of the chest height between the ground and the bottom of the chest.
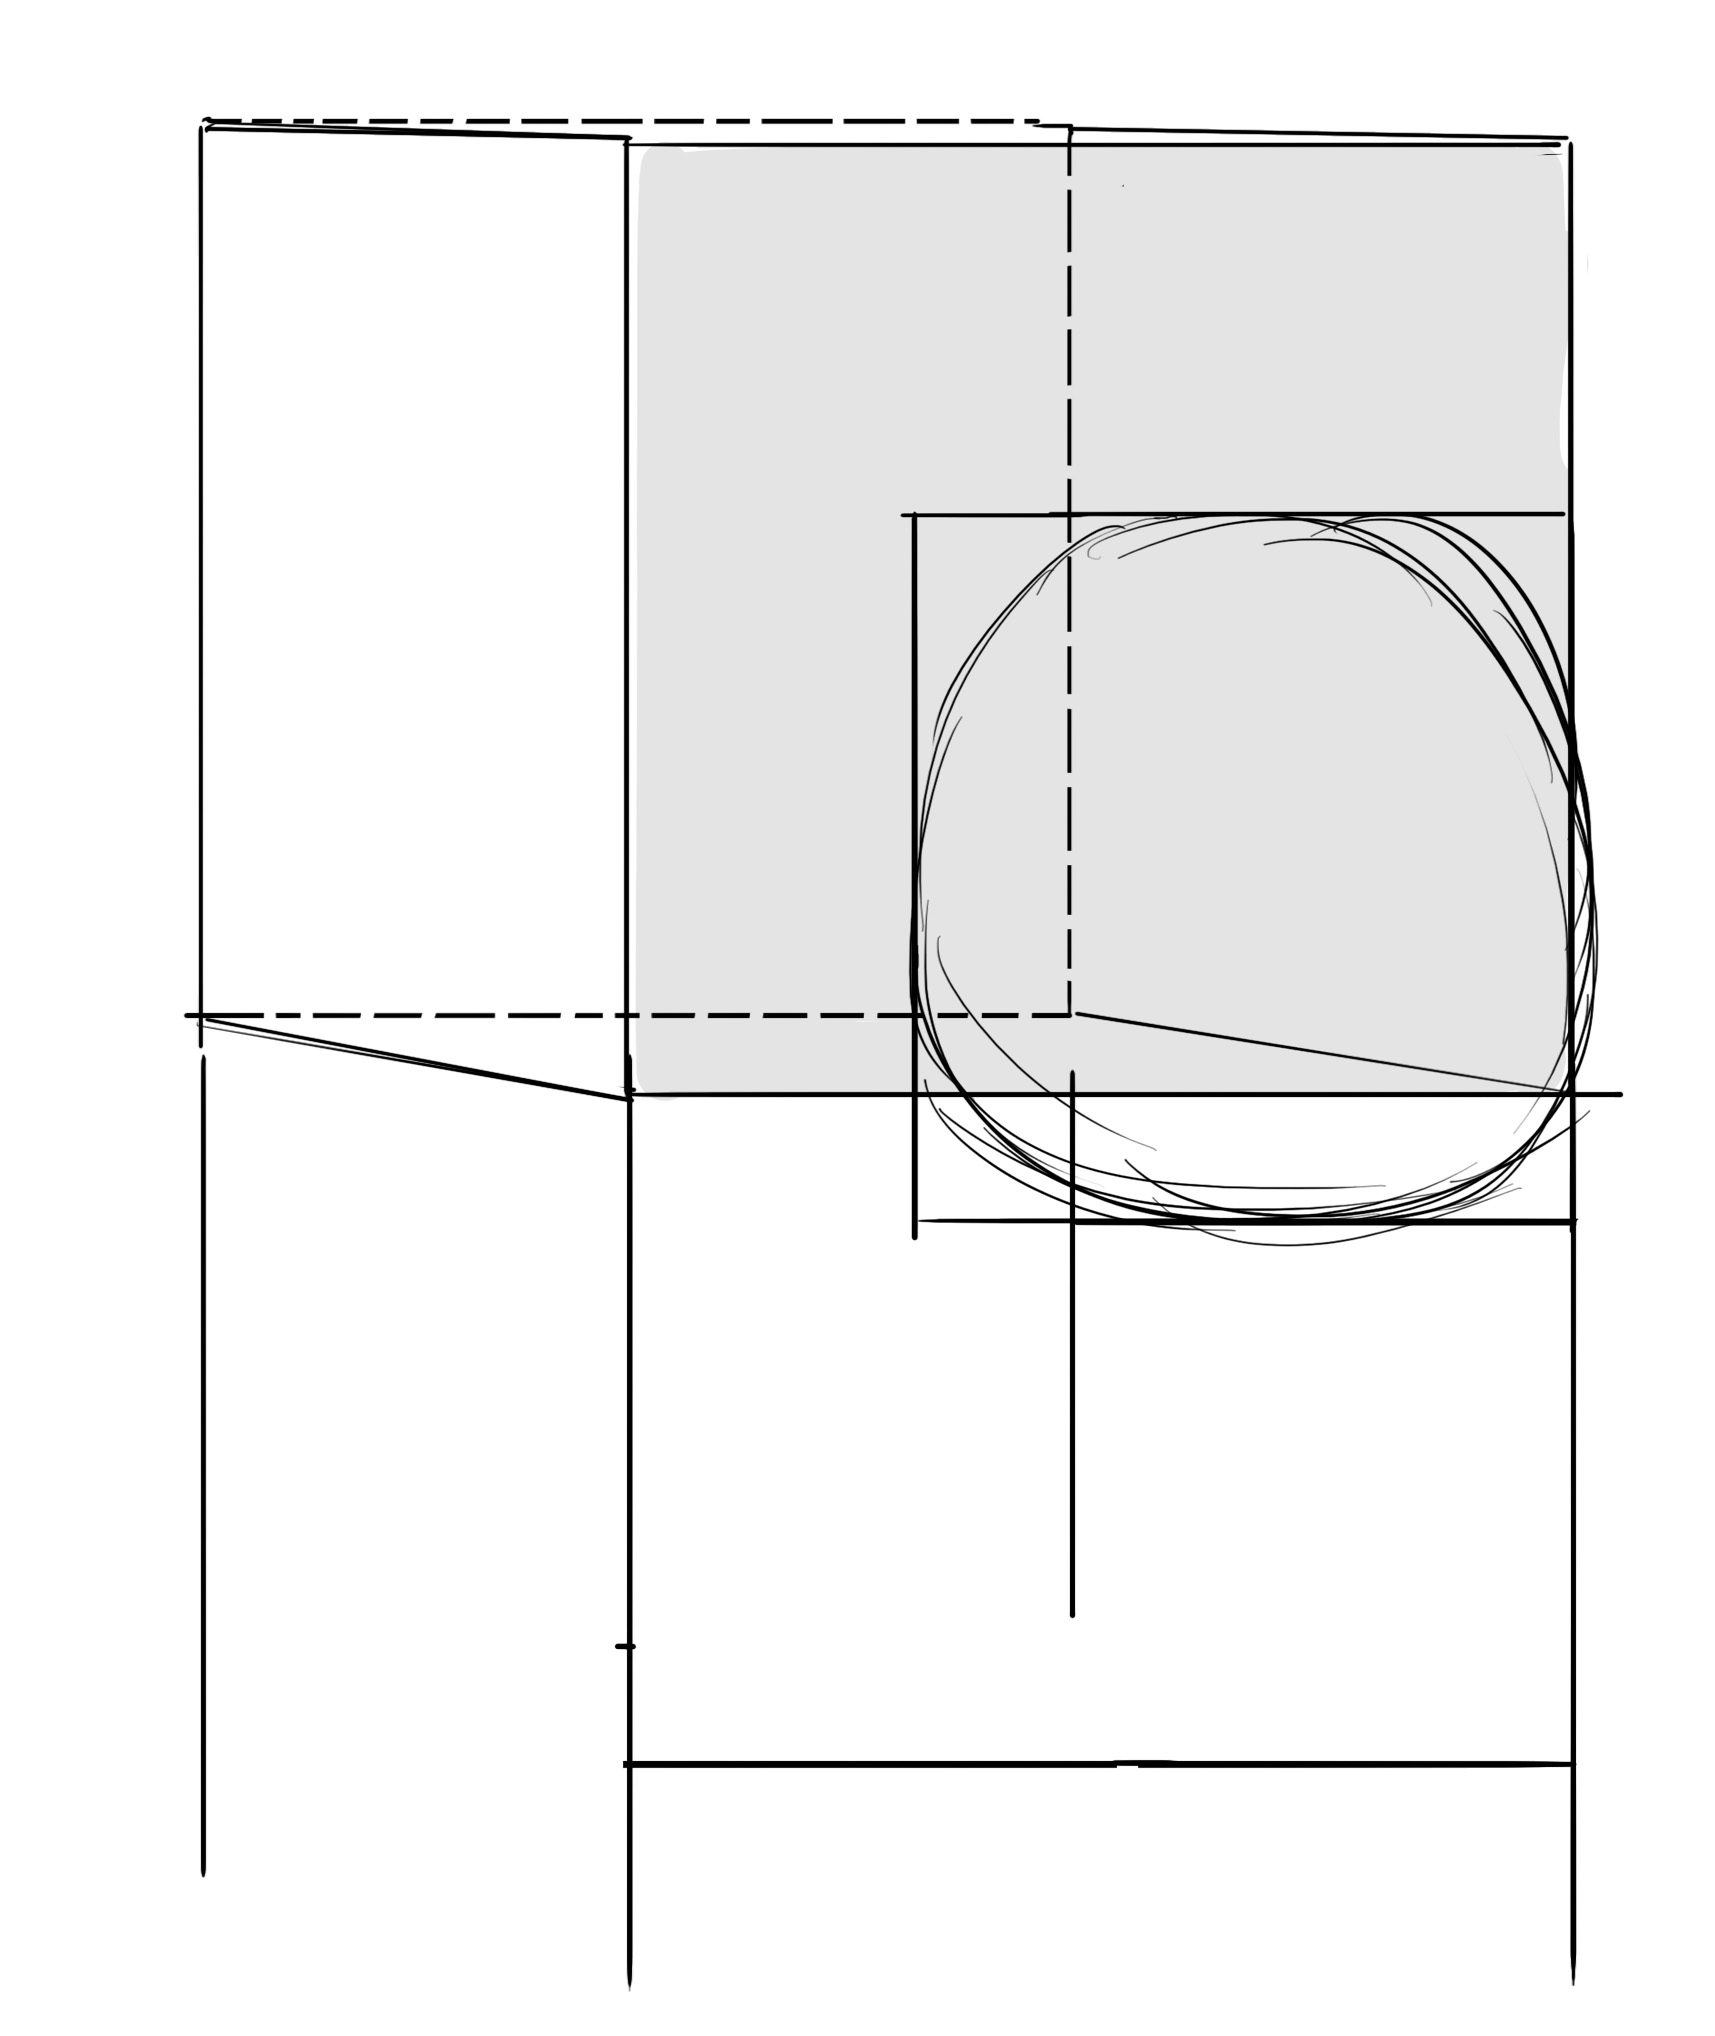
We go slightly less low for the rear end and connect the front and the rear which should give something like this:

THE DETAILS OF THE DRAWING
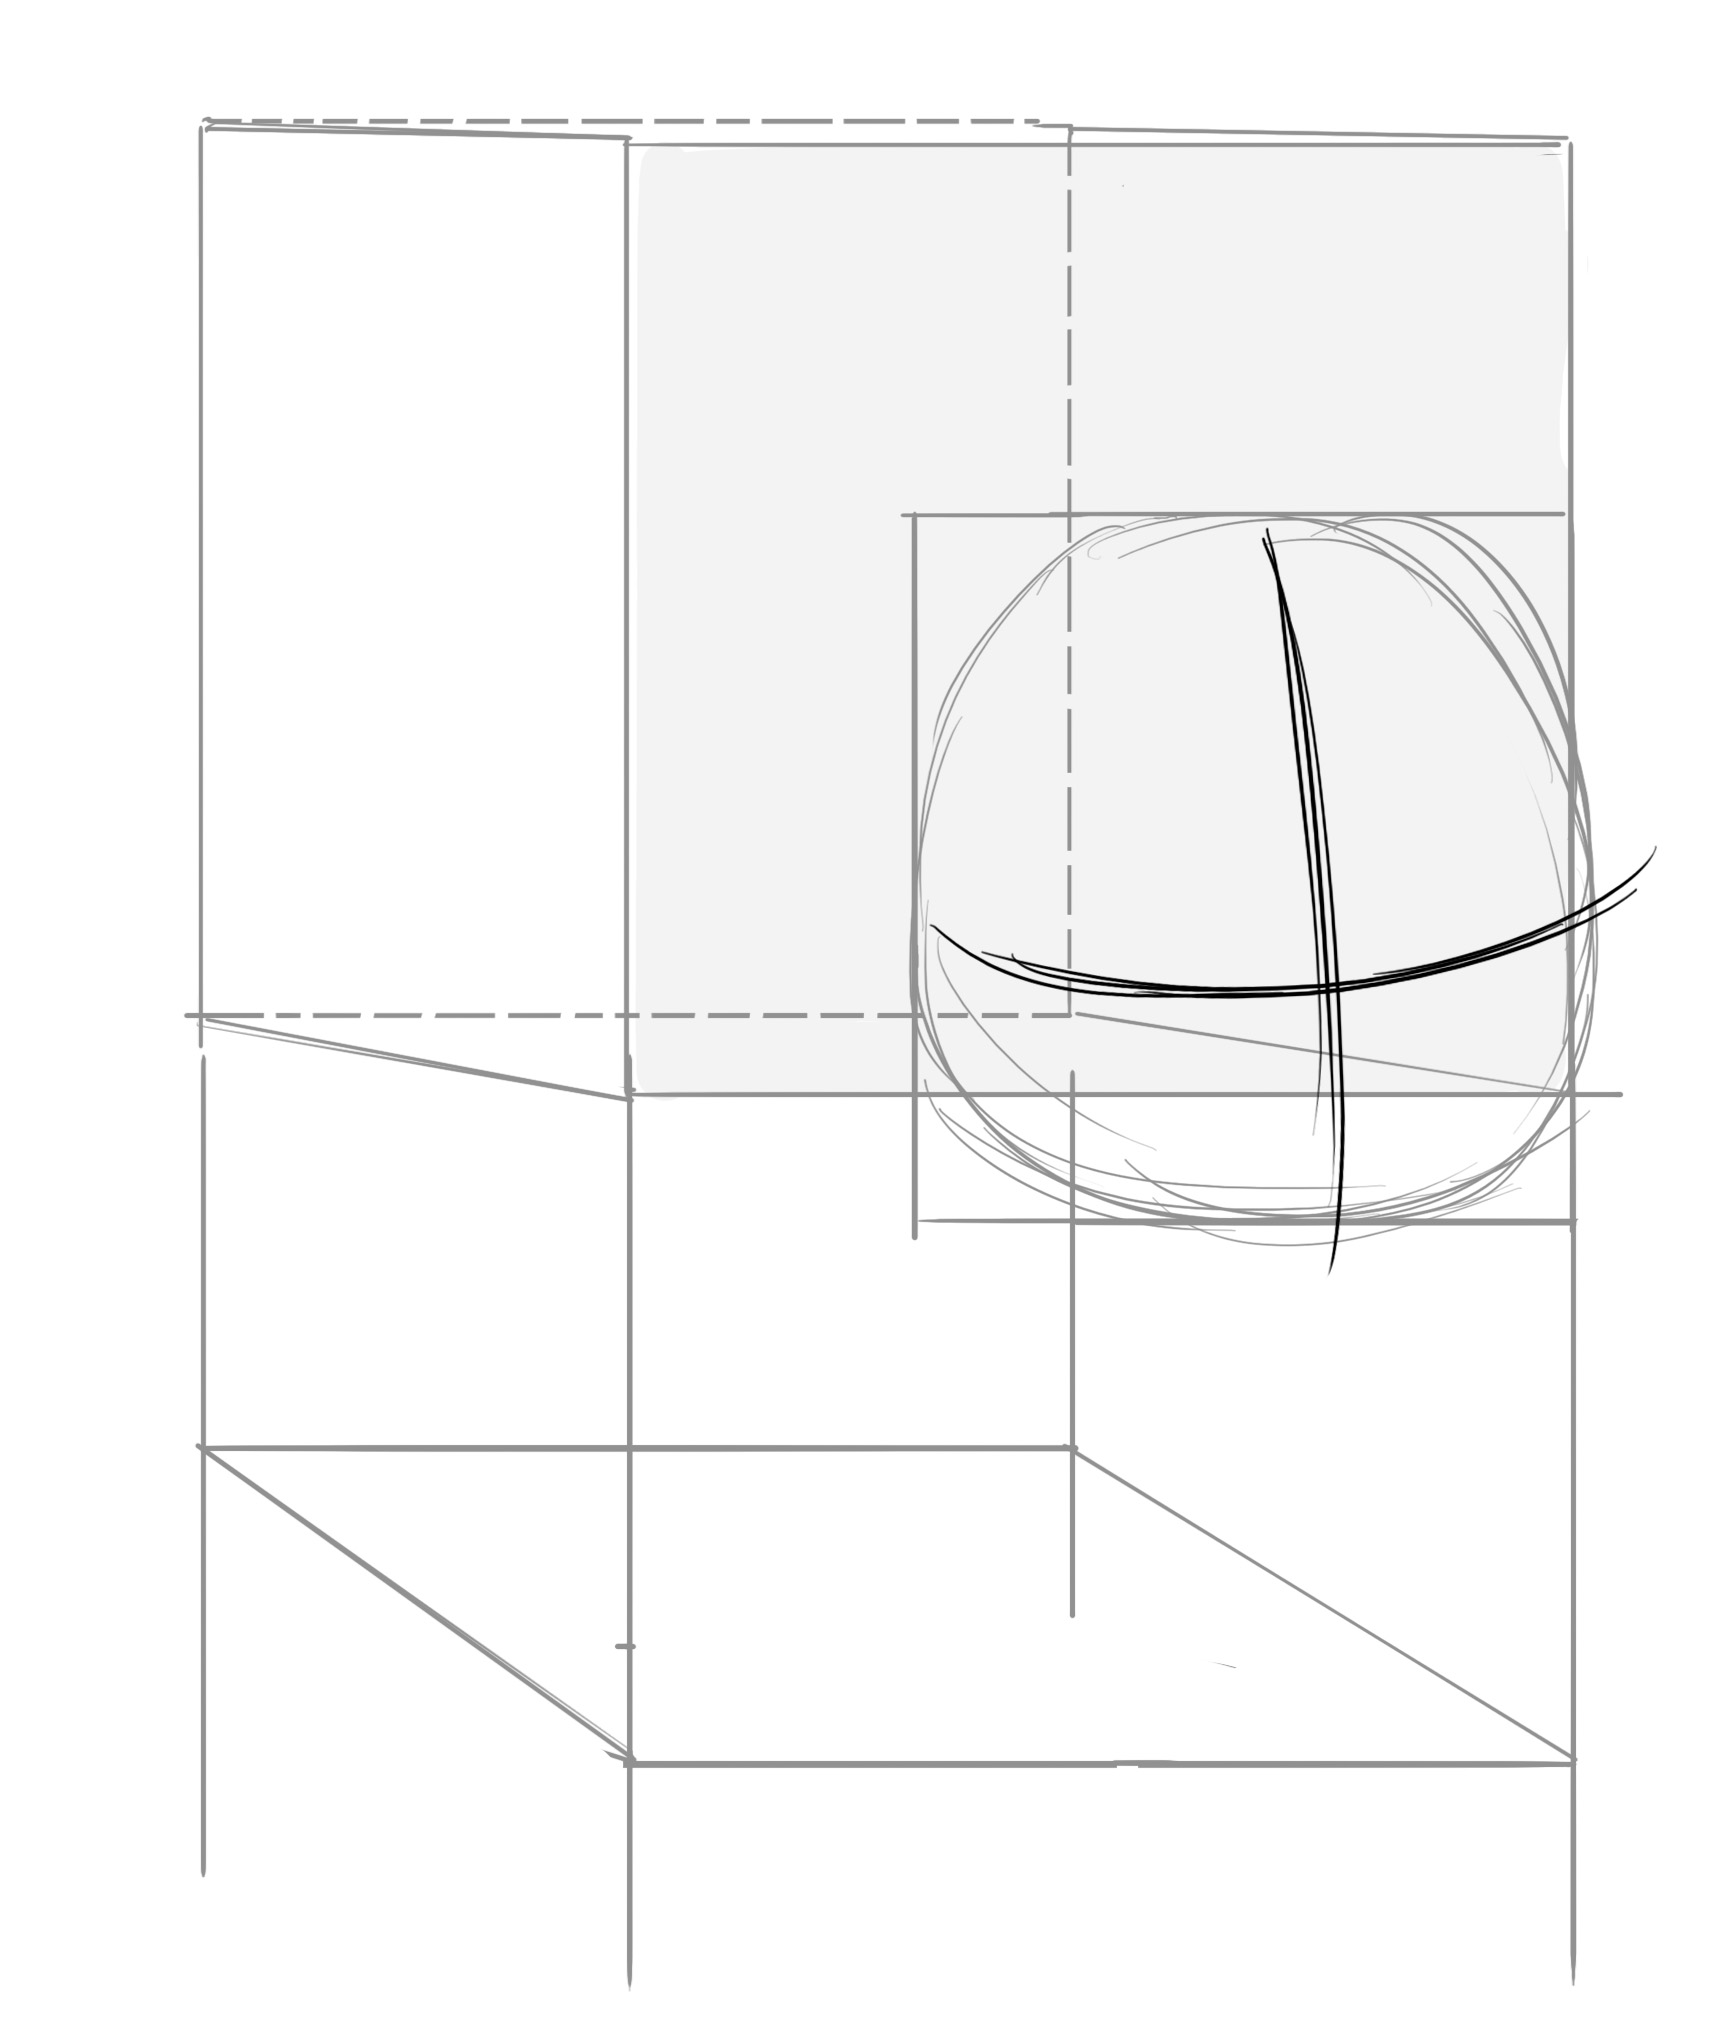
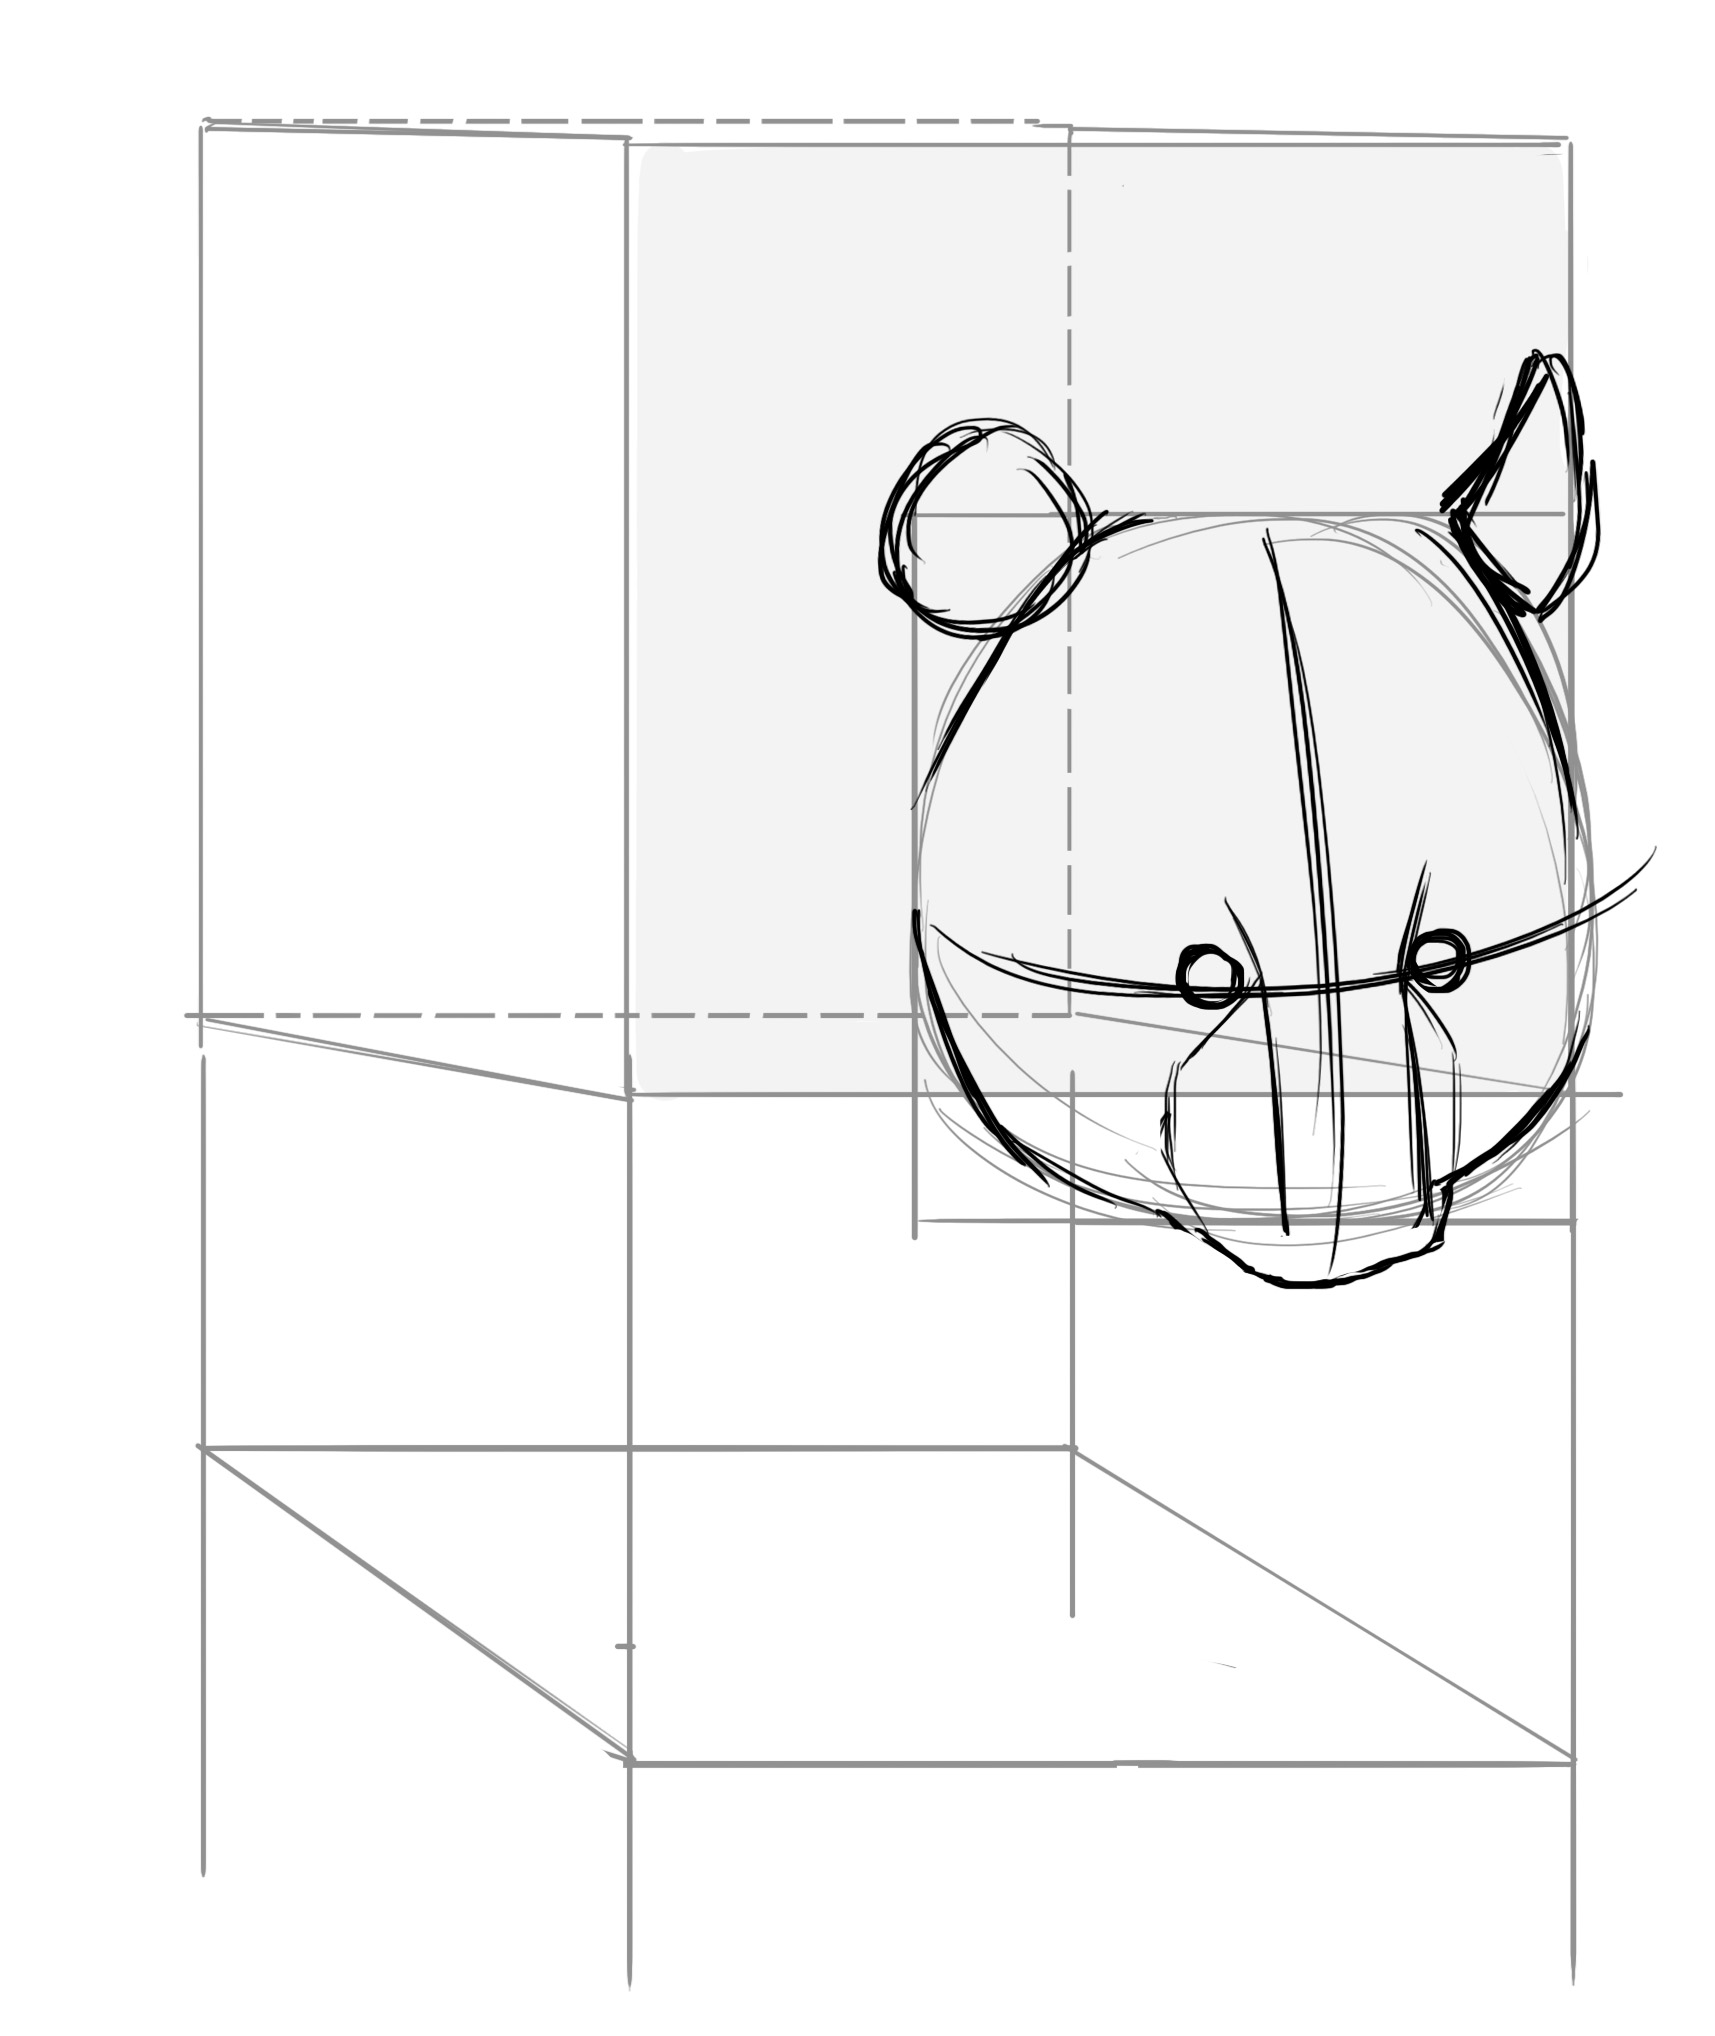
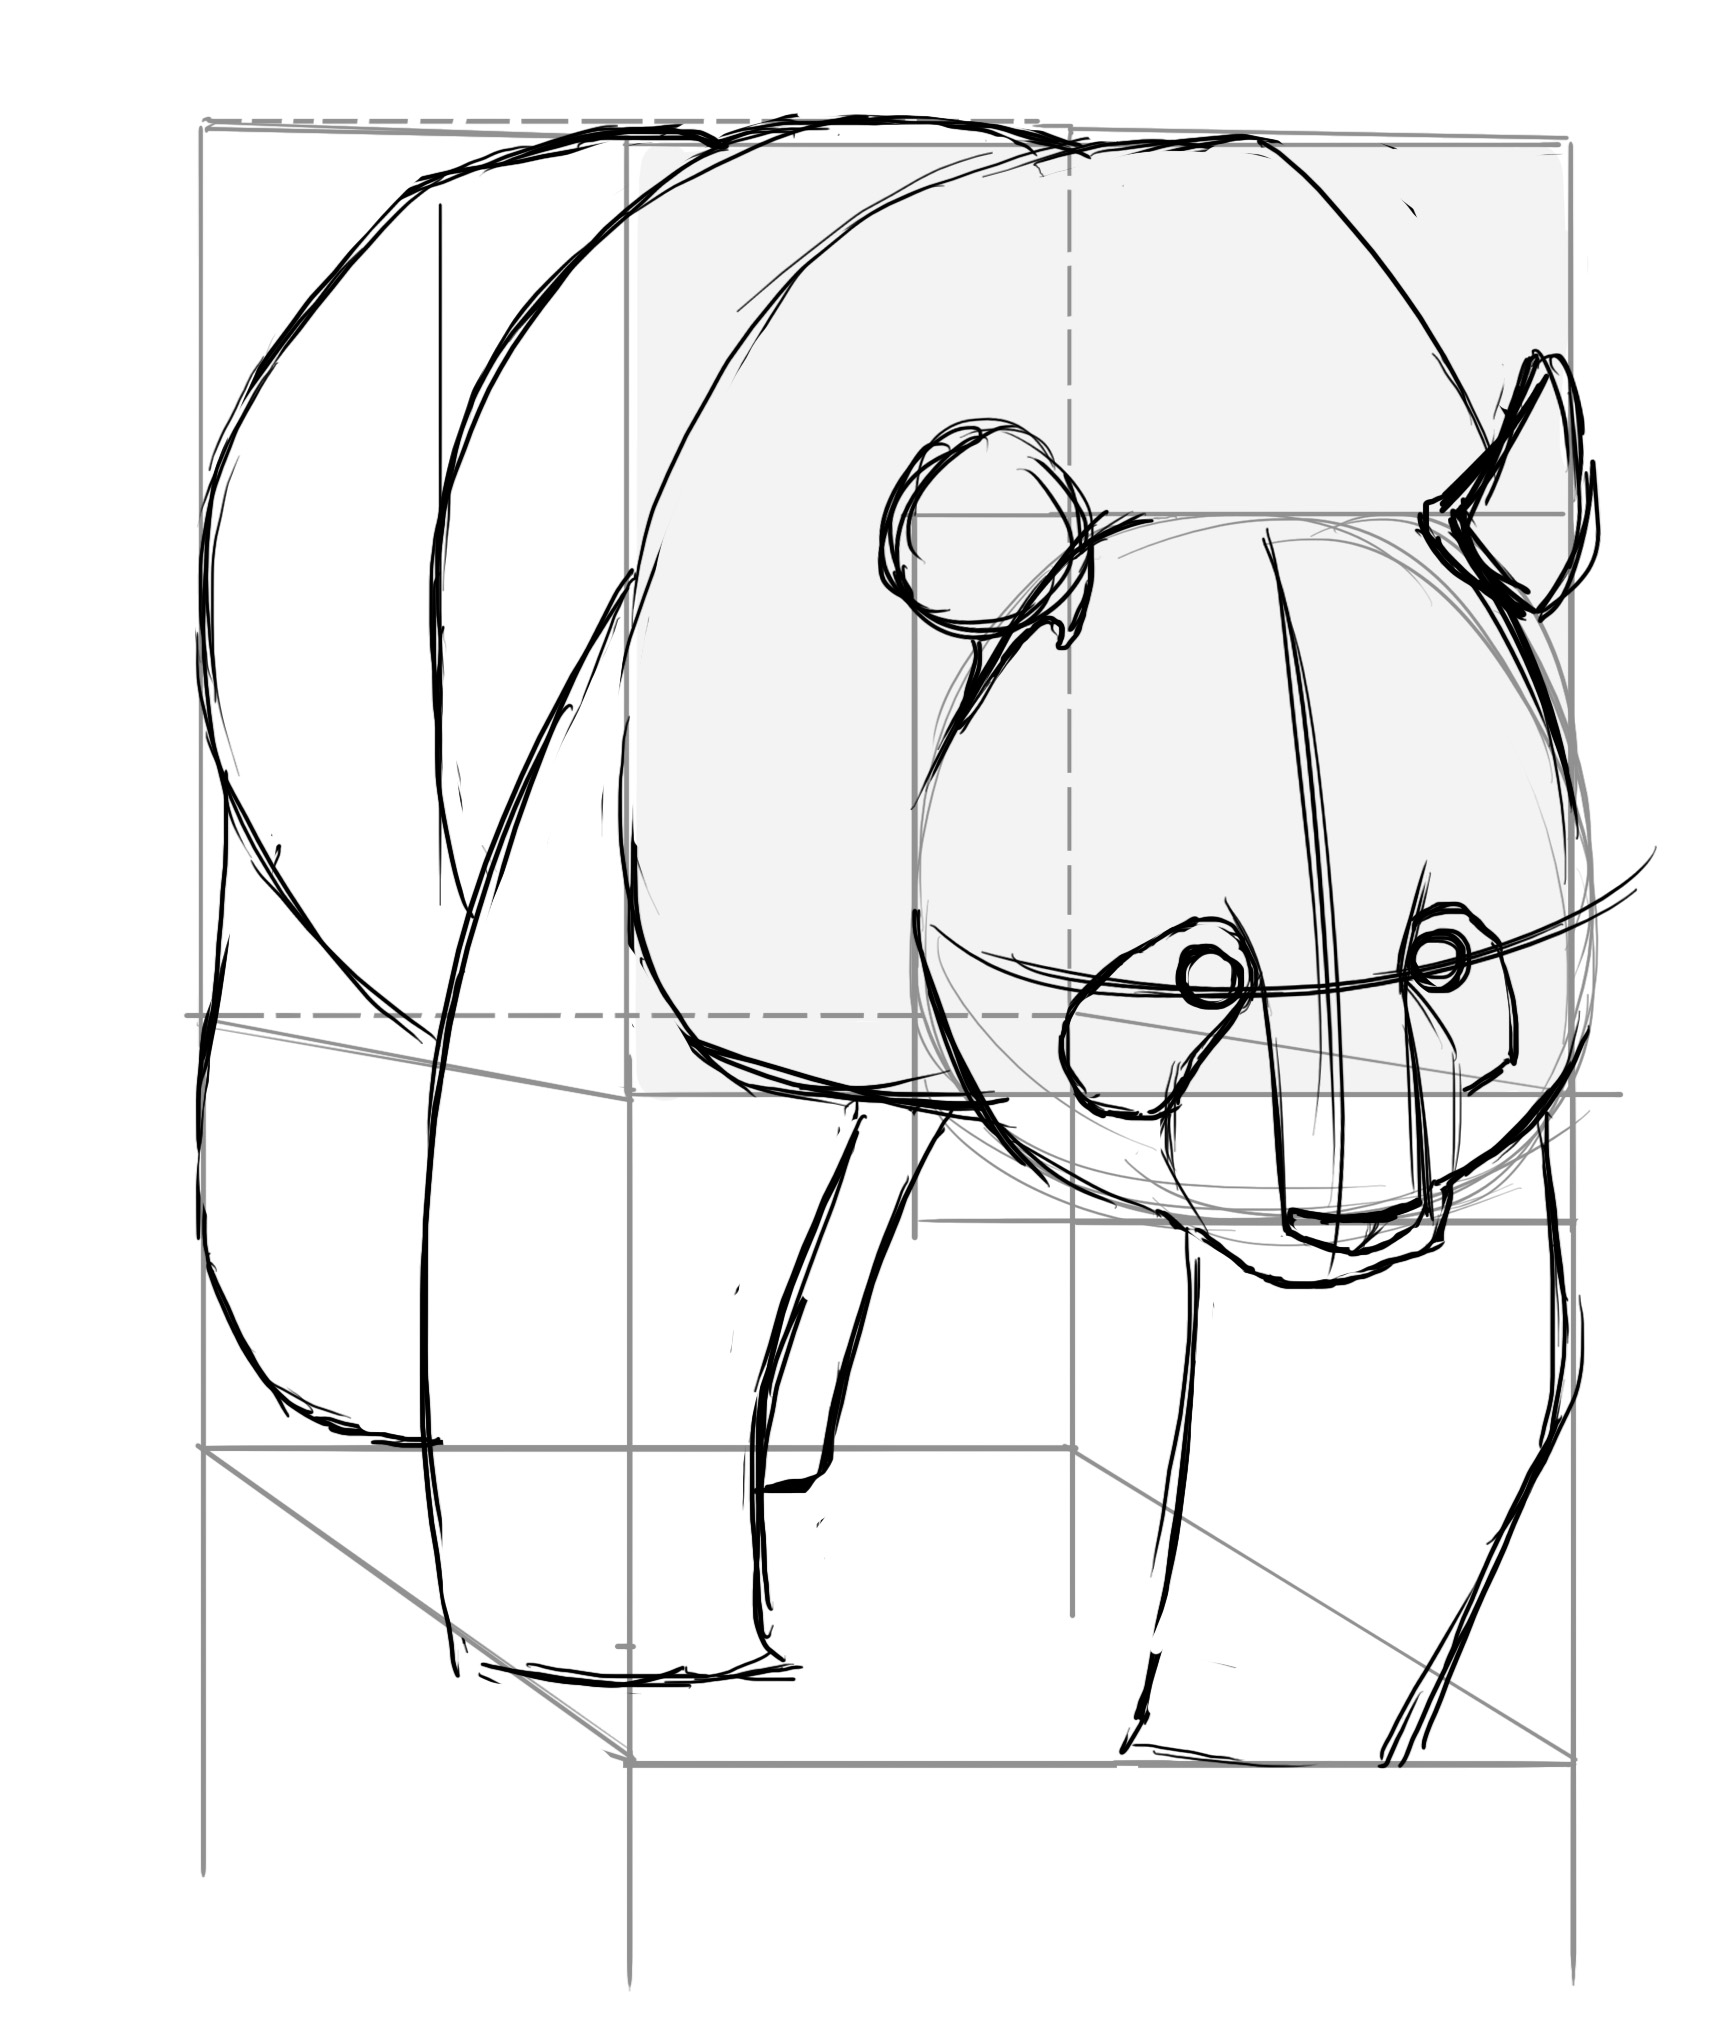
So let's start detailing all of that. Let's get back to the head! We place our usual cross marking the middle of the head and therefore under which angle we see it. Here, our panda's head is slightly tilted to the left and lowered.
THE PANDA'S HEAD
The eyes are placed at about 2/3, which also marks the beginning of the muzzle. The muzzle forms a rectangle one and a half times longer than wide.


The eyes are placed slightly wider apart than the edges of the nose.
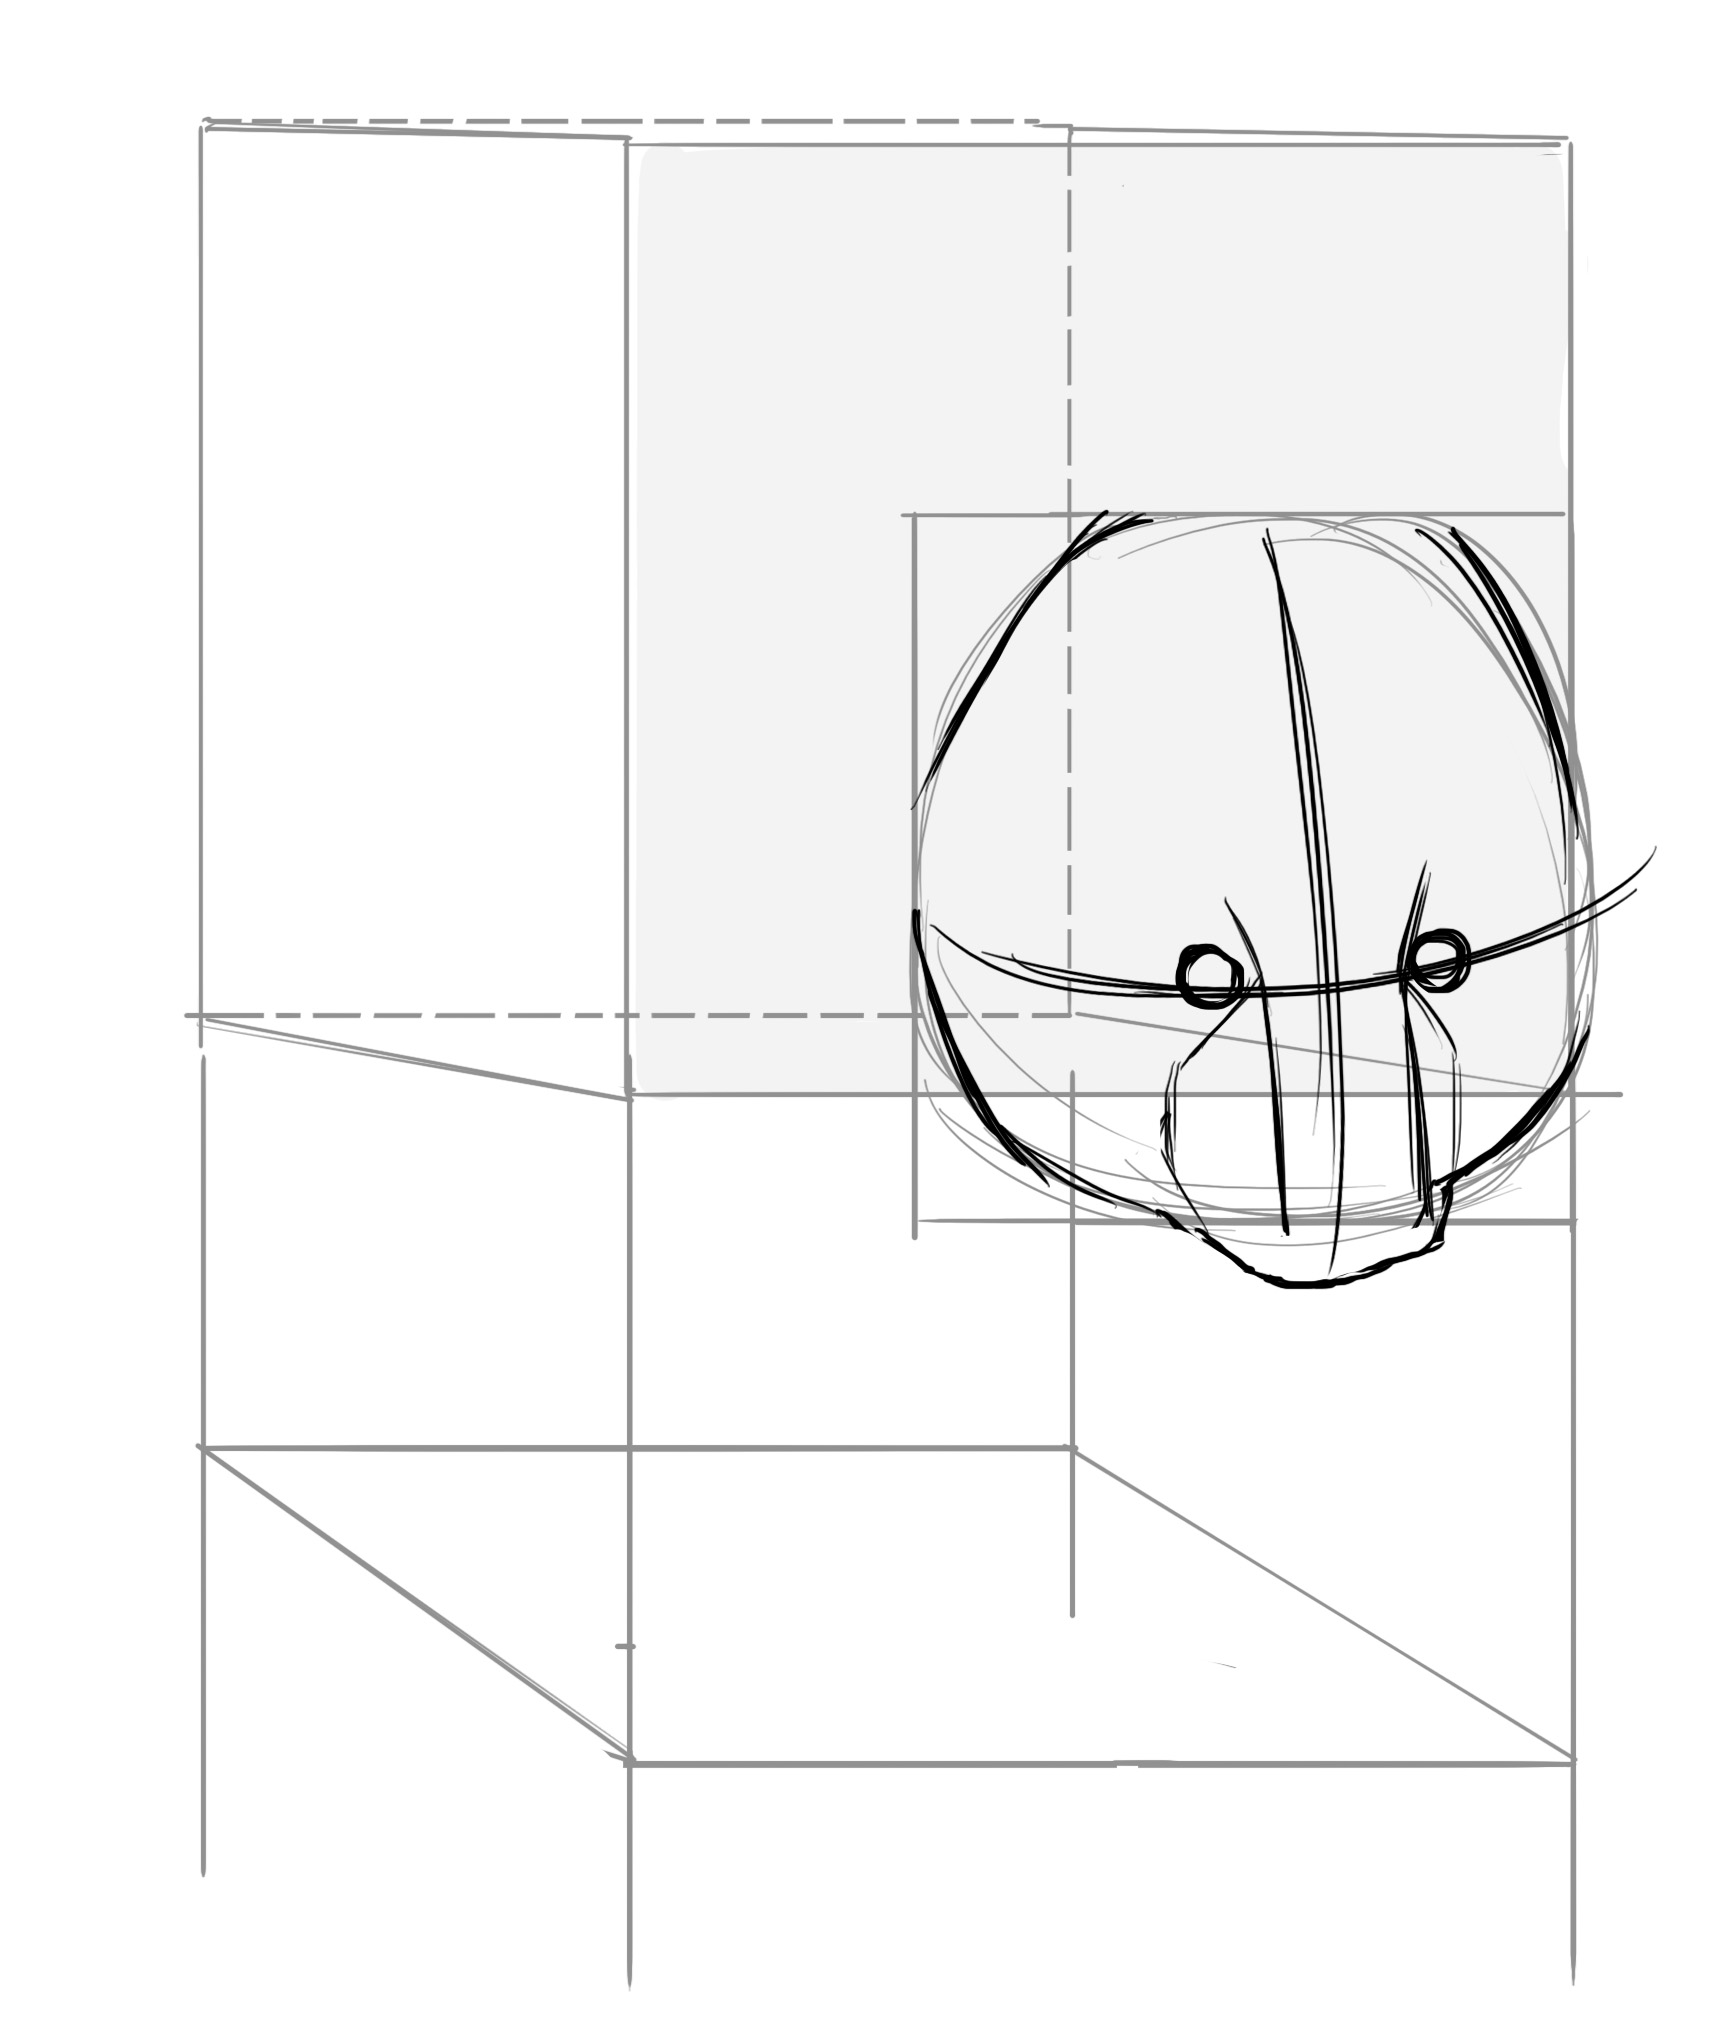
The ears are at the very top of the skull, still offset to the sides compared to the eyes. We can say that there is a little less than two muzzle widths between the ears. They are about as wide as they are tall.
DRAWING THE BODY
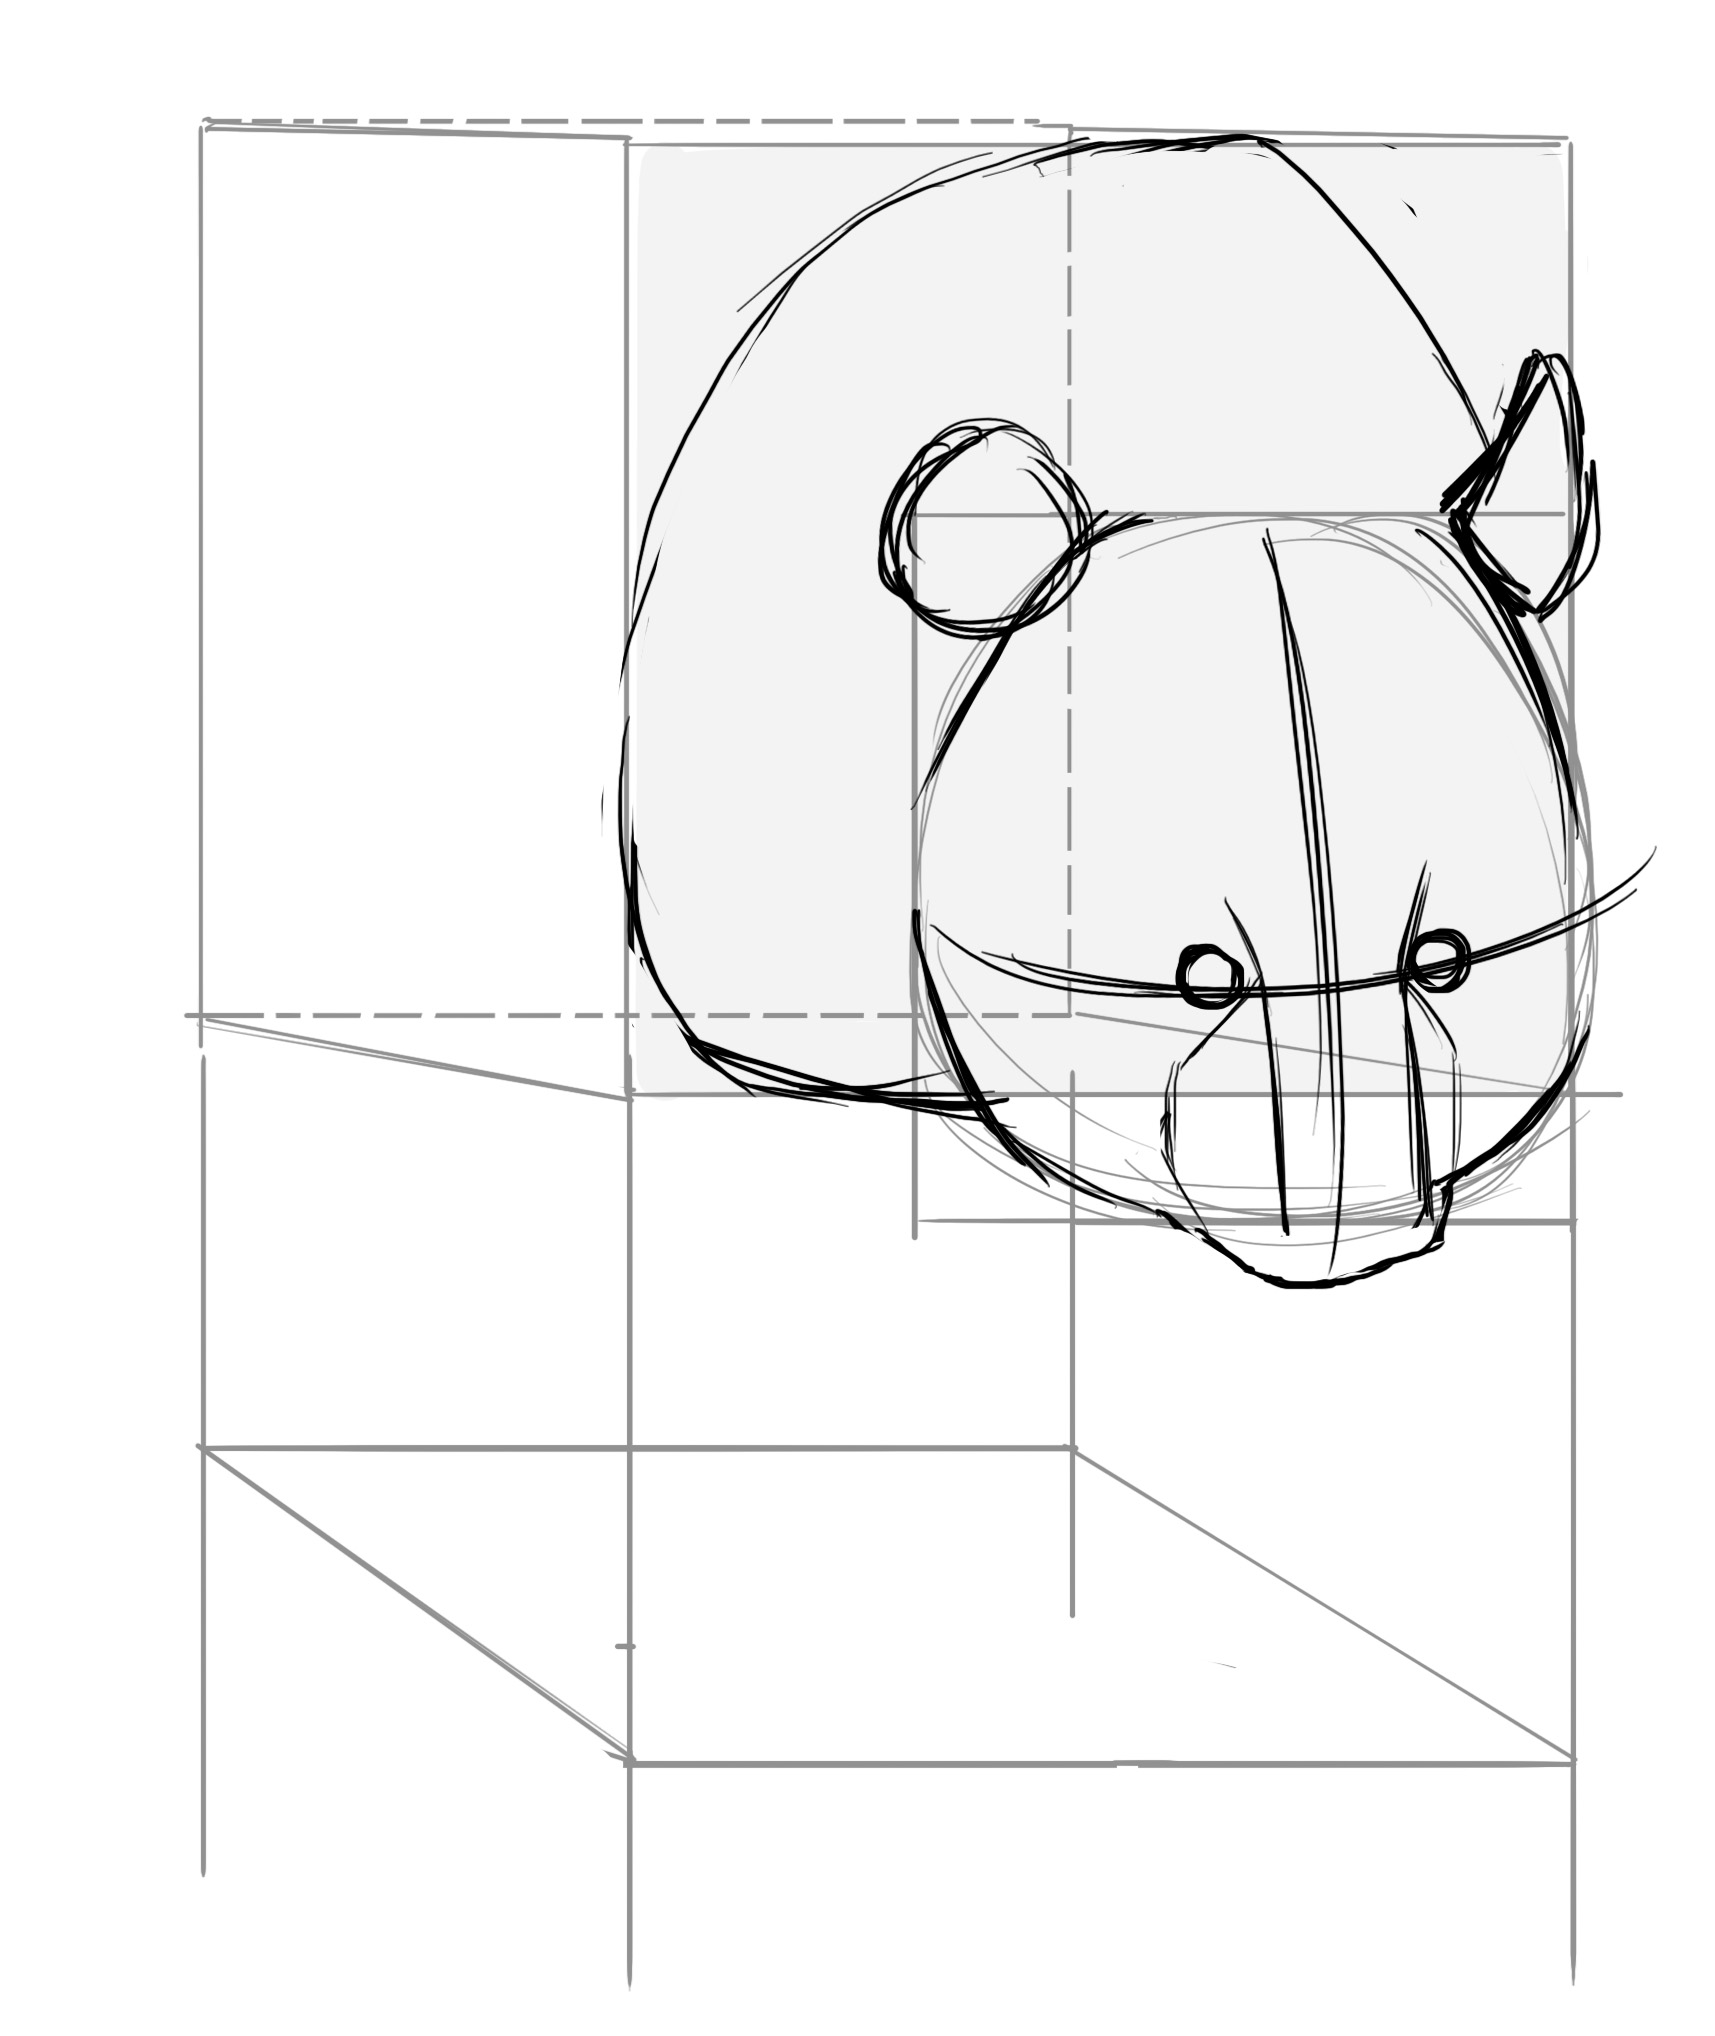
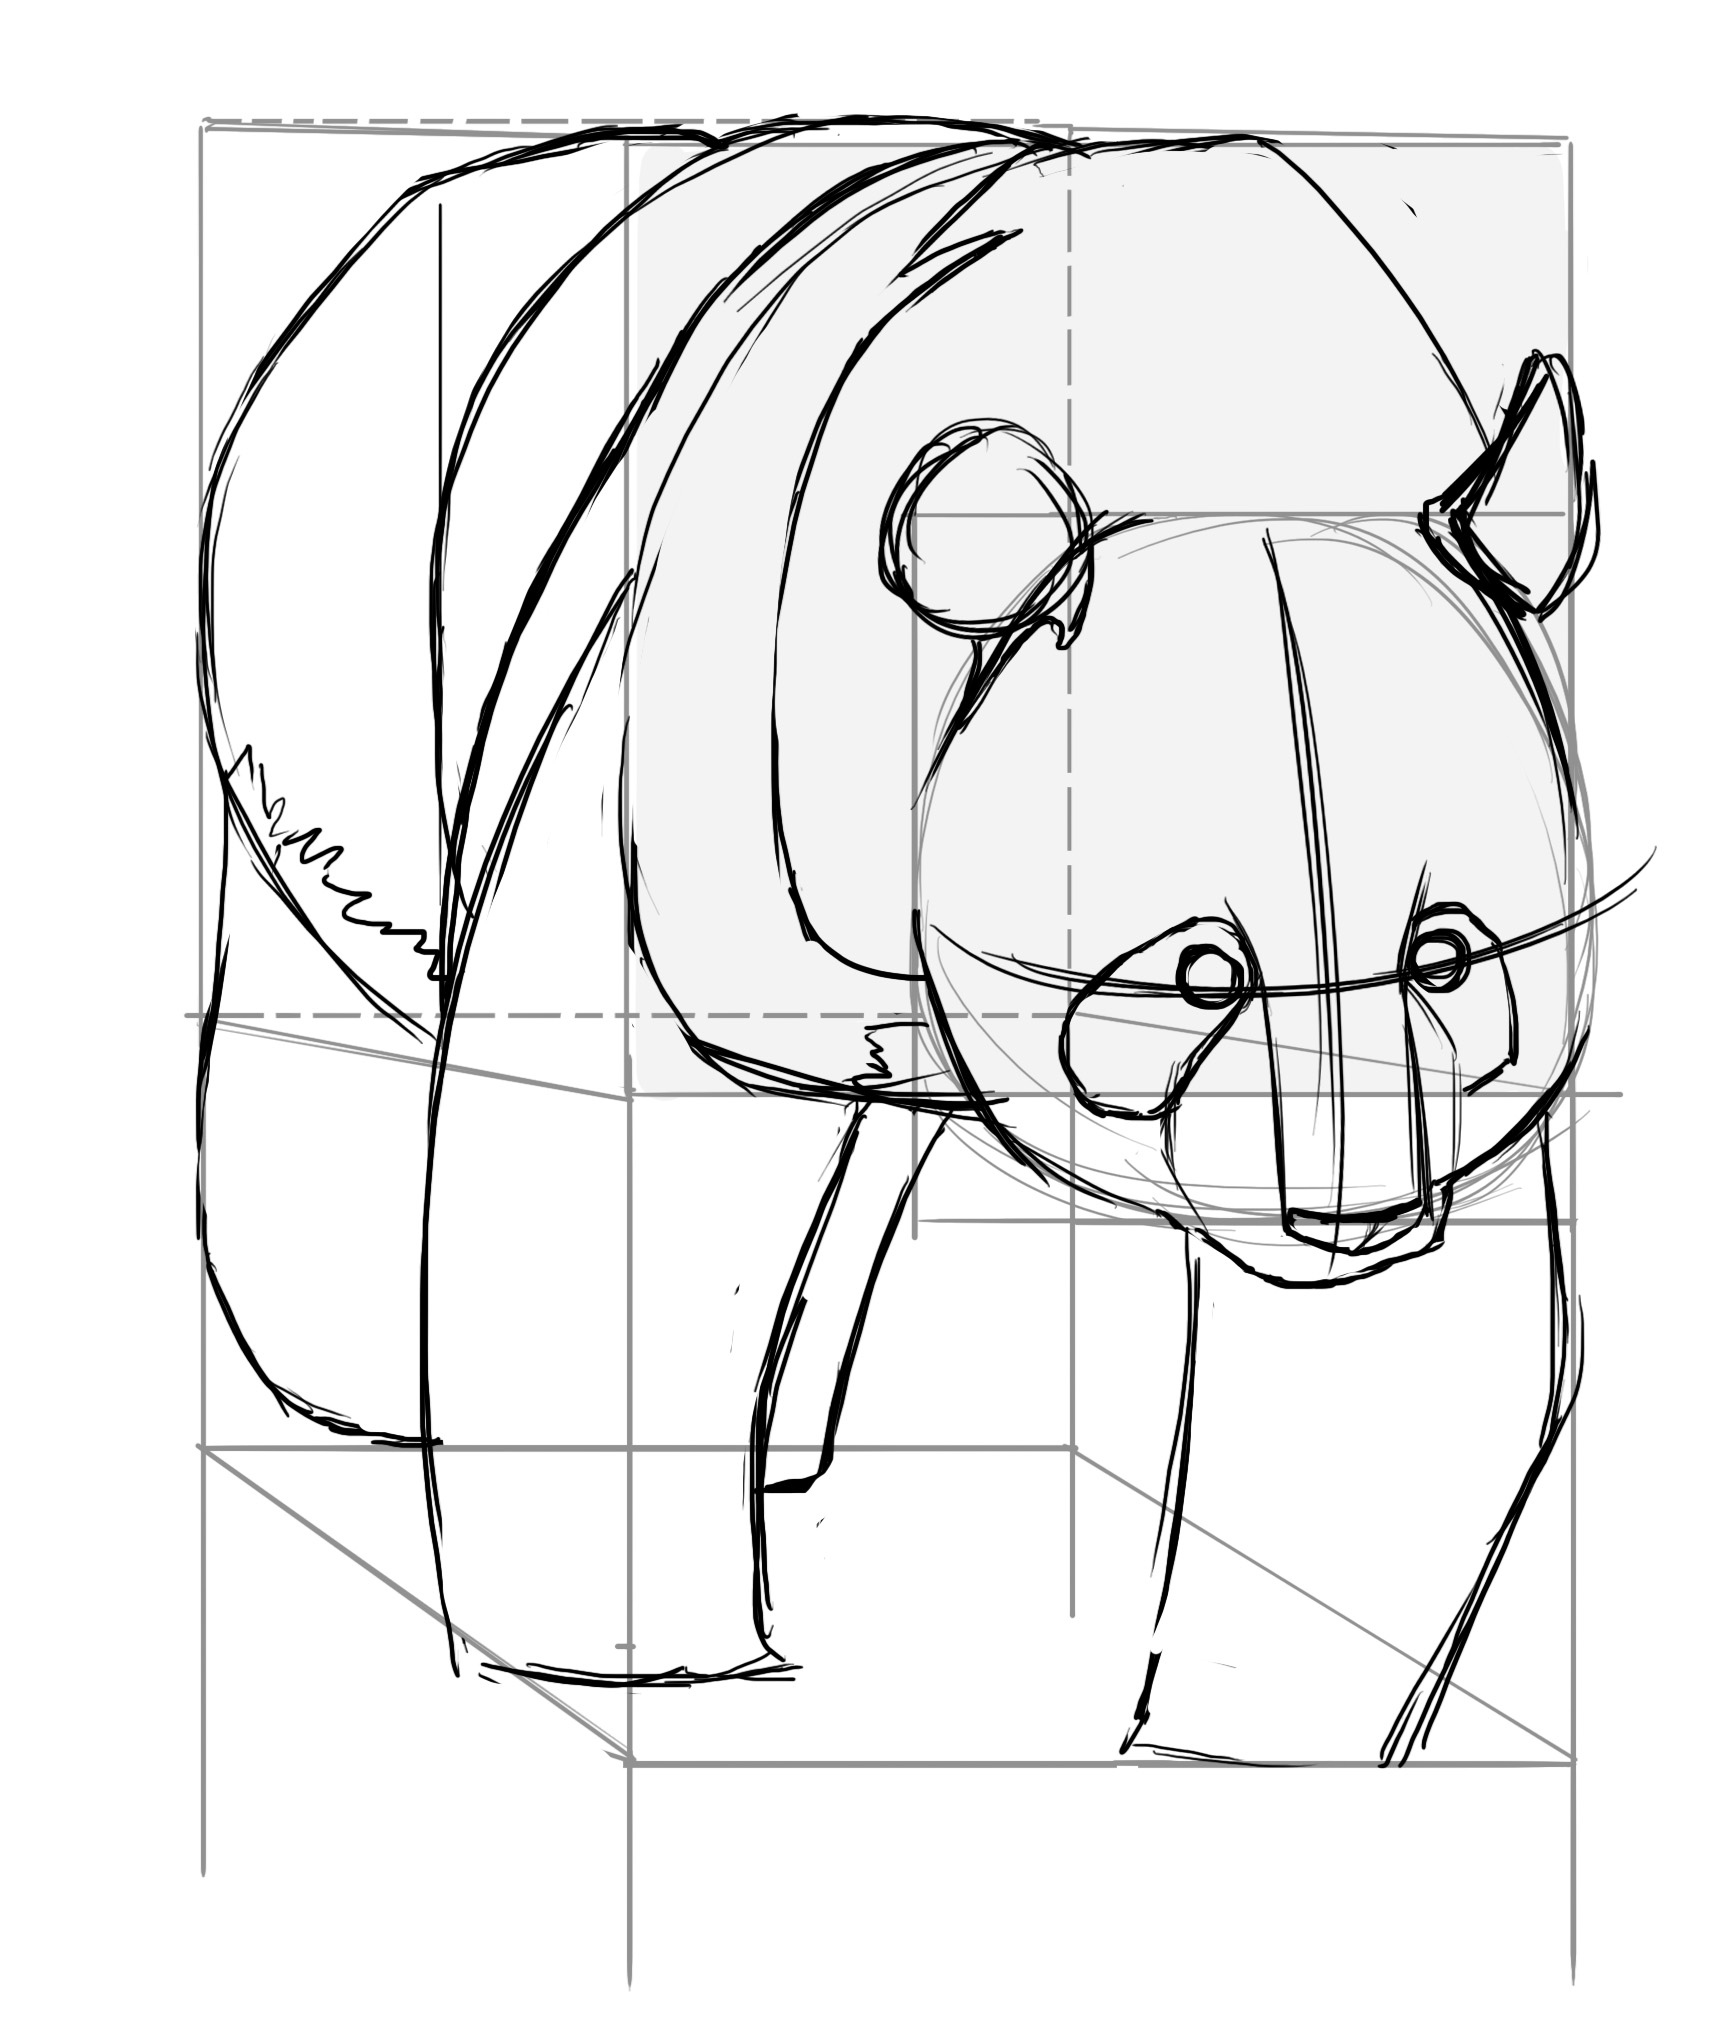
We are going to tackle the body now. It is generally quite round. Be careful, we are dealing with something living, so there is no need for perfect ellipses, quite the contrary. Here I'm going to first place the chest, which has a somewhat potato-like shape. Our panda is leaning on its left front paw (so the right one for us), so its shoulder on this side is higher than the other. There is an incline.
We'll take this opportunity to position the legs. Obviously, place them within the rectangle we drew earlier on the ground. I think you've noticed, the right front leg (so the left one from our perspective) is set back. So do not place it at the same height as the other. I use two potato-like / rectangular shapes.
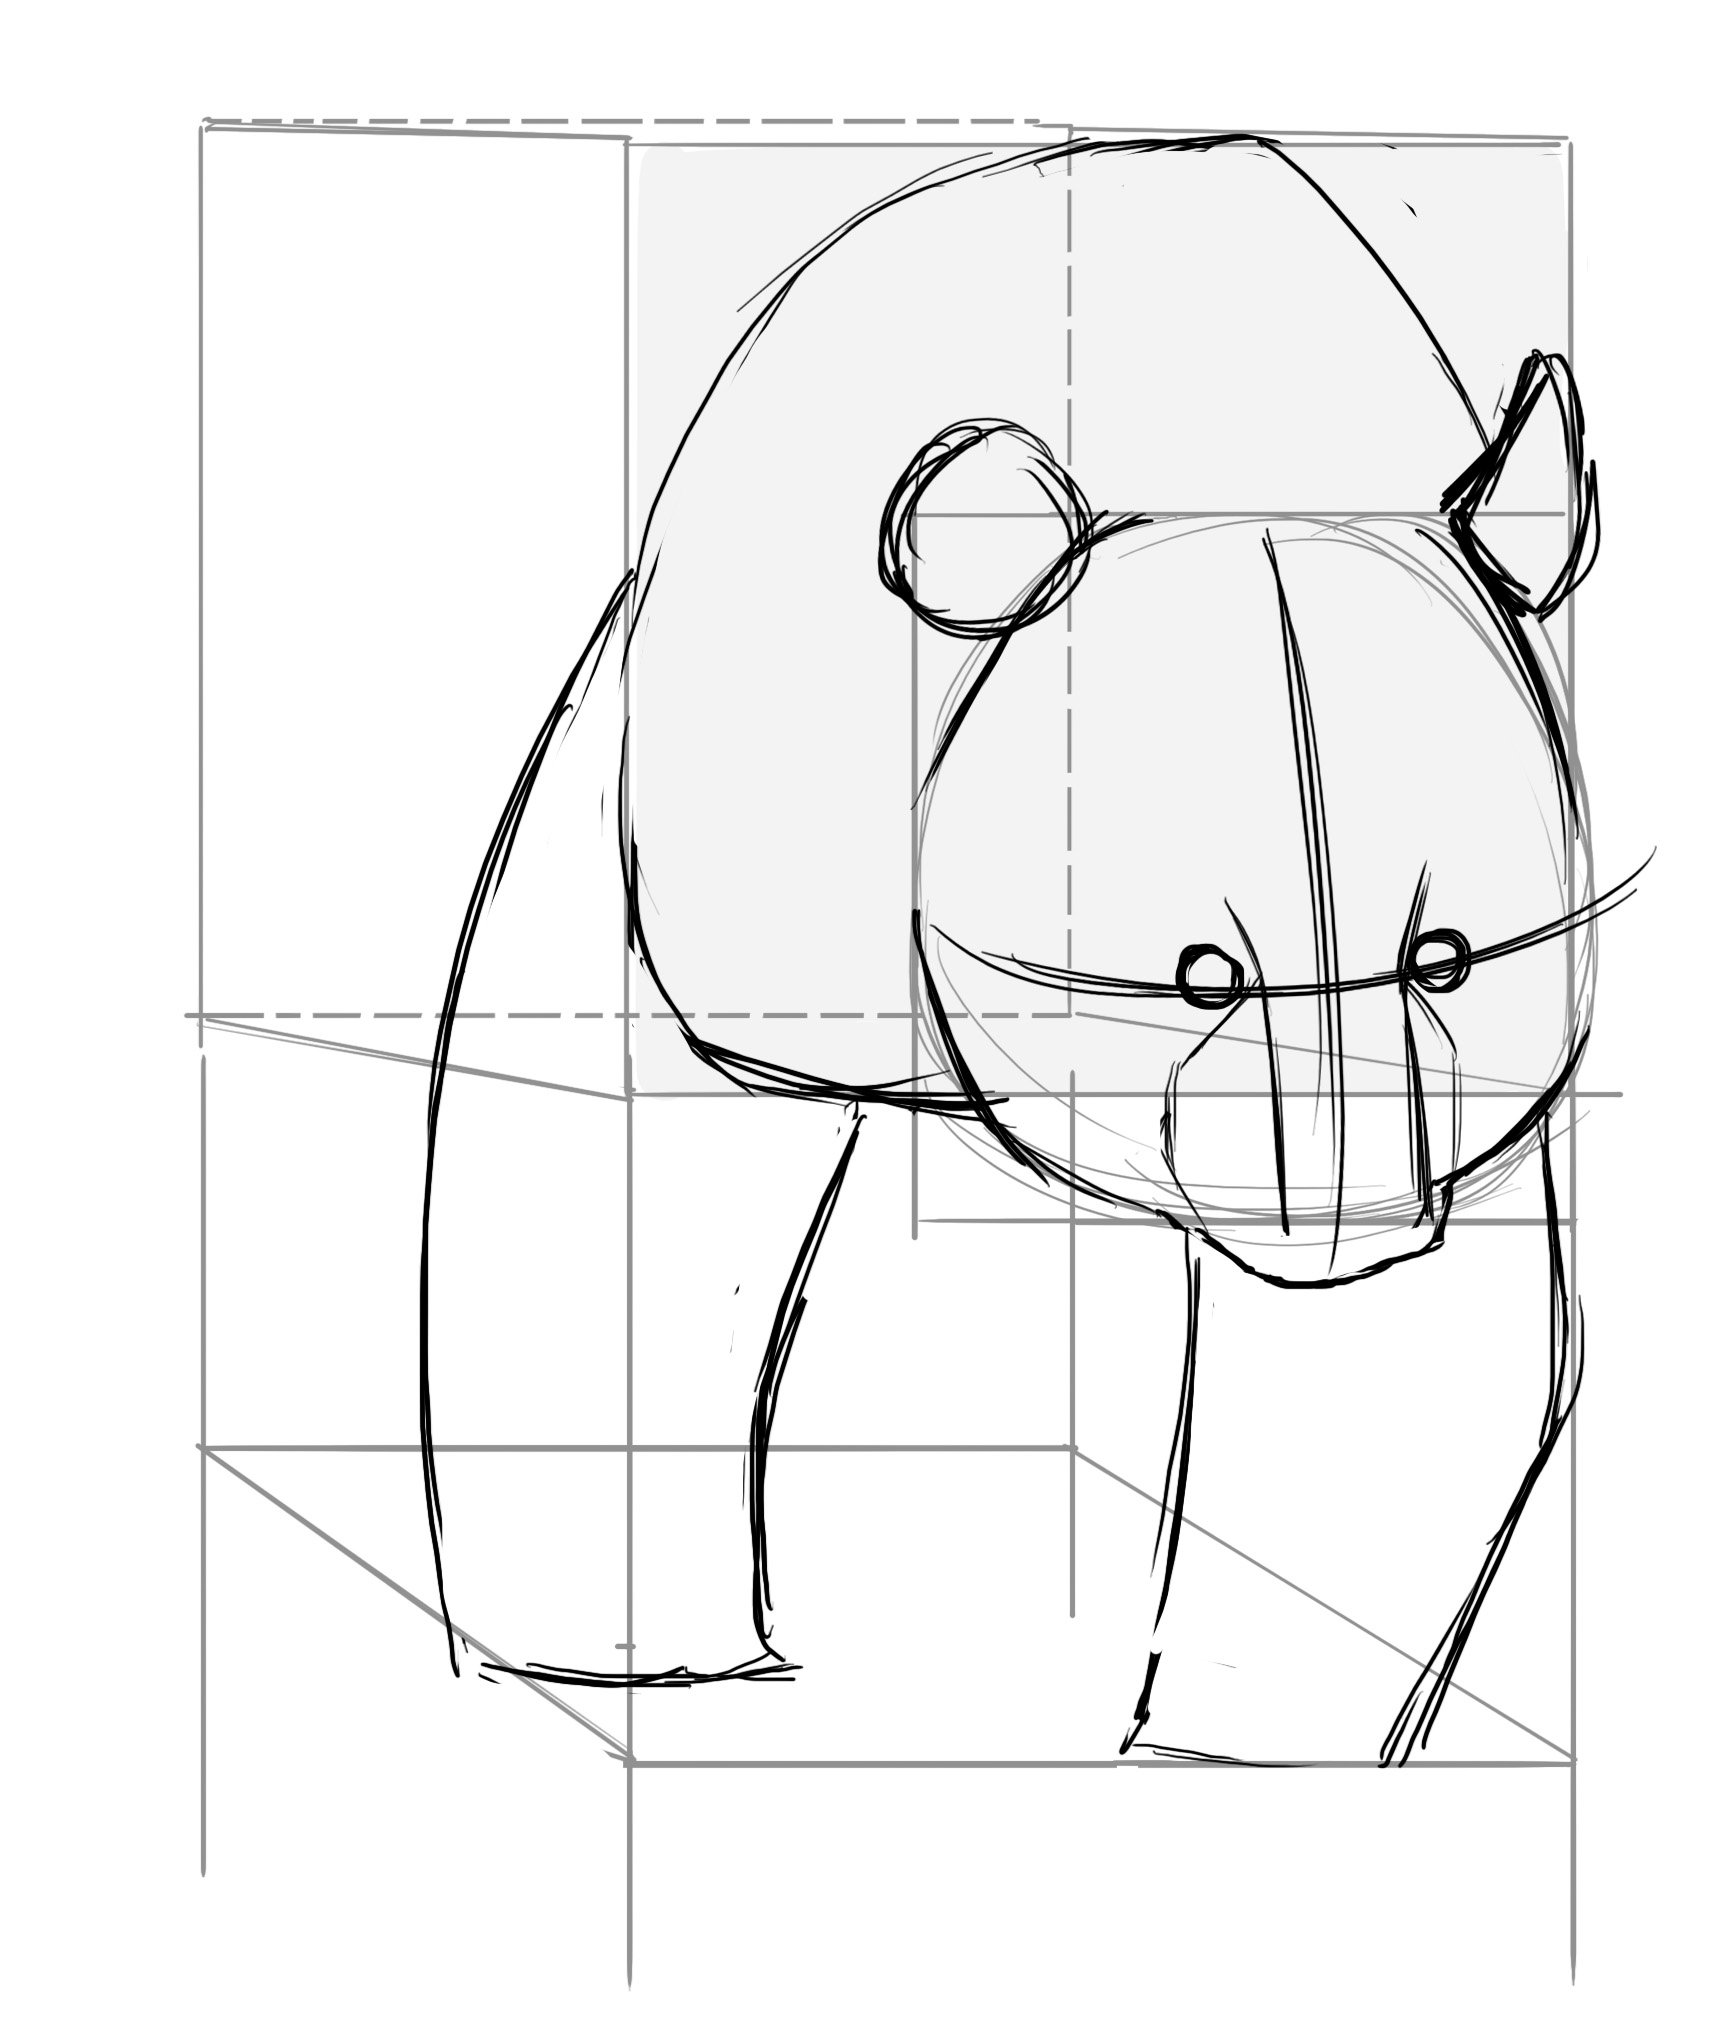
We draw the abdomen. Here, it takes up less than half of the remaining space between the chest and the hindquarters (take this measurement in relation to a vertical edge, because the hindquarters will round out and thus "reduce" afterwards if you measure it too high and it will distort your proportions).

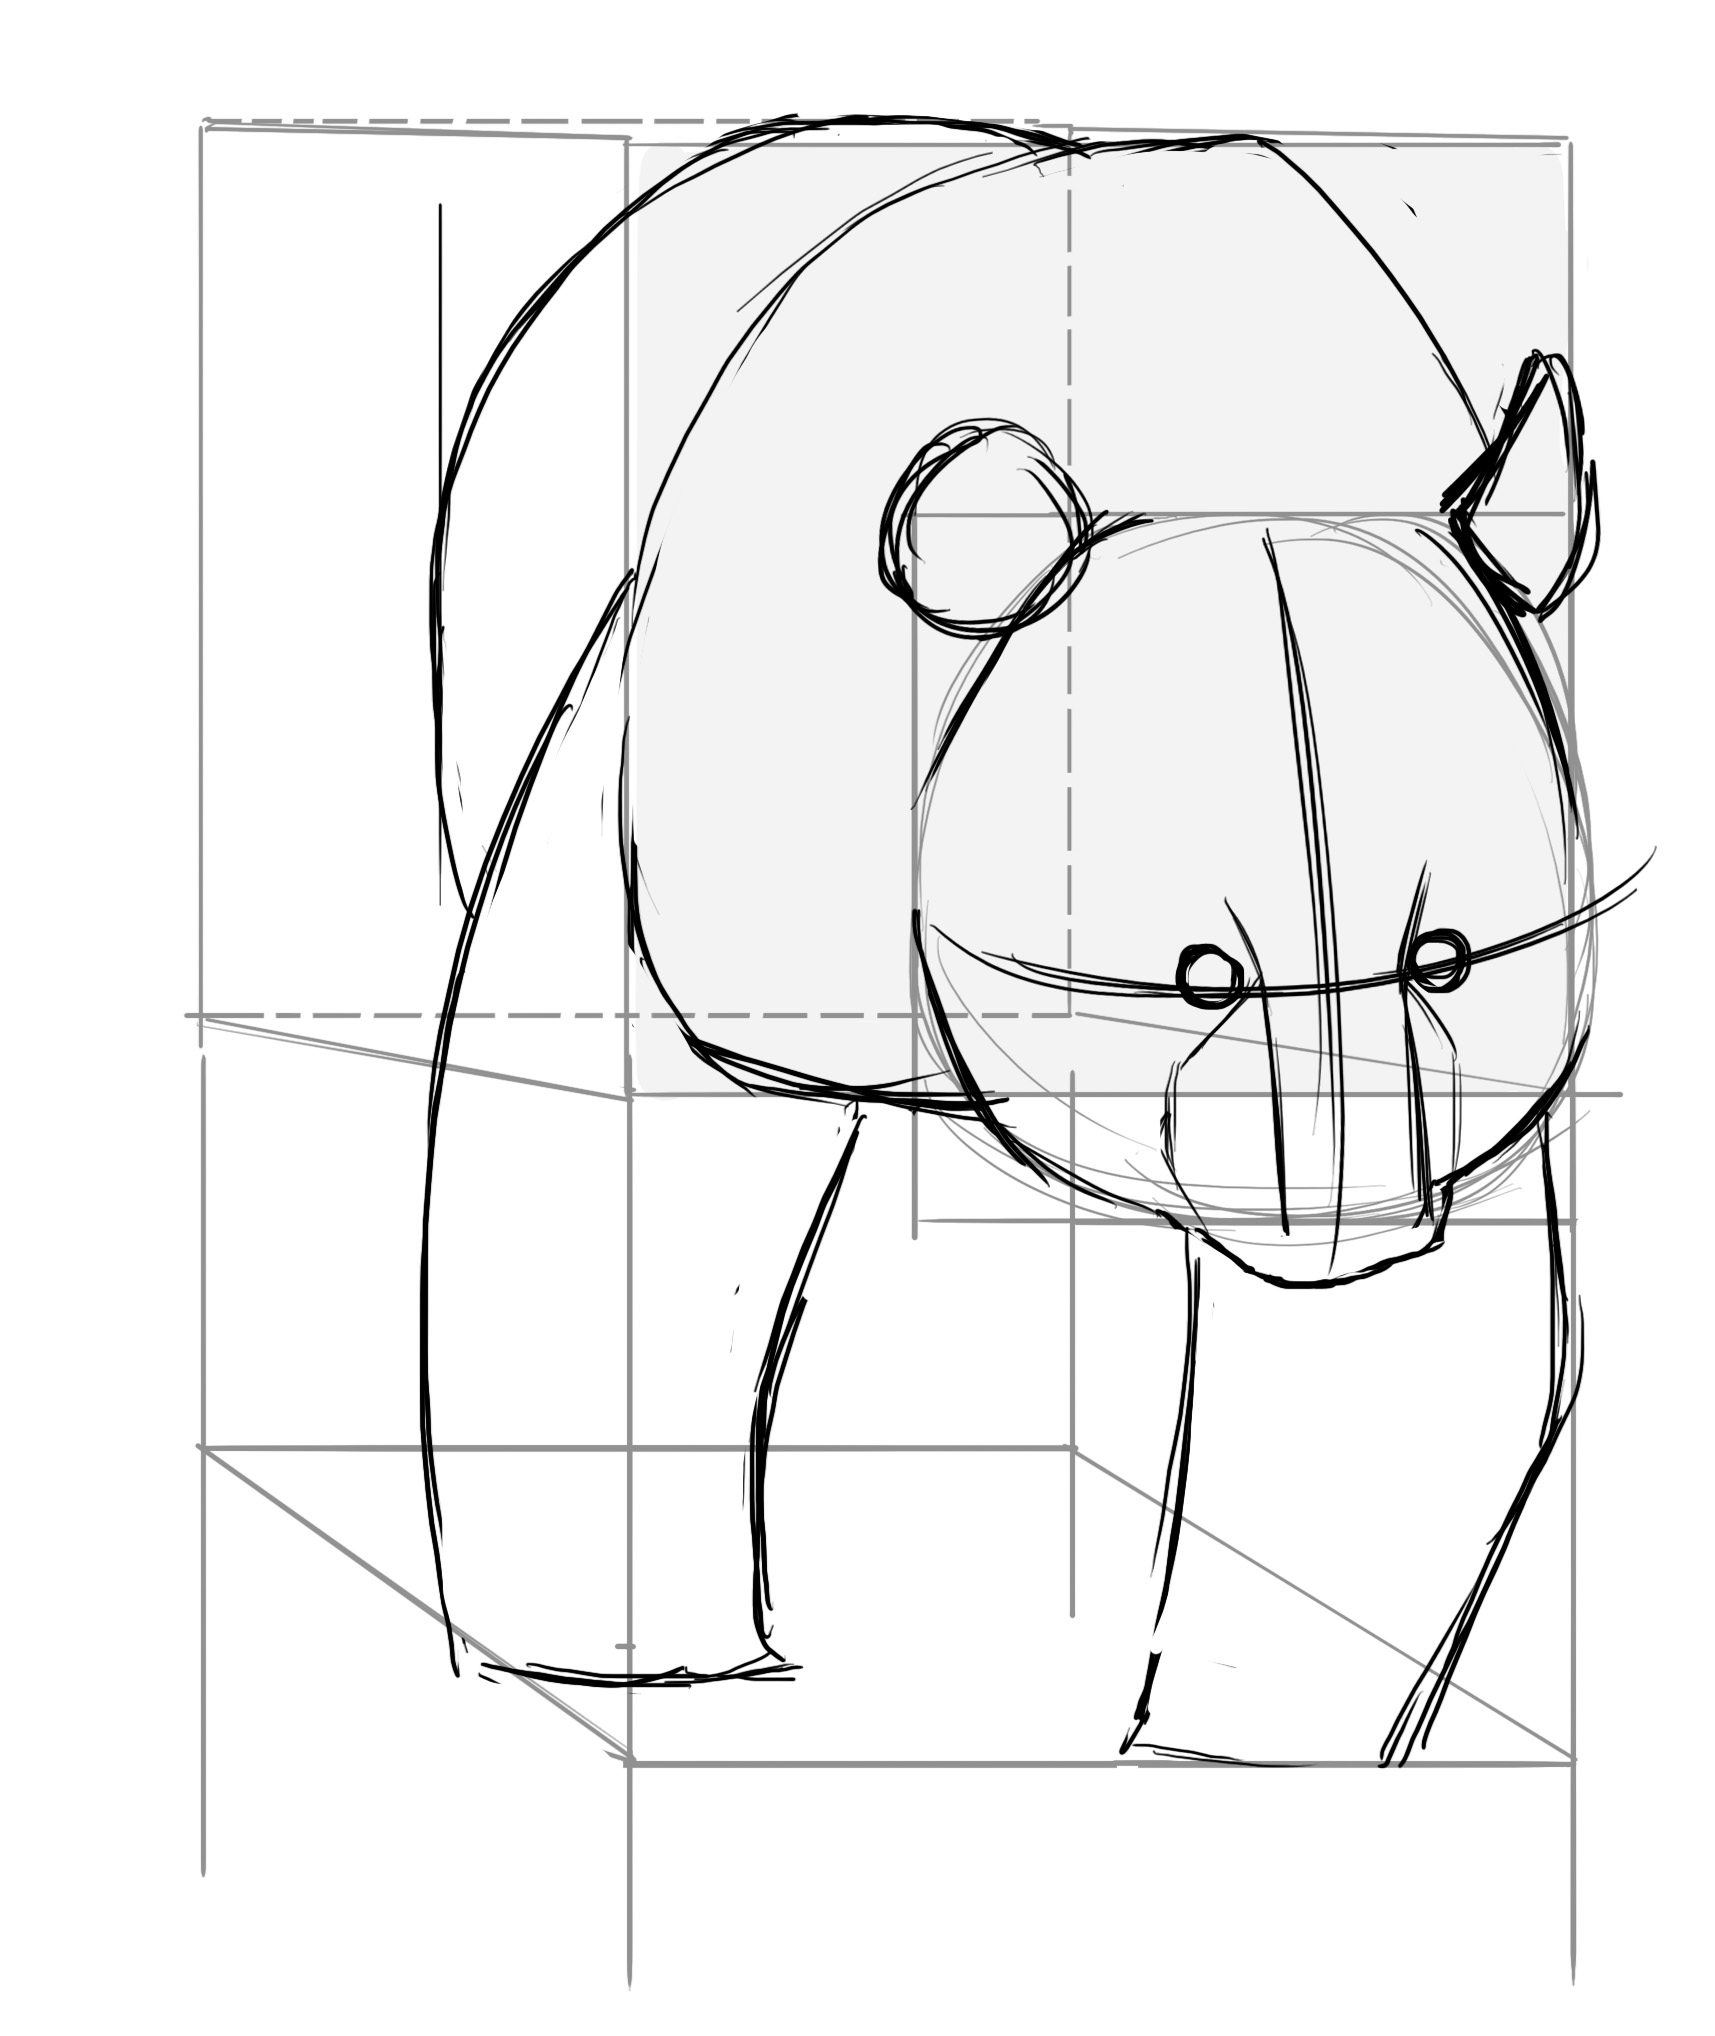
We do the same thing with the back: we redefine the shape of the rear (be careful, this goes down to the left). And we draw the legs of course.

PANDA SPOTS
Before adding details, we will place the famous characteristic black marks. We have the easiest ones: the ears. The end of the nose is shaped like a crescent moon (it's not a mark, it's the snout, I know, but it plays a big role in the characteristic appearance of our panda ^^).
Then the eyes. The marking surrounds the eye approximately at the same distance, except downwards diagonally outwards. The marks go down to about the middle of the muzzle. They are twice as long as they are wide :)
Next, the main part: the paws. The markings encompass the entirety of the front and rear legs and go up to the shoulder blades. As they go up, they taper. They also rise towards the neck under the chest and up to the base of the head. This always sharply outlines and gives this very round shape to the panda's head :D
The hind legs are completely enclosed as well, but the markings stop much sooner, just above the level of the abdomen.
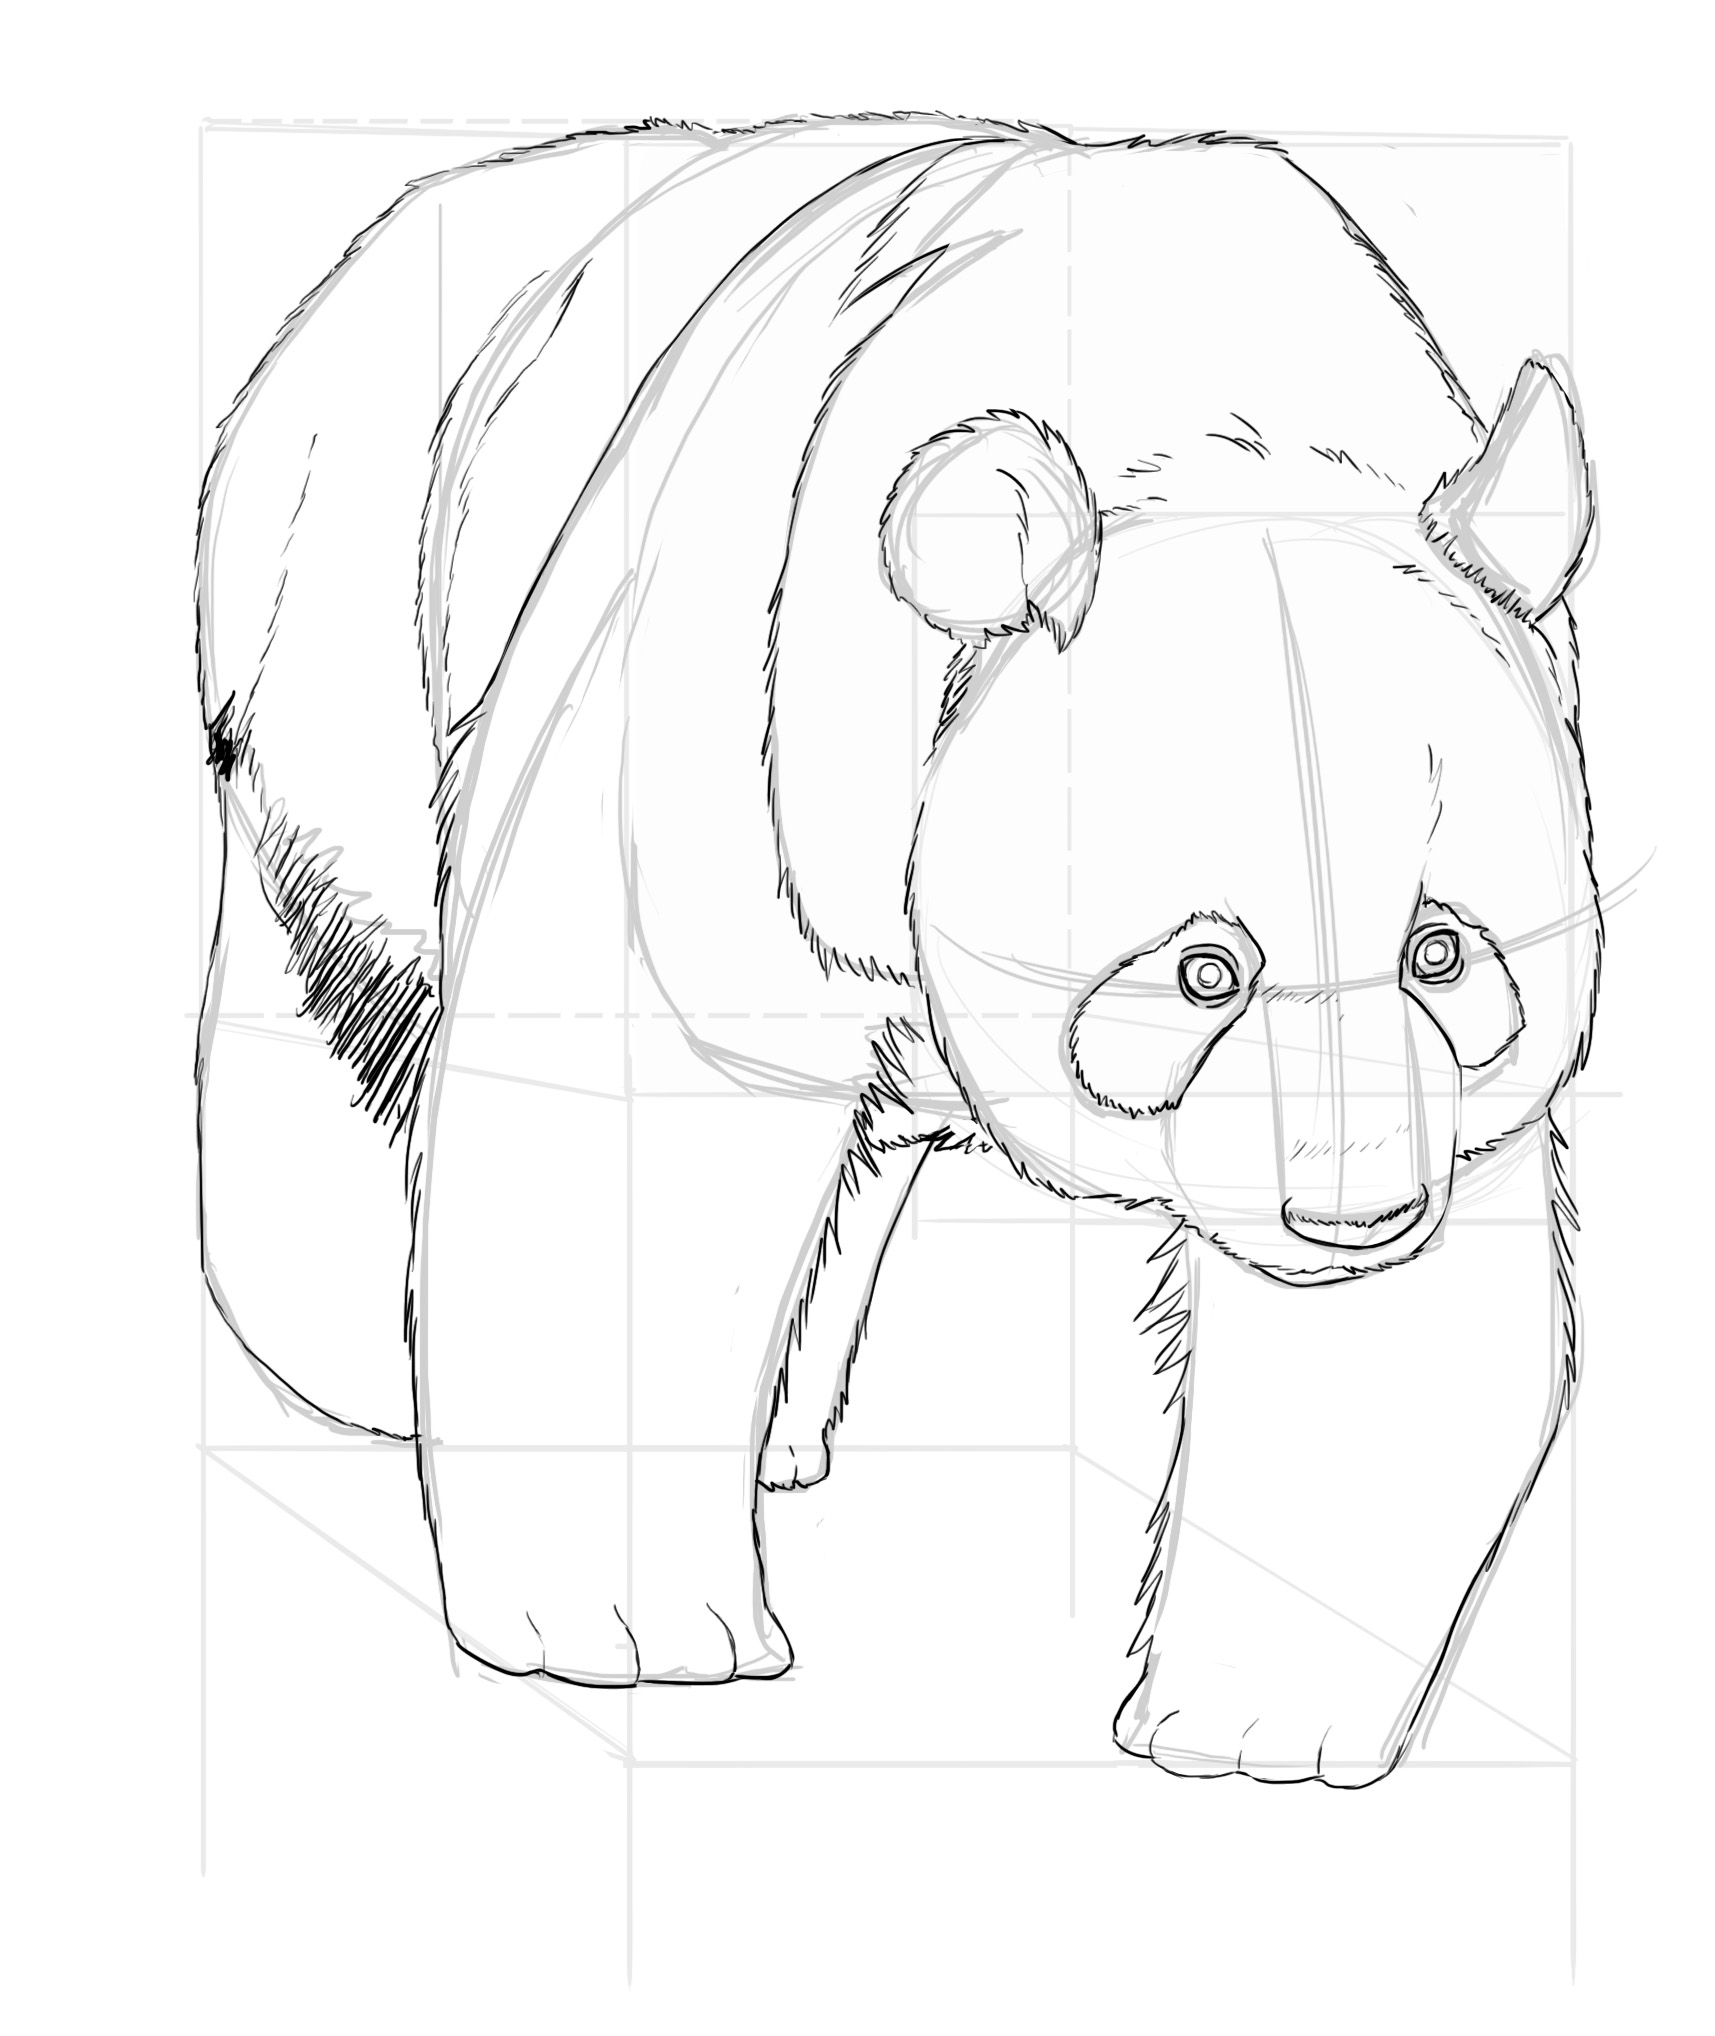
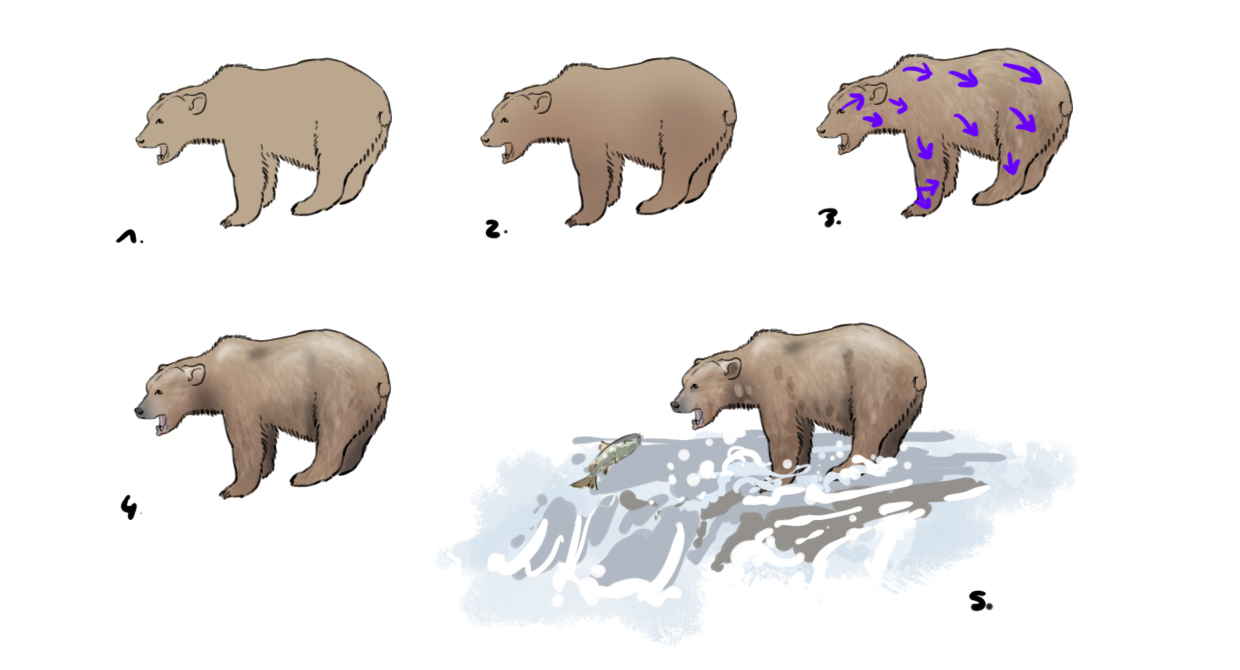
DRAWING THE FUR
Now we can elaborate!
The panda is not very difficult, except for the head and the addition of fur, as there are not many details to add. It should be noted that since they belong to the bear family, they have 5 clawed toes on their paws.
In the end, we should get something like this ^^
And we're going to add some black to finish it all off.
I finally get this result:

Summary:
- As always, we observe its model and characteristics.
- In the case of a shortcut, don't panic, try to think with simpler shapes to better understand the subject
- Geometric shapes are always a good way to build the foundation of your model, no matter how simple it may seem at first glance ^^
Discussion
3 comments